

Garmin Oregon 550t, Oregon 550 Thai, Oregon 550 Korea, Oregon 550, Oregon 450t User Manual
...Page 1

®
OREGON
450, 450t, 550, 550t
series
quick start manual
Page 2
WARNING
See the Important Safety and
Product Information guide in the
product box for product warnings
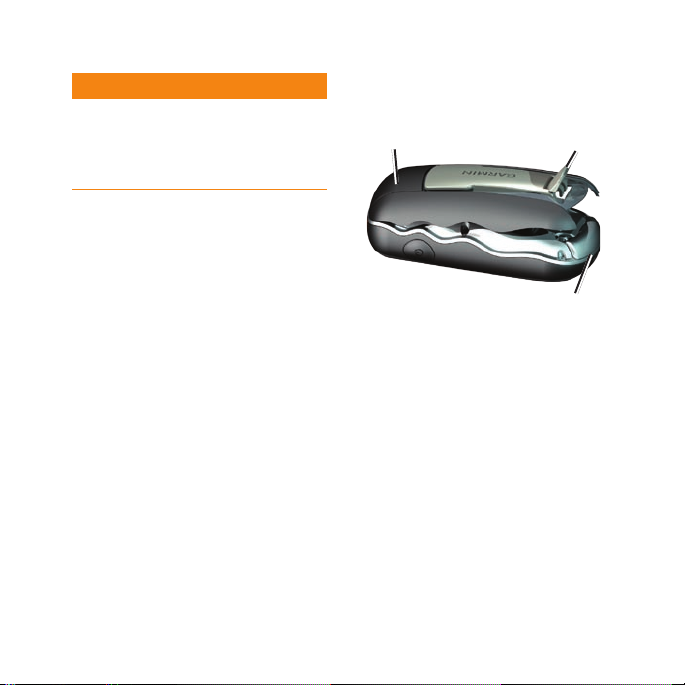
To install the batteries:
1. Lift the latch and remove the
battery cover.
Battery cover
Latch
and other important information.
Oregon units operate on two AA
batteries. Use alkaline, NiMH, or
lithium batteries. Use precharged
NiMH or lithium batteries for best
results. Standard alkaline batteries
are not recommended for Oregon
550 units when using the camera
feature.
2 Oregon Series Quick Start Manual
2. Insert the batteries, observing
polarity.
3. Replace the battery cover and
push the latch down.
To select the battery type:
1. Touch Setup > System > Battery
Type.
2. Select
Alkaline, Lithium, or
NiMH.
Weather cap
Page 3
Notice
Remove batteries when you do not
plan to use the Oregon for several
months. Stored data is not lost when
batteries are removed.
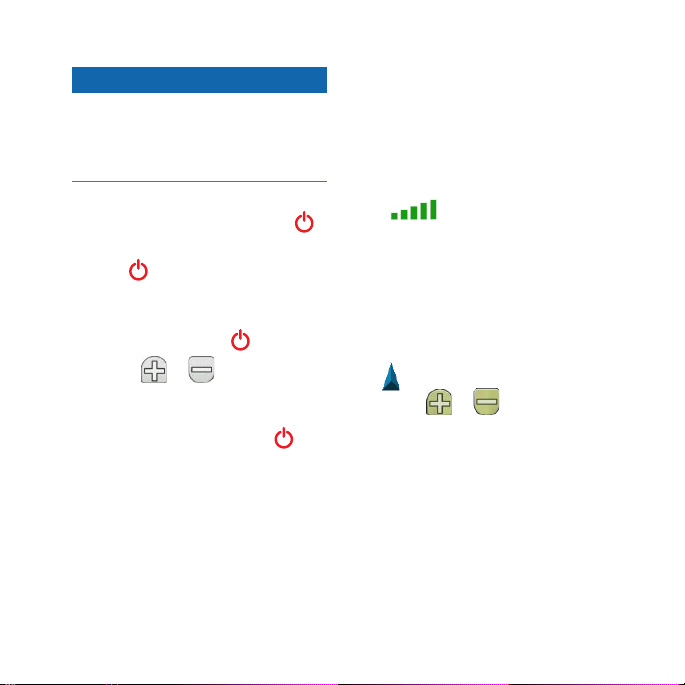
To turn the Oregon on or off:
1. To turn on the Oregon, press .
2. To turn off the Oregon, press and
hold .
To adjust the backlight level:
1. While the Oregon is on, press
and quickly release .
2. Touch
To lock or unlock the screen:
1. Press and quickly release .
2. Touch
Oregon Series Quick Start Manual 3
or to adjust the
brightness levels.
Lock Screen (or Unlock
Screen).
To acquire GPS satellite signals:
1. Go outdoors to an open area,
away from tall buildings and trees.
2. Turn on the Oregon. Acquiring
satellite signals can take a few
minutes.
The bars on the Main page
indicate satellite strength. When
the bars are green, the Oregon has
acquired satellite signals.
To use the map:
1. Touch Map. Your current location
is indicated by a location marker
.
2. Touch
3. Touch and drag the screen to pan
or to zoom.
the map.
Page 4

To open the Compass page:
Touch Compass.
The bearing pointer points to
your destination, regardless of the
direction you are moving. If the
bearing pointer points toward the
top of the compass, you are traveling
directly toward your destination. If
it points any other direction, turn
toward that direction until the arrow
is pointing toward the top of the
To calibrate the electronic
compass:
1. While outdoors, hold the Oregon
level and do not stand near
objects that inuence magnetic
elds, such as cars, buildings, or
overhead power lines.
2. Touch
3. Touch
Setup > Heading > Press
To Begin Compass Calibration.
Start and follow the on-
screen directions.
compass.
Calibrate the compass after moving
long distances, experiencing
temperature changes, or changing the
batteries.
4 Oregon Series Quick Start Manual
Page 5

To review information about a
point on the map:
1. Touch the location you want to
review.
2. Touch the information button at
the top of the screen.
To mark your current location as
a waypoint:
1. Touch Mark Waypoint.
2. Touch
Save and Edit.
3. Touch an attribute you want to
change.
4. Touch letters, numbers, or
symbols to make the changes.
5. Touch
(except when
changing a symbol). Change
other attributes, if necessary.
6. Touch
to discard the
changes.
Oregon Series Quick Start Manual 5
To edit a waypoint:
1. Touch Waypoint Manager.
2. Touch the waypoint.
3. Touch the attribute you want to
change.
4. Touch letters, numbers, or
symbols to make the changes.
5. Touch
(except when
changing a symbol). Change
other attributes, if necessary.
6. Touch
to discard the
changes.
To reposition a waypoint to your
current location:
1. Touch Waypoint Manager.
2. Touch the waypoint you want to
reposition.
3. Touch
Reposition Here.
Page 6

To navigate to a destination
using Where To?:
Use the Where To? page to navigate
to your saved waypoints, enter
5. Use the compass to navigate to
your destination.
To stop navigating, touch Where
To? > Stop Navigation.
coordinates, nd points of interest,
and more.
1. Touch Where To?.
2. Touch a category.
3. Touch the item to which you want
to navigate.
4. Touch
5. Touch
6. Use the compass to navigate to
To navigate to a point on the
1. Touch Map.
2. Touch the point on the map.
3. Touch the information button at
4. Touch
6 Oregon Series Quick Start Manual
Go. A colored line indicates
your course.
> Compass.
your destination.
map:
the top of the screen.
Go > > Compass.
To create and navigate a new
route:
1. Touch Route Planner > <Create
Route>
> <Select First Point> to
select a starting point.
2. Touch a category.
3. Touch the rst item on the route.
4. Touch
5. Repeat until the route is
6. Touch
7. Touch
To record your tracks:
1. Touch Setup > Tracks > Track
Use > <Select Next
Point>.
complete.
to save the route.
> Where To? >
Routes to navigate the route.
Log.
Page 7

2. Touch Do Not Record; Record,
Do Not Show
On Map.
; or Record, Show
If you select Record, Show On
Map, a line on the Map page
indicates your track.
To clear your current track:
Touch Setup > Reset > Clear
Current Track > Yes.
To connect your Oregon to your
computer:
1. Lift the weather cap on the bottom
of the Oregon.
2. Insert the smaller connector on
the USB cable into the mini USB
connector.
3. Connect the other end of the
cable to a USB port on your
computer.
Visit www.garmin.com for additional
documentation and information.
Oregon Series Quick Start Manual 7
Page 8

For the latest free software updates (excluding map data) throughout the life of
your Garmin products, visit the Garmin Web site at www.garmin.com.
© 2009 Garmin Ltd. or its subsidiaries
1200 East 151st Street, Olathe, Kansas 66062, USA
Liberty House, Hounsdown Business Park, Southampton, Hampshire, SO40 9LR UK
No. 68, Jangshu 2nd Road, Sijhih, Taipei County, Taiwan
Nov. 2009 Part Number 190-01140-01 Rev. A Printed in Taiwan
Garmin International, Inc.
Garmin (Europe) Ltd.
Garmin Corporation
www.garmin.com
 Loading...