

Page 1

Pilot’s Handbook
Page 2

page 02 is blank
Page 3

Information in this document is subject to change without notice. Except as otherwise noted, the
example organizations, people, and events depicted herein are fictitious. No association with any
real organization, person, or event is intended or should be inferred. Complying with all applicable
copyright laws is the responsibility of the user. Without limiting the rights under copyright, no part
of this document may be reproduced, stored in, or introduced into a retrieval system, or transmitted in any form or by any means (electronic, mechanical, photocopying, recording, or otherwise),
or for any purpose, without the express written permission of Microsoft Corporation.
Microsoft may have patents, patent applications, trademarks, copyrights, or other intellectual property
rights covering subject matter in this document. Except as expressly provided in any written license
agreement from Microsoft, the furnishing of this document does not give you any license to these patents,
trademarks, copyrights, or other intellectual property.
© 1983–1999 Microsoft Corporation. All rights reserved.
DirectInput, Microsoft, MS-DOS, MSN, SideWinder, Windows, and Windows NT are either registered
trademarks or trademarks of Microsoft Corporation in the US and/or other countries.
Microsoft Flight Simulator scenery designed for Microsoft Corporation by MicroScene, Inc. under contract
and produced by Microsoft Corporation.
The AOPA wings logo is a registered service mark of the Aircraft Owners and Pilots Association.
Jeppesen, Jeppesen Sanderson, JeppView, and NavData are registered trademarks of Jeppesen
Sanderson, Inc. SIMCharts is a trademark of Jeppesen Sanderson, Inc.
FlightSafety International is a registered trademark of FlightSafety International, Inc.
Other product and company names mentioned herein may be the trademarks of their respective owners.
This product is for entertainment purposes only and shall not be used for training purposes. It is not part of
an approved training program under the standards of the FAA or any other regulatory agency.
Aeronautical sectional charts provided by National Ocean Service Office of Aeronautical Charting and
Cartography
Terrain images supplied by: Aeromap U.S.A; Eurosense Belfotop N.V.; Intrasearch Inc.; National Aerial
Resources; Walker and Associates.
Photo Sources: Aircraft Owners and Pilots Association, King Schools, Nick Gunderson/Tony Stone
Images, George Hall/Corbis, Kenneth Jarecke/Contact Press Images/PNI, Mike Fizer/AOPA
Page 4

page 04 is blank
Page 5
Microsoft Flight Simulator 2000 Pilot’s Handbook
Section I
Chapter 1 Before You Fly ........................................................................ 1
Flight Simulator 2000 is designed to work on many different kinds of computers, with many different
kinds of accessories. In this chapter, you’ll learn how to install the software, set up your accessories,
and configure your system for optimal performance.
Chapter 2 Finding Information .............................................................. 7
From in-flight checklists to aircraft histories, it’s easy to find the information you’re looking for. In Flight
Simulator 2000, facts and assistance are always close at hand.
Chapter 3 Exploring the Features .......................................................11
With more features than ever before, Flight Simulator 2000 will keep even experienced pilots busy for
hundreds of hours. This chapter provides the details.
Chapter 4 Having Some Fun ................................................................ 17
There’s more to Flight Simulator 2000 than meets the eye. From ridge soaring in a glider to flying upside
down, the sky’s the limit. Here are some of the possibilities to set you free.
Chapter 5 Expanding Your Hobby ....................................................... 27
Flight Simulator 2000 is more than just software on your desktop. Learn about the Flight Simulator Web
site, add-on products, virtual airlines, and how Flight Simulator 2000 can complement real-world pilot
training.
Section II
Chapter 6 Getting Certified .................................................................. 31
Real-world pilots go through a challenging certification process, and you can do the same by completing the Flight Simulator 2000 Tutorials, Lessons, and Checkrides. Follow this chapter’s step-by-step
curriculum to earn Flight Simulator 2000 pilot certificates and ratings.
Chapter 7 Learning to Fly with Rod Machado ................................. 41
Getting off the ground has never been easier! Renowned aviation educator and humorist Rod Machado
teaches you the basics in these step-by-step, hands-on Flight Simulator 2000 Tutorials.
v
Page 6
Section III
Chapter 8 The Fleet........................................................................... 163
The Flight Simulator 2000 fleet offers a wide range of flight experiences for pilots of all levels. Before
heading out to the flightline, read more about the real aircraft and the people who built them.
Appendices
Appendix A Charts ............................................................................ 191
Appendix B Glossary ........................................................................ 219
Appendix C Recommended Reading ............................................ 225
Appendix D Microsoft Product Support Services ...................... 227
Index
Pilot’s Handbook Index .................................................................... 231
vi
Microsoft
Flight Simulator
20002000
2000
20002000
Page 7
Before
You Fly
1
chapter one
Page 8
Whether you’re a rookie, a Microsoft® Flight
Simulator veteran, or a licensed pilot, you
probably can’t wait to climb into the cockpit.
Before you start flying Microsoft Flight Simulator
2000 though, there are a few things you need to
do. This chapter tells you how to get started.
Installing Flight Simulator
1. Turn on your computer and start Microsoft
Windows
2. Insert Flight Simulator 2000 Disc 1 into your
CD-ROM drive.
3. Follow the instructions on the screen.
If your computer doesn’t support automatic
installation, follow these steps:
1. Click Start on the taskbar.
2. Point to Settings, and then click Control
Panel.
3. Double-click Add/Remove Programs.
4. On the Install/Uninstall tab, click Install.
5. Follow the instructions that appear on your
screen.
During Setup you’ll have the option of selecting a
Minimum, Typical, or Custom installation. If you
need to conserve hard disk space on your
computer, choose the Minimum setup option. If
you want to optimize flying performance, choose
Typical. If you are an advanced user and want to
choose exactly what gets installed, choose
Custom.
Note: Installation may require one or more of the
Flight Simulator compact discs, depending on the
options you choose.
®
95 or later.
Starting Flight Simulator
1. Insert Flight Simulator 2000 Disc 1 into your
CD-ROM drive.
2. Click Start, point to Programs, point to
Microsoft Games, point to Flight Simulator 2000, then click Flight Simulator 2000.
-or-
Double-click the Flight Simulator 2000
icon on the Windows desktop.
Note: You’ll always need to have Flight Simulator
2000 Disc 1 in the drive when you start Flight
Simulator 2000.
When you start Flight Simulator 2000, you’ll see
the opening screen, from which you can select
one of the following options:
· Getting Started: Watch an introductory
video, produced by King Schools, that
explains how to get into the air quickly.
· What’s New: Learn about the new features
that make Flight Simulator 2000 “As Real As
It Gets.”
· Flying Lessons: Start with an Intro Flight,
just like you would in the real world.
Continue with lessons linked to the Tutorials
in Chapter 7 of this Pilot’s Handbook. You’ll
be amazed at how much you’ll learn—and
how much fun you’ll have!
· Fly Now!: Hop into the cockpit and start
flying. When you first start Flight Simulator,
you’ll be flying the Cessna 182S out of Meigs
Field in Chicago. Later, you can change the
“default flight” to any airplane and flight
conditions you want.
2
Microsoft
Flight Simulator
20002000
2000
20002000
Page 9
Setting Up and Using
Joysticks and Other
Game Controllers
Flight Simulator 2000 is more realistic when you
use a joystick, yoke, or other controller. You can
fly more precisely, and the buttons and controls
make it easy to change views, adjust the throttle,
extend or retract the landing gear and flaps, and
operate other aircraft controls.
Flight Simulator 2000 is compatible with joysticks,
yokes, gamepads, and other controllers supported
by Microsoft Windows and DirectInput
device that works best for you as your primary
control; it can be customized to suit your needs.
Different products have different configurations,
so refer to your controller’s documentation for its
button assignments.
Before you fly, make sure your joystick or other
controller is:
· plugged into your computer
· set up in Microsoft Windows
· calibrated properly
· enabled in Flight Simulator 2000 (on the
Options menu, point to Controls, and click
Enable Joystick)
Also make sure you have the latest device drivers.
If in doubt, download and install them from the
manufacturer’s Web site.
For more information about setting up and using
game controllers, see the Simulator Help section
of onscreen Help.
®
. Use the
1
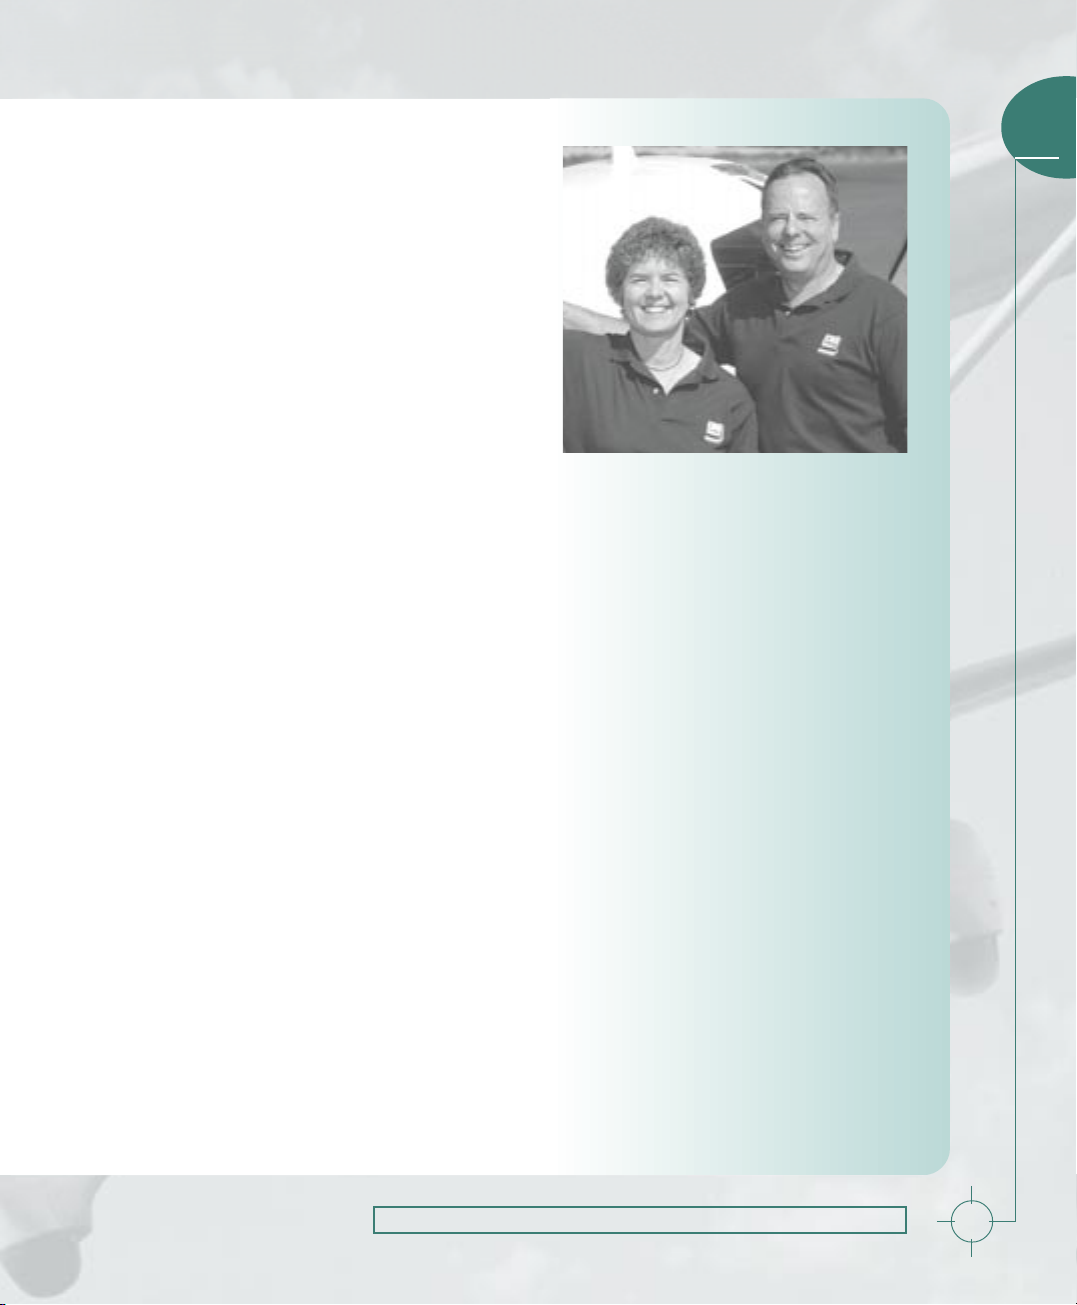
John and Martha King,
King Schools
“Clarify, Simplify, and Make it Fun!”
That’s the mission of King Schools,
founded by John and Martha King. King
Schools has been providing aviation
software and video instructional materials for over 17 years. Nearly one-third of
all pilots in the United States have used
King Schools courses to attain their
licenses.
John and Martha have the distinction
of being the first husband and wife team
(and Martha, the first woman) to have
every possible category rating, class
rating, and instructor’s certificate offered
by the FAA. They made their mark by
developing learning materials that
express their enthusiasm and share it
with others. Click the Getting Started
button on the opening screen to see a
short video in which the Kings explain
how to get up and flying in Flight
Simulator.
Before You Fly
3
Page 10
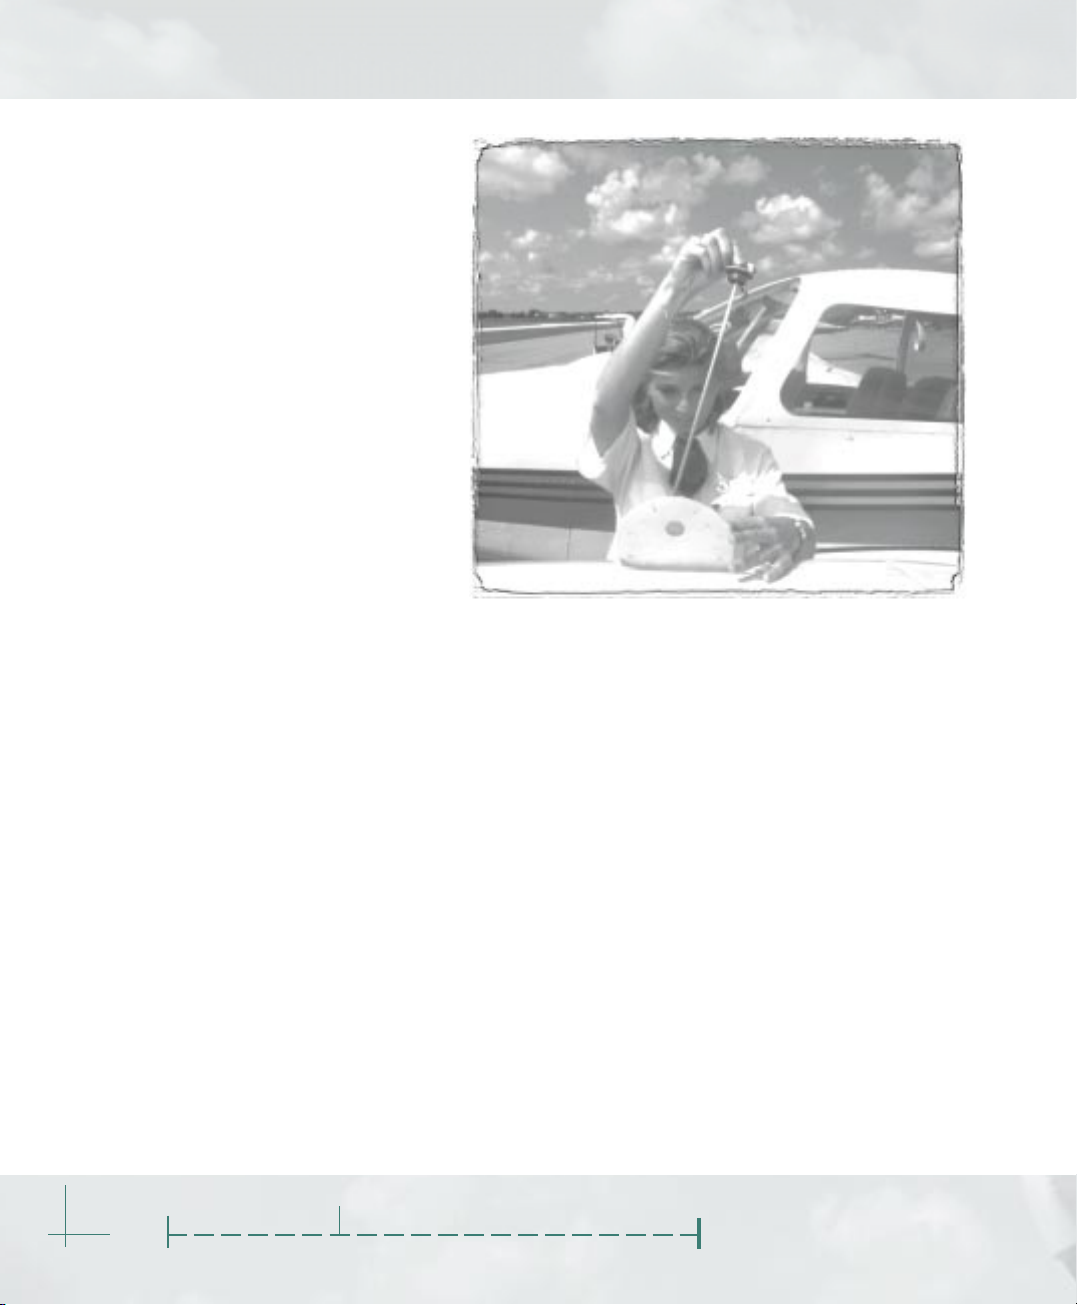
Using the Mouse
As you fly, you can use the mouse to
manipulate the buttons, knobs, and
levers in the cockpit. Just click the
appropriate control. Some controls are
toggles (for example, clicking the
landing gear lever once retracts the
wheels; clicking it again extends
them). Other controls, such as the
throttle and trim wheel, move through
a series of positions. You can drag
these controls with the mouse, much
as you would move them with your
hand in a real airplane.
If you don’t own a joystick, yoke, or
gamepad, you can also use the mouse
as the primary flight control. Rightclick anywhere on the aircraft instrument panel and choose Mouse as
Yoke from the menu that appears. Any movement
you make with the mouse controls the aircraft just
like a joystick would. (Moving the mouse to the
left makes the aircraft bank left, and so on.) To
return to using the mouse to manipulate cockpit
controls, right-click on the panel again.
Using the Keyboard
The keyboard is often the best way to view and
operate certain aircraft controls and to choose
commands and options. By learning which keys
do what you can be more efficient in the Flight
Simulator cockpit. And although it’s best to use a
joystick or yoke as the primary flight control, you
can fly the aircraft by using the keyboard to
control the ailerons, elevator, and rudder.
commands you’ll need. The same information is
on the back cover of this book. The complete list
of commands is in the Simulator Help section of
Help.
Customizing the Controls
In real aircraft, each button, lever, or knob serves
a specific function. In Flight Simulator, you can
customize the joystick and keyboard commands
so that your simulated cockpit works the way you
like best. For example, you could reassign the key
used to extend and retract the landing gear from
the G key to another. On the Options menu, point
to Controls, and click Assignments. To adjust
how sensitive your joystick is, on the Options
menu, point to Controls, then click Sensitivities.
The Key Commands tab on the Kneeboard in
Flight Simulator (press F10 to display the
Kneeboard) features a list of the basic keyboard
4
Microsoft
Flight Simulator
Note: For assistance with any Flight Simulator
2000 dialog box, click the ? button, or right-click
any item and choose What’s This?.
20002000
2000
20002000
Page 11
Making Flight Simulator
2000 Really Fly
When talking about a flight simulation’s graphics,
quality refers to how real the images look on the
screen, and performance refers to how quickly
and smoothly the images move. Higher quality
typically means decreased performance, since
displaying complex, richly-detailed, threedimensional graphics puts a heavy load on your
system. If you’re not seeing the graphics quality
and performance you expect, this section explains
some choices and tradeoffs you can make to
optimize your experience.
Improving both quality and
performance
To achieve maximum quality and performance,
consider the following options:
Shut down other applications
When you’re flying, you probably won’t be using
other applications such as word processors and
email programs, so close them to free up more of
your computer’s brainpower for Flight Simulator.
Get a 3-D graphics accelerator card
To display Flight Simulator graphics, your computer must convert a three-dimensional world into
a two-dimensional image. A 3-D graphics
accelerator makes this task easier, by taking some
of the burden away from the main processor. This
leaves the main processor more resources to
handle the simulation’s flight model. The result?
Better performance and graphics quality.
If you have a 3-D card, make sure you:
· set the display options in Flight Simulator to
take full advantage of it (see “Change display
options,” later in this chapter)
· download and install the latest drivers from
the manufacturer’s Web site
If you have problems getting your 3-D card to
1
work properly, make sure you’ve read the Flight
Simulator 2000 Readme file and the card
manufacturer’s documentation.
Get more RAM
Random access memory (RAM) is your
computer’s short-term memory. Generally, the
more of it there is, the faster your computer’s
brain (the CPU) can process data. Your computer
needs to have at least 32 megabytes (MB) of
RAM to run Flight Simulator 2000.
Get a faster processor
Although Flight Simulator 2000 will run on a
Pentium 166 machine, a faster processor will
provide better performance.
Making a tradeoff between quality
and performance
Choosing between quality and performance
depends on what you want to do. If you want to
spend an evening reading signs and billboards as
you fly the Bell 206B JetRanger III helicopter
down the glittering streets of Las Vegas, then
you’re probably willing to sacrifice a little performance for a better view. If, however, you want to
test your instrument flying skills by guiding the
Concorde into Heathrow in a storm, then smooth
movement of the aircraft and the instruments will
take precedence over scenery details. No matter
what kind of hardware you have, you can make
tradeoffs between graphics quality and performance.
Try the following options to find the balance
between quality and performance that’s right for
your needs.
Watch your windows
Flight Simulator runs in a window. The
simulation’s views and instrument panels are also
Before You Fly
5
Page 12
windows. Increasing the size of windows and
displaying multiple windows simultaneously
decreases performance, so use as few windows
as possible and keep them as small as you can
(with the exception of Full Screen mode, described below).
Change the resolution
Depending on the type of video card and monitor
you have, you can run Flight Simulator 2000 at a
variety of screen resolutions. The instrument
panels were optimized for readability in 640 x 480
and 1024 x 768 screen resolutions. A screen
resolution of 1024 x 768 will provide the best
overall graphics quality. Note though that as you
increase resolution to see more detail, you may
notice a decrease in performance. Experiment
with different resolutions to find the best combination of detail and performance for your system.
For more information about adjusting the screen
resolution on your computer, on the Windows
Start menu, click Help, and look up “resolution.”
Use Full Screen mode
Full Screen mode makes the Flight Simulator
window fill the entire screen (no menu bar or
taskbar) and will likely improve performance. To
toggle between Full Screen and Normal modes,
press ALT+ENTE R, or on the Views menu select
or deselect Full Screen. To bring up the menu bar
while in Full Screen mode, press ALT. To set the
resolution used in Full Screen mode, click the
Options menu, point to Settings, and click
Display.
Change display options
One way to improve performance is to change the
display options in Flight Simulator. Each option
has a different effect, and changes you make
apply to all flights. Turning an option on or off is
noticeable only when you see an effect related to
that option on the screen. For example, reducing
the scenery complexity won’t have much effect if
you’re flying in the clouds.
To change display options, click the Options
menu, point to Settings, and click Display.
Change sound preferences
Depending on your machine, changing sound
preferences (or turning sound off) may improve
performance. To change sound options, on the
Options menu, point to Settings, and click
Sound.
Change visibility and other weather
settings
Generally speaking, the less scenery you see out
of the window, the better the performance will be.
Reducing visibility is a simple way to improve
performance. On the World menu, click Weather.
Monitor the frame rate
Monitoring the frame rate (the number of times
the screen is redrawn each second) is an easy
way to assess Flight Simulator’s performance.
Press SHI FT+Z twice to display the frame rate
counter. When you try the options listed above,
check the frame rate to see whether it has
improved. Remember though: it’s how the
simulation looks and feels to you that matters
most.
Experiment
The best way to make Flight Simulator really fly on
your machine is to experiment. Change something, then see if things look or feel any different.
Read the Readme file in the Flight Simulator
directory on your hard drive for additional tips.
6
Microsoft
Flight Simulator
20002000
2000
20002000
Page 13
Finding
Information
2
chapter two
Page 14
use it to learn about aviation, practice what you
already know, or just have fun. Interspersed with
information about getting up and running,
learning to fly, and using the simulator, are
interesting facts about aviation history. Think of
the Pilot’s Handbook as the view from 30,000 feet;
if you need detailed procedures and specifications, use Flight Simulator Help.
Let’s face it, flying is a complex endeavor. The
information and assistance provided with
Microsoft
®
Flight Simulator 2000 let you spend
more time doing what you want—flying—and less
time searching for the information you need to do
it. This chapter helps you find the information
you’re looking for.
Pilot’s Handbook
This Pilot’s Handbook gives you an overview of
Flight Simulator 2000 and suggests ways you can
Simulator Help
Aviation Articles
Aircraft Information
Glossary
Want to choose another airplane, add some turbulence, or figure out
what all those gauges in the cockpit are for? To learn about Flight
Simulator 2000 menus, screens, buttons, knobs, and levers, check
out Simulator Help for step-by-step procedures.
Want to learn more about aviation? Aviation Articles explain
subjects from the basics of flight to complex aerobatic maneuvers.
The Aircraft Owners and Pilot’s Association (AOPA) contributed many
of the articles, which are of interest to novices and real-world pilots
alike. Videos and animations help explain it all.
Looking for data about the aircraft in the Flight Simulator 2000 fleet?
The Aircraft Information section provides statistics, cockpit
diagrams, and more.
Not sure what an unfamiliar aviation or Flight Simulator term means?
Look in the comprehensive Glossary.
Flight Simulator Help
Want to learn about Flight Simulator commands
and techniques? Aviation? The Flight Simulator
2000 aircraft? Aviation terminology? Look in Flight
Simulator Help, which you can access from the
Help menu.
Just like surfing the Web with a browser, you can
move from topic to topic using the navigation bar
at the top of the Help screen or by clicking “hot”
text. Flight Simulator Help is divided into four
sections: Simulator Help, Aviation Articles, Aircraft
Information, and Glossary.
8
Microsoft
Flight Simulator
20002000
2000
20002000
Page 15
Help While You’re Flying
When you’re on final approach to a short runway,
the last thing you want to do is stop everything
and go searching for that keyboard command to
lower the flaps. Use the onscreen assistance
described below to get the information you need
exactly when you need it.
2
The Kneeboard
Many real-world pilots use a “kneeboard” to hold reference material they
need during a flight. In some cases, the kneeboard is literally strapped to the
pilot’s thigh for easy access. The Flight Simulator 2000 “kneeboard” is
accessible from the Aircraft menu or by pressing F10. It has four tabs:
· Key Commands: A list of the most important Flight Simulator 2000
keyboard commands.
· Checklists: A series of checklists for the aircraft you’re currently flying,
one checklist for each phase of flight.
· Reference: Useful aircraft-specific data, such as performance tables.
· Notes: Notes you write yourself.
Each tab of the kneeboard is customizable. For more information, see
Simulator Help, described on page 8.
Instrument Panel Labels
“What’s This?” Help
To learn the name of an instrument or control in the cockpit, just hold the
mouse pointer over the item—a label will appear.
To learn more about any item in the cockpit, right-click it and choose What’s
This? from the pop-up menu that appears.
Help in Dialog Boxes
You’ll use dialog boxes to set options such as
flight location, weather, and aircraft settings. Use
Help to get information about any item in a dialog
box or step-by-step assistance for everything
from choosing an aircraft to using the Global
Positioning System (GPS).
Screen Labels Hold the mouse pointer over any item in a dialog box, and a short,
descriptive name appears.
“What’s This?” Help To learn more about any item in a dialog box, right-click it and choose
What’s This? from the pop-up menu that appears.
Button
Click the ? button in any dialog box to see a Help topic that explains
how and why to use the screen.
Finding Information
9
Page 16
Further Information and
Assistance
The Flight Simulator 2000 Web site contains news,
tips, articles, reference material, and links to other
interesting simulation and aviation sites. You can
connect to the Flight Simulator 2000 Web site
from the Help menu, or type the following URL
into your Web browser:
http://www.microsoft.com/games/fsim
The Flight Simulator 2000 Readme file contains
late-breaking information about Flight Simulator.
It’s a good idea to read the Readme file to check
for any known compatibility problems with
hardware you’re using. You can find the Readme
file in the Flight Simulator folder on your hard
drive.
If you’re having problems running Flight Simulator
2000, you can obtain product support by using
the services described in Appendix D, “Microsoft
Product Support Services.”
10
Microsoft
Flight Simulator
20002000
2000
20002000
Page 17
Exploring
the Features
chapter three
3
Page 18
In many ways, Microsoft® Flight Simulator 2000 is
even better than reality—with just a few clicks of
the mouse, you can instantly change your aircraft,
location, and the weather. In this chapter, we’ll
take a look at these options and many other
features you should know about.
To learn more about all these features, see the
Simulator Help section of the onscreen Help. For
an overview of any dialog box, click the ? button
at the bottom of the dialog box. For an explanation of a specific item, right-click it and choose
What’s This? from the pop-up menu that
appears.
Aircraft
When you start Flight Simulator, by default you’ll
be flying the Cessna Skylane 182S. Whether
you’re on the ground or in the air, you can easily
switch to another aircraft or change options that
affect the aircraft you’re flying.
12
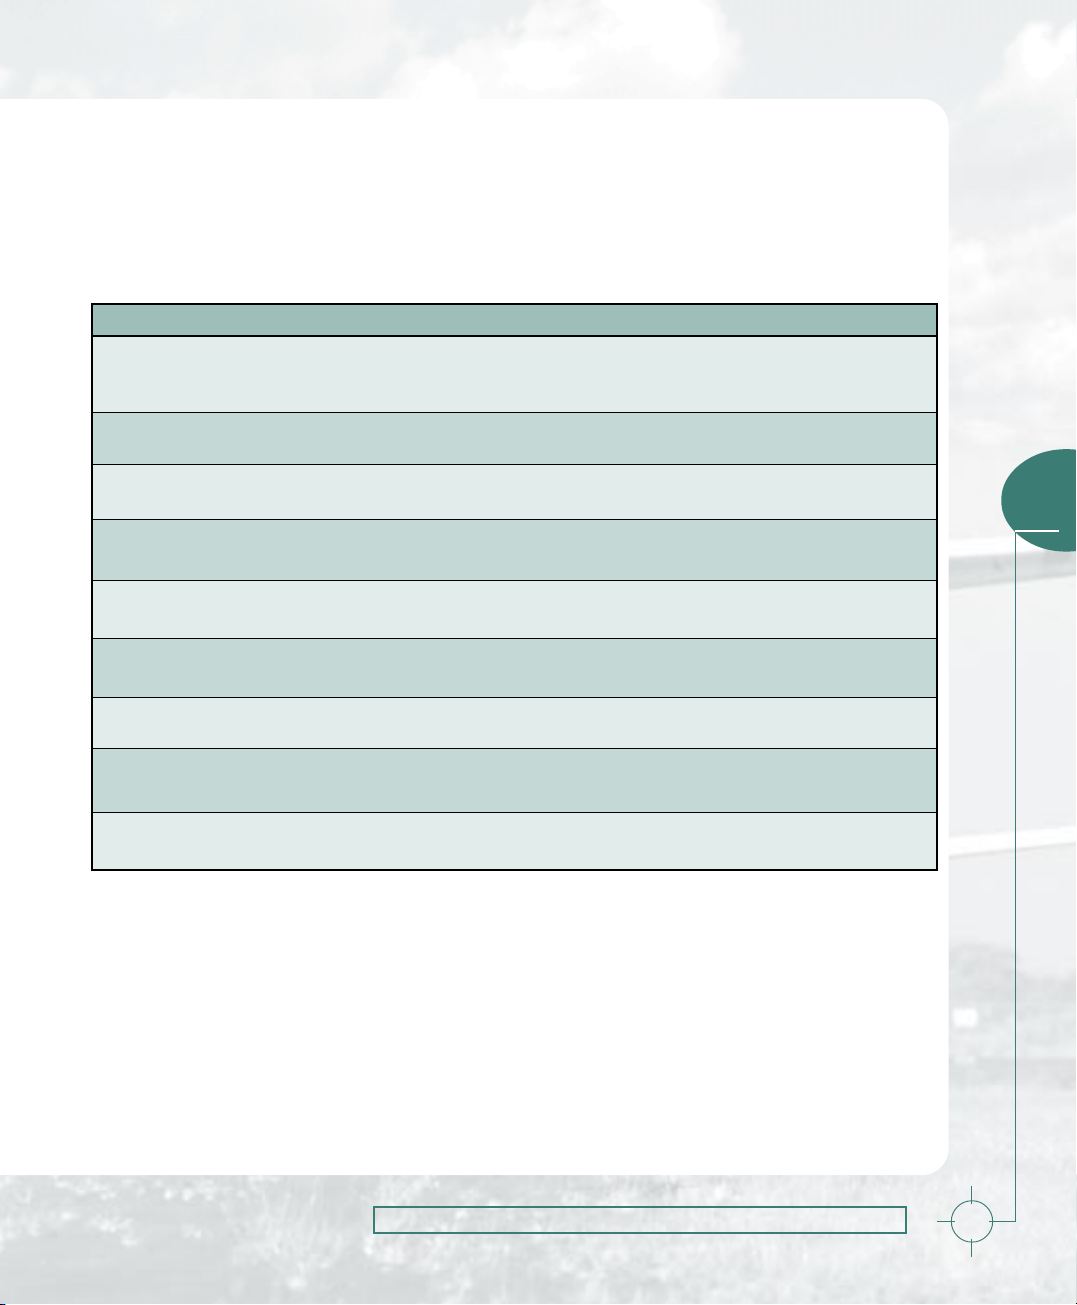
Feature
Select Aircraft
Fuel
Realism Settings
System Failures
Microsoft
Description
See pictures, descriptions, and specifications for each
aircraft in the Flight Simulator 2000 fleet, and select
the one you want to fly.
Change the amount of fuel in each tank to change
your aircraft’s weight, performance, and range.
Quickly set the realism of your Flight Simulator 2000
experience using sliders, or manually select specific
realism options that affect:
· the aircraft’s flight characteristics
· the instruments and lights
· the engines and propeller
· crashes and damage
· the flight controls
Set failures for instruments, systems, and radios
(either randomly or for a specific instrument) to make
your Flight Simulator 2000 flights more realistic and
challenging.
Flight Simulator
20002000
2000
20002000
Command
On the Aircraft menu, click Select
Aircraft.
On the Aircraft menu, click Fuel.
On the Aircraft menu, click
Realism Settings.
On the Aircraft menu, click System
Failures.
Page 19
Views and Windows
You can use the features on the Views menu to
see the things you’d see from the cockpit of a real
airplane—and more. Different views serve
different purposes—experiment with them to find
your favorites. Use your joystick’s hat switch (or
use key commands) to “turn your head” within
a view.
To learn more about using views and windows,
see the Simulator Help section of Help. For a list
of view-related key commands, see the back
cover of this book. You can easily assign your
favorite views to joystick buttons or your own
custom key commands.
Feature
Cockpit View
Tower View
Track View
Spot Plane View
Top-down View
Secondary Instrument
Panel Components
Description
See the world as a pilot usually does, over the
instrument panel. This is the default view.
See yourself from the control tower window.
Track another aircraft from your cockpit. Available
only in multiplayer flight.
Watch your aircraft from a spot plane that you can
reposition.
A bird’s eye view of the earth beneath your aircraft.
Display secondary instrument panel windows to view
radios, GPS, throttle quadrants, and other cockpit
items.
Command
On the Views menu, point to View
Mode, and then click Cockpit. Or,
press S to cycle through Cockpit,
Tower, Track, and Spot Plane views.
On the Views menu, point to View
Mode, and then click To w er . Or,
press S to cycle through Cockpit,
Tower, Track, and Spot Plane views.
On the Views menu, point to View
Mode, and then click Track. Or,
press S to cycle through Cockpit,
Tower, Track, and Spot Plane views.
On the Views menu, point to View
Mode, and then click Spot Plane.
Or, press S to cycle through Cockpit,
Tower, Track, and Spot Plane views.
To jump to Spot Plane view directly
from Cockpit view, press Shift+S.
On the Views menu, point to View
Mode, and then click Top-down.
On the Views menu, point to
Instrument Panel, then click one of
the panel components to display it.
3
Exploring the Features
13
Page 20

Flight Planning and
Navigation
Flight Simulator 2000 starts with your Cessna
182S on the ground at the end of runway 36 at
Merrill C. Meigs Field in Chicago. After you get to
know your way around the city, you’ll probably
want to try flying somewhere else. You can
instantly reposition your aircraft to a new location
on the ground or in the air, or plan an entire flight.
Flight Simulator 2000 has many new features that
simplify flight planning and navigation.
Feature
Go to Airport
Map View
GPS (Moving Map)
Flight Planner
Navigation Log
Slew Control
Description
Position your aircraft on a specific runway at any of
more than 20,000 airports. If you don’t know an
airport’s name or alphanumeric identifier, you can
search for it by geographical area.
Look at airports, navigational aids, airways, airspace,
general geographical information, and the course
you’ve been flying. You can enter your desired
latitude, longitude, altitude, heading, and airspeed, or
drag the aircraft symbol across the map to reposition
it. Clicking on airports and navigational aids displays
information about them.
Navigate the modern way, directly from waypoint (a
point of reference along your route) to waypoint,
using a Global Positioning System (GPS) receiver
displayed in its own window.
Create or load a VFR or IFR flight plan. Define your
own route or select auto-routing via:
· direct GPS
· low altitude airways
· high altitude airways
· VOR to VOR
View the details of your flight plan. Information
provided for each leg includes:
· altitude
· true airspeed
· magnetic heading
· estimated groundspeed
· fuel consumption
· time en route
Rapidly change your aircraft’s attitude, location, or
altitude without actually flying in real time. A great
way to check out the scenery.
Command
On the World menu, click Go To
Airport.
On the World menu, click Map
View.
On the Views menu, point to
Instrument Panel, then click GPS.
On the Flights menu, click Flight
Planner.
On the Flights menu, click
Navigation Log.
Press Y. Or, on the Aircraft menu,
click Slew Control.
14
Microsoft
Flight Simulator
20002000
2000
20002000
Page 21

Weather
From a clear blue sky to one filled with clouds,
wind, turbulence, rain, freezing rain, hail, snow,
lightning, and thunderstorms, Flight Simulator
2000 gives you as much control over the weather
conditions as you want. For the ultimate in
realism, you can download the latest real-world
weather provided by Jeppesen DataPlan, and
have those conditions automatically recreated in
Flight Simulator.
Feature
Real-World Weather
Basic Weather
Advanced Weather
Description
Download the current real-world weather conditions
and forecast winds aloft for thousands of weather
reporting stations. Flight Simulator automatically
connects your computer to a server on the MSN™
Gaming Zone, downloads the real-world conditions,
and then recreates them in Flight Simulator.
Set general levels for clouds, precipitation, visibility,
and the wind’s strength and direction. You can set
weather for the entire Flight Simulator 2000 world, or
for individual reporting stations as displayed on a
map.
Gain even more control over the weather you fly
through. You can define individual layers of weather,
each with its own:
· cloud type and coverage
· icing and precipitation
· wind speeds, gusts, turbulence, and shear strength
· temperature, dew point, and pressure
· visibility
Command
On the World menu, click Weather,
and then click the Real-World
Weather button.
On the World menu, click Weather.
On the World menu, click Weather,
then click the Advanced Weather
button.
3
Exploring the Features
15
Page 22
Videos and Logging
While real-world pilots have to carry cameras and
journals to memorialize their flights, in Flight
Simulator 2000 you can track your flight time and
review your performance automatically.
Feature
Flight Video
Instant Replay
Logbook
Flight Photograph
Description
Record “videos” of your flights to impress your
friends.
Replay the last portion of flight at any time and watch
the drama unfold at any speed and from any view.
Track your Flight Simulator flight time, either
automatically or manually.
Take an aerial snapshot for your electronic
“scrapbook.”
Simulator Settings
Some Flight Simulator settings are maintained
from one session to another. Here are some of the
most useful. For complete documentation of every
Feature
Control Assignments/
Sensitivities
General Settings
Display Settings
Instrument Settings
International Settings
Sound Settings
Description
Customize which keys and joystick buttons do what,
and how your joystick behaves.
Change the default Flight and other general settings.
Configure Flight Simulator to effectively use your
video card and choose display options that make
tradeoffs between graphics quality and performance.
Change whether the airspeed indicator shows
indicated or true airspeed, and how radio frequencies
are displayed.
Define the units of measurement used in various
features.
Change the volume of individual sounds.
Command
On the Options menu, click Flight
Video.
On the Options menu, click Instant
Replay.
On the Options menu, click
Logbook.
Press the PRINT SCREEN key on
your keyboard and then paste the
image into any graphics program.
menu item and dialog box, see the Simulator
Help section of the onscreen Help.
Command
On the Options menu, point to
Controls, then click Assignments
or Sensitivities.
On the Options menu, point to
Settings, then click General.
On the Options menu, point to
Settings, then click Display.
On the Options menu, point to
Settings, then click Instrument.
On the Options menu, point to
Settings, then click International.
On the Options menu, point to
Settings, then click Sound.
16
Microsoft
Flight Simulator
20002000
2000
20002000
Page 23
Having
Some Fun
4
chapter four
Page 24
For fledgling and veteran Flight Simulator pilots
alike, there are many fun and challenging
activities available. Not only can you learn to fly
with the help of expert instructor Rod Machado,
visit interesting destinations, view spectacular
scenery, fly a new plane or helicopter, or even fly
with friends. There are numerous possibilities,
whatever your skill level.
but you can extend that passion for flight by
completing the curriculum for Flight Simulator
pilot certificates and ratings. If you just want to
The following table offers some ideas for having
fun with Microsoft
®
Flight Simulator 2000.
get in the cockpit and get off the ground, you can
Type of Activity Description
Learn to Fly and Get Certified Study the Tutorials created by expert flight instructor Rod
Machado, and then fly the Lessons and Checkrides to earn
Flight Simulator certificates and ratings.
Take a Fun Flight Choose from a variety of interesting flights in locations
throughout the world.
Check Out Cool Scenery Visit cities around the world that feature highly detailed
landmarks and scenery.
Have an Adventure Keep the seatbelt tight while flying one of the many heart-
pounding Adventures.
Create a Flight Use the Flight Planner to customize a flight of your own by
selecting the aircraft, weather, and airports for your flight.
Fly a Sailplane Challenge yourself to stay aloft in a sailplane. Practice thermal
and ridge soaring at some great sailplane locations.
Fly a Helicopter Try flying a helicopter. You’ll have to stay busy just to keep it
upright.
Make a Movie Turn on the video recorder and make a movie of one of your
flights. Then, sit back and watch yourself in action.
Perform Aerobatics Learn from aerobatic champion Patty Wagstaff, who’ll show you
how to perform loops and rolls in the small, maneuverable
Extra 300S.
Fly with Other Pilots Online Challenge your Flight Simulator comrades to air races and
demonstrations of flying prowess.
Take Flight Simulator to the Limit Take it to the limit by flying upside down or backwards. You can
also give “deadsticking” a try.
18
Microsoft
Flight Simulator
20002000
2000
20002000
Page 25
Learn to Fly and
Get Certified
If you picked up your copy of Flight Simulator
because you want to learn the basics of how
airplanes fly or how to navigate and understand
the flight instruments, then you’ve come to the
right place. In “Learning to Fly with Rod
Machado” later in this book, expert flight
instructor Rod Machado provides a series of
tutorials to get you off the ground and back again.
Want to find out if you’ve got the mettle to earn a
Flight Simulator Private Pilot Certificate? In
“Getting Certified” later in this book, you’ll find a
complete curriculum for achieving Flight Simulator pilot certificates and ratings that parallel realworld pilot certificates.
Note that while Flight Simulator is a great
complement to flight training, it’s not a substitute
for instruction from a Certified Flight Instructor
and is not part of an approved training program
under the standards of the FAA or any other
regulatory authority.
The options don’t end there. You can take a flight
over Beijing—past the Forbidden City and
Tiananmen Square. Or, try the canyon approach
to Hoover Dam and fly as close as you dare to the
canyon bottom—but don’t forget to pull up when
you get to the dam! Fly your way through
situations in many of the major cities of the world,
including Rome, Las Vegas, Tokyo, London,
Chicago, Paris, and New York. The sky’s the limit!
4
Take a Fun Flight
Choose Select Flight from the Flights menu to
choose one of many intriguing flying situations
we’ve provided for you. The flights in the list take
place in many different locations and aircraft, and
often start with you already in the air. Fly past the
1983 eruption of Kilauea, or fly through Athens,
Greece, past the Acropolis. As you do your fly-by,
take a quick look to your right at the Olympic
Stadium, site of the first modern Olympic games.
Aviation Wisdom
Don't run out of airspeed,
ideas, and altitude all at the
same time.
Having Some FHaving Some F
Having Some F
Having Some FHaving Some F
unun
un
unun
19
Page 26
Check out Cool Scenery
Flight Simulator 2000 includes more detailed
scenery than any previous version. In many of the
world’s greatest cities you’ll find new scenery
objects such as buildings, antennas, towers,
unique skyscrapers, stadiums, and other famous
landmarks.
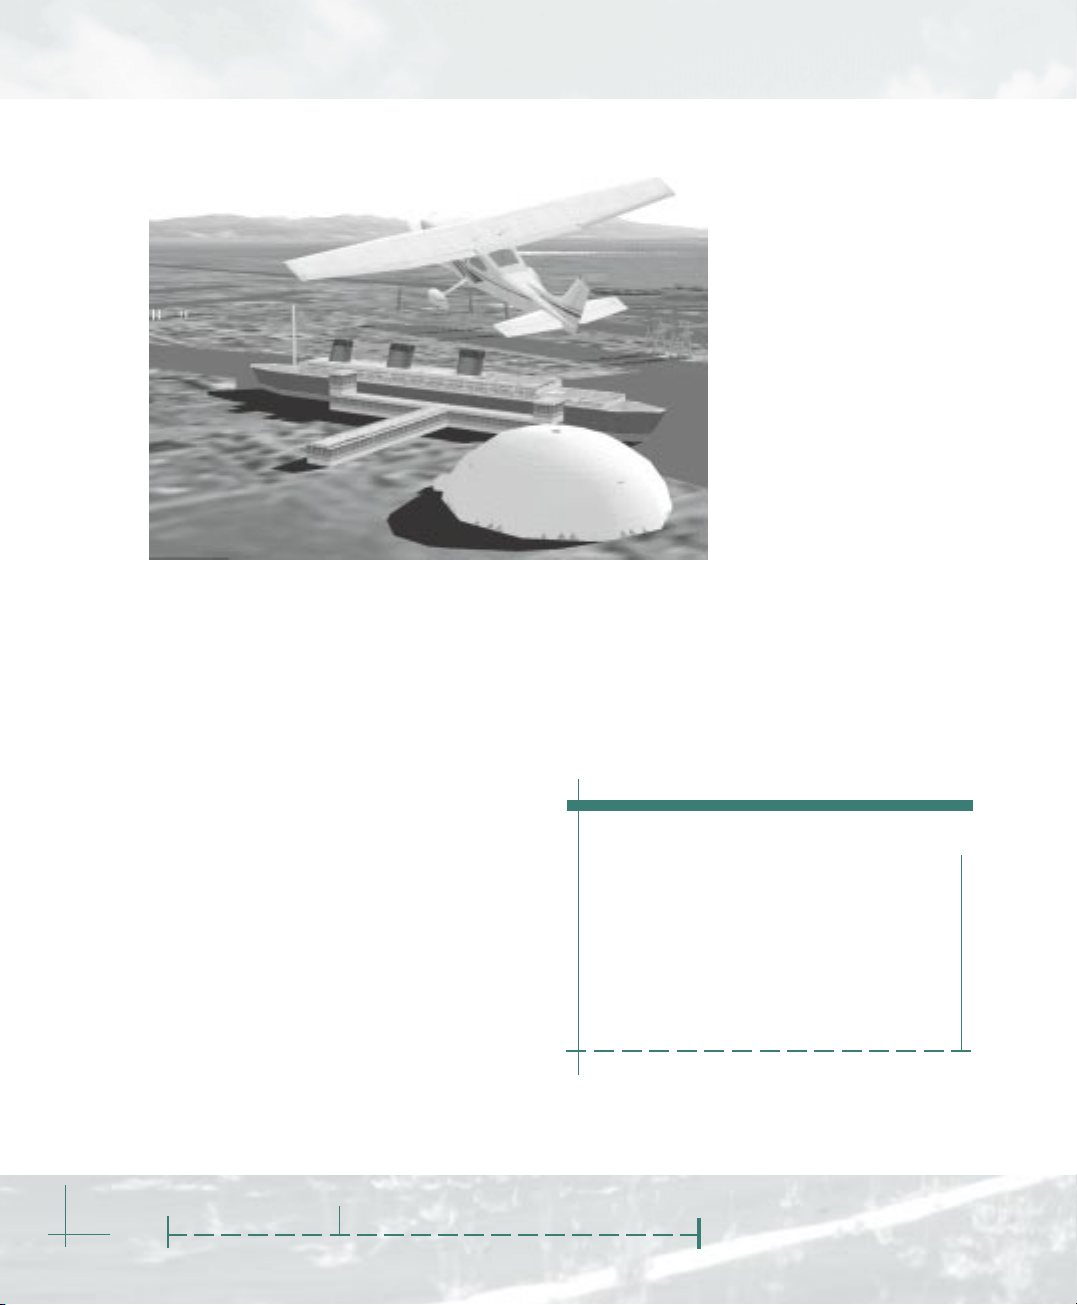
The United States cities
featuring great detail include
New York, Los Angeles, San
Francisco, and Chicago. In
New York City, try circling the
World Trade Center, the
Statue of Liberty, or Yankee
Stadium. Ever wonder what
the La Brea tar pits look like
from the air, or what the RMS
Queen Mary looks like? Just
enter the coordinates in your
GPS or take off from Los
Angeles International or
Whiteman Airport and take a
look.
To start your sightseeing in
Europe, check out famous landmarks in Paris: the
Arc de Triomphe and Jardin de Tuileries, found at
either end of the Avenue des Champs Élysées. Or
in London, tip a wing to the Houses of Parliament
and Big Ben, the Tower of London, and the Tower
Bridge. Flight Simulator opens up a world of
sightseeing options for you.
20
Detailed Scenery in Six Cities
Worldwide
Scenic flights are a great way to get started with
Flight Simulator. Just hop into the airplane of your
choice and fly around the cities with the most
detailed scenery. We’ve included a few
sightseeing suggestions along with coordinates to
enter into the Map View dialog box.
Microsoft
Flight Simulator
Pilot-speak
$100 hamburger: Why go to
your local burger shop
when you can fly to another
airport and get one there?
Any excuse to fly!
20002000
2000
20002000
Page 27
The following table lists coordinates for the
landmarks mentioned in this section.
Note: The syntax for entering coordinates in the
Landmark City Coordinates
World Trade Center New York City 40° 42’ N, 74° 00’ W
Statue of Liberty New York City 40° 41’ N, 74° 02’ W
Yankee Stadium New York City 40° 49’ N, 73° 55’ W
La Brea Tar Pits Los Angeles 34° 03’ N, 118° 21’ W
RMS Queen Mary Los Angeles 33° 45’ N, 118° 11’ W
Map View dialog box in Flight Simulator 2000 may
be different than the way they’re depicted in the
table. Follow the examples shown in the dialog
box.
4
Arc de Triomphe Paris 48
Jardin des Tuileries Paris 48° 51’ N, 2° 19’ E
Houses of Parliament London 51° 29’ N, 0° 07’ W
Tower of London London 51° 30’ N, 0° 04’ W
° 52’ N, 2° 17’ E
Having Some FHaving Some F
Having Some F
Having Some FHaving Some F
unun
un
unun
21
Page 28

Create a Flight
You can also create your
own customized flights in
the Flight Planner. Choose
an aircraft, departure and
destination airports, the date
and time, weather, and so
on, and you’re ready for
takeoff. You can also use
auto-routing or GPS, and
Flight Simulator will find a
route for you. Nearly every
detail of a flight can be
determined ahead of time.
You can even download
real-time weather. The
following is an example of a
flight you might create.
22
Have an Adventure
When you’re ready for a flight complete with
instructions from air traffic control (ATC) and even
some help from a copilot, try flying one of the
many Adventures. Flight Simulator 2000 offers
new Adventures that test your skills in a variety of
aircraft and take you to interesting places.
Adventures aren’t just guided tours: fly in under
the radar to land in Red Square; beat the clock in
a helicopter by landing in three different locations
in a set amount of time; or land your Cessna on
an aircraft carrier off the coast of San Francisco
after you experience an engine failure.
Microsoft
Flight Simulator
Fly Over Wembley Stadium
Perhaps you’ve always lived and breathed soccer
and rather than join the fans down below, you
decide to fly over Wembley Stadium in London,
England, home of the Football Association (FA)
Cup soccer finals. In the Flight Planner, start by
choosing an aircraft, such as the Cessna Skylane
182S. Next, look up airports in the London area.
For example, you can take off from Roberts
airport. Set the date for game day, and plan a
departure time of around noon so that you have
plenty of time to make the kickoff. Finally, set the
weather as clear skies with a light wind, so you’ll
be able to see the match! Actually, you won’t be
able to see the match, but you certainly will have
the best seat in the house.
20002000
2000
20002000
Page 29
Fly a Sailplane
In Flight Simulator you can fly an aircraft that
doesn’t have an engine. Try soaring in the
Schweizer 2-32 sailplane and experience what it’s
like to be whisked away by the wind. Actually, it’s
not as easy as it sounds. The Schweizer 2-32 is an
aerobatic sailplane that offers easy handling
characteristics and good performance, but you
still need to know where to find lift and how to
use it to your advantage.
For more details about flying a sailplane, see the
Aviation Articles and Aircraft Information
sections in Help.
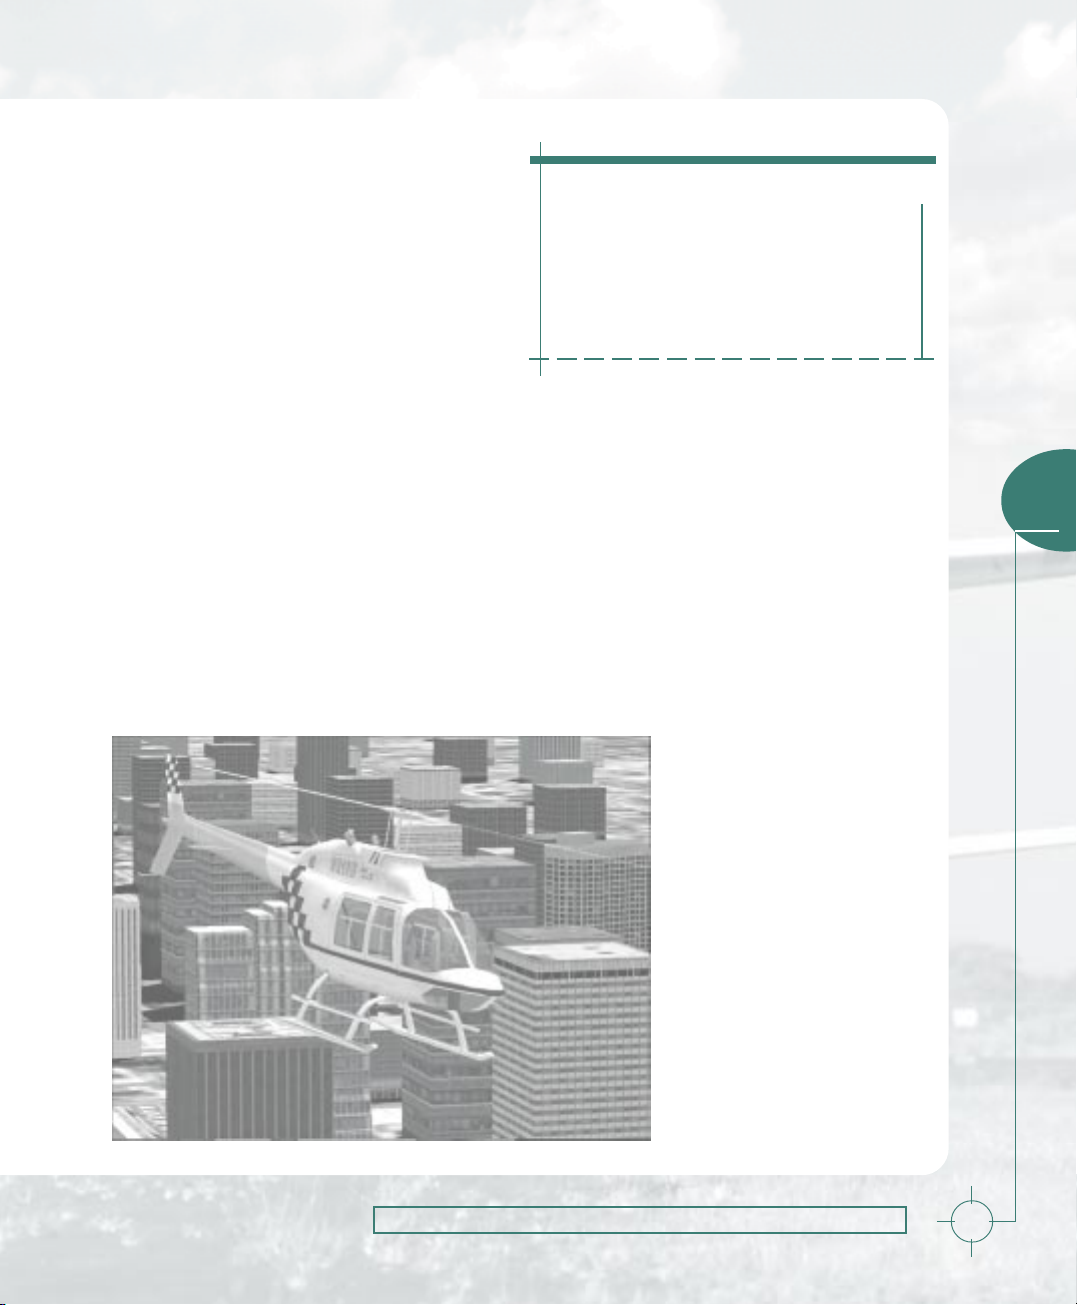
Fly a Helicopter
Another exciting challenge in Flight Simulator is
flying the Bell 206B JetRanger III. Helicopter flying
demands small, smooth control inputs. Unlike
airplanes, helicopters are inherently unstable. The
key to understanding helicopter aerodynamics is
Aviation History
June 26, 1936. First successful
helicopter flight.
remembering that a helicopter’s main rotor system
is its “wings.” Because the rotors are airfoils, they
produce lift much like an airplane’s wings, and
they react to changes in angle of attack and stall
just like a wing. Abrupt or large movements of the
controls quickly lead to ever-larger oscillations
that can rapidly escalate to complete loss of
control, so take it slow and easy. You can learn
more about flying the JetRanger in the Aviation
Articles and Aircraft Information sections of the
onscreen Help.
Make a Movie
Another fun thing to do in Flight
Simulator is to make a movie of
yourself flying. For example, turn
on the Smoke System, and then
the Flight Video. Let the film run
while you take off and fly in and
around Paris or any of the other
highly detailed cities. When
you’re done, save the flight
video and play it back. Change
the view to Spot Plane while you
sit back and watch yourself in
flight. Look in Simulator Help
for additional instructions.
4
Having Some FHaving Some F
Having Some F
Having Some FHaving Some F
unun
un
unun
23
Page 30
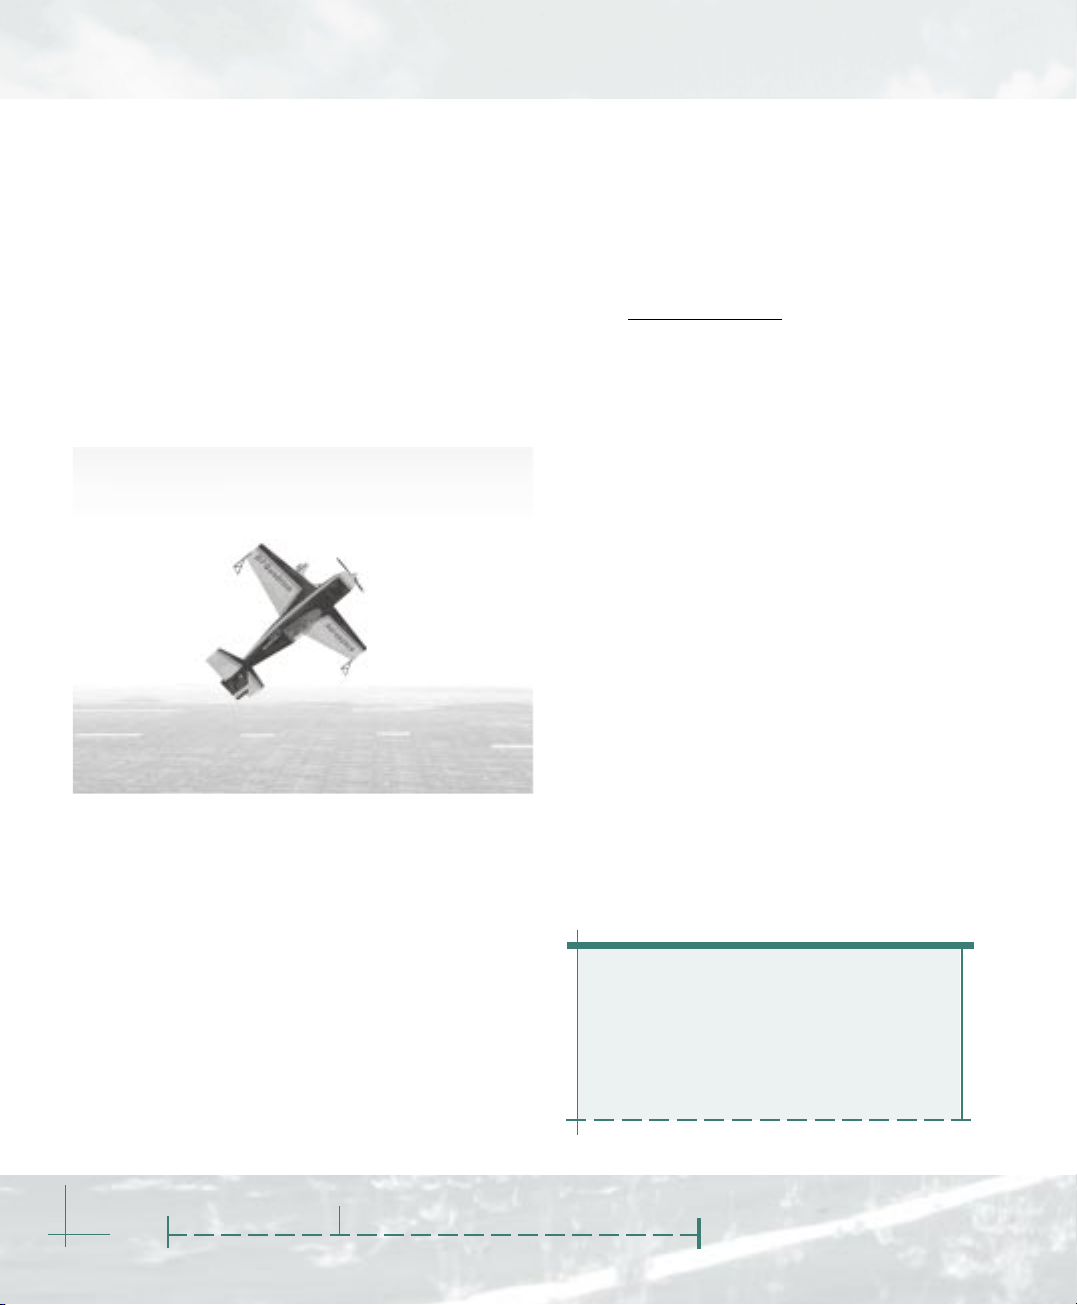
Perform Aerobatics
When you’re ready to try something more daring,
take a shot at aerobatics. Flying aerobatic
maneuvers gets your head out of the clouds real
fast. Aerobatic maneuvers you can attempt
include the loop, aileron roll, hammerhead, and
Cuban Eight. Further test your skill by trying an
Immelmann, a Split-S, or some spins. Enhance the
experience by turning on the Smoke System and
Flight Video so you can play back your flight and
see yourself performing the maneuvers.
Fly with Other Pilots Online
Time to fly with some Flight Simulator buddies? In
Flight Simulator 2000 you can enjoy formation
flights, aerobatic competitions, and similar
activities with other Flight Simulator pilots. An
ideal place to try this is on the MSN™ Gaming
Zone (
http://zone.msn.com). A multiplayer session
can host up to eight Flight Simulator aircraft at the
same time. You can also join a session as an
observer, which can be a helpful learning tool.
There are a number of multiplayer activities to
help you learn or just have some fun. For instance,
you and your fellow pilots can take turns being
the flight instructor, directing the flight and
determining the altitudes and headings to use. Or,
play follow-the-leader as one of you dives or
climbs away from the pack. Make the game more
interesting by choosing San Francisco or another
highly detailed city as your training ground. You
can also fly in helicopters and play hide and seek
using the skyscrapers to hide from view. If you
want to turn a chase into a real competition, set
up air races from one location to another. Time
yourselves from takeoff to landing and see who’s
got the time to beat.
24
Descriptions of each maneuver are available in
the Aviation Articles section of Help and
highlight the abilities of Patty Wagstaff, a threetime U.S. National Aerobatic Champion and
world-class air show pilot. Wagstaff performs the
maneuvers in her Extra 300S, the same airplane
you can choose to fly in Flight Simulator.
Background topics and videos about aerobatics
are also available in the Aviation Articles section
of Help.
Microsoft
Flight Simulator
For more details about how to set up your
multiplayer connection, see the Simulator Help
section of Help.
“Mayday” is an English
spelling of the latter part of
the French phrase venez
m’aider, “come help me.”
20002000
2000
20002000
Page 31

· Try Deadsticking: Deadsticking is landing
without engine power. You can simulate this
by cutting the engine. This is good practice
for an actual engine failure. To make it even
tougher, try deadsticking above a city such as
New York City and putting it down in an open
area, such as Central Park. Or, for a more
serious challenge, try deadsticking an ILS
(instrument landing system) approach.
· Fly a “Zero-Zero” Approach: Set the
weather for zero visibility and a zero-foot
ceiling, and then try to follow an ILS approach all the way to the runway … without
the autopilot.
Take Flight Simulator to
the Limit
In addition to the real-world-oriented activities
you can perform in Flight Simulator, there are a
variety of fun things to do that don’t resemble
anything a pilot should try in the real world.
Since it’s a simulator and there’s no risk of injury,
try using the following activities to push Flight
Simulator to the limit:
· Fly Inverted: Flying inverted (upside down)
is not a typical activity in most airplanes
unless you are practicing aerobatics, but it’s
a fun thing to do in Flight Simulator. Try any
of the flights in the Flights list, but do them
upside down. Or, how about weaving your
way through Paris or one of the other highlydetailed cities upside down in the very
maneuverable Extra 300S!
· Fly Backwards: In the Weather dialog box,
set the wind to be greater than the regular
cruising speed of the aircraft you’re flying.
Once you’re in the air, observe yourself
actually flying backwards. Good luck trying to
land!
4
Aviation Wisdom
The three most useless
things in aviation:
(1) altitude above you;
(2) runway behind you;
(3) fuel back at the airport.
Flight Simulator 2000 opens up a world of flying to
beginners as well as experts. Whether you just
want to get a sense of what flying an airplane
might be like, or you’re a serious student of flight
and want to work on and perfect your piloting
skills, Flight Simulator 2000 has a lot to offer. So,
get into the cockpit and give it a try, but don’t
forget to have some fun along the way!
Having Some FHaving Some F
Having Some F
Having Some FHaving Some F
unun
un
unun
25
Page 32

Aircraft Owners and Pilots Association
With 350,000 members—56% of all pilots in the United States—AOPA (the largest,
most influential aviation association in the world) represents pilots of all levels from
Student to Commercial pilot and aircraft owner. AOPA’s mission is to make flying
more productive, safe, affordable, and fun. It provides a wealth of services to pilots,
represents the interests of General Aviation before government agencies and Congress, and offers continuing pilot education through its AOPA Air Safety Foundation.
AOPA helps members stay up-to-date on aviation news, regulatory and technical
developments, and new information to increase the productivity and fun of flying.
Its toll-free hotline answers technical questions, offers advice on flight training and
aircraft purchase, and provides flight planning assistance.
AOPA’s award-winning Web site offers up-to-the-minute aviation news; a
comprehensive airport directory; feature articles and photos from AOPA PILOT and
AOPA Flight Training magazines; real-time aviation weather, radar, and satellite
images; the latest FAA rules, reports, and policies; and a flight planning service. In
addition, some 30,000 pages of information and a library of databases make AOPA
Online a virtual aviation encyclopedia!
You’ll find many articles from AOPA PILOT (General
Aviation’s biggest and best magazine) and AOPA Flight Training
magazine (the leading publication for prospective new pilots,
flight students, and flight instructors) throughout the Flight
Simulator 2000 Help system.
26
Microsoft
To take the next step to becoming a pilot in the real world,
visit AOPA’s Web site specially designed for Microsoft Flight
Simulator users at
Flight Simulator
http://www.aopaflighttraining.org.
20002000
2000
20002000
page 26 is blank
Page 33

5
chapter five
Page 34

If you can’t get enough of Microsoft
Flight Simulator 2000, you’re not alone.
The Flight Simulator community includes
thousands of individuals, organizations,
and companies that share your passion
for aviation, both real and simulated.
When you’re ready to make your hours in
the Flight Simulator cockpit even more
rewarding, explore some of the suggestions in this chapter.
®
The Flight Simulator
2000 Web Site
The Flight Simulator Web site is the best place to
start browsing for Flight Simulator-related
information and products. You’ll find:
· news
· tips
· articles
· reference material
· downloadable add-ons
· links to interesting and useful Flight
Simulator sites all over the world
out! Virtual airlines provide a structured environment in which to conduct your Flight Simulator
flights. There are dozens of virtual airlines in
operation today on the Web, and usually becoming a pilot for one of them is simply a matter of
signing up. Each airline has its own style and
emphasis: some specialize in cargo operations,
some fly passengers. From continent-spanning
majors flying the latest glass-cockpit jets, to
island-hopping charter operators flying beat-up
old bush planes, there’s a virtual airline for
everyone.
28
In short, it’s the first place to turn for anything
Flight Simulator-related. Start surfing by clicking
Flight Simulator on the Web on the Help menu
in Flight Simulator. Or, open your browser and go
to
www.microsoft.com/games/fsim.
Virtual Airlines
If you’ve always wondered what it would be like to
be an airline pilot, join a virtual airline and find
Microsoft
Flight Simulator
Once on board, you’ll download the airline’s
aircraft, scenery, and training materials, then use
Flight Simulator to complete the assigned flights.
You’ll send reports of your flights back to the
airline and work your way through different
ratings, aircraft, and routes.
Participating in most virtual airlines is free; some
charge a small fee for the experience. The virtual
airline community on the Web is growing rapidly.
There are new airlines every day, and a number of
organizations are taking leadership roles within
20002000
2000
20002000
Page 35

the community—providing enthusiasts with news,
airline directories, and bulletin boards.
Add-Ons
Amateur and professional software developers all
over the world have created products that can
enhance your Flight Simulator experience. Check
the shelves of your local computer store, and be
sure to look on the Web (many downloadable
add-ons are freeware or shareware). Add-ons are
usually easy to install and fun to use.
If you like flying a variety of aircraft, there are
literally thousands to choose from. There are also
add-on avionics packages that simulate the latest
display and navigation technology, and specialized scenery areas that make the simulated world
even more realistic. If you like air traffic control,
there are a number of products that add simulated radio communications to your Flight
Simulator flights. A few even enable Flight
Simulator pilots to fly together in a radarcontrolled environment over the Internet—with
real people acting as the air traffic controllers.
Create your own add-ons with utilities such as
aircraft, panel, scenery, and adventure builders.
Your Desktop Cockpit
If you want to make your desktop seem more like
the cockpit of a real airplane, add some hardware.
The options range from full desktop consoles with
working switches down to the basics described
here: a joystick or a yoke, and rudder pedals. You
can find these accessories at many computer
stores and on the Web.
Joystick or Control Yoke
While you don’t need a joystick or control yoke to
use Flight Simulator, veteran pilots agree that it’s
almost essential to a realistic, enjoyable experience. There are many models to choose from,
ranging from stripped-down basic models to fullblown controls with more buttons and knobs than
you’ll probably ever use. The best ones come with
a throttle control built-in, and some feature
mixture and propeller controls too.
5
Rudder Pedals
Pilots fly using their hands and
feet. Plug in a pair of rudder
pedals, and you’ll find that you
have much greater control
over the aircraft you fly. The
coordinated use of rudder and
aileron in turns will become
more intuitive, and you’ll
become a better pilot. Pedals
are especially useful if you like
flying the Bell 206B JetRanger
III helicopter.
Expanding Your Hobby
29
Page 36

Pilot Supplies
As a Flight Simulator pilot, you’ll find many realworld pilot supplies useful. Find a local flight
school or pilot’s shop in the phone book, then
head on down and see what they’ve got. The
salesperson will be glad to show you around (and
will most likely try to sign you up for flying
lessons!). At best you’ll become a student pilot. At
worst, you’ll walk out with an armload of toys. If
you’d rather do your shopping from the comfort of
home, there are a number of well-known pilot
supply companies that do business on the Web.
Take a look at aviation charts (some stores give
them away when they’re out-of-date), calculators,
course plotters, and radio scanners. Most stores
have a lot of aviation books too, on subjects such
as aircraft and aircraft systems, weather, navigation, communications, and training.
Fly for Real
Flight Simulator 2000 is a game, a simulation, and
a training aid all rolled into one. Many Flight
Simulator enthusiasts have gone on to become
licensed pilots, and many pilots (both recreational
and professional) fire up Flight Simulator to have
fun and practice their skills. It’s not unusual these
days for a new student to arrive at the airport for
his or her first flight lesson already knowing about
control towers, stalls, and the horizontal component of lift.
Flight Simulator provides a comfortable, relaxed
atmosphere in which to learn and practice the
fundamentals of visual and instrument flying,
including:
· Operating flight and engine controls
· Using and interpreting flight instruments
· Using navigational aids
· Flying in an airport environment
· Flying solely by reference to instruments
· Understanding and managing systems
failures
Student pilots using Flight Simulator can isolate
specific tasks and focus on them without the
distractions and complexities of flying a real
aircraft in busy airspace. Instructors can use Flight
Simulator as an interactive tool for pre- and postflight demonstrations, as well as for classroom
presentations. The ability to save specific situations as Flights, record and playback “videos” of
Flight Simulator flights, and induce systems
failures is particularly useful to instructors. Keep
in mind though that while Flight Simulator is a
great complement to flight training, it’s not a
substitute for instruction from a Certified Flight
Instructor and is not part of an approved training
program under the standards of the FAA or any
other regulatory authority.
The next chapter, “Getting Certified,” describes
the path real-world pilots take in their training
and lays out a curriculum you can follow to climb
the career ladder within Flight Simulator.
30
Microsoft
Flight Simulator
20002000
2000
20002000
Page 37

Getting
Certified
chapter six
6
Page 38

Whether attracted to the technology, the speed, or
the simple beauty of the sky, all pilots share a
passion for what they do. They climb up the
aviation ladder one step at a time, increasing and
improving their skills along the way. They study
hard, spend many hours getting instruction and
building flight time, and pass knowledge and
practical examinations to mark their progress.
A similar systematic approach will help you build
your skills as a Microsoft
pilot. You’re free, of course, to explore the
simulation on your own. But if you really want to
learn to fly in Flight Simulator, read on. First we’ll
take a look at the training real-world pilots
receive. Then we’ll present a step-by-step course
you can follow to work your way up the ranks
from zero experience to the cockpit of a Flight
Simulator jet.
®
Flight Simulator 2000
In ground school, a pilot-to-be learns about
regulations, navigation, radio communication,
weather, aircraft operation and performance,
aerodynamics, aircraft systems, emergency
procedures, and decision-making.
In flight training, the work focuses on acquiring
basic skills: preflight preparation and procedures,
airport operations, flight maneuvers, navigation,
basic instrument maneuvers, emergency operations, night operations, and post-flight procedures. A typical student spends 20 to 30 hours
flying dual with an instructor, and practices his or
her skills by flying solo for another 20 hours or so.
To get the Private Pilot Certificate, the student
must pass a simple medical examination, a
computerized knowledge test, and oral and flight
examinations given by an examiner designated by
the Federal Aviation Administration (FAA).
32
Getting Certified In the
Real World
Requirements for pilot certification vary from
country to country, but the training is similar no
matter where you are. In this section, we’ll
examine the typical career path a pilot takes in
the United States. The Federal Aviation Regulations concerning pilot certification are quite
detailed. What follows is a simplified overview.
Private Pilot Certificate
Becoming a private pilot is the first step in an
aviation career, and one many pilots never go
beyond. Although it’s possible to get a Private
Pilot Certificate in a multi-engine airplane,
seaplane, glider, helicopter, balloon, blimp, or
gyroplane, most students do their initial training
in a single-engine, land-based airplane.
Microsoft
Flight Simulator
While some private pilots use an airplane as a
means to the end of personal or business
transportation, most fly just for the fun of it.
Private pilots can take their family and friends
flying during the day or at night. Without an
Instrument Rating (described below) private pilots
can fly only when they can stay out of the clouds
and when the visibility is good enough to see
other aircraft and the ground. While private pilots
can share expenses with their passengers, they
can’t be paid for their flying. The Private Pilot
Certificate has its limitations to be sure, but for
thousands of recreational aviators, it’s all they
need to have fun on the weekends or to get from
here to there quickly and in style.
Instrument Rating
For private pilots who are tired of being stuck on
the ground when the weather’s bad, or for those
pilots with career aspirations, the next logical step
20002000
2000
20002000
Page 39

is to add an Instrument Rating. Instrument
training gives a private pilot the skills to fly in the
clouds and in reduced visibility, using only the
instruments in the cockpit. A pilot with an
Instrument Rating operates under different rules
than a pilot flying visually. In the clouds, the
responsibility for keeping aircraft apart from one
another rests with air traffic controllers, who use
radar to keep track of each airplane’s position.
Just as in private pilot training, the Instrument
Rating requires ground school and a knowledge
test. The focus is on learning to fly and navigate
using only the instruments, and on learning to
communicate effectively with air traffic controllers. During the required 40 hours of instrument
flight training, the student usually wears a view-
limiting device (a special visor or goggles) that
prevents him or her from looking out the window.
Getting the Instrument Rating is both challenging
and rewarding. It makes flying a more reliable
mode of transportation, refines basic flying skills,
and enables a private pilot to fly in the same air
traffic control system that airline pilots use. For
pilots attracted to aviation gadgetry, there’s
nothing better than flying “on the gauges.”
Commercial Pilot Certificate
For pilots looking to make a career out of flying,
or to hone their skills, the next step after adding
an Instrument Rating is the Commercial Pilot
Certificate. (While a pilot doesn’t have to have an
Instrument Rating to get a Commercial Certificate,
most commercial flying jobs require it.) The only
real difference between a Private Pilot Certificate
and a Commercial Pilot Certificate is that the
latter allows a pilot to legally carry passengers
and cargo for hire. With a Commercial Pilot
Certificate in hand, a pilot can finally get paid to
fly!
FlightSafety International
FlightSafety International’s mission
is clear: providing the highest standard
of training for the safe and effective
operation of complex, high-risk
equipment. FlightSafety trains over
50,000 pilots and aircraft maintenance
technicians each year, in facilities
located across the United States and
Canada and in Paris, France.
6
FlightSafety’s instructors and
facilities are equipped to train pilots
and technicians in practically every
make and model of corporate and
commercial aviation aircraft.
FlightSafety is known around the
world for the training of pilots in all
categories: private, commercial, airline,
and military. The training of aircraft
maintenance technicians, dispatchers,
and additional aircraft support teams
has added to FlightSafety’s reputation
as an all-encompassing aviation
training company.
Getting Certified
33
Page 40

Commercial Pilot ground school, flight training,
and examinations are very similar to those faced
by private pilots, but there are new regulations,
calculations, and maneuvers to master. Additionally, the tolerances for errors are much smaller. At
least some of the training must be done in a
complex aircraft (an aircraft with an adjustable
propeller, flaps, and retractable landing gear). The
flight training consists of 20 hours or more of
instruction, and a pilot needs at least 250 hours of
total flight time before taking the oral and flight
examinations.
ment. The flight training takes a pilot’s existing
skills to even higher levels of precision. Before
undergoing the ATP oral and flight examinations,
a pilot needs to have logged at least 1,500 hours
total time as a pilot.
Once a pilot secures a position (usually Copilot,
also known as First Officer) with a major airline or
corporation, advancement to better routes, larger
aircraft, and Captain is usually based on seniority.
Entry-level commercial pilots typically spend their
days flying charter flights and scenic tours,
towing banners, hauling freight, or carrying sky
divers. Adding a Multi-engine Rating or a Flight
Instructor Certificate makes commercial pilots
more marketable, as does the Airline Transport
Pilot Certificate (described below).
After accumulating about 1,000 hours of flying
time and some experience in complex singleengine and multi-engine aircraft, a commercial
pilot may be ready to fly for a corporation or a
commuter airline. On twin-engine or turbinepowered aircraft, the rookie will likely act as the
copilot.
Airline Transport Pilot Certificate
The Airline Transport Pilot Certificate (known as
the ATP) is the Ph.D. of aviation, and is a prerequisite for many airline and corporate flying jobs. It
allows a pilot to act as pilot in command during
the commercial operation of an airliner.
ATP ground school and the knowledge test
emphasize airline-oriented information and skills,
focusing on subjects like weight and balance,
aircraft performance, and crew resource manage-
Aviation History
March 8, 1910, Madame la
Baronne de la Roche becomes
the first certified woman pilot
(license issued in France).
Getting Certified In Flight
Simulator 2000
As in the real world, learning to fly with Flight
Simulator is easy if you view the task as a series
of steps. You can follow this curriculum at your
own pace. Complete the Tutorials, Lessons, and
Checkrides in the order they’re presented.
Remember that while Flight Simulator is a great
complement to flight training, it’s not a substitute
for instruction from a Certified Flight Instructor and
is not part of an approved training program under
the standards of the FAA or any other regulatory
authority.
34
Microsoft
Flight Simulator
20002000
2000
20002000
Page 41

Tutorials are found in the next chapter of this
book. In them, renowned flight instructor, aviation
educator, and humorist Rod Machado walks you
through the basics of flying. Each tutorial starts
with some homework; read the suggested
material in the onscreen Help, watch the videos,
and you’ll be better prepared to absorb the
information to come. The tutorials themselves are
hands-on. You’ll read a section, then use Flight
Simulator to apply what you’ve learned. With
Rod’s assistance, learning is fun, and you’ll be in
the air before you know it.
Lessons team you up with a virtual instructor
who guides you through maneuvers step-by-step.
The Lessons complement the Tutorials and
increase in difficulty as your skills increase. Rod
will be your virtual instructor for the Private and
Instrument Lessons.
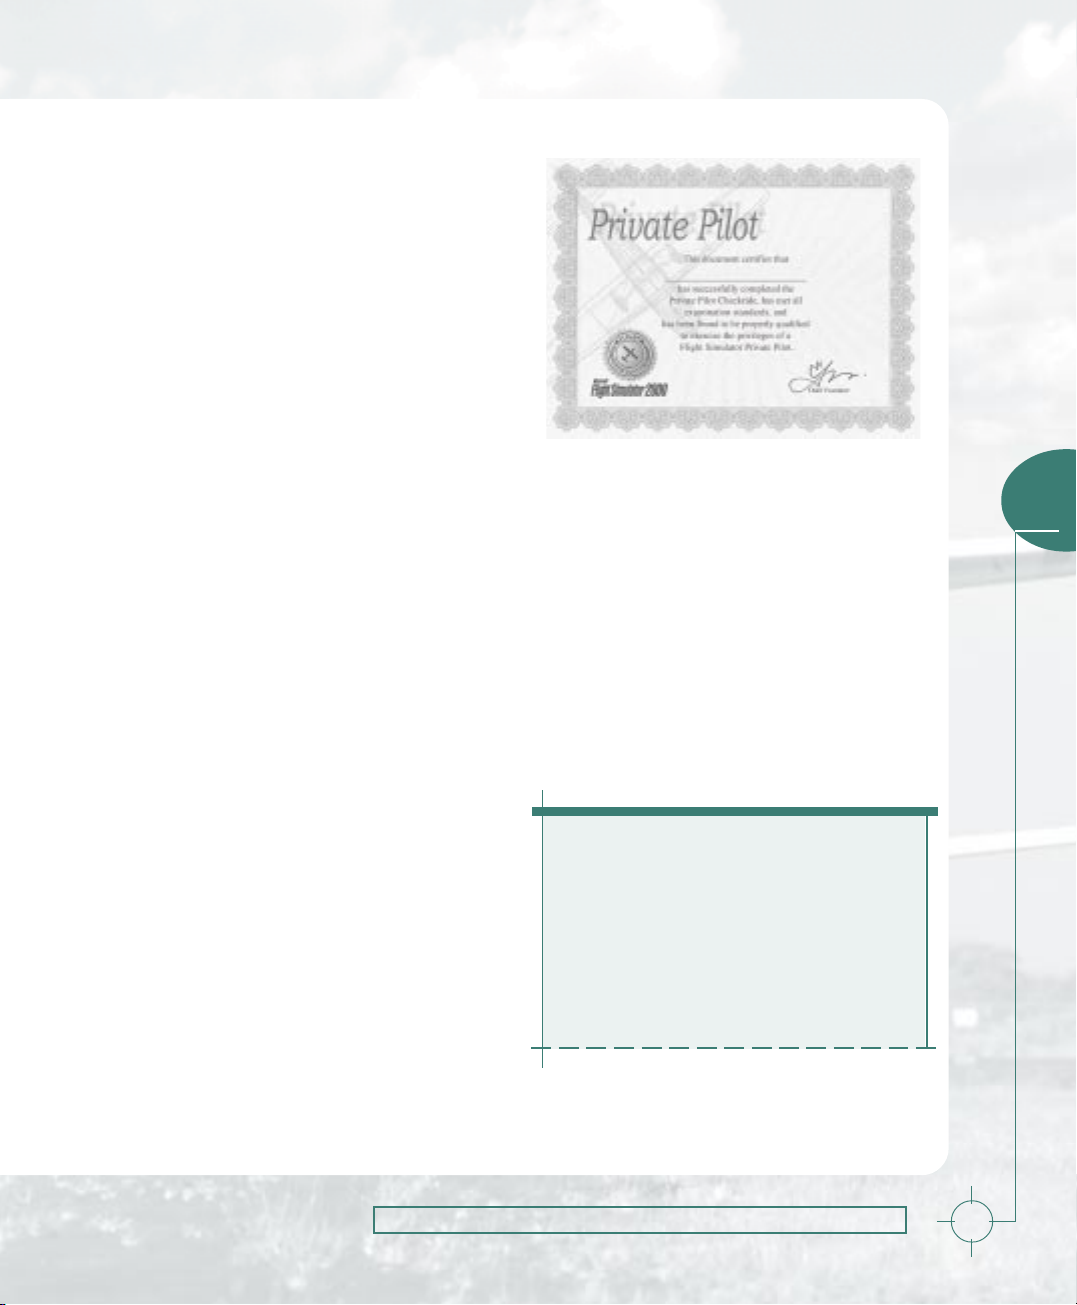
Checkrides put you in the cockpit with an
Examiner who will test your mastery of certain
tasks. Before you take a Checkride, make sure
you’ve met the prerequisites listed in the Preflight
Briefing. Once you pass, you’ll be awarded a
certificate that you can print, frame, and hang on
your wall.
Lessons and Checkrides are real-time, interactive
experiences in the cockpits of Flight Simulator
2000 aircraft. To get to them, click Lessons on the
Flights menu. Be sure to watch any associated
videos and study the Preflight Briefings before you
go flying.
After you’ve completed a series of Lessons and
passed the associated Checkride, try flying some
of the suggested Adventures—they’re a fun way to
use your new skills. Adventures range from short
dramatic scenarios lasting a few minutes to
lengthy realistic flights of several hours, complete
with air traffic control. On the Flights menu, click
Adventures.
Renting an Airplane
There are more than 600,000 pilots
in the United States. Some own their
own airplanes, but the majority take to
the sky in aircraft they rent. Most flight
schools, flying clubs, and fixed-base
operators (businesses at airports that
provide training, rentals, fuel, supplies,
maintenance, and so on) charge a “wet”
hourly rate, meaning that the rate
includes fuel. Renting an airplane isn’t
cheap, but because renters usually pay
only for the time the engine is running, a
rented airplane can be a feasible way to
get from one place to another.
6
Getting Certified
35
Page 42

Private Pilot Certificate
The first step in a Flight Simulator 2000 career is
to become a private pilot. This training is the
foundation for everything else you’ll learn. In these
Tutorials and interactive Lessons, you’ll fly a
Cessna 182S to learn basic flight maneuvers and
radio navigation. Master these skills, and the rest
of your training will go more smoothly. Complete
these steps in sequence:
Task to Complete
Tutorial 1: Straight-and-Level
Tutorial 2: Turns
Private Lesson 1: Reviewing the Basics,
182S
Tutorial 3: Climbs and Descents
Tutorial 4: Slow Flight
Tutorial 5: Stalls
Tutorial 6: Steep Turns
Tutorial 7: Landings
Private Lesson 2: Practicing Landing,182S
Tutorial 8: Takeoffs and Traffic Patterns
Private Lesson 3: Flying the Pattern, 182S
Tutorial 9: VOR Navigation
Private Lesson 4: VOR Intercept and
Tracking, 182S
Private Pilot Checkride
Description
Learn the secrets of flying the most basic maneuver of them all: straightand-level flight.
Master the coordinated use of ailerons, rudder, and elevator that result in
a turn.
Review straight-and-level flight and turns in the Cessna 182S over
Chicago.
Discover how to use pitch and power to make an airplane go up and
down.
Master the subtle art of flying an aircraft near its stall speed.
Learn how to prevent, detect, and recover from stalls.
Become proficient at steep turns—you’ll learn to fly more precisely and to
divide your attention between the instruments and the view outside.
Learn what it takes to get your aircraft back on the ground.
Guide the Cessna 182S down to the runway at the Ohio University Airport.
Learn to fly a standard traffic pattern around the runway.
Put it all together and practice flying the traffic pattern in the Cessna 182S
at Meigs Field.
Master a basic form of radio navigation using a VHF Omnidirectional
Range (VOR).
Intercept and track VOR radials in the Cessna 182S over the Honolulu
International Airport.
Hop into the Cessna 182S and strut your stuff for an examiner. Meet the
high standards, and you’ll be awarded a Private Pilot Certificate.
36
Congratulations! Now that you’re a certified
Flight Simulator 2000 pilot, it’s time to have some
fun. Try flying some of the Beginner Adventures.
Microsoft
Flight Simulator
20002000
2000
20002000
Page 43

Instrument Rating
Just like in the real world, getting an Instrument
Rating in Flight Simulator 2000 will make you a
more versatile pilot. You’ll also be able to take
better advantage of Flight Simulator’s navigation
and weather features. You’ll do your instrument
training in the same aircraft you used for your
private pilot certification, the Cessna 182S. While
the basic maneuvers are the same, this time you’ll
learn to perform them solely by reference to your
instruments. You’ll also master the art of the
instrument scan and learn the intricacies of flying
instrument approaches.
There are few thrills in aviation like taking off into
the clouds, flying for a few hours, and breaking
out with a runway at another airport directly
ahead. By the time you finish your instrument
training, you’ll be capable of getting from here to
there in almost any weather. Here are the steps:
Task to Complete
Tutorial 10: Attitude, Power, and Trim
Tutorial 11: Radial Scanning the Primary
Instruments
Tutorial 12: Trimming Using the VSI and
Monitor Scanning the Big 6 Instruments
Tutorial 13: Understanding Approaches
Tutorial 14: Flying a VOR Approach
Instrument Lesson 1: VOR Hold, 182S
Instrument Lesson 2: VOR Approach with
Procedure Turn, 182S
Tutorial 15: Flying an ILS Approach
Instrument Lesson 3: ILS Approach,
Straight-In, 182S
Instrument Lesson 4: ILS Approach with
Procedure Turn, 182S
Instrument Rating Checkride
Description
Start learning the basics of flight by reference to instruments.
Further your understanding of instrument flight and the “scan.”
Learn how to reduce your workload by using trim and your peripheral
vision.
Discover the different approaches to the runway when flying on
instruments.
Learn how to use a VOR to get to the runway.
Practice instrument flying by “holding” like the airliners over the
Richmond, Virginia, VOR. You’ll be flying the Cessna 182S in Visual
Meteorological Conditions (VMC).
Take the Cessna 182S through a full VOR approach to the Flying Cloud
Airport near Minneapolis, Minnesota, in VMC.
Learn the art of “flying the needles” to the runway, using an Instrument
Landing System (ILS).
Guide the Cessna 182S down an ILS approach to Space Center Executive
Airport in Titusville, Florida, in VMC.
Fly a full ILS approach in the Cessna 182S to Long Island Mac Arthur
Airport in Islip, New York, in VMC.
Take an Examiner for a cloudy ride in the Cessna 182S. Pass, and you’ll be
awarded the Instrument Rating.
6
As an instrument-rated Flight Simulator 2000 pilot
your flying is now more precise. Give some of the
Intermediate Adventures a try, and see how you
do.
Getting Certified
37
Page 44

Commercial Pilot Certificate
In the real world, commercial training focuses on
advanced flight maneuvers. In Flight Simulator
2000, we’ll stray from the real-world curriculum so
that you can perfect the instrument flying skills
you already have. This time, you’ll be flying an
aircraft with retractable landing gear—the Cessna
182RG. The training will be similar to your
instrument training, except that all the tolerances
will be tighter and you’ll do all the flying in the
clouds (in what pilots call instrument meteorologi-
cal conditions, or IMC). After passing the Commercial Pilot Checkride, you’ll be ready to try
flying more advanced aircraft. That journey begins
with these steps:
38
Task to Complete
Commercial Lesson 1: VOR Hold, 182RG
Commercial Lesson 2: VOR Approach with
Procedure Turn, 182RG
Commercial Lesson 3: ILS Approach,
Straight-In, 182RG
Commercial Lesson 4: ILS Approach with
Procedure Turn, 182RG
Commercial Pilot Checkride
Description
Hold the Cessna 182RG over the Richmond, Virginia, VOR in instrument
meteorological conditions (IMC).
Take the Cessna 182RG through a full VOR approach to the Flying Cloud
Airport near Minneapolis, Minnesota, in I MC.
Guide the Cessna 182RG down an Instrument Landing System (ILS)
approach to Space Center Executive Airport in Titusville, Florida, in IMC.
Fly a full ILS approach in the Cessna 182RG to Long Island Mac Arthur
Airport in Islip, New York, in IMC.
Ready to get paid to fly? Prove it in the Cessna 182RG, and you’ll be
awarded the Commercial Pilot Certificate.
Now try flying some of the Advanced Adventures:
they’ll help you keep your new commercial-level
Flight Simulator 2000 flying skills sharp.
Microsoft
Flight Simulator
20002000
2000
20002000
Page 45

Airline Transport Pilot Certificate
Most commercial airline pilots who fly jets have
an ATP certificate, and if you’re serious about
developing your skills, you should too. In the real
world, the training is often done in a single-
engine propeller-driven airplane. In Flight
Simulator 2000, you’ll have to prove yourself in the
cockpit of a Boeing 737 jet. Up for the challenge?
Follow these steps:
Task to Complete
ATP Lesson 1: VOR Hold, 737–400
ATP Lesson 2: VOR Approach with
Procedure Turn, 737–400
ATP Lesson 3: ILS Approach, Straight-In,
737-400
ATP Lesson 4: ILS Approach with
Procedure Turn, 737–400
Airline Transport Pilot Checkride
Ready for some
real challenges?
Try flying some of
the Expert
Adventures.
Successfully
completing these
is the mark of a
true Flight
Simulator 2000
professional.
Description
Hold the Boeing 737–400 over the Richmond, Virginia, VOR, in VMC.
Take the Boeing 737–400 through a full VOR approach to JFK International Airport in New York, in VMC.
Guide the Boeing 737–400 down an ILS approach to Space Center
Executive Airport in Titusville, Florida, in VMC.
Fly a full ILS approach in the Boeing 737–400 to Long Island Mac Arthur
Airport in Islip, New York, in VMC.
Share the cockpit with an examiner one last time. It doesn’t get any more
challenging than this test in the Boeing 737-400. Pass, and you’ll get the
ATP certificate.
6
Getting Certified
39
Page 46

page 40 is blankpage 40 is blank
Page 47

LEARNING TO FLY
with
Page 48

For the past 25 years,
pilots across the
United States and
Europe have been
laughing and learning
with Rod. Rod learned
to fly at 16 and
currently holds an
Airline Transport Pilot
certificate, all fixedwing flight instructor
ratings, and degrees in
psychology and aviation
science.
Enjoy Rod’s humor and
insights in his monthly
AOPA Pilot and Flight
Training magazine
columns, as well as in
Rod Machado’s Private
Pilot Handbook.
Meet Your Instructor
I’m Rod Machado, your flight instructor. I’m going to take you flying, so buckle
up and adjust that seat. We’re going to learn a lot and have fun.
Over the years I’ve taught many people how to fly. My methods were
straightforward. We’d review the concepts on the ground, hop in the airplane for
a flight lesson, then discuss our accomplishments after landing.
We’ll do the same here. I’ll treat you as if you’re learning to fly a real airplane. All
I ask is that you complete the required homework before each tutorial.
Homework is very important. One day, when I was inHomework is very important. One day, when I was in
Homework is very important. One day, when I was in
Homework is very important. One day, when I was inHomework is very important. One day, when I was in
grade school, I didn’t bring my homework to class.grade school, I didn’t bring my homework to class.
grade school, I didn’t bring my homework to class.
grade school, I didn’t bring my homework to class.grade school, I didn’t bring my homework to class.
The teacher asked me why and I said, “Ahh, the dogThe teacher asked me why and I said, “Ahh, the dog
The teacher asked me why and I said, “Ahh, the dog
The teacher asked me why and I said, “Ahh, the dogThe teacher asked me why and I said, “Ahh, the dog
ate it.” The savvy teacher responded by saying, “Rod,ate it.” The savvy teacher responded by saying, “Rod,
ate it.” The savvy teacher responded by saying, “Rod,
ate it.” The savvy teacher responded by saying, “Rod,ate it.” The savvy teacher responded by saying, “Rod,
do you really expect me to believe the dog ate your homework?” Ido you really expect me to believe the dog ate your homework?” I
do you really expect me to believe the dog ate your homework?” I
do you really expect me to believe the dog ate your homework?” Ido you really expect me to believe the dog ate your homework?” I
replied, “Well, I had to force him, but he ate it.” Of course, Ireplied, “Well, I had to force him, but he ate it.” Of course, I
replied, “Well, I had to force him, but he ate it.” Of course, I
replied, “Well, I had to force him, but he ate it.” Of course, Ireplied, “Well, I had to force him, but he ate it.” Of course, I
won’t force you to do your homework; but if you do, I guaranteewon’t force you to do your homework; but if you do, I guarantee
won’t force you to do your homework; but if you do, I guarantee
won’t force you to do your homework; but if you do, I guaranteewon’t force you to do your homework; but if you do, I guarantee
you’ll learn real flying skills like everyone else I’ve taught.you’ll learn real flying skills like everyone else I’ve taught.
you’ll learn real flying skills like everyone else I’ve taught.
you’ll learn real flying skills like everyone else I’ve taught.you’ll learn real flying skills like everyone else I’ve taught.
A Little Extra Help
Your ally in this process is the Help system, accessed from the menu bar at the
top of the Microsoft
From the Help menu, choose Overview to open the Help system. Then choose
one of the four main sections of Help (Simulator Help, Aircraft Information,
Aviation Articles, and Glossary), or click Search to search the Help index. I’ve
added a shortcut for you: choose Homework from the Help menu to get
quickly to the homework for each Tutorial.
There’s no better way to learn than by doing, so let’s get started. You’ll learn
what you need as you go along instead of trying to learn isolated bits of
information out of context. This way, you won’t need to keep five pounds of facts
swirling around in a three-pound brain.
®
Flight Simulator 2000 screen.
42
Microsoft
You may have heard the phrase, “Don’t try this at home.” But, in this case, you
should try this ONLY at home. Don’t even think about trying to fly in a real plane
without taking real flying lessons from a Certified Flight Instructor—a virtual
instructor isn’t enough!
Flight Simulator
20002000
2000
20002000
Page 49

Tutorial 1: Straight-&-Level Flight
The very first thing you need to do is (yes, you’ve guessed it) homework! Watch or read all of the
selections for Tutorial 1 before you go on. These will give you a good foundation for some things we’ll
be talking about.
Homework for this tutorial is found in the Help menu under Homework. When you first start Flight
Simulator 2000, click the Fly Now! button on the opening screen. When the menus at the top
become visible, click Help and then click Homework. Read all the topics and watch the videos for
Tutorial 1.
Your first tutorial is one of the most important. You’re about to practice straight-and-level flight, one of
aviation’s most fundamental maneuvers. Does this sound like two separate maneuvers instead of
one? Well, it is. Straight flight means the airplane’s nose remains pointed in one direction and the
wings are parallel to the earth’s horizon. Level flight means the airplane doesn’t gain or lose altitude.
Let’s see what this looks like from the air.
1. On the menu bar located at the top of the screen, click the Flights menu, then click Select
Flight, then choose Tutorial 1, Situation 1 from the list of available flights. We’ll combine our
first flight with a little European vacation: this situation puts you in a Cessna 182S over Rome.
2. Click the OK icon (that’s the check mark, not the X).
3. As soon as the simulation starts, press P on your keyboard to pause the simulation.
Now you want to activate the autopilot. Why? It allows me to demonstrate a maneuver and gives
you a chance to relax so I can explain things and give you pep talks. The autopilot has several
features, but you’ll only use two: the wing leveler and altitude hold. The wing leveler keeps the
wings from banking, thus it keeps the airplane flying straight ahead. Altitude hold adjusts the
airplane’s nose-up or nose-down pitch, which helps it maintain a constant altitude.
We’ll use keyboard commands to control the autopilot, but you canWe’ll use keyboard commands to control the autopilot, but you can
We’ll use keyboard commands to control the autopilot, but you can
We’ll use keyboard commands to control the autopilot, but you canWe’ll use keyboard commands to control the autopilot, but you can
also select also select
also select Autopilot
also select also select
autopilot settings.autopilot settings.
autopilot settings.
autopilot settings.autopilot settings.
4. Press Z to activate the autopilot from the keyboard, then press Ctrl+V to activate the wing
leveler, and press Ctrl+Z to activate the altitude hold function. These keys program the autopilot
to fly the airplane straight (no bank) and level (constant altitude).
5. Now press P again to reactivate the simulation.
from the from the
from the Aircraft
from the from the
Learning To Fly with Rod Machado
menu to see and change the menu to see and change the
menu to see and change the
menu to see and change the menu to see and change the
7
43
Page 50

This is what straight-and-level flight looks like
from the left seat, where you, the pilot, normally sit
(Figure 1). Don’t worry if you seem to be headed
for a distant mountain village. I’m with you.
Besides, this is Rome and those Romans are very
good at repairing villages.
How to Tell You’re Going Straight
Okay, how do you know you’re actually flying
straight and level? The easiest way is to look over
the instrument panel out the windscreen (the front
window) as shown in Figure 1. It appears that the top portion of the instrument panel is
approximately parallel with the earth’s distant horizon. This implies that your wings are not banked,
which means you’re flying straight and not turning.
There is, however, another way to tell if you’re flying straight.
1. Press the hat switch on your joystick to the left (the hat switch is the button that sticks straight
up out of the middle, near your thumb) to take a look out the left window. (You can also use
Shift+4 on the numeric keypad to look left.)
Notice how far the wing is above the earth’s horizon.
2. Now press the hat switch to the right and take a look out the right window. (You can also use
Shift+6 on the numeric keypad to look right.)
Figure 1
44
In straight flight, both wings should be the same distance above the horizon (refer to the
horizon, not the mountains).
Having the
Right Attitude
In airplanes, I prefer that my students almost strip
the gears in their neck by looking right and left
out the windows. This helps them check the
wing’s position and keeps their eyes out of the
cockpit looking for traffic. In the simulator, it’s
inconvenient to keep shifting views to the left and
to the right. So, you’ll use the attitude indicator to
help maintain straight-and-level flight. The
attitude indicator is located at the top of the six
main flight instruments directly in front of you
Figure 2
Microsoft
Flight Simulator
(Figure 2).
20002000
2000
20002000
Page 51

The attitude indicator is an artificial representation of the real horizon. Just as its name suggests, the
attitude indicator displays the airplane’s attitude (its upward or downward pitch and the bank the
wings make with the horizon). The upper half of the attitude indicator is blue (like the real sky, unless,
of course, you fly in Los Angeles), the bottom half is brown (like the surface below us). The thin white
line between these colors is the artificial horizon line. Pilots use the attitude indicator when they can’t
see the earth’s horizon because of restrictions to visibility or when it’s inconvenient to look at the
wing tips (which is your situation right now).
You’ve Got It
Okay, I think you’re ready to take the controls.
1. First, press Ctrl+V to disengage the autopilot’s wing leveler. This leaves only the altitude hold
feature active.
2. Place your hand on the joystick or flight yoke (I’ll use the term joystick from now on), and gently
move it about one inch to the left of its center (default) position.
3. Hold this position for about three seconds, then let the joystick return to its center position.
4. Watch the airplane’s response both on the attitude indicator and out
the front windscreen.
Moving the joystick to the left banks the airplane to the left, which dips
the left wing downward toward the ground. This is how you begin a left
turn. Notice that the miniature, orange-winged airplane in the attitude
indicator also appears to dip its left wing
toward the ground as shown in Figure 3A.
Figure 3A
picture of the airplane’s attitude. Nevertheless, you can always tell
which way you’re banking by determining which one of the small
orange wings in the attitude indicator dips toward the ground (this is
easy since you only have two choices).
5. Gently move the joystick to the right in the same manner described
above. The attitude indicator now indicates a right turn since the right
wing dips toward the ground (Figure 3B).
6. Move the joystick to the right or left until both wings are parallel to the
artificial horizon line (Figure 3C), then return the joystick to its center
(default) position.
This is how you make the airplane fly straight. After all, if the wings
aren’t banked, the airplane isn’t turning.
7. Push Ctrl+V to reactivate the wing leveler and take a short break.
Mechanically speaking, it’s really the background
of the attitude indicator that moves and creates a
Learning To Fly with Rod Machado
7
Figure 3B
Figure 3C
45
Page 52

The airplane will return to straight-and-level flight on its own. Now that you understand straight
flight, let’s move on to level flight.
Making Sure You’re on the Level
Let’s see what happens to your altitude when you pitch the airplane’s nose up or down.
1. Even though the altitude hold mode is still active, gently pull the joystick back about one inch
from its center position, hold it there, and watch the response.
A B
C
Figure 4
Directly below the altimeter is the vertical speed indicator (VSI). Its needle also deflects upward
showing a rate of climb (Figure 4C). This is another indication that you’re climbing and not
maintaining level flight.
3. Return the joystick to its center position and let the airplane
settle back into level flight (remember, the autopilot’s altitude
hold and wing leveler features are still active).
Once the altimeter’s hands and the VSI’s needle stop
moving, proceed to the next step for a pitch-down
demonstration.
4. Pitch the airplane downward with a gentle forward push of
about one inch on the joystick.
The attitude indicator’s miniature airplane points toward the
surface (the brown color) as shown in Figure 5A. Notice that
the altimeter unwinds (rotates counter-clockwise) indicating
a loss of altitude (Figure 5B). The VSI also shows a rate of
descent as its needle deflects downward (Figure 5C). It’s safe
to say that if the big hand of the altimeter stops moving and the VSI needle indicates zero, then
you’re in level flight. Let’s see.
5. Gently move the joystick to place the attitude indicator’s miniature airplane directly over the
The airplane pitches up and the attitude indicator’s
miniature airplane also points upward, toward the sky (the
blue) as shown in Figure 4A.
2. Look at the altimeter, which is located directly to the right of
the attitude indicator (Figure 4B).
The biggest hand (the hundred foot hand) is moving
clockwise. And, just like the hands of a watch, clockwise
movement means something is increasing. In this case it’s
your altitude.
A B
Figure 5
C
46
Microsoft
Flight Simulator
20002000
2000
20002000
Page 53

artificial horizon line (Figure 6).
Or you can let go of the controls and the autopilot will return the
airplane to level flight. In a real airplane, however, letting go of the
controls often makes the passengers nervous (especially if you
simultaneously say, “Hmmm, let’s see, I thought I remembered how
these things work”).
6. Look at the altimeter’s hundred foot hand (the long one) and the VSI
needle. They’ve settled down and have stopped moving. This is how
pilots confirm that their airplane is in level flight.
7. Push P to pause the simulation and relax for a bit.
It takes practice to keep these needles stationary (in real life, they’re always moving just a tiny bit).
The average private pilot does a great job if he or she remains within 100 feet of a chosen altitude.
Unfortunately, when I was a student, I found it much easier to keep changing the target altitude at
which I wanted to be (until, of course, I finally perfected this skill). Challenge yourself to remain within
private pilot tolerances.
So, here’s your assignment. When you’re ready:
1. Press P to reactivate the simulation.
2. Press Z to take the simulator off autopilot.
3. Practice maintaining straight-and-level flight; keep the attitude indicator’s miniature airplane
(the orange wings) parallel to the artificial horizon line.
Figure 6
If a wing dips right or left, raise it by moving the joystick left or right.
The altimeter’s hundred foot hand shouldn’t move. If it does:
4. Use the joystick to change the pitch slightly until the needle stops moving. This is the pitch
attitude required for level flight.
If things get a little crazy, press Z, then Ctrl+V, then Ctrl+Z to activate the autopilot’s wing
leveler and altitude hold feature, then relax and give it another try.
This is exactly how we’d do it in the real airplane except I play the part of the autopilot (and you’d
activate me by saying the word “Help!”).
5. When you’re done, push P to pause the simulation and read on.
Learning To Fly with Rod Machado
7
47
Page 54

Time for a Trim?
Having fun roaming around Rome? Have you chased everyone out of the city
yet? I’m glad you’re practicing. Let’s try another experiment.
1. Press P to reactivate the simulation.
2. Press Z to disengage the autopilot (if it was on), and manually fly straight
and level.
Think of trim as anThink of trim as an
Think of trim as an
Think of trim as anThink of trim as an
imaginary hand thatimaginary hand that
imaginary hand that
imaginary hand thatimaginary hand that
holds the airplane inholds the airplane in
holds the airplane in
holds the airplane inholds the airplane in
the desired attitudethe desired attitude
the desired attitude
the desired attitudethe desired attitude
while eliminating thewhile eliminating the
while eliminating the
while eliminating thewhile eliminating the
pressure you apply topressure you apply to
pressure you apply to
pressure you apply topressure you apply to
the joystick.the joystick.
the joystick.
the joystick.the joystick.
Use two keys on theUse two keys on the
Use two keys on the
Use two keys on theUse two keys on the
numeric keypadnumeric keypad
numeric keypad
numeric keypadnumeric keypad
the airplane for thethe airplane for the
the airplane for the
the airplane for thethe airplane for the
proper pitch attitude.proper pitch attitude.
proper pitch attitude.
proper pitch attitude.proper pitch attitude.
Key number Key number
Key number 1
Key number Key number
nose-up trimnose-up trim
nose-up trim
nose-up trimnose-up trim
number number
number 7
number number
nose-down trim.nose-down trim.
nose-down trim.
nose-down trim.nose-down trim.
to trim to trim
to trim
to trim to trim
provides provides
provides
provides provides
and key and key
and key
and key and key
provides provides
provides
provides provides
It’s possible that you may need a little forward pressure or back pressure
on the joystick to keep the airplane in level flight. This means you need a
little trim. No, I’m not referring to your flowing locks.
3. Press P to pause the simulation before continuing.
Airplanes are subject to an assortment of aerodynamic forces. Some try to pitch
the nose up, others try to pitch it down. Engine power, weight placement, and lift
are just a few of these forces. What does this mean to you? Well, if the airplane
wants to pitch forward, you can’t sit there pulling back on the joystick for the
entire flight. You’ll get tired fast. So let’s use the trim control to keep the airplane
in the desired attitude.
Here’s how it works:
1. Press P to reactivate the simulation.
2. Ease up the pressure you’re applying to the joystick to maintain level flight.
3. Watch the needle in the VSI. If it begins to show a climb (rotates upward),
then apply a little forward pressure on the joystick to return to level flight
just as you did in the previous exercise.
4. Press the 7 key on the numeric keypad once for a little nose-down trim.
(Make sure the NUM LOCK on your keyboard is off). Release the pressure
on the joystick and see what happens.
The more you push the trim button, the more trim you apply. Be patient; you
may have to repeat this same process several times until the VSI’s needle
remains relatively horizontal, near the zero climb rate value.
5. If the VSI’s needle shows a descent (rotates downward), apply a little back
pressure on the joystick to return the airplane to level flight.
6. Press the 1 key on the numeric keypad a few times for nose-up trim.
Release the joystick pressure and watch the VSI’s needle response.
7. Repeat the process as necessary until the airplane neither climbs nor
descends.
48
Microsoft
Flight Simulator
20002000
2000
20002000
Page 55

8. When the airplane is perfectly trimmed, let it fly by itself for a while, then press P to pause the
simulation.
I prefer to use the VSI’s needle for trimming since it’s very sensitive. I don’t mean that it will cry if you
tell it that it’s ugly. I mean that its needle is very sensitive to small changes in pitch. This makes it
easier to detect deviations from level flight. Later on I’ll show you how to use the VSI’s needle for
trimming in a climb or descent.
Many airplanes have trim for bank control. Bank trim is sometimes necessary when the wing’s fuel
load is unbalanced or if you have heavier passengers sitting to one side of the airplane.
Regardless of how well the airplane is trimmed, it may oscillate up or down slightly, varying its
altitude by perhaps 100 feet up or down. That’s the way airplanes are. Each one likes to do its own
thing and may vary slightly in altitude and heading even when properly trimmed. Let them go, unless
they wander too far off. Your job is to make the airplane as easy as possible to fly so you have more
time to think and look outside.
Okay, time for more practice. Return to the simulation and teach those Romans a thing or two about
flying straight and level. Try not to hit anything, especially an ancient ruin (although, how would
anyone know if you did?). I’m here (in the book) if you need me. You’re doing a great job and I’m
proud of you. If you’re following the curriculum in Chapter 6 (“Getting Certified”), then check off
Tutorial 1 in the chart. You’ve completed it! In our next tutorial I’ll introduce you to the basics of turns.
Learning To Fly with Rod Machado
7
49
Page 56

Tutorial 2: Turns
If you ended our last tutorial by flying into the sunset, you’re probably still headed that way. After all, I
didn’t teach you how to turn the airplane—a very important maneuver that all pilots need to know. It’s
time to learn about turns: right ones, left ones, steep ones, and shallow ones. Perform turns well and
every heading of the compass is open to you for discovery.
Let’s begin this tutorial by reactivating our European vacation:
1. From the Flights menu, click Select Flight, then choose Tutorial 2, Situation 1, and click the
OK icon.
2. Press Z, then CTRL+Z to activate the autopilot’s altitude hold.
The airplane is paused in straight-and-level flight and I’ve given you an external (Spot Plane)
view.
3. Continue reading.
Turn Aerodynamics
To understand how an airplane turns we need to
know something about the forces that keep it
airborne. Figure 1 shows the four forces acting
DRAG
on an airplane in flight. (And you learned about
these when you did your homework, right?
Right?) Thrust, produced by the engine-propeller
combination, pulls the airplane through the air.
Drag acts opposite to thrust and is the air’s
Figure 1
resistance to a moving airplane. Weight is the
force exerting a constant downward pull on the airplane. And lift, which acts opposite to weight, is
the upward-acting force that keeps an airplane airborne.
LIFT
THRUST
WEIGHT
50
TOTAL LIFT
HORIZONTAL
COMPONENT
Figure 2
Microsoft
VERTICAL
COMPONENT
Important point here: Lift is also the force responsible for
allowing an airplane to turn.
I want you to think of lift as a force that pulls the airplane
upward. Since lift pulls upward, could it also pull a little to the
right or the left? Absolutely. Tilting the lift force allows it to pull
the airplane horizontally, right or left, as well as upward
(Figure 2). The small horizontal component of lift that’s pulling
to the side is the part responsible for making the airplane
turn.
Flight Simulator
20002000
2000
20002000
Page 57

Let’s watch a video and see this horizontal component of lift in action. Get that popcorn ready, then:
1. From the Help menu, choose Homework.
2. In the homework for Tutorial 2, click the Turns video and watch the presentation.
Eat that popcorn fast because the video isn’t very long. After you’re done watching, leave the Help
screen up, because we’re going to use it again very soon.
There you have it. Proof that airplanes turn by deflecting some of their lift sideways. Now, let me play
the role of Socrates, the philosopher, and ask you a very important question. (Don’t mind the bed
sheet I’m dressed in. If, however, I show up wrapped in a mattress, that means we’re ready to practice
landings.) The question is, “How do we tilt lift so as to make the airplane turn?” The answer is, “With
the ailerons.”
Banking on Ailerons
I see you have some popcorn left over, so let’s finish
it off by watching another video.
In the homework for Tutorial 2, click the Axes of
Flight video and watch the presentation.
Did you see the ailerons move on the wings?
Ailerons, shown in Figure 3, are the moveable, flaplike appendages on the outer half of the wings that
allow the airplane to roll (no, the ailerons are not
used to wave to pilots in other airplanes). Ailerons
are controlled from inside the airplane by the
joystick (or control wheel). Picture this: moving the joystick to the left raises the aileron on the left
wing while simultaneously lowering the aileron on the right wing. When one goes up, the other goes
down. Don’t worry, this doesn’t mean they’re broken. They’re designed to work this way.
Remember what happened last time you stuck your hand out the window of a moving car? Yes,
everyone thought you were preparing to turn. In actuality, you were doing an aerodynamic
experiment. (Too bad the police officer didn’t see it that way.) Twisting your hand upward (so the front
edge is higher) simulates the position of a lowered aileron, which forces the hand, as well as the
wing, upward. Twisting your hand downward simulates the position of a raised aileron, which forces
the hand, as well as the wing, downward. This is how the airplane rolls to the right or left about its
longitudinal axis—the long axis running from the tail to the airplane’s nose.
It’s the roll and eventual bank that tilts the lifting force to the right or left. To turn, you simply deflect
the joystick (when I say “deflect” I mean to lean it slowly) in the desired direction of the turn and roll
the airplane until reaching a specific bank angle. Then you return the joystick to its neutral (center)
position and the airplane usually remains established at this bank angle. If the airplane drifts from the
desired bank, then give the joystick a nudge or two to maintain the bank angle. Let’s give this a try.
Figure 3
AILERONS
7
Learning To Fly with Rod Machado
51
Page 58

Your Turn
Time to try it yourself.
1. Press P to activate the simulation.
Remember, the altitude hold is active, the wing leveler is not.
2. Move the joystick slowly to the left and put the airplane in a medium bank turn of approximately
30 degrees (you can eyeball this by banking until the Cessna’s wing strut is parallel with the
horizon).
3. Once the airplane is established in the bank, return the joystick to its neutral or center position.
(Remember, the altitude hold feature is still active in the autopilot, so don’t pull or push on the
joystick.)
Notice how the airplane tends to remain in the bank you’ve established (unless it’s a very steep
or very shallow bank).
4. Now roll out of the left turn back to level flight by deflecting the joystick slowly to the right.
Did you notice that the amount of joystick deflection determinesDid you notice that the amount of joystick deflection determines
Did you notice that the amount of joystick deflection determines
Did you notice that the amount of joystick deflection determinesDid you notice that the amount of joystick deflection determines
how fast you roll into or out of a bank? Good pilots roll into ahow fast you roll into or out of a bank? Good pilots roll into a
how fast you roll into or out of a bank? Good pilots roll into a
how fast you roll into or out of a bank? Good pilots roll into ahow fast you roll into or out of a bank? Good pilots roll into a
bank slowly and smoothly. It not only feels better, it keeps thebank slowly and smoothly. It not only feels better, it keeps the
bank slowly and smoothly. It not only feels better, it keeps the
bank slowly and smoothly. It not only feels better, it keeps thebank slowly and smoothly. It not only feels better, it keeps the
passengers from returning the lunch you bought them.passengers from returning the lunch you bought them.
passengers from returning the lunch you bought them.
passengers from returning the lunch you bought them.passengers from returning the lunch you bought them.
Okay, now I want you to fly around for a while and practice making turns. Try making a few steeper
turns (more than 30 degrees) and a few shallow ones (less than 30 degrees). Get the feel of the
airplane. Any time you feel like you’re losing control, activate the wing leveler feature (CTRL+V).
Learn by doing and have a little fun too, but don’t forget to come back; there’s still much to learn.
52
When you want to learn more about turns, press P to pause the simulation and continue reading.
You Can Bank on This
Let’s continue with our tutorial by seeing what turns look like from
inside the cockpit.
1. While the simulation is still paused, press S on your keyboard for
the cockpit view.
Let me roll myself up in that sheet and play Socrates again by asking,
“From the inside of the cockpit, how can you tell how steeply you’re
banking?” After all, you can’t have another pilot follow you around just
to tell you what your bank is. Here’s a better way.
Microsoft
Flight Simulator
20002000
2000
20002000
Figure 4
10°
30°
60°
90°
Page 59

Figure 4 shows the attitude indicator that we learned about earlier. At the
top of the attitude indicator, immediately to the right and left of center,
are three white bank marks. Each mark indicates 10 degrees of bank, up
to 30 degrees. Beyond the 30-degree mark are the 60-degree and 90degree bank marks as shown in Figure 4. To establish a bank, roll the
airplane until a white bank mark rests over the little orange triangle. Time
to try another experiment.
10° BANK
2. Press P to reactivate the simulation.
3. If you activated the wing leveler, press CTRL+V to deactivate it.
4. Gently roll the airplane to the right into a 10-degree bank as
shown in Figure 5A.
Remember, the autopilot’s altitude hold mode is still active.
5. Try a 30-degree bank as shown in Figure 5B.
Not too tough, is it? But what if you want to bank at 15 or 45 degrees?
There are two white diagonal lines angled downward from the middle
of the attitude indicator. These are bank lines for 15 and 45 degrees of
bank, respectively.
15° BANK
LINE
Figure 6A
45° BANK
LINE
6. Gently roll the airplane to the right until the attitude indicator’s
miniature airplane (the one with little orange wings) is parallel to
the first diagonal line as shown in Figure 6A Now you’re in a 15degree bank.
7. Try a 45-degree bank by gently rolling the airplane until the
miniature airplane’s wings are parallel to the second diagonal line
(Figure 6B).
8. When you’re finished, roll the airplane back to straight-and-level
flight.
There’s one more thing you need to understand before I cut the leash
and send you off to practice turns on your own without using the
autopilot. You guessed it, time for one more experiment.
Figure 5A
30° BANK
Figure 5B
7
Figure 6B
Learning To Fly with Rod Machado
53
Page 60

Here’s a Good Pitch
If you did your homework, you learned about pitch in The Axes of
Flight. See, I told you homework was important. Make your dog
cough it up.
With altitude hold active and the wing leveler still disengaged, place
the airplane in straight-and-level flight. Observe the position of the
miniature airplane (especially the orange ball between the wings). In
straight-and-level flight, notice that the miniature airplane (and
orange ball) rests almost directly over the artificial horizon line as
shown in Figure 7. In a bank, however, it’s hard to identify the airplane’s pitch on the attitude
indicator since the miniature airplane is no longer aligned with the artificial horizon line. Therefore,
use the position of the orange ball (Figure 7) in relation to the artificial horizon line as a pitch
reference in a turn. Here’s how it works:
1. Roll the airplane into a 15-degree bank to the right (remember, altitude hold is still on).
Observe the attitude indicator to see how the autopilot changes
the airplane’s pitch to maintain altitude. Pay attention to the
orange ball’s position in relation to the artificial horizon line. It’s
obvious the autopilot had to pitch the airplane’s nose up a little to
maintain altitude in a turn, as shown in Figure 8A.
2. Increase the bank to 30 degrees.
Once again, the autopilot had to
pitch the airplane up a little bit
Figure 8A
3. Press P to pause the simulation before reading further.
more to maintain altitude, as
shown in Figure 8B.
Figure 7
54
The point here is that steeper turns require an increase in pitch to
maintain altitude. Why? You’ll learn why in the upcoming section on
slow flight. For now, when banking the airplane, make whatever pitchup adjustment is necessary to maintain altitude. In steeper turns, you’ll
need to pull back a little more on the joystick to keep the VSI’s needle
reading zero and the altimeter’s big (hundred foot) hand steady. Use the orange ball’s position
relative to the artificial horizon line to determine the airplane’s pitch while banked. And remember to
lower the pitch when returning to straight-and-level flight.
Now’s a good time to practice turns of varying banks with the autopilot disengaged. Try steep turns at
45 degrees of bank. They are a challenge. At 60 degrees of bank it’s very difficult to hold altitude.
Don’t even think about doing turns at 90 degrees of bank. They’re impossible in this airplane.
Microsoft
Flight Simulator
20002000
2000
20002000
Figure 8B
Page 61

And remember, this isn’t a shoot ‘em up game. Since you’re not saving the universe from space
aliens, make smooth movements on the flight controls. In other words, move the joystick like a
surgeon, not like a jackhammer technician. We’re not churning butter here.
4. Press P to reactivate the simulation.
5. Press Z to turn the autopilot off.
6. When you’re done, press P to pause the simulation before reading any further.
Have fun!
Know Where You’re Heading
As a student pilot I got lost a lot. In fact, instead of heading for a specific destination, I found it easier
to keep changing where it was I wanted to go. You won’t have this problem because I’m going to
show you a practical purpose for making turns. It’s called flying a specific heading.
Figure 9 shows the airplane’s heading indicator (sometimes called the
directional gyro). It’s found in the middle of the bottom row of the six
main flight instruments that we discussed in Tutorial One. Think of the
heading indicator as a mechanical compass that shows which way
your airplane points. Notice the numbers on the face of the heading
indicator. Add a single zero to any number on the face to get the
airplane’s actual heading. In other words, 6 is really a heading of 60
degrees (spoken as zero-six-zero degrees). The number 33 is actually a
heading of 330 degrees. (When we say that aloud, we say “three-three-
zero degrees” for extra clarity. It’s important to be extra clear when
you’re flying.) These numbers appear at 30-degree intervals. Between
these numbers are 5- and 10-degree heading increments.
Figure 9
To fly a specific heading, simply turn the airplane in the shortest direction to the heading desired. For
example, turn the airplane until the nose of the white airplane in the heading indicator points to the
letter W for West (this is a heading of 270 degrees).
1. Press P to reactivate the simulation and give this a try (make sure the altitude hold and wing
leveler are disengaged). I recommend that you make all turns at 20 to 30 degrees of bank. This
makes the turn easier to manage.
2. When you are within 5 degrees of the desired heading of 270 degrees, start rolling out to
straight-and-level flight.
With more experience you’ll learn the precise amount of lead necessary to roll out on the desired
heading.
Now that you have a basic idea of which way the airplane’s heading, try turning to specific headings.
Learning To Fly with Rod Machado
7
55
Page 62

What You’ve
Learned So Far
Believe it or not, in
these first two
tutorials you’ve
learned around 50% of
all the basic flying
skills you’ll need to
fly an airplane. But
hold on, we’re not done
yet, so hold off a
little longer before
you apply for that
airline job. We still
need to learn how to
make an airplane climb
and descend. After all,
when you become an
airline pilot, you’ll
want to climb to take
advantage of favorable
winds. You just can’t
fly around at low
altitudes knocking
buildings over. And,
once up there, you’ve
got to come down. We’ll
learn how to do this in
our next tutorial.
Extra Credit!
I promised you I’d provide training that was as close to real airplane training as
possible and I mean to keep my word. Here’s a short section on rudder usage in
case you’re one of the Flight Sim users who have such things. You don’t need to
know this to have a realistic flight simulator experience. You will, however, need
to know about rudder usage if you plan on flying real airplanes. Don’t worry if
this is difficult at first; it’s difficult for all student pilots. It requires coordination
between your hands (joystick) and feet (rudder pedals), or for some of you, your
wrists (if you joystick gets its rudder action by twisting). So, if you look funny
when you dance, then you’ll probably need a little practice to perfect this skill.
Your simulator has a feature called Auto-Rudder, which you access by choosing
Realism Settings from the Aircraft menu. When Auto-Rudder is active, the
simulator works the rudder for you. Simply stated, the rudder points the
airplane’s nose in the direction it’s turning. Yes, the airplane’s nose doesn’t
always point in the same direction as the airplane is banking. You have a
phenomenon known as adverse yaw to thank for this.
Adverse Yaw
When banking to the right, the aileron on the left wing lowers, causing that wing
to lift up. While the lowered aileron increases the lift on the left wing, it also
causes a slight increase in drag. “Wait a minute,” you say, “I didn’t order any
drag with my lift.” True, but this isn’t a pizza either. Mother Nature always
accompanies lift with a little drag—like a chaperone on a high school date
(which would really be a drag).
In a right turn, the aileron on the left wing goes down to lift that wing. The wing
rises but the slight increase in drag pulls the left wing aft a little. This has the
effect of pulling (or yawing) the airplane’s nose adversely to the left as the
airplane banks to the right. Thus the name adverse yaw.
Obviously, if you’re banked to the right you want the nose to point in the same
direction you’re banking, don’t you? This is where rudders come in handy.
The rudder is controlled by pedals on the cockpit floor, or by a twisting action in
some joysticks. Let’s do another experiment.
56
Microsoft
1. From the Aircraft menu, choose Realism Settings, deactivate the Auto-
Rudder feature, and then click the OK icon.
2. Press P to reactivate the simulation.
Leave the altitude hold and wing leveler off. Okay, here we go.
Flight Simulator
20002000
2000
20002000
Page 63

3. Give the airplane a little right and left rudder and watch what happens.
4. The airplane yaws to the right and left respectively, while the wings remain fairly level.
5. Neutralize the rudder (take the pressure off both rudder pedals).
6. Press P to resume the simulation.
Look at the instrument called the turn coordinator, which is found at the
bottom left of the six main flight instruments (Figure 10). Notice the black
ball located in the curved glass tube. This combination is called the
inclinometer. When the ball is in the bottom center of the tube, the
airplane’s nose is perfectly pointed in the direction of turn. If the ball is
deflected to the right of center, add a little right rudder to center it. If it’s
deflected to the left of center, add a little left rudder to center it. Moving the
ball to the center of the glass tube is known as making a coordinated turn.
Figure 10
Okay, you’re ready for more practice.
7. Press P to resume the simulation. Have fun!
8. Make a few shallow turns.
Watch the inclinometer and apply enough rudder pressure to keep the ball centered.
Remember, adverse yaw affects the airplane as it rolls into or out of a bank. Therefore, more rudder
pressure is needed when rolling into or out of a bank. Once you’re established in a turn, you can
neutralize the rudder and the nose should remain pointed in the direction you’re headed. (Later, you’ll
learn about situations where it’s necessary to keep a little rudder pressure applied in a turn.)
The inclinometer is one way pilots tell if the airplane’s nose is pointed
precisely in the direction of turn.
Practice, Practice, Practice
There’s a joke you’ve probably heard about a tourist in New York City who asks a native, “How do I
get to Carnegie Hall?” The answer is, “Practice, practice, practice.” Well, that’s good advice if you
want to be good at anything, so now I’d like you to spend some quality time in the first online lesson.
On the Flights menu, click Lessons, then choose Private Pilot Lesson 1.
When you’re done, come back to the book, and we’ll talk about the ups and downs of flying.
Learning To Fly with Rod Machado
7
57
Page 64

Tutorial 3: Climbs & Descents
The homework is always easy to find. Just click the Help menu, then click Homework. All of the
stuff there is important, but I want to emphasize the section on Using Engine Controls, because if you
don’t read this, you’ll find yourself really up in the air, but in a bad way.
In the fifth grade my teacher asked me to come to the front of the class and name the parts of
speech. I walked up, turned around, and calmly replied, “Lips, tongue, lungs, and oxygen.” Apparently
that wasn’t the answer she was looking for.
Speech has its basic components, and so does aviation. So far, we’ve practiced two of the four most
important fundamentals of flight: straight-and-level flight and turns. Now it’s time to practice the final
two: climbs and descents.
I hope you’re not tired of Europe, because we’re going there again. Let’s reactivate our European
vacation.
1. From the Flights menu, click Select Flight.
2. Choose Tutorial 3, Situation 1. (Rome? Again? Yes. I’ll take you somewhere else soon. I
promise.)
3. Click the OK icon.
4. Activate the autopilot’s altitude hold and wing leveler (press Z, then Ctrl+Z, then Ctrl+V).
This time I want you to add the Spot Plane View window. This window allows you to view the
airplane from its side during climbs and descents.
5. On the Views menu, point to New View, then click Spot Plane.
6. Press P to activate the simulation.
As the flight commences, you should be viewing
the airplane from its right side as shown in Figure
1. If not, simultaneously press Shift and the
number 6 on your keypad for the right side view.
Now you’re ready.
58
Figure 1
Microsoft
Flight Simulator
20002000
2000
20002000
Page 65

Trust Your Thrust
In Tutorial 2, we mentioned that thrust (produced
by the engine-propeller combination) is the force
that moves the plane forward. The engine’s
manifold pressure gauge is your means of
measuring that thrust. Figure 2 shows the manifold
pressure gauge, which is located at the lower left
side of the instrument panel (don’t get it confused
with the fuel flow gauge on the right).
Think of the manifold pressure gauge as the engine’s power meter. Applying full throttle gives you
more manifold pressure, which means the engine’s producing more power (thrust). Reducing the
power to idle gives you less manifold pressure, which means the engine’s producing less power
(thrust).
Look carefully at the calibrations on the manifold pressure gauge. They range from a low of 10 inches
to a high of 35 inches. Inches? Huh? Don’t worry. This is just another means of calibration (it’s like
using liters instead of quarts). For now, just use the calibrations on this gauge to adjust your throttle.
If I say “set the manifold pressure (MP) to 22 inches,” then move the throttle until the needle on the
MP gauge points to a value of 22. (That’s two tiny increments above a reading of 20 on the MP
gauge. If you can’t read those increments, don’t worry. Just use a ballpark estimate.) If I say give me
full power, then move the throttle all the way forward and don’t worry about the MP reading. A
request to reduce the power to flight idle means to pull the throttle all the way back and, once again,
don’t worry about the MP reading. Easy enough, right?
MP GAUGE
Figure 2
Now look in the upper left corner of the six main flight instruments, and you’ll find the airspeed
indicator (Figure 3). The airspeed indicator shows
the speed of the wind blowing on your airplane
(which is not necessarily the same thing as how
fast your airplane is moving). It’s calibrated to read
in knots (or nautical miles per hour) and has
nothing to do with what’s going on in a pilot’s
stomach. You’re presently flying at an indicated
airspeed of 110 knots.
Figure 3
Learning To Fly with Rod Machado
AIRSPEED
INDICATOR
7
59
Page 66

Before we start flight
training, let’s pretend
that you’re listening
to the philosophical
radio station KYMI.
Let’s also assume that
it’s aviation question
night. Here’s your
question. With the
power set to 17 inches
of MP, why does the
airspeed reading remain
at a steady value of
110 knots? Drag is the
reason. This power
setting produces enough
thrust to accelerate
the airplane to
approximately 110
knots. When the
rearward pull of drag
precisely matches the
forward pull of thrust,
the airplane’s speed
remains constant.
Beginning a Climb
Get that lab coat because it’s time for another experiment.
1. Keep the autopilot’s wing leveler active but disengage its altitude hold
feature (press Ctrl+Z).
2. Raise the airplane’s nose
by applying a little back
pressure on the joystick
until the upper-middle
part of your instrument
panel touches the
distant horizon as shown
in Figure 4.
3. Apply enough nose-up
trim to hold the airplane
in this attitude and
examine the results.
Notice that the airspeed drops as the vertical speed indicator shows a
climb. The airplane appears to be in a slight nose-up attitude as seen in the
Spot Plane View.
4. Press P to pause the simulation once you’re established in the nose-up
attitude.
Believe it or not, you’ve just entered your first climb and this is what it looks like.
Here’s the aerodynamic explanation:
In straight-and-level flight at 17 inches of manifold pressure, the engine
produces enough thrust to pull the airplane forward at 110 knots. As you raised
the nose, the airplane began to slow down in much the same way a car slows
down when it begins to climb a hill. In a sense, when you placed the top middle
part of the instrument panel on the distant horizon, you pointed the airplane up
a relatively shallow hill.
As the airplane’s speed decreased, its drag also decreased. Therefore, since you
didn’t change the setting, you had more thrust than you needed to fly at a
slower speed. (As you’ll learn later on, there are two basic types of drag. One
type decreases as the airspeed slows. Then, as the airspeed continues to slow,
another type of drag starts to increase. But you don’t need to worry about that
yet.)
Figure 4
60
Microsoft
Flight Simulator
20002000
2000
20002000
Page 67

So what’s the airplane doing with its extra thrust? It’s allowing you to climb at a few hundred feet per
minute. In fact, excess (unused) thrust is the reason an airplane climbs in the first place. Let’s make
our airplane climb at a greater rate on the VSI.
1. Press P to reactivate the simulation.
Remember, we have a lot of thrust we haven’t even used. So let’s develop maximum thrust by
applying full throttle while keeping the airplane at precisely the same attitude as before. In other
words, keep the top of the instrument panel on the distant horizon. This represents an
approximate 10-degree nose-up pitch attitude as shown in Figure 5.
2. Give the airplane some nose-down trim to
keep the attitude constant and observe what
happens to the airspeed and rate of climb.
3. When the airplane is stabilized at its new
settings, press P to pause the simulation.
Figure 5 shows your airplane climbing at 85 knots
and 500 feet per minute. The extra thrust allows
you to climb at a faster airspeed and a larger rate
of climb. This explains why pilots usually climb
with full throttle. After all, it makes sense to get the
airplane up in the air as fast as is reasonable, to
take advantage of favorable winds (among other
reasons).
Figure 5
You’re on Your Way Up
Engineers (not the kind that drive trains) tell us that efficient climbs are conducted at specific
airspeeds. In fact, these same engineers discovered that your Cessna 182S climbs most efficiently at
80 knots. Since you’re at 85 knots, how do you get the airplane slowed down to 80 knots while
continuing to climb at full power?
Think of the airplane as a car climbing a hill. If you have the “pedalThink of the airplane as a car climbing a hill. If you have the “pedal
Think of the airplane as a car climbing a hill. If you have the “pedal
Think of the airplane as a car climbing a hill. If you have the “pedalThink of the airplane as a car climbing a hill. If you have the “pedal
to the metal” (full throttle), the car’s speed is determined by theto the metal” (full throttle), the car’s speed is determined by the
to the metal” (full throttle), the car’s speed is determined by the
to the metal” (full throttle), the car’s speed is determined by theto the metal” (full throttle), the car’s speed is determined by the
steepnesssteepness
steepness
steepnesssteepness
slows down; shallower, the car speeds up. It works the same forslows down; shallower, the car speeds up. It works the same for
slows down; shallower, the car speeds up. It works the same for
slows down; shallower, the car speeds up. It works the same forslows down; shallower, the car speeds up. It works the same for
airplanes. But you have an advantage over car drivers: you get to choose howairplanes. But you have an advantage over car drivers: you get to choose how
airplanes. But you have an advantage over car drivers: you get to choose how
airplanes. But you have an advantage over car drivers: you get to choose howairplanes. But you have an advantage over car drivers: you get to choose how
steep your hill is. All you have to do is adjust the size of the hill you’resteep your hill is. All you have to do is adjust the size of the hill you’re
steep your hill is. All you have to do is adjust the size of the hill you’re
steep your hill is. All you have to do is adjust the size of the hill you’resteep your hill is. All you have to do is adjust the size of the hill you’re
climbing by changing your pitch to obtain the climb airspeed desired.climbing by changing your pitch to obtain the climb airspeed desired.
climbing by changing your pitch to obtain the climb airspeed desired.
climbing by changing your pitch to obtain the climb airspeed desired.climbing by changing your pitch to obtain the climb airspeed desired.
of the hill. If the hill suddenly becomes steeper, the car of the hill. If the hill suddenly becomes steeper, the car
of the hill. If the hill suddenly becomes steeper, the car
of the hill. If the hill suddenly becomes steeper, the car of the hill. If the hill suddenly becomes steeper, the car
Learning To Fly with Rod Machado
7
61
Page 68

Give it a try.
1. Press P to reactivate the simulation.
2. Raise the airplane’s nose (increase the steepness of the hill you’re climbing) to a slightly higher
climb attitude. Hold it there, and watch the response on the airspeed indicator.
3. Adjust the pitch up or down slightly until the airspeed indicator shows 80 knots. Be patient.
Airplanes have inertia and take a moment or two to settle into a new speed once the pitch is
changed.
4. Once you’re established at this speed, press P to pause the simulation.
To maintain an 80-knot climb speed, you should show a pitch of approximately 13 degrees on the
attitude indicator (for now we’ll use the attitude indicator for our bank and pitch reference since it’s
difficult to see the real horizon over the instrument panel). The little lines on the attitude indicator
are worth five degrees each, so you read them (from bottom to top) 5, 10, 15, and 20 degrees of
pitch. 13 degrees of pitch would be just below the third line up.
Of course, the pitch for a climb varies a little from day to day, depending on several variables like
airplane weight, configuration, or engine power, to name a few. All that matters is that you find the
proper pitch that gives you the climb airspeed desired.
Care to Waltz?Care to Waltz?
Care to Waltz?
Care to Waltz?Care to Waltz?
Now you know the secret to climbing an airplane. The next time you wantNow you know the secret to climbing an airplane. The next time you want
Now you know the secret to climbing an airplane. The next time you want
Now you know the secret to climbing an airplane. The next time you wantNow you know the secret to climbing an airplane. The next time you want
to climb, raise the nose to to climb, raise the nose to
to climb, raise the nose to
to climb, raise the nose to to climb, raise the nose to
attitude indicator, add full throttle, and trim the airplane to maintain thisattitude indicator, add full throttle, and trim the airplane to maintain this
attitude indicator, add full throttle, and trim the airplane to maintain this
attitude indicator, add full throttle, and trim the airplane to maintain thisattitude indicator, add full throttle, and trim the airplane to maintain this
attitude. It’s as simple as that. Then adjust the pitch slightly (perhaps only aattitude. It’s as simple as that. Then adjust the pitch slightly (perhaps only a
attitude. It’s as simple as that. Then adjust the pitch slightly (perhaps only a
attitude. It’s as simple as that. Then adjust the pitch slightly (perhaps only aattitude. It’s as simple as that. Then adjust the pitch slightly (perhaps only a
degree or two) to give you the airspeed desired. Think of entering a climb as adegree or two) to give you the airspeed desired. Think of entering a climb as a
degree or two) to give you the airspeed desired. Think of entering a climb as a
degree or two) to give you the airspeed desired. Think of entering a climb as adegree or two) to give you the airspeed desired. Think of entering a climb as a
three-step waltz. Think: three-step waltz. Think:
three-step waltz. Think:
three-step waltz. Think: three-step waltz. Think:
Change the Change the
Change the
Change the Change the
stabilized at its new attitude.stabilized at its new attitude.
stabilized at its new attitude.
stabilized at its new attitude.stabilized at its new attitude.
attitudeattitude
attitude
attitudeattitude
one—two—three, one—two—threeone—two—three, one—two—three
one—two—three, one—two—three
one—two—three, one—two—threeone—two—three, one—two—three
, change the , change the
, change the
, change the , change the
approximatelyapproximately
approximately
approximatelyapproximately
power,power,
and then and then
power,
and then
power,power,
and then and then
13 degrees pitch-up on the 13 degrees pitch-up on the
13 degrees pitch-up on the
13 degrees pitch-up on the 13 degrees pitch-up on the
, or, or
attitude—power—trim attitude—power—trim
, or
attitude—power—trim
, or, or
attitude—power—trim attitude—power—trim
trimtrim
the airplane once it’s the airplane once it’s
trim
the airplane once it’s
trimtrim
the airplane once it’s the airplane once it’s
..
.
..
62
Of course, you may elect to climb at a slightly faster speed. Sometimes I preferOf course, you may elect to climb at a slightly faster speed. Sometimes I prefer
Of course, you may elect to climb at a slightly faster speed. Sometimes I prefer
Of course, you may elect to climb at a slightly faster speed. Sometimes I preferOf course, you may elect to climb at a slightly faster speed. Sometimes I prefer
climbing at 90 knots simply because it makes it easier to look over theclimbing at 90 knots simply because it makes it easier to look over the
climbing at 90 knots simply because it makes it easier to look over the
climbing at 90 knots simply because it makes it easier to look over theclimbing at 90 knots simply because it makes it easier to look over the
instrument panel (so I can watch for other airplanes and see pretty things).instrument panel (so I can watch for other airplanes and see pretty things).
instrument panel (so I can watch for other airplanes and see pretty things).
instrument panel (so I can watch for other airplanes and see pretty things).instrument panel (so I can watch for other airplanes and see pretty things).
When a rapid, efficient climb to altitude isn’t necessary, find the airspeedWhen a rapid, efficient climb to altitude isn’t necessary, find the airspeed
When a rapid, efficient climb to altitude isn’t necessary, find the airspeed
When a rapid, efficient climb to altitude isn’t necessary, find the airspeedWhen a rapid, efficient climb to altitude isn’t necessary, find the airspeed
that gives you both a good climb rate and a reasonable view over the panel.that gives you both a good climb rate and a reasonable view over the panel.
that gives you both a good climb rate and a reasonable view over the panel.
that gives you both a good climb rate and a reasonable view over the panel.that gives you both a good climb rate and a reasonable view over the panel.
What Goes Up…
Now that we’ve almost climbed out of our atmosphere (just kidding), we should talk about coming
back down. This is a good time to show you a neat little trick about how airplanes fly.
1. Press P to reactivate the simulation.
2. Keeping in mind that the wing leveler is on, slowly reduce the throttle to flight idle (throttle all
Microsoft
Flight Simulator
20002000
2000
20002000
Page 69

the way back) but don’t touch the joystick.
3. Observe the airplane’s response as it pitches nose down and goes through a few pitch cycles
until its attitude stabilizes.
4. Press P to pause the simulation.
Even though we’ve reduced power, the airspeed stays relatively constant at approximately 80
knots. Once the airplane is trimmed to maintain a specific airspeed, it will attempt to maintain
that airspeed even with a power change (many factors affect this, so the airspeed will vary a
little.)
The VSI shows a 700 foot per minute (FPM) descent while the airplane is at a 3-degree nose-up
attitude (an attitude lower than the previous climb attitude). Whether you know it or not, you’ve just
made your first successful descent.
Think of descending in an airplane as you would going down a hill in aThink of descending in an airplane as you would going down a hill in a
Think of descending in an airplane as you would going down a hill in a
Think of descending in an airplane as you would going down a hill in aThink of descending in an airplane as you would going down a hill in a
car. First, as the car points down a steep hill, you normally take yourcar. First, as the car points down a steep hill, you normally take your
car. First, as the car points down a steep hill, you normally take your
car. First, as the car points down a steep hill, you normally take yourcar. First, as the car points down a steep hill, you normally take your
foot off the accelerator and coast downward (especially near a donutfoot off the accelerator and coast downward (especially near a donut
foot off the accelerator and coast downward (especially near a donut
foot off the accelerator and coast downward (especially near a donutfoot off the accelerator and coast downward (especially near a donut
shop—that’s where the police are). The steepness of the hill determinesshop—that’s where the police are). The steepness of the hill determines
shop—that’s where the police are). The steepness of the hill determines
shop—that’s where the police are). The steepness of the hill determinesshop—that’s where the police are). The steepness of the hill determines
the car’s eventual speed. Steep hills result in faster coasting speeds, whilethe car’s eventual speed. Steep hills result in faster coasting speeds, while
the car’s eventual speed. Steep hills result in faster coasting speeds, while
the car’s eventual speed. Steep hills result in faster coasting speeds, whilethe car’s eventual speed. Steep hills result in faster coasting speeds, while
shallow hills result in slower coasting speeds. Airplanes work similarly.shallow hills result in slower coasting speeds. Airplanes work similarly.
shallow hills result in slower coasting speeds. Airplanes work similarly.
shallow hills result in slower coasting speeds. Airplanes work similarly.shallow hills result in slower coasting speeds. Airplanes work similarly.
We’ve reduced the power to flight idle. In a sense we’re coasting down a hill. Our airspeed stabilized
at 80 knots because the previous trim setting determined the steepness of our hill. Now, let’s change
the steepness of the hill.
But first, let’s give ourselves a little more altitude. If we go too low in this part of the country, we’ll
need permission from the Bureau of Land Management—because we’ll hit something.
1. On the World menu, click Map View.
2. Click in the Altitude (MSL) text box (make sure it’s the aircraft one, not the tower one) and type
the number 5000, which represents 5,000 feet above sea level.
3. Click the OK icon.
You’re automatically boosted to 5,000 feet without having to rub a genie’s lamp.
4. Press P to reactivate the simulation (remember, the wing leveler is still active).
Pitch Change Means Airspeed Change
Let’s see how a small change in pitch affects the airspeed. Without readjusting the trim, I want you to
lower the nose slightly (make a steeper hill) and find an attitude that produces an airspeed reading of
90 knots.
1. Using the attitude indicator, make a small, slight pitch adjustment—perhaps a degree or two—,
hold it, and watch the airspeed’s response.
Observe the change, but don’t chase the airspeed needle. If you want to descend at this speed,
you’d simply trim the airplane to maintain this attitude.
Learning To Fly with Rod Machado
7
63
Page 70

2. Now raise the nose (make a shallower hill) and find an attitude that produces an airspeed
reading of 70 knots.
3. Since the airplane is trimmed for an 80-knot glide, slowly release the back pressure on the
joystick and resume the 80-knot descent.
4. Once the airspeed stabilizes at 80 knots, press P to pause the simulation.
5. Click World, click Map View, and type 5000 in the Altitude (M SL) field. Click the OK icon and
we’re back to 5,000 feet above sea level.
The reason I had you change pitch with the power set at flight idle was to give you an idea of how we
control the airplane’s airspeed. This becomes very important when you prepare for landings. After all,
you’ll need to fly at different speeds when making your landing approach. By making changes in
pitch you can descend at any airspeed you desire.
Changing Descent Rates
What if you want to descend at the same airspeed but at a slower descent rate (a smaller reading on
the VSI)? Well, here’s your chance for power. (Sorry, I mean engine power. No world domination
today!) Power has a direct bearing on your rate of descent.
1. Press P to reactivate the simulation.
At 80 knots, with the power at flight idle, the airplane descends at approximately 700 FPM.
Suppose, for example, you’re approaching to land and need less of a descent rate to make it to
the runway. What do you do?
2. Simply increase your MP to a higher value, say 11 inches and adjust the pitch slightly to
maintain 80 knots.
3. Retrim as necessary.
With this slight increase in power, the airplane descends at 300 FPM. Of course, as more power
is added, the airplane will stop descending. And, if you give it even more power, the airplane will
fly level or even start climbing at 80 knots.
4. Press P to pause the simulation.
64
At this stage of your training, it’s a good time to agree on how you’ll control the airplane. Power
(throttle position) should be your means of adjusting the rate of descent (what the VSI reads). The
airplane’s pitch attitude (controlled by the joystick) is your means of maintaining a specific airspeed.
And, in a climb, you’ll always use the maximum allowable power (usually full throttle) while adjusting
the airplane’s attitude with the joystick for the airspeed desired. Since you’re familiar with the
procedure for making climbs and descents, let’s combine these with the skills we developed in
tutorial two.
Microsoft
Flight Simulator
20002000
2000
20002000
Page 71

Things Are Turning Up
It’s time to combine climbs and descents with turns. I want you to press Ctrl+; (that’s the Ctrl key and
the semicolon key) to reset this flight. You’ll return to a condition of straight-and-level flight. Read the
following steps all the way through before trying them, since this will take some concentration.
I want you to enter a 20-degree right banking turn. Once established, you will start a climb to 4,000
feet, and then roll into straight-and-level flight. Here’s how you might do it:
1. Press Z to deactivate the autopilot.
2. Start your 20-degree bank turn.
3. Increase the pitch to a 13-degree nose-up attitude. Since you’re in a turn, you’ll need to use the
attitude indicator’s orange ball as the pitch reference.
4. Adjust the attitude slightly to give you the desired 80-knot climb airspeed, then trim to maintain
this attitude.
5. When you approach within 50 feet of 4,000 feet (that’s 3,950 on your altimeter) lower the nose
and roll out into a straight-and-level flight attitude. (In case you’re wondering, we’ll use a 50-foot
altitude lead when climbing or descending to any new altitude so as to prevent overshooting or
flying through the target altitude.)
6. Then reduce power to a cruise setting of 20 inches of MP.
7. Once the airspeed stabilizes, trim for this attitude.
8. When you’re done, press P to pause the simulation.
Ready? Give it a try.
Well, how did you do? Believe it or not, that wasn’t necessarily a simple maneuver. Remember, the
secret to going from one attitude to another (such as from straight-and-level to a climb) is to do it like
a waltz: Attitude, power, and trim. You adjust the attitude to a known value that puts your airplane in
the ballpark for a climb (13 degrees for a climb at 80 knots). Then you adjust the power (you’ll climb
with full power in this airplane). And finally, you provide enough trim to hold this attitude. Attitude,
power, and trim is the secret when making any pitch change.
Time for a Turn Down
Now that we’re at 4,000 feet, let’s descend to 2,500 feet while in a left turn at 20 degrees of bank.
And to make this a little more challenging, do it at 90 knots. Here’s how it’s done. (Don’t do it till
you’ve read through all the steps.)
1. Roll into a 20-degree left turn.
2. Reduce power to flight idle.
3. Lower the nose to an attitude that you suspect gives you an airspeed of 90 knots. Since three
degrees positive pitch gives you 80 knots, perhaps you’ll attain 90 knots at one degree positive
pitch (a slightly lower attitude). Remember, because you’re in a turn, you’ll use the attitude
Learning To Fly with Rod Machado
7
65
Page 72

indicator’s orange ball as the pitch reference.
4. When you’re at 2,550 feet (a 50-foot lead above 2,500), put the airplane in the attitude for
straight-and-level flight.
5. Increase power to a cruise setting of 20 inches of MP and trim when the airspeed stabilizes.
Attitude, power, and trim, right?
Ready? Let’s go. Press P to reactivate the simulation. When you’re done with this exercise, press P to
pause the simulation and stand by for your impromptu motivational pep talk.
You did it! You now know how to make climbs, turns, and descents as well as perform straight-andlevel flight. Yes, you understand the basics. Now you need practice. I’m soloing you, cutting you loose
to practice without using the autopilot. I want you to practice straight-and-level flight, climbs, turns,
and descents alone and in combination with each other. Practice on your own before beginning the
next tutorial.
Remember, you’ve learned the basics of moving the airplane through the air, but next we’re going to
learn all the little things that allow you to get it down on the runway. In fact, our next tutorial deals
with flying at slower speeds, just like the speeds you’ll fly at during a landing approach.
66
Microsoft
Flight Simulator
20002000
2000
20002000
Page 73

Reading the AltimeterReading the Altimeter
Reading the Altimeter
Reading the AltimeterReading the Altimeter
Reading the altimeter is very similar to reading a watch. I say this with
caution knowing that some readers have been raised on digital watches and
no longer know what it means when Mickey’s little hand is on the 3 and his
big hand is on the 12. Some may not even know which way Mickey’s hands used to
turn.
Figure 6 shows a typical altimeter found in most airplanes. It has three hands,
which is how many you’ll wish you had sometimes when things get busy in the cockpit.
A
Figure 6
The shortest hand points to numbers representing the airplane’s height in tens of
thousands of feet. The medium, thicker hand represents altitude in thousands of
feet. And the long, thin hand represents the airplane’s altitude in hundreds of
feet.
The easiest way to read an altimeter is to read it just like you would read a clock.
For instance, if Altimeter A in Figure 6 were a clock, what time would it read? Yes,
it would read 3 o’clock. Since Altimeter A isn’t a clock, it shows an altitude of
3,000 feet. The long (hundreds) hand points to zero hundred feet, and the medium
(thousands) hand points to 3,000 feet.
If Altimeter B were a clock, what time would it say? It would read 3:30, or half
past 3 o’clock. As an altimeter it reads half past three thousand or 3,500 feet. The
long (hundreds) hand points to 500 feet and the medium (thousands) hand points
between 3,000 and 4,000 feet. The altitude is 500 feet past 3,000 feet (3,500
feet).Not too tough, is it?
B C
7
Try reading Altimeter C like a clock. What time is it? Yes, it looks like it’s 3:00,
but take a closer look at the very short (ten thousands) hand. This hand points a
little past a value of 1, meaning you need to add 10,000 feet onto the value shown
by the altimeter’s medium and long hand. Altimeter C indicates an altitude of 13,000
feet.
Learning To Fly with Rod Machado
67
Page 74

Tutorial 4: Slow Flight
Okay, here’s the deal. I’m going to stick you in an airplane that’s capable of doing 120 knots—twice as
fast as the cars on the freeway below—and I have only one request: I want you to fly as slow as you
can. Sounds reasonable, right? Not really. This is like asking an Indy race driver not to take his
machine out of first gear. There is, however, a good reason for flying slowly.
The practice of slow flight is the proving ground on which you prepare for aviation’s biggest event:
landing. After all, you don’t want to land at cruise speeds, because airplanes weren’t designed to
maneuver on the surface at high velocities. You don’t want to burn the tires off the rims, do you?
(Just kidding, but it’s not far from the truth.) In general, the slower you are upon touchdown, the
easier it is to control the airplane on the runway.
Additionally, airplanes can’t fly too slowly, or they’ll cease flying and start falling (this is called stalling,
but it has nothing to do with the engine stopping, as you’ll learn later). That’s why I want you to feel
comfortable operating at slower speeds so you’ll know where the dangers are. And, as you’ll
eventually discover, it’s sometimes necessary to follow slower airplanes. You need to know how to
adjust your airspeed to prevent chewing up their tail feathers. These are only a few of the reasons we
practice slow flight. It’s an important maneuver. Let’s get started.
Guess where we’re going? You got it, Europe. ”Oh no, not again!” Yes, you must redeem yourself.
Many Italians think a strike by your landing gear put the “lean” in the Leaning Tower of Pisa. You
must show them you’re a masterful pilot by slow-flying your airplane over their country. So, let’s
reactivate our European vacation.
1. On the Flights menu, click Select Flight.
2. Choose Tutorial 4, Situation 1.
3. Click the OK icon.
4. Press Z, then Ctrl+Z, then Ctrl+V to activate the autopilot’s altitude hold and wing leveler.
5. Let’s also add the Spot Plane View: click the Views menu, then point to New View, then click
Spot Plane.
6. Drag the new window to the upper-left corner of your screen, if it’s not there already.
The airplane should be established in straight-and-level-flight at 110 knots at 3,000 feet above
sea level.
68
Microsoft
Flight Simulator
20002000
2000
20002000
Page 75

Slow Flight in Action
In Tutorial 3, we mentioned that thrust (produced by the engine-propeller combination) balances
drag, which acts opposite to thrust and is the air’s resistance to a moving airplane. Our present power
setting produces enough thrust to pull the airplane through the air at 110 knots at a pitch attitude of
approximately 4 degrees nose up, as seen on the attitude
indicator. Notice how the airplane looks from the side (Spot
View) as shown in Figure 1.
1. Press P to activate the simulation.
2. Reduce power to flight idle and watch what the
autopilot does to the airplane’s pitch attitude. As the
airplane slows down below 75 knots, increase power to
13 inches of MP and continue watching.
The airplane’s pitch attitude increased to 15 degrees
nose-up pitch as the airspeed decreased to
Figure 1
Look at the Spot Plane View. Compared to the slight
nose-up pitch attitude for straight-and-level-flight at 110
knots, it looks like your airplane is popping a wheelie.
3. Increase the power to 20 inches of MP and observe the
airplane’s reaction.
An increase in power allowed the airplane to fly faster
and at a lower pitch attitude.
4. When the airplane accelerates to 110 knots, reduce
power to 17 inches of MP and press P to pause the
simulation.
What’s going on here?
approximately 63 knots (Figure 2).
Figure 2
You’re in a Relationship
You’ve just witnessed an important relationship between airspeed and the angle at which the wing
meets the wind. To better understand this, I think we need to go to the movies. This is a rerun (you
did it for your homework in the last tutorial) but I want you to watch it again.
Click the Help menu, then click Homework. Under Tutorial 4, select How Wings Work and play the
video.
As you see, wings develop lift when air passes over them. The wing separates the airflow into two
streams: one stream flows above the wing; the other, below. Air flowing above the wing undergoes an
Learning To Fly with Rod Machado
7
69
Page 76

artificial curve induced by the wing’s engineered
shape (Figure 3). Air flowing below the wing’s flat-
bottom surface remains relatively unbent as it moves
aft.
Because air flowing over the wing bends, it is forced
to travel a greater distance than the air flowing
underneath. Because it travels a greater distance,
the bent air must move faster on its journey over the
wing. It’s this relative increase in wind speed above
the wing that lowers pressure and produces lift.
Figure 4
Figure 3
It’s test tube and Bunsen burner time again;
let’s try another experiment.
1. Take a piece of writing paper and hold
it in such a way that the top surface is
curved downward as shown in Figure
4. With a little imagination, you can see
how the top of the bent paper is similar
in appearance to the wing’s upper
curved surface.
2. Blow over the top of the paper.
70
What happens? The paper should rise upward. (Do this for kids sometime. They’ll think you’re magic.)
Increasing the velocity of air over a surface reduces the atmospheric pressure on that surface. This
means you have low pressure above the wing and high pressure underneath. Since high pressure
always moves toward low pressure, the wing (which just happens to be in the way) is pushed upward
in the process. Known as Bernoulli’s (pronounced Brr-NEW-lee) principle, this effect is responsible
for much of the lift produced by the wing (and explains the sightings of at least one or two toupees
on windy days).
At a cruise speed of 110 knots, the wing’s shape (its engineered curvature) produces enough lift to
counterbalance the airplane’s weight. The airplane maintains its altitude at a relatively low pitch
attitude. When power is reduced, the airplane slows down, resulting in the airflow over the wing
decreasing in speed. This, in turn, results in a decrease in lift unless we take corrective action to keep
the lift constant. Remember, if lift is less than weight, the airplane will be unable to maintain altitude.
What do we do? We must increase the angle of attack.
Microsoft
Flight Simulator
20002000
2000
20002000
Page 77

Angle of Attack
The angle between the
wing and the wind that
blows on it is called the
angle of attack, as shown in
Figure 5.
AIRPLANE’S MOTION
Figure 5
ANGLE OF
ATTAC K
RELATIVE MOTION
A
Figure 6
enough to provide the necessary lift for flight. This allows us to fly at a small angle of attack. When the
airspeed decreases, however, the wing’s engineered shape can’t bend or curve the air sufficiently to
produce adequate lift. Therefore, we needed to artificially bend the air flowing over the wing by
making the wing attack the air at a larger angle. A larger angle of attack imparts a larger bend or
curve to the wind, causing the wind’s speed to increase as it flows aft. This results in an increase in
lift even though the airplane is flying at a slower airspeed.
At this point you’re probably thinking, “Hmmm, instead of learning to fly, maybe I should try
something simpler, like neurosurgery.” Don’t fret. You now have enough information to understand
the process of slow flight. Do you see the relationship between angle of attack and airspeed?
As the airspeed decreases, you must increase the angle of attack to maintain altitude. In other words,
to maintain level flight, you must increase the airplane’s pitch attitude by applying rearward pressure
on the joystick. At higher airspeeds, the wing’s engineered shape produces sufficient lift for level
flight at a near-level pitch attitude. Now you know why commercial airliners need large nose-up pitch
attitudes on liftoff since their takeoff speeds are so low. Once the jetliner accelerates to its cruise
speed, it flies along at a lower pitch attitude. Let’s put our knowledge to practice.
B
In cruise flight at 110 knots, the
angle of attack is relatively small,
resulting in a near-level pitch
attitude, as shown in Figure 6A.
When we slowed the airplane
down, the autopilot, in order to hold
altitude, increased the angle of
attack by raising the airplane’s
pitch attitude, as shown in Figure
6B.
In cruise flight, the wing’s
engineered shape curves the air
7
Learning To Fly with Rod Machado
71
Page 78

A Demonstration by the Autopilot
For any given power setting, the airplane requires a specific angle of attack to maintain altitude
(assuming all other variables remain the same: air density, weight, etc.). Let’s assume that we’re
preparing the airplane for landing.
1. Return to the simulation and press P to resume straight-and-level-flight. The first thing we need
to do is slow down to 80 knots while remaining in level flight. Let’s see how the autopilot
handles the controls during this process.
2. Reduce power to 14 inches of MP. (Remember,
the autopilot is still active.)
Notice how the pitch attitude increased to
approximately 8 degrees nose-up, as shown on the
attitude indicator in Figure 7. From the Spot Plane
View, you can see that the angle of attack has
increased. The autopilot raised the airplane’s nose just
enough to maintain altitude (or keep the VSI and
altimeter needles from moving) as the airplane
decelerated. The selected power (14 inches of MP)
was sufficient to keep the airplane in level flight at this
pitch attitude.
Okay, suppose we want to return to cruise speed. Let’s
watch the autopilot do it.
72
3. Apply 20 inches of MP.
As the speed increases, the autopilot decreases
the angle of attack by lowering the airplane’s
pitch attitude just enough to keep the altitude from increasing as the airplane accelerates to 110
knots.
4. When you reach 110 knots, reduce the MP to 17 inches.
5. Press P to pause the simulation.
Microsoft
Flight Simulator
Figure 7
20002000
2000
20002000
Page 79

Entering Slow flight
It’s time for you to hand-fly this airplane and practice entering and leaving slow flight. Let’s do this
with the wing leveler active (altitude hold inactive) so you need to concentrate on only two variables:
power and pitch attitude.
Let’s suppose you’re following another airplane as you’re preparing to land. While maintaining
straight-and-level-flight you must slow the airplane to 75 knots to keep from weed-whacking the
airplane ahead of you. Here’s the general procedure you should use for entering slow flight while
maintaining altitude.
1. First, press Ctrl+Z to deactivate the altitude hold mode, then follow the sequence below.
2. Press P to activate the simulation.
3. Reduce power to flight idle (with experience you’ll eventually learn the power settings for the
speed desired and will reduce power to that value).
4. Raise the nose just fast enough to keep the VSI needle steady at zero (or the altimeter’s
hundred-foot hand steady).
5. As the airplane decelerates, apply a little nose-up trim to help maintain the nose-up pitch
attitude (this is approximately 9 degrees nose-up pitch as shown on the attitude indicator).
6. When the airplane is at the desired airspeed, apply enough power to hold your altitude (around
13 inches). Use small adjustments in pitch to maintain the desired airspeed.
7. Make a final trim adjustment (if necessary) to maintain the pitch attitude that gives you the
desired airspeed.
8. Press P to pause the simulation.
Leaving Slow flight
Let’s suppose the tower controller wants you to increase your speed from 75 to 85 knots. How do you
accomplish this? Simply reverse the process used to enter slow flight:
1. Press P to activate the simulation.
2. Increase power to a tad less than 15 inches of MP.
3. Lower the nose just fast enough to keep the VSI needle steady at zero (or the altimeter’s
hundred-foot hand steady).
4. As the airplane accelerates, apply a little nose-down trim to help maintain the desired pitch
attitude (which is approximately six degrees nose-up pitch as shown on the attitude indicator).
5. When the airplane is at the desired airspeed, apply enough power to hold your altitude. Use
adjustments in pitch to maintain the desired airspeed.
6. Make a final trim adjustment (if necessary) to maintain the pitch attitude which gives you the
desired airspeed (85 knots in this instance).
7. Press P to pause the simulation.
Learning To Fly with Rod Machado
7
73
Page 80

Here’s What You’ve Learned
So far, you’ve learned how to fly the airplane at severalSo far, you’ve learned how to fly the airplane at several
So far, you’ve learned how to fly the airplane at several
So far, you’ve learned how to fly the airplane at severalSo far, you’ve learned how to fly the airplane at several
different speeds. At this stage of your training, you’vedifferent speeds. At this stage of your training, you’ve
different speeds. At this stage of your training, you’ve
different speeds. At this stage of your training, you’vedifferent speeds. At this stage of your training, you’ve
learned that the throttle is best used to maintain your altitudelearned that the throttle is best used to maintain your altitude
learned that the throttle is best used to maintain your altitude
learned that the throttle is best used to maintain your altitudelearned that the throttle is best used to maintain your altitude
or rate of descent. The airspeed is maintained by adjusting theor rate of descent. The airspeed is maintained by adjusting the
or rate of descent. The airspeed is maintained by adjusting the
or rate of descent. The airspeed is maintained by adjusting theor rate of descent. The airspeed is maintained by adjusting the
airplane’s pitch attitude. But what about when you’re not trying to maintain aairplane’s pitch attitude. But what about when you’re not trying to maintain a
airplane’s pitch attitude. But what about when you’re not trying to maintain a
airplane’s pitch attitude. But what about when you’re not trying to maintain aairplane’s pitch attitude. But what about when you’re not trying to maintain a
specific speed, such as in cruise flight? After all, in cruise flight, you don’tspecific speed, such as in cruise flight? After all, in cruise flight, you don’t
specific speed, such as in cruise flight? After all, in cruise flight, you don’t
specific speed, such as in cruise flight? After all, in cruise flight, you don’tspecific speed, such as in cruise flight? After all, in cruise flight, you don’t
maintain your altitude with throttle adjustments, do you? No, you don’t. Here’smaintain your altitude with throttle adjustments, do you? No, you don’t. Here’s
maintain your altitude with throttle adjustments, do you? No, you don’t. Here’s
maintain your altitude with throttle adjustments, do you? No, you don’t. Here’smaintain your altitude with throttle adjustments, do you? No, you don’t. Here’s
why.why.
why.
why.why.
In cruise flight, you typically set the throttle to a power setting that won’tIn cruise flight, you typically set the throttle to a power setting that won’t
In cruise flight, you typically set the throttle to a power setting that won’t
In cruise flight, you typically set the throttle to a power setting that won’tIn cruise flight, you typically set the throttle to a power setting that won’t
harm the engine (for simplicity in teaching we’ll assume that the application ofharm the engine (for simplicity in teaching we’ll assume that the application of
harm the engine (for simplicity in teaching we’ll assume that the application of
harm the engine (for simplicity in teaching we’ll assume that the application ofharm the engine (for simplicity in teaching we’ll assume that the application of
full throttle in any of our simulations won’t hurt the engine). Then, for thefull throttle in any of our simulations won’t hurt the engine). Then, for the
full throttle in any of our simulations won’t hurt the engine). Then, for the
full throttle in any of our simulations won’t hurt the engine). Then, for thefull throttle in any of our simulations won’t hurt the engine). Then, for the
most part, you leave the throttle alone. You’re not necessarily concerned withmost part, you leave the throttle alone. You’re not necessarily concerned with
most part, you leave the throttle alone. You’re not necessarily concerned with
most part, you leave the throttle alone. You’re not necessarily concerned withmost part, you leave the throttle alone. You’re not necessarily concerned with
maintaining a specific airspeed in cruise flight. In this case, power is maintaining a specific airspeed in cruise flight. In this case, power is
maintaining a specific airspeed in cruise flight. In this case, power is
maintaining a specific airspeed in cruise flight. In this case, power is maintaining a specific airspeed in cruise flight. In this case, power is
a specific setting and you make slight adjustments in pitch attitude to hold ora specific setting and you make slight adjustments in pitch attitude to hold or
a specific setting and you make slight adjustments in pitch attitude to hold or
a specific setting and you make slight adjustments in pitch attitude to hold ora specific setting and you make slight adjustments in pitch attitude to hold or
modify your altitude. In slow flight, however, you’ll use power to control yourmodify your altitude. In slow flight, however, you’ll use power to control your
modify your altitude. In slow flight, however, you’ll use power to control your
modify your altitude. In slow flight, however, you’ll use power to control yourmodify your altitude. In slow flight, however, you’ll use power to control your
altitude, and pitch (joystick) to control your airspeed. This might be thealtitude, and pitch (joystick) to control your airspeed. This might be the
altitude, and pitch (joystick) to control your airspeed. This might be the
altitude, and pitch (joystick) to control your airspeed. This might be thealtitude, and pitch (joystick) to control your airspeed. This might be the
opposite of what you’d guess. But as you’ll soon see, this is the technique Iopposite of what you’d guess. But as you’ll soon see, this is the technique I
opposite of what you’d guess. But as you’ll soon see, this is the technique I
opposite of what you’d guess. But as you’ll soon see, this is the technique Iopposite of what you’d guess. But as you’ll soon see, this is the technique I
want you to use when landing an airplane.want you to use when landing an airplane.
want you to use when landing an airplane.
want you to use when landing an airplane.want you to use when landing an airplane.
You’re On Your Own
Now I want you to practice slow flight with the autopilot completely disengaged. Your objective is to
maintain altitude and heading while trying to fly at various slow flight speeds of your choosing. At
first, you’ll find it a bit tricky to maintain airspeed and altitude while flying a precise heading. So
establish priorities with these items. First, adjust pitch to attain the desired airspeed. Then, while
maintaining that pitch attitude, make small adjustments in power to hold your altitude.
fixedfixed
fixed
fixedfixed
at at
at
at at
74
If you feel lucky, try slow flight in turns. But be careful in those turns. Remember from the second
tutorial that a slight increase in pitch attitude was necessary to maintain altitude in a turn. Now that
you know how to use the throttle, you’ll want to add a little bit of power (perhaps one or two inches
of MP) if necessary to help maintain altitude in a turn. The steeper the turn, the more power you’ll
need. Be generous with your use of trim in slow flight (although, it’s best not to trim in turns since
turns are transient conditions). This prevents the airplane slinking away from the desired pitch
attitude if your attention is diverted from the instrument panel.
Above all, have fun. And that’s what we’ll continue to do in our next tutorial which, by the way, is
about stalls.
Microsoft
Flight Simulator
20002000
2000
20002000
Page 81

Tutorial 5: Stalls
You did your homework, right? (Click the Help menu, then click Homework.)
Several years ago a farmer called the fire department to report that his barn was on fire. The fireman
said, “Okay, we’ll be right over, but how do we get there?” With his country drawl the farmer replied,
“Well, you still have that big red truck, don’t ya?”
That’s what psychologists call a communication problem. Flight instructors have a similar problem
with the term stall. Some people think a stall is where the airplane is kept at night or what you do
when you have a lot of aviation homework to complete. Seriously, though, many people think it has to
do with the airplane’s engine faltering, since that’s how a car stalls.
Actually, it’s none of these; stalls have nothing to do with the engine at all. Stall is a term identifying
what happens when the smooth airflow over the wings is disrupted, thereby preventing the airplane
from developing sufficient lift for flight.
Sharp student that you are, I’m sure you’re thinking, “Why do I need to learn about stalls in the first
place?” The sad fact is that pilots continue to accidentally stall airplanes. They may become
distracted and let their airspeed get too slow for a given condition of flight or they get a little too
aggressive on the flight controls. Either one can cause an airplane to stall. The solution to this
dilemma is to recognize the onset of a stall and prevent it from occurring in the first place. And, if you
accidentally enter one, know how to recover quickly with a minimum loss of altitude.
When stalls happen close to the ground, such as when approaching to land, it can be a real downer
for the pilot. And I mean that both figuratively and literally. That’s why I’m here: to teach you to
identify a stall, prevent it from happening and, if it happens, show you how to recover. So let’s get
started.
First, a Little Theory
I’ve assumed that you’ve completed your homework assignment. If not, now is a good time to do so.
No stalling here!
In Tutorial 4, I showed how, in order to maintain sufficient lift for flight, the wing’s angle of attack
increased as the airspeed decreased. Perhaps you’ve wondered if there is a limit to how much the
angle of attack could increase. After all, common sense suggests there are limits to all things. The
ancient Egyptians had common sense limits, especially regarding the size of pyramids they could
build (I think this is known as Tut-an-kommon sense). Wings have limits, too.
In the stall homework you observed air begin to burble over the top of the wing when the wing
reached a very large angle of attack (about 18 degrees for most airplanes). The angle at which the air
begins burbling, followed by the wings stalling, is known as the critical angle of attack.
Learning To Fly with Rod Machado
7
75
Page 82

Okay, here comes an idea that’s like the biggest fish you ever caught—it’s a real keeper. Since wings
always stall when they exceed the critical angle of attack, you can recover from the stall by decreasing
the angle of attack to less than the critical value. Now it’s time to start stalling.
Stop Flying, Start Stalling
Let’s hop on over to Hong Kong for some stall practice.
1. On the Flights menu, click Select Flight, then choose
Tutorial 5, Situation 1 and click the OK icon.
2. Press Z, then Ctrl+Z, then Ctrl+V to activate the autopilot’s
altitude hold and wing leveler.
The airplane will settle down into straight-and-level flight at
110 knots at 4,000 feet above sea level. Notice that I’ve also
included the Spot Plane View in the upper-left corner of
your screen.
The best way to understand stalls is to jump right in and see
what they look like. Then I will talk about what you observed. For
this demonstration, we’ll forgo some of the formalities regarding
the stall. Things like doing clearing turns before each stall (this
allows you to observe other airplanes below you and keeps you
from literally dropping in on them).
Additionally, because this is a simulator, we’re going to have to
exaggerate things a bit for you to see how stalls really work. In
the actual airplane, you’d have many sensory cues to alert you to
the onset of a stall. Like the airplane actually shaking a bit when
the stall occurs. (If you find yourself shaking, it’s time to cut back
on those cappuccinos.)
Figure 1
Figure 2
76
Here we go.
Your First Stall
1. Press P to activate the simulation.
2. Press Ctrl+Z to deactivate the autopilot’s altitude hold,
leaving the wing leveler function active, and reduce the
power to flight idle.
3. Slowly pull the joystick all the way back (towards you) and
hold it there.
4. In the Spot Plane View window, you should observe the airplane pitch up (Figure 1), then stall
(Figure 2), then pitch forward (Figure 3).
Microsoft
Flight Simulator
20002000
2000
20002000
Figure 3
Page 83

You’re in the beginning of a stall when the stall horn activates (it’s an audible cockpit warning
that activates when the airplane is at or near the critical angle of attack). In the simulator, the
word STALL appears in the spot plane view window. At that point:
5. Return the joystick to neutral and let the airplane cycle through two up and down pitch changes.
6. Press P to pause the simulation when done.
You’ve just witnessed the reason aeronautical engineers get paid the big bucks. They design
airplanes to pitch forward after exceeding the critical angle of attack. And this allows most airplanes
to recover from stalls all by themselves. Neat, huh?
Here’s What You Observed
Pulling way back on the joystick caused the wings to exceed their critical angle of
attack and stall. During the stall, airflow burbles instead of flowing smoothly over
the top of the wing. This results in insufficient lift for flight, causing the airplane to
pitch forward (if the baggage, passengers, and fuel are loaded properly in the
airplane). This automatic nose-down pitch is somewhat like doing the Heimlich
maneuver on yourself; the airplane reduces its own angle of attack to less than the critical value and
regains its ability to fly.
If airplanes are built to recover from stalls themselves, why do you need to learn any of this? The
problem is that pilots often do things which prevent stall recovery. You need to know what these
things are so you know not to do them. Also, an accidental stall close to the ground requires that you
know how to quickly recover in order to minimize your altitude loss. Let’s try another stall, but this
time, let’s see what happens if you prevent the airplane from pitching forward on its own.
Doing the Wrong Thing in a Stall
We’ll stall again but prevent the airplane from recovering from the stall. Since we’re kind of low out
there, let’s reset this simulation before we go through the window of that downtown high-rise over
there.
1. Press Ctrl+; to reset the simulation; then press Z followed by Ctrl+V to activate only the
autopilot’s wing leveler.
2. Press P to resume the simulation.
3. Reduce the throttle to flight idle, raise the nose, and slow the airplane to 70 knots while in level
flight. Once done, lower the nose a little and begin a descent at 70 knots. Make sure you use
trim for the descent.
4. Slowly pull back on the joystick and this time hold it all the way back (this is what you shouldn’t
do in real life!). The airplane will eventually stall.
5. While still pulling the joystick back, let the airplane pitch up and down once or twice, and then
press P to pause the simulation.
Learning To Fly with Rod Machado
7
77
Page 84

How do you know
if you’ve decreased the
angle of attack
sufficiently? In a
simulator, you should
sense these things: the
stall horn stops
blaring, the word STALL
The airplane stalled and remained stalled with the joystick held full aft. It did not
climb, not matter how hard you pulled on that joystick. Think about this carefully.
You could remain stalled all the way to the ground while the joystick is pulled full
aft (that’s all the way back). Which doesn’t bring you much joy, right? Holding
the joystick full aft keeps the wing’s angle of attack at or beyond its critical
value. Unfortunately, this is what some pilots do after stalling an airplane.
Stall recovery requires that you do just the opposite of what caused the stall in
the first place: you must release any back pressure on that joystick and move it
forward until the wings are at less than their critical angle of attack.
With a few exceptions, this is the way pilots have always recognized stalls and
recovered from them. You’ll also want to add full power immediately after
reducing the angle of attack. This helps accelerate the stall recovery process. Be
careful not to let the nose pitch up as you add power. This might, once again,
increase the angle of attack sufficiently to induce another stall.
disappears from the
screen, the airplane
begins to fly again,
the airspeed begins to
increase, and the
flight controls become
more responsive. If
your instructor were
onboard, his or her
voice would also reduce
in pitch and whales
would no longer be
inclined to beach
themselves.
Doing the Right Thing in a Stall
All right, let’s see what it’s like to do the right thing in a stall. Here’s how we’ll do
it (remember, you’re still in a stall from the last demonstration).
1. Press P to resume the simulation.
2. Lower the nose.
The proper attitude for recovery is subject to many variables, so we’ll use a
5- to 10-degree nose-down pitch for simulator stall recoveries. You don’t
want an excessively steep nose-down attitude since it results in excessive
altitude loss and airspeed increase.
3. Add full power to help with stall recovery.
4. When the airplane is no longer stalled (i.e., the stall horn stops blaring),
raise the nose to climb attitude and establish climb airspeed.
For this demonstration, assume you’re no longer stalled when the stall horn
is no longer heard, and the airplane is once again controllable.
5. Press P to pause the simulation when you’ve completed a single stall
recovery.
Be careful not to get over-enthusiastic when recovering from a stall, or you’ll
end up in another. This happens after you initiate a recovery from the stall, then
pull too hard on the joystick before the airplane has time to accelerate to a more
normal speed and attitude. We even have a special name for this kind of stall.
It’s called a secondary stall.
78
Microsoft
Flight Simulator
20002000
2000
20002000
Page 85

Departure Stalls
What happens if you stall with full power already applied? Let’s say that you’ve just lifted off from an
airport and are climbing with full power (as you normally do in this airplane). Suddenly you find a big
bumblebee in the cockpit. You’re distracted and forget to fly the airplane as you swat the critter with
both hands. Of course, all your flailing in the air makes the cockpit look like the set of a Kung Fu
movie as the airplane stalls. What do you do?
Well, Grasshopper, all the Kung Fu in the world won’t help you now unless you do one thing: reduce
the wing’s angle of attack to less than its critical value. Once the airplane is no longer stalled, you
can recover back to climbing attitude. Don’t worry about touching the throttle since full power is
already applied.
Here’s how we’ll do it.
Departure Stall Sequence
1. Press Ctrl+; to reset the simulation and press Z and then Ctrl+V to activate only the autopilot’s
wing leveler.
2. Press P to activate the simulation.
3. Establish a climb at 70 knots with full power. Make sure you trim for this condition.
4. Raise the nose high enough to exceed the critical angle of attack. This simulates the attitude the
airplane may default to when you’re distracted.
You’ll know when the airplane stalls because the stall horn activates, the word STALL appears,
and the airplane begins to pitch forward.
5. Recover from the stall by lowering the nose sufficiently to decrease the angle of attack.
6. When the airplane is no longer stalled, raise the nose and resume your climb. Be sure to avoid a
secondary stall by not raising the nose too fast or raising it beyond a normal climb attitude.
7. Press P to pause the simulation when finished.
Learning To Fly with Rod Machado
7
79
Page 86

There you have it: your first introduction to the aerial entertainment theme park known as Stall World.
The only problem, however, is that you didn’t visit one corner of the park called Reality Land. Here’s
what you missed:
I didn’t lie to you when I said that airplanes stall because they exceed their critical angle of attack. I
just didn’t tell you that this can happen in any attitude, at any airspeed, and at any power setting. Time
now for more truth.
In reality, if the airplane were pointed straight down and you
pulled back hard enough on the controls, the airplane would stall.
Of course, we wouldn’t do this in the actual airplane (even if it
was a rental). Remember, this is a simulator. We can do things
you’d never dream of doing in a real airplane. It’s like visiting Fantasy
Land in that we’re not exposed to great risk in the demonstration. So, let’s
take advantage of our technology and see what others only talk about and
never actually do.
Trouble in Fantasy Land
Here’s how you’ll demonstrate a stall with the nose pointed nearly straight down (something we only
want to do in a simulator).
1. Press P to reactivate the simulation.
2. With full power applied, pull the airplane into a near vertical nose-up attitude until the airplane is
near, but not yet in, a stall. (Remember, all these examples are highly exaggerated! You’re not
going to be doing this in a real airplane.)
80
3. Immediately push the nose of the airplane over until it’s pointed straight down toward the
ground. At this point, pull back abruptly and fully on the joystick until the airplane stalls. (You
don’t want to do this in a real airplane, either! If you do, your non-simulated passengers won’t be
simulating heart attacks.)
4. The airplane is stalled and it’s pointed nearly straight down towards the ground. You can recover
by doing what doesn’t come naturally: move the joystick forward enough to reduce the angle of
attack to less than critical. Then, after recovering from the stall, pull back, but only gently to
prevent entering a secondary stall. Of course, in real life we’d want to avoid excessive indicated
airspeeds.
5. Press P to pause the simulation.
Microsoft
Flight Simulator
20002000
2000
20002000
Page 87

I wanted you to see this for a very important reason. It’s a common misconception to think that stalls
only occur at slow speeds. The beginning of the green arc on the airspeed indicator is the speed at
which this airplane stalls without flaps extended (more on flaps during the tutorial on landings). It is,
however, just as common for pilots to stall at higher speeds.
For instance, if you pull back too hard to correct for an excessive rate of descent while on final
approach, the airplane might stall at a higher speed. The difficulty here is that you must recover from
the stall while fighting the almost instinctual response to pull the nose up to climb. At this point,
pulling up won’t help you. You’ve already seen why. You must actually go against your natural
inclination and push forward slightly (or decrease the back pressure applied to the joystick) to
reduce the angle of attack to less than its critical value. Simultaneously adding power also helps
assist in the stall recovery. Then, and only then, will the airplane recover from a stall, at which point
you can select a nose-up pitch attitude and climb.
One of the key things to remember about stalls is, if you sense one coming on (an imminent stall),
you do the things necessary to prevent a full stall from occurring. This is just common sense. In other
words, if you hear the stall horn (which typically activates 5 to 7 knots above a stall) you immediately
apply stall recovery procedures.
If you understand this point, you understand the most important thing about stalls. But, whoa, Lone
Ranger! One more thing to do before I take you into the traffic pattern to practice takeoffs and
landings. Stalling at higher than normal speeds is something you want to avoid. That’s why we’ll
practice steep turns in our next tutorial. These turns show us how the airplane handles (or how it
doesn’t) in steep banks or when applying a lot of back pressure on the joystick.
One additional note: stalls are serious things for pilots.
There’s a lot more to them than can be shown on a simulator. If
and when you decide to take flight training in an actual
airplane, your instructor will cover all the intricacies we can’t
even begin to cover here.
Learning To Fly with Rod Machado
7
81
Page 88

Tutorial 6: Steep Turns
I like steep turns! They’re fun, challenging and, in many cases, a good test of a pilot’s ability to
recognize the limits of airplane performance. And, if you play Microsoft
they’re useful to get away from a bandit who is trying to shoot your tail off!
Steep turns (those typically done between 45 and 55 degrees of bank) are used to develop flight
proficiency. Practice them often and you’ll find yourself becoming smoother on the flight controls.
Steep turns also help you learn to handle the natural division of attention that accompanies such a
high-performance maneuver.
There’s another benefit of which you may not be aware. Steep turns demonstrate that airplanes have
limits and that exceeding those limits has a cost. Making too steep a turn may result in a stall. This
isn’t necessarily dangerous if you’re several thousand feet above the ground. But don’t try making a
steep turn to align yourself with the runway when you’re at a low altitude with insufficient airspeed.
This is a sure-fire way to get into a new line of work, like geology. You’ll really get into it—about six
feet deep into it.
®
Combat Flight Simulator,
Steep Turn Aerodynamics
First, a little review. In an earlier tutorial you learned that banking the wings allows lift to pull the
airplane sideways. The airplane turns because some of its lifting force acts in the horizontal direction.
Of course, once an object is set in motion, it wants to remain in motion. A fellow named Newton said
that (that’s Isaac, not Wayne). When an airplane turns, its entire mass still wants to maintain its
original direction. That’s why you feel yourself forced down in your seat on a roller coaster when the
track changes direction. The roller coaster is changing directions but your body wants to continue
moving straight ahead. Coupled with the downward pull of the earth, you feel like you’ll go right
through the roller coaster’s seat.
82
While airplanes don’t fly on tracks, you’ll feel a similar force that seems to pull you down in your seat
when making a steep coordinated turn. The steeper the turn, the greater the seat-pulling force. This
force is sometimes called the G-force (or load factor). The “G” in G-force is derived from the word
gravity and has nothing to do with the sound passengers make when they feel themselves forced
down in their seats during steep turns: “Gee!”
G-force is a predictable force for all airplanes. Figure 1 shows a graph representing the increase in
G-force for a given bank. The example shows that in a 60-degree bank you and the airplane will feel
a G-force of 2 (2 Gs). In other words, you and the airplane feel like you weigh twice as much as you
normally do. Imagine that. You experience an apparent increase in weight, all without letting even
one bag of greasy fries slip past those disciplined lips of yours. Of course, you can lose that weight by
rolling out of the turn and back into straight-and-level flight where you’ll feel a G-force of 1—just like
you feel right now (which is determined by how many fries you’ve eaten up till this point in your life).
Microsoft
Flight Simulator
20002000
2000
20002000
Page 89

Here’s the catch. If you and the airplane feel heavier because of anHere’s the catch. If you and the airplane feel heavier because of an
Here’s the catch. If you and the airplane feel heavier because of an
Here’s the catch. If you and the airplane feel heavier because of anHere’s the catch. If you and the airplane feel heavier because of an
increase in G-force, then you, the pilot, must compensate for theincrease in G-force, then you, the pilot, must compensate for the
increase in G-force, then you, the pilot, must compensate for the
increase in G-force, then you, the pilot, must compensate for theincrease in G-force, then you, the pilot, must compensate for the
artificialartificial
artificial
artificialartificial
it is to keep flying. Without compensating for this, the airplaneit is to keep flying. Without compensating for this, the airplane
it is to keep flying. Without compensating for this, the airplane
it is to keep flying. Without compensating for this, the airplaneit is to keep flying. Without compensating for this, the airplane
won’t be able to maintain altitude in a steep turn. It may evenwon’t be able to maintain altitude in a steep turn. It may even
won’t be able to maintain altitude in a steep turn. It may even
won’t be able to maintain altitude in a steep turn. It may evenwon’t be able to maintain altitude in a steep turn. It may even
stall. And you don’t want to become known as a pilot who stalls whenever he orstall. And you don’t want to become known as a pilot who stalls whenever he or
stall. And you don’t want to become known as a pilot who stalls whenever he or
stall. And you don’t want to become known as a pilot who stalls whenever he orstall. And you don’t want to become known as a pilot who stalls whenever he or
she makes a steep turn. Imagine the kind of nickname you’d get for that: Imeldashe makes a steep turn. Imagine the kind of nickname you’d get for that: Imelda
she makes a steep turn. Imagine the kind of nickname you’d get for that: Imelda
she makes a steep turn. Imagine the kind of nickname you’d get for that: Imeldashe makes a steep turn. Imagine the kind of nickname you’d get for that: Imelda
Impact, Steve Splatdown, or Chris Crater.Impact, Steve Splatdown, or Chris Crater.
Impact, Steve Splatdown, or Chris Crater.
Impact, Steve Splatdown, or Chris Crater.Impact, Steve Splatdown, or Chris Crater.
weight increase. You must increase the airplane’s lift if weight increase. You must increase the airplane’s lift if
weight increase. You must increase the airplane’s lift if
weight increase. You must increase the airplane’s lift if weight increase. You must increase the airplane’s lift if
Increasing lift in a steep turn means you must
increase the angle of attack by applying back
pressure on the joystick. Lift must equal weight—real
weight or apparent weight—if the airplane is to
remain flying. That’s why steep banks require large
angles of attack to produce the lift necessary for
flight. You see what’s coming, right?
If you make too steep a turn, the airplane may reach
its critical angle of attack before producing sufficient
lift for flight. The airplane will stall. Now you’re
forced to recover from the stall before you can
continue flying.
STALL FACTOR & BANK
ANGLE CHART
A 60° bank
increases
stall speed
by 40%
You’ve just learned that an airplane’s stall speed
increases in a steep turn. While you may stall at 50
knots in straight-and-level flight, you may need 70
knots to keep from stalling when turning steeply.
Figure 2 is another graph, which allows you to
predict this increase in stall speed based on an
increase in G-force.
LOAD FACTOR CHART
A 60° bank
produces a
load factor of
“2” or “2Gs”
Load Factor G-Force
Bank Angle in Degrees
Figure 1
7
Percent Increase in Stall Speed
Bank Angle in Degrees
Figure 2
For example, in a 60-degree bank (Figure 1), the
airplane and its contents experience 2 G’s (that’s a
G-force of two). Figure 2 shows that 2 G’s gives you
a 40% increase in stall speed. Therefore, an airplane
stalling at 50 knots in level flight will stall at 70
knots in a 60-degree bank (40% of 50 added to 50).
Learning To Fly with Rod Machado
83
Page 90

Here’s what this means to you. If you’re planning on doing a steep turn at 60 degrees of bank, you’d
better have an airspeed of at least 70 knots if you want to avoid a stall. Isn’t that amazing? You made
a prediction and didn’t need to peek at a magic crystal ball, throw bones, or read tea leaves (you can
save these things for weather predictions).
That’s why you’ll need to add additional power when doing steep turns. In most cases this provides
the necessary increase in speed which helps prevent a stall. Of course, if your airplane doesn’t have
a big engine, it may not be able to produce the thrust necessary to keep the speed high enough to
prevent a stall during a steep turn. Well, I remember going to a doctor and saying, “Doctor, it hurts
when I do this!” Her advice, of course, was “Don’t do that.”
If you don’t have sufficient power, then you can’t go around making really steep turns. And the
author’s decision is final on that.
Okay, enough theory. Time for a little action. Let’s practice a few steep turns. You’ll do your first turn
at 45 degrees of bank. This won’t cause a large increase in G-force, so the turn will be a little more
manageable.
Your First Steep Turn
This time you’re going to sunny
Southern California to practice your
maneuver. You’ll like it. It’s a crazy
place. (I can say that; I live there.) In
fact, if aliens from space landed in
Hollywood, it’s doubtful that you
could tell. That’s part of its charm.
84
1. On the Flights menu, click
Select Flight and choose
Tutorial 6, Situation 1, then
click the OK icon.
The airplane should be
established in straight-and-level
flight at 110 knots at 3,000 feet
above sea level. (You can see
the Hollywood sign in the
distance. And it’s pretty tough
to see anything at that distance
in Los Angeles.)
2. Click Views, point to New View, then click Spot Plane to add the Spot Plane View.
Microsoft
Flight Simulator
Figure 3
20002000
2000
20002000
Page 91

You’re starting out as shown in Figure 3. Your airspeed is 110 knots, your attitude is about 3 degrees
nose up and your MP is about 17 inches. As you do the steep turn pay attention to the airspeed and
attitude. Notice what happens to these. To make the first steep turn less complicated, you won’t add
any power.
I can’t fool you, can I? Oh well, you caught me. Yes, you’re doing an experiment again. So, Doc, get
that white lab coat on.
Here’s what I want you to do:
3. Press P to activate the simulation.
4. Note your present heading, using
the orange heading marker at the
top of the heading indicator as a
reference.
5. Enter a steep turn at 45 degrees of
bank (Figure 4).
Remember from Tutorial 2 that
you’re in a 45-degree bank when the
small orange wings are parallel to
the second white diagonal line in the
lower half of the attitude indicator.
6. While holding the bank steady, adjust the pitch on the attitude indicator until you find an attitude
that allows you to hold your altitude. To compensate for the increase in G-force, you’ll need to
increase the angle of attack by applying rearward pressure on the joystick.
7. When you’re established in the turn and the altitude and bank are steady, press P to pause the
simulation.
Figure 4
Don’t worry about technique right now. You want to examine the aerodynamics first, and then we’ll
talk about the art of making turns.
What This Means to You
You should see a panel similar to that shown in Figure
5. It appears that you need a 6-degree nose-up attitude
to hold your altitude in this turn. Since your angle of
attack increased, more of the wing’s underside is
exposed to the air stream. This creates more lift—but
also more drag. Thus, the airplane slows down a bit, as
shown on the airspeed indicator.
Figure 5
Learning To Fly with Rod Machado
7
85
Page 92

The Tough Part
Here’s where pilots
often get themselves
into trouble. When
maneuvering for landing
with power at idle,
they make steep turns
to align themselves
with the runway.
Given their slow speed
and steep bank, the
airspeed and stall
speed converge. In
other words, while in a
steep turn, the stall
speed increases because
of increasing G-force
and the airspeed
decreases because of
increasing drag.
When the airspeed and
stall speed meet, the
airplane stalls. If
this happens close to
the ground, it’s a real
bad deal.
You’ll often hear this
type of stall called an
“accelerated” stall.
It’s accelerated
because of the high Gforce caused by a steep
turn.
Your experiment reveals that a steep turn with a constant altitude is
accompanied by a decrease in airspeed. Coupled with an increase in stall speed,
you may find yourself caught between the proverbial rock and a hard place if
you’re not careful.
As the stall speed increases and the airspeed decreases, the two may eventually
meet. What happens then? Yes, the airplane stalls. How might you prevent this
in a steep turn? Try adding power to prevent airspeed loss. Let’s try this. Once
again, don’t worry about making beautiful steep turns yet; ugly ducklings are
fine for right now. Hack your way through it, and I’ll teach you the proper steps
to the dance in a bit.
More Power to You
Start from the steep turn you were in prior to pausing the simulation.
1. Press P to reactivate the simulation.
2. Maintain the 45-degree bank in which the airplane is already established.
3. Add full power.
4. Once the bank and altitude are established, press P to pause the
simulation.
Notice that the increase in power allowed you to maintain approximately
110 knots.
There you have it. A nice steep turn without a decrease in airspeed. But suppose
the turn is really steep? Let’s say it’s at 60 degrees of bank. As we’ve already
discussed, at this bank angle, your stall speed increases from 50 knots to 70
knots. The question is, “Do you have enough power to keep the airspeed above
70 knots in a 60-degree bank turn?” You won’t know until you try another
experiment. Put that lab coat back on. Here you go.
2 G or Not to G
Start from where the simulation is paused.
1. Press P to reactivate the simulation.
2. While at full power, increase the bank to 60 degrees.
You’ll find that you’ll need a large increase in angle of attack to maintain
altitude. Be generous with that pull on the joystick.
86
Microsoft
Flight Simulator
20002000
2000
20002000
Page 93

Your airspeed will decrease to approximately 90 knots, as shown
in Figure 6.
3. Make a couple of circles to get the feel of a really steep turn.
4. Choose a heading to roll out on, and bring the airplane back to
level flight.
5. Press Z, Ctrl+Z, Ctrl+V to reactivate the autopilot.
6. Reduce power to 17 inches of MP.
7. Let the airplane return to straight-and-level flight, then press P
Figure 6
to pause the simulation.
A Touch of Class Before You’re Out of Gas
One secret to making a good steep turn is to have a predetermined idea of the attitude necessary to
hold altitude in that turn. While there are many variables affecting this, you can still approximate it.
Normally, you’d also use outside visual references while doing steep turns in the actual airplane. This
allows you to keep a lookout for other airplanes as well as identify the airplane’s attitude. Using
outside visual references for steep turns, however, is a little tough to do in a simulator, so you’ll focus
on the attitude indicator instead.
Take a look at Figure 7. This is the approximate attitude necessary for a
turn at 45 degrees of bank. As you roll into the turn, progressively
increase the pitch until reaching a 6-degree nose-up attitude. Then use
the altimeter to determine what type of small pitch correction is
necessary to hold altitude. You can also use the VSI as an additional
source of information if you like. The secret is to make small corrections
and always keep an eye on your attitude.
Overcorrection is sure to send you wandering all over the sky as you try
returning to your assigned altitude. A steep turn is considered
acceptable by private pilot standards when the following things are all true:
Figure 7
· Your altitude doesn’t vary more than 100 feet.
· The heading on rollout is within 10 degrees of the direction you started with.
· The bank varies no more than 5 degrees.
· The airspeed remains within 10 knots of the entry speed.
Now you know why steep turns develop and test your skill at handling distractions. Let’s try a steep
turn (45 degrees of bank) from a heading of north and make two complete circles to the right (that’s
two 360-degree turns to the right).
Learning To Fly with Rod Machado
7
87
Page 94

Here you go:
1. Press Ctrl+; to reset this simulation.
2. Press P to activate the simulation.
3. On your present heading, roll into a right turn and gradually increase the pitch to 6 degrees nose
up.
Your pitch increase is proper when the altimeter’s hundred foot
hand remains stationary during the roll in. (You’ll find that you
don’t need much increase in pitch until passing approximately 30
degrees of bank, because of G-force increase and loss of some
vertical lift. Then you’ll need to increase the pitch quickly, as
shown in Figure 8).
4. Scan back and forth between the attitude indicator and the
altimeter. If the altimeter hand moves up or down, return to the
attitude indicator and make a 1- or 2-degree change in pitch to
Figure 8
stop the altimeter needle’s movement and return it to the desired
altitude.
Don’t make large changes in pitch. This is one of the biggest mistakes pilots make during steep
turns.
5. Add power to maintain your airspeed within 10 knots of the entry speed.
6. If the steep turn starts to get away from you, go directly to the attitude indicator and establish a
6-degree nose-up pitch and the proper bank. Then make small pitch corrections to return to the
assigned altitude.
7. When you’re within approximately 20 degrees of your assigned heading, look at the attitude
indicator and roll back to the attitude for straight-and-level flight.
The secret to a good rollout is sensing when to release the back pressure on the joystick that
you held during the turn.
8. Reduce the power to 17 inches of MP after the rollout is complete.
9. Press P to pause the simulation, put a dollar in the nearest soda machine, and have a cold one.
You’ve earned it!
88
Congratulations! That’s your first official steep turn.
Did you notice that pulling back on the joystick increased the bank a little? That’s why you must be
careful not to let the bank increase during a steep turn. This is a rather common occurrence when
applying back pressure on the joystick.
Additionally, at steep bank angles, airplanes have a natural tendency to steepen their bank without
the pilot doing anything to cause this. Be prepared to compensate for this with aileron pressure, if
necessary.
Microsoft
Flight Simulator
20002000
2000
20002000
Page 95

Have you noticed that you didn’t trim for the steep turn condition? Well, you only use trim to hold the
controls in one place for a long time. So since steep turns are transitory, trim isn’t normally used.
Besides, steep turns help you to recognize the onset of an accelerated stall. In the actual airplane, you
can feel yourself being forced down in the seat by increasing G-force. You can’t feel this in a
simulator. Therefore, you must rely on the back pressure you’re applying to the joystick to warn you of
an approaching stall at higher airspeeds. So, there’s another good reason not to trim in steep turns.
You’re now qualified to try steep turns at larger banks. Go all the way to 55 degrees, which is the
bank required for commercial license certification. Roll into and out of the turns while holding altitude
within 100 feet, airspeed within 10 knots, and rollout headings within 10 degrees of the entry
direction. Have as much fun as you can. Why? Because it will all pale in comparison to the fun you’re
going to have as you practice landings in our next tutorial.
Learning To Fly with Rod Machado
7
89
Page 96

We’re going to
approach this tutorial
a little differently
than I would in an
actual airplane. I
plan on teaching you
how to land before
teaching you takeoffs
and flying the traffic
pattern. That way,
when I teach you to
take off and fly a
traffic pattern, you
can actually land,
instead of dropping to
earth with all the
grace of a butterfly
overdosed on caffeine.
Besides, something
tells me that if we
don’t do landings now,
you’ll be out there
practicing them
yourself. So let me
help you put your hand
in the cookie jar.
Tutorial 7: Landings
You remember how to get to the homework, right? Click the Help menu, then
click Homework. There. No excuses.
Landings are to a pilot what a beautiful painting is to an artist. When you look at
Leonardo’s Mona Lisa (or its famed counterpart the Mona Larry), you see a
beautiful work of art. To pilots, a good landing offers the same satisfaction. I
intend to show you how to paint that beautiful picture on any runway of your
choice.
I always tell my students that airplanes will land themselves (well, almost). All
the pilot has to do is nudge the machine toward the runway and twiddle with the
throttle a bit. But who believes that? So, let me prove it to you. Close the door,
strap on that seat belt, and let’s go to where the rubber meets the runway as I
show you how to land an airplane.
Landing Setup
From the Flights menu, click Select Flight and choose Tutorial 7, Situation 1
in which we’ll land at the Mojave airport. To aid you in these examples, I’ve
activated the wing leveler. This is just like having me on board to keep you from
overbanking the airplane while on final approach (a common problem for
students). Nevertheless, you can still make shallow banks while it’s active.
On your first try, you’re going to land this airplane by doing absolutely nothing
other than maintaining 65 knots in a power-off glide. Once the simulation starts,
simply adjust the pitch to maintain your airspeed and fly that speed all the way
to the ground. Yes, there’s a runway ahead of you, but don’t worry about landing
on it. Remember, this is a simulation. No one’s going to get hurt, except for a few
simulated groundhogs who picked a bad time to raise their little periscopes.
90
Microsoft
Flight Simulator
20002000
2000
20002000
Page 97

Your First Landing
1. Press P to activate the simulation.
2. With power set to idle, adjust the pitch (about 10
degrees nose-up) to maintain 65 knots as shown
in Figure 1.
3. Trim to maintain 65 knots airspeed and fly that
speed all the way to touchdown.
In other words, don’t allow the pitch to vary one
bit. Do not attempt to raise the nose before
touchdown. Watch what happens.
4. When the airplane is firmly established on (or off!) the runway, press P to pause the simulation.
There you have it. The touchdown was a little rough, but you landed the airplane with only the
help of the wing leveler. Even if the airplane didn’t end up on the runway, it still landed
successfully (conked groundhogs notwithstanding).
5. Press Ctrl+; to reset the simulation, then try the landing two more times.
6. Press P to start the simulation, and press P again when you’re done. Then we’ll talk.
Here’s the skinny: the secret to a good landing is to keep from working too hard. This airplane almost
landed itself. You hardly did a thing. That’s the point. If the airplane’s trimmed for the proper airspeed,
there’s little else to do other than keep the wings level and make small adjustments in power to vary
the glidepath. Now for the details.
Figure 1
Landing Details
Why did I choose 65 knots as the speed to fly the
final approach? (Final approach is the portion
where you’re lined up with the runway.) Pilots
typically use a final landing speed that is 30%
above the airplane’s stall speed. In our case, the
airplane’s “no flap” stalling speed is 50 knots (this
is where the green arc begins on the airspeed
indicator). Thus, our “+30%” speed is 65 knots. Fly
a little faster than that and the airplane will tend to
float and resist touching down on the desired
landing spot. Fly a little slower and the airplane is
uncomfortably close to the stall speed. Controlling
your airspeed is perhaps the most important quality for a successful landing.
Figure 2
MAIN
GEAR
NOSE
GEAR
7
Additionally, for our simulated airplane, 65 knots keeps the nose gear just a little higher in relation to
the main gear as shown in Figure 2. The Cessna 182 is a tricycle gear airplane. It’s designed to be
landed on the two main gear wheels first, after which the nose gear is gently lowered to the ground.
Learning To Fly with Rod Machado
91
Page 98

Land on the nose gear first and you could invoke the scariest phrase in a pilot’s vocabulary: insurance
deductible. You could also porpoise, which is a bouncing action, not a tuna’s playmate.
This simulated landing is a little too hard for my tastes. I’ll eventually show you how to make softer
landings. But first, let’s see how power can change the flight path.
Playing with Power
1. From the Flights menu, click Select Flight, and choose Tutorial 7, Situation 2.
The wing leveler is also active for this example. Here’s what you’re going to do.
2. Press P to activate the simulation.
3. Trim the airplane for a power-off descent at 65 knots. Maintain 65 knots all the way to
touchdown (which will be short of the runway, but that’s what I want).
4. Land short of the runway.
5. Press P to pause the simulation.
You landed short because I started you at a lower altitude
RUNWAY
than in the first example. Could you sense that you were
too low on the approach and wouldn’t make the runway?
You can tell that you’re descending too quickly when you
observe the runway geometry changing as shown in
Figure 3. First, the distance between the far end of the
runway and the distant horizon decreases. Second, both
ends of the runway appear to converge. Finally, you know
you’re too low when desert shrubbery appears at eye level
and you skid your tires on a desert tortoise. Here’s how to
handle this.
92
Figure 3
Microsoft
Run this simulation again. Don’t worry about being
precisely on the runway centerline in this example. If
you’re off to the side in the dirt, that’s okay for now. And
use the wing leveler. You’ll have plenty of time to practice
without it later.
1. Press Ctrl+; to reset this simulation, then press P to
begin (remember, the wing leveler is active).
2. Increase the power to approximately 12 inches of MP
(which will change the glidepath as shown in Figure
4).
3. Maintain 65 knots as before.
Flight Simulator
20002000
2000
20002000
Page 99

GLIDEPATH
WITH POWER
Any time power adjustments are
made, you’ll have to adjust the pitch
to maintain the desired airspeed. In
a previous tutorial you learned that,
with power fixed at a specific setting,
you’ll need to lower the nose to go
faster and raise it to slow down.).
GLIDEPATH
WITHOUT POWER
Figure 4
Make sure you trim for this attitude,
too.
4. After completing the simulation,
press P and read on.
Glidepath Adjustment if You’re Too Low
You’ll immediately notice that your descent rate decreased a little after adding power as shown in
Figure 5. Small adjustments of power make small adjustments in glidepath. Ideally, your glidepath
should take you straight to the runway without numerous vertical bends or curves in the airplane’s
trajectory. Ah, if this were only a perfect world, eh? It’s not.
Therefore, pilots frequently adjust power and vary the glidepath
as necessary to make it to the runway.
In fact, if you’re too low, it’s perfectly reasonable to add power
and hold your altitude until you’re in a position for a normal
glide to the runway. Experience will tell you when you’re in a
position to reduce power for a normal glide to the runway. Of
course, if you’ve misjudged and are really low, you should start
a climb. Then, when you’re high enough for a normal glide to
the runway, you simply reduce power and commence the
descent.
What do you do if you’re too high? We’ll talk about that in a bit. First, I want you to practice landing
the airplane directly on the runway centerline. Why? Aiming for the runway’s center reduces your
chances of running wheels into soft sod or catching wing tips on snow banks. Either one may invoke
that word, deductible.
Figure 5
IDLE
12in of MP
7
A Landing on Your Own
1. Press Ctrl+; to reset the previous simulation.
Remember, in this simulation you begin at a lower altitude. Therefore, you’ll need at least 12
inches of MP to make the runway. Here’s what I want you to do.
2. Press P to activate the simulation.
Learning To Fly with Rod Machado
93
Page 100

3. Fly this approach at 65 knots all the way to touchdown.
4. Adjust power in small amounts to modify the glidepath for a landing beyond the runway
numbers (the large white numbers painted on the beginning of the runway).
Even though the wing leveler is active, you can still make small (2-3 degree) bank changes with
the joystick. Remember, the wing leveler prevents you from overcontrolling the airplane. Please
keep it activated.
5. When you’re over the runway, slowly reduce power to idle and maintain 65 knots until touching
down (hold the attitude for 65 knots all the way to the ground). Make sure the wings are
perfectly level before landing.
6. Press P again to stop the simulation when finished.
7. After touchdown, rerun this simulation at least two more times by pressing Ctrl+;.
Feeling more confident about getting an airplane on the runway? Good. Now let’s work on the finer
points of landing. Then I’ll show you how to get down if you’re too high.
The Landing Flare
Until now you’ve flown the airplane onto the runway at a final approach speed of 65 knots. You could
do this because, at 65 knots, the simulated airplane is in a minimally acceptable landing attitude (i.e.,
the airplane is pitched nose-up, putting the nose gear above the main gear). Additionally, the descent
rate in this simulation isn’t excessive at this speed and doesn’t put undue stress on the landing gear.
But this isn’t the way it is with all airplanes. Nor is it necessarily this way with the same airplane when
flaps are extended for landing. Therefore, to land properly under all conditions, you must learn to flare
the airplane to ensure a soft, safe touchdown.
94
The landing flare begins at approximately 10
to 20 feet above the runway. At this point,
raise the nose with a slight and gentle pull on
the joystick. How much of a pull? Once again,
that’s a matter of experience. The objective is
to “shallow” your descent angle and decrease
the airspeed for landing. Now the airplane
can settle onto the runway at a smaller
descent rate and at a slightly higher nose-up
attitude. This makes for a softer touchdown
and keeps the nose gear higher than the
Figure 6
What if the airplane stalls during the flare? No problem, as long as it stalls a few inches above the
ground. If you try to flare at 50 feet above the ground, plan on settling into the runway instead of onto
it. (Ouch! Deductible!) Big difference. As you’ll soon see, the flare requires a little timing but there’s a
lot of latitude in how it’s accomplished.
Microsoft
Flight Simulator
main gear (Figure 6).
20002000
2000
20002000
 Loading...