

Page 1
Page 2
SEGA PC DISC – NOTES ON USE
HEALTH ISSUES
Use this software in a well-lit room, staying a good distance away
from the monitor or TV screen to not overtax your eyes. Take breaks
of 10 to 20 minutes every hour, and do not play when you are tired
or short on sleep. Prolonged use or playing too close to the monitor
or television screen may cause a decline in visual acuity.
In rare instances, stimulation from strong light or flashing when
staring at a monitor or television screen can cause temporary
muscular convulsions or loss of consciousness for some people.
If you experience any of these symptoms, consult a doctor before
playing this game. If you experience any dizziness, nausea,
or motion-sickness while playing this game, stop the game
immediately. Consult a doctor when any discomfort continues.
PRODUCT CARE
Handle the game discs with care to prevent scratches or dirt on
either side of the discs. Do not bend the discs or enlarge their center
holes.
Clean the discs with a soft cloth, such as a lens cleaning cloth. Wipe
lightly, moving in a radial pattern outward from the center hole
towards the edge. Never clean the discs with paint thinner, benzene,
or other harsh chemicals.
Do not write or attach labels to either side of the discs.
Store the discs in their original case after playing. Do not store the
discs in a hot or humid location.
The Medievel II game discs contain software for use on a personal
computer. Please do not play the discs on an ordinary CD player, as this
may damage the headphones or speakers.
* Also read the manual of your personal computer.
* The game discs may not be used for rental business.
* Unauthorized copying of this manual is prohibited.
* Unauthorized copying and reverse engineering of this
software is prohibited.
CONTENTS
HAIL COMMANDER! WELCOME TO MEDIEVAL II: TOTAL WAR! . . . . . . . . . . . . . . . . . . . . . . . . 5
INSTALLATION . . . . . . . . . . . . . . . . . . . . . . . . . . . . . . . . . . . . . . . . . . . . . . . . . . . . . . . 5
Requirements . . . . . . . . . . . . . . . . . . . . . . . . . . . . . . . . . . . . . . . . . . . . . . . . . . . . . 5
How to Install . . . . . . . . . . . . . . . . . . . . . . . . . . . . . . . . . . . . . . . . . . . . . . . . . . . . . 5
Installation Key . . . . . . . . . . . . . . . . . . . . . . . . . . . . . . . . . . . . . . . . . . . . . . . . . . . . 5
STARTING MEDIEVAL II: TOTAL WAR . . . . . . . . . . . . . . . . . . . . . . . . . . . . . . . . . . . . . . . . 5
The Main Menu . . . . . . . . . . . . . . . . . . . . . . . . . . . . . . . . . . . . . . . . . . . . . . . . . . . . 5
Single Player Menu . . . . . . . . . . . . . . . . . . . . . . . . . . . . . . . . . . . . . . . . . . . . . . . . . 6
Multiplayer Menu. . . . . . . . . . . . . . . . . . . . . . . . . . . . . . . . . . . . . . . . . . . . . . . . . . . 6
Load Game Menu . . . . . . . . . . . . . . . . . . . . . . . . . . . . . . . . . . . . . . . . . . . . . . . . . . 6
Options Menu . . . . . . . . . . . . . . . . . . . . . . . . . . . . . . . . . . . . . . . . . . . . . . . . . . . . . 7
HELP, ADVICE & THE TUTORIAL. . . . . . . . . . . . . . . . . . . . . . . . . . . . . . . . . . . . . . . . . . . . 7
Learning How to Play . . . . . . . . . . . . . . . . . . . . . . . . . . . . . . . . . . . . . . . . . . . . . . . . 7
The Tutorial – “Hands On” Lessons . . . . . . . . . . . . . . . . . . . . . . . . . . . . . . . . . . . . . . 7
Your Advisors. . . . . . . . . . . . . . . . . . . . . . . . . . . . . . . . . . . . . . . . . . . . . . . . . . . . . . 7
Receiving Advice . . . . . . . . . . . . . . . . . . . . . . . . . . . . . . . . . . . . . . . . . . . . . . . . . . 8
Advice Preferences . . . . . . . . . . . . . . . . . . . . . . . . . . . . . . . . . . . . . . . . . . . . . . . . . 8
Asking for Advice . . . . . . . . . . . . . . . . . . . . . . . . . . . . . . . . . . . . . . . . . . . . . . . . . . . 8
Using Help . . . . . . . . . . . . . . . . . . . . . . . . . . . . . . . . . . . . . . . . . . . . . . . . . . . . . . . 8
CAMPAIGNS . . . . . . . . . . . . . . . . . . . . . . . . . . . . . . . . . . . . . . . . . . . . . . . . . . . . . . . . 8
The Grand Campaign . . . . . . . . . . . . . . . . . . . . . . . . . . . . . . . . . . . . . . . . . . . . . . . . 8
Starting a Grand Campaign . . . . . . . . . . . . . . . . . . . . . . . . . . . . . . . . . . . . . . . . . . . . 9
PLAYING THE GRAND CAMPAIGN. . . . . . . . . . . . . . . . . . . . . . . . . . . . . . . . . . . . . . . . . . . 9
How to Win a Campaign . . . . . . . . . . . . . . . . . . . . . . . . . . . . . . . . . . . . . . . . . . . . . . 9
The Campaign Map View . . . . . . . . . . . . . . . . . . . . . . . . . . . . . . . . . . . . . . . . . . . . . 9
Moving the View . . . . . . . . . . . . . . . . . . . . . . . . . . . . . . . . . . . . . . . . . . . . . . . . . . 10
The Control Panel . . . . . . . . . . . . . . . . . . . . . . . . . . . . . . . . . . . . . . . . . . . . . . . . . 10
The Review Panel . . . . . . . . . . . . . . . . . . . . . . . . . . . . . . . . . . . . . . . . . . . . . . . . . 10
The Mini-map Panel. . . . . . . . . . . . . . . . . . . . . . . . . . . . . . . . . . . . . . . . . . . . . . . . 11
Starting Play - Your First Turn . . . . . . . . . . . . . . . . . . . . . . . . . . . . . . . . . . . . . . . . . 11
Before Ending Your First Turn . . . . . . . . . . . . . . . . . . . . . . . . . . . . . . . . . . . . . . . . . 11
EVENTS & MISSIONS . . . . . . . . . . . . . . . . . . . . . . . . . . . . . . . . . . . . . . . . . . . . . . . . . 12
What Are Events?. . . . . . . . . . . . . . . . . . . . . . . . . . . . . . . . . . . . . . . . . . . . . . . . . . 12
Your First Event Mission . . . . . . . . . . . . . . . . . . . . . . . . . . . . . . . . . . . . . . . . . . . . . 12
Who Gives Missions . . . . . . . . . . . . . . . . . . . . . . . . . . . . . . . . . . . . . . . . . . . . . . . . 12
Mission Rewards & Penalties . . . . . . . . . . . . . . . . . . . . . . . . . . . . . . . . . . . . . . . . . 12
Faction & World Events . . . . . . . . . . . . . . . . . . . . . . . . . . . . . . . . . . . . . . . . . . . . . 13
Historical Events . . . . . . . . . . . . . . . . . . . . . . . . . . . . . . . . . . . . . . . . . . . . . . . . . . 13
CHARACTERS . . . . . . . . . . . . . . . . . . . . . . . . . . . . . . . . . . . . . . . . . . . . . . . . . . . . . . 13
The Characters of
Viewing Character Information . . . . . . . . . . . . . . . . . . . . . . . . . . . . . . . . . . . . . . . . 13
Military Class Characters . . . . . . . . . . . . . . . . . . . . . . . . . . . . . . . . . . . . . . . . . . . . 13
Medieval II: Total War . . . . . . . . . . . . . . . . . . . . . . . . . . . . . . . . . . 13
1
Page 3

Generals . . . . . . . . . . . . . . . . . . . . . . . . . . . . . . . . . . . . . . . . . . . . . . . . . . . . . . . . 13
Captains . . . . . . . . . . . . . . . . . . . . . . . . . . . . . . . . . . . . . . . . . . . . . . . . . . . . . . . . 14
Admirals . . . . . . . . . . . . . . . . . . . . . . . . . . . . . . . . . . . . . . . . . . . . . . . . . . . . . . . . 14
gent Class Characters . . . . . . . . . . . . . . . . . . . . . . . . . . . . . . . . . . . . . . . . . . . . . . 14
A
Priests/Imams . . . . . . . . . . . . . . . . . . . . . . . . . . . . . . . . . . . . . . . . . . . . . . . . . . . . 14
Diplomats . . . . . . . . . . . . . . . . . . . . . . . . . . . . . . . . . . . . . . . . . . . . . . . . . . . . . . . 14
Princesses. . . . . . . . . . . . . . . . . . . . . . . . . . . . . . . . . . . . . . . . . . . . . . . . . . . . . . . 14
Spies . . . . . . . . . . . . . . . . . . . . . . . . . . . . . . . . . . . . . . . . . . . . . . . . . . . . . . . . . . 14
Assassins . . . . . . . . . . . . . . . . . . . . . . . . . . . . . . . . . . . . . . . . . . . . . . . . . . . . . . . 15
Merchants. . . . . . . . . . . . . . . . . . . . . . . . . . . . . . . . . . . . . . . . . . . . . . . . . . . . . . . 15
Character Attributes . . . . . . . . . . . . . . . . . . . . . . . . . . . . . . . . . . . . . . . . . . . . . . . . 15
Improving Your Characters . . . . . . . . . . . . . . . . . . . . . . . . . . . . . . . . . . . . . . . . . . . 16
Traits . . . . . . . . . . . . . . . . . . . . . . . . . . . . . . . . . . . . . . . . . . . . . . . . . . . . . . . . . . 16
Retinue. . . . . . . . . . . . . . . . . . . . . . . . . . . . . . . . . . . . . . . . . . . . . . . . . . . . . . . . . 17
USING ARMIES . . . . . . . . . . . . . . . . . . . . . . . . . . . . . . . . . . . . . . . . . . . . . . . . . . . . . 17
Total War Armies . . . . . . . . . . . . . . . . . . . . . . . . . . . . . . . . . . . . . . . . . . . . . . . . . . 17
Who Commands in Battle? . . . . . . . . . . . . . . . . . . . . . . . . . . . . . . . . . . . . . . . . . . . 17
Unit Types. . . . . . . . . . . . . . . . . . . . . . . . . . . . . . . . . . . . . . . . . . . . . . . . . . . . . . . 17
Forming Armies . . . . . . . . . . . . . . . . . . . . . . . . . . . . . . . . . . . . . . . . . . . . . . . . . . . 18
Moving Armies. . . . . . . . . . . . . . . . . . . . . . . . . . . . . . . . . . . . . . . . . . . . . . . . . . . . 18
Merging Armies . . . . . . . . . . . . . . . . . . . . . . . . . . . . . . . . . . . . . . . . . . . . . . . . . . . 19
Splitting Armies. . . . . . . . . . . . . . . . . . . . . . . . . . . . . . . . . . . . . . . . . . . . . . . . . . . 19
Merging Units . . . . . . . . . . . . . . . . . . . . . . . . . . . . . . . . . . . . . . . . . . . . . . . . . . . . 19
Unit Experience . . . . . . . . . . . . . . . . . . . . . . . . . . . . . . . . . . . . . . . . . . . . . . . . . . . 20
Hiring Mercenaries. . . . . . . . . . . . . . . . . . . . . . . . . . . . . . . . . . . . . . . . . . . . . . . . . 20
Building Forts & Watchtowers . . . . . . . . . . . . . . . . . . . . . . . . . . . . . . . . . . . . . . . . . 20
Picking Your Ground . . . . . . . . . . . . . . . . . . . . . . . . . . . . . . . . . . . . . . . . . . . . . . . 21
Setting an Ambush . . . . . . . . . . . . . . . . . . . . . . . . . . . . . . . . . . . . . . . . . . . . . . . . 21
Attacking with an Army . . . . . . . . . . . . . . . . . . . . . . . . . . . . . . . . . . . . . . . . . . . . . 21
Using Reinforcements . . . . . . . . . . . . . . . . . . . . . . . . . . . . . . . . . . . . . . . . . . . . . . 21
Multiple Attacks . . . . . . . . . . . . . . . . . . . . . . . . . . . . . . . . . . . . . . . . . . . . . . . . . . 22
USING FLEETS . . . . . . . . . . . . . . . . . . . . . . . . . . . . . . . . . . . . . . . . . . . . . . . . . . . . . . 22
Total War Fleets . . . . . . . . . . . . . . . . . . . . . . . . . . . . . . . . . . . . . . . . . . . . . . . . . . . 22
Who Commands in Naval Battles? . . . . . . . . . . . . . . . . . . . . . . . . . . . . . . . . . . . . . . 22
Moving Fleets . . . . . . . . . . . . . . . . . . . . . . . . . . . . . . . . . . . . . . . . . . . . . . . . . . . . 22
Using Fleets as Transports . . . . . . . . . . . . . . . . . . . . . . . . . . . . . . . . . . . . . . . . . . . 23
Merging & Splitting Fleets . . . . . . . . . . . . . . . . . . . . . . . . . . . . . . . . . . . . . . . . . . . 23
Attacking with a Fleet . . . . . . . . . . . . . . . . . . . . . . . . . . . . . . . . . . . . . . . . . . . . . . 23
Blockading Ports . . . . . . . . . . . . . . . . . . . . . . . . . . . . . . . . . . . . . . . . . . . . . . . . . . 23
Trouble at Sea. . . . . . . . . . . . . . . . . . . . . . . . . . . . . . . . . . . . . . . . . . . . . . . . . . . . 23
RUNNING SETTLEMENTS . . . . . . . . . . . . . . . . . . . . . . . . . . . . . . . . . . . . . . . . . . . . . . . 24
What do Settlements do? . . . . . . . . . . . . . . . . . . . . . . . . . . . . . . . . . . . . . . . . . . . . 24
How Do I Manage a Settlement? . . . . . . . . . . . . . . . . . . . . . . . . . . . . . . . . . . . . . . . 24
Settlements on the Campaign Map . . . . . . . . . . . . . . . . . . . . . . . . . . . . . . . . . . . . . 24
The Settlement Scroll . . . . . . . . . . . . . . . . . . . . . . . . . . . . . . . . . . . . . . . . . . . . . . 25
Understanding Cities & Castles . . . . . . . . . . . . . . . . . . . . . . . . . . . . . . . . . . . . . . . . 25
Cities . . . . . . . . . . . . . . . . . . . . . . . . . . . . . . . . . . . . . . . . . . . . . . . . . . . . . . . . . . 25
Castles . . . . . . . . . . . . . . . . . . . . . . . . . . . . . . . . . . . . . . . . . . . . . . . . . . . . . . . . . 26
The Governor. . . . . . . . . . . . . . . . . . . . . . . . . . . . . . . . . . . . . . . . . . . . . . . . . . . . . 26
Constructing Buildings . . . . . . . . . . . . . . . . . . . . . . . . . . . . . . . . . . . . . . . . . . . . . . 27
The Building Browser . . . . . . . . . . . . . . . . . . . . . . . . . . . . . . . . . . . . . . . . . . . . . . . 27
Repairing Buildings . . . . . . . . . . . . . . . . . . . . . . . . . . . . . . . . . . . . . . . . . . . . . . . . 28
Recruiting Units, Ships & Agents . . . . . . . . . . . . . . . . . . . . . . . . . . . . . . . . . . . . . . 28
The Unit Information Scroll . . . . . . . . . . . . . . . . . . . . . . . . . . . . . . . . . . . . . . . . . . 29
Recruitment Buildings . . . . . . . . . . . . . . . . . . . . . . . . . . . . . . . . . . . . . . . . . . . . . . 30
Retraining & Upgrading Units . . . . . . . . . . . . . . . . . . . . . . . . . . . . . . . . . . . . . . . . . 30
Upgrading Ar
2
. . . . . . . . . . . . . . . . . . . . . . . . . . . . . . . . . . . . . . . . . . . . . . . . . .
mor
30
Armor Types . . . . . . . . . . . . . . . . . . . . . . . . . . . . . . . . . . . . . . . . . . . . . . . . . . . . . 31
Upgrading Weapons . . . . . . . . . . . . . . . . . . . . . . . . . . . . . . . . . . . . . . . . . . . . . . . . 31
Weapon Types . . . . . . . . . . . . . . . . . . . . . . . . . . . . . . . . . . . . . . . . . . . . . . . . . . . . 31
he Guilds . . . . . . . . . . . . . . . . . . . . . . . . . . . . . . . . . . . . . . . . . . . . . . . . . . . . . . 31
T
Faction-Specific Buildings . . . . . . . . . . . . . . . . . . . . . . . . . . . . . . . . . . . . . . . . . . . 31
The Settlement Details Scroll . . . . . . . . . . . . . . . . . . . . . . . . . . . . . . . . . . . . . . . . . 32
The Trade Scroll & Trade Resources. . . . . . . . . . . . . . . . . . . . . . . . . . . . . . . . . . . . . 32
Converting Settlements . . . . . . . . . . . . . . . . . . . . . . . . . . . . . . . . . . . . . . . . . . . . . 33
City Upgrading & Conversion . . . . . . . . . . . . . . . . . . . . . . . . . . . . . . . . . . . . . . . . . . 33
Castle Upgrading & Conversion . . . . . . . . . . . . . . . . . . . . . . . . . . . . . . . . . . . . . . . . 33
USING AGENTS . . . . . . . . . . . . . . . . . . . . . . . . . . . . . . . . . . . . . . . . . . . . . . . . . . . . . 33
Using Merchants . . . . . . . . . . . . . . . . . . . . . . . . . . . . . . . . . . . . . . . . . . . . . . . . . . 33
Using Priests & Imams . . . . . . . . . . . . . . . . . . . . . . . . . . . . . . . . . . . . . . . . . . . . . . 34
Using Spies. . . . . . . . . . . . . . . . . . . . . . . . . . . . . . . . . . . . . . . . . . . . . . . . . . . . . . 35
Using Assassins . . . . . . . . . . . . . . . . . . . . . . . . . . . . . . . . . . . . . . . . . . . . . . . . . . . 35
Using Diplomats . . . . . . . . . . . . . . . . . . . . . . . . . . . . . . . . . . . . . . . . . . . . . . . . . . 36
Using Princesses . . . . . . . . . . . . . . . . . . . . . . . . . . . . . . . . . . . . . . . . . . . . . . . . . . 36
RELIGION . . . . . . . . . . . . . . . . . . . . . . . . . . . . . . . . . . . . . . . . . . . . . . . . . . . . . . . . . 37
Religion in
Spreading Your Faith . . . . . . . . . . . . . . . . . . . . . . . . . . . . . . . . . . . . . . . . . . . . . . . 37
The Pope . . . . . . . . . . . . . . . . . . . . . . . . . . . . . . . . . . . . . . . . . . . . . . . . . . . . . . . 37
Excommunication & Reconciliation . . . . . . . . . . . . . . . . . . . . . . . . . . . . . . . . . . . . . 37
The Papal States . . . . . . . . . . . . . . . . . . . . . . . . . . . . . . . . . . . . . . . . . . . . . . . . . . 38
The College of Cardinals. . . . . . . . . . . . . . . . . . . . . . . . . . . . . . . . . . . . . . . . . . . . . 38
Papal Elections . . . . . . . . . . . . . . . . . . . . . . . . . . . . . . . . . . . . . . . . . . . . . . . . . . . 39
Election Results . . . . . . . . . . . . . . . . . . . . . . . . . . . . . . . . . . . . . . . . . . . . . . . . . . 39
Special Religious Agents . . . . . . . . . . . . . . . . . . . . . . . . . . . . . . . . . . . . . . . . . . . . 39
CRUSADES & JIHADS . . . . . . . . . . . . . . . . . . . . . . . . . . . . . . . . . . . . . . . . . . . . . . . . . 40
Crusades. . . . . . . . . . . . . . . . . . . . . . . . . . . . . . . . . . . . . . . . . . . . . . . . . . . . . . . . 40
Requesting Crusades . . . . . . . . . . . . . . . . . . . . . . . . . . . . . . . . . . . . . . . . . . . . . . . 40
Joining or Leaving a Crusade . . . . . . . . . . . . . . . . . . . . . . . . . . . . . . . . . . . . . . . . . 41
Crusading Army Effects . . . . . . . . . . . . . . . . . . . . . . . . . . . . . . . . . . . . . . . . . . . . . 41
Ending Crusades . . . . . . . . . . . . . . . . . . . . . . . . . . . . . . . . . . . . . . . . . . . . . . . . . . 41
Jihads. . . . . . . . . . . . . . . . . . . . . . . . . . . . . . . . . . . . . . . . . . . . . . . . . . . . . . . . . . 41
DIPLOMACY. . . . . . . . . . . . . . . . . . . . . . . . . . . . . . . . . . . . . . . . . . . . . . . . . . . . . . . . 42
The Diplomacy Scroll . . . . . . . . . . . . . . . . . . . . . . . . . . . . . . . . . . . . . . . . . . . . . . . 42
Demeanor – Reading Their Reaction . . . . . . . . . . . . . . . . . . . . . . . . . . . . . . . . . . . . 43
Making Proposals & Declarations . . . . . . . . . . . . . . . . . . . . . . . . . . . . . . . . . . . . . . . 43
Proposal Items . . . . . . . . . . . . . . . . . . . . . . . . . . . . . . . . . . . . . . . . . . . . . . . . . . . 44
Proposal Balance . . . . . . . . . . . . . . . . . . . . . . . . . . . . . . . . . . . . . . . . . . . . . . . . . . 44
MANAGING YOUR EMPIRE . . . . . . . . . . . . . . . . . . . . . . . . . . . . . . . . . . . . . . . . . . . . . . 44
The Faction Overview Scroll . . . . . . . . . . . . . . . . . . . . . . . . . . . . . . . . . . . . . . . . . . 44
The Diplomacy Overview Scroll . . . . . . . . . . . . . . . . . . . . . . . . . . . . . . . . . . . . . . . . 44
The Family Tree Scroll . . . . . . . . . . . . . . . . . . . . . . . . . . . . . . . . . . . . . . . . . . . . . . 45
New Family Members . . . . . . . . . . . . . . . . . . . . . . . . . . . . . . . . . . . . . . . . . . . . . . . 45
The Faction Rankings Scroll . . . . . . . . . . . . . . . . . . . . . . . . . . . . . . . . . . . . . . . . . . 45
The Rosters Scroll . . . . . . . . . . . . . . . . . . . . . . . . . . . . . . . . . . . . . . . . . . . . . . . . . 46
Your Job as Faction Leader . . . . . . . . . . . . . . . . . . . . . . . . . . . . . . . . . . . . . . . . . . . 46
How to Make Money. . . . . . . . . . . . . . . . . . . . . . . . . . . . . . . . . . . . . . . . . . . . . . . . 46
Rebellion . . . . . . . . . . . . . . . . . . . . . . . . . . . . . . . . . . . . . . . . . . . . . . . . . . . . . . . 46
How to Deal with Loyalty & Rebellion . . . . . . . . . . . . . . . . . . . . . . . . . . . . . . . . . . . 47
BATTLES IN MEDIEVAL II: TOTAL WAR . . . . . . . . . . . . . . . . . . . . . . . . . . . . . . . . . . . . . . 47
How Battles Work in Total War . . . . . . . . . . . . . . . . . . . . . . . . . . . . . . . . . . . . . . . . 47
The Battle Deployment Scroll . . . . . . . . . . . . . . . . . . . . . . . . . . . . . . . . . . . . . . . . . 47
Attackers & Defenders
Medieval II: Total War. . . . . . . . . . . . . . . . . . . . . . . . . . . . . . . . . . . . . . . 37
. . . . . . . . . . . . . . . . . . . . . . . . . . . . . . . . . . . . . . . . . . . . . .
48
3
Page 4

How to Win Battles . . . . . . . . . . . . . . . . . . . . . . . . . . . . . . . . . . . . . . . . . . . . . . . . 48
Deploying your Units for Battle . . . . . . . . . . . . . . . . . . . . . . . . . . . . . . . . . . . . . . . . 48
Placing Units During Deployment . . . . . . . . . . . . . . . . . . . . . . . . . . . . . . . . . . . . . . 48
he Battle View & HUD . . . . . . . . . . . . . . . . . . . . . . . . . . . . . . . . . . . . . . . . . . . . . 49
T
The Battlefield View . . . . . . . . . . . . . . . . . . . . . . . . . . . . . . . . . . . . . . . . . . . . . . . . 49
The Battle Control Panel . . . . . . . . . . . . . . . . . . . . . . . . . . . . . . . . . . . . . . . . . . . . 49
The Battle Review Panel . . . . . . . . . . . . . . . . . . . . . . . . . . . . . . . . . . . . . . . . . . . . . 50
States & Effects on Units in Battle . . . . . . . . . . . . . . . . . . . . . . . . . . . . . . . . . . . . . 50
The Battle Mini-map . . . . . . . . . . . . . . . . . . . . . . . . . . . . . . . . . . . . . . . . . . . . . . . 51
The Battle Cameras . . . . . . . . . . . . . . . . . . . . . . . . . . . . . . . . . . . . . . . . . . . . . . . . 52
Morale . . . . . . . . . . . . . . . . . . . . . . . . . . . . . . . . . . . . . . . . . . . . . . . . . . . . . . . . . 52
Routing. . . . . . . . . . . . . . . . . . . . . . . . . . . . . . . . . . . . . . . . . . . . . . . . . . . . . . . . . 53
Factors that Reduce Your Morale . . . . . . . . . . . . . . . . . . . . . . . . . . . . . . . . . . . . . . . 53
Factors that Increase Your Morale . . . . . . . . . . . . . . . . . . . . . . . . . . . . . . . . . . . . . . 53
Ways to Attack the Enemy’s Morale . . . . . . . . . . . . . . . . . . . . . . . . . . . . . . . . . . . . . 53
Fatigue . . . . . . . . . . . . . . . . . . . . . . . . . . . . . . . . . . . . . . . . . . . . . . . . . . . . . . . . . 53
Giving Orders – Moving & Attacking. . . . . . . . . . . . . . . . . . . . . . . . . . . . . . . . . . . . . 53
Multiple Selections, Grouping & Formations . . . . . . . . . . . . . . . . . . . . . . . . . . . . . . . 54
Selecting & Ordering Multiple Units . . . . . . . . . . . . . . . . . . . . . . . . . . . . . . . . . . . . 54
Groups . . . . . . . . . . . . . . . . . . . . . . . . . . . . . . . . . . . . . . . . . . . . . . . . . . . . . . . . . 54
Using AI Assistance . . . . . . . . . . . . . . . . . . . . . . . . . . . . . . . . . . . . . . . . . . . . . . . . 55
Using Formations. . . . . . . . . . . . . . . . . . . . . . . . . . . . . . . . . . . . . . . . . . . . . . . . . . 55
Attacking other Units . . . . . . . . . . . . . . . . . . . . . . . . . . . . . . . . . . . . . . . . . . . . . . . 55
Using Special Abilities . . . . . . . . . . . . . . . . . . . . . . . . . . . . . . . . . . . . . . . . . . . . . . 55
Taking Prisoners . . . . . . . . . . . . . . . . . . . . . . . . . . . . . . . . . . . . . . . . . . . . . . . . . . 56
Battle Results . . . . . . . . . . . . . . . . . . . . . . . . . . . . . . . . . . . . . . . . . . . . . . . . . . . . 56
Prisoner Ransoms . . . . . . . . . . . . . . . . . . . . . . . . . . . . . . . . . . . . . . . . . . . . . . . . . 56
SIEGES & SIEGE BATTLES . . . . . . . . . . . . . . . . . . . . . . . . . . . . . . . . . . . . . . . . . . . . . . 57
Launching a Siege . . . . . . . . . . . . . . . . . . . . . . . . . . . . . . . . . . . . . . . . . . . . . . . . . 57
Victory in Siege Battles . . . . . . . . . . . . . . . . . . . . . . . . . . . . . . . . . . . . . . . . . . . . . 57
Using Siege Equipment & Artillery . . . . . . . . . . . . . . . . . . . . . . . . . . . . . . . . . . . . . 57
Capturing Walls . . . . . . . . . . . . . . . . . . . . . . . . . . . . . . . . . . . . . . . . . . . . . . . . . . . 58
Defending in Siege Battles . . . . . . . . . . . . . . . . . . . . . . . . . . . . . . . . . . . . . . . . . . . 58
Sally Battles . . . . . . . . . . . . . . . . . . . . . . . . . . . . . . . . . . . . . . . . . . . . . . . . . . . . . 58
Using Defensive Fortifications . . . . . . . . . . . . . . . . . . . . . . . . . . . . . . . . . . . . . . . . . 58
HISTORICAL BATTLES . . . . . . . . . . . . . . . . . . . . . . . . . . . . . . . . . . . . . . . . . . . . . . . . . 58
Playing a Historical Battle . . . . . . . . . . . . . . . . . . . . . . . . . . . . . . . . . . . . . . . . . . . 59
Winning a Historical Battle . . . . . . . . . . . . . . . . . . . . . . . . . . . . . . . . . . . . . . . . . . . 59
CUSTOM BATTLES . . . . . . . . . . . . . . . . . . . . . . . . . . . . . . . . . . . . . . . . . . . . . . . . . . . 59
Choosing Conditions. . . . . . . . . . . . . . . . . . . . . . . . . . . . . . . . . . . . . . . . . . . . . . . . 59
Customize Battle . . . . . . . . . . . . . . . . . . . . . . . . . . . . . . . . . . . . . . . . . . . . . . . . . . 60
Selecting Units . . . . . . . . . . . . . . . . . . . . . . . . . . . . . . . . . . . . . . . . . . . . . . . . . . . 60
MULTIPLAYER BATTLES . . . . . . . . . . . . . . . . . . . . . . . . . . . . . . . . . . . . . . . . . . . . . . . . 61
Setting up a Multiplayer Battle . . . . . . . . . . . . . . . . . . . . . . . . . . . . . . . . . . . . . . . . 61
The Multiplayer Lobby . . . . . . . . . . . . . . . . . . . . . . . . . . . . . . . . . . . . . . . . . . . . . . 61
Using Chat . . . . . . . . . . . . . . . . . . . . . . . . . . . . . . . . . . . . . . . . . . . . . . . . . . . . . . 61
Hosting a Multiplayer Game . . . . . . . . . . . . . . . . . . . . . . . . . . . . . . . . . . . . . . . . . . 62
WARRANTY . . . . . . . . . . . . . . . . . . . . . . . . . . . . . . . . . . . . . . . . . . . . . . . . . . . . . . . . 65
CREDITS . . . . . . . . . . . . . . . . . . . . . . . . . . . . . . . . . . . . . . . . . . . . . . . . . . . . . . . . . . 66
4
HAIL COMMANDER! WELCOME TO MEDIEVAL II: TOTAL WAR!
Medieval II: Total War is a truly epic strategy game that puts you in charge of one of the
powers of the Middle Ages, allowing you to lead your soldiers on the field of battle, as well
as plan the expansion of your empire across the Old World. Unlike most other strategy
games,
Total War games separate the action of battle from managing your empire’s affairs.
These are the battle and campaign sides of the game respectively.
Medieval II: Total War offers the complete warfare experience, with realistic battle
mechanics and historical accuracy. You will need to master the same tactics that actual
field commanders used in real combat situations, and you will do it with exactly the same
sorts of troops, armor and weapons that took to the field of battle in the Middle Ages.
This is the time of great leaders such as Richard the Lionheart and Saladin. This is the
time of noble knights, mighty castles, acts of chivalry, religious crusades and deadly
treachery. This is your time to conquer the world!
INSTALLATION
Requirements
Please make sure your computer system uses either Windows XP or Windows 2000.
Medieval II: Total War is not compatible with earlier versions of Windows, or non-Windows
operating systems.
drivers for your DVD drive, sound card and video card to operate at its best. If you have any
problems running the program, older sound or video drivers are the most likely cause.
How to Install
• Before installing, close all other applications.
Medieval II: Total War DVD 1 into your DVD drive. If you have Autoplay enabled, the
• Insert
title screen will display shortly after inserting the DVD into your drive. If Autoplay is not
enabled, simply
to launch the game installer. On the title screen
installation process and then follow the on-screen instructions.
• After
Medieval II: Total War is installed, your computer will install Microsoft DirectX 9.0c
drivers (if you do not already have them). When DirectX installation is complete, you may
need to restart your computer for the new drivers to take effect. For more information on
DirectX 9.0c, see the relevant Help file.
• Now you can run
DVD title screen. Please note that the game requires you to have a
DVD in your DVD Drive at all times in order to play the game.
Installation Key
Your copy of the game comes with an installation code, which should be located inside the
case. When you install the game you will need to type in this key. Your installation key is
unique and without this key, you will not be able to play the game. Please enter the key
exactly as it appears on the case.
Keep your installation key safe and private - do not give it to anyone else as this may
impair your ability to play multiplayer games.
Medieval II: Total War also requires the latest DirectX 9.0c compatible
double-click on My Computer and then double-click on your DVD Drive
Medieval II: Total War from the Start menu or by clicking Play on the
click the Install button to begin the
Medieval II: Total War
STARTING MEDIEVAL II: TOTAL WAR
The Main Menu
• Single Player – This will take you to the SINGLE PLAYER MENU from which you can start a
Grand Campaign, Custom Battle, Quick Battle or play a Historical Battle.
Continue Campaign – This will automatically load your last saved campaign game/auto-save
•
and allow you to continue your conquest.
5
Page 5

• Multiplayer – Accesses all of the multiplayer modes available. For detailed instructions on
getting started with multiplayer, see the Multiplayer Battles section of this manual.
oad Game–Allows you to load saved campaigns, custom battles and battle replay
•
L
movies.
Options – Adjusts the options available for Video, Audio and Game Controls.
•
Quit – Exit Medieval II: Total War and return to Windows®.
•
Any options that you cannot currently access will be “greyed-out” until you can use them.
To quickly quit the game hit the ESC key on your keyboard.
Single-Player Menu
• Tutorial – The recommended way to start playing Medieval II: Total War! This will guide you
through how to play the game.
•
Grand Campaign – This begins your epic conquest of the Old World as the ruler of one of
the great powers of the Middle Ages.
Custom Battle – Fight the battles you want to fight, the way you want to fight them.
•
Choose the place, the conditions, the rules, the armies and create your dream battle
scenarios.
Quick Battle – Instantly teleports you to a battlefield where a pre-assembled army awaits
•
your command. You must adapt your tactics to the troops you have been given
to become victorious.
•
Historical Battle – This gives you a chance to relive the greatest battles of the medieval
era. An opportunity to prove that you yourself could have defeated the superior French
army at the Battle of Agincourt.
Clicking on the “Back” button located in the bottom left corner takes you back to the main
menu. This option will be available in many of the menu pages. Alternatively, you can press
the
ESC key on your keyboard.
savour your victories.
aved gamescan be made throughout different parts of the game. Campaign save games
S
an be created while on the campaign map. Battle replays can be made at the end of each
c
battle. Custom battles have more saving options that will be explained in a later section of
this manual.
Options Menu
• Video Settings – This contains all your game settings in regards to your graphics and
overall look of the game, for advanced visual options
Options” icon under Graphical Quality.
Audio Settings – This contains all your sound settings. Use the sliders to adjust the various
•
sound levels in the game.
Keyboard Settings – This lists all the game shortcut keys for the camera, battles,
•
campaigns and other miscellaneous controls. To save/load your new keys
“Load/Save Settings” button. If you want to revert back to the game default keys click on
“Restore Default Settings” button.
the
• Game Settings – Use the sliders to adjust your in-game camera movement speed - left
being slower and right faster. This menu also contains an adjustment for your game unit
size, which increases or decreases the amount of units your armies have on the
battlefield. Another feature allows the user to play with minimal UI to view more of the
battlefield.
View The Credits – This will present you with the list of the fine men and women that
•
made this game.
Some “Video” and “Audio” settings will be able to be changed via the in-game options
panel. This is accessible by pressing the
ESC key and choosing the relevant menu option.
click on the “Show Advanced
click on the
Multiplayer Menu
• Online Battles – With an internet connection in place, you will be able to test your skill
against other aspiring strategists across the world using the GameSpy
•
LAN Battles – This option will allow you to battle your friends across a Local Area Network
connection. All users will need a copy of
• Player Name – This is your game name/call-sign that is displayed within LAN and Online
battles.
Email Address – This acts as your register to play online and across a LAN.
•
Password – For a secure gaming experience, your password is used to protect your
•
account; this stops other players from using your account online or across a LAN.
DO NOT give out your password; it should be kept private!
• Visit www.totalwar.com – Here you’ll find information, hints and tips for your game,
downloads, and links to our user forums.
Load Game Menu
• Load Campaign – This will load any saved games that you have made while playing in the
Grand Campaign. This will also include your auto-saves that are created at the end of
your last turn.
Load Custom Battle – This allows you to load your saved preset custom battles and your
•
last quick battle. You are able to save your settings for custom battles when setting them
up in the custom battles menu.
•
Load Battle Replay – Loading replays will allow you to watch your victories or defeats.
While viewing your replay file you are unable to affect units in the battle but you are able
to speed up and slow down the battle. This is a great way to learn from your mistakes or
Medieval II: Total War on their computer.
®
engine.
6
HELP, ADVICE & THE TUTORIAL
Learning How to Play
Medieval II: Total War
To ensure that you can focus on ruling your empire rather than reading this manual
repeatedly, there are three features to explain how things work:
• The Tutorial
• Your Advisors
• Help Buttons
The Tutorial – “Hands On” Lessons
The first option in the Single Player Menu takes you to the Medieval II: Total War Tutorials –
The Norman Conquest, a Prologue that comes in two parts. Starting off is the “Battle of
Hastings” where you will receive lessons on how to fight battles in
Then secondly, “The Norman Conquest,” where you will receive hands-on lessons on how to
control your empire in a campaign including two siege tutorials, one for a city and one for a
castle.
It is very strongly advised that you play through both parts of the Tutorial before starting a
Grand Campaign.
Your Advisors
Like any medieval king or sultan, as the ruler of a vast realm you will have advisors to
assist you through your reign in
master on the battlefield compared to planning your strategies across the campaign map,
you have two different advisors to assist you:
Sir Robert is your trusty battle mentor. He will give you advice on how to use the battle
•
controls and, more importantly, alert you to situations that arise in battle that require your
attention. Listening to Sir Robert is a sure step on the path to victory.
•
Lady Gwendolyn is your voice of wisdom when controlling your faction on the campaign
map. She can advise you about settlements, r
provides a very deep strategy experience with countless options.
Medieval II: Total War.
Medieval II: Total War. Since there are very different skills to
uitment, your empir
ecr
e, diplomacy, religion
7
Page 6

and anything else you deal with in the
strategic side of
Receiving Advice
When an advisor has something important
to tell you, their portrait will appear on a small panel in the top left corner of the screen.
The message will also appear as text in a speech bubble beside their portrait. Sometimes at
the end of that speech bubble is a checkbox –
advice on that topic again in future. You can reset all the advice being blocked in the
, by hitting the ESC key during the campaign.
Settings
The controls that surround the advisor’s portrait are:
The
being offered.
Click on this button to have the advisor demonstrate how to carry out an action in the
game. They’ll take you through a step-by-step process so you can see how a part of
the game works.
This
text only, or speech only.
The X button dismisses an advisor, closing the Advisor Panel. The panel will return
when new advice is being brought to your attention.
Advice Preferences
You can adjust the amount of advice you receive before starting a Grand Campaign or
during a campaign in the Game Options. You will find these settings when starting a Grand
Campaign.
• Turn Advice Off - Stop the advisors from appearing on screen at all. The
only exception is when you actually request help or advice.
• Only Vital Info – Your advisors will only give you warnings and vital status updates.
• Get Me Started - Your advisors will give you enough help to play the game, but give you
room for your own experimentation.
• Tell Me Everything – Your advisors will provide detailed instructions and
explanations of most aspects of the game as you play.
Asking for Advice
The Settlement Scroll has an icon of the advisor that you can click to
receive a construction or recruitment suggestion. If you are unsure of
what to recruit or build next in a settlement, you can
for help. The advice given will be determined by whether the player has
selected the
Using Help
Throughout Medieval II: Total War you’ll see a “?” button on scrolls and information
panels, typically in the top-right corner.
about the relevant part of the game – This help will arrive via your advisor.
Medieval II: Total War.
click on it if you wish to avoid hearing
magnifying glass button will show you the location that is relevant to the advice
Advisor Speech & Text button toggles between offering advice as speech & text,
click on this button
Construction Panel or the Recruitment Panel.
Click on this to bring up help information
CAMPAIGNS
The Grand Campaign
The Grand Campaign is the “main game” of Medieval II: Total War, where you not only lead
your armies into battle, but also manage an entire empire. These two things are handled
quite separately – You take your time planning where to send armies and managing the
affairs in your realm. However on the field of battle, you need to react swiftly and decisively
to any threats or opportunities.
Your overall goal in the Grand Campaign is to lead your people to become the most
dominant empire in the world, seeking to control a huge area of land, and either have
control of a certain region or outlive a particular opposing faction. Victory in the Grand
8
Game
Campaign is a truly epic achievement – they generally take
days, or even weeks, to complete.
tarting a Grand Campaign
S
From the Main Menu, select Single Player, then select
Grand Campaign. Before you start playing, you must select
a faction. This is also where you decide on any special
settings you’d like for this particular campaign. Once
you’ve adjusted the settings for the campaign you are
about to play,
corner of the screen to begin!
The campaign settings & options include:
• Campaign Rules: Choose between short and long victory conditions. Conditions vary
from faction to faction.
• Advice Level: Determines amount of advice given in the campaign.
• Difficulty: The higher the difficulty the more effective AI-controlled factions are,
and the more other factions will take offence to diplomatic transgressions.
• Battle Difficulty: The higher the difficulty, the more effective AI controlled opponents
are in battle.
• Manage All Cities: Selecting this will allow you to manage cities without having a
governor in residence.
• No Battle Time Limit: Selecting this will remove the time limit from campaign battles.
• Show CPU Moves: Selecting this will track the movement of armies and characters
visible to the player during the CPU factions’ turns.
click on the “Next” button in the bottom-right
PLAYING THE GRAND CAMPAIGN
How to Win a Campaign
Your main goal in the Grand Campaign is to expand your empire by conquering regions of
land, either near or far. Your secondary goal will be to either take control of a certain
settlement or wipe out an opposing faction. That secondary goal will depend upon whether
or not you selected to play a long (standard) or short campaign.
Let’s look at understanding what’s in front of you at the
start of the campaign to get you on the road to
conquering the world!
The Campaign Map View
The first time you play the Grand Campaign, your
campaign advisor Lady Gwendolyn will give you a tour of
your lands, and show you some ideal targets to strike at
first. After her tour, you will have control of the campaign
map view yourself, and this is your basic window to the
Medieval II: Total War.
world in
You will see that the campaign map has all sorts of climates and terrain types over it and
that the lands are divided into different regions, marked out by borders. The colors of the
borders show you which faction controls the land.
Firstly, these are the following things you will see around the campaign map as you play
Medieval II: Total War:
Settlements. These appear as either cities or castles on the map, with a name plate.
•
The amount of filled color on the banner above the settlement indicates the power of
the force garrisoned within it.
Armies. These appear as a military figure with a banner above them. The amount of
•
filled color of the banner above the
beside an army represent the experience of the General leading it.
Agents. These include all the non-military character types such as Spies, Assassins,
•
Priests, Merchants, Diplomats and Princesses. Some types of agent are always controlled
by the CPU, such as
Resources. Around the map you will see various trade resources out in the countryside.
•
These show what goods can be exported from the region they are in and also where
Heretics, Witches and Inquisitors.
army indicates its overall power. Command stars
9
Page 7
Merchants can stand to earn trade bonuses.
•
Sea-Crossing Points. At various points around the map there are green arrows that
represent points land-based armies can cross without a fleet.
ark Areas.These represents areas of the map that your faction cannot see, due to not
D
•
having a character close enough to show who or what is there. The completely black
areas are totally uncharted.
Moving the View
You can move your view of the campaign map in the following ways:
• Move the mouse cursor to the edge of the screen to move the view in that direction.
• Use either the
view in the appropriate “compass point” direction.
• Use your mouse wheel (or
and out.
Click on the mini-map (bottom left of screen) to instantly move the view to that
•
location in the world.
You can also get more information about what you see in the area you’re viewing by:
• Mousing-over a
• Right-click-and-hold over the map without a unit or settlement selected to get
confirmation of what sort of terrain is at the cursor’s position.
The Control Panel
In the bottom right of the screen you will find the Control Panel – This is where the
basic controls and information for the campaign can be accessed.
•
• Selection Information & buttons. The currently selected army, settlement or
•
• Construction button. Click on this when a settlement is selected to open up a
•
•
The Review Panel
In the middle of the bottom of the screen you will find the Review Panel – This is where you
can see what units, buildings, agents and fleets are in a given location. This is where you
will transfer units in and out of your armies.
At the top of the panel you will see the Review Panel Tabs:
Army/Navy Tab. Click to see what units are in the currently selected army/navy
•
or settlement. Rightfaction’s armies.
City Tab. Click to see what buildings are in the currently selected settlement. Right-
•
click
Agents Tab. Click to see what non-military characters are in the currently selected
•
army or settlement.
faction’s agents.
•
Fleets Tab. Click to see what ships are in the currently selected fleet or settlement.
arrow keys or the 1, 2, 3 & 5 keys on your numeric keypad to move the
+ & - keys if no mouse wheel present) to zoom the view in
character or object to receive more information in a pop-up tooltip.
Faction Shield button. Click on this to open a panel that has information on your
faction, your relations with other factions, and if you’re playing as a Catholic
faction, information on
character will have its name displayed here.
of the information to cycle through selectable settlements and characters.
End Turn button. Click on this button to end your turn, while the number beneath
it shows the current
scroll with its construction options.
outside of a settlement to build a
Recruit button. Click on this when a settlement is selected to open a scroll with
its recruitment options.
settlement to hire mercenaries.
Finances button. Click on this to bring up your faction’s Financial Details Scroll.
The number beneath it shows your current
click to open up the Military Forces Roster to list all of your
to open up the Settlements Roster to list all of your faction’s cities and castles.
Right-click to open up the Agents Roster to list all of your
the Pope.
Click on the buttons on either side
turn number.
Click on this with a General selected
fort or a watchtower.
Click on this with a General selected outside of a
treasury amount.
10
he Review Panel Display Areais the large area below the tabs. This display area changes
T
ased upon which of the tabs you have selected. For example, if you have the
b
selected, you will see military units. If you have the “City” tab selected, you will see the
buildings within a settlement.
The main way to use the review panel area is to
Information Scroll on that unit, building or character.
get an
The Mini-map Panel
In the bottom left of the screen you will find the Mini-map
Panel
– This is where you can quickly look to see what faction
owns each region that your own faction can presently see. It is
also where you will find the
•
+ and - buttons. Click on these two buttons to zoom the mini-map display in or
out accordingly.
•
Missions button. Click on this button to open up the Missions Scroll. There you
will find a record of all current missions your faction is undertaking (see below).
The Mini-map. Click on the panel to center the campaign map view on
•
that location.
Starting Play - Your First Turn
The part of Medieval II: Total War that is played on the campaign map is turn-based –
simply meaning that each faction in the game takes turns moving its armies and managing
its settlements and affairs before the next one does. This means you can take as long as
you like to plan out your moves on the campaign map; there is no time limit at all.
Each turn you will usually do the following things (all detailed in later sections of the
manual):
• Check your
• Move armies and fleets, attack with them
• Move
• Recruit
• Select
• Check that your settlements are free of problems
• Work towards completing a
You will also sometimes have the need to do other things like:
• Engage in
• Hire
Upgrade the armor or weapons of your units
•
Repair buildings and retrain units
•
• Combat
Before Ending Your First Turn
There are lots of things you can do, even in the first turn of the game. Details on all of your
options are covered in the following sections of the manual, but here is a quick overview of
wise things to do before considering hitting the
• Look for idle armies and agents that you may wish to use this turn. You can do this
quickly by using the
• Check for settlements that have an empty construction queue or recruitment queue.
You can do this quickly on the
• Look for foreign
ensure that you are prepared for what they might do.
event messages
agents, use their skills where appropriate
units in settlements
buildings to construct in settlements
diplomacy with other factions
mercenaries outside of a settlement
Heresy
armies and agents that could threaten your settlements or armies, and
Missions button.
mission
selection buttons on your Control Panel.
Settlement Roster Scroll.
right-click on any card in the panel area to
End Turn button:
Army” Tab
“
11
Page 8
EVENTS & MISSIONS
What are Events?
edieval II: Total War,events are reports relating to things happening within your faction,
InM
or news from around the world. These events arrive as square icons that drop down the left
side of the main display area, which you then
could be anything from information about a declaration of war, news on a natural disaster
or announcements of royal weddings. There are literally hundreds of events in
Total War
To use event icons:
Your First Event and Mission
The first event icon that appears when you start a campaign is a mission –
However ignoring them means failing them, and sometimes there is some sort of penalty for
failure. You can always check on your current missions by
the corner of the
Who Gives Missions?
Missions can come to you from several sources, and they may vary in importance to how
you’re managing your faction.
The sources of missions are:
Mission Rewards & Penalties
When you complete a mission, there is always a reward that comes with it. Not all missions
have a penalty for failure, but any mission that does will have the penalties detailed in the
Missions Scroll.
It is always wise for you to assess what the rewards or penalties will mean for your current
plans for your faction, and what effort will be required to complete the mission. If
something happens that would prevent you from being able to complete the mission, it will
be cancelled – this does not count as failure.
Rewards may include things such as:
to face as a ruler in the medieval era.
Click to open an event icon to see the full description of whatever has
•
happened.
Right-click on an event icon to dismiss it.
•
That mission will be given to you by your Council of Nobles to take control
of a nearby Rebel settlement within a certain number of turns. All missions
have a time limit.
Important Tip: Completing missions is always optional.
Mini-map Panel to view the Missions Scroll.
Council of Nobles. These missions are essentially advice from the nobility of
•
your realm as to what they believe would be in the best interests of your people.
Guilds. Guilds are essentially trade powers and knightly orders that will interact with
•
your faction throughout the game, depending on what you build and promote in your
realm. Their missions will typically involve their “trade.”
The Pope. Catholic factions will receive orders from the Pope. As you would expect,
•
he takes your success or failure in the missions he gives personally.
Faction Heirs. You may be approached by the successor to another faction’s
•
throne, asking that you help speed up his ascension to power by killing his
current Faction Leader!
• A financial reward
• A bonus
• Improved relations with another faction
unit
12
click on to get the full message – Which
clicking on the Missions button in
Medieval II:
Penalties may include things such as:
•
Excommunication from the Catholic Church
• Having an
A deterioration of relations with another faction
•
Faction & World Events
Most messages are going to be reports about things that have happened in your faction,
such as what units were recruited, what buildings were completed, family members that
died or a mission to undertake.
You will also receive news of diplomatic happenings, such as declarations of war, or an
announcement that some foreign power has become the richest kingdom in the world.
Reading these messages will help ensure that you are aware of things going on both within
your borders, and far beyond them as well.
Historical Events
Sometimes a message will be about a discovery in the world, or an event that heralds new
possibilities or problems. An example would be the discovery of gunpowder, which is
arguably the most important advance in the history of military technology.
Some historical events will just prove to be amusing, interesting or terrifying, but ensure
that you read these messages to be informed of new opportunities that arise as the game
progresses.
Inquisitor sent to your lands
CHARACTERS
Every figure seen on the campaign map is a “character,” and they fall into two basic
classes: military characters and agents. Using these characters will be explained in the
Using Armies and Using Agents sections of this manual, but here you will learn their role
and how to read information on a specific character.
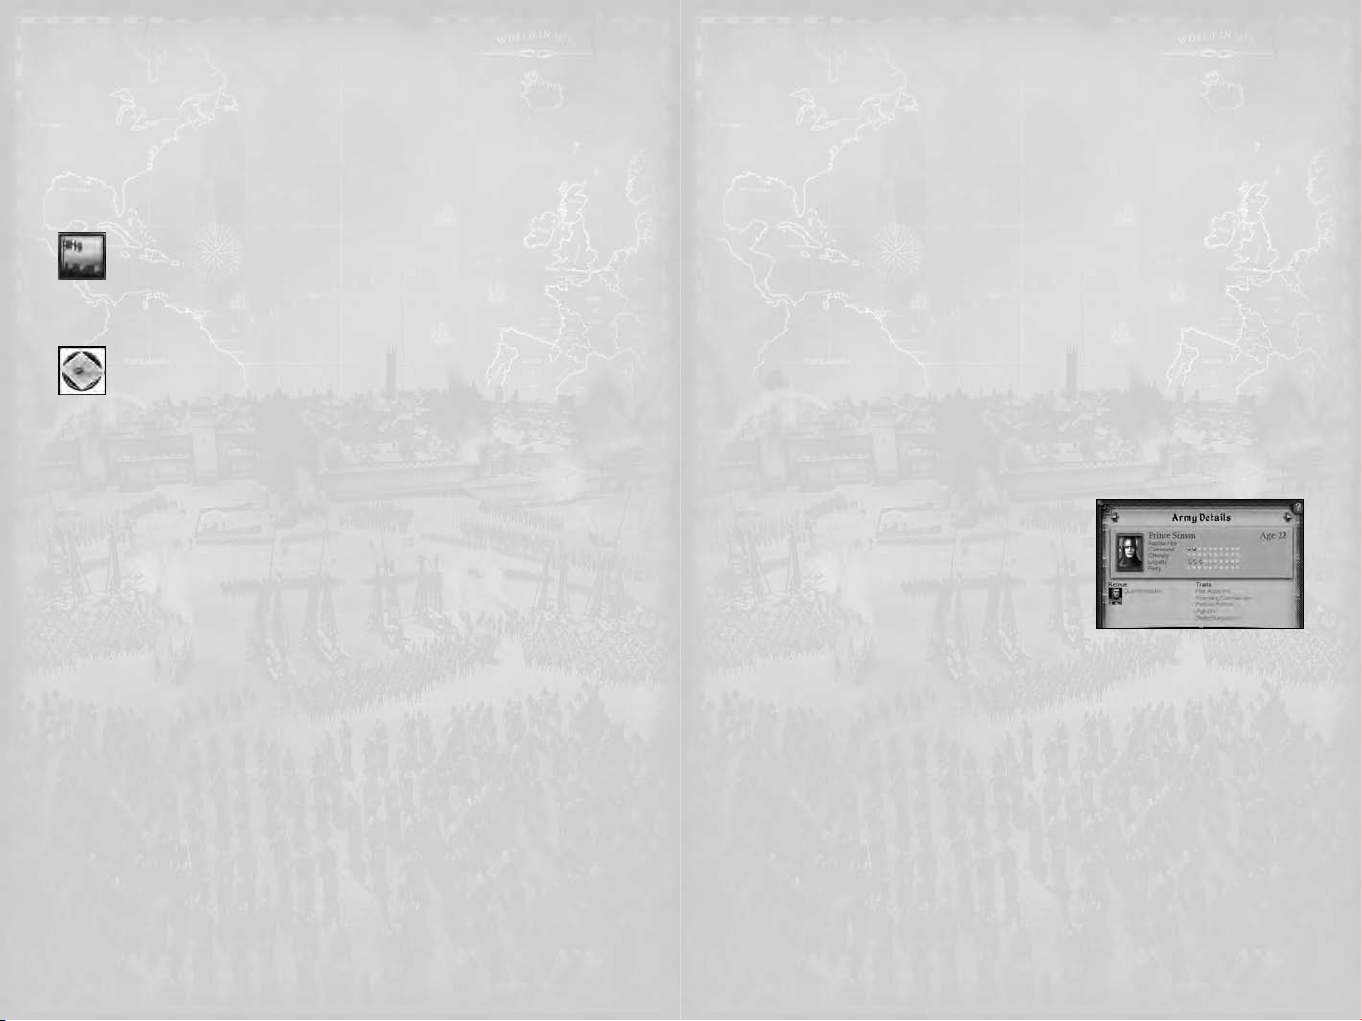
Viewing Character Information
When you double-click on any character on the
campaign map, or
Review Panel, you call up a scroll that has information on
the selected character. Here you can access all the key
information about this individual.
Character Information Panel details include:
The
Name: The character’s name, which may alter
•
depending on their title, or an epithet they are known by.
•
Age: The character’s age in years. Nobody lives forever.
Character Class: This shows what type of character it is.
•
•
Attributes: The names of the attributes are listed on the left, with the meters to
the right filling with images as the attribute is higher. More on attributes below.
Retinue: The personal followers and items that go wherever the character does.
•
These affect the character’s attributes.
•
Traits: Traits can be everything from physical characteristics, to a representation of
experiences and natural abilities. These can be positive or negative, and they affect the
character’s attributes.
Military Class Characters
These are the characters that appear as soldiers or ships on the campaign map.
Their use is covered in
Generals
Available to: All factions
Role: Commands armies and governs settlements
Generals are the most important characters in your faction, as they are the only ones who
can recruit mercenaries, build field structures and govern settlements. They also have a
positive effect on troops being led into battle. The way you use them will greatly
right-click on their card in the
Using Armies.
13
Page 9

determine what sort of leaders they will become and what their strengths and weaknesses
will become.
Generals that weren’t bribed to join your faction are considered to be a part of your
Family Tree” and can become successors to the throne of your empire.
“
Captains
Available to: All factions
Role: Temporary commander
When an army has no General a Captain from within one of its units will step forward to
lead the army. Captains do not earn traits from accomplishments in battle unless they are
promoted to a General – something that may be offered to you during play. Armies led by
a Captain are more prone to bribery from foreign Diplomats.
Admirals
Available to: All factions
Role: Naval commander
Admirals command a fleet of ships in battle, and can develop their combat ability in the
same way that a General can – by winning battles. They cannot govern a settlement like a
General; they are a purely naval commander.
Agent Class Characters
These characters are specialists that perform tasks away from the battlefield. Mastering
their use can help to ensure that aspects of your faction’s workings such as religion, trade
and diplomacy all run smoothly.
Priests / Imams
Available to: All factions
Role: Preaching and Denouncing
Priests and Imams are religious men who ensure that their people’s faith is spread
throughout their lands. They are also the only characters aside from assassins that are
capable of dealing with Heretics, except they perform a
attack.
Diplomats
Available to: All factions
Role: Diplomacy
Diplomats are refined men who are sent to negotiate with foreign dignitaries.
Although Princesses can also enter diplomacy, only a Diplomat can attempt to bribe a
foreign army, settlement or character, and are thus extremely useful for wealthy factions.
Princesses
Available to: Catholic and Orthodox factions
Role: Marriage and Diplomacy
A Princess is a member of the ruling family of her faction, whose main ability is to
marry a General. This can be as part of a marriage alliance to a Faction Heir, an attempt
to “steal” a foreign General or to marry someone within her own faction. She can
represent her people as a Diplomat.
Spies
Available to: All factions
Role: Espionage and Propaganda
Spies are intelligence operatives that are capable of moving undetected by foreign forces.
Their main task is to infiltrate foreign settlements, where they will report on the buildings
and garrison behind the walls. When within an enemy settlement, Spies inspire unrest in
the population, and may also help disable wall defenses. Finally, Spies are also the most
effective character at spotting other hidden agents.
heresy trial, rather than a physical
14
Assassins
Available to: All factions
Role: Elimination and Sabotage
ssassins are similar to Spies in that they have a good chance of moving and operating
A
undetected, except that their job is to directly target a person or building for elimination.
Assassination attempts are considered an act of war.
Merchants
Available to: All factions
Merchants are men who serve your people by traveling to far off lands to find resources
and establish a lucrative trade route back to your capital. Merchants can attempt to put a
foreign Merchant out of business – however this does not count as an act of war, nor does
entering foreign lands.
Character Attributes
The attributes shown on the Character Information Panel are your most direct means to
assess your characters’ weaknesses.
Command
Used by: Generals and Admirals
This is a measure of a General’s ability to lead troops in battle and the higher his
Command rating, the better the morale of his troops and the greater his ability to
rally his troops who are routing (see
Piety
Used by: Priests/Imams and Generals
This shows how devout a character is seen to be. For Generals this affects the happiness
of settlements he governs and his chances of surviving an inquisition. For Priests, it
affects how effectively they convert the populace to their religion, as well
as their chances of denouncing a Heretic or Witch.
Chivalry / Dread
Used by: Generals
This shows how honorable or dishonorable this man’s actions in both rule and war may
be. Letting prisoners go free, showing bravery in battle and abstaining from taxing the
people harshly are examples of chivalrous behavior. Executing prisoners, exterminating
large numbers of people and ruling oppressively are examples of dreadful behavior.
Dread generals can cause fear to inspire a morale penalty in their enemies, while
chivalrous generals can inspire a morale boost in their own troops. Chivalry and
dread also have an effect upon the population of a settlement governed by a General
with either attribute.
Loyalty
Used by: Generals
This shows how seriously this character honors their role of servitude. During the
course of
loyalty of your Generals, and the higher this attribute, the more likely they shall
honor their pledge to you.
Authority
Used by: Faction Leader
This shows the amount of respect commanded by a
with high Authority is more likely to retain the loyalty of his Generals, while a leader with
low authority is more likely to face rebellion.
Charm
Used by: Princesses
This shows how effective this woman is at swaying those she deals with. The higher a
Medieval II: Total War there will be numerous situations that will test the
Routing).
Faction Leader. A Faction Leader
15
Page 10

princess’s Charm, the more effective she is in diplomacy, and the more likely she will be
to successfully convince a General to marry into her family.
nfluence
I
Used by: Diplomats
This shows how effective this man is at convincing others to accept diplomatic
proposals during negotiations. The higher a Diplomat’s Influence rating, the more
effective is his diplomacy.
Subterfuge
Used by: Spies and Assassins
This shows how effective this man is at performing acts of stealth and espionage.
For Spies it affects their ability to infiltrate an enemy army or foreign settlement
undetected. It also determines how much unrest they cause via propaganda once
behind the walls, as well as their chances of opening the gates in a siege.
For Assassins it effects their ability to successfully eliminate a target marked for
assassination or sabotage. Both Spies and Assassins use
unseen from other characters, as well as spot hidden foreign agents.
Finance
Used by: Merchants
This shows how efficient this man is with money and trade. It affects a Merchant’s
ability to acquire a foreign Merchant’s assets, and also the amount of income generated
from standing on a trade resource.
Improving Your Characters
As your characters do things in the campaign, they will begin to develop traits and gain
followers as they either succeed or fail. Sometimes they will develop traits just as a result
of sitting around or being in a certain environment.
With both logic and observation, you should be able to see a connection between what you
do with your characters, and what sort of traits they develop. Leave a General in a town
with a big tavern forever and he’ll eventually turn to drink. However, pro-active behavior is
the way to develop positive traits and gain more useful followers.
There are literally hundreds of things that can lead to receiving traits, followers and items.
Here are some examples of them:
• Hereditary traits, both through bloodline and the parents’ beliefs.
• The outcome of a battle
• Personal involvement in battle
• Getting married
• Succeeding or failing at agent missions
• How you have Governors manage their settlements
• Completing certain missions
• Building certain buildings
• The environment the character lives in
Traits
Traits can come in several different forms. It is important not to think of these as abilities
earned but side effects of the character’s life up until this point. Your involvement with
your characters’ traits comes in making decisions as to where they will be and what
they will do.
If your characters develop negative traits, the best way to deal with them is to either
acknowledge it as a weakness of the character or attempt to redeem themselves with
positive actions.
Examples of types of Traits:
• Physical characteristics
• Personal beliefs
Subterfuge to remain
16
• Leadership styles
• Experience in an activity
• Insanities
Fears and hates
•
Retinue
A character’s retinue is their entourage of followers, as well as their personal belongings
that they keep with them on their journeys. Some of your followers and items can be
transferred from one character to another by
them onto the portrait of another character. Of course, there are some items that characters
will not part with, and there are followers who simply will not be told who they will
accompany.
clicking on the item or individual and dragging
USING ARMIES
Total War Armies
Your armies are your primary weapon in the Medieval II: Total War campaign. Each army
contains 1-20 military units that move and fight together. When you select an army on the
campaign map, you will immediately see what units it contains in the
Things to know about armies on the campaign map:
•
Click on an army on the campaign map to select the entire army.
• Any gold stars to the left of the army show the Command rating of the general in
charge (0-10); the more stars, the better the
• The banner color and symbol shows the owning faction.
• The darker color that “fills” the banner from the bottom shows the strength of the
army. The stronger the army: the more of the banner will be filled from the bottom.
• There are certain things that armies led by a
General can hire mercenaries and build fortifications.
Who Commands in Battle?
The commander of an army is determined by the following rules:
• The General with the highest Command rating is the Commander.
• The only exception is when the Faction Leader is present, he is always the
Commander, regardless of his Command rating.
• The commanding General’s unit card will be marked with a gold star.
We will cover commanding armies in battle in
covers forming armies, and using them in the campaign map.
Unit Types
There are several different classes of unit on the battlefield, and it is vital to understand
the basic role that they play. Some types of unit are very effective against other types. It is
best to know this before you begin recruiting units.
The basic types are:
Light Infantry. These are troops who are lightly armed and armored, and are best
•
used in support roles to attack or defend in unison, rather than be used in an
important position in a front line.
Heavy Infantry. These are troops who are heavily armed and/or armoured and are
•
generally good at engaging other infantry.
Spears. These troops are specialized infantry armed with lengthy pole-mounted
•
weapons that are ideally suited to forming a defensive line, especially against cavalry.
Their role makes them vulnerable to missiles.
Missile. These are troops who are armed with ranged weapons that can strike enemy
•
targets at a distance. They are usually very vulnerable in hand-to-hand combat.
•
Light Cavalry. These are mounted troops who are somewhat lightly armed and armored,
but extremely swift and mobile. They are excellent at chasing down routing enemies,
but poor against spears.
General is at leading in battle.
Captain cannot do. Only armies led by a
Medieval II: Total War Battles – this section
Review Panel.
17
Page 11
• Heavy Cavalry. These are mounted troops who are well armed and armore and used as a
strong, fast attacking force. They are poor against spears.
•
Missile Cavalry. These are mounted troops who are armed with ranged weapons such as
ows. They are generally poor at melee combat but can hit and run, making difficult
b
targets.
•
Artillery. These are mobile war machines or cannons that can be used as powerful
ranged weapons on both enemy troops and settlement walls and defenses. They are
poor at defending themselves and typically require defending infantry to protect them.
Forming Armies
To form an army, you need to either recruit new troops in a settlement or hire mercenaries
with a general outside of a settlement. Troops can be pulled together from multiple places
and merged together to form a larger, more capable army.
Tips on how to have a balanced army:
• Always try to have a mix of infantry, spears, missiles and cavalry. This will ensure you
have a unit to counter whatever the enemy sends at you.
• When first building an army, start with infantry. Most missile, cavalry and artillery units
are poor at standing their ground without help.
Tips on how to produce an army for a special purpose:
• If you’re creating a
is more reliable than building siege equipment during siege.
• If you’re creating a defensive garrison, missile units are extremely effective from walls
and can be defended with little infantry.
• If you’re looking to capture prisoners, ensure you have multiple cavalry units to make
chasing down routers easier.
Moving Armies
Select an army by clicking on it. Once selected, there are numerous ways to move the army,
some involving attacking or merging with other armies:
• The highlighted area shows every place in the game world that the army can
move during the current turn. All actions (moves and attacks) cost movement
points, and as these are used the distance an army can move for the remainder
of the turn will reduce.
Right-click on the spot where you want an army to go. A large arrow will show
•
the proposed route for the army.
Right-click-and-drag to show the route changing for an army as its destination
•
changes.
Right-click on an enemy or neutral army or settlement to attack it. The cursor
•
will change into a sword to show that an attack is possible. Attacking a neutral
army or settlement is a declaration of war on that faction. See
Medieval II: Total War
Right-click on another of your faction’s armies (not an ally!) to merge the
•
selected army into the stationary one. There are further details about merging
armies that are covered below.
Right-click on a friendly settlement (not an allied settlement) to merge the army
•
with the settlement garrison (if any). The army will move into the settlement,
and if the army has a General and the settlement doesn’t have a Governor, then
the General will be automatically appointed as the new Governor. See the
Running Settlements section for more information.
• Red highlighted areas are in enemy zones of control, which means that they are
adjacent to an enemy army. Movement in red highlighted zones is restricted.
Armies cannot move directly between red spaces on the map. They must move
away from their enemies (or neutral armies) before marching back into contact.
Right-click beyond the green highlighted area to set a multi-turn movement
•
order. The route will be shown as normal, except with a multi-colored line, with
siege army, include artillery units capable of destroying walls. This
Battles in
to learn about how to command in battles.
18
each color representing one turn’s movement. The army will move as ordered
unless its path is blocked or is given new orders.
• Armies that can move no further will have no highlighted zone around them
hen selected. They will kneel to show their resting state.
w
• Armies are also shown as kneeling figures when they are hidden in woodland
terrain and ready to ambush any passing enemies.
Merging Armies
Move an army onto another friendly (same faction)
army or settlement to merge the two forces. It may be
useful to merge units before attempting to merge two
armies. You can’t merge units at the same time as
merging armies.
• The general with the highest Command rating
is always in charge of a merged army. When an
army led by a Captain is merged with a General’s
army, the Captain is reduced to the ranks
and disappears.
• If fewer than 20 units in total (in both armies)
are involved, then the merging process is completely automatic.
If there are more than 20 units (total, in both armies) involved in the merging, then the
Merge Armies Scroll will appear.
• Select the units in either army that you wish to move to the other army. You can make
multiple selections holding down the
• Some units may be greyed out. These have already moved as far as they are able this
turn, and therefore cannot move (merge) to another army.
•
Click on the transfer arrow button in the middle of the scroll once you’re happy with
the army compositions. You can also drag-and-drop units between the two armies on
this scroll.
• Once you are happy with the merged armies,
right hand corner of the scroll.
Splitting Armies
There will be times when you need to take some units out of a large army or garrison and
send them elsewhere – This is splitting armies.
• Select the units you wish to move using their unit cards in the
center of the
• You can use the
Hold down the
all the units of that type.
Move the cursor to the spot you want the selected units to go, then Right-click to order
•
them to move there.
• You can also drag-and-drop the selected units from the review panel to an appropriate
location in the game world.
• In both cases, the new army that is breaking away from the original one will appear
next to the force it is leaving and march to the new location.
Merging Units
After battles, there is a strong chance that you will have taken some casualties, and
not all of your units will have their full compliment of men in them. Even if a unit has only
a few men remaining, it will still take up one of your 20 unit slots, and may be too small
to engage effectively anymore. To deal with this, you can merge two units of the same
type together.
•
Click-and-drag one unit onto another in the Review Panel, and the two will merge. The
men in the unit being dropped are added to the target unit.
Control Panel at the bottom of the screen.
SHIFT and CTRL keys while selecting to make multiple selections.
CTRL key and double-click on a unit card in the review panel to select
CTRL key as you click.
click on the “tick” button in the lower
Review Panel in the
19
Page 12

• The dragged unit may vanish if all its men are used in this way. Any “spare” men
remain in their original unit.
• You can auto-merge depleted units in an army by pressing the
Important Tip: Be aware that the experience rating of the two units being merged will be
averaged out in the process.
Unit Experience
The number and color of the chevrons on the unit card in the Review Panel show unit
experience. A unit with experience can be relied on in combat, and will usually beat an
otherwise identical unit. Chevrons can also be gained by units under Generals with high
Command values or as a result of good training facilities (buildings).
No chevrons indicate that the unit has little or no battle experience.
•
Bronze chevrons show that the unit has some experience in battle.
•
Silver chevrons show that the unit has much battle experience and is composed of
•
highly experienced soldiers.
Gold chevrons show that the unit is full of veterans of field warfare who can always be
•
relied upon.
Hiring Mercenaries
An army led by a general can hire mercenaries when outside of a settlement.
Using mercenaries can be somewhat expensive, however they offer you immediate
support away from a friendly base.
Click on the Recruit Mercenaries button in the Control Panel (it replaces the Unit Training
that shows when a settlement is selected). When there are no mercenaries available
button
the button is greyed out.
• This brings up the
available mercenaries.
Click on any mercenary unit to select it and add it to the “queue” of
•
mercenaries to be hired. You can deselect a mercenary unit for hiring by
clicking on it once again.
• Right-click on a mercenary to bring up details about the unit.
Click on the “Hire all queued units” button at the bottom of the scroll.
•
Things that affect what sort of mercenary units are available:
• The region of the world the general is in.
• Recruiting on the coasts allows the hiring of mercenary fleets.
• Being on a Crusade or Jihad - some units will only join a General on a religious cause.
Building Forts & Watchtowers
Only an army under the command of a General can build watchtowers and/or forts.
When this is not possible this button is greyed out.
Clicking on the Construction button brings up the Field Construction Scroll.
•
From here you can select either a
associated with it.
Watchtowers are permanent structures that you can erect in your lands to give
•
your faction a better view of incoming foreign armies and characters.
•
Forts require a garrison to remain in play. If it is empty and does not have a
garrison at the end of any turn it will fall into disrepair and be removed from
the campaign map.
Forts do not actually belong to any faction. If one faction constructs a fort and
•
leaves it empty, another faction’s forces can move into the fort and take it over
– be aware this is a declaration of war.
•A
General can build as many watchtowers and/or forts as you want in a single
20
turn, limited only by movement points (his ability to move to a new site).
Army Details Scroll, showing the General and the list of
Watchtower or a Fort - Each has a cost
M key.
Forts can be extremely useful in defending strategic “choke points” such as mountain
passes: an enemy will have to lay siege to the fort before he can advance. It’s even possible
to build a “wall” of forts to isolate an area.
Picking Your Ground
An important thing to note about the campaign map in Medieval II: Total War is that the
terrain that you see is very much a reflection of what you’ll see in the battle map when two
armies do battle there. If you position your army on hills and an enemy army attacks you,
you will have the opportunity to position your troops on hills – a reliable defensive tactic.
Some unit types are less effective in certain terrains, while others are more effective. For
example, a unit of archers can fire further when shooting from higher ground, but are very
ineffective when firing at a target in the woods.
Finally, positioning troops next to a friendly or allied army will see them join as
reinforcements during battle should one ensue. See
Tip: When you have no unit or settlement selected, right-click-and-hold on the campaign
map to check what the terrain type is at that point.
Setting an Ambush
When an army is moved into “Woodlands” terrain, it can become hidden from the enemy –
This is considered being placed for an ambush in
army will attack any enemy army that moves next to them, without giving them an
opportunity to position their forces before battle.
Attacking with an Army
When you have an army selected right-click on the enemy army or settlement you wish to
attack:
• The most important piece of information is the
the scroll. When you move the cursor over the crossed swords you can see the
odds for the coming battle.
Battle Deployment Scroll will appear. This gives a breakdown of your forces
• The
and the enemy arrayed against you.
• Reinforcements from adjacent armies are also shown here.
Using Reinforcements, below.
See
•
Click this button to fight the battle for yourself, taking control of your
units on the battlefield. This gives you the most control and is – we think – the
most fun!
Click this button to have the CPU fight the battle out automatically for you and
•
give a result. Casualties may be heavier than if you fight the battle for yourself,
and you cannot protect your
• You can cancel your attack. When you do this your army will withdraw to a
nearby location.
• If you’re attacking a settlement, then this is dealt with in the
Sieges & Siege Battles section of the manual.
Using Reinforcements
Reinforcements can join an attack. When a battle is auto-resolved, their strength is simply
taken into account. When a battle is fought out in detail, they will actually join the battle in
some context:
• When one army attacks, any other friendly army (yours, or belonging to an ally)
that is adjacent to the army or settlement under attack can be reinforcements.
• The army that attacks is the one that you control directly. Make sure that your
forces are all in the red zone of control of an enemy army, or cancel the attack
and then move up another army to act as reinforcements before entering battle.
General from harm, so he may be killed.
Using Reinforcements below.
Medieval II: Total War. The ambushing
Balance of Power in the center of
21
Page 13

• Any adjacent army that is commanded by a General or a Captain can be
placed under AI control on the battlefield by
“AI control” icon. This will see that army arrive as one complete force on the
the
attlefield.
b
• Any adjacent army that is not under AI control will give the player total control
of the reinforcements that arrive. Remembering that there is a limit of 20 units
per army, reinforcements will appear as and when a “slot” in your army is
available, either through casualties or because a unit has run away.
• Reinforcements on the battlefield always appear from a direction that matches
their position on the campaign map.
Multiple Attacks
You will notice that most times when you defeat an enemy army that they retreat a few
steps rather than vanish. It is very important to be aware that your armies are capable of
attacking multiple times per turn, provided that they have the movement points required to
do so. Thus instead of allowing a defeated army to scamper away to rebuild itself and
bother you later, you can move in to attempt to wipe the force from the map.
clicking on the checkbox next to
USING FLEETS
Total War Fleets
The naval ships that you see on the campaign map seas are fleets. Each fleet has an
Admiral, who has his own Command rating for combat at sea. Fleets engage each other
in the same way that armies do, only that the battle is always auto-resolved.
Fleets serve two other very useful roles aside from assaulting enemy fleets:
Transporting. Fleets can be loaded up with a full army and agents to take them to
•
distant shores they otherwise cannot reach.
Blockading. Fleets can be used to close the passage into foreign ports, cutting off the
•
sea trade of the settlement in the same region.
Who Commands in Naval Battles?
As stated under “Admirals” in the Characters section, there can only be one Admiral per
fleet – So he always commands the fleet. The basic things to know about Admirals are:
• Admirals earn Command stars from winning naval battles, improving their performance
in future conflicts.
• Once they earn a Command star, Admirals cannot merge with another Admiral.
Moving Fleets
Fleets move much like armies, but there are a few key differences due to the nature of
being at sea. After you have selected a fleet:
• A green movement area will surround it. The fleet can move to any point within this
zone during its turn. Coastal squares will be included in this zone when there are
passengers on the fleet, as they could disembark into one of these land squares.
• Red spaces in the movement zone are adjacent to enemy fleets.
• You can order a fleet to move beyond the green zone, in which case it will remember
its orders and a colored line shows where the fleet’s headed. Each color segment
shows a turn’s worth of movement.
The Review Panel in the center at the bottom of the screen will change to show the
•
ships in the fleet along with characters and military units on board.
• The movement rate of your fleet changes as they enter deeper or shallower waters.
Travel around the shallows is much quicker and safer.
• At the beginning of the game, no faction has a ship capable of making ocean voyages.
22
This will change with certain events during the game, and eventually the following
ships will become available to make such a journey:
Grande Carrack.
Baghlah, Caravel, Carrack and
Using Fleets as Transports
If you want an army or agent to board a fleet, you will have to bring them to the shore to do
so. Select the land-based army or agent and move the cursor over your fleet. The cursor will
hange to a boarding symbol to show that this move is possible.
c
Right-click to confirm the boarding order. From now on, movement orders to the fleet will
•
include its passengers.
• To disembark passengers, select the fleet and then
aboard a fleet will then disembark at this spot. Any and all agents will be attached to
a disembarked army.
• If you want to partially unload a fleet select the units or agent(s) in the review panel,
Merging & Splitting Fleets
To merge two fleets, simply move one fleet to the location of another. If the two fleets have
more than 20 ships in total then you’ll be asked to decide exactly which ship ends up in
each fleet. In every other case one large fleet of 20 or fewer ships will be created.
Keep in mind that you cannot merge two Admirals into one fleet if one of them has earned
a Command star.
If you wish to split a fleet, select the ships you want to form a new fleet in the
Panel
automatically leave and a new admiral will be appointed for the new fleet. Any passengers
stay with the original fleet.
Attacking with a Fleet
As pr
select a fleet and set them towards the enemy. To start a naval battle,
select it, and
Blockading Ports
It is possible to blockade an enemy port and cut its trade links with the outside world.
The blockaded faction will not receive sea-trading income each turn that the blockade
is in force.
Trouble at Sea
Aside from the fleets of enemy factions, there are two major perils at sea – pirates and
storms. Pirates are Rebel ships that will aggressively assault your own forces.
Storms however can cause fleets to lose entire ships, and any military units they are
carrying on those ships will be completely lost as well. Although the effects of a storm are
less severe in shallower waters, avoiding them altogether is the only truly safe way to deal
with them.
right-click on the campaign map on the coastal area where you want them to
and then
disembark.
and then drag-and-drop them to the destination for your new fleet. They will
eviously stated, all naval battles are auto-resolved, meaning all you need to do is
right-click on the fleet you wish to attack.
• Fleets that lose ships in combat will lose any military units or characters that the lost
ship(s) happened to be carrying.
• The Command rating of the fleet’s Admiral influences its fortunes in battle.
• After combat the losing fleet will either sink or pull away from the victorious enemy.
• Select a fleet, then
placed around the port to show that a blockade is in force.
• You can lift a blockade at any time by moving your fleet away from the port.
• You can break enemy blockades by successfully attacking the blockading fleet.
Victory will break the blockade.
right-click on the port you wish to blockade. A barrier will be
right-click on a coast. Everybody
Review
click on your fleet to
23
Page 14

RUNNING SETTLEMENTS
What do Settlements do?
n the Grand Campaign, settlements serve as both military training centers, as well as your
I
money-making machine. They form the central population centers from which you will
recruit men into service, tax the populace and establish an infrastructure to support trade.
There is always one settlement per region, representing the civil center for that area of
Medieval II: Total War allows the owner of a region of land to maintain their
land.
settlements as either cities or castles – with the ability to change between the two, with
certain limitations. You will need both cities and castles in your realm if you are to be
successful, as they both play very different roles.
How Do I Manage a Settlement?
Firstly, to properly manage a settlement, you need to install a General to serve as Governor
(unless you selected “Manage All Cities” in the Grand Campaign settings prior to starting).
If you do not do so, you will not be able to control any of the following tasks that are
involved with properly managing a settlement:
•
Recruit units for your armies, and agents for your non-military tasks.
• Construct new buildings, which will improve various aspects of your setlement’s
workings and capabilities.
• Adjust the
for your faction.
•
Retrain units, to replenish their ranks and also upgrade their weapons and/or armor if
the right buildings are present.
Repair buildings that may have been damaged by siege attacks, rioting or ominous
•
disasters of terrifying proportions.
Keep control of public order. If you do not do this, you will face the prospect of riots
•
and possibly even a rebellion in the settlement.
All of these things will be explained throughout this section of the manual.
Settlements on the Campaign Map
Cities and castles are represented on the campaign map with a
figure that looks appropriate for the size, type and culture of the
settlement. Each settlement has its own label that includes basic
details about the settlement’s status. These details are:
24
tax rate in cities to ensure that they generate as much income as possible
Settlement Name - The top line includes the name of
•
the settlement, and will also show an appropriate icon
if it is suffering from
Income - The number beside this icon shows the income
•
generated by the settlement each turn. A negative value means that the
settlement is actually running at a loss.
Public Order - This icon shows the overall happiness of the settlement
•
population:
Red – rebellious.
• This icon shows whether or not the
numbers or not:
Indicates the population is stable,
This is a matter of concern.
• This icon appears if a unit is being trained in the settlement. Green indicates
training is in progress, Red indicates the recruitment queue has stalled.
• This icon appears if a building is being constructed or repaired in the
settlement. Green indicates construction is in progress, red indicates the
construction queue has stalled.
revolt or the plague.
Green – happy, Yellow – content, Blue – disillusioned,
population of the settlement is increasing in
Green - Indicates the population is growing, Amber/Orange -
Red - Indicates the population is falling.
This icon appears if the settlement is being auto-managed.
•
The Settlement Scroll
Regardless of whether it is a city or a castle you wish to
examine, to view it’s
the settlement on campaign map. Here you will see the
Governor Panel at the top of the scroll, followed by the
basic details and settings of the settlement, and then
finally the
The basic details displayed for settlements are:
Understanding Cities & Castles
Cities and castles are very different sorts of settlements, but the way you improve them is
identical – by constructing
construct within the two different types of settlement.
Being able to choose where your cities and castles lie can be very useful, and the smaller
ones can be converted to the other type of settlement. Note that it is very important to
understand that if you intend to convert your settlements in the future – some types of
buildings do not belong in both settlement types, and therefore won’t survive a conversion.
There will be more on constructing buildings and converting settlements below. Firstly it is
necessary to understand how the two different settlement types work.
Cities
Cities are settlements that revolve around supporting trade and a large population. In fact,
it is population that drives these places - When a city reaches a high enough population it
will be ready to grow into a larger settlement with the construction of better walls.
Inside cities you will find constructions such as inns, markets, town halls, religious
buildings, and schools of alchemy. Aside from bringing wealth to your realm, these
buildings offer access to agents that can be of great use to your faction’s cause.
Cities provide the benefits of:
Recruitment / Construction Panel.
Income. The amount of florins this settlement is
•
generating for your treasury per turn.
Public Order. The percentage shown here represents
•
what level of public order is being maintained, with
100% being considered stable. The further this drops
below 100% the more likely the settlement is to
experience rioting, or possibly even rebellion (losing the settlement to Rebels). The
higher this is above 100%, the happier the population is with their situation.
Population. This is the number of people living in the settlement, and has a direct
•
effect upon upgrading all cities, and some castles.
Population Growth. The percentage shown here represents the current population
•
growth, or decline per turn. A settlement with high population growth will be able to be
upgraded sooner.
Automanage. Click on the checkbox to put the settlement’s building and/or construction
•
tasks under CPU control.
Tax Rate. This shows the current level of taxation on the people in the region: Low,
•
Normal, High, and Very High. Only cities can have their tax rate adjusted - Use the
arrows to cycle through the settings. Higher rates yield more tax income for your
treasury, but also result in a direct drop in public order.
Race Settings. Certain Islamic factions create facilities to support horse racing festivals.
•
Use the arrows to adjust how often the races are held – More frequent races improve
happiness, but cost money to hold.
The ability to set the tax rate for the region as desired.
•
• Several types of buildings that support and improve trade income.
Settlement Scroll, double-click on
buildings. The difference lies in what buildings you can
25
Page 15

• Buildings that spread your faction’s faith greatly.
• Buildings that allow you to recruit spies, assassins, priests, diplomats and merchants.
• Buildings that allow the recruitment of militia and siege artillery.
Free upkeep for some militia units while garrisoned.
•
Cities come with the problems of:
• Public unrest leading to riots, or even rebellion.
• Corrupting Governors with a wealthy environment.
• Usually lacking in buildings to recruit cavalry and missile infantry.
• Only one defensive wall for sieging forces to breach.
City upgrading works as follows:
City Size Population Wall Required
Village - N/A
Town 400 Wooden Palisade
Large Town 2000 Wooden Wall
City 6000 Stone Wall
Large City 12000 Large Stone Wall
Huge City 24000 Huge Stone Wall
Castles
Castles are military settlements with strong defenses that oversee the surrounding lands,
collecting the taxes at a set rate with a rigid regularity. This makes them the ideal place to
train men for military service, and make a stand.
Castles can be upgraded to a larger size that can play home to more effective structures,
simply by constructing the next level of castle in the
wish to upgrade to the two highest castle sizes, “Fortress” and “Citadel”. These also
require a certain population already in the settlement before you can construct them.
Castles provide the benefits of:
• Naturally high public order.
• Very strong defenses, including multi-ring walls at the higher levels of castle size
Castles come with the problems of:
• Not being able to adjust the tax rate.
• Usually lacking in buildings that improve trade.
• Usually lacking in buildings that recruit agents such as Spies, Assassins, Diplomats
and Merchants.
• Usually lacking in academic buildings.
Castle upgrading works as follows:
Castle Size Population Defences
Motte & Bailey - Keep only
Wooden Castle - 1 Wooden Wall
Castle - 1 Stone Wall
Fortress 4500 2 Stone Walls
Citadel 9000 3 Stone Walls
The Governor
Your Generals take on a very different kind of leadership role when you move them
into a settlement to become its
General capable on the battlefield, but it is actually his reputation for Piety and Chivalry
or Dread that will make him a better man for the job.
Required to Upgrade
Construction Panel. That is until you
Required
Governor. His Command rating may be what makes a
26
• Governors with a high Piety rating are better at reducing disorder caused by religious
unrest and provide an influence bonus to the public order of the settlement.
• Governors with a high Chivalry rating provide an influence bonus to the public order
nd population growth of the settlement.
a
• Governors with a high Dread rating provide an influence bonus to the public order of
the settlement.
• Governors can also have traits and retinue that improve various aspects of how the
settlement functions, detailed in their tooltip displays.
• The General with the highest Piety rating will be installed as Governor. The people
generally prefer to serve under a man of faith – They are both spiritually sound and
generally educated as well.
Constructing Buildings
Settlements are a collection of buildings and the way to develop and improve your cities
and castles is to construct various buildings and facilities. This is done by
tab labelled “Construction” to open the
•
Click on the Construction Tab to see what buildings are available
for construction.
• The number of different buildings shown in the
of settlement, the size of the settlement and what you have already built there.
Right-click on a building in options or the Construction Queue to bring up the relevant
•
Building Information Scroll to see what benefits you will receive from the available
construction options.
• Buildings with construction costs that are beyond your treasury are greyed out, but can
still be added to the queue for construction when funds become available.
Click on a building in the Construction Panel to add it to the Construction Queue. If you
•
can afford the buildings, and there are no other items currently waiting to be built, the
cost of the building is immediately deducted from your treasury.
• The leftmost building in the queue will be shaded to show that work has begun, and
the number of turns until completion is shown. The shading is gradually removed as
progress is made over a number of turns.
Click on a building in the Construction Queue to cancel the construction order. Any
•
allocated funds are automatically returned to your treasury.
• Buildings in the
the order of construction work by dragging-and-dropping the building pictures until you
are happy with the construction order.
• Some buildings can only be constructed if you are approached by a guild, or a knightly
order.
The Building Browser
At the bottom of the Settlement Scroll is a button that will open
Building Browser. This is where you can find all the
up the
information you need on all of the things you can construct.
Building Browser is split into two parts - the left panel
The
provides an image display showing what buildings of the
currently selected
sizes of settlement. The panel on the right is where you can
see all the building types that are available in a city or a
castle, depending on which tab you have selected.
settlement images on the left show what level your
• The
settlement is currently at. Greyed out items represent
the sizes your settlement can grow to later.
• The building images beneath the “City” heading show which levels of this type of
building type ar
to construct.
Construction Queue are completed in left-to-right order. You can alter
building type are available with the different
e available in a city
Right-click on any building image to see its Building Information Scroll.
Construction Panel.
Construction Panel depends on the type
. Greyed out items represent buildings you have yet
clicking on the
27
Page 16

• The building images beneath the “Castle” heading show which of this type of
building are available in a castle. Greyed out items represent buildings you have
yet to construct.
croll
.
S
• If a building image does not have an equivalent building in the other type of
settlement for that settlement size/level, then the building will have to be
destroyed if you choose to convert the settlement.
• When this icon is colored, it shows that you can currently construct this type of
building in your settlement.
• When this icon is greyed out, it shows that you cannot yet construct this type of
building in your settlement.
• The types of buildings that you currently have constructed in your settlement
have their name shown in black in the panel on the right.
• The types of buildings you have not yet constructed in your settlement have
their name shown in a lighter shade in the panel on the right.
Repairing Buildings
Buildings can be damaged through rioting, natural disasters and siege assaults. It’s quite
possible to damage a town without taking it and, the longer an assault takes, the more
“collateral damage” is done during the battle. Repairing buildings works in a similar
fashion to new Construction. The cost of repairs is usually substantially less than the cost
of a new building, both in terms of cash and time.
Click on the Repair Tab to see what buildings require restoration work.
•
This will be greyed out if no buildings are damaged.
• Instead of being presented with Construction Options, there is a collection of
Buildings Needing Repair.
• Click on any damaged building to add it to the Construction Queue. It can be draggedand-dropped in the queue, and clicked to cancel the work as described above for new
construction work.
Recruiting Units, Ships & Agents
To form armies, construct ships and enlist the service of agents, you will need to
recruit them in a settlement. Recruiting units and agents costs money, which will
be deducted from your treasury to cover their training, equipment and starting
wages – Once recruited, units, ships and agents go into a
They will arrive for service in the following turn, so long as they are in one of the
recruitment slots.
There are several key things to know about how recruitment works before you begin:
Recruitment Slots – As a settlement grows in size, it gains more recruitment slots,
•
allowing it to recruit more units per turn.
Recruitment Queue – As you select units to recruit they are added to the Recruitment
•
Queue.
Recruitment Pools - Units are recruited from a “pool” of men that are ready to be
•
trained into service, the number in the top-right corner of the unit image represents
how many units are ready to be trained right now. When you take men from the pool to
recruit a unit, it will replenish back up to its limit over time.
Recruitment Effects Combine – If you have two buildings that can recruit the same unit
•
in one settlement, that unit will have a larger recruitment pool limit, and will replenish
more quickly.
Buildings Allow Recruitment – You will need to construct buildings in order to recruit
•
units.
Right-click on any building image to see its Building Information
Recruitment Queue.
28
• Agent Limits – There is a limit to how many agents, such as Priests/Imams and
Merchants, you can recruit. When you construct higher level churches and markets
respectively, you will increase the amount of agents you can put into service. You will
ind these limits on the relevant
f
To recruit units & agents in your settlements:
Click on the Recruitment Tab to see what units are available for hire on the
•
Recruitment Panel, with the Recruitment Queue shown at the bottom.
• Click on a unit in the main section of the Recruitment Panel to add it to the Recruitment
Queue. If you can afford to train the unit, and there are free recruitment slots available,
the money is immediately spent. The men required to recruit the unit are removed from
the pool immediately.
• Units with recruitment costs that are beyond your means are greyed out, but can still be
added to the Recruitment Queue when funds become available.
• Units may also be greyed out if there are insufficient “spare” men in their unit pool to
form a unit. Mouse over the unit you wish to purchase and you will receive a tooltip that
will advise how long until you are able to recruit this unit again.
• All ships are treated as military units, but they appear at the port in the settlement’s
province.
• The leftmost units in the queue will be colored to show that training has begun, and that
they will arrive next turn.
Click on a unit in the Recruitment Queue to cancel the training order. The unit will
•
disappear from the queue, and any allocated funds are returned to your treasury.
• Up to nine units can be entered into the Recruitment Queue. When the queue is full, all
units in the Recruitment Panel will be greyed out and unavailable.
• You can alter the order of recruitment by dragging-and-dropping the unit cards.
Right-click on a unit card to bring up the relevant Unit Information Scroll.
•
The Unit Information Scroll
This scroll shows information about a given unit. This includes historical background,
and the unit’s in-game effects, including the all-important training and upkeep costs.
Unit Information Scroll also allows you to disband your units. This saves your faction
The
upkeep costs of the unit.
Click on this button to disband the unit. The soldiers in the unit are added
•
back to the unit pools for the region’s settlement. This allows the men to be
available for recruitment again if the need arises, although it does “cost” any
military experience that the men might have gained.
uilding Information Scrolls
B
.
29
Page 17

Recruitment Buildings
If you want to field the best units available to your faction, you will need to know which
particular buildings will provide you with the ability to recruit these troops. These three lists
elow show building types that can always recruit units, types that can recruit agents and
b
finally some factions that get bonus recruitment from some types of buildings.
Buildings types that recruit units:
• Walls – Cavalry units
Castles – Knight (Cavalry) units
•
City Barracks – Militia Infantry and
•
Gunpowder units
Castle Barracks – Infantry units
•
•
Ranges – Missile units
Stables – Cavalry units
•
Siege – Artillery units
•
Gunsmiths – Cannon units
•
Military Academy – Special Elite units
•
Horse Racing – Cavalry units
•
Plaza del Toro – Cavalry units
•
Knights Templar – Knight (Cavalry) units
•
Hospitaller Knights – Knight
•
(Cavalry) units
Teutonic Knights - Knight (Cavalry) units
•
Knights of Santiago – Knight
•
(Cavalry) units
Hashashim’s Guild – Special
•
Infantry units
•
Woodsmen’s Guild – Special
Missile units
Masons’ Guild – Special Militia
•
Infantry units
•
Merchants’ Guild – Special
Cavalry units
Retraining & Upgrading Units
that can recruit the type of unit you want to bring back to full strength.
Upgrading weapons and armor requires you to have a certain building, have the funds to
pay for the upgrade and finally satisfy some other conditions (see
Upgrading Weapons).
A unit in a garrison is eligible to be retrained if it meets one of the following two
conditions:
• The unit is numerically
ranks than when it was originally trained. Under-strength units that are retrained may
have any battle experience diluted by the raw recruits who enter their ranks.
• If a unit is able to
Important Tip: Be aware that retraining costs money, and can be quite expensive when you
wind up upgrading and replenishing your units at the same time.
Upgrading Armor
The obvious advantage of upgrading a unit’s armor is that it becomes better at taking
damage in battle and surviving – useful for any unit on the field.
• Different units have varying levels that their armor can be upgraded to. The higher the
level a smith building is, the higher the level of armor it can upgrade a unit’s armor to.
You can replenish a unit’s numbers and ensure that it has the best weapons
and armor that a settlement can provide by retraining it.
Replenishing a unit’s numbers requires that you have a building present
under strength: it has taken losses and has fewer men in its
upgrade it’s armor or weapons (see below).
Building types that recruit agents:
• Churches/Masjids – Priests/Imans
Inns – Spies and Assassins
•
Markets – Merchants
•
Town Halls – Diplomats
•
Academy (castle) – Spies, Diplomats
•
and Assassins
Factions that can gain special recruitment
options from certain buildings:
• Holy Roman Empire – High level
Town Hall buildings
• Milan –
• Venice – Town Hall
• Turks – Town Hall
• Russia – Town Hall
• Hungary – Assassins’ Guild and Inns
• Denmark – Churches
Town Hall
Upgrading Armor and
30
Armor Types
These are the levels of armor available to units, and also the Smith building required to
upgrade to that armor level.
Armor Types Smith Building Required
Unarmored None
Padded or Leather Leather Tanner
Light Mail Blacksmith
Heavy Mail or Breastplate Armorer
Partial Plate Heavy Armorer
Full Plate Master Armorer
Advanced Plate Armor Factory
Upgrading Weapons
There is only one level of weapon upgrade capable for any given unit. To upgrade a unit’s
weapon, you simply need to have the right kind of building present, and not already have
the upgrade.
Weapon Types
These are the types of weapons that can be upgraded in settlements – If you want to check
to see what weapon type a unit has, you’ll find it listed on its
Weapon Type Weapon Upgrade Building
Melee Swordsmiths’ Guild
Gunpowder Troops Alchemists’ Lab
Cannons Alchemy School
Artillery University
The Guilds
In Medieval Times, the guilds used their widespread influence to regulate trade throughout
the western world. Each guild represents a particular trade, study or order – such as the
Masons’ Guild, Theologians’ Guild or the Knights Templar.
All guilds offer benefits. You can look in the Building Browser to see which guilds are
•
available to your faction, then check the benefits that come with each guild available
Building Information Scrolls.
on their
•
Some guilds are only available to certain factions. The Knights of Santiago for example
are specific to Spain and Portugal.
Guilds are “invite only.” Guilds approach you about constructing a guild house in your
•
settlements. They are more likely to offer to do this if you support their trade or cause.
•
Guild Houses and Minor Chapter Houses. These are the lowest ranks of a guild building,
and cost 1000 florins to build. They can exist in any settlement in your faction.
Master Guild Houses and Major Chapter Houses. These are the second ranks of a guild
•
building, and cost 2000 florins to build. Only one can exist in any given faction’s
lands.
•
Headquarters. These are the highest rank level of guild building, and cost 3000 florins
to build, but offer incredible benefits. Only one of these will exist in the entire world at
any given time.
•
Keep working for upgrades. You will need to continue to support your guild’s interests to
receive an offer to upgrade it to the next rank of building. Thus, only factions that truly
focus on something find a guild headquarters in their lands.
Faction-Specific Buildings
There are a series of special buildings that are only available to a small selection of
factions, sometimes even just one, that are called Faction-Specific Buildings. These
structures offer benefits that are often unique, and thus, can help their faction to develop
an edge in a certain aspect of their empire.
For example, the Turks, Egyptians and Moors can all construct Horse Racing buildings to
recruit cavalry in cities - a genuine advantage.
Unit Information Scroll.
31
Page 18

The Settlement Details Scroll
This scroll allows you to review the settlement in detail, and see what factors are
ontributing to the overall
c
Income, and Religion of the regions.
• For each of these four areas of interest, the positive
factors are shown above the negative factors.
• The exception to this is that the Religion
details show the dominant religion on top, and
the breakdown of the minority religions in the
bottom row.
• Move the cursor over each icon and a tooltip will
appear telling you what it represents. Use this
information to discover what is preventing your
settlement from running
at its best.
• The other important, perhaps vital, piece of information shown beneath the
Religion details is the length of time that the settlement can withstand a siege.
This represents the surplus food that the settlement has in storage.
Click this button to bring up the Trade Summary Scroll. This will allow you to see
•
how your settlement is generating taxable income.
Click on this button to make this settlement your capital. This is where all new
•
Generals and reward units from Missions will appear.
The Trade Scroll & Trade Resources
There are two ways to raise the income from a settlement: one
is to change the tax rate (through the
other is to improve the economic structures in a settlement.
Taxable trade income is improved by having better traders and
markets in your settlements, and by the quality (and number)
of connecting routes to other settlements (roads and sea
routes).
There are three potential generators of taxable income:
farming and mining. All of these can be improved by
constructing different buildings, although all three also rely on
the resources in the province.
• Any resources in the surrounding province will be traded
automatically, if only within the local settlement.
Mines can be built to extract precious metals that can be seen on the campaign map
•
as metallic resources. These need to be constructed like any other building.
Farms increase the income from farming and the growth rate of a settlement as more
•
food is generated. However, not all regions are equally fertile, so don’t expect farms to
have the same effects in all parts of the world. That said, a settlement always benefits
from farming improvements.
Market buildings in a settlement improve the efficiency of trade, and the amount of
•
money it generates. It will also allow you to recruit Merchants.
Port (and its subsequent upgrades) allows trade goods to be moved greater distances,
•A
with a consequent increase in the value of exports and imports. Ports always appear on
the coastline of the region, although they are part of the settlement. They also help
train naval units, of course. Finally, landlocked regions cannot have ports.
Sea Trade buildings also increase your overall trade income after you have constructed
•
Port, and allow more trade fleets to connect to your settlement via the port.
a
Roads allow trade goods to be carried to neighboring settlements automatically. They
•
also allow the faster movement of armies and agents as well.
•
32
Merchants can also be sent to distant trade resources to earn extra trade income for
opulation Growth
P
Settlement Scroll); the
ublic Order
, P
,
trade,
your faction. This is covered in detail in the USING AGENTS section of the manual.
Trade routes are shown on the map as convoys of wagons moving along roads, or as dashed
ines between ports. Trade routes can be blocked by enemy armies (including rebels and
l
bandits) on land, and by enemy fleets at sea.
Converting Settlements
One of your construction options will often be to convert your settlement from city to castle,
or vice-versa. This involves re-arranging the basic layout of the settlement defenses, and
takes both time and money.
It is
very important to note several key things about converting settlements:
• When a city settlement has grown to become a “Large City,” it can no longer be
converted to a castle.
• Be aware that when you convert a “Citadel,” it will convert to a “City” – a lower level
settlement.
• Use the Building Browser to check to see which of your settlement’s constructions can
exist in both settlement types.
City Upgrading & Conversion
City Level Population to upgrade Conversion to Castle…
Village - Motte & Bailey
Town 400 Wooden Castle
Large Town 2000 Castle
City 6000 Fortress
Large City 12000 No longer possible
Huge City 24000 No longer possible
Castle Upgrading & Conversion
Castle Size Population Required Conversion to City
Motte & Bailey - Village
Wooden Castle - Town
Castle - Large Town
Fortress 4500 City
Citadel 9000 City
to this Level
USING AGENTS
Agents are not military characters, but have their own form of aggressive ability in Medieval
II: Total War
their particular target – whether it be a city to infiltrate for a Spy, or a General to kill for an
Assassin.
Using Merchants
Trading
Mer
the campaign map, sending the precious goods or minerals back to their faction capital.
. For most agents, using their “Active” abilities is as simple as right-clicking
• Agents move and merge like armies do.
• When an agent succeeds or fails when using an ability there is a chance their traits
will be adjusted – Directly affecting their main attribute (eg. A Spy who infiltrates
successfully may see an increase in their Subterfuge rating). It is best to send agents
on easier tasks at first to help them develop some experience.
• The number of Merchants and Priests that a faction can recruit is limited. Building
larger Markets and Churches respectively will raise the limits.
• Princesses arrive for service when they come of age. You can check your
(covered later in the manual) to see when your next noble daughter may be due to
begin serving her people.
- Passive ability
chants generate trade income for their faction when they stand on a trade r
Family Tree
esource on
33
Page 19

There are several things to know about how trade works:
hecking income per turn.You can see how many florins per turn the currently selected
•
C
erchant will earn from a trade resource by mousing-over the resource and reading the
m
tooltip.
Finance rating. The higher a Merchant’s Finance rating, the more florins they will
•
generate per turn.
Trade rights. Having trade rights with the faction that owns the resource a merchant is
•
trading increases the amount of florins generated.
Resource value. The amount will vary based on the actual resource itself. Resources
•
like gold and silk are valuable commodities.
Distance bonus. The further the closest instance of a trade resource is to a merchant’s
•
capital, the greater a bonus he will get to the trade income he will earn from it.
Acquisition – Active ability
Acquisition is when one merchant attempts to forcibly seize the assets of another
merchant, putting them out of business. Success means an immediate financial bonus, and
control of any trade resource the foreign merchant may be standing on. Failure could either
mean an annoyance or the end of the aggressor’s career.
Right-click on a foreign merchant to make an Acquisition attempt. The chance
•
of success will be shown on a panel – press the
• A merchant’s Finance rating is the primary factor in determining success or
failure.
• Acquisition is not an act of war, though it may well annoy the faction that you
are attacking in this economic manner.
Using Priests & Imams
Preaching – Passive ability
Priests and Imams are constantly spreading their faith in the region they are in, which
effectively “converts” a percentage of the population from the other religions, over to his
faction’s religion.
Piety rating. A Priest or Imam’s Piety rating directly affects how great a percentage of
•
the population that they can convert.
More is better. Multiple Priests or Imams can work in a region together to convert the
•
population more quickly.
Preaching is not a transgression. Preaching in another faction’s lands is not considered
•
a diplomatic transgression or an act of war.
Denouncing – Active ability
Priests and Imams can rid their lands of Witches and Heretics by attempting to denounce
them at a trial for Heresy. Success means the blasphemous individual is put to death.
Failure to denounce a Heretic can result in him escaping, or converting the Priest into
another Heretic. Failure to denounce a Witch can result in the woman escaping, or worse,
destroying the Priest.
Right-click on a Witch or Heretic to make a Denouncement attempt.
•
The chance of success will be shown on a panel – press the
to proceed.
• A Priest or Imam’s Piety rating is the primary factor in determining
success or failure.
• A Priest or Imam that has traits stating they have some
likely to become a Heretic during denouncement attempts.
Acquisition button to proceed.
Denounce button
Unorthodoxy is more
34
Using Spies
nfiltration
I
pies will attempt to infiltrate any army or settlement they are moved into, unveiling
S
information about the target. Success means the information is gathered and displayed
immediately. Failure will mean that the Spy will either be driven away before they gather
information, or killed in the event that they are caught in the act.
Stealth – Passive ability
Spies are constantly attempting to remain unseen by other factions, so even though you can
see your spies on the campaign map all the time, the other factions cannot.
•
•
Using Assassins
Assassination – Active ability
Assassins are capable of targeting any one character on the campaign map for termination,
regardless of whether they are out in the wilderness or inside a foreign settlement. Success
means the targeted character is killed, and their faction will be unaware as to who was
responsible. Failure will mean that the Assassin will either be driven away without
completing the job, or killed in the event that they are caught in the act.
Sabotage – Active ability
Sabotage works much like Assassination, except that the target is always a building in a
settlement. Success means the targeted building is destroyed, and their faction will be
unaware as to who was responsible. Failure will mean that the Assassin will either be driven
away without completing the job, or killed in the event that they are caught in the act.
Active ability
–
Right-click on a settlement, army or agent to make an Infiltration attempt. The
•
chance of success will be shown on a panel – press the Infiltrate button to
proceed.
•
Subterfuge rating. A Spy’s Subterfuge rating directly affects their ability to
infiltrate a settlement successfully.
• If a Spy infiltrates a settlement, they will begin to spread propaganda to instil a
small sense of unrest – affecting Public Order.
Act of war. Unlike most agent actions, if caught, an infiltration attempt will be
•
counted as transgression. If the spy succeeds however, the enemy is none the
wiser – secrecy is part of the success.
Leaving voluntarily. Double-click on the settlement your Spy is in, select the
•
Agents tab on the Review Panel, then click on your Spy on the Enemy Settlement
Details Scroll
Subterfuge Rating. A Spy’s Subterfuge rating directly affects their ability to both remain
hidden, as well as detect other hidden agents, such as Spies and Assassins.
Constant, not foolproof. Even though stealth is a constant effect, it is not foolproof, and
there is always a chance of being detected by a foreign character.
Right-click on a settlement, army or agent to make an Assassination attempt.
•
The chance of success will be shown on a panel – press the Assassinate button
to proceed.
Subterfuge rating. An Assassin’s Subterfuge rating directly affects their chances
•
of assassinating a target successfully.
Assassination traits. Some traits that an Assassin can earn will improve or
•
worsen the chances of success for assassination.
Act of war. Unlike most agent actions, if caught, an assassination attempt will
•
be counted as an act of war. If the Assassin succeeds however, the enemy is
none the wiser – secrecy is part of the success.
Right-click on a settlement to make a Sabotage attempt. The chance of success
•
will be shown on a panel, if not
Sabotage button to proceed.
•
Subterfuge Rating. An Assassin’s Subterfuge rating directly affects their chances
of sabotaging a building successfully.
•
Sabotage Traits. Some traits that an Assassin can earn will improve or worsen
the chances of success for assassination.
. He can be moved out of the settlement as normal.
click on the “Sabotage” tab – press the
35
Page 20

• Act of war. Sabotage is an act of war, with similar consequences as described
under assassination, should the assassin be caught.
tealth–Passive ability
S
Assassins use Stealth in exactly the same way that Spies do (see
Using Diplomats
Diplomacy – Active ability
Diplomacy is the act of negotiating with other factions in
very different to all other agent actions – It is covered in its own section of the manual
DIPLOMACY).
(see
• Right-click on an army, character or settlement to enter diplomacy with them.
Influence rating. A Diplomat’s Influence rating has an effect on his chances of making
•
successful proposals during diplomacy.
Able to bribe. Diplomats can attempt to bribe foreigners over into their own faction’s
•
service during diplomacy. No other character can do this.
• Only Generals, Captains, Settlements and other Diplomats can actually be approached
to make a diplomatic proposal. All other character types can only be approached for
bribery, and some characters cannot be bribed at all, such as Princesses, Faction
Leaders and Faction Heirs.
Using Princesses
– Active ability
Marriage
This is a special kind of marriage, where the Princess attempts to marry a General – either
a General from her own faction, or a foreign General. If the General is from her own faction,
he will always accept. If she succeeds in marrying a foreign General he will leave his
faction to join hers. If she fails, she will either continue to serve her people, or be
disgraced and never to be heard from again.
Right-click on a General to make a Marriage attempt. The chance of success
•
will be shown on a panel – press the
Charm rating. A Princess’s Charm rating directly affects her chances of making a
•
successful marriage attempt. If the General is from another faction, his Loyalty
rating also has an effect on the chances of success.
• Princesses cannot attempt to marry Generals from an Islamic faction (Egypt,
Turks, Moors) or factions that do not have Princesses.
• A General who marries a Princess receives a Loyalty rating bonus, making him
less susceptible to bribery and thoughts of rebellion.
Diplomacy – Active ability
Princesses use Diplomacy in exactly the same way Diplomats do, except:
Right-clicking on a character or settlement from another faction, a list of
• After
suitable marriage targets is presented. Press the
bottom of the panel to initiate diplomacy instead.
Princesses cannot bribe. Unlike Diplomats, a Princess cannot attempt to bribe
•
other characters during diplomacy. They can however enter a marriage alliance.
Charm rating. A Princess’s Charm rating has an effect on her chances of making
•
successful proposals during Diplomacy.
Marriage button to proceed.
Using Spies).
Medieval II: Total War, and is
Enter Diplomacy button on the
36
RELIGION
Religion in Medieval II: Total War
lthough your victory conditions in the Grand Campaign do not involve any religious goals,
A
religion is something that you must treat with respect, even as the ruler of a vast empire.
Faith played an enormous role in both daily life and politics in the medieval era, and this is
represented in the Grand Campaign.
Your basic concerns with religion are:
• Ensuring your religion is dominant in your regions.
• Ensuring Heresy does not get out of hand in your regions.
• Considering how your actions may affect your relationship with other factions of your
religion, or the Pope.
Spreading Your Faith
To ensure that your lands are free of religious problems, you will need to invest some
money in building
and Masjids will help their faith spread so that a percentage of the population that follows
other religions will change to your faction’s religion. Priests and Imams have the same
effect in the regions that they stand in.
• You can check the religious breakdown of the population of a region by looking at its
Settlement Details Scroll.
• It can be advantageous to send a Priest or Imam into a region you plan to conquer if
the population there has a different religion to your faction. This is not considered an
act of war or diplomatic transgression.
• A Heretic will spread Heresy in the regions they enter in the same way a Priest or
Imam spreads their religion.
The Pope
The Pope is the head of the Catholic Church, and the Faction
of the Papal States, which are the lands belonging to the
Leader
Church. As an individual with a huge amount of power, the
Pope’s personality will have an effect on all of Christendom.
He may believe in “holy” war against the people of other
religions, or he could abhor violence altogether. He may also
be a shining example of righteous beliefs, or corrupted by the
power his position has afforded him.
It is also important to note that the Pope was once but a
humble Priest. The experiences during a Priest’s life will have
an effect on what sort of spiritual leader he will become should
he one day be elected as Pope.
Excommunication & Reconciliation
The reason that maintaining a healthy relationship with the Pope is so important for
Catholic factions is that if he deems that a Catholic Faction Leader is behaving poorly,
does not support the faith properly or is actively opposing him, he may
the Faction Leader in question.
When the Pope excommunicates a faction, it is only the leader that he has a problem with.
However, this is no consolation for the people of that faction who are still cut off from the
Churches or Masjids, and also in recruiting Priests or Imams. Churches
• To see an overview of the current Pope,
Control Panel, then click on The Pope tab at the top of the scroll.
• The Pope’s age, plus anything known about the Pope’s personality can be found
beside the Pope’s portrait.
Click on this button, left of the Pope’s portrait to request that he call a Crusade
•
CRUSADES & JIHADS below).
(see
• The columns of crosses in the lower part of the
the Pope’s view of the Catholic factions. The more crosses, the more he
respects and admires that faction.
click the Faction button on the
Pope Overview Scroll represent
excommunicate
37
Page 21

Pope, their spiritual leader. In fact, when a Faction Leader is excommunicated, his people
will be upset with him for allowing problems with the Catholic Church to go so far, rather
than annoyed at the Pope for excommunicating them in the first place.
econciliationis when the Pope “forgives” the faction that he had excommunicated, and is
R
the opposite of excommunication.
• Both your population and your Generals will not be pleased about your faction
being excommunicated. It may lead to public order issues and rebelling Generals.
• An excommunicated faction will not receive any missions from the Pope.
• An excommunicated faction may have a Crusade called against it.
• Catholic factions can attack an excommunicated faction without fear of repercussions
from the Pope.
• It is possible to request to reconcile with the Pope during diplomatic negotiations
with the Papal States. There is also a chance the Papal States will offer reconciliation
as well.
• Excommunication is a personal thing between the Pope and a Faction Leader. If the
Faction Leader dies, or a new Pope is elected, the Pope may decide to reconcile the
faction again.
The Papal States
The Papal States still exist today in the modern era, as the “Vatican City.” In Medieval II:
, the Papal States are considerably larger, and work like a normal Catholic faction
Total War
in most regards. However, there are some very important differences as to how the Papal
States works that you will need to be aware of when you’re thinking of dealing with them:
The Papal States cannot be wiped out, ever. If they lose their last settlement, the
•
Catholic Church will seek out a new home for the Papacy, and will even ask Catholic
factions to grant them a region. Obviously, that will have a massive positive effect with
that faction’s relations with the Pope and the Papal States.
• Attacking the Papal States is almost certain to bring the wrath of all Catholic factions
upon you… and there are a lot of them, so think twice about choosing the Papal States
as an enemy.
• The Papal States do not have a family tree. Instead the Pope is its Faction Leader and
Cardinals (see below) are the potential “heirs.”
the
The College of Cardinals
The Catholic Church has a council of the highest ranked
Priests within the faith, called Cardinals. These men form a
collective called the College of Cardinals, of which there are
never more than thirteen.
Click on this button at the bottom of the Overview
•
to bring up the College of Cardinals Scroll.
Scroll
This shows who the current Cardinals are, and
where they are from.
• A Catholic Priest must have a sufficiently high
Piety rating to be considered for promotion to a
Cardinal by the Pope.
• The College of Cardinals does not have to have all
thirteen seats filled. If there are not enough Catholic Priests in the game of
sufficient Piety, then there will be fewer Cardinals.
• Cardinals are immune to the effects of Heresy, and can never become a Heretic
character. This makes them extremely useful at getting rid of Heretics from the
campaign map.
• When the Pope dies, a new Pope will be elected from the College of Cardinals
(covered below).
Papal Elections
When the Pope dies the College of Cardinals will convene
for a Papal election to elect a new Pope. This is a moment
here the rulers of the Catholic factions have an opportunity
w
to seriously improve their relations with the Papacy.
There are only ever a maximum of three candidates for the
Papacy – these men are called the
that has a Cardinal can vote in the Papal election. Even
though you can simply vote and see the results, there are
opportunities here to wheel and deal with other factions in
an effort to control the outcome of the election.
• The Papal Election Scroll will only appear when the election takes place and
you have a Cardinal to give your faction a vote.
• The faction of each Preferati is shown beside their portrait. Faction symbols to
the right of that show which factions are known to support that candidate.
Mouse over any of these shields for extra information about this faction in a
tooltip.
Click on this button to the right of a Cardinal you wish to vote for.
•
•
Click on one of the Faction shield buttons along the bottom of the scroll to
enter diplomacy with that faction.
Election Results
It is good to have a sound understanding of the results of a Papal election, because voting
for the loser could have a negative effect on your relationship with the Papacy. It may not
always be in your best interests to back an ally if they will lose:
• The Preferati with the most votes becomes the new Pope.
• Preferati from other factions will always vote for themselves in the election.
• If there is a tie for votes, the Preferati with the highest Piety rating will win. If there is
a tie for Piety as well, the Preferati from the faction with the best relationship with the
Papal States will win.
• Factions that voted for the winner will have their relations with the Papal States
improved.
• Factions that voted for someone other than the winner will have their relations with the
Papal States worsened.
Special Religious Agents
There are two sorts of blasphemous characters that wander the campaign map, leaving a
trail of strife and spiritual unrest in their wake – Heretics and Witches. Both of them
encourage the spread of
effects as well.
Heretics
A Heretic is a man of faith who has adopted a different take on one of the
major religions, or has even attempted to forge an entirely new one of his own
will. He is utterly convinced that what he is doing is correct, but he is also
aware that the major religions find his attempts to spread a message of faith
other than their own to be blasphemous.
• Heretics may appear suddenly in regions with high Heresy.
• Heretics spread Heresy in the regions they are in.
• Heretics can be denounced by a Priest or Imam.
• Heretics have a chance to convert a Priest into a Heretic should the
Heresy in any region that they stand in, but have their own unique
Priest fail to denounce him.
Preferati. Any faction
38
39
Page 22

Witches
Inquisitors
A Witch is a woman believed to have magical powers, granted to her through
the practice of foul, blasphemous arts. Once a woman is deemed a Witch, she
s essentially an outcast, being forced to wander in an effort to escape
i
religious authorities that would seek to end her heretical practices.
• Witches may appear suddenly in regions with high Heresy.
• Witches spread Heresy in the regions they are in.
• Witches move about the campaign map, approaching people of interest.
• Generals approached by a Witch may end up being cursed… Or at least
believing that they have been stricken by some unholy affliction.
• The higher a Witch’s Magic rating, the more likely she is to curse a General.
• Witches can be denounced by a Priest or Imam.
• Witches have a chance to kill a Priest if he fails to denounce her… At least
that’s what the peasants will report happened.
An Inquisitor is a special sort of Priest, sent by the Catholic Church to deal
with Heresy when it becomes a serious problem in the Pope’s eyes. These men
are charged with the right to attempt to denounce any man or woman they
suspect of blasphemous behavior through a trial for Heresy – including your
Generals, or even your Faction Leader! It is definitely better to avoid having an
Inquisitor coming to visit in the first place than finding a way to get rid of
them once they are there.
• Inquisitors work like a Catholic Priest in that they spread the Catholic faith
throughout the regions they travel through.
• Although an Inquisitor can attempt to denounce Generals and agents, they
will move to Heretics and Witches first – the obvious purveyors of Heresy.
• Inquisitors also work like a Priest in that their Piety rating directly affects
their chances of denouncing a character, regardless whether they are a
General, Heretic or Witch.
• A General’s Piety rating directly affects his chances of surviving an
Inquisitor’s denouncement attempt.
• An Inquisitor can be assassinated, but be aware that he represents the
Papal States, and there may be serious consequences for attempting this.
CRUSADES & JIHADS
Crusades
A Crusade is a religious quest, a holy war undertaken with Papal sanction. The mission
statement of those who join is to capture a certain settlement in the name of Christendom.
This could be because the place is rife with Heresy, or because there is a Catholic
population there that requires some spiritual rescue in his Holiness’s eyes. Sometimes the
Pope will call a Crusade on his own initiative, but he is also open to suggestion from the
Catholic Faction Leaders.
Being a religious cause, Crusades inspire men to push themselves far beyond their normal
capabilities. Once a Crusade has been called, it is up to Catholic Generals to take up the
cause and lead their zealous soldiers to victory in God’s name. Any man who can lead a
successful assault on a settlement targeted by a Crusade will be the toast of Christendom
for years to come!
Requesting Crusades
A Crusade is an incredibly serious event, and not something that the Pope will approve
lightly – After all, he is essentially asking the able bodied men of Christendom to travel a
great distance and potentially give their lives for this cause. Here are some things to know
about requesting a Crusade:
• You can request that the Pope call a Crusade via the
40
ou must then select a Crusade target settlement before the Pope accepts or
) Y
Pope
rejects your request.
Pope Overview Scroll. (see The
• The chances of the Pope agreeing to a Crusade request are strongly affected by the
Pope’s relationship with the faction that makes the request.
• The greater the percentage of the population of taken to Heresy in a settlement, the
ore likely the Pope will approve a Crusade there.
m
• The larger the Catholic population in a settlement owned by a non-Catholic faction, the
more likely the Pope will approve a Crusade there.
Joining or Leaving a Crusade
Because there are some serious penalties and benefits for an army on a Crusade, it is
important to know how to join a Crusade:
• There is a time limit within which to join a Crusade.
• All Catholic Generals have the option to join a Crusade, provided that their
faction is not excommunicated.
• To have a General join a Crusade, he must first be outside of a settlement,
and have at least 8 units in his army. Then
Army Details Scroll, and click on the “Join the Crusade” button at the bottom
of the scroll.
• This Crusade marker will appear at the top of a Crusading army’s banner.
• It is possible for a General to abandon the Crusade, although doing so will
cause his units to begin deserting. This can cause the loss of a huge military
force, so be very careful
Crusading Army Effects
Once a General has joined a Crusade, his army experiences the following effects:
• Crusading armies can move at twice their normal movement rate.
• Crusading armies do not pay any upkeep for their units.
• There are special units that are only available to Crusading armies. If a Crusading
General attempts to hire mercenaries, he may see new units available that wish to join
the Crusade for a nominal fee.
• If a Crusading army does not make sufficient progress towards the Crusade target each
and every turn, it will begin to lose troops to desertion. These men are utterly
committed to the cause, and will not wait to serve a man that lacks their conviction.
• If a unit in a Crusading army is ordered out of the army, then it will vanish after one
turn, disgusted at being asked to abandon their holy cause. The only exception to
this is when a Crusading army captures a city, it may leave units there to form
a new garrison.
Ending Crusades
Crusades can end several ways:
• A Crusade succeeds when a Crusading army successfully captures the target
settlement of the Crusade.
• A Crusade fails if no Generals have joined the Crusade within the time limit to join.
• If the target settlement belongs to an excommunicated faction and it reconciles, the
Crusade ends peacefully.
• If the target settlement falls to a Christian army not on Crusade, then the Crusade
ends uneventfully.
• Factions that participate in a Crusade can receive a variety of rewards, depending upon
their involvement. Simply participating can earn positive rewards, even if another
faction is the one that takes the target settlement.
Jihads
A Jihad is a Muslim Holy War against the infidels that would make themselves the enemies
of Islam. Jihads have almost identical effects to a Crusade, however the way that they are
called is very different. Since there is no singular spiritual leader within Islam, Muslim
Faction Leaders do not have to seek someone else’s approval to call a Jihad.
• Any Islamic faction that has an Imam with a sufficient Piety rating can call one.
Click on the “Declar
Information Scroll
e a Jihad” button
double-click on him to open his
at the bottom of the Imam’sCharacter
41
Page 23

• Islamic Generals join a Jihad in exactly the same way that a Catholic General
joins a Crusade, via the
• A Jihad army experiences exactly the same restrictions, bonuses and effects
hat a Crusading army does.
t
• Jihads end for exactly the same reasons as a Crusade, except that there is no
equivalent of excommunication.
“Join the Jihad” button on their Army Details Scroll.
DIPLOMACY
Although it might be your destiny to conquer the known world, your faction is but one of
many in the Grand Campaign. Sometimes it will be better to attempt to deal with other
factions in a more civilized manner to further your plans of conquest. This is where
diplomacy comes in.
Diplomacy in the Grand Campaign works by a system of proposals. One faction makes a
proposal of some sort, and the other faction accepts, refuses or counters it. Choosing to
counter is the way to haggle in negotiations.
Throughout diplomacy you will hear the other party speak to you, and their tone will help
give you an idea about what they thought of the last thing you proposed to them. It is quite
possible to insult someone badly enough to make their faction think less of you; should you
push things too far…
The Diplomacy Scroll
Once you enter Diplomacy, there is plenty
of information made available to you about
your faction, the other faction and the
individual you are negotiating with, and
the proposals you make yourself.
• Your faction’s details, and the items
you can put into a proposal are shown
in the panel on the left hand side of
Diplomacy Scroll.
the
• The other faction’s details, including a
display of their enemies and allies, as
well as any treaties you have with
them, are shown in the panel on the
right hand side of the
• Your current stance of allied, neutral or at war with the other faction, and the number
of turns that this has been the case is displayed at the top of the scroll.
• The speech bubble shows what the other faction has to say to you throughout the
negotiations. Some of this will come as actual speech.
• The Demeanor display below the speech bubble will give a description to confirm what
the speech you heard was implying.
• The two negotiators will have their name and diplomacy-related attribute shown.
Details: Relations – This represents the relationship you have with the other faction.
•
Details: Reputation – This represents this faction’s reputation throughout the world.
•
Factions that break treaties become known for it.
•
Details: Power – This faction’s total military might, including that of their allies. It may
well be worth considering who has the most ability to back their threats.
Details: Wealth – For your faction, your treasury value is shown. Thinking about what
•
the other faction can afford is worth factoring into your proposals.
Details: Priorities – If you happen to have an insight into what the other faction may
•
want from at this moment, it will be displayed here.
Private Dealings: Bribe – If this is shown, you have the option to bribe the army,
•
settlement or individual you are dealing with.
•
Make Offer – The items listed here are things you can offer in your proposals. Some
items may or may not be much of an actual offer, depending on the circumstances.
Make Demand – The items listed here are things you can ask from the other faction in
•
oposals. It may or may not actually be demanding to propose these.
your pr
Make Declaration – The items listed here are treaties that you can cancel, by putting
•
42
Diplomacy Scroll.
them into a “proposal.”
• The center scroll is where you actually form proposals, and the items you include in a
proposal are shown here.
uttonsbelow the scroll select how you put the proposal forward – as a gift,a
The
b
•
proposal, or a declaration that you are cancelling a treaty.
Demeanor - Reading their Reaction
A large part of negotiating is figuring out what the people you’re dealing with are thinking,
or are prepared to accept – This is where
When you start diplomacy, the first demeanor reaction you receive from the other party will
be a greeting, which will vary depending on whether or not you were at war, allied, or
neutral. From that point on, all demeanor reactions you hear and see on the demeanor
display will be relating the reaction to the last proposal you made.
Making Proposals & Declarations
The center scroll shows the proposal that you are going to put forward. You build up a
treaty by selecting items from the two lists to the side of the scroll:
Click on items under the “Make Offer” heading in the left hand column to add
•
•
•
•
• As you add and remove items, you can see the “Proposal Balance” shown
• Proposals do not have to be balanced, but you’ll find proposals that are
• If you’re simply offering money, territory or map information and not asking for
• When you want to bring an end to a treaty you have with another faction, such
• It’s quite possible that your proposed treaty was interesting, but not quite what
• Once a counter offer treaty is on the table, you can accept it or make your own
• It’s quite possible for negotiations to go through several rounds of offer and
• If you make an offer or demand without adding the other type,
offers in the proposal. These are things that you’re willing to give to the
them as
other party, including land, cash, information, military support or access, an
alliance, and other such things.
Click on items under the “Make Demands” heading in the left hand column to
add them to the proposal as
Click on items under the “Make Declarations” heading in the left hand column
to add them to the proposal – although this is not a proposal, but rather a
declaration that you are ending a treaty.
Click on an item already in the proposal to remove it.
beneath the offers and demands you have added to the proposal.
obviously imbalanced in your favor are rejected more often than proposals that
offer the other faction something genuine.
Click the Make Offer button below the proposal text. Your opposite
•
number will then respond. He will do one of three things:
outright, accept immediately or make a counter-offer.
anything in return, you can offer these as a
usually make the other faction see your people in a better light.
as taking away their military access or breaking an alliance, you can do so by
selecting these items under the “Make declaration”, and then
Cancel Treaty button instead of making an offer.
the opposition wanted. In this case, observe their demeanor as they make a
counter-offer to you. The demeanor will help you get an idea of how close you
were to success.
proposals in response as a
clicking on either the offers, the demands, and on the proposal scroll itself.
counter offer before a deal is reached. Be mindful, though, that not everyone’s
patience is endless and one man’s haggling is another man’s waste of time!
Offer button
accept what you’ve suggested.
. You will be asking the other party what it would take for them to
Demeanor comes in.
demands from your opposite number.
refuse
gift to the other faction. This will
clicking on the
counter offer. Again, you can change the treaty by
click the Make
43
Page 24

Proposal Items
The items available on the left that you can enter as offers, demands or private dealings
will change depending upon what situations are available. Here are some things to know
bout special situations and proposals:
a
• Offering Trade Rights is an ideal first proposal for neutral factions.
• Only a Diplomat can attempt to bribe a settlement, army or character.
• Only a Princess can offer herself in a marriage alliance, and she can also be
approached personally for one as well. A marriage alliance is serious, and both parties
are expected to honor the deal.
• Military Access means granting passage through a faction’s lands, without it any longer
being considered a hostile action.
• If you are negotiating for Papal election votes, relevant offers and demands
will appear here.
Proposal Balance
The “Proposal Balance” displayed at the bottom of the proposal scroll is a very useful tool
in that it lets you know how generous or demanding your suggestion is.
The information shown relates how balanced the proposal is on raw terms – in other words,
without considering the situations for both parties. Thus, what normally may be generous
may be unappealing to the faction you are dealing with now.
MANAGING YOUR EMPIRE
In the Grand Campaign, you will discover that as your empire becomes larger and more
powerful, it will also become a more unruly beast for you to tame. You will have to deal
with increasing numbers of enemies, the prospect of rebellion within your realm, deaths in
your ruling family, and much more!
This section of the manual covers how to get a grip on your faction’s empire - from knowing
where all your forces are through to who your allies and enemies are.
The Faction Overview Scroll
Click on this button to get an overview of your faction. The Faction Overview Scroll
displays some information about your faction, and opens access to other scrolls
relating to your faction’s state:
• A host of information and stats about your faction, from who your greatest
General is, through to what year it is and your victory conditions.
• Access the automanage controls which allow you to have either the taxes or
construction in your settlements managed by the AI. There is also a slider to
44
adjust the spending policies when using automanage.
• Tabs that open other overview scrolls, such as the
can see the current stances for all known factions in the campaign at present.
Click on this button to view your Family Tree Scroll.
•
• Click on this button to view the Faction Rankings Scroll.
• Click on this button to view your Rosters Scroll.
Click on this button to view the College of Cardinals Scroll.
•
Diplomacy Overview where you
The Family Tree Scroll
The Family Tree Scroll shows all the important characters in
our faction—the men who can be Generals and Governors,
y
as well as your noble daughters who will become Princesses.
• Portraits in color are living characters; those
characters shown in grey are dead.
• The two most important characters are the
Faction Leader and the immediate Faction Heir,
and the status of these two is marked on their
portraits. The Faction Leader is always the most
senior General in any army, regardless of actual
Command ratings.
• All the larger portraits are characters in your
faction that you can use in the campaign now. Move the cursor over a portrait to
see the character’s name and abilities displayed at the bottom of the scroll.
• Select one of the larger portraits by
“Show Me” button to reveal character’s location on the campaign map.
• The smaller portraits are wives or children who have not yet come of age.
New Family Members
During the Grand Campaign you will have characters and family members die, but you will
also have new members join the ranks of your ruling family. Sometimes your direct actions
will expand or change your family tree, while other times promising Generals, keen suitors
or women of noble breeding may be presented to you, seeking to join your nobility.
Ways to join your Family Tree include:
Being born in. Characters born into your Family Tree become either a General or a
•
Princess when they come of age, depending on their gender. They may have traits as a
result of their parents’ influence.
Being married in. Characters can join your family by marrying someone in your Family
•
Tree. This may be a direct result of the player’s actions, such as attempting to marry a
General with a Princess, or seal a marriage alliance in diplomacy. It could also be
because a suitable husband or wife has become available.
Being adopted in. Characters that lack their own children may choose to adopt a
•
younger man and make him his ward, someone that they would be prepared to have
serve his family’s interests, and potentially name as a potential successor to their
wealth and estates.
•
Bribed characters do not join the family. It is important to note that bribing a General
does not actually bring him into the family tree of his new faction. The only way that
these Generals may join the family is by being married to a Princess within the faction,
and this is limited to European factions.
The Faction Rankings Scroll
This scroll gives you a way of seeing your progress in the
game, and comparing your strength with that of your rivals
in several different ways. The graph shows your faction’s
power over time as an absolute value; it does not show the
proportion of the world’s “power” that you control.
• The ranking choice allows you to choose an aspect of
your faction’s power: production, territorial, financial,
population and overall.
• The faction choice lets you choose which collection of
factions you wish to compare: your own, all factions, the
top five, neighboring factions and a custom selection.
• You can use the faction symbols to toggle the graph
lines on and off for any particular faction(s). This can
be very useful when reviewing your progress in a war.
clicking on it and then click on the
45
Page 25

The Rosters Scroll
The Rosters Scroll
rosters either via the
n the tabs at the top of the Review Panel
o
•
Military Forces Roster. This roster lists the Generals, Admirals and Captains for your
faction. It also displays their attributes, their status and location, and how many
soldiers they have under their command.
•
Settlements Roster. This roster lists the settlements for your faction. It shows the level
of settlement, population, public order, income, Governor (if any) and icons to flag
when construction or recruitment are taking place.
Agents Roster. This roster lists all the agents in service for your faction. Also displayed
•
are their attributes, their character type, and where they are located.
Your Job as Faction Leader
There are countless options as to what you can do in the Grand Campaign, and it would be
incorrect to say that you have to touch on everything to succeed. In fact, the more focused
your actions, the more effective they are.
These are the primary tasks you have as the ruler of your faction:
Ensure you have enough troops. To conquer other lands and defend your own, you will
•
need armies and garrisons. It is up to you to ensure that your empire has the facilities
to recruit these units.
Ensure you have enough money. Without finances you will find that there is very little
•
chance of success in the Grand Campaign. Money may not be one of your goals, but it
will be required to reach them.
Deal with other factions. The agreements you make with other factions can have a huge
•
effect on your situation. An aggressive allied faction can drag you into huge conflicts,
or a timid one might not back you sufficiently when you could use their help.
Deal with threats of rebellion. Good leaders find out about trouble within their own ranks
•
before it happens. Keep an eye on your Generals and settlements to see if they are
loyal and content.
Plan conquests. You will need to have an idea of what’s going on both in your lands,
•
and those beyond your borders so you know where the opportunities lie to expand your
empire.
How to Make Money
There are several ways to make money for your faction in the Grand Campaign, though it is
important to know that doing some of these things may have other repercussions.
These are some of the basic ways to improve the amount of money your faction is
generating:
Establish trade rights. Send your Diplomats and Princesses out to establish trade rights
•
with everyone you can.
Increase your tax rates. Just ensure you’re not going to send your settlements into a
•
state of riot and unrest by doing so.
•
Construct buildings that improve trade income. Constructing trade buildings may cost
money, but they pay themselves off over time and then make your settlements more
profitable.
Disband surplus units. Most troops require that you pay them an upkeep cost each turn.
•
If you are keeping units you will never put into action, disbanding them will help cut
down your military expenditure.
Ransom Prisoners. When you fight battles, attempt to capture lots of prisoners and then
•
ransom them back to the enemy.
•
Use Merchants. The amount of money that you can generate from sending Merchants
out onto valuable trade resources can be significant.
Rebellion
Not everybody is content to remain a servant, and there may be times that you are faced
with characters, armies or settlements that actually rebel against you. This is usually
is actually three roster lists rolled into one location. You can access the
button at the bottom of the Faction Overview Scroll, or by right-clicking
:
46
because they are either disloyal to begin with, or are in a position where their loyalty is
being strained.
ow to Deal with Loyalty & Rebellion
H
There are several ways to prevent rebellion; having to recapture a settlement or lose a
General who you were counting on can be a true setback.
Here are some ways you can avoid rebellion:
Marry a Princess to a General. This will boost his loyalty significantly.
•
Don’t leave Generals stranded. If you leave a General to fight in very difficult odds, he
•
won’t appreciate it. Ensure they have the troops they need to not be in too much
danger.
Keep disloyal Generals close. Generals with a loyalty problem should be kept close. If
•
you send them far away, they are more likely to become rebellious.
Keep the people happy. Try and build everything you can to improve the settlements you
•
have, install Governors where there are issues and having a decent garrison of units
helps there.
BATTLES IN MEDIEVAL II: TOTAL WAR
How Battles work in Total War
Realistic large-scale conflicts are what Total War battles are all about. Unlike many realtime strategy games where you can continually recruit troops during battle and use sheer
numbers to overwhelm your opponent, battles in
same sorts of tactics for field and siege warfare that commanders of the period had to
master themselves.
As a commander you’ll be doing things like:
• Making sure your units are organized and positioned to do their job.
• Looking to the terrain for places where you can use one unit to hold back many
enemies, or higher ground to defend and shoot from.
• Choosing the right units to do the job. You don’t want to send cavalry charging into a
row of spears formed into a wall of spikes for example.
• Paying attention to what the enemy is doing, and moving to counter his plans.
• Looking for opportunities to outnumber and outflank enemy units to take enemies
down more easily.
• Ensuring that you don’t let your men get too exhausted or break their morale.
Your men are no good to you if they are spent, or running for their lives!
• Using your Generals (if present) to rally troops and influence the battle.
The Battle Deployment Scroll
When you have an army selected on the campaign map
right-click on an enemy army or settlement to attack.
This will bring up the
• The strength comparison bar in the center of
the scroll gives you the overall battle odds.
Move the cursor over the crossed swords to
see the exact odds.
• Reinforcements are also listed (and taken
into account in the odds calculation). These
are drawn from armies that are adjacent to
the site of the battle or siege.
Click here to take control of your units on the battlefield.
•
• You can have the game work out the result. Auto-resolving a battle is speedy,
but your tactical skill is obviously not taken into account. Casualties may be
heavy, and you can’t protect valuable Generals.
Click her
•
will withdraw a short distance to a safer position.
Battle Deployment Scroll:
e to cancel the battle. If the other army was the attacker, your force
Medieval II: Total War involve using the
47
Page 26

Attackers & Defenders
In every campaign battle there is an attacking army and a defending army. During sieges the
besieging army is usually the attacker. The only exception to this is when the defenders
ally out, or a relief force attacks the besiegers. In this case the besieging army is the
s
defender. Attacking and defending armies have different
have different deployment rules.
How to Win Battles
Generally speaking, in a field battle you need to drive the enemy from the battlefield in
order to win. You can press the
• This may involve killing many enemy troops, although a crisis of morale (the death of a
General, for example) will make the enemy flee the battle.
attacker, there is a time limit. If you haven’t defeated the enemy before the
• As an
timer expires, you lose the battle.
• As a
defender, the timer works in your favor. Remain on the field until it runs out and
the attacker is automatically defeated.
• During a
• During a battle you can press the
Deploying Your Units for Battle
At the start of the battle you may be given a chance to deploy your troops. The rules of
deployment work as follows:
• As an
• As a
• Units must be positioned within the boundaries of your deployment zone. This is the
• If you are ambushed, then you will not be able to manually deploy your units at all.
•
Placing Units During Deployment
There are several controls to understand so that you can actually deploy your units in a
sensible manner:
Click on a unit or its card in the Control Panel, and then right-click on the ground you
•
want it to occupy.
• You can select multiple units for deployment.
• You can deploy multiple units by
You can also
siege battle, victory is determined by control of the central square or plaza in
the settlement. The attackers must take this square before the timer expires.
the victory conditions.
attacker your army will always deploy on a section of the battlefield that matches
the line of its approach. March onto a battlefield from the north, and that’s were your
forces will deploy. There is an exception to this in siege battles, where you will
approach from the side of the settlement that has a gate.
defender, you’ll deploy in a complementary area of the battlefield.
area on the map bordered by your faction color.
Reinforcements always appear on the edge of the battlefield that matches their position
on the campaign map. It can be very worthwhile, for example, to position supporting
armies on the campaign map on the flanks or in the rear of an enemy position before
you attack.
• Hold down the
(in the Control Panel) you wish to select.
• Hold down
all units of the same type in your army.
Click-and-drag on the battlefield to have a yellow box around the units you wish
•
to select. All units surrounded in this fashion will be selected.
• If you select one card then hold down shift and
will select all cards in between.
right-click-and-drag the units out as a line.
ESC key at any time to end a battle.
F1 key to see information about the battle, including
CTRL key and click on the units (on the battlefield) or unit cards
CTRL and double-click on a unit card (in the Control Panel) to select
right-clicking on the ground you want them to occupy.
victory conditions in battle and
click on another card, then it
The Battle View & HUD
What you see on screen during a battle can be divided into four main sections:
he Battlefield View.The actual display of the battlefield. Much of the controls in battle
T
•
•
•
•
The Battlefield View
Medieval II: Total War’s
the battle itself, but when there’s a lot happening, being able to recognize exactly what
everything is can be vital:
• You can
• Some units also carry smaller flags showing your faction color and symbol. These show
• Terrain has exactly the effects you would expect in real life: marching through snow is
• Weather also has realistic effects: A blazing sun will heat plate armor; fog will obscure
• The out-of-bounds area of the map is marked by a bright red line that is visible when
The Battle Control Panel
There are two sets of buttons to use on the Battle Control Panel – Unit controls, and
Group controls:
Unit Controls
clicking on the actual men and terrain.
involve
The Battle Mini-map. On the left are the mini-map and game speed controls.
The Battle Review Panel. In the center are the unit cards, each of which represents one
of your units on the battlefield.
The Battle Control Panel. On the right are the controls for individual units, groups of
units and the army as a whole.
battlefield offers a realistic and direct take on what’s happening in
click on the large banner to select the unit – this can be quite useful in the
middle of tense hand-to-hand fighting. Different shaped banners are shown for
different classes of unit (eg. Cavalry and infantry use different banners).
a combination of its experience and upgrades to weaponry and armor.
tiring, as is marching up hill; charging downhill is more effective than charging uphill;
positioning artillery and archers atop hills and cliffs gives them a range bonus and
clear shot, etc.
or even hide units at a distance and rain will make missile fire less accurate, etc.
the camera is close to the battlefield’s edge. Units cannot be ordered beyond this line,
although they will go there if running away or withdrawing.
• Clicking on the portrait of your commanding General or Captain immediately
moves the camera to a position behind the Generals’ unit.
Click here to cancel the current orders being carried out by the selected unit(s).
•
You can also press the
Click here to make the selected unit(s) withdraw from battle in good order. The
•
units will retreat into the out of bounds area of the map. A unit that is given
withdrawal orders can be stopped and recalled to the fight up until the point it
leaves play.
Click here to toggle the unit formation from “tight” to “loose.” This alters the
•
spacing between men within the selected unit(s).
Click here when a unit is selected to toggle the unit’s movement speed between
•
walking and running. A unit that runs will tire more quickly than one that
marches at a steady pace.
Click here to set the selected unit(s) to guard mode. When this is toggled on the
•
unit(s) hold position and formation at all costs, and let the enemy come to
them. A unit on guard will not pursue fleeing enemies. This can be useful for
holding an important location (such as a gateway).
Backspace key for the same effect.
48
49
Page 27

• Click here to toggle skirmish mode on and off. A missile unit set to skirmish will
seek to keep a safe distance between itself and the enemy (usually the range of
its missile weapons). If a unit cannot skirmish this button will be greyed out.
Click here to toggle Fire at will mode on or off. When this is on selected missile-
•
armed units will fire at nearby targets without further orders. When a unit
without missiles is selected this button will be greyed out and unavailable.
• These
buttons are reserved for a variety of special abilities, depending on the
type of unit currently selected. See
• This displays the number of prisoners you have captured during the battle.
Using Special Abilities.
• A single arrowhead at the top of the card shows that the unit is moving at a
steady
march towards its ordered destination.
• A double arrowhead at the top of the card shows that the unit is moving
towards its ordered destination at the run, or is
yet to make contact.
• Crossed swords show that the unit is engaged in
charging an enemy unit and is
hand-to-hand combat.
Group Controls
• When a group of units is selected click here to bring up the Group formations
.
buttons
• Click this button to group the selected units. This button is greyed out unless
multiple units have been selected.
Click this button to toggle CPU control for the group, and the game will
•
independently issue orders to the units once you have given the group some
orders.
The Battle Review Panel
Each of the cards in this section represents one unit on the battlefield. When a card is
highlighted all men in the unit on the battlefield are highlighted with a circle, and an arrow
showing the direction they are facing.
• The number is the current number of men in the unit. The artwork on the card
shows the unit type.
• Large portrait unit cards are always Generals accompanied by their bodyguards.
A gold star on the unit card identifies the commanding general in battle. Any
other generals have a silver star.
• Units that have gained experience and/or improved weapons or armor have this
shown on the unit card as chevrons, swords and/or shield markers.
• All units that are armed with missile weapons have a bar across the bottom of
the card that shows their current
and as the unit fires missiles the bar empties.
• Artillery units have an ammunition status bar, just like other missile units. The
number on the card is the
pieces. Each artillery piece requires a minimum number of men to crew it.
• Units can be
in the group can be selected and controlled as one.
• Unit cards can have action icons superimposed to show what the unit is
currently doing (covered below).
States & Effects on Units in Battle
The unit cards in the control panel also give you a way of monitoring what your units are
doing without having to dash to each one in turn. Each unit card can have a superimposed
symbol as “shorthand” notification of what is happening to the unit:
• When a unit
card will turn red.
grouped together during battle. By clicking on the tab all the units
takes casualties the number of men in the unit shown on the unit
ammunition status. This bar always starts full,
number of men in the unit, not the number of artillery
50
• A bow and arrow symbol shows that the unit is
used even if the unit is using ammo other than arrows).
• Arrows show that the unit is
range or ordering it to attack its tormentors!
• This symbol shows that the unit is currently
enemy forces.
• The white flag symbol shows that the unit has suffered a morale crisis and is
routing: running from the enemy. The unit banner also changes to white on
now
the battlefield. It may be possible for a General to rally troops that are routing.
• These symbols only appear on unit cards during sieges.
To find out more see
It’s quite possible for more than one of these symbols to apply at any one time. If this is
the case, the symbols that apply are displayed in turn.
The Battle Mini-map
The mini-map gives you a view directly down onto the battlefield. Terrain on the battlefield
is taken from the campaign map location. you’ll see distant mountains and bodies of water
in the correct places beyond the battlefield.
• The mini-map is always oriented so that north is at the top.
• The arrowheads in faction colours show the position and facing of units on the
battlefield.
• Selected units are always highlighted on the mini-map.
• The two blue lines show the current view onto the battlefield.
• The markers on the mini-map indicate if the unit is yours (green), the enemy’s (red) or
neutral (blue).
• The shadowed area at the edge of the mini-map is out of bounds during a battle. Units
may only enter this part of the map if they are withdrawing from battle or routing.
• It is possible to issue movement orders using the mini-map.
Giving Orders – Moving & Attacking for more details.
See
Drag-and-click on the mini-map to adjust its displayed view.
•
The other data and controls in this section of the panel are:
• You can zoom in and out of the mini-map using these
map scale.
• Three buttons adjust the game speed. The
down the action respectively.
“Play” button. The number shown is the game speed multiplier. Hit
toggle between standard and the fastest speed setting.
• The hourglass timer shows how much time remains before the battle ends. If
you speed up the game, the timer speeds up, too.
• Just above the game speed controls the
failure of your army in disposing of the enemy.
under fire. It may be worth moving the unit out of
SIEGES & SIEGE BATTLES.
“Pause” stops the battle, and then becomes a
firing missiles. (This symbol is
hiding and may not be spotted by
buttons to change the
“plus” and “minus” speed or slow
CTRL + T to
power bar shows the relative success or
51
Page 28

The Battle Cameras
The default for the battlefield camera in Medieval II: Total War is an RTS-style camera,
which can be controlled by the mouse or keyboard controls (there is a second mode which
ill be discussed below):
w
• Moving the cursor to the edge of the screen alters the camera view. The cursor
will change shape to show that the view is being altered. The view will
the same direction as the side of the screen the cursor was moved to.
mouse-wheel (if your mouse has one) alters the camera height. The camera
• The
automatically
battlefield.
• The
camera height in the same fashion. The
numeric keypad alter the camera tilt towards or away from the ground without
altering its height.
Clicking the center (third) button on the mouse zooms the camera viewpoint to
•
look at the unit nearest the cursor while the button is held down. When the
button is released the camera moves back to its previous position. (On some
mice the mouse-wheel acts as the center button).
• The cursor arrow keys on the keyboard
and back without changing the viewing angle.
down the left or right arrow keys to
• The numeric keypad also changes the camera view. Check the key settings by
pressing the
• Double-click on a unit card to make the camera move to a position directly
behind that unit. Pressing the
• Click on the General’s portrait in the control panel to move the camera to a
position directly behind the General’s bodyguard unit. If no General is present,
there will be a Captain.
• The blue lines on the mini-map showing the visible area of the battlefield
change as the camera position alters.
• The camera view can be changed when the game is paused.
Pressing the
selected unit(s). This will be familiar to players of earlier
camera controls are the same, with one important exception:
• The
• The
Morale
Morale is an area where Total War differs from most other strategy games. Total War battles
simulate the psychological factors that affect soldiers in some detail, and it’s important to
have some understanding of these factors. Not only will this keep your own army fighting
longer, but convincing the enemy soldiers to run away is a much safer route to victory than
having to actually kill them.
How your units react will depend on their particular training and disposition, so read the
unit descriptions carefully.
• In general, peasants and militia are likely to run away at the first sign of trouble,
• You can see each unit’s morale on the unit tool tip. If it says eager, then everything is
Routing
If your men become too scared or disheartened and their morale drops too low, they will
Delete key toggles the second camera mode – locking the view onto the
up and down arrow keys on the keyboard track the camera view forward and back
without changing the viewing angle.
left and right arrow keys on the keyboard pan the camera (spin on its vertical axis)
without changing its position.
whereas elite units such as knights will fight on in sticky situations.
fine. If it says, “wavering” then the unit is likely to run away soon if you don’t get
them some help.
pitches (tilts) downwards as its height is raised above the
/ and * keys (divide and multiply) on the numeric keypad also alter the
- and + keys (minus and plus) on the
track the camera view left, right, forward
Click on the ground and hold
pan the camera rapidly.
F1 key during battle for the camera controls.
End key also has the same effect.
Total War titles. Virtually all
52
move in
break and rout. The tool tip will show their action as “routing” and their morale state as
“broken.” They will attempt to exit the battle as quickly as possible and you will no longer
be able to select them, or give them orders. It is easy to spot units that are routing, as their
anner will flash white.
b
If they reach a place where they feel safe, then they may rally and return to your control.
Units won’t rally when an enemy is close by, so chasing after enemy units will ensure that
they don’t return to the fight.
Factors That Reduce Your Morale
Morale will naturally fall over the course of the battle as units take casualties and become
tired. There are some specific things that directly affect morale as well:
• Losing your General.
• Being engaged in a losing melee battle.
• Being outnumbered.
• Being under fire from artillery, guns and flaming ammo.
• Having allies flee nearby. Note that routing can work like a chain reaction in the
worst-case scenarios.
• Threats from enemies at the rear or flanks.
• Frightening foes such as elephant cavalry and savage natives that practice live
sacrifices, etc.
• Being hit by a nauseous gas cloud from a cow carcass.
Factors That Increase Your Morale
The best ways to bolster morale are:
• Being engaged in a winning melee battle.
• Outnumbering the enemy.
• Keep your forces concentrated so that units can support each other.
• Keep your General near the action.
• Use your General’s Rally ability.
• Position high morale units at the end of your line, as this is the most exposed position.
Ways to Attack the Enemy’s Morale
Your aim is to clear the enemy from the field of battle, so be sure to use some of these
techniques to get them routing:
• Concentrate assaults in one place so you can overwhelm certain enemy units.
• Concentrate missile fire on one unit to increase the chances of breaking it.
• Look for ways to get several enemy units routing at once to create a mass panic.
• Get units behind the enemy to undermine the morale of the whole force.
• If the chance arises, kill or rout the enemy General.
Fatigue
When your men are tired, they don’t fight as well, and are more likely to run away.
The fatigue level is shown on the unit tool tip. If a unit is exhausted, you should
try and give it rest.
Things that affect fatigue include:
• Units get tired when they fight or shoot.
• Units get tired when they run a long distance, or climb a steep slope.
• If a unit has become tired, then leave it standing still for a while, and it will recover.
• Units do not become tired walking on flat ground, but nor do they recover.
• Troops used to the cooler climate of the north, or who are wearing heavy armor will tire
out if fighting in the heat of the desert or the tropics.
Giving Orders - Moving and Attacking
Medieval II: Total War
on the battlefield for a destination or target.
• Click on a unit on the battlefield or a unit card in the Review Panel to select the unit.
uses the same basic controls for both tasks: click to select, right-click
53
Page 29

• Right-click on the ground to have all the selected units move to that point.
•
Right-click on an enemy unit to have all the units attack it – Note that the cursor will
change based on the unit you have selected, and the way it will attack.
You can review movement orders for all units by holding down the
•
colored chevrons will show all unit destinations for as long as the spacebar is held.
• When you order a tightly bunched selection of units to move to a point, they’ll keep
their formation, and move so that the center of the group of units is the point that you
clicked. If they’re widely spread, then they’ll arrange themselves intelligently around
the point you selected.
cursor will become green when targets are in range of a selected unit that uses a
• The
missile attack. The
Multiple Selections, Grouping, and Formations
Understanding groups and formations is important if you wish to be an effective
commander. These features allow your units to work together more effectively, and let you
control your army more easily. It’s usually best to set up your groups and formations during
the battle’s deployment phase.
Selecting & Ordering Multiple Units
There are several ways you can select multiple units at once:
• Hold down the
units already selected.
Click-and-drag on the ground, and drag out a box to enclose several units.
•
• Use one of the shortcut keys to select all the units of a particular type. The default
shortcuts are
CTRL + M to select all missile units.
•
CTRL + C to select all cavalr
•
CTRL + I to select all non-missile infantry units.
•
CTRL + B to select all artillery units.
•
CTRL + A to select all units.
•
Once you have multiple units selected, you can order them all together in the same way
that you’d order a single unit. This includes moving, attacking, and the various special
order buttons.
Groups
When you have multiple units selected, you can easily turn them into a group by clicking
the Group button on the control panel. Once you do this, you’ll see that the unit cards
rearrange themselves on the review panel, with a border around them and a convenient tab
that you can use to select the group in future. There are several benefits to grouping your
units.
• You can create a group with a specific number, by selecting the units you wish to
group, then holding down
alternatively hit the
• It’s easy to select them again by
select the group by pressing the number key that corresponds to the number on the
group tab.
• To remove a unit from a group, select the unit, and
• To split a group into two, select the units you wish to split off,
remove them from the group, then
• To add units to a group, you must reform it. Select the existing group, then hold down
the control key and select the units or groups that you wish to add.
button
or CTRL and a number key to form a new group with all these units.
• When grouped units move, they all move at the same speed, and attempt to maintain
their formation.
The group remembers the formation it was in when formed, making it easy to reform
•
cursor will be red if the target is out of range.
CTRL key when clicking on a unit or unit card. This will add it to those
y units.
CTRL and pressing the number you desire. You can
G key to group the currently selected units.
clicking their tab on the Review Panel. You can also
click the Group button again.
click it again to form them into a new group.
pacebarkey. The
s
click the Group button to
Click the Group
54
again if the units have been dispersed.
• Groups can be given a preset formation, making it easy to organize your units.
• If you order a group to attack an enemy unit, the units in the group will intelligently
ssign themselves to attack surrounding enemy units too. A common situation that
a
occurs in the game is when two lines face off against each other. If you group the units
in your line, then
will intelligently match off with the enemy unit facing them.
• The group may be placed under “AI assistance.”
Once you’ve formed units into a group, you can still give orders to individual units within it,
if you temporarily need them to do something different. Units always obey the last order
that they’ve been given though, so whenever you issue an order to the group, this overrides
any individual orders you’ve given units.
Using AI Assistance
You can place a group under “AI Assistance” (computer control) by selecting the group,
and
clicking the “AI Assistance” button on the Control Panel. The computer will now take
care of controlling these units for you. You can give high-level instructions to the computer
by selecting the group, then
enemy you’d like it to attack. If you don’t give any orders, the group will defend the spot
where it currently stands.
Using Formations
A “Formation” is an arrangement of units, where each unit type has a set position for the
current formation. Knowing how to use formations makes keeping your forces in a certain
shape quick and easy.
Cr
eate your own formations
•
desired positions before assigning them as a group. The units in the group will always
move back into that formation when you give it an order.
Using preset formations – Once a group is selected, click on the Group Formations button
•
to reveal a selection of 8 present formation buttons. Clicking on one of these will
arrange the units into the formations as described by their tool tip. The units arrange
themselves instantly in the deployment phase.
•
Formation stretching - If you’ve assigned a preset formation, you can vary the width of
the group, by
dragging out a line to define exactly where you’d like the group to go, and how spread
out you’d like it to be.
Using Special Abilities
Some units have special capabilities that you can call upon in battle, ranging from actual
attacks, through to unique formations and actions like trying to rally your allies.
Rally troops – This ability is unique to Generals and gives a temporary morale
•
boost to all nearby friendly units. This may stop wavering units from breaking,
or encourage routing units to rally.
Sharpened stakes – This ability allows missile units to place down a row of heavy
•
wooden stakes in front of their current position during deployment only. This
forms a defensive wall that is ideal for deterring cavalry charges.
Spear wall formation – This ability allows a spear-wielding unit to form up a
•
deadly wall of spikes that makes them extremely difficult to attack from the
front. While in this formation, the unit cannot run and moves slowly.
Fire flaming ammo – This ability allows units with missile weapons to set fire to
•
their ammo, causing a drop in accuracy, but adding extra fire damage to shots
that connect.
•
Fire exploding ammo - Exploding shot is an advanced form of munitions that
detonate on impact, creating a deadly hail of shrapnel, killing most troops
caught in the blast.
right-click on the unit in the center of the enemy line, all your units
clicking on the place you’d like it to defend, or clicking on the
– To create your own formation, arrange your units into the
right-clicking on the terrain, holding the mouse button down, and
55
Page 30

• Barrage fire – Allows gunpowder artillery to fire many individual shots all in one
attack.
otting cow carcass–Loads a decaying bovine carcass into a trebuchet, which
•
R
will create a cloud of nauseous gas. Units affected by the gas suffer a morale
penalty.
Circle and shoot – Causes missile cavalry units to ride in a circle as they attack
•
the enemy, making their shots slightly less accurate, but also making them
much more difficult to hit themselves.
Wedge formation – Forms cavalry into a narrow wedge that is ideally suited to
•
moving through enemy lines, rather than stopping to engage.
Schiltrom formation – Forms a spear/pike wielding unit into a circular formation,
•
with all troops facing outwards. This is a useful defensive formation when
outnumbered or surrounded.
Taking Prisoners
Battle Results
When a battle ends, whatever the reason, a panel will
appear giving you information about the result. The
following details and controls are available here.
Dealing with Prisoners
If you were the victor, and thus the captor, you will have a decision about what to do with
the prisoners you have taken in battle.
Ransom
Choosing to ransom asks the other faction to pay for the return of their troops, and possibly
Generals or even
neither noble nor nasty.
Release
Choosing to release lets these men go after the battle, showing mercy. This is considered to
be a rather chivalrous thing to do, although letting the enemy go is not always wise.
Execute
Choosing to execute the prisoners is quite obviously a dreadful thing to do, but if you can’t
afford for the enemy to be regaining troops, this can be the best course of action.
Things to know about how you deal with prisoners:
56
Whenever an enemy soldier that is routing is brought down by one of your men,
the enemy is taken prisoner. Note that you only get to take prisoners if you are
victorious, as the winning side is in a position to reclaim their men that were
taken themselves.
• Statistics about the battle you just had, whether
you won or lost, and if it was a close battle or a
slaughter.
Click this button to exit the battle entirely.
•
Click this button to save a replay of the battle that just took place so you can
•
view it later to relive your more glorious moments.
• The option to save a replay does not occur in campaign battles.
Click this button for more detailed information about the battle that
•
just took place.
Faction Leaders or Heirs. This is considered common and acceptable,
• The faction that actually captured the prisoners is the one that decides to ransom,
execute or release them.
• The only decision the faction that lost the battle makes is whether or not it pays the
ransom, should one be offered.
• Generals, Faction Leaders and Faction Heirs are worth far more money than standard
units in ransom calculations.
• Declining to pay ransoms when you can afford it can be considered somewhat
dreadful, while choosing to pay a large ransom is considered quite chivalrous.
• If you can’t actually afford a ransom, nobody will think worse of you for not paying.
SIEGES & SIEGE BATTLES
Sieges occur when an army assaults a settlement or attempts to break into a fort. They
have much in common with field battles, but with the important qualification that one side
is behind a set of defenses. All the normal rules of the battlefield apply to sieges; orders for
attacks and movement are issued in the normal fashion.
There are, however, extra conditions that apply during sieges, and new weapons and tactics
for both the attacker and defender to consider.
Launching a Siege
When you attack a settlement with an army, you are
launching a siege and will receive a special
that comes with options not found in field battles.
Scroll
• Any defenses including walls or improved towers
will be displayed here to show what you’re up
against.
• The number of turns that the settlement can last
before having to surrender from starvation is
shown below the defenses.
Click on this button to have your army withdraw,
•
calling off the siege.
Click on this button to launch your attack now with the forces and equipment
•
you have now.
Click on these buttons to begin building the siege equipment shown
•
on them: Ladders, Rams and Siege Towers. Items selected will
appear in the construction queue below, and points will be
deducted from the army’s build points total.
Click on this button to have your siege army maintain its position, holding the
•
siege. This can be used to build more siege equipment, wait for reinforcements,
or even attempt to starve out the defenders so that they will surrender.
Victory in Siege Battles
The victory conditions of a siege battle are different to that of a field battle. You can still
win by killing all of your opponent’s troops or routing them from the battlefield, but
controlling the settlement is actually what a siege battle is about.
• There is a square in the center of every settlement, indicating which faction the
square, and thus the settlement belongs to.
• The besieging army must have at least one of its units in the square without any
defenders in the square to actually take control of it.
• When the besieging army takes control of the square a timer will appear, counting
down the time remaining before they have fully taken control of the settlement itself. If
the remaining defenders do not reclaim the square within that time limit, they lose the
battle, and the settlement.
Using Siege Equipment & Artillery
There are two basic types of machines that you can employ in siege battles – artillery units
that are capable of attacking walls and structures, and actual siege equipment.
Artillery can target walls, defenses and buildings like any other unit in battle. Siege
equipment however works quite differently depending on the equipment being used:
• A unit equipped with a
The cursor will change to show a suitable target gate for the ram. The ram
affords the men using it some protection from missile fire.
• A unit equipped with
(not a tower). The cursor will change to show a suitable length of wall to
ladders can be sent to scale a suitable stretch of wall
Siege Details
ram can be sent against a gateway or wooden wall.
57
Page 31

assault. The unit will march towards the walls, raise their ladders and then
climb up onto the top of the walls. They will have to fight any defenders on the
walls after climbing up.
A unit equipped with a
•
tower in the defenses). The cursor will change to show a suitable wall to attack.
The unit will push the siege tower towards the wall, bring it to a halt next to the
wall, and then clamber up it before launching an assault directly over the
battlements. They will have to fight any defenders who are present on the wall.
• This cursor appears whenever it is possible to target walls or defenses with a
selected artillery unit. The artillery unit will continue to fire until its target
structure is destroyed or it runs out of ammunition.
Click on this button in the Control Panel to toggle flaming missiles on and off.
•
Flaming missiles can set buildings on fire, often ensuring that they will be
totally destroyed.
Capturing Walls
Wooden palisades serve only as a barrier to keep out attackers. However, settlements
with proper walls men can walk upon can be actively fought over by the attackers
and defenders:
• Any infantry (i.e. non-mounted) unit can be ordered to move to the top of a wall, or
ordered to attack defenders on a wall.
• If an attacking unit is in sole possession of a wall, gatehouse or tower it will capture
the structure.
• The defenders can recapture walls.
Defending in Siege Battles
Even though being under siege is not a good thing, having the advantage of walls and
defensive structures is. When armies are evenly matched, the defender actually has a
huge advantage, as it is not they that need to take a risk – it is up to the attacker to find
a way in.
Sally Battles
Sally battles occur when the settlement garrison emerge from behind their walls to drive off
their besiegers. In the case of a sally battle the
attackers and the besiegers as the battle defenders even though, in strategic terms, the
situation is the other way round.
The besiegers will appear on the battlefield outside the settlement, and they will not have a
chance to position their troops for the battle. For the attackers (sallying out) to win, they
must kill or drive off all the defenders (the besieging army).
Using Defensive Fortifications
Defensive fortifications need to be manned in order to be activated – It is not enough to
simply build the fortifications in the first place.
• If a unit of the defending faction is near a tower or gatehouse, the defensive missiles
installed there will fire on enemy units that come into their firing range.
• It is possible for the attacker to take control of fortifications once they gain control of
the central square.
iege towercan be sent to assault a suitable wall(not a
s
garrison are always treated as the battle
HISTORICAL BATTLES
Historical Battles are battles taken from history that are brought to life in Medieval II: Total
. These battles come as special scenarios where you play as one of the sides in an epic
War
battle where you have to make the most of the situation at hand. Being based on the actual
historical events, history itself has shown us a winning tactic in these scenarios – apply
those tactics and you should prove victorious!
58
Playing a Historical Battle
To begin playing a Single Player Historical Battle, go to the Single Player Menu and then
select Historical Battles to see the list of currently available battles to play. Multiplayer
istorical Battles involve the same process as below, except that the “Select Army” screen
H
includes information to show which player is controlling which army.
Click on the battles listed under “Select Battle.” This will bring up the basic details of
•
the battle in question.
•
Click on the “Next” button in the bottom right to go to the “Select Army” screen.
• Mouse-over the faction shields to see which armies are playable in this battle.
their shields to see that army’s units – the last selectable army you
with a glow.
• When you are ready to begin the battle,
Winning a Historical Battle
The rules of Historical Battles are only slightly different to that of any other field battle
or siege:
• The deployment is always pre-determined. Part of the challenge with these battles is
winning from a poor starting position.
• Reinforcements may appear to arrive in a manner that looks unfamiliar, so keep an eye
out for them – They may be close, but well hidden.
click on the “Next/Start” button.
click on will pulse
Click on
CUSTOM BATTLES
Custom Battles give the player the ability to fine-tune a battle scenario to their liking,
for both Single Player and in
Player” in the
before your Custom Battle can begin: the conditions, the teams and the armies.
Choosing Conditions Screen
There are a wide variety of conditions that can be
adjusted to tailor the battlefield to your needs. Once
you are done,
to the
Custom Battle Conditions Settings:
•
Choose Battle. This selects a battle location. Locations marked with a cross before the
name includes a specially defined settlement. Locations without rivers can have
settlements added to them.
•
Load Previous Battles. Click on the “Load Previous Battles” button to quickly recall the
settings of a previously fought battle.
Game Type. Chooses between victory conditions of “Last man standing” (survive to
•
win), “Scored resolution” (score based on units involved and combat results) for field
battles. Siege Battles will always be set to “Siege Assault.”
Season, Weather & Time of Day. These adjust the basic season, weather and time of day
•
for the battle. Some weather and time settings have an effect on how combat works.
Time Limit. Allows varying time limits, or a “No time limit” battle.
•
Level. Allows varying settlement levels to be included, to play the battle as a siege. Set
•
this to “None” for a field battle.
•
Culture. Allows the settlement culture to be set to Northern European, Southern
European, Mesoamerican or Middle Eastern.
Defences. Allows for the inclusion of improved towers in siege battles.
•
•
Difficulty. Sets the battle difficulty – the higher the difficulty, the more capable and
dangerous your CPU opponent will be.
Period. Works as a unit filter. If set to “All,” all units are available. “Early,” “Late” and
•
“High” all refer to a medieval time period. Late period units are more advanced, early
period units are more primitive.
Main Menu, then click on “Custom Battle.” There are three things to set
click on the “Next” button to continue
Customize Battle Screen.
Multiplayer Battles. To start a Custom Battle, click on “Single
59
Page 32

Customize Battle Screen
This is the screen where the teams are set up for
battle. You can have up to 8 factions and 4 teams
n one battle using the controls on screen as
i
follows:
• Team details are shown down the left.
Aside from seeing which player is in
which team, you can also adjust the amount of florins that team can use to
spend on units, and whether or not that team plays as the attacker or defender.
• Player details are shown in the middle of the screen.
shield or player name area selects that player – Then you can select a faction
for that player by
of the screen.
• These shields show which team that player is on.
to change teams.
Clicking on this button will remove that player from the game, emptying that
•
player slot.
Click on the “Next” button in the bottom-right corner to continue to unit
•
selection.
Select Units Screen
This screen is where you select the individual
units that will be in each army. There are certain
things that will limit what you can select, or
affect the costs of the units:
Faction and Florins Left show the currently
•
selected faction, and its remaining budget for
unit selection and upgrades – This is not the
team budget. As units and unit upgrades are selected, this value will drop accordingly.
• The area in the center of the screen is where teams and factions are selected.
faction shield to change armies and select another force. The army currently being
a
selected has a glowing faction shield. The panel below the shields shows the units that
have been added to this army.
• The area to the right of the screen shows the available units for that faction. Mousing-
over each card shows information about that unit both in the displays above, and on a
tooltip. The number on the unit card is the number of men in the unit.
•
Click on an available unit in the right area to add it to the army. The unit cost is
immediately deducted from the available money.
• You can
you make. Not all units can be upgraded:
first unit selected is always the army leader.
• The
Right-click on a unit in the central area to remove it from the army. The unit cost
•
is credited to the available budget.
• You can drag-and-drop units within the lower army box. You can drag-and-drop a
unit into the first place in your army (the upper left hand box) to make it the
commander’s unit. This can also help the organization of your army when you
have a few identical units.
• If you recruit more than four of one unit type, that unit will begin to cost more
and more as you continue to recruit more of them.
upgrade some units in an army. This costs money for every improvement that
•
Click on the arrowheads next to the chevrons to change the unit’s experience
rating. The more chevrons, the greater the unit’s experience. A grey chevron
indicates no experience.
•
Click on the arrowheads next to the sword to upgrade the unit’s weapons. Not all
clicking on a faction shield in the “Factions” area at the right
Click on a unit in the army to select it – not a right-click, this
•
removes the unit from the army!
Clicking on the Faction
Click on the arrows either side
60
Click on
units can have their weapons upgraded.
•
Click on the arrowheads next to the shield to change the unit’s armor quality;
grey indicates standard armor, while bronze, silver and gold indicate 1-3 levels of
ncreased quality respectively. Not all units are capable of receiving armor
i
upgrades.
• In siege battles you can give siege equipment to the attacking army:
Click on the arrowheads below each of the siege equipment
items to add them to the attacking army.
• Note that these have no cost at all – They are useless without
units.
•
Click on this button to clear the selected units in an army and start again.
Click on this button to make the computer select an army for you. It will do its
•
best to spend your budget as efficiently as possible and create as flexible a force
as possible. You can make adjustments to the CPU’s suggested force.
Click on the “Load & Save Battle” button to save this custom battle set up, or load
•
a Custom Battle you created earlier.
Click on the “Load & Save Army” button to save the current army’s unit and
•
upgrade set up, or load an army you set up earlier.
MULTIPLAYER BATTLES
Multiplayer games allow you to battle against other people, either over the Internet or
across a Local Area Network (LAN). You can create Multiplayer Custom Battles, or fight one
of the special Historical or Balanced Multiplayer battles that have been included with
Medieval II: Total War.
Setting Up a Multiplayer Battle
To begin playing Multiplayer battles, click on “Multiplayer” in the Main Menu and then go
through the following steps:
Enter your details – Include your player name that other players will see in game, your
•
email address and GameSpy password (only needed for online play).
Select Online or LAN – Choose between online play over the Internet via GameSpy or a
•
Local Area Network game. Once you
multiplayer lobby.
The Multiplayer Lobby
The lobby is the “hub” of Multiplayer gaming where
players meet before the battle. The screen lists games
being played and allows you to sort them by several
different criteria. You can also host and join games
from here.
Click on any game in the central display area to
•
select it. Mousing-over it will give additional
information about the conditions and settings.
• If a game is selected,
will take you into the relevant team or Unit Selection screen, depending on the
button
battle type (see
Click on any of the buttons at the top of the lobby to sort all the games by the
•
information in that column.
Using Chat
At the bottom of all Multiplayer lobby screens is the chat area, with messages being
displayed on the left, and the people chatting listed on the right. You can type a message
and it will appear on screen for everyone in the lobby. There is also a “Private” chat mode,
allowing you to send messages to specific players.
clicking on the “Join Game”
Hosting a Multiplayer Game below).
click on one, you will then be taken to the
61
Page 33

• To use the chat filter toggles, click on a player’s name you wish to filter or
ignore, then
lickto toggle between public and private chat modes. This lets you talk to one
C
•
or more people aside from those in the lobby.
Click to toggle the selected player(s) as a private chat recipient. Their name will
•
click on the appropriate toggle button.
be marked with an icon.
Click to toggle filtering of all messages from the selected player(s).
•
Click to toggle between blocking or unblocking the selected player(s) from
•
joining your game.
•
Click to toggle directing all your messages to team members only on or off.
• Toggle to filter lobby chat
Click on this to maximize the chat window for long chat sessions. Click on it
•
again to minimize the chat window.
Hosting a Multiplayer Game
Hosting a Multiplayer game is almost identical to
playing either a Custom Battle or Historical Battle
depending on game type. To host a multiplayer game,
go to the Multiplayer lobby,
, then proceed through the following steps:
button
click on the “Host Game”
• Game Name – Click on the “Game Name”
display and enter a name for the game to be
shown in the Lobby.
•
Set Players & Password – Set the maximum number
of players, and enter a password if you wish to set up a private game.
Unit Scale – You may wish to reduce this if one or more of the players has an older PC
•
or graphics hardware.
Custom, Historical or Balanced – Click on the type of multiplayer battle you wish
•
to host.
•
Selecting teams, armies and units – Subsequent screens from here involve simply
choosing teams, using the same basic setup screens as you would have in a single
player Custom Battle or Historical Battle – except with options to lock any vacant slots.
A WORD OF RESPECT TO THE FAITHFUL
We here at the Creative Assembly want to make it clear from the outset that we are
aware that certain game elements and events within
liberties with how the different religions are handled. The way some things in the game
are described may not adhere to the mandates of those faiths. This is because
Total War
effect of religion.
No one religion is better than another in
work the same for all faiths within the game system. We sincerely apologize to anyone who
is not a game about religion; it is simply a strategy wargame that represents an
Medieval II: Total War, and the effects of religion
Medieval II: Total War may take
Medieval II:
finds the portrayal of their faith offensive; it was never our intention.
END USER LICENSE AGREEMENT
PLEASE READ THE FOLLOWING END USER LICENSE AGREEMENT (“AGREEMENT”) BEFORE
INSTALLING MEDIEVAL II: TOTAL WAR, (THE “GAME SOFTWARE”). BY INSTALLING, COPYING, AND/OR
OTHERWISE USING THE GAME SOFTWARE, YOU AGREE TO BE BOUND BY THE TERMS OF THIS
AGREEMENT AS SET FORTH BY SEGA CORPORATION OF 1-2-12, HANEDA, OHTA-KU, TOKYO,
144-8531 JAPAN AND ITS AFFILIATED COMPANIES (COLLECTIVELY, “SEGA”).
IF YOU AGREE TO THE TERMS SET FORTH IN THIS AGREEMENT, select “Yes” to install the Game
Software and to indicate your acceptance of these terms and your understanding of the conditions of
use of the Game Software.
IF YOU DO NOT AGREE TO THE TERMS SET FORTH IN THIS AGREEMENT, select “No” and Sega shall not
grant to you the License (defined below) to the Game Software. Sega requests that you either return the
u
nused Game Software to the place of purchase or contact one of the customer service centers
advertised in the information accompanying the Game Software. Please note that there may be a charge
for the telephone call to the customer service center.
LIMITED USE LICENSE
The term “Game Software” includes the software included in this video game, the associated media,
any software associated with the online mode of the video game, any printed materials, any online or
electronic documentation, and any and all copies of such software and materials. Sega grants to you the
non-exclusive, non-transferable, limited right and license to install and use one (1) copy of the Game
Software solely for your personal use (the “License”). All rights not specifically granted under this
License are hereby reserved by Sega and, as applicable, by its licensors. The Game Software is licensed
to you, not sold. This License does not give you any title or ownership in the Game Software, and
should not be construed as a sale or transfer of any intellectual property rights to the Game Software.
OWNERSHIP
You agree and acknowledge that all title, ownership rights, and intellectual property rights connected
with the Game Software and any and all copies thereof (including but not limited to any derivative
works, titles, computer code, themes, objects, characters, character names, stories, dialogs, catch
phrases, locations, concepts, artwork, animation, sounds, musical compositions, audio-visual effects,
text, methods of operation, moral rights, “applets” incorporated into the Game Software, and any
related documentation) are owned by Sega or its licensors.
The Game Software is protected by the copyright laws of the United States, international copyright
treaties and conventions, and other laws. All rights are reserved. The Game Software contains certain
licensed materials, and Sega and Sega's licensors may protect their rights in the event of any violation
of this Agreement.
contained on or within the Game Software.
LICENSE CONDITIONS
You agree to only use the Game Software, or any part of it, in a manner that is consistent with this
License and you SHALL NOT:
(a) without written permission from Sega, exploit the Game Software or any of its parts commercially,
including but not limited to use at a cyber (Internet) café, computer gaming center or any other locationbased site;
(b) without a separate, additional license, use the Game S
Software, on more than one computer, game console, handheld device or PDA at the same time;
(c) use the Game Software, or permit use of the Game Software, in a network, multi-user arrangement
or remote access arrangement, including any online use, except as otherwise explicitly permitted by
Sega in writing;
(d) make copies of the Game Software or any part thereof, except that you may make one (1) copy of
the Game Software for backup or archival purposes, or make copies of the materials accompanying the
Game Software;
(e) sell, rent, lease, license, distribute or otherwise transfer this Game Software or any copies without
the express prior written consent of Sega;
(f) reverse engineer, derive source code, modify, decompile, disassemble, or create derivative works of
the Game Software, in whole or in part (except as the applicable law expressly permits, in which case
all and an
ty of Sega and/or its licensors on creation, in any event);
proper
You agree not to remove, disable or circumvent any proprietary notices or labels
oftware or permit the use of the Game
y modifications, adaptations, improvements, etc. shall belong to, vest in and be the exclusive
62
63
Page 34

(g) remove, disable or circumvent any security protections, proprietary notices or labels contained on or
within the Game Software;
(h) export or re-export the Game Software or any copy or adaptation in violation of any applicable laws
or regulations; or
(i) create data or executable programs that mimic data or functionality in the Game Software.
Furthermore, you agree that you shall abide by the safety information, maintenance instructions or
other relevant notices contained in the manual that is included with the Game Software.
LIMITATIONS ON DAMAGES
The Limited Warranty does not apply if the defects have been caused by your negligence, accident,
u
nreasonable use, modification, tampering, or any other causes not related to defective materials or
manufacturing workmanship, and Sega and its licensors shall not be held liable for any damage, injury
or loss if caused as a result of any of these reasons. However, Sega and its licensors do not seek to
exclude or limit their liability for personal injury arising from their negligence. The Limited Warranty
does not apply to used Game Software or to Game Software acquired through private transactions
between individuals or purchased from online auction sites.
In no event shall Sega or its licensors be liable for special, incidental, or consequential damages
resulting from possession, use or malfunction of the Game Software, including without limitation the
risks connected with lost profit, damage to property, lost data, loss of goodwill, console, computer or
handheld device failure, errors and lost business or other information as a result of possession, use or
malfunction of the Game Software, or personal injuries, even if Sega has been advised of the possibility
of such loss or damages. Furthermore, in no event shall Sega or its licensors be liable for consequential
or incidental damages resulting from the breach of any express or implied warranties. Sega’s total
liability shall not exceed the actual price paid for the Game Software.
TERMINATION
Without prejudice to any other rights of Sega, this License shall terminate automatically if you fail to
comply with its terms and conditions. In such event, you must destroy all copies of the Game Software.
INJUNCTION
Because Sega would be irreparably damaged if the terms of this Agreement were not specifically
enforced, you agree that Sega shall be entitled, without bond or other security or proof of damages, to
take such action as may be required, including seeking an injunction and other equitable remedies, in
addition to any other remedies available to it under the applicable law.
INDEMNITY
You agree to indemnify, defend and hold Sega, its partners, affiliates, contractors, licensors, officers,
directors, employees, and agents harmless from all claims, damages, costs and expenses (including
legal expenses) arising directly or indirectly from your acts or omissions to act in using the Game
Software pursuant to the terms of this License.
MISCELLANEOUS
This Agreement represents the complete agreement between you and Sega concerning the License,
in relation to the use of the Game Software, and supersedes all prior agreements and representations,
warranties or understandings between you and Sega (whether negligently or innocently made but
excluding those made fraudulently), reg
amend this Agreement at any time, at its sole discretion. If any provision of this Agreement is held
to be unenforceable for any reason, such provision shall be reformed only to the extent necessary to
make it enforceable, and the remaining provisions of this Agreement shall remain in full force and
not be affected.
This Agreement shall be construed under California law as such law is applied to agreements between
California residents entered into and to be performed within California, except as governed by federal
law, and you consent to the exclusive jurisdiction of the state and federal courts in San Francisco,
California.
If you have any questions concerning this Agreement or the License contained therein, you may
contact Sega at 650 Townsend Street, Suite 650, San Francisco, CA 94103, USA, Attn. Legal Department.
arding the same subject matter. Sega reserves the right to
LIMITED WARRANTY:
SEGA of America, Inc. warrants to the original consumer purchaser that the game disc or cartridge shall be
f
ree from defects in material and workmanship for a period of 90-days from the original date of purchase. If
a defect covered by this limited warranty occurs during this 90-day warranty period, the defective game disc
or cartridge will be replaced free of charge. This limited warranty does not apply if the defects have been
caused by negligence, accident, unreasonable use,
modification, tampering, or any other causes not related to defective materials or manufacturing
workmanship. This limited warranty does not apply to used software or to software acquired through private
transactions between individuals or purchased from online auction sites. Please retain the original, or a
photocopy, of your dated sales receipt to establish the date of purchase for in-warranty replacement. For
replacement, return the product, with its original packaging and receipt, to the retailer from which the
software was originally purchased. In the event that you cannot obtain a replacement from the retailer,
please contact Sega to obtain support.
Obtaining technical support/service
To receive additional support, including troubleshooting assistance, please contact Sega at:
• Website: www.sega.com/support
• E-mail: support@sega.com
• Telephone: 1-80 0-USA-SEGA
LIMITATIONS ON WARRANTY
ANY APPLICABLE IMPLIED WARRANTIES, INCLUDING WARRANTIES OF MERCHANTABILITY AND FITNESS
FOR A PARTICULAR PURPOSE, ARE HEREBY LIMITED TO 90 DAYS FROM THE DATE OF PURCHASE AND ARE
SUBJECT TO THE CONDITIONS SET FORTH HEREIN. IN NO EVENT SHALL SEGA OF AMERICA, INC., BE
LIABLE FOR CONSEQUENTIAL OR INCIDENTAL DAMAGES RESULTING FROM THE BREACH OF ANY
EXPRESS OR IMPLIED WARRANTIES. THE PROVISIONS OF THIS LIMITED WARRANTY ARE VALID IN THE
UNITED STATES AND CANADA ONLY. SOME STATES DO NOT ALLOW LIMITATIONS ON HOW LONG AN
IMPLIED WARRANTY LASTS, OR EXCLUSION OF CONSEQUENTIAL OR INCIDENTAL DAMAGES, SO THE
ABOVE LIMITATION OR EXCLUSION MAY NOT APPLY TO YOU. THIS WARRANTY PROVIDES YOU WITH
SPECIFIC LEGAL RIGHTS. YOU MAY HAVE OTHER RIGHTS THAT VARY FROM STATE TO STATE.
To register this product, please go to www.sega.com
SEGA of America, Inc.
650 Townsend Street, Suite 650, San Francisco, CA 94103
SEGA is registered in the U.S. Patent and Trademark Office. © 2006 The Creative Assembly Limited. Total War, Medieval: Total War, and the Total War logo are
trademarks or registered trademarks of The Creative Assembly Limited in the United Kingdom and/or other countries. SEGA is registered in the U.S. Patent and
Trademark Office. SEGA and the SEGA logo are either registered trademarks or trademarks of SEGA Corporation. The ratings icon is a registered trademark of the
Entertainment Software Association. All other trademarks and trade names are the properties of their respective owners. All rights reserved. SEGA and the SEGA
logo are registered trademarks of SEGA Corporation.
6564
Page 35

The Creative Assembly Brisbane Australia
roject Director & Lead Designer
P
.T. Smith
R
Production
Prasant Moorthy
Studio Manager
George Fidler
Design
Penny Sweetser
Dan Toose
Richard Lagarto
Dan Lehtonen
Programming
Ken Turner
Craig Allsop
Andriy Doroshchuk
Dmytro Dudnikov
Dan Glastonbury
Artem Kulakov
Grigoriy Podgorny
Martin Slater
Martin Valigursky
Adam Bryant
Scott Lowther
Iain McManus
Art
John Carline
Jason Dalton
Zaquri Foster
Brendan Rogers
Nick Smith
Viktor Sylak
Taamati Hanson-Pou
Denzil O’Neill
Damien Paon
Simon Pennington
Animation
David Zwierzchaczewski
Andrew Bedford
Shane Oakes
Mathieu Walsh
Music & Audio
Jeff van Dyck
Richard Vaughan
James Vincent
Quality Assurance
Ashley Parker
Kim Sellentin
Jason Turnbull
William Hamilton
Kevin Stoker
Stephen Berg
Mark Burns
Christian Carriere
CREDITS
ean Davidson
S
illiam Davis
W
homas Doig
T
aniel Driscoll
D
Terry Greisbach
Chris Harvey
Craig Hughes
Rohan McAlinden
Vana Prayitno
Mikhail Raspaskovski
Mathew Ray
Mark Taylor
IT Support
Matthew Pawlowski
Special Thanks
John Harmon
Paul Greasley
The Creative Assembly Southwater UK
Development Director
Mike Simpson
Design
Ian Roxburgh
Jeff Woods
James Whitston
Testing
Graham Axford
Dion Lay
James Buckle
Art
Peter Brophy
Nick Tresadern
Pawel Wojs
Roland MacDonald
Joss Adley
Tunde Glover
Ranulf Busby
Howard Rayner
Paul Abbot
Animation
Ben Potts
Greg Alston
Pre Battle Speeches
Mike Brunton
Marketing & PR
Mark Sutherns
Richie Skinner
IT Support
Gareth Hailes
Simon Allan
Additional Support
Chris Waller
oran Paldi
M
Alistair Hope
Melvyn Quek
Sophie Blakemore
Lara Sweeney
Special Thanks
The entire Rome Dev Team
Outsourced Roles
Motion Capture Actors
Simon Johns of YoungBlood
Tim Klotz of YoungBlood
Scriptwriter
Antony Zwierzchaczewski
FX Animator
Allen McKay
Medieval Combat Consultants
Joshua Cavalchini of Knight Fight
Kit Cavalchini of Knight Fight
Voice Casting
Andy Emery of Side UK
Cheryl Prince of Side UK
Voice Direction
Andy Walsh of Side UK
Olivier Deslandes of Side UK
Sound Engineer
Phil Evans of Side UK
Vocal Talent
Tim Bentinck
Steffan Boje
Walter Bonacker
Emmanuel Bonami
Brian Bowles
Angelo Cola
Stephane Conicord
Maria Darling
David De Keyser
Olivier Deslandes
Ken Drury
Chris Fairbank
Javier Fernandez
Wayne Forrester
Jon Glover
Framboise Gommendy
Simon Greenall
Stephen Grief
Stephan Grothgar
Sarah Hadland
Togo Igawa
Jessica Juffre
Jonathan Keeble
Jonathan Kydd
Dhafer L’Abidine
Aletta Lawson
Lewis Macleod
Neil McCaul
Graham McT
avish
lag Mirochincov
O
Alex Norton
Lucy Robinson
Kerry Shale
Slav Shumor
Philippe Smolikowski
Luis Soto
Robbie Stevens
Dai Tabuchi
Keith Wickham
In-Game Font
Kevin King
Additional Thanks
Andy Bagley and crew at Musiclab
Liam Byrne at Creative Labs
Special Thanks
A big thanks to the Org, all the moderators
on the official forums, and all the fans that
have helped make the online community
as great as it is!
And of course, endless thanks to our families
and friends for their understanding and
support throughout the entire production of
Medieval II: Total War.
SEGA Europe
CEO
Naoya Tsurumi
President/COO
Mike Hayes
Development Director
Gary Dunn
Creative Director
Matthew Woodley
Director of European Marketing
Gary Knight
Head of External Studios
Jim Woods
Production
Darius Sadeghian
Simon Mathews
Head of Brand Marketing
Helen Camilleri
European PR
Lynn Daniel
Kerry Martyn
Brand Manager/Senior Brand Manager
Darren Williams
Creative Services
Alison Warfield
Tom Bingle
Morgan Gibbons
Arnoud Tempelaere
Akane Hiraoka
6766
Page 36

ead of Development Services
H
Mark Le Breton
ocalization Manager
L
Marta Lois Gonzalez
Localization Coordinator
Giuseppe Rizzo
QA Supervisor
Marlon Grant
Stuart Arrowsmith
Julie Metior
Mastering Group
John Hegarty
Jigar Patel
Roy ‘Papa’ Boateng
Senior Team Lead
Ben Howell
Team Leads
Phongtep Boonpeng
Tony Langan
Assistant Team Lead
Jide Alabi
Testers
Herculess Bekker
Clinton LittleJohn
Paul Rogers
Faesel Saeed
Amir Hafeez
Trevor Kite
Stuart Fenn
James Cauldwell
Titus Samkubam
Andrzej Lubas
Chris Jones
Michael Beirne
Jania Moudrak
Clint Gibson
Colin Perman
Zahra Al Naib
Dean Powell
Tristan Carree
Arian Barvarz
Oliver Bennett
Robert Williamson
Jacob Barker
Jasmine Lillywhite
Samuel Morgan
Paul Kershaw
Chris Bien
Aidan Howe
Hayk Galstyan
Nahiyan Al-Muhaymeen
Hany Gohary
Bryan Fevrier
Robert Thompson
Jiten Patel
oss Green
R
Adrian Daly
Andrew Sparks
Additional QA Documentation
ickard Kallden
R
Mark Day
Remi Mckenzie
SEGA of America, Inc.
CEO
Naoya Tsurumi
President
Simon Jeffery
VP of Production Department
David Cobb
Senior Producer
Constantine Hantzopoulos
Associate Producer
Martin Hunter Caplan
VP of Marketing
Scott Steinberg
Director of Marketing
Chip Blundell
Product Manager
Elliott Chin
Manager, Research & Analysis
Vincent Chin
Senior Consumer Research
Analyst
Prabha Kannan
Public Relations
Jay Boor
Denny Chiu
Steve Groll
Jennie Sue
Creative Services Manager
Jen Groeling
Production Specialist
Heather Lucchetti
Graphic Designer
Marco Garcia
irector of Development
D
Services
Deni Skeens
QA Supervisor
Josh Morton
Test Leads
Lee Frohman
Nestor Protacio
Testers
Sam Carion
Tim Erbil
Emily Sheafe
Special Thanks
Beejey Enriquez
Mina Provonsha
One PR
NOTES
6968
 Loading...