

Page 1
COMBAT MISSION II
Game User Manual
PDF Addendum
Combat Mission: Barbarossa to Berlin
1
Page 2

Safety Information
A very small percentage of people may experience a
seizure when exposed to certain visual images, including
flashing lights or patterns that may appear in video games.
Even people who have no history of seizures or epilepsy
may have an undiagnosed condition that can cause these
.photosensitive epileptic seizures. while watching video
games.
These seizures may have a variety of symptoms
including: lightheadedness, altered vision, eye or face
twitching, jerking or shaking of arms or legs,
disorientation, confusion, or momentary loss of awareness.
Seizures may also cause loss of consciousness or
convulsions that can lead to injury from falling down or
striking nearby objects.
Immediately stop playing and consult a doctor if
you experience any of these symptoms. Parents should
watch for or ask their children about the above
symptoms.children and teenagers are more likely than
adults to experience these seizures.
The risk of photosensitive epileptic seizures may be
reduced by sitting farther from the television screen, using
a smaller television screen, playing in a well-lit room, and
not playing when you are drowsy or fatigued.
If you or any of your relatives have a history of seizures
or epilepsy, consult a doctor before playing.
2
Combat Mission: Barbarossa to Berlin
Page 3

Table of Content
Please note that parts of this manual are
contained on the CD in PDF format.
THE BASICS 3
HE INTERFACE 11
T
HE MISSION 26
T
HE ENVIRONMENT PDF 4
T
HE COMBAT 41
T
HE MEN AND MACHINES PDF 24
T
HE COMMAND 64
T
HE EDITOR PDF 63
T
HE CHALLENGE PDF 89
T
HE BEGINNERS TUTORIAL PDF 108
T
HE ADVANCED TUTORIAL PDF 123
T
HE OSTFRONT PDF 128
T
PPENDIX A HOTKEYS 73
A
PPENDIX B - ORDERS 76
A
PPENDIX C - TROUBLESHOOTING PDF 142
A
PPENDIX D - INDEX PDF 152
A
REDITS 83
C
UPPORT 86
S
Combat Mission: Barbarossa to Berlin
3
Page 4

The Environment
The effect of climate in Russia is to make things impassable
in the mud of spring and autumn, unbearable in the heat of
summer and impossible in the depths of winter. Climate in Russia
is a series of natural disasters.
General von Greiffenburg, Chief of Staff 12th Army
(War on the Eastern Front, the German Soldier in Russia 1941-
1945, James Lucas, pg 78)
The Environment
Many things can influence the outcome of wars, but
among these the environment where a battle takes place
be it the weather, the lay of the land, the ground conditions
and even the time of day is generally regarded as the
most influential in a military sense. The beginning of the
mud season, the near standstill of combat in the winter,
the unreliability of equipment in the hot summer months in
the steppe were all deciding factors in the outcome of the
struggle on the Eastern Front, at both the strategic and
tactical levels.
Combat Mission: Barbarossa to Berlin simulates many
different environmental conditions, from the seasons to the
time of day, to the weather, temperature and ground
conditions. Each mix can be a unique challenge. From
fighting in a foggy night in deep snow, to struggling
through deep mud on a rainy day in spring, to sweating in
extreme heat on the steppe the possibility for scenario
designers and armchair generals are manifold. The
4
Combat Mission: Barbarossa to Berlin
Page 5

The Environment
following chapter explains the various settings and their
effect on gameplay.
Terrain
There are many different terrain types in the game.
Each one has an impact on lines of sight, cover,
concealment, and movement. What you need to
understand to play the game is that what you see in the
game is merely a visual representation of the underlying
mathematical 3D battlefield and some abstractions are
necessary to keep the game (dis)playable.
Trees are one such abstraction. Although you see
individual trees on the map, their actual placement plays
no role for the game as such, as can be seen by the fact
that tree density can be toggled by the user to fit hardware
performance ability. What counts is the woods terrain
tile, as seen by the different kind of ground beneath and
around trees. Same applies to for example - brush
terrain, and graveyards.
Open ground, although seemingly empty, is not.
Bushes, small dips, high grass and other random features
are all taken into account, and so the LOS cannot be traced
endlessly even across open ground. More importantly,
weapons accuracy decreases dynamically with range, not
only because it is harder to hit something farther away, but
also because it is harder to see the target at all.
The LOS tool is a very useful aid to understand the
terrain on the map better, as it shows what kind of terrain
is used for the in-game calculations. You can pinpoint the
exact end of woods, the exact corner of a building, the
exact point where a wall or hedge starts, etc. Most of the
time such things are clear from looking at the map (and
your judgement will become better with playing
experience), but when in doubt, the LOS tool provides the
answer.
Terrain also changes with the different seasons. For
example, depending on the scenarios time and date trees
can be dense and thick (summer) or leafless (winter).
Grain fields also change dramatically with the seasons and
Combat Mission: Barbarossa to Berlin
5
Page 6
The Environment
weather. This has a direct impact on the concealment and
cover provided by such terrain.
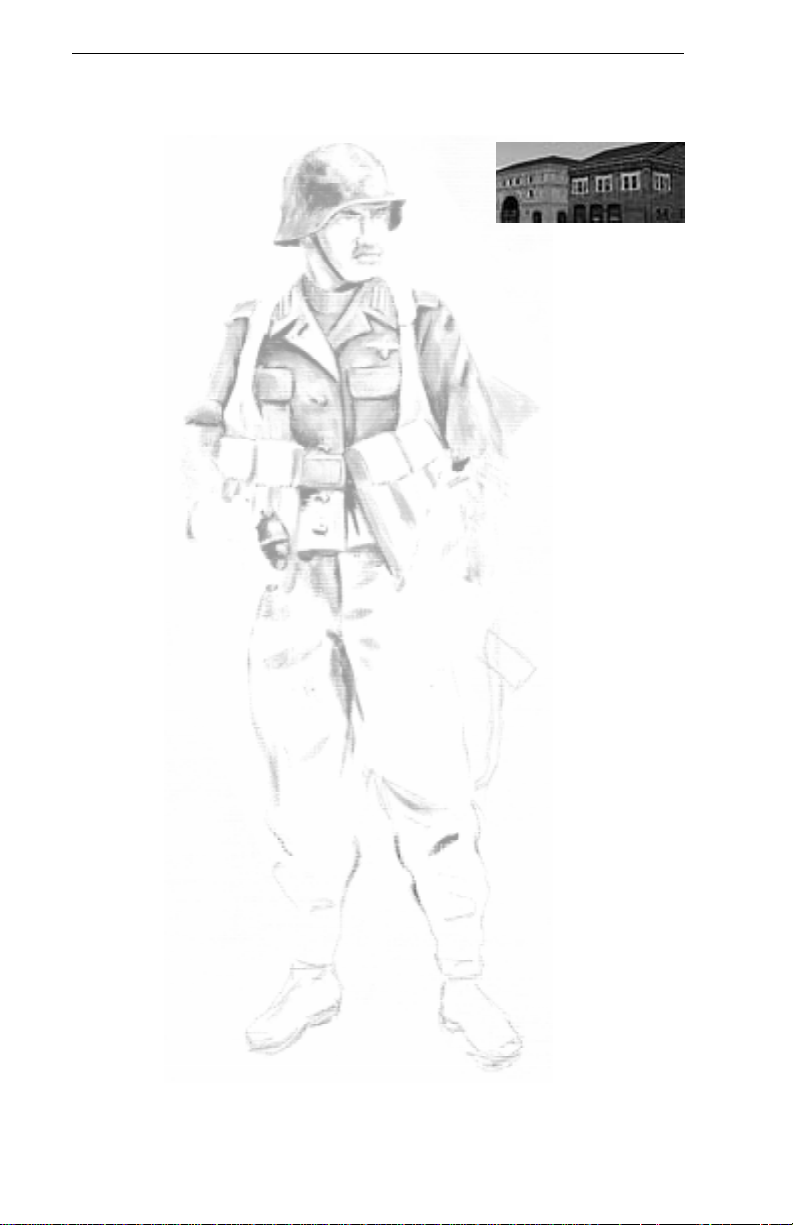
Buildings
There are various types of buildings
in the game: wooden shacks
(considered extremely light buildings), small farm houses
(light and heavy), a tall light building (2 levels), a big
blockhouse (2 levels, heavy), a church (basically a special
type of the big blockhouse, i.e. 2-level heavy building), and
large factory complexes (considered 2-level heavy
buildings). Buildings have an impact on concealment and
cover, with heavy buildings being more protective than
light ones. Light buildings also tend to be reduced to rubble
much more quickly than heavy buildings, with a few high-
explosive rounds of 75mm caliber or higher being enough
to achieve this (one such round is often enough to destroy
a wooden shack). Any unit inside a 2-level building which
collapses will usually suffer serious casualties.
Lines of sight can be a bit tricky around buildings at
first, but most answers are easy when you think about it.
In order to be able to look outside of a building without
restrictions, a unit needs to be within a few meters of the
outside wall (i.e. to peer through windows or other
openings). If it is further away than about 5 meters, it can
still see a few meters into or out of the house, but not far
beyond that.
When a building or a unit in a building is fired at,
regardless if it is direct fire or indirect fire (from mortars
for example), most of the fire hits the outer walls of the
building. Units hiding within can still be hurt by the blast
from flying stones, glass, shrapnel or even just the blast.
However, some rounds can also make it into the building
and explode within, e.g. through holes in the outer walls or
roof, blasted doors or windows. Such shots can cause
severe damage. There is even a very small chance that a
round can make it into and THROUGH a building, exploding
on the other side!
The interiors of buildings are abstracted and included
into combat resolution calculations. Although you can trace
an LOS within a building without restrictions (though with
6
Combat Mission: Barbarossa to Berlin
Page 7
The Environment
limited range) the chance of enemy units hiding within the
same building and remaining unspotted is relatively high
(imagine them hiding in another room), but drops
dramatically the more time your units spend inside.
There are also two different height levels for buildings.
Level one, the ground level, simulates houses that are one
to two stories high. Level two simulates houses three to
four stories high. These are the only available levels for
Combat Mission: Barbarossa to Berlin. You cannot place
units in church towers.
One thing to keep in mind with buildings is that they
are a confined space and can contain only so many soldiers
at a time. The general rule of thumb is one squad per
corner of a building. But if you try to put a whole platoon
into a small farmhouse, dont be surprised to find that one
squad has to leave and wait outside.
Watch out when you want to fire weapons with
backblast (like bazookas and Panzerfausts) within buildings
- this often suppresses the firing unit and there is a good
risk that the building will catch fire from the backblast.
Vehicles and guns are not allowed to enter buildings.
Mortars can enter a building, but cannot fire from it.
Building Damage
Buildings and bridges display damaged or heavily
damaged labels according to how much damage they have
received, and the Warning Labels option is on.
Additionally, theyre listed with a * attached, like light
building*, or a ** for heavy damage. The building will
begin to show damage visually after 40% of the structure
is damaged.
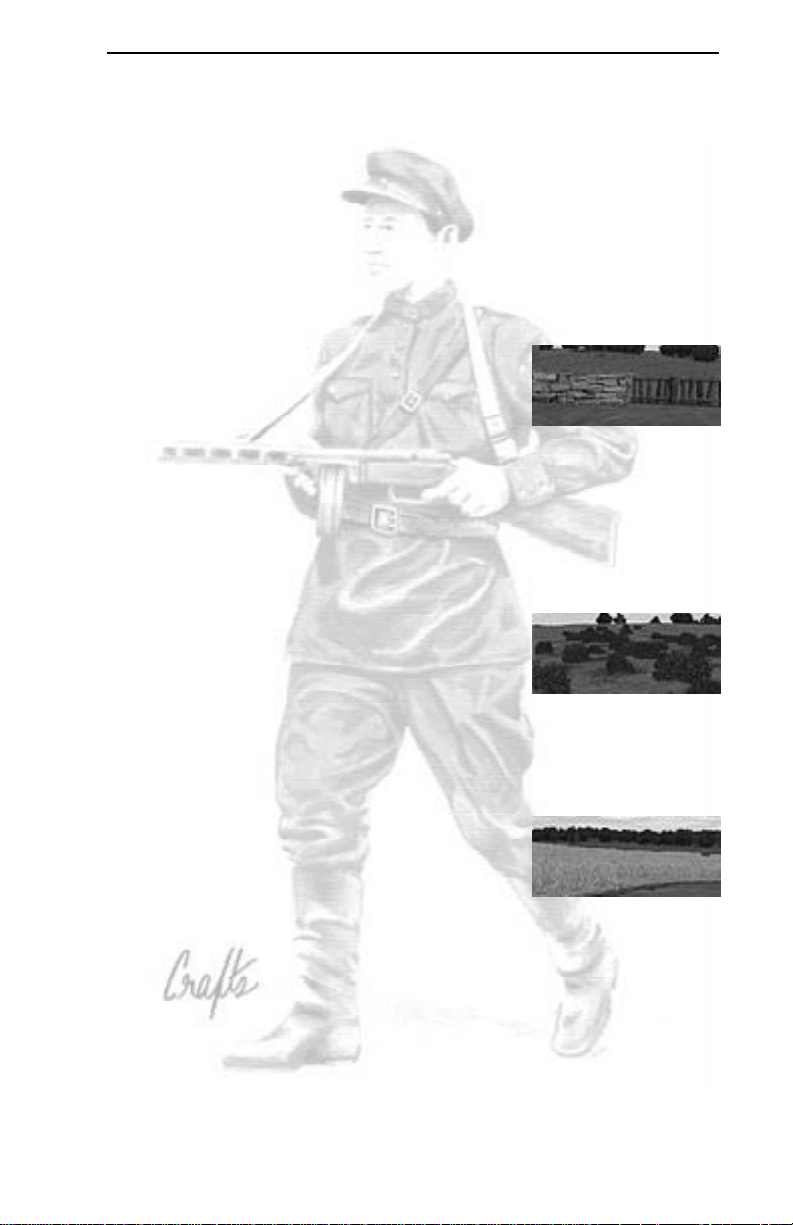
Rubble
These are the leftovers after a
building has collapsed. Vehicles may not
enter rubble. It provides excellent cover and concealment
for infantry. LOS is heavily restricted across rubble, but
only to a certain height (which is naturally much lower
than the building previously was). There are two forms of
rubble in the game rubble as it originates from a
Combat Mission: Barbarossa to Berlin
7
Page 8
The Environment
collapsed building, with parts of exterior walls still
standing, and flat rubble, which can simulate debris piled
up on roads for example. The difference is visual only, as
both types of rubble behave the same and cannot be, for
example, entered or crossed by vehicles.
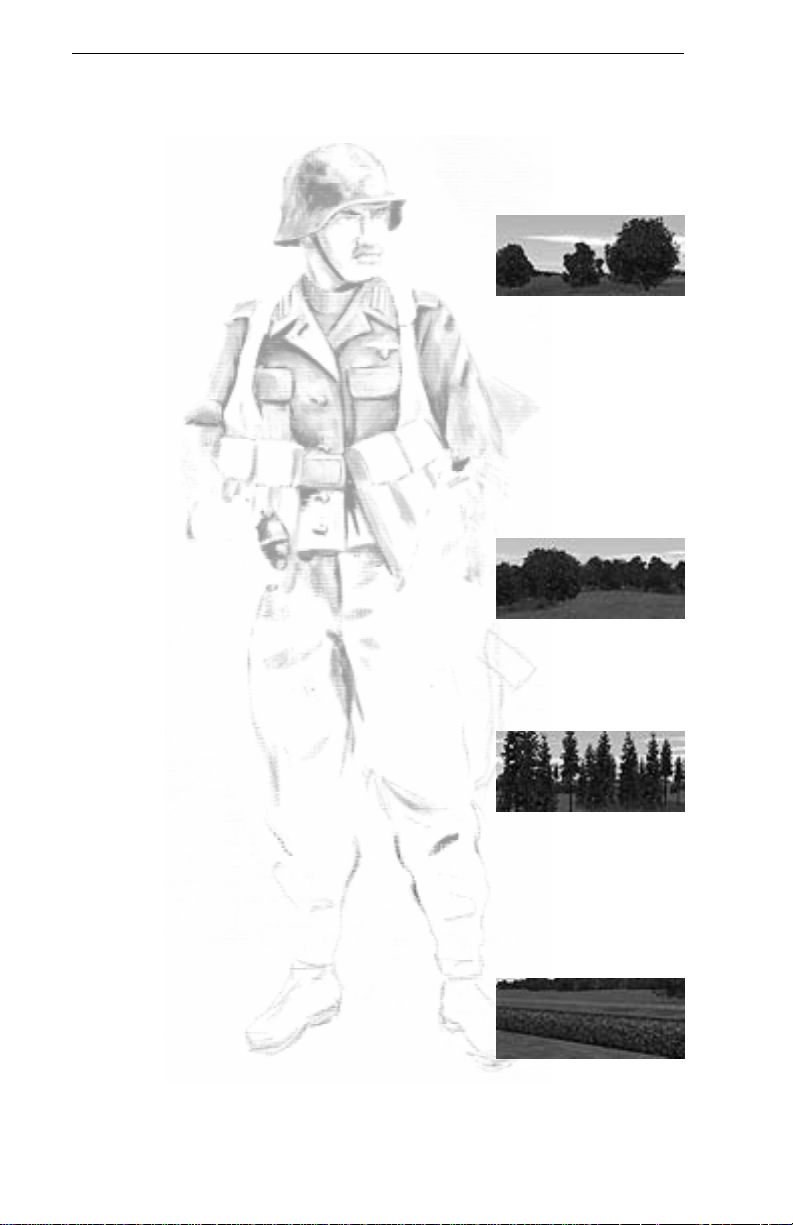
Scattered Trees
These are single trees with little or
no brush, standing in loose groups
together or along a road. Orchards fall
into this terrain type as well. They provide only light cover
and concealment, but are certainly better than open
ground. Do not expect miracles, especially in winter when
even a single squad has trouble hiding in scattered trees.
Note: Scattered trees can also be used to simulate narrow
paths in forests, allowing tanks and other vehicles to pass at a
slow rate and considerable risk of bogging down.
Woods
This is the usual woods terrain,
which includes mixed types of trees,
and fairly thick underbrush and bushes.
Woods provide good cover and concealment. No vehicles
are allowed to enter woods in Combat Mission: Barbarossa
to Berlin.
Tall Pines
Tall pines represents dense woods
terrain, but with only little underbrush
and bushes, and provide cover and concealment similar to
Woods, except that the pines are taller and so are more
likely to block elevated lines of sight from tall buildings or
hilltops. Movement through tall pines is faster than through
woods, and LOS can be traced further due to less
underbrush.
Hedges
This is the common type of hedge
and is about one meter high, planted or
naturally grown, and is passable for tracked vehicles and
8
Combat Mission: Barbarossa to Berlin
Page 9
The Environment
infantry (with some impact on speed, however). It provides
decent concealment for prone units, but little cover.
Stone Wall
A man-made stone wall, about 1 meter high, and thick
enough to block even a direct hit from a tank main round.
Walls are passable for tracked vehicles and infantry, albeit
at a lower speed. Vehicles behind stone walls can achieve
hull-down status, unless the enemy is on a higher
elevation. Stone walls provide good cover and
concealment, especially for prone units
behind it, but not when the attacker is
at a higher elevation or attacking from
the sides or rear.
Wooden fence
A man-made fence, usually to separate fields, but also
very often found in Russian villages around each house.
This is only a small obstacle to vehicles and infantry, and
can be crossed by all unit types with a small delay. It
provides nearly no cover and very little concealment.
Brush
Brush can be used to simulate
several things types of terrain such as
bushes, wild fields or low trees. It provides good
concealment and restricts LOS, but offers little cover. It
tends to catch and spread fire quickly.
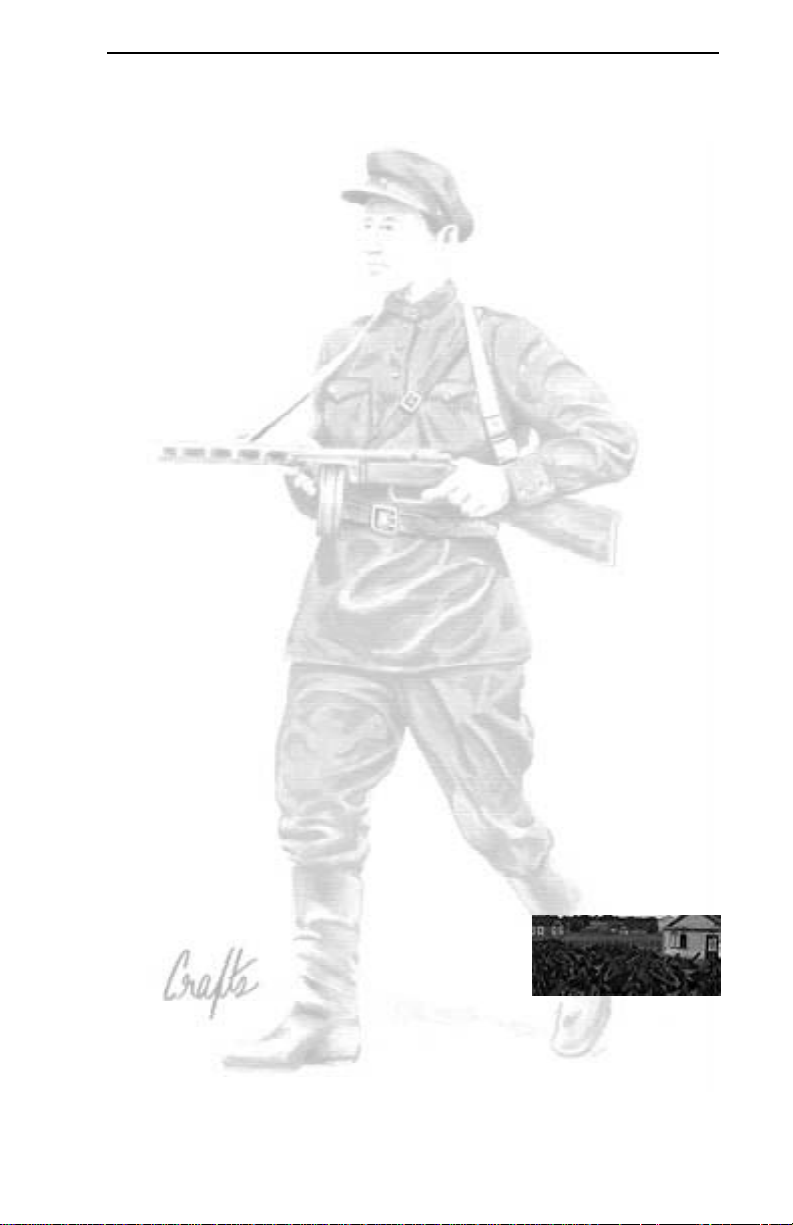
Grain Fields
Grain fields are just that. The
concealment and cover they provide
vary with the seasons. Basically
considered open ground in winter with not much to hide
behind, they can provide decent concealment in summer
and less so in fall or spring. Cover, however, is almost
nonexistent. Grain fields also increase the chance of
vehicles bogging down in them, even with otherwise dry
ground conditions. This type of terrain tends to catch and
spread fire quickly.
Combat Mission: Barbarossa to Berlin
9
Page 10
The Environment
Marsh
Marsh is swampy open ground,
providing little more cover than some
bushes and grass. It is difficult to walk
on even for infantry, and cannot be entered or crossed by
vehicles or heavy support weapons of any type.
Soft ground
This can be a muddy field, a shallow marsh or a small
stream, and although passable to all units, dramatically
increases the danger of vehicles bogging down as well as
slows down all movement. It provides no extra cover or
concealment.
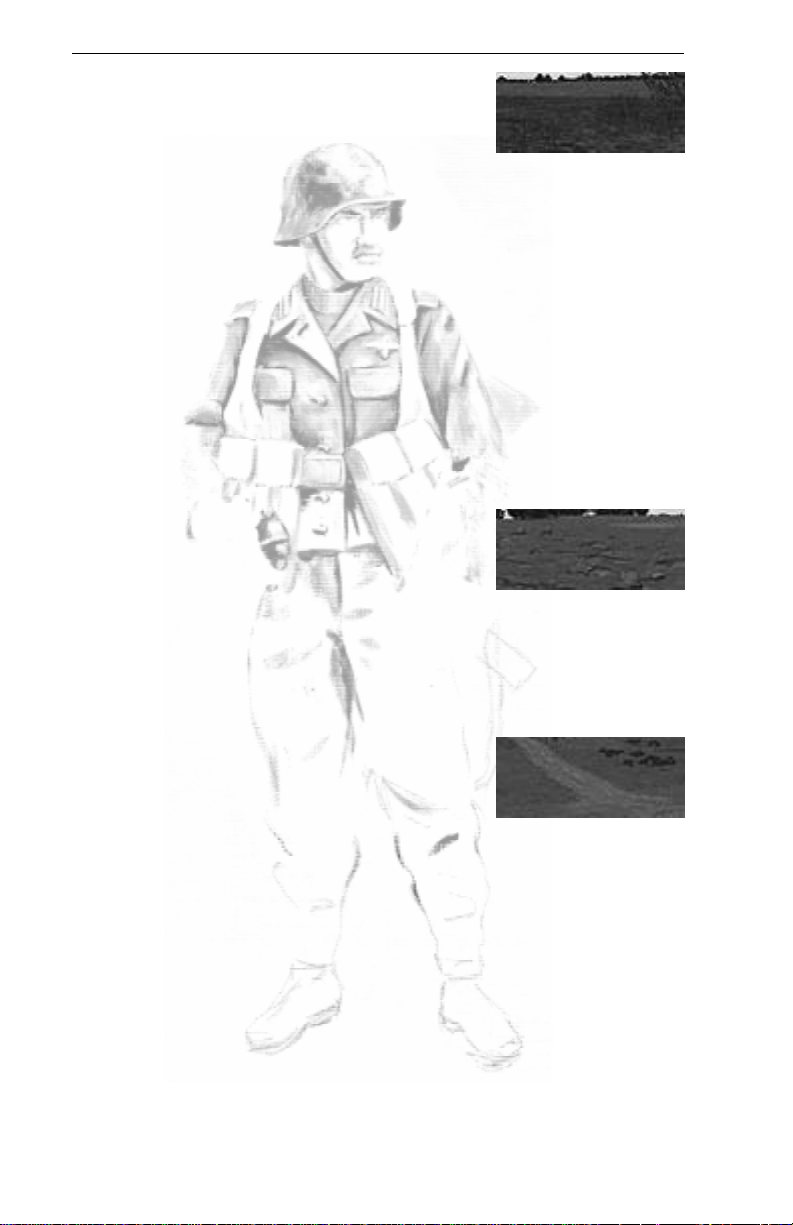
Rough
Rough represents heavily broken or rocky terrain,
impossible for vehicles to cross and
accessible only by infantry. It provides
good cover and concealment.
Rocky
Similar to rough terrain but more easily passable -
with usually a number of large rocks or debris to provide
decent cover and concealment, but also enough open space
for vehicles to pass through.
Roads
Roads come as two types: dirt and
paved. Dirt roads are the main type of
road encountered in Eastern Europe outside of the big
cities. There is no cover or concealment on a road, but
movement is fast.
Paved roads have gravel or hard concrete surfaces and
are relatively easy to drive on even during muddy ground
conditions or snow. However, besides some few main
highways and city streets, paved roads are not
encountered very often on the Eastern Front.
10
Combat Mission: Barbarossa to Berlin
Page 11
The Environment
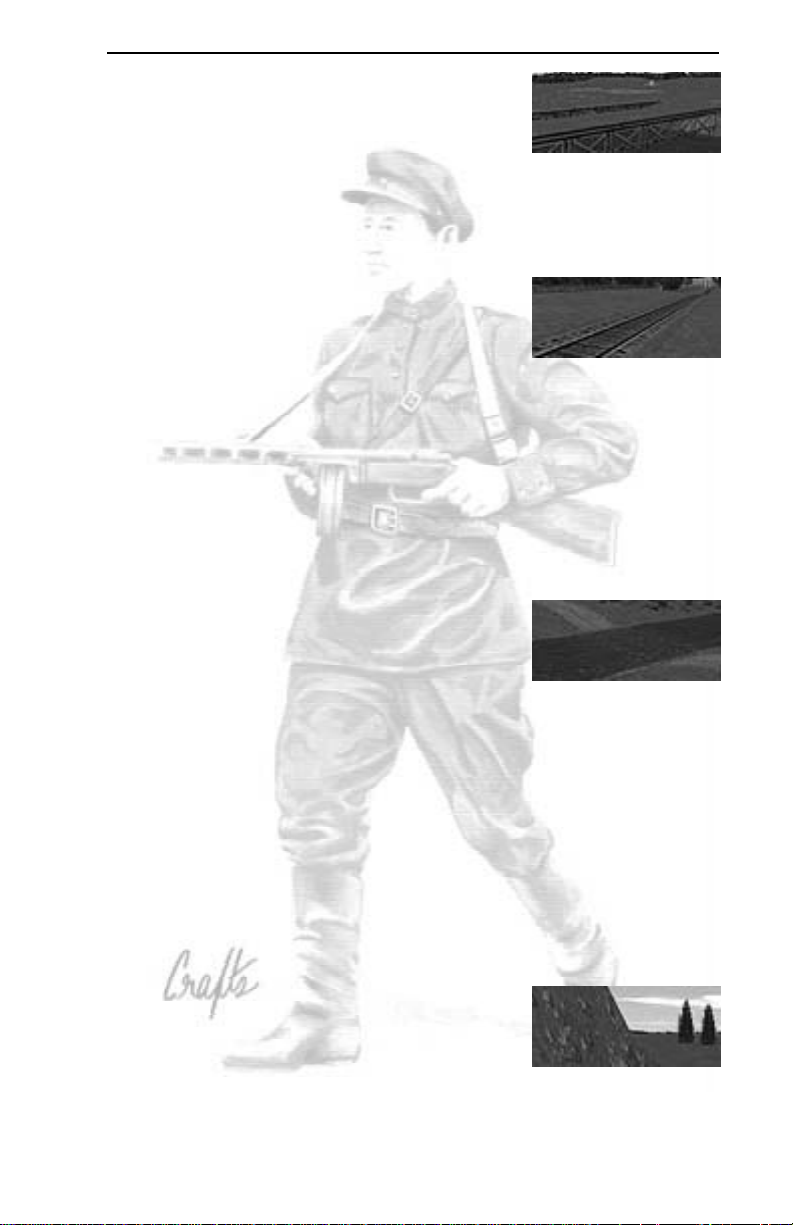
Bridges
There are three types of bridges -
wooden bridges, often encountered
across small streams or creeks and two
elevations high; stone bridges, spanning small rivers at two
elevations high; and tall stone bridges, across major rivers
or valleys, four elevation levels in height which allow
vehicles and troops to pass under them.
Railroad Tracks
These offer little concealment and
almost no cover, and troops do not gain
much speed advantage on them (in fact, wheeled vehicles
are slowed down, and chances of bogging increase due to
the rough surface).
Water
Water tiles are used to simulate rivers or lakes, and
cannot be entered by any units except infantry embarked
in assault boats. Regardless if there is
snow on the ground or not, when
temperature is set to freezing and
below, water becomes frozen - vehicles
and guns are not allowed to enter, but
infantry is able to cross ice.
Fords
CMBB features two types of fords, which allow crossing
rivers on foot or with vehicles. Shallow fords can be
crossed (slowly) by all units, although the chances for
bogging down are high especially for non-tracked
vehicles. Deep fords can only be used by infantry units.
Slopes
These are inclines steep enough to
prohibit vehicular travel. Infantry can
still climb them, albeit slowly.
Cliffs
No unit is allowed to traverse a cliff.
Combat Mission: Barbarossa to Berlin
11
Page 12

The Environment
Steppe
This is a special type of terrain, found mainly in
Southern Russia. It consists of waist-high grass which
provides excellent concealment for hiding infantry, but very
little cover. The random map generator in Quick Battles and
the editor will use Steppe as the default terrain type for
all southern maps with rural and flat or gentle slopes
settings (see Editor). Of course Steppe terrain can also
be used to simulate high grass on any map.
Fortifications
Fortifications (bunkers, pillboxes, wire, and mines) are
available only for the defender, and never in meeting
engagement scenarios. They are granted to a side by the
scenario designer or can (and in the case of Assault type
battles MUST) be bought for Quick Battles. During the
Setup Phase of a battle, you are free to move and place
them within the constraints of the setup zones, but they
cannot be moved during the battle itself.
All forms of fortifications (including mines) may be
placed only within a valid setup zone. A minefield is 20m x
20m in size (except for daisy-chain mines, which represent
hasty laid mines not dug into the earth, and which are
slightly smaller than 20m in diameter), with the mine
marker placed in its center. The defender can place
minefields next to each other, thereby creating larger
minefields, but for game purposes CM treats these as
separate 20m x 20m elements. Once a minefield has been
spotted, the TacAI will try to move units around it during
the Action Phase, or simply refuse to enter minefields and
stop a distance away from them. You can not force units to
enter minefields, as the movement line will turn red trying
to do so, until these have been cleared by engineers using
demo charges.
Fortified Firing Positions
Bunkers and pillboxes have a firing arc inside which
they can engage targets through a frontal firing slit.
Outside of this arc, they are basically impotent. The rear of
a bunker or pillbox is its weak point - since this is where
the exit doors are located - and can be penetrated even by
light ordnance. From close range, however, a bunker/
12
Combat Mission: Barbarossa to Berlin
Page 13
The Environment
pillbox is always vulnerable to infantry, which can throw
grenades through firing ports. Flamethrowers are especially
useful for knocking out bunkers/pillboxes, as well as
grenade bundles, demo charges and molotov cocktails.
Additionally, ordnance can occasionally score a lucky hit to
a pillboxs frontal firing slit, possibly knocking out the
pillbox in the process. But this is generally only possible at
close range (within a few hundred meters).
Note: AT gun Pillboxes receive an accuracy bonus, vs. a
normal AT gun, because such fortifications have already
ranged in the area within their firing arc. Range
determination is one of the greatest contributors to aiming
accuracy, so predetermined and reliable range information
greatly increases accuracy (all else being equal).
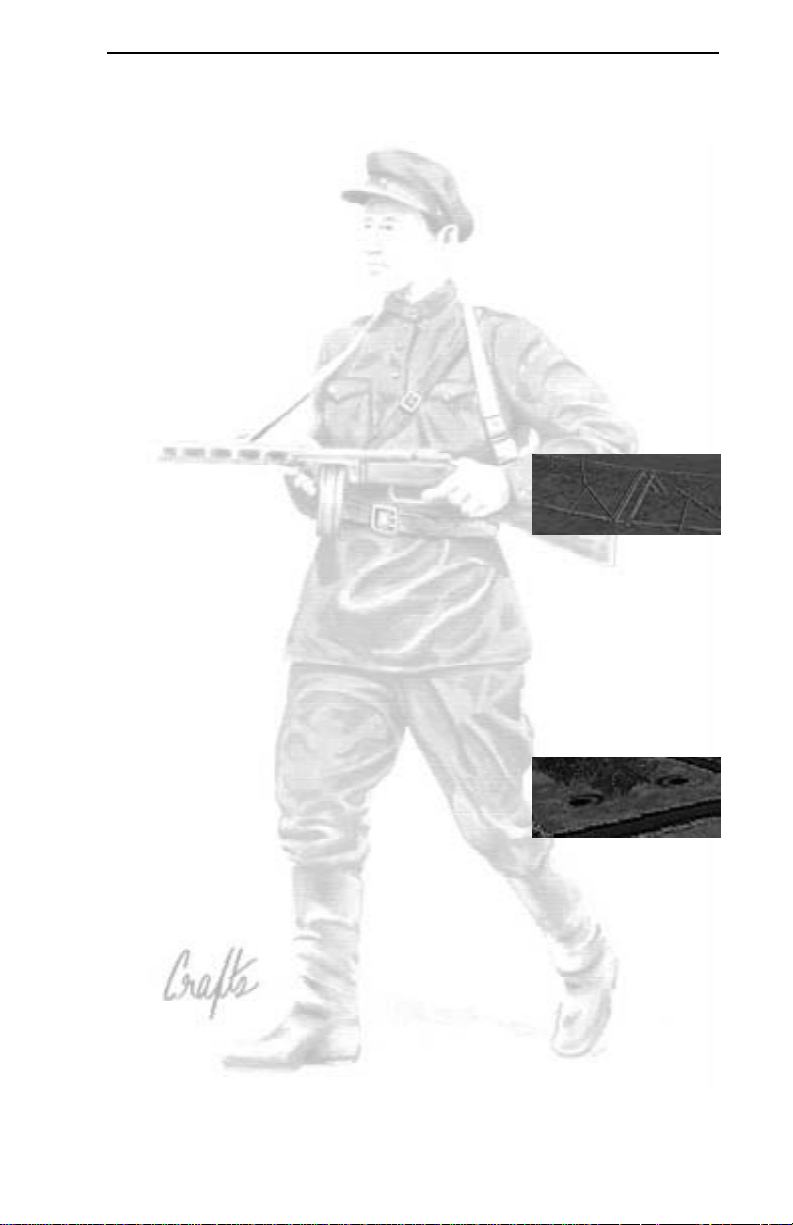
Barbed Wire & Roadblocks
Wire can be crossed by infantry or
fully-tracked vehicles, but only at a
much slower pace. Roadblocks can be
crossed by infantry (at a slower pace) but are impassable
to vehicles. Roadblocks and wire cannot be placed on water
and marsh terrain, as well as not inside buildings. There
must be sufficient space to place wire and roadblocks, so
when two houses are too close together it might be not
possible to do so (or you will have to rotate the wire or
roadblock marker to fit in between).
Trenches and foxholes
Each defending infantry unit in an
eligible location (i.e. not on paved
surfaces, in marsh or water or other
unsuitable terrain) can dig in at the beginning of a battle,
creating a foxhole underneath. The foxhole remains on the
map for the duration of the battle (or operation), and can
be used by other units (including the enemy) to gain its
defensive benefits (mainly cover). Digging in occurs
automatically but the player can toggle it on or off with the
Dig In command.
Also, depending on the parameters of a battle or
operation, the defending player can create additional
fallback positions using the ALT-F hotkeys during the setup
phase of a battle. These additional foxholes can be created
Combat Mission: Barbarossa to Berlin
13
Page 14

The Environment
anywhere within a valid setup zone on the map by left-
clicking on the map while in ALT-F mode, and the number
of available foxholes is equal to the number of non-heavy
infantry units on the map. Left-clicking on an already
existing foxhole makes it disappear and return to the
foxhole pool. Hitting ALT-F again exits the foxhole
placement mode.
Note that in Quick Battles which are Meeting Engagements or
Probes, neither side is allowed to dig foxholes. And Assaults
are the only Quick Battles in which the defender may dig fall-
back foxholes.
In regular scenarios, neither side may dig in during
Meeting Engagements. Otherwise, the ability of the
defender to dig in is determined by the scenario author.
Trenches are similar to foxholes except they are much
larger and provide considerably more cover and
concealment for their occupants. Further, they may be
placed and rotated during the setup phase like any other
unit. In addition, they can be used by infantry to move
from one location to another while staying inside the
trench, thereby benefiting from its defensive bonus on the
way. In fact, it is possible to place a whole trench system
on the map by simply linking trenches together (placing
them adjacent to one another). Trenches can be rotated
like any other unit in any direction desired. Trenches
cannot be placed on unsuitable terrain (marsh, water, fords
and in buildings), and remain on the map for the duration
of the battle (or operation).
Only fully-tracked vehicles are allowed to enter or cross
trenches, but do so very slowly and at great risk of
bogging.
Mines
There are three types of mines in the game.
Antipersonnel Mines
Lethal to infantry and can cause several casualties
within seconds when stumbled upon. Casualties are higher
14
Combat Mission: Barbarossa to Berlin
Page 15

The Environment
for infantry units moving quickly through a mined area
than when crawling or moving slowly. Once spotted, a mine
marker appears in the area. Infantry will refuse to enter
such a minefield even when ordered to. They may,
however, enter it when in panic or rout. Since mines are
dug into the earth, they cannot be placed on paved
surfaces or in buildings, in water or marsh or rough terrain.
Sneak (crawl) is always less likely to set off a mine.
Mines are also much less likely to go off if theyre
*known* (i.e. one already went off, and your men are now
assumed to be paying more attention and doing things like
moving in a single line (or a couple of lines) to minimize
further explosions).
So the least mine explosions happen in a known
minefield to crawling units.
Note: Dug in mines are never spotted unless one actually
explodes!
Antitank Mines
Dangerous to tanks and all vehicles, and although not
always lethal, can at least immobilize them. Antitank mines
are harmless to infantry because infantry is not heavy
enough to detonate them. Since mines are dug into the
earth, they cannot be placed on paved surfaces or in
buildings, in water or marsh or rough terrain.
Daisy-Chain Mines
Hastily-placed anti-vehicle mines that are easily spotted
by the enemy because they are above ground. They do not
generally cause direct harm, but rather deny the enemy
certain approaches, generally across road surfaces. Their
real life advantage is that they can be placed MUCH faster
than normal minefields and hence were used often in hasty
retreats. Daisy-Chain Mines cannot be placed on water or
marsh, and not in buildings.
Clearing Mines
Engineers and Pioneers with demolition charges are
able to clear gaps through minefields. Simply move them
within 25 meters of the minefield and wait. It takes a few
Combat Mission: Barbarossa to Berlin
15
Page 16

The Environment
minutes (turns) to clear a gap through the mines. You can
of course also target the minefield marker manually.
Additionally, engineers can clear Daisy-chain mines
without the use of demolition charges. The number of
engineers and their experience affect their speed in
clearing mines. Generally a near full squad is needed to
accomplish clearing a particular mined area.
Minefields can be reduced or eliminated by shellfire
(though this will not be explicitly shown - you just have to
judge roughly by how many craters you see, and hope).
Weather
It is common military knowledge that weather can in
fact dictate the outcome of wars. The German progress (or
lack of it in the winter) during Operation Barbarossa - their
assault against Russia - is a good example. The Russian
ability to bring their air superiority to bear (with decisive
results) during periods of clear weather later in the war is
another. At the tactical level, bad weather means troops
tire more quickly and vehicles get stuck more easily.
Movement is generally slower during periods of rain or
snow, and visibility can be seriously impaired as well.
Simply changing a battles weather settings can
fundamentally alter the way the battle plays out.
Time of Day
There are four daylight conditions simulated in CM:
dawn, mid-day, dusk, and night. Visibility is reduced during
dawn and dusk and heavily restricted during night.
Nighttime fighting also creates a risk of misidentifying
ones own troops as enemy and friendly fire can result.
Keep this in mind when separating your forces and/or
moving close to enemy positions, and occasionally check
your units target orders to make sure they have not by
mistake decided to fire on their own troops.
Atmospheric Weather
Clear - a nice sunny day with few or no clouds, offering
good visibility across long distances. This is the only
weather type that allows airplanes to operate in the game.
Overcast - the sky is full with dark, low hanging
clouds. Visibility is somewhat reduced.
16
Combat Mission: Barbarossa to Berlin
Page 17

The Environment
Rain - Visibility is reduced substantially. Noises are
muffled and sound contacts are considerably more difficult
to obtain.
Fog - a light mist covers the battlefield and visibility as
well as noise are reduced.
Fog and Rain - a mix (or more like an addition) of the
two above. Visibility and noise are heavily reduced.
Thick Fog - you almost cant see your own hand if you
stretch it out in front of your face. Visibility is reduced to a
mere few meters and the fog reduces the chance for sound
contacts.
Snow - reduces visibility and has a slightly lesser
impact on sound contacts than rain.
Blizzard - very heavy snowfall reduces visibility and
noise substantially.
Ground Conditions
Very Dry - very dry ground conditions increase the
chance of fires substantially.
Dry - dry ground.
Damp - early in the morning or after several days of
overcast weather or fog, ground conditions are often damp.
This raises the chance for vehicles bogging down when off
dirt or paved roads.
Wet - after rain showers you tend to have wet ground.
The chance of bogging down when off roads is substantially
increased, and even the dirt roads pose some danger of
bogging.
Mud - when it has been raining for a few days, wet
ground will turn into mud. Vehicles tend to get stuck in
muddy ground (even on dirt roads) quickly and mud also
greatly reduces the speed of vehicles and infantry.
Combat Mission: Barbarossa to Berlin
17
Page 18

The Environment
Deep Mud - after long periods of rain or melting snow,
the ground can become a quagmire, what the Russians call
Rasputitsa. Vehicles should stick to roads (paved if
possible) and even infantry will find the going slow and
tiring through such ground conditions.
Light Snow - a few inches of snow. The chance for
bogging is increased slightly and the snow affects
movement speed a bit, but most vehicles can handle it
well. Soft ground remains uncovered by snow during this
condition.
Snow - roughly 8 inches of snow. Wheeled vehicles will
get stuck frequently and even tracked vehicles will find the
going tougher. Infantry moves more slowly.
Deep Snow - 12 inches or more. Most vehicles will get
bogged eventually and infantry movement is slowed down
substantially.
Fire & Smoke
If there is anything to be found on a WWII battlefield
more often than casualties, it is smoke and fire, from
burning terrain or vehicles, or from smoke rounds used to
cover the attackers approaches or defenders line of
retreat.
Smoke
Smoke in varying sizes comes from burning buildings,
fields, woods, vehicles, and smoke rounds from tanks,
guns, or artillery. Small smoke shells or small burning
vehicles (e.g. Kübelwagen) degrade, but do not always
block, LOS through them.
Designers Note: Infantry smoke grenades, a source of smoke
commonly found in other WWII games is not available in
CMBB. Our research shows little credible evidence that this
type of smoke was used regularly at the squad level in WWII
for tactical purposes. Instead, it appears to have been used
for signalling mostly, and we have therefore decided to
exclude it from CMBB to prevent its potential unrealistic
overuse.
18
Combat Mission: Barbarossa to Berlin
Page 19

The Environment
Fire
The chance of a piece of terrain catching fire depends
largely on ground conditions and weather. You will see
fewer terrain fires during rain or with wet or snowy ground.
On the other hand, very dry ground increases the chances
for fires, and sometimes even tracer ammunition from an
MG can be enough to spark a blaze.
Terrain fires often start off small, and at this stage
have no effect on the game except for some smoke. But
small fires have the chance to grow and spread depending
on overall conditions. If a fire becomes big (the whole
terrain tile (20m by 20m) is burning) units located in that
tile are forced to exit the area immediately. If for some
reason a unit cannot do this (say it is immobilized), the
unit will be destroyed by the fire and any remaining crew
will abandon the vehicle/gun immediately and run to
safety. Units will also refuse to enter terrain burning with a
large fire.
Burning terrain and vehicles remain burning for the
duration of a battle (and can, in fact, cause adjacent
terrain to catch fire eventually). Fires and smoke will
cease, and burned buildings will collapse to rubble between
the battles of an operation.
Fog of War
Unless you choose to play with Fog of War: none (in
the Options menu at scenario startup), only friendly forces
will be visible on the map initially. Enemies must be
spotted by one of your units before they appear on the
map. Combat Mission: Barbarossa to Berlin uses a complex
spotting model to simulate the limited knowledge of a
battlefield commander and what is generally known as Fog
of War.
Enemy units can be displayed on the map according to
five spotting levels:
No Contact - Level 0
No enemy unit is displayed. Its still out there, but you
cant see it, because none of your units are able to see or
hear it. Keep in mind, though, that the enemy might see
Combat Mission: Barbarossa to Berlin
19
Page 20

The Environment
you! If youre walking down a quiet road and the enemy is
hiding behind some hedges, he might have identified all
your units before you even catch a glimpse of him. In fact,
your units might be dead before they see where the fire is
coming from in such a situation.
Sound Contact - Level 1
Most wargames allow spotting only when a line of sight
exists between the spotter and the target. In Combat
Mission: Barbarossa to Berlin, sound also plays an
important role. If you are close enough, or if the target is
loud enough (e.g. a tank racing down a road at full speed
or an infantry squad firing its weapons), you can spot a
unit even when no line of sight exists. Such units are
displayed as generic gray icons, and clicking on them
reveals SOUND CONTACT in the unit info window. The
general type of the unit is displayed as well, e.g. infantry?
or tank?, but do not rely too much on this. Additionally, the
enemy unit is shown at a location which may be somewhat
incorrect (your soldiers are making their best guess by
listening), so dont be surprised if the enemy unit seems to
move through impassable terrain (or even off-map), and
then suddenly moves into line of sight in a different (but
nearby) location.
First Contact - Level 2
The enemy unit has moved into line of sight and one of
your friendly units has caught a glimpse of it or the enemy
has opened fire at you and you see the muzzle flashes. At
this point only sketchy details are available. When you click
on such a unit, a general unit type is given (Infantry? or
Tank?), but not much more than that. Enemy infantry units
are always displayed using one soldier figure, regardless of
the actual type. Enemy vehicles and guns are always
displayed with a generic grey model.
Contact - Level 3
If the enemy is close enough, is exposed, or has been
firing at you for a while, more information becomes
available. Enemy infantry units now are classified as
squads or teams (e.g. mortar teams, anti-tank teams) and
weapons can be spotted, too. Vehicle types - tanks or tank
20
Combat Mission: Barbarossa to Berlin
Page 21

The Environment
destroyers or assault-guns - are usually identifiable at this
stage.
Infantry is displayed with the corresponding number of
figures based on unit strength and vehicles are displayed
as a common model of vehicle for the identified vehicle
type and the given month and year.
Take careful note of the fact that sometimes your
troops - especially the inexperienced ones - can incorrectly
identify enemy vehicles, usually as something bigger and
scarier than they really are. However, once the spotting
reaches level 4 (see below) any mistakes are corrected
and the true identity of the vehicle is displayed.
Identified- Level 4
If the unit is sufficiently close or exposed, one of your
units will identify it fully. This means that the number of
soldiers in a squad or team are displayed in the unit
window, as well as the correct model of vehicle, experience
of the unit, and more. This is as much information as you
will ever get about the enemy.
Lost Contact - Generic Unit Marker
After a unit has been spotted, it is possible to lose
contact with it. The lost unit will be graphically replaced
by a generic unit marker (each nationality has its own
unique marker type- stars for Russians, crosses for
Germans, etc.), showing the last known position of the
enemy unit. Clicking on such a marker will display the last
available information about the unit.
These markers stay on the map until the same unit has
been spotted again (even if in a completely different
location) or if you approach near enough to the marker to
verify that the previously spotted unit is no longer there.
In such a case the marker disappears, regardless of
whether the enemy has been spotted elsewhere.
Option - Extreme Fog of War
With the option set to Fog of War: extreme it will take
a lot longer before your units are able to fully identify
enemy units, i.e. reach spotting level 4. Enemy units must
Combat Mission: Barbarossa to Berlin
21
Page 22

The Environment
come into very close contact with your troops before
headcount, experience and armament become visible to
you, and many units in cover or far away will never be fully
identified for the duration of a battle. In fact, reaching
identification level 4 and even 3 will be a rare occurrence in
most situations. While more realistic, this option requires
more attention from the player, and is therefore not set as
default. Otherwise, this option works the same as Full Fog
of War, which is the default setting explained above.
Option - Partial Fog of War
With the options set to Fog of War: partial, enemy
units must still be spotted, but every spotted enemy is
automatically fully identified from this point on. This is a
good way for less-experienced players to get used to the
game system.
Option - No Fog of War
With the setting Fog of War: none, all enemy units on
the map will be shown and fully identified, regardless if
they are spotted or not. This is a great way for beginners
to get a feel for the game, but also for scenario designers
who wish to test a battle they made. Mind you though, this
works both ways, your opponent is able to see all of your
units also when this setting is in effect, even the computer
player!
SPOTTING
Units spot best when stationary. Movement, especially
running, means that a units field of vision is generally
restricted to the direction in which the unit is moving. The
same is true for vehicles, as the driver and tank
commander are (at least partly) focused on getting to their
objective without colliding with obstacles or bogging down.
Hiding units also spot worse, as their main task is to keep
their heads down, not watch for the enemy.
Spotting is always worst to the rear of a unit, and
panicked or broken units relay almost no useful spotting
information to the player.
Vehicles are generally much poorer spotters than
infantry, especially when buttoned up. In fact, most tanks
22
Combat Mission: Barbarossa to Berlin
Page 23

The Environment
have large blind spots within a certain distance around the
tank when buttoned up due to the heavily restricted field of
view. In CMBB, this has been abstracted into a general
rule: Buttoned vehicles have a blind spot for infantry
(which is NOT currently targeting the vehicle) within 15m
provided the infantry is not in the front 60-degree arc
centered on the turret facing.
So dont be surprised when one of your tanks with
closed hatches suddenly runs into an anti-tank team hiding
just a few meters away from it. Also dont be surprised
when YOU (as the player hovering above the battlefield)
can see a target that your tank simply will not engage.
What you can see is not necessarily what the tank can see!
Its often tactically wise to keep some units stationary
on overwatch duty while others advance. Unfortunately,
one cannot always afford the luxury of being cautious.
Designers Note: In order to prevent the abuse of bailed out
crews as disposable scouts, we drastically reduced their ability
to spot enemy units. Be warned that if you go moving your
crews off into enemy territory the first unit they spot might be
their last!
Combat Mission: Barbarossa to Berlin
23
Page 24
The Men and Machines
In addition, a fire fight with Josef Stalin tanks should not be
undertaken at less than platoon strength; employment of
individual Tigers means their loss.
From Septemer 1944 issue of the Nachrichtenblatt der
Panzertruppen, report of a Tiger unit which had met the IS-II
Stalin tank in combat
(found in: Soviet Armor Tactics in World War II, Charles C. Sharp)
The Men and Machines
Units in Combat Mission: Barbarossa to Berlin represent
squads and teams of soldiers as well as individual vehicles
and guns with crew. These are (with a few exceptions) the
smallest tactical elements that can receive orders in
other words, in Combat Mission you are not telling every
individual soldier what to do, but issue orders from the
position of a squad or team leader to the whole group.
This is obvious from looking at your units although
you will see individual figures standing on the map, these
do not represent single men, but rather a group. In the
case of squads, usually three figures (two if you use the
reduced figures option) represent anywhere from 7-14
men. Teams (including HQs and gun crews) are usually
shown as one figure regardless of the actual team size a
design decision to keep squads and teams easily
recognizable.
24
Combat Mission: Barbarossa to Berlin
Page 25

The Men and Machines
Designers note: We would have loved to show every single
man on the battlefield, but have decided not to because of
restrictions of current computer hardware to display and
animate thousands of soldiers on the map, and in order to
keep the interface from getting clogged. Individual soldiers
and their positions on the battlefield ARE tracked with regard
to casualties, however, albeit somewhat abstractly.
Combat Mission: Barbarossa to Berlin features a
tremendous number of units for each of the six nations,
including infantry formations, guns and vehicles and other
heavy weapons. Listing them all even with a brief overview
would be totally beyond the scope of this manual. However,
each units detailed information can be accessed from
within the game and in the editor, by clicking on a unit and
hitting the ENTER key. This opens the Detailed Unit
Information window in the upper left corner. Detailed stats
for each unit, its weapons, and capabilities are displayed
here. On the following pages you will find a short
explanation of what is shown and tracked by CMBB.
Combat Mission: Barbarossa to Berlin
25
Page 26
The Men and Machines
Men
Nationality, Division and Type of Unit
This shows the nationality of the unit, its parent
division type, and the unit type, similar to what is shown in
the unit information panel described earlier.
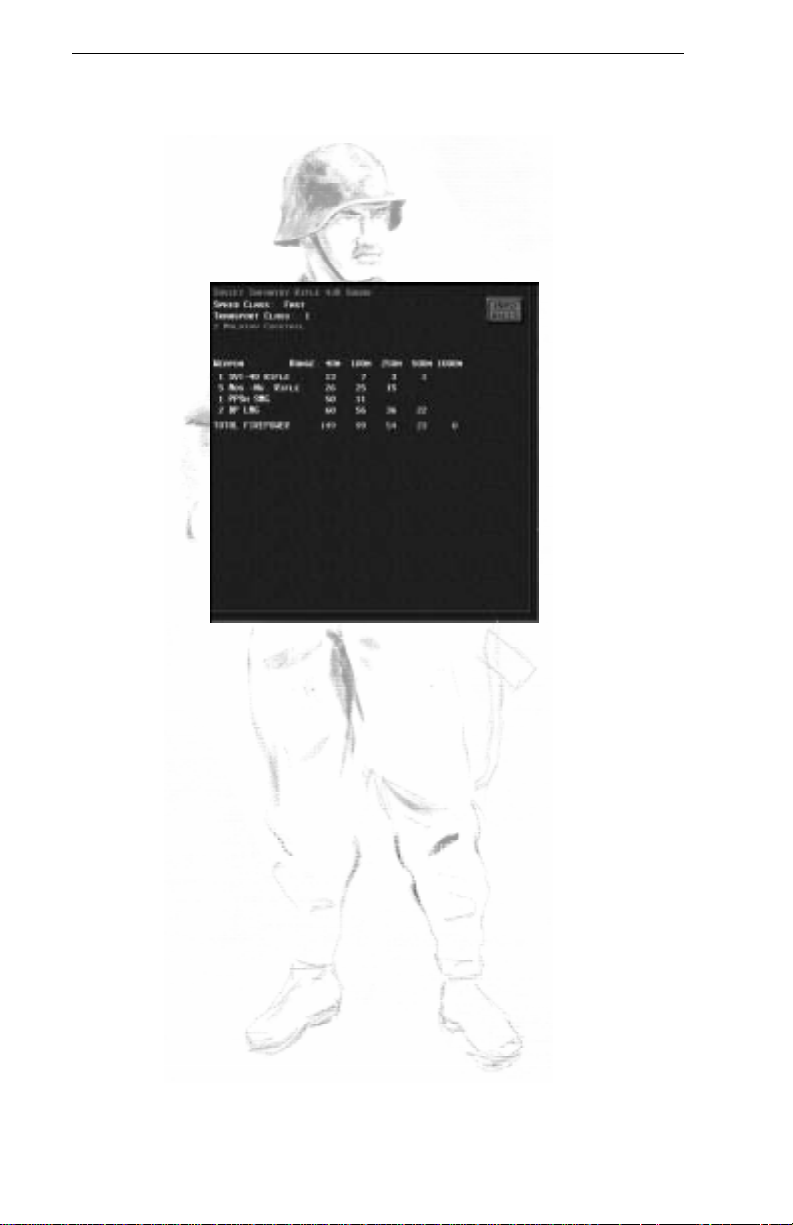
Speed Class
The speed class determines the speed at which the
infantry unit is able to move. The speed class a unit
belongs to depends essentially on how much heavy
equipment it is carrying. There are three speed classes for
infantry units (there are some more for other units,
explained later in this chapter):
Slow - most heavy equipment (e.g. the MG42 heavy
machinegun) but also units carrying a lot of extra
equipment like artillery spotting teams without radio sets
Medium - light machineguns, light mortars (e.g. the
60mm mortar), and spotters with radios
Fast - squads, sharpshooters, and other small and
mobile infantry teams
Slow and medium speed units CAN use RUN movement
orders, but will tire a lot faster than FAST units; if you do
not want to exhaust your troops too quickly, RUN orders
26
Combat Mission: Barbarossa to Berlin
Page 27

The Men and Machines
should be given to slow and medium units to cover short
stretches in emergencies only.
Transport Class
Ranges from 1 to 9, with 9 representing the largest
heavy equipment in the game. Units can only mount
vehicles which offer at least the same or higher transport
class.
Leadership Abilities
If the selected unit is an HQ unit, its leadership abilities
(if any) are displayed as, for example, Morale +1 or
Command +2.
Special Equipment
If a unit is carrying special equipment (e.g.
Panzerfaust, rifle grenades, demolition charges, Molotov
cocktails, magnetic mines etc.), the type and quantity is
mentioned here. Hand grenades are NOT mentioned here
seperately. Also, if the unit has binoculars (greatly
enhancing its long range spotting and identifying abilities),
this will be noted here as - you guessed it - has
binoculars.
Weapons & Firepower
A list of available small arms for the selected unit is
displayed. Which weapons are available depends on the
nationality and type of the unit. Note that some captured
weapons can be assigned to units from game start,
depending on their documented historical use (the
Germans reportedly loved the Russian PPSh
submachinegun for example, and you will often find a
number of these assigned to German squads and HQ units)
As the unit takes casualties, individual weapons
disappear from the list, showing that the soldier carrying
that particular weapon has been put out of action.
Sometimes, however, soldiers can exchange weapons. For
example, if the soldier carrying a squads machinegun is
hit, another soldier of that squad might drop his own
weapon and pick it up.
Combat Mission: Barbarossa to Berlin
27
Page 28

The Men and Machines
Beside the weapons listing, a firepower table shows the
firepower of each weapon according to the range to a
target. The firepower (FP) is shown for all weapons of the
same type, e.g. a German Rilfe 44 squad has 6 K98 rifles.
That means 6 x fp 3 at 250m = 18 fp. However, the
firepower as shown in increments of 40m, 100m, 250m,
500m, and 1000m is a reference for the player only - the
game engine uses a more precise system measuring down
to the meter.
Eligible for exit
If a unit is eligible for map exit (as part of a scenarios
victory objectives), this will be noted in the right upper
corner of the detailed unit info screen.
Info/Kills
By clicking on the white Info/Kills box in the upper right
corner of the info screen, you can toggle the display
between unit stats and a summary of how the unit fared in
the particular battle so far. To preserve the fog of war,
only verified kills are shown - so if your mortar team takes
out a squad hiding in woods and nobody sees it, the kill
will not be shown here until the battle is completely over.
28
Combat Mission: Barbarossa to Berlin
Page 29

The Men and Machines
Machines
Nationality, Division and Type of Unit
This shows the nationality of the unit, its parent
division type, and the unit type, similar to what is shown in
the unit information panel described earlier.
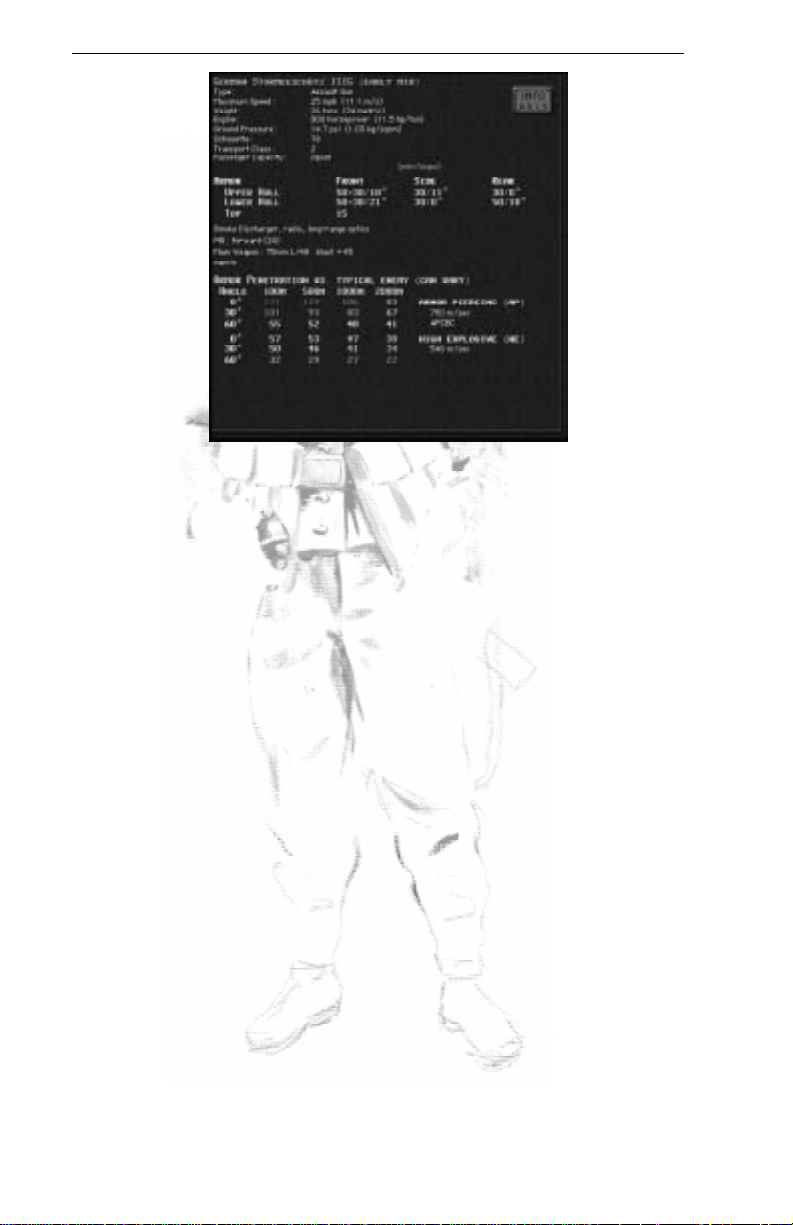
Maximum Speed
This states (in miles per hour and meters per second)
the maximum speed the vehicle can go on a paved road.
Cross-country movement is generally much slower.
Weight
Measured in tons (U.S. and metric).
Engine
The horsepower is used for speed and acceleration
calculations. Diesel-powered engines are slightly less likely
to catch fire when hit.
Ground Pressure
Measurement of the vehicle weight and the surface-
contact area of its tracks. Higher ground pressure increases
the chance of bogging down.
Silhouette
A numerical value representing the size of the vehicle,
modified especially by its height, that affects gunnery
accuracy and spotting against it. A value of 100 is medium
size.
Transport Class
A vehicle can only transport (tow) other units with the
same or lower transport class.
Passenger Capacity
Can be squad, team or none. Units may ride on the
deck of a tank for example, or within a passenger
compartment on transport vehicles like some halftracks
and trucks.
Combat Mission: Barbarossa to Berlin
29
Page 30
The Men and Machines
Armor
The armor table gives the thickness and slope of armor
for various tank parts (usually turret, upper hull, lower
hull, and top) for the front, sides and rear. Other
information may include armor quality (values lower than
100% represent manufacturing and metallurgical flaws,
common in early Allied vehicles and some late-war German
vehicles). Special features like armor skirts (Schürzen) or
partly-open vehicles (open top and/or sides) are also noted
here, along with curved mantlets such as the famous
Saukopfblende of the German StuGIII, which can provide
an effective armor protection substantially higher than the
base thickness and slope indicate (depending on which part
of the curved armor is hit, thickness and slope can vary to
a large degree within a fairly small hit area). When you see
a value like 50+20, then the 50 represents the tanks
base armor, and the 20 additional bolted-on armor, either
as field modification or done by the factory. This increases
armor protection somewhat, but bolted-on armor is usually
a somewhat less effective than the armor of the same
thickness made from a single piece of metal.
Special Equipment
Smoke Dischargers - small chemical packets mounted
on the outside of a tank that can create a smoke cloud.
30
Combat Mission: Barbarossa to Berlin
Page 31

The Men and Machines
Nahverteidigungswaffe - close defense weapon -
hurls an HE or smoke grenade from the inside of the tank
against any enemy infantry approaching the tank.
Alternate Rear-facing Driver - some German
armored cars were equipped with a second driver seat in
the rear of the vehicle, allowing them to reverse quickly
out of enemy view.
Cupola - some tanks feature a tank commanders hatch
with cupola allowing the tank commander a 360° view
around the tank even with the hatch closed. It enhances a
tanks close range observation against infantry assaults,
even from from the rear.
1 man turret - some early war tank models with a
crew of 2 have only one man in the turret - meaning that
the tank commander is usually also the gunner and loader,
and therefore cannot remain unbuttoned and fire the tanks
main armament at the same time. This greatly diminishes
a tanks spotting abilities while firing and affects rate of fire
and accuracy also, as the tank commander has to reload by
himself and therefore is forced to take his eye off the sight
for each shot.
2 man turret - many earlier T-34 models have only
two men in the turret - usually a loader and the tank
commander/gunner. This greatly diminishes a tanks
spotting abilities while firing, rate of fire and accuracy -
albeit not as much as a 1 man turret layout. The tank must
button up to fire its main armament.
Radio - many early war Soviet tanks were not equipped
with radios, making inter-platoon communication for
armored formations very difficult, having to use hand
signs, flares and even whistles to communicate. Tanks
without radio have to stay a lot closer to the formations
parent HQ to remain in command, and also lose any
command bonus when either the HQ or subordinate unit
(or both) are buttoned up.
Optics
All vehicles in game are rated for their optics (described
in more detail later in this chapter). When a vehicle or tank
has optics better than STANDARD, this is listed here.
Combat Mission: Barbarossa to Berlin
31
Page 32

The Men and Machines
Special Features
Burns Easily - some vehicles stow ammunition and/or
fuel in such a way that internal damage regularly causes
the entire vehicle to catch fire.
Shot Trap - certain vehicles (like the early Panther
model A) have a design flaw in their external shape, which
creates a shot trap - a curved surface on the underside of
the turret front which deflects incoming projectiles
downward into the turret ring, or the weakly-armored hull
top, where it often penetrates easily.
Slow ROF - certain vehicles are known for their slow
rate of fire, i.e. long reloading times for their main gun.
This can be due to design flaws (e.g. a cramped crew
compartment) or especially bulky ammunition or
cumbersome loading mechanisms.
Turret Speed
Turreted vehicles (mostly tanks but also some armored
cars) are rated for their ability to rotate the turret. Five
different speeds are possible: Very fast turret, fast turret,
medium turret, slow turret, very slow turret.
Machine Gun
Most vehicles have one or more machineguns mounted
in various places. Most common are bow and co-axial MGs,
with the first able to fire only within the vehicle hulls front
arc, while the latter can be directed wherever the main gun
can point. Flexible machineguns, usually top-mounted
and meant for antiaircraft purposes, have a full 360º
traverse but can normally only be operated when the
vehicle is unbuttoned, though some German vehicles have
remote-control capability for these weapons (which, if
applicable, is also listed here). Some Russian tanks feature
an MG mounted on the rear of the turret, but this usually
cannot be fired at the same time as the main gun, as there
is no extra crew to man this MG at all times. Machinegun
ammo is listed in brackets.
Flame
Vehicles equipped with a flamethrower have this entry,
together with the available ammo, i.e. flamebursts. Note
32
Combat Mission: Barbarossa to Berlin
Page 33

The Men and Machines
that flames fired at longer ranges can use more than one
ammo point per shot.
Main Weapon
Gives the caliber, muzzle velocity and blast strength of
the main gun, as well as any other special info, e.g. rear-
facing for vehicles with guns (or mortars) only capable of
firing towards the rear of the vehicle. The blast strength is
a rough measure that represents, in a single number, the
values tracked by the game engine, which are the
explosive power and the shrapnel generation of the guns
shells.
Armor Penetration
The penetration table states how many millimeters of
armor the shell can penetrate at four ranges (100m, 500m,
1000m, and 2000m), for three different armor slopes (0°,
30° and 60°) and the various anti-armor ammunition types
that the gun can fire. These values, however, can vary a lot
in the heat of battle, and are supposed to give a rough idea
only. Also, although only four ranges are shown, the game
engine uses much more precise algorithms (down to a
fraction of a meter). The table is color coded to correspond
to the colors shown for the various armor parts in the unit
interface. For each ammo type, also additional information
is listed, like the muzzle velocity and type of ammo
(explained later in this chapter).
Combat Mission: Barbarossa to Berlin
33
Page 34

The Men and Machines
Guns
The details screen for guns is a mix of the entries
available for infantry units and tanks. Most entries are the
same as for infantry units. Additional to that, the MAIN
WEAPON is shown, including caliber (e.g. 57mm), muzzle
velocity (e.g. 823 m/sec) and a blast value. The latter
indicates roughly how lethal the weapon is within a certain
range from the impact point.
For guns, the optics (explained in detail further below)
are listed here as well, if they are classified as better than
STANDARD.
Below that is an armor penetration table, which is
intended to give a rough idea of the potential of the gun.
Its a rough idea only because a lot of factors influence the
actual chance of armor penetration in the heat of battle.
The penetration table states how many millimeters of
armor the shell can penetrate at four ranges (100m, 500m,
1000m, and 2000m), for three different armor slopes and
the best anti-armor ammunition types that the gun can
fire.
Two additional speed levels are available for guns:
Immobile - the unit cannot move on its own and has
to be towed (usually only heavy guns, e.g. the 88mm
34
Combat Mission: Barbarossa to Berlin
Page 35

The Men and Machines
Flak). Additionally, guns which took an exceptionally long
time to be prepared for towing after having been setup for
firing, will be noted as cannot embark during battle. Such
units can enter the game map towed and move into
position, but cannot embark once they disembark. Keep in
mind that vehicles can only tow guns with the same or a
lower transport class.
Very Slow - usually used for heavier guns which can
be pushed by their crews, albeit slowly (e.g. the 75mm AT
Gun)
Combat Mission: Barbarossa to Berlin
35
Page 36

The Men and Machines
Weapons
Small arms
Small arms is a military term describing rifles, pistols,
machineguns, and other small-caliber bullet-firing weapons
wielded by the individual soldier. Although Combat Mission:
Barbarossa to Berlin simulates squads and teams rather
than individual soldiers, it does treat all weapons of an
infantry unit individually.
Small arms and MGs use abstracted ammo points.
When a squad or team fires it expends one ammo point.
Infantry units never run completely out of ammunition to
simulate the scrounging of ammo found on the battlefield
or taken from fallen comrades. Instead, when the last
ammo point has been used, ammo is considered to be
low and the unit tries to conserve its last ammo. Such
units fire their weapons rarely and even then primarily in
self-defense.
Machineguns on vehicles are treated like other Small
Arms. Unlike these, however, ammo counts for MGs are
displayed in the units Detailed Unit Information window,
and the vehicle MGs CAN run out of ammo. Vehicle-
mounted flamethrowers sometimes consume even more
than one ammo point per shot when the target is near
the maximum flamethrower range.
Long Distance Targeting
In the case of infantry squads, all weapons of a squad
which are effective at the particular range to the target are
fired automatically. This means that usually past 400
meters, only the squads light automatic weapon will fire.
As the target comes closer first rifles, and then
submachineguns, join in.
Ammo Loss Due to Casualties
Ammo points are reduced whenever a moving team-
served weapon (not squad!) suffers casualties. This
simulates the lost ammo carried by the now-
incapacitated men. Take a bazooka team for example. It
consists of two men; a gunner and an ammo bearer. If one
36
Combat Mission: Barbarossa to Berlin
Page 37

The Men and Machines
of them is hit, expect to see the ammo available for the
unit cut significantly. The same is true for machinegun
teams, although these usually have more than one ammo
bearer which means the ammo loss is not as dramatic.
Extra and Reduced Ammo Levels
During prepared defense situations, units often are
awarded (by the scenario designer) extra ammo to
stockpile within their fortified positions. Even if a unit
suffers no casualties, the extra ammo is lost once the team
decides to leave its defensive position, because theres no
one to carry it!
Units can also start out with less ammo than they
normally can carry. This would be done to simulate units
that are under-supplied or have recently had intense
combat and have not yet had the chance to acquire
replacement ammo fully.
Effects of Small-arms Fire
When a unit fires, the firepower rating is used to
determine the chance of causing damage. Many factors are
used in the calculations, like exposure of the enemy unit,
the terrain it is in, the activity and suppression of both firer
and target (running, crawling, hiding), the marksmanship
(experience) of the firing unit - just to name a few.
Generally, the higher the outgoing firepower and the
higher the exposure of the target, the more casualties can
be expected with each shot. A random factor is built in,
however, as lady luck always takes part in any combat
situation.
Suppression
Even when no casualties are caused, incoming fire
always has a chance to suppress the target and other units
nearby. The higher the effective firepower, the higher the
chance of suppressing the enemy.
But suppression does not always mean that the enemy
goes prone or runs away. Sometimes incoming fire will
only change the enemy units status from OK to Alerted
Combat Mission: Barbarossa to Berlin
37
Page 38

The Men and Machines
or Cautious, which might be enough to cause it to re-
evaluate its orders or return fire less effectively.
Small arms fire from a unit (simulating sometimes the
firing of a dozen rifles and machineguns at a time) is NOT
directed at one pinpoint area only. Instead, each shot
affects an area around the target unit or zone, in which it
can cause casualties or suppression. This area is bigger for
the area fire command.
Infantry Casualties
Casualties for infantry squads and teams are tracked on
a man-by-man basis instead of an arbitrary unit strength
rating. When a squad is fired at, the game determines how
many and which of its members are hit. When a man (or
men) of your unit has been hit, you can see this
immediately in the detailed info window, because the
weapon carried by that particular soldier is removed from
the list, and the firepower ratings adjusted accordingly.
Example: a German Rifle 1944 squad consists of 6 soldiers
armed with the K98 bolt action rifle, two MP40
submachineguns and one MG42 light machinegun. If the
squad is hit and suffers one casualty, one of these weapons
(and the soldier carrying it) is removed. You might lose a rifle,
the submachinegun or - if youre unlucky - the MG42 gunner.
However, important squad weapons - like machineguns
(e.g. MG42s) as well as light anti-tank weapons - might be
picked up by another squad member even if the man
initially carrying the weapon is hit. In such a case, one of
the squad members drops his own weapon and acquires
the more important one.
Casualties do not necessarily represent dead soldiers.
In fact, most of the soldiers regarded as casualties are not
dead, just (more or less) seriously wounded. But the end
result is the same since the soldier is not capable of
fighting any more and is removed from the squad as a
casualty. Only at the end of the battle is the actual
distribution of wounded vs. killed determined (randomly). A
portion of the casualties sustained might be wounded just
lightly and return for subsequent battles (during
operations).
38
Combat Mission: Barbarossa to Berlin
Page 39

The Men and Machines
Casualties for infantry units have several effects during
the course of a game. Besides an adverse effect on a units
morale, there is a loss of firepower as individual weapons
are removed. Additionally, if a heavy infantry weapon (e.g.
most mortars and heavy machineguns) loses most of its
crew, not only is ammunition lost if the unit attempts to
move, but when only one man remains the weapon
becomes entirely immobilized because a single man simply
cannot effectively carry the weapon, ammo, and personal
equipment by himself.
Hand-To-Hand Combat
Up close and personal, this kind of combat usually does
not last very long, as one or the other side (and often
both) are decimated quickly and either surrender or are
completely annihilated. Close combat starts when two
infantry units are within approximately 20 meters or so
from each other. You can recognize hand-to-hand combat
by the sounds of shouts and rifle butts knocking on
helmets, as well as liberal use of grenades by both sides.
The victor usually is the one that had some combination of
superior numbers, close-range firepower (e.g. SMGs),
better experience, and suppressing fire from other friendly
units.
Normally, small arms like rifles and machineguns are
too weak to cause serious damage to armored vehicles.
The exception is lightly-armored vehicles like halftracks
and armored cars, or soft vehicles without any armor
(e.g. jeeps, trucks, and assault boats). These can indeed
be penetrated and even destroyed by small arms fire. The
penetration chances decrease with distance, but the
HMG42 can destroy lightly armored halftracks or armored
cars out to as much as 200 or 300 meters depending on
angle.
But even if no penetration is achieved, small arms fire
can still be effective against armored targets. It can cause
crew casualties if the target vehicle is unbuttoned, or
force it to button up. Open top vehicles, like the SU-76M
tank destroyer or the Hummel assault howitzer, are also
vulnerable to small arms fire. Firing rifles from a higher
elevation right into the top of such a vehicle usually
Combat Mission: Barbarossa to Berlin
39
Page 40

The Men and Machines
achieves good results in Combat Mission: Barbarossa to
Berlin, as it would in real life.
The closer the armored target, the more options are
available to destroy it. Many units have specialized antitank
weapons available later in the war (see SPECIAL
EQUIPMENT section), but all infantry squads and HQs have
hand grenades, which can be used for a close assault
against a tank. Hand grenades work best against open-top
vehicles, but can also be used - albeit less effectively -
against buttoned up tanks. This simulates the occasional
hero climbing on, or right up to, an enemy tank and
placing the grenade in a vulnerable spot. Demolition
charges and grenade bundles are very useful anti-tank
weapons at very close ranges by providing extra punch,
as are rifle grenades (used by the Germans), which can
take out light armored vehicles at medium distances. By
the far the best close distance anti-armor weapon are
magnetic mines, which are placed or sometimes thrown on
enemy tanks and stick to the metallic surface of its armor;
Molotov cocktails can also be used effectively against open-
top vehicles and - to a limited degree - against armored
targets.
The main problem with using these weapons is that the
infantry unit often needs to get within throwing distance to
an enemy tank, and often expose itself to the tank or -
much worse - other enemy units covering the tank. There
is a good reason why most nations awarded medals for
individuals close-assaulting enemy armor, and why a good
number of those individuals didnt survive the war...
Special Equipment
Panzerfausts, demolition charges, rifle grenades and
other special infantry squad weapons are handled
automatically by the TacAI. The player does not give direct
orders for the use of these weapons; their actual use is
determined instead by the TacAI, but by manually
targeting a close-by enemy tank, the TacAI is encouraged
to use special equipment against that target if in range.
40
Combat Mission: Barbarossa to Berlin
Page 41

The Men and Machines
Panzerfaust
A short-range, one-shot antitank rocket launcher
commonly used by late-war German infantry squads. They
come in four different types and three ranges (two types
are 30m, one each is 60m and 100m) depending on the
scenario date.
If an enemy armored vehicle comes within range, your
squad tries to fire its Panzerfaust. However, suppression
can reduce the likelihood of this significantly, and
additionally your troops will be reluctant to fire at distances
close to the weapons maximum effective range as the
chance for a miss is high. Sometimes your troops might
even fire a Panzerfausts at enemy infantry if the enemy is
heavily dug in and/or your unit is carrying several
Panzerfausts and feels it can spare one for antipersonnel
use.
Demolition Charges
Usually carried only by engineers, these bags of
explosives are automatically used to clear minefields,
destroy enemy units in close combat, or knock out fixed
fortifications. This weapon packs a lot of punch and will
usually be enough to at least immobilize a tank!
Rifle Grenades
German squads might be armed with special grenades
which can be fired using a modified rifle. They provide a
light anti-tank capability at greater ranges than hand
grenades or demolition charges.
Grenade bundles
A bundle of six or more grenades to provide extra
punch - used often against lightly armored targets, which
would normally withstand the impact of one hand grenade
alone. An improvised anti-tank weapon. It can take out a
tank or most often at least immobilize it, but dont count
on it.
Magnetic mines
Anti-tank charges designed to stick to the metal surface
of tank and vehicle armor. Usually placed on a vulnerable
Combat Mission: Barbarossa to Berlin
41
Page 42

The Men and Machines
spot on a tank, like top armor, engine compartment cover,
the tracks or hatches to maximize damage. During the war,
Germany developed a special anti-magnetic paste called
Zimmerit to prevent magnetic mines from sticking to the
tanks. Ironically, Germanys opponents never used
magnetic mines.
Panzerwurfmine
These are hand-held shaped-charge grenades with
fabric wings or a directional strip that help the charge
arrive head on when contacting armor after being thrown
through the air. The Russian RPG-43 (not to be confused
with the modern Russian RPG) is a similar weapon.
Molotov cocktails
Essentially, a bottle filled with a flammable liquid,
designed to burst into a ball of flame upon impact. There
are various designs of Molotov cocktails, ranging from rude
(a bottle of gasoline with a piece of cloth, which is ignited
before throwing) to sophisticated (specially manufactured
glass containers with a mix of gasoline and other chemicals
and a more effective ignition mechanism). The end result is
usually the same - the target is engulfed in a ball of flame
which continues to burn for some time. Its meant for use
against armor, though its effects are limited, unless a
critical hit against the engine compartment can be
achieved, or the armored vehicle is open topped or
unbuttoned. The Russians also developed a special
launching mechanism for Molotov-like projectiles, called
Ampuloment, which was able to hurl a Molotov across
bigger distances, and even though widely used, this
mechanism never proved to be very effective.
42
Combat Mission: Barbarossa to Berlin
Page 43

The Men and Machines
Anti-tank
Ammo Types for Guns/Mortars
Ammunition is tracked individually for heavy guns
(tanks, ordnance, infantry anti-tank weapons, and
mortars). The five types of ammo are:
he - High Explosive (HE)
Rounds of this type carry a significant explosive charge
and are intended to generate on impact as many shell
fragments (shrapnel) as possible, thereby increasing the
lethal radius against soft targets (infantry, lightly armored
or open-top vehicles) but sacrificing penetrating power
against more heavily-armored targets.
ap - Armor Piercing (AP)
This type of shell (or shot) uses kinetic energy to punch
through armor plate and has little or no explosive charge.
This makes it ideal for use against armored vehicles but
generally ineffective against soft targets.
hc - Hollow Charge
Also referred to as HEAT ammunition, this projectile
uses a hollow (or shaped) explosive to focus a thin jet
of hot gas against armor plate, literally melting a hole
through it instead of smashing through with brute force
(like AP ammunition does). Because it does not rely on
kinetic energy, a HEAT rounds penetrative capability does
not decrease over long range.
c - Canister
Canister ammunition is not unlike a shotgun cartridge -
a lightweight shell breaks apart (intentionally) and releases
several hundred steel balls that spread out laterally. Its
deadly against soft targets at short range (within about
200m) but ineffective against hard targets or at long
range.
Russians use it in 57mm and 76mm tank guns.
Germans use it in their 75mm short gun, like on the
early StuG III.
Combat Mission: Barbarossa to Berlin
43
Page 44

The Men and Machines
t - Tungsten Core
Known by the Germans as PzGr40 (Panzergranate 40).
This type of projectile is lighter than a standard AP round
and can be fired at a higher muzzle velocity. It has a high-
density shatter-resistant metal core (usually made of
tungsten) with greatly improved penetrative power against
armor. The drawback to tungsten ammo is that its smaller
(core) caliber and lighter shell mass mean that kinetic
energy is lost more rapidly over long distances, and the
shell has a tendency to ricochet off steeply sloped armor.
But the increase in velocity and shell strength almost
always make up for these drawbacks. Tungsten is a
relatively expensive material meaning these shells are
generally rare. By 1944 Germany suffered from a severe
shortage of tungsten and other metals, and so had virtually
no PzGr40 available.
s - Smoke
These projectiles are designed to generate a thick
smoke screen as cover for other friendly forces. Smoke
ammo causes no damage if fired against enemy infantry or
armor, but generally blocks LOS through it for a short time.
Designers Note: understand the above five ammo types as
basic categories, used to describe the countless types and
models of projectiles used during the war. Internally, Combat
Mission: Barbarossa to Berlin tracks the weight, muzzle
velocity, ballistic coefficient and size of explosive charge of all
the different shell types from all the different guns in the
game individually. The AP ammo generally used by the
Soviets until April 1944 (uncapped AP) is NOT the same that
they use thereafter (ballistic-capped APBC - exceptions:
122mm switches over in August and 100mm never switches
to APBC). The APBC is generally more powerfulpartly
because AP ammo was poorly manufactured, especially in
1941, and also because Russian APBC has ablunt nose shape
which grips on contact and does reasonablywell against
highly-sloped armor.NOTE: Russian 45mm AP ammo in 1941
is especially poorly made.
Selecting Ammo Type
Your units decide, based on your orders and the type of
target they are about to fire at, which ammo type to use.
44
Combat Mission: Barbarossa to Berlin
Page 45

The Men and Machines
You cannot order a tank specifically to fire tungsten ammo,
for example. The tank commander (read: TacAI) is
responsible for the choice of ammo and usually tries to first
fire some regular rounds to bracket the target. The tank
commander uses special ammo once a hit is likely to be
achieved, but only when the standard type proves
ineffective.
Anti-tank gunnery
The phenomenon of armor penetration by projectiles is
a complex matter. Unlike many other wargames, Combat
Mission: Barbarossa to Berlin simulates the process by
modeling real-world physics instead of abstract CRTs
(Combat Resolution Tables).
Hit Chance
First of all, an anti-tank round - regardless if fired from
an anti-tank gun, a light infantry anti-tank weapon like a
panzerschreck or another tank - has to hit its target. As a
guideline, a Hit Chance is shown whenever you order a unit
to fire at an enemy armored vehicle. The hit chance is
calculated based on many different dynamic factors, which
also change constantly during the course of an Action
Phase - but it does give the player a rough idea about the
capabilities of the firing weapon.
Some factors taken into account when calculating hit
chances are
size of the target (the silhouette rating)
facing of the target (vehicle sides are usually bigger -
longer - than the front)
distance between firing unit and target
exposure of the target (its much more difficult to hit
something which is obstructed from view by trees, a stone
wall, a house or a slope - see HULL DOWN)
the accuracy of the firing weapon, which is often
directly proportional to its muzzle velocity, i.e. a faster shot
means a flatter trajectory and easier aiming
the experience rating of the firing crew
number of previous rounds already fired at this
target, which allow the gunner to bracket
Combat Mission: Barbarossa to Berlin
45
Page 46

The Men and Machines
ammunition type, caliber, and weight
the optics of the firing unit
if the firing unit and/or target are moving. The hit
chance is dramatically reduced when the firing unit is on
the move.
Hull Down
One of the best tactics to enhance the survivability of
your armor is to occupy hull down positions. Hull down
means that only the turret or superstructure is visible to
(and hittable by) the enemy, thereby minimizing the target
area tremendously (the silhouette of a vehicle is reduced)
without sacrificing ones own ability to fire. Hull-down
vehicles are also harder to spot in the first place.
Hull-down positions are not as easy to find as one
might think, though. What makes it so difficult is that a
hull-down position is always relative between the firing unit
and the target. It is entirely possible to be hull-down
against one tank, while being in full view of another one.
Only rarely will you find a natural dip in the terrain large
enough to fit a tank which also provides hull-down status
in multiple directions. (Note: in some scenarios you might
be allowed to dig in your tanks, however, which achieves
exactly this result).
Experience is what it takes to spot good hull-down
positions. Hull-down positions can be found anywhere, all
the time, and not only in holes but even on top of a hill.
If your tank is far enough off the ridge, only its turret/
superstructure will be visible to targets on the opposite
side.
The seek hull down order in Combat Mission:
Barbarossa to Berlin is intended to make finding hull-down
spots relative to ONE specific spot on the map easier for
the average player, but it is a command best used while
out of contact with the enemy and represents the ability of
pretty much any tank crew to find a hull-down spot given
enough time and preparation. For getting hull-down during
the heat of combat, you might be better off scout the map
yourself and use your best judgement. Here, the LOS or
TARGET tool will aid you, as the words hull down will
46
Combat Mission: Barbarossa to Berlin
Page 47

The Men and Machines
appear over the targetted area or unit as soon as your unit
has reach a hull-down position.
Misses
If a shot misses, it does not magically disappear.
Instead, the round is tracked to its impact point. Since the
trajectory of gun rounds is modelled realistically (i.e.
rounds drop by gravity as they travel), this might mean
that a missed projectile ends up somewhere behind the
missed target in the ground or, if fired too short, in front of
it. But elevations can change this dramatically, and when a
target on a hill is missed, the round can easily travel
hundreds or thousands of meters further.
Wherever the impact point lies, damage is caused. If a
round which missed the intended target sails further and
lands near another unit, damage is assessed just as if the
unlucky target was the intended one. It wont happen
often, but it can.
Armor Penetrations
When a gun round hits an armored target, it does not
mean an automatic kill. Far from it - both Axis and Allies
had tanks in service which could shrug off direct hits,
especially if the shell came from long range and at an
oblique angle.
Some factors taken into account when determining
whether a round penetrates armor are:
armor thickness for front/side/rear as well as top/
turret/upper hull/lower hull
armor slope for all of the above
Side angle (i.e. obliquity)
Striking velocity (reduced by air resistance as the
shell travels)
Armor quality (i.e. metallurgical flaws)
Face hardened or homogeneous armor plate
Brinnell Hardness Number (BHN)
Shot-to-plate diameter ratio
Shell cap type and strength
Special ammo (like tungsten rounds)
Shot shatter
Combat Mission: Barbarossa to Berlin
47
Page 48

The Men and Machines
Shot traps (a design flaw in the vehicle shape which
tends to catch shells rather than let them ricochet away)
Armor skirts (Schürzen)
Note: Combat Mission: Barbarossa to Berlin does not use a
generic armor strength, but real-life values taken directly
from historical sources: armor thicknesses in millimeters and
slopes measured in degrees.
A successful anti-armor round penetrates the armor,
sending molten metal fragments and spray into the crew
compartment, and - if the shell also contains an explosive
charge - exploding inside the vehicle. In many (but not all)
cases this means that the penetrated vehicle is either
physically damaged in some fundamental way, members of
the crew are incapacitated or panicked, or both. A vehicle
so damaged is called knocked out, and surviving crew
members hastily bail out of their wrecked vehicle before
the next shell arrives. Sometimes the results are even
more horrific. If the penetration contacts live ammunition
inside the vehicle, or a tank of gasoline, the whole vehicle
can burst into flames, otherwise known as a brew up.
Sometimes no one escapes these deadly infernos.
The lethality of a penetration takes into account the
mass of armor sent into the interior, the likelihood of the
armor to fragment, and the size of the bursting charge of
AP ammo, if any (and the chance it might not function
properly on penetrations which dont make it cleanly
through). Youll find that AP shot (which has no
explosive capacity) tends to to a better job penetrating
armor, but less damage once inside compared to AP
shells which have an explosive charge. With small guns -
especially antitank rifles - it often takes multiple hits to
knock out tanks, and often this will be from injuring or
killing the crew rather than significant physical damage to
the tank itself.
Armor penetrations that penetrate less than 15%
beyond the armor resistance will be displayed as partial
penetration and often are less dangerous to the crew of
the tank which was hit. (Note: the reduced lethality is not
a hard cutoff at 15%, thats just the cutoff to show the
partial message).
48
Combat Mission: Barbarossa to Berlin
Page 49

The Men and Machines
Non-Penetrating Hits
An armored vehicle can still be damaged even by a hit
which does not penetrate the armor. External equipment
such as the gun or its optics can be damaged, as well as
the vehicle becoming immobilized by a hit to the tracks or
a vital engine component. A non-penetrating hit can even
injure or kill crewmembers by causing internal armor
flaking or spalling. This happens when the impact force
on the outside rips small fragments off the inside of the
armor and hurls them around the crew compartment,
potentially injuring or killing the crew.
A round can also bounce off and ricochet. This happens
mostly when the armor slope and angle of impact (called
side angle or obliquity) prevents the round from striking
the target plate head-on. If the round lacks the power to
penetrate the armor it literally bounces off or even
shatters. Ricochets can sometimes cause armor flaking, but
are usually harmless and good news for the tank crews.
Ricochets sometimes are prevented by the target
itself. Pockets in a vehicles shape that tend to catch
shells are known as Shot Traps. Look at the underside of a
Panther model A mantlet. You can see how a hit would be
deflected downward, right into the thin roof of the hull.
This was fixed with the later Model Gs additional chin.
Rounds can also shatter upon impact. German shells
were made stronger than Allied shells, and the metal could
withstand greater stress without breaking apart. Shot
shatter happens when an improperly tempered (i.e. heat-
treated) shell hits very thick armor and breaks upon
contact. Allied shells often were not tempered properly.
The shot diameter-to-plate thickness ratio can have a
significant impact on the chance a shell might penetrate its
target. The shot-to-plate ratio compares the caliber of the
round with the thickness of the armor. A general rule of
thumb is that if the ratio is <1 (the plate is thicker than
the caliber of the shell), the round is underpowered and
has a lesser chance of achieving a penetration. If the ratio
is >1 (the shell is bigger than the thickness of the armor),
the shot is overpowered and the chances for a
penetration are higher.
Combat Mission: Barbarossa to Berlin
49
Page 50

The Men and Machines
Armor Types
Different qualities of steel and different types of
manufacturing have a big impact on the effective
resistance of armor. Obsolete or poor manufacturing
techniques can cause armor to resist with less capability
than one would expect for a given thickness. For example,
check out the Model 1943 T-34 tank. Its armor quality is
rated at only 90%.
A separate but related concept is the Brinnell Hardness
Number (BHN) which is a measure of the metallurgical
hardness of the armor. Tank armor is generally
considered to be ideal at approximately 240 BHN. BHN
numbers are not displayed in CMBB, but the engine
simulates them. Generally speaking, early-war Russian
armor tended to be overly hard and brittle, which meant
that it could crack apart when struck hard enough. And
even a lesser nonpenetrating hit was likely to cause
flaking/spalling of the armor into the crew compartment.
The same was true for late-war German armor when
German industry ran short of proper alloys.
There are also different types of armor: face-hardened
and homogenous. Homogenous plate is a largely uniform
block. Face-hardened armor has been treated to arrive at a
higher hardness (measured in the BHN) just on the front,
or face, thus increasing the chance that a shell will
ricochet or shatter. Face-hardened armor does have a
weakness, though. Because it is more brittle than uniform
block, it can catastrophically break apart upon impact.
Generally speaking, capped armor piercing shells
penetrate more face-hardened armor than homogenous
armor, while the reverse is true for basic uncapped AP.
Reinforced Turret Front Armor
Applies to the Tiger only. Some parts of the turret
mantlet are thicker than the stated value.
Armor Skirts (Schürzen)
Schürzen is the name for the relatively thin (about
5mm) soft steel plates mounted a short distance (usually a
50
Combat Mission: Barbarossa to Berlin
Page 51

The Men and Machines
couple of feet) from the primary flank armor of a tank.
Originally designed by the Germans to help protect
vehicles from the Soviet 14.5mm Anti-Tank Rifles, they
also proved useful against shaped charges used by many
types of light anti-tank weapons like bazookas (on the
Western Front).
Gunnery Optics
CMBB is the first wargame seriously tackling the issue
of optics, and, based on months of research, tries to
accurately simulate its effects on tank duels.
There are seven types of optics in the game. Note that
nations other than Germany exclusively use standard
optics.All six other types are German-only.
Note: despite months of research, the data we were able to
turn up for Soviet optics used throughout the war is extremely
sparse. In order to not put the Soviets at a disadvantage
without justification other than rumors that Soviet optics
were generally worse than German optics, we have decided to
set all Soviet gun optics to standard values.
Standard:Mediocre quality and magnification, normal
field of view. Not listed in the data window.
Good: Typical good-quality general-purpose German
optics, mostly used by tanks. Crew must be green or
better to use without penalties.
Binocular:Same as Good but allows use of two eyes
for better depth perception. Used by early Tigers and
Panthers.Crew must be green or better to use without
penalties.
Long-range:High-magnification German optics, with
limited field of view, used by assault guns and tank
destroyers. Crew must be regular or better to use without
penalties.
Very long-range:Extreme magnification power.Used
only by late-model Jagdpanther. Crew must be veteran or
better to use without penalties
Dual-Magnification: Can switch between two
different magnification levels, to optimize both spotting
and tracking.Used by late-model Panthers.Crew must be
veteran or better to use without penalties.
Narrow:Cheaper (by German standards) optics of
generally good quality but limited field of view.Often used
Combat Mission: Barbarossa to Berlin
51
Page 52

The Men and Machines
by lightly-armored self-propelled guns. Crew must be
regular or better to use without penalties.
Effects of Optics
Good magnification allows for better spotting and
gunfire accuracy at long range, except in low-light
conditions where the greater need for light of high-
magnification optics becomes a hindrance, reducing their
effectiveness relative to lower-power lens.
Wider field of view allows for quicker target acquisition
and tracking, which allows the gun to be aimed (and fired)
faster.
Limited field of view can cause difficulty tracking
moving targets at close range.
Hot temperature reduces optical performance,
especially for German equipment. The reduction is lesser
for more experienced crews.
Extremely cold temperature reduces performance of
standard optics, especially for inexperienced crews.
Extremely cold temperature increases performance of
German optics, especially for experienced crews.
52
Combat Mission: Barbarossa to Berlin
Page 53

The Men and Machines
Artillery
There are two forms of artillery in Combat Mission:
Barbarossa to Berlin: on-map and off-map. For the sake of
this discussion, artillery stands for any form of weapon
designed to hurl an explosive charge at a designated
target. This includes howitzers, mortars, rockets, and naval
guns unless otherwise noted. Artillery fire has been heavily
changed from what it was in Combat Mission: Beyond
Overlord, so make sure you read this section carefully,
even if youre familiar with the game.
Blast Strength
Often much deadlier than small arms are the high
explosive rounds from mortars, howitzers and tank guns.
The firepower of these weapons is represented by a BLAST
VALUE, which is a rough measure of both the size of the
shell and the amount of explosive charge it carries.
The blast value helps give a general guide to the
strength of an explosion, which increases the closer you
are to its center. It also helps combine blast radius and
blast strength into one easy-to-use number, though the
game engine tracks both phenomena separately. For
example, the U.S. 75mm and 76mm HE shells used by
lend-lease Sherman tanks are roughly the same size, but
have different blast radii. The 76mm has a lesser amount
of explosive (TNT), so its blast radius is smaller. If its an
accurate shot then the shrapnel from the 76mm is (nearly)
as deadly as that from the 75mm, because theres about
the same amount of it (the shells are roughly the same
size). But if its not an accurate shot the shrapnel must
therefore travel farther to hit a target. Thus the smaller
TNT charge of the 76mm causes less damage since it has
less ability to project shrapnel over distance compared to
the 75mm round.
The blast value is measured in the same game units as
small-arms firepower.
On-Map Artillery
On-map artillery is represented by actual artillery guns
on the map, while off-map artillery is represented by
artillery spotter teams. Except for small-caliber mortars
Combat Mission: Barbarossa to Berlin
53
Page 54

The Men and Machines
(60mm and 81mm for example) it is rather unusual to
have an artillery gun on the battle map, since most of the
time artillery batteries were positioned well behind the
front lines. They are included in the game, however, to
simulate rear guard actions and exceptional circumstances.
While on-map, artillery units behave just like any other
units and have their own set of available orders. Some big
artillery guns cannot move (theyre simply too big and it
can take hours to relocate them), but many can be either
towed or manhandled (slowly). After moving, however, a
gun has to be set up and prepared for firing (the process is
automatic - the time it takes to setup a firing position is
displayed in the units info screen). Depending on the type
of the gun, this can take anywhere between one and
several minutes. A timer indicates the time required for
this.
Another form of on-map artillery are mortars and
howitzers mounted on vehicles, and besides their better
mobility, they work just the same as infantry mortars and
howitzers in the game. Vehicle-mounted mortars and
howitzers cannot disembark from vehicles. Note also that
in order to fire some mortars, the vehicle needs to rotate
its rear towards the target!
On-map artillery units (both infantry and vehicle based)
usually are only able to fire on targets they can see,
although an HQ unit can also spot for on-map artillery
units (see below).
Using HQs for Indirect Fire
When the firing artillery piece is actually on-map a
direct LOS to the target is required in order to fire. The
exceptions to this are on-map mortars, both infantry and
vehicle-mounted which, due to their high trajectory, can
perform indirect fire at close range. Usually, mortars
require a LOS to be able to fire. However, if a mortar unit is
within command radius of an HQ unit, the HQ unit can
serve as spotter and the mortar is able to AREA FIRE at
locations which are out of its own LOS but within LOS of
the HQ unit. However, the HQ unit is not allowed to be
HIDING to be able to spot! Additionally, mortars are
allowed to fire at Target Reference Points (TRP), even if out
54
Combat Mission: Barbarossa to Berlin
Page 55

The Men and Machines
of LOS, but only provided they have not moved from their
initial setup positions. It took a lot of time to set up and
register mortars to do this sort of shooting, so if you move
you lose!
To fire indirectly simply set up everything as described
above, and target the mortar as you normally would. The
LOS line, if pointing to an area not visible to the mortar
team, will still appear to be BLACK. Click where you would
like the target to be and, if the HQ commanding the mortar
can see it, the targeting line will stick showing that an
Area Fire order was successfully plotted. If the line does
not stick it means the HQ does not have LOS to that
exact spot. Double check with the HQ units LOS to choose
a legitimate spot to target. Make sure, however, that the
target line from the mortar unit is orange - if its red, then
youre targetting an enemy unit (not an area), and youre
ordering the mortar to focus on that target when it moves
into LOS; the mortar will hold its fire until this happens.
Off-Map Artillery
Most of the time, an artillery battery is represented on
the map by an artillery spotter team. This team is equipped
with binoculars, detailed terrain map with overlay grid, and
a radio or field telephone. Its job is to spot targets for a
particular artillery battery by reporting the location of
incoming rounds and adjusting the aim. Spotter teams
equipped with a radio are able to move around quicker (as
seen by their higher speed class) than those with
telephones, since the latter required a wire line to be laid
out to their new position while moving.
Plotting Artillery Missions
To call in an artillery strike, simply issue a TARGET or
TARGET WIDE order to the artillery spotter team. Target is
the normal choice, delivering fairly concentrated fire on a
specifc area, while Target Wide is useful for larger and
dispersed formations of enemy units. When the spotter can
actually see the target area, the speed and accuracy of the
barrage are greatly enhanced, but it is not required. In
other words, you CAN call in off-map artillery anywhere on
the map without having to trace an LOS.
Combat Mission: Barbarossa to Berlin
55
Page 56

The Men and Machines
Artillery Ammunition
Artillery spotter teams have AMMO displayed in their
unit info window just like any other unit. On-map artillery
units have a limited number of specific types of shells (HE
and usually Smoke). But in the case of a spotter, ammo
represents the number of shells (of any type) that the
attached battery is allowed to fire. Some types of batteries
can fire SMOKE as well as normal high-explosive shells;
this is noted in the units detailed info screen as well as
purchase screen in the editor and for Quick Battles. In this
case, each ammo point can be used as either smoke or
high-explosive. Rounds used for spotting DO count
against the batterys total. Note also that a battery can
consist of anything between two and more than 200 (!)
tubes, and EACH shell is counted against the ammo total.
An 18 tube battery would therefore use up 36 ammo
points in two volleys, wheras a 4 tube battery could fire 9
volleys before running out of the 36 ammo points.
Delays
There is a delay between issuing a target order and the
arrival of the first rounds, ranging anywhere from about 30
seconds up to 10-15 minutes and sometimes even more.
The delay depends primarily on the formation to which the
firing guns are attached - Corps and Army artillery take
longest to arrive, because they are higher up the chain of
command and receiving fire requests from more than just
your formation, while Regimental and Battalion assets are
usually a lot quicker, since their primary task is local
support. Divisional artillery is in between. Delays are
further modified by the experience of the observer team as
well as nationality, since different nations used different
procedures for calling in artillery, with Russians most
notably known for pre-determined fire plans and little
flexibility, therefore often exceedingly long reaction times -
at least in the early years of the war. (NOTE: High-level
Soviet artillery can take so long to open fire, that often
their only useful purpose is in a pre-planned bombardment
see below). Another important factor for delays is if the
target area is in LOS of the spotting team or not. If not,
fire delays can be a lot longer for an artillery strike, and
the chance for missing the target area altogether rises
dramatically.
56
Combat Mission: Barbarossa to Berlin
Page 57

The Men and Machines
The ESTIMATED time delay before the strike
commences is shown in the artillery spotters unit info
window. Keep in mind that this is only the estimated time
and it can take a little less or much longer before the first
rounds fall.
Also, during an ongoing barrage, the time between two
volleys is indicated here as well, as the guns are re-loaded
and/or realigned.
Usually about 30-60 seconds before the full strike, a
few spotting rounds fall on or near the target. These are
needed for the spotter team to adjust the fire properly (an
automatic procedure - no input from the player is
required). Accuracy for the main strike is considerably
better if the spotter has a line of sight to the target see
below: Accuracy. The artillery strike will continue over
several turns until either the ammo is used up, or until the
spotters targeting order is cancelled (or he dies).
A spotting team cannot call for an artillery strike while
hidden - it must unhide before the target command
becomes available in its order menu, and cannot hide for
the duration of the barrage.
Pre-planned bombardments
During the orders phase for turn 1 of a battle (and
ONLY then), each FO is able to call in for a pre-planned
artillery bombardment which will commence without any
delay at a specific point in time during the battle, to
simulate a pre-planned bombardment on known or
suspected enemy positions or part of an established fire
plan. The default is for the bombardment to begin
immediately, but a player can specify a later turn for this
preplanned bombardment to begin by using the Q key.
Each time you press the key, 1 turn is added to the delay.
This pre-planned fire starts at the first second of the turn
specified (including turn 1), and is always accurate - see
below: Accuracy.
This pre-planned bombardment order cannot be
changed or cancelled and will remain in effect until all
ammo allocated for the battery has been used up, even
Combat Mission: Barbarossa to Berlin
57
Page 58

The Men and Machines
when the spotter has been subsequently eliminated or has
left the map! Keep in mind: this is true also for smoke fire
missions ordered during the setup phase!
Note also that while the bombardment commences
without delay, the delay time between volleys (for
reloading and adjusting) remains in effect.
Accuracy
Artillery fire is not always on target. Depending on the
experience of the spotting team, the type of artillery being
fired, and whether the target area is in sight of the spotter
(which is the most important factor), artillery can miss its
mark widely, sometimes resulting in nasty friendly fire
incidents.
There are two exceptions to this - pre-planned
bombardments are always on target (since it is assumed
that the necessary calculations have been made ahead of
time and the guns have been registered on target), as well
as fire (even if out of LOS) on Target-Reference Points
(TRPs), which have been likewise pre-registered in a
fireplan.
The player receives no feedback if an artillery strike is
accurate or not - it is important to watch the battlefield and
see where the artillery actually falls. Look for that spotting
round - if its widely off target, chances are that the full
barrage is going to be off the mark, too.
Adjusting Fire
When you find your artillery strike to be off the mark,
or if you simply want to adjust or walk the aiming point a
short distance (even after the strike has begun), you will
need to adjust your fire. Simply select the spotting team
whose fire you want to adjust, and plot a new target point
not too far away from the original mark. If the targeting
line is light green, you are within the acceptable quick
adjustment radius of the original aiming point. If the line
is blue, you are too far away and the time delay will be the
same as if a completely new order had been issued, since
the guns have to recalibrate. Note that the targetting line
will not turn green when the target area is out of sight of
58
Combat Mission: Barbarossa to Berlin
Page 59

The Men and Machines
the FO hence you cannot adjust your fire and gain the
benefit of a shorter command delay if the new target is out
of LOS!
Press SPACE to cancel a retargeting order in progress
without disturbing the current targeting order if you realize
you cant get a green line where you want it.
Alternatively, and even more convenient, is the Reset
Target order (hotkey R) which resets the target point (and
delay) to what it was at the beginning of the order phase,
regardless if you moved the target point or even cancelled
the target order altogether. This is especially useful when
you mis-clicked on a location or simply changed your
mind, and allows you to avoid exceedingly long target
delays for some of the larger caliber guns otherwise
enforced by mistake.
Adjusted fire can STILL be inaccurate, though it is a lot
more probable that it will fall on target than the first strike.
So you still need to watch the landing of the actual barrage
to be able to re-adjust again if needed.
Target Reference Points
Target Reference Points (TRP) are locations which have
been carefully pre-registered on the maps - i.e. all heavy
weapons have recorded the coordinates and necessary
firing adjustments before the battle, in order to be able to
bring fire on such an area with the highest accuracy and in
the shortest possible time. This is true for artillery, but also
any other heavy infantry weapons on the map!
Usually players put TRPs, which look like red-colored
bullseye markers, onto important locations like enemy
staging areas, likely defensive strongpoints, road junctions,
or probable avenues of attack. In fact, often the first thing
to do for a combat unit, sometimes even before digging
foxholes, is pre-registering targets for the artillery.
In the game, TRPs are available whenever a side is
allowed to purchase fortifications (meaning it had enough
time to dig-in and pre-register targets), and the scenario
designer decides to include them (or not) for each side
(and they can also be purchased for quick battles like any
other fortifications). During the Setup Phase (and only
Combat Mission: Barbarossa to Berlin
59
Page 60

The Men and Machines
during the Setup Phase), they can be moved freely across
the map (unless padlocked) and are not bound by setup
zones.
In Operations, TRPs are valid for one battle only, and
disappear in subsequent battles.
If a TRP is targeted by an artillery spotter, the time it
takes for the artillery strike to arrive is cut drastically. It
can take as little as ten seconds for the first rounds to
arrive, and never takes more than 1 minute, even for guns
with usually much longer firing delays! CMBB simulates
that these TRPs are not only registered targets, but also
part of a defensive or offensive fire plan, and therefore
such fire can be called for by a simple codeword. LOS (or
lack thereof) doesnt influence fire delay times or accuracy.
TRPs can also be targeted by on-map mortars even if
out of LOS, but ONLY if the mortar team did not move from
its original setup position. The reason for this limitation is
that the calculations for hitting a particular target point
when not in direct line of sight require skill and preparation
and the exact knowledge of ones own position relative to
the target - this cannot be adjusted on the fly during the
span of a battle.
Other on-map ordnance, like antitank guns for
example, can use TRPs to their advantage as well, as long
as they remain in their original setup positions. When firing
at enemy units on or very near a TRP, they gain a
considerable accuracy bonus because they are considered
to have boresighted or ranged their weapons to the TRP
before the battle.
Designers Note: You will notice some very large artillery
calibers in the game. We included these enormous weapons
for the sake of completeness, because they did have a (rare)
presence on the CMBB-scale battlefield. However, if you begin
to design scenarios for people other than yourself, we implore
you to add heavy artillery (200mm and up) very sparingly if at
all to your scenarios. Huge guns just werent commonly used
at the small tactical level and can unbalance a game
tremendously. The purchase ratios for Quick Battles, where
only a certain percentage of points is allowed to be spent on
artillery for each side, is a good indication of what gun calibres
are within limits for a given battle size.
60
Combat Mission: Barbarossa to Berlin
Page 61

The Men and Machines
Air support
Both sides can receive or purchase close air support
(CAS) for a battle. However, the player does NOT control
the actions of his planes. They roam above the battlefield,
spot and engage targets at their own discretion.
Combat Mission: Barbarossa to Berlin does NOT
simulate carpet-bombings or large scale raids. These are
outside of the games scope. Instead, the fighting on the
ground is intended to take place AFTER such bombings,
and close air support in Combat Mission: Barbarossa to
Berlin means the appearance of small formations of fighter-
bombers (maybe just a single plane), over which company
and battalion commanders have no immediate control.
There are various plane models available for purchase
to both Axis and Allies in CMBB, and depending on the
models chosen, have different armament layouts, and
therefore engagement capabilities. Some planes might be
better suited for anti-armor attacks, while others will be
better against infantry and other soft targets. In order to
allow for air cover in smaller battles also, some planes can
also be purchased with full armament loadout (expensive)
or for simple strafing (much less expensive), with the
latter usually meaning that a limited number of strafing
runs with MGs will be allowed, although the plane could
theoretically carry more ammunition/armament.
When you click on an anti-aircraft weapon targeting a
plane, you will be able to see the plane model displayed as
a tag on the targeting line. Otherwise, planes are not
visible in CMBB other than as a shadow on the ground.
How often a plane attacks and conducts strafing and/or
bombing runs depends largely on how much anti-aircraft
fire it encounters (i.e. how many AA assets the opposition
has on the map). Heavy AA fire can make a plane break off
its attack prematurely and even become damaged or shot
down (this will be indicated as an explosion in the sky, and
later displayed in the After Action Report (see the section
about AAR).
Besides dedicated AA (Flak) guns, vehicles equipped
with AA machineguns will engage airplanes unless they are
Combat Mission: Barbarossa to Berlin
61
Page 62

The Men and Machines
busy firing at ground targets, or are buttoned up and
unable to access the MG. Infantry will rarely if ever fire at
planes, choosing instead to save ammunition.
Since airplanes have to spot targets just like ground
units do, it does improve survivability for the player under
air attack to hide units in trees or other cover. A tank
sitting out in an open field is an easy target. The TacAI will
try to move your units into cover when they are subject to
an air attack, but often by that time its too late.
Fighter pilots can misidentify targets and attack friendly
units by mistake. Do not be too surprised when, especially
while locked in close combat with an enemy, a couple of
friendly bombs take out YOUR last tank!
Fighter-Bombers appear only in clear weather (and
cannot be purchased in other weather conditions in the
editor or Quick Battle purchase screen). No fighter-bomber
activity is allowed during the night.
Note: even though the Russians are known to have employed
night bomber runs quite often, research indicates that these
were conducted on an operational scale, and not in a close air
support role to aid nighttime ground combat.
62
Combat Mission: Barbarossa to Berlin
Page 63

The Editor
The German Wehrmacht has to be prepared, even before an
end to the war against England, to conquer Soviet Russia in a
quick operation (Case Barbarossa)
Führer Order No. 21
(found in: Army Group South, Werner Haupt)
The Editor
The Scenario Editor in CMBB is a powerful tool, enabling
you to create, from scratch, pretty much any combat action
on the Eastern Front between 1941 and 1945. It is the
same Editor we used to create the scenarios and operations
included on the CMBB CD, and includes all the features
needed to (re)create nearly any historical or fictional battle
on the Eastern Front.
Combat Mission: Barbarossa to Berlin
63
Page 64

The Editor
When entering the Scenario Editor, you will see the
Editor Main Screen, showing you 10 buttons to access the
various elements of the editor, as well as listing the
Scenario Name (when entering for the first time this is
Untitled) and the Scenario Type (the default is Battle).
NEW BATTLE creates a new battle scenario. By
clicking on this button, all settings in the editor will be
reset and the Parameters screen will automatically be
called up. If you have been working in the editor before,
you will be asked if you want to save your current scenario
first, before all settings are reset.
NEW OPERATION same as above, though the
Scenario Type will be changed to Operation, and you will be
able to start designing an Operation Scenario. The
Parameters screen opens automatically. Again, you will be
prompted to save what you have done previously if you
have made any changes to the editor settings before
clicking on this button.
LOAD lets you load an existing scenario file to edit.
Depending on which scenario you decide to load, the
Scenario Type will be changed accordingly. You will be
prompted to save your current work before loading another
scenario.
SAVE lets you save your scenario. You will be asked
to specify a file name and a location to save to. The default
location is the Scenarios folder in the CMBB directory.
Even though you can change this, only scenarios contained
64
Combat Mission: Barbarossa to Berlin
Page 65

The Editor
in this folder will show up on the playable scenario list in
the game main screen. If you want to make a map which
can be imported into Quick Battles, change the directory to
the Quick Battles folder in the CMBB directory. The name
you specify for your file before saving will be adopted as
the Scenario Name automatically.
TOURNAMENT SAVE this is a special form of saving
your scenario, and should be done only after you are
finished with it. Tournament saving a scenario means that
nobody not even you will be able to open and edit the
scenario at a later stage! As the name implies this is a
great feature for tournaments as it prevents cheating, but
it can be a pain when you realize later on that you would
like to edit something because you cant. It is
recommended to save a backup copy using the regular
SAVE feature just in case.
PARAMETERS opens the parameters screen for the
current battle or operation.
UNIT EDITOR lets you purchase units for both sides
MAP EDITOR lets you create a map for the battle or
operation, as well as preview the map in 3D and place units
and victory locations accordingly
LOAD BRIEFINGS Allows you to load in three text
files which will be displayed as briefings to the player(s).
Create three different text files in any word processor, each
one to do the following:
Text file 1 General Briefing, will be displayed to both
players before starting the game and choosing sides
Text file 2 Axis Briefing, will be displayed to Axis
player before setup
Text file 3 Allied Briefing, will be displayed to Allied
player before setup
These files MUST be in text format (extension *.txt for
PC) for CM to understand them. The names of the files are
not important.
The Load Briefings dialog will ask you to locate these
files, one after the other. Pay attention to the sequence of
Combat Mission: Barbarossa to Berlin
65
Page 66

The Editor
the briefings, which always is: General, Axis, Allies. After
finishing, the text of the briefings will be incorporated and
saved with the scenario file (do not forget to save your
scenario before exiting!) You can click Cancel anytime
during the process, which will abort it. Any briefings loaded
will be incorporated into the scenario, however.
If you want to make changes to your briefing texts at a
later time, simply edit them in your preferred text editor.
You will then have to go through this menu again to update
them for the scenario.
Note: There is a hidden feature that allows you to output the
text from an already compiled scenario. This is great if you
lost your originals or wish to use someone elses text as a
template for your own. To do this, simply hold down the SHIFT
and CONTROL keys when you click on the Load Briefings
button. You will go through the same sequence as when
loading briefings, except that you will be asked to specify
where to SAVE the briefings TO in plain text format.
EXIT exits the Scenario Editor. You will be prompted
to save your work before doing so.
Parameters
Each battles and operations parameters consist of two
parts the overall parameters (which set some global
settings for each battle or operation; the overall
parameters screen is the same for both battles and
operations) and the battle or operation specific parameters,
which are different from each other.
Overall parameters
The Overall Parameters are very important and should
be adjusted before anything else is done in the editor, since
they determine which unit types are available and what
they cost (with Rarity on) and what the the weather (and
ground) conditions will be. Therefore, whenever you click
on the NEW BATTLE or NEW OPERATION buttons, the
parameters window opens automatically.
Note: If you should ever wonder why you cant find a
particular unit in the Purchase screen, make sure you double-
check the Date and Region settings. Units that were not
66
Combat Mission: Barbarossa to Berlin
Page 67

The Editor
historically available before/after the current Date or in the
particular region (e.g. there were no Hungarian troops in
Finland) are not displayed.
Date - Select the month and year. June 1941 until May
1945 is available.
Region possible options are Finland, North, Central,
South and All Combined. The latter allows you to mix and
match various nations and unit types without historical
geographical restrictions.
Ground Condition - Very dry, dry, damp, wet, mud,
deep mud, light snow, snow, heavy snow. For Operations,
this is the ground condition encountered for the first battle
subsequent battles will have the ground condition
modified depending on actual weather, ie. after several
battles of rain, ground conditions will deteriorate to damp,
wet, mud, deep mud and so on.
Temperature ranges from Hot to Extreme Cold.
Temperature affects troop fatigue and weapons reliability.
Defender is not dug in, dug in, dug in with
fallbacks, or dug in with vehicles. This sets the
entrenchment options for the defender. Not dug in means
that defending infantry will not have the benefit of
foxholes. Dug in means that defending infantry will start
with foxholes on map. Dug in with fallback means that
defending infantry will start with foxholes on map, and
Combat Mission: Barbarossa to Berlin
67
Page 68

The Editor
additionally the player will be able to place a number of
foxholes as secondary positions. Dug in with vehicles
means that fallback positions are allowed, and additionally,
any vehicle on the map may be dug in for the duration of
the battle.
Map Contours - Can be 1.25m, 2.5m, or 5m per
elevation change. Since there are up to 20 height levels in
CMBB, this allows for height differences of up to 100m.
Allow Sewer Movement can be yes or no for
each Axis and Allies.
Fanaticism - Same choices available for Axis and/or
Allies normal means that the usual morale rules apply.
The other settings determine the percentage chance that a
squad/unit of the selected type of troops (regular or better,
or all troops) will be fanatic, i.e. never panic (except when
attacked by flamethrowers) and rarely surrender. Neither
player knows beforehand which of their troops will be
fanatic.
Brief Description - Enter a brief description about the
scenario youre creating. This is displayed in the Load
Game Window as a quick reference for players.
Battle Parameters
This screen sets the parameters specific to a battle.
Time Mid-Day, Dusk, Dawn, Night.
Weather - Clear, Overcast, Rain, Fog, Rain & Fog, Thick
fog, Snow, Blizzard.
Wind sets the wind strength and direction.
Game Length - 2-120 turns are possible. Additionally,
the game length can be fixed (ie. the battle will end
automatically after the final turn as set here) or variable,
ie. the battle will end after a variable number of additional
turns played after the max. number set here (the number
of extra turns depends on how much combat action takes
place).
68
Combat Mission: Barbarossa to Berlin
Page 69

The Editor
Type Assault, Attack, Probe or Meeting Engagement.
This option is important for the Force Readiness feature
(see THE MISSION) and therefore possibly affects end
game calculations.
Map Edges Friendly To - All four directions can be
toggled to Axis, Allied, or Neutral.
Map Edge for Exit Points - If the goal for one side is
to fight through and exit the map, the map edge eligible
for exit is set here.
Flag Type - There are several flag types static large
flags, static small flags and dynamic flags. These are
explained in detail in The Mission. Note that in Meeting
Engagements all flags MUST be static. For dynamic flags,
the option is available that the one valid flag can be
selected by the attacker at game start, or that it will be
randomly assigned by the computer.
Axis Bonus - Can be positive or negative. Used mainly
for unbalanced historical battles where one side is superior
to the other. The inferior side is awarded this many points
to allow it to win when it achieves greater success than
expected, given the situation.
Combat Mission: Barbarossa to Berlin
69
Page 70

The Editor
Operation Parameters
This screen sets the parameters specific to an
operation.
Operation Type - This is the most important setting
for an Operation. It defines, in no small way, how the
Operation will play out. It might take a few tries to
understand the subtleties of these options, but the more
you think about historical examples the better your
Operations will be.
Advance the Battle map is a portion of the entire
operational map, and slides forward (or backward)
between battles. The attacker wins by reaching the end of
the operational map before the time limit is over (this may
take several battles) As soon as the attacker reaches the
end of the map the game automatically ends, and the
victory level of the attacker is determined by how quickly
he achieved his goal. If the operation ends before the
attacker reaches the end of the map, the victory level for
the DEFENDER will depend on how far the attacker came.
Units which end the last battle in no mans land are
automatically shifted back to their own front lines. This
type of operation is great for fluid fire & maneuver battles.
Assault similar to above with regard to map movement
and victory conditions (ie. the attacker wins by reaching
the end of the operational map). However - units are NOT
70
Combat Mission: Barbarossa to Berlin
Page 71

The Editor
shifted between battles. Some may be cut off when too far
forward in no mans land and will be padlocked during the
next battles setup phase, and will not be resupplied. This
type of operation is great for assaults on fortified positions,
urban or forest battles and firefights until the last man.
Static The battle map covers the entire operational map,
ie. it does NOT slide. Victory is judged by causing
casualties to the enemy and holding victory FLAGS. Units
are NOT shifted between battles. Some may be cut off and
will be padlocked during the next battles setup phase,
and will not be resupplied. Static operations are essentially
a series of connected battles on the same map.
Weather Pattern - Good, Mixed or Bad. Combat
Mission: Barbarossa to Berlin semi-randomly assigns the
weather conditions for each battle based on this setting.
Operation Length - 1-20 battles. 10 battles is
generally an appropriate length.
Attacker - Allied or Axis
Night Falls No night, or every other to every
tenth battle. Example: a ten battle operation with night on
every fifth battle would simulate two days of combat. A ten
battle operation with no night would simulate fighting ten
engagements on the same day.
Each Battle Lasts - 10 to 60 turns (minutes). The
battle end can be fixed (battle ends after the last turn as
specified here), or variable (the battle can go on for a
variable number of turns after the last turn specified here).
Attacker Comes From - North, south, east, or west.
This defines the direction in which the operation map
moves.
Battle Window Size (only applicable to Advance and
Assault operations) the minimum is 1200m, the maximum
depends on the overall length of the operation map.
Determines how large the map is for each battle.
Opening Battle Time Slot - Can be anything between
1st to 10th. 1st is the default setting and means that the
Combat Mission: Barbarossa to Berlin
71
Page 72

The Editor
operation will open with the first battle conducted during
dawn. If you choose a subsequent setting, the battle will
open at the time of day specified for that slot. For example,
if an operation is set to Night on every fifth battle, and the
opening battle time slot is set to five, the operation will
start with the first engagement played during the night.
May Initiate Night Combat - Axis/Allies, yes or no. If
one or both sides are not able to initiate night combat,
they will still be able to reposition their forces during that
battles setup phase.
Supply - Ample, Full, Adequate, Limited, Scarce,
Severe - determines the amount of ammo replenished
between battles.
Vehicle Recovery & Repair - Excellent, Good,
Average, Poor, None. Determines the chance that an
abandoned vehicle can be recovered, repaired, and
returned to the game after a few battles.
Size of No Mans Land 0m to 800m in 80m
increments.
Note: The Size of No Mans Land should reflect the type of
map played on. For open steppe maps, it makes sense to set
this to (nearly) the maximum, while for urban maps with short
lines of sight, it should probably be 80m or 160m. Setting this
option to 0 is generally not advised, since it can lead to the
unrealistic event of units within hand grenade range of the
enemy being able to relocate to a totally different part of the
map in between battles.
72
Combat Mission: Barbarossa to Berlin
Page 73

The Editor
Maps
The random map generator lets you quickly make a
map for your battle, operation or QuickBattle. By setting a
number of variables (and according to the region you have
pre-set in the overall parameters or for your QuickBattle,
you are able to determine what type of map and
topography you will have to face.
Map Type
Rural most of Russia outside of the bigger
settlements classifies as rural. Rural maps have virtually no
settlements, except only the occasional peasant shack and
few roads. Rural maps can be heavily fortified areas or
simply open farmland, marshes or steppe, depending on
the other settings.
Farm Land you will encounter wheat fields here and
some tiny settlements of usually just a few farmhouses
scattered across the map. You might see a dirt road or two
run through the map. Farm Land can also simulate steppe
maps with some settlements.
Village the main feature of such maps will be a small
settlement of wooden farmhouses and an occasional
church, as well as usually at least one dirt road, and often
wheat fields as well.
Town towns are bigger settlements, and will see
some two-story buildings, sometimes more than one
church and a few roads.
Large Town large towns feature paved roads and
blockhouses and usually include parts of the suburban area
around it as well.
Tree Coverage Can be set to heavy, moderate, light
or open. This directly determines the amount of forest you
will see on the map, modified by the other settings. Open
and lightly wooded maps in the SOUTH region will usually
be STEPPE maps.
Combat Mission: Barbarossa to Berlin
73
Page 74

The Editor
Hilliness Large Hills, Modest Hills, Small Hills, Gentle
slopes and flat are the options here. This determines how
many height differences the computer will assign to the
map. The actual height of the hills depends on the height
difference per level settings made in the Parameters.
Damage can be None, Light, Medium, Heavy,
Massive. Determines the number of craters seen on the
map, as well as damage to any structures done prior to
battle. Urban maps with massive damage will be little more
than smoldering ruins. Note that maps with massive
damage can put quite a strain on your hardware.
Editing maps
Of course you can also make your own maps from
scratch in the Map Editor. These can be used for operations
or battles, and can even be saved and later imported for
Quick Battles!
Basic interface
Done moves you back to the Editor main screen
Preview lets you preview the map in 3D mode. This
is where you place units, fortifications and victory flags on
the battlefield, or simply double-check your map. Double
checking is important because the 2D editor map does not
give any indication of lines of sight, which is an important
part of designing a map. Also, you can evaluate the visual
appeal of your map and check for any imperfections, as
these are quickly visible in 3D view mode.
Note: when you save your scenario to disk, the last camera
position you used is saved as well, and becomes the opening
shot of the 3D battlefield for players. This is true for both
sides use the \ hotkey to switch between Allied and Axis
view. Both views are saved independently. This way you can
determine what the Allied and Axis players will see when they
first enter a battle or operation.
Height is ON/OFF Shows or hides the height
information on every terrain tile. The default elevation
level is 7 and no number is shown on the map tiles for that
value. Possible elevations range from 0 to 19. Each
74
Combat Mission: Barbarossa to Berlin
Page 75

The Editor
elevation represents a height difference of 1,25, 2,5 or 5
meters, depending on the parameters set for that map.
Place Terrain Lets you place terrain tiles. Each
tile represents an aread of 20 by 20 meters. Click on a
terrain tile on the left hand palette to select it, then click
anywhere on the map grid to place it. You can also Shift-
left click to place a square of 5 by 5 tiles good for filling
large areas quickly.
By keeping the left mouse button pressed, you can
simply paint a map with the currently selected terrain
feature. The currently selected terrain is highlighted, and a
short description is shown above the terrain palette.
In order to place landmarks (a short text label
describing terrain features, objectives, and historical areas,
visible on the 3D map for both players), you have to use
the CTRL-left click combination. This will open a new
window in which you can enter the name of the landmark.
You can notice landmarks by a small yellow triangle within
the tiles they have been placed into. You can erase
landmarks by CTRL-clicking on a tile with a yellow triangle
and erasing the entered text description.
Change Height Allows you to adjust the elevation of
each tile. Use the + and keys to adjust the current
elevation that each subsequent click on the map will set.
Again, shift-left click allows you to fill an area of 5 by 5
tiles. You can also paint elevations just like terrain tiles.
Setup zones Allows you to define setup zones for
both sides. Each side has three (color-coded) setup zones.
There are no restrictions on how many tiles a setup zone
has to consist of, nor do the setup zone tiles have to
adjacent to each other. Shift-left click and painting works
for setup zones as well.
Width, Height sets the size of the map. Maximum
area for a Battle map is 9 square kilometres (roughly 3km
by 3km), though neither dimension may exceed 4 km. An
operation map may be 6000m along the axis of advance
(set in the parameters under Attacker comes from), and
4000m across for a total of 24 square kilometres! Smaller
maps are recommended, though.
Combat Mission: Barbarossa to Berlin
75
Page 76

The Editor
You can adjust the size of your map at any time and
from all four directions. In order to extend/cut the map
from the north/east, simply click on the appropriate
Height/Width buttons. If you hold SHIFT and click, the map
will be cut/extended from west/south respectively.
Compass Scrolls the map grid up, down, left of
right if less than the whole map grid fills your screen.
Down Arrow, Up Arrow lets you access the
remaining parts of the terrain tiles palette, if not the
whole palette is visible on your screen.
Saving Maps for Quick Battles
When you intend to make maps which can be later
imported into a Quick Battle, make sure that you click on
NEW BATTLE before starting on your map. Operation maps
cannot be imported! Also, CM provides a special directory
for maps designed for Quick Battles called Quick Battle
maps, which is the default directory opened when
importing maps, so make sure you save your map into that
directory to be able to quickly find it later on.
When making maps for Quick Battles, you can but dont
have to purchase units and/or assign setup zones. The
former CAN be imported into Quick Battles (but dont have
to), and the latter will be imported automatically.
Other battle settings, e.g. ground conditions, weather,
dates and regions are meaningless when you intend to
make maps for Quick Battles, as these will be assigned by
the parameters of the Quick Battle played, overriding any
settings previously set. Victory flags remain, however, as
they were placed by the map designer.
Useful hints for map design
Keep in mind that maps in CM are 3D. Use this feature
to create visually appealing maps resembling the real
world, and the players will thank you for it. Get lazy, for
example by making completely flat maps or not paying
attention to how a river flows or that hills in real life really
arent small lumps of dirt piled up on an area of 40x40
76
Combat Mission: Barbarossa to Berlin
Page 77

The Editor
meters, and you will find your scenarios not played all too
often. Think about the real world rarely will you find
completely flat areas, and gentle slopes, small ditches,
elevated roads are everywhere. Paying attention to detail
when making maps pays in more visual appeal and more
tactical options!
Light and medium bridges in CMBB span two elevation
levels above the ground below, while heavy bridges span
four elevation levels above. Keep this in mind when
planning to add bridges to your map, it might save you a
lot of re-working later on.
Note: There is a hidden feature which allows you to place
destroyed bridges and other buildings on the map, including
factories and churches (which do not have their own terrain
palette). Heres how it works: place a rubble tile on the
desired spot (DONT use flat rubble). Preview the map
(important!). The destroyed tag is now fixed for that
particular tile. Now go back to the map editor and place a
bridge or building on top of the tile. Go into preview again
the bridge or building will now be shown as destroyed.
If you want to undo this, place an open ground tile on
the spot, preview map, and the damaged tag will
disappear.
Its a good idea to have rivers/ponds/lakes on lower
elevations than surrounding terrain, as it looks more real
and gives the map a certain visual depth. Also do not
forget that rivers flow DOWN, so try to avoid having height
differences in your rivers which would force it to flow down
and up again
Roads are just that roads. Do not use roads terrain to
simulate dirt paths or muddy tracks or driveways towards a
house unless it is really wide enough to be considered a
road. Open ground serves well to simulate these small
paths, and a row of scattered trees within a forest can be
used to simulate tracks which can be used by vehicles
albeit at some chance of bogging.
Paved roads are extremely rare in Eastern Europe in the
mid-40s. In fact, in the countryside you will often only find
dirt tracks which would even be better simulated by open
ground than a dirt road in CMBB. Use paved roads for
Combat Mission: Barbarossa to Berlin
77
Page 78

The Editor
major highways only, as well as in cities. Of course theres
always the exception to the rule, but generally paved roads
were a luxury, even within medium-sized towns.
Typical villages in Eastern Europe are often built along a
single road, one house deep. You often see wooden fences
around such houses, and, for the more wealthy, a stone
wall sometimes.
Ditches on the side of a road are often very shallow.
Since such ditches usually do not provide enough cover for
a whole infantry squad, there is nothing wrong with simply
leaving them out and using flat open ground. Alternatively,
scattered trees and brush can simulate the cover gained by
such ditches. Use lower elevations only when deep ditches
providing complete concealment, even for vehicles, are
what you want. Keep in mind that since elevation
information is tied to a complete tile, such ditches will be a
minimum of 20m wide.
With a bit of practice you will soon be able to admire
your own CM landscape and then destroy it!
78
Combat Mission: Barbarossa to Berlin
Page 79

The Editor
Units
The unit purchase screen allows you to select which
forces will be fighting in your scenario. The same screen is
also used to purchase units for Quick Battles (see THE
CHALLENGE), though when making custom scenarios the
restrictions usually applicable to Quick Battles are not in
effect.
On top you see the Options bar. Here you can select:
Army Axis or Allies
Nation only those nations available during the
timeframe and in the region you have selected in the
parameters will be shown, other options are greyed out
Division only those Division types available to a
given nation are displayed here
Experience sets the experience of the units or
formations you want to purchase
Fitness sets the fitness of the units or formations
you want to purchase (not available for vehicles)
Headcount by setting the headcount to anything
else but full reduces the cost for a given unit or
formation, but at the same time reduces the headcount of
that unit by to the percentage set, representing casualties
suffered in previous battles (not available for vehicles)
Location Units can start on map or be set to enter
as reinforcements. There are 30 reinforcement slots
available. Each slot can be assigned different rules for
activation. See REINFORCEMENTS below.
Below the options bar, you will see buttons with various
unit categories: Infantry, Support, Vehicles, Armor,
Artillery/Air, Fortifications. As you purchase units, the point
totals corresponding with the types of troops you purchase
will be updated here. On the right hand side, the total
number of points you have spent is shown. These point
numbers can work as an indication for the scenario
designer if the battle or operation is balanced, but there
are no limits on how many points you can spend in the
Editor.
The two columns in the purchase screen show on the
left the available units, based on the selections made in
Combat Mission: Barbarossa to Berlin
79
Page 80

The Editor
the option screen, and on the right the already
purchased units. When you move your mouse cursor over a
unit in either column, some of its details are summarized
at the left bottom of the screen. These details usually
include headcount, main armament, a general classification
for vehicles types based on their normal use (e.g. Assault
Gun, Medium Tank), Armor thickness, Speed, Transport
Class and so on. For formations, the composition of the
formation is indicated, e.g. for a typical rifle platoon, this
could be: 1x Platoon Headquarters, 3x Rifle Squad.
You can also delete and edit any units in the right hand
column (already purchased) using the respective buttons
at the bottom of the column (you can also edit a unit by
double-clicking on it instead). Deleting the parent HQ of a
formation will delete the entire formation. For editing units,
see EDITING UNITS below.
Which units are available for purchase depends on the
Parameter settings you have chosen, mainly the nations,
the date, and the region. Ground conditions are important
for ski troops, which can only be purchased when there is
snow on the ground. Listing all the availability options
80
Combat Mission: Barbarossa to Berlin
Page 81

The Editor
would be way beyond the scope of the manual, one could
write a whole book about it, but here a quick overview:
Finland: Finns, Soviets, some German force types
North: Germans, Soviets
Center: Germans, Hungarians, Italians, Romanians, Soviets
South: Same as Center
Example: The dates various forces are available, and which
Forces within a Nation, are highly variable. For example, for
most of 1943 the Hungarians have no Infantry (Force Type)
units on the Eastern Front. With the exception of early and
late war, the Hungarian Mountain and Cavalry units are not
available. In Finalnd, only German Infantry, Mountain, and
WG Mountain units are allowed. A handful of vehicles are also
allowed. The Italians have a small presence in 1941, then a
decent one for 1942. But after that, they arent around.
Reinforcements
Units can start a game on map, or can be assigned to
any of the 30 available reinforcement slots. When
purchasing units, simply change the setting in the options
bar under Location. You dont have to use the
reinforcement slots in numerical order, though its easier to
relocate what you created later on.
Each reinforcement slot can be assigned a set of rules
for its activation. If the activation is triggered, all units in
that reinforcement slot will be placed on the map. For both
operations and battles, there is an option which specifies
the first possible arrival of such reinforcements.
First possible arrival
For Battles, this number represents the first turn in
which the units from that reinforcement slot can appear.
For operations, the number represents the first BATTLE in
which the units can enter, and they will do so during the
setup phase.
Chance
This percentage gives the chance that the units will
indeed enter on a given turn (or battle). The lowest
Combat Mission: Barbarossa to Berlin
81
Page 82

The Editor
possible setting is 1%. If set to 100%, the units will always
arrive on the turn of first possible arrival.
The chance remains the same for each subsequent
turn. Example: a unit is set for a first possible arrival at
turn 4 of a battle, with a chance of 30%. This means that it
will NEVER arrive on turns 1-3. It has a 30% chance to
arrive on turn 4. If it does not arrive on turn 4, it then has
a 30% chance to arrive on turn 5, and so on.
Reserves (operations only)
For operations, reinforcements slots can also be
assigned reserve status. Instead of scheduling a first
possible arrival and a chance, you can simply assign the
reinforcement slot to one of three reserve pools
Battalion, Regimental and Divisional reserves. When things
start to go wrong and casualties mount, the Computer will
release reserves to the player, starting with Battalion
reserves (after light casualties), then Regimental reserves
(after heavy casualties), then Divisional reserves (after
very heavy casualties). Only one reinforcement slot will be
released per battle. If more than one slot has been
assigned to the same reserve pool (e.g. when you have two
slots assigned to Battalion reserve), they will be released in
subsequent battles in numerical order (first reinforcement
slot 1, then 2 and so on).
You can also skip reserve pools, for example by
assigning a divisional reserve only, but no battalion or
regimental reserves. This means that the player will have
to receive more casualties before first reinforcements
appear, as divisional reserves are usually only released
when things go terribly wrong.
Link to map (advance and assault operations only)
For advance and assault operations, there is also a third
option for reinforcements linked to map. When a
reinforcement slot is assigned this status, a reinforcement
flag will appear on the 3D map. It can be moved and
placed just like victory flags in operations by left-clicking
on it and issuing a PLACE order. When the battle map
advances so that the reinforcement flag would appear on
the map, the reinforcements are triggered and placed on
map in the setup area of the player receiving them (they
are NOT placed around the flag location). This is a great
way to simulate defenses in depth, for example, as the
82
Combat Mission: Barbarossa to Berlin
Page 83

The Editor
reinforcements for the defender will appear based on the
attackers speed of advance and not a rigid schedule.
Fortifications as reinforcements
In CMBB, it is possible to purchase fortifications like
bunkers and minefields as reinforcements in both battles
and operations. This is necessary to simulate the deep
Soviet fortified defense systems, which stretched for miles
into the rear. But use your discretion when assigning
fortifications to reinforcement slots, as there are no
security features built in to prevent magical appearance
of a bunker close to the frontlines which wasnt there in
previous battles or turns. The best way to use this feature
is to link fortifications to the map during advance and
assault type operations, and rarely, if ever, allow
fortifications to enter the map as scheduled reinforcements
or reserves.
Editing units
Although certainly not mandatory, CMBB allows each
individual unit to be customized to some extent. None of
the changes allowed make fundamental changes to the
units inherent qualities (for example, you cant give a
Panther an 88mm gun, or a squad all light machineguns).
But you can change various other unit abilities.
Select a unit from the right hand column of the
purchase screen, and double click on it or click on the EDIT
button at the bottom. This will open that units editing
screen. In all screens, CANCEL negates any changes made
and brings you back to the purchase screen, and OK
accepts any changes and closes the window. Dont forget to
save the scenario before exiting the Editor, though, for the
changes to have any effect.
Depending on which unit type you want to edit, the
editing screen might differ slightly. Three of the main
examples are explained below.
Combat Mission: Barbarossa to Berlin
83
Page 84

The Editor
Infantry units
Unit type - The type of unit you are editing is always
shown on the upper left.
Ammunition - Below the units name, you are able to
edit the small arms ammunition available to that unit. Note
that every unit has a maximum capacity for carrying
ammo, which is also listed. Units rarely start off with their
maximum capacity by default.
Experience you can adjust the units experience
rating. This is a great way to add individual elite and crack
units to an otherwise regular formation.
Fitness changes the fitness level for the unit.
Standard Name/Special name the Standard Name
for each unit is randomly assigned when you enter a battle.
For historical scenarios, you might want to change this
name to reflect a certain historical personality (in the case
of a Rifle Squad, for example, a known squad leader). By
clicking on the button, you will be able to enter a special
name for the unit, which will be displayed every time the
scenario is played.
Suppression units usually start off without
suppression, but can also enter the map panicked or even
routed, to simulate pre-battle fatigue. Suppression pre-set
here is subject to the normal rally rules.
Fatigue similarily, units can enter a map tired or
even exhausted, for example after a long forced march.
Again, fatigue set here is subject to the normal recovery
rules once in the game.
Nr. Explosives infantry units can carry up to three
explosive bundles. These are usually demolition charges for
84
Combat Mission: Barbarossa to Berlin
Page 85

The Editor
pioneer and engineer units, and grenade bundles for
other units. They pack a lot more punch than regular hand
grenades and can be used to destroy minefields, or
buildings, or to assault tanks.
Nr. Antitank Weapons up to 4 anti-tank weapons
can be assigned to an infantry unit. These will all be of the
same type as set below.
Type here you can determine which type of anti-tank
weapon is being carried by the infantry unit. Only those
options available for the timeframe of the scenario, the unit
type and the nationality chosen are highlighted. Options
include Rifle Grenades, various types of Panzerfaust,
Panzerwurfmine, Magnetic Mines, Molotov Cocktails and
RPG Antitank Grenades. These are explained in THE
COMBAT.
Infantry HQ units
Infantry HQ units can be edited pretty much like any
infantry unit with two exceptions: Infantry HQ units (be it
Platoon, Company or Battalion HQs) never carry explosives,
and each HQ has a set of Leadership Abilities which can be
edited here.
Leadership abilities there are four, Command,
Combat, Morale, and Stealth (explained in THE COMMAND),
and possible values are 0, +1, and +2. You can add or
subtract to each ability by clicking on the + and buttons
respectively.
Each HQ is assigned a random set of abilities when the
unit is purchased. Usually, Platoon HQs get higher values
for Stealth and Combat, while Battalion HQs get better
Morale and Command. Company HQs are in the middle.
Armored and support units
The editing screen for armoured and support units
differs somewhat from the infantry editing screen. Below is
shown the editing screen for a German Platoon leaders
Tiger tank. For support units like Anti-tank Guns and
mortars, the screen is similar, except that suppression and
fatigue are additional editable options (and no leadership
values are displayed.)
Combat Mission: Barbarossa to Berlin
85
Page 86

The Editor
The main difference to the infantry edit screen is that
ammunition values are split into the various available shell
types for the given gun. In the case of the Tiger example
below, the available ammunition is split into High Explosive
Rounds, Armor Piercing Rounds and Smoke Rounds. The
total for ALL shell types combined cannot be higher than
the max number stated.
Also note that armoured HQs only have two Leadership
values instead of the four associated with infantry HQs.
Tables of Organization and Equipment
(TO&E)
CMBB lets you purchase individual guns, vehicles and
support units, as well as whole formations of infantry and
armor. Armor can be purchased in platoons, which normally
range from 2 to 5 vehicles, with one vehicle assigned as
Platoon HQ. Infantry units can be purchased in Platoons,
Companies and Battalions, all with their respective HQ
units. The availability of the various formations and what
they consist of has been painstakingly researched and
includes a plethora of historical options.
Combat Mission is about as consistent as it can be with
TO&E. Unfortunately, the number of nations, formations,
length of the conflict, and the constant changes made to
formations make it difficult to get things perfectly
organized. To keep things as consistent to the user as
possible, the following conventions were used to organize
the TO&E:
1. The formation name is designed to give the player a
lot of information very quickly and easily. Each title
contains some or all of the following pieces of information
in addition to its basic name (ex: Rifle Battalion, Infantry
Company, etc.):
Level - Battalions are assumed to be attached to
Regiments if they are standard fighting formations,
Divisions if they are specialists such as Recon and
Pioneers. Formations which are not Battalion size, or are
not attached like this, have the appropriate notation made
at the beginning (ex: Divisional Pioneer Company,
Regimental Recon Platoon, etc.)
86
Combat Mission: Barbarossa to Berlin
Page 87

The Editor
Divisional Type - In some circumstances standard
formations were slightly different in one type of division
than another within the same force type (i.e. Infantry,
Mechanized, Cavalry, etc.) To reduce confusion, formations
which appear in the same force type which are different for
two or more division types are noted in ( ). For
example, (Pz) means only available for Panzer Divisions,
(PzG) for Panzergrenadier Divisions, (Pz/PzG) for both
types, etc.
Introduction Year - The year the formation was
introduced is noted as 41, 42, 43, 44, or 45. If there
were more than one formation during this time period,
then a letter is used right after to differentiate between
them (ex: 41A, 41B, 41C, etc.). Depending on
circumstances these duplicate formations might be
available at the same time or not. If there is no date at all
that means the formation was the only one of that type in
use for 3 or more years in a row.
Incomplete/Complete - Some formations, particularly
Recon units, had great numbers of vehicles assigned to
them. This is not something that Combat Mission is set up
to handle, especially because these units often fought
separate from each other by design.
If such units were left out there is a - at the very end
denoting that some assigned units were purposefully not
included.
If you see the - you can safely assume that some
type of light wheeled or tracked armor would likely
accompany this formation. Note that armored Halftracks
and sometimes Armored Cars are included for the most
part. Generally only company sized armored vehicle
formations were left out.
In addition, some German Panzer Divisions were
supposed to have a fully armored Battalion per Regiment.
In reality generally only the Elite Panzer Divisions
managed to acquire the assigned number of vehicles. The
typical Battalions have a - mark denoting that only one
Company out of three have halftracks. A + notes a
Battalion fully outfitted with all its halftracks according to
its TO&E.
Combat Mission: Barbarossa to Berlin
87
Page 88

The Editor
2. In addition to the above conventions, Company-sized
formations sometimes have their mode of transportation
noted. In general it should be assumed that all formations
move either by foot, horse, or with the assistance of
minimal numbers of unarmored motor vehicles. Heavy
Weapons Companies are assumed to be transpoted by
motorized or armored transportation in Mechanized
formations, horse and some vehicles for all others.
Company-sized formations which used armored vehicles
for transport or support, usually halftracks, are noted as
(Armored). Those companies which primarily used non
armored vehicles for transportation are noted as
(Motorized). Some formations used light 4x4s (VW) or
motorcycles (MC) to move from battle to battle. In
general these designations are in place to help avoid
confusion because their TO&Es are generally different from
each other.
NOTE: Only armored support vehicles are included in the
TO&E because non-armored transport were not intended to
take part in combat. Also, Combat Mission purposefully does
not include motorcycles to avoid players using swarms of
them in a historically incorrect manner.
3. Forces are grouped according to their basic
classification. From top to bottom the TO&E covers
Infantry, Recon, Pioneers, Misc.
4. Within each grouping units are organized with the
most common units listed first. For example, standard
Infantry Battalions appear over variations, like Light
Infantry Battalions and Regimental Pioneer units appear
before Divisional ones.
88
Combat Mission: Barbarossa to Berlin
Page 89

The Challenge
They call us the 6th Panzer Army because we have six tanks
left.
General Sepp Dietrich (War on the Eastern Front, the German
Soldier in Russia 1941-1945, James Lucas, pg 41)
The Challenge
Combat Mission features one of the most advanced
artificial intelligences found in wargames today. Its capable
of handling any map, situation and task you ask from it,
some better, some worse, but under almost all
circumstances it will be a worthy opponent. With one
difference, the AI doesnt learn but you do. So over time
we strongly encourage you to try out a game against
another opponent, be it by email or the Internet. You will
discover completely new sides to the tension and
excitement of leading your troops into combat. Matching
your tactical knowledge against another human is an
incredibly rewarding and thrilling experience, and with the
Turn Timer option for Internet-based games adding
time pressure to make snap decisions your combat
experience will be complete!
This chapter describes the various challenges the game
can offer you, when playing alone or against another
person.
Combat Mission: Barbarossa to Berlin
89
Page 90

The Challenge
Artificial Intelligence
Combat Mission features essentially two levels of
computer-player Artificial Intelligence, which we call very
loosely Strategic AI (StratAI) and Operational AI (OpsAI).
The former develops the battle plan against your forces
when you play the computer in a single player game. It
analyzes its own force and key locations on the map,
places units for defense and decides the best approach to
the objectives in the attack. The StratAI is not scripted,
meaning that it can tackle any map layout and set of
objectives. It is, of course, by no means perfect even
though its probably the best out there and will generally
be at a disadvantage against an experienced human player,
but almost always puts up a good fight.
The OpsAI, on the other hand, makes sure that the
orders developed by the StratAI are executed properly. It
adjusts waypoints and reacts to enemy threats, reports
to the StratAI if an order is impossible to execute due to
(for example) strong enemy resistance and so on. The
interaction of these two levels of AI, mixed with a heavy
dose of fuzzy logic decision making, ensures variety of
play and even to some extent a human component
even in single-player mode.
In addition, there is a third AI in the game, which not
only leads computer controlled forces, but your own as
well! When issuing orders, you have to keep in mind that
your units are not robots. Being trained soldiers, they try
their best to do what you tell them, but there are
limitations. On certain occasions a unit might change your
order a little or completely disregard it. The Tactical
Artificial Intelligence (TacAI), which is responsible for this
behavior, simulates the individual on the battlefield and
takes into consideration what he thinks, sees and hears. It
is, however, never proactive and acts only in self-
preservation and self-defense!
Imagine a situation in which you order one of your
units to fire at an enemy hidden in woods several hundred
meters away, and all of a sudden another platoon appears
on your flank, from behind a dip or a house merely 40
meters away. If your men dutifully carry out your orders for
90
Combat Mission: Barbarossa to Berlin
Page 91

The Challenge
the full 60-second Action Phase, the enemy will probably
overrun your position before you - the player - get a
chance to change your orders accordingly. Instead, the
TacAI usually intercedes to simulate your soldiers taking it
upon their own initiative to switch fire toward the suddenly
far more threatening enemy unit. Imagine another
situation where your lead tank runs into a mine! Would you
want to see your other units, which were plotted to follow
the lead vehicle, simply rumble forward into the same
minefield? If your answer is no then youll be happy,
because the TacAI will change their orders and have them
try to drive around the obstacle.
Not only does the employment of the TacAI result in a
more rewarding and realistic gaming experience, it also
serves to simulate the behavior of human beings on a
lethal World War Two battlefield. The uncertainties of
human behavior (stress, morale, panic, will to survive) are
taken into account and simulated in the game.
The TacAI also uses fuzzy logic principles when
determining the likely reactions of your units. This leads to
a rich and varied set of possible unit behavior in different
situations, and makes the units appear human in their
actions. Some might run away when facing a new enemy
close by, some might stand and fight or even charge.
Although you might not always like the results, keep in
mind that real world commanders often feel the same way!
In other words, the TacAI is not programmed to be
perfect since there is no such thing as perfection in war.
Only after the 60-second Action Phase has elapsed can
you issue new orders to your units and redirect their
actions, simulating tactical input from a squad or platoon
commander to the individual soldiers.
Combat Mission: Barbarossa to Berlin
91
Page 92

The Challenge
Quick Battles
Quick Battle Scenarios are randomly generated battles
following parameters set by the player. As the name Quick
Battle implies, this is a great way to quickly generate
battles in nearly endless variations and to get into the thick
of things. Another advantage for 2 player matches is that
these battles are not known to either player beforehand
and can be quickly balanced to match the skills of the
players.
Many options are available, which are discussed in
detail below.
In order to start a Quick Battle, you need to choose
Quick Battle from the list of available scenarios/battles.
This option is always on top of the list.
Date and Region the first screen lets you select the
month and year of the battle, as well as the geographical
region. These selections are important, as they determine
the equipment and formations and terrain available to you.
All three settings can be set to random. You also have the
option of choosing All combined for the region this will
allow you to select any troops from all the geographical
regions.
Battle parameters
The next screen allows you to set the main battle
parameters, like the forces that will be fighting each other,
but also victory conditions and more.
Force Mix Six options are available. These determine
the equipment that will be available to you. The options
are:
Combined Arms a balanced mix of infantry,
mechanized and armored units, much like a typical Combat
Group would look like during WWII.
Infantry Only armoured vehicles are ruled out in
this option
Mechanized a mix of infantry and light vehicles, with
a limited number of armored vehicles
92
Combat Mission: Barbarossa to Berlin
Page 93

The Challenge
Armor all unit types are allowed, and you will be able
to spend most of your purchase points on tanks and
armored vehicles if you wish
Unrestricted you can buy units in any mix you
prefer
Random the computer will randomly assign one of
the above Force Mixes
Nationality here you are able to chose which nations
will be pitted against one another. The choices available
depend on your settings of date and region.
Division Type most forces in WWII were not mixed
together willy-nilly, but usually belonged to a certain type
of superior organization, like an Infantry Division, or an
Armored Corps. By setting the Division Type, you
determine what kind of equipment will be available to
purchase, and in what quantities. A mechanized Division
will be allowed to spend more points on purchasing tanks
than an Infantry Division, for example.
You can also set this option to random, in which case
the Division type will be selected by the computer.
The available options are -
Axis
Infantry, Mechanized, Cavalry, Mountain, WG Infantry,
WG Mechanized, WG Cavalry, WG Mountain, Security,
Luftwaffe Infantry, Luftwaffe Mechanized, Airborne
(Fallschirmjäger), Volkssturm and Ski.
Allies
Infantry, Mechanized, Cavalry, Mountain, Airborne, Ski,
Naval, Guards, Guards Mechanized
Quality - Low, Medium, High, Unrestricted or Random.
Sets the available troop experience ratings. Low quality
means that only conscripts or green units can be used. At
medium, only green or regular units can be bought. At
high, only veteran or crack units can be bought.
Unrestricted means that you can purchase units of all
experience ratings. Random randomly chooses one of the
above.
Combat Mission: Barbarossa to Berlin
93
Page 94

The Challenge
Note: Elite is not available for QBs at all, not even under the
unrestricted option! Troops of this calibre were extremely
rare, and in order to prevent unrealistic overuse of elite
troops, their selection has been excluded.
Purchase Units - Automatic or Allow Human.
Automatic has the computer select the combat units for
that side while Allow Human allows the player to choose
them.
Fitness choices are Fit, Weakened, Unfit or Random.
Casualties you can set a percentage from 0%-50%,
or have the computer randomly assign a pre-battle
casualty rate. Your units will be depleted randomly by the
computer according to the percentage set here. This
includes reducing headcount for squads and teams, but
also eliminating certain equipment AFTER you purchase it.
For example: if you have chosen a 50% casualty rating for
your side, and purchase a platoon of 4 Panther tanks,
chances are that only 2 will be available to you for the
game. See also Force Size below.
Ammunition allows you to set how much
ammunition your side has available. Options are 10% -
100%. Please note that setting your ammo too low can
have a strong impact on play balance. Thats why there is
no random setting available here.
Sewer Movement selects if either or both sides are
able to use sewer movement or not.
Battle Type - Assault, Attack, Probe, or Meeting
Engagement. This determines the force balancing (how
many points the attacker gets relative to the defender),
the map size, whether the defender may have
fortifications, as well as victory flag placement. See The
Mission for more details.
Force Size - 300-5000 points. These are the points
given to the DEFENDER to purchase combat units. The
attackers points are calculated relative to this number
according to the Battle Type selected above. For Meeting
Engagements, both sides points are equal.
94
Combat Mission: Barbarossa to Berlin
Page 95

The Challenge
Also, depending on the casualty settings for each side,
this point total will be increased in proportion to the
casualty percentage set (eg. if you play with 50%
casualties, your point total will double. After you purchase
your units, half of them will be deleted randomly, thereby
reducing your points available for the battle to the number
set in this option).
Map Size - Small, Medium, Large, or Huge. This is a
relative setting. The actual map size (in meters) depends
on the selected force size.
Handicap - This determines how many extra buying
points (if any) are added to or subtracted from the
attacking force, based on the Force Size selected above.
Its great for balancing play between opponents of unequal
skill levels.
Rarity can be fixed, variable or turned off. All unit
costs in the editor are rated for their performance, but also
for how rare they were on the actual WWII battlefield.
Fixed Rarity will always apply these rarity modifiers in the
unit purchase screen. Variable rarity introduces a random
element, by which a rare unit can occasionally become
much more common, and therefore cheaper to purchase.
Turning rarity off means that unit costs are not adjusted by
their rarity at all and units are rated for performance only.
Time Mid-Day, Dawn, Dusk, Night, or Random.
Weather - Clear, Overcast, Rain, fog, Rain&Fog, Thick
Fog, Snow, Blizzard, Random
Game Length - 20-60 turns.
After setting the general preferences, the random map
generator screen appears. It works exactly the same as the
auto-generate map function in the scenario editor (see THE
EDITOR/Maps), with one addition for Quick Battles, it is
possible to import custom-made maps.
Combat Mission: Barbarossa to Berlin
95
Page 96

The Challenge
Importing Maps
A new feature in CMBB allows you to import any user-
generated maps into Quick Battles. When prompted to
determine which map you want to play on, you will see the
usual map generator window as explained in THE EDITOR,
but in addition a button appears on the right labeled load
from file. Clicking on that button opens a new window
listing all available maps. The default directory opened is
called Quick Battle Maps, but you can browse your
harddrive for any maps available, including those from
other battles and even saved games! Maps from Operations
cannot be imported, however.
Note: you can, for example, import the autosave from a
previously finished battle. All terrain features, including terrain
damage like craters and destroyed buildings as well as
foxholes will be imported, allowing you to essentially play a
series of Quick Battles on the same map! Make sure you dont
forget to set date, year and region (and possibly force types)
accordingly, or you might find that the steppe map from 1941
you just fought on suddenly was teleported to Finland into the
year 1945
After selecting the map, scenario or saved game you
want, you will be asked if you want to import troops, also.
These troops will be added to your force in addition to
those you purchased for the Quick Battle, and they DO NOT
count against your point total. When you import the forces
from a saved game, troops will be imported in the state
they were in when the game was saved. Note that these
troops do NOT get resupplied, and a squad with LOW ammo
will enter the new battle in exactly the same condition.
One word of caution, however there are no safety
features built in for importing maps. Make sure that the
map youre importing fits the size of the Quick Battle you
are generating. Importing a 400x400m map for a 6000
points Assault is not a wise thing to do. Likewise, importing
troops from a 6000 points assault scenario to play a
meeting engagement with 500 additional points purchased
can seriously unbalance the game. Note also that setup
zones and victory flags remain in their default position as
placed by the map designer, and may not fit the type of
battle you want to play. The troop orientation in Quick
Battles is ALWAYS east/west with the Allies starting at the
96
Combat Mission: Barbarossa to Berlin
Page 97

The Challenge
east map edge and the Axis on the west. Use your own
discretion!
Choose type of game
Finally, choose which side you want to play and if you
want to start a single player game, a PBEM game, a
hotseat game or a game over the Internet via TCP/IP (all
explained in The Challenge).
When you have chosen to have the computer
automatically purchase forces for you, you will find yourself
immediately in the setup phase of the battle. Otherwise,
you will enter the UNIT PURCHASE screen.
Purchasing units in Quick Battles
The unit purchase screen for Quick Battles is the same
one used to make custom-made scenarios in THE EDITOR,
but there are some differences, explained below. For a
more detailed description of how the screen works overall,
see THE EDITOR.
Depending on the parameters you have set for the
Quick Battle, some options in the unit purchase screen will
be greyed out. For example, when you set Fitness to Fit
in the Parameters, only this option will be available in the
unit purchase screen. When you have used random
settings in the parameters, for example for force mix or
nationalities, make sure you check out all your available
options in the purchase screen. The Location option is
always set to On Map, as no reinforcements can be
purchased for Quick Battles.
Under the options bar, you will notice how many points
you are able to spend for the Quick Battle. On the right
hand side, the total number of points you can use to
purchase your troops is displayed. This can be different
from the number you set in the parameters, depending on
the chosen casualty level and battle type.
Note: when casualties have been set to 50%, you are allowed
to spend twice as many points as will enter the battlefield,
because half of your force will be randomly eliminated before
Combat Mission: Barbarossa to Berlin
97
Page 98

The Challenge
the setup phase. See the previous section about Battle
Parameters.
Also, depending on the battle type, each side will often
be able to spend a different point total - except for meeting
engagements, where both opponents normally get the
same number of points - the attacker in a Quick Battle
usually gets more points than the defender. A Probe yields
the least point advantage, an Assault the most. Of course
this is modified by any Handicap settings.
The total is broken down into various categories of unit
types which you are allowed to purchase Infantry,
Support, Vehicles, Armor, Artillery/Air and Fortifications.
How many points are available for each category depends,
again, on the parameter settings for your Quick Battle,
including force mix, division type, region and battle type.
By clicking on each category, the available unit list
appears in the purchase screen. The cost for each unit or
formation is listed, as well as the rarity adjustment (if
applicable).
Note: many formations listed under Infantry actually consist
of a mix of infantry and support units (and sometimes
vehicles), so the cost listed is not always directly deductible
from the Infantry point allowance. Example: A Grenadier
Battalion 43 might cost approx. 1150 points combined, but it
consists of about 740 points of infantry units, about 270 points
of support units (Heavy Machineguns mostly) and about 140
points of artillery units (forward observers).
Before purchasing any units, make sure you adjust the
options in the top options bar. For example, often you will
be able to choose from units with different experience, e.g.
green or regular troops, and you should set the option to
reflect which ones you want to buy before actually
selecting that formation.
Purchased units appear in the righthand column of the
purchase screen. You can delete any units from this area if
you change your mind. When you spend more points than
you are allowed for a category or overall, the corresponding
point value will turn red and you will be reminded that you
exceeded your point total when you try to exit the
98
Combat Mission: Barbarossa to Berlin
Page 99

The Challenge
purchase screen. How many points you spent is shown in
the Spent line directly below the options bar.
Note: it is possible that even though you are allowed to spend
points for a certain category (for example armor or vehicles),
no units will actually be listed in the purchase screen. This is
not a bug, but indicates that the particular force mix,
nationality and division type for the set date and region
excludes the use of that category of units for this battle. This
is often the case for Partisans and minor nations like
Hungarians and Romanians, which often did not have armor or
vehicle support.
Combat Mission: Barbarossa to Berlin
99
Page 100

The Challenge
PBEM
Playing by Email (PBEM) can be an extraordinary
gaming experience. Matching your tactical skills directly
against those of another human opponent, regardless of
where he is in the world, will bring your enjoyment of
Combat Mission to new heights.
But in order to start and complete a PBEM game
successfully, a little bit of organization can help. Without it,
PBEM-ing can quickly become frustrating: whose turn is it?
Where is the last file? Did I plot my last turn already? Did
the last PBEM file get overwritten?
PBEM games play just like single player games against
the AI, except that each time you finish a game turn, you
will need to send this information to your opponent.
After you click GO!, Combat Mission generates a text
file, which contains the encrypted turn data that needs to
be emailed to your opponent. You will be asked to name
the file, which then will be saved into the PBEM directory
within the CM folder. The default name is PBEM, but you
can change it to anything you like.
When renaming PBEM files, it makes sense to use a
short description of what that file is, as it will allow you to
track down quickly what game and which turn it is. The
moment you start playing more than one PBEM game at
once (dont worry, it WILL happen!), youll learn to
appreciate the correct naming of your files. There are many
ways to do this. You can simply number the files in
sequence, starting with Stalingrad 1 this is the easiest
way to find a file. If you also want to know exactly what
the file contains, you could also label it Stalingrad Turn 15
Soviet, or Steve Setup Germans. Use whichever file
names work best for you. Remember that files with the
same name will be overwritten thats why it makes sense
to name them after the scenario name or even your
opponents name. It is also good if you agree beforehand
with your opponent on which numbering system you want
to use.
100
Combat Mission: Barbarossa to Berlin
 Loading...