

Page 1
®
PROGRAMMABLE WATERING TIMER
PROGRAMMABLE
WATERING TIMER
Operation and safety notes
ELEKTRONICZNE URZĄDZENIE
DO NAW ADNIANIA
Wskazówki dotyczące obsługi i bezpieczeństwa
BEWÄSSERUNGSCOMPUTER
Bedienungs- und Sicherheitshinweise
IAN 311538
IAN XXXXXX
BEVA TTNINGSDAT OR
Bruksanvisning och säkerhetsanvisningar
LAISTYMO KOMPIUTERIS
Nurodymai dėl valdymo ir saugumo
Page 2
GB Operation and Safety Notes Page 5
SE Bruksanvisning och säkerhetsanvisningar Sidan 27
PL Wskazówki dotyczące obsługi i
LT Nurodymai dėl valdymo ir saugumo Puslapis 71
DE / AT / CH Bedienungs- und Sicherheitshinweise Seite 92
bezpieczeństwa Strona 48
Page 3
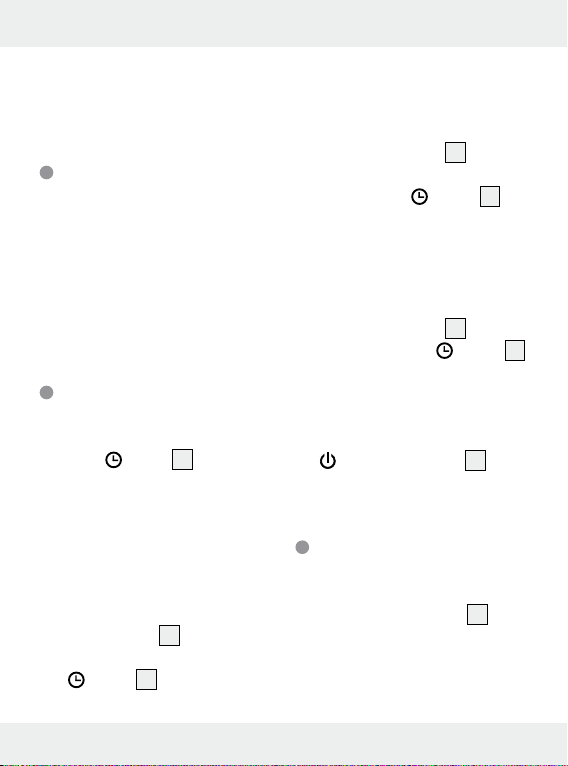
A
SET
10
9
8
11
1 2 7 3
4
6
5
B
18
161715 14
3 4 6 7
12
C
13
8
Page 4
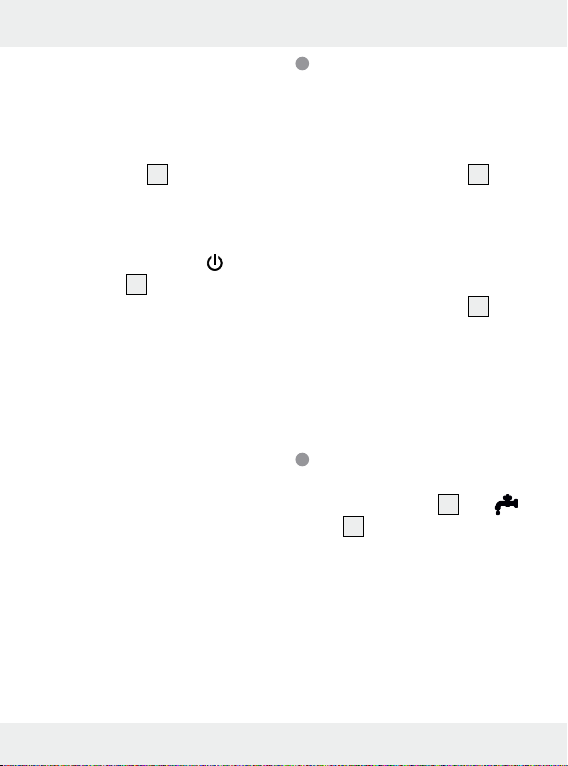
D
10
9
1
11
Page 5

List of pictograms used ..............................................Page 7
Introduction .........................................................................Page 7
Intended use ..............................................................................Page 7
Scope of delivery ......................................................................Page 8
Technical data ...........................................................................Page 8
Parts description ........................................................................Page 9
Display indicators ......................................................................Page 9
Safety .......................................................................................Page 10
Safety instructions ......................................................................Page 10
Safety instructions for batteries / rechargeable batteries .......Page 12
Inserting / replacing batteries ..............................Page 15
Initial use ...............................................................................Page 15
Operation .............................................................................Page 16
Putting the product into operation ............................................Page 17
Setting current time and day of week ......................................Page 17
Programming for automatic watering ......................................Page 17
Manual operation for watering................................................Page 19
Read / modify watering programmes ......................................Page 20
Reset ...........................................................................................Page 20
Switching 12 / 24 hours display ..............................................Page 21
Switching off the display...........................................................Page 21
Battery status display ................................................................Page 21
Troubleshooting ..............................................................Page 22
GB 5
Page 6

Cleaning and Care .........................................................Page 23
Cleaning the filter ......................................................................Page 24
Storage ...................................................................................Page 24
Disposal ..................................................................................Page 24
Warranty ...............................................................................Page 25
6 GB
Page 7
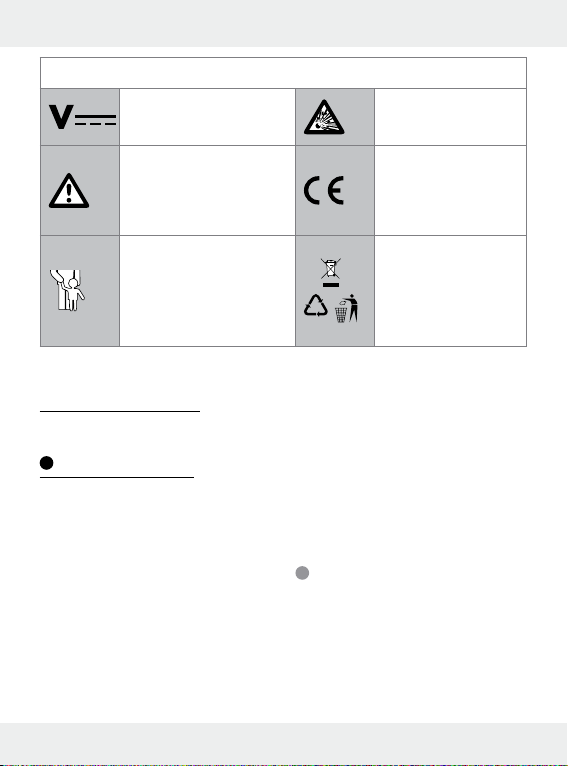
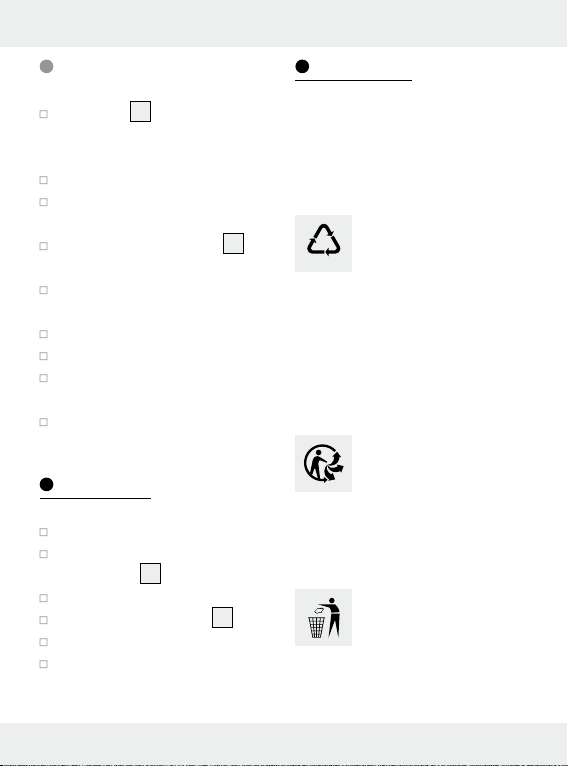
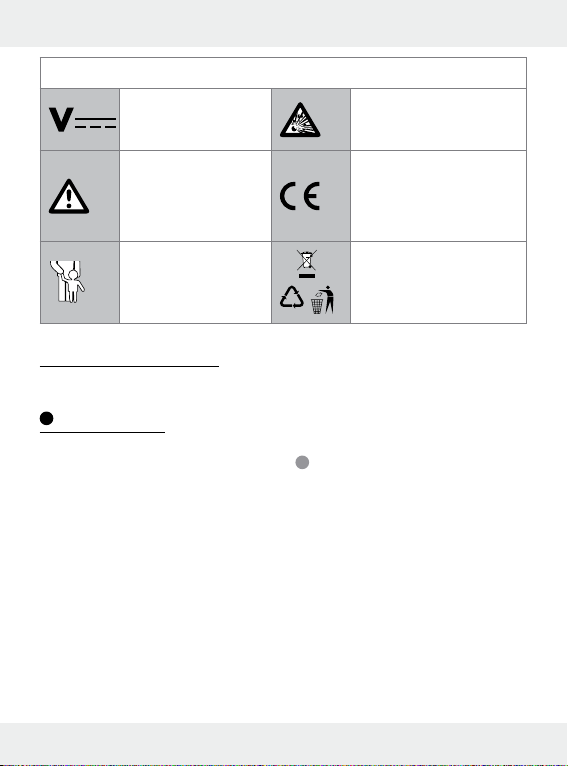
List of pictograms used
Volt (direct current)
Observe caution and
safety notes!
Never leave children
unattended with packaging materials or the
product.
Caution! Explosion
hazard!
Product meets the
applicable European
product-specific
directives
Dispose of the
packaging and
b
a
device in an environmentally-friendly
manner!
Programmable
Watering Timer
Introduction
We congratulate you on the purchase of your new product. You
have chosen a high quality product. The instructions for use are part
of the product. They contain important information concerning safety,
use and disposal. Before using the
product, please familiarise yourself
with all of the safety information
and instructions for use. Only use
the product as described and for
the specified applications. If you
pass the product on to anyone
else, please ensure that you also
pass on all the documentation
with it.
Intended use
This product is designed to control
sprinklers and sprinkler and irrigation
systems. It facilitates the automatic
irrigation of outdoor areas at a
GB 7
Page 8

programmed time and for a programmed duration. The product
may save up to 6 programmes for
automatic irrigation. The product
may only be used outdoors. Any
other use or modification to the
product constitutes improper use.
The manufacturer assumes no liability for damages due to improper
use. This product is not intended
for commercial use.
Scope of delivery
1 Programmable water timer
1 Tap connector
1 Adapter 33.3 mm to 26.5 mm
(G 1“ to G ¾”)
1 Filter
2 Batteries 1.5 V Type AA
1 Instructions for use
Technical data
Model No.: HG04678
Operating
pressure: 34.5–827 kPa
(0.34–8.27 bar)
Max. water
temperature: 40 °C
Power supply: 2 x 1.5 V
(direct current)
batteries type AA
Flow rate
(at approx.
3 bar water
pressure): approx. 28 l / min
Programmable
Irrigation
time : max. 09:59 h
Manual
Irrigation
time : max. 09:59 h
Water
connection: G ¾” (26.5 mm)
or
G 1” (33.3 mm)
Protection
class:
IP X4 (splash-proof)
8 GB
Page 9
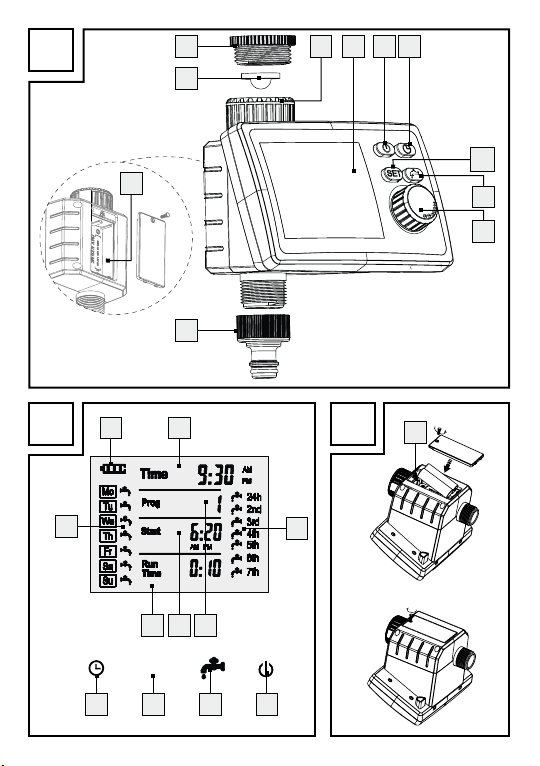
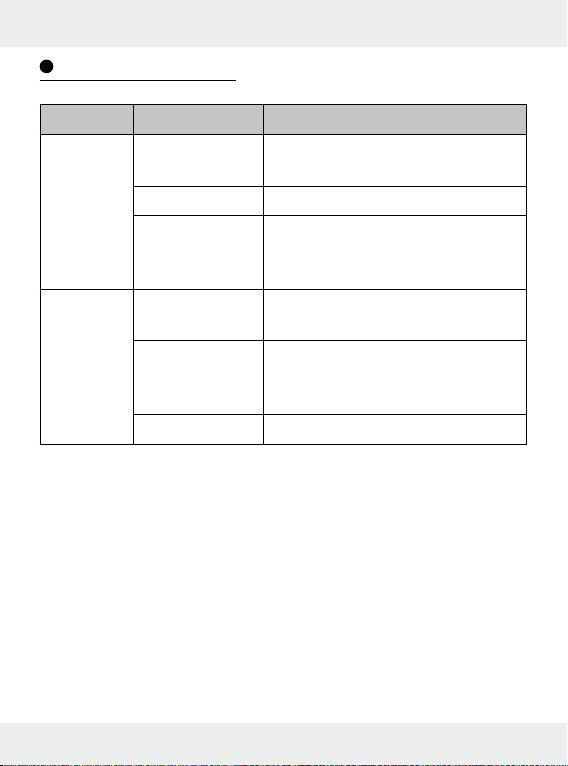
Parts description
(Fig. A)
1
Union nut ‒ 33.3 mm (G 1“)
2
Display
3
Button
4
Button SET
5
Rotary control
6
Button
7
Button (ON/OFF)
8
Battery compartment
9
Filter
10
Adapter 33.3 mm to 26.5 mm
(G1” to G ¾”)
11
Tap connector - for connecting
hose and irrigation computer
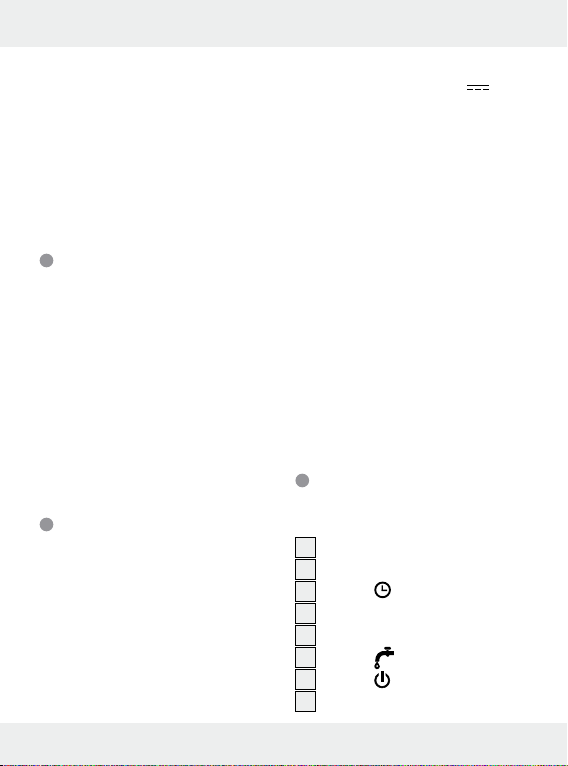
Display indicators
(Fig. B)
Display Meaning
12
13
Current time
Watering cycle:
24h/2nd/3rd/
4th/5th/6th/7th
correspond to every
24 hours / every 2/
3/4/5/6/7 days
Display Meaning
14
15
16
Current watering
program (1‒6)
Program start time
Run time - watering
duration
Weekday: Current
17
weekday or programmed watering
days
18
SET
Battery status
Button for setting
time
Button for setting
operation mode
Button for changing
irrigation mode
Button for switching
device (ON/OFF)
Weak battery status
display
GB 9
Page 10
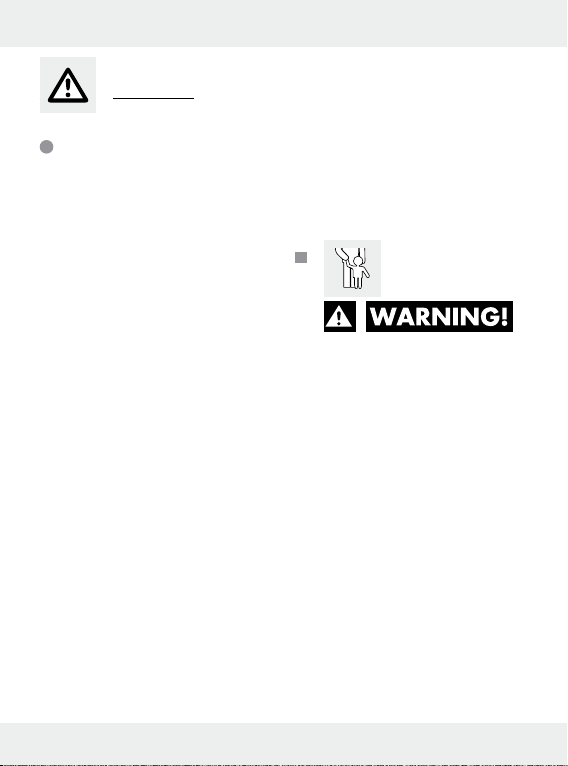
Safety
Safety
instructions
KEEP ALL THE SAFETY
ADVICE AND INSTRUCTIONS IN A SAFE
PLACE FOR FUTURE
REFERENCE!
Damage due to failure
to comply with these
operating instructions
will void the warranty!
We assume no liability
for consequential damages! We assume no
liability for property
damage or personal injury due to improper
handling or failure to
observe the safety instructions!
10 GB
DANGER TO LIFE
AND RISK OF
ACCIDENT FOR
INFANTS AND
CHILDREN! Never
leave children unsupervised with the
packaging materials. The packaging
material poses a
suffocation hazard.
Keep this product
Page 11

well away from children. This product is
not a toy.
This product may be
used by children
age 8 years and up,
as well as by persons
with reduced physical, sensory or mental capacities, or
lack ing experience
and / or knowl edge,
so long as they are
supervised or instructed in the safe
use of the product
and un derstand the
associated risks.
Children should not
be allowed to play
with the product.
Clean ing and user
maintenance should
not be performed by
children without supervision.
Any repairs during
the warranty period
must be performed
by a manufacturer
authorised service
centre, or the warranty will be void if
subsequent damages occur.
Always replace de-
fective parts with genuine spare parts.
Only by using these
parts will you ensure
that the safety requirements are met.
GB 11
Page 12
Avoid direct sunlight.
Always shut off the
tap if you no longer
use the product
Do not operate the
product near open
flames.
Check the product
and its supply lines
at regular intervals
to ensure that they
are impermeable
and that they function perfectly.
Do not aim the wa-
ter jet at electrical
equipment!
RISK OF DEATH /
ELECTRIC SHOCK!
Do not aim the water
jet at persons or animals!
The product is not
suitable for supplying
drinking water.
Safety
instructions
for batteries /
rechargeable
batteries
DANGER TO
LIFE! Keep batter-
ies / rechargeable
batteries out of reach
of children. If accidentally swallowed
seek immediate
medical attention.
12 GB
Page 13
DANGER
OF EXPLO-
SION! Never re-
charge non-rechargeable batteries. Do not
short-circuit batteries /
rechargeable batteries and / or open
them. Overheating,
fire or bursting can
be the result.
Never throw batter-
ies / rechargeable
batteries into fire or
water.
Do not exert me-
chanical loads to
batteries / rechargeable batteries.
Risk of leakage
of batteries /
rechargeable
batteries
Avoid extreme envi-
ronmental conditions
and temperatures,
which could affect
batteries / rechargeable batteries, e. g.
radiators / direct
sunlight.
If batteries / recharge-
able batteries have
leaked, avoid contact with skin, eyes
and mucous membranes with the
chemicals! Flush
immediately the affected areas with
GB 13
Page 14
fresh water and seek
medical attention!
WEAR
PROTEC-
TIVE GLOVES!
Leaked or damaged
batteries / rechargeable batteries can
cause burns on contact with the skin.
Wear suitable protective gloves at all
times if such an event
occurs.
In the event of a
leakage of batteries / rechargeable
batteries, immediately remove them
from the product to
prevent damage.
Only use the same
type of batteries / rechargeable batteries.
Do not mix used and
new batteries / rechargeable batteries.
Remove batteries /
rechargeable batteries if the product will
not be used for a
longer period.
Risk of damage of
the product
Only use the speci-
fied type of battery /
rechargeable battery!
Insert batteries / re-
chargeable batteries
according to polarity marks (+) and (-)
14 GB
Page 15
on the battery /
rechargeable battery and the product.
Clean the contacts
on the battery /
rechargeable battery and in the battery compartment
before inserting!
Remove exhausted
batteries / rechargeable batteries from
the product immediately.
Inserting / replacing
batteries (see Fig. C)
Untighten the screw of the
battery compartment
ver, remove the cover.
Insert 2 AA batteries (LR06 /
Mignon) into the battery
8
co-
compartment 8. Observe
correct polarity.
Remark: The display show
all LCD symbols for approx. 1
second and then switch to
„Setting current time and day
of week“ section.
Close the cover and tighten
the screw.
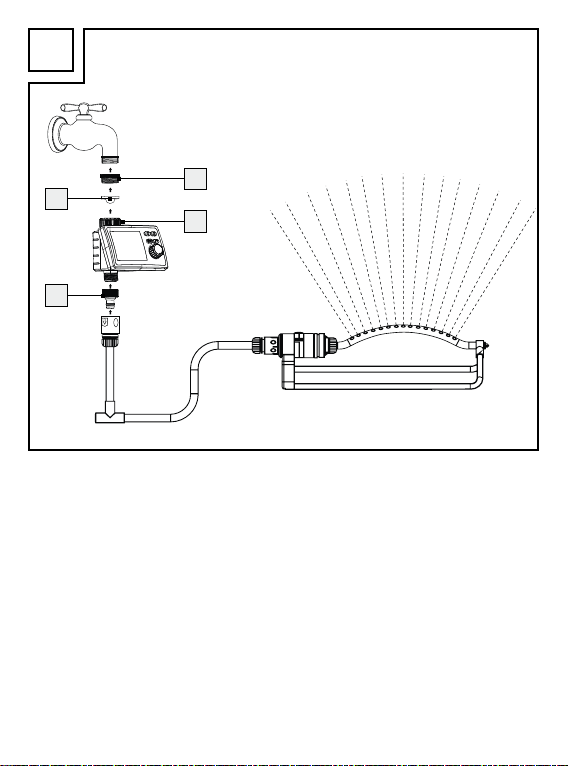
Initial use
The site where the product will be
installed must meet the following
requirements for safe and trouble-free operation:
The maximum temperature of
the flowing water is 40 °C.
The minimum operating tem-
perature is +5 °C.
The maximum temperature of
the environment is +50 °C.
Only use clear freshwater.
Only connect the product ver-
tically with the hose connec-
11
tion
pointed downwards
to prevent water from entering
the battery compartment
8
.
GB 15
Page 16
ATTENTION! The irrigation
controller may only be connected to a drinking water abstraction point with a safety
device which corresponds to
TYPE HD at the very least according to EN 1717 (backflow preventer with tube
ventilation).
Note: Such mains adapters
are available from speciality
retailers.
Check the water connection
type available. The product is
fitted with a union nut
1
for
a tap with a 33.3 mm thread
(G 1”). For a tap with a
26.5 mm thread (G ¾”) use
the adapter supplied
10
.
Insert the filter 9 into the
union nut
1
as depicted in
Figure A.
For a 26.5 mm thread (G ¾”):
Screw the adapter
10
onto
the tap. Do not use any tools
for this purpose.
Screw the union nut 1 onto
the thread of the tap or the
adapter. Do not use any tools
for this purpose.
Screw the tap connector 11
onto the hose connection.
You can then connect a hose
to the tap connector
11
.
Open the tap.
ATTENTION! If defects /
leaks arise when using the
adapter
10
, the thread of
the tap must be wrapped
using sealing tape.
Programme irrigation as
described in the chapter
„Operation“.
Operation
Irrigation can be fully automated
at any time of the day using the irrigation controller. A sprinkler,
sprinkler system or drip irrigation
system may be connected.
The irrigation controller automatically carries out irrigation at the
respective programmed start time
and for the programmed duration. Take the season and time of
the day into consideration when
16 GB
Page 17
programming. Evaporation and
water consumption is lowest early
in the morning or late in the evening.
Putting the product
into operation
1. Insert batteries to the item as
described in the chapter „Inserting / replacing batteries“.
2. Connect the water timer to
water tap (see Fig. D).
Setting current time
and day of week
1. Press button 3 for approx.
2 seconds (see Fig. 1) (not
necessary if you just insert batteries).
The hour display in the
“Time” section will flash
on screen.
2. Set the time in hours with the
rotary control
9 hour) and confirm with the
button 3 (see Fig. 2).
5
(For example
The minute display in the
“Time” section will flash on
screen.
3. Set the time in minutes with
the rotary control
ample 30 minutes) and confirm with the
(see Fig. 3).
The cursor in the “day of
the week” section will flash
on screen.
4. Set the day of the week with
the rotary control
confirm with the
(see Fig. 4).
Remark: In case you input a
wrong data, you can always press
the
(ON/OFF) button 7 to go
to previous step.
5
(For ex-
button 3
5
and
button 3
Programming for
automatic watering
1. Press the SET button 4 for
approx. 2 seconds (see Fig. 5).
The program number
display flash on the “Prog”
section will flash on screen.
GB 17
Page 18
2. Use the rotary button to set
the program number (e.
g. Prog 3) and confirm by
pressing the SET button
4
(see Fig. 6).
The hour display on the
“Start” section will flash
on screen.
3. Set the hours for starting the
watering time with the rotary
5
control
confirm with the SET button
(e. g. 6 hours) and
4
(see Fig. 7).
The minute display on the
“Start” section will flash on
screen.
4. Set the minutes for starting
the watering time with the rotary control
5
(e. g. 20 mi-
nutes) and confirm with the
SET button
4
(see Fig. 8).
The hour display on the
“Run Time” section will
flash on screen.
5. Set the hour for the watering
time and confirm with the SET
4
button
(see Fig. 9).
The minute display on the
“Run Time” section will
flash on screen.
6. Set the minutes for the wa-
tering time and confirm with
t
he SET button 4 (see Fig. 10).
The cursor of the “wate-
ring frequency” section
will flash on screen.
The watering frequency
can be selected by:
The watering cycle (right
hand column of the display),
see step 7.
or
The watering days (left
hand column of the display),
see step 8.
7. Select the watering cycle
with the rotary button (e. g.
2nd) and confirm by pressing
the SET button 4 (see Fig. 10).
Remark: 24h / 2nd / 3rd /
4th / 5th / 6th / 7th means:
Watering every 24 hours /
every 2 / 3 / 4 / 5 / 6 / 7
days.
The week preview will be
displayed in the left hand
column.
The display on the “Prog”
will flash on screen.
18 GB
Page 19

8. Turn the rotary button until the
cursor on the “watering
days” section flash.
Select each watering day
and confirm by pressing the
SET button
4
(see Fig. 11).
After select the watering
days, press the
6
button
to final confirm.
The display on the “Prog”
will flash on screen.
9. Select the “Prog ON” with
the rotary button and confirm
by pressing the SET button
4
(or you can select OFF if
you don’t want to activate the
program at this moment).
After setting up the first pro-
gram, the system will now
jump back to step 2, so you
can set up program No. 2–6.
When you have finished set-
ting up the programs, you
can press the
button
(ON/OFF)
7
to exit the programming mode and go back to
the normal operation mode.
Remark: In case you input a
wrong data, you can always press
the
(ON/OFF) button 7 to go
to previous step.
Manual operation
for watering
The valve can be opened or
closed manually at any time.
A program-controlled open valve
can be closed early without changing the program data (watering
start time, run time and frequency).
1. Press the
approx. 2 seconds to open
the valve manually (or just
press the
close an opened valve).
2. Press the SET button
you want to set a specific
duration.
The hour display on the
“Run Time” section will
flash on screen.
3. Set the hour of the watering
time and confirm with the SET)
button
button 6 for
button 6 to
4
.
4
if
GB 19
Page 20
The minute display on the
“Run Time” section will
flash on screen.
4. Set the minute of the water-
ing time and confirm with the
SET button
Remark: If you want to quit
setting up the manually watering
mode, you can press the
OFF) button
gramming and go back to the
normal operation mode.
Remark: If the valve has been
opened manually and a programmed start of a watering period overlaps the manual opening
period, the programmed starting
time is suppressed.
Example:
The valve is opened at 9:00
am manually, the opening pe-
riod is 30 minutes. A program
with a start time between 9:00
am and 9:30 am will not be
undertaken in this case.
4
.
7
to exit the pro-
(ON/
Read / modify
watering
programmes
1. In the normal operation mode,
press the SET button
read the programme data.
Use the rotary switch to switch
between Programme 1‒6 to
read the data.
2. To modify the program data,
press the SET button
selecting the program in step
1. After modifying the program
data, the system will go back
to the normal operation mode.
4
4
to
after
Reset
Press the SET button 4 and
6
button
approx. 3 seconds. The LCD display will show all symbols for approx. 1 second and the system
will restart. All the programmed
data will be erased and restore
to factory setting.
at the same time for
20 GB
Page 21
Switching 12 / 24
hours display
Battery status
display
You can switch the time display
between 12 hours or 24 hours
display mode. In the normal operation model, press the
3
to switch the time display.
button
Switching off the
display
Press the (ON/OFF) but-
7
ton
for approx. 2 second
can turn off the LCD display.
Press the (ON/OFF) but-
7
ton
for approx. 3 second
can turn on the LCD display.
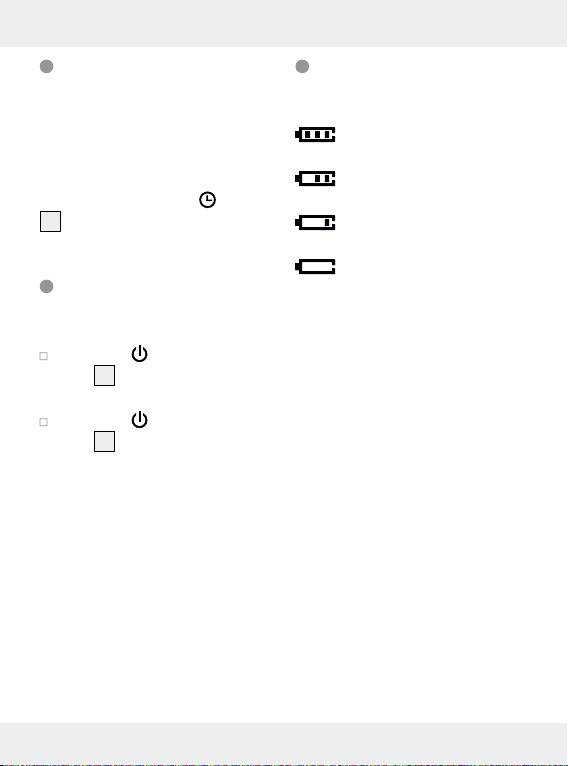
: Battery is full.
: Battery is approx. half full.
: Battery is low.
: Batter is extremely low,
cannot operate the valve
in this condition! User
should replace the batteries as soon as possible.
Remark: During replacing the
batteries, the program data will
be saved for approx. 2 minutes.
If replacing the batteries takes
longer time, all program data will
be lost.
GB 21
Page 22
Troubleshooting
Fault
No display
appears
Manual
watering is
not possible using
the (Man)
button
Possible Cause
Battery inserted
incorrectly
Flat battery Insert new battery
Temperature on
the display is
higher than 60 C°
Batter is flat
(only I bar left)
Manual watering
period is set to
0:00
Tap turned off Turn tap on
Solution
Check polarity markings match
Display will appear after temperature has dropped
Insert new battery
Set the manual watering period to a
figure greater than 0:00
22 GB
Page 23
Fault
Watering
program is
not being
undertaken
(no watering)
Possible Cause
Watering program has not
Solution
Read the watering program data
and modify if necessary
been entered
completely
Programs deacti-
Activate program (Prog ON )
vated (Prog OFF )
Valve was ope-
Avoid possible program overlaps
ned manually
previously.
Tap turned off. Turn tap on.
Program overlap
(1st watering start
Enter new watering program
without overlaps
time has priority)
Battery flat
Insert new (alkaline) battery
(1 bar flashing)
Cleaning and Care
Attention! Potential damage
to the product. Moisture entering
the product may result in damage.
Ensure no moisture enters the battery compartment
ning to prevent damaging the
product beyond repair.
10
during clea-
Only clean the housing with
a slightly damp cloth and
mild washing-up liquid.
Never use petrol, alcohol or
other aggressive cleaning
agents to clean the housing.
GB 23
Page 24
Cleaning the filter
Disposal
The filter 11 must be regu-
larly checked and cleaned
if necessary.
Close the tap.
Allow the product to run dry
by manual irrigation.
Unscrew the union nut 1
from the tap or adapter thread.
Remove the conical filter from
the water inlet in the union nut.
Clean the filter.
Reinsert the filter.
Screw the union nut onto the
thread of the tap or adapter.
Open the tap.
Storage
Close the tap.
Loosen the hose from the tap
connector
Allow the product to run dry.
Loosen the union nut 1.
Remove the batteries.
Store the product in a dry
and frost-free environment.
11
.
The packaging is made entirely of
recyclable materials, which you
may dispose of at local recycling
facilities.
Observe the marking
b
of the packaging mate-
a
rials for waste separation, which are marked with abbreviations (a) and numbers (b)
with following meaning: 1–7:
plastics / 20–22: paper and fibreboard / 80–98: composite
materials.
The product and pack-
aging materials are re-
cyclable, dispose of it
separately for better waste treatment. The Triman logo is valid in
France only.
Contact your local re-
fuse disposal authority
for more details of how
to dispose of your worn-out product.
24 GB
Page 25
To help protect the environment, please dis-
pose of the product
properly when it has reached the
end of its useful life and not in the
household waste. Information on
collection points and their opening hours can be obtained from
your local authority.
Faulty or used batteries / rechargeable batteries must be recycled
in accordance with Directive
2006/66/EC and its amendments.
P
lease return the batteries / recharge-
able
batteries and / or the product
to the available collection points.
Environmental
damage through
incorrect disposal
of the batteries /
rechargeable bat-
teries!
Batteries / rechargeable batteries
may not be disposed of with the
usual domestic waste. They may
contain toxic heavy metals and
are subject to hazardous waste
treatment rules and regulations.
The chemical symbols for heavy
metals are as follows: Cd = cadmium, Hg = mercury, Pb = lead.
That is why you should dispose of
used batteries / rechargeable batteries at a local collection point.
Warranty
The product has been manufactured to strict quality guidelines and
meticulously examined before delivery. In the event of product defects you have legal rights against
the retailer of this product. Your legal rights are not limited in any way
by our warranty detailed below.
The warranty for this product is 3
years from the date of purchase.
Should this product show any fault
in materials or manufacture within
3 years from the date of purchase,
we will repair or replace it – at our
choice – free of charge to you.
The warranty period begins on
the date of purchase. Please keep
GB 25
Page 26
the original sales receipt in a safe
location. This document is required
as your proof of purchase. This
warranty becomes void if the product has been damaged, or used
or maintained improperly.
The warranty applies to defects in
material or manufacture. This warranty does not cover product parts
subject to normal wear, thus possibly considered consumables (e.
g. batteries) or for damage to fragile parts, e. g. switches, rechargeable batteries or glass parts.
26 GB
Page 27

Teckenförklaring till
använda piktogram ................................................... Sidan 29
Inledning .............................................................................. Sidan 29
Avsedd användning ................................................................ Sidan 29
Leveransomfattning ................................................................. Sidan 30
Tekniska specifikationer .......................................................... Sidan 30
Beskrivning av delarna ........................................................... Sidan 30
Displayindikeringar ................................................................. Sidan 31
Säkerhet ....................................................................... Sidan 31
Säkerhetsinformation .............................................................. Sidan 31
Säkerhetsinformation om batterier / batteripack ................... Sidan 34
Isättning / byte av batterier ................................. Sidan 36
Idrifttagning ...................................................................... Sidan 37
Drift........................................................................................... Sidan 38
Idrifttagning av produkten ...................................................... Sidan 38
Inställning av aktuell tid och veckodag ................................. Sidan 38
Programmering för automatisk bevattning ............................ Sidan 39
Manuell bevattning ................................................................. Sidan 41
Läsa av / ändra bevattningsprogrammen .............................. Sidan 42
Återställning ............................................................................. Sidan 42
Skifta mellan 12- / 24-timmarsvisning .................................... Sidan 42
Påslagning / avstängning av bildskärmen ............................. Sidan 42
Batteri-statusindikering ............................................................ Sidan 42
SE 27
Page 28

Felavhjälpning ................................................................ Sidan 43
Rengöring och skötsel .............................................. Sidan 44
Rengöring av silen................................................................... Sidan 45
Förvaring ............................................................................. Sidan 45
Avfallshantering ........................................................... Sidan 45
Garanti .................................................................................. Sidan 46
28 SE
Page 29
Teckenförklaring till använda piktogram
Volt (likström) Se upp! Explosionsrisk!
Beakta varnings- och
säkerhetsinformationen!
Livsfara och risk för
olyckor för småbarn
och barn!
Bevattningsdator
Inledning
Grattis till köpet av din nya produkt.
Du har köpt en högklassig produkt.
Bruksanvisningen hör till produkten.
Den innehåller viktiga anvisningar
för säkerhet, användning och
avfallshantering. Läs säkerhetsanvisningarna och monteringsanvisningen innan du använder produkten.
Använd produkten endast enligt
beskrivningen och endast för de
angivna ändamålen. Se till att
Produkten motsvarar
de produktspecifikt
gällande europeiska
direktiven
Lämna förpackning och
b
a
utrustning till miljövänlig
avfallshantering!
bruksanvisningen alltid finns tillgänglig även vid vidare användning av tredje man.
Avsedd användning
Den här produkten är avsedd för
styrning av sprinkler, sprinkler- och
bevattningssystem. Det möjliggör
en automatisk bevattning utomhus
till programmerade tider och perioder. Produkten kan spara upp
till 6 program för automatisk bevattning. Produkten får utelsutande
användas utomhus. Andra
SE 29
Page 30
användningar eller förändringar
på produkten är inte ändamålsenliga. Tillverkaren ansvarar inte för
skador som förorsakas av icke ändamålsenlig användning. Produkten är ej
användning.
avsedd för yrkesmässig
Leveransom-
fattning
1 bevattningsdator
1 anslutning för vattenkran
1 adapter 33,3 mm på 26,5 mm
(G 1” på G ¾”)
1 sil
2 batterier 1,5 V typ AA
1 bruksanvisning
Tekniska
specifikationer
Modell nr.: HG04678
Arbetstryck: 34,5–827 kPa
(0,34–8,27 bar)
Max. vattentemperatur: 40 °C
Spänningsförsörjning: 2 x 1,5 V
(likström)
batterier typ AA
Flödesmängd
(vid ca 3 bar
vattentryck): ca 28 l / min
Programmerbar
bevattningstid: max. 09:59 h
Manuell
bevattningstid: max. 09:59 h
Vattenanslutning: G ¾” (26,5 mm)
eller G 1”
(33,3 mm)
Kapslingsklass: IP X4 (stänkvatten-
skyddad)
Beskrivning av
delarna (bild A)
1
Huvmutter ‒ 33,3 mm (G 1“)
2
Display
3
Knapp
4
Knappen SET
5
Vridbrytare
6
Knapp
7
Knapp (TILL / FRÅN)
8
Batterifack
30 SE
Page 31

9
Sil
10
Adapter 33,3 mm på
26,5 mm (G 1” på G ¾”)
11
Vattenkrananslutning ‒ för
anslutning av slang och
bevattningsdator
Displayindi-
keringar (bild B)
Visning Betydelse
12
13
14
15
16
Aktuell tid
Bevattningscykel:
24h / 2nd / 3rd /
4th / 5th / 6th / 7t h
betyder: alltid efter
24 timmar / 2 dagar / 3 dagar /
4 dagar / 5 dagar /
6 dagar / 7 dagar
Aktuellt bevattningsprogram (1‒6)
Programmets
starttid
Gångtid - bevattningsperiod
Visning Betydelse
Veckodag:
17
18
SET
aktuell veckodag eller programmerade
dagar med bevattning
Batteriindikering
Knapp - tidsinställning
Knapp - programmera
Knapp - ändra
bevattnings
Knapp - slå på /
stänga av produkten
(ON/OFF)
Svagt batteri
läge
Säkerhet
Säkerhets-
information
Garantin gäller inte för
skador som förorsakas
på grund av att bruksanvisningen inte har
SE 31
Page 32

beaktats! Vi ansvarar
inte för följdskador! Vi
ansvarar inte för sak- eller personskador, som
förorsakas på grund av
felaktig hantering eller
på grund av att säkerhetsinformationen inte
har beaktats!
SPARA ALLA SÄKERHETSINSTRUKTIONER
OCH ANVISNINGAR
FÖR FRAMTIDA REFERENS!
RISK FÖR LIVS-
FARA OCH
OLYCKOR FÖR
SMÅBARN OCH
BARN! Lämna ald-
rig barn utan uppsikt
med förpackningsmaterialet. Kvävningsrisk föreligger.
Förvara produkten
utom räckhåll för
barn. Denna produkt är ingen leksak.
Denna produkt kan
användas av barn
från och med 8 år
samt av personer
med nedsatt fysisk,
32 SE
Page 33

motorisk eller mental
förmåga eller med
bristande erfarenhet
och kunskap, om de
hålls under uppsikt
eller instruerats om
en säker användning
av produkten och om
de förstått de risker
som användningen
kan medföra.
Barn får inte leka med
produkten. Rengöring
och användarunderhåll får inte utföras
av barn utan uppsikt
av vuxen person.
Under garantitiden
får reparationer endast utföras av tillverkaren auktoriserad
kundtjänst, i annat
fall upphör garantin
att gälla i händelse
av efterföljande
skador.
Defekta byggdelar
får endast bytas ut
mot originalreservdelar. Endast användningen av dessa delar
garanterar att säker-
hetskraven uppfylls.
Undvik direkt solljus.
Stäng alltid vatten-
kranen om du inte
längre använder
produkten.
Produkten får inte
användas i närheten
av öppna lågor.
SE 33
Page 34

Kontrollera produkten
och dess tilledningar
regelbundet med avseende på täthet och
felfri funktion.
LIVSFARA PÅ
GRUND AV ELEKTRISKA STÖTAR!
Rikta inte vattenstrålen mot elektriska
anordningar.
Rikta inte vattenstrå-
len mot personer eller djur!
Produkten är inte
lämplig för tappning
av dricksvatten.
Säkerhetsin-
formation om
batterier /
batteripack
LIVSFARA! Håll
batterier / batteri-
pack utom räckhåll
för barn. Uppsök
omedelbart läkare
om någon råkar
svälja ett batteri!
EXPLO-
SIONS-
RISK! Ladda aldrig
icke-laddbara batte-
rier. Kortslut aldrig
batterier / batteripack
och / eller öppna dem
ej. Följden kan bli
överhettning,
34 SE
Page 35

brandfara eller
spruckna batterier.
Kasta aldrig batterier
batteripack i öppen
eld eller vatten.
Utsätt inte batterier /
batteripack för mekanisk belastning.
Risk för läckande
batterier /
batteripack
Undvik extrema för-
hållanden och temperaturer som kan
påverka batterier /
batteripack, t.ex.
på värmeelement /
i direkt solljus.
Om batterier / batteri-
pack runnit ut undvik
att kemikalierna kom-
mer i kontakt med hud,
/
ögon och slemhinnor!
Spola omedelbart av
de drabbade ställena
med rent vatten och
uppsök läkare om-
gående!
ANVÄND
SKYDDS-
HANDSKAR! Läck-
ande eller skadade
batterier / batteripack
kan vid beröring för-
orsaka frätskador på
huden. Använd därför
i detta fall lämpliga
skyddshandskar.
Om batterierna / bat-
teripacken skulle läcka
måste de omedelbart
SE 35
Page 36

tas ut ur produkten för
att undvika skador.
Använd endast bat-
terier / batteripack av
samma typ. Blanda
inte gamla och nya
batterier / batteripack!
Ta ut batterierna /
batteripacken, om produkten
inte ska an-
vändas en längre tid.
Risk för skador på
produkten
Använd endast den
angivna typen av
batteri / batteripack!
Sätt i batterierna /
batteripacken enligt
polaritetsmarkeringen
(+) och (-) på batteri /
batteripack och pro-
dukt.
Rengör kontakterna
på batteri / batteri-
pack och batterifack
före isättning!
Ta alltid omgående
ut förbrukade
batterier / batteripack ur
produkten.
Isättning / byte av
batterier (se bild C)
Lossa batterifackets 8 skruv
och ta loss skyddet.
Sätt i 2 batterier, storlek AA
(LR06 / Mignon), i batteri-
8
facket
Hänvisning: Displayen visar
alla LCD-symboler i ca en sekund, därefter kopplar indikeringen om till menyn „Inställning
av aktuell tid och veckodag“.
. Beakta polariteten.
36 SE
Page 37

Stäng skyddet och dra åt
skruven hårt.
Idrifttagning
För säker och felfri användning av
produkten måste installationsplatsen
uppfylla följande förutsättningar:
Temperaturen på det vatten
som flyter igenom får maximalt vara 40 °C.
Den minimala arbetstempera-
turen är +5 °C.
Den maximala arbetstempe-
raturen är +50 °C.
Använd endast klart sötvatten.
Anslut produkten endast lodrätt
med slanganslutningen
nedåt, för att undvika att vatten
tränger in i batterifacket
OBS! Bevattningsdatorn får
endast anslutas till ett tappställe
för dricksvatten med säkrings-
anordning, som minst motsva-
rar TYP HD enligt EN 1717
(återflödesstopp med rörven-
tilation).
Hänvisning: Motsvarande
adaptrar finns i fackhandeln.
11
8
.
Kontrollera den tillgängliga
vattenanslutningens typ. Produkten är utrustad med en
huvmutter
1
för vattenkranar
med 33,3 mm-gänga (G 1”).
För vattenkranar med 26,5 mmgänga (G ¾”) använder du den
medföljande adaptern
10
.
Sätt i silen 9 i huvmuttern
precis som bild A
1
visar.
För 26,5 mm-gängor (G ¾”):
Skruva adaptern
10
på vattenkranen. Ta inga verktyg till
hjälp för detta ändamål.
Skruva huvmuttern 1 på vat-
tenkranens resp. adapterns
gänga. Ta inga verktyg till
hjälp för detta ändamål.
Skruva vattenkranens anslut-
11
ning
på slanganslutningen.
På vattenkranens anslutning
11
kan du sedan ansluta en slang.
Öppna vattenkranen.
OBS! Om 10 otätheter / läc-
kage uppstår vid adapterns
användning måste vattenkranens gänga lindas med tätningsband.
SE 37
Page 38

Programmera bevattningen
enligt beskrivningen i kapitel
„Drift“.
Drift
Med bevattningsdatorn kan man
bevattna helautomatiskt när man
vill. Det kan anslutas sprinkler, ett
sprinklersystem eller ett droppbevattningssystem för bevattning.
Bevattningsdatorn tar helautomatiskt
över bevattningen i överensstämmelse med motsvarande programmerad starttid och för programmerad
tid. Ta hänsyn till årstider och dagistider vid programmeringen.
Tidigt på morgonen eller sent på
kvällen är avdunstningen och därmed vattenförbrukningen lägst.
Idrifttagning av
produkten
Inställning av aktuell
tid och veckodag
1. Håll 3 tryckt i ca 2 sekunder (se bild 1) (krävs inte
om du endast sätter i batterier).
På bildskärmen blinkar timin-
dikeringen i avsnittet „Tid“.
2. Ställ in timmarna med vridbrytaren
och bekräfta med
pen
På bildskärmen blinkar mi-
nutindikeringen i avsnittet
„Tid“.
3. Ställ in tiden i minuter med
vridbrytaren
nuter) och bekräfta med
knappen
På bildskärmen blinkar mar-
kören i avsnittet „Veckodag“.
4. Ställ in
vridbrytaren och bekräfta med
5
(t.ex. klockan 9)
3
(se bild 2).
5
(t.ex. 30 mi-
3
(se bild 3).
5
veckodagen med
‒knappen 3 (se bild 4).
‒knap-
‒
1. Sätt i batterierna enligt kapitel
„Isättning / byte av batterier“.
2. Anslut bevattningsdatorn till
vattenkranen (se bild D).
38 SE
Hänvisning: Om du har matat
in felaktiga uppgifter, kan du när
som helst trycka på
(TILL/FRÅN)-
Page 39

knappen 7, för att komma tillbaka
till förra steget.
Programmering
för automatisk
bevattning
1. Håll SET-knappen tryckt i 4
ca 2 sekunder (se bild 5).
På bildskärmen blinkar indike-
ringen programnummer i
avsnittet „Prog“.
2. Ställ in programnummer
med vridbrytaren (t.ex. Prog 3)
och bekräfta genom att trycka
på SET-knappen 4 (se bild 6).
På bildskärmen blinkar timin-
dikeringen i avsnittet
„Start“.
3. Ställ in timmarna för bevattningsperiodens början med
vridbrytaren
6) och bekräfta med SETknappen
I avsnittet „Start“ på bild-
skärmen blinkar minutindi-
keringen.
5
(t.ex. klockan
4
(se bild 7).
4. Ställ in minuterna för be-
vattningsperiodens start med
hjälp av vridbrytaren
5
(t.ex. 20 minuter) och bekräfta med SET-knappen
4
(se bild 8).
I avsnittet „Gångtid“ på
bildskärmen blinkar timindi-
keringen.
5. Ställ in timmen för bevatt-
ningsperioden och bekräfta
med SET-knappen
4
(se
bild 9).
I avsnittet „Gångtid“ på
bildskärmen blinkar minu-
tindikeringen.
6. Ställ in minuterna för be-
vattningsperioden och bekräfta med SET-knappen
4
(se bild 10).
På bildskärmen blinkar mar-
kören i avsnittet „Bevattningsintervaller“.
Bevattningsintervallerna
kan väljas enligt följande:
Bevattningscykel (bild-
skärmens högra kolumn),
se steg 7.
SE 39
Page 40

eller
Bevattningsdagar (bild-
skärmens vänstra kolumn), se
steg 8.
7. Välj bevattningscykeln
med vridbrytaren (t.ex. 2.)
och bekräfta genom att
trycka på SET-knappen
4
(se bild 10).
Hänvisning: 24h / 2. / 3. /
4. / 5. / 6. / 7. betyder:
Bevattning alltid efter
24 timmar / var 2 / 3 /
4 / 5 / 6 / 7 dag.
Veckoplanen visar i högra
kolumnen.
På bildskärmen blinkat indike-
ringen „Prog“.
8. Vrid vridbrytaren tills mar-
kören blinkar i avsnittet
„Bevattningsdagar“.
Välj de enskilda bevatt-
ningsdagarna och be-
kräfta genom att trycka på
SET-knappen
4
(se bild 11).
När du valt antalet dagar för
bevattning kan du bekräfta
valet av bevattningsdagarna
med
‒knappen 6.
På bildskärmen blinkat indike-
ringen „Prog“.
9. Välj „Prog TILL“ med vrid-
brytaren och bekräfta genom
att trycka på SET-knappen
(eller välj FRÅN, om du inte vill
aktivera programmet precis vid
denna tidpunkt).
Efter inställning av det första
programmet går systemet tillbaka till steg 2, så att du kan
installera programmen nr. 2‒6.
När programmen är färdigt
installerade kan du trycka på
(TILL / FRÅN)-knappen 7,
för lämna programmeringsläget och återvända till det normala driftläget.
Hänvisning: Om du har matat
in felaktiga uppgifter, kan du när
som helst trycka på
knappen
7
, för att komma tillbaka
till förra steget.
4
(TILL / FRÅN)-
40 SE
Page 41

Manuell bevattning
Ventilen kan när som helst öppnas eller stängas manuellt.
En programstyrd öppen ventil kan
stängas i förtid utan förändring av
programuppgifterna (start, gångtid och frekvens).
1. Håll
2. Tryck på SET-knappen
I avsnittet „Gångtid“ på
3. Ställ in timmen för bevatt-
I avsnittet „Gångtid“ på
4. Ställ in minuterna för be-
‒knappen tryckt i 6
ca 2 sekunder, för att öppna
ventilen manuellt (eller tryck
på knappen
6, för att
öppna eller stänga ventilen).
4
,
när du vill ställa in en viss tid.
bildskärmen blinkar timindi-
keringen.
ningsperioden och bekräfta
med SET-knappen
4
.
bildskärmen blinkar minu-
tindikeringen.
vattningsperioden och bekräfta med SET-knappen
4
Hänvisning: Om du vill lämna
läget för manuell bevattning, kan
du trycka på
(TILL / FRÅN)knappen 7, för att lämna programmeri
ngsläget och för att återvända
till det normala driftläget.
Hänvisning: Om ventilen har
öppnats manuellt och det uppstår
en överlappning av en programmerad start av en bevattningsperiod
och en manuell öppningsperiod,
undertrycks den programmerade
starttiden.
Exempel:
Ventilen öppnas manuellt
klockan 9:00, öppningstiden
är 30 minuter. I detta fall utförs
inget program med en start-
tid mellan klockan 9:00 och
klockan 9:30.
.
SE 41
Page 42

Läsa av / ändra
bevattningsprogrammen
Skifta mellan
12- / 24-timmarsvisning
1. Tryck på SET-knappen 4 i
normalt driftläge för att läsa
av programuppgifterna.
Använd vridbrytaren, för att
hoppa mellan programmen
1‒6 för att läsa av uppgifterna.
2. Efter det att du valt programmet
tryck i steg 1 på SET-knappen
4
, för att ändra programuppgifterna. När programuppgifterna ändrats går systemet
tillbaka till det normala driftläget.
Återställning
Håll SET-knappen 4 och ‒
knappen
under. LCD-bildskärmen visar alla
symboler i ca 1 sekund och systemet startar på nytt. Alla programmerade uppgifter raderas och
fabriksinställningarna återställs.
6
samtidigt i ca 3 sek-
När tiden visas kan du skifta mellan
12- och 24-timmars-läget. Tryck
på
-knappen 3 i normalt drift-
läge, för att ändra tidvisningen.
Påslagning /
avstängning av
bildskärmen
Håll (TILL/FRÅN)-knappen
7
tryckt i ca 2 sekunder för
att stänga av LCD-bildskärmen.
Tryck och håll (TILL /FRÅN)-
knappen
för påslagning av LCD-bildskärmen.
7
i ca 3 sekunder,
Batteri-statusin-
dikering
: Batteriet är fullt.
: Batteriet är halvfullt.
42 SE
Page 43

: Batteriet är svagt.
: Batteriet är extremt svagt,
ventilen kan inte manövreras i detta tillstånd! Användaren bör byta ut
batterierna så fort som
möjligt.
Felavhjälpning
Hänvisning: Vid byte av batte-
rierna sparas programuppgifterna
i ca 2 minuter.
Om batteribytet tar längre tid i
anspråk, förloras alla programuppgifter.
Störning Möjlig
Orsak
Ingen display Batteriet är fel isatt. Kontrollera om polaritetsmar-
Svagt batteri Sätt i ett nytt batteri.
Temperaturen på bild-
skärmen är högre än
60 °C.
Den manuella
bevattningen
med
(Man)-knappen är inte
möjlig.
Batteriet är svagt
(endast en stapel kvar).
Den manuella bevattningsperioden är
inställd på 0:00.
Vattenkranen
avstängd
Åtgärd
keringarna överensstämmer.
Indikeringen visas när temperaturen sjunker.
Sätt i ett nytt batteri.
Ställ in den manuella bevattningsperioden på ett högre
värde än 0:00.
Öppna vattenkranen.
SE 43
Page 44

Störning Möjlig
Orsak
Bevattningsperioden
utförs inte
(ingen bevattning).
Bevattningsprogrammet har inte matats
in fullständigt.
Program inaktiverade (Prog FRÅN).
Ventilen öppnades
manuellt tidigare.
Vattenkranen
avstängd.
Programöverlappning (den 1:a starttiden för bevattning
prioriteras).
Batteriet är svagt
(1 blinkande stapel).
Åtgärd
Läs av bevattningsprogrammets uppgifter och ändra
dem vid behov.
Aktivera programmet
(Prog TILL).
Undvik möjliga överlappningar i programmen.
Öppna vattenkranen.
Mata in ett nytt bevattningsprogram utan överlappningar.
Sätt i ett nytt (alkaliskt) batteri.
Rengöring och
skötsel
OBS! Möjlig skada på pro-
dukten. Inträngande fukt kan skada
produkten. För att undvika en
44 SE
irreparabel skada på produkten
måste du se till att ingen fukt
tränger in i batterifacket
Rengör produkten endast med
en lätt fuktad duk och ett milt
diskmedel.
10
.
Page 45

Använd under inga omständig-
heter bensin, alkohol eller andra
aggressiva rengöringsmedel
för rengöring av kåpan.
Rengöring av silen
Silen 11 måste kontrolleras
regelbundet och rengöras vid
behov.
Stäng vattenkranen.
Låt produkten köras tom ge-
nom manuell bevattning.
Skruva av huvmuttern 1 från
vattenkranens resp. adapterns
gänga.
Ta ut den konformade silen ur
vattentillförseln i huvmuttern.
Rengör silen.
Sätt i batteriet igen.
Skruva av huvmuttern från vat-
tenkranens resp. adapterns
gänga.
Öppna vattenkranen.
Förvaring
Stäng vattenkranen.
Lossa slangen från vattenan-
slutningen
Låt produkten köras tom.
Lossa huvmuttern 1.
Ta ut batterierna.
Förvara produkten i en torr
och frostfri miljö.
Avfallshantering
Förpackningen består av miljövänliga material, som kan lämnas
på lokala återvinningsstationer.
b
a
avfallshantering. Dessa har markerats med förkortningar (a) och
siffror (b) med följande betydelse:
1–7: plaster / 20–22: papper
och kartong / 80–98: kompositmaterial.
11
.
Beakta märkningen på
förpackningsmaterialet
för rätt källsortering vid
SE 45
Page 46

Produkten och förpackningsmaterialet kan åter-
vinnas. Källsortera dem
för en bättre avfallshantering. Triman-logotypen gäller endast för
Frankrike.
Kontakta kommunen för
närmare information om
avfallshantering av den
förbrukade produkten.
Var rädd om miljön och
kasta inte den uttjänta
produkten i hushållsavfallet utan säkerställ en fackmässig avfallshantering. Information
om återvinningsstationer och deras öppettider erhåller du hos de
lokala myndigheterna.
Defekta eller förbrukade batterier / batteripack måste återvin nas
i enlighet med direktiv 2006/66/
EG och dess ändringar. Lämna
batterier / batteripack och /
eller produkten på befintliga återvinningsstationer.
Risk för miljöskador på grund av
felaktig avfallshantering av batterier /
batteripack!
Batterier / batteripack får inte kastas
i hushållssopo
hålla giftiga tungmetaller och ska
behandlas som farligt avfall. De
kemiska symbolerna för tungmetaller är följande: Cd = kadmium,
Hg = kvicksilver, Pb = bly. Lämna
därför förbrukade batterier / batteripack på kommunens återvinningsstation.
rna. De kan inne-
Garanti
Denna produkt har tillverkats med
omsorg enligt stränga kvalitetskrav och kontrollerats noggrant
före leverans. Om fel uppstår på
produkten gäller dina lagstadgade rättigheter gentemot säljaren. Dessa lagstadgade
rättigheter begränsas inte av vår
garanti, som redovisas nedan.
46 SE
Page 47

Du erhåller 3 års garanti på denna
produkt från och med köpdatum.
Garantitiden börjar på inköpsdagen. Spara originalkvittot. Denna
handling behövs som bevis för köpet.
Om ett material- eller tillverkningsfel uppstår på produkten inom 3
år från köpdatum, reparerar eller
ersätter vi efter eget gottfinnande
produkten utan extra kostnad.
Denna garanti förfaller om produkten skadas, används på fel
sätt eller inte underhålls.
Garantin gäller för material- eller
tillverkningsfel. Denna garanti omfattar inte produktkomponenter som
utsätts för normalt slitage och därför betraktas som slitdelar (t.ex. batterier). Uteslutna är även skador på
ömtåliga delar, som t.ex. brytare,
batteripack eller delar tillverkade
av glas.
SE 47
Page 48

Legenda zastosowanych
piktogramów .................................................................Strona 50
Wstęp ....................................................................................Strona 50
Zastosowanie zgodne z przeznaczeniem ...........................Strona 51
Zakres dostawy ......................................................................Strona 51
Dane techniczne ....................................................................Strona 51
Opis części .............................................................................Strona 52
Komunikaty na wyświetlaczu ................................................Strona 52
Bezpieczeństwo ............................................................Strona 53
Wskazówki dotyczące bezpieczeństwa ..............................Strona 53
Wskazówki bezpieczeństwa dla
baterii / akumulatorów ...........................................................Strona 56
Zakładanie / Wymiana baterii ........................Strona 59
Uruchomienie..................................................................Strona 59
Praca ......................................................................................Strona 60
Uruchomienie produktu .........................................................Strona 61
Ustawianie aktualnego czasu godzinowego i
dnia tygodnia .........................................................................Strona 61
Programowanie automatycznego nawadniania .................Strona 61
Ręczny tryb nawadniania ......................................................Strona 63
Odczyt / Zmiana programów nawadniania ........................Strona 64
Resetowanie ....................................................................................Strona 64
Przełączanie między wskaźnikiem 12- / 24-godzinowym.......Strona 65
Włączanie / Wyłączanie ekranu ..........................................Strona 65
Wskaźnik stanu baterii ..........................................................Strona 65
48 PL
Page 49

Usuwanie usterek .......................................................Strona 66
Czyszczenie i pielęgnacja .....................................Strona 67
Czyszczenie sita.....................................................................Strona 68
Przechowywanie ........................................................Strona 68
Utylizacja ...........................................................................Strona 68
Gwarancja ........................................................................Strona 69
PL 49
Page 50

Legenda zastosowanych piktogramów
Wolt (prąd stały)
Należy
przestrzegać
ostrzeżeń i wskazówek
bezpieczeństwa!
Zagrożenie dla
życia i
niebezpieczeństwo
odniesienia
obrażeń przez
dzieci!
Elektroniczne
urządzenie do
nawadniania
Wstęp
Gratulujemy Państwu zakupu
nowego produktu. Tym samym
zdecy
dowali się Państwo na zakup produktu
Instrukcja obsługi jest częścią
tego produktu. Zawiera ona
wysokiej jakości.
Ostrożnie! Niebezpieczeństwo wybuchu!
Produkt odpowiada
specyficznym dla produktu obowiązującym
dyrektywom europejskim
Opakowanie i
urządzenie przekazać
b
a
do utylizacji zgodnie z
przepisami o ochronie
środowiska!
ważne wskazówki dotyczące
bezpieczeństwa, użytkowania i
utylizacji. Przed pierwszym użyciem produktu należy zapoznać
się ze wszystkimi wskazówkami
dotyczącymi obsługi ibezpieczeństwa. Używać produktu wyłącznie
zgodnie zjego poniżej opisanym
przeznaczeniem. Wprzypadku
przekazania produktu innej osobie należy dołączyć do niego
całą jego dokumentację.
50 PL
Page 51

Zastosowanie
zgodne z
przeznaczeniem
Ten produkt przeznaczony jest do
sterowania zraszaczami, systemami
zraszającymi i nawadniającymi.
Umożliwia automatyczne nawadnianie obszarów zewnętrznych
przy zaprogramowanej godzinie
i czasie trwania. Produkt może
automatycznie zapisać maksymalnie 6 programy do automatycznego nawadniania. Produktu
można używać wyłącznie na zewnątrz. Inne zastosowania lub
zmiany produktu są niezgodne z
jego przeznaczeniem. Producent
nie ponosi odpowiedzialności za
szkody powstałe wskutek użycia
produktu niezgodnie z jego przeznaczeniem. Produkt nie jest przeznaczony do użytku komercyjnego.
Zakres dostawy
1 komputer nawadniający
1 przyłącze kranowe
1 adapter 33,3 mm na 26,5 mm
(G1” na G¾”)
1 sito
2 baterie 1,5 V typu AA
1 instrukcja obsługi
Dane techniczne
Nr modelu: HG04678
Ciśnienie
robocze: 34,5–827 kPa
(0,34–8,27 bar)
Maks. temperatura
wody: 40 °C
Zasilanie: 2 x 1,5 V
(prąd stały)
baterie typu
AA
Natężenie
przepływu
(przy ciśnieniu
wody ok. 3 bar): ok. 28 l / min
Programowany
nawadniania
ręcznego: maks. 09:59 h
Czas trwania
nawadniania
ręcznego: maks. 09:59 h
PL 51
Page 52

Przyłącze wody: G ¾”
(26,5 mm) lub
G 1”
(33,3 mm)
Rodzaj ochrony: IP X4 (ochrona
przed pryskającą wodą)
Opis części (rys. A)
1
Nakrętka złączkowa ‒
33,3 mm (G 1“)
2
Wyświetlacz
3
Przycisk
4
Przycisk SET
5
Pokrętło
6
Przycisk
7
Przycisk (WŁĄCZ /
WYŁĄCZ)
8
Komora baterii
9
Sito
10
Adapter 33,3 mm na
26,5 mm (G1” na G¾”)
11
Przyłącze kranowe ‒ do po-
łączenia węża i komputera
nawadniającego
Komunikaty na
wyświetlaczu
(rys. B)
Komunikat
12
13
14
15
16
17
18
Znaczenie
Aktualny czas
godzinowy
Cykl nawadniania:
24h / 2nd / 3rd /
4th / 5th / 6th / 7 th
oznacza: co
24 godziny /
2 dni / 3 dni /
4 dni / 5 dni /
6 dni / 7 dni
Aktualny program
nawadniania
(1‒6)
Czas uruchamiania programu
Czas działania Czas nawadniania
Dzień tygodnia:
aktualny dzień tygodnia lub zaprogramowane dni z
nawadnianiem
Wskaźnik baterii
52 PL
Page 53

Komunikat
SET
Znaczenie
Przycisk ustawianie czasu
godzinowego
Przycisk programowanie
Przycisk - zmiana
trybu
nawadniania
Przycisk - włączanie / wyłączanie
produktu (ON/OFF)
Słaba bateria
Bezpieczeństwo
Wskazówki
dotyczące
bezpieczeństwa
niniejszej instrukcji obsługi prawo do gwarancji wygasa! Za szkody
pośrednie producent
nie ponosi odpowiedzialności!
W przypadku szkód
materialnych lub osobowych, które powstały
wskutek niewłaściwego
obchodzenia się z
urządzeniem lub nieprzestrzegania wskazówek dotyczących
bezpieczeństwa, nie
ponosimy żadnej odpowiedzialności!
W przypadku szkód
spowodowanych nieprzestrzeganiem
WSZYSTKIE WSKAZÓWKI DOTYCZĄCE
BEZPIECZEŃSTWA
PL 53
Page 54

ORAZ INSTRUKCJE
NALEŻY ZACHOWAĆ
NA PRZYSZŁOŚĆ!
NIEBEZPIECZEŃ-
STWO UTRATY
ŻYCIA LUB ODNIESIENIA OBRAŻEŃ PRZEZ
DZIECI! W żadnym
wypadku nie pozostawiać dzieci bez
nadzoru w pobliżu
opakowania. Niebezpieczeństwo
uduszenia. Produkt
należy trzymać z dala
od dzieci. Produkt
nie jest zabawką.
Niniejszy produkt
może być używany
przez dzieci od lat
8 oraz przez osoby
z obniżonymi zdolnościami fizycznymi,
sensorycznymi lub
mentalnymi lub brakiem doświadczenia
i/lub wiedzy, jeśli
pozostają pod nadzorem lub zostały
pouczone w kwestii
bezpiecznego użycia produktu i rozumieją wynikające z
niego zagrożenia.
Dzieci nie mogą ba-
wić się produktem.
54 PL
Page 55

Czyszczenie i konserwacja nie mogą być
przeprowadzane
przez dzieci bez
nadzoru.
Naprawa produktu
w czasie trwania
gwarancji może być
wykonywana wyłącznie przez serwis
klienta autoryzowany
przez producenta,
w innym razie przy
poniższych szkodach
nie istnieje już roszczenie gwarancyjne.
Uszkodzone części
mogą być wymieniane wyłącznie na
oryginalne części zamienne. W przypadku
tych części zapewnione jest przestrzeganie przez nie
wymogów bezpieczeństwa.
Unikać bezpośred-
nich promieni słonecznych.
Zawsze należy za-
kręcać kran, jeśli produkt nie jest używany.
Nie używać produktu
w pobliżu otwartych
płomieni.
Sprawdzić produkt
i jego przewody doprowadzające w regularnych odstępach
czasu pod kątem
szczelności i niezawodnego działania.
PL 55
Page 56

ZAGROŻENIE
ŻYCIA PRZEZ
PORAŻENIE
PRĄDEM ELEKTRYCZNYM! Nie
kierować strumienia
wody na urządzenia elektryczne!
Nie kierować stru-
mienia wody na ludzi lub zwierzęta!
Produkt nie nadaje
się do poboru wody
pitnej.
Wskazówki
bezpieczeństwa dla
baterii / akumulatorów
ZAGROŻENIE
ŻYCIA! Baterie /
akumulatory należy
trzymać poza zasięgiem dzieci. W przypadku połknięcia
należy natychmiast
udać się do lekarza!
NIEBEZ-
PIECZEŃ-
STWO WYBU-
CHU! Baterii jedno-
razowego użytku
nie wolno ładować
ponownie. Baterii /
akumulatorów nie
56 PL
Page 57

należy zwierać i /
lub otwierać. Może
to doprowadzić do
przegrzania, pożaru lub wybuchu.
Nigdy nie należy
wrzucać baterii /
akumulatorów do
ognia lub wody.
Nigdy nie należy
narażać baterii /
akumulatorów na
obciążenia mechaniczne.
Ryzyko wycieku
kwasu z baterii /
akumulatorów
Należy unikać eks-
tremalnych warunków i temperatur,
które mogą oddziaływać na baterie /
akumulatory, np.
kaloryferów / bezpośredniego działania promieniowania
słonecznego.
Unikać kontaktu ze
skórą, oczami i błonami śluzowymi!
W razie kontaktu z
kwasem akumulatorowym należy natychmiast przepłukać
dane miejsce czystą
wodą i niezwłocznie
udać się do lekarza!
ZAKŁADAĆ
RĘKAWICE
OCHRONNE!
PL 57
Page 58

Wylane lub uszko-
dzone baterie /
akumulatory po dotknięciu skóry mogą
spowodować poparzenia chemiczne.
Dlatego należy w
takim przypadku nakładać odpowiednie
rękawice ochronne.
W przypadku wy-
cieku baterii natychmiast usunąć je z
produktu, aby uniknąć uszkodzeń.
Używać wyłącznie
baterii / akumulatorów tego samego
typu. Nie zakładać
razem nowych oraz
zużytych baterii /
akumulatorów!
Jeżeli produkt nie jest
przez dłuższy czas
używany, baterie /
akumulatorynależy
wyjąć.
Ryzyko uszkodzenia produktu
Używać wyłącznie
zalecanego rodzaju
baterii / akumulatora!
Podczas wkładania
baterii do urządzenia należy zwrócić
uwagę na prawidłowe ułożenie biegunów! Jest ono
pokazane w komorze baterii!
58 PL
Page 59

Jeśli to konieczne,
oczyścić styki baterii
i w komorze baterii
przed włożeniem
baterii!
Zużyte akumulatory /
baterie wyjąć jak
najszybciej z produktu.
Zakładanie/
Wymiana baterii
(patrz rys. C)
Odkręcić śrubę komory bate-
8
rii
i zdjąć pokrywę.
Włożyć 2 baterie, wielkości
AA (LR06 / Mignon) do komory baterii
uwagę na biegunowość.
Wskazówka: Wyświetlacz
przez ok. jedną sekundę
wszystkie symbole LCD, następnie zmienia się widok w
8
. Zwrócić
menu „Ustawianie aktualnego
czasu i dnia tygodnia“.
Zamknąć pokrywę i ponownie
dokręcić śrubę.
Uruchomienie
W celu bezpiecznej i bezbłędnej
pracy produktu miejsce instalacji
musi spełniać następujące warunki:
Temperatura przepływającej
wody może wynosić maksymalnie 40 °C.
Minimalna temperatura robo-
cza wynosi +5 °C.
Maksymalna temperatura ro-
bocza wynosi +50 °C.
Należy używać tylko czystej
wody słodkiej.
Produkt należy podłączać
wyłącznie pionowo, z przyłączem węża
w dół, aby uniknąć wniknięcia
wody do komory baterii
UWAGA! Komputer nawad-
niający może być podłączony
wyłącznie do ujęcia wody pitnej z urządzeniem zabezpieczającym, które odpowiada
11
skierowanym
8
.
PL 59
Page 60

przynajmniej TYPOWI HD wg
EN 1717 (zabezpieczenie
przed przepływem zwrotnym
z rurą wentylacyją).
Wskazówka: Odpowiednie
adaptery są dostępne w
sprzedaży specjalistycznej.
Sprawdzić rodzaj dostępnego
przyłącza wody. Produkt jest
wyposażony w nakrętkę złączkową 1 do kranów z gwintem
33,3 mm (G 1”). Do kranów
z gwintem 26,5 mm (G ¾”)
proszę użyć dołączonego
adaptera
10
.
Włożyć sito 9 jak pokazano
na rysunku A w nakrętkę
złączkową
1
.
Dla gwintu 26,5 mm (G ¾”):
Przykręcić adapter
10
do
kranu. Nie używać do pomocy żadnych narzędzi.
Nakręcić nakrętkę złączkową
1
na gwint kranu lub adaptera. Nie używać do pomocy
żadnych narzędzi.
Przykręcić przyłącze kranowe
11
do przyłącza węża. Następnie do przyłącza krano-
wego 11 można podłączyć
wąż.
Odkręcić kran.
UWAGA! Jeśli przy użyciu
adaptera
10
wystąpią nieszczelności / wycieki, należy
owinąć gwint kranu taśmą
uszczelniającą.
Zaprogramować nawadnia-
nie jak opisano w rozdziale
„Praca“.
Praca
Za pomocą komputera nawadniającego można nawadniać w pełni
automatycznie o każdej wybranej
porze dnia. W celu nawadniania
można podłączać zraszacz, tryskacz lub system nawadniania
kroplowego.
Komputer nawadniający w pełni
automatycznie przejmuje nawadnianie zgodnie z zaprogramowanym czasem rozpoczęcia i przez
zaprogramowany czas trwania.
Przy programowaniu należy
uwzględnić pory roku i dnia.
60 PL
Page 61

Wczesnym rankiem lub późnym
wieczorem parowanie i tym samym
zużycie wody jest najmniejsze.
Uruchomienie
produktu
1. Włożyć baterie jak opisano
w rozdziale „Zakładanie /
Wymiana baterii“.
2. Podłączyć komputer nawadniający do kranu (patrz rys. D).
Ustawianie
aktualnego czasu
godzinowego i
dnia tygodnia
1. Przytrzymać wciśnięty 3
przez ok. 2 sekundy (patrz
rys. 1) (nie jest wymagane,
jeśli tylko włoży się baterię).
Na ekranie w sekcji „Czas“
miga wskaźnik godzinowy.
2. Ustawić czas w godzinach
pokrętłem
potwierdzić przyciskiem
(patrz rys. 2).
5
(np. godz. 9) i
3
Na ekranie w sekcji „Czas“
miga wskaźnik minutowy.
3. Ustawić czas w minutach po-
5
krętłem
potwierdzić przyciskiem
(patrz rys. 3).
Na ekranie w sekcji kursor
miga „dzień tygodnia“.
4. Ustawić pokrętłem
tygodnia i potwierdzić przyciskiem
Wskazówka: Jeśli podano niewłaściwe dane, zawsze można
nacisnąć przycisk
WYŁĄCZ)
poprzedniego kroku.
(np. 30 minut) i
5
dzień
3 (patrz rys. 4).
(WŁĄCZ /
7
, aby powrócić do
3
Programowanie
automatycznego
nawadniania
1. Przytrzymać wciśnięty przycisk SET
kundy (patrz rys. 5).
Na ekranie w sekcji „Prog“
miga wskaźnik numer pro-
gramu.
4
przez ok. 2 se-
PL 61
Page 62

2. Ustawić numer programu
pokrętłem (np. Prog 3) i potwierdzić przyciskiem SET
4
(patrz rys. 6).
Na ekranie w sekcji „Start“
miga wskaźnik godzi-
nowy.
3. Ustawić godziny rozpoczę-
cia czasu nawadniania po-
5
krętłem
(np. godz. 6) i
potwierdzić przyciskiem SET
4
(patrz rys. 7).
Na ekranie w sekcji „Start“
miga wskaźnik minutowy.
4. Ustawić minuty rozpoczę-
cia czasu nawadniania po-
5
krętłem
(np. 20 minut) i
potwierdzić przyciskiem SET
4
(patrz rys. 8).
Na ekranie w sekcji „Czas
działania“ miga wskaźnik godzinowy.
5. Ustawić godzinę rozpoczę-
cia czasu nawadniania i potwierdzić przyciskiem SET
4
(patrz rys. 9).
Na ekranie w sekcji „Czas
działania“ miga wskaźnik minutowy.
6. Ustawić minutę rozpoczę-
cia czasu nawadniania i potwierdzić przyciskiem SET
(patrz rys. 10).
Na ekranie miga kursor
sekcji „częstość nawad-
niania“.
Częstość nawadniania
można wybrać w następujący sposób:
Cykl nawadniania
(prawa kolumna ekranu),
patrz krok 7.
lub
Dni nawadniania
(lewa kolumna ekranu),
patrz krok 8.
7. Wybrać cykl nawadnia-
nia pokrętłem (np. 2) i potwierdzić przyciskiem SET
(patrz rys. 10).
Wskazówka: 24h / 2. / 3. /
4. / 5. / 6. / 7. oznacza: na-
wadnianie co 24
godziny / co 2 / 3 / 4 / 5 /
6 / 7 dni.
Przegląd tygodnia pokazy-
wany jest w lewej kolumnie.
Na ekranie miga wskaźnik
„Prog“.
4
4
62 PL
Page 63

8. Przekręcić pokrętło, aż kur-
sor zacznie migać w sekcji
„dni nawadniania“.
Wybrać poszczególne dni
nawadniania i potwierdzić
przyciskiem SET
4
(patrz
rys. 11).
Po wybraniu dni nawadnia-
nia w celu ostatecznego
potwierdzenia nacisnąć
przycisk
6.
Na ekranie miga wskaźnik
„Prog“.
9. Wybrać pokrętłem „Prog
WŁĄCZ“ i potwierdzić przyciskiem SET
4
(lub można
wybrać WYŁĄCZ, jeśli program nie ma być w tym momencie aktywowany).
Po ustawieniu pierwszego
programu system wraca teraz
do kroku 2, dlatego można
ustawić programy nr. 2‒6.
Jeśli ustawienie programów
jest gotowe, można nacisnąć
przycisk
ŁĄCZ)
(WŁĄCZ /WY-
7
, aby opuścić tryb
programowania i wrócić do
zwykłego tryby roboczego.
Wskazówka: Jeśli podano niewłaściwe dane, zawsze można
nacisnąć przycisk
WYŁĄCZ)
(WŁĄCZ /
7
, aby powrócić do
poprzedniego kroku.
Ręczny tryb
nawadniania
Zawór można zawsze otworzyć lub zamknąć ręcznie.
Sterowany programem otwarty
zawór można zamknąć przed
czasem bez zmiany danych programu (rozpoczęcie, czas działania i częstość nawadniania).
1. Przytrzymać wciśnięty przycisk
6 przez ok. 2 sekundy, aby ręcznie otworzyć
zawór (lub nacisnąć przycisk
6, aby otworzyć lub za-
mknąć zawór.).
2. Nacisnąć przycisk SET
jeśli ma być ustawiony określony czas trwania.
Na ekranie w sekcji „Czas
działania“ miga wskaźnik godzinowy.
4
,
PL 63
Page 64

3. Ustawić godzinę rozpoczę-
cia czasu nawadniania i potwierdzić przyciskiem SET
4
Na ekranie w sekcji „Czas
działania“ miga wskaźnik minutowy.
4. Ustawić minutę rozpoczęcia
czasu nawadniania i potwierdzić przyciskiem SET
4
.
Wskazówka: Jeśli chce się
opuścić tryb ustawiania ręcznego
nawadniania, można nacisnąć
przycisk
7
(WŁĄCZ / WYŁĄCZ)
, aby opuścić tryb programowania i wrócić do zwykłego tryby
roboczego.
Wskazówka: Jeśli zawór został
otworzony ręcznie i zaprogramowany start czasu nawadniania
pokrywa się z czasem ręcznego
otwierania, zaprogramowany
czas startu zostanie wstrzymany.
Przykład:
Zawór zostanie otwarty ręcznie o godz. 9:00, czas otwie-
rania wynosi 30 minut. W tym
przypadku program z czasem
startu między godz. 9:00 i 9:30
nie zostanie zrealizowany.
.
Odczyt / Zmiana
programów
nawadniania
1. W normalnym trybie roboczym
nacisnąć przycisk SET
odczytać dane programu.
Użyć pokrętła, aby w celu
odczytu danych przełączać
między programami 1‒6.
2. Po wybraniu programu w
kroku 1 nacisnąć przycisk
4
SET
, aby zmienić dane
programu. Po zmianie danych
programu system ponownie
przechodzi do normalnego
trybu roboczego.
Resetowanie
Przytrzymać wciśnięty jednocześnie przycisk SET
6
cisk
przez ok. 3 sekundy.
4
i przy-
4
, aby
64 PL
Page 65

Ekran LCD wskazuje wszystkie
symbole przez ok. 1 sekundę i
system uruchamia się ponownie.
Wszystkie zaprogramowane
dane są usuwane i zostają przywrócone ustawienia fabryczne.
Wskaźnik stanu
baterii
: Bateria jest pełna.
: Bateria jest w połowie
pełna.
Przełączanie między
wskaźnikiem 12- /
24-godzinowym
Na wskaźniku czasu można przełączać między trybem 12- i 24-godzinnym. W normalnym trybie
roboczym nacisnąć przycisk
aby zmienić wskaźnik czasu.
3,
Włączanie /
Wyłączanie ekranu
Aby wyłączyć ekran LCD,
przytrzymać wciśnięty przez
ok. 2 sekundy przycisk
WŁĄCZ/ WYŁĄCZ
Aby włączyć ekran LCD,
przytrzymać wciśnięty przez
ok. 3 sekundy przycisk
WŁĄCZ/ WYŁĄCZ
7
.
7
.
: Bateria jest słaba.
: Bateria jest bardzo słaba,
w tym stanie nie można
obsługiwać zaworu! Użytkownik powinien wymienić
baterie tak szybko, jak to
możliwe.
Wskazówka: Przy wymianie
baterii dane programów są zapisywane na ok. 2 minuty.
Jeśli wymiana baterii trwa dłużej,
wszystkie dane programów zostaną utracone.
PL 65
Page 66

Usuwanie usterek
Problem Możliwa
przyczyna
Brak wyświetlania na
ekranie
Ręczne nawadnianie
przy pomocy
przycisku
(Man) nie
jest możliwe.
Nie jest uruchamiany
program
nawadniania
(brak nawadniania).
Bateria jest źle
włożona.
Słaba bateria Włożyć nową baterię.
Temperatura na
ekranie jest wyższa niż 60 °C .
Bateria jest słaba
(tylko jeden
pasek).
Ręczny czas nawadniania jest
ustawiony na
0:00.
Kran jest zakręcony
Program nawadniania nie został
podany w całości.
Program dezaktywowany (Prog
WYŁ.).
Rozwiązanie
Sprawdzić czy zgadzają się
oznaczenia biegunowości.
Wskaźnik pojawia się przy
spadku temperatury.
Włożyć nową baterię.
Ręczny czas nawadniania ustawić
na wyższą wartość niż 0:00.
Odkręcić kran.
Przeczytać dane programu nawadniania i zmienić je w razie
potrzeby.
Aktywować program (Prog WŁ.).
66 PL
Page 67

Problem Możliwa
przyczyna
Zawór został
wcześniej ręcznie
otworzony.
Kran jest zakręcony.
Nakładanie się
na siebie programów (1 czas nawadniania ma
priorytet).
Słaba bateria
(1 migający
pasek).
Rozwiązanie
Unikać możliwego nakładania
się na siebie programów.
Odkręcić kran.
Wprowadzić nowy program nawadniania bez nakładania się.
Należy włożyć nową baterię
(alkaliczną).
Czyszczenie i
pielęgnacja
UWAGA! Możliwe uszkodze-
nie produktu. Wnikająca wilgoć
może prowadzić do uszkodzenia
produktu. Upewnić się, że przy
czyszczeniu do komory baterii
nie wniknęła wilgoć, aby uniknąć
nieodwracalnego uszkodzenia
produktu.
10
Obudowę czyścić jedynie
lekko wilgotną szmatką i łagodnym środkiem do czyszczenia.
Do czyszczenia obudowy w
żadnym razie nie należy używać benzyny, alkoholu ani innych agresywnych środków
czyszczących.
PL 67
Page 68

Czyszczenie sita
Sito 11 należy regularnie
sprawdzać i w razie koniecz-
ności oczyścić.
Zakręcić kran.
Uruchomić bieg jałowy pro-
duktu w trybie ręcznym.
Odkręcić nakrętkę złączkową
1
od gwintu kranu lub ada-
ptera.
Wyjąć sito w kształcie sita z
dopływu wody w nakrętce
złączkowej.
Oczyścić sito.
Ponownie nałożyć sito.
Nakręcić nakrętkę złączkową
na gwint kranu lub adaptera.
Odkręcić kran.
Przechowywanie
Zakręcić kran.
Odłączyć wąż od przyłącza
kranowego
Uruchomić bieg jałowy pro-
duktu.
Odkręcić nakrętkę złączkową
1
.
68 PL
11
.
Wyjąć baterie.
Produkt przechowywać w
suchym pomieszczeniu bez
mrozu.
Utylizacja
Opakowanie wykonane jest z
materiałów przyjaznych dla środowiska, które można przekazać
do utylizacji w lokalnym punkcie
przetwarzania surowców wtórnych.
Przy segregowaniu
b
odpadów prosimy
a
zwrócić uwagę na
oznakowanie materiałów opakowaniowych, oznaczone są one
skrótami (a) i numerami (b) o następującym znaczeniu: 1-7: Tworzywa sztuczne /20-22: Papier i
tektura/80-98: Materiały kompozytowe.
Produkt i materiał opa-
kowania nadają się do
ponownego przetworzenia, należy je zutylizować
osobno w celu lepszego
Page 69

przetworzenia odpadów. Logo Triman jest ważne tylko dla Francji.
Informacji na temat
możliwości utylizacji
wyeksploatowanego
produktu udziela urząd gminy
lub miasta.
Z uwagi na ochronę
środowiska nie wyrzu-
cać urządzenia po zakończeniu eksploatacji do odpadów
domowych, lecz prawidłowo zutylizować. Informacji o punktach
zbiorczych i ich godzinach otwarcia udziela odpowiedni urząd.
Szkody ekologiczne
w wyniku niewłaściwej utylizacji
baterii!
Baterii nie należy wyrzucać razem
z odpadami domowymi. Mogą
one zawierać szkodliwe metale
ciężkie i należy je traktować jak
odpady specjalne. Symbole chemiczne metali ciężkich są następujące: Cd = kadm, Hg = rtęć,
Pb = ołów. Dlatego też zużyte
baterie należy przekazywać do
komunalnych punktów gromadzenia odpadów.
Uszkodzone lub zużyte baterie
muszą być poddane recyklingowi
zgodnie z dyrektywą 2006/66/
WE i jej zmianami. Oddać baterie
i/lub produkt w dostępnych punktach zbiorczych.
Gwarancja
Produkt wyprodukowano według
wysokich standardów jakości i
poddano skrupulatnej kontroli
przed wysyłką. W przypadku
wad produktu nabywcy przysługują ustawowe prawa. Gwarancja nie ogranicza ustawowych
praw nabywcy produktu.
PL 69
Page 70

Produkt objęte jest 3 gwarancją,
licząc od daty zakupu. Gwarancja wygasa w razie zawinionego
przez użytkownika uszkodzenia
produktu, niewłaściwego użycia
lub konserwacji.
W przypadku wystąpienia w ciągu
3 lat od daty zakupu wad materiałowych lub fabrycznych, dokonujemy – według własnej oceny
– bezpłatnej naprawy lub wymiany
produktu.
Świadczenie gwarancyjne obejmuje
wady materiałowe i fabryczne.
Gwarancja nie obejmuje części
produktu ulegających normalnemu zużyciu, uznawanych za
części zużywalne (np. baterie)
oraz uszkodzeń części łamliwych,
np. przełączników, akumulatorów
lub wykonanych ze szkła.
70 PL
Page 71

Šioje instrukcijoje naudojamų
piktogramų reikšmės ........................................... Puslapis 73
Įžanga ................................................................................ Puslapis 73
Naudojimo paskirtis ............................................................ Puslapis 73
Tiekiamas rinkinys ...............................................................Puslapis 74
Techniniai duomenys ..........................................................Puslapis 74
Dalių aprašas ...................................................................... Puslapis 75
Ekrano rodmenys ................................................................ Puslapis 75
Sauga ................................................................................. Puslapis 76
Saugos nurodymai .............................................................. Puslapis 76
Baterijų / aku muliatorių naudojimo saugos nurodymai ......Puslapis 78
Baterijų įdėjimas / keitimas ..............................Puslapis 81
Naudojimo pradžia ................................................ Puslapis 81
Naudojimas ...................................................................Puslapis 82
Produkto naudojimo pradžia..............................................Puslapis 82
Dabartinio laiko ir savaitės dienos nustatymas ................. Puslapis 83
Automatinio laistymo programavimas ............................... Puslapis 83
Rankinio laistymo režimas .................................................. Puslapis 85
Duomenų peržiūrėjimas / laistymo programų keitimas ..... Puslapis 86
Pradinės būsenos atkūrimas ............................................... Puslapis 86
12 / 24 valandų rodmens įjungimas..................................Puslapis 86
Ekrano įjungimas / išjungimas ............................................Puslapis 87
Baterijos būsenos rodmuo .................................................. Puslapis 87
LT 71
Page 72

Trikčių aptikimas ir šalinimas ........................Puslapis 87
Valymas ir priežiūra .............................................. Puslapis 89
Sietelio valymas ..................................................................Puslapis 89
Nenaudojamo prietaiso laikymas.............Puslapis 89
Išmetimas ........................................................................ Puslapis 89
Garantija ......................................................................... Puslapis 90
72 LT
Page 73

Šioje instrukcijoje naudojamų piktogramų reikšmės
Voltai (nuolatinė
srovė)
Laikykitės įspėjamųjų ir saugos nurodymų!
Pavojus kūdikių bei
vaikų sveikatai ir
gyvybei!
Laistymo kompiuteris
Įžanga
Sveikiname Jus įsigijus naują gaminį. Tai aukštos kokybės gaminys.
Naudojimo instrukcija yra neatskiriama šio gaminio dalis. Joje yra
svarbių nurodymų dėl saugos, naudojimo ir grąžinamojo perdirbimo.
Prieš naudodami šį gaminį, gerai
susipažinkite su visais jo naudojimo ir saugos nurodymais. Naudokite gaminį tik pagal aprašymą
Atsargiai! Sprogimo
pavojus!
Šis produktas atitinka
šios kategorijos produktams taikomas
Europos direktyvas
Pakuotę ir nebetinkamą
naudoti prietaisą išmes-
b
a
kite atsižvelgdami į
aplinkos apsaugos reikalavimus!
ir nurodytą paskirtį. Perduodami
šį gaminį kitiems asmenims, kartu
perduokite visus jo dokumentus.
Naudojimo
paskirtis
Šis produktas skirtas purkštuvams
ir purškimo bei drėkinimo įrenginiams valdyti. Juo suprogramuotu
laiku ir suprogramuotai trukmei
automatiškai įjungiamas drėkinimas
lauke. Produkte galima įrašyti daugiausia 6 automatinio drėkinimo
LT 73
Page 74

programas. Produktą galima naudoti tik lauke. Šio produkto naudojimas kitiems tikslams ar jo pakeitimai
la
ikomi naudojimu ne pagal paskirtį.
Gamintojas neprisiima atsakomybės už žalą, atsiradusią naudojant
šį produktą ne pagal paskirtį. Šis
produktas nėra skirtas komerciniams
tikslams.
Tiekiamas rinkinys
1 drėkinimo kompiuteris
1 čiaupo jungtis
1 adapteris 33,3 mm – 26,5 mm
(G1” – G¾”)
1 sietelis
2 baterijos 1,5 V, AA tipo
1 naudojimo instrukcija
Techniniai duomenys
Modelis nr.: HG04678
Darbinis slėgis: 34,5–827 kPa
(0,34–8,27 bar)
Maks. vandens
temperatūra: 40 °C
Maitinimo
įtampa: 2 x 1,5 V
Srauto sparta
(kai vandens
slėgis apie
3 bar): apie 28 l / min.
Užprogramuojama
drėkinimo
trukmė: maks. 09:59 h
Rankinio
drėkinimo
trukmė: maks. 09:59 h
Vandens
jungtis: G ¾” (26,5 mm)
Apsaugos
laipsnis: IP X4 (apsaugo-
(nuolatinės srovės)
AA tipo baterijos
arba G 1”
(33,3 mm)
tas nuo vandens
purslų)
74 LT
Page 75

Dalių aprašas
(A pav.)
1
Jungiamoji veržlė ‒ 33,3 mm
(G 1“)
2
Ekranas
3
Mygtukas
4
Mygtukas SET
5
Sukamoji rankenėlė
6
Mygtukas
7
Mygtukas (ĮJUNGI-
MAS / IŠJUNGIMAS)
8
Baterijų skyrelis
9
Sietelis
10
Adapteris 33,3 mm –
26,5 mm (G1” – G¾”)
11
Čiaupo jungtis ‒ žarnai ir
laistymo kompiuteriui prijungti
Ekrano rodmenys
(B pav.)
Rodmuo Reikšmė
12
13
14
15
16
17
18
SET
Dabartinis laikas
Laistymo ciklas:
24h / 2nd / 3rd /
4th / 5th / 6th / 7 th
reiškia: kas
24 valandas/
2 dienas/ 3 dienas /
4 dienas/ 5 dienas/
6 dienas/ 7 dienas
Dabartinė laistymo
programa (1‒6)
Programos
įjungimo laikas
Veikimo trukmė –
laistymo trukmė
Savaitės diena:
dabartinė savaitės
diena arba užprogramuotos laistymo
dienos
Baterijos rodmuo
Laiko nustatymo
mygtukas
Programavimo
mygtukas
LT 75
Page 76

Rodmuo Reikšmė
Laistymo režimo
keitimo mygtukas
Produkto įjungimo /
išjungimo mygtukas
(ON/OFF)
Nusilpo baterija
Sauga
Saugos
nurodymai
turtui padarytos žalos,
atsiradusios netinkamai
naudojant šį produktą
ar nesilaikant saugos
nurodymų!
IŠSAUGOKITE VISĄ
SAUGOS INFORMACIJĄ IR NURODYMUS – JŲ GALI
PRIREIKTI ATEITYJE!
Garantinės pretenzijos
dėl žalos, patirtos nesilaikant šios naudojimo
instrukcijos, nepriimamos!
Neprisiimame jokios atsakomybės dėl netiesioginės žalos!
Neprisiimame atsakomybės dėl žmonėms ar
76 LT
PAVOJUS KŪDIKIŲ BEI VAIKŲ
GYVYBEI IR NELAIMINGO
ATSITIKIMO PAVOJUS! Niekada
Page 77

nepalikite neprižiūrimų vaikų su pakuotės medžiagomis.
Kyla pavojus uždusti.
Produktą laikykite
vaikams nepasiekiamoje vietoje. Šis produktas nėra žaislas.
Vyresni nei 8 metų
vaikai ir asmenys,
kurių fiziniai, jutiminiai ar protiniai gebėjimai silpnesni ir
kurie turi mažiau patirties ir žinių, šį produktą gali naudoti tik
tuomet, jei yra prižiūrimi arba buvo išmokyti saugiai naudoti
produktą ir supranta
jo keliamą pavojų.
Neleiskite vaikams
žaisti su šiuo produktu.
Neprižiūrimiems vaikams draudžiama
valyti šį produktą ir
atlikti naudotojo
atliekamus techninės
priežiūros darbus.
Garantiniu laikotar-
piu produktą gali
taisyti tik gamintojo
įgaliota klientų aptarnavimo tarnyba,
nes kitaip paskesnių
gedimų atveju nebebus taikoma garantija.
Sugedusios dalys
turi būti keičiamos
tik originaliomis atsarginėmis dalimis.
LT 77
Page 78

Tik naudojant tokias
dalis vykdomi visi
saugos reikalavimai.
Saugokite produktą
nuo tiesioginių saulės spindulių.
Visuomet užsukite
vandens čiaupą, kai
produkto nebenaudojate.
Nenaudokite pro-
dukto arti atviros
liepsnos.
Reguliariai tikrinkite,
ar produktas ir jo
įvadai yra sandarūs
ir tinkamai veikia.
ELEKTROS SMŪ-
GIO PAVOJUS
GYVYBEI! Nenu-
kreipkite vandens
srovės į elektrinius
įrenginius!
Nenukreipkite van-
dens srovės į žmones ar gyvūnus!
Produktas netinka
geriamajam vandeniui tiekti.
Baterijų / aku
muliatorių
naudojimo
saugos
nurodymai
PAVOJUS GYVY-
BEI! Baterijas / aku-
muliatorius laikykite
vaikams nepasiekiamoje vietoje. Prarijus
78 LT
Page 79

nedelsdami kreipkitės
į gydytoją!
SPROGIMO
PAVOJUS!
Niekada nemėginkite
įkrauti neįkraunamųjų
baterijų. Nejunkite
baterijų / akumuliatorių trumpuoju jungimu
ir (ar) neardykite jų.
Taip elgiantis, baterijos / akumuliatoriai
gali perkaisti, sprogti
arba sukelti gaisrą.
Niekada nemeskite
baterijų / akumuliatorių į ugnį ar vandenį.
Pasirūpinkite, kad
baterijos / akumuliatoriai nebūtų veikiami mechaniškai.
Baterijų / akumuliatorių skysčio
ištekėjimo pavojus
Venkite kraštutinių
sąlygų ir temperatūrų,
galinčių paveikti baterijas / akumuliatorius, pvz., nedėkite
jų ant radiatorių ir
saugokite nuo tiesioginių saulės spindulių.
Venkite sąlyčio su
oda, akimis ir gleivine! Ant kūno patekus baterijų rūgšties,
atitinkamas vietas
tuoj pat nuplaukite
švariu vandeniu ir
nedelsdami kreipkitės į gydytoją!
LT 79
Page 80

MŪVĖKITE
APSAUGI-
NES PIRŠTINES!
Prisilietus prie ištekėjusių arba pažeistų
baterijų / akumuliatorių, cheminės medžiagos gali nudeginti
odą. Tokiu atveju būtinai mūvėkite tinkamas apsaugines
pirštines.
Pastebėję ištekėjusį
baterijų skystį, nedelsdami išimkite jas iš
produkto, kad produktas nesugestų.
Naudokite tik to pa-
ties tipo baterijas /
akumuliatorius. Nenaudokite vienu metu
senų ir naujų baterijų / akumuliatorių!
Išimkite baterijas /
akumuliatorius, jei
produkto ilgesnį
laiką nenaudosite.
Produkto sugadinimo pavojus
Naudokite tik nuro-
dyto tipo baterijas /
akumuliatorius!
Dėdami visada įdė-
kite tinkamu poliumi!
Poliai nurodyti baterijų skyrelyje!
Jei reikia, prieš įdė-
dami bateriją nuvalykite baterijos ir
baterijos skyrelio
kontaktus!
80 LT
Page 81

Nedelsdami išimkite
iš produkto išsekusias baterijas / akumuliatorius.
Baterijų įdėjimas /
keitimas (žr. C pav.)
Atsukite baterijų skyrelio 8
varžtą ir nuimkite dangtelį.
Įdėkite 2 AA dydžio baterijas
(LR06 / „Mignon“) į baterijų
8
skyrelį
į poliškumą.
Nurodymas: ekrane apie
vieną sekunde matomi visi
skystųjų kristalų ekrano simboliai, o po to įsijungia meniu
„Dabartinio laiko ir savaitės
dienos nustatymas“.
Uždarykite dangtelį ir prisukite
varžtą.
. Atkreipkite dėmesį
Naudojimo pradžia
Kad produktas veiktų saugiai ir be
trikčių, jo įrengimo vieta turi atitikti
šiuos reikalavimus:
Pratekančio vandens tempe-
ratūra turi būti ne aukštesnė
nei 40 °C.
Žemiausia veikimo tempera-
tūra yra +5 °C.
Aukščiausia veikimo tempera-
tūra yra +50 °C.
Naudokite tik švarų gėlą
vandenį.
Produktą prijunkite tik vertika-
liai, žarnos jungtį
į apačią, kad vanduo neprasiskverbtų į baterijų skyrelį
DĖMESIO! Drėkinimo kom-
piuterį galima jungti tik prie
geriamojo vandens tiekimo
vietos su saugos įtaisu, kuris
pagal EN 1717 standartą
yra ne žemesnio nei HD tipo
(atbulinis vožtuvas su vėdinimo vožtuvu).
Nurodymas: tinkamų
adapterių galima įsigyti specializuotose prekybos vietose.
11
nukreipę
8
.
LT 81
Page 82

Patikrinkite esamos vandens
jungties tipą. Produktas yra su
jungiamąja veržle
1
, skirta
prijungti prie vandens čiaupų
su 33,3 mm sriegiu (G 1”).
Vandens čiaupams su
26,5 mm sriegiu (G ¾”) naudokite kartu tiekiamą adap-
10
terį
.
Sietelį 9 įdėkite į jungiamąją
1
veržlę
, kaip pavaizduota
A paveikslėlyje.
Jei sriegis 26,5 mm (G ¾”):
ant vandens čiaupo užsukite
adapterį
10
. Nenaudokite tam
jokių įrankių.
Jungiamąją veržlę 1 užsu-
kite ant vandens čiaupo arba
adapterio sriegio. Nenaudokite tam jokių įrankių.
Čiaupo jungtį 11 užsukite
ant žarnos jungties. Tada prie
čiaupo jungties
11
galite pri-
jungti žarną.
Atsukite vandens čiaupą.
DĖMESIO! Jei naudojant
adapterį
10
atsirastų nesandarumų / pratekėjimų, vandens
čiaupo sriegį reikia apvynioti
sandarinamąja juosta.
Suprogramuokite drėkinimą,
kaip aprašyta skyriuje „Naudojimas“.
Naudojimas
Drėkinimo kompiuteriu galima
įjungti automatinį drėkinimą bet
kuriuo norimu paros metu. Drėkinti galima prijungus laistymo
įrenginį, purškimo sistemos įrenginį
arba lašinio drėkinimo sistemą.
Drėkinimo kompiuteris automatiškai įjungia drėkinimą atitinkamai
suprogramuotu pradžios laiku ir
suprogramuotai trukmei. Programuodami atsižvelkite į metų ir paros laiką. Anksti ryte arba vėlai
vakare garavimas, o kartu ir vandens sąnaudos, yra mažiausi.
Produkto
naudojimo pradžia
1. Įdėkite baterijas, kaip aprašyta
skyriuje „Baterijų įdėjimas /
keitimas“.
82 LT
Page 83

2. Laistymo kompiuterį prijunkite
prie vandens čiaupo (žr. D pav.).
Dabartinio laiko ir
savaitės dienos
nustatymas
1. Apie 2 sekundes spauskite
3
(žr.1 pav.) (nebūtina, jei
tik įdedate baterijas).
Ekrano lauke „Laikas“ mirksi
valandų rodmuo.
2. Sukamuoju reguliatoriumi
nustatykite laiko valandas
(pvz., 9 val.) ir patvirtinkite
mygtuku 3 (žr. 2 pav.).
Ekrano lauke „Laikas“
mirksi minučių rodmuo.
3. Sukamuoju reguliatoriumi
nustatykite laiko minutes (pvz.
30 minučių) ir patvirtinkite
mygtuku 3 (žr. 3 pav.).
Ekrano lauke „Savaitės
diena“ mirksi žymeklis.
4. Sukamuoju reguliatoriumi
nustatykite savaitės dieną ir
patvirtinkite
mygtuku 3
(žr. 4 pav.).
5
5
5
Nurodymas: jei įvedėte neteisingus duomenis, į ankstesnį žingsnį
bet kada galite grįžti paspaudę
(ĮJUNGIMO / IŠJUNGIMO)
mygtuką
7
.
Automatinio
laistymo
programavimas
1. Apie 2 sekundes spauskite
SET mygtuką
Ekrano lauke „Prog“ mirksi
programos numerio rodmuo.
2. Sukamuoju reguliatoriumi
nustatykite programos
numerį (pvz., Prog 3) ir
patvirtinkite paspausdami
SET mygtuką
Ekrano lauke „Įjungimas“
mirksi valandų rodmuo.
3. Sukamuoju reguliatoriumi
nustatykite laistymo pradžios
valandas (pvz., 6 val.) ir
patvirtinkite SET mygtuku
(žr. 7 pav.).
4
(žr. 5 pav.).
4
(žr. 6 pav.).
5
4
LT 83
Page 84

Ekrano lauke „Įjungimas“
mirksi minučių rodmuo.
4. Sukamuoju reguliatoriumi
5
nustatykite laistymo pradžios
minutes (pvz., 20 minučių)
ir patvirtinkite SET mygtuku
4
(žr. 8 pav.).
Ekrano lauke „Veikimo
trukmė“ mirksi valandų
rodmuo.
5. Nustatykite laistymo trukmės
valandas ir patvirtinkite SET
mygtuku
4
(žr. 9 pav.).
Ekrano lauke „Veikimo
trukmė“ mirksi minučių
rodmuo.
6. Nustatykite laistymo trukmės
minutes ir patvirtinkite SET
mygtuku
4
(žr. 10 pav.).
Ekrane mirksi lauko „Lais-
tymo dažnumas“ žymeklis.
Laistymo dažnumą galima
pasirinkti kaip aprašyta
toliau:
Laistymo ciklas (dešinioji
ekrano skiltis), žr. 7 žingsnį.
arba
Laistymo dienos (kairioji
ekrano skiltis), žr. 8 žingsnį.
7. Sukamuoju reguliatoriumi pa-
sirinkite laistymo ciklą
(pvz., 2) ir patvirtinkite paspausdami SET mygtuką
(žr. 10 pav.).
Nurodymas:
24h / 2 / 3 / 4 / 5 / 6 / 7 reiškia: laistymas kas
24 valandas / kas 2 / 3 /
4 / 5 / 6 / 7 dienas.
Savaitės dienos vaizduojamos
kairiojoje skiltyje.
Ekrane mirksi rodmuo „Prog“.
8. Sukite sukamąjį reguliatorių,
kol žymeklis mirksės lauke
„Laistymo dienos“.
Pasirinkite atskiras lais-
tymo dienas ir patvirtinkite
paspausdami SET mygtuką
(žr. 11 pav.).
Pasirinkę laistymo dienas,
parinktį galutinai patvirtinkite
paspausdami
mygtuką 6.
Ekrane mirksi rodmuo „Prog“.
9. Sukamuoju reguliatoriumi pa-
sirinkite „Prog ĮJN.“ ir patvirtinkite paspausdami SET
mygtuką
4
(arba, jei
4
4
84 LT
Page 85

programos šiuo momentu
įjungti nenorite, galite pasirinkti IŠJ.).
Nustačius pirmąją programą,
sistema grįžta į 2 žingsnį, todėl
galite nustatyti 2‒6 programas.
Galutinai nustatę programas,
galite paspausti
(ĮJUNGIMO / IŠJUNGIMO)
mygtuką
7
, išjungti programavimo režimą ir grįžti į įprasto
veikimo režimą.
Nurodymas: jei įvedėte neteisingus duomenis, į ankstesnį žingsnį
bet kada galite grįžti paspaudę
(ĮJUNGIMO / IŠJUNGIMO)
mygtuką
7
.
Rankinio laistymo
režimas
Vožtuvą galima bet kada atidaryti
arba uždaryti rankomis.
Programos atidarytą vožtuvą galima uždaryti anksčiau nepakeičiant
programos duomenų (pradžios,
kimo trukmės ir laistymo dažnumo).
vei-
1. Vožtuvą rankomis atidarysite
apie 2 sekundes spausdami
mygtuką 6 (arba vožtuvą
atidarysite ar uždarysite paspaudę mygtuką
6).
2. Jei norite nustatyti konkrečią
trukmę, paspauskite SET myg-
4
tuką
.
Ekrano lauke „Veikimo
trukmė“ mirksi valandų
rodmuo.
3. Nustatykite laistymo trukmės
valandas ir patvirtinkite SET
mygtuku
4
.
Ekrano lauke „Veikimo
trukmė“ mirksi minučių
rodmuo.
4. Nustatykite laistymo trukmės
minutes ir patvirtinkite SET
mygtuku
4
.
Nurodymas: norėdami išjungti
rankinio laistymo nustatymo režimą,
galite paspausti
IŠJUNGIMO) mygtuką
(ĮJUNGIMO /
7
programavimo režimą ir grįžti į
įprasto veikimo režimą.
, išjungti
LT 85
Page 86

Nurodymas: jei vožtuvas buvo
atidarytas rankomis ir užprogramuotas laistymo įjungimo laikas
sutampa su rankinio atidarymo
laiku, į užprogramuotą įjungimo
laiką neatsižvelgiama.
Pavyzdys:
Vožtuvas 9:00 val. atidaromas
rankomis, atidarymo trukmė –
30 minučių. Šiuo atveju programa,
kuri turi būti įjungta tarp 9:00
val. ir 9:30 val., nebus
vykdoma.
Duomenų
peržiūrėjimas /
laistymo programų
keitimas
2.
Pasirinkę programą, 1 žingsnyje
paspauskite SET mygtuką
ir pakeiskite programos duomenis. Pakeitus programos
duomenis, sistema vėl grįžta
į įprasto veikimo režimą.
Pradinės būsenos
atkūrimas
Vienu metu apie 3 sekundes
spauskite SET mygtuką
mygtuką 6. Skystųjų kristalų
ekrane apie 1 sekundę matomi
visi simboliai, ir sistema paleidžiama iš naujo. Visi užprogramuoti duomenys pašalinami ir
atkuriamos gamyklinės nuostatos.
4
ir
4
1. Norėdami peržiūrėti programos duomenis, paspauskite
SET mygtuką
kimo režimu.
1‒ 6 programų duomenis
peržiūrėkite sukdami sukamąjį reguliatorių.
86 LT
4
įprasto vei-
12 / 24 valandų
rodmens įjungimas
Laiko rodmenyje galite pasirinkti
12 arba 24 valandų režimą. Laiko
rodmenį pakeisite paspausdami
mygtuką
3
įprasto veikimo režimu.
Page 87

Ekrano įjungimas /
išjungimas
: baterija maždaug pusiau
pilna.
Skystųjų kristalų ekraną iš-
jungsite apie 2 sekundes
spausdami
IŠJUNGIMO) mygtuką
Skystųjų kristalų ekraną įjung-
site apie 3 sekundes spausdami
IŠJUNGIMO) mygtuką
(ĮJUNGIMO /
(ĮJUNGIMO /
7
.
7
.
Baterijos būsenos
: baterija nusilpo.
: baterija visiškai nusilpo ir
esant šiai būsenai vožtuvo
valdyti negalima! Naudotojas turėtų kuo greičiau
pakeisti baterijas.
Nurodymas: keičiant baterijas,
programų duomenys išsaugomi
apie 2 minutes.
rodmuo
Jei baterijos keičiamos ilgiau, visi
: baterija pilna.
programų duomenys prarandami.
Trikčių aptikimas ir šalinimas
Triktis Galima priežastis Šalinimas
Ekrane
nėra rodmenų
Baterija neteisingai
įdėta.
Baterija išseko Įdėkite naują bateriją.
Temperatūra ekrane
aukštesnė nei 60 ° C .
Patikrinkite, ar sutampa pažymėti
poliai.
Rodmuo matomas temperatūra
krentant.
LT 87
Page 88

Triktis Galima priežastis Šalinimas
Neįmanoma
įjungti rankinio laistymo
(rankinio
laistymo)
mygtuku.
Laistymo
programa
nevykdoma (nelaistoma).
Baterija nusilpo (liko
vos viena juostelė).
Nustatyta rankinio
laistymo 0:00 trukmė.
Vandens čiaupas
užsuktas
Įvesti ne visi laistymo
programos duomenys.
Programos išjungtos
(Prog IŠJ.).
Vožtuvas prieš tai
buvo atidarytas rankomis.
Vandens čiaupas užsuktas.
Programų laikas sutampa (pirmumą turi
1 laistymo įjungimo
laikas).
Nusilpo baterija (1
mirksinti juostelė).
Įdėkite naują bateriją.
Nustatykite ilgesnę nei 0:00
rankinio laistymo trukmę.
Atsukite
vandens čiaupą
.
Peržiūrėkite laistymo programos
duomenis ir prireikus juos pakeiskite.
Įjunkite programą (Prog ĮJN.).
Stenkitės, kad programų laikas
nesutaptų.
Atsukite vandens čiaupą.
Įveskite naują laistymo programą, kurios laikas nesutaptų.
Įdėkite naują (šarminę) bateriją.
88 LT
Page 89

Valymas ir priežiūra
DĖMESIO! Tai gali sugadinti
produktą. Įsiskverbusi drėgmė gali
sugadinti produktą. Įsitikinkite, kad
valant drėgmė neįsiskverbs į baterijų skyrelį
gali nepataisomai sugesti.
Korpusą valykite tik šiek tiek
Jokiu būdu nevalykite korpuso
10
, antraip produktas
sudrėkinta šluoste ir švelniu
plovikliu.
benzinu, alkoholiu ar kitokiomis agresyviomis priemonėmis.
Sietelio valymas
Sietelį 11 reikia reguliariai
tikrinti ir prireikus išvalyti.
Užsukite vandens čiaupą.
Ištuštinkite produktą įjungę
rankinį drėkinimą.
Jungiamąją veržlę 1 nusu-
kite nuo vandens čiaupo arba
adapterio sriegio.
Išimkite kūgio formos sietelį
iš vandens įleidimo vietos
jungiamojoje veržlėje.
Išvalykite sietelį.
Vėl įdėkite sietelį.
Jungiamąją veržlę užsukite
ant vandens čiaupo arba
adapterio sriegio.
Atsukite vandens čiaupą.
Nenaudojamo
prietaiso laikymas
Užsukite vandens čiaupą.
Atjunkite žarną nuo čiaupo
11
jungties
Ištuštinkite produktą.
Nusukite jungiamąją veržlę 1.
Išimkite baterijas.
Nenaudojamą produktą lai-
kykite sausoje ir nuo šalčio
apsaugotoje vietoje.
.
Išmetimas
Pakuotė pagaminta iš aplinkai nekenksmingų medžiagų, kurias galite išmesti įprastose grąžinamojo
perdirbimo vietose.
LT 89
Page 90

Rūšiuodami atliekas,
b
atkreipkite dėmesį į pa-
a
kuočių ženklinimą, kurį
sudaro santrumpos (a) ir skaičiai
(b), reiškiantys: 1–7: plastikai /
20–22: popierius ir kartonas /
80–98: kombinuotosios pakuotės.
Pažeistos arba nebetinkamos
naudoti baterijos turi būti atiduotos perdirbti pagal Direktyvos
2006/66/EB ir jos pataisų reikalavimus. Nugabenkite baterijas
ir(arba) produktą į nurodytas
surinkimo vietas.
Gaminys ir pakuotės
medžiagos yra perdir-
bamos, jas sutvarkyti
bus lengviau, jei išmesite atskirai.
„Triman“ logotipas galioja tik
Prancūzijai.
Daugiau informacijos
apie nebetinkamo nau-
doti gaminio išmetimą
sužinosite savo savivaldybės ar
miesto administracijoje.
Aplinkos apsaugos su-
metimais neišmeskite
nebetinkamo naudoti
gaminio kartu su buitinėmis atliekomis; pristatykite jį į nurodytus
surinkimo punktus. Informacijos
apie surinkimo punktus ir jų darbo
laiką suteiks vietos kompetentingos
institucijos.
90 LT
Netinkamai išmesdami baterijas darote žalą aplinkai!
Draudžiama išmesti baterijas
kartu su buitinėmis atliekomis.
Jose gali būti nuodingų sunkiųjų
metalų, todėl baterijos turi būti
tvarkomos kaip specialiosios atliekos. Šie cheminiai simboliai nurodo sunkiuosius metalus: Cd =
kadmis, Hg = gyvsidabris, Pb =
švinas. Todėl nebetinkamas naudoti baterijas nugabenkite į komunalinius surinkimo punktus.
Garantija
Šis gaminys buvo kruopščiai pagamintas laikantis griežtų kokybės
reikalavimų ir prieš tiekiant
Page 91

sąžiningai patikrintas. Aptikę šio
gaminio defektą, galite kreiptis į
jo pardavėją ir pasinaudoti įstatymais apibrėžtomis jūsų teisėmis.
Šių teisių neapriboja toliau aprašyta mūsų teikiama garantija.
Suteikiame šio gaminio 3 metų garantiją nuo pirkimo dienos. Garantinis laikotarpis įsigalioja pirkimo
dieną. Prašome išsaugoti originalų
pirkimo čekį. Jo gali prireikti pirkimui įrodyti.
Jei per 3 metus nuo pirkimo dienos
aptiksite šio gaminio medžiagų ar
gamybos defektą, jis bus nemokamai jums sutaisytas ar pakeistas
(mūsų pasirinkimu). Ši garantija
netenka galios, jei gaminys buvo
pažeistas, netinkamai naudojamas ar prižiūrimas.
Garantija apima medžiagų ar gamybos defektus. Ši garantija negalioja gaminio dalims, kurios įprastai
susidėvi (pvz., baterijoms), todėl
laikomos susidėvinčiomis dalimis,
ar lūžtančių dalių, pvz., jungiklių,
akumuliatorių ar iš stiklo pagamintų
detalių, pažeidimams.
LT 91
Page 92

Legende der verwendeten
Piktogramme ................................................................... Seite 94
Einleitung .............................................................................Seite 94
Bestimmungsgemäße Verwendung ........................................Seite 94
Lieferumfang ............................................................................Seite 95
Technische Daten ....................................................................Seite 95
Teilebeschreibung ...................................................................Seite 96
Displayanzeigen .....................................................................Seite 96
Sicherheit .............................................................................Seite 97
Sicherheitshinweise .................................................................Seite 97
Sicherheitshinweise für Batterien / Akkus ...............................Seite 100
Batterien einlegen / wechseln ............................Seite 102
Inbetriebnahme .............................................................Seite 103
Betrieb ...................................................................................Seite 104
Inbetriebnahme des Produkts .................................................Seite 104
Aktuelle Uhrzeit und Wochentag einstellen ..........................Seite 105
Programmieren für automatische Bewässerung ....................Seite 105
Manueller Bewässerungsbetrieb ............................................Seite 107
Ablesen / Ändern der Bewässerungsprogramme .................Seite 108
Zurücksetzen............................................................................Seite 109
Wechseln zwischen 12- / 24-Stunden-Anzeige ....................Seite 109
Ein- / Ausschalten des Bildschirms ..........................................Seite 109
Batterie-Statusanzeige ............................................................Seite 110
92 DE/AT/CH
Page 93

Fehlerbehebung ............................................................Seite 110
Reinigung und Pflege ................................................Seite 112
Sieb reinigen ...........................................................................Seite 112
Lagerung .............................................................................Seite 113
Entsorgung .........................................................................Seite 113
Garantie ...............................................................................Seite 114
DE/AT/CH 93
Page 94

Legende der verwendeten Piktogramme
Volt (Gleichstrom)
Warn- und Sicherheitshinweise
beachten!
Lebens- und Unfallgefahren für Kleinkinder und Kinder!
Bewässerungscomputer
Einleitung
Wir beglückwünschen Sie zum Kauf
Ihres neuen Produkts. Sie haben
sich damit für ein hochwertiges
Produkt entschieden. Die Bedienungsanleitung ist Teil dieses Produkts. Sie enthält wichtige Hinweise
für Sicherheit, Gebrauch und Entsorgung. Machen Sie sich vor der
Benutzung des Produkts mit allen
Bedien- und Sicherheitshinweisen
Vorsicht! Explosionsgefahr!
Produkt entspricht den
produktspezifisch geltenden europäischen
Richtlinien
Entsorgen Sie Verpa-
b
a
ckung und Gerät
umweltgerecht!
vertraut. Benutzen Sie das Produkt
nur wie beschrieben und für die
angegebenen Einsatzbereiche.
Händigen Sie alle Unterlagen bei
Weitergabe des Produkts an Dritte
mit aus.
Bestimmungs-
gemäße
Verwendung
Dieses Produkt ist zur Steuerung
von Sprinklern, Sprinkler- und Bewässerungsanlagen bestimmt.
Es ermöglicht eine automatische
94 DE/AT/CH
Page 95

Bewässerung von Außenbereichen
zu einer programmierten Zeit und
Dauer. Das Produkt kann bis zu 6
Programme zur automatischen Bewässerung speichern. Das Produkt
darf ausschließlich im Außenbereich verwendet werden. Andere
Verwendungen oder Veränderungen des Produkts gelten als nicht
bestimmungsgemäß. Für aus bestimmungswidriger Verwendung
entstandene Schäden übernimmt
der Hersteller keine Haftung. Das
Produkt ist nicht für den gewerblichen Einsatz bestimmt.
Lieferumfang
1 Bewässerungscomputer
1 Wasserhahnanschluss
1 Adapter 33,3 mm auf 26,5 mm
(G 1” auf G ¾”)
1 Sieb
2 Batterien 1,5 V Typ AA
1 Bedienungsanleitung
Technische Daten
Modell-Nr.: HG04678
Betriebsdruck: 34,5–827 kPa
(0,34–8,27 bar)
Max. Wassertemperatur: 40 °C
Spannungsversorgung: 2 x 1,5 V
(Gleichstrom)
Batterien Typ AA
Durchflussmenge (bei
ca. 3 bar
Wasserdruck): ca. 28 l / min
Programmierbare
Bewässerungsdauer: max. 09:59 h
Manuelle
Bewässerungsdauer: max. 09:59 h
Wasseranschluss: G ¾” (26,5 mm)
oder G 1”
(33,3 mm)
Schutzart: IP X4 (spritzwasser-
geschützt)
DE/AT/CH 95
Page 96

Teilebeschreibung
(Abb. A)
1
Überwurfmutter ‒ 33,3 mm
(G 1“)
2
Display
3
Taste
4
Taste SET
5
Drehregler
6
Taste
7
Taste (EIN/AUS)
8
Batteriefach
9
Sieb
10
Adapter 33,3 mm auf
26,5 mm (G 1” auf G ¾”)
11
Wasserhahnanschluss ‒ zum
Verbinden von Schlauch und
Bewässerungscomputer
Displayanzeigen
(Abb. B)
Anzeige Bedeutung
12
Aktuelle Uhrzeit
Anzeige Bedeutung
Bewässerungszyklus: 24h / 2nd /
3rd / 4th / 5th / 6th /
13
7th bedeutet: alle
24 Stunden /
2 Tage / 3 Tage /
4 Tage / 5 Tage /
6 Tage / 7 Tage
Aktuelles Bewässe-
14
rungsprogramm
(1‒6)
15
16
Startzeit des
Programms
Laufzeit - Bewässerungszeitraum
Wochentag:
aktueller Wochen-
17
tag oder programmierte Tage mit
Bewässerung
18
SET
Batterieanzeige
Taste - Uhrzeit
einstellen
Taste -
Programmieren
Taste - Bewässerungs-
modus ändern
96 DE/AT/CH
Page 97

Anzeige Bedeutung
Taste - Produkt
ein- / ausschalten
(ON/OFF)
Batterie schwach
Sicherheit
die durch unsachgemäße Handhabung
oder Nichtbeachtung
der Sicherheitshinweise
verursacht werden,
wird keine Haftung
übernommen!
Sicherheits-
hinweise
Bei Schäden, die durch
Nichtbeachtung dieser
Bedienungsanleitung
verursacht werden,
erlischt der Garantieanspruch! Für Folgeschäden wird keine Haftung
übernommen! Bei Sachoder Personenschäden,
BEWAHREN SIE ALLE
SICHERHEITSHINWEISE
UND ANWEISUNGEN FÜR
DIE ZUKUNFT AUF!
LEBENS- UND
UNFALLGEFAHR
FÜR
KLEINKIN-
DER UND
DE/AT/CH 97
Page 98

K
INDER! Lassen
Sie Kinder niemals
unbeaufsichtigt mit
dem Verpackungsmaterial. Es besteht
Erstickungsgefahr.
Halten Sie das Produkt von Kindern
fern. Das Produkt ist
kein Spielzeug.
Dieses Produkt kann
von Kindern ab 8
Jahren und darüber
sowie von Personen
mit verringerten physischen, sensorischen
oder mentalen Fähigkeiten oder Mangel
an Erfahrung und
Wissen benutzt
werden, wenn sie
beaufsichtigt oder
bezüglich des sicheren Gebrauchs des
Produktes unterwiesen wurden und die
daraus resultierenden Gefahren verstehen.
Kinder dürfen nicht
mit dem Produkt
spielen. Reinigung
und Benutzerwartung dürfen nicht von
Kindern ohne
Beaufsichtigung durchgeführt werden.
Eine Reparatur des
Produktes während
der Garantiezeit
darf nur von einem
vom Hersteller
98 DE/AT/CH
Page 99

autorisierten Kundendienst vorgenommen
werden, sonst besteht bei nachfolgenden Schäden kein
Garantieanspruch
mehr.
Defekte Bauteile
dürfen nur gegen
Original-Ersatzteile
ausgetauscht werden. Nur bei diesen
Teilen ist gewährleistet, dass sie die Sicherheitsanforderungen erfüllen werden.
Vermeiden Sie direkte
Sonneneinstrahlung.
Schließen Sie stets
den Wasserhahn,
wenn Sie das Produkt
nicht mehr benutzen.
Das Produkt nicht in
der Nähe von offenen
Flammen betreiben.
Überprüfen Sie das
Produkt und seine Zuleitungen in regelmäßigen Abständen auf
Dichtheit und einwandfreie Funktion.
LEBENSGEFAHR
DURCH ELEKTRISCHEN SCHLAG!
Richten Sie den
Wasserstrahl nicht
auf elektrische Einrichtungen!
Richten Sie den Was-
serstrahl nicht auf
Personen oder Tiere!
DE/AT/CH 99
Page 100

Das Produkt ist nicht
zur Trinkwasserentnahme geeignet.
Sicherheits-
hinweise für
Batterien /
Akkus
LEBENSGEFAHR!
Halten Sie Batterien /
Akkus außer Reichweite von Kindern.
Suchen Sie im Falle
eines Verschluckens
sofort einen Arzt auf!
EXPLOSIONSGE-
FAHR!
Laden Sie
nicht aufladbare
Batterien niemals
wieder auf. Schließen Sie Batterien /
Akkus nicht kurz und /
oder öffnen Sie diese
nicht. Überhitzung,
Brandgefahr oder
Platzen können die
Folge sein.
Werfen Sie Batte-
rien / Akkus niemals
in Feuer oder Wasser.
Setzen Sie Batterien /
Akkus keiner mechanischen Belastung aus.
Risiko des Auslaufens von
Batterien / Akkus
Vermeiden Sie ext-
reme Bedingungen
100 DE/AT/CH
 Loading...