

Page 1
Models FB409, FB410
User Manual
Version 1.1
Page 2

Table of Contents
Getting Started ............................................................................................................................................. 1
What you’ll find in the box ..................................................................................... 1
What’s in this document ........................................................................................ 1
Setting up your Fitbit FB409 & FB410 .............................................................................................. 2
Setting up your tracker on your mobile device......................................................... 2
Setting up your tracker on your Windows 10 PC ...................................................... 3
Setting up your tracker on your Mac ....................................................................... 3
Syncing your tracker data to your Fitbit account ...................................................... 4
Getting to know your Fitbit FB409 & FB410 .................................................................................. 5
Wrist placement ..................................................................................................... 5
All-day wear and exercise ................................................................................... 5
Wrist choice and dominant hand ......................................................................... 6
Navigation............................................................................................................. 6
Waking a dimmed screen .................................................................................... 7
Using the clock and menus ................................................................................. 7
Tapping your tracker .......................................................................................... 8
Battery life and charging ........................................................................................ 9
Finding your current battery level ........................................................................ 9
Charging your tracker ......................................................................................... 9
Care .................................................................................................................... 10
Changing the wristband ....................................................................................... 11
Removing a wristband ...................................................................................... 11
Attaching a new wristband ................................................................................ 12
Page 3

Automatic tracking with Fitbit FB409 & FB410 ........................................................................ 13
Viewing all-day stats ........................................................................................... 13
Viewing your heart rate ........................................................................................ 13
Using heart-rate zones ........................................................................................ 14
Default heart-rate zones ................................................................................... 14
Custom heart-rate zones .................................................................................. 15
Tracking a daily activity goal ................................................................................ 15
Choosing a goal ............................................................................................... 15
Seeing goal progress ........................................................................................ 16
Tracking hourly activity ........................................................................................ 16
Sleep Tracking ........................................................................................................................................... 17
Setting sleep goals .............................................................................................. 17
Setting up bedtime reminders .............................................................................. 17
Learning about your sleep habits .......................................................................... 17
Exercising with Fitbit FB409 & FB410 ........................................................................................... 18
Using SmartTrack ................................................................................................ 18
Using the Exercise menu ...................................................................................... 18
GPS requirements ............................................................................................. 18
Tracking exercise ............................................................................................. 19
Practicing Guided Breathing with FB409 & FB410 .................................................................. 20
Using Silent Alarms ................................................................................................................................ 21
Enabling or disabling silent alarms ....................................................................... 21
Dismissing silent alarms ...................................................................................... 21
Receiving Call, Text, & Calendar Notifications .......................................................................... 22
Calendar requirements ........................................................................................ 22
Page 4

Enabling notifications .......................................................................................... 22
Viewing incoming notifications ............................................................................. 23
Customizing your Fitbit FB409 & FB410 ...................................................................................... 25
Changing the clock face ....................................................................................... 25
Using Quick View ................................................................................................. 25
Adjusting the heart rate tracker ............................................................................ 25
Updating your Fitbit FB409 & FB410.............................................................................................. 27
Troubleshooting your Fitbit FB409 & FB410 ............................................................................. 28
Heart-rate signal missing .................................................................................... 28
Unexpected behavior ........................................................................................... 28
Fitbit FB409 & FB410 General Info & Specifications .............................................................. 31
Sensors ............................................................................................................... 31
Materials ............................................................................................................. 31
Wireless technology ............................................................................................. 31
Haptic feedback................................................................................................... 31
Battery ................................................................................................................ 31
Memory .............................................................................................................. 32
Display................................................................................................................ 32
Size .................................................................................................................... 32
Environmental conditions ..................................................................................... 32
Learn More .......................................................................................................... 33
Return policy and warranty................................................................................... 33
Regulatory & Safety Notices ............................................................................................................... 34
Notice to the User ................................................................................................ 34
Canada: Industry Canada (IC) statement................................................................ 35
Page 5

European Union (EU) ............................................................................................ 36
Argentina ............................................................................................................ 36
Australia/New Zealand ......................................................................................... 37
China .................................................................................................................. 37
India ................................................................................................................... 38
Indonesia ............................................................................................................ 38
Israel .................................................................................................................. 38
JAPAN ................................................................................................................. 38
Mexico ................................................................................................................ 39
Morocco .............................................................................................................. 39
Nigeria ................................................................................................................ 39
Oman.................................................................................................................. 40
Philippines .......................................................................................................... 40
Serbia ................................................................................................................. 40
South Korea ........................................................................................................ 40
Taiwan ................................................................................................................ 41
Customs Union .................................................................................................... 43
Page 6
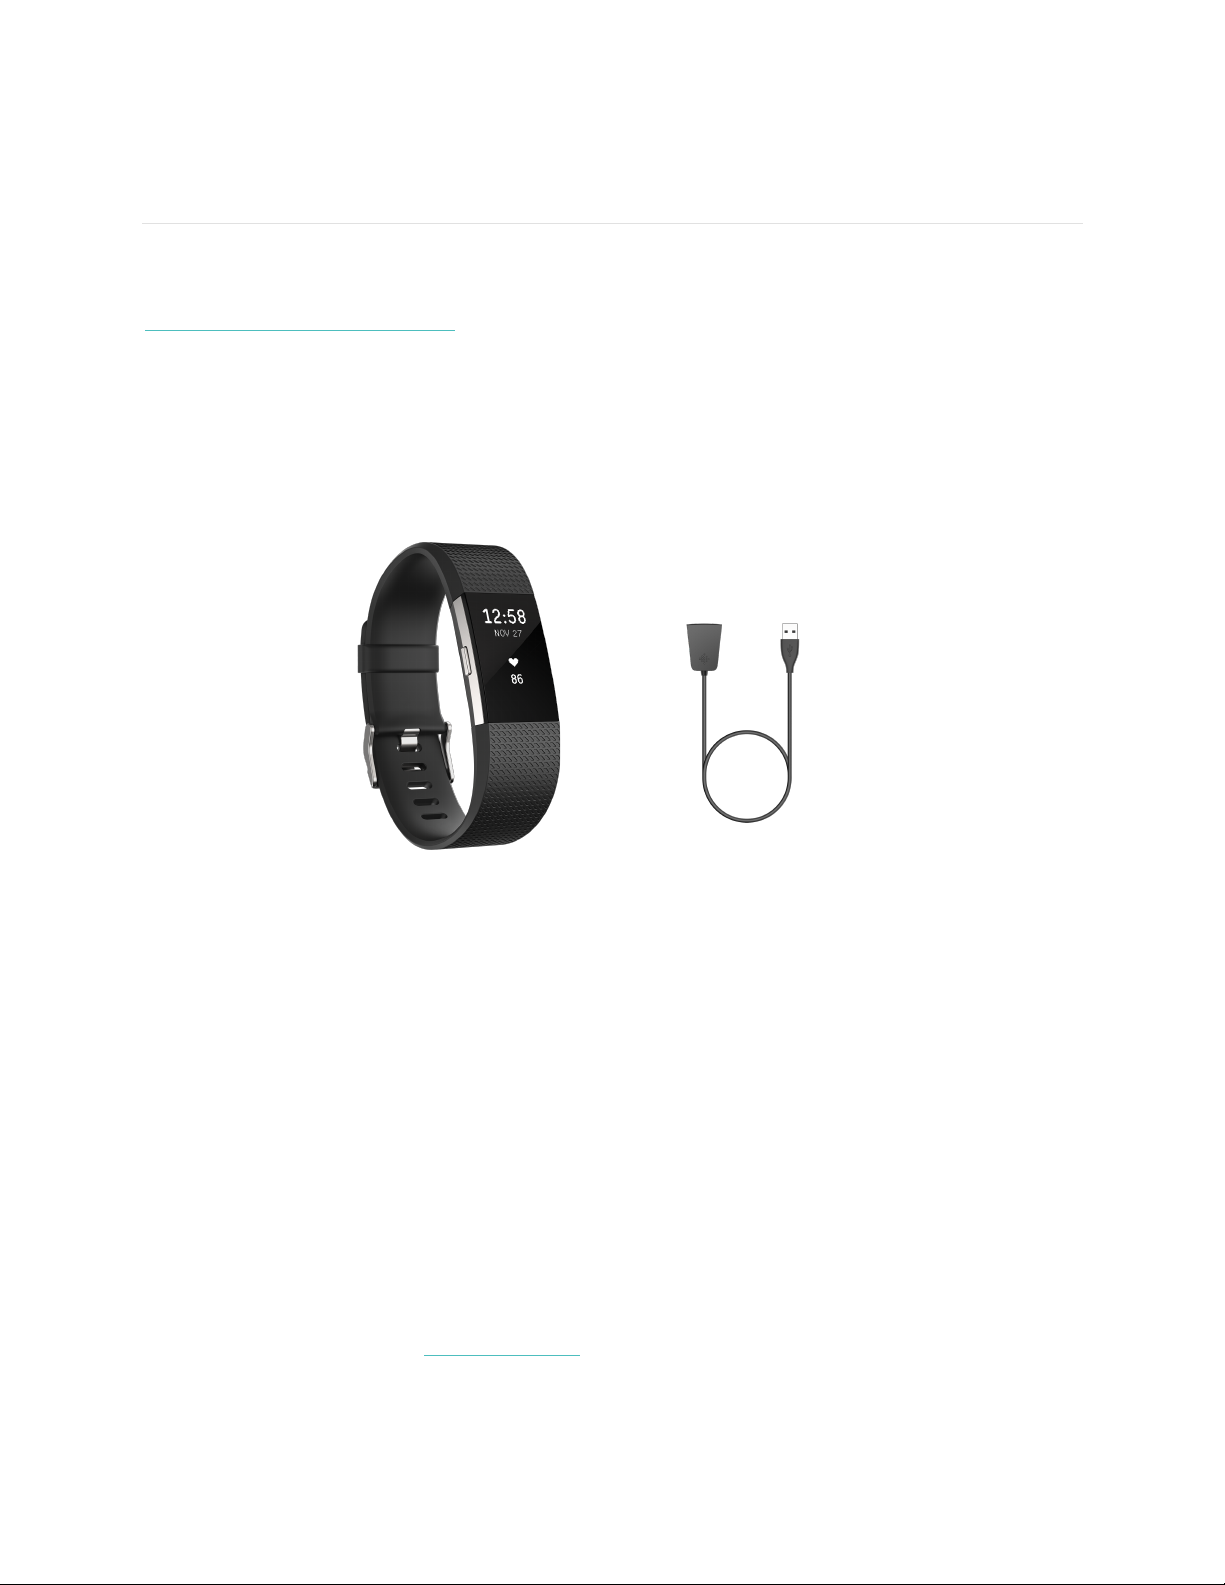
Tracker
Charging cable
Getting Started
Welcome to Fitbit FB409 & FB410™, the smart fitness band that helps you reach your
goals in style. Take a moment to review our complete safety information at
http://www.fitbit.com/safety.
What you’ll find in the box
Your Fitbit FB409 & FB410 box includes:
The top and bottom detachable wristbands can be swapped for other colors and
materials sold separately.
What’s in this document
We get you started quickly creating a Fitbit® account and making sure your tracker can
transfer the data it collects to your dashboard. The dashboard is where you’ll set goals,
analyze historical data, identify trends, log food and water, keep up with friends, and
much more. As soon as you’re done setting up your tracker, you’re ready to start
moving.
Next, we explain how to find and use the features that interest you and adjust your
preferences. To find more information, tips, and troubleshooting, please browse our
comprehensive articles at help.fitbit.com.
Page 7

Setting up your Fitbit FB409 & FB410
For the best experience we recommend using the Fitbit apps for iOS, Android, or
Windows 10. If you don’t have a mobile device, you can also use a Bluetooth®-enabled
Windows 10 PC or Mac. For non-Bluetooth options visit help.fitbit.com.
Your Fitbit account asks for information such as height, weight, and gender to make
various calculations such as stride lengths to estimate distance and basal metabolic
rate to estimate calorie burn. You have the option to share your age, height, or weight
with Fitbit friends but the information you provide is private by default.
Setting up your tracker on your mobile device
The free Fitbit app is compatible with more than 200 mobile devices that support iOS,
Android, and Windows 10 operating systems.
To get started:
1. Make sure the Fitbit app is compatible with your mobile device by checking
http://www.fitbit.com/devices.
2. Find the Fitbit app in one of these locations, depending on your device:
• The Apple® App Store® for iOS devices such as an iPhone® or iPad®.
• The Google Play™ Store for Android devices such as the Samsung®
Galaxy® S5 and Motorola Droid Turbo.
• The Microsoft® Windows Store for Windows 10 mobile devices such as
the Lumia™ phone or Surface™ tablet.
3. Install the app. Note that if you don’t have an account with the store you’ll be
required to create one before you can download the app.
4. When the app is installed, open it and tap Join Fitbit to be guided through a
series of questions that help you create your Fitbit account, or login to your
existing account.
5. Continue following the onscreen instructions to connect, or
FB410 to your mobile device. Pairing makes sure the tracker and mobile device
can communicate with one another (sync data back and forth).
When you’re done pairing, read through the guide about your new tracker and then
explore the Fitbit dashboard.
pair
, your FB409 &
Page 8

Setting up your tracker on your Windows 10 PC
If you don’t have a mobile device, you can set up and sync your tracker using a
Bluetooth-enabled Windows 10 PC. The same Fitbit app that is available for Windows
10 mobile devices is available for your computer.
To get the Fitbit app for your computer:
1. Click the Start button on your PC and open the Windows Store (called Store).
2. Search for “Fitbit app” and when you find it click Free to download the app to
your computer.
3. If you’ve never downloaded an app to your computer you’ll be prompted to
create an account with the Windows Store.
4. Click Microsoft account to sign in with your existing Microsoft account. If you
don’t already have an account with Microsoft, follow the onscreen instructions
to create a new account.
5. Open the app after it’s done downloading.
6. Click Join Fitbit to be guided through a series of questions that help you create a
Fitbit account, or login to your existing account.
7. Continue following the onscreen instructions to connect, or
FB410 with the Windows 10 app. Pairing makes sure the tracker and app can
communicate with one another (sync data back and forth).
pair
, your FB409 &
When you’re done pairing, read through the guide about your new tracker and then
explore the Fitbit dashboard.
Setting up your tracker on your Mac
If you don’t have a compatible mobile device, you can set up your tracker with a
Bluetooth-enabled Mac and use the fitbit.com dashboard to see your stats. To use this
method you’ll first install a free software application called Fitbit Connect that lets
FB409 & FB410 sync its data with your fitbit.com dashboard.
To install Fitbit Connect and set up your tracker:
1. Go to http://www.fitbit.com/setup.
2. Scroll down and click the option to download. If the button does not correctly
show your type of computer (for example, if it says “Download for Mac”), choose
the correct type, then click the button.
Page 9

3. You’ll see an option to open or save a file; choose open. After several seconds
you’ll see an option to install Fitbit Connect.
4. Double-click Install Fitbit Connect.pkg. The Fitbit Connect installer opens.
5. Click Continue to move through the installer.
6. When prompted, choose Set up a New Fitbit Device.
7. Follow the onscreen instructions to create a Fitbit account, or login to your
existing account, and connect your tracker with Fitbit Connect.
When you’re done with the setup steps, Fitbit guides you through an introduction to
your new FB409 & FB410 and then takes you to the fitbit.com dashboard.
Syncing your tracker data to your Fitbit account
When you start using your FB409 & FB410 you'll need to regularly sync it with your
Fitbit dashboard. The dashboard is where you’ll track progress, see your exercise
history, track your sleep patterns, participate in challenges, and much more. We
recommend syncing at least once a day.
The Fitbit apps and Fitbit Connect use Bluetooth Low Energy (BLE) technology to sync
with your Fitbit tracker.
Each time you open the Fitbit app it syncs automatically if the paired tracker is nearby.
You can also use the Sync Now option in the app at any time.
Fitbit Connect syncs every 15 minutes if the tracker is within 20 feet of the computer.
To force a sync, click the Fitbit Connect icon located near the date and time on your
computer and choose Sync Now.
Page 10
Getting to know your Fitbit FB409 &
FB410
This section tells you how best to wear, navigate, and charge your tracker. If you
bought an accessory wristband, you’ll also find instructions for taking off the original
band and putting on a different one.
Wrist placement
Review these tips to make sure you’re wearing your tracker for optimal results.
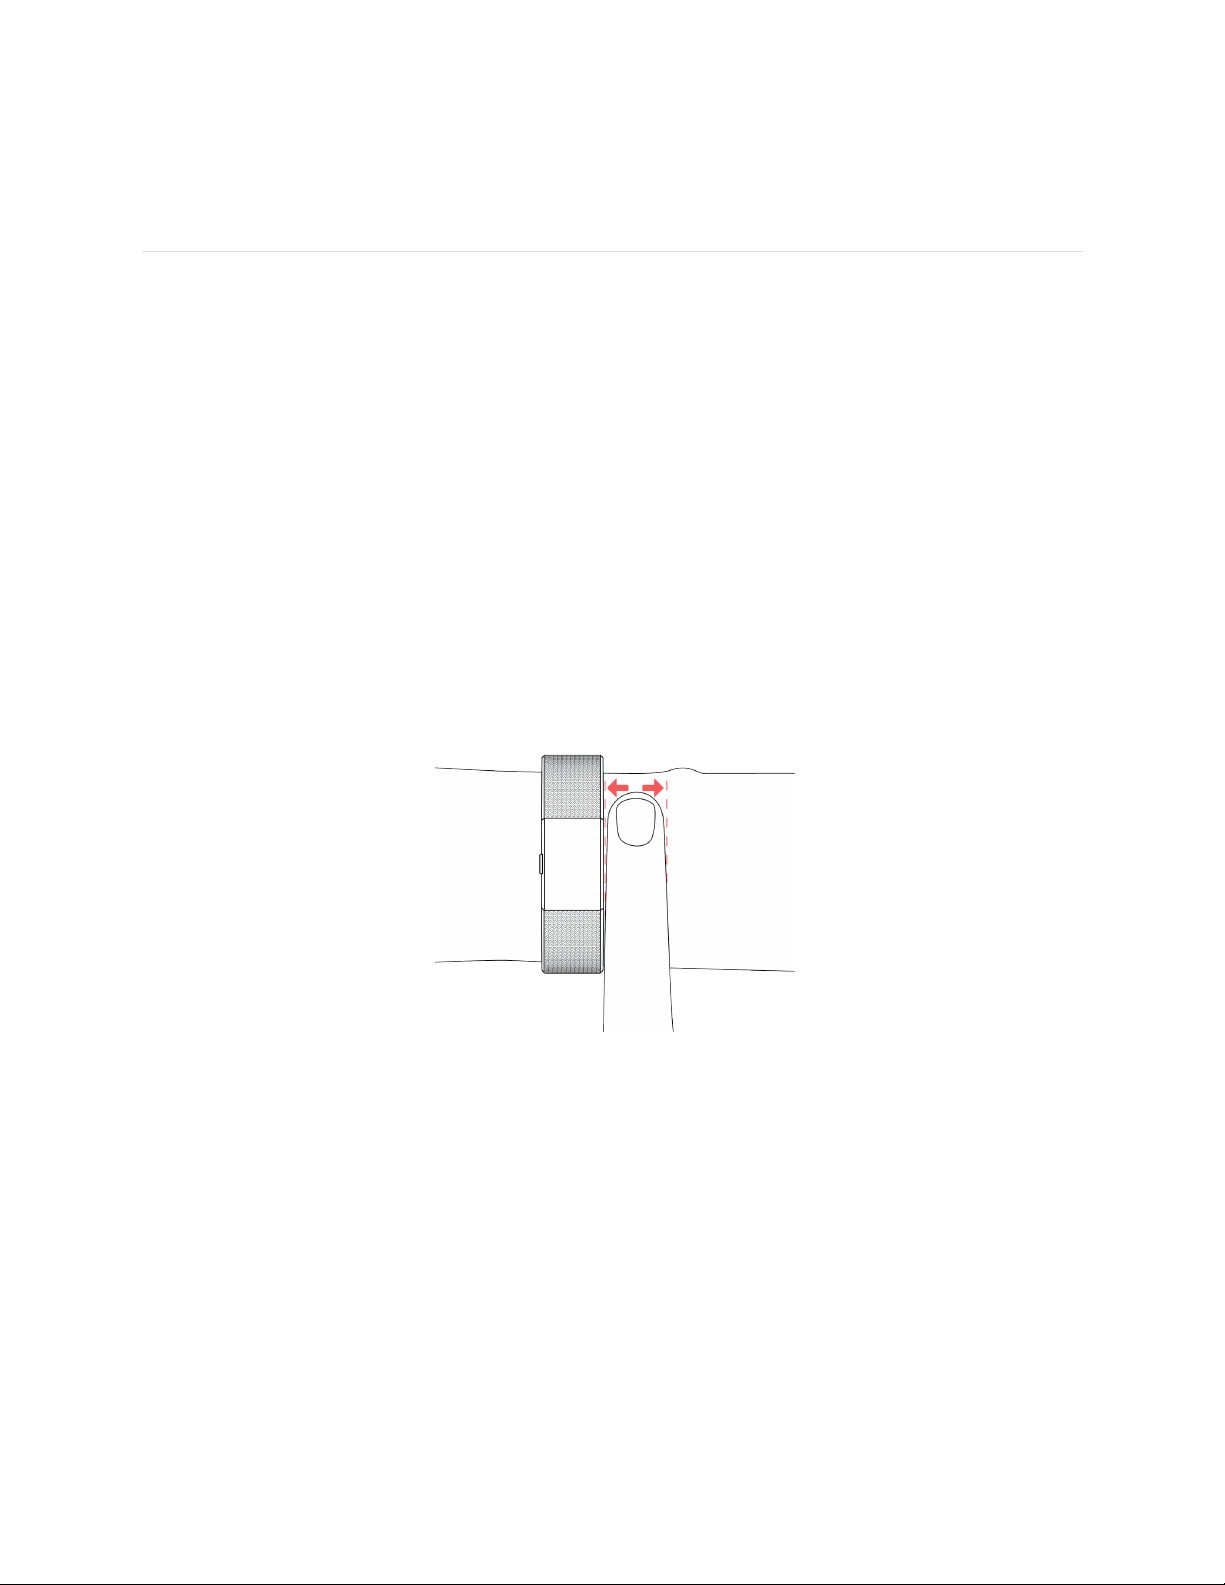
All-day wear and exercise
For all-day wear when you’re not exercising, your FB409 & FB410 should usually rest a
finger’s width below your wrist bone and lay flat, as you would normally wear a watch.
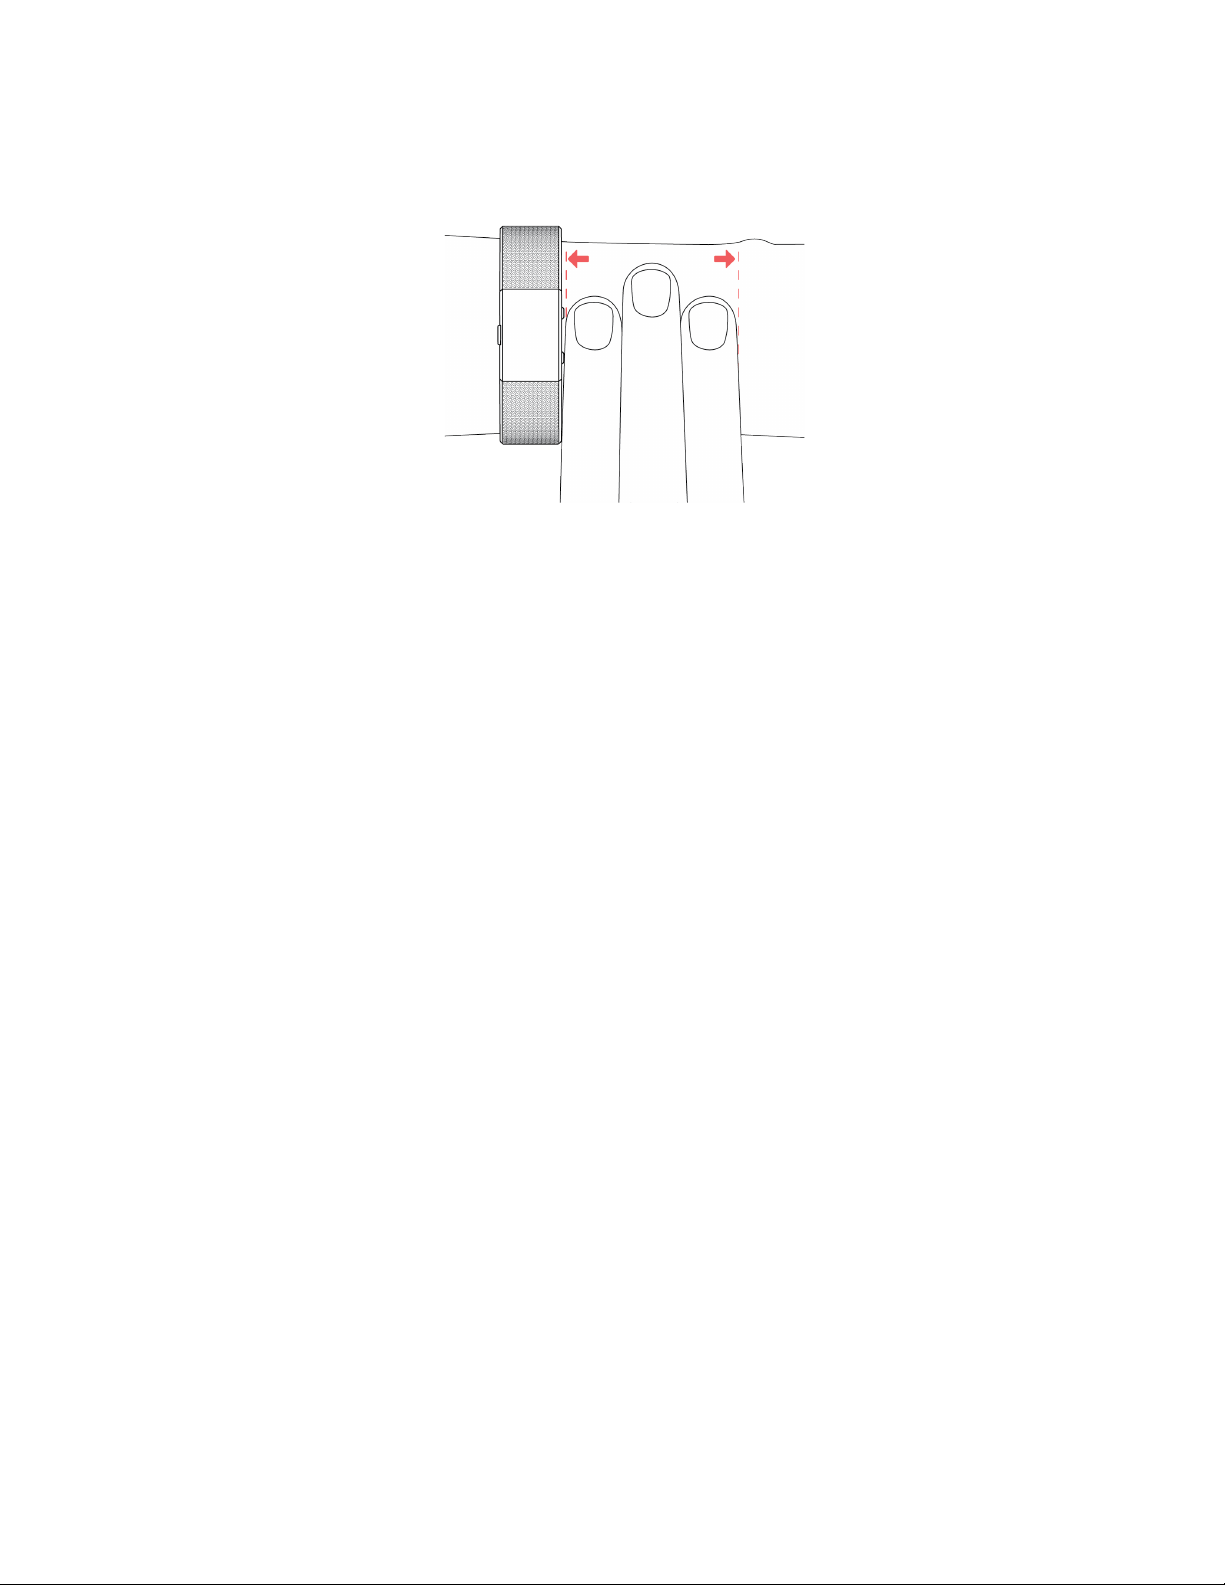
For optimized heart rate tracking keep these tips in mind:
1. Experiment with wearing the tracker higher on your wrist during exercise.
Because blood flow in your arm increases the farther up you go, moving the
tracker up a couple inches can improve the heart rate signal. Also, many
exercises such as bike riding or weight lifting cause you to bend your wrist
frequently, which is more likely to interfere with the heart rate signal if the
tracker is lower on your wrist.
Page 11
2. Do not wear your tracker too tight; a tight band restricts blood flow, potentially
affecting the heart rate signal. That being said, the tracker should also be
slightly tighter (snug but not constricting) during exercise than during all-day
wear.
3. With high-intensity interval training or other activities where your wrist is
moving vigorously and non-rhythmically, the movement may limit the sensor’s
ability to provide a heart rate reading. Similarly, with exercises such as weight
lifting or rowing, your wrist muscles may flex in such a way that the band
tightens and loosens during exercise. If your tracker does not show a heart rate
reading, try relaxing your wrist and staying still briefly (about 10 seconds), after
which you should see a heart rate reading.
Wrist choice and dominant hand
For greater accuracy, your tracker needs to know which wrist you wear it on
(right or left) and which hand you consider dominant (right or left). Your dominant
hand is the one you usually write or throw with.
During setup you’re asked to choose the wrist where you're going to wear your tracker.
Should you later decide to move your tracker to the other wrist, change the Wrist
setting. You can also change your dominant hand at any time with the Handedness
setting. Both settings are found in the Account section of the Fitbit app or in the
Personal Info section of your fitbit.com dashboard settings.
Navigation
FB409 & FB410 has an OLED tap display and one button.
Page 12
Waking a dimmed screen
When you’re not using FB409 & FB410 the display is off. To wake it up:
• Press the button
• Turn your wrist towards you. This behavior, known as Quick View, can be turned
off in your tracker settings.
• Double-tap your tracker.
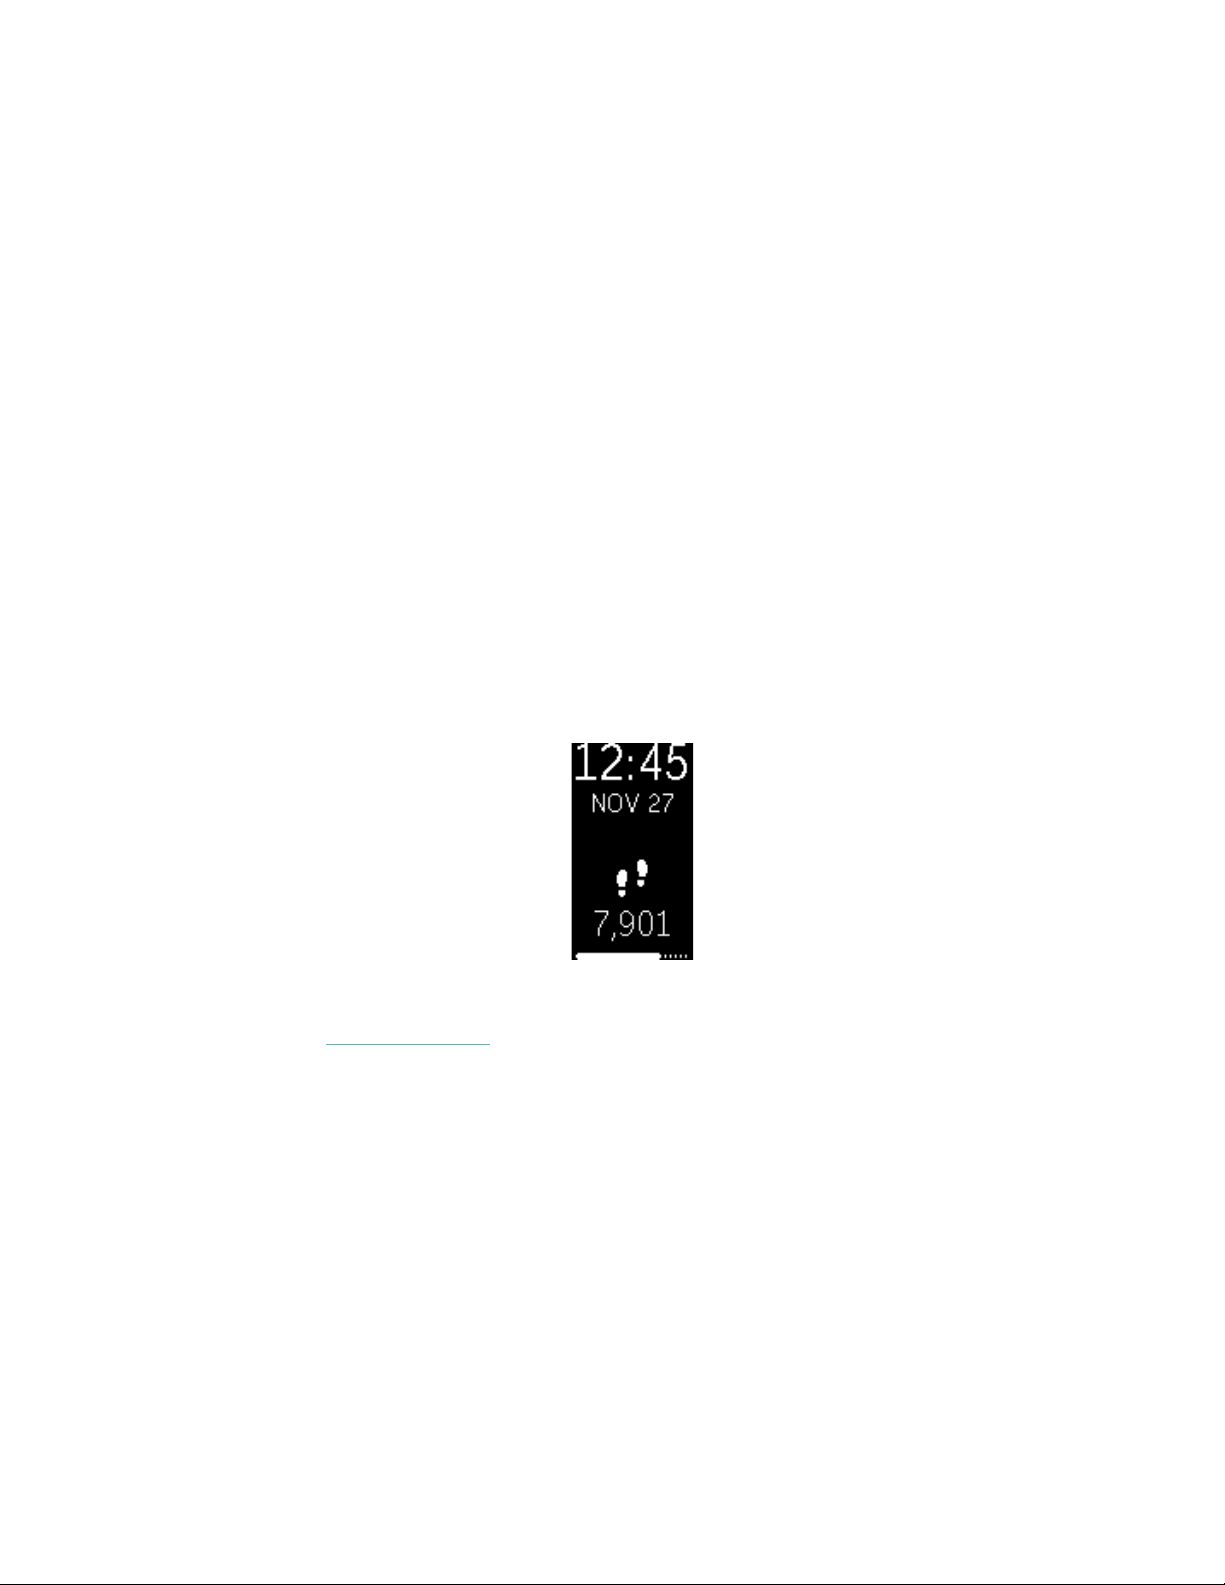
Using the clock and menus
The default or “home” screen is a clock, which is available in several styles. On the
clock screen you can:
• Tap to see your steps taken, heart rate, distance, calories burned, floors
climbed, active minutes, and hourly activity.
• Press the button to move to through the menus.
• Press and hold the button to turn on or turn off notifications, including
reminders to move.
You can customize the both the stats and menus shown on your tracker. For more
information, see help.fitbit.com.
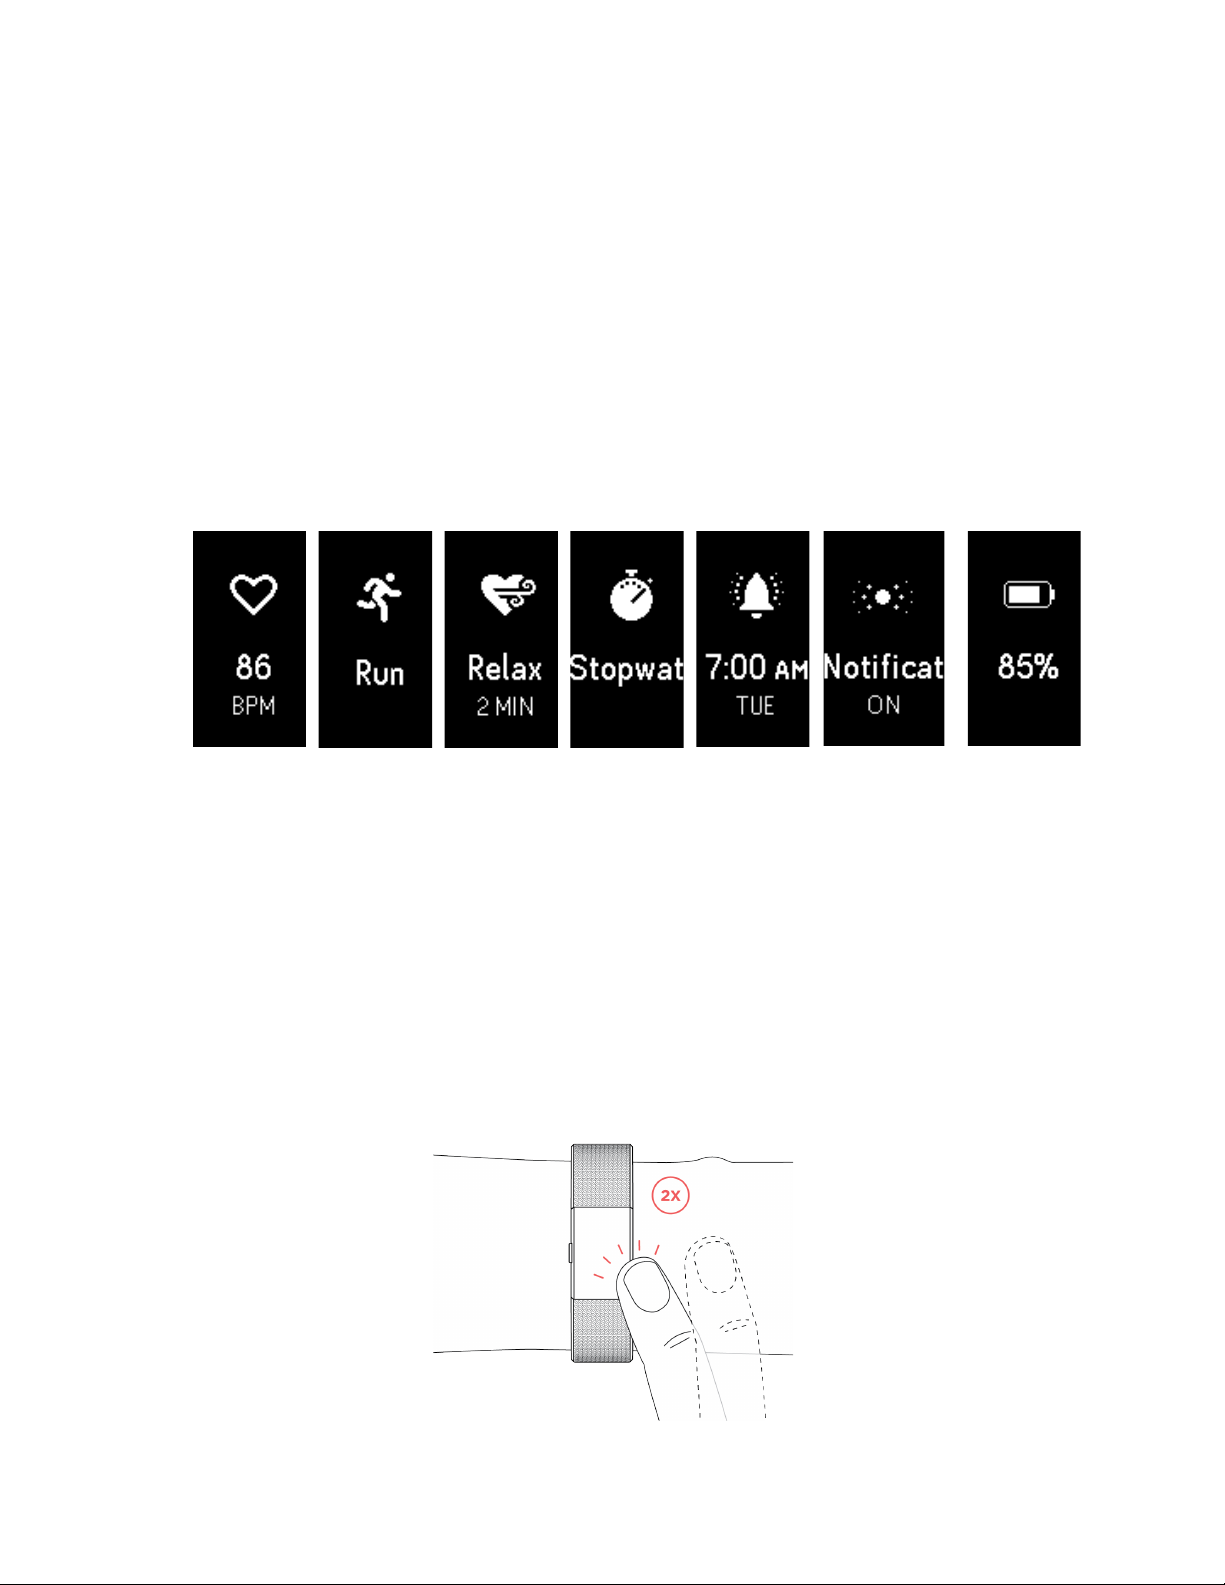
After viewing the clock screen, you can cycle through the different menus to see
information or use different functions on your tracker. The following menus are
available:
• Heart rate—Shows your current heart rate. Tap to see your resting heart rate.
• Exercise—Tap to move through your exercise choices, then press and hold the
button to start the selected exercise. Press and hold the button again to end the
exercise.
• Relax—Tap to choose a guided breathing session. Press and hold the button to
start the session.
Page 13
Heart
rate
Exercise
Relax
Stopwatc
h
Alarms
Notificatio
ns
Battery
• Stopwatch—Press and hold the button to start the stopwatch. Press the button
to stop and resume the stopwatch. Press and hold the button again to reset the
stopwatch.
• Alarms—Tap to scroll through any alarms you’ve set. Press and hold the button
to disable or enable any alarms. The alarm screen appears only when you have
alarms set.
• Notifications—Press and hold the button to turn on or turn off notifications. If
you turn off notifications, your tracker will not alert you when you receive a
phone call, text message, or calendar alert on your mobile device, nor will you
receive reminders to move.
• Battery—Shows the percentage of battery life remaining on your tracker. The
battery screen appears only if you turn it on in your tracker settings.
Tapping your tracker
For best results, tap your tracker where the screen meets the band as shown. To wake
up your tracker, double-tap it; to flip through your stats or the menus, single-tap it.
Page 14

FB409 & FB410 doesn’t respond to swipes. You must use the button or firmly and
quickly tap the screen.
Battery life and charging
Your fully charged FB409 & FB410 has a battery life of up to five days. Battery life and
charge cycles vary with use and other factors; actual results will vary.
Finding your current battery level
If your battery is low, when you wake up your FB409 & FB410 you’ll see a low battery
icon after a few seconds. If you see a critical battery icon you’ll be unable to navigate
to any of the tracker screens until you charge your tracker. Your tracker continues to
track your activity until your battery runs out.
You can check your battery level at any time on the battery screen on your tracker or
on your Fitbit dashboard. To see the battery screen you must turn on the battery menu
item in the Fitbit app.
Charging your tracker
To charge your tracker:
1. Plug the charging cable into the USB port on your computer or a UL-certified
USB wall charger.
2. Clip the other end of the charging cable to the port on the back of the tracker.
The pins on the charging cable must lock securely with the port.
Page 15
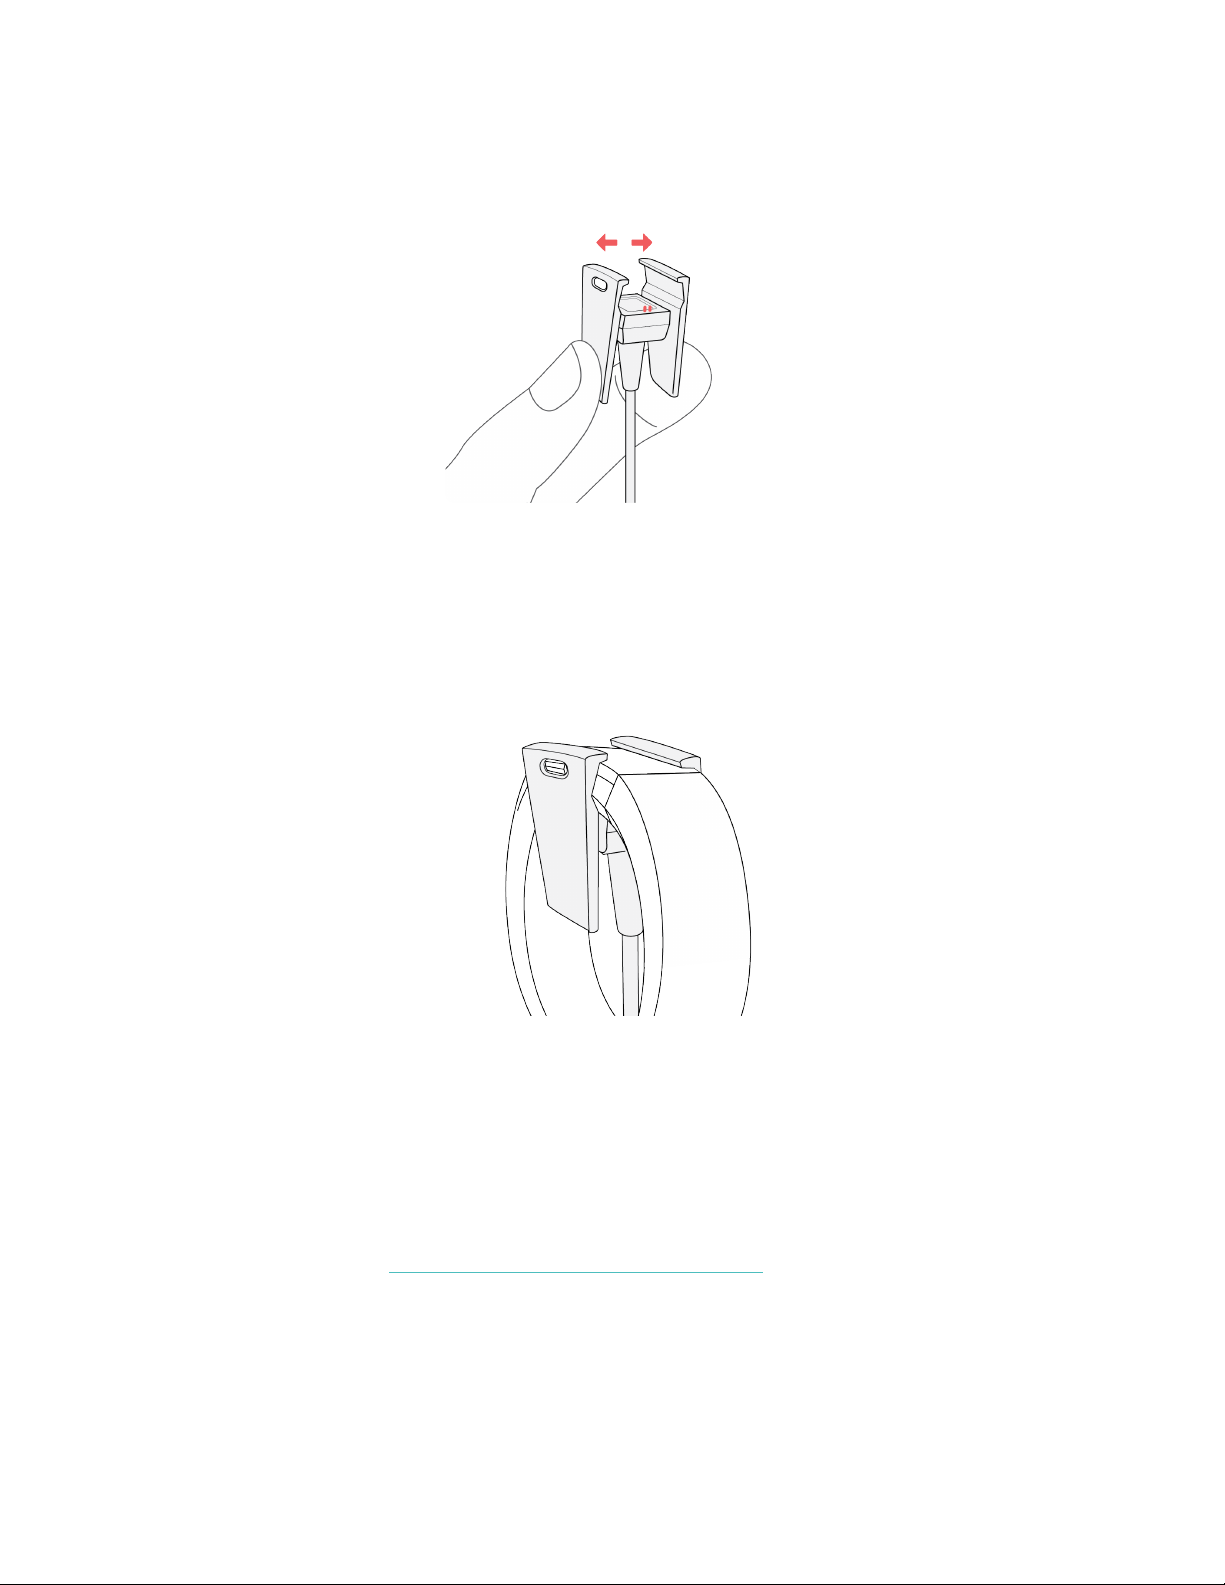
3. Make sure the button on your tracker is aligned with the button opening on the
charging cable. You’ll know the connection is secure when the tracker vibrates
and you see a battery icon on your tracker’s display. The battery icon disappears
after three seconds.
Charging fully takes about one to two hours. While the tracker charges, you can tap it
to check the battery level. A fully charged tracker shows a solid battery icon.
Care
It’s important to clean and dry your FB409 & FB410 regularly. For instructions and
more information, see http://www.fitbit.com/productcare.
Page 16

Changing the wristband
The wristband has two separate bands (top and bottom) that you can swap with
accessory bands sold separately.
Removing a wristband
To remove the wristband:
1. Turn over your FB409 & FB410 and find the band latches—there’s one on each
end where the band meets the frame.
2. To release the latch, press down on the flat metal button on the strap.
3. Slide the band up to release it from the tracker.
4. Repeat on the other side.
If you’re having trouble removing the band or if it feels stuck, gently move the band
back and forth to release it.
Page 17

Attaching a new wristband
Before you attach a new wristband, first identify the top and bottom bands. The top
band has a watch buckle at the end of it. The bottom band has notches and should be
attached on the side closest to the charging port.
To attach a band, slide it down on the end of the tracker until you feel it snap into
place.
Page 18

Automatic tracking with Fitbit FB409 &
FB410
Your FB409 & FB410 continuously tracks a variety of stats whenever you have it on.
The information is transferred to your dashboard every time you sync your tracker.
Viewing all-day stats
Press the button to wake up your FB409 & FB410 and see the time of day. Tap the
screen to see each of these all-day stats:
• Steps taken
• Current heart rate
• Distance covered
• Calories burned
• Floors climbed
• Active minutes
• Hourly activity
On your Fitbit dashboard you can find other information captured by your tracker, such
as:
• Your sleep history, including hours slept and sleep patterns
• The hours of your day that you were stationary vs. active (walked at least 250
steps)
• Your exercise history and progress towards a weekly exercise goal
• Your beats per minute (BPM), average resting heart rate, and time spent in
heart-rate zones
Note: FB409 & FB410 resets at midnight to begin a new day.
Viewing your heart rate
FB409 & FB410 allows you to view your real-time heart rate and your resting heart rate
on your tracker. To view your heart rate, press the button until you get to the Heart
rate screen where you’ll see your current heart rate. Tap to see your resting heart rate.
Page 19
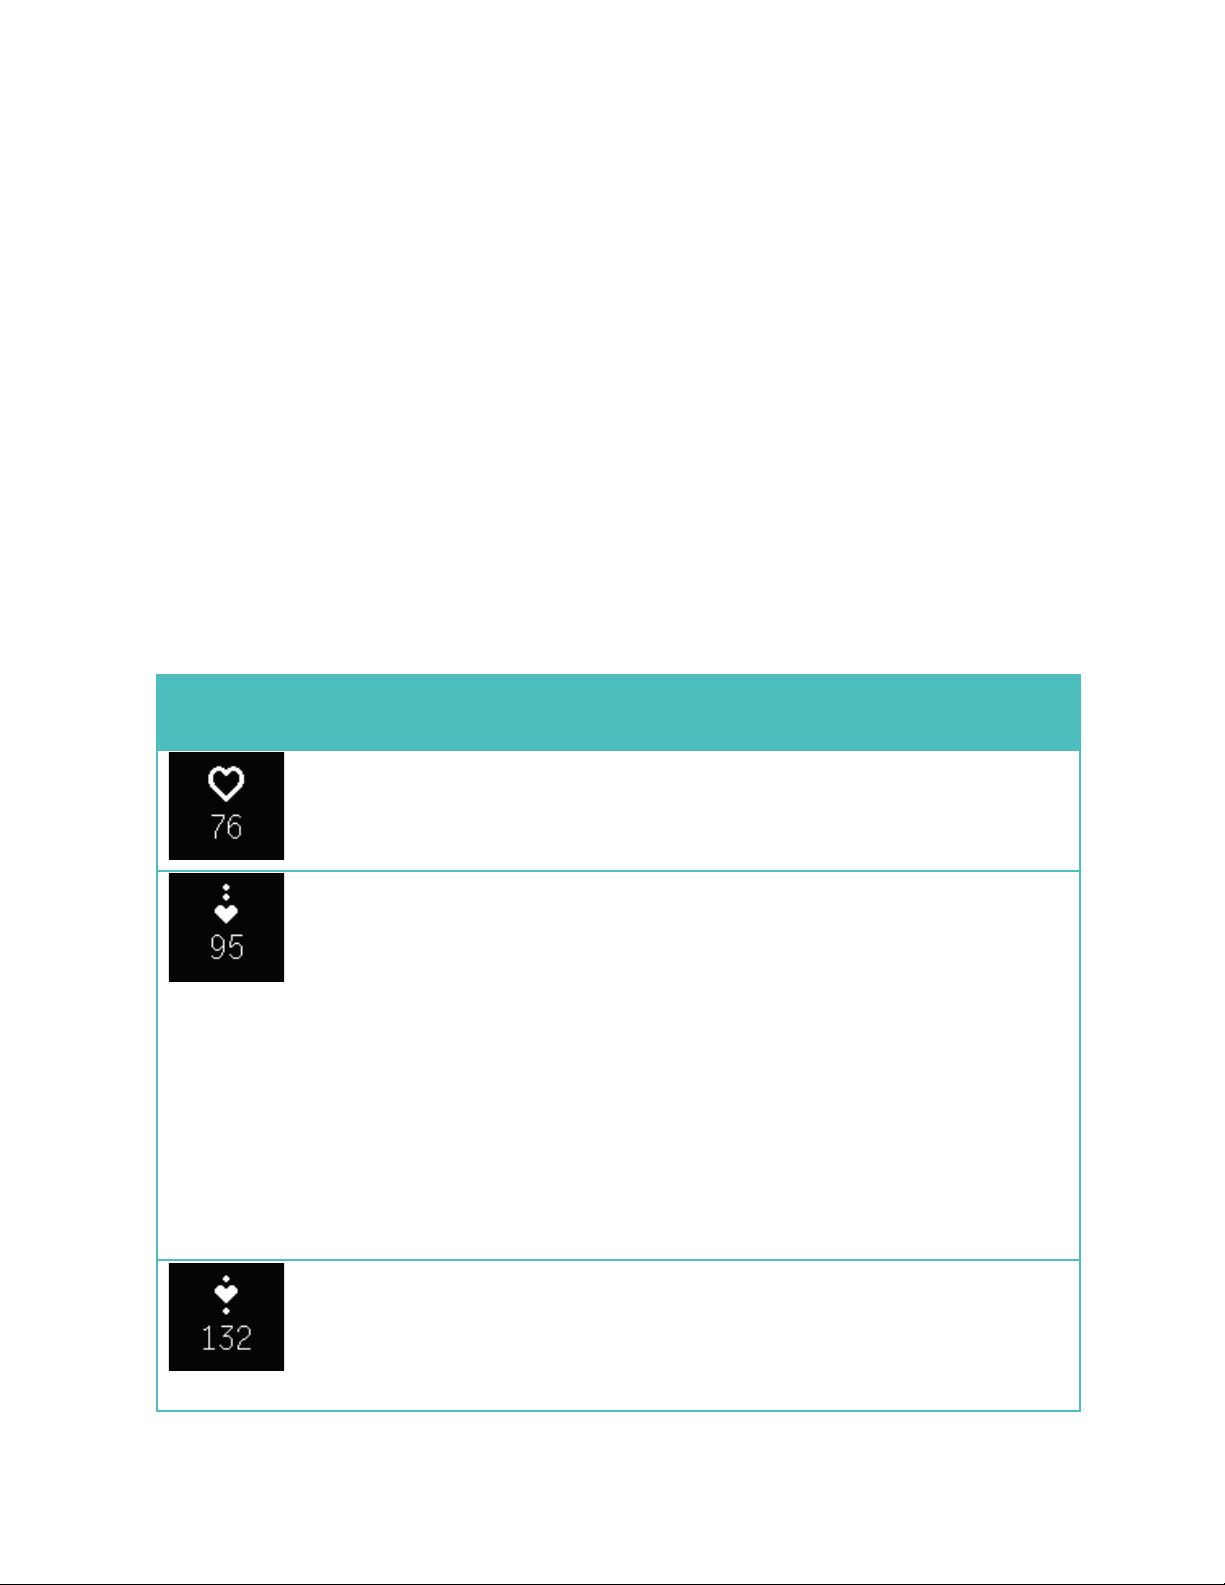
Icon
Zone
Calculation
Description
Out of Zone
Below 50% of your
maximum heart rate.
Your heart rate may
be elevated but not
enough to be
considered exercise.
Fat Burn
Between 50% and
69% of your
maximum heart rate.
Low-to-medium
intensity exercise
zone. This zone may
be a good place to
start for those new
to exercise. It’s
called the Fat Burn
zone because a
higher percentage of
calories are burned
from fat, but the
total calorie burn
rate is lower.
Cardio
Between 70% and
84% of maximum
heart rate.
Medium-to-high
intensity exercise
zone. In this zone
you’re pushing
yourself but not
Using heart-rate zones
Heart-rate zones help you target the training intensity of your choice. Your tracker
shows your current zone above your heart rate, and on your Fitbit dashboard you can
see your time spent in zones during a particular day or exercise. Three zones based on
American Heart Association recommendations are available by default, or you can
create a custom zone if you have a specific heart rate you’re targeting.
Default heart-rate zones
Default heart-rate zones are calculated using your estimated maximum heart rate.
Fitbit calculates your maximum heart rate with the common formula of 220 minus
your age.
The heart icon you see above your current heart rate tells you your zone. Refer to the
following table for an explanation of the different heart rate zones.
Page 20

straining. For most
people this is the
exercise zone to
target.
Peak
Greater than 85% of
your maximum heart
rate.
High-intensity
exercise zone. This
zone is for short
intense sessions that
improve
performance and
speed.
Custom heart-rate zones
Instead of using the default heart-rate zones, you can configure a custom zone or a
custom max heart rate if you have a specific target in mind. For example, elite athletes
might have a target that differs from the American Heart Association’s
recommendations for the average person. When you’re in your custom zone you’ll see
a solid heart on your tracker. When you’re not in the zone you’ll see an outline of a
heart.
For more details about heart rate tracking, including links to relevant American Heart
Rate Association information, see help.fitbit.com.
Tracking a daily activity goal
Your FB409 & FB410 tracks your progress towards a daily activity goal of your choice.
When you reach your goal, the tracker vibrates and shows a celebration.
Choosing a goal
By default your goal is 10,000 steps per day. You can change the goal to distance
traveled, calories burned, active minutes, or floors climbed and select the
corresponding value you prefer. For example, you may want to keep steps as your goal
but change the target from 10,000 to 20,000 steps.
Page 21

Hourly
Celebration
Daily
Celebration
Seeing goal progress
A goal progress bar helps keep you motivated. The filled in portion of the bar shown
below indicates that you’re more than halfway to your goal.
Tracking hourly activity
FB409 & FB410 helps keep you active throughout the day by keeping track of when
you’re stationary and reminding you to move.
If you haven’t walked at least 250 steps in a given hour, at ten minutes before the hour
you’ll feel a vibration reminding you to walk. When you meet the 250-step goal after
receiving a reminder, you’ll feel a second vibration and see a congratulatory message.
You’ll also see a daily celebration if you meet your goal every hour.
Page 22

Sleep Tracking
Wear your FB409 & FB410 to bed to automatically track both your time spent asleep
and your sleep quality. To see your sleep information, sync your tracker when you
wake up and check your dashboard.
For more details about sleep tracking see help.fitbit.com.
Setting sleep goals
By default, you have a customizable sleep goal of 8 hours of sleep per night. For more
information about your sleep goal, including how to change it, see help.fitbit.com.
Setting up bedtime reminders
Your Fitbit dashboard can recommend consistent bedtimes and wake times to help you
improve the consistency of your sleep cycle. You can even choose to be reminded
nightly when it’s time to start winding down for bed.
For more information about setting up bedtime reminders, see help.fitbit.com.
Learning about your sleep habits
Your FB409 & FB410 tracks several sleep metrics including how long you’re asleep and
time spent in each sleep stage. When used with the Fitbit dashboard, your FB409 &
FB410 can help you understand how your sleep patterns compare to others who share
your age range and gender. For more information about what happens when you’re
asleep, see help.fitbit.com.
Page 23

Exercising with Fitbit FB409 & FB410
FB409 & FB410 uses SmartTrack™ to automatically detect and record select exercises.
For more precision or to see real-time stats and a workout summary right on your
wrist, you can tell your tracker when exercise starts and stops. All workouts appear in
your exercise history for deeper analysis and comparison.
Using SmartTrack
SmartTrack ensures you get credit for your most active moments of the day. When you
sync your tracker after a SmartTrack-detected exercise, you can find several stats in
your exercise history including duration, calories burned, impact on your day, and
more.
By default, SmartTrack detects continuous movement at least 15 minutes in length.
You can increase or decrease the minimum duration or disable SmartTrack for one or
more exercise types. For more information about customizing and using SmartTrack,
see help.fitbit.com.
Using the Exercise menu
You can choose from over a dozen exercise types to customize the Exercise menu with
your favorites. Some exercises, like running, biking, and hiking have a GPS option.
For more information about customizing your Exercise menu, see help.fitbit.com.
Note: FB409 & FB410 does not have built-in GPS. Its
with the GPS sensors on your nearby mobile device to give you real-time pace
and distance information, as well as recording a map of your route. Turning on
connected GPS enables more precise tracking of your exercise stats.
Connected GPS is not available with the Fitbit app for Windows 10.
GPS requirements
Connected GPS is available for iOS and Android mobile devices. For more information
about setting up connected GPS, see help.fitbit.com.
connected GPS
feature works
1. If you’re going to use connected GPS, make sure Bluetooth and GPS are both
enabled on your phone and that your tracker is paired to your phone.
Page 24

GPS signal connected
GPS signal disconnected
Searching for GPS signal
2. Make sure the Fitbit app has permission to use GPS or location services.
3. Verify that connected GPS is turned on for the exercise in the Fitbit app.
a. Find the Exercise shortcuts in the Fitbit app. For more information see,
help.fitbit.com.
b. Tap the exercise you want to track and make sure Connected GPS is
turned on.
Tracking exercise
To track an exercise:
1. On your tracker, press the button until you get to the Exercise screen and then
tap to find the exercise of your choice.
2. Press and hold the button to start the exercise. If you see a phone icon at the
top, that exercise offers connected GPS and your device is connected to a GPS
signal. If the phone icon is crossed out, a GPS connection isn’t available. An
animated dashed line means your device is trying to find a GPS signal.
3. During your workout, tap your tracker to scroll through your real-time stats or
4. To pause your workout, press the button. Then press the button again to
5. When you’re done with your workout, press and hold the button to stop
6. Press the button to see a summary of your results. With each button press you’ll
Syncing your tracker stores the workout in your exercise history. There you can find
additional stats and see your route if you used connected GPS.
check the time of day.
resume the exercise."
recording. You’ll see a flag icon and a congratulatory message.
cycle to a different set of stats. You can view your exercise summary one time.
Page 25

Practicing Guided Breathing with FB409
& FB410
FB409 & FB410 provides personalized guided breathing sessions on your tracker to
help you find moments of calm throughout the day. You can choose between twominute and five-minute long sessions.
To begin a session:
1. On your tracker, press the button until you get to the Relax screen.
2. The two-minute session is the first option. Tap to choose the five-minute
session.
3. Press and hold the button to start.
4. Remain still and breathe deeply during the calibration period, which lasts 30-40
seconds. You’ll see the phrase “sensing your breathing” on your tracker’s
screen.
5. When prompted, inhale and exhale deeply.
Sparkles will appear on your tracker’s screen to indicate how closely you’re
following the guide. If you feel dizzy or uncomfortable, stop the guided
breathing session.
6. After you’ve completed the session, press the button to return to the clock.
All notifications are automatically disabled during the session. If you’ve set a silent
alarm, your FB409 & FB410 will vibrate at the time specified.
For more information about guided breathing sessions, including the benefits of
practicing deep breathing and safety information, see help.fitbit.com.
Page 26

Using Silent Alarms
FB409 & FB410 can gently vibrate to wake or alert you with its silent alarm feature. You
can set up to eight alarms to recur every day or on particular days of the week only.
For more information about customizing and using silent alarms, see help.fitbit.com.
Enabling or disabling silent alarms
Once an alarm has been set, you can disable or re-enable it directly on your FB409 &
FB410 without opening the Fitbit app. You can only set an alarm in the Fitbit app.
1. Press the button on your tracker until you find the Alarms screen.
2. Tap your tracker until you find the alarm you’re looking for.
3. Press and hold the button to disable or enable the alarm.
Dismissing silent alarms
The tracker flashes and vibrates when an alarm goes off. To dismiss the alarm, press
the button on your tracker or walk 50 steps. If you don’t press the button during the
alarm, it will automatically repeat once.
Page 27

Receiving Call, Text, & Calendar
Notifications
Over 200 compatible iOS and Android mobile devices let you receive incoming phone
call, text message, and calendar event notifications on your FB409 & FB410 when your
mobile device is nearby. To determine whether your device supports this feature, go to
http://www.fitbit.com/devices. Note that notifications aren’t available with the Fitbit
app for Windows 10.
Calendar requirements
Your tracker will show calendar events and any information sent from your calendar
app to your mobile device. Note that if your calendar app does not send notifications
to your mobile device, you won’t receive notifications on your tracker.
If you have an iOS device, your FB409 & FB410 shows notifications from all calendars
synced to the default iOS Calendar app. If you have a third-party calendar that is not
synced to the iOS Calendar app, you won’t see notifications from that calendar.
If you have an Android device, your FB409 & FB410 shows calendar notifications from
the calendar app you choose during setup. You can choose from the default Calendar
app on your mobile device or several third-party calendar apps.
Enabling notifications
Before you turn on notifications in the Fitbit app, make sure that Bluetooth on your
mobile device is turned on and that your mobile device is capable of sending
notifications (often under Settings > Notifications).
For more information about making sure your mobile device permits notifications, see
help.fitbit.com.
Page 28

Call and text notifications are on by default. To turn on calendar notifications:
1. With your tracker nearby, on the Fitbit app dashboard, tap the Account icon (
).
2. Tap the FB409 & FB410 tile.
3. Tap Notifications and turn on or off any combination of text, call, or calendar
notifications.
4. Follow the onscreen instructions to connect (bond) your mobile device with your
tracker.
After notifications are enabled, “FB409 & FB410” appears in the list of Bluetooth
devices paired to your mobile device.
Note: If this is your first time setting up notifications on your Android mobile device,
for detailed instructions, see help.fitbit.com.
Viewing incoming notifications
If your tracker and mobile device are within 30 feet of each other, a call, text message,
or calendar event causes the tracker to vibrate. Your screen will remain off until you
wake it up to view the notification. To wake up your tracker and view the notification,
turn your wrist towards you or press the button. The notification is only available for
one minute after you receive it. If you have more than one unread notification, you’ll
see a plus sign (+) indicator.
For phone calls, the notification scrolls four times with the name or number of the
caller while an animation plays. To dismiss the notification, press the button.
For text messages the message scrolls one time and then disappears. The sender’s
name scrolls once and remains static.
Page 29

For calendar events, the name of the event scrolls one time and then disappears. The
event time scrolls once and remains static.
If the text message, calendar event, sender or event time, is short enough to show on
the screen, the information does not scroll. The character limit for notifications is 40.
Page 30

Customizing your Fitbit FB409 & FB410
This section explains how to change your clock face and modify certain tracker
behaviors.
Changing the clock face
FB409 & FB410 comes with several clock faces. Some examples include:
You can change your clock face using the Fitbit app or the fitbit.com dashboard. For
more information, see help.fitbit.com.
Using Quick View
To preserve battery your screen turns off when not in use. It wakes up automatically
when you turn your wrist towards you (known as Quick View), or you can wake it up by
pressing the button or double tapping.
For more information about turning Quick View on or off, see help.fitbit.com.
Adjusting the heart rate tracker
Your FB409 & FB410 uses PurePulseÒ technology to track heart rate automatically and
continuously. The Heart Rate setting has three options:
• Auto (the default)—Heart rate tracking is active when you’re wearing your
tracker.
• Off—Heart rate tracking is off.
Page 31

• On—Heart rate tracking is on regardless of whether you’re wearing your tracker.
For more information about adjusting the heart rate tracker, see help.fitbit.com.
Page 32

Updating your Fitbit FB409 & FB410
We occasionally make free feature enhancements and product improvements available
through firmware updates. We recommend keeping your FB409 & FB410 up to date.
When a firmware update is available you’ll see a notification in the Fitbit app
prompting you to update. When the update starts, a progress bar appears on the
tracker and in the Fitbit app until the update is complete.
Keep your tracker and mobile device close to each other during the update process.
Note: Updating your FB409 & FB410 takes several minutes and may be demanding on
the battery. For this reason we recommend updating while your tracker is fully
charged or plugged into the charging cable.
Page 33

Troubleshooting your Fitbit FB409 &
FB410
If your tracker is not working properly, review our troubleshooting guidance below.
Visit help.fitbit.com more information.
Heart-rate signal missing
FB409 & FB410 continuously tracks your heart rate while you’re exercising and
throughout the day. Occasionally the heart rate tracker may have difficulty finding a
good signal. When this happens you’ll see dashed lines where your current heart rate
usually appears
Heart rate signal missing
If you’re not getting a heart rate signal, first make sure you’re wearing your tracker
correctly, either moving it higher or lower on your wrist or tightening or loosening the
band. After holding your arm still and straight for a short wait, you should see your
heart rate again. If the heart rate signal is still missing, check your Heart Rate setting
on your Fitbit dashboard and make sure it’s set to On or Auto.
Unexpected behavior
If you experience one of the following problems, it may be fixed by restarting your
tracker:
• Not syncing despite successful setup
• Not responding to button presses or taps despite being charged
• Not tracking your steps or other data
Page 34

Note: Restarting your tracker reboots the device but does not delete any data.
To restart your tracker:
1. Plug the charging cable into the USB port on your computer or a UL-certified
USB wall charger.
2. Clip the other end of the charging cable to the port on the back of the tracker.
The pins on the charging cable must lock securely with the port.
3. Make sure the button on your tracker is aligned with the button opening on the
charging cable. You’ll know the connection is secure when the tracker vibrates
and you see a battery icon on your tracker’s display. Your FB409 & FB410 will
begin charging.
4. Press and hold the button on your tracker for four seconds. When you see the
Fitbit logo and the tracker vibrates, this means the tracker has restarted.
Page 35

After your tracker restarts you can unplug it from the charging cable and put it back
on. For additional troubleshooting or to contact Customer Support, see help.fitbit.com.
Page 36

Fitbit FB409 & FB410 General Info &
Specifications
Sensors
Your FB409 & FB410 contains the following sensors:
• A MEMS 3-axis accelerometer, which tracks your motion patterns
• An altimeter, which tracks altitude changes
• An optical heart rate tracker
Materials
The wristband that comes with FB409 & FB410 is made of a flexible, durable elastomer
material similar to that used in many sports watches. It does not contain latex.
Accessory wristbands are available in genuine leather.
The buckle and frame on FB409 & FB410 are made of surgical-grade stainless steel.
While all stainless steel contains traces of nickel and can cause an allergic reaction in
someone with nickel sensitivity, the amount of nickel in all Fitbit products meets the
European Union's stringent Nickel Directive.
Wireless technology
FB409 & FB410 contains a Bluetooth 4.0 radio transceiver.
Haptic feedback
FB409 & FB410 contains a vibration motor, for alarms, goals, notifications, and
reminders.
Battery
FB409 & FB410 contains a rechargeable lithium-polymer battery.
Page 37

Small wristband
Fits a wrist between 5.5 and 6.7 inches in
circumference
Large wristband
Fits a wrist between 6.7 and 8.1 inches in
circumference
Extra large wristband
Fits a wrist between 8.1 and 9.3 inches in
circumference
Operating Temperature
14° to 113° F
(-10° to 45° C)
Non-operating Temperature
-4° to 140° F
(-20° to 60° C)
Water Resistant
Splash proof. Do not shower with the device or
submerge it in water.
Memory
FB409 & FB410 stores most minute-by-minute stats and exercise data for seven days.
It stores SmartTrack data for three days and summary totals for 30 days. Heart rate
data is stored at one-second intervals during exercise tracking and at five-second
intervals at all other times.
Stored data consists of steps, distance, calories burned, floors, active minutes, heart
rate, exercise, sleep, and stationary vs. active hours. FB409 & FB410 can store a
maximum of 10 hours of exercise data. This means that if you exercise for more than
10 hours and don’t sync your tracker, your exercise history will not include everything.
We recommend syncing your tracker at least once a day.
Display
The FB409 & FB410 has an OLED tap display.
Size
Wristband sizes are shown below. Note that accessory wristbands sold separately may
vary slightly in size.
Environmental conditions
Page 38

Maximum Operating Altitude
30,000 feet
(10,000 m)
Learn More
To learn more about your tracker and dashboard, visit help.fitbit.com.
Return policy and warranty
Warranty information and the fitbit.com return policy can be found at
http://www.fitbit.com/returns.
Page 39

Regulatory & Safety Notices
Notice to the User
Regulatory content for select regions can also be viewed on your device. To view
the content:
Settings > About > Regulatory Info
USA: Federal Communications Commission (FCC)
statement
Model Names: FB409 and FB410
Notice to the User: The FCC ID can also be viewed on your device. To view the
content:
Settings > About > Regulatory Info
This device complies with Part 15 of the FCC Rules.
Operation is subject to the following two conditions:
1. This device may not cause harmful interference and
2. This device must accept any interference, including interference that may cause
undesired operation of the device.
FCC Warning
Changes or modifications not expressly approved by the party responsible for
compliance could void the user’s authority to operate the equipment.
Note: This equipment has been tested and found to comply with the limits for a Class B
digital device, pursuant to part 15 of the FCC Rules. These limits are designed to
provide reasonable protection against harmful interference in a residential installation.
This equipment generates, uses and can radiate radio frequency energy and, if not
installed and used in accordance with the instructions, may cause harmful interference
to radio communications. However, there is no guarantee that interference will not
occur in a particular installation. If this equipment does cause harmful interference to
radio or television reception, which can be determined by turning the equipment off
and on, the user is encouraged to try to correct the interference by one or more of the
following measures:
• Reorient or relocate the receiving antenna.
• Increase the separation between the equipment and receiver.
• Connect the equipment into an outlet on a circuit different from that to
which the receiver is connected.
• Consult the dealer or an experienced radio/TV technician for help.
Page 40

This device meets the FCC and IC requirements for RF exposure in public or
uncontrolled environments.
Model FB409:
FCC ID: XRAFB409
Model FB410:
FCC ID: XRAFB410
Canada: Industry Canada (IC) statement
Model Names FB409 and FB410
Notice to the User: The IC ID can also be viewed on your device. To view the
content:
Settings > About > Regulatory Info
Noms de modèles FB409 et FB410
Avis à l'utilisateur: L'ID de l'IC peut également être consulté sur votre appareil.
Pour voir le contenu:
Paramètres> À propos> Informations réglementaires
This device meets the IC requirements for RF exposure in public or uncontrolled
environments.
Cet appareil est conforme aux conditions de la IC en matière de RF dans des
environnements publics ou incontrôlée
IC Notice to Users English/French in accordance with current issue of RSS GEN:
This device complies with Industry Canada license exempt RSS standard(s).
Operation is subject to the following two conditions:
1. this device may not cause interference, and
2. this device must accept any interference, including interference that may cause
undesired operation of the device.
Cet appareil est conforme avec Industrie Canada RSS standard exempts de licence (s).
Son utilisation est soumise à Les deux conditions suivantes:
1. cet appareil ne peut pas provoquer d’interférences et
2. cet appareil doit accepter Toute interférence, y compris les interférences qui
peuvent causer un mauvais fonctionnement du dispositive
Model FB409:
IC: 8542A-FB409
Model FB410:
IC: 8542A-FB410
Page 41

European Union (EU)
Model Names FB409 and FB410
Simplified EU Declaration of Conformity
Hereby, Fitbit, Inc. declares that the radio equipment type Models FB409 and FB410 are in
compliance with Directive 2014/53/EU. The full text of the EU declaration of conformity is
available at the following internet address: www.fitbit.com/safety
Vereinfachte EU-Konformitätserklärung
Fitbit, Inc. erklärt hiermit, dass die Funkgerättypen Modell FB409, FB410 die Richtlinie
2014/53/EU erfüllen. Der vollständige Wortlaut der EU-Konformitätserklärungen kann unter
folgender Internetadresse abgerufen werden: www.fitbit.com/safety
Declaración UE de Conformidad simplificada
Por la presente, Fitbit, Inc. declara que el tipo de dispositivo de radio Modelo FB409, FB410
cumple con la Directiva 2014/53/UE. El texto completo de la declaración de conformidad de la
UE está disponible en la siguiente dirección de Internet: www.fitbit.com/safety
Déclaration UE de conformité simplifiée
Fitbit, Inc. déclare par la présente que les modèles d’appareils radio FB409, FB410 sont
conformes à la Directive 2014/53/UE. Les déclarations UE de conformité sont disponibles dans
leur intégralité sur le site suivant : www.fitbit.com/safety
Dichiarazione di conformità UE semplificata
Fitbit, Inc. dichiara che il tipo di apparecchiatura radio Modello FB409, FB410 è conforme alla
Direttiva 2014/53/UE. Il testo completo della dichiarazione di conformità UE è disponibile al
seguente indirizzo Internet: www.fitbit.com/safety
Argentina
Model FB409:
Model FB410:
C-21863
C-21864
Page 42

部件名称
Part Name
有毒和危险品
Toxic and Hazardous Substances or Elements
Model FB410
铅
(Pb)
水银(Hg)
镉
(Cd)
六价铬
(Cr(VI))
多溴化苯
(PBB)
多溴化二苯醚
(PBDE)
表带和表扣
(
Strap and
Buckle)
O O O O O
O
电子
(
Electronics)
-- O O O O
O
电池
(
Battery)
O O O O O
O
充电线 (
Charging
Cable)
O O O O O
O
本表格依据 SJ/T 11364 的规定编制
O = 表示该有害物质在该部件所有均质材料中的含量均在 GB/T 26572规定的限量要求以下
(indicates that the content of the toxic and hazardous substance in all the
Australia/New Zealand
Model Name FB410
China
Model Name FB410
Regulatory content can also be viewed on your device. To view the content:
Settings > About > Regulatory Info
CMIIT ID: 2018DJ3954
China RoHS
Page 43
Homogeneous Materials of the part is below the concentration limit requirement as
described in GB/T 26572).
X = 表示该有害物质至少在该部件的某一均质材料中的含量超出 GB/T 26572规定的限量要
求 (indicates that the content of the toxic and hazardous substance in at least
one Homogeneous Material of the part exceeds the concentration limit requirement as
described in GB/T 26572).
56621/SDPPI/2018
3788
India
Model Name FB410
Regulatory content can also be viewed on your device. To view the content:
Settings > About > Regulatory Info
Indonesia
Model Name FB410
Israel
Model Name FB409
Model Name FB410
JAPAN
51-64667 התאמה אישור
. המ ו צ ר של המ ו ד ו ל אר י בח ל ק טכ נ י שי נ ו י כל לבצע אי ן
51-64668 התאמה אישור
. המ ו צ ר של המ ו ד ו ל אר י בחל ק טכ נ י שי נ ו י כל לבצע אי ן
Notice to the User:
Page 44

Regulatory content for select regions can also be viewed on your device. To view
the content:
Settings > About > Regulatory Info
Mexico
Model Names FB409 and FB410
“La operación de este equipo está sujeta a las siguientes dos condiciones: (1) es posible que este
equipo o dispositivo no cause interferencia perjudicial y (2) este equipo o dispositivo debe aceptar
cualquier interferencia, incluyendo la que pueda causar su operación no deseada
Morocco
Model Name FB409
Model Name FB410
Nigeria
Model Names FB409 and FB410
Connection and use of this communications equipment is permitted by the Nigerian
Communications Commission.
Page 45

Oman
Model Name FB409
OMAN-TRA/TA-R/5771/18
D100428
Model Name FB410
OMAN-TRA/TA-R/5773/18
D100428
Philippines
Model Name FB410
Serbia
Model Names FB409 and FB410
South Korea
Model Name FB410
Page 46

클래스B장치(가정사용을위한방송통신기기):EMC등록주로가정용(B급)으로하고,모든지역에서사용할수있습니다
얻을이장치.
Taiwan
Model Name FB410
注意!
依據 低功率電波輻射性電機管理辦法
第十二條 經型式認證合格之低功率射頻電機,非經許可,公司、商號或使用者均不得擅自變更頻
率、加大功率或變更原設計之特性及功能
第十四條
低功率射頻電機之使用不得影響飛航安全及干擾合法通信;經發現有干擾現象時,應立即停用,
並改善至無干擾時方得繼續使用。
前項合法通信,指依電信法規定作業之無線電通信。
低功率射頻電機須忍受合法通信或工業、科學及醫療用電波輻射性電機設備之干擾。
Translation:
Article 12
Without permission, any company, firm or user shall not alter the frequency, increase the power,
or change the characteristics and functions of the original design of the certified lower power
frequency electric machinery.
Article 14
The application of low power frequency electric machineries shall not affect the navigation
safety nor interfere a legal communication, if an interference is found, the service will be
suspended until improvement is made and the interference no longer exists. The foregoing legal
communication refers to the wireless telecommunication operated according to the
telecommunications laws and regulations. The low power frequency electric machinery should
be able to tolerate the interference of the electric wave radiation electric machineries and
equipment for legal communications or industrial and scientific applications.
使用過度恐傷害視力」使用30分鐘請休息10分鐘。 2歲以下幼兒不看螢幕,2歲以
上每天看螢幕不要超過1小時。
Translation:
“Excessive use may cause damage to vision”
Rest for 10 minutes after every 30 minutes.
Children under 2 years old should stay away from this product. Children 2 years old or more
should not see the screen for more than 1 hour. see the screen for more than 1 hour.
電池警語:
此裝置使用鋰電池。
Page 47

ZMB/ZICTA/TA/2013/10/5
若未遵照下列準則,則裝置內的鋰離子電池壽命可能會縮短或有損壞裝置、發生火災、化學品灼
傷、電解液洩漏及/或受傷的風險。
l 請勿拆解、鑿孔或損壞裝置或電池。
l 請勿取出或嘗試取出使用者不可自行更換的電池。
l 請勿將電池曝露於火焰、爆炸或其他危險中。
l 請勿使用尖銳物品取出電池。
Translation:
Battery warning:
This device uses a lithium battery.
If the following guidelines are not followed, the life of the lithium-ion battery in the device may be
shortened or there is a risk of damage to the device, fire, chemical burn, electrolyte leakage and
/ or injury.
• Do not disassemble, puncture or damage the device or battery.
• Do not remove or try to remove the battery that the user cannot replace.
• Do not expose the battery to flames, explosions or other hazards.
• Do not use sharp objects to remove the battery.
United Arab Emirates
Model Name FB409
TRA Registered No: ER63685/18
Dealer No: 35294/14
Model Name FB410
TRA Registered No: ER63686/18
Dealer No: 35294/14
Zambia
Model Name FB409
Page 48

ZMB/ZICTA/TA/2013/10/5
Model Name FB410
Customs Union
 Loading...