Fishman M-100, M-200 INSTALLATION GUIDE

M-100/M-200
INSTALLATION GUIDE
www.fishman.com
Read Me First!
Installation of this product is a simple procedure, but we recommend this job only if you are an experienced repair technician.
Requirements
Determine whether the top of this bridge is compatible with the base of the existing bridge on the instrument. If so, you may place the furnished bridge top onto the existing base and discard the furnished base.
Installation
Observe the following precaution!
•Handle the pickup carefully! Please pay close attention to the dimensional requirements for installation. Failure to do so can result in permanent damage to the pickup.
Installing the pickup
1. If using the furnished base, fit the bridge to the instrument using your preferred method.
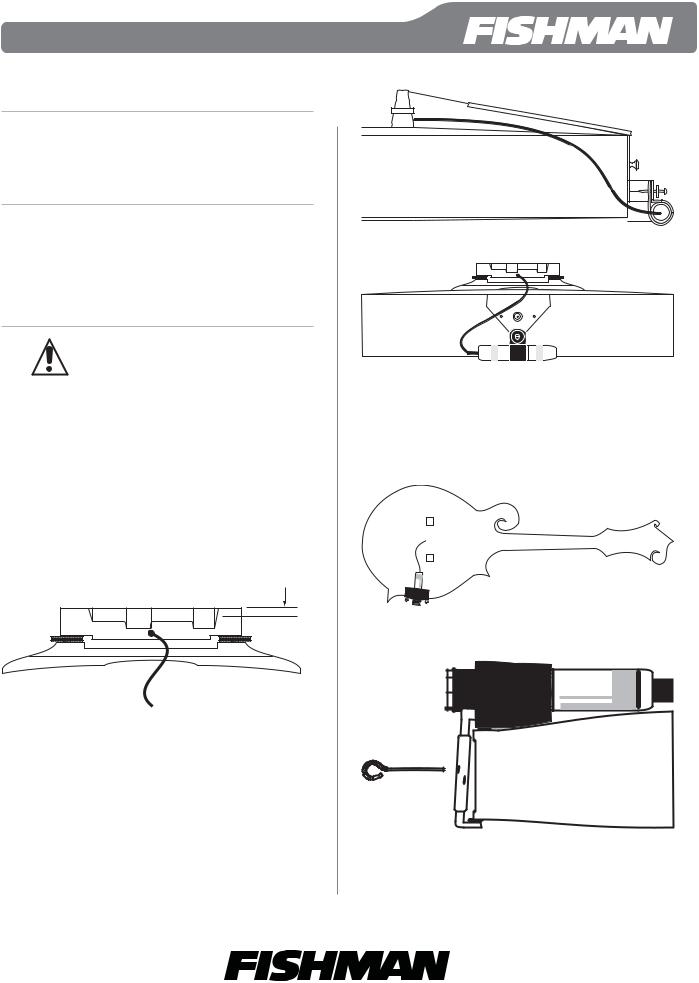
2. When profiling and notching the top of the bridge, you may safely remove up to .125” of wood without damaging the sensing element (figure 1).
.125”
Figure 1
Jack installation
For M-100: Remove the screw at the bottom of the tailpiece (figure 2) and replace with the supplied screw, washer and jack/clamp assembly. Fasten the assembly securely (figure 3).
Figure 2
Figure 3
For M-200: After fitting the pickup to the mandolin, locate the jack to the right of the bridge (figure 4) and tighten it with the enclosed chinrest key (figure 5). Be careful not to scratch the side of your mandolin.
Figure 4
Figure 5
www.fishman.com |
514-300-112 Rev A 5-09 |
 Loading...