


POCKET BLENDER
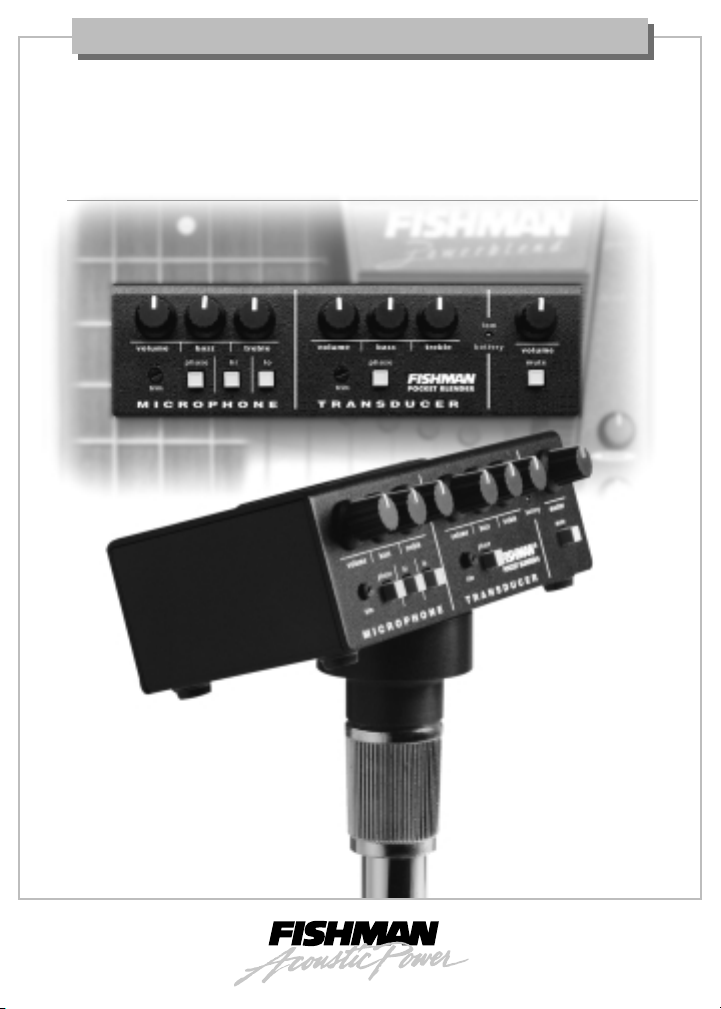
User Guide
Pocket Blender
Acoustic Instrument Preamp
®
Pocket Blender
20
dB 0
-30
-10
-20
-30
-20
-10
100 1k 10k 20k
FIG. 1
20
dB 0
-30
-10
-20
-30
-20
-10
100 1k 10k 20k
FIG. 2
20
dB 0
-30
-10
-20
-30
-20
-10
100 1k 10k 20k
Thank you for choosing the Fishman Pocket Blender. Our goal is to provide you with acoustic amplification
products that will simply let you sound your best. With our long-standing commitment to quality, you can
feel confident that your Fishman gear will produce great sound and trouble-free performance for years to
come. Please take a few minutes to read this guide and familiarize yourself with the system. Your satisfaction
is very important to us. If you have any questions or comments, please contact us at tech@fishman.com or
by phone at 978-988-9665.
CONTENTS
Introduction ...................................................................... 1
Install pickup/Microphone on the instrument ................... 1
Quick Start ....................................................................... 1
Features ........................................................................... 1
Power Options.................................................................. 1
Front Panel
Microphone Channel ............................................ 1
Transducer Channel ............................................ 1
Master Section ..................................................... 1
Rear Panel ....................................................................... 1
Suggested Input Options .................................................
Suggested Output Options ..............................................
Outputs/Effects Loops .....................................................
Trouble Shooting .............................................................
Optional Accessories .......................................................
Specifications ...................................................................
Block Diagram ................................................................
Appendix - The Microphone ...........................................
2
3
4
5
6
6
7
8
8
10
12
13
14
15
15
16
17
INTRODUCTION: THE BLENDER SYSTEM
The Fishman Pocket Blender is a compact yet full-featured
2-channel outboard mixer/preamp designed for acoustic
stringed instruments. It is specifically set up for blending a
pickup with an onboard miniature microphone.
1 - Microphone and Pickup (Transducer)
Everyone loves the way a microphone captures the natural
ambience and resonance of an acoustic instrument. But
microphones have a downside; they feedback when you
crank up the volume and tend to get lost in the mix when
there are other amplified instruments onstage. Pickups
deliver a balanced high output signal with low feedback,
but they can sound somewhat dry compared to
microphones.
MINI-MICROPHONE MOUNTED ON
2
X-BRACE NEAR SOUNDHOLE
UNDER-SADDLE PIEZO
TRANSDUCER
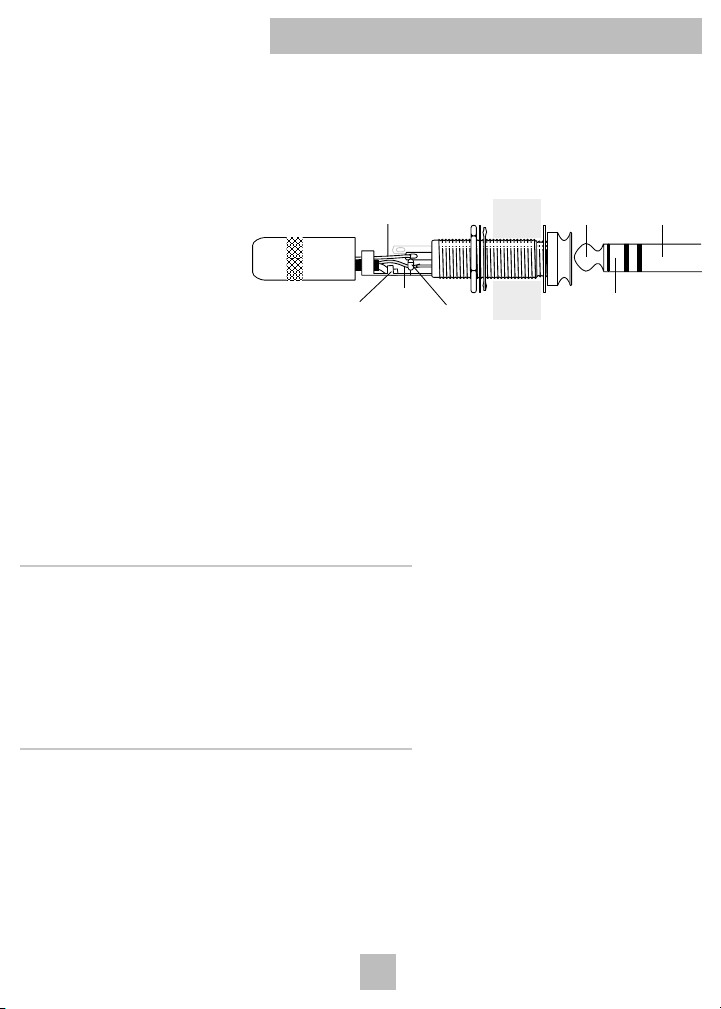
Pocket Blender
Shield to
Sleeve
Pickup Signal
to Tip
Microphone to Ring
Zener Diode
between Ring & Sleeve
Ring
Tip Sleeve
Stereo PlugStereo Jack
The Pocket Blender allows you to combine the benefits of both pickup and microphone signals to achieve results not
available by simply using one or the other. With this system, a microphone rounds out the dry, direct sound of a pickup
- while the "bite" of a pickup adds focus and definition to the microphone sound.
We recommend (and sell) the Crown GLM-200 mini-microphone for the Pocket Blender. Electret microphones made
by other manufacturer's can be modified for use with the Pocket Blender (contact the manufacturer for specific wiring).
2 - Stereo Instrument Cable
For convenience, we use a TRS
stereo instrument cable to get the
individual microphone and pickup
signals from the instrument into the
Pocket Blender. The Pocket Blender
supplies a 9-Volt bias voltage through
the ring connection that in turn
powers the mini-microphone.
3 - The Pocket Blender
Each channel of the Pocket Blender is set up for the particular signal conditioning requirements of microphone and
pickup. Once the pickup/microphone signals are blended, the composite signal can be routed to amplification,
recording gear or signal processing equipment via XLR and 1/4" outputs. An effects loop is also included for each
channel.
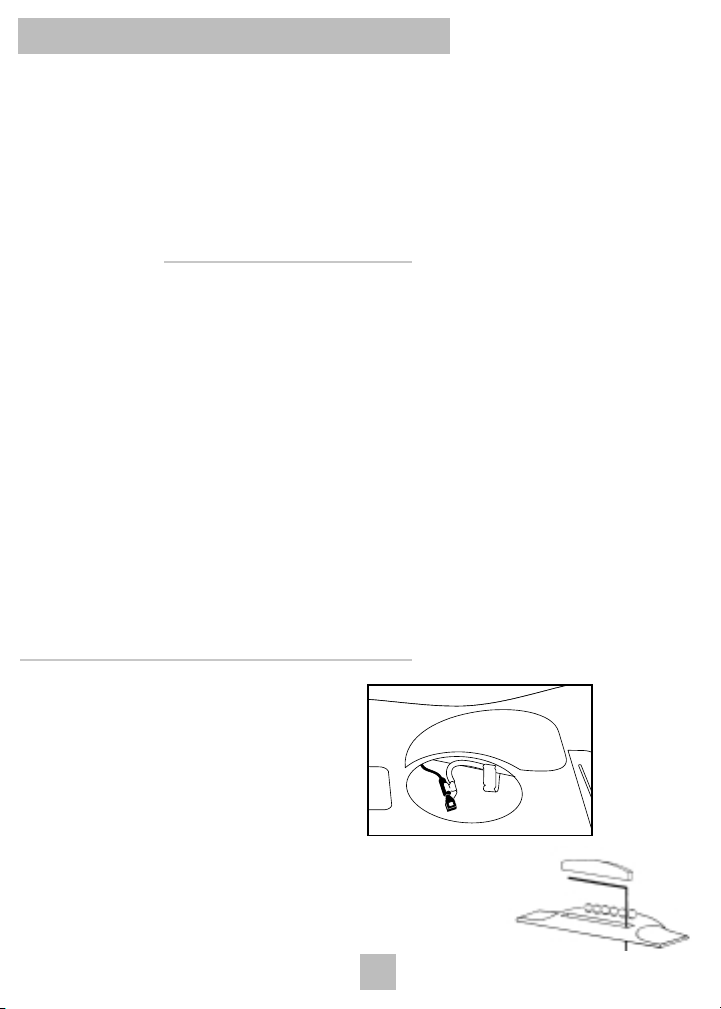
INSTALLING A PICKUP / CROWN GLM 200 MICROPHONE
COMBINATION ON YOUR INSTRUMENT
Before you begin using your Pocket Blender, have a repair professional install the appropriate pickup and
microphone combination for your instrument.
Note:
The Pocket Blender is also compatible with other manufacturers' mini-electret microphones. Consult the manufacturer
for specific minimum power requirements, wiring configuration and instrument mounting systems (the Fishman microphone
mounts are dedicated to the Crown GLM series).
Three Common Scenarios:
1 - WIRING A PASSIVE PICKUP & MICROPHONE
A passive pickup is any transducer (piezo or magnetic) that works without a battery.
Note:
To minimize crosstalk with a passive pickup, use a "2-pair" premium stereo cable (Fishman part # ACC-BLE-15C) with
separate shields for both the pickup and microphone signals.
1.
Connect red microphone wire to ring terminal.
2.
Connect white and shield microphone wires to sleeve.
3.
Connect pickup signal wire to tip and pickup shield to sleeve.
4.
Connect supplied zener diode in place between red wire (ring) and ground (sleeve).
Note that banded side of diode must be closest to red wire.
3

Pocket Blender
Shield to
Sleeve
Pickup Signal
to Tip
Microphone to Ring
Zener Diode
between Ring & Sleeve
Ring
Tip Sleeve
Stereo PlugStereo Jack
2 - WIRING TO ACOUSTIC MATRIX NATURAL I & II
1.
Remove shielding cap to expose preamp circuit board.
2.
Connect red microphone wire to ring pad on circuit board.
3.
Connect white and shield microphone wires to "G" pad adjacent to ring pad.
4.
Connect supplied zener diode in place between red wire and sleeve. Note that banded side of the zener diode
must be closest to red microphone wire.
3 - WIRING THE MIC & PICKUP WITH SEPARATE CONNECTORS
The advantages to wiring the microphone and pickup to separate mono connectors are:
a. Microphone is interchangeable with other instruments.
b. Less cross talk between passive pickups and the microphone.
Typically, classical guitarists and double bassists find this arrangement convenient for sharing the microphone with
several different instruments. Classical guitarists can install the microphone without drilling holes in the instrument. In
this configuration, the microphone can also be removed without disturbing the pickup.
1.
Connect red microphone wire to tip terminal on a ¼" mono plug.
2.
Connect white microphone wire and shield to sleeve terminal the same plug.
3.
Solder supplied zener diode in place between red wire and sleeve.
Note:
The banded side of the diode must be closest to the red wire. For use with the Pocket Blender, plug the mic into the
RING jack of a stereo "Y" cable (available from Fishman).
Warning: Installation by a qualified repairperson is strongly recommended. Fishman Transducers Inc. will not be responsible
for any damages due to improper installation.
QUICK START
To get up and running you'll need these components:
•
Pocket Blender
•
9-Volt alkaline battery
•
Pickup and mini-microphone connected to a stereo jack (See Page 3)
•
Stereo instrument cable
•
XLR cable or 1/4" instrument cable
1.
Install a fresh 9-Volt alkaline battery.
2.
Connect the stereo cable between the instrument and the input of the Pocket Blender.
3.
Set the Mute, Lo and Hi switches to the out position. Set the phantom power switch on the rear panel to the in
position. Set both channel volume controls fully counter clockwise. Set the Master level to 3:00. Set all the bass
and treble controls to 12:00.
4.
Run a cable from one of the outputs on the rear panel of the Pocket Blender to your amp or PA.
5.
Adjust the trim controls - See Page 7
6.
With the Pocket Blender's Master Level at 3:00, adjust both the microphone and transducer volume controls to
approximately the same level.
7.
Set the phase switches - See Page 6
4
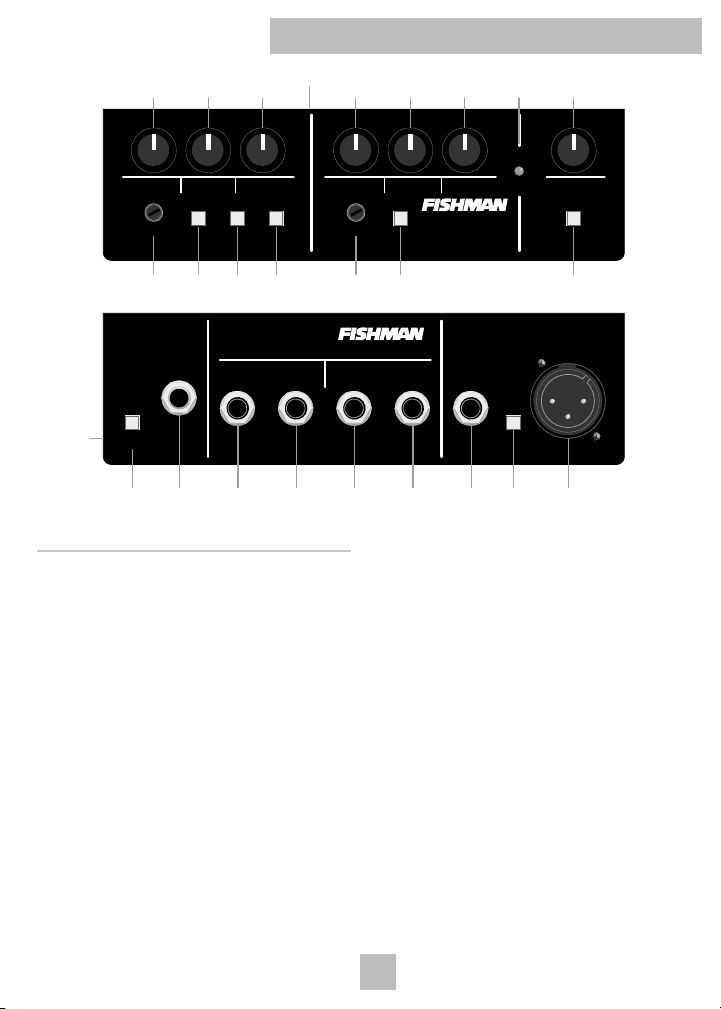
volume volume
trim
phase mute
bass bass volume
TRANSDUCER
MICROPHONE
treble treble
battery
low
POCKET BLENDER
input
microphone - ring
transducer - tip
phantom
power
ground
lift
9V
effects loop
send
microphone
Made in the USA
transducer
return send return
output
AC ADAPTERS
FISHMAN 910-R,
ROLAND PSA SERIES
26
2
10
17
3
11
18
4
12
19 20 21 22 23
5
13
6
14
24
7
15
98
16
25
1
trim
phase hi lo
Located on top
Pocket Blender
FEATURES
FRONT PANEL
1) BATTERY COMPARTMENT
2) MICROPHONE VOLUME
3) MICROPHONE BASS CONTROL
4) MICROPHONE TREBLE CONTROL
5) TRANSDUCER VOLUME CONTROL
6) TRANSDUCER BASS CONTROL
7) TRANSDUCER TREBLE CONTROL
8) BATTERY LOW LED
9) MASTER VOLUME CONTROL
10) MICROPHONE TRIM CONTROL
11) MICROPHONE PHASE SWITCH
12) MICROPHONE HI CUT SWITCH
13) MICROPHONE LO CUT SWITCH
14) TRANSDUCER TRIM CONTROL
15) TRANSDUCER PHASE SWITCH
16) MUTE SWITCH
FEATURES
REAR PANEL
17) 9-VOLT PHANTOM POWER SWITCH
18) 1/4” INPUT JACK (TRS)
19) MICROPHONE EFFECTS SEND
20) MICROPHONE EFFECTS RETURN
21) TRANSDUCER EFFECTS SEND
22) TRANSDUCERS EFFECTS RETURN
23) 1/4” UNBALANCED OUTPUT
24) GROUND LIFT SWITCH
25) XLR BALANCED OUTPUT
26) AC ADAPTER INPUT
5

Pocket Blender
POWER OPTIONS
9-Volt Battery
Lift the lid on top of the Pocket Blender and insert a fresh 9-Volt alkaline battery. Observe the correct
polarity. Battery life is an estimated 60 hours of continuous use.
9-Volt AC Adapter Input
Use only a well filtered and regulated 9-Volt AC adapter. We recommend a Fishman Model-910 or
Roland PSA series regulated AC Adapter. Use of an unregulated adapter will not only void the warranty,
but may damage the unit.
Input Jack
Plug in a TRS stereo cable here. The input will accept two separate signals via a stereo instrument cable.
(Tip = Transducer Channel, Ring = Microphone Channel)
Engage the Mute switch before you plug into the
input to avoid a loud pop through the speakers. When you plug in here the battery turns on. To save the
battery remember to unplug the input when you're not using the Pocket Blender.
MICROPHONE CHANNEL
Use the Microphone Channel for a mini-electret microphone (switch 9-Volt phantom on rear panel on) or
with a second pickup (9-Volt phantom off).
Volume Control
Normally set the volume for the microphone at around 12:00 (see Trim instructions below).
Bass And Treble
These shelving style tone controls provide basic equalization for the Microphone Channel. Set them at
12:00 for no cut or boost (flat).
Phase Switches
Prevent feedback and match up the pickup and microphone signals for a stronger amplified sound.
How to kill feedback in the Microphone Channel:
•
Adjust the Master volume level to 3:00 and turn the Transducer volume off (7:00).
•
Adjust the Microphone Channel volume to just below the threshold of feedback. Play your instrument and
toggle the Microphone Channel phase switch. Leave the switch where it feeds-back the least.
How to get the pickup in phase with the microphone:
•
After you perform the above step, raise the Transducer Channel volume until it is about the same level as
the Microphone. Play a sustained note or chord on your instrument and toggle the Transducer Channel
Phase switch. Leave the switch in the position that sounds strongest and feeds-back the least.
•
Once the pickup and Microphone are in Phase, make note of the relative position of the two switches.
They will be either in the same position, or one in and one out. To keep pickup/mic in phase, push both
switches anytime you adjust the overall polarity.
6
 Loading...