

Page 1

WF-M5799 User's Guide
Page 2

Page 3

Contents
WF-M5799 User's Guide............................................................................................................................ 15
Product Basics .......................................................................................................................................... 16
Using the Control Panel ..................................................................................................................... 16
Control Panel Buttons and Lights .................................................................................................. 17
Status Icon Information ............................................................................................................. 18
Changing LCD Screen Language.................................................................................................. 19
Selecting the Date and Time ......................................................................................................... 20
Selecting Your Country or Region ................................................................................................. 21
Setting a Password and Locking the Control Panel ....................................................................... 21
Entering Characters on the LCD Screen................................................................................... 23
Using Presets ................................................................................................................................ 23
Setting User Feature Restrictions (Access Control) ...................................................................... 26
Adjusting Control Panel Sounds.................................................................................................... 27
Adjusting the Screen Brightness.................................................................................................... 27
Turning Off the Operation Time Out Setting .................................................................................. 28
Preventing PC Connection via USB .............................................................................................. 29
Product Parts Locations ..................................................................................................................... 29
Product Parts - Front ..................................................................................................................... 30
Product Parts - Inside .................................................................................................................... 32
Product Parts - Back...................................................................................................................... 34
Using Power Saving Settings ............................................................................................................. 35
Changing the Sleep Timer Settings ............................................................................................... 35
Changing the Power Off Timer Settings ........................................................................................ 36
Epson Connect Solutions for Smartphones, Tablets, and More ......................................................... 36
Setting Up Epson Connect Services.............................................................................................. 37
Using Epson Email Print ............................................................................................................... 38
Using the Epson iPrint Mobile App ................................................................................................ 39
Using Epson Remote Print ........................................................................................................... 39
Using Epson Scan to Cloud........................................................................................................... 40
Using AirPrint .................................................................................................................................... 40
3
Page 4

Using Google Cloud Print................................................................................................................... 41
Setting Up Google Cloud Print on a Chromebook .............................................................................. 42
Android Printing Using the Epson Print Enabler ................................................................................ 43
Using the Mopria Print Service .......................................................................................................... 43
Using Fire OS Printing ....................................................................................................................... 44
Using Windows 10 Mobile Printing .................................................................................................... 45
Using Epson Print and Scan App with Windows Tablets ................................................................... 45
Printing and Scanning with NFC from Your Android Device............................................................... 46
Wi-Fi or Wired Networking........................................................................................................................ 48
Network Security Recommendations ................................................................................................. 48
Wi-Fi Infrastructure Mode Setup......................................................................................................... 49
Selecting Wireless Network Settings from the Control Panel ........................................................ 50
Wi-Fi Direct Mode Setup .................................................................................................................... 52
Enabling Wi-Fi Direct Mode ........................................................................................................... 52
Wi-Fi Protected Setup (WPS)............................................................................................................. 54
Using WPS to Connect to a Network ............................................................................................. 54
Printing a Network Status Sheet......................................................................................................... 55
Configuring Email Server Settings...................................................................................................... 56
Changing or Updating Network Connections ..................................................................................... 58
Accessing the Web Config Utility................................................................................................... 58
Changing a USB Connection to a Wi-Fi Connection...................................................................... 58
Changing a Wi-Fi Connection to a Wired Network Connection...................................................... 59
Connecting to a New Wi-Fi Router ................................................................................................ 59
Disabling Wi-Fi Features ............................................................................................................... 60
Enabling Epson Universal Print Driver (PCL) or PostScript Printing.................................................... 61
Installing the Epson Universal Print Driver - Windows ....................................................................... 61
Installing the PostScript (PS3) Printer Software - Windows ............................................................... 65
Installing the PostScript (PS3) Printer Software - Mac ....................................................................... 65
Selecting PDL (Page Description Language) Settings ....................................................................... 66
PDL Print Configuration Options.................................................................................................... 67
Selecting Printer Language and Interface Settings ............................................................................ 70
Printing Language and Interface Options ...................................................................................... 71
Printing a PCL or PS3 (PostScript) Status Sheet ............................................................................... 72
4
Page 5

Loading Paper ........................................................................................................................................... 73
Installing the Optional Paper Cassette Unit........................................................................................ 73
Enabling the Optional Paper Cassette - Windows ......................................................................... 75
Enabling the Optional Paper Cassette - Mac ................................................................................ 77
Loading Paper in the Cassette ........................................................................................................... 78
Loading Paper or Envelopes in the Rear Paper Feed Slot ................................................................ 81
Paper Loading Capacity..................................................................................................................... 84
Double-sided Printing Capacity.......................................................................................................... 87
Available Epson Papers ..................................................................................................................... 88
Paper or Media Type Settings - Printing Software.............................................................................. 89
Selecting the Paper Settings for Each Source - Control Panel ........................................................... 90
Paper Type Settings - Control Panel ............................................................................................. 91
Selecting Default Paper Settings - Administrator................................................................................ 92
Selecting the Default Printer Settings ............................................................................................ 92
Paper Source Settings Options................................................................................................. 93
Selecting the Universal Print Settings............................................................................................ 94
Universal Print Settings Options ............................................................................................... 95
Placing Originals on the Product ............................................................................................................. 96
Placing Originals on the Scanner Glass ............................................................................................. 96
Placing Originals in the Automatic Document Feeder ........................................................................ 97
Copying .................................................................................................................................................... 101
Copying Documents or Photos......................................................................................................... 101
Copying Options............................................................................................................................... 102
Printing from a Computer ....................................................................................................................... 106
Printing with the Standard Epson Printer Software - Windows ......................................................... 106
Selecting Basic Print Settings - Windows .................................................................................... 107
Paper Source Options - Windows ........................................................................................... 109
Print Quality Options - Windows ............................................................................................. 109
Multi-Page Printing Options - Windows................................................................................... 109
Selecting Double-sided Printing Settings - Windows ................................................................... 110
Double-sided Printing Options - Windows............................................................................... 113
Print Density Adjustments - Windows ..................................................................................... 113
Selecting Additional Layout and Print Options - Windows ........................................................... 114
5
Page 6

Image Options and Additional Settings - Windows.................................................................. 115
Header/Footer Settings - Windows ......................................................................................... 116
Selecting a Printing Preset - Windows......................................................................................... 117
Selecting Extended Settings - Windows ...................................................................................... 119
Extended Settings - Windows ................................................................................................. 120
Printing Your Document or Photo - Windows............................................................................... 121
Locking Printer Settings - Windows ............................................................................................. 122
Locked Setting Options........................................................................................................... 124
Entering a User ID and Password for Printing ............................................................................. 124
Selecting Default Print Settings - Windows.................................................................................. 126
Changing the Language of the Printer Software Screens ....................................................... 127
Changing Automatic Update Options .......................................................................................... 128
Printing with the Built-in Epson Driver - Windows 10 S..................................................................... 129
Selecting Print Settings - Windows 10 S...................................................................................... 129
Printing with the Epson Standard Printer Software - Mac................................................................. 133
Selecting Basic Print Settings - Mac ........................................................................................... 134
Paper Source Options - Mac................................................................................................... 137
Print Quality Options - Mac ..................................................................................................... 137
Selecting Page Setup Settings - Mac .......................................................................................... 138
Selecting Print Layout Options - Mac........................................................................................... 139
Selecting Double-sided Printing Settings - Mac........................................................................... 139
Double-sided Printing Options and Adjustments - Mac........................................................... 141
Managing Color - Mac ................................................................................................................. 141
Color Matching - Mac.............................................................................................................. 141
Selecting Printing Preferences - Mac .......................................................................................... 142
Printing Preferences - Mac...................................................................................................... 143
Printing Your Document or Photo - Mac ...................................................................................... 143
Checking Print Status - Mac.................................................................................................... 144
Printing with the Epson Universal Print Driver - Windows................................................................. 145
Synchronizing Printer Settings - Epson Universal Print Driver - Windows ................................... 145
Selecting Basic Print Settings - Epson Universal Print Driver - Windows .................................... 147
Selecting Additional Layout and Print Options - Epson Universal Print Driver - Windows ........... 150
Selecting Maintenance Options - Epson Universal Print Driver - Windows.................................. 152
6
Page 7

Extended Settings - Epson Universal Print Driver - Windows ................................................. 153
Selecting Default Print Settings - Epson Universal Print Driver - Windows.................................. 154
Locking Printer Settings - Epson Universal Print Driver - Windows ............................................. 156
Epson Universal Print Driver Locked Setting Options ............................................................. 157
Adding Network Printers - Epson Universal Print Driver - Windows............................................. 158
Printing with the PostScript (PS3) Printer Software - Windows ........................................................ 161
Enabling the Optional Paper Cassettes - PostScript Printer Software - Windows ....................... 161
Selecting Basic Print Settings - PostScript Printer Software - Windows ...................................... 162
Selecting Additional Layout and Print Options - PostScript Printer Software - Windows ............. 166
Selecting Default Print Settings - PostScript Printer Software - Windows.................................... 167
Printing with the PostScript (PS3) Printer Software - Mac ................................................................ 168
Enabling the Optional Paper Cassettes - PostScript Printer Software - Mac ............................... 169
Selecting Basic Print Settings - PostScript Printer Software - Mac ............................................. 170
Selecting Page Setup Settings - PostScript Printer Software - Mac ............................................ 175
Selecting Print Layout Options - PostScript Printer Software - Mac............................................. 176
Sizing Printed Images - PostScript Printer Software - Mac ......................................................... 177
Managing Color - PostScript Printer Software - Mac ................................................................... 177
Printing Your Document or Photo - PostScript Printer Software - Mac ........................................ 178
Checking Print Status - PostScript Printer Software - Mac ..................................................... 179
Cancelling Printing Using a Product Button...................................................................................... 179
Scanning .................................................................................................................................................. 181
Starting a Scan................................................................................................................................. 181
Starting a Scan Using the Product Control Panel ........................................................................ 181
Scanning to a Network Folder or FTP Server.......................................................................... 183
Scanning to Email ................................................................................................................... 185
Adding and Assigning Scan Jobs with Document Capture Pro - Windows ............................. 187
Adding and Assigning Scan Jobs with Document Capture - Mac............................................ 190
Scanning to a Memory Device ................................................................................................ 190
Scanning to the Cloud............................................................................................................. 192
Scanning Using Web Services for Devices (WSD) - Windows................................................ 193
Control Panel Scanning Options............................................................................................. 194
Starting a Scan Using the Epson Scan 2 Icon ............................................................................. 196
Starting a Scan from a Scanning Program................................................................................... 198
7
Page 8

Starting a Scan from a Smart Device........................................................................................... 200
Entering a User ID and Password for Scanning........................................................................... 200
Scanning with Document Capture or Document Capture Pro .......................................................... 201
Setting the Operation Mode on the Product Control Panel .......................................................... 202
Scanning with Document Capture Pro in Simple View - Windows............................................... 202
Scanning with Document Capture Pro in Standard View - Windows ........................................... 205
Scanning with Document Capture - Mac ..................................................................................... 208
Scanning in Epson Scan 2 ............................................................................................................... 211
Available Document Source Settings .......................................................................................... 214
Additional Scanning Settings - Main Settings Tab ....................................................................... 214
Additional Scanning Settings - Advanced Settings Tab............................................................... 215
Saving Scanned Documents as a Searchable PDF Using Epson Scan 2 ................................... 216
Image Format Options................................................................................................................. 218
Scan Resolution Guidelines ........................................................................................................ 218
Scanning Special Projects................................................................................................................ 219
Scanning to a SharePoint Server or Cloud Service - Windows.................................................... 219
Scanning to a SharePoint Server or Cloud Service - Mac ........................................................... 222
Scanning Multi-Page Originals as Separate Files - Windows ...................................................... 223
Faxing....................................................................................................................................................... 227
Connecting a Telephone or Answering Machine.............................................................................. 227
Setting Up Fax Features .................................................................................................................. 230
Setting Up Basic Fax Features .................................................................................................... 230
Using the Fax Setting Wizard.................................................................................................. 231
Selecting the Line Type........................................................................................................... 232
Setting the Number of Rings to Answer .................................................................................. 233
Selecting Advanced Fax Settings................................................................................................ 234
Send Settings - Fax................................................................................................................. 235
Receive Settings - Fax............................................................................................................ 235
Report Settings - Fax .............................................................................................................. 237
Basic Settings - Fax ................................................................................................................ 238
Security Settings - Fax............................................................................................................ 240
Setting Up the Fax Utility - Windows............................................................................................ 241
Setting Up Fax Features Using the Fax Utility - Mac ................................................................... 243
8
Page 9

Setting Up Contacts and Contact Groups......................................................................................... 244
Setting Up Contacts Using the Product Control Panel................................................................. 245
Creating a Contact .................................................................................................................. 245
Editing or Deleting a Contact .................................................................................................. 247
Creating a Contact Group ....................................................................................................... 248
Editing or Deleting a Contact Group........................................................................................ 249
Importing Contacts Using the Fax Utility - Windows .................................................................... 251
Setting Up Speed/Group Dial Lists Using the Fax Utility - Mac.................................................... 253
Sending Faxes ................................................................................................................................. 255
Sending Faxes from the Product Control Panel........................................................................... 255
Sending a Fax Using the Keypad, Contact List, or History...................................................... 256
Fax Sending Options .............................................................................................................. 258
Sending a Fax at a Specified Time ......................................................................................... 260
Sending a Fax on Demand ..................................................................................................... 261
Sending a Stored Fax ............................................................................................................. 262
Dialing Fax Numbers from a Connected Telephone ............................................................... 263
Sending Faxes Using the Fax Utility - Windows .......................................................................... 264
Sending Faxes Using the Fax Utility - Mac .................................................................................. 267
Receiving Faxes............................................................................................................................... 270
Fax Reception ............................................................................................................................. 270
Receiving Faxes Automatically ................................................................................................... 271
Receiving Faxes Manually........................................................................................................... 271
Forwarding Received Faxes........................................................................................................ 272
Receiving a Fax by Polling .......................................................................................................... 272
Saving Faxes to an External USB Device ................................................................................... 273
Saving and Viewing Received Faxes .......................................................................................... 274
Selecting Received Fax Options Using the Fax Utility - Windows ............................................... 275
Checking Fax Status ....................................................................................................................... 278
Printing Fax Reports......................................................................................................................... 279
Fax Report Options ..................................................................................................................... 279
Using External USB Devices with Your Product................................................................................... 281
Connecting a USB Device................................................................................................................ 281
USB Device Photo File Specifications ......................................................................................... 281
9
Page 10

Disconnecting a USB Device............................................................................................................ 282
Viewing and Printing from the LCD Screen ...................................................................................... 282
Printing JPEG Photos.................................................................................................................. 282
Printing TIFF Files ...................................................................................................................... 284
Printing PDF Files........................................................................................................................ 285
Print Setting Options - Device Mode............................................................................................ 285
Transferring Files on a USB Device ................................................................................................. 287
Setting Up File Sharing for File Transfers from Your Computer................................................... 287
Transferring Files from a USB Device to Your Computer ............................................................ 288
Replacing Ink Supply Units (Ink Packs) and Maintenance Boxes ....................................................... 289
Check Ink and Maintenance Box Status........................................................................................... 289
Checking Ink Status on the LCD Screen...................................................................................... 289
Checking Ink and Maintenance Box Status - Windows................................................................ 290
Checking Ink and Maintenance Box Status - Mac ....................................................................... 292
Purchase Epson Ink Packs and Maintenance Boxes ....................................................................... 294
Ink Supply Unit (Ink Pack) Part Numbers..................................................................................... 294
Removing and Installing Ink Packs................................................................................................... 295
Maintenance Box Replacement ....................................................................................................... 299
Adjusting Print Quality............................................................................................................................ 300
Print Head Maintenance................................................................................................................... 300
Print Head Nozzle Check............................................................................................................. 300
Checking the Nozzles Using the Product Control Panel ......................................................... 301
Checking the Nozzles Using a Computer Utility...................................................................... 302
Print Head Cleaning .................................................................................................................... 305
Cleaning the Print Head Using the Product Control Panel ...................................................... 305
Cleaning the Print Head Using a Computer Utility................................................................... 307
Enabling the Periodic Cleaning Setting................................................................................... 309
Print Head Alignment ....................................................................................................................... 310
Aligning the Print Head Using the Product Control Panel ............................................................ 310
Print Quality Adjustment................................................................................................................... 312
Adjusting the Print Quality Using the Product Control Panel........................................................ 312
Cleaning the Paper Guide ................................................................................................................ 314
10
Page 11

Cleaning and Transporting Your Product ............................................................................................. 315
Cleaning Your Product ..................................................................................................................... 315
Transporting Your Product ............................................................................................................... 318
Solving Problems .................................................................................................................................... 323
Checking for Software Updates........................................................................................................ 323
Product Status Messages ................................................................................................................ 324
Job Status Error Codes .................................................................................................................... 326
Running a Product Check ................................................................................................................ 331
Resetting Control Panel Defaults ..................................................................................................... 332
Solving Setup Problems ................................................................................................................... 333
Product Does Not Turn On or Off................................................................................................. 333
Noise After Ink Installation ........................................................................................................... 334
Software Installation Problems .................................................................................................... 334
Solving Network Problems ............................................................................................................... 334
Product Cannot Connect to a Wireless Router or Access Point .................................................. 335
Network Software Cannot Find Product on a Network................................................................. 336
Product Does Not Appear in Mac Printer Window ....................................................................... 337
Cannot Print Over a Network....................................................................................................... 338
Cannot Scan Over a Network ...................................................................................................... 339
Solving Copying Problems ............................................................................................................... 340
Product Makes Noise, But Nothing Copies.................................................................................. 340
Product Makes Noise When It Sits for a While............................................................................. 341
Originals Do Not Feed From the Automatic Document Feeder.................................................... 341
Solving Paper Problems................................................................................................................... 342
Paper Feeding Problems............................................................................................................. 342
Paper Jams Inside the Product.................................................................................................... 343
Paper Ejection Problems ............................................................................................................. 343
Solving Problems Printing from a Computer..................................................................................... 344
Nothing Prints.............................................................................................................................. 344
Product Icon Does Not Appear in Windows Taskbar ................................................................... 345
Printing is Slow ............................................................................................................................ 346
Solving PostScript Printing Problems............................................................................................... 347
Nothing Prints Using the PostScript Printing Software................................................................. 348
11
Page 12

Documents Print Incorrectly Using the PostScript Printing Software ........................................... 348
Accessing Printer Properties - PostScript - Windows .................................................................. 348
Solving Page Layout and Content Problems.................................................................................... 349
Inverted Image............................................................................................................................. 349
Too Many Copies Print ................................................................................................................ 350
Blank Pages Print ........................................................................................................................ 350
Incorrect Margins on Printout....................................................................................................... 351
Incorrect Characters Print............................................................................................................ 351
Incorrect Image Size or Position.................................................................................................. 352
Slanted Printout........................................................................................................................... 352
Solving Print Quality Problems......................................................................................................... 353
White or Dark Lines in Printout .................................................................................................... 353
Blurry or Smeared Printout .......................................................................................................... 354
Faint Printout or Printout Has Gaps ............................................................................................. 356
Grainy Printout............................................................................................................................. 356
Solving Scanning Problems ............................................................................................................. 357
Scanning Software Does Not Operate Correctly ......................................................................... 358
Cannot Start Epson Scan 2 ......................................................................................................... 358
Solving Scanned Image Quality Problems ....................................................................................... 359
Image Consists of a Few Dots Only............................................................................................. 359
Line of Dots Appears in All Scanned Images............................................................................... 360
Straight Lines in an Image Appear Crooked ................................................................................ 360
Image is Distorted or Blurry ......................................................................................................... 360
Image Colors are Patchy at the Edges ........................................................................................ 361
Image is Too Dark ....................................................................................................................... 361
Back of Original Image Appears in Scanned Image .................................................................... 361
Ripple Patterns Appear in an Image ............................................................................................ 362
Scanned Image Colors Do Not Match Original Colors................................................................. 362
Scanned Image Edges are Cropped ........................................................................................... 362
Solving Faxing Problems.................................................................................................................. 363
Cannot Send or Receive Faxes................................................................................................... 363
Cannot Receive Faxes with a Telephone Connected to Your Product ........................................ 365
Fax Memory Full Error Appears................................................................................................... 365
12
Page 13

Sent Fax Quality is Poor .............................................................................................................. 366
Sent Fax is Received in an Incorrect Size ................................................................................... 367
Received Fax Quality is Poor ...................................................................................................... 367
Received Fax is Not Printed ........................................................................................................ 367
Solving USB Device Problems ......................................................................................................... 368
Cannot View or Print from a USB Device..................................................................................... 368
Cannot Save Files on a USB Device ........................................................................................... 368
Cannot Transfer Files To or From a USB Device......................................................................... 369
Uninstall Your Product Software....................................................................................................... 369
Uninstalling Product Software - Windows.................................................................................... 369
Uninstalling Product Software - Mac............................................................................................ 370
Where to Get Help............................................................................................................................ 371
Technical Specifications ........................................................................................................................ 373
Windows System Requirements ...................................................................................................... 373
Mac System Requirements .............................................................................................................. 374
Paper Specifications ........................................................................................................................ 375
Printable Area Specifications ........................................................................................................... 376
Automatic Document Feeder (ADF) Specifications .......................................................................... 377
Scanning Specifications ................................................................................................................... 378
Fax Specifications ............................................................................................................................ 378
Ink Pack Specifications .................................................................................................................... 379
Dimension Specifications ................................................................................................................. 380
Electrical Specifications ................................................................................................................... 381
Environmental Specifications ........................................................................................................... 381
Interface Specifications .................................................................................................................... 382
External USB Device Specifications................................................................................................. 382
Network Interface Specifications ...................................................................................................... 382
Safety and Approvals Specifications ................................................................................................ 384
PostScript Fonts............................................................................................................................... 384
PCL Fonts ........................................................................................................................................ 386
PCL Mode 5 Symbol Sets ................................................................................................................ 388
Notices ..................................................................................................................................................... 392
Important Safety Instructions............................................................................................................ 392
13
Page 14

General Product Safety Instructions ............................................................................................ 392
Ink Pack Safety Instructions ........................................................................................................ 394
Wireless Connection Safety Instructions ..................................................................................... 395
LCD Screen Safety Instructions................................................................................................... 395
Telephone Equipment Safety Instructions ................................................................................... 396
FCC Compliance Statement............................................................................................................. 396
Binding Arbitration and Class Waiver ............................................................................................... 399
Trademarks...................................................................................................................................... 402
Copyright Notice............................................................................................................................... 402
libTIFF Software Acknowledgment.............................................................................................. 403
A Note Concerning Responsible Use of Copyrighted Materials................................................... 404
Default Delay Times for Power Management for Epson Products ............................................... 404
Copyright Attribution.................................................................................................................... 404
14
Page 15

WF-M5799 User's Guide
Welcome to the WF-M5799 User's Guide.
For a printable PDF copy of this guide, click here.
15
Page 16

Product Basics
See these sections to learn about the basic features of your product.
Note: Printing software instructions in this manual are intended for use with the standard Epson printer
software. For more information on using the Printer Command Language (PCL) or PostScript (PS3)
printer software, please see the appropriate sections.
Using the Control Panel
Product Parts Locations
Using Power Saving Settings
Epson Connect Solutions for Smartphones, Tablets, and More
Using AirPrint
Using Google Cloud Print
Setting Up Google Cloud Print on a Chromebook
Android Printing Using the Epson Print Enabler
Using the Mopria Print Service
Using Fire OS Printing
Using Windows 10 Mobile Printing
Using Epson Print and Scan App with Windows Tablets
Printing and Scanning with NFC from Your Android Device
Using the Control Panel
See these sections to learn about the control panel and select control panel settings.
Control Panel Buttons and Lights
Changing LCD Screen Language
Selecting the Date and Time
Selecting Your Country or Region
Setting a Password and Locking the Control Panel
Using Presets
Setting User Feature Restrictions (Access Control)
Adjusting Control Panel Sounds
Adjusting the Screen Brightness
16
Page 17
Turning Off the Operation Time Out Setting
Preventing PC Connection via USB
Parent topic: Product Basics
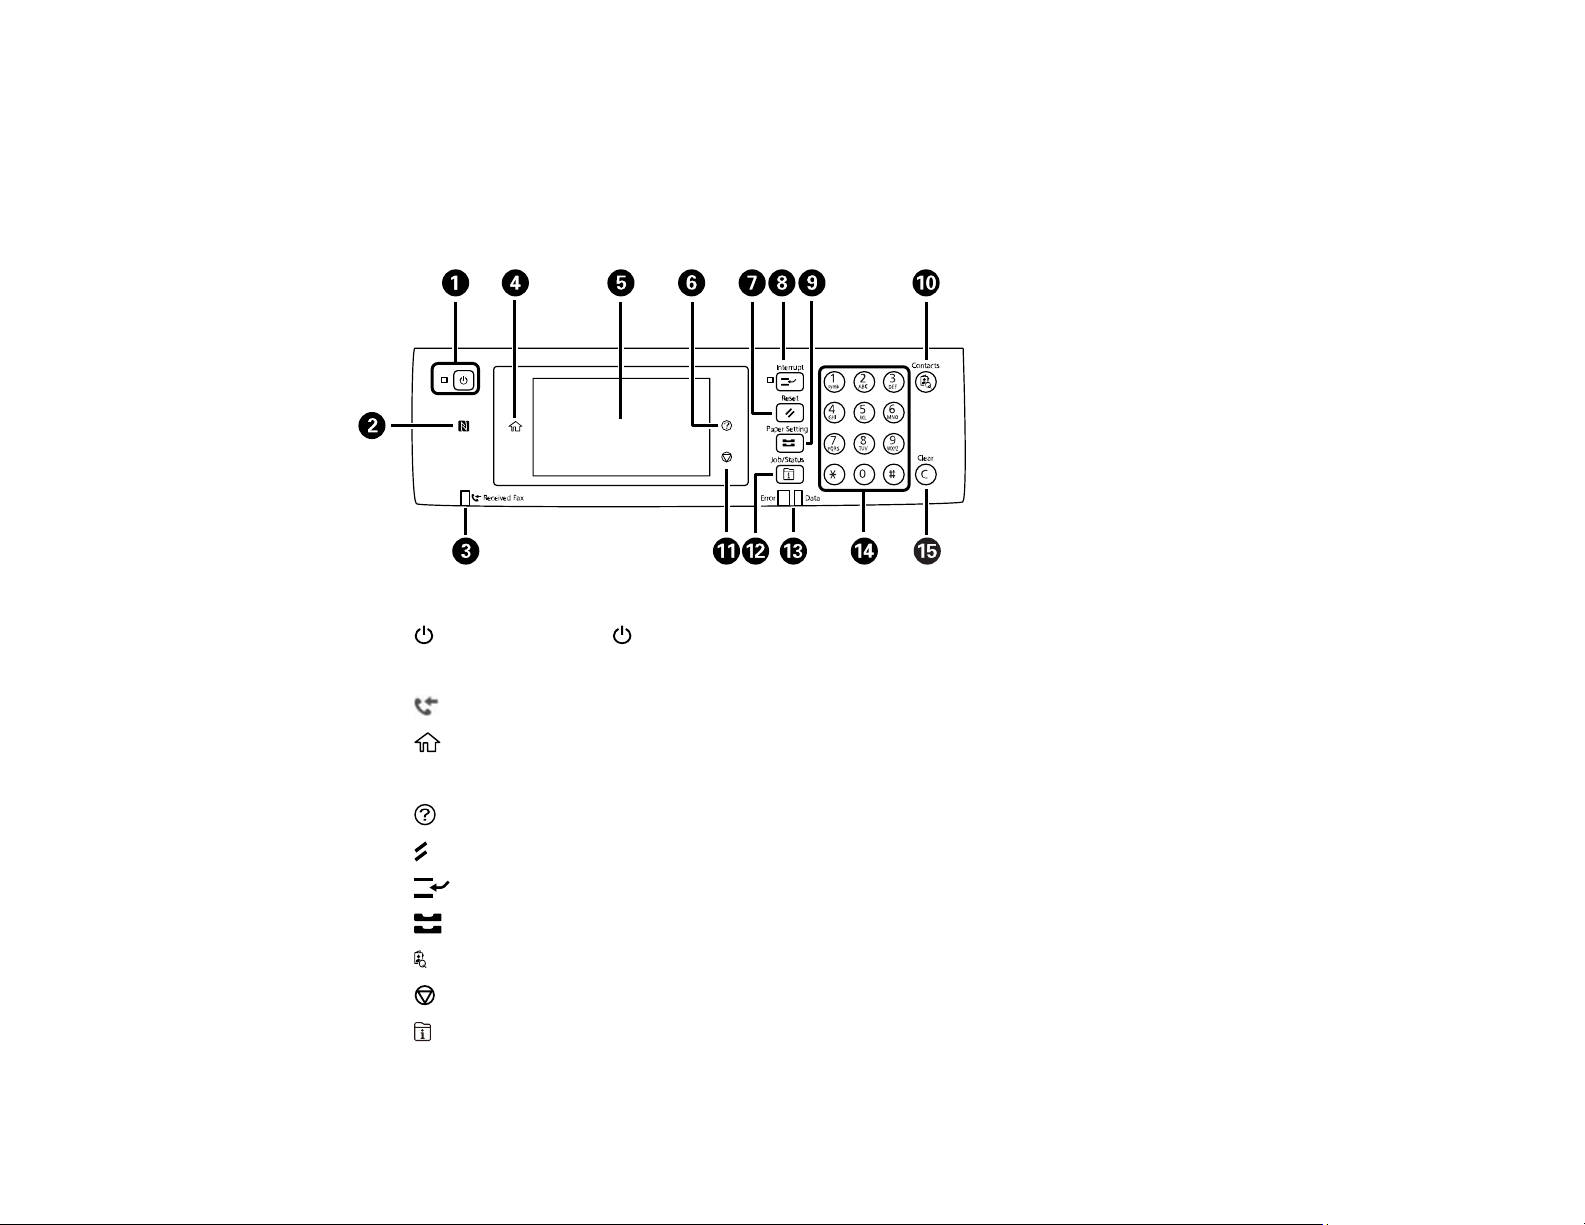
Control Panel Buttons and Lights
1
2 NFC (Near Field Communication) tag
3
4
5 LCD screen
6
7
8
9 Paper Setting button
10 Contacts button
11
12 Job/Status button
13 Error and Data lights
power button and power light
Received Fax light
home button
help button
Reset button
Interrupt button
stop button
17
Page 18
14 Numeric keypad
15 C Clear button
Status Icon Information
Parent topic: Using the Control Panel
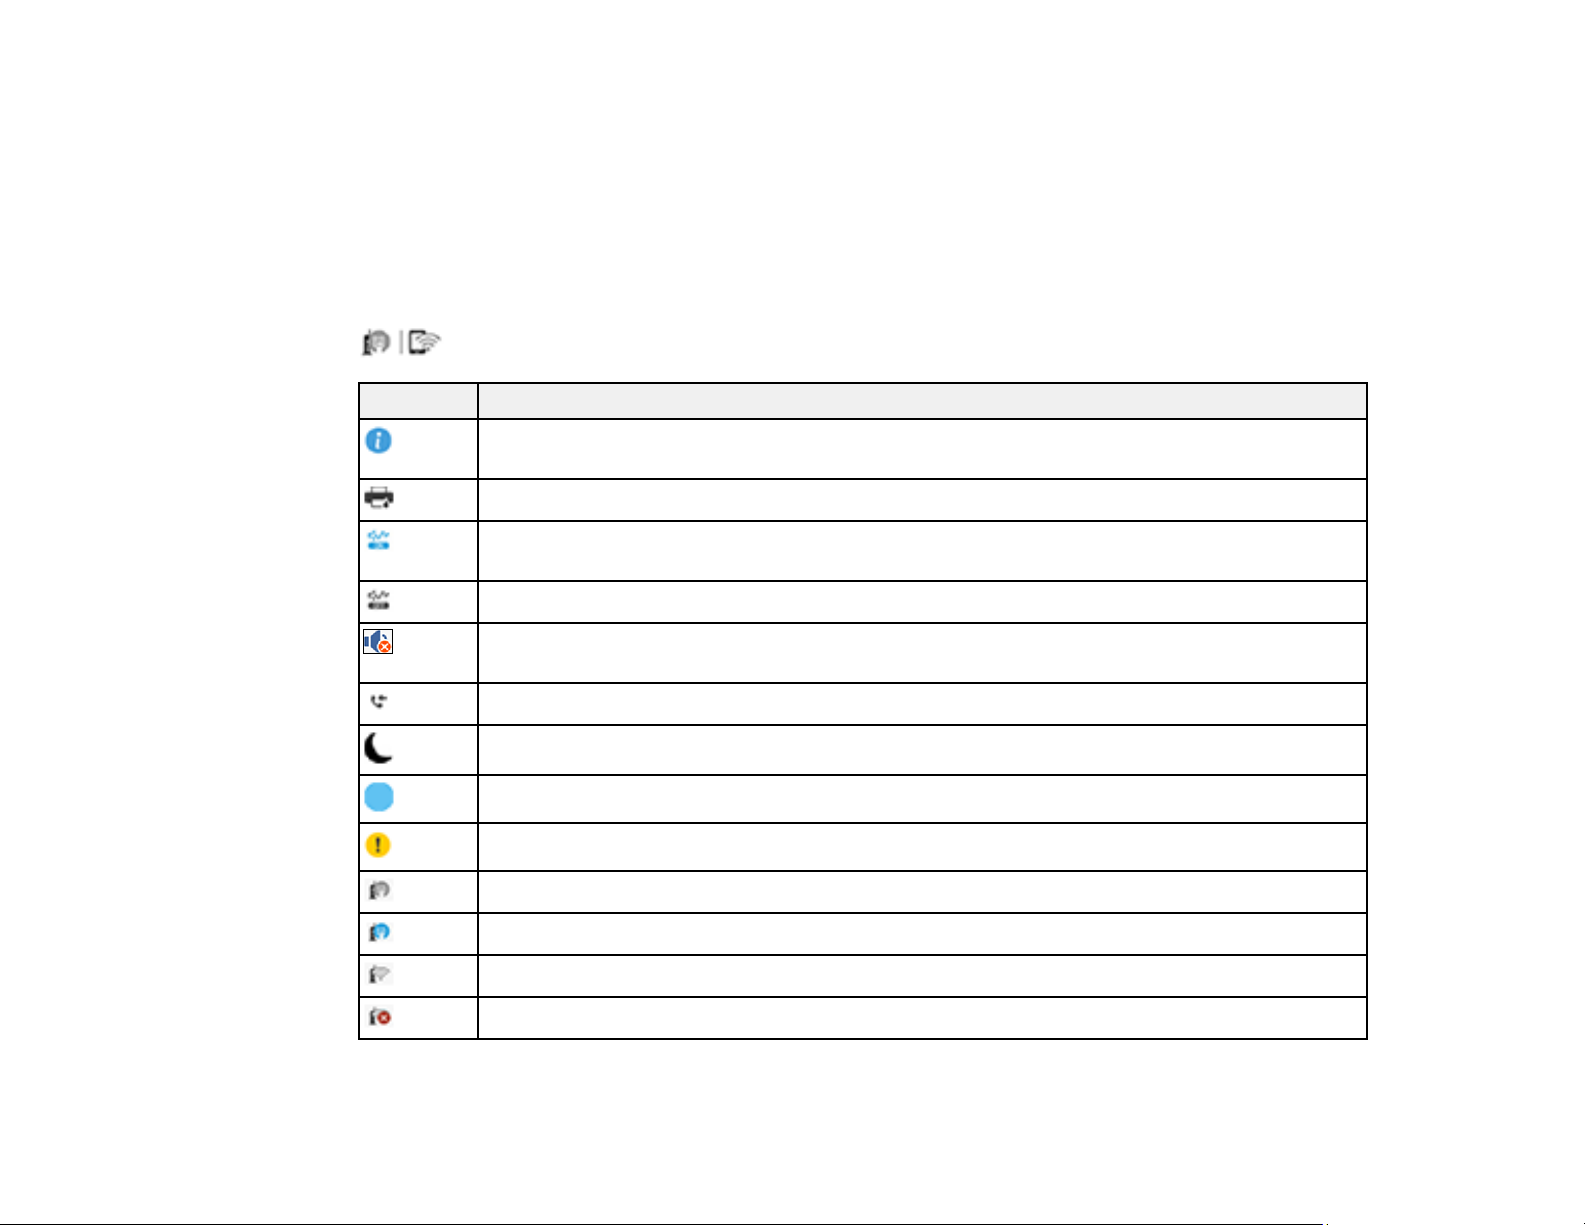
Status Icon Information
Your product displays status icons on the LCD screen for certain product status conditions. Press the
Icons Description
icon to view or change the current network settings.
Displays additional information or instructions, such as loading paper or placing a
document.
Displays the Printer Status screen.
Quiet Mode is enabled. Noise is reduced during printing, but the print speed may be
reduced. Press this icon to change the settings.
Quiet Mode is disabled. Press this icon to change the settings.
The Mute setting is enabled. The product does not make any sound when you press
buttons on the control panel.
Displays the Fax Data Information screen.
Press this icon to enable sleep mode and turn off the LCD screen.
The indicated setting has changed.
There is a problem with the indicated setting. Press the icon to resolve the problem.
No Ethernet connection.
An Ethernet connection is established.
No Wi-Fi connection.
A Wi-Fi network error has occurred or the product is searching for a connection.
18
Page 19
Icons Description
A Wi-Fi connection is established. The number of bars indicates the connection's signal
strength.
No Wi-Fi Direct connection.
A Wi-Fi Direct connection is established.
Access to the product's functions are restricted to authorized users. Press the icon to log in
to the product using a user name and password. Contact your administrator if you do not
know the login information.
Access to the product's functions are restricted to authorized users and a user is currently
logged in. Press the icon to log out of the current user account.
Parent topic: Control Panel Buttons and Lights
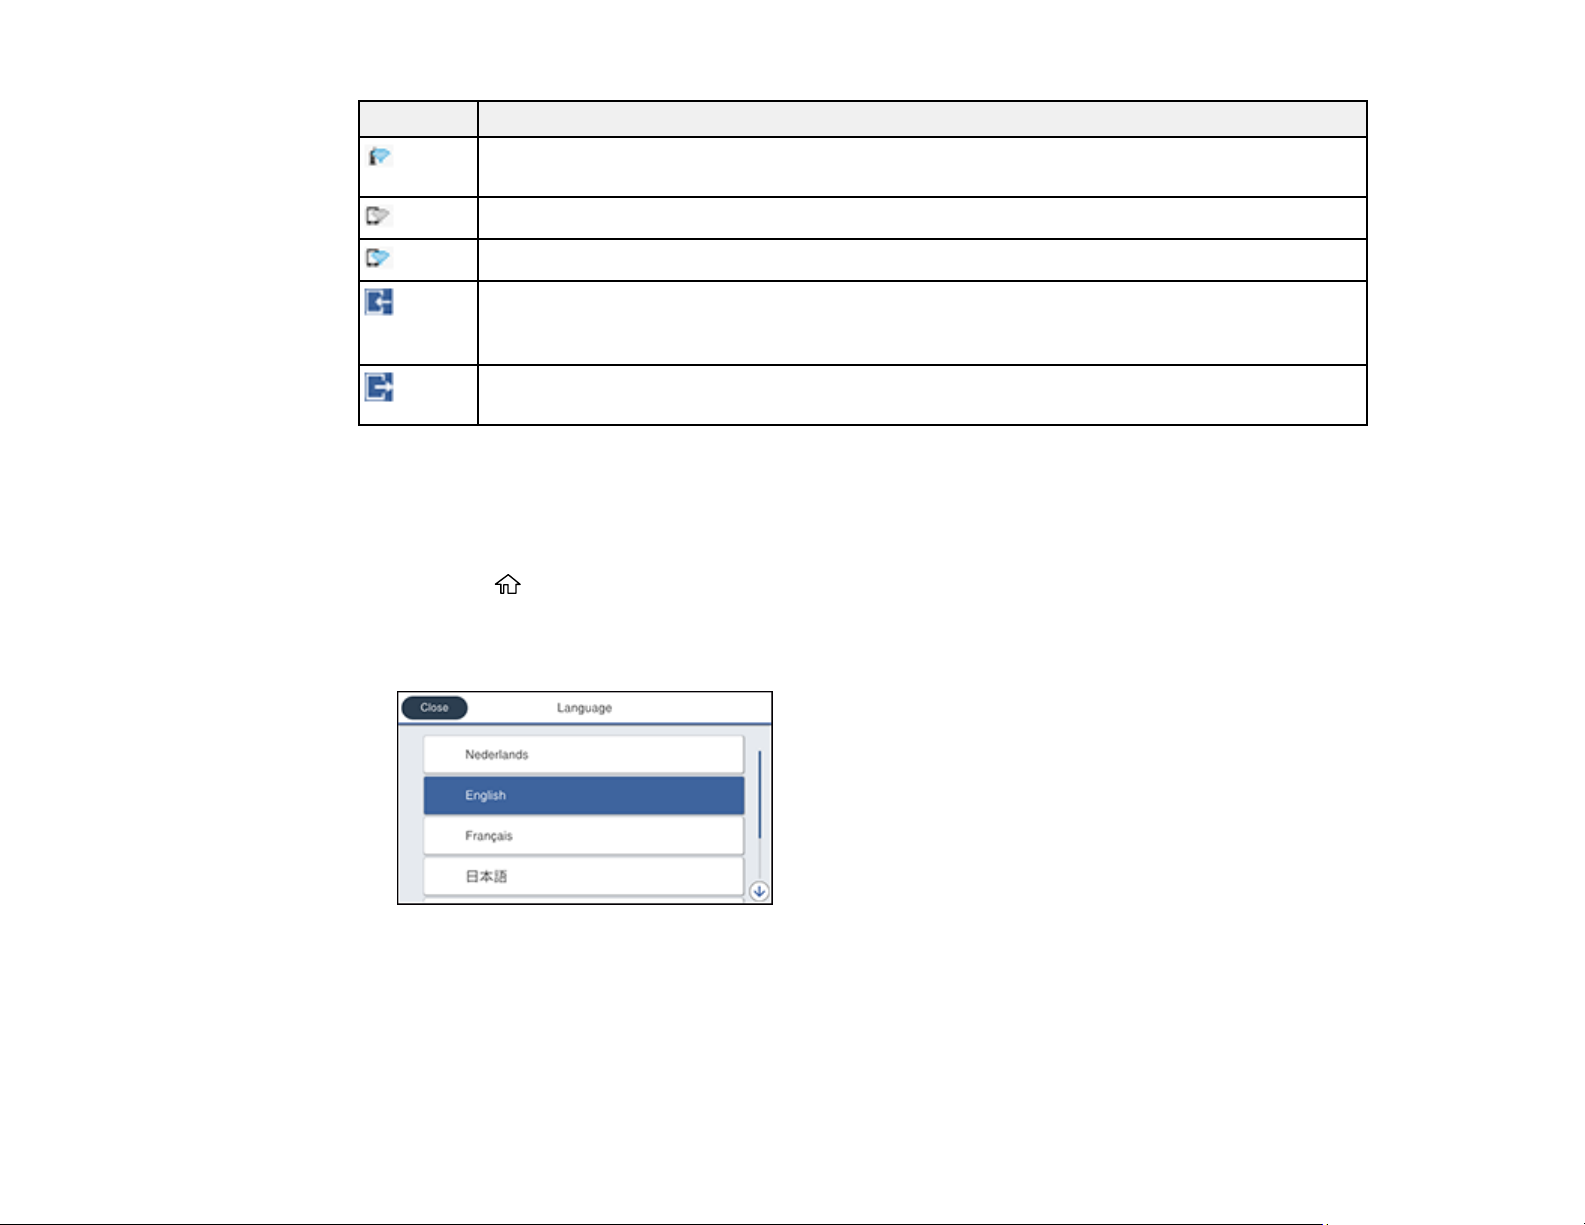
Changing LCD Screen Language
You can change the language used on the LCD screen.
1. Press the home button, if necessary.
2. Select Settings > General Settings > Basic Settings > Language.
You see a screen like this:
3. Select a language.
Parent topic: Using the Control Panel
19
Page 20
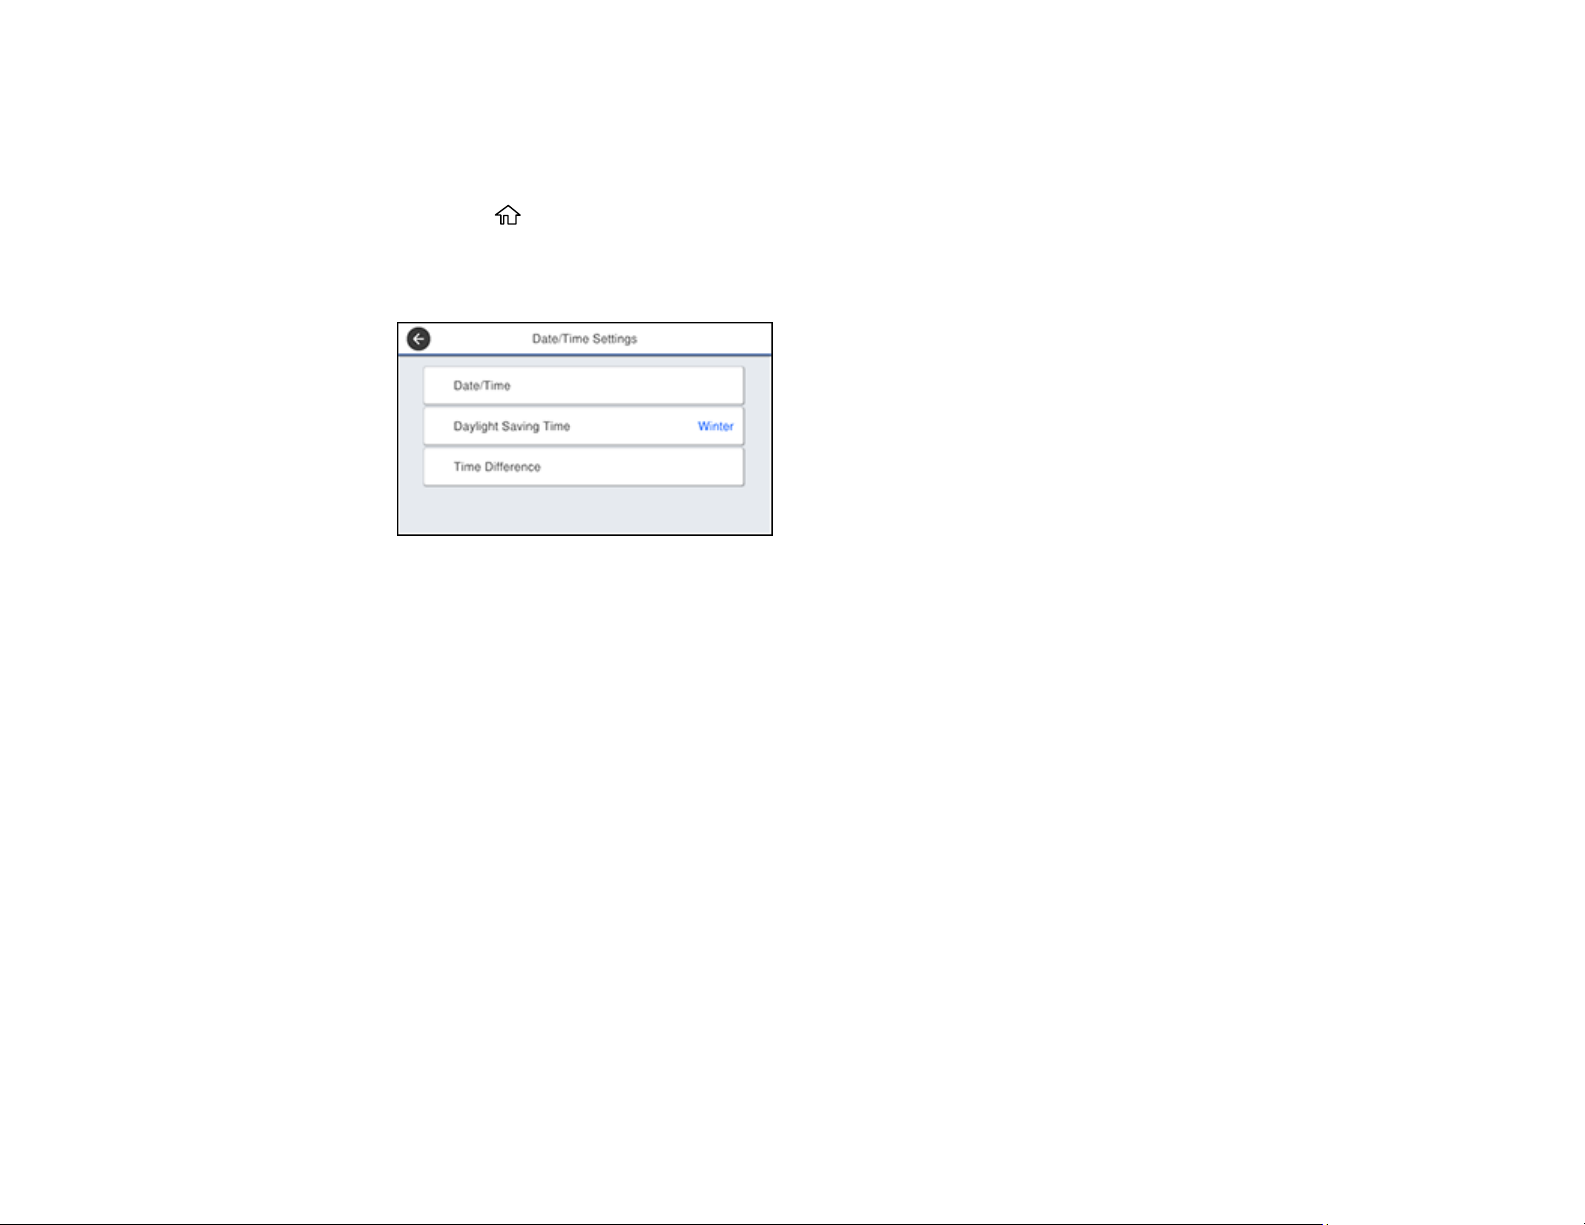
Selecting the Date and Time
Before faxing, select the current date, time, and daylight saving phase in your area, and choose your
preferred date and time format.
1. Press the home button, if necessary.
2. Select Settings > General Settings > Basic Settings > Date/Time Settings.
You see a screen like this:
3. Select Daylight Saving Time.
4. Select the setting that applies to your area:
• Winter: it is winter or your region does not use Daylight Saving Time (DST)
• Summer: it is spring or summer and your region uses Daylight Saving Time (DST)
Note: If your region uses Daylight Saving Time (DST), you must change this setting to match the
season. When you change from Winter to Summer, your product automatically sets its clock ahead
one hour. When you change from Summer to Winter, it sets its clock back one hour.
5. Select Date/Time.
6. Select the date format you want to use.
7. Use the numeric keypad to enter the current date.
8. Select the time format you want to use.
9. Use the numeric keypad to enter the current time.
Parent topic: Using the Control Panel
20
Page 21
Selecting Your Country or Region
Before using your product, select the country or region in which you are using your product.
Note: If you change the country or region, your fax settings return to their defaults and you must select
them again. This setting can be locked by an administrator. If you cannot access or change this setting,
contact your administrator for assistance.
1. Press the home button, if necessary.
2. Select Settings.
3. Select General Settings > Basic Settings.
4. Scroll down and select Country/Region.
5. Scroll up or down, if necessary, and select your country or region.
You see a confirmation screen about returning your fax settings to their defaults.
6. If the setting is correct, select Yes. (If not, select No.)
Parent topic: Using the Control Panel
Setting a Password and Locking the Control Panel
You can set an administrator password to lock the following settings and prevent them from being
changed:
• Certain Basic Settings and Printer Settings
• System Administration Settings
• Presets
21
Page 22
• Contacts
• Network Settings
• Web Service Settings
• Scan Settings
• Fax Settings
Note: For more information on administration settings, see the Administrator's Guide.
1. Press the home button, if necessary.
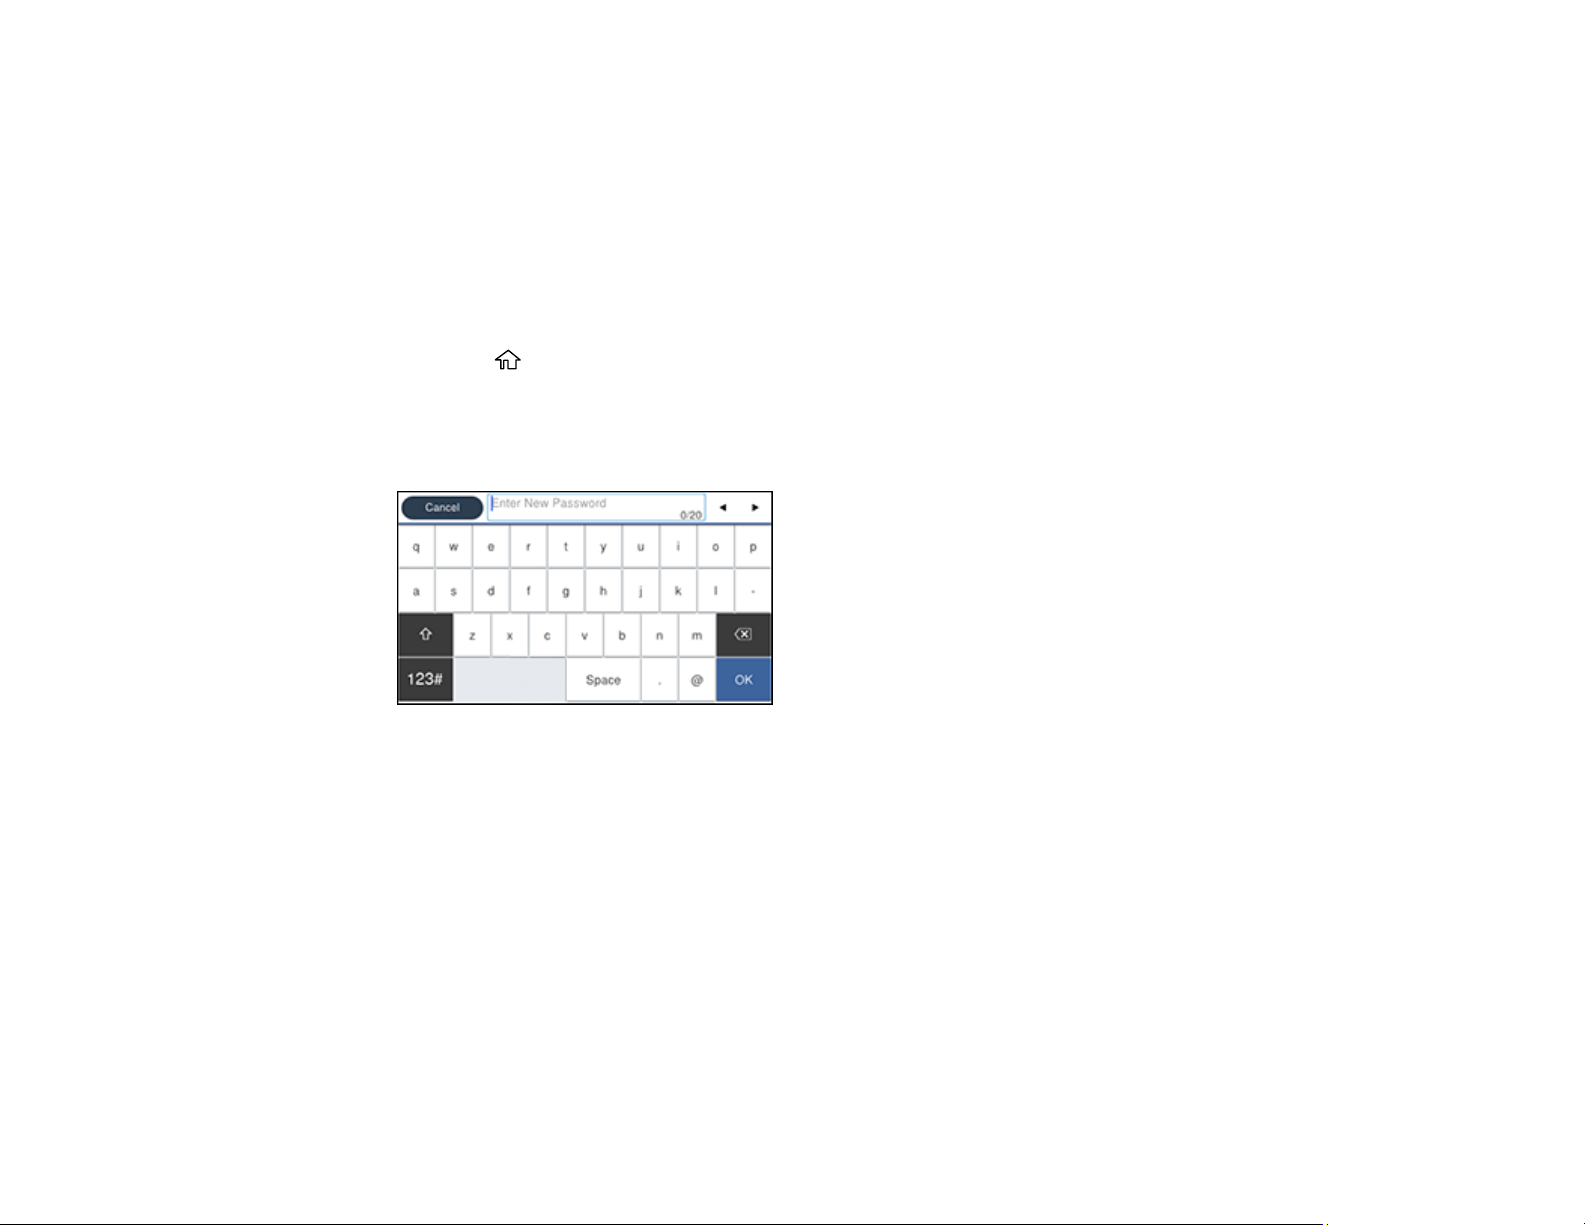
2. Select Settings > General Settings > System Administration > Security Settings > Admin
Settings > Admin Password > Register.
You see a screen like this:
3. Use the displayed keyboard to enter a password, then select OK.
4. Enter your password again to confirm, then select OK.
5. Select OK.
6. Select Lock Setting and select On.
When the control panel is locked, you must enter the password to access any of the locked settings.
Note: If you forget your password, contact Epson for assistance.
Entering Characters on the LCD Screen
Parent topic: Using the Control Panel
22
Page 23
Related tasks
Setting User Feature Restrictions (Access Control)
Entering Characters on the LCD Screen
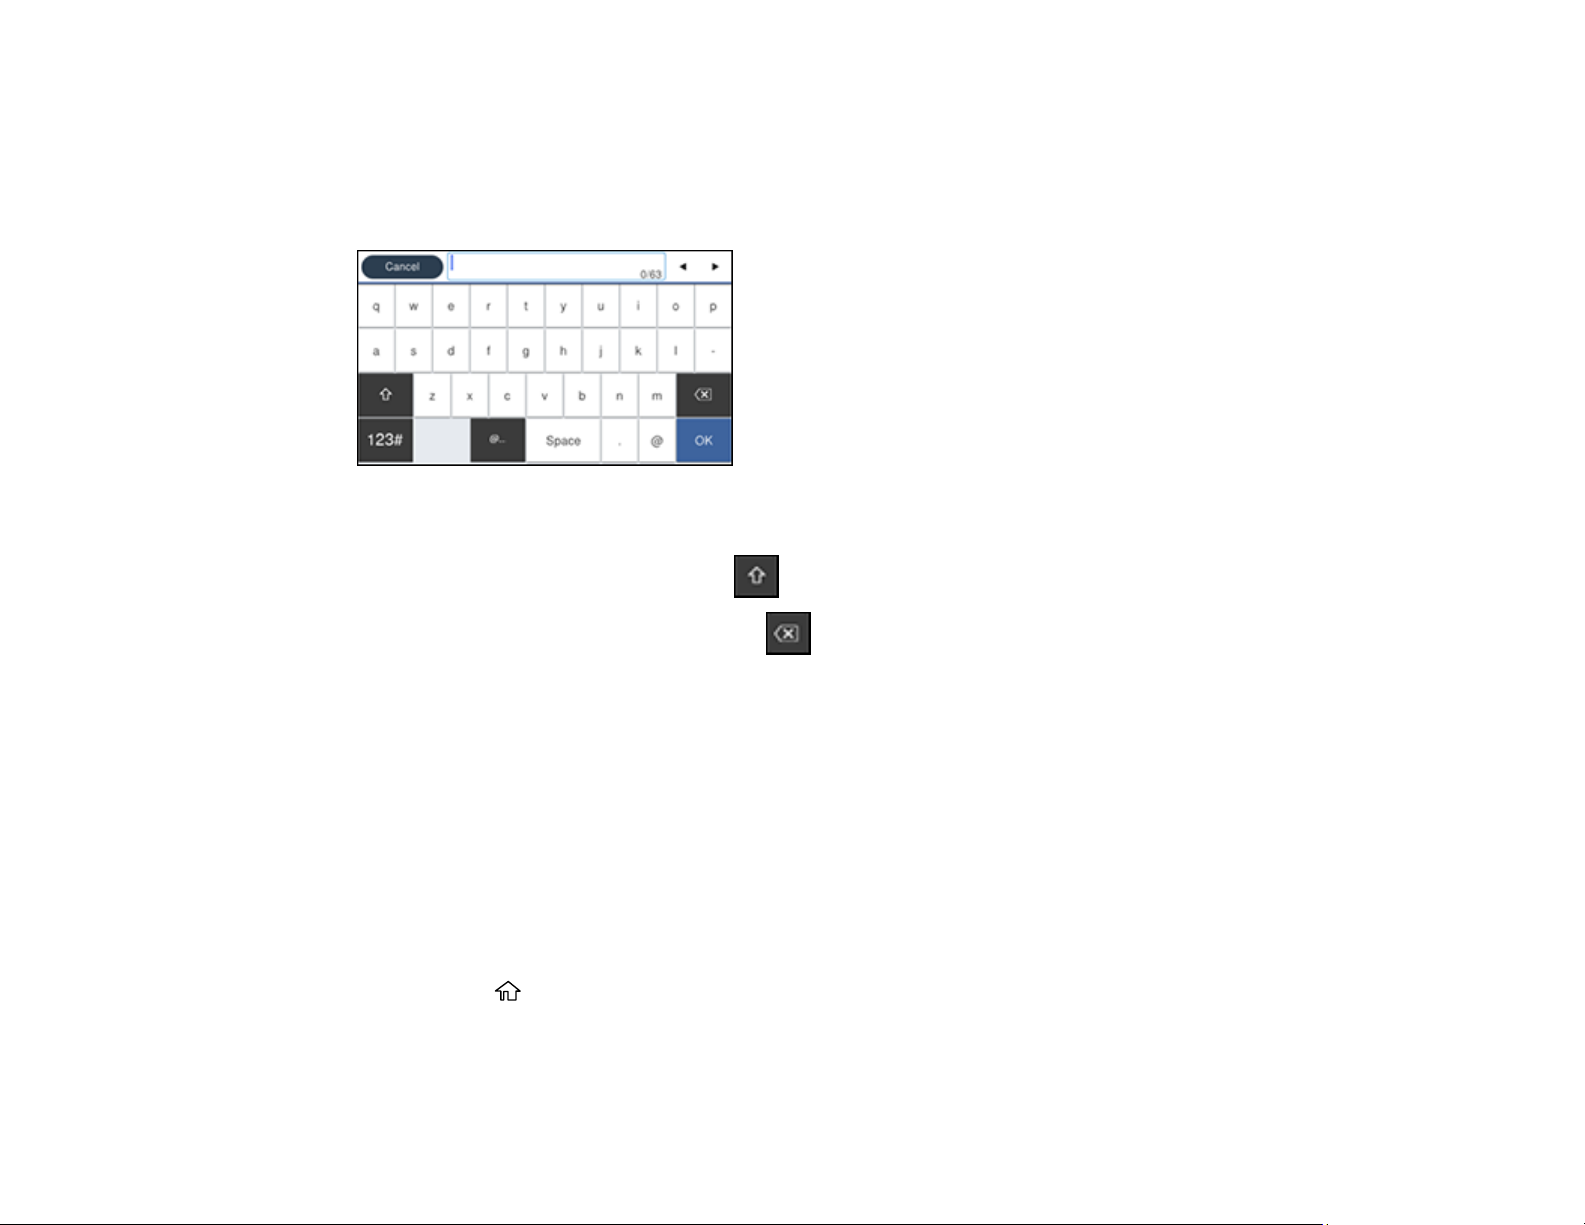
Follow these guidelines to enter characters for passwords and other settings.
• To move the cursor, select the left or right arrows.
• To change the case of letters, select .
• To delete the previous character, select .
• To enter numbers or symbols, select 123#.
• To enter a space, select Space.
Parent topic: Setting a Password and Locking the Control Panel
Using Presets
You can save frequently used copy, fax, and scan settings as presets. This lets you easily reuse them
whenever necessary.
Note: This setting can be locked by an administrator. If you cannot access this setting, contact your
administrator for assistance.
1. Press the home button, if necessary.
2. Select Presets.
23
Page 24
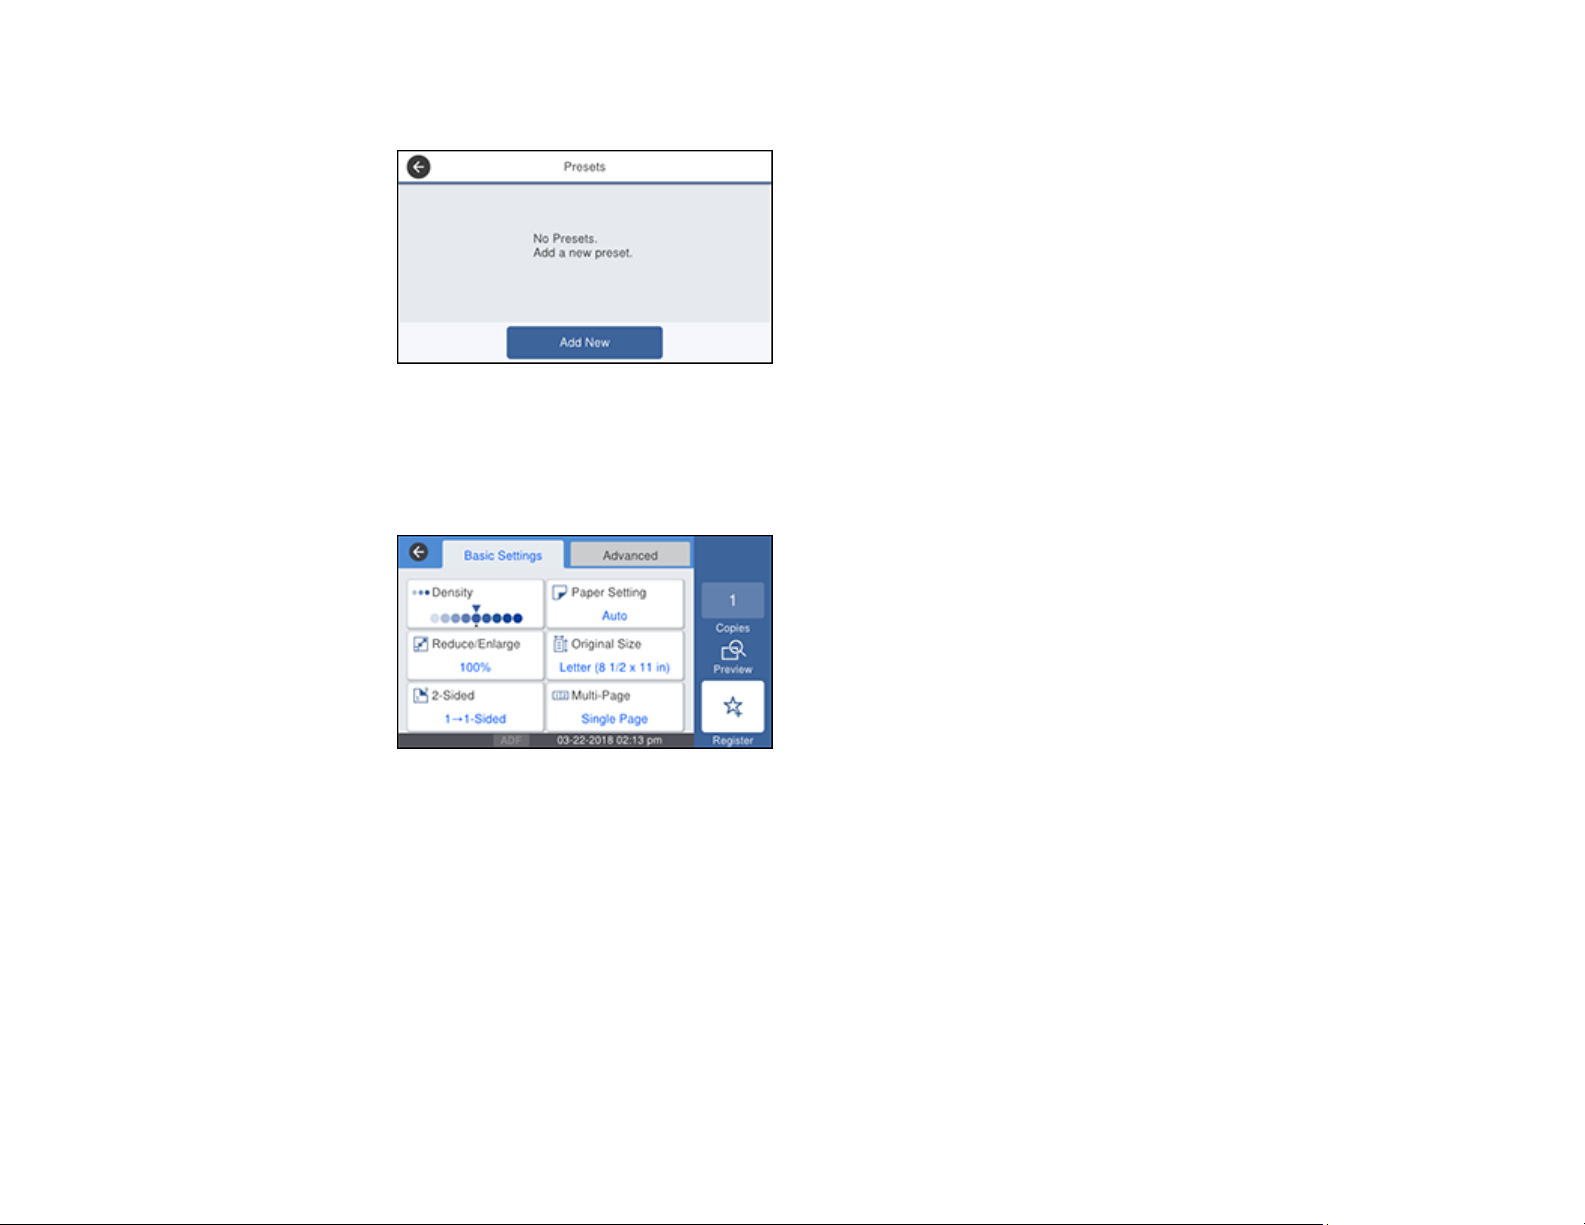
You see a screen like this:
3. Select Add New.
4. Select the function for which you want to set up a preset, such as Copy.
You see the main screen for that function:
5. Select the settings you want to save and select Register.
24
Page 25
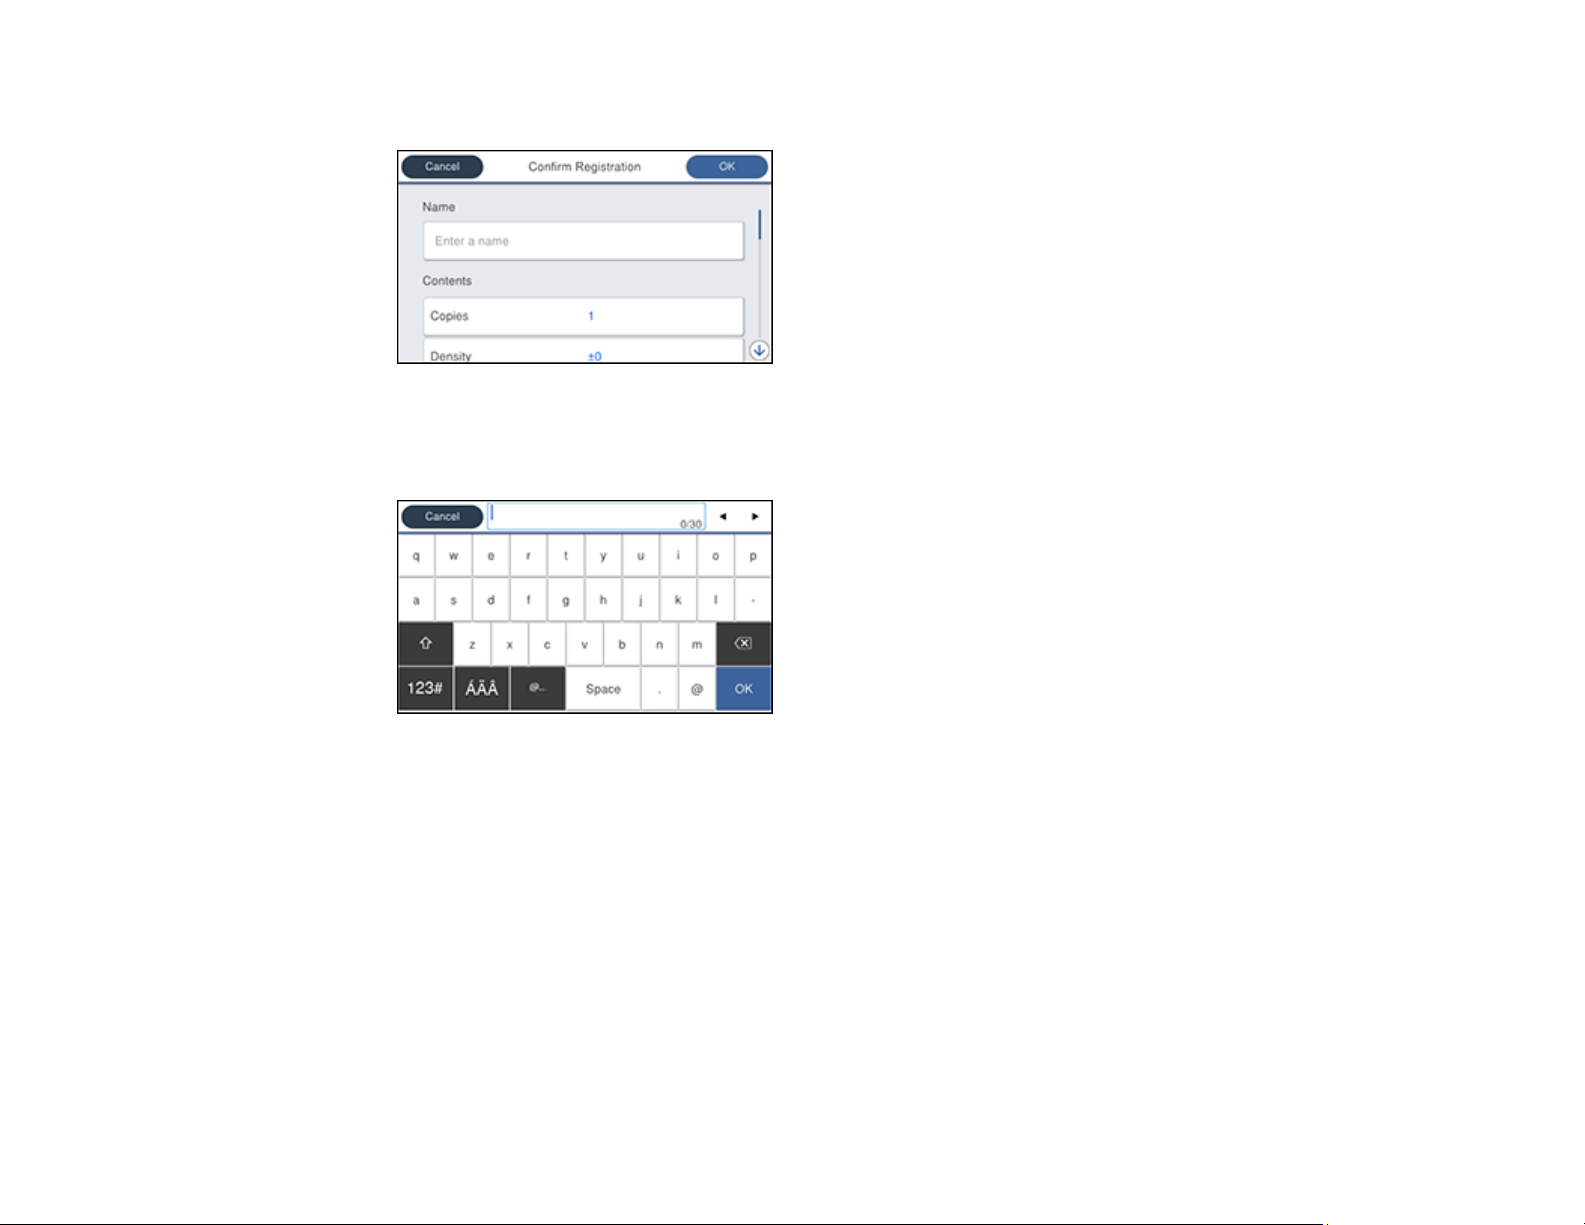
You see a screen like this:
6. Select Name.
You see a screen like this:
7. Use the displayed keyboard to enter a name for the preset and select OK.
8. Select OK.
When you copy, fax, or scan, you can use the preset by selecting Presets and selecting your preset
name from the list.
Parent topic: Using the Control Panel
Related tasks
Entering Characters on the LCD Screen
25
Page 26
Setting User Feature Restrictions (Access Control)
Using Web Config Access Control settings, you can restrict access to product features for individual
users to prevent misuse of the product. Restricted features require the user to enter an ID and password
on the product control panel.
After you set up feature restrictions, you must enable them using the product control panel.
Note: For more information on administration settings, see the Administrator's Guide.
1. Press the home button, if necessary.
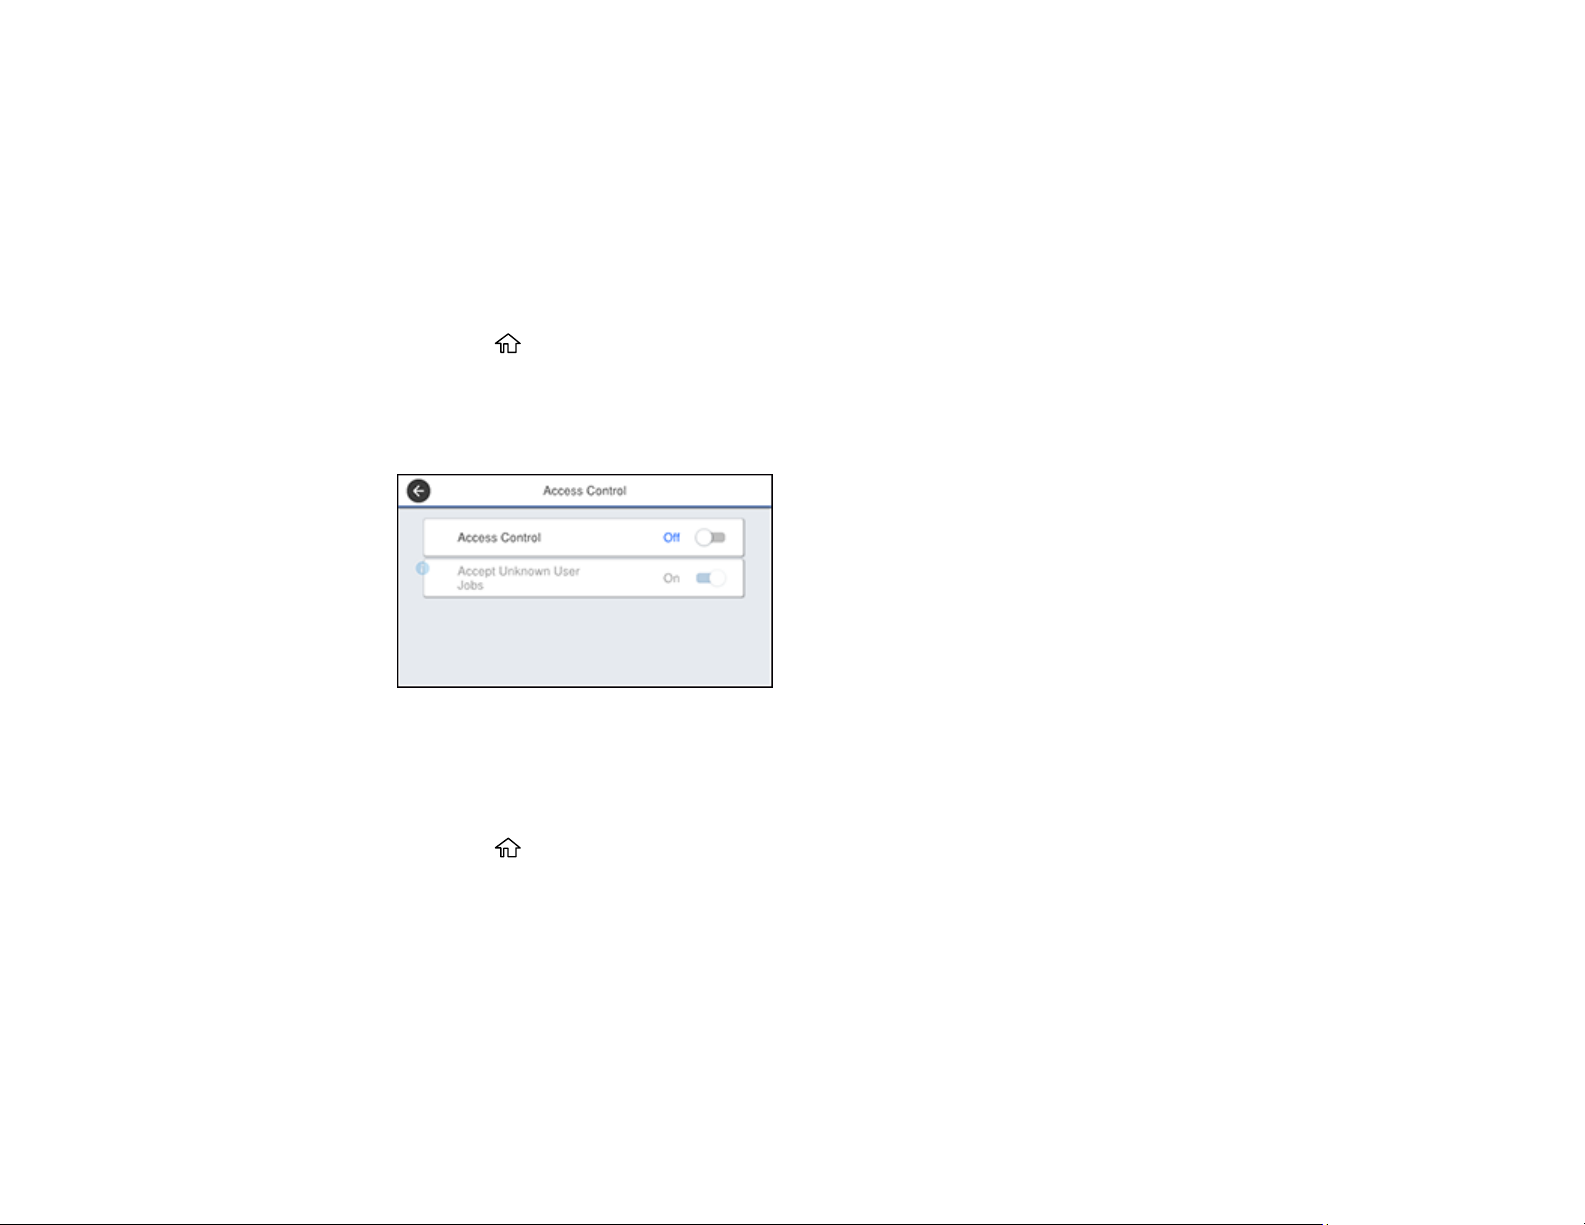
2. Select Settings > General Settings > System Administration > Security Settings > Access
Control.
You see a screen like this:
3. Select the Access Control field to turn the setting on.
4. If you want to allow users to print from generic drivers or use WSD scanning, select the Accept
Unknown User Jobs field to turn the setting on.
5. Press the home button to exit.
Parent topic: Using the Control Panel
Related tasks
Setting a Password and Locking the Control Panel
Entering a User ID and Password for Printing
Entering a User ID and Password for Scanning
26
Page 27
Adjusting Control Panel Sounds
You can adjust the sound level heard when you press buttons on the control panel.
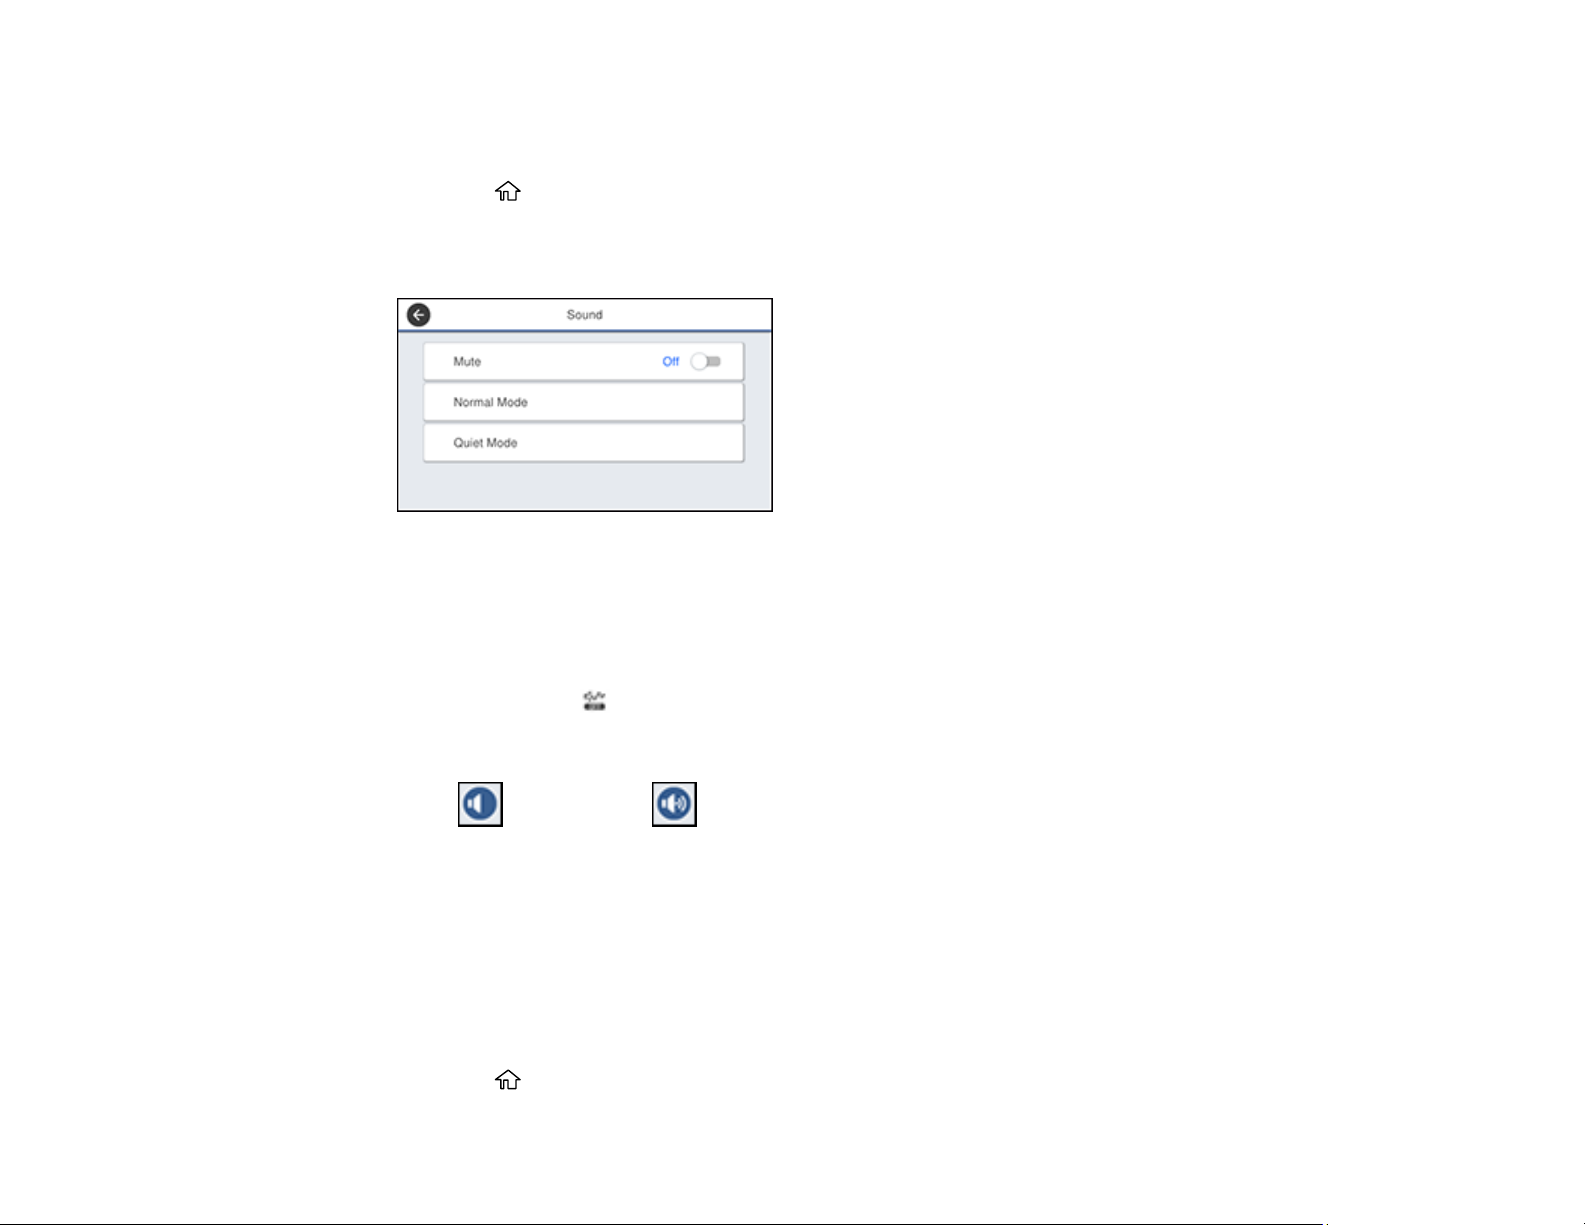
1. Press the home button, if necessary.
2. Select Settings > General Settings > Basic Settings > Sound.
You see a screen like this:
3. Do one of the following:
• To mute all control panel sounds, turn the Mute setting off.
• To select a specific sound level, select Normal Mode or Quiet Mode.
Note: Press the icon on the home screen to switch between Normal Mode and Quiet Mode.
4. If you did not mute the sounds, select Button Press to adjust the volume level.
5. Press to decrease or to increase the volume.
6. Select OK to exit.
Note: You can also adjust the Sound Type and the sound level for various product functions.
Parent topic: Using the Control Panel
Adjusting the Screen Brightness
You can adjust the brightness of the LCD screen.
1. Press the home button, if necessary.
27
Page 28
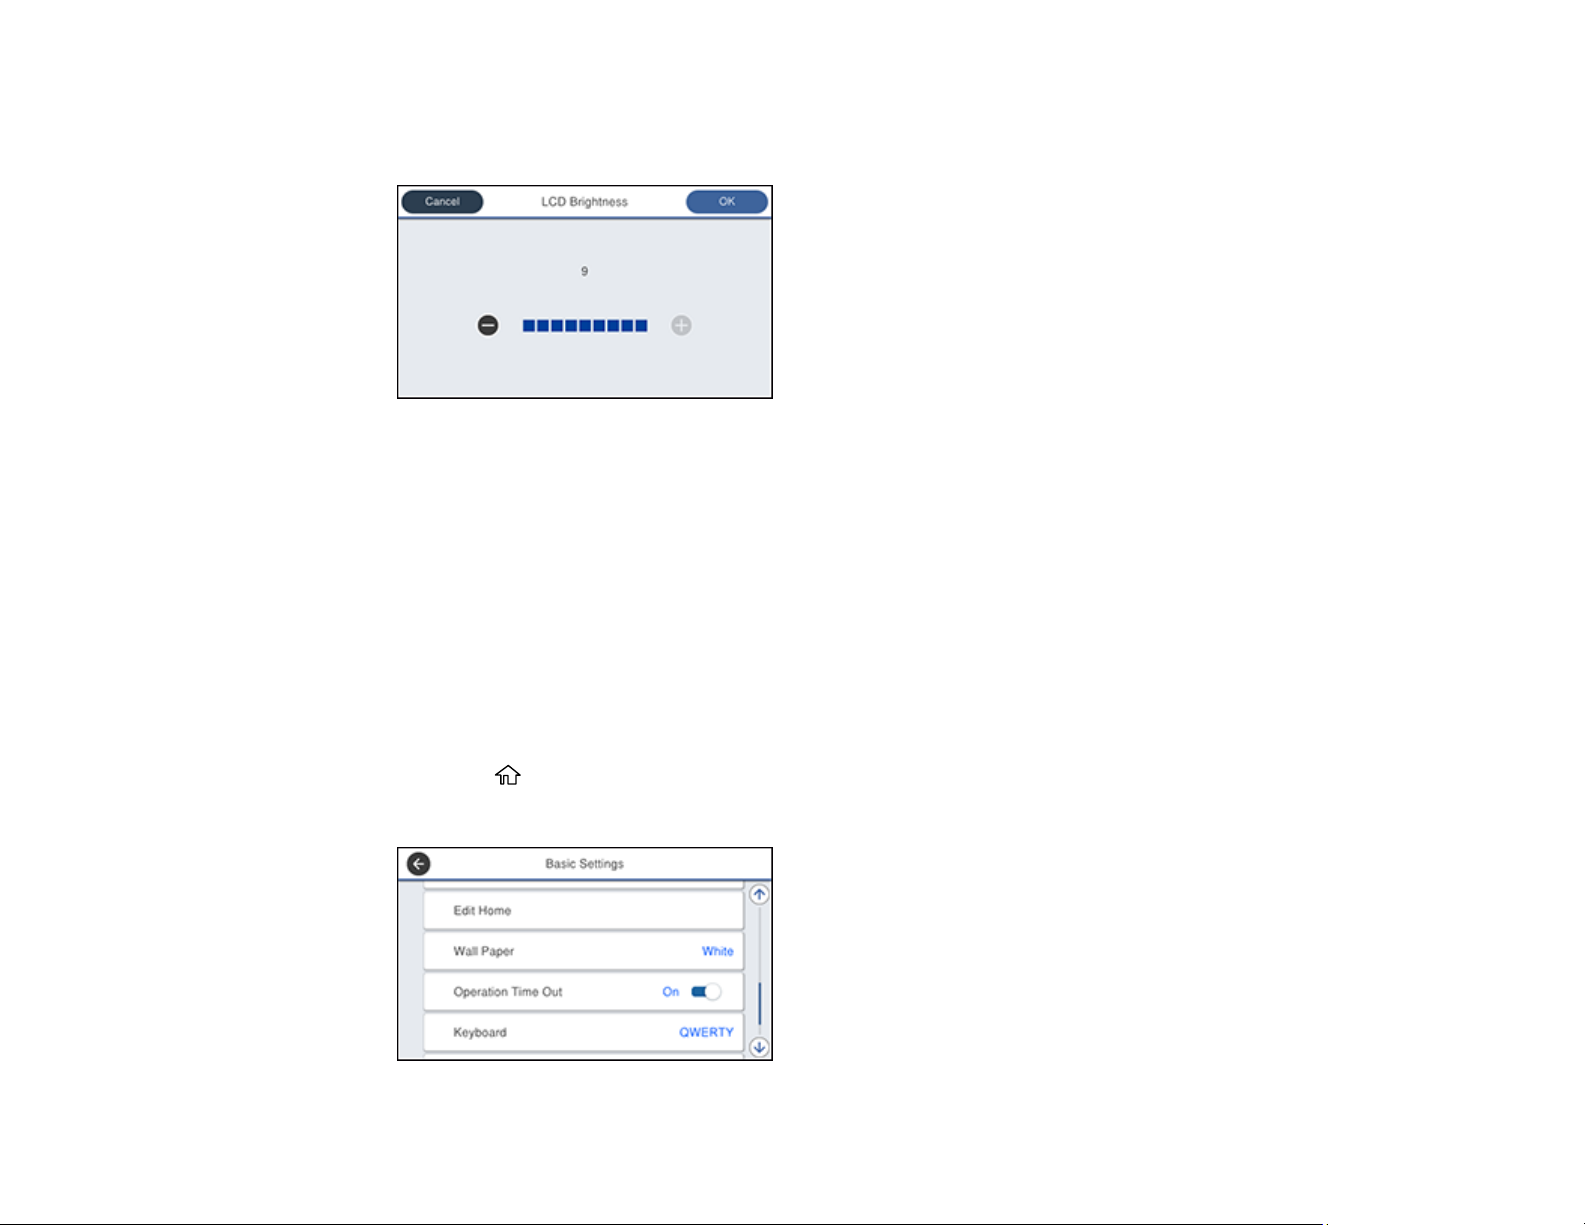
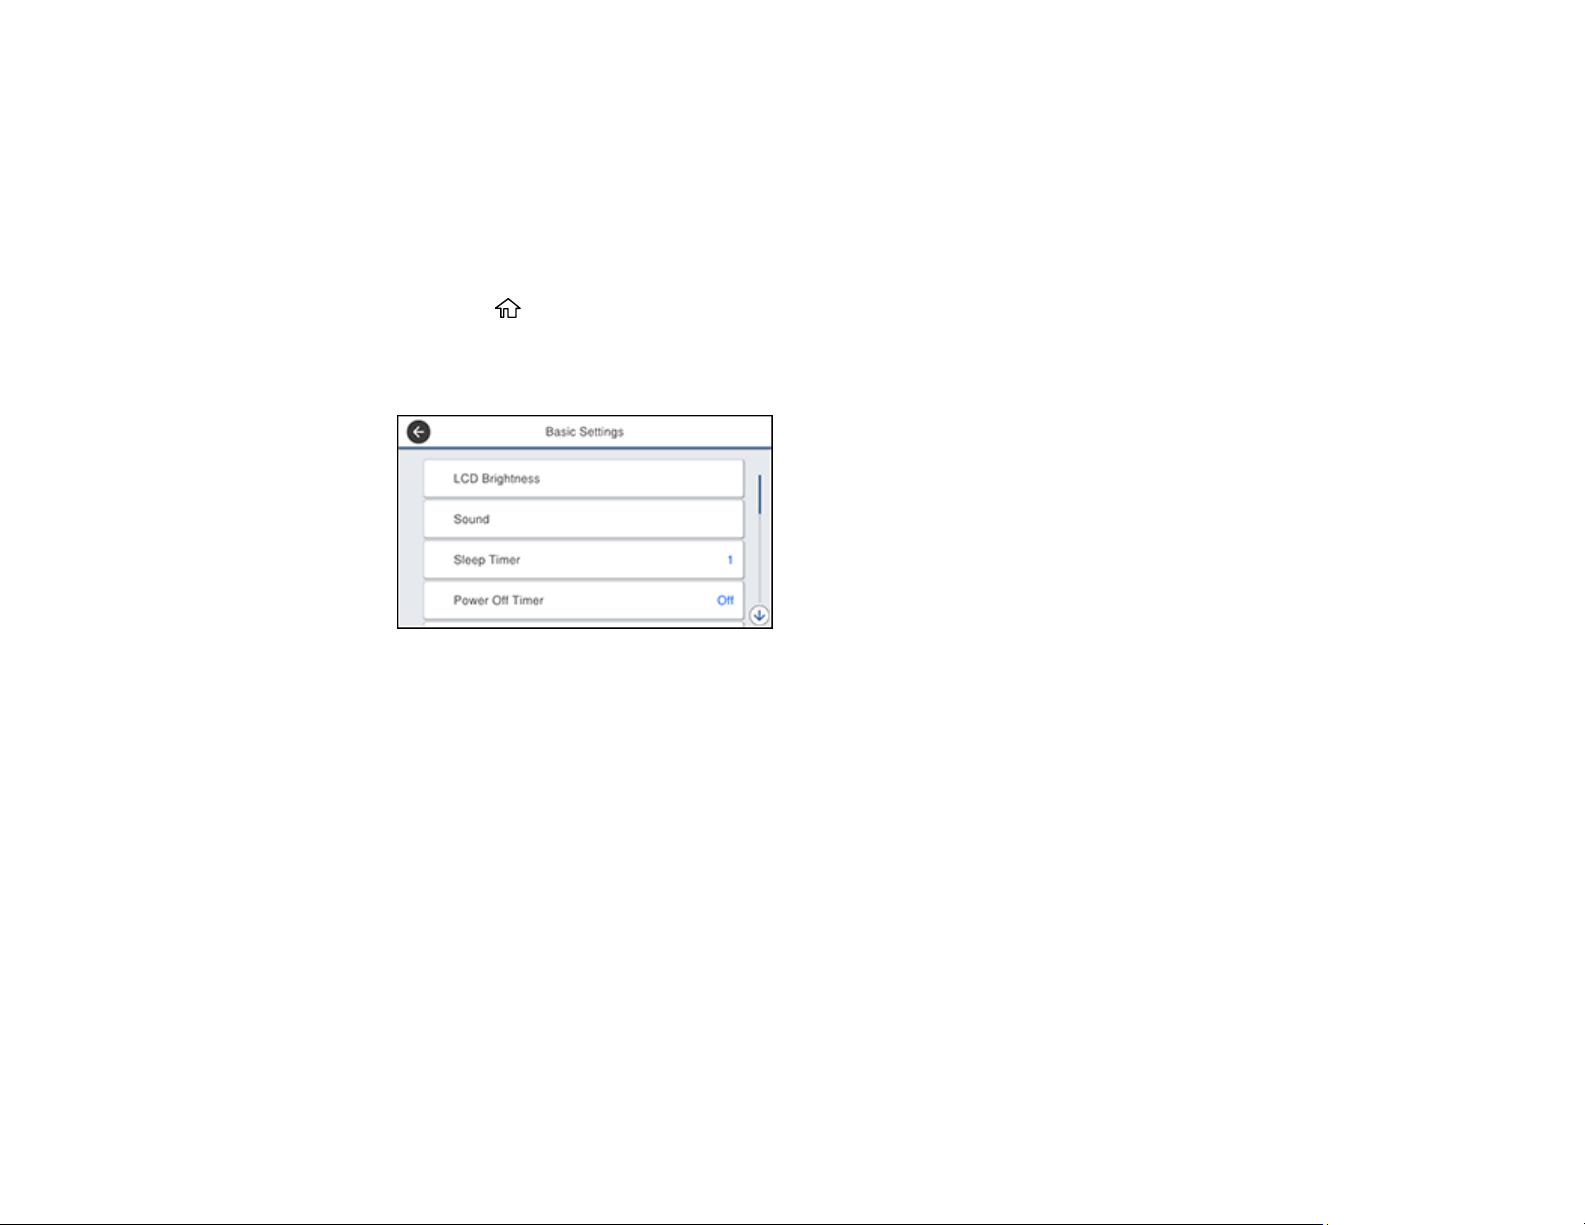
2. Select Settings > General Settings > Basic Settings > LCD Brightness.
You see a screen like this:
3. Press the – or + icons to decrease or increase the brightness.
4. Select OK to exit.
Parent topic: Using the Control Panel
Turning Off the Operation Time Out Setting
The Operation Time Out setting causes the LCD screen to return to the Home screen after a few minutes
of inactivity. This feature is enabled by default, but you can turn it off.
Note: This setting can be locked by an administrator. If you cannot access this setting, contact your
administrator for assistance.
1. Press the home button, if necessary.
2. Select Settings > General Settings > Basic Settings > Operation Time Out.
28
Page 29
3. Select Off.
Parent topic: Using the Control Panel
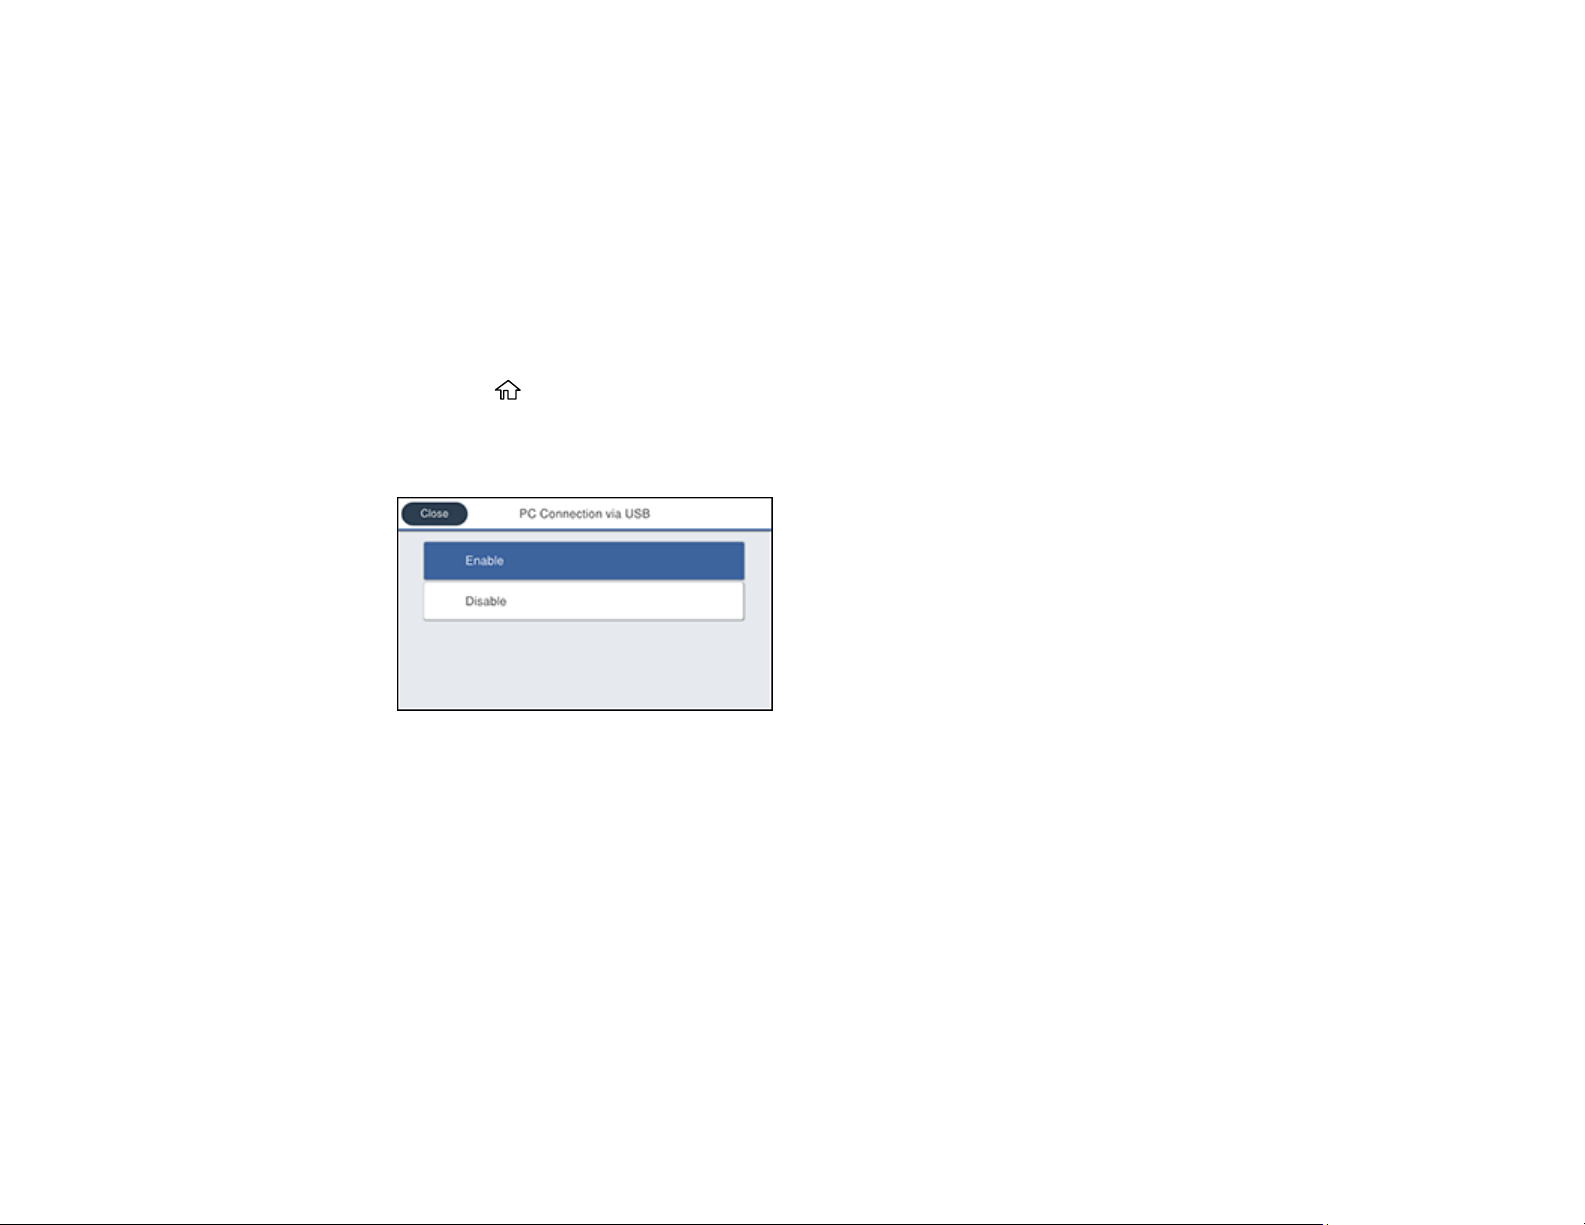
Preventing PC Connection via USB
You can disable access to your product from a USB-connected computer. This restricts non-network
access to the product and protects the security of confidential scanned documents.
Note: This setting can be locked by an administrator. If you cannot access this setting, contact your
administrator for assistance.
1. Press the home button, if necessary.
2. Select Settings > General Settings > Printer Settings > PC Connection via USB.
You see a screen like this:
3. Select Disable.
4. Do one of the following:
• Select Yes to restart the product.
• Select No or Close to return to the Printer Settings screen without restarting the product.
Note: The change will not take effect until the product is restarted.
Parent topic: Using the Control Panel
Product Parts Locations
See these sections to identify the parts on your product.
29
Page 30
Product Parts - Front
Product Parts - Inside
Product Parts - Back
Parent topic: Product Basics
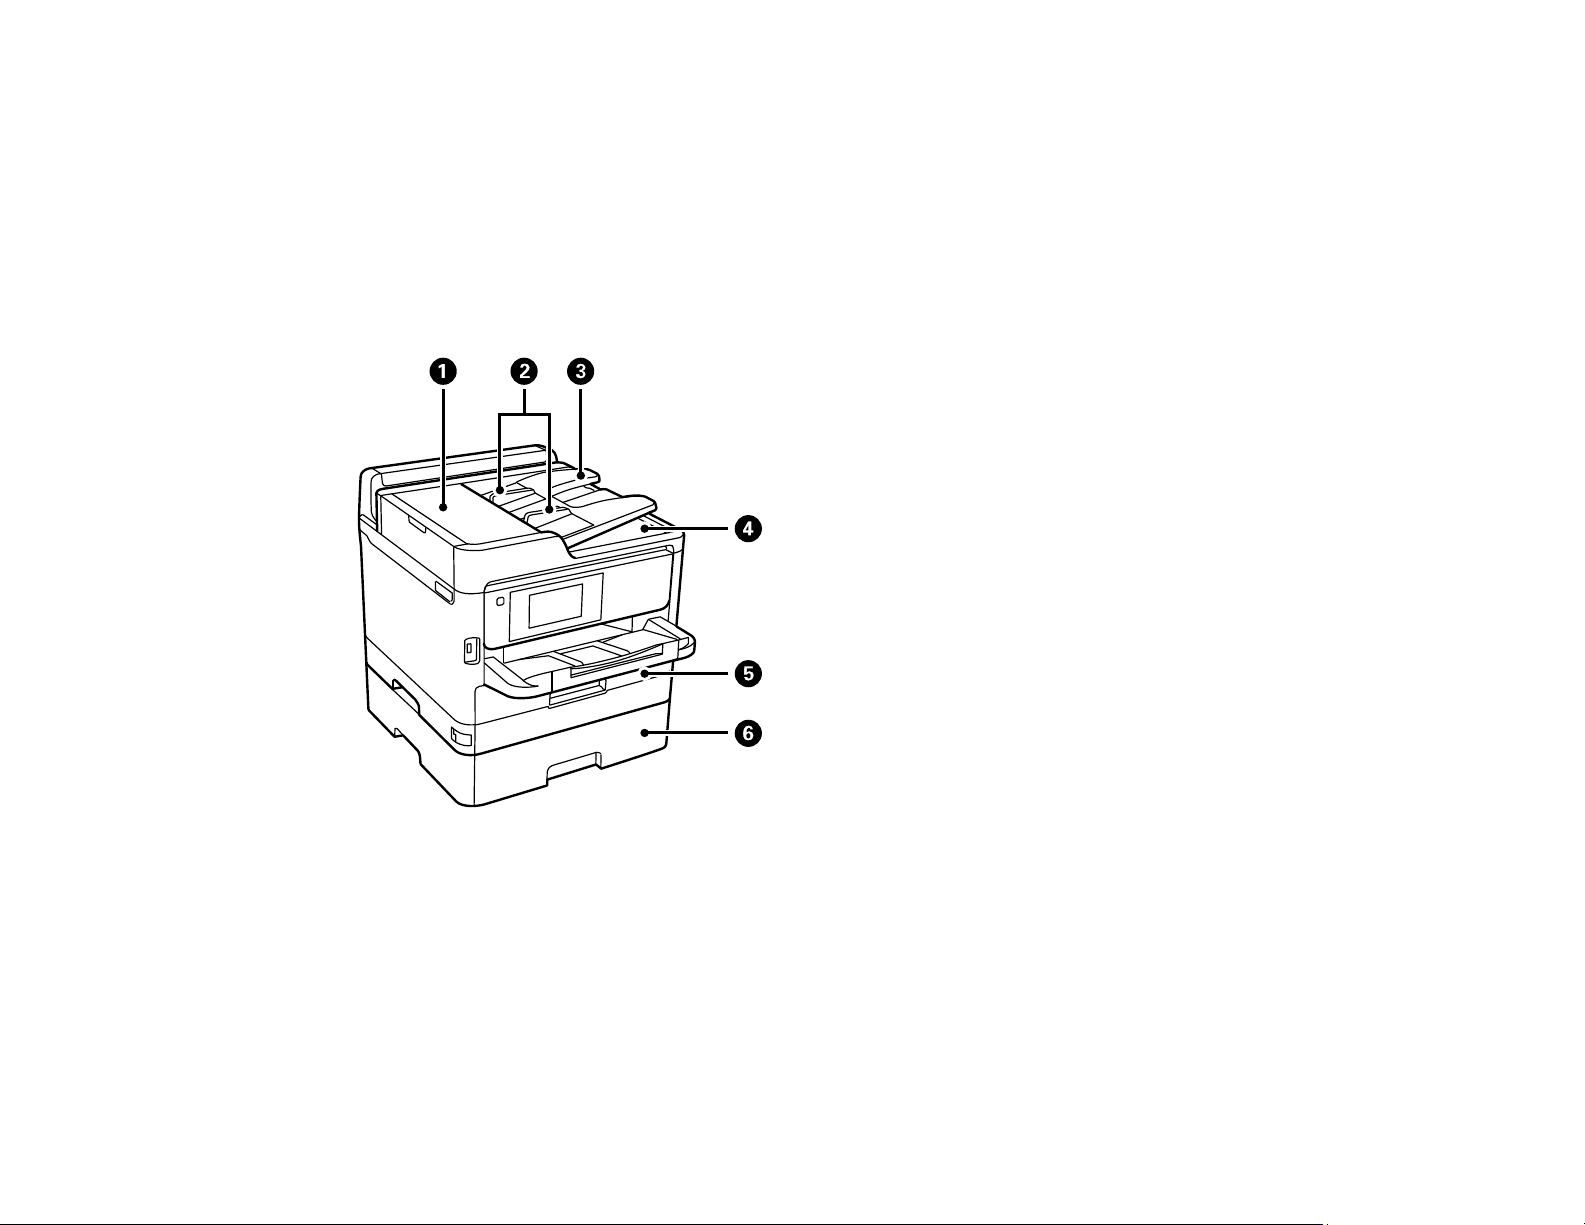
Product Parts - Front
Certain parts are labeled with a letter and number code. If you encounter any paper jams or errors, you
can use these codes to locate and correct the problem.
1 Automatic Document Feeder (ADF) cover (F)
2 ADF edge guides
3 ADF input tray
4 ADF output tray
5 Paper cassette 1 (C1)
30
Page 31

6 Optional cassette 2 (C2)
1 Rear paper feed edge guides
2 Paper support and extension
3 Feeder guard
4 Rear paper feed slot (B)
5 Output tray
6 Paper cassette edge guides
7 Paper cassette
Parent topic: Product Parts Locations
31
Page 32

Product Parts - Inside
Certain parts are labeled with a letter and number code. If you encounter any paper jams or errors, use
these codes to locate and correct the problem.
1 Document cover
2 Scanner glass
3 Control panel
4 USB Type A port for external devices
32
Page 33

1 Scanner unit (J)
2 Print head
3 Ink pack tray
4 Front cover (A)
5 Front cover lock
Parent topic: Product Parts Locations
33
Page 34

Product Parts - Back
Certain parts are labeled with a letter and number code. If you encounter any paper jams or errors, use
these codes to locate and correct the problem.
1 LAN port
2 USB port
3 Service USB port for future use (do not remove sticker)
4 Line port
5 EXT port
6 AC inlet
7 Rear cover (D)
8 Paper cassette rear cover (E)
9 Maintenance box cover (H)
Parent topic: Product Parts Locations
34
Page 35

Using Power Saving Settings
Your product enters sleep mode automatically and turns off the LCD screen if it is not used for a period
of time. You can make the time period shorter and select other options to save energy and resources.
Changing the Sleep Timer Settings
Changing the Power Off Timer Settings
Parent topic: Product Basics
Changing the Sleep Timer Settings
You can adjust the time period before your product enters sleep mode and turns off the LCD screen.
Note: This setting can be locked by an administrator. If you cannot access this setting, contact your
administrator for assistance.
1. Press the home button, if necessary.
2. Select Settings > General Settings > Basic Settings > Sleep Timer.
You see a screen like this:
3. Do one of the following:
• Select the – or + icon to decrease or increase the number of minutes.
• Select the number of minutes on the LCD screen, select the number of minutes from the on-
screen keypad, and select OK.
4. Select OK.
Parent topic: Using Power Saving Settings
35
Page 36

Changing the Power Off Timer Settings
You can have the product turn off automatically if it is not used for a specified period of time.
Note: This setting can be locked by an administrator. If you cannot access this setting, contact your
administrator for assistance.
1. Press the home button, if necessary.
2. Select Settings > General Settings > Basic Settings > Power Off Timer.
You see a screen like this:
3. Select a time period between 30minutes and 12h (12 hours).
Parent topic: Using Power Saving Settings
Epson Connect Solutions for Smartphones, Tablets, and More
Use your smartphone, tablet, or computer to print and scan documents, photos, emails, and web pages
from your home, office, or even across the globe.
Note: If you are using your Epson product with the Windows 10 S operating system, you cannot use the
software described in this section. You also cannot download and install any Epson product software
from the Epson website for use with Windows 10 S; you must obtain software only from the Windows
Store.
Print from anywhere with these Epson Connect solutions:
• Epson Email Print
• Epson iPrint Mobile App
36
Page 37

• Epson Remote Print
Scan and send a file as an email or upload it to an online service directly from your Epson product with
Epson Scan to Cloud or the Epson iPrint Mobile App.
Setting Up Epson Connect Services
Using Epson Email Print
Using the Epson iPrint Mobile App
Using Epson Remote Print
Using Epson Scan to Cloud
Parent topic: Product Basics
Setting Up Epson Connect Services
If you did not activate your product's email address for use with Epson Connect when you set up your
product, you can activate it using the product control panel.
1. Press the home button, if necessary.
2. Select Settings.
3. Select General Settings.
You see a screen like this:
4. Select Web Service Settings.
5. Select Epson Connect Services
37
Page 38

You see a screen like this:
6. Select Register.
7. Follow the instructions on the screen to activate your product's email address.
Parent topic: Epson Connect Solutions for Smartphones, Tablets, and More
Using Epson Email Print
With Epson Email Print, you can print from any device that can send email, such as your smartphone,
tablet, or laptop. Just activate your product's unique email address. When you want to print, attach a
PDF, Microsoft Office document, or photo to an email and send it to your product. Both the email and the
attachments will print automatically.
1. Connect your product to your network. See the link below.
2. If you did not already set up Email Print when you installed your product software, see the link below
to use your product control panel to activate your unique email address. Or visit epson.com/connect
(U.S), epson.ca/connect (Canada), or epsonconnect.com (Caribbean) to learn more about Email
Print, create your Epson Connect account, and register your product to the Epson Connect service.
3. Now you are ready to send and print emails to your product's Email Print address.
Note: Go to epsonconnect.com and log into your Epson Connect account to personalize your product's
email, adjust print settings, and set up other Epson Connect services.
Parent topic: Epson Connect Solutions for Smartphones, Tablets, and More
Related tasks
Setting Up Epson Connect Services
38
Page 39

Related topics
Wi-Fi or Wired Networking
Using the Epson iPrint Mobile App
Use this free Apple and Android app to print and scan with networked Epson products. Epson iPrint lets
you print PDFs, Microsoft Office documents, photos, and web pages over a wireless network. You can
scan and save a file on your device, send it as an email, or upload it to an online service such as Box,
Dropbox, Evernote, or Google Drive.
1. Connect your product to your wireless network. See the link below.
2. Visit epson.com/connect (U.S), epson.ca/connect (Canada), or epson.com.jm/connect (Caribbean)
to learn more about Epson iPrint and check the compatibility of your mobile device.
3. Download Epson iPrint from the Apple App Store or Google Play.
4. Connect your mobile device to the same wireless network as your product.
5. Open Epson iPrint and select your Epson product.
Now you are ready to print or scan with your mobile device and your Epson product.
Parent topic: Epson Connect Solutions for Smartphones, Tablets, and More
Related topics
Wi-Fi or Wired Networking
Using Epson Remote Print
With Epson Remote Print software, you can print from your laptop or desktop computer to an Epson
Email-enabled product anywhere in the world.
1. Connect your Epson product to your wireless network. See the link below.
2. If you did not already set up an Epson Connect account when you installed your product software,
visit epsonconnect.com to create your account and register your product to the Epson Connect
service.
Note: Make a note of your product's email address.
3. Visit epsonconnect.com to learn more about Remote Print and how to download the Remote Print
Driver software.
4. Download and install the Remote Print software.
5. Enter the email address and optional access key of your Epson product during Remote Print setup.
39
Page 40

6. Now you are ready to print remotely. Select the print command in your laptop or desktop computer
application and choose the Remote Print option for your Epson product.
Parent topic: Epson Connect Solutions for Smartphones, Tablets, and More
Related topics
Wi-Fi or Wired Networking
Using Epson Scan to Cloud
The Epson Scan to Cloud service allows you to scan and send a file as an email or upload it to an online
service directly from your Epson product. Register an email address or online services such as Box,
DropBox, Evernote, or Google Drive with your Epson Connect account.
1. Connect your Epson product to your network. See the link below.
2. If you did not already set up an Epson Connect account when you installed your product software,
visit epsonconnect.com to create your account and register your product to the Epson Connect
service.
Note: Make a note of your product's email address and password.
3. Visit epsonconnect.com to sign into your account with the email address and password you
selected.
4. Select your product, select Scan to Cloud, and select Destination List.
5. Click Add, then follow the instructions on the screen to create your destination list.
6. Now you are ready to use Scan to Cloud. Select the setting for scanning to Scan to Cloud on your
Epson product control panel.
Parent topic: Epson Connect Solutions for Smartphones, Tablets, and More
Related topics
Wi-Fi or Wired Networking
Using AirPrint
AirPrint enables instant wireless printing from iPhone, iPad, and iPod touch with the latest version of
iOS, and Mac with the latest version of OS X or macOS.
40
Page 41

Note: If you disabled paper configuration messages on your product control panel, you cannot use
AirPrint. See the link below to enable the messages, if necessary.
1. Load paper in your product.
2. Set up your product for wireless printing. See the link below.
3. Connect your Apple device to the same wireless network that your product is using.
4. Print from your device to your product.
Note: For details, see the AirPrint page on the Apple website.
Parent topic: Product Basics
Related topics
Selecting Default Paper Settings - Administrator
Wi-Fi or Wired Networking
Using Google Cloud Print
With a Google Account, you can print from your Apple or Android device to your Epson product. You can
also print from Chromebooks and the Google Chrome browser without drivers or cables.
1. Connect your Epson product to your wireless network. See the link below.
2. Note your product's IP address by checking your network status. See the link below.
3. Connect your computer or your Apple or Android device to the same wireless network as your Epson
product.
4. Enter your product's IP address into the address bar of a web browser.
5. Select the Google Cloud Print Services option.
Note: If you don't see the Google Cloud Print Services option, turn your product off and back on. If
the option still doesn't appear, select the Firmware Update option and follow the on-screen
instructions to update your product.
6. Click Register.
7. Select the checkbox to agree to the Usage Advisory and click Next.
8. Click OK to launch the sign-in page.
A separate browser window opens.
41
Page 42

9. Enter your Google Account username and password and click Sign in, or, if you don't have an
account, click Sign up for a new Google Account and follow the on-screen instructions.
10. Click Finish printer registration to complete setup and print a test page.
Your product is now linked to your Google Account and can be accessed from any Chromebook,
computer, Apple or Android device with Internet access. Visit Epson Support for Google Cloud Print
(U.S) or Epson Support for Google Cloud Print (Canada) for more information on using Google Cloud
Print, or the Google Cloud Print website for a list of supported apps.
Parent topic: Product Basics
Related topics
Wi-Fi or Wired Networking
Setting Up Google Cloud Print on a Chromebook
With a Google Account, you can print from a Chromebook without drivers or cables.
1. Connect your Epson product to your wireless network. See the link below.
2. Turn on your Chromebook and connect it to the same wireless network as your product.
Note: See your Chromebook's documentation for details on connecting to a network.
3. Do one of the following:
• Click Add to Cloud Print in the notification that appears in the corner of your Chromebook
screen.
Note: If you do not see a notification, check to see if a number appears in the status area at the
lower-right corner of the screen. Click this number to open the notifications menu, then click Add
to Cloud Print.
• Open a web browser and enter chrome://devices in the address bar. Skip to step 5.
• If you see a registration confirmation screen instead, click Register.
4. Click Add Device.
5. Click the Register button that appears next to your product.
6. Click Register on the confirmation screen. Your product's LCD screen displays a confirmation
message.
7. Select OK or press the OK button on your product to confirm the Google Cloud Print connection and
print a test page.
42
Page 43

Your product is now linked to your Google Account and can be accessed from any Chromebook, iPhone,
or Android phone with Internet access. Visit Epson Support for Google Cloud Print (U.S) or Epson
Support for Google Cloud Print (Canada) for more information on using Google Cloud Print, or the
Google Cloud Print website for a list of supported apps.
Parent topic: Product Basics
Related topics
Wi-Fi or Wired Networking
Android Printing Using the Epson Print Enabler
You can wirelessly print your documents, emails, photos, and web pages right from your Android phone
or tablet (Android v4.4 or later). With a few taps, your Android device will discover your nearby Epson
product and print.
1. Connect your Epson product to your wireless network. See the link below.
2. On your Android device, download the Epson Print Enabler plug-in from Google Play.
3. Go to Settings on your Android device, select Printing, and enable the Epson plug-in.
4. Connect your Android device to the same wireless network as your product.
5. Now you are ready to print. From an Android application such as Chrome or Gmail, tap the menu
icon and print whatever is on the screen.
Note: If you do not see your product, tap All Printers and select your product.
Parent topic: Product Basics
Related topics
Wi-Fi or Wired Networking
Using the Mopria Print Service
You can use the Mopria Print Service to print from your Android phone or tablet (Android v4.4 or later) to
your Epson product or any Mopria-certified product from other manufacturers. You can download the
Mopria Print Service from Google Play.
Note: For details on the Mopria Print Service, click here (U.S) or click here (Canada).
1. Connect your Epson product to your wireless network. See the link below.
43
Page 44

2. On your Android device, download the Mopria Print Service from Google Play.
Note: On some Samsung Galaxy devices, Mopria may come preinstalled.
3. Go to Settings on your Android device, select Printing, and enable the Mopria Print Service.
4. Connect your Android device to the same wireless network as your product.
5. Now you are ready to print. From an Android application such as Chrome or Gmail, tap the menu
icon and select Print. Then select All printers, select your Epson product, adjust your print settings,
and print.
Parent topic: Product Basics
Related topics
Wi-Fi or Wired Networking
Using Fire OS Printing
You can wirelessly print from Amazon Fire tablets and phones to your nearby networked Epson product.
There is no software to download, no drivers to install, and no cables to connect. With just a few taps in
Email, Calendar, Contacts, and WPS Office, you can send whatever is on the screen to an Epson
product.
1. Connect your Epson product to your wireless network. See the link below.
2. Connect your Amazon device to the same wireless network as your product.
3. Now you are ready to print. From your Amazon application, tap the print option and select your
product to print whatever is on the screen.
Note: If you see a message telling you that a plug-in is required, tap OK and tap Download. If your
Amazon Fire product uses Fire OS 5 and above, your device automatically uses the built-in Mopria
Print Service app to print.
Visit epson.com/connect (U.S), epson.ca/connect (Canada), or epson.com.jm/connect (Caribbean) to
learn more about Fire OS Printing (one of many Epson Connect Partner Solutions) and check the
compatibility of your mobile device.
Parent topic: Product Basics
Related topics
Wi-Fi or Wired Networking
44
Page 45

Using Windows 10 Mobile Printing
You can wirelessly print from Windows 10 Mobile tablets and phones to your nearby networked Epson
product. There is no software to download, no drivers to install, and no cables to connect. Look for the
print option in your Windows 10 application to send whatever is on the screen to an Epson product.
1. Connect your Epson product to your wireless network. See the link below.
2. Connect your Windows 10 Mobile device to the same wireless network as your product.
3. Now you are ready to print. From your Windows 10 application, tap the print option and select your
product to print whatever is on the screen.
Visit epson.com/connect (U.S), epson.ca/connect (Canada), or epson.com.jm/connect (Caribbean) to
learn more about Windows 10 Mobile Printing (one of many Epson Connect Partner Solutions) and
check the compatibility of your mobile device.
Parent topic: Product Basics
Related topics
Wi-Fi or Wired Networking
Using Epson Print and Scan App with Windows Tablets
You can use this free app to print photos and scan from your Windows (Windows 8 or higher) Surface
RT or Pro tablet with networked Epson products. Epson Print and Scan App allows you to scan and
capture images right to your tablet or to Microsoft OneDrive.
Note: The Epson Print and Scan App does not support Windows 10 Mobile printing.
1. Connect your Epson product to your wireless network. See the link below.
2. Download Epson Print and Scan App from the Microsoft Windows Store.
3. Connect your Windows tablet to the same wireless network as your product.
4. Open Epson Print and Scan App and select your Epson product.
Now you are ready to print photos or scan.
Visit epson.com/connect (U.S), epson.ca/connect (Canada), or epson.com.jm/connect (Caribbean) to
learn more about Epson Print and Scan App.
Parent topic: Product Basics
Related topics
Wi-Fi or Wired Networking
45
Page 46

Printing and Scanning with NFC from Your Android Device
You can easily connect your Android 4.0 or later device to your product using NFC (Near Field
Communication). Once connected, you can print and scan using Epson iPrint.
1. Make sure Epson iPrint is installed on your Android device.
2. Make sure Simple AP mode or Wi-Fi Direct is enabled on your product and that you are using the
default Wi-Fi Direct password.
Note: NFC printing and scanning will not work if you changed the default Wi-Fi Direct password.
3. Do one of the following:
• If you are going to print, make sure paper is loaded in the product.
• If you are going to scan, place your original on the product for scanning.
4. Touch the NFC antenna of your Android device to the NFC tag on your product.
Note: The location of your mobile device's NFC antenna varies. See your mobile device
documentation for details.
Epson iPrint opens on your device.
Note: If you do not have Epson iPrint installed, the app store page for the Epson iPrint app opens on
your device. Install Epson iPrint and repeat this step.
46
Page 47

5. Touch the NFC antenna of your Android device to the product NFC tag on your product again.
The product and Android device connect.
Note: If the Android device and product disconnect, try to print or scan a document. The Android
device and product should reconnect automatically.
6. If you are going to print, open the file you want to print in Epson iPrint.
7. Touch the NFC antenna of your Android device to the NFC tag on your product to start printing or
scanning.
Parent topic: Product Basics
Related tasks
Using the Epson iPrint Mobile App
47
Page 48

Wi-Fi or Wired Networking
See these sections to use your product on a Wi-Fi or wired network.
Network Security Recommendations
Wi-Fi Infrastructure Mode Setup
Wi-Fi Direct Mode Setup
Wi-Fi Protected Setup (WPS)
Printing a Network Status Sheet
Configuring Email Server Settings
Changing or Updating Network Connections
Network Security Recommendations
To help deter unauthorized access to your product over a network, you should protect your network
environment using appropriate security measures.
Security measures such as these can help deter threats such as loss of user data, use of telephone and
fax lines, and other intrusions:
• Enable security on your wireless LAN
Enable the appropriate security on the wireless LAN you plan to use with your product. Network
security such as a network password can deter interception of traffic over the wireless LAN. Your
router may already have a default password enabled by your Internet service provider (ISP). See your
ISP and router documentation for instructions on how to change the default password and better
secure your network.
• Connect your product only to a network protected by a firewall
Connecting your product directly to the Internet may leave it vulnerable to security threats. Instead,
connect it to a router or other network connection protected by a firewall. Your router may already
have a firewall set up by your Internet service provider; check with your ISP for confirmation. For best
results, set up and use a private IP address for your network connection.
• Change the default administrator password on your product
If your product has an option to set an administrator password, change the default administrator
password to deter access by unauthorized users to personal data stored on your product, such as IDs,
passwords, and contact lists.
Parent topic: Wi-Fi or Wired Networking
48
Page 49

Wi-Fi Infrastructure Mode Setup
You can set up your product to communicate with your computer using a wireless router or access point.
The wireless router or access point can be connected to your computer over a wireless or wired network.
1 Epson product
2 Wireless router or access point
3 Computer with a wireless interface
4 Computer
5 Internet
6 Ethernet cable (used only for wired connection to the wireless router or access point)
Selecting Wireless Network Settings from the Control Panel
Parent topic: Wi-Fi or Wired Networking
49
Page 50

Selecting Wireless Network Settings from the Control Panel
You can select or change wireless network settings using your product control panel.
To install your product on a wireless network, follow the instructions on the Start Here sheet and install
the necessary software by downloading it from the Epson website. The installer program guides you
through network setup.
Note: Breakdown or repair of this product may cause loss of fax and network data and settings. Epson is
not responsible for backing up or recovering data and settings during or after the warranty period. We
recommend that you make your own backup or print out your fax and network data and settings.
1. Press the home button, if necessary.
2. Press the icon.
You see a screen like this:
3. Select Router.
4. Select Start Setup or Change Settings.
5. Select Wi-Fi Setup Wizard.
6. Select the name of your wireless network or select Enter Manually to enter the name manually. Use
the displayed keypad to enter your network name.
50
Page 51

7. Select the Password field and enter your wireless password using the displayed keypad.
Note: The network name and password are case sensitive. Be sure to correctly enter uppercase and
lowercase letters, and numeric or special characters.
• To move the cursor, select the left or right arrows.
• To change the case of letters, select .
• To delete the previous character, select .
• To enter numbers and symbols, select .
• To enter a space, select Space.
8. Select OK when you finish entering your password.
9. Confirm the displayed network settings and select Start Setup to save them.
10. If you want to print a network setup report, select Print Check Report. (Otherwise, select OK.)
11. Press the home button to exit.
You see the icon on the LCD screen and should be able to connect to your product directly from
your computer or device, and then print. If you are printing from a computer, make sure you installed
the network software as described on the Start Here sheet.
Note: If you don't see the icon, you may have selected the wrong network name or entered the
password incorrectly. Repeat these steps to try again.
Parent topic: Wi-Fi Infrastructure Mode Setup
51
Page 52

Related references
Status Icon Information
Related tasks
Entering Characters on the LCD Screen
Wi-Fi Direct Mode Setup
You can set up your product to communicate directly with your computer or another device without
requiring a wireless router or access point. In Wi-Fi Direct Mode, the product itself acts as a network
access point for up to 4 devices.
1 Epson product
2 Computer with a wireless interface
3 Other wireless device
Enabling Wi-Fi Direct Mode
Parent topic: Wi-Fi or Wired Networking
Enabling Wi-Fi Direct Mode
You can enable Wi-Fi Direct mode to allow direct communication between your product and computer or
other devices without a wireless router or access point.
1. Press the home button, if necessary.
52
Page 53

2. Press the icon.
You see a screen like this:
3. Select Wi-Fi Direct.
4. Select Start Setup twice.
You see a screen like this:
5. Use your computer or wireless device to select the Wi-Fi network name (SSID) displayed on the
LCD screen, then enter the password shown.
6. Press the home button to exit.
You see the icon on the LCD screen and should be able to connect to your product directly from
your computer or device, and then print. If you are printing from a computer, make sure you installed
the network software as described on the Start Here sheet.
53
Page 54

Note: If you don't see the icon on the LCD screen, you may have selected the wrong network
name or entered the password incorrectly. Repeat these steps to try again.
Parent topic: Wi-Fi Direct Mode Setup
Related references
Status Icon Information
Related tasks
Entering Characters on the LCD Screen
Wi-Fi Protected Setup (WPS)
If your network uses a WPS-enabled wireless router or access point, you can quickly connect your
product to the network using Wi-Fi Protected Setup (WPS).
Note: To check if your router is WPS-enabled, look for a button labeled WPS on your router or access
point. If there is no hardware button, there may be a virtual WPS button in the software for the device.
Check your network product documentation for details.
Using WPS to Connect to a Network
Parent topic: Wi-Fi or Wired Networking
Using WPS to Connect to a Network
If you have a WPS-enabled wireless router or access point, you can use Wi-Fi Protected Setup (WPS) to
connect your product to the network.
1. Press the home button, if necessary.
2. Press the icon.
54
Page 55

You see a screen like this:
3. Select Router.
4. Select Push Button Setup (WPS).
5. Follow the instructions on the LCD screen to complete WPS setup.
6. Press the home button to exit.
You see the icon on the LCD screen and should be able to connect to your product directly from
your computer or device, and then print. If you are printing from a computer, make sure you installed
the network software as described on the Start Here sheet.
Note: If you don't see the icon, repeat these steps to try again.
Parent topic: Wi-Fi Protected Setup (WPS)
Printing a Network Status Sheet
You can print a network status sheet to help you determine the causes of any problems you may have
using your product on a network.
1. Press the home button, if necessary.
2. Select Settings.
3. Select General Settings.
55
Page 56

You see a screen like this:
4. Select Network Settings > Network Status > Print Status Sheet.
5. Select Print to print the sheet.
Examine the settings shown on the network status sheet to diagnose any problems you may have.
Parent topic: Wi-Fi or Wired Networking
Configuring Email Server Settings
To use features such as scanning to email or forwarding faxes to email, you need to configure the email
server. You can select settings for the email server using the control panel on the product.
Note: These settings can be locked by an administrator. If you cannot access these settings, contact
your administrator for assistance.
1. Press the home button, if necessary.
2. Select Settings.
3. Select General Settings > Network Settings.
56
Page 57

You see a screen like this:
4. Scroll down and select Advanced.
5. Select Email Server > Server Settings.
You see a screen like this:
6. Select one of the options shown above, then select the settings you want to use. Contact your
internet service provider if necessary to confirm the authentication method for the email server.
7. Select Proceed to save your settings.
8. Select Close to exit.
9. Select Connection Check to verify the connection to the email server.
Parent topic: Wi-Fi or Wired Networking
Related tasks
Scanning to Email
Forwarding Received Faxes
57
Page 58

Changing or Updating Network Connections
See these sections to change or update how your product connects to a network.
Accessing the Web Config Utility
Changing a USB Connection to a Wi-Fi Connection
Changing a Wi-Fi Connection to a Wired Network Connection
Connecting to a New Wi-Fi Router
Disabling Wi-Fi Features
Parent topic: Wi-Fi or Wired Networking
Accessing the Web Config Utility
You can select your product's network settings and confirm its operating status using a web browser.
You do this by accessing your product's built-in Web Config utility from a computer or other device that is
connected to the same network as your product.
Note: For more information on administration settings, see the Administrator's Guide.
1. Print a network status sheet.
2. Locate the IP address for your product that is listed on the network status sheet.
3. On a computer or other device connected to the same network as your product, open a web
browser.
4. Enter your product's IP address into the address bar.
You see the available Web Config utility options.
Parent topic: Changing or Updating Network Connections
Changing a USB Connection to a Wi-Fi Connection
If you have already connected your product to your computer using a USB connection, you can change
to a Wi-Fi connection.
1. Disconnect the USB cable from your product.
2. Uninstall your product software.
3. Download and install your product software from the Epson website using the instructions on the
Start Here sheet.
Parent topic: Changing or Updating Network Connections
58
Page 59

Changing a Wi-Fi Connection to a Wired Network Connection
If you have already connected your product to your computer wirelessly, you can change to a wired
network connection if necessary.
1. Disable your product's Wi-Fi features.
2. Connect one end of an Ethernet network cable to the product's LAN port.
3. Connect the other end to any available LAN port on your router or access point.
4. Uninstall your product software.
5. Download and install your product software from the Epson website.
6. Follow the on-screen instructions to install the software.
7. When you see the Select Your Connection screen, select Wired network connection.
8. If you see a Select Setup Option screen, select Set up printer for the first time.
9. Continue following the rest of the on-screen instructions.
Parent topic: Changing or Updating Network Connections
Related tasks
Disabling Wi-Fi Features
Connecting to a New Wi-Fi Router
If you change the wireless router you have been using on your network, you need to update your
product's Wi-Fi connection to the new router.
Note: If you switch to a 5 GHz wireless router, set the router to operate in dual band (2.4 GHz and
5 GHz) mode. See your router documentation for instructions.
1. Do one of the following:
• Windows: Uninstall your product software.
• Mac: Go to the next step.
2. Download and install your product software from the Epson website using the instructions on the
Start Here sheet.
Parent topic: Changing or Updating Network Connections
Related concepts
Uninstall Your Product Software
59
Page 60

Disabling Wi-Fi Features
You may need to disable your product's Wi-Fi features if you change your network connection type or
need to solve a problem with your network connection.
Note: Before disabling Wi-Fi features, make a note of your product's SSID (network name) and
password, and any network settings selected for the Epson Connect services you may use.
1. Press the home button, if necessary.
2. Press the icon.
You see a screen like this:
3. Select Router > Change Settings > Others > Disable Wi-Fi.
4. Select Yes to disable Wi-Fi.
Parent topic: Changing or Updating Network Connections
60
Page 61

Enabling Epson Universal Print Driver (PCL) or PostScript Printing
Before enabling Epson Universal Print Driver (PCL) or PostScript printing on your product, make sure
you have installed the software as described on the Start Here sheet.
To download the Epson Universal Print Driver or PostScript drivers, visit epson.com/support (U.S.),
epson.ca/support (Canada), or epson.com.jm/support (Caribbean) and select your product.
Installing the Epson Universal Print Driver - Windows
Installing the PostScript (PS3) Printer Software - Windows
Installing the PostScript (PS3) Printer Software - Mac
Selecting PDL (Page Description Language) Settings
Selecting Printer Language and Interface Settings
Printing a PCL or PS3 (PostScript) Status Sheet
Installing the Epson Universal Print Driver - Windows
The Epson Universal Print Driver supports multiple printer languages, such as PCL and ESC/P-R, and
can be installed on a Windows computer.
Note: Make sure your product is turned on and connected to the same network as your computer before
installing the printer software. Depending on your model, not all printer languages may be supported.
1. To download the EPSON Universal Print Driver file, visit epson.com/support (U.S.),
epson.ca/support (Canada), or epson.com.jm/support (Caribbean) and select your product.
2. Double-click the downloaded package.
61
Page 62

3. Follow the on-screen instructions until you see this screen:
4. Select Yes: Network connection and click OK.
Note: Select the Set Default of Printer Control Language to PCL6 checkbox if you want to set the
default printer language to PCL6. Leave this option deselected to set the printer language to ESC/PR. (You can change this setting later as needed.)
62
Page 63

After the software finishes searching for products, you see a screen like this:
5. Do one of the following:
• If you are installing one product, make sure Add EPSON Universal Print Driver is selected and
continue with the next step.
• If you are installing more than one product, select Add found printers and go to step 9.
Note: You can customize and filter your product search results by clicking Display Settings.
63
Page 64

6. Open the Select a port to connect a printer menu and select an existing printer port, if necessary.
Otherwise, skip this option to create a new port automatically.
7. Select the product you want to install from the Found Printers list.
Note: Deselect the Set as default printer checkbox if you do not want the product to be set as your
default printer.
8. Click OK, then skip the remaining steps.
9. If you are installing more than one product, select the products from the Found Printers list and click
Add to Printer Folder.
64
Page 65

The selected products appear in the lower section of the screen.
10. Select the checkbox next to the product you want to make your default printer, if necessary.
11. Click OK.
Parent topic: Enabling Epson Universal Print Driver (PCL) or PostScript Printing
Installing the PostScript (PS3) Printer Software - Windows
If you did not install the standard Epson printer software or Epson Universal Print Driver, you need to
install the PostScript (PS3) printer software before you can adjust the print settings and print to your
network printer.
Note: Make sure your product is turned on and connected to the same network as your computer before
installing the printer software.
1. To download the Drivers and Utilities Combo Package - PS3 PostScript file, visit
epson.com/support (U.S.), epson.ca/support (Canada), or epson.com.jm/support (Caribbean) and
select your product.
2. Double-click the downloaded package.
3. Click OK.
4. Click Accept.
5. Click Install.
6. Click Next and follow the on-screen instructions.
Parent topic: Enabling Epson Universal Print Driver (PCL) or PostScript Printing
Installing the PostScript (PS3) Printer Software - Mac
If you did not install the standard Epson printer software, you need to install the PostScript (PS3) printer
software before you can adjust the print settings and print to your network printer.
Note: Make sure your product is turned on and connected to the same network as your computer before
installing the printer software.
1. To download the Drivers and Utilities Combo Package - PS3 PostScript file, visit
epson.com/support (U.S.), epson.ca/support (Canada), or epson.com.jm/support (Caribbean) and
select your product.
2. Double-click the downloaded package.
65
Page 66

3. Double-click EPSON.
4. Click Continue on the next two screens.
5. Click Agree.
6. Click Install.
7. If necessary, enter the administrator password.
8. Click Start and follow the on-screen instructions.
Parent topic: Enabling Epson Universal Print Driver (PCL) or PostScript Printing
Selecting PDL (Page Description Language) Settings
You can select settings for PCL and PostScript printing using the control panel on the product.
Note: These settings can be locked by an administrator. If you cannot access these settings, contact
your administrator for assistance.
1. Press the home button, if necessary.
2. Select Settings.
3. Select General Settings.
You see a screen like this:
4. Select Printer Settings.
66
Page 67

You see a screen like this:
5. Select PDL Print Configuration.
You see a screen like this:
6. Select one of the options shown above, then select the PDL print configuration options you want to
use.
7. When you are finished, press the home button to exit.
PDL Print Configuration Options
Parent topic: Enabling Epson Universal Print Driver (PCL) or PostScript Printing
PDL Print Configuration Options
Select the PDL Print Configuration options you want to use for PCL or PostScript printing.
67
Page 68

PDL Print Configuration
option
Available
settings
Description
Common Settings
Paper Size Various sizes Sets the default paper size for PCL or PostScript
printing
Paper Type Various paper
types
Sets the default paper type for PCL or PostScript
printing
Orientation Portrait Sets the default orientation for PCL or PostScript
Landscape
printing
Quality Draft Sets the quality for PCL or PostScript printing
Standard
Best
Ink Save Mode On/Off Saves ink by reducing print density
Print Order Last Page on
Starts printing from the first page of a file
Top
First Page on
Starts printing from the last page of a file
Top
Number of Copies 1 to 999 Selects the number of copies to print
Binding Margin Left Edge Specifies the binding edge for double-sided documents
Top Edge
Auto Paper Ejection On/Off Ejects paper automatically when printing is stopped
during a print job
2-Sided Printing On/Off Selects duplex printing
PCL Menu
Font Source Resident Uses a font preinstalled on the printer
Font Number 0 to 111 Selects the default font number for the default font
source
Pitch 0.44 to 99.99 cpi Selects the default font pitch if the font is scalable and
fixed-pitch (availability depends on font source and
number settings)
68
Page 69

PDL Print Configuration
option
Available
settings
Description
Height 4.00 to 999.75 pt Selects the default font height if the font is scalable and
proportional (availability depends on font source and
number settings)
Symbol Set Various Selects the default symbol set. If the selected font is not
available for the selected symbol set, the font source
and number are replaced with IBM-US (the default
setting).
Form 5 to 128 lines Sets the number of lines for the selected paper size and
orientation. Changes the line spacing (VMI) stored in
the printer. Later changes in page size or orientation
cause changes in the Form value based on the stored
VMI.
CR Function CR Selects the line feed command when printing with a
CR+LF
driver from a specific operating system
LF Function LF
CR+LF
Paper Source Assign 4 Makes the paper source select command compatible
with HP LaserJet 4
4K Makes the paper source select command compatible
with HP LaserJet 4000, 5000, and 8000
5S Makes the paper source select command compatible
with HP LaserJet 5S
PS3 Menu
Error Sheet On/Off Prints a sheet showing the status when errors occur
during PostScript or PDF printing
Binary On/Off Enable when printing files that contain binary images
(available when the product is connected to the
network). Allows you to print binary images even if the
driver is set to ASCII.
69
Page 70

PDL Print Configuration
option
PDF Page Size Various sizes Selects the paper size when printing a PDF file. If Auto
Parent topic: Selecting PDL (Page Description Language) Settings
Available
settings
Description
is selected, the paper size is determined based on the
size of the first page.
Selecting Printer Language and Interface Settings
You can select printer language and interface settings using the control panel on the product.
Note: These settings can be locked by an administrator. If you cannot access these settings, contact
your administrator for assistance.
1. Press the home button, if necessary.
2. Select Settings.
3. Select General Settings.
You see a screen like this:
4. Select Printer Settings.
70
Page 71

You see a screen like this:
5. To change interface settings, scroll down and select the interface options for your connection type.
6. To select printer language settings, select Printing Language and select the printing language for
your connection type.
7. When you are finished, press the home button to return to the Home screen.
Printing Language and Interface Options
Parent topic: Enabling Epson Universal Print Driver (PCL) or PostScript Printing
Printing Language and Interface Options
Select the printing language and interface options you want to use.
Option Available
settings
PC Connection via USB Enable Select whether to allow USB communication with the
Disable
USB I/F Timeout Setting 0.5 to 300
seconds
Description
product
Specify the length of time before ending USB
communication from a computer using the PCL or
PostScript driver. This setting is necessary to avoid
endless USB communication.
71
Page 72

Option Available
settings
Printing Language Auto Select the language for the USB or network interface
PCL
PS3
PDF
Parent topic: Selecting Printer Language and Interface Settings
Description
Printing a PCL or PS3 (PostScript) Status Sheet
You can print a PCL or PS3 (PostScript) status sheet to confirm the current font information.
1. Press the home button, if necessary.
2. Select Settings.
You see a screen like this:
3. Scroll down and select Printer Status/Print.
4. Select Print Status Sheet.
5. Select PS3 Font List or PCL Font List.
6. Select Print to print the status sheet.
Parent topic: Enabling Epson Universal Print Driver (PCL) or PostScript Printing
72
Page 73

Loading Paper
Before you print, load paper for the type of printing you will do.
Installing the Optional Paper Cassette Unit
Loading Paper in the Cassette
Loading Paper or Envelopes in the Rear Paper Feed Slot
Paper Loading Capacity
Double-sided Printing Capacity
Available Epson Papers
Paper or Media Type Settings - Printing Software
Selecting the Paper Settings for Each Source - Control Panel
Selecting Default Paper Settings - Administrator
Installing the Optional Paper Cassette Unit
You can install an optional paper cassette unit to provide more paper capacity.
1. Turn off the product, and unplug the power cord and any connected cables.
Warning: To avoid electric shock, make sure you unplug the power cord.
2. Remove the paper cassette unit from its packaging and remove any protective materials.
73
Page 74

3. Lift up your product and gently lower it onto the paper cassette unit with the corners aligned.
Warning: To lift the product, have two people hold it as shown here. Lifting from other areas may
cause the product to fall or cause you to pinch your fingers when placing the product down.
74
Page 75

4. Place the cassette number sticker on the cassette unit.
5. Connect the power cord and other connection cables, then plug in the product.
6. Turn on the product.
7. Pull out and reinsert the paper cassette in the optional paper cassette unit, and confirm that the
cassette unit number appears on the screen.
8. Enable the optional paper cassette unit in the product software.
Enabling the Optional Paper Cassette - Windows
Enabling the Optional Paper Cassette - Mac
Parent topic: Loading Paper
Enabling the Optional Paper Cassette - Windows
You need to enable the optional paper cassette unit before you can use it with the printer software.
Note: If you are using the Epson Universal Print Driver or PostScript (PS3) printer software, see the link
below to enable the optional cassette unit.
1. Do one of the following:
• Windows 10: Click and select (Settings) > Devices > Printers & scanners. Select your
product name and select Manage > Printer properties.
75
Page 76

• Windows 8.x: Navigate to the Apps screen and select Control Panel > Hardware and Sound >
Devices and Printers. Right-click your product name and select Printer properties.
• Windows 7: Click and select Devices and Printers. Right-click your printer name and select
Printer properties.
• Windows Vista: Click and select Control Panel. Click Printer under Hardware and Sound,
then right-click your printer name and select Properties.
2. Click the Optional Settings tab.
You see a window like this:
3. Make sure Acquire from Printer is selected, then click Get.
The optional paper sources are listed in the Current Printer Information section.
4. Click OK.
The optional paper cassette is now enabled.
76
Page 77

Parent topic: Installing the Optional Paper Cassette Unit
Related tasks
Synchronizing Printer Settings - Epson Universal Print Driver - Windows
Enabling the Optional Paper Cassettes - PostScript Printer Software - Windows
Enabling the Optional Paper Cassette - Mac
You need to enable the optional paper cassette unit before you can use it with the printer software.
Note: If you are using the PostScript (PS3) printer software, see the link below to enable the optional
cassette unit.
1. In the Apple menu or the Dock, select System Preferences.
2. Select Print & Fax, Print & Scan, or Printers & Scanners, select your product, and select Options
& Supplies.
3. Select Driver or Options.
You see a screen like this:
77
Page 78

4. Select the optional cassette unit you installed as the Lower Cassette setting.
5. Click OK.
The optional paper cassette is now enabled.
Parent topic: Installing the Optional Paper Cassette Unit
Related tasks
Enabling the Optional Paper Cassettes - PostScript Printer Software - Mac
Loading Paper in the Cassette
You can load paper up to this size in the paper cassette: Legal (8.5 × 14 inches [216 × 356 mm])
Note: If the optional paper cassette unit is installed, do not remove more than one cassette at a time.
1. Make sure the product is not operating and pull out the paper cassette.
78
Page 79

2. Slide the front edge guide outward all the way, then slide the side edge guides to the paper size you
are using.
3. Load paper with the printable side facedown and slide the front edge guide against the paper.
Note: Make sure the paper fits beneath the arrow mark inside the edge guides.
79
Page 80

4. Insert the paper cassette all the way into the product.
5. Do one of the following:
• Select the size and type of paper you loaded on the LCD screen.
• Press the Paper Setting button and select the paper source, then select the size and type of
paper you loaded.
• Select the size and type of paper you loaded in the Settings > General Settings > Printer
Settings > Paper Source Settings > Paper Setting menu.
Always follow these paper loading guidelines:
• Load only the recommended number of sheets.
• Load paper short edge first, no matter which way your document faces.
• Load the printable side facedown.
• Load letterhead or pre-printed paper top edge first.
• Do not load paper above the line underneath the arrow mark inside the edge guides.
• Check the paper package for any additional loading instructions.
Parent topic: Loading Paper
Related references
Paper Specifications
80
Page 81

Paper Loading Capacity
Related tasks
Loading Paper or Envelopes in the Rear Paper Feed Slot
Loading Paper or Envelopes in the Rear Paper Feed Slot
You can print envelopes or documents in a variety of paper types and sizes in the rear paper feed slot.
1. Open the feeder guard and pull up the paper support.
2. Slide the edge guides outward.
81
Page 82

3. If you are inserting a stack of paper, fan the sheets and tap the stack on a flat surface to even the
edges.
Note: You can load one sheet of binder paper with holes on one of the long edges as shown. Do not
select automatic 2-sided printing for this type of paper. Select Letterhead or Preprinted as the
paper type setting.
4. Do one of the following:
• Insert paper, glossy or printable side up and short edge first, in the center of the slot.
Caution: To prevent paper feeding problems, make sure you do not load paper above the arrow
marks inside the edge guides.
82
Page 83

• Load envelopes short edge first, with the flap facing down and the flap edge to the left, in the
center of the slot.
5. Slide the edge guides against the paper, but not too tightly.
6. Extend the output tray.
7. Do one of the following:
• Select the size and type of paper you loaded on the LCD screen.
83
Page 84

• Press the Paper Setting button and select the paper source, then select the size and type of
paper you loaded.
• Select the size and type of paper you loaded in the Settings > General Settings > Printer
Settings > Paper Source Settings > Paper Setting menu.
Always follow these paper loading guidelines:
• Load only the recommended number of sheets.
• Load paper short edge first, no matter which way your document faces.
• Load the printable side faceup.
• Load letterhead or pre-printed paper top edge first.
• Do not load paper above the line under the arrow mark inside the edge guides.
• If you have trouble loading a stack of envelopes, press each envelope flat before loading it or load one
envelope at a time.
• If print quality declines when printing multiple envelopes, try loading one envelope at a time.
• Do not load envelopes that are curled, folded, or too thin.
• Do not load windowed envelopes or envelopes with adhesive surfaces on the flaps.
• Check the paper package for any additional loading instructions.
Parent topic: Loading Paper
Related references
Paper Specifications
Paper Loading Capacity
Related tasks
Loading Paper in the Cassette
Paper Loading Capacity
As described in the tables below, do not load paper in the paper cassettes above the arrow marks on
these stickers inside the cassette:
• Use this guide for standard paper:
• Use this guide for thick paper:
84
Page 85

Standard and Thick Paper Capacity
You can load up to the following number of sheets in the rear paper feed slot:
• 80 sheets of standard paper; load only 1 sheet of paper in a user-defined size between 14 inches
(355.6 mm) and 236 inches (6000 mm) long
• 30 sheets of thick paper (25 to 68 lb [91 to 256 g/m2]); load only 1 sheet of thick paper in a user-
defined size between 14 inches (355.6 mm) and 44 inches (1117.6 mm) long (available only when
printing from a computer)
• 10 envelopes
Paper type Paper size Loading capacity
Cassette 1 Cassette 2 (optional)
Plain paper
Letterhead paper
Recycled paper
Colored paper
Pre-printed paper
High-quality plain paper
Available paper sizes*
User defined (4 × 5.8
inches [100 × 148 mm]
to 8.5 × 14 inches [216 ×
355.6 mm])
User defined (2.5 × 5
inches [64 × 127 mm] to
8.5 × 14 inches [216 ×
Up to the arrow mark on the cassette sticker
— —
355.6 mm])
User defined (2.5 × 14
inches [64 × 355.6 mm]
to 8.5 × 236 inches [216
× 6000 mm])
User defined (3.5 × 5
inches [89 × 127 mm] to
Up to the arrow mark on
the cassette sticker
—
8.5 × 5.8 inches [216 ×
148 mm])
User defined (3.5 × 5.8
inches [89 × 148 mm] to
4 × 14 inches [100 ×
355.6 mm])
Envelopes #10 10 —
85
Page 86

Paper type Paper size Loading capacity
Cassette 1 Cassette 2 (optional)
Thick paper (25 to 43 lb
[91 to 160 g/m2])
Available paper sizes*
User defined (4 × 5.8
inches [100 × 148 mm]
to 8.5 × 14 inches [216
× 355.6 mm])
User defined (3.5 × 5
inches [89 × 127 mm] to
8.5 × 5.8 inches [216 ×
148 mm])
User defined (3.5 × 5.8
inches [89 × 148 mm] to
4 × 14 inches [100 ×
355.6 mm])
User defined (2.5 × 5
inches [64 × 127 mm] to
8.5 × 14 inches [216 ×
355.6 mm])
User defined (2.5 × 14
inches [64 × 355.6 mm]
to 8.5 × 44 inches [216 ×
1117.6 mm])
90 250
90 —
— —
* Select the paper specification link below to view the list of available paper sizes.
Note: Half Letter size is not available when printing with the PostScript printer driver.
Epson Paper Capacity
Paper type Loading capacity
Cassette 1 Cassette 2 (optional) Rear paper feed slot
Epson Bright White
200 sheets 400 sheets 50 sheets
Paper
86
Page 87

Paper type Loading capacity
Cassette 1 Cassette 2 (optional) Rear paper feed slot
Epson Presentation
Paper Matte
Epson Premium
Presentation Paper
Matte
Epson Premium
Presentation Paper
Matte Double-sided
Note: When printing at a user defined size on genuine Epson paper, you can only print at Standard or
Normal print quality. Even if the printer driver allows you to choose a better print quality, the printer will
print using Standard or Normal print quality.
Parent topic: Loading Paper
Related references
Paper Specifications
80 sheets — 70 sheets
50 sheets — 20 sheets
Double-sided Printing Capacity
Automatic Double-sided Printing
You can automatically print double-sided from any paper source on the following sizes of standard and
thick papers (up to 43 lb [160 g/m2]):
• Letter (8.5 × 11 inches [216 × 279 mm])
• A4 (8.3 × 11.7 inches [210 × 297 mm])
• Executive (7.25 × 10.5 inches [184 × 267 mm])
Manual Double-sided Printing
You can manually print double-sided pages using only the rear paper feed with the following papers:
87
Page 88

Paper type Size Manual double-sided
printing capacity
Plain paper
Available paper sizes
1
30 sheets
Copier paper
Letterhead paper
User defined (8.5 × 14 to 236 inches
[216 × 355.6 to 6000 mm])
2
1 sheet
Recycled paper
Colored paper
Pre-printed paper
High quality plain paper
Epson Bright White Paper Letter (8.5 × 11 inches
30 sheets
[216 × 279 mm])
Thick paper 1 (25 to 43 lb [91 to 160
g/m2])
Thick paper 2 (43 to 68 lb [161 to
Available paper sizes
User defined (8.5 × 14 to 44 inches
[216 × 355.6 to 1117.6 mm])
1
2
5 sheets
1 sheet
256 g/m2])
1
: Select the paper specification link below to view the list of available paper sizes.
2
: Available only when printing from a computer
Parent topic: Loading Paper
Related references
Paper Specifications
Related tasks
Selecting Double-sided Printing Settings - Windows
Selecting Double-sided Printing Settings - Mac
Available Epson Papers
You can purchase genuine Epson ink, maintenance boxes, and paper at epson.com (U.S. sales),
epson.ca (Canadian sales), or epson.com.jm (Caribbean sales). You can also purchase supplies from
an Epson authorized reseller. To find the nearest one, call 800-GO-EPSON (800-463-7766) in the U.S.
or 800-807-7766 in Canada.
Note: Paper/media availability varies by country.
88
Page 89

Paper Type Size Part number Sheet count
Epson Bright White Paper Letter (8.5 × 11 inches
[216 × 279 mm])
Epson Presentation Paper Matte Legal (8.5 × 14 inches
[216 × 356 mm])
Letter (8.5 × 11 inches
[216 × 279 mm])
Epson Premium Presentation
Paper Matte
Epson Premium Presentation
Paper Matte Double-sided
Parent topic: Loading Paper
8 × 10 inches (203 × 254 mm) S041467 50
Letter (8.5 × 11 inches
[216 × 279 mm])
Letter (8.5 × 11 inches
[216 × 279 mm])
Paper or Media Type Settings - Printing Software
For this paper Select this paper Type or Media Type setting
Plain paper
Epson Bright White Paper
High-quality plain paper
Plain Paper
S041586 500
S041067 100
S041062 100
S041257
S042180
S041568 50
50
100
Letterhead paper Letterhead
Recycled paper Recycled
Colored paper Color
Pre-printed paper Preprinted
Envelopes Envelope
Epson Presentation Paper Matte Epson Premium
Presentation Paper Matte
Epson Premium Presentation Paper Matte Doublesided
Thick paper (25 to 43 lb [91 to 160 g/m2]) Thick Paper 1
89
Premium Presentation Paper Matte
Page 90

For this paper Select this paper Type or Media Type setting
Thick paper (43 to 68 lb [161 to 256 g/m2]) Thick Paper 2
Note: The settings listed here are available only when printing from your computer; they do not apply to
your product's control panel settings.
Parent topic: Loading Paper
Selecting the Paper Settings for Each Source - Control Panel
You can change the default paper size and paper type for each source using the control panel on the
product.
1. Press the Paper Setting button.
You see a screen like this:
2. Select the paper source you want to select settings for.
You see a screen like this:
90
Page 91

3. Select Paper Size.
4. Select the paper size you loaded.
5. Select Paper Type.
6. Select the paper type for the paper you loaded.
7. Select the back arrow to select another paper source or press the home button to exit.
Paper Type Settings - Control Panel
Parent topic: Loading Paper
Paper Type Settings - Control Panel
Select a Paper Type setting that matches the paper you loaded.
Paper type loaded Paper Type setting
Plain paper
Epson Bright White Paper
Letterhead paper Letterhead
Recycled paper Recycled
Colored paper Color
Pre-printed paper Preprinted
High-quality plain paper High Quality Plain Paper
Envelopes Envelope
Epson Presentation Paper Matte
Epson Premium Presentation Paper Matte
Epson Premium Presentation Paper Matte Doublesided
Thick paper up to 25 to 413 lb (91 to 160 g/m2) Card Stock 1
Thick paper up to 43 to 68 lb (161 to 256 g/m2) Card Stock 2
Parent topic: Selecting the Paper Settings for Each Source - Control Panel
Plain Paper
Prem. Matte
91
Page 92

Selecting Default Paper Settings - Administrator
As an administrator, you can adjust default paper settings that apply to all print jobs sent to the product.
Note: These settings can be locked by an administrator. If you cannot access these settings, contact
your administrator for assistance.
Selecting the Default Printer Settings
Selecting the Universal Print Settings
Parent topic: Loading Paper
Selecting the Default Printer Settings
You can change default printer settings using the control panel on the product.
Note: These settings can be locked by an administrator. If you cannot access these settings, contact
your administrator for assistance.
1. Press the home button, if necessary.
2. Select Settings.
3. Select General Settings.
You see a screen like this:
4. Select Printer Settings.
92
Page 93

You see a screen like this:
5. Select one of these options for the Auto Error Solver setting:
• Turn on this setting to display a warning and print single-sided when a 2-sided printing error
occurs, or to print only what the printer could process when a full memory error occurs.
• Turn off this setting to display an error message and stop printing if an error occurs.
6. Select Paper Source Settings.
7. Select the Paper Source Settings options you want to use.
8. When you are finished, press the home button to exit.
Paper Source Settings Options
Parent topic: Selecting Default Paper Settings - Administrator
Paper Source Settings Options
Select the paper source options you want to use for your print jobs.
Paper Source
Settings option
Paper Setting Various Select the paper size and type for each paper source
Rear Paper Feed
Priority
A4/Letter Auto
Switching
Available settings Description
On Select On to give printing priority to paper loaded in the rear
Off
paper feed slot
On Select On to switch the selected paper size to match the
Off
loaded paper (Letter or A4) if the wrong size is selected
93
Page 94

Paper Source
Settings option
Available settings Description
Auto Select
Settings
Error Notice Paper Size Notice Select On for either of these settings to display an error
Paper Setup
Auto Display
Parent topic: Selecting the Default Printer Settings
Copy Select On for any of these settings to automatically print on
Fax
Other
Paper Type Notice
On Select On to automatically display a menu that lets you
Off
Selecting the Universal Print Settings
You can change the default universal print settings using the control panel on the product.
Note: These settings can be locked by an administrator. If you cannot access these settings, contact
your administrator for assistance.
paper from any source containing paper that matches your
paper settings
message when the selected paper type or size does not
match the loaded paper
select the paper size and type when you load paper in the
product
Note: If you disable this setting, you will not be able to print
using AirPrint.
1. Press the home button, if necessary.
2. Select Settings > General Settings > Printer Settings > Universal Print Settings.
You see this screen:
94
Page 95

3. Adjust the settings as necessary.
4. When you are finished, press the home button to exit.
Universal Print Settings Options
Parent topic: Selecting Default Paper Settings - Administrator
Universal Print Settings Options
Select the universal print setting options you want to use for your print jobs.
Universal Print
Available settings Description
Settings option
Top Offset — Adjust the top or left margin
Left Offset
Top Offset in
Back
— Adjust the top or left margin of the back page when printing
double-sided.
Left Offset in
Back
Check Paper
Width
On Select On to check the paper width before printing. This
Off
prevents printing beyond the edges of the paper when the
paper size settings are incorrect, but may reduce the
printing speed.
Skip Blank Page On Select On to skip printing of blank pages automatically
Off
Parent topic: Selecting the Universal Print Settings
95
Page 96

Placing Originals on the Product
Follow the instructions here to place your original documents or photos on the product.
Caution: Do not place anything on top of your product or use its cover as a writing surface to avoid
damaging it.
Placing Originals on the Scanner Glass
Placing Originals in the Automatic Document Feeder
Placing Originals on the Scanner Glass
You can place originals up to this size on the scanner glass: Letter (8.5 × 11 inches [216 × 279 mm]) or
A4 (8.3 × 11.7 inches [210 × 297 mm]).
Note: When originals are placed in the ADF and on the scanner glass, priority is given to the originals in
the ADF.
1. Open the document cover.
96
Page 97

2. Place your original facedown on the scanner glass with the top facing into the corner. Slide the
original to the edges of the indicated corner.
Note: The edges of your original may be cropped by 0.06 inch (1.5 mm) from the edge of the
scanner glass. Manually position your original away from the edges to prevent cropping.
3. Close the document cover gently to keep your original in place.
Caution: Do not push down on the document cover or scanner glass or you may damage the
product.
Parent topic: Placing Originals on the Product
Related topics
Copying
Scanning
Faxing
Placing Originals in the Automatic Document Feeder
You can place single- or multi-page original documents in the Automatic Document Feeder (ADF). You
can also use the ADF to scan both sides of a 2-sided document. Make sure the originals meet the
Automatic Document Feeder specifications before loading them.
Caution: Make sure your originals are not creased or folded, and do not contain holes, staples, tape, or
other materials that could obstruct the feeder.
Caution: Do not place photographs or valuable artwork in the ADF. Place fragile or valuable originals on
the scanner glass to avoid wrinkling or damaging them.
97
Page 98

Note: When originals are placed in the ADF and on the scanner glass, priority is given to the originals in
the ADF.
1. Slide the ADF edge guides outward.
2. Fan your stack of originals and tap them gently on a flat surface to even the edges.
98
Page 99

3. Insert the originals into the ADF faceup and top-edge first.
Note: Do not load originals above the arrow mark on the ADF edge guide.
The ADF icon on the Copy, Scan, and Fax screens lights up.
99
Page 100

4. Slide the ADF edge guides against the originals, but not too tightly.
Parent topic: Placing Originals on the Product
Related references
Mac System Requirements
Copying Options
Related topics
Copying
Scanning
Faxing
100
 Loading...