

Page 1

User’s Guide
Overview of Your Scanner Features
These features help you create the best possible scans,
no matter what shape your original is in.
Placing Originals on the Scanner
Follow the steps here to place your original documents
or photos on the scanner.
Scanning Special Projects
Follow the instructions here for specific scanning
projects you may need to create.
Solving Problems
If you have a problem using your scanner or its
software, check here for solutions.
Safety
Copyright and Trademarks
Guide to the Scanner Parts
Check this section to identify the parts of your scanner.
Scanning Your Originals
Follow the step-by-step instructions here to scan your
original documents or photos using any of the available
scanning methods.
Maintenance
Follow the guidelines here to maintain and transport
your scanner.
Technical Specifications
Check here for technical details about your scanner and
its accessories.
Page 2

Home > Overview of Your Scanner Features
Overview of Your Scanner Features
These features help you create the best possible scans, no matter what shape your original is in.
Color Restoration
Dust Removal
DIGITAL ICE Technology
Backlight Correction
Text Enhancement
Page 3

Home > Guide to the Scanner Parts
Guide to the Scanner Parts
Check these sections to identify the parts of your scanner.
Scanner Parts
Lights and Buttons
Page 4

Home > Placing Originals on the Scanner
Placing Originals on the Scanner
Follow the steps here to place your original documents or photos on the scanner.
Placing Documents or Photos
Placing Film or Slides
Page 5

Home > Scanning Your Originals
Scanning Your Originals
Follow the step- by - step instructions here to scan your original documents or photos using any of the available scanning
methods.
Scanning with Epson Scan
Starting Epson Scan
Selecting an Epson Scan Mode
Changing the Scan Mode
Scanning in Full Auto Mode
Scanning in Office Mode
Scanning in Home Mode
Scanning in Professional Mode
Selecting File Save Settings
Detailed Setting Instructions
Finishing the Scan
Scanning with Easy Photo Scan
Scanning with Easy Photo Scan
Page 6

Home > Scanning Special Projects
Scanning Special Projects
Follow these instructions for specific scanning projects you may need to create.
Restoring Color
Removing Dust Marks with the Dust Removal Feature
Removing Dust and Scratch Marks from Originals Using DIGITAL ICE Technology
Fixing Backlit Photos
Text Enhancement
Using the Scanner as a Copier
Scanning to a PDF File
Scanning Directly to an E-mail
Converting Scanned Documents Into Editable Text
Scanning Accurate Color Images
Assigning a Program to a Scanner Button
Page 7

Home > Maintenance
Maintenance
Follow the guidelines here to maintain and transport your scanner.
Cleaning the Scanner
Replacing the Scanner Light Source
Power Off Timer Setting
Transporting the Scanner
Page 8

Home > Solving Problems
Solving Problems
Troubleshooting
If you have a problem using your scanner or its software, check here for solutions.
Scanner Problems
Scanning Problems
Scan Quality Problems
Uninstalling Your Scanning Software
Where To Get Help
Epson Technical Support
Page 9

Home > Technical Specifications
Technical Specifications
Check here for technical details about your scanner and its accessories.
System Requirements
Scanner Specifications
Note:
Epson offers a recycling program for end of life products. Please go to www.epson.com/recycle for information
on how to return your products for proper disposal.
Page 10

Home > Safety
Important Safety Instructions
Restrictions on Copying
Read all these instructions, and follow all warnings and instructions marked on the scanner.
In this document, warnings, cautions, and notes indicate the following:
Warnings
must be followed carefully to avoid bodily injury.
Cautions
must be observed to avoid damage to your equipment.
Notes
contain important information and useful tips on the operation of this product.
Place the scanner close enough to the computer for the interface cable to reach it easily. Do not place or store the
scanner or the AC adapter outdoors, near excessive dirt or dust, water, heat sources, or in locations subject to
shocks, vibrations, high temperature or humidity, direct sunlight, strong light sources, or rapid changes in temperature
or humidity. Do not use with wet hands.
Place the scanner and the AC adapter near an electrical outlet where the adapter can be easily unplugged.
Caution:
Be sure the AC power cord meets the relevant local safety standards.
The AC power cord should be placed to avoid abrasions, cuts, fraying, crimping, and kinking. Do not place objects on
top of the AC power cord and do not allow the AC adapter or the power cord to be stepped on or run over. Be
particularly careful to keep the AC power cords straight at the end and the point where it enters the AC adapter.
Use only the AC adapter that comes with your scanner. Using any other adapter could cause fire, electrical shock, or
injury.
The AC adapter is designed for use with the scanner with which it was included. Do not attempt to use it with other
electronic devices unless specified.
Use only the type of power source indicated on the AC adapter’s label, and always supply power directly from a
standard domestic electrical outlet with the AC adapter that meets the relevant local safety standards.
When connecting this product to a computer or other device with a cable, ensure the correct orientation of the
connectors. Each connector has only one correct orientation. Inserting a connector in the wrong orientation may
damage both devices connected by the cable.
Avoid using outlets on the same circuit as photocopiers or air control systems that regularly switch on and off.
If you use an extension cord with the scanner, make sure the total ampere rating of the devices plugged into the
extension cord does not exceed the cord’s ampere rating. Also, make sure the total ampere rating of all devices
plugged into the wall outlet does not exceed the wall outlet’s ampere rating.
Never disassemble, modify, or attempt to repair the AC adapter, scanner, or scanner option by yourself except as
specifically explained in the scanner’s guides.
Do not insert objects into any opening as they may touch dangerous voltage points or short out parts. Beware of
electrical shock hazards.
If damage occurs to the plug, replace the cord set or consult a qualified electrician. If there are fuses in the plug,
make sure you replace them with fuses of the correct size and rating.
Unplug the scanner and the AC adapter, and refer servicing to qualified service personnel under the following
conditions: The AC adapter or plug is damaged; liquid has entered the scanner or the AC adapter; the scanner or the
Page 11

AC adapter has been dropped or the case has been damaged; the scanner or the AC adapter does not operate
normally or exhibits a distinct change in performance. (Do not adjust controls that are not covered by the operating
instructions.)
Unplug the scanner and the AC adapter before cleaning. Clean with a damp cloth only. Do not use liquid or aerosol
cleaners.
If you are not going to use the scanner for a long period, be sure to unplug the AC adapter from the electrical outlet.
Restrictions on Copying
Observe the following restrictions to ensure responsible and legal use of your scanner.
Copying of the following items is prohibited by law:
Bank bills, coins, government- issued marketable securities, government bond securities, and municipal securities
Unused postage stamps, pre - stamped postcards, and other official postal items bearing valid postage
Government- issued revenue stamps, and securities issued according to legal procedure
Exercise caution when copying the following items:
Private marketable securities (stock certificates, negotiable notes, checks, etc.), monthly passes, concession tickets,
etc.
Passports, driver’s licenses, warrants of fitness, road passes, food stamps, tickets, etc.
Note:
Copying these items may also be prohibited by law.
A note concerning responsible use of copyrighted materials
Epson encourages each user to be responsible and respectful of the copyright laws when using any Epson product. While some
countries' laws permit limited copying or reuse of copyrighted material in certain circumstances, those circumstances may not
be as broad as some people assume. Contact your legal advisor for any questions regarding copyright law.
Default Delay Times for Power Management for Epson products
This product will enter sleep mode after a period of nonuse. The time interval has been set at the factory to ensure that the
product meets Energy Star standards of energy efficiency, and cannot be modified by the consumer.
Restriction on disassembling and decompiling
You may not disassemble, decompile or otherwise attempt to derive the source code of any software included with this
product.
Top
Page 12

Home > Copyright and Trademarks
Copyright and Trademarks
No part of this publication may be reproduced, stored in a retrieval system, or transmitted in any form or by any means,
electronic, mechanical, photocopying, recording, or otherwise, without the prior written permission of Seiko Epson Corporation.
No patent liability is assumed with respect to the use of the information contained herein. Neither is any liability assumed for
damages resulting from the use of the information contained herein.
Neither Seiko Epson Corporation nor its affiliates shall be liable to the purchaser of this product or third parties for damages,
losses, costs, or expenses incurred by the purchaser or third parties as a result of: accident, misuse, or abuse of this product
or unauthorized modifications, repairs, or alterations to this product.
Seiko Epson Corporation and its affiliates shall not be liable against any damages or problems arising from the use of any
options or any consumable products other than those designated as Original Epson Products or Epson Approved Products by
Seiko Epson Corporation.
EPSON® and Perfection® are registered trademarks and EPSON Exceed Your Vision is a registered trademark of Seiko Epson
Corporation.
Microsoft®, Windows®, and Windows Vista® are registered trademarks of Microsoft Corporation.
Adobe®, Adobe Reader®, Acrobat®, and Photoshop® are registered trademarks of Adobe Systems Incorporated.
Apple®, ColorSync®, and Macintosh® are registered trademarks of Apple Inc.
ABBYY® and ABBYY FineReader® names and logos are registered trademarks of ABBYY Software House.
PRINT Image Matching™ and the PRINT Image Matching logo are trademarks of Seiko Epson Corporation.
Intel® is a registered trademark of Intel Corporation.
Epson Scan Software is based in part on the work of the Independent JPEG Group.
libtiff
Copyright © 1988- 1997 Sam Leffler
Copyright © 1991- 1997 Silicon Graphics, Inc.
Permission to use, copy, modify, distribute, and sell this software and its documentation for any purpose is
hereby granted without fee, provided that (i) the above copyright notices and this permission notice appear in all
copies of the software and related documentation, and (ii) the names of Sam Leffler and Silicon Graphics may
not be used in any advertising or publicity relating to the software without the specific, prior written permission
of Sam Leffler and Silicon Graphics.
THE SOFTWARE IS PROVIDED "AS- IS" AND WITHOUT WARRANTY OF ANY KIND, EXPRESS, IMPLIED OR
OTHERWISE, INCLUDING WITHOUT LIMITATION, ANY WARRANTY OF MERCHANTABILITY OR FITNESS FOR A
PARTICULAR PURPOSE.
IN NO EVENT SHALL SAM LEFFLER OR SILICON GRAPHICS BE LIABLE FOR ANY SPECIAL, INCIDENTAL, INDIRECT
OR CONSEQUENTIAL DAMAGES OF ANY KIND, OR ANY DAMAGES WHATSOEVER RESULTING FROM LOSS OF USE,
DATA OR PROFITS, WHETHER OR NOT ADVISED OF THE POSSIBILITY OF DAMAGE, AND ON ANY THEORY OF
LIABILITY, ARISING OUT OF OR IN CONNECTION WITH THE USE OR PERFORMANCE OF THIS SOFTWARE.
Digital ICE is a trademark of Kodak.
General Notice: Other product names used herein are for identification purposes only and may be trademarks of their
respective companies.
This information is subject to change without notice.
4/15
© 2015 Epson America, Inc.
CPD-27477R4
Page 13

Home > Overview of Your Scanner Features
Color Restoration
Using the Color Restoration feature in Epson Scan, you can transform an old, faded, or badly exposed photo into one with
true- to- life color and sharpness.
Original image Color Restoration applied
For instructions on using this feature, see Restoring Color.
Page 14

Home > Overview of Your Scanner Features
Dust Removal
Using the Dust Removal feature in Epson Scan, you can virtually “clean” the dust marks from your originals as you scan
them.
Original image Dust Removal applied
For instructions on using this feature, see Removing Dust Marks with the Dust Removal Feature.
Page 15

Home > Overview of Your Scanner Features
DIGITAL ICE Technology
Your scanner and its Epson Scan software are equipped with the DIGITAL ICE Technology feature that removes dust or
scratch marks from your originals.
Original image DIGITAL ICE Technology applied
DIGITAL ICE Technology can remove dust marks that the Dust Removal feature cannot. However, it takes longer to scan using
DIGITAL ICE Technology and also uses more of your system resources. It is best to try removing dust marks using Dust
Removal before using DIGITAL ICE Technology.
For instructions on using this feature, see Removing Dust and Scratch Marks from Originals Using DIGITAL ICE Technology for
instructions.
Page 16

Home > Overview of Your Scanner Features
Backlight Correction
Using the Backlight Correction feature in your scanning software, you can remove shadows from photos that have too much
background light.
Original image Backlight Correction applied
For instructions on using this feature, see Fixing Backlit Photos.
Page 17

Home > Overview of Your Scanner Features
Text Enhancement
When you scan documents, you can sharpen the text and increase accuracy by using the Text Enhancement feature in Epson
Scan.
Original Text Enhancement: Off Text Enhancement: On
For instructions on using this feature, see Text Enhancement .
Page 18

Home > Guide to the Scanner Parts
Scanner Parts
a. scanner cover
a. document mat
b. document table
c. carriage (in the document table)
Page 19

a. Power switch
b. DC inlet
c. transportation lock
d. USB interface connector
a. transparency unit window
Page 20

Home > Guide to the Scanner Parts
Lights and Buttons
Lights
Buttons
Note:
Your product may look different from the illustrations in this guide, but the instructions are the same.
The scanner has four buttons for scanning operations. The Status lights indicate whether the scanner is operating normally.
a. Status lights
b. PDF button
c. E- mail button
d. Copy button
e. Start button
Lights
The green and orange status lights are on the left of the PDF button and the blue status light is on the bottom of the four
buttons.
Color Indicator
Green
Orange
Blue
Status
On
Flashing
Flashing
Flashing
Meaning
Power is on.
Entering power saving mode.
An error has occurred. See The Status Light Is Flashing for more information.
Initializing or scanning.
Page 21

(None)
Off
The scanner is off.
Buttons
Before using the scanner buttons, make sure you have installed Epson Scan.
Button Function
Start
Copy
E- mail
PDF
See Using the Scanner Buttons .
Epson Scan starts.
Copy Utility starts.
Epson Scan automatically scans, then the Send File Via E- mail window appears.
The Scan to PDF window appears.
Top
Top
Page 22

Home > Placing Originals on the Scanner
Placing Documents or Photos
Placing Documents or Photos on the Document Table
Placing Large or Thick Documents
Caution:
Do not place heavy objects on the document table glass and do not press the glass with too much force.
Placing Documents or Photos on the Document Table
Open the scanner cover.
Make sure the document mat is installed inside the cover. If it is not installed, see Replacing the Document Mat for
instructions.
a. document mat
Place your document or photo facedown on the document table. Make sure the upper right corner of the document or
photo is against the corner of the scanner, next to the arrow mark.
Page 23

Note:
If you are scanning multiple photos at once, position each photo at least 20 mm (0.8 inch) apart from the
others.
Close the scanner cover gently so that your original does not move.
Note:
Always keep the document table clean.
Do not leave photos on the document table for an extended period of time as they may stick to the
glass.
Page 24

To start scanning, see Starting Epson Scan for instructions.
Placing Large or Thick Documents
When you scan a large or thick document, you can pull the scanner cover straight up.
Place a large or thick document on the document table.
Top
Close the document cover and hold it down firmly as you scan.
Top
Page 25

Home > Placing Originals on the Scanner
Placing Film or Slides
Removing the Document Mat
Placing Film in the Holder
Placing Slides in the Holder
Replacing the Document Mat
Removing the Document Mat
To scan film strips or slides, you need to remove the document mat from the scanner cover. This uncovers the transparency
unit window so your scanner can use it to scan your film or slides.
Open the scanner cover and gently slide up the document mat to remove it.
Use a soft cloth to wipe the transparency unit window and the document table before placing your film or slides.
Page 26

a. transparency unit window
To place film for scanning, see Placing Film in the Holder.
To place slides for scanning, see Placing Slides in the Holder.
To replace the document mat, see Replacing the Document Mat.
Placing Film in the Holder
Placing 35 mm Film Strips
Open the cover of the 35 mm film strip holder.
Top
Slide one or two film strips all the way into the film holder with the shiny base side facing down. Your images and any
wording on the film strips should appear backwards on the side that faces up.
Page 27

Note:
Hold the edge of the film gently or use gloves to touch the film; otherwise you may damage the film.
Make sure the white stickers on the back of the film holder and the areas around them are not
scratched, dusty, or covered in any way. If the areas are obscured, the scanner may have trouble
recognizing your film in Full Auto Mode.
Do not cover the small holes in the film holder.
Make sure the film strip is placed as shown.
Close the cover and press it down until you hear a click. Then press down on all the edges of the covers to secure them.
Place the film holder on the document table so that it is aligned as shown. Make sure the tab labelled “A” on the film
holder fits into the area labelled “A” on the scanner.
Page 28

Make sure you removed the document mat. See Removing the Document Mat .
Close the scanner cover.
To scan your film, see Starting Epson Scan .
When you are finished scanning film, be sure to replace the document mat before scanning documents or photos. See
Replacing the Document Mat .
Placing Medium Format Film
Open the cover on the medium format film holder.
Slide one medium format film image into the film holder with the shiny base side facing down. Your image and any
wording on the film should appear backwards on the side that faces up. Make sure the entire image frame is positioned
in the film holder opening.
Note:
Hold the edge of the film gently or use gloves to touch the film; otherwise you may damage the film.
Do not cover any of the tiny holes in the film holder or the scanner may have trouble recognizing
which film holder you are using.
Page 29

Make sure the film strip is placed as shown.
Close the cover over the film and press it down until it clicks. Then press down on all the edges of the cover to secure it.
Place the film holder on the document table so that it is aligned with the upper left corner. Make sure the tab labelled
“B” on the film holder fits into the area labelled “B” on the scanner.
Make sure you removed the document mat. See Removing the Document Mat .
Close the scanner cover.
Page 30

Note:
You cannot use Full Auto Mode to scan medium format film.
When you are finished scanning film, be sure to replace the document mat before scanning documents or photos. See
Replacing the Document Mat .
Using the scanning support sheet
When the film is curled, flatten the film using the scanning support sheet that came with the medium format film holder.
Caution:
Keep at least 2 mm space between the image frame and scanning support sheet.
Make sure that the glossy side contacts with the film surface. When you set the scanning support
sheet upside down, it may damage the film.
When the film is curled downwards:
Place the scanning support sheet under the film with glossy surface facing up. Then, close the holder cover.
When the film is curled upwards:
Place the scanning support sheet on the film with glossy surface facing down. Then, close the holder cover.
Placing Slides in the Holder
You can scan up to four 35 mm slides at a time using the slide portion of the film holder.
Top
Page 31

Note:
Make sure the white stickers on the back of the film holder and the areas around them are not
scratched, dusty, or covered in any way. If the areas are obscured, the scanner may have trouble
recognizing your slides in Full Auto Mode.
Do not cover the small holes on the film holder.
Place the film holder on the document table so that it is aligned as shown. Make sure the tab labelled “C” on the film
holder fits into the area labelled “C” on the scanner.
Place up to four slides in the film holder with the shiny base side facing down. Your images should appear backwards on
the side that faces up. Your images should be oriented as shown.
Note:
Page 32

Make sure you place the long edge of the slide in the film holder as shown above.
Make sure you removed the document mat. See Removing the Document Mat .
Close the scanner cover.
To scan your slides, see Starting Epson Scan.
When you are finished scanning slides, be sure to replace the document mat before scanning documents or photos. See
Replacing the Document Mat .
Top
Replacing the Document Mat
Replace the document mat by sliding it into the notches in the scanner cover. Make sure the white surface faces outwards.
Top
Page 33

Home > Scanning Your Originals
Starting Epson Scan
Using the Scanner Buttons
Using the Epson Scan Icon
Using the Scanner Buttons
a. PDF button
b. E- mail button
c. Copy button
d. Start button
You can start Epson Scan just by pressing the Start button on the scanner. The Epson Scan window automatically opens.
See Selecting an Epson Scan Mode for instructions on selecting an Epson Scan mode.
You can also start scanning by pressing the following buttons on the scanner.
PDF button lets you scan multiple originals and save them as one PDF file on your computer. See Scanning to a
PDF File for instructions.
E- mail button lets you scan and attach the image file to an e- mail message. See Scanning Directly to an E- mail
for instructions.
Copy button lets you use your scanner along with a printer connected to your computer just like you would use a
copy machine. See Using the Scanner as a Copier for instructions.
Top
Using the Epson Scan Icon
You can start Epson Scan by double - clicking the Epson Scan icon.
Windows 8:
Double - click the Epson Scan icon on the desktop.
Or, navigate to the Start screen > Epson Scan.
Page 34

Windows 7/Vista/XP:
Double - click the Epson Scan icon on the desktop.
Or, select the start button icon or Start > All Programs or Programs > Epson > Epson Scan > Epson Scan.
Mac OS X:
Select Applications > Epson Software > Epson Scan.
The Epson Scan window automatically opens. See Selecting an Epson Scan Mode for instructions on selecting an Epson Scan
mode.
Note:
You can use any TWAIN - compliant scanning program, such as ArcSoft PhotoStudio, to scan with your scanner.
When you are finished scanning, the scanned image opens in your scanning program so you can modify,
print, and save it.
Top
Page 35

Home > Scanning Your Originals
Selecting an Epson Scan Mode
Epson Scan offers several scanning modes to choose from.
Full Auto Mode lets you scan quickly and easily, without selecting any settings or previewing your image. Full Auto
Mode is best when you need to scan your originals at 100% size and you do not need to preview the images before
scanning. You can restore faded colors or remove dust marks in Full Auto Mode. This is the default mode in Epson
Scan.
See Changing the Scan Mode for instructions on switching to Full Auto Mode.
See Scanning in Full Auto Mode for instructions on making settings in Full Auto Mode.
Office Mode lets you quickly select settings for scanning text documents and check their effects with a preview
image.
See Changing the Scan Mode for instructions on switching to Office Mode.
See Scanning in Office Mode for instructions on making settings in Office Mode.
Home Mode lets you customize some scanning settings and check their effects with a preview image.
Home Mode is best when you want to preview images of your originals before scanning them. You can size the image
as you scan, adjust the scan area, and adjust many image settings, including color restoration, dust removal, and
backlight correction.
See Changing the Scan Mode for instructions on switching to Home Mode.
See Scanning in Home Mode for instructions on making settings in Home Mode.
Professional Mode gives you total control of your scanning settings and lets you check their effects with a preview
image.
Professional Mode is best when you want to preview your image and make extensive, detailed corrections to it before
scanning. You can sharpen, color correct, and enhance your image with a full array of tools, including color
restoration, dust removal, and backlight correction.
See Changing the Scan Mode for instructions on switching to Professional Mode.
See Scanning in Professional Mode for instructions on making settings in Professional Mode.
Page 36

Home > Scanning Your Originals
Changing the Scan Mode
To change the scan mode, click the arrow in the Mode box in the upper right corner of the Epson Scan window. Then, select
the mode you want to use from the list that appears.
Note:
The mode you select remains in effect when you start Epson Scan next time.
For instructions on scanning using these modes, see one of these sections.
Full Auto Mode: Scanning in Full Auto Mode
Office Mode: Scanning in Office Mode
Home Mode: Scanning in Home Mode
Professional Mode: Scanning in Professional Mode
Page 37
Home > Scanning Your Originals
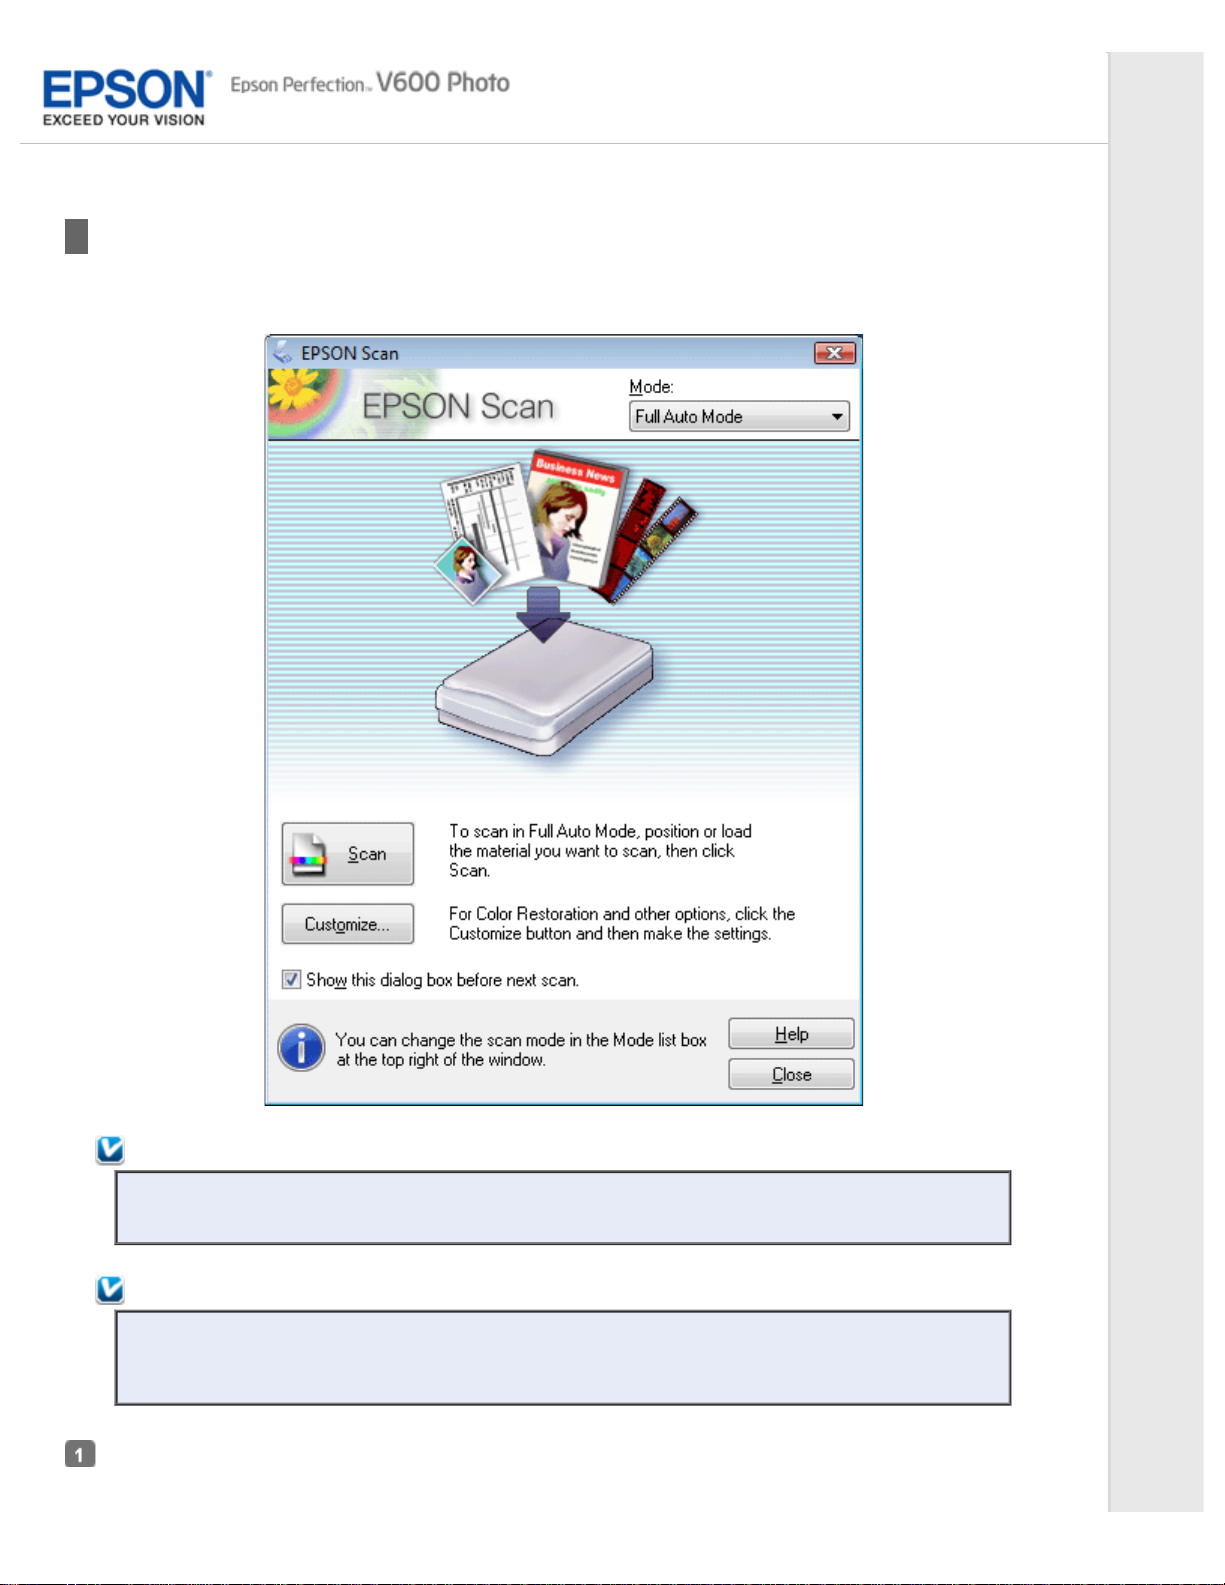
Scanning in Full Auto Mode
When you start Epson Scan for the first time, it runs in Full Auto Mode and displays the Epson Scan Full Auto Mode window.
Note for film or slides:
In Full Auto Mode, you can scan only 35 mm color film strip or color positive slides. To scan other types of
film, use Home Mode or Professional Mode. To change the scan mode, see Changing the Scan Mode.
Note:
If the Show this dialog box before next scan check box is cleared, the Epson Scan starts scanning
immediately without displaying this screen. To return to this screen, click Cancel in the Scanning dialog box
during scanning.
Place your original(s) on the document table. See one of these sections for instructions.
Documents or photos: Placing Documents or Photos
Page 38

Film or slides: Placing Film or Slides
Start Epson Scan. See Starting Epson Scan for instructions.
Select Full Auto Mode from the Mode list. See Changing the Scan Mode for instructions.
If you want to select a custom resolution, restore faded colors, or remove dust marks, click Customize. You see the
Customize window.
Note:
If you started scanning from a TWAIN - compliant program like ArcSoft PhotoStudio, the File Save Settings
button does not appear.
Select your settings and click OK. For details on selecting the settings in the Customize window, see Epson Scan Help.
Click Scan. Epson Scan starts scanning in Full Auto Mode.
Page 39

Epson Scan previews each image, detects which type of original it is, and selects the scan settings automatically. After a
moment, you see a small preview of each image in the Epson Scan window.
Note:
It takes a few minutes to scan a full film strip.
If you need to change any settings, click Pause. You will return to the Epson Scan Full Auto Mode
window.
If you need to cancel scanning, click Cancel when it appears.
What happens next depends on how you started your scan. See Finishing the Scan for instructions.
Page 40

Home > Scanning Your Originals
Scanning in Office Mode
When you select Office Mode, you see the Epson Scan Office Mode window.
Place the original(s) on the document table. See Placing Documents or Photos for instructions.
Start Epson Scan. See Starting Epson Scan for instructions.
Select Office Mode in the Mode list. See Changing the Scan Mode for instructions.
Select Color, Grayscale, or Black&White as the Image Type setting.
Select Document Table as the Document Source setting.
Select the size of your original document as the Size setting.
Page 41

Click the arrow to open the Resolution list and select an appropriate resolution for your original. See Selecting the Scan
Resolution for instructions.
Click Preview to preview your image(s). The Preview window appears and displays your image. See Previewing and
Adjusting the Scan Area for instructions.
Modify the image quality if necessary. See Adjusting the Color and Other Image Settings for instructions.
Click Scan.
What happens next depends on how you started your scan. See Finishing the Scan for instructions.
Page 42

Home > Scanning Your Originals
Scanning in Home Mode
When you select Home Mode, you see the Epson Scan Home Mode window.
Place your original(s) on the document table. See one of these sections for instructions.
Documents or photos: Placing Documents or Photos
Film or slides: Placing Film or Slides
Start Epson Scan. See Starting Epson Scan for instructions.
Select Home Mode in the Mode list. See Changing the Scan Mode for instructions.
Click the arrow to open the Document Type list, and select the type of your original(s) you are scanning.
Page 43

Select Color, Grayscale, or Black&White as the Image Type setting.
In the Destination box, click the button for the way you plan to use the scanned image(s).
Screen/Web for images you will view only on a computer screen or post on the web.
Printer for image(s) you will be printing or converting to editable text with an OCR (Optical Character Recognition)
program.
Other if you want to select a specific resolution for other purposes.
Epson Scan selects a default resolution setting based on the Destination setting you select. If you selected Other as the
Destination setting to select a specific resolution, see Selecting the Scan Resolution for instructions.
Click Preview to preview your image(s). The Preview window appears and displays your image(s). See Previewing and
Adjusting the Scan Area for instructions.
Modify the image quality, if necessary. See Adjusting the Color and Other Image Settings for instructions.
Click the arrow to open the Target Size list to select the size of the scanned image(s), if necessary. You can scan your
images at their original size, or you can reduce or enlarge their size by selecting Target Size. See Selecting the Scan Size
for instructions.
Click Scan.
What happens next depends on how you started your scan. See Finishing the Scan for instructions.
Page 44

Home > Scanning Your Originals
Scanning in Professional Mode
When you select Professional Mode, you see the Epson Scan Professional Mode window.
Page 45

Place your original(s) on the document table. See one of these sections for instructions.
Documents or photos: Placing Documents or Photos
Film or slides: Placing Film or Slides
Start Epson Scan. See Starting Epson Scan for instructions.
Select Professional Mode in the Mode list. See Changing the Scan Mode for instructions.
Click the arrow to open the Document Type list and select Reflective (for scanning documents or photos) or Film (for
scanning film or slides).
If you selected Reflective (for scanning documents or photos) as the Document Type setting, click the arrow in the
Auto Exposure Type list and select Photo or Document.
If you selected Film (for scanning film or slides) as the Document Type, click the arrow in the Film Type list and select
Positive Film, Color Negative Film, or B&W Negative Film.
Click the arrow to open the Image Type list and select the detailed image type you are scanning.
Image Type setting Type of image you are scanning
48-bit Color Color photos that you may want to modify in a 48 - bit image - editing program
24-bit Color Color photos
Color Smoothing Color graphics, such as a chart or graph
16-bit Grayscale Black-and - white photos with many shades of gray
8- bit Grayscale Black-and - white photos with just a few shades of gray
Black & White Documents with black text and/or line art
Note:
If you select 8-bit Grayscale or Black & White, you can also select an Image Option setting, as described
below.
Image Option Setting Description
None No Image Option setting is applied.
Dropout: Red Drops out red from the scan.
Dropout: Green Drops out green from the scan.
Dropout: Blue Drops out blue from the scan.
Color Enhance: Red Enhances red in the scan.
Color Enhance: Green Enhances green in the scan.
Color Enhance: Blue Enhances blue in the scan.
Click the arrow to open the Resolution list and select an appropriate resolution for your original(s). See Selecting the
Scan Resolution for instructions.
Click Preview to preview your image(s). The Preview window appears and displays your image(s). See Previewing and
Adjusting the Scan Area for instructions on settings in the Preview window.
Click the arrow to open the Target Size list to select the size you want of the scanned image(s), if necessary. You can
scan your images at their original size, or you can reduce or enlarge their size by selecting Target Size. See Selecting the
Scan Size for instructions.
Modify the image quality, if necessary. See Adjusting the Color and Other Image Settings for instructions.
Click Scan.
Page 46

What happens next depends on how you started your scan. See Finishing the Scan for instructions.
Page 47

Home > Scanning Your Originals
Selecting File Save Settings
When you see the File Save Settings window, you can select the location, name, and format of the scanned image file.
Full Auto Mode: Click Customize, then click File Save Settings.
Office Mode, Home Mode, or Professional Mode: Click the File Save Settings icon to the right of the Scan
button.
The File Save Settings window appears.
Note:
If you start Epson Scan from a TWAIN - compliant program, such as ArcSoft PhotoStudio, the File Save
Settings button or File Save Settings icon does not appear.
In the File Save Settings window, specify the file folder in which you want to save your scanned image.
Click the Documents or Pictures radio button, or the My Documents or My Pictures radio button.
If you want to select another folder, click the Other radio button, then click Browse (Windows) or Choose (Mac OS X)
and select the folder.
Page 48

If you want to save your image on the desktop, simply click the Other radio button.
Specify a file name prefix with an alphanumeric character string. A 3- digit number is automatically added to the file
name, but you can change the Start Number if you like. If you are scanning multiple images at once, each image will
receive a different 3 - digit number.
Note:
The following characters cannot be used in the prefix.
Windows: \, /, :, _, *, ?, ", <, >, │
Mac OS X: :
Click the arrow to open the Type list and select a file format as described in the following table. Depending on the
format, the Options button may be available for making detailed settings.
Format (File
Extension)
BITMAP (*.bmp)
(Windows only)
JPEG (*.jpg) A compressed file format in which the Compression Level can be selected. The
Multi- TIFF (*.tif) A TIFF format where multiple pages are saved to the same file. You can also edit
PDF (*.pdf) A document format that can be read on both Windows and Mac OS X systems
PICT (*.pct) (Mac OS
X only)
PRINT Image Matching
II JPEG (*.jpg) or TIFF
(*.tif)
TIFF (*.tif) A file format created for exchanging data between many programs, such as graphic
Description
A standard image file format for Windows. Most Windows programs, including word
processing programs, can read and prepare images in this format.
JPEG format lets you highly compress image data. However, the higher the
compression, the lower the image quality. Any lost image quality data cannot be
restored, and the quality deteriorates each time the data is saved. The TIFF format
is recommended when modification and retouching are required.
the scanned images before saving them. See Epson Scan Help for details. To open
Multi- TIFF files, you need a program that supports it.
(platform independent). To use PDF documents in Windows, you need Adobe
Reader or Acrobat. Multi- page documents can be saved as one PDF file. When you
save color or grayscale images in PDF, you can select a Compression Level.
A standard image file format for Mac OS X. Most Mac OS X programs, including
word processing programs, can read and prepare images in this format.
A file format that includes PRINT Image Matching II data for enhanced quality and
a wider color range. Print Image Matching II compatible printers can then print this
data for brilliant, true - to- life results. (PRINT Image Matching data does not affect
the way the image displays on the screen.) Available in JPEG or TIFF format.
and DTP software. When scanning black & white images, you can specify the
Compression type.
The check boxes at the bottom of the window give you these options.
Overwrite any files with the same name
Select this option if you want to reuse the selected file name and location and overwrite previous files with the
same names.
Show this dialog box before next scan (Office Mode, Home Mode, or Professional Mode only)
Select this option if you want the File Save Settings window to appear automatically before you scan. If you
deselect it, you must click the File Save Settings icon to open the window before clicking the Scan button.
Open image folder after scanning
Select this option if you want Windows Explorer or the Mac OS X Finder to automatically open the folder where
your scanned image file is saved when Epson Scan finishes scanning.
Show Add Page dialog after scanning
Select this option if you want the Add Page Confirmation window to appear automatically after each scan in PDF or
multi- Tiff. The Add Page Confirmation window includes the Add page, Edit page, and Save File buttons.
Click OK.
Page 49

Home > Scanning Your Originals
Detailed Setting Instructions
Selecting the Scan Resolution
Previewing and Adjusting the Scan Area
Adjusting the Color and Other Image Settings
Selecting the Scan Size
Selecting the Scan Resolution
You can select a specific Resolution setting for your images. Keep in mind that higher resolution settings increase scanning
time, so do not select a higher resolution than you need. See the following table to reference the appropriate resolution setting
to use so that you do not have to take more time than necessary.
What you will do with the scanned image Suggested scan resolution
Send via e- mail, upload to web, or view only on the
screen
Convert to editable text (OCR) 400 dpi
Searchable PDF 200 to 400 dpi
Print using ink jet printer with normal quality 150 dpi (Color or Grayscale)
Print using ink jet printer with high quality 300 dpi (Color or Grayscale)
Print using page printer 200 dpi (Color or Grayscale)
Fax 200 dpi
Enlarge after scanning at 100%
96 to 150 dpi
360 dpi (Black & White)
720 dpi (Black & White)
600 dpi (Black & White)
Increase Resolution setting by same amount you will
increase image size after scanning.
For example, if the resolution is 300 dpi, but you will
increase the image size to 200%, change the
resolution setting to 600 dpi.
To select the resolution setting, see one of these sections.
Full Auto Mode: Selecting the Resolution in Full Auto Mode
Home Mode: Selecting the Resolution in Home Mode
Office Mode or Professional Mode: Selecting the Resolution in Office Mode or Professional Mode
Selecting the Resolution in Full Auto Mode
You can change the resolution you want at any time. Follow these steps to select the resolution setting.
In the Full Auto Mode window, click Customize. The Customize window appears.
Page 50

Click the Specify resolution for Full Auto Mode check box and select the number of dpi (dots per inch) at which you
want to scan.
Selecting the Resolution in Home Mode
To change the resolution, first select Other as the Destination setting.
Click the arrow next to the Resolution list and select the number of dpi (dots per inch) at which you want to scan.
Selecting the Resolution in Office Mode or Professional Mode
You can select the resolution you want at any time.
Office Mode
Page 51

Professional Mode
Click the arrow next to the Resolution list and select the number of dpi (dots per inch) at which you want to scan.
Previewing and Adjusting the Scan Area
Once you have selected your basic settings and resolution, you can preview your image and select or adjust the image area of
the image(s) in a Preview window on your screen. There are two types of preview.
Normal preview displays your previewed image(s) in their entirety. You must select the scan area and make any
image quality adjustments manually.
Thumbnail preview displays your previewed image(s) as thumbnail(s). Epson Scan automatically locates the edges of
your scan area, applies automatic exposure settings to the image(s), and rotates the image(s) if necessary.
To preview your image, follow the steps below.
Top
Note:
If you are using Full Auto Mode or Office Mode, the thumbnail preview is not available.
Click Preview. If you want to change the preview mode, select the Normal or Thumbnail tab on Preview window if it is
available.
Note:
Depending on your document type and other settings, you may not be able to change the preview
type.
You can resize the Preview window. To resize the Preview window, click and drag the corner of the
Preview window.
If you preview with the Preview dialog not displayed, image(s) will be displayed in the default preview
mode. If you preview with the Preview dialog displayed, image(s) will be displayed in the preview
mode that was displayed just before previewing.
Some of the settings that you change after preview will be initialized if you change the Preview mode.
Epson Scan prescans your image(s) and displays them in one of the following Preview windows.
Normal preview
Document Film
Page 52

Thumbnail preview
Document Film
If you are viewing the normal preview, you can do the following to adjust the image(s).
To select your scan area, click the auto locate icon to create a marquee that marks the edges of your image
area. You can move the marquee to change the scan area. See Creating a Marquee on a Preview Image for
instructions.
Note:
Page 53

If you are going to scan at a different size than your original, you must first select your Target Size
and automatically create a marquee that is proportioned to that size. See Selecting the Scan Size for
instructions. You can then copy the marquee and place it on each image you will scan at that size.
To enlarge or reduce the preview image in the Normal preview, resize the Preview window. The image size
changes corresponding to the Preview window size.
To zoom in on an image in the Normal preview, click inside the scan area and click the Zoom button.
Note:
Zoom button changes into Full button on Zoom display.
Full button changes into Zoom button on Full display.
To rotate an image, click the left or right rotate icon.
To adjust the image quality, click the scan area(s) you want to modify and make the adjustments. See Adjusting
the Color and Other Image Settings for instructions.
If you are viewing the thumbnail preview, you can do the following to adjust the image(s).
To zoom in on an image in the Thumbnail preview, double - click the thumbnail to zoom in.
You can change the size of thumbnail by using either the Thumbnail <Large>, Thumbnail <Small>, or
Full size of 1 frame buttons.
To rotate an image or flip it horizontally (like a mirror image), click its thumbnail and then click the rotation
icon or mirroring icon.
Note:
If your image is not rotated correctly, see Images are Rotated Incorrectly.
To adjust the scan area to crop your image differently, you can create and move a marquee that marks the edges
of your scan. See Creating a Marquee on a Preview Image for instructions.
To adjust the image quality, click the image(s) or scan area(s) you want to modify and make the adjustments.
See Adjusting the Color and Other Image Settings for instructions. If you want to apply the adjustments you have
made to all of your images, click All.
Creating a Marquee on a Preview Image
A marquee is a moving dotted line that appears on the edges of your preview image to indicate the scan area.
Documents or photos Film or Slides
Page 54

You can move the marquee and adjust its size. If you are viewing the normal preview, you can create multiple marquees (up
to 50) on each image to scan different image areas in separate scan files.
Note for film or slides:
When you use the Thumbnail preview, Epson Scan automatically creates marquees around your image(s) for
you. If you need to adjust a marquee, click inside it and click the delete marquee icon before completing
the steps in this section. If you do not need to adjust any marquees, skip to Adjusting the Color and Other
Image Settings.
To draw a marquee, move your cursor over a preview image. The pointer becomes a set of cross- hairs.
Note:
If you are viewing the normal preview and you only have one photo on the document table, you can click the
auto locate icon to automatically draw a marquee, then skip to step 3.
Position the pointer in the area where you want to place the corner of your marquee and click. Hold down the mouse
button and drag the cross- hairs over the image to the opposite corner of the desired scan area. Then release the mouse
button. You see the moving dotted line of the marquee.
Page 55

Do one of the following to adjust the marquee.
To move the marquee, position your cursor inside the marquee. The pointer becomes a hand. Click and drag the
marquee to the desired location.
To resize the marquee, position your cursor over the edge or corner of the marquee. The pointer becomes a
straight or angled double - arrow. Click and drag the edge or corner to the desired size.
Note:
To restrict the movement of the marquee to vertical or horizontal only, hold down the Shift key as
you move the marquee.
To restrict the size of the marquee to the current proportions, hold down the Shift key as you resize
the marquee.
For best results and image exposure, make sure all sides of the marquee are located inside the
preview image. Do not include any of the area around the preview image in the marquee.
If you are viewing the normal preview, you can create multiple marquees (up to 50). Just draw them as described in
steps 1 through 3, or click the copy marquee icon to create additional marquees of the same size. You can move
and resize all the marquees as described in step 3. To delete a marquee, click inside it and click the delete marquee
icon.
Note:
Page 56

If you draw multiple marquees, make sure you click All in the Preview window before you scan. Otherwise,
- when the Image Type is set to Grayscale and Image Option
only the area inside the last marquee you drew will be scanned.
Top
Adjusting the Color and Other Image Settings
Once you have previewed your image(s) and adjusted the scan area, you can modify the image quality, if necessary. Epson
Scan offers a variety of settings for improving color, sharpness, contrast, and other aspects affecting image quality. Before you
make adjustments, be sure to click the image or marquee for the area you want to adjust.
To adjust the color and other image settings, see one of these sections.
Office Mode: Making Color Adjustments and Other Image Settings in Office Mode
Home Mode: Making Color Adjustments and Other Image Settings in Home Mode
Professional Mode: Making Color Adjustments and Other Image Settings in Professional Mode
Making Color Adjustments and Other Image Settings in Office Mode
The table below describes the settings available in Office Mode. For details on adjusting these settings, see Epson Scan Help.
Note:
If you are scanning multiple images at the same time and you want to apply the image adjustments to all of
your images or scan areas, click All in the Preview window before you begin making your adjustments.
Setting Description
Unsharp Mask Turn on to make the edges of image areas clearer for an
Descreening Removes the rippled pattern that can appear in subtly - shaded
Image Option Text Enhancement Enhances text recognition when scanning text documents.
overall sharper image. Turn off to leave softer edges. This
setting is available only when the Image Type is set to Color
or Grayscale.
image areas, such as in skin tones. Also improves results
when scanning magazine or newspaper images which include
screening in their original print processes. This setting is
available only when the Image Type is set to Color or
Grayscale. The results of descreening do not appear in the
preview, only in your scanned image.
This setting is available in the following conditions:
- when the Image Type is set to Color and Image Option is
selected
Page 57

is selected
- when the Image Type is set to Black&White and Image
Option is selected
When the Image Type is set to Black&White, the results of
Text Enhancement do not appear in the preview, only in your
scanned image.
Auto Area Segmentation Makes Black&White images clearer and text recognition more
Dropout Drops out red, green, or blue in the scan.
Color Enhance Enhances red, green, or blue in the scan.
Brightness Adjusts the overall image lightness and darkness.
Contrast Adjusts the difference between the light and dark areas of the
Threshold Adjusts the level at which the black areas in text and line art
accurate by separating the text from the graphics. This
setting is available only when the Image Type is set to
Black&White and Image Option is selected.
This setting is available in the following conditions:
- when the Image Type is set to Grayscale and Image Option
is selected
- when the Image Type is set to Black&White and Image
Option is selected
This setting is available in the following conditions:
- when the Image Type is set to Grayscale and Image Option
is selected
- when the Image Type is set to Black&White and Image
Option is selected
This setting is available in the following conditions:
- when the Image Type is set to Color
- when the Image Type is set to Grayscale
- when the Image Type is set to Black&White, and Image
Option and Auto Area Segmentation are selected
overall image.
This setting is available in the following conditions:
- when the Image Type is set to Color
- when the Image Type is set to Grayscale
- when the Image Type is set to Black&White, and Image
Option and Auto Area Segmentation are selected
are delineated, improving text recognition in OCR programs.
This setting is available in the following conditions:
- when the Image Type is set to Black&White, and Image
Option is not selected
- when the Image Type is set to Black&White, and Image
Option and Color Enhance are selected
Note:
To view the red, green, and blue levels at particular points in your preview image as you make
adjustments, click the densitometer icon in the Preview window and move your cursor over an
image area. See Epson Scan Help for details.
Certain settings may not be available, or may be automatically selected, depending on the type of
image you are previewing and other settings you have selected.
You can customize how certain Epson Scan settings behave by clicking Configuration and changing
settings in the window that appears. See Epson Scan Help for details.
To undo any image quality adjustments you make to the preview image, click Reset if available, turn
off the settings, or preview your image again.
Making Color Adjustments and Other Image Settings in Home Mode
Page 58

The table below describes the settings available in Home Mode. For details on adjusting these settings, see Epson Scan Help.
This setting is available in the following conditions:
Note:
If you are scanning multiple images at the same time and you want to apply the image adjustments to all of
your images or scan areas, click All in the Preview window before you begin making your adjustments.
Setting Description
Descreening Removes the rippled pattern that can appear in subtly - shaded
Backlight Correction Removes shadows from photos that have too much background
Color Restoration Restores the colors in faded photos automatically.
DIGITAL ICE Technology Remove dust marks that the Dust Removal feature cannot.
Image Option Text Enhancement Enhances text recognition when scanning text documents.
Auto Area
Segmentation
image areas, such as in skin tones. Also improves results when
scanning magazine or newspaper images which include screening
in their original print processes.
This setting is available in the following conditions:
- when the Image Type is set to Color
- when the Image Type is set to Grayscale
The results of descreening do not appear in the preview, only in
your scanned image.
light.
This setting is available in the following conditions:
- when you select Photograph as the Document Type setting and
Image Type is set to Color
- when you select Photograph as the Document Type setting and
Image Type is set to Grayscale
This setting is available in the following conditions:
- when you select Photograph as the Document Type setting, and
Image Type is set to Color
- when you select Photograph as the Document Type setting, and
Image Type is set to Grayscale
DIGITAL ICE Technology takes longer to scan and also uses more
of your system resources.
This setting is available in the following conditions:
- when you select Photograph as the Document Type and Image
Type is set to Color or Grayscale with the Show Texture check
box in the Configuration window cleared
- when you select Positive Film as the Document Type and Image
Type is set to Color or Grayscale
- when you select Color Negative Film as the Document Type and
Image Type is set to Color or Grayscale
- when you select B&W Negative Film as the Document Type and
Image Type is set to Color or Grayscale
This setting is available in the following conditions:
- when you select Magazine as the Document Type setting and
Image Option is selected
- when you select Newspaper as the Document Type setting and
Image Option is selected
- when you select Text/Line Art as the Document Type setting
and Image Option is selected
Makes Black&White images clearer and text recognition more
accurate by separating the text from the graphics.
Page 59

- when you select Magazine as the Document Type, the Image
Type is set to Black&White, and Image Option is selected
- when you select Newspaper as the Document Type, the Image
Type is set to Black&White, and Image Option is selected
- when you select Text/Line Art as the Document Type, the
Image Type is set to Black&White, and Image Option is selected
Brightness Adjusts the overall image lightness and darkness.
This setting is available in the following conditions:
- when the Image Type is set to Color
- when the Image Type is set to Grayscale
- when you select Magazine as the Document Type setting, the
Image Type is set to Black&White, and Image Option and Auto
Area Segmentation are selected
- when you select Newspaper as the Document Type setting, the
Image Type is set to Black&White, and Image Option and Auto
Area Segmentation are selected
- when you select Text/Line Art as the Document Type setting,
the Image Type is set to Black&White, and Image Option and
Auto Area Segmentation are selected
Click Brightness to access the Brightness setting.
Contrast Adjusts the difference between the light and dark areas of the
Threshold Adjusts the level at which the black areas in text and line art are
overall image.
This setting is available in the following conditions:
- when the Image Type is set to Color
- when the Image Type is set to Grayscale
- when you select Magazine as the Document Type setting, the
Image Type is set to Black&White, and Image Option and Auto
Area Segmentation are selected
- when you select Newspaper as the Document Type setting, the
Image Type is set to Black&White, and Image Option and Auto
Area Segmentation are selected
- when you select Text/Line Art as the Document Type setting,
the Image Type is set to Black&White, and Image Option and
Auto Area Segmentation are selected
Click Brightness to access the Contrast setting.
delineated, improving text recognition in OCR programs.
Available only when the Image Type is set to Black&White, and
Image Option is not selected.
Click Brightness to access the Threshold setting.
Note:
To view the red, green, and blue levels at particular points in your preview image as you make
adjustments, click the densitometer icon in the Preview window and move your cursor over an
image area. See Epson Scan Help for details.
Certain settings may not be available, or may be automatically selected, depending on the type of
image you are previewing and other settings you have selected.
You can customize how certain Epson Scan settings behave by clicking Configuration and changing
settings in the window that appears. See Epson Scan Help for details.
To undo any image quality adjustments you make to the preview image, click Reset if available, turn
off the settings, or preview your image again.
Making Color Adjustments and Other Image Settings in Professional Mode
Page 60

The table below describes the settings available in Professional Mode. For details on adjusting these settings, see Epson Scan
Help.
Note:
You may need to scroll down to view the Adjustments area of the Professional Mode window.
If you are scanning multiple images at the same time and you want to apply the image adjustments to
all of your images or scan areas, click All in the Preview window before you begin making your
adjustments.
Setting Description
Auto Exposure
Click the Auto Exposure icon. To turn it on continuously, click Configuration,
click the Color tab and select Continuous auto exposure. You can adjust the level of
exposure adjustment using the slider.
Histogram Provides a graphical interface for adjusting highlight, shadow, and gamma levels
Tone Correction Provides a graphical interface for adjusting tone levels individually. For advanced users
Brightness Adjusts the overall image lightness and darkness.
individually. For advanced users only.
Click the Histogram Adjustment icon to access the Histogram setting.
only.
Click the Tone Correction icon to access the Tone Correction setting.
Click the Image Adjustment icon to access the Brightness setting.
Contrast Adjusts the difference between the light and dark areas of the overall image.
Click the Image Adjustment icon to access the Contrast setting.
Saturation Adjusts the density of colors in the overall image.
Click the Image Adjustment icon to access the Saturation setting.
Color Balance Adjusts the balance of red, green, and blue colors in the overall image.
Click the Image Adjustment icon to access the Color Balance settings.
Color Palette Provides a graphical interface for adjusting mid- tone levels, such as skin tones, without
Unsharp Mask Turn on to make the edges of image areas clearer for an overall sharper image. The
affecting the highlight and shadow areas of the image. For advanced users only. See
Using the Color Palette Feature (for Professional Mode Only) for more information.
Click the Color Palette icon to use the Color Palette settings.
level of sharpness is adjustable. Turn off to leave softer edges.
Page 61

This setting is available in the following conditions:
- when the Image Type is set to 48 - bit Color
- when the Image Type is set to 24 - bit Color
- when the Image Type is set to 16 - bit Grayscale
- when the Image Type is set to 8 - bit Grayscale
Descreening Removes the rippled pattern that can appear in subtly shaded image areas, such as
Color Restoration Restores the colors in faded photos automatically.
Backlight Correction Removes shadows from photos that have too much background light. The level of
Dust Removal Removes dust marks from your originals automatically. The results of Dust Removal do
Digital ICE Technology Remove dust marks that the Dust Removal feature cannot. DIGITAL ICE Technology
Threshold Adjusts the level at which the black areas in text and line art are delineated, improving
skin tones. Also improves results when scanning magazine or newspaper images that
include screening in their original print processes. The results of descreening do not
appear in the preview, only in your scanned image. The level of descreening is
adjustable.
This setting is available in the following conditions:
- when the Image Type is set to 48 - bit Color
- when the Image Type is set to 24 - bit Color
- when the Image Type is set to Color Smoothing
- when the Image Type is set to 16 - bit Grayscale
- when the Image Type is set to 8 - bit Grayscale
This setting is available in the following conditions:
- when you select Photo as the Auto Exposure Type setting and the Image Type is set
to 48- bit Color
- when you select Photo as the Auto Exposure Type setting and the Image Type is set
to 24- bit Color
- when you select Photo as the Auto Exposure Type setting and the Image Type is set
to 16- bit Grayscale
- when you select Photo as the Auto Exposure Type setting and the Image Type is set
to 8 - bit Grayscale
backlight correction is adjustable.
This setting is available in the following conditions:
- when you select Photo as the Auto Exposure Type setting and the Image Type is set
to 48- bit Color
- when you select Photo as the Auto Exposure Type setting and the Image Type is set
to 24- bit Color
- when you select Photo as the Auto Exposure Type setting and the Image Type is set
to 16- bit Grayscale
- when you select Photo as the Auto Exposure Type setting and the Image Type is set
to 8 - bit Grayscale
not appear in the preview, only in your scanned image. The level of dust removal is
adjustable.
This setting is available in the following conditions:
- when you select Photo as the Auto Exposure Type setting and the Image Type is set
to 48- bit Color
- when you select Photo as the Auto Exposure Type setting and the Image Type is set
to 24- bit Color
- when you select Photo as the Auto Exposure Type setting and the Image Type is set
to 16- bit Grayscale
- when you select Photo as the Auto Exposure Type setting and the Image Type is set
to 8 - bit Grayscale
takes longer to scan and also uses more of your system resources.
This setting is available in the following conditions:
- when you select Reflective as the Document Type and Auto Exposure Type is set to
Photo with the Show Texture check box in the Configuration window cleared
- when you select Film as the Document Type
text recognition in OCR programs. Available only when you select Black & White as the
Image Type setting.
Note:
To view red, green, and blue levels at particular points in your preview image as you make
adjustments, click the densitometer icon in the Preview window and move your cursor over an
image area. See Epson Scan Help for details.
Certain settings may not be available, or may be automatically selected, depending on the type of
image you are previewing and other settings you have selected.
You can customize how certain Epson Scan settings behave by clicking Configuration and changing
settings in the window that appears. See Epson Scan Help for details.
Page 62

To undo any image quality adjustments you make to the preview image, click Reset if available, turn
off the setting, or preview your image again.
Top
Selecting the Scan Size
You can scan your images at their original size, or you can reduce or enlarge their size as you scan them. You do this using
the Target Size setting.
If you are going to scan your image to a specific size, you should select the Target Size setting after previewing it, but before
adjusting your scan area indicated by creating a marquee. This sets the scan area to correct proportions so your image will not
be cropped unexpectedly.
To select the scan size, see one of these sections.
Home Mode: Selecting the Scan Size in Home Mode
Professional Mode: Selecting the Scan Size in Professional Mode
Selecting the Scan Size in Home Mode
You can select a predefined scan size from the Target Size list. Click the arrow to open the list and select the size you
want. A marquee (dotted line) proportioned for that size appears on your preview image.
Documents or photos Film or Slides
Page 63

If you need to create a scan size that is not in the Target Size list, you can create a custom size. Click the arrow to
open the list and select Customize. You see the Target Size window.
Type a name for your custom size, enter the size, click Save, then click OK. Your new size appears in the Target Size
list.
Once you have selected your scan size, you can click and drag the marquee to the area in the image you want to scan.
For details, see Creating a Marquee on a Preview Image. The marquee proportions are retained as you adjust it.
If you need to rotate the marquee for a landscape or portrait image without changing its aspect ratio, click the
orientation icon.
Note:
Page 64

The orientation icon is not available if you selected Original as the Target Size setting.
Selecting the Scan Size in Professional Mode
You can select a predefined scan size from the Target Size list. Click the arrow to open the list and select the size you
want. A marquee (dotted line) proportioned for that size appears on your preview image.
Documents or photos Film or Slides
If you need to create a scan size that is not in the Target Size list, you can create a custom size. Click the arrow to
open the list and select Customize. You see the Target Size window.
Page 65

Type a name for your custom size, enter the size, click Save, then click OK. Your new size appears in the Target Size
list.
You can fine- tune the size using additional tools. Click the + (Windows) or (Mac OS X) button next to Target Size to
display these tools.
To size your image by a certain percentage, adjust the Scale value.
To change the way your image is cropped, turn Trimming on or off. See Epson Scan Help for details.
To unlock the proportions of your scan size, click the lock icon. Then adjust the marquee or enter new
width/height measurements.
Once you have selected your scan size, you can click and drag the marquee to the area in the image you want to scan.
For details, see Creating a Marquee on a Preview Image. The marquee proportions are retained as you adjust it.
If you want to rotate the marquee for a landscape or portrait image without changing its aspect ratio, click the
orientation icon.
Note:
The orientation icon is not available if you selected Original as the Target Size setting.
Top
Page 66

Home > Scanning Your Originals
Finishing the Scan
What happens after you scan depends on how you started your scan.
Full Auto Mode:
If you started your scan by running Epson Scan from the Epson Scan icon, your scanned image is saved in the file
format and location you selected in the File Save Settings window. If you did not select any settings in the File Save
Settings window, it is saved as a JPEG file in Pictures or My Pictures.
If you started your scan from a TWAIN - compliant program such as ArcSoft PhotoStudio, your scanned image opens in
the program window. If Epson Scan does not automatically close after scanning, click Close to exit the Epson Scan
window and view your image in the program window.
Office Mode, Home Mode, or Professional Mode:
If you started your scan by running Epson Scan from the Epson Scan icon or by pressing the Start button on the
scanner, you see the File Save Settings window. This lets you select the name and location of your saved scan files.
See Selecting File Save Settings for details. After you select these settings, Epson Scan starts scanning.
If you started your scan from a TWAIN - compliant program such as ArcSoft PhotoStudio, your scanned image(s) opens
in the program window. If Epson Scan does not automatically close after scanning, click Close to exit the Epson Scan
window and view your image(s) in the program.
Page 67

Home > Scanning Your Originals
Scanning with Easy Photo Scan
You can scan documents or photos and upload them to Facebook and other online destinations, such as photo - sharing sites,
web servers, or network folders using Easy Photo Scan.
Note:
The settings may vary, depending on the software version you are using. See the Help information in Easy
Photo Scan for details.
Place your original(s) on the document table. See one of these sections for instructions.
Documents or photos: Placing Documents or Photos
Film or slides: Placing Film or Slides
Do one of the following to start Easy Photo Scan:
Windows 8: Navigate to the Apps screen and select Easy Photo Scan.
Windows 7/Vista/XP: Click the start button icon or Start > All Programs or Programs > Epson Software > Easy
Photo Scan.
Mac OS X: Select Applications > Epson Software and double - click the Easy Photo Scan icon.
Note:
If you do not already have Easy Photo Scan, you can obtain it online. To download Easy Photo Scan, visit
Epson's driver download site at epson.com/support (U.S.) or epson.ca/support (Canada).
You see a window like this:
Page 68

Click to open the Epson Scan window.
Click Scan in the Epson Scan window. The scanned image is displayed in the Easy Photo Scan window.
To edit the name of the file, select the image thumbnail at the bottom of the screen, click , and enter the new
filename.
To edit the scanned image, click and select one of the displayed options.
Note:
See the Easy Photo Scan help for additional information on image editing options.
Repeat these steps for each image you want to upload.
Click one of the Destination icons to choose where to upload the images.
Note:
You may need to click the arrow next to the icons in order to see all of them. The available icons may vary,
depending on the software version you are using.
Select settings as necessary, then click OK or Send to upload the images.
Page 69

Home > Scanning Special Projects
Restoring Color
Color Restoration in Full Auto Mode
Color Restoration in Home Mode
Color Restoration in Professional Mode
Using the Color Palette Feature (for Professional Mode Only)
Using the Color Restoration feature in Epson Scan, you can transform old, faded, or badly exposed photos into ones with
true- to- life color and sharpness. You can restore printed photos, film, or slides automatically as you scan them.
Original image Color Restoration applied
See one of these sections for instructions on restoring colors.
Full Auto Mode: Color Restoration in Full Auto Mode
Office Mode: This feature is not available in Office Mode. Change the scan mode to Home Mode or Professional Mode. See
Changing the Scan Mode for instructions.
Home Mode: Color Restoration in Home Mode
Professional Mode: Color Restoration in Professional Mode
Color Restoration in Full Auto Mode
Place your original(s) on the document table. See one of these sections for instructions.
Documents or photos: Placing Documents or Photos
Film or slides: Placing Film or Slides
Note for film or slides:
You can scan only 35 mm color film strip or color positive slides in Full Auto Mode. To scan other types of
film, use Home Mode or Professional Mode. To change the scan mode, see Changing the Scan Mode.
Start Epson Scan. See Starting Epson Scan for instructions.
In the Full Auto Mode window, click Customize. The Customize window appears.
Click the Color Restoration check box.
Page 70

If you want to select the file save settings, click File Save Settings. See Selecting File Save Settings for instructions.
Note:
If you started Epson Scan from a TWAIN-compliant program like ArcSoft PhotoStudio, the File Save Settings
button does not appear.
When you finish making all the necessary settings, click OK to return to the Full Auto Mode window.
Click Scan.
What happens next depends on how you started Epson Scan. See Finishing the Scan for instructions.
Color Restoration in Home Mode
Place your original(s) on the document table. See one of these sections for instructions.
Documents or photos: Placing Documents or Photos
Film or slides: Placing Film or Slides
Top
Start Epson Scan. See Starting Epson Scan for instructions.
In the Home Mode window, select the Document Type, Image Type, and Destination settings. For details, see
Scanning in Home Mode .
Click Preview to preview your image(s), then select your scan area. See Previewing and Adjusting the Scan Area for
details.
Click the Color Restoration check box.
Page 71

Note:
If you are scanning multiple images at the same time and you want to apply the Color Restoration feature to
all of your images or scan areas, click All in the Preview window before you click the check box.
Make any other necessary image adjustments. See Adjusting the Color and Other Image Settings for details.
Size your image(s) as necessary. See Selecting the Scan Size for details.
Click Scan.
What happens next depends on how you started Epson Scan. See Finishing the Scan for instructions.
Color Restoration in Professional Mode
Place your original(s) on the document table. See one of these sections for instructions.
Documents or photos: Placing Documents or Photos
Film or slides: Placing Film or Slides
Top
Start Epson Scan. See Starting Epson Scan for instructions.
In the Professional Mode window, select the Document Type, Document Source, Auto Exposure Type (for scanning
documents or photos) or Film Type (for scanning film or slides), Image Type, and Resolution settings. For details, see
Scanning in Professional Mode .
Click Preview to preview your image(s), then select your scan area. See Previewing and Adjusting the Scan Area for
details.
Scroll down to the Adjustments area and click the Color Restoration check box.
Page 72

Note:
If you are scanning multiple images at the same time and you want to apply the Color Restoration feature to
all of your images or scan areas, click All in the Preview window before you click the check box.
Make any other necessary image adjustments. See Adjusting the Color and Other Image Settings for details.
If you want to make more precise color adjustments, click the Color Palette icon. See Using the Color Palette
Feature (for Professional Mode Only) for instructions.
Size your image(s) as necessary. See Selecting the Scan Size for details.
Click Scan.
What happens next depends on how you started Epson Scan. See Finishing the Scan for instructions.
Top
Using the Color Palette Feature (for Professional Mode Only)
Follow the steps in these sections to fine - tune the colors in your image using the Color Palette feature in Professional Mode.
This feature is available only after previewing your images, so make sure to click Preview to activate this feature.
Sampling a Color from an Image
Click the Color Palette icon.
Page 73

Click the color extractor icon. Your cursor changes to an eye dropper.
In the Preview window, click on the color in your image that needs adjustment.
The color you selected is moved to the center cell in the Color Palette window with variations in hue in the surrounding
cells.
Select the cell that contains the hue you would like to use to adjust the color in your image. This color now becomes the
color of the center cell and the color change is reflected in your image.
Note:
You can also use the cells to the right of the adjustment area to change the brightness, if necessary.
If you want to continue adjusting the color, repeat step 4.
If you want to save the color for future scans, click the save icon. The color appears in the save area.
Note:
To load a previously saved color, select the color and click the apply to palette icon.
When you are finished adjusting the color, click Close to return to the Professional Mode window.
For further details on using the Color Palette feature, see Epson Scan Help.
Page 74

Applying a Color to an Image
Click the Color Palette icon.
Select the cell that contains the hue you would like to use to adjust the color in your image. This color now becomes the
color of the center cell.
Note:
You can also use the cells to the right of the adjustment area to change the brightness, if necessary.
Click the color applicator icon. Your cursor changes to a droplet.
In the Preview window, click on the color in your image that needs adjustment. The color change is reflected in your
image.
If you want to continue adjusting the color, repeat steps 2 through 4.
If you want to save the color for future scans, click the save icon. The color appears in the save area.
Note:
To load a previously saved color, select the color and click the apply to palette icon.
When you are finished adjusting the color, click Close to return to the Professional Mode window.
Page 75

For further details on using the Color Palette feature, see Epson Scan Help.
Top
Page 76

Home > Scanning Special Projects
Removing Dust Marks with the Dust Removal Feature
Dust Removal in Full Auto Mode
Dust Removal in Professional Mode
Using the Dust Removal feature in Epson Scan, you can virtually “clean” the dust marks from your originals as you scan
them.
Before scanning your originals, carefully remove any dust that you can see on them.
Original image Dust Removal applied
Note:
Before scanning your originals, carefully remove any dust that you can see on them.
Do not use Dust Removal to scan your originals that do not contain dust or scratch marks; otherwise
your scanned image may be distorted or blurred.
When you scan film or slides, the Dust Removal feature is available for Full Auto Mode or Professional
Mode only (it is not available for Home or Office Mode). To remove dust marks from color film or slides
in Home Mode, use the DIGITAL ICE Technology feature as described in Removing Dust and Scratch
Marks from Originals Using DIGITAL ICE Technology.
If you still have dust marks on color film or slides after using the Dust Removal feature, try scanning
it again using DIGITAL ICE Technology as described in Removing Dust and Scratch Marks from
Originals Using DIGITAL ICE Technology.
This feature is not available if the DIGITAL ICE Technology check box is selected.
See one of these sections for instructions on removing dust marks from your original(s).
Full Auto Mode: Dust Removal in Full Auto Mode
Office Mode: This feature is not available in Office Mode. Change the scan mode to Full Auto Mode or Professional Mode. See
Changing the Scan Mode for instructions.
Home Mode: This feature is not available in Home Mode. Change the scan mode to Full Auto Mode or Professional Mode. See
Changing the Scan Mode for instructions.
Professional Mode: Dust Removal in Professional Mode
Dust Removal in Full Auto Mode
Place your original(s) on the document table. See one of these sections for instructions.
Documents or photos: Placing Documents or Photos
Film or slides: Placing Film or Slides
Page 77

Note for film or slides:
You can only scan 35 mm color film strip or color positive slides in Full Auto Mode. To scan other types of
film, use Home Mode or Professional Mode. To change the scan mode, see Changing the Scan Mode.
Start Epson Scan. See Starting Epson Scan for instructions.
In the Full Auto Mode window, click Customize. The Customize window appears.
Click the Dust Removal check box.
If you want to select the file save settings, click File Save Settings. See Selecting File Save Settings for instructions.
Note:
If you started Epson Scan from a TWAIN-compliant program like ArcSoft PhotoStudio, the File Save Settings
button does not appear.
When you finish making all the necessary settings, click OK to return to the Full Auto Mode window.
Click Scan.
What happens next depends on how you started Epson Scan. See Finishing the Scan for instructions.
Dust Removal in Professional Mode
Place your original(s) on the document table. See one of these sections for instructions.
Top
Page 78

Documents or photos: Placing Documents or Photos
Film or slides: Placing Film or Slides
Start Epson Scan. See Starting Epson Scan for instructions.
In the Professional Mode window, select the Document Type, Document Source, Auto Exposure Type (for scanning
documents or photos) or Film Type (for scanning film or slides), Image Type, and Resolution settings. For details, see
Scanning in Professional Mode .
Click Preview to preview your image(s), then select your scan area. See Previewing and Adjusting the Scan Area for
details.
Scroll down to the Adjustments area and click the Dust Removal check box. If you want to increase or decrease the
level of the dust removal effect, click the + (Windows) or (Mac OS X) button next to the option and select a setting
in the Level list.
Note:
The result of the Dust Removal does not appear in the image(s) in the Preview window.
If you are scanning multiple images at the same time and you want to apply the Dust Removal feature
to all of your images or scan areas, click All in the Preview window before you click the check box.
This feature is not available if DIGITAL ICE Technology check box is selected.
Make any other necessary image adjustments. See Adjusting the Color and Other Image Settings for instructions.
Size your image(s) as necessary. See Selecting the Scan Size for instructions.
Click Scan.
What happens next depends on how you started Epson Scan. See Finishing the Scan for instructions.
Top
Page 79

Home > Scanning Special Projects
1200 dpi 16 MB 59 MB
Removing Dust and Scratch Marks from Originals Using DIGITAL ICE Technology
DIGITAL ICE Technology Specifications
Using DIGITAL ICE Technology in Home Mode
Using DIGITAL ICE Technology in Professional Mode
Your scanner and its Epson Scan software are equipped with the DIGITAL ICE Technology feature that removes stubborn
dust or scratch marks from your originals.
Original image DIGITAL ICE Technology applied
DIGITAL ICE Technology can remove dust marks that the Dust Removal feature cannot. However, it takes longer to scan using
DIGITAL ICE Technology and also uses more of your system resources. It is best to try removing dust marks using Dust
Removal before using DIGITAL ICE Technology. See Removing Dust Marks with the Dust Removal Feature for details.
Note:
You cannot use Dust Removal and DIGITAL ICE Technology at the same time.
Do not use DIGITAL ICE Technology to scan originals that do not contain dust or scratch marks;
otherwise your scanned image(s) may be distorted or blurred.
Images scanned with DIGITAL ICE Technology may appear softer than your original images.
This feature is not available if the Show Texture check box in the Configuration dialog box is selected.
Before using DIGITAL ICE Technology, make sure your system meets the requirements in DIGITAL ICE Technology
Specifications.
DIGITAL ICE Technology Specifications
To use DIGITAL ICE Technology, your system memory and hard disk space must meet the requirements in the table below.
DIGITAL ICE Technology needs additional resources to process and store your scanned images at the sizes and resolutions
specified here.
Original type Resolution * Hard disk space System memory
4 × 6 - inch (10.2 × 15.2 cm) photograph 600 dpi 157 MB 185 MB
4800 dpi 626 MB 370 MB
A4 size photograph 600 dpi 631 MB 255 MB
4800 dpi 2524 MB 510 MB
35 mm film or slide 150 dpi 1 MB 8 MB
300 dpi 1 MB 15 MB
600 dpi 4 MB 30 MB
Page 80
2400 dpi 63 MB 117 MB
3600 dpi 142 MB 175 MB
12800 dpi 251 MB 233 MB
Medium format film (6 × 20 cm) 150 dpi 4 MB 34 MB
300 dpi 8 MB 70 MB
600 dpi 29 MB 139 MB
1200 dpi 116 MB 277 MB
2400 dpi 464 MB 553 MB
3600 dpi 1042 MB 830 MB
12800 dpi 1853 MB 1106 MB
* This is the actual scan resolution used by DIGITAL ICE Technology, which is higher than the scan resolution you specify in Epson Scan.
Make sure your system resources meet these increased requirements.
You can use DIGITAL ICE Technology on the following types of originals.
Original type DIGITAL ICE Technology
Glossy Photo Yes
Color negative film Yes
Color positive film or slides Yes *
Monochrome negative film No **
Monochrome positive film No
* Kodachrome film is not supported.
** Only chromogenic monochrome negative film is supported.
Note:
It may take much longer to scan and for your software to respond to clicking Cancel if you have
insufficient system resources.
If you place your original on the document table at an angle, DIGITAL ICE Technology may require
even more system memory to process your images. Be sure to place your original straight on the
document table.
See one of these sections for instructions on using DIGITAL ICE Technology.
Full Auto Mode: This feature is not available in Full Auto Mode. Change the scan mode to Home Mode or Professional Mode.
See Changing the Scan Mode for instructions.
Office Mode: This feature is not available in Office Mode. Change the scan mode to Home Mode or Professional Mode. See
Changing the Scan Mode for instructions.
Home Mode: Using DIGITAL ICE Technology in Home Mode
Professional Mode: Using DIGITAL ICE Technology in Professional Mode
Top
Using DIGITAL ICE Technology in Home Mode
Place your original(s) on the document table. See one of these sections for instructions.
Documents or photos: Placing Documents or Photos
Film or slides: Placing Film or Slides
Start Epson Scan. See Starting Epson Scan for instructions.
Page 81

In the Home Mode window, select the Document Type, Image Type, and Destination settings. For details, see
Scanning in Home Mode .
Click Preview to preview your image(s), then select your scan area. See Previewing and Adjusting the Scan Area for
details.
Click the DIGITAL ICE Technology check box.
Note:
The results of DIGITAL ICE Technology do not appear in the images in the Preview window, but apply to all
of them. You must scan the images to see the effects.
Make any other necessary image adjustments. See Adjusting the Color and Other Image Settings for instructions.
Size your image(s) as necessary. See Selecting the Scan Size for instructions.
Click Scan to scan and remove dust and scratch marks in your image(s).
What happens next depends on how you started Epson Scan. See Finishing the Scan for details.
Using DIGITAL ICE Technology in Professional Mode
Place your original(s) on the document table. See one of these sections for instructions.
Documents or photos: Placing Documents or Photos
Film or slides: Placing Film or Slides
Start Epson Scan. See Starting Epson Scan for instructions.
In the Professional Mode window, select the Document Type, Auto Exposure Type (for scanning documents or photos),
Film Type (for scanning film or slides), Image Type, Resolution, and Document Size settings. For details, see
Scanning in Professional Mode .
Top
Click Preview to preview your image(s), then select your scan area. See Previewing and Adjusting the Scan Area for
details.
Scroll down to the Adjustments area and click the DIGITAL ICE Technology check box.
When you select Reflective as the Document Type, you can change the level of the DIGITAL ICE Technology correction
effect. Click the + (Windows) or (Mac OS X) button next to the option and select Standard or High.
Page 82

Note:
The results of DIGITAL ICE Technology do not appear in the images in the Preview window, but apply to all
of them. You must scan the images to see the effects.
Make any other necessary image adjustments. See Adjusting the Color and Other Image Settings for instructions.
Size your image(s) as necessary. See Selecting the Scan Size for instructions.
Click Scan to scan and remove dust and scratch marks in your image(s).
What happens next depends on how you started Epson Scan. See Finishing the Scan for details.
Top
Page 83

Home > Scanning Special Projects
Fixing Backlit Photos
Backlight Correction in Home Mode
Backlight Correction in Professional Mode
Using the Backlight Correction feature in Epson Scan, you can remove shadows from photos that have too much background
light. You can fix printed photos, film, or slides automatically as you scan them.
Original image Backlight Correction applied
See one of these sections for instructions on fixing backlit photos.
Full Auto Mode: This feature is not available in Full Auto Mode. Change the scan mode to Home Mode or Professional Mode.
See Changing the Scan Mode for instructions.
Office Mode: This feature is not available in Office Mode. Change the scan mode to Home Mode or Professional Mode. See
Changing the Scan Mode for instructions.
Home Mode: Backlight Correction in Home Mode
Professional Mode: Backlight Correction in Professional Mode
Backlight Correction in Home Mode
Place your original(s) on the document table. See one of these sections for instructions.
Documents or photos: Placing Documents or Photos
Film or slides: Placing Film or Slides
Start Epson Scan. See Starting Epson Scan for instructions.
In the Home Mode window, select the Document Type, Image Type, and Destination settings. For details, see
Scanning in Home Mode .
Click Preview to preview your image(s), then select your scan area. See Previewing and Adjusting the Scan Area for
details.
Click the Backlight Correction check box.
Page 84

Note:
If you are scanning multiple images at the same time and you want to apply the Backlight Correction feature
to all of your images or scan areas, click All in the Preview window before you click the check box.
Make any other necessary image adjustments. See Adjusting the Color and Other Image Settings for details.
Size your image(s) as necessary. See Selecting the Scan Size for details.
Click Scan.
What happens next depends on how you started Epson Scan. See Finishing the Scan for instructions.
Backlight Correction in Professional Mode
Place your original(s) on the document table. See one of these sections for instructions.
Documents or photos: Placing Documents or Photos
Film or slides: Placing Film or Slides
Top
Start Epson Scan. See Starting Epson Scan for instructions.
In the Professional Mode window, select the Document Type, Document Source, Auto Exposure Type (for scanning
documents or photos) or Film Type (for scanning film or slides), Image Type, and Resolution settings. For details, see
Scanning in Professional Mode .
Click Preview to preview your image(s), then select your scan area. See Previewing and Adjusting the Scan Area for
details.
Scroll down to the Adjustments area and click the Backlight Correction check box. If you want to increase or decrease
the level of the backlight correction effect, click the + (Windows) or (Mac OS X) button next to the option and select
a setting in the Level list.
Page 85

Note:
If you are scanning multiple images at the same time and you want to apply the Backlight Correction feature
to all of your images or scan areas, click All in the Preview window before you click the check box.
Make any other necessary image adjustments. See Adjusting the Color and Other Image Settings for details.
Size your image(s) as necessary. See Selecting the Scan Size for details.
Click Scan.
What happens next depends on how you started Epson Scan. See Finishing the Scan for instructions.
Top
Page 86

Home > Scanning Special Projects
Text Enhancement
Text Enhancement Using the PDF Button
Text Enhancement in Office Mode
Text Enhancement in Home Mode
When you scan documents, you can sharpen the text and increase accuracy by using the Text Enhancement feature in Epson
Scan.
Original Text Enhancement: Off Text Enhancement: On
Note:
You can enhance text only when you scan using a resolution of 600 dpi or less.
See one of these sections for instructions on text enhancement.
Text Enhancement Using the PDF Button
Office Mode: Text Enhancement in Office Mode
Home Mode: Text Enhancement in Home Mode
Note:
The instructions in these sections are for scanning to a PDF file, but text enhancement is also effective when
you convert scanned documents into editable text. See Converting Scanned Documents Into Editable Text for
details.
Text Enhancement Using the PDF Button
Place your document on the document table. See Placing Documents or Photos for instructions.
Press the PDF button on the scanner.
When you see the Scan to PDF window, click Settings. You see the Scan to PDF Settings window.
In the Scan to PDF Settings window, select the Image Type and Destination settings. For details, see Scanning to a
PDF File Using the PDF Button.
Click the Image Option check box, and then select Text Enhancement.
Page 87

Make any other necessary image adjustments. See Adjusting the Color and Other Image Settings for details.
Click File Save Settings. Make file save settings as necessary and click OK. See Scanning to a PDF File Using the PDF
Button for details.
Click Close to close the Scan to PDF Settings window, then click Scan or press the Start button on the scanner.
Epson Scan scans your page.
When you are finished scanning all of your pages, click Finish or press the PDF button on the scanner. Your
document is saved as a PDF file in the Pictures or My Pictures folder, or in the location you selected in the File Save
Settings window.
Text Enhancement in Office Mode
Place your document on the document table. See Placing Documents or Photos for instructions.
Start Epson Scan. See Starting Epson Scan for instructions.
In the Office Mode window, select the Image Type, and Destination settings. For details, Scanning in Office Mode .
Top
Click the Image Option check box, and then select Text Enhancement.
Click Preview to preview your document, then select your scan area. For details, see Previewing and Adjusting the Scan
Area.
Make any other necessary image adjustments. See Adjusting the Color and Other Image Settings for details.
Page 88

Click Scan. The File Save Settings window appears.
Make File Save and PDF settings as necessary. See Scanning to a PDF File in Office Mode for details.
Click OK.
Text Enhancement in Home Mode
Place your document on the document table. See Placing Documents or Photos for instructions.
Start Epson Scan. See Starting Epson Scan for instructions.
In the Home Mode window, select the Document Type, Image Type, and Destination settings. For details, see
Scanning in Home Mode .
Click the Image Option check box, and then select Text Enhancement.
Top
Click Preview to preview your document, then select your scan area. For details, see Previewing and Adjusting the Scan
Area.
Make any other necessary image adjustments. See Adjusting the Color and Other Image Settings for details.
Click Scan. The File Save Settings window appears.
Make File Save and PDF settings as necessary. See Scanning to a PDF File in Home Mode for details.
Click OK.
Top
Page 89
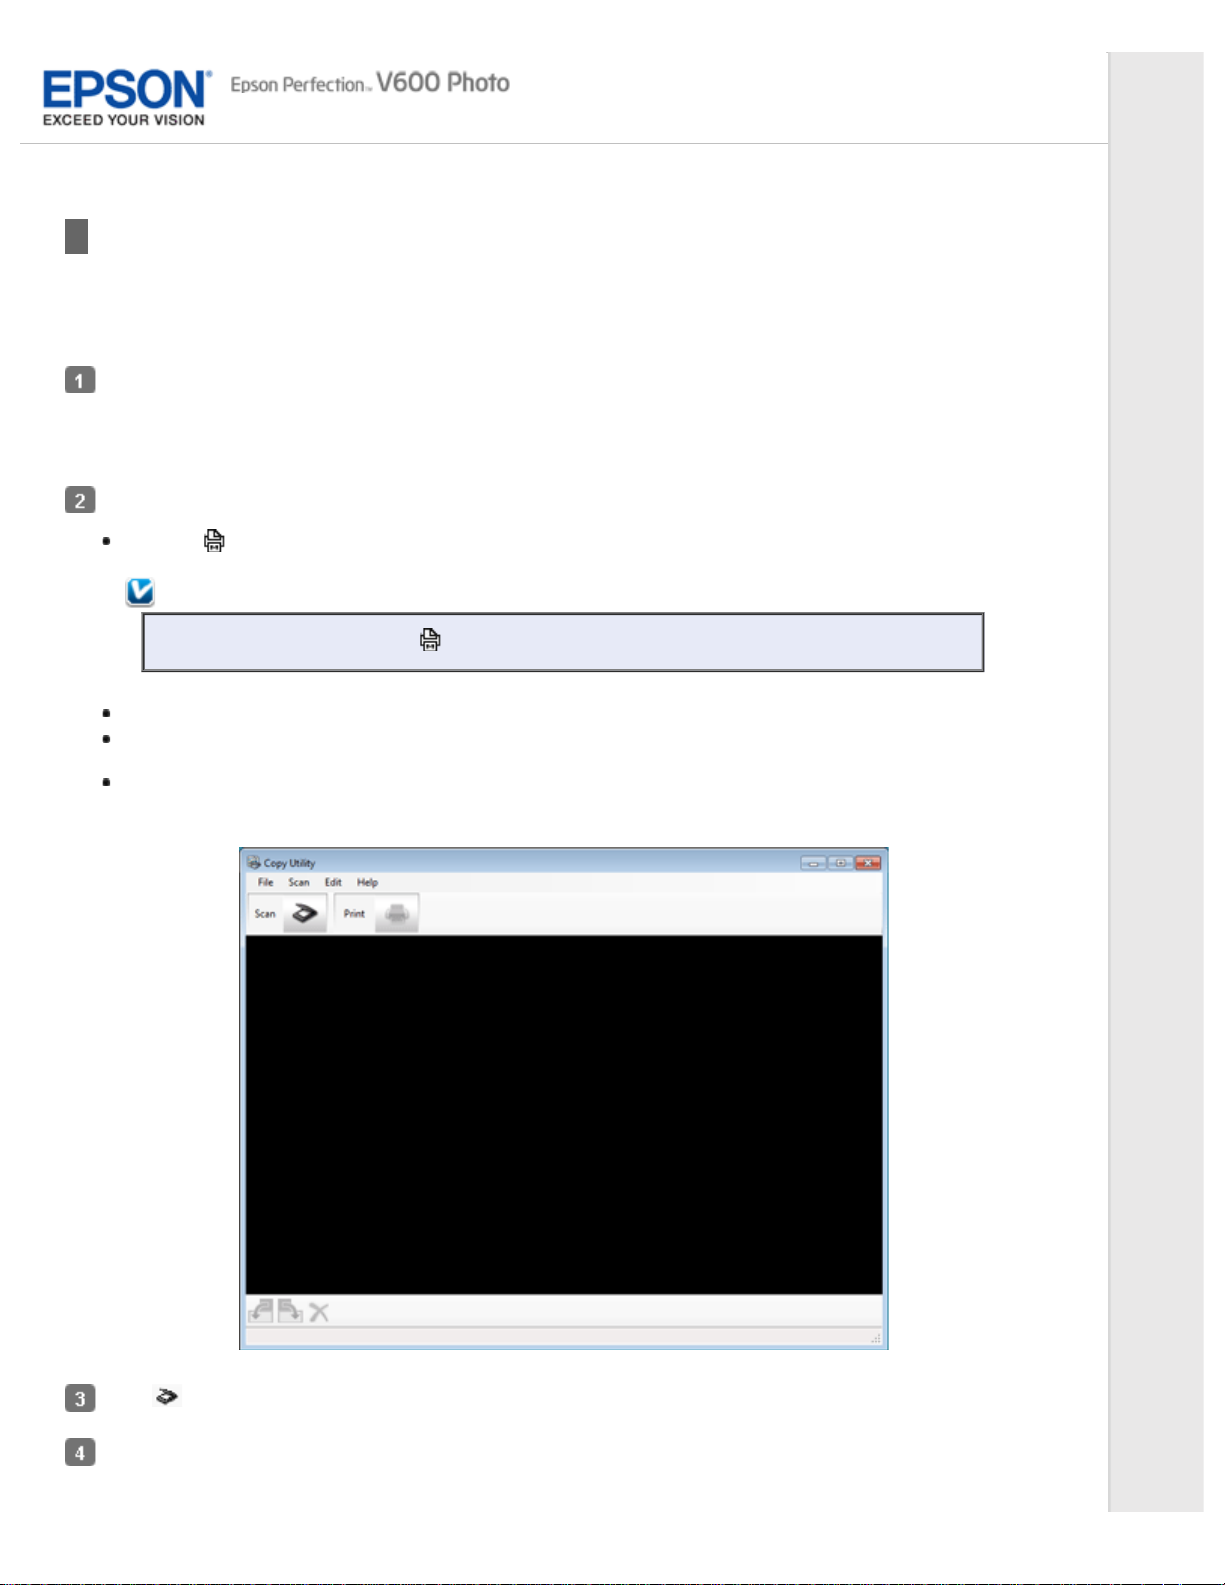
Home > Scanning Special Projects
Using the Scanner as a Copier
You can use your scanner along with a printer connected to your computer just like you would use a copy machine. You can
even enlarge and reduce, restore faded colors, remove dust, enhance text, and adjust image brightness and contrast as you
copy.
Place your original(s) on the document table. See one of these sections for instructions.
Documents or photos: Placing Documents or Photos
Film or slides: Placing Film or Slides
Start the Copy Utility in one of these ways:
Press the Copy button on the scanner.
Note:
If you start Copy Utility with the Copy button, the Epson Scan window opens at the same time.
Windows 8: Navigate to the Apps screen and select Copy Utility.
Windows 7/Vista/XP: Select the start button or Start > Programs or All Programs > Epson Software >
Copy Utility.
Mac OS X: Select Applications > Epson Software and double - click the Copy Utility icon.
You see the Copy Utility window.
Click to open the Epson Scan window, if necessary.
Scan your document using Epson Scan. See Scanning Your Originals for more information.
If the Epson Scan window is still open after scanning the document, click Close.
Page 90
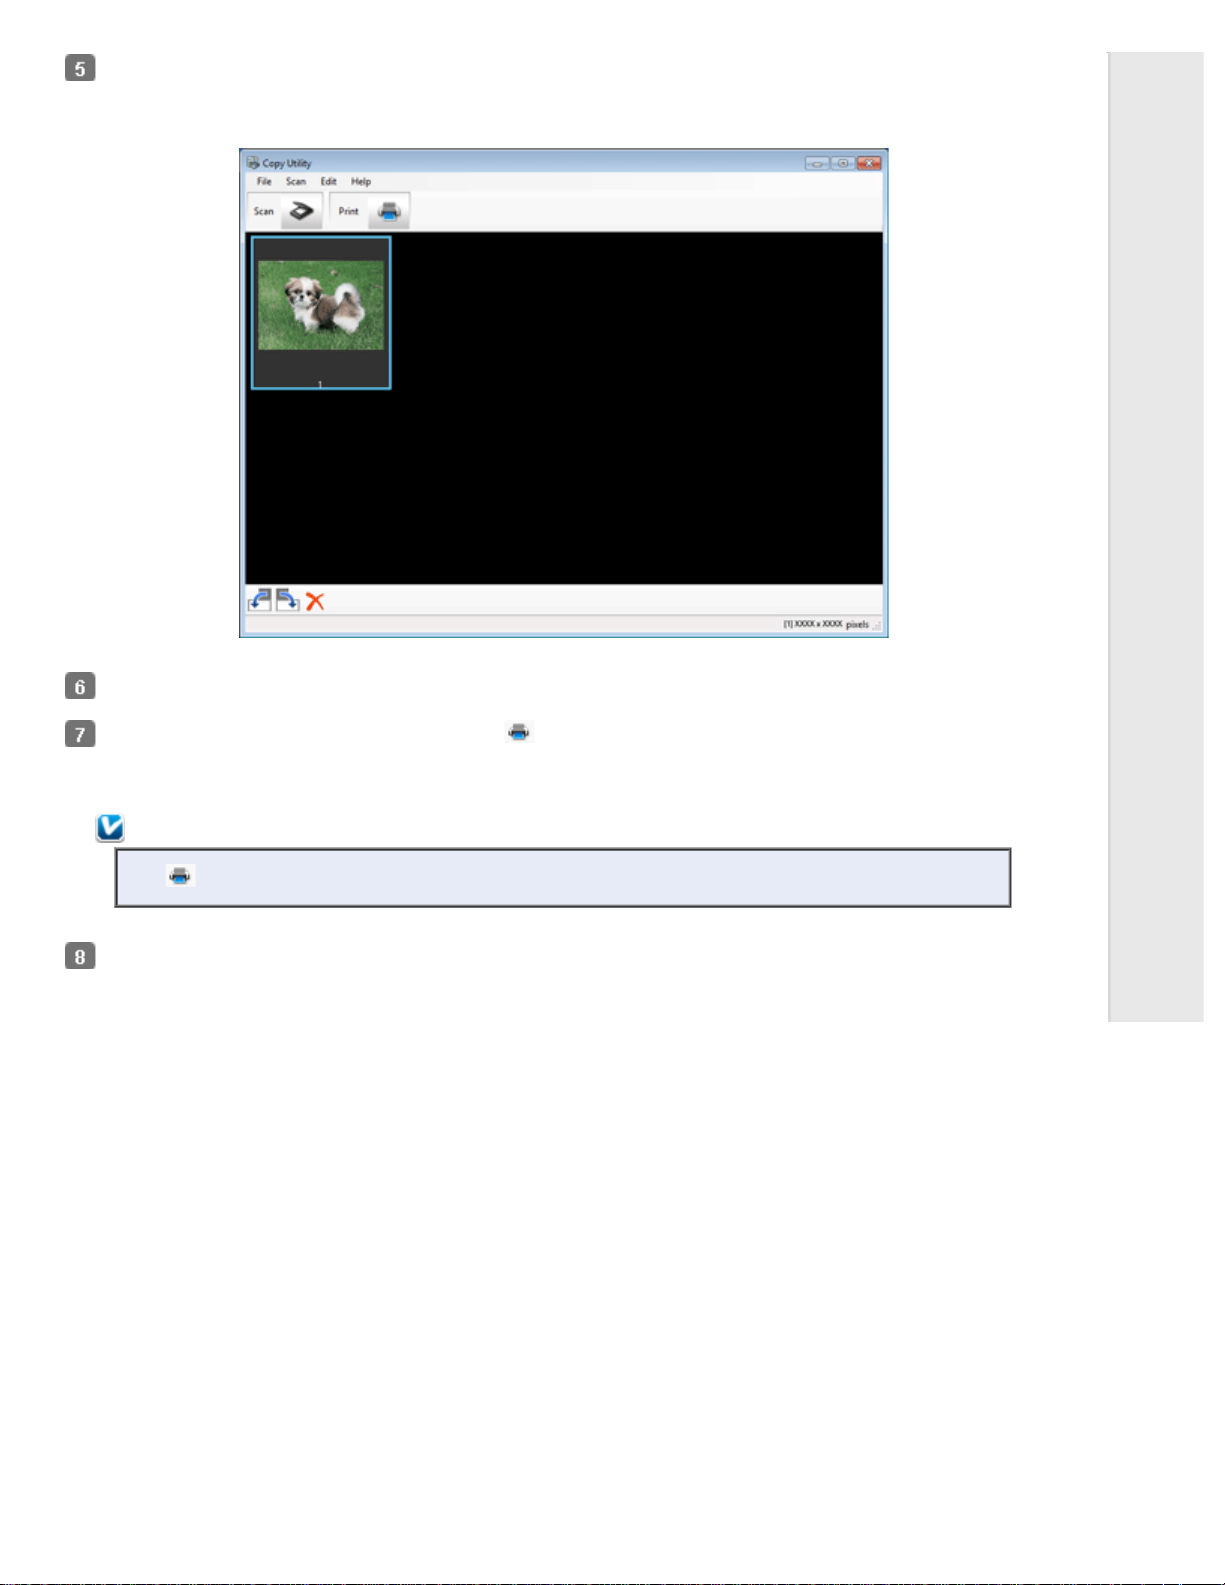
The scanned image is displayed in the Copy Utility main window.
Check the scanned image and then rotate it using the thumbnail tool if necessary.
When you have finished checking the image, click .
The window for print settings is displayed.
Note:
The button is not active until after a scan has been performed and an image is ready to be printed.
Specify the necessary items, and then click Print to print the image.
The scanned image is printed.
Page 91

Home > Scanning Special Projects
Scanning to a PDF File
Scanning to a PDF File Using the PDF Button
Scanning to a PDF File in Office Mode
Scanning to a PDF File in Home Mode
Scanning to a PDF File in Professional Mode
The easiest way to scan multiple document pages to a PDF file is to press the PDF button on the scanner. See Scanning to
a PDF File Using the PDF Button for instructions.
Using Epson Scan, you can create a PDF file with the following features.
Scanning multiple document pages into a single PDF file: You can scan multiple document pages and save them in a
single PDF file.
Creating a searchable PDF file: You can create a PDF file with search functionality, so that you can look for words in the file.
(This feature may not be available in some countries.)
Specifying the number of pages in a single PDF file: You can specify the maximum number of pages that can be included
in one PDF file. For example, if you are scanning a 20 - page document, and specify the page number to be included in one
PDF as 4, 5 PDF files are automatically created.
Note:
You need ABBYY FineReader that came with your scanner to use some of these features. If you have installed
your scanning software as described in the Start Here sheet, it has already been installed. (ABBYY FineReader
may not be available in some countries.)
See one of these sections to start scanning to a PDF file.
Scanning to a PDF File Using the PDF Button
Full Auto Mode: Select PDF as the Image Type setting in the File Save Settings window. See Scanning in Full Auto Mode for
instructions. If you want to scan multiple document pages into one PDF file serially, change the scan mode to Office Mode,
Home Mode or Professional Mode. See Changing the Scan Mode for instructions.
Office Mode: Scanning to a PDF File in Office Mode
Home Mode: Scanning to a PDF File in Home Mode
Professional Mode: Scanning to a PDF File in Professional Mode
Scanning to a PDF File Using the PDF Button
Place your document on the document table. See Placing Documents or Photos for instructions.
Press the PDF button on the scanner. You see the Scan to PDF window.
Page 92

Click Settings. You see the Scan to PDF Settings window.
Select Color, Grayscale, or Black&White as the Image Type setting to select the colors in the original.
Page 93

Select Document Table as the Document Source setting.
Click the arrow to open the Size list and select the size of your original(s).
If you need to select a size that is not in the Size list, you can create a custom size. Click the arrow in the Size list and
select Customize. You see the Source Size window.
Type a name for your custom size, enter the size, click Save, then click OK. Your new size appears in the Size list.
Click the arrow next to the Resolution list and select the number of dots per inch at which you want to scan. See the
table below for guidelines.
What you will do with the scanned image Suggested scan resolution
Send via e- mail, upload to web, view only on the
screen
Fax 200 dpi
Print 300 dpi
Use the settings in the Image Adjustments area of the window to modify the image quality if necessary. See the table
below for guidelines.
Setting Description
Brightness Adjusts the overall image lightness and darkness. This setting is
Contrast Adjusts the difference between the light and dark areas of the overall
Unsharp Mask Turn on to make the edges of image areas clearer for an overall
Descreening Removes the rippled pattern that can appear in subtly shaded image
Image Option Text
Enhancement
available only when the Image Type is set to Color or Grayscale.
image. This setting is available only when the Image Type is set to
Color or Grayscale.
sharper image. Turn off to leave softer edges. This setting is available
only when the Image Type is set to Color or Grayscale.
areas, such as skin tones. Also improves results when scanning
magazine or newspaper images that include screening in their original
print process. This setting is available only when the Image Type is
set to Color or Grayscale.
Enhances text recognition when scanning text documents.
This setting is available in the following conditions:
96 to 150 dpi
Page 94

- when the Image Type is set to Color and Image Option is selected
- when the Image Type is set to Grayscale and Image Option is
selected
- when the Image Type is set to Black&White and Image Option is
selected
When the Image Type is set to Black&White, the results of Text
Enhancement do not appear in the preview, only in your scanned
image.
Auto Area
Segmentation
Dropout Drops out red, green, or blue in the scan.
Color Enhance Enhances red, green, or blue in the scan.
Threshold Adjusts the level at which the black areas in text and line art are
Makes Black&White images clearer and text recognition more accurate
by separating the text from the graphics. This setting is available only
when the Image Type is set to Black&White and Image Option is
selected.
This setting is available in the following conditions:
- when the Image Type is set to Grayscale and Image Option is
selected
- when the Image Type is set to Black&White and Image Option is
selected
This setting is available in the following conditions:
- when the Image Type is set to Grayscale and Image Option is
selected
- when the Image Type is set to Black&White and Image Option is
selected
delineated, improving text recognition in OCR programs. This setting is
available only when the Image Type is set to Black&White.
Click File Save Settings. The File Save Settings window appears. The current Paper Size, Orientation, Margin, and other
settings are displayed below it.
Page 95

If you need to change any of the current PDF settings, click Options. You see the Epson PDF Plug - in Settings window.
Select the settings that match your document and click OK. You return to the File Save Settings window.
Note:
The Text tab is available only when ABBYY FineReader is installed. If ABBYY FineReader is not available
in your country, you will not see the Text tab.
Make any other file save settings, and click OK.
Click Close to close the Scan to PDF Settings window, then click Scan or press the Start button on the scanner.
Epson Scan scans your page.
If you are scanning multiple pages, replace the first page on the document table with the second page and click Scan or
press the Start button again. Repeat this step for each page in your document.
When you are finished, click Finish or press the PDF button on the scanner. Your document is saved as a PDF file in
the Pictures or My Pictures folder, or in the location you selected in the File Save Settings window.
Scanning to a PDF File in Office Mode
Top
Place your document on the document table. See Placing Documents or Photos for instructions.
Page 96

Start Epson Scan. See Starting Epson Scan for instructions.
In the Office Mode window, select the Image Type, Document Source, Size, and Resolution settings. For details,
Scanning in Office Mode .
Click Preview to preview your image(s), then select your scan area. For details, see Previewing and Adjusting the Scan
Area.
Make any other necessary image adjustments. See Adjusting the Color and Other Image Settings for details.
Click Scan. The File Save Settings window appears.
Select PDF as the Type setting. The current Paper Size, Orientation, Margin, and other settings are displayed below it.
Click Options. You see the Epson PDF Plug - in Settings window.
To create a searchable PDF file, click the Text tab, select the Create searchable PDF check box, then select your
language from the Text Language list.
Page 97

Note:
The Text tab is available only when ABBYY FineReader is installed. If ABBYY FineReader is not available in
your country, you will not see the Text tab.
To specify the maximum number of pages that can be included in one PDF file, click the General tab and adjust the
Select number to make file setting.
Page 98

For other settings in the Epson PDF Plug - in Settings window, see Epson Scan Help for details.
Select the settings that match your document and click OK. You return to the File Save Settings window.
Make any other file save settings, and click OK. Epson Scan scans your document and displays the window below.
Note:
If you deselect the Show Add Page dialog after scanning check box in the File Save Settings window, this
window does not appear and Epson Scan automatically saves your document.
Select one of the following options.
Page 99

Add page: Click this button to scan the next page of your document. Replace the first page on the document
table with the next page, and click Scan. Repeat this step for each page in your document. When you are
finished, click Edit page and go to step 12.
Edit page: Click this button if you have scanned all the necessary pages so you can edit the scanned pages
before saving them in one PDF file. Then go to step 12.
Save File: Click this button when you are ready to finish scanning and save the scanned pages into one PDF
without editing them. Then go to step 14.
You see the Editing Page window displaying thumbnail images of each scanned page.
Use the tools below the Editing Page window to select, rotate, reorder, and delete pages.
If you want to include all the document pages in your PDF files as they currently look, go to step 13.
If you want to rotate pages, click the pages, or use the odd pages, even pages, or all pages icon to
select the pages, then click the left or right rotate icon to rotate them.
If you want to delete pages, click the pages, or use the odd pages, or even pages icon to select the pages,
then click the delete icon to delete them.
Note:
The delete icon is not available when all pages are selected.
For further details on the tools in the Editing Page window, see Epson Scan Help.
When you have finished editing your pages, click OK. The pages are saved in one PDF file in Pictures, My Pictures, or
the location you selected in the File Save Settings window, and you return to the Office Mode window.
Click Close to exit Epson Scan.
Scanning to a PDF File in Home Mode
Place your document on the document table. See one of these sections for instructions.
Top
Page 100

Documents or photos: Placing Documents or Photos
Film or slides: Placing Film or Slides
Start Epson Scan. See Starting Epson Scan for instructions.
In the Home Mode window, select the Document Type, Image Type, and Destination settings. For details, see
Scanning in Home Mode .
Click Preview to preview your image(s), then select your scan area. For details, see Previewing and Adjusting the Scan
Area.
Make any other necessary image adjustments. See Adjusting the Color and Other Image Settings for details.
Size your image as necessary. See Selecting the Scan Size for details.
Click Scan. The File Save Settings window appears.
Select PDF as the Type setting. The current Paper Size, Orientation, Margin, and other settings are displayed below it.
Click Options. You see the Epson PDF Plug - in Settings window.
To create a searchable PDF file, click the Text tab, select the Create searchable PDF check box, then select your
language from the Text Language list.
 Loading...