

Page 1
Transparency Unit
The transparency unit (B12B813362) lets you scan transparent materials—35 mm
slides, filmstrips, and negatives, 4 × 5 inch film, medium format (120/220) film, and
nonstandard film sizes up to 12.2 × 16.5 inches (309 × 420 mm). To switch
from scanning transparent materials to ordinary paper documents, see page 52.
Note: The transparency unit is optional for the GA version of the Expre ssion 10000XL. It
is included with the Photo version.
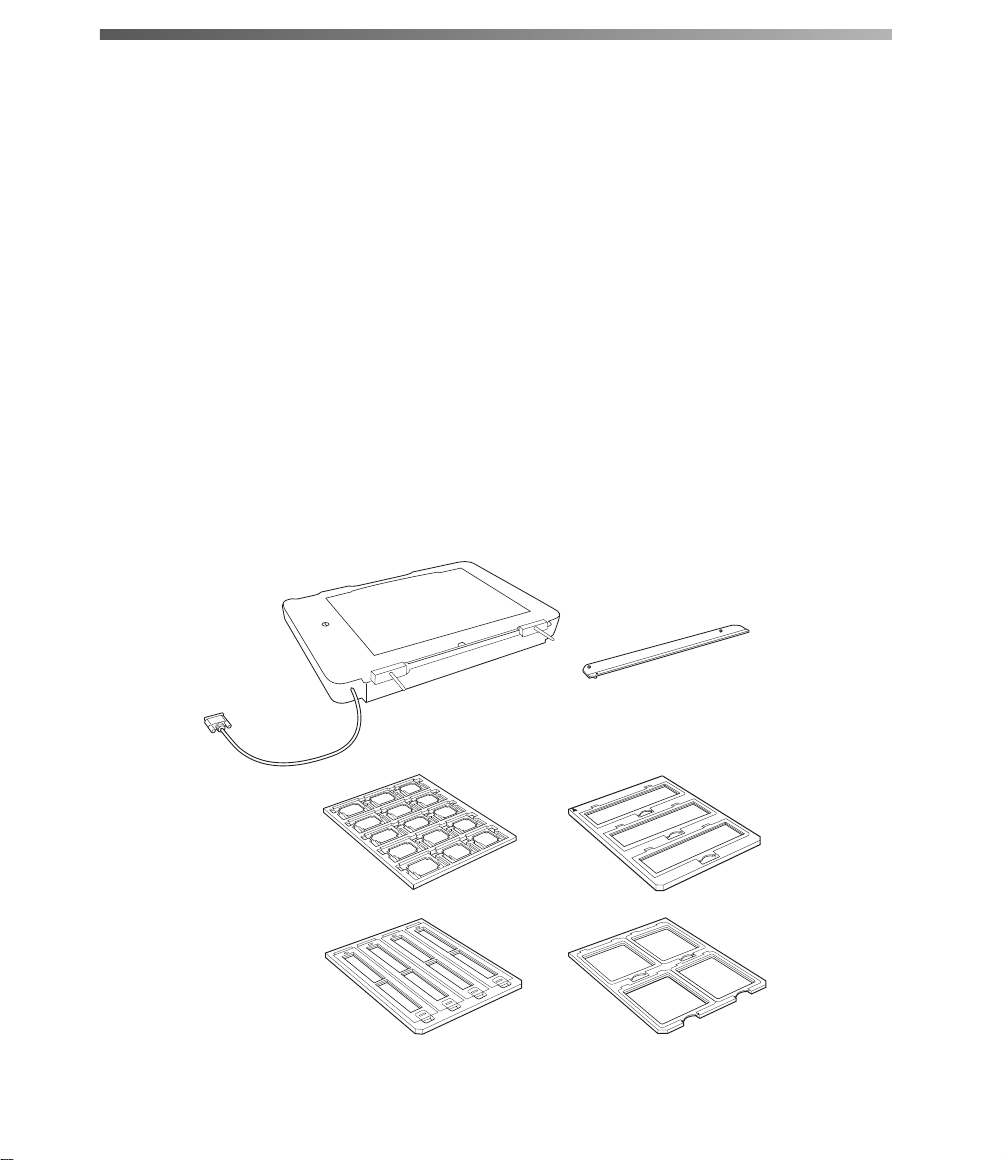
Unpacking the Transparency Unit
Make sure that all of the following items are included in the transparency unit box. If
any items are missing or damaged, contact your Epson dealer, or contact Epson at
(562) 276-4382 (in the United States) or (905) 709-3839 (in Canada). Keep all the
packing materials so you can use them for storage when you are not scanning
transparencies.
Transparency unit
(including reflective
document mat)
Transparency guide
Film holders
(two of each type)
Page 2
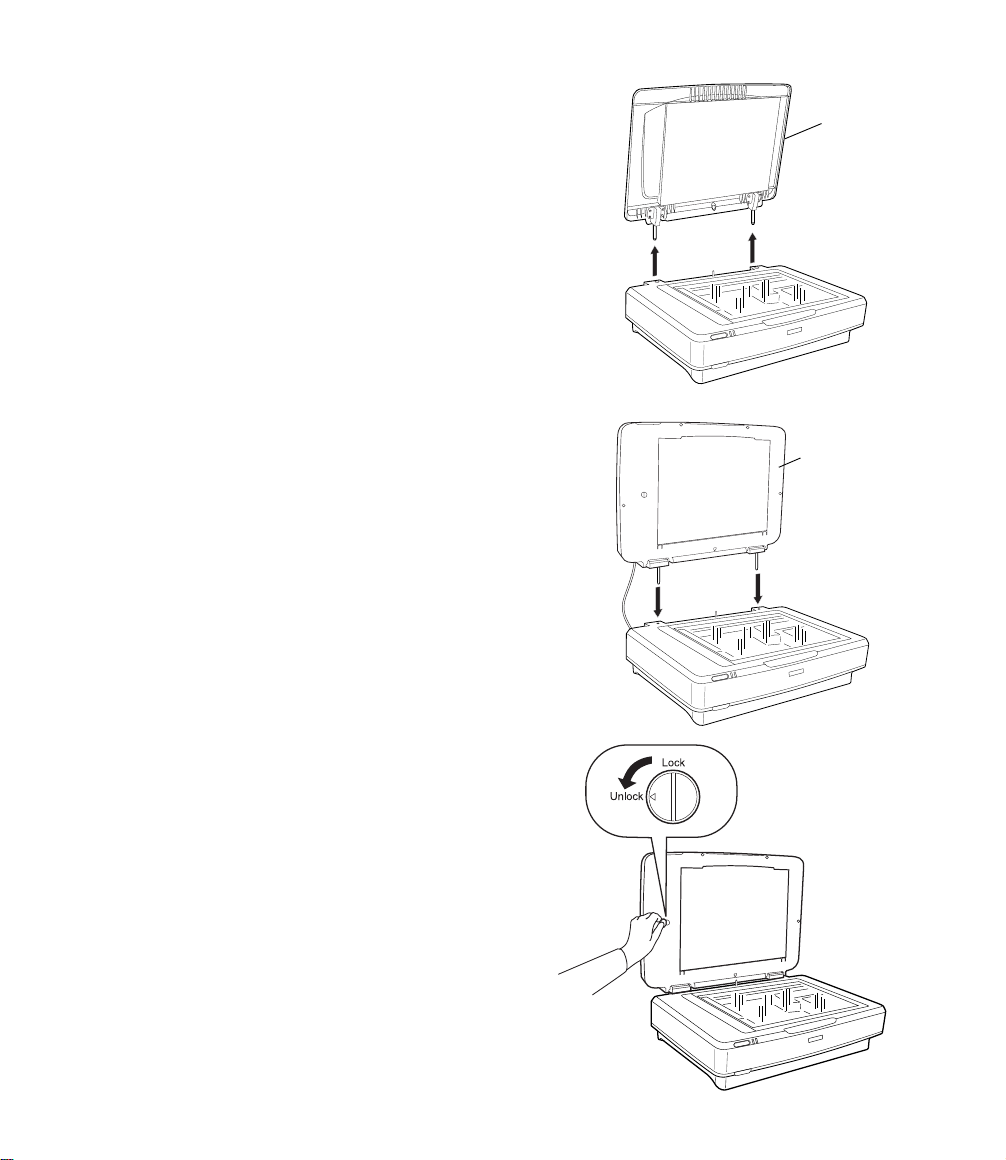
Installing the Transparency Unit
1. Make sure the scanner is turned off, then
unplug the power cord from the scanner.
2. Fully open the scanner’s document cover,
then lift it straight up.
3. Lower the transparency unit onto the
scanner, so that the pins fit into the holes as
shown.
Document
cover
Transparency
unit
4. Use a coin to turn the transportation lock
to the Unlock position.
Page 3
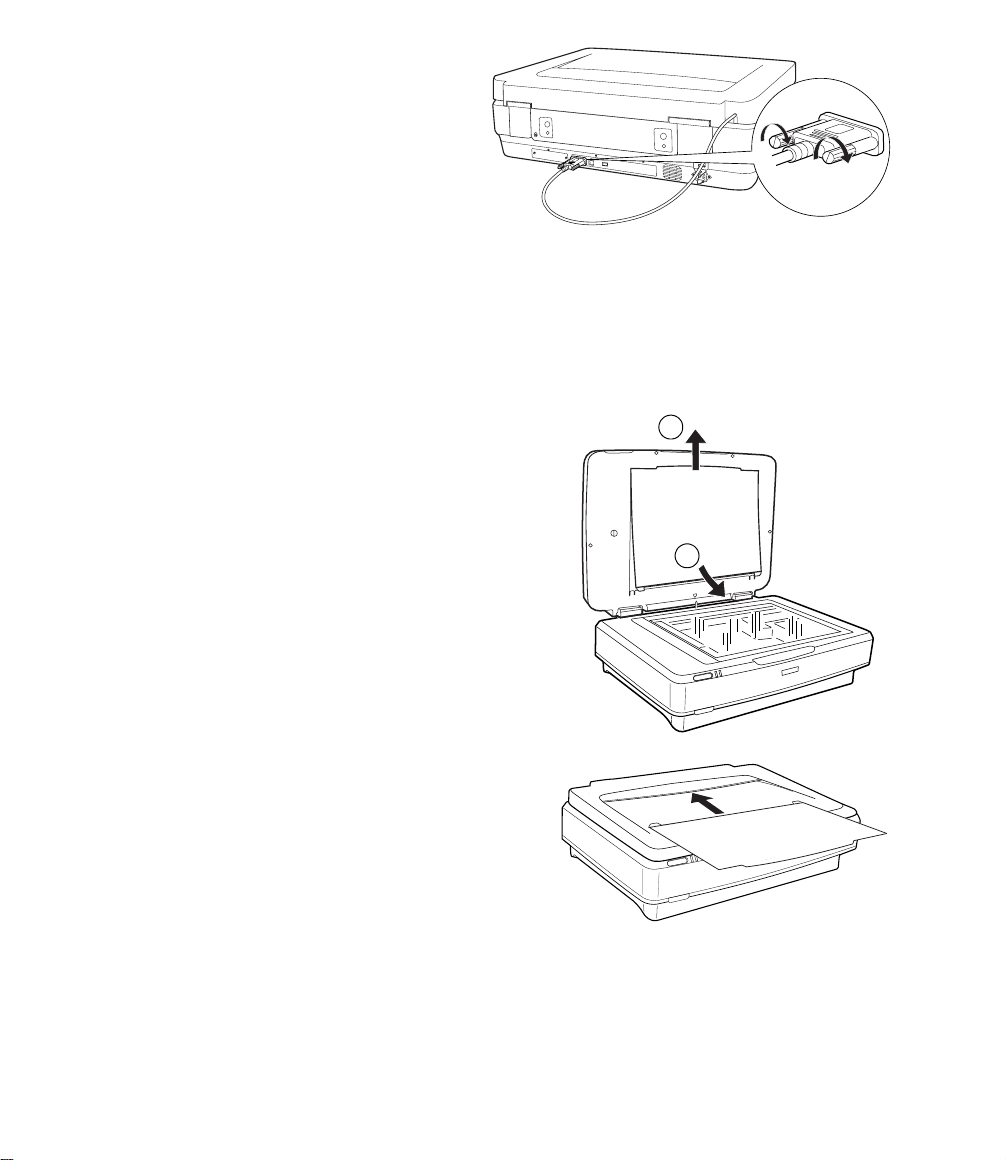
5. Close the transparency unit.
6. Connect the transparency unit cable
to the scanner’s OPTION port, then
tighten its screws.
Using the Transparency Unit
Before using the transparency unit (TPU), you need to remove the reflective
document mat and make sure the glass on both the document table and the TPU
is clean.
1. Open the transparency unit.
1
2. Grasp the white reflective document mat by
its top edge and slide it upward to free the
bottom edge of the mat.
3. Lower the mat slightly to free the tabs at the
2
top edge, then remove the mat.
4. Place the mat in the storage pocket located
on top of the TPU.
5. Make sure the glass on the scanner’s
document table and on the TPU is
completely clean and free of dust. If
necessary, use a soft cloth to wipe it clean.
Caution: Never spray glass cleaner directly on the document table. Always spray
it on a cloth first and then wipe the glass.
Page 4

6. Place the transparency guide at the
back edge of the document glass, so
that its alignment pins fit into the
holes as shown.
Placing Standard Film Sizes on the Scanner
Use the film holders that came with the transparency unit to scan 35 mm slides,
filmstrips, and negatives, 4 × 5 inch film, and medium format (120/220) film.
1. Place the film holder on a flat surface. Open its cover (if it has one), then load the
film with its shiny side face down and the film emulsion layer face up.
L400 16
35 mm slides 35 mm strips
Medium format film4 × 5 inch film
Page 5

2. Make sure the transparency guide is in
place at the back edge of the document
glass (see page 47). Then place the film
holder on the document glass, aligning
the arrow marks as shown.
When scanning large numbers of images,
you can place a second film holder on the
scanner next to the first one. The holders
can be for different sizes of film (unless
you plan to scan 35 mm slides using the Thumbnail preview screen; see page 50).
3. Close the transparency unit and scan as described on page 49.
Note: If the transparency unit is not closed, you will get an error message and be
unable to scan.
Placing Nonstandard Film Sizes on the Scanner
You can scan film in nonstandard sizes up to 12.2 × 16.5 inches (309 × 420 mm).
Follow these guidelines:
1. Make sure the transparency guide is in place at the back edge of the document
glass (see page 47).
2. Set your film directly on the document
glass, with the shiny side face down
and the film emulsion layer face up.
Align the film with the edge of the
transparency guide, as shown.
3. Close the transparency unit and scan
as described in the next section.
Note: When setting film directly on the
glass or using film holders other than
those that came with the scanner, be sure to adjust the focus (see page 50).
Page 6

Scanning Your Film
You can scan your film in either Home Mode or Professional Mode. For greater
control over your scanned images, choose Professional Mode.
Note: Be sure to select the correct Document Type (in Home Mode) or Film Type (in
Professional Mode): Positive Film, Color Negative Film, or B&W Negative Film.
Also, be sure to adjust the focus if you’re placing your film directly on the glass (instead
of in a holder) or are using film holders other t han those that came with the scanner. See
page 50.
If you’re using Professional Mode, follow these steps:
1. Open your imaging application, then choose the Import (or Acquire) option in
the application and select Epson Expression 10000XL.
Note: If you are using Windows XP and choose WIA-EPSON Expression
10000XL, certain features won’t be available.
The EPSON Scan dialog box
opens.
2. Select Professional Mode
from the selection box at the
top of the screen.
Select
Professional Mode
Note: You may have to scroll
down to see all of the settings.
3. Under the Original settings,
select Film as your
Scroll down to see
more options
Document Type, and then
select the correct Film Type
(Positive Film, Color
Negative Film
, or B&W Negative Film).
4. Under the Destination settings, choose a color depth from the Image Type menu:
■ 48-bit Color for the highest quality color scans
Note: If you choose this option, make sure your application supp orts 48-bit
image files (Photoshop Elements does not support 48-bit color). This option
significantly increases your file size.
■
24-bit Color for high quality color scans
Page 7

Color Smoothing to reduce color variations without lessening sharpness
■
■ 16-bit Grayscale for the highest quality scans of black-and-white photos or
images
Note: Make sure your application supports 16-bit grayscale.
8-bit Grayscale for high quality scans of black-and-white photos or images
■
Click (Windows) or (Macintosh) to see more options, then choose Best or
Draft for the Scanning Quality.
5. Choose a resolution setting (50 to 12800 dpi). See page 30 for guidelines.
6. If you’re scanning 35 mm slides, you can
Select Thumbnail
click the arrow next to the Preview button
and select Thumbnail as the type of
preview screen you want to use. This
locates each image automatically, speeding
up your workflow (see page 38).
For all other types of film, make sure Normal is selected.
7. Click the Preview button to see previews of your images.
8. Click and drag within each image to select just the area you want to scan. For best
results, avoid including borders in your image. This enables EPSON Scan to
apply the optimal exposure and color balance settings (see page 31).
9. If you’re not using the film holders that came with your TPU, you’ll have to reset
the focus. Click the All button (to select all the images) or click a specific image to
adjust, and then do one of the following:
■ If you’ve placed your film directly on the document glass, click the
Manual focus button on the preview screen, set the focus position to
0.0, and then click OK.
■ If you’re using a non-Epson film holder, manually adjust the focus to the
position specified for your holder, or click the
Auto focus button to
adjust the focus position automatically.
Page 8

10. Use these Adjustment settings (on the main screen) to modify your images as
necessary.
Auto Adjust – If you’ve turned off Continuous auto exposure, click this
button to apply your color management settings and have the software
determine the best exposure and color balance for your scan. (If Continuous
auto exposure
is turned on, clicking this button has no effect; see page 31.)
Histogram Adjustment – Click this button to adjust the highlight, shadow,
and gamma input levels.
Tone Correction – Click this button to choose a preset tone curve for specific
effects or to change the tone curve manually.
Image Adjustment – Click this button to adjust the color balance, saturation,
brightness, and contrast settings.
For any of these settings, you can click Reset to go back to the default settings for
an image. Click the Help for more information about using these options.
11. To enhance the appearance of your images, select from the following options:
■ To sharpen an image, select
Unsharp Mask Filter.
■ To reduce the appearance of graininess
in your film, select Grain Reduction.
■ To correct the color on faded photos,
select Color Restoration.
■ To digitally remove unwanted specks of dust, select Dust Removal.
Click (Windows) or (Macintosh) next to each setting and then choose a Level
to increase or decrease the effect. For more information about these options, see
page 33.
12. Click Scan.
13. When scanning completes, click Close to exit EPSON Scan and view the scanned
images in your imaging application.
Page 9

Scanning Paper Documents
If you want to scan an ordinary paper document while leaving the transparency unit
installed, follow these steps.
1. Remove the transparency guide.
2. Insert the reflective document mat, top
edge first, being careful to keep the mat’s
white surface from getting caught under the
frame of the TPU.
1
3. Insert the tabs along the bottom edge of the
mat to hold it in place.
4. Scan your document, following the
instructions in Chapter 1 for the mode that
you’re using.
Note: If you’re scanning in Professional
Mode, be sure to select Reflective as your
Document Type.
2
 Loading...