

Page 1

®
EPSON TWAIN Pro
User’s Guide
Page 2

Copyright Notice
All rights reserved. No part of this publication may be reproduced, stored in a retrieval system, or transmitted
in any form or by any means, electronic, mechanical, photocopying, recording, or otherwise, without the prior
written permission of SEIKO EPSON CORPORATION. The information contained herein is designed only for
use with this EPSO N scanner. EPSON is not responsible for any use of this information as applied to other
scanners.
Neither SEIKO EPSON CORPORATION nor its af filiates shall be liable to the purchaser of this product or
third parties for damages, losses, costs, or expenses incurred by purchaser or third parties as a result of:
accident, misuse, or abuse of this product or unauthorized modifications, repairs, or alterations to this product,
or (excluding the U.S.) failure to strictly comply with SEIKO EPSON CORPORATION’s operating and
maintenance instructions.
SEIKO EPSON CORPO RATIO N and its affiliates shall not be liable for any damages or problems arising from
the use of any options or any consumable products other than those designated as Original EPSON Products
or EPSON Approved Products by SEIKO EPSON CORPORATION.
A Note Concerning Responsible Use of Copyrighted Materials
Digital cameras and scanners, like photocopiers and conventional cameras, can be misused by improper
copying of copyrighted material. While some countries’ laws permit limited copying of copyrighted material in
certain circumstances, those circumstances may not be as broad as some people assume. EPSON
encourages each user to be responsible and respectful of copyright laws when using digital cameras and
scanners.
Page 2
Page 3

Trademarks
EPSON is a registered trademark of SEIKO EPSON CORPORATION, and EPSON Expression is a registered
trademark of Epson America, Inc. EPSON FaxAdvice is a trademark, and EPSON SoundAdvice is a service
mark of Epson America, Inc.
General Notice: Other product names used herein are for identification purposes only and may be
trademarks of their respective companies.
Copyright © 1998 by Epson America, Inc., Torrance, California, USA ETP1298-00
12/98
Page 3
Page 4

Contents
Introduction
System Requirements 7
Windows System Requirements 7
Macintos h System R equiremen t s 8
How to Use This Manual 9
Where to Get Help 10
Scanni ng from Your Application Software
Basic Scanning 13
Selecting Basic Settings 15
Preview ing Your Sca n 21
Preview Zo om ing Optio ns 22
Using Marquees 22
Advanced Scanning
Customizing Image Types 28
Customizing Destination Settings 32
Adjustin g Source and T arget Image Siz es 35
Scaling th e I m age 37
13
27
6
Page 4
Page 5

Using Automatic Adjustment Features 37
Using Au to Loc ate 38
Using Au to Ex posure 39
Adjusting Image Controls 39
Using the Ey edropper Buttons 42
Using Tone Correct ion 42
Customizing Tone Correction Settings 44
Using Color Adjustments 45
Changing the Gray Balance Int ensity 46
Changing the Saturation 46
Saving Cu s t om Settings 47
Configu ring EPSON T W AI N Pro 48
Troubl eshooting
Problems U s ing EPSON T W AI N Pro 50
Problems with Image Quality 55
Glossary
Index
50
62
64
Page 5
Page 6

Introduction
EPSON® TWAIN P ro is t he interface program be tween your application
software and scanner that lets you scan
includes m any f eatures for prev iewing an d m odifying yo ur images fo r a
perfect scan:
images into your software. It
◗ Captures all kinds of image types, from black and white text to 36-bit
color imag es
◗ Locates and exposes t he image au to m atically
◗ Opens a se parate Pre v iew w indow allowing you t o c hange setti ngs
and view their effects before you scan
◗ Provides a helpful marquee
or a specific portion of it for s c anning
◗ Uses EPSON’s Auto Area Segmentation and Text Enhancement
Technology features to im prove text rec ognition a nd provide c lear
separation from graphic areas when you scan images with text
◗ Gives you pr edefined set t ings for a vari et y of im age types and output
destinations, and lets you customize your own settings
feature so y ou can fram e t he exact image
Introduction Page 6
Page 7

Onscr een colo r and
tone reproduction
depend on the
display capabilities
of your computer
system, including th e
video controller,
monit or, and
software.
System Requirements
Before ins ta lling the scann er s oftware, make sure your system meets the
following m inimum requirements. If you are scanning high resolution
images, y ou need mor e t han the minim um availa ble hard dis k space
listed.
Windows® System Requirements
◗ An IBM® compatible PC with a 486/66 MHz or faster processor
®
◗ Microsoft
◗ 16MB RAM for Windows 95 and Windows 98; 32MB RAM for
Windows NT (32MB RAM recommended for all systems)
◗ 50MB available hard dis k s pace
◗ PCI slot for the Adaptec
Windows 95, Window s 98, or Wi ndows NT® 4.0
®
SCSI ad apt er (include d w it h y our scanner)
◗ VGA color m onitor with 640 × 480 resolution
resolutio n of 800 × 600 or higher rec om mended)
◗ 8-bit 256-c olor displa y adapter card (24-bit display adapt er card with
millions o f colors recom m ended)
Introduction Page 7
(a color mo nit or with a
Page 8

Macintosh® System Requirements
Onscr een colo r and
tone reproduction
depend on the
display capabilities
of your computer
system, including
the vide o c ontroller,
monit or, and
software.
EPSON TWAIN Pro supports the Apple® ColorSync™2.0 color
management system and QuickTime.
◗ PowerPC
™
(or higher processor) running system 7.5 (system 8.1 or
™
later recommended)
◗ Macintosh st andard SC SI int erface
◗ 16MB RAM (32MB RAM recommended)
◗ 50MB available hard dis k s pace
◗ CD-ROM drive
◗ VGA color monitor with 640 × 480 resolution (a color monitor with a
resolutio n of 800 × 600 or higher rec om mended)
◗ 8-bit 256-c olor displa y adapter card (24-bit display adapt er card with
millions o f colors recom m ended)
Introduction Page 8
Page 9

How to Use This Manual
This
User’s Guide
TWAIN Pro on a Windows or Macintosh system. For instructions on
installing th e s oftware, see
tells you what you need to know to scan with EPSON
Setting Up and Using Your Scanner
.
Scanning from Your Application Softwa re
for basic scanning and previewing of your im ages.
Advance d Scanning
procedures, such as customizing image type and destination settings,
adjustin g im age size and scale, using image controls, t one correct ion,
and color adjustments, saving custom setting groups, and configuring
EPSON T W AI N Pro.
Troubles hooting
At the end, y ou’ll find a Glo s s ary
describe s adv anced E PSON TW AI N Pro
provides so lut ions to problems you may encounter.
and an Index.
gives step-by-step instructions
Introduction Page 9
Page 10
Where to Get Help
EPSON provides cu s to m er support t hrough the f ollowing services:
Electron ic su pport services
Service Access
World W ide Web From the Internet , you can reach EPSON’s Home P age at
http://www.epson.com.
EPSON Internet FTP
Site
EPSON Download
Service
EPSON For um on
CompuServe
®
If you hav e I nt ernet FTP ca pability, use your Web browser (or other
software for FTP downloading) to log onto ftp.epson.com with the user
name anonymous and your e-mail address as the password.
You can call the EPSON Download Service at (800) 442-2007. Set your
communications software to 8 data bits, 1 stop bit, no parity. Modem
speed can be up to 28.8 Kbps.
Members of CompuServe can type GO EPSON at the menu prompt to
reach th e Epson America Forum . F or a free intr oductory CompuSer v e
memb ers hip, call (800) 848-8199 and ask f or represen ta t iv e #529.
Introduction Page 10
Page 11
Automa te d t elephone s erv ic es
Service Access
SM
EPSON SoundAdvi c e
For pre-recorded an s w ers to commonly asked questi ons about EPSO N
products 24 hours a day, seven days a week, call (800) 922-8911.
EPSON FaxAdvice
™
Access EPSON’s te c hnical inform ation libra ry by c alling
(800) 922-8911. You must provide a return fax number to us e this
service.
EPSON Referral
Service
For the lo c at ion of your nearest Auth orized EPSON Res eller or
Customer Care Center, call (800) 922-8911.
Introduction Page 11
Page 12

EPSON als o provide s tec hnical support and in fo rm ation on t he
installation, config uration, and operation of EPSO N products. D ial
(310) 974 -1970 (U.S. ) or (905) 709-3839 (Canada), 6 A. M . to 6 P.M.,
Pacific Time, Monday t hrough Frid ay .
If you need help
using software
with an EPSON
product , see the
docume nt at ion for
that prog ram for
technical support
information.
Before yo u c all, please have the follo w ing informat ion ready:
◗ Product name
◗ Product serial number
◗ Computer configuration
◗ Descript ion of the problem
You can purchase opt ional equipment, m anuals, and accessories from
EPSON Ac c essories at (8 00) 873-7766 (U.S. sales only) . In C anada,
please ca ll (800) 873-7766 for de aler referral. For U.S. sales, you can
also visit our website at www.epsonsupplies.com.
Introduction Page 12
Page 13

If you start your
applicat ion software
before turning on
your scanner, the
software may not
work properly.
Scanning from Your
Application Software
Before scanning, make sure you’ve installed the EPSON TWAIN Pro
software (as described in
applicat ion software t hat support s EPSON TWAIN Pro, su c h as Adobe
Photosh op.
This chapter gives you instructions on:
◗ Basic Scanning
◗ Preview ing Your Sca n
®
Basic Scan ning
Setting U p and Using Your Scanner
) and the
You usually need to
perform steps 3
and 4 only once,
when yo u us e your
scanner and
TWAIN-compliant
software for the
first time.
Scanning from Your Application Softw are Page 13
Follow the steps in this section to start EPSON TWAIN Pro and select the
settings for a bas ic scan of one image. T o s c an m ultiple im ages or use
advanced EPSON TWAIN Pro settings, see Advanced Sc anning.
1 Before you start your application software, make sure to set up and
turn on the scanner as de s c ribed in
Scanner
table.
2 Start your application software.
. Then place the document you want to sca n on the d ocument
Setting Up and Using Your
Page 14
3 Select the sc anner sour c e. Fo r ex ample, ch oose Import or Acquire
from the Fi le m enu, and then select on e of the following:
Window s 9 5, 98, N T 4. 0: Select TWAIN_32 Source
Macintosh: Select TWAIN Source or TWAIN Select
4 Then selec t o ne of the following in the S elect Sour c e dialog box:
For help anytime
you’re us ing EPSON
TWAIN Pro, click the
Help button.
The screen ex am ples
in this book are from
EPSON TWAIN Pro
for Macint os h. The
Window s s c reens
look a bit different, but
they cont ain the
same options. Any
exceptions are noted
in the text.
Window s 9 5, 98, N T 4. 0: EPSON TWAIN Pro(32-bit
)
Macintosh: EPSON TWAIN Pro
5 To open EP SON TWAIN Pro for scann ing, choo s e Import or Acquire
from the File menu and then select one of the following:
Window s 9 5, 98, N T 4. 0: TWAIN_32
Macintos h: TWAIN or TWAIN Acquire
The EPSON TWAIN Pro window appears.
Scanning from Your Application Softw are Page 14
Page 15
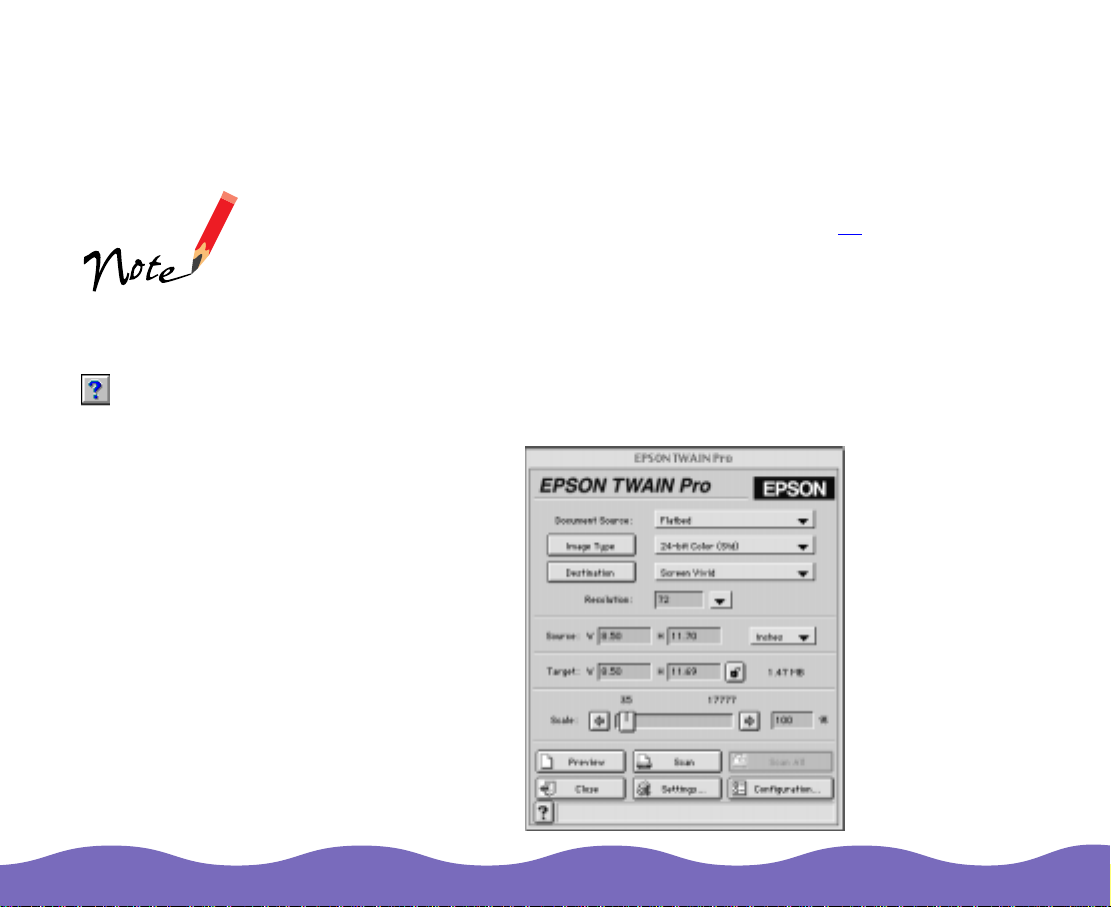
To select your scanning settings, see Selecting Basic Settings
Selecting Basic Settings
below.
Document Source
settings fo r optional
equipment appea r in
the list only when
that option is
installe d.
If you’re s ca nning
positive, reflective
originals with
the opt ional
transparency unit
and its reflective mat
installed, be sure to
select Flatbed as t he
Document Source
option.
For most scans, you need to check four basic settings: Document
Source, Image Type, De stina ti on, and Resolution. You’ll also probably
want to preview the image to check it before the actual scan; for
instructions, see Previewin g Your Scan .
1 If you’re scanning a document from the scanner’s document table,
select Flatbed (default
installed th e optional au to document fe eder or trans parency unit on
your scanner, selec t o ne of the following optio ns in t he Document
Source lis t:
Document Source
options Description
Auto Document Feeder For scanning documents using the auto
TPU for Neg. Film For scanning negative film (such as 35 mm
TPU for Pos. Film For scanning positive film (such as 35 mm
) as the Document Source setting. If you’ve
document feeder
film strips) with the transparency unit
slides) wi th th e t ransparen c y unit
Scanning from Your Application Softw are Page 15
Page 16
2 For best results, select an Image Type each time you scan. Image
types automatically select other TWAIN Pro settings and set the
ranges fo r yo ur Image Controls.
Image Type Defa ult settings
36-bit C olor
(HiFi)*
24-bit C olor
(Std)
24-bit C olor
De-screening
12-bit Gray
(HiFi)*
8-bit Gray
(Std)
Pixel De pt h: 36-bit Color; Sc anning Mo de: Best;
De-screening: Off
Pixel De pt h: 24-bit Color; Sc anning Mo de: Best;
De-screening: Off
Pixel De pt h: 8-bit Gray; S c anning Mod e: Best;
De-screening: On ; Dr opout: Non e
Pixel De pt h: 12-bit Gray; Sc anning Mo de: Best;
De-screening: Off; Dropout: None
Pixel De pt h: 8-bit Gray; S c anning Mod e: Best;
De-screening: Off; Dropout: None
Line Art Pixel Depth: Black & White; Scanning Mode: Draft;
Dropout: None; B/W Option: None; Halftone
: None
OCR Pixel De pt h: Black & White; Scanning Mode: Best;
Dropout: None; B/W Option: Text Enhancement
Technology
Copy & Fax Pixel Depth: Black & White; Scanning Mode: Draft;
Dropout : N one; B/W Op tio n: Auto Area Segmen ta t ion;
Halftone: Model A (H ard tone)
* The 36-bit Color (HiFi) and 12-bit Gray (HiFi) settings are available only for
certain applications, such as Adobe Photoshop 4.0 or 5.0 (full version).
Scanning from Your Application Softw are Page 16
Page 17

You can also change the settings for these options or save your own
custom Image Types. See Customizing Image Types
for more
information.
3 Now select th e output dev ic e w here you want to displa y o r print your
scanned im age from the Destination list. The s e destinatio ns
automatic ally select resolution
and sharpness sett ings appro priate for
the outpu t d ev ic e. Select one of t he f ollowing op t ions:
Sharpn es s se t ti ngs
range from -2 (most
unfocused) to 2
(sharpest).
Destination options Default settings
Screen Resolu t ion: 72 Draw ing/Halftone, 72 Photo;
Sharpness: 0
Screen Vivid Resolu t ion: 72 Draw ing/Halftone, 72 Photo;
Sharpness: +1
Prepress 175 lpi Resolution: 350 Drawing/Halftone, 350 Photo;
Sharpness: 0
Prepress 150 lpi Resolution: 300 Drawing/Halftone, 300 Photo;
Sharpness: 0
Prepress 133 lpi Resolution: 266 Drawing/Halftone, 266 Photo;
Sharpness: 0
Prepress 120 lpi Resolution: 240 Drawing/Halftone, 240 Photo;
Sharpness: 0
LineWork Scan R esolution: 1200 Drawing/Halftone, 600
Photo; Sharpness: +1
Stylus Photo Resolu t ion: 720 Drawing/Hal ftone, 360 Photo;
Sharpness: +1
Scanning from Your Application Softw are Page 17
Page 18
Destination options Default settings
Stylus Photo 700 Resolution: 720 Drawing/ H alftone, 360 Photo;
Sharpness: +1
Stylus Photo EX
Stylus C OLOR Resolu t ion: 720 Drawing/Hal ftone, 240 Photo;
Sharpness: +1
Stylus COLOR II
Stylus COLOR IIs
(Window s only)
Stylus COLOR 200
(Window s only)
Stylus COLOR 300
(Window s only)
Stylus COLOR 400
(Window s only)
Stylus COLOR 500
Stylus COLOR 600
Stylus COLOR 800
Stylus COLOR 850
Stylus Pro XL
Stylus Pro XL+
Stylus Pro 5000 Resolu t ion: 720 Drawing/Hal ftone, 360 Photo;
Sharpness: +1
Scanning from Your Application Softw are Page 18
Page 19
Destination options Default settings
Stylus 1500 Resolu t ion: 720 Drawing/Hal ftone, 240 Photo;
Stylus COLOR 1520
Sharpness: +1
Keep in mind that the
Resolution setting is
closely related to the
Target height and
width and Scale
settings, and
drastically affects
your file size.
Stylus COLOR 3000
EPL-C8000 Resolution: 600 Drawing/Halftone, 200 Photo;
Sharpness: +1
InkJet Printer Resolution: 720 Drawing/Halftone, 360 Photo;
Sharpness: +1
Laser Printer Resolu t ion: 600 Drawing/Halftone , 200 Photo;
Sharpness: +1
FAX Resolution: 200 Drawing/Halftone, 200 Photo;
Sharpness: +1
OCR Resolution: 300 Drawing/Halftone, 300 Photo;
Sharpness: 0
You can also change the settings for these options or save your own
custom destinations. See Customizing Destination Sett ings
for more
information.
4 Most of the time, the Image Type and Destination settings you
choose a ut om atically select the correct Resolution setting for your
image. If you need to change it, select a new setting from the
Resolution list, or enter a value in the Resolution textbox. The
resolutio ns lis t ed are: 50, 72, 200, 240, 266, 300, 350, 360, 400, 600,
720, 800, 1200, 3200, 4800, 640 0, and 12800 dpi
.
Scanning from Your Application Softw are Page 19
Page 20

5 It’s a go od ide a to pr eview y our i m age bef ore yo u actually scan s o you
can make any necessary changes. See Previewing Your Scan
for
preview in s tr uc t ions. See Advanced Scanni ng f or informat ion on the
rest of the TWAIN Pro settings.
6 When you’re ready to scan, click th e Scan button. The scanned image
appears in your appl ic at ion window.
7 If necessary, click the Close button to close the EPSON TWAIN Pro
window a nd return to yo ur application.
To modify or s av e your scan ned image u s ing your appl ic at ion
software, see your software documentation.
Scanning from Your Application Softw are Page 20
Page 21
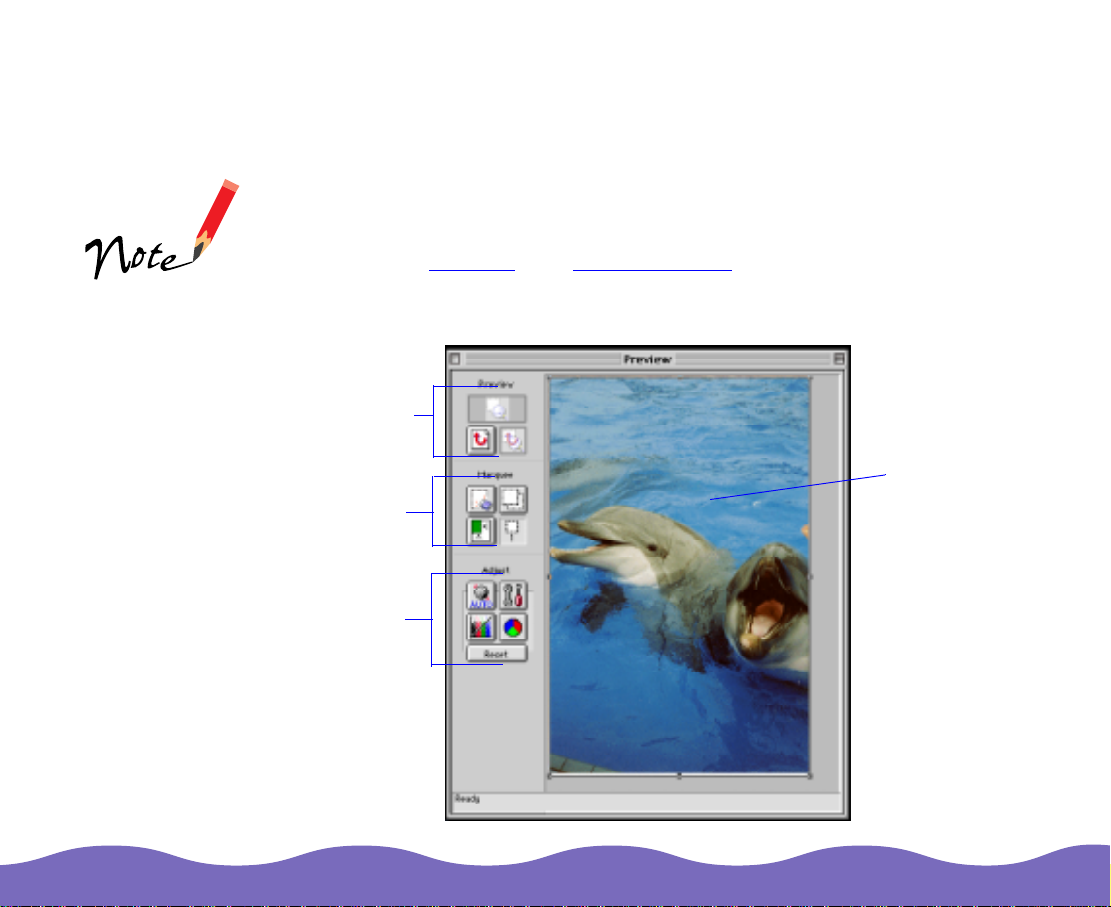
Previewing Your Scan
You can preview you r im age in a sepa rate Preview w indow to see the
effects of your settings before scanning. Previewing also allows you
to determine the widt h and height of the s ca nned imag e and the fin al
file size.
To crop the image or scan multiple portions of an image, you can preview
and use a m arquee
. See Using Marque es .
You cannot preview
an image t hat
exceeds available
memory or disk
space.
Although the image in
the Preview window
changes when you
modify settings, the
settings don’t affect
the real im age until
you scan it.
Click the Preview button to op en t he Preview w indow.
preview
zooming
options
marquee
options
adjust
options
preview
image area
Scanning from Your Application Softw are Page 21
Page 22

Previe w Zooming Op t ions
Click the Z oom Preview button to en large the act iv e m arquee.
See Using M arquees for m o re informa tion.
Click the Return to Full Preview button to restore the zoomed
marquee t o a full preview (available only when th e preview ima ge or
marquee is z oomed).
Click the Return to Zo om Preview button to rest ore the im age to the
previous zo om ed size (av ailable only w hen the ma rquee was zo om ed
previous ly ). Th is res t ores the zo om ed preview f rom memory, which is
quicker than clicking th e Z oom Preview button again.
Using Marquees
A marquee is a frame around an entire image, or a portion of an image so
you can sc an only the mo s t important part. You can even create multip le
marquees on one or mo re im ages and scan them one at a time, if your
applicat ion software s upports mu lt iple image windows .
To create a marquee, follow these steps:
1 Move the mouse pointer over the im age in the Preview wi ndow. The
pointer bec omes a cro s s h air.
2 Position th e pointer in the c orner of the area you w ant to select and
press the m ouse butto n.
Scanning from Your Application Softw are Page 22
Page 23
3 Drag the mo us e across the im age, creat ing a marqu ee (or fram e).
4 Release th e button whe n t he marquee c ont ains the ima ge area you
want.
If you need to adjust the marquee size or position, see Resizing and
Moving Marquees. To create additional marquees, see Creating Mu lti ple
Marquees. To de let e or duplica t e a m arquee , see Deleting a nd
Duplicating Marqu ees.
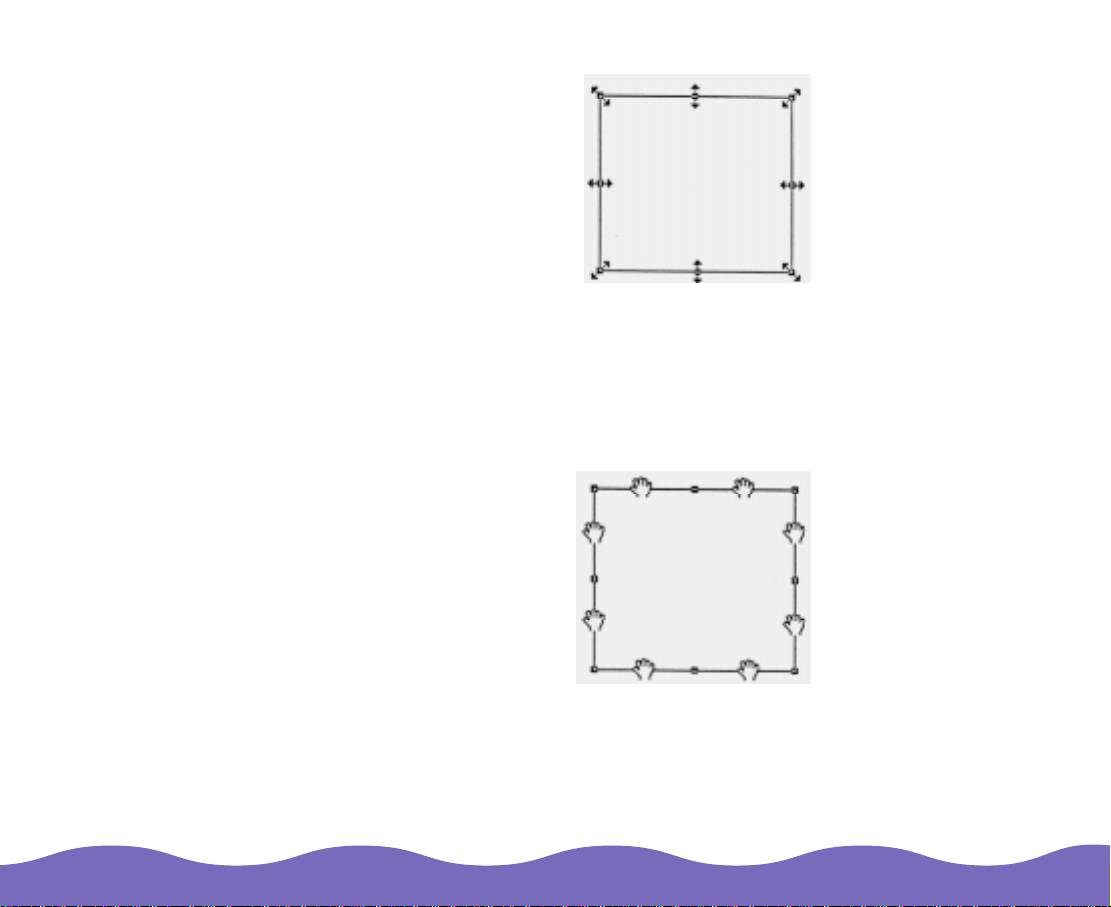
Resizing and Moving Marquees
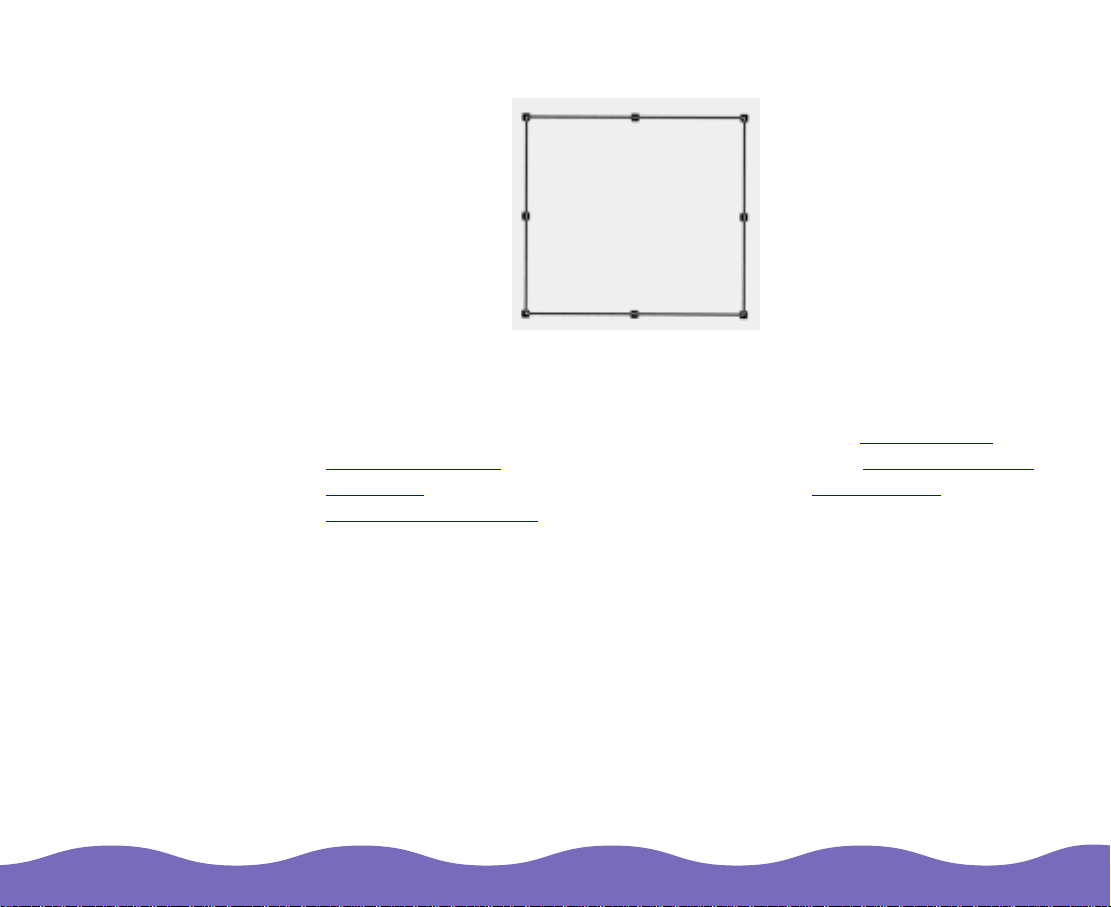
To resize a marquee, place the mouse pointer over any of the eight boxes
on its edge . The pointer ch anges to a double-he aded arrow . Cl ic k the
mouse bu t to n and drag the box up, down , sid ew ays, or diagonally to the
size you want.
Scanning from Your Application Softw are Page 23
Page 24
To resize th e m arquee proportion ally , press the Shift key and drag th e
box (Wind ow s only).
To move a marquee, place the mouse pointer anywhere on the edge of
the marquee. The pointer changes to a hand. Click the mouse button and
drag the ent ire marque e t o m ove it where yo u w ant it.
To limit mo ve m ent of the marquee to vertical or h oriz ontal mov em ent,
press the Shift key and drag th e m arquee up and down o r si de to side
(Windows only).
Scanning from Your Application Softw are Page 24
Page 25

Creating Mult iple Marquees
You can create multiple marquees in one image to sequentially scan only
the most important parts while ig noring the rest. You can also scan
multiple images with a m arquee o n each.
Marquees c an be different sizes and they can overlap. Additiona l
marquees c an be made any w here except on the frame of anot her
marquee. The
have been created.
To create an addition al m arquee, draw a new one a s d es c ribed in Using
Marquees or dup lic at e the active one as des c ribed in Deleting and
Duplicating Marqu ees.
T
otal Marq uees icon indicates ho w m ay m arquees
active
marquee
To distinguish the ac tive marque e f rom other ma rquees, ch ec k th e
marquee f rame. The a c tive marque e has eight small boxes on it. To
select a dif fe rent marquee as the ac tive one, mo v e t he mouse pointer to
Scanning from Your Application Softw are Page 25
Page 26

You can also delete
the active marquee
by pressing the
Delete key on your
keyboard.
the corne r of an inactive marquee. The pointer c hanges to a si ngle arrow
(Windows). Click the mouse button once to select it as the active
marquee.
Once you’ve created multiple marquees, you can create different settings
for each one and save them with a unique name for later use, if you want.
See Saving Custom Settings
When you’ve finished selecting your settings, you can batch scan all the
marquees at once using t he Scan All button. Click Scan All in the
EPSON T W AI N Pro windo w . TW AIN Pro lo ads each ma rquee into your
applicat ion as a separate image, one at a time. When you ’re finished,
close EPS ON TWAIN Pro and mod if y a nd save your images in y our
applicat ion.
for details.
Deleting and Duplicating Marquees
To delete a m arquee, mak e it the active m arquee (as des c ribed und er
Creating M ult iple Marqu ees
to delete it.
To create another marquee the same size as the active marquee, click
the Dup lic at e Marquee button.
). Then clic k t he Delete Marquee bu t to n
Scanning from Your Application Softw are Page 26
Page 27

Advanced Scanning
The instructions in this chapter tell you how to perform these advanced
scannin g operation s:
◗ Customizing Image Types
◗ Customizing Destination Settings
◗ Adjusting Source and T arget Image Siz es and scale
◗ Using Automatic Adjust ment Features
Exposure
◗ Adjusting Image Controls
shadow s
◗ Using Tone Correct ion
◗ Using Color Adjustments, such as saturation
◗ Saving Cus t om Settings
◗ Configu ring EPSON T W AI N Pro preview and color o pt ions
, such as Aut o Locate and Auto
, such as the exposure, highligh t s , an d
Advanced Scanning Page 27
Page 28

Most of the example
screens in this
chapter are from
EPSON TWAIN Pro
for Macintosh. The
Window s screens
look a bit d ifferent,
but the op ti ons are
the same, unless
noted in the text.
Customizing Image Types
You can ch ange the set ti ngs for the pre defined Image Type options in
EPSON T W AI N Pro or add new options of yo ur own.
To customize an image type or create a new one, click the Image Ty pe
button in the EPSON TWAIN Pro window. You see the Image Type dialog
box:
Windows
Macintosh
To chang e t he s ettings of one of the predefined im age types , select it
from the Image Type list, change the settings, and click Save.
Advanced Scanning Page 28
Page 29

If you’re running Windows, you can also create a new image type. Select
a predefined type with similar se ttings from the Image Type Name lis t ,
then type a name for your new image type in the box at the top of the list.
Change t he s ettings as necessary and click Sa ve.
To delete an image type, select it in the Image Type list and click Delete.
The table below describes the Image Type settings.
Image Type setting Options Description
Pixel D epth 36-bi t
Color For 36-bit color ima ges
24-bit Co lor For 24-bit color image s
12-bit Gray For 12-bits/pixel im ages in shades of gray
8-bit Gray For 8-bits/pix el images in s hades of gray
Black & White For 1 bit/pixel bl ac k and white ima ges
Scanning Mode Draft Scans faster and at a lower resolution
for drafts
Best Scans at th e highest quality
De-screening
ON Improves quality when s ca nning phot ographs an d
illustra ti ons printed in newspapers and magazines by
turning t he dots in the halftone screen proce s s in t o a
smoother pattern
OFF Turns descreening off
Advanced Scanning Page 29
Page 30

Image Type setting Options Description
Dropout
* None Includ es all c olor value s in a monochrome scan
B/W Op ti on
(Window s )
Black a nd W hite
Option (Macintosh)
Red R epresents red areas as wh it e in a monoc hrome sca n
Green Represen t s green areas as wh it e in a monoc hrome sca n
Blue Represen t s blue areas as w hit e in a monochrome sc an
None Selects no black and white scanning options
Text
Enhancement
Technology
Auto Area
Segmentation
Improves text rec ognition acc uracy and rem oves the
document background when performing OCR (Optical
Charac t er R ecognition) scanning
Separates text from graphics when scanning grayscale
images by applying a h alf t one algorith m t o im prove
quality fo r fa x and copy applications
Advanced Scanning Page 30
Page 31

Image Type setting Options Description
Halftone** None Lets the data format of your image determine the tone
Mode A (H ard
tone)
Mode B (Soft
tone)
Mode C (Net
screen)
Dither A (4 × 4
Conve rt s th e im age into a ha rd t oned distinc t im age of 1
and 2 bits/pixel/color
Conve rt s th e im age into a sof t er t one for images with
large ar eas of similar t ones (1 bit/pixel/color)
Repres ents image s in net screen, similar to newspaper
photographs (1 bit/pixel/ c olor)
Repres ents image s in a 4×4 Bayer dither
pattern
Bayer)
Dither B (4 × 4
Repres ents image s in a 4×4 spiral dither pattern
Spiral)
Dither C (4 × 4
Repres ents image s in a 4×4 net screen dither pattern
Net screen)
Dither D (8 × 4
Repres ents image s in an 8× 4 net screen dither patt ern
Net screen)
* Dropout is available only when the Pixel Depth setting is set to 8-bit Gray, 12-bit Gray, or Black & White.
** Half tone is available only when the Pixe l Depth setting is set to Black & White.
Advanced Scanning Page 31
Page 32

Customizing Destination Settings
You can ch ange the set ti ngs for the pre defined D es t ination options
available in EPSON TWAIN Pro or add new options of your own.
To customize a destination (output device) or create a new one, click the
Destination button in the EPS ON TWAIN Pro window . You see the
Destination dialog box:
To chang e t he s ettings of one of the predefined destinatio ns , s elect it
from the Destination Name list, change the settings, and click Save.
To create a new destination, type a name fo r it i n the box at the to p of th e
list, then change the settings as necessary and click Save.
To delete a destination, select it in the Destination Name list and click
Delete.
Advanced Scanning Page 32
Page 33

You can also select
the Resolution
setting from the list
on the EPSON
TWAIN Pro window.
Resolution is closely
related t o t he Ta rget
width an d height and
Scale settings. Keep
in mind that changing
one set t ing may
affect the others.
The resolution and sharpness (–2 = most unfocused to 2 = sharpest)
default settings for each of the predefined Destination options are listed in
the table b elow:
Destination options Default settings
Screen Resolution: 72 Draw ing/Halftone, 72 Photo;
Sharpne s s : 0
Screen Vivid Resolution: 72 Draw ing/Halftone, 72 Photo;
Sharpne s s : +1
Prepress 175 lpi Resolution: 350 Drawing/ H alftone, 3 50 Photo ;
Sharpne s s : 0
Prepress 150 lpi Resolution: 300 Drawing/ H alftone, 3 00 Photo ;
Sharpne s s : 0
Prepress 133 lpi Resolution: 266 Drawing/ H alftone, 2 66 Photo ;
Sharpne s s : 0
Prepress 120 lpi Resolution: 240 Drawing/ H alftone, 2 40 Photo ;
Sharpne s s : 0
LineWork Scan Resolution: 1200 Drawing/H alf t one, 600 Ph ot o;
Sharpne s s : +1
Stylus Photo Resolution: 720 Draw ing/Half to ne, 360 Pho to ;
Stylus Photo 700
Sharpne s s : +1
Stylus Photo EX
Advanced Scanning Page 33
Page 34

Destination options Default settings
Stylus C OLOR Resolutio n: 720 Drawing/ H alftone, 2 40 Photo;
Stylus COLOR II
Sharpne s s : +1
Stylus COLOR IIs
(Windows)
Stylus COLOR 200
(Windows)
Stylus COLOR 300
(Windows)
Stylus COLOR 400
(Windows)
Stylus COLOR 500
Stylus COLOR 600
Stylus COLOR 800
Stylus COLOR 850
Styl us Pro XL
Styl us Pro XL+
Styl us 1500
Stylus COLOR 1520
Stylus COLOR 3000
Stylus Pro 5000 Resolution: 720 Draw ing/Half to ne, 360 Pho to ;
Sharpne s s : +1
Advanced Scanning Page 34
Page 35

Sometimes the
values you select
may be rounded up or
down to retain the
proportions of your
image or marquee.
Destination options Default settings
EPL-C8000 Resolution: 600 Drawi ng/ H alftone, 2 00 Photo;
Sharpne s s : +1
Inkjet Printer Resolution: 720 Draw ing/Half to ne, 360 Photo;
Sharpne s s : +1
Laser Printer R es olution: 600 Drawing/ H alftone, 2 00 Photo ;
Sharpne s s : +1
FAX Resolution: 200 Draw ing/Half to ne, 200 Photo;
Sharpne s s : +1
OCR Resolution: 300 Draw ing/Half to ne, 300 Photo;
Sharpne s s : 0
Adjusting Source and Target Image Sizes
The Source width and height fields indicate the size of the ent ire preview
image or of the active marquee. You can ty pe in a n ew w id th an d he ig ht to
specify exactly how much of the image you want to scan.
measurement units
To change the unit of measurement used for the Source and Target
width and height fields, select inches, pixels, or cm (centimeters) from
the measurement units list.
Advanced Scanning Page 35
Page 36

The Source and
Target width and
height, Scale, and
Resolution settings
are all clos ely
related. Keep in mind
that changing one
setting may affect the
others. The width and
height se t ti ngs are
ignored if you scan
without first
preview ing the
image.
The Target width and he ight fields indicate the si ze of yo ur scanned
image usi ng the current s et t ings. The values in thes e fi elds chan ge as
you modify s et t ings. You ca n als o type in a sp ec if ic w idt h and height to
specify the target image size exactly.
lock button
file size
To lock the Target width and height values, click the lock button. Click it
again to unlock the values.
The file siz e indicator on t he right show s th e approxim ate size of th e
scanned im age in KB or M B.
Advanced Scanning Page 36
Page 37

The Scale, Source,
and Target width
and heig ht , and
Resolution settings
are all closely related.
Keep in mind that
changing one setting
may affect the others.
Scaling the Image
The Scale field indicates t he amount by w hic h an image is enlarge d or
reduced during scanning.
You can adjust the sca le by moving th e s lider, clicking the left or right
arrow, or ty ping a perce nt age in the Sc al e f ield.
The range of the
possible s ca le v alues
depend s on t he
Resolution setting.
Advanced Scanning Page 37
Using Automatic Adjustment Features
EPSON TWAIN Pro includes three automatic adjustment features to help
you quickly prepare yo ur preview im age for scanning, as described in
thes e s ec tions:
◗ Using Auto Loc ate
◗ Using Au to Ex posure
Page 38

Using Auto Locate
Click the Auto Locate button in the Preview window to crop
everything on the do cu m ent table ex c ept your imag e.
Auto Locate button
If you want t o s c an part of an im age, drag the m ouse pointer to crea t e a
marquee around th e area to be sca nned. (It doesn’t hav e t o be precise. )
Then click the Auto Locate button. The marquee automatically adjusts to
the area yo u defined.
Auto Locate button
Advanced Scanning Page 38
Page 39

The Auto Exposure
featu re is
automatically
enable d af t er a full
preview and zoom
previe
w.
If you have a Macintosh
and you can’t click the
Auto Ex pos ure b utt on or
adjust Image Controls,
click the Co nf iguration
button on the EPSON
TWAIN Pro Main
window to check the
Color Sy nc s et t ing. You
can’t use t hese tools if
Color Sy nc is s elected.
Using Auto Exposure
Click the A ut o Ex posure bu t to n on the Preview window t o
automatic ally adjust th e im age exposure. Auto Ex posure s et s th e
Exposure, Highlight, Gamma, an d Shadow se ttings in the Image
Controls dialog box and the Gray B al ance Intensity setting in the Color
Adjustment dialog box.
Adjusting Image Cont rols
Use the Image Controls to adjust the following settings:
◗ Exposure
◗ Gamma
◗ Highlight
◗ Shadow
◗ Threshold*
Advanced Scanning Page 39
Page 40

The Auto Exposure
feat ure ove rrid es any
Image Controls
setting you select.
If you have a Macintosh,
you can’t adjust Image
Controls if Color Sync is
selected in the
Configu rat ion dialog
box.
Click the Image Controls button to display the Image Controls dialog
box:
setting fields
eyedropper
buttons
and sliders
To change the Image Controls, move the slider for the setting or click the
left or right ar rows. You ca n also t y pe a value in the fiel d on th e right . See
Using the Ey edropper Buttons
for instruc t ions on using the eyedropper
buttons.
Advanced Scanning Page 40
Page 41

The Image Controls settings ar e describe d in t he table bel ow .
Image Controls settings Description
Exposure Select the intensity of light in the image as
determ ined by a com bination of t he
Highlight and Shadow settings from –10
(darkes t ) t o 20 (brighte st)
Gamma Select the amount of contrast in your
image f rom 50 (lowest ) to 500 (highes t )
Highlight Select th e am ount of det ail v is ible in
the brightest area s of the im age from 61
(lightes t ) to 490 (darkest )
Shado w Select th e am ount of det ail v is ible in
the dark es t areas of you r im age from 0
(lightes t ) to 60 (darkest )
Threshold* Select the point at which the gray areas in
the ima ge are scanned as either black or
white from 0 (darkes t ) t o 255 (lightest )
* The Threshold setting is available only when the Pixel Depth setting is set to
Black & White
setting is active, the rest of the Image Controls are not available.
and the Halftone setting is set to
None
. When the Threshold
Advanced Scanning Page 41
Page 42

Using the Eyedrop per Buttons
The Highlight and Shadow sett ings include an eyedropper but to n y ou
can use to s elect particular colors in t he image for us e as the hi ghlight
and shadow colors.
Click an eyedropper button and move the mouse pointer over the preview
image; the pointer changes to an eyedropper icon. T hen click on a co lor
that you wa nt t o us e as the highlight (lightest color) or shadow (darkest
color) for the entire image. The color box beneath the setting turns to that
color.
Using Tone Correction
You can use Tone Correction to change the pixel brightness in the
midtone s, highlights, and shado w s o f a n im age. This p roduces g reater
detail in the im age without dramatica lly c hanging it.
Advanced Scanning Page 42
Page 43

Click the Tone Correction button on the Preview window to display
the Tone Correction dialog box .
tone curve
output
checkboxes
and fields
tone correction
types list
channels radio
buttons
Each point on the tone cu rv e represen t s the Output checkbox
characteristic to its right. For exam ple, the top point on the cu rv e
represent s th e Highlight characteristic.
In addition , the Channels rad io buttons indicate the color (s ) th at the ton e
curve will m odify: red, green, blue , o r all t hree colors.
Advanced Scanning Page 43
Page 44

Once you’ve selected the color you want to modify using the Channels
buttons, use these methods to change the tones:
◗ Drag points on t he tone curv e t o adjust the tone value.
◗ Type a number in the field for an Outp u t setting an d c lic k outside the
Tone Correction dialog box. To lock a setting in place so it’s unaffected
by chang es in ot her setting s , clic k it s ch ec k box. The set t ing will not
change unless you d rag its point on th e t one curve.
◗ Select a setting from the tone correction type list. Select Linear,
Lighten, Darken, Flat Contrast, High Contrast, or Open Shadow.
You can als o c reate your ow n custom t one correct ion settings , as
describe d below.
Customizin g Tone Cor rection Settings
To save a custom tone correction setting, first make the changes on the
Tone Correction dialog box. The tone correction setting in the list changes
to User Defined. Change the name in the list box to the one you want to
use for your custom setting. Then click Save.
To delete a se t tin g, s elect its nam e in t he tone correction list and click
Delete.
Advanced Scanning Page 44
Page 45

Using Color Adjustments
You can adjust the Gray Balance Intensity and Saturation of colors in a
color image using the Color Adjustment tools.
The Col or
Adjustment settings
are disabled if you
click the Scan button
withou t pr ev iewing
the imag e.
If the Pixel Depth in
the Image Type
dialog b ox is se t to
8-bit Gray, 12-bit
Gray, or Line Art,
you cannot select the
Color Adjustment
button.
Click the Color Adjustment button on the Preview window to display
the Color A djustment dialog box :
Advanced Scanning Page 45
Page 46

Changing the Gray Balance Intensity
The Gray Balance Intensity setting adjusts the gray tones in the image
to appear m ore neutra l. You may need to adjus t this s et t ing if the three
colors that are mixed to get her to form the neutral gray are unbalanced.
To change the Gray Balance Intensity, follow these steps:
1 First click the ey edropper button and m ove the mo us e pointer onto
your prev iew im age. The m ouse pointer changes to an eye dropper
icon.
2 Select a color that you want removed from the neutral gray tones in the
image in the Preview window. The original and corrected colors appear
in the boxe s bes ide the eyedropper but t on.
3 Adjust the gray level (from 0 to 100) by moving the slider or clicking the
left or right arrow. You c an also type a va lue in the fie ld on the right.
Changing the Saturation
Changing the satur at ion level of co lors increas es or decreases t he
amount o f color in each hue. Less sat urated colors are more pale, while
saturated colors are ric her.
Adjust the s at uration level from –100 (less sat urated) to 100 (mor e
saturated) by movin g t he slider or clic k ing the left or right arrow. You can
also type a v alue in the field on the righ t.
Advanced Scanning Page 46
Page 47
Saving Custom Settings
You can save a custom set of all the EPSON TWAIN Pro settings for your
scan so yo u c an easily sel ec t it when you pe rfo rm a s im ilar scan lat er.
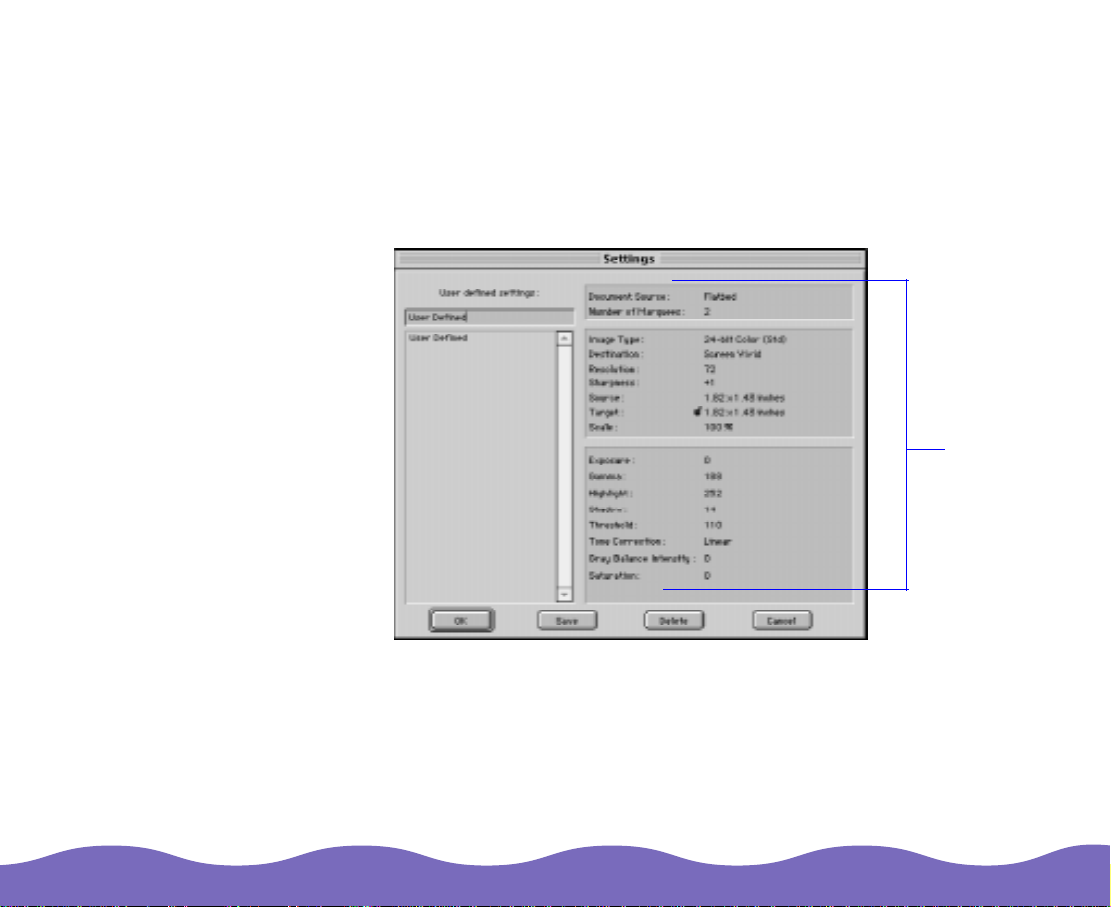
Click the Sett ings button in the EPSON TWAIN Pro window to display the
Settings dialog box :
current
settings
The currently selected EPSON TWAIN Pro settin gs are listed on the ri ght.
To save these settings, click Save (you can type a new name for the
group to replace the name User Defined). When you want to use this
settings group again, cl ic k S ettings, select the group, and click OK.
To delete a c ustom se tting group, cli ck its name in the list; t hen click Delete.
Advanced Scanning Page 47
Page 48

Configuring EPSON TWAIN Pro
You can co nf igure EPSON TWAIN Pro’s prev iew and color o pt ions so
they work the way you want whenever you use the program.
Click the Configuration button to display the Co nf iguration dialog box:
Macintosh
To specify the size of the Preview window, select Large, Medium, or
Small in the Preview Window Size list.
If you want to automatically save the preview image and all the scanning
settings when you preview, scan, or close EPSON TWAIN Pro, click the
Save Preview Imag e and Setti ngs checkbox.
Click the Fast Preview checkbox to enable hig h-speed lo ading of the
preview image.
Advanced Scanning Page 48
Windows
Page 49

If you have the Artist
or Profes s ional mode l
of the scanner, use
Monaco Profiler Lite t o
achieve better color
management. Se e t he
electron ic m anual on
your Monaco Profiler
Lite CD-ROM for
details.
Don’t move or rename
the Gt9600t.icm or
EPSON GT-9600 TPU
profiles unless you
have a transparency
unit.
To automatically ad jus t th e ex posure ea c h t im e y ou preview t he image,
click the Auto Exposure on Preview button. See Using Auto Exposure
for more in fo rm ation.
You can sp ec if y an exact size fo r im age areas se lec t ed with the
eyedropper options in the Image Controls and Color Adjustment dialog
boxes from t he Eyedrop per Sampli ng Area list . S elect 1 × 1 pixel, 3 × 3
pixel, or 5 × 5 pixel.
If you’re experienced with color management software, you can use the
Windows ICM featu re (on Windo w s 95 or 98) or the ColorSync feature
(on a Macin t os h).
To experiment with EPSON TWAIN Pro’s ICM or ColorSync feature,
make sure y ou move or rename EP SON TWAI N Pro’s origin al profiles
and repla c e th em w it h new ones as f ollows:
In Windows, move or rename the Gt9600r.icm file (and th e
Gt9600t .icm file, if you have a transparency unit) in the
Window s\System\ C olor folder. T hen name and store yo ur new
profile(s ) w ith th e s am e name(s) in the same fo lder.
On a Macin t os h, m ov e or renam e t he EPSON GT-9600 profile (and
the EPSON GT-9600 TPU profile, if you have a t ranspare nc y unit) in
the Syste m Fo lder\Preferences\ColorSync Profiles fo lder. Then name
and store yo ur new profile(s) with the s ame nam e(s ) in the same
folder.
Be sure to increase the Gamma value in the Image Con tr ols t ool, if
necessary .
Advanced Scanning Page 49
Page 50

Troubleshooting
If you encounter any problems using EPSON TWAIN Pro, try the
solution s in th es e s ections:
◗ Problems U s ing EPSON T W AI N Pro
◗ Problems with Image Quality
If the information her e doesn’t help you solve the probl em , ch ec k w it h
your dealer or contact EPSON. See Where to Get Help for contact
information.
Problems Using EPSON TWAIN Pro
The rows in the Screen Calibration dialog box never seem to match closely enough.
Problem Solution
Your monit or
adjustments may
be off.
Troubleshooting Page 50
Try adjust ing your monitor’s bright ness an d c ont rast settin gs .
Page 51

When you select a TWAIN source, EPSON TWAIN Pro isn’t listed.
Problem Solution
Either EPSON TWAIN
Pro wasn ’t in s ta lled or
it wasn’t installed
correctly.
Reinstall t he software f ollowing the instruct ions in
Your Scanner
EPSON TWAIN Pro doesn’t start.
Problem Solution
The scanner isn’t
ready.
Your system does not
meet the minimum
requirements.
EPSON T W AI N Pro
needs mo re m emory.
EPSON T W AI N Pro is
not selected as your
TWAIN source.
Your SCSI settings are
incorrect.
Make sure your scanner is turned on and the cables are connected
properly.
Make sure your computer, scanner, and software are compatible and
meet the s pec if ic ations under System Requirements
Make sure EPSON TWAIN Pro can access enough system memory.
See the se c tio n on memory allocation in y our comput er manual.
EPSON TWAIN Pro may not be selected as the TWAIN source in your
applicat ion. See Basic Scanning
You may h av e s elected th e w rong SCSI ID during setup. Check t he
settings for your scanner and any other SCSI devices you may have.
Then reinstall EPSON TWAIN Pro following the instructions in
Up and Using Your Sc anner
Setting Up and Using
.
.
for instructions on selecting it.
Setting
.
Troubleshooting Page 51
Page 52

Problem Solution
A system error has
occurred.
Window s h as detected
new hardware.
An error condition may have caus ed your appl ic at ion or the TWAIN
source to stop working correctly. Save any documents in process, close
any open applications, and exit Windows. Restart Windows, then start
your applic ation and try again.
Sometimes an error condition may cause the computer to display a
message telling you that your scanner is not recognized. If this happens,
reset your s c anner by pu sh ing the RESET button. Then restart your
computer and try again.
If you are using Windows 95 or 98, its hardware detection utility may not
have corr ec t ly det ected the S C SI c ont roller. Res t art W indows a nd s ee
the Windo w s H elp utility for ins t ruc t ions on detec t ing new hardware.
Troubleshooting Page 52
Page 53

The scanner does not start scanning.
Problem Solution
The scanner isn’t
ready.
You have a system
interrupt conflict
(Windows).
Your INF file may not
be loaded correctly
(Windows).
You’re scanning a large
image and running out
of system memory.
You don’t have enough
hard disk space.
Check if the scanner’s READY light is on. If no t, press the RESET
button an d t ry again.
If you have ot her expansion cards in y our comput er, m ak e sure th ey ’re
not set to the same in terrupt level or I/O address as the interface ca rd for
your scanner. See your comput er manual and interfac e card manual.
Use Add/R emove Programs in th e W indows C ont rol Panel to uninstall
EPSON T W AI N Pro, then reinstall it. See
Scanner
for installation instr uc t ions.
Setting U p and Using Your
If the image you’re scanning is too large or if your system has a
minimum amount of m em ory installe d, y ou may run out of m em ory.
You’ll usually get an error message or your system locks up when this
happens. Reduce the image size or resolution and try scanning again. If
you still can’t scan the image, add more system memory.
On a Macin t os h, y ou can assig n additiona l m em ory to the ap plication
itself. See yo ur Macinto sh document at ion for deta ils .
®
If you’ve ju st s c anned a large image in P hotoshop
and then
immedia te ly s ca nned anot her, Photos hop may no t hav e released th e
memory allocated fo r t he first image. Select Purge in Photoshop’s Edit
menu, or close Photos hop, resta rt it, and try scanning aga in.
Try reducing the document size, scanning fewer pages at once, or
deleting unused files on your hard disk. If you’re running Windows,
empty your Recycle Bin. If these methods don’t work, see your system
docume nt at ion for more informatio n about fre eing hard dis k sp ac e.
Troubleshooting Page 53
Page 54

You have trouble scanning multiple images.
Problem Solution
Your app lic at ion
program doesn’t
support multiple image
scannin g.
You may not have
enough system
memory or hard disk
space.
Some application programs don’t support scanning of multi ple images.
When you try to batch scan or use the optional auto document feeder
with this type of program, you get an error message or the system locks
up. Check th e program d oc um entation and, if necessary, us e another
program f or batch scanning.
Try the follo w ing:
◗ Reduce the size or resolution of your images, or scan fewer pages
at once.
◗ If you’re running Win dows, emp t y yo ur R ecycle Bin .
◗ Delete un us ed files on yo ur hard disk
◗ Add system memory. If you have a Macintosh, you can assign
additional memory to the application itself. (See your Macintosh
docume nt at ion for details . )
If these methods don’t work, see your system documentation for more
information about freeing system memory or hard disk space.
Troubleshooting Page 54
Page 55

You cannot scan images at all or only a few dots appear in the scanned image.
Problem Solution
You may have selected
incorrec t sc an settings.
Select different EPSON TWAIN Pro settings. You may have selected an
incorrect Image Type or Destination setting, or the Exposure,
Highlight, an d Tone Correction settings may be inappropriat e fo r yo ur
image. If Image Type is set to Line Art, try decreasing the Threshold
setting.
Problems with Image Quality
Images are very dark and without details.
Problem Solution
Some EPSON TWAIN
Pro settings may be set
incorrectly.
If the Halftone
not to None.
Check that the Destination (output device) is set correctly. Try setting
Destination to Screen or Screen Vivid if your printer is n’t lis t ed.
Change the Exposure, Tone Correction, and Shadow settings to
lighter va lues and scan th e im age again.
Some application s of tware does not s upport 36-bit color. If you set your
Image Type to 36-bit Color, change the setting to 24-bit Color. Then
scan aga in.
setting is available, make sure it is set to a halftone mode,
Troubleshooting Page 55
Page 56

The entire image is distorted or blurred.
Problem Solution
The document isn’t
position ed c orrectly on
the scanner’s
document table.
Make sure t hat the docu m ent is place d fl at against the d oc ument table.
You may have moved the document during scanning. Check the position
of the docum ent.
See that the scanner is not tilted or pl ac ed on an uns ta ble surface.
Part of the image is distorted or blurred.
Problem Solution
The document isn’t
position ed c orrectly on
the scanner’s
document table.
The document table is
dusty or dirty.
There may be IRQ
(interrupt request)
conflicts within your
system.
Part of the original ma y b e w rinkled, wa rped, or not in c ontact with the
document table. Be sure the document is flat.
Turn the sc anner off and unplug th e power cable, then ge nt ly w ipe the
document table with a soft, dry, lint-free cloth.
Check your operating system manual and electronic help files for
instructions on how to resolve IRQ conflicts.
Troubleshooting Page 56
Page 57

Color is pat chy or distorted at the edges of the document.
Problem Solution
The document isn’t
position ed c orrectly on
the scanner’s
document table.
If the original is very thic k or w arped at the edges, the edges of th e
image ma y be discolored. Cover the edges of th e original with opaque
paper to av oid interference from out s ide light.
If part of the original is ou t si de t he document table , the edge may be
discolore d. C hange the pos it ion of the original.
The image is faint or out of focus.
Problem Solution
The document isn’t
position ed c orrectly on
the scanner’s
document table.
Some EPSON TWAIN
Pro settings may be set
incorrectly.
Your monit or isn’t
calibrate d or isn’t
adjusted co rrectly.
Make sure the document is placed flat on the document table.
Check your Tone Correction setting and/or select a da rk er Exposure
setting.
Make sure y ou have calibrated your monitor t o y our scann er as
describe d in
monitor’ s b rightness a nd c ontrast set t ings.
Setting U p and Using Your Scanner.
Also check your
Troubleshooting Page 57
Page 58

A line of dots is always missing on the scanned image.
Problem Solution
Your print heads are
dirty.
Your scanner may be
malfunctioning.
If this happens only on your printed image, your printer’s print head may
need cleaning; see y our printer manual.
If this happ ens on both y our screen and printout, the scan ner’s senso r
may be malf unctioning. Consul t your dealer.
The colors on the monitor seem different from those of the original image.
Problem Solution
Your monit or may not
be calibrat ed correctl y .
Your Destination
setting may be
incorrect.
Your system’s color
matching may be
affecting your results.
Depending on your mo nit or, its resolution
EPSON TWAIN Pro settings, the screen colors may differ from the
original colors. This is normal, esp ec ially if the co lors in the print ed
image mor e clo s ely m at c h th e original. Mak e su re y ou’ve perform ed the
screen calibration a s des c ribed in
For best results on basic scans, select Screen or Screen Vi vi d as your
Destination setting.
Check the co lor matchin g and color management capabilities of your
computer, display adapter, and software. Some computers can change
the color palette to adjust colors on your screen. (See your software and
computer manuals f or details.)
Exact ma tching of colors on your m onitor, sca nner and printer is very
difficult. If you have the Artist or Professional model of the EPSON
Expression 800, use Monaco Profiler Lite to set up ICC profiles for these
devices. See the electronic manual on the Monaco Profiler Lite CD-ROM
for details.
Setting Up and Using Your Scanner
/color settings, and your
.
Troubleshooting Page 58
Page 59

Printed colors are different from those in the original image.
Problem Solution
You may need to use a
color corr ec t ion
Your system’s color
matching may be
affecting your results.
mode.
Colors in the printed image may not match th e c olors of the original
image ex ac t ly bec ause the scanning and printing proc esses us e
different color interpreting technologies. Use the ICM (Windows) or
ColorSync (Macintosh) features in EPSON TWAIN Pro to more closely
match the colors. (See Configuring EPSON TWAIN Pro
Exact ma tching of colors on your m onitor, sca nner and printer is very
difficult. If you have the Artist or Professional model of the EPSON
Expression 800, use Monaco Profiler Lite to set up ICC profiles for these
devices. See the electronic manual on the Monaco Profiler Lite CD-ROM
for details.
The printed image is larger or smaller than the size of the original.
Problem Solution
You may have used the
Zoom Preview feature.
The Scale slider is set
to scale the im age at a
percenta ge greater
than or less than 100%.
Check the im age size sett ings in your application and EPS ON TWAIN
Pro. Don’t use the size of the image on your monitor to judge the printed
size.
Set the Sc al e s lider on the E PSON TWA IN Pro main window to scale
the im age to 100% .
for instru cti ons.)
Troubleshooting Page 59
Page 60

The colors of the preview for your negative film image look strange.
Problem Solution
The wrong Document
Source se t tin g is
selected.
The film guide or slide
transpar ency guide
affects the exposure of
the scanning area.
Make sure you select TPU for Neg. Film as the Document Source
setting.
The scanner software perceives the dark film guide frame as white,
which alters the expo s ure of the scanning are a and causes t he scan to
appear dar ke r. To see the co lors that will actually be scanned, selec t an
area by clicking and dragging the mouse over the preview, then click the
zoom pre v iew button.
The printer can’t print the image, or the printout is garbled or isn’t an image.
Problem Solution
Your printer and
computer may not be
securely connected.
Your softw are is not
installed co rrectly for
your print er.
Check tha t th e printer is properly connected to t he c omputer and is
correctly se t up; se e y our printer ma nual.
Check tha t yo ur application software is properl y in s ta lled and set up for
your print er; s ee your appl ic at ion software manual.
Troubleshooting Page 60
Page 61

Moiré (crosshatch) patterns appear in the scanned image.
Problem Solution
You have s c anned a
document with halftone
patterns.
To minimize moiré patterns, try the following:
◗ Place a transparent sheet between the document and the document
table to un fo c us th e im age sligh tly.
◗ Move or angle the do c um ent slight ly .
◗ Adjust th e Sharpnes s s et ti ng t o a lower value to unfo cu s th e im age.
See Customizing D es t ination Sett ings
◗ Chang e t he Scale setting slightly .
◗ In the Image Type dialog box, make su re th e Sc anning Mo de option
is set to Best and the De-s c reening opt ion is set to On. See
Customizing Image Types
for details.
for more information.
Troubleshooting Page 61
Page 62

Glossary
bit Short for bin ary digit. The sma lles t unit of data in com put er proces s ing. A
bit can represent two values, on and off, or 1 and 0.
bit/pixel T he unit that in dic ates the nu m ber of bits allo c at ed for a pixe l. Th e larger
the value , the more detail a pixel can represen t.
color correction A m ethod of adjusting the c olor image da t a fo r a particul ar t y pe of device
so that the reproduction results c om e close to the original c olors.
default A set of values us ed when no ot her selectio ns have been ma de.
De-screening Counters the effect of the screen process on your image and turns the
dots into a s m oother patt ern. De-screening is us eful for scanning
photographs and ill us t rat ions printed in newspapers or m agazines to
improve los t res olution or sharpness.
dither A process in which software or an output device simulates continuous
tones with groups of dots.
dpi Dots per inch. A unit of measurement for resolution. The higher the value,
the higher t he resolution.
Dropout An EPSON TWAIN Pro option that lets you select a color for the scanner
to ignore.
Halftone A method of us ing dot patte rns t o represen t an im age.
Glossary Page 62
Page 63

marquee A sizeable and moveable frame on a prev iew im age that identifies the
part select ed for scann ing.
monochrome Black and white ima ges, or imag es represented only by th e intensity of
luminosi ty.
pixel Short for pic tu re element. Ev ery image is co m posed of a num ber of
pixels. Pix els are also counted in uni ts of dots.
resolution Indication of how finely an image is resolved into pixels. Measured in dots
per inch (dpi), pixels p er inch (ppi), or s amples per inch (spi).
scan An operation performed by the sensor and the carriage of a scanner. The
sensor “re ads” the colo rs in an image, and sends t he c olor inform ation to
the computer as digit al data.
Threshold An EPSON TWAIN Pro option that sets the point at wh ic h gray values in
an image are represe nt ed as either black or whi te .
Glossary Page 63
Page 64

Index
A
Accessories, EPSON, 12
Auto Area Segmen ta ti on, 6
Auto docu m ent feeder
ordering , 12
settings, 15
Auto Exposure, 39, 40, 49
Auto Locate, 38
Automa tic adjustme nt fe at ures, using ,
37
to 39
B
Batc h scanni n g, 26, 38, 54
Blurred image, 56
C
Calibration problems, 50, 57 to 58
Color
buttons, 42
Color Adjustment settings, 45 to 46
correction options, 59
managing, 49
problems, 57 to 60
ColorSync, 49
CompuServe, 10
Configuration settings, 48 to 49
Contra s t, adjusting, 41, 42
Custom settings, saving, 26, 47
D
Destinat ion setting , 17 to 19, 55
Destinations, customizing, 32 to 35
Document position problems, 56 to 57
Document Source setting, 15
Downlo ad Service, 10
E
EPSON
Accessories, 12
autom at ed telephon e s ervices, 11
electronic support services, 10 to 12
telephone support, 12
Exposure
adjusting automatically, 39
adjusting manually, 41
Exposure setting, 55
Index Page 64
Page 65

F
Faint image, 57
FaxAdvice, EPSON, 11
Features, 6
FTP site, 10
G
Gamma setting, 41
Gray Balance Intensity setting, 45to 46
H
Halftone setting, 31
Help, EPSON, 10 to 12
Highlight, adjusting, 41 to 42
I
ICM , 49
Image Controls
adjusting, 39
default set t ings, 16
Image quality problems, 55 to 61
Image siz e, adjusting, 35 to 37, 59
Image Ty pe s etting, 15 to 19
Image types, customizing, 28 to31
Internet s upport numbers, 10
to 42
M
Macintosh system requirements, 8
Main window, 14
Manual, how to use, 9
Marquees
creating automatically, 38
creating manually, 22 to 23
deleting, 26
duplicating, 26
moving, 24
multiple, 25 to 26
resizing, 23to 24
using, 22 to 26
Memory problems, 51, 53 to 54
Moiré patterns, 61
Monitor
Macintosh, 8
Windows, 7
N
Negative film, scanning, 15
O
Options , ordering, 12
Out of focus image, 57
Output device, selecting, 17 to 19, 55
Index Page 65
Page 66

P
Photoshop problems, 53
Pixel Depth setting, 29, 31, 41, 45
Previewing
configur at ion options, 48
images, 21 to 26
zooming options, 22, 59
Printer problems, 59, 60
Problems
batch scanning, 54
blurred image, 56
color matc hing, 58 to 59
faint or out of fo c us im age, 57
image quality, 55 to 61
line of dots is m is s ing, 58
scanner does not start, 53
screen calibration, 50
using TWAIN Pro, 50 to 55
to 49
Q
QuickTime, 8
R
Refe rral Service, EPSON, 11
Requirements, system, 7
Resolution setting , 17 to 19, 33 to 35
S
Saturation setting, 45, 46
Scale se t tin gs , 19, 33, 36, 37
Scanning
advanc ed, 27
basic, 13 to 20
from application software, 13 to 26
multipl e im ages, 25 to 26, 38, 54
previewing, 21 to 26
SCSI interface
Macintosh, 8
proble m s , 51
Windows, 7
Service, 10to 12
Setting s
adjusting gray tones, 45
adjusting image size, 35 to 37
adjusting saturation, 45 to 46
automatic adjustment tools, 37 to 39
correcting tone, 42 to 44
default Destination settings, 33to 35
Exposure, 41
Gamm a (c ontrast), 41
Highlight, 41, 42, 44
Image Type options, 28 to 31
saving custom settings, 47
selected incorrectly, 55, 57
selecting basic, 15 to 20
Shadow, 42
Thresh old, 41
Shadow s etting, 41, 55
to 49
to 46
Index Page 66
Page 67

Size, adju s ti ng im age, 35
Software installation problems, 51, 60
SoundA dv ic e, EPSON, 11
Source se t tin gs , 35 to 37
Support, 10 to 12
System interrupt conflicts, 53
System requirements
Macintosh, 8
Windows, 7
to 37
T
Target set t ings, 17 to 19, 32 to 37
Technical support numbers, 10 to 12
Text Enhancement Technology, 6
Thresho ld s et t ing, 41
Tone Correction settings
customizing, 44
problems, 55
using, 42 to 44
Transp arency unit
orderin g, 12
scanning reflective documents, 15
settings, 15
Troubleshooting, 50 to 61
TWAIN Pro
access ing from application so ftw are,
13
to 14
configu ring, 48 to 49
problems using, 50 to 55
TWAIN source, selecting, 14, 51
W
Window s s yst em require m ents, 7
World W ide Web site , 10
Z
Zoomin g options, 22, 59
Index Page 67
 Loading...