

Page 1
Easy Interactive Tools Operation Guide
Page 2
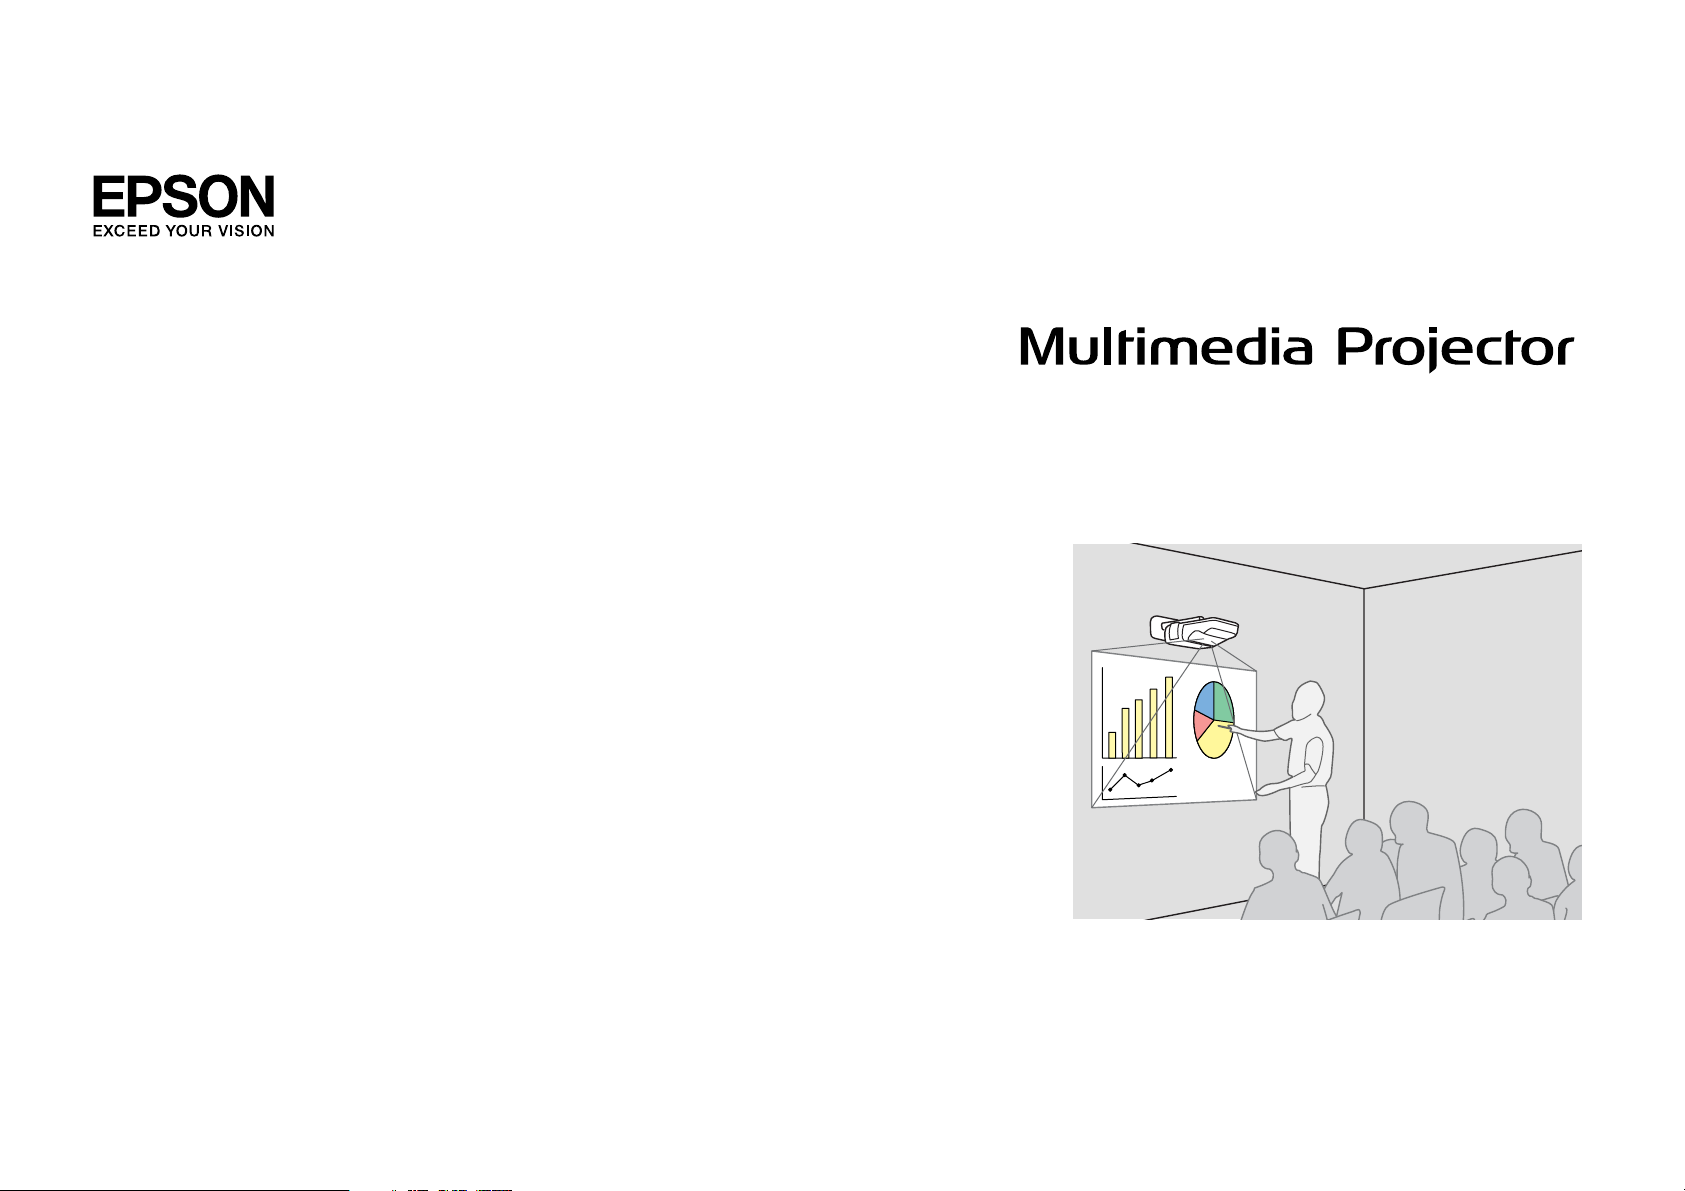
Using Easy Interactive Tools
Easy Interactive Tools is a dedicated application software and works as part of the Easy Interactive Function.
Easy Interactive Tools allows you to electronically annotate your document or projection screen by using the pen supplied to highlight key points and draw on
the projection screen while projecting. It will make your presentations or lessons much more compelling.
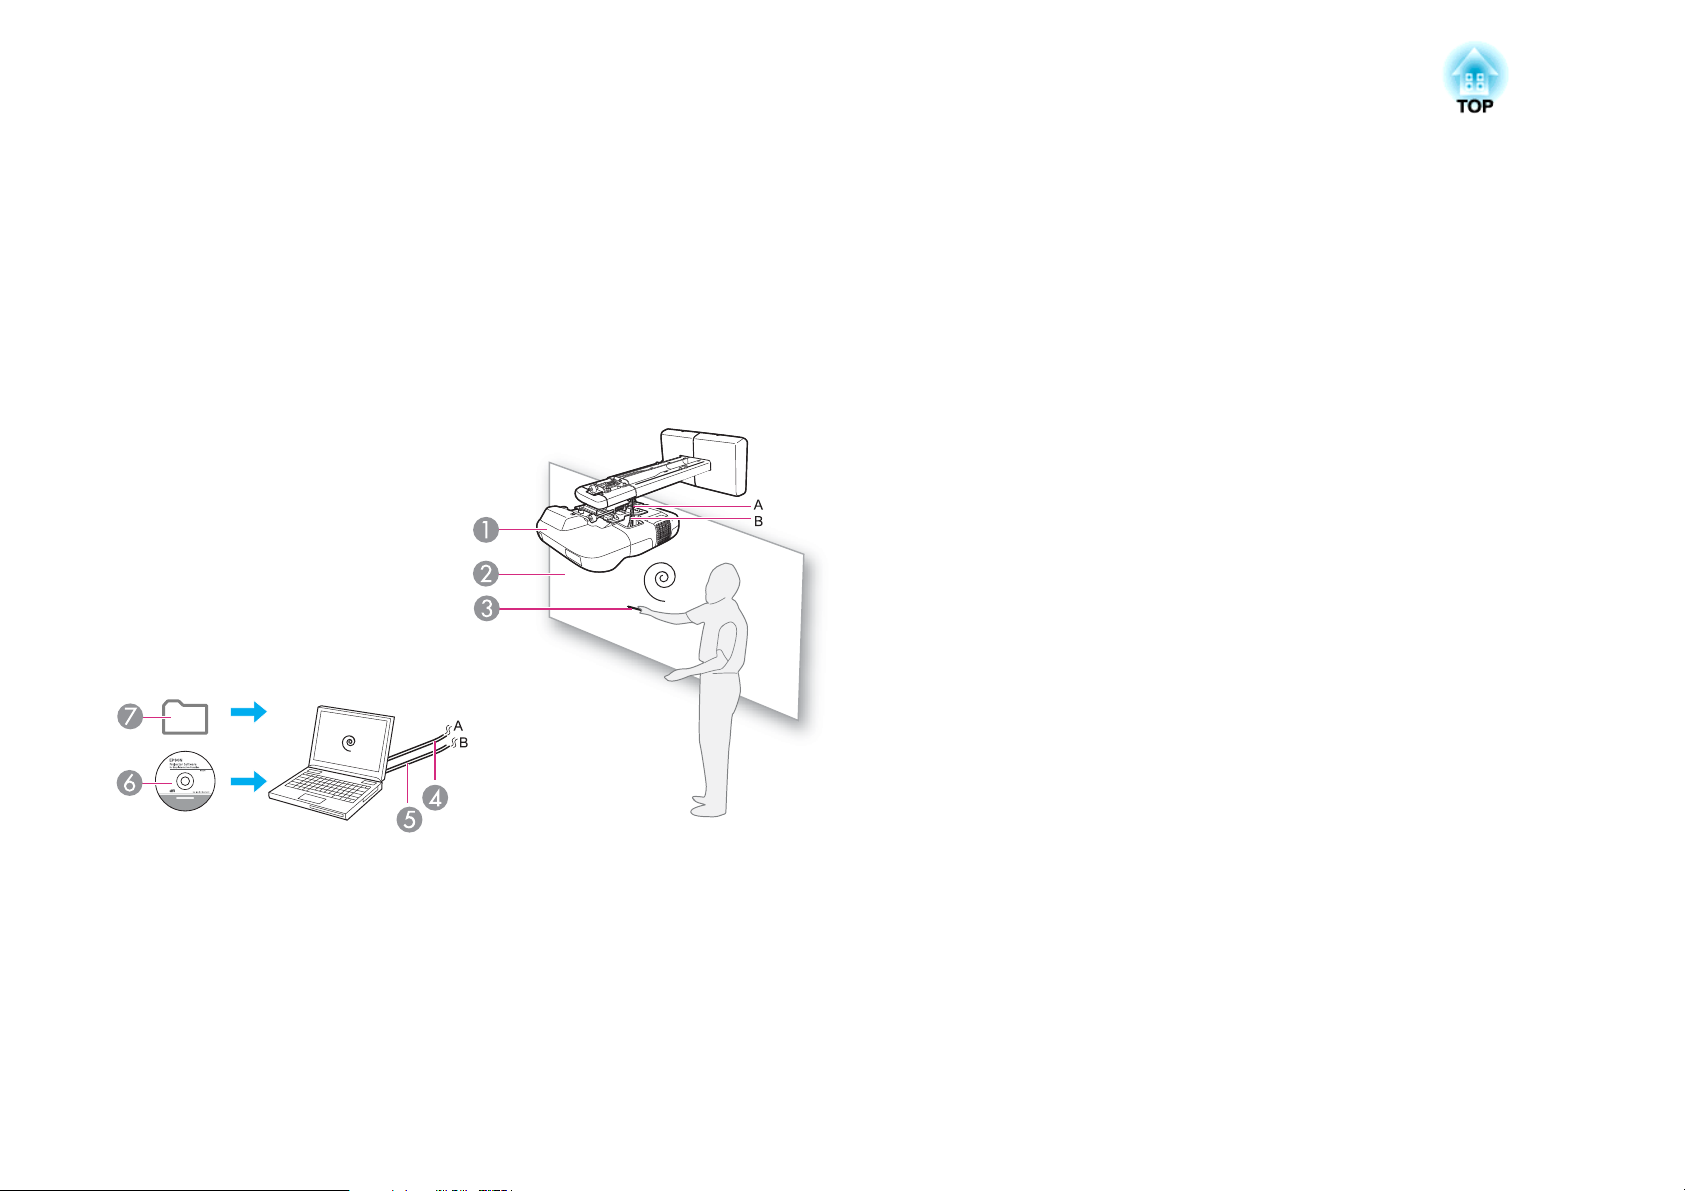
To use Easy Interactive Function, install the driver from the "EPSON Projector Software for Easy Interactive Function" CD-ROM supplied with the supported
s
Epson projector. For more details, see the projector user’s guide.
User’s Guide "Easy Interactive Function (EB-460i/450Wi only)"
Epson projector
A
Projection screen
B
Easy Interactive Pen
C
Computer cable
D
USB cable *Download the Easy Interactive Tools software from the
E
Easy Interactive Driver software
F
Easy Interactive Tools software*
G
Epson Web site.
s http://www.epson.com/
Page 3
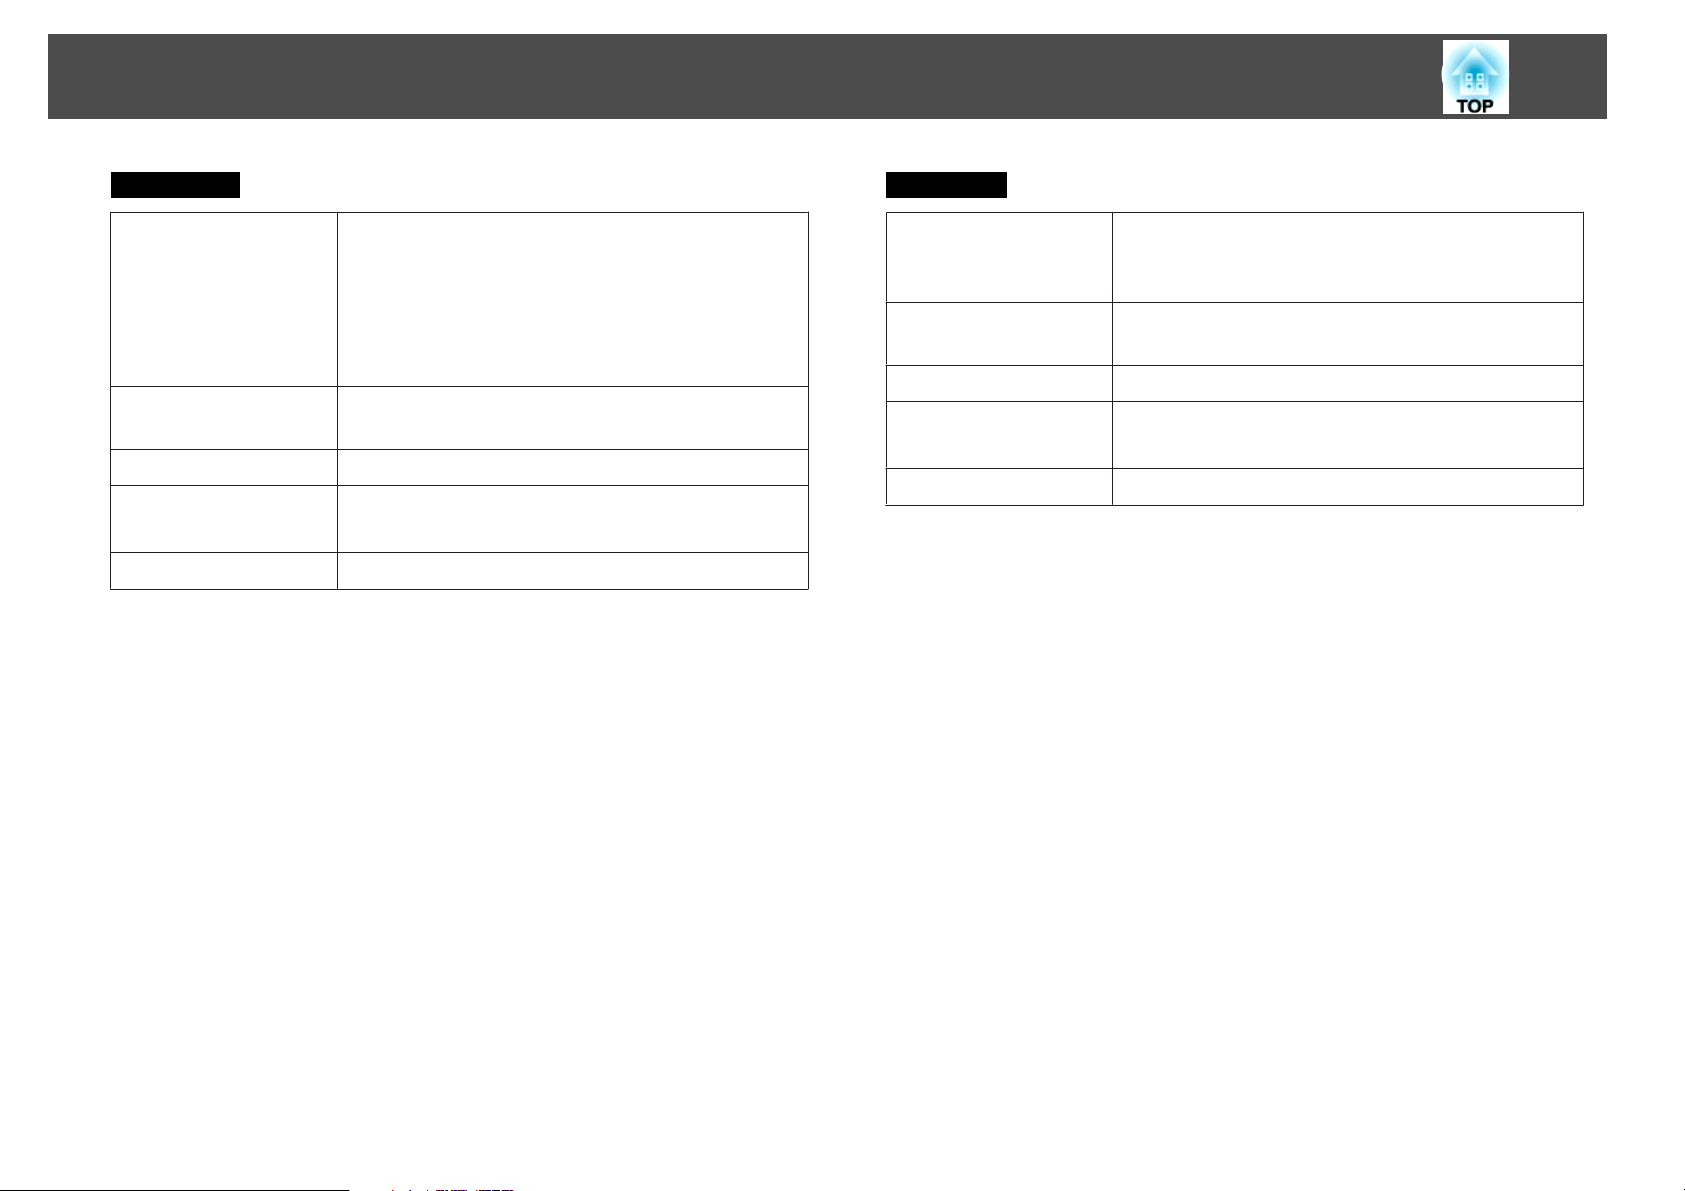
System Requirements
3
For Windows
OS
CPU
Amount of Memory
Hard Disk
Free Space
Display
*
32-bit versions only
Windows 2000 Service Pack 4 or later
Windows XP Service Pack 2 or later
(Home Edition/Professional)
Windows Vista
(All editions except for Starter)
Windows 7
Pentium III 1.2GHz or faster
Recommended: Pentium M 1.6GHz or faster
256MB or more
100MB or more
Resolution greater than XGA (1024x768)
*
*
For Mac OS
OS
CPU
Amount of Memory
Hard Disk
Free Space
Display
Mac OS X 10.4.x
Mac OS X 10.5.x
Mac OS X 10.6.x
Power PC G3 900MHz or faster
Recommended: Intel Core Duo 1.5GHz or faster
256MB or more
100MB or more
Resolution greater than XGA (1024x768)
Page 4
Installing Easy Interactive Tools
4
Installing
q
Procedure
For Windows
A
B
C
D
Turn on the computer.
Double-click the "EIToolsVxxx_Setup.exe" file that you
downloaded from the Epson Web site.
Follow the on-screen instructions to install.
Click "Finish" to close the installer.
For Mac OS
• Install the software as a user with administrator authority.
• Close all running applications and then start the installation.
Uninstalling
For Windows
Select Start - Settings - Control Panel - Add-Remove Programs or Add or
Remove Programs and then remove Easy Interactive Tools.
For Mac OS
Run EIToolsVxxx_Uninstaller in the hard disk volume on which Easy
Interactive Tools is installed.
A
B
C
D
Turn on the computer.
Double-click the "EIToolsVxxx_Setup" file that you downloaded
from the Epson Web site.
Follow the on-screen instructions to install.
When "Install Succeeded" is displayed, the installer closes.
Page 5

Starting Easy Interactive Tools
5
If you start Easy Interactive Tools when playing a movie, the movie
q
For Windows
To start Easy Interactive Tools, double-click the Easy Interactive Tools icon
on the desktop.
Easy Interactive Tools starts and displays the toolbar menu.
To close Easy Interactive Tools, click
playback screen is displayed as a black screen. Change the video
accelerator settings manually.
Procedure:
(1) Select Start - Settings - Control Panel - Display - Settings and
then click the Advanced button.
(2) Select Troubleshoot.
(3) Move the Hardware acceleration to the position second from the
left.
Depending on the computer, the movie playback screen in Windows
Media Player may not be displayed, and the screen saver preview may
not be displayed correctly.
s
p.6
on the system tray menu.
For Mac OS
To start Easy Interactive Tools, double-click the Easy Interactive Tools icon
in its installation folder.
To close Easy Interactive Tools, click Easy Interactive Tools - Quit Easy
Interactive Tools from the main menu.
You can also exit by right-clicking in the Dock, and then clicking Quit
from the popup menu.
Page 6

Menu and Setting
6
For Windows
System tray menu
After running Easy Interactive Tools, an icon is displayed on the
system tray toolbar. Click or right-click the icon to display the following
popup menu.
Saving Setting
Selects where to save the file and the desktop image format.
About Easy Interactive Tools
Displays information about Easy Interactive Tools.
Exit
Closes Easy Interactive Tools.
Notation mode
A
Working mode switch (Mouse display)
The Easy Interactive Pen functions as a mouse. Click on this icon to
switch to notation mode (
).
Toolbar menu
After running Easy Interactive Tools, the following toolbar menu is
displayed.
B
C
D
E
Working mode switch (Notation display)
You can use the Easy Interactive Pen to write, draw and make notes
anywhere on the projection screen. Click on this icon to switch to mouse
emulation mode (
Whiteboard mode
Click on this icon to enter whiteboard mode. The projection screen
instantly transforms into an interactive whiteboard.
Page up
Go to the previous page in an opened document.
Page down
).
Page 7

Menu and Setting
7
F
G
H
I
J
K
L
M
N
Go to the next page in an opened document.
Highlight
Write and annotate using a highlight pen effect.
Toggle Pen and Rubber (Pen display)
Switch to rubber from pen.
Toggle Pen and Rubber (Rubber display)
Switch to pen from rubber.
Fast pen set
Select pen color and line width for annotation and writing. You can
select pen types from the popup window.
Accurate pen set
Select pen color and line width for annotation and writing. You can
make manual settings from the popup window.
Draw free lines
Write and annotate anywhere on the projection screen.
Draw straight lines
Draw circles
Draw rectangles
S
T
U
V
Screen shade
Use this to cover the projection screen; you can alter the shaded section
and direction at anytime.
Use the Easy Interactive Pen to drag vertically or horizontally, and the
direction icon is highlighted as
direction at a time.
Screen spotlight
Emphasizes the contents of a page using a spotlight effect. You can
customize the color and transparency outside the spotlight zone.
Click
Click
Right button simulation
As a default, the Easy Interactive Pen’s tip acts the same way as leftclicking a mouse. Use the Easy Interactive Pen to click "Right button
simulation" to use the pen’s tip as a mouse’s right button instead. The
Easy Interactive Pen automatically returns to default mode after
performing the right click action.
This function may not be available for some applications. In that case,
press the pen’s button to right click.
Minimize the toolbar
, and then select the setting you want from the popup menu.
to exit spotlight.
or . You can only move in one
O
P
Q
R
Undo
Undo the previous operation.
Clear the desk annotation
Clears all desktop annotations and written contents. Once the screen is
cleared, contents cannot be restored.
Virtual keyboard
Displays a virtual keyboard on the screen. Click the keys on the virtual
keyboard to enter the characters.
Save screen
Captures the current screen and saves it as an image file.
Page 8

Menu and Setting
8
Whiteboard mode
E
F
G
H
I
J
K
Choose background color or pattern
Use the current desktop background as the whiteboard background.
New page
Opens a new page on the whiteboard.
Copy drawings from the last displayed page
Copy written contents from the previous page to the current page.
Redo
Restore page notations which were lost due to a screen refresh, and so
on.
Save this whiteboard document
Saves all the pages in bmp or jpg format.
Print preview
Print the page
The following only describes differences with the notation mode.
A
B
C
D
View list
Displays a list of whiteboards being edited.
Switch back to interactive mode
Close whiteboard mode.
Delete the current page
Select a background picture
Insert any picture as the whiteboard background.
Page 9

Menu and Setting
9
For Mac OS
Main menu
After running Easy Interactive Tools, the following main menu is displayed.
About Easy Interactive Tools Displays information about Easy Interactive
Tools.
Hide Easy Interactive Tools Hides Easy Interactive Tools and switches to
other running applications.
Hide Others Hides other running applications.
Show All Shows other running applications.
Transparent Background Close the whiteboard and return to the default
(transparent) screen.
Show Toolbox Show the toolbar menu if it is hidden.
Toolbar menu
After running Easy Interactive Tools, the following toolbar menu is
displayed.
Quit Easy Interactive Tools Closes Easy Interactive Tools.
Highlight Pen Write and annotate with the highlight pen effect.
White Background The projection screen instantly transforms into an
interactive whiteboard.
A
B
Pen
Eraser
Page 10

Menu and Setting
10
C
D
E
F
G
H
I
J
K
L
Draw Straight Line
Clear the Desktop Annotation
Clears all desktop annotations and written contents. Once the screen is
cleared, contents cannot be restored.
Word-Input
Click anywhere on the screen to open the word-input dialog. Type in the
dialog and then click Enter to finish. Use the context menu in the dialog
to set the font type, check spelling and grammar, and use additional
functions.
Nontransparency mode display
Switch to transparency mode from nontransparency mode.
Transparency mode display
Switch to nontransparency mode from transparency mode.
Draw Circle
Draw Rectangle
Circle and Rectangle Fill Set
Select one of three types of circle and rectangle shapes.
Click
Click
Click
Line Width Set
Move the slider to set the pen’s line width, eraser, straight line, circles
and rectangle.
Foreground Color and Full Color Set
Select the top left color to set the foreground color. The foreground
color is the pen’s border color, straight line, circle, and rectangle.
Select the bottom right color to set the fill color for circles and
rectangles.
to draw a normal circle or rectangle.
to draw a filled circle or rectangle.
to draw a filled circle or rectangle with colored borders.
Page 11

General Notes
11
All rights reserved. No part of this publication may be reproduced, stored in a retrieval
system, or transmitted in any form or by any means, electronic, mechanical,
photocopying, recording, or otherwise, without the prior written permission of Seiko
Epson Corporation. No patent liability is assumed with respect to the use of the
information contained herein. Neither is any liability assumed for damages resulting
from the use of the information contained herein.
Neither Seiko Epson Corporation nor its affiliates shall be liable to the purchaser of this
product or third parties for damages, losses, costs, or expenses incurred by the
purchaser or third parties as a result of: accident, misuse, or abuse of this product or
unauthorized modifications, repairs, or alterations to this product, or (excluding the
U.S.) failure to strictly comply with Seiko Epson Corporation's operating and
maintenance instructions.
Seiko Epson Corporation shall not be liable against any damages or problems arising
from the use of any options or any consumable products other than those designated as
Original Epson Products or Epson Approved Products by Seiko Epson Corporation.
The contents of this guide may be changed or updated without further notice.
Illustrations in this guide and the actual projector may differ.
Software Copyright:
This product uses free software as well as software to which this company
holds the rights.
Z
SEIKO EPSON CORPORATION 2010. All rights reserved.
411863900EN
General Notice:
XGA is trademark or registered trademark of International Business Machines
Corporation.
Mac and Mac OS are registered trademarks of Apple Inc.
Windows, Windows Vista, Windows 7, PowerPoint, and Windows logo are trademarks
or registered trademarks of Microsoft Corporation in the United States and/or other
countries.
Other product names used herein are also for identification purposes only and may be
trademarks of their respective owners. Epson disclaims any and all rights in those
marks.
 Loading...