

Page 1
Page | 1
Installation Instructions for
Epson R1900 Easy Flow IV
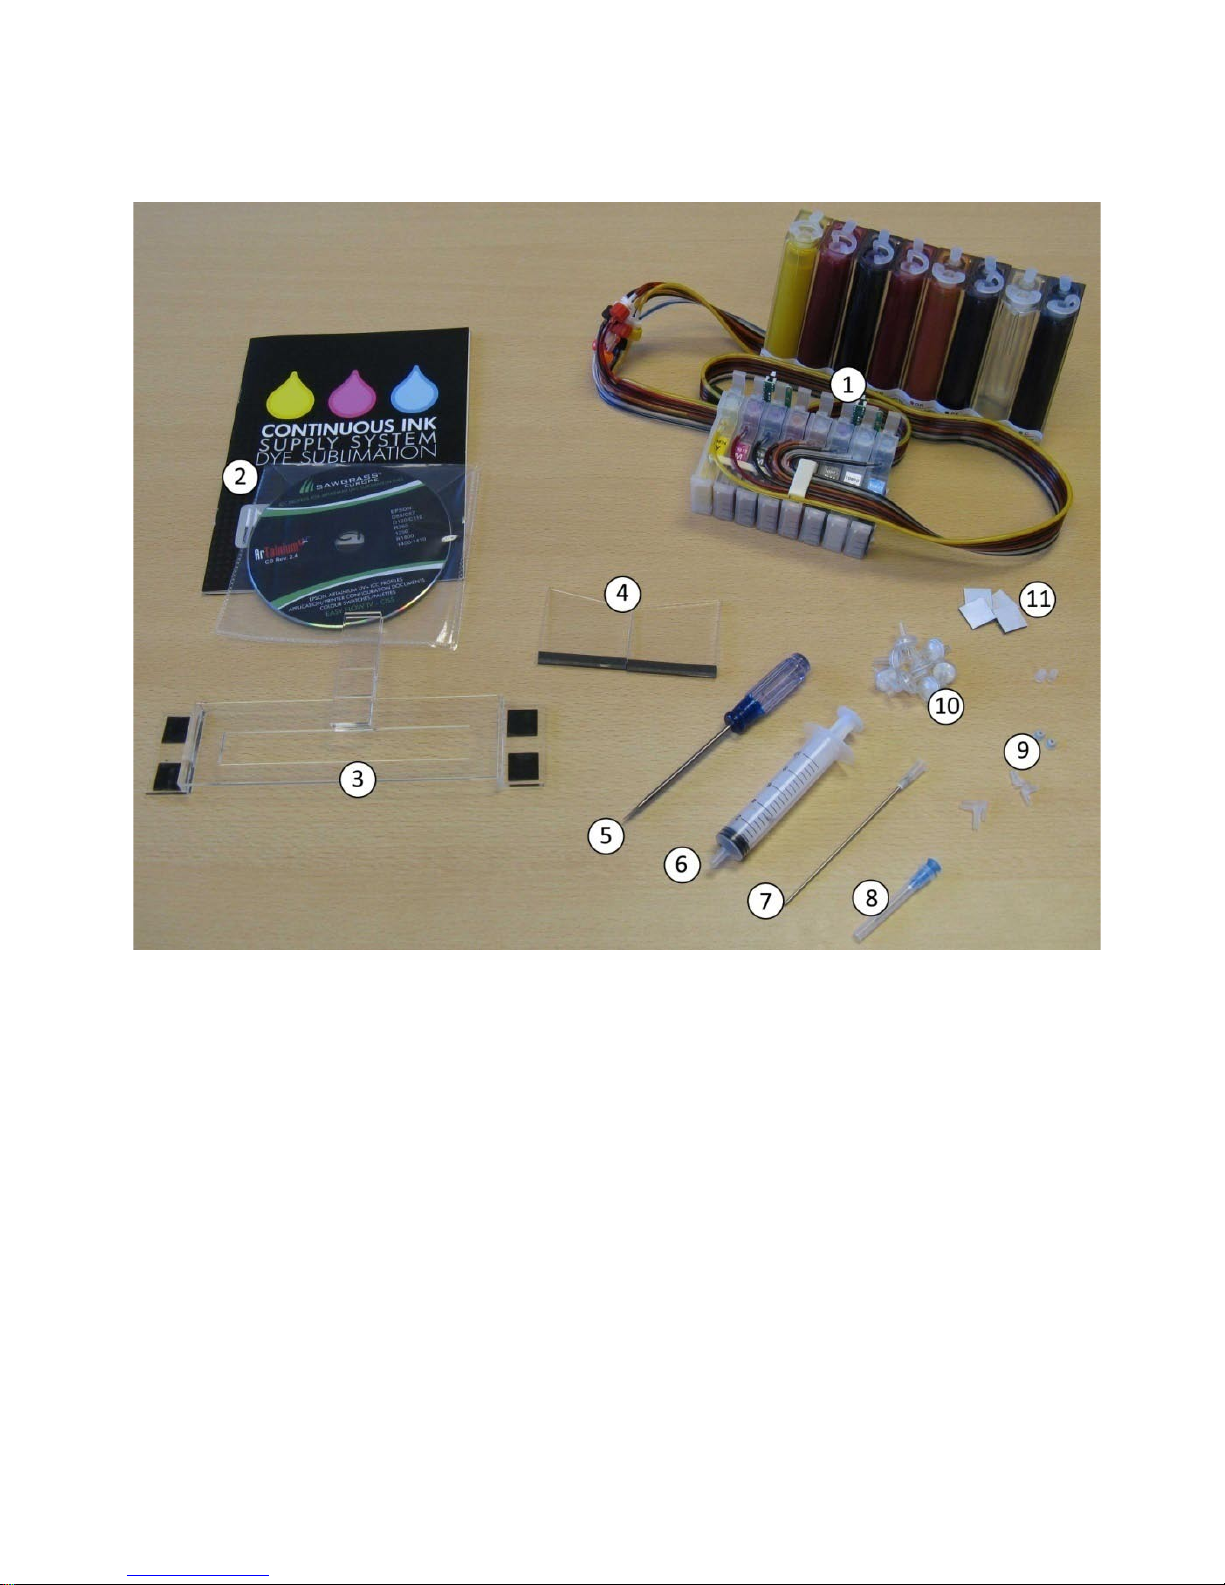
CONTENTS
1. Easy Flow IV Ink Reservoirs & Cartridges
2. Installation Manual and Instruction CD
3. Tube Support Bracket
4. Lid Support Bracket
5. Screwdriver
6. 10ml Syringe
7. Long Needle
8. Sharp Needle
9. Spare elbows and bungs
10. Air Filters
11. Spare Sticky Pads
Page 2
Page | 2
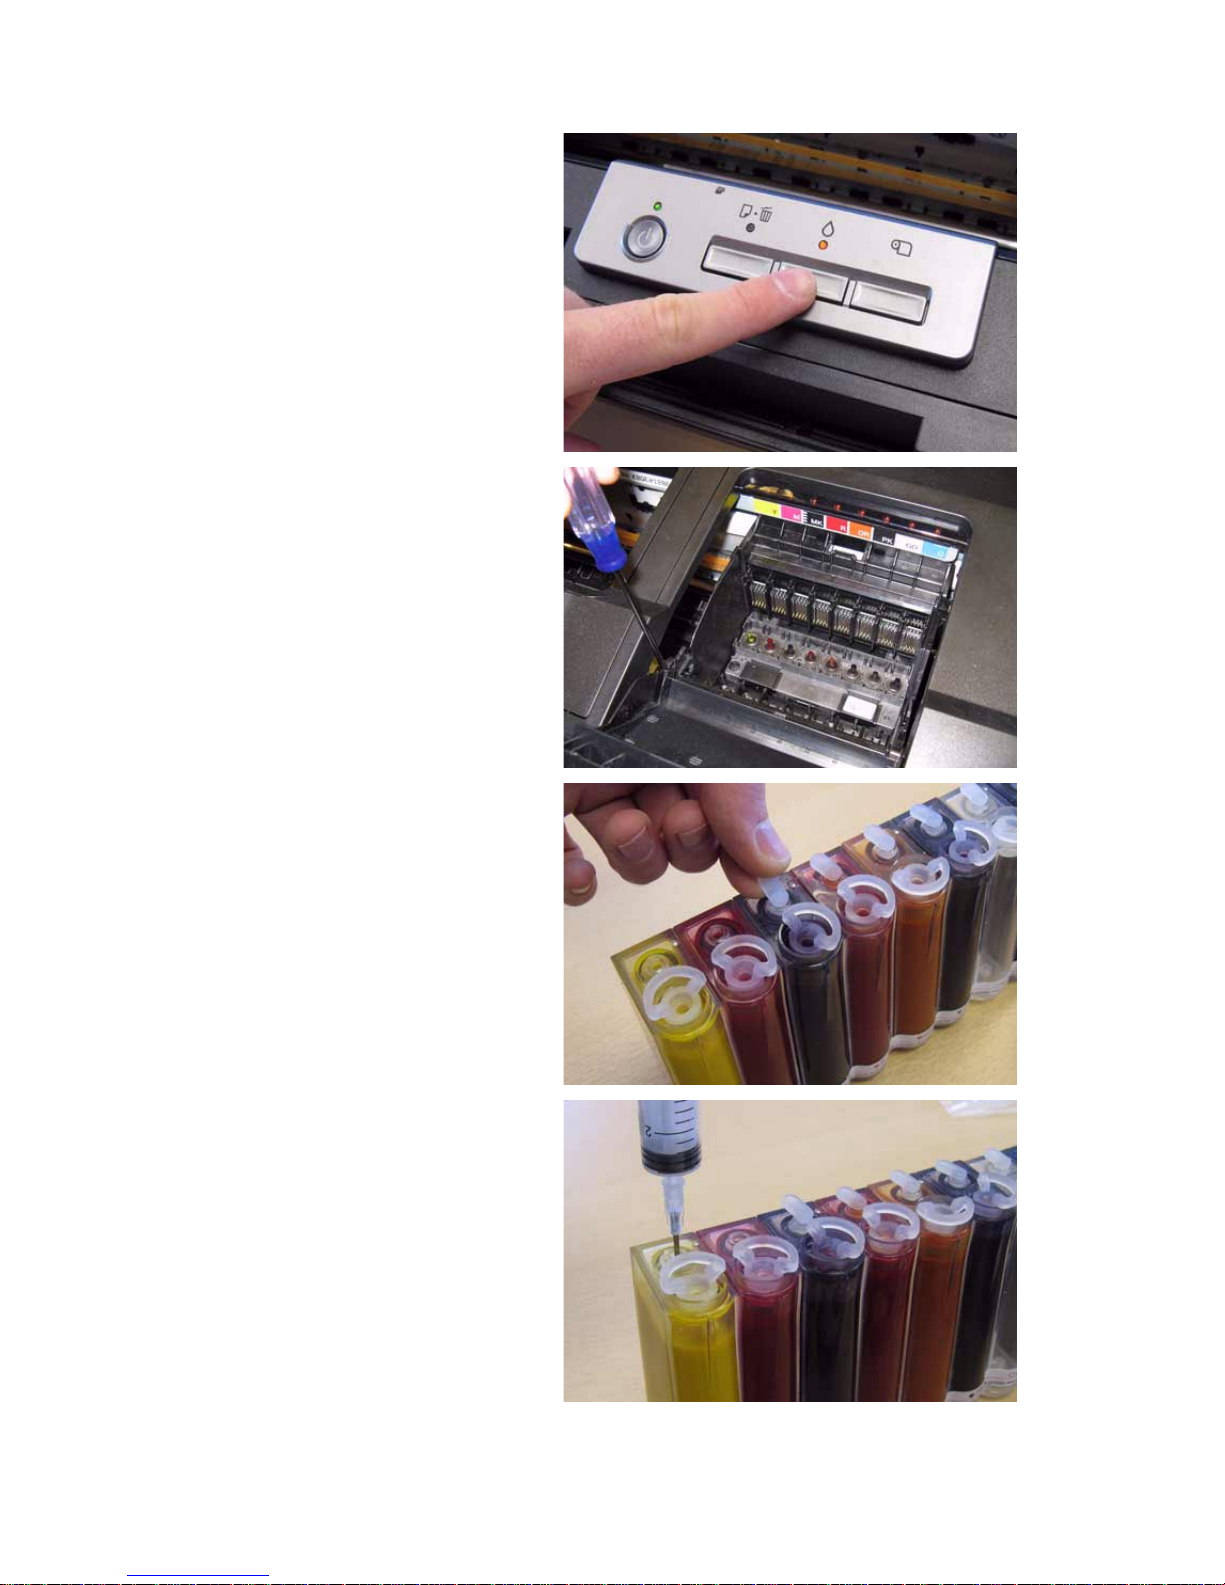
Turn on the printer and press the ink
button. When the printhead has
moved to the cartridge removal
position unplug the mains cable
from the printer.
This allows the printhead to be
manually moved.
Remove the printhead lid. Use the
small screwdriver provided to prise
the hinges open
Remove any cartridges from the
machine.
Remove all the small rubber bungs
from the bottles.
DO NOT THROW THESE AWAY AS
THEY ARE NEEDED FOR REFILLING
THE INK CHAMBERS
Using the long needle attachment
on the 10ml syringe draw any ink
out of the centre chamber through
the small hole.
To replace this ink in the reservoir
see page 8.
Wipe the syringe and repeat this for
all chambers.
Page 3

Page | 3
Repeat this for each color then fit the
supplied air filters.
Place the bottles to the left of the printer
as shown.
NEVER PLACE THE BOTTLES HIGHER THAN
THIS
Move the printhead as far to the left of the
carriage as possible.
Feed the cartridges under the printer
housing…
…and place the cartridges on the housing
whilst you move the printhead back to the
cartridge removal position.
Page 4

Page | 4
Place the cartridges into the cartridge
housing and press them down firmly by
spreading fingers across all the cartridges.
Important:
ENSURE THAT EACH CARTRIDGE HAS
CLICKED INTO PLACE.
Remove the backing tape from the sticky
pads on the tube support bracket.
Position the bracket around the printer
button housing, ensuring that the plastic
tab fits into the slot.
Place the tubes into the tube support so
that the tubes are taut and there is no
slack.
Ensure that the tubes are placed all the
way in the support.
Remove the backing tape from the small
support bracket and fit as shown
Page 5

Page | 5
If you wish to close the printer lid you
will need to attach the lid support
brackets as shown.
Plug in the mains power cable and turn on
your printer.
The printer will go through the initial
head charge before your system is ready
for use.
If the orange ink light is displayed when
the printer is turned on.
Press the ink button to move the
cartridges to the removal position.
Ensure that all the cartridges are firmly
pushed into place and then hold one of
the chip reset button for 5 seconds.
Page 6

Page | 6
Press the ink button and the printhead
will read the chips and begin the initial
head charge.
Your system is now ready for use.
Print a nozzle check to ensure all heads are printing ok. Read the following section if you do
not have a perfect nozzle check.
Page 7

Page | 7
See the Installation CD that came with your system for:
1. Profile Installation
2. Epson Driver Configuration
3. Graphic Software Configuration
After the ink charge, print out a nozzle check to see if all the colors are printing correctly.
If they are, you are set to go. If not, perform a head clean and test the nozzle check
again.
If still not perfect you can perform one or two more head cleans (do not overuse this
exercise) until you get a good nozzle check.
Occasionally a printer will stubbornly refuse to print a perfect nozzle check after a couple
of head cleans. There can be a number of reasons for this including the fitting of a dye
sublimation system for the first time or a printer being left for a long period of time
without running any prints.
If you have to run more than a couple of head cleans be careful not to overdo it. Run up
to 5 head cleans but keep checking the nozzles after each one. If the nozzle pattern
improves dramatically but is not perfect leave the printer to sit for at least 1 hour then
check the nozzles again.
Sometimes the nozzle check has improved further still without wasting any more ink
(and trying your patience). If there are only a couple of nozzles missing try a print to see
if this kicks in those last couple.
Further head cleans when the nozzle check is almost perfect can often result in the
whole thing going backwards and the nozzle checks becoming very poor.
Page 8

Page | 8
REFILLING THE BOTTLES
Remove the air filters and replace the
small rubber bungs (that you did not
throw away).
Remove the large rubber bungs
This sequence prevents the chambers
filling with ink.
Refill the bottle through the large
opening.
REPLACE THE LARGE RUBBER BUNG
FIRST!
Then remove the small bung and replace
the air filter.
If this sequence is not followed and the centre chamber is allowed to fill with ink use the
procedure on page 3 to remove the ink.
 Loading...