

Dymo LabelWriter 300 series, LabelWriter 400 series User Manual

THERMAL TICKET PRINT SERVER
USER MANUAL
1. Configuring your thermal ticketprinter
1.1. Dymo LabelWriter series printersetup
1.2. Star TSP series printer set up
1.3. Citizen CL series printer setup
2. Configuring the print server software
Introduction
The TicketSource thermalticketprint server is acompanion product to theTicketSource service.
The easy-to-use software provides functionality for printing thermal tickets booked using the TicketSource website directly
to a thermal ticket printer connected to yourcomputer.
The TicketSource thermal ticketprint serveris designed to operate on systems running MicrosoftWindows 7,Windows 8or
Windows 10 andrequiresan available Internet connection when inuse.
Before you start
Before installing the TicketSource thermal ticket print server, you will need to install and configure your thermal ticket
printer and its printerdriverto be used withthe print server,as per the manufacturer’s instructions.
Please note thatdue to thenature and wideof variety ofthermal ticket printers available, we areunable to provide technical
support on individual thermal printer installations. You can test your thermal ticket printer’s successful installation by using
the “Print TestPage”option in thePrinterdialog of theWindowsControl Panel.
Please ensure you have installed the DYMOLabelWriterprinter driver from theCD supplied withthe printer and thenconnected
the printer to yourcomputerbeforefollowingthe configuration steps below...
Open Devices andPrintersfromthe Start Menu,
Right click the DYMOLabelWriterprintericon,
On the pop-upmenu, click Printing Preferences
THERMAL TICKET PRINT SERVER
Dymo LabelWriter series printer set up
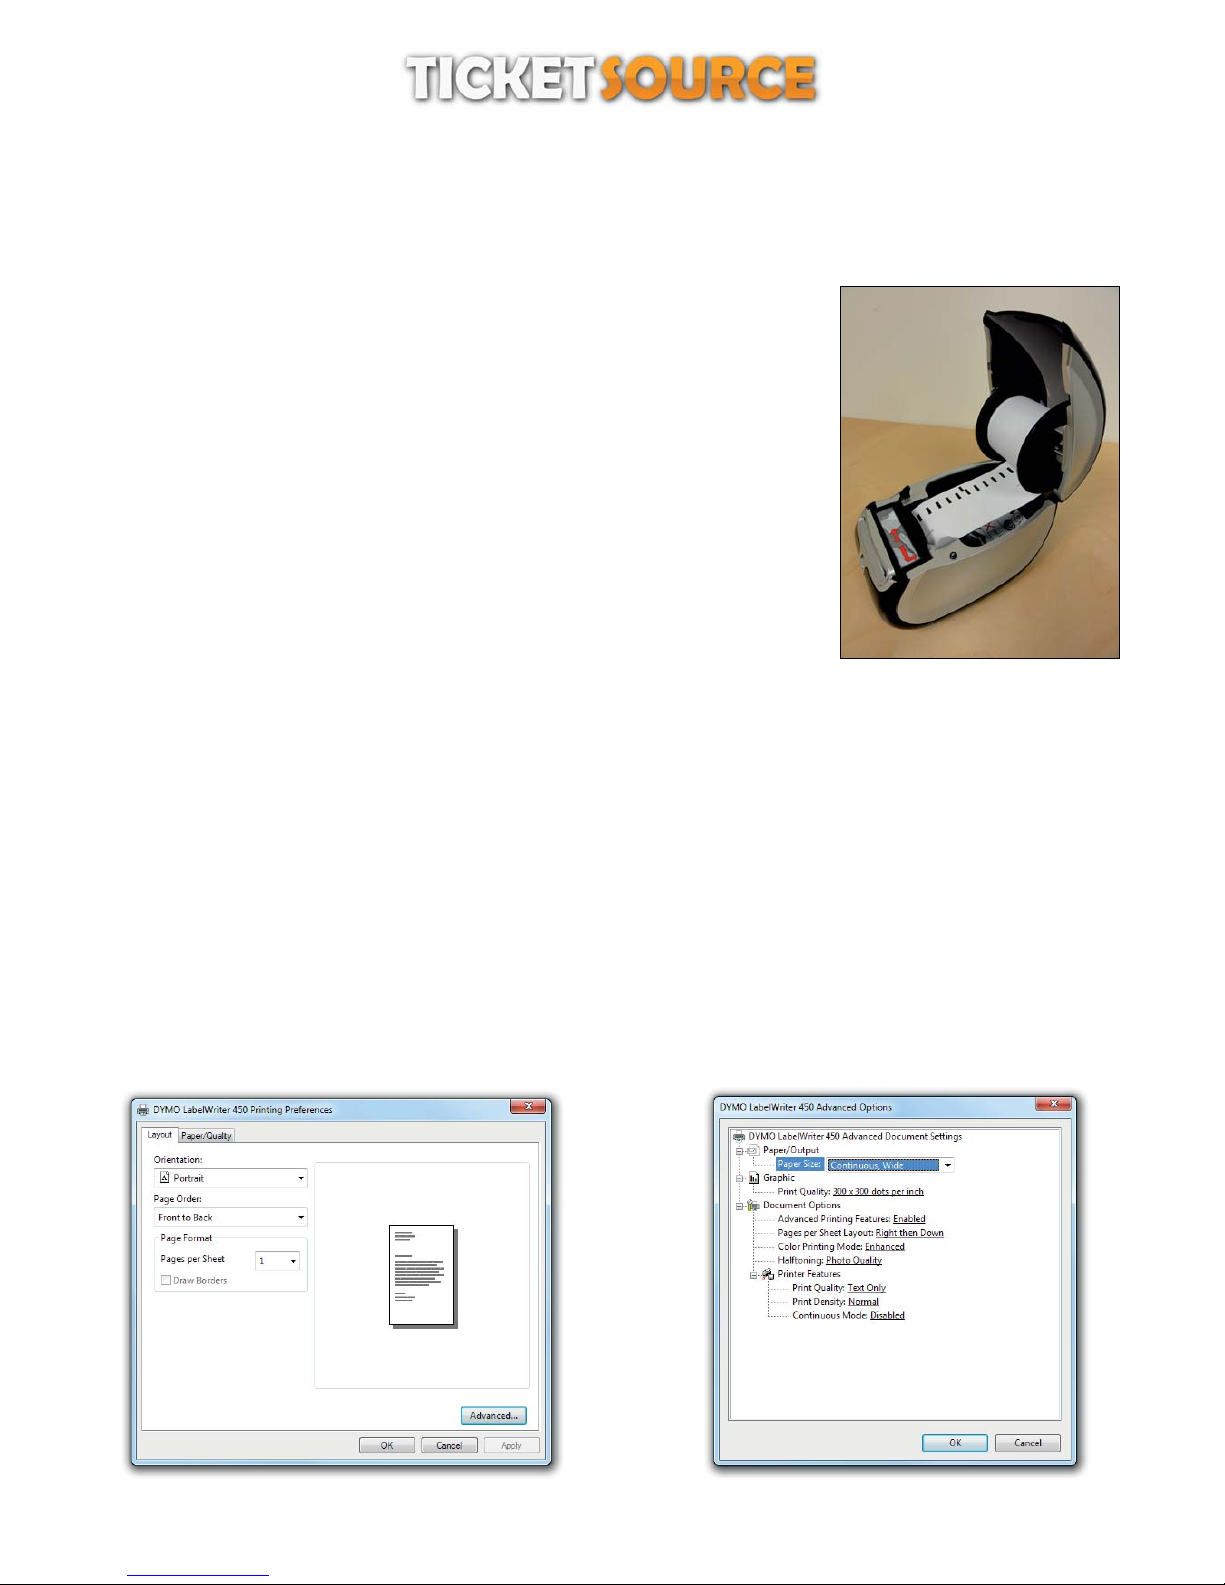
The DYMO LabelWriter series setup instructions cover the LabelWriter 300 and400 series labelprinters.
Inserting the thermalcardroll
1 With the printer plugged in, press the form-feed button to eject the labels that
protectedthe printer during shipment.
2 Open the top cover and remove any packing material inside the label compartment.
3 Remove the spool from inside the cover and separate the spool guide from the
spindle.
4 Hold the spool spindle in your left hand and place the card roll on the spindle so that
the cards feed from underneath and the left edge of the card roll is firmly against the
side of the spool.
5 Slide the spool guide onto the right side of the spool and press the guide tightly
against the side of the card roll, between the roll and the spool.leaving no gap
Note To ensure proper feeding of cards during printing, the card roll must fit snugly
against both sides of the card spool, with no gaps.
6 Insert the card spool into the slot in the printer cover with the cards extending from
underneath the roll.
7 Align the left edge of the card with the left edge of the card feed slot and insert the
card into the slot. The printer automatically feeds the cards, stopping at the beginning of the first card. If the printer does
not feed the cards, make sure the first card is fully inserted and then press the form-feed button.
8 Slide the card guide to the left until the card guide aligns with the right edge of the card.
9 Carefully lower the top cover.
Step 1 - clickthe “Advanced...” button Step 2 - set thepaper size option to “Continuous ,Wide” and
click ‘OK’
Configuring the printer
2
THERMAL TICKET PRINT SERVER
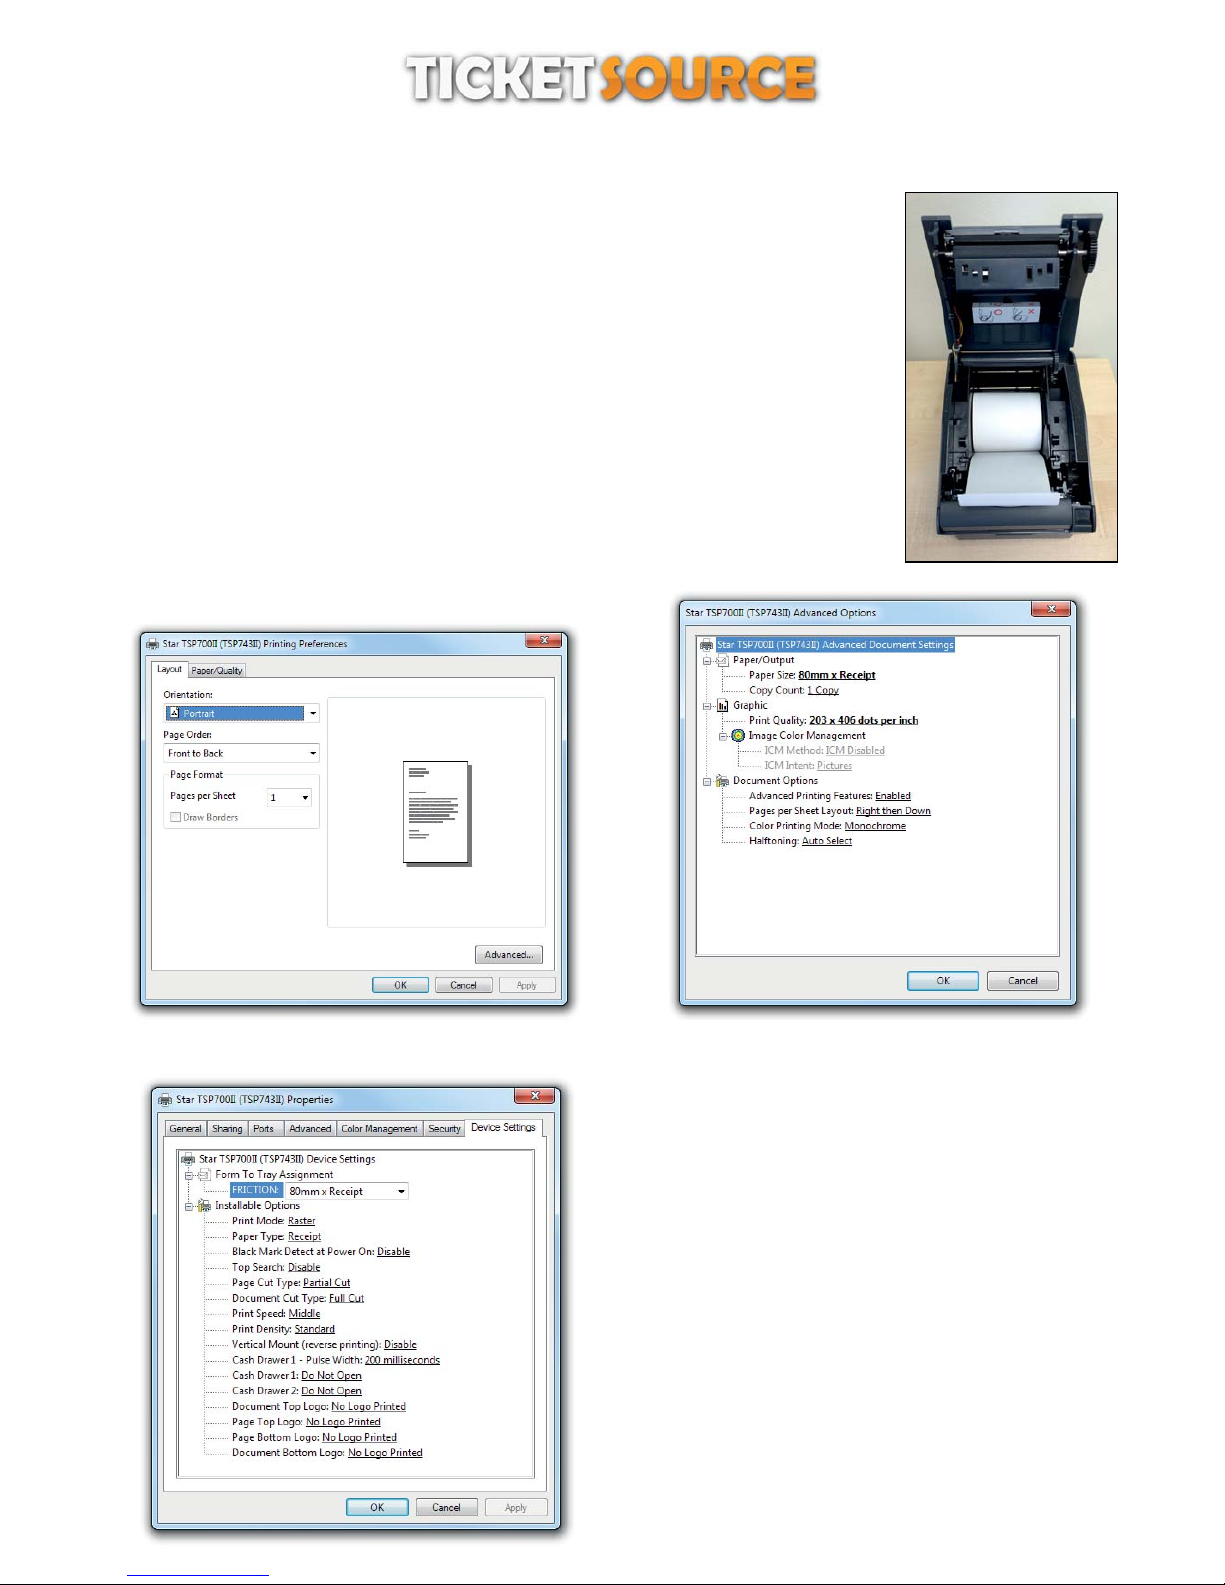
Star TSP series printer set up
The Star TSP seriesset up instructions cover theTSP-700 receipt printer.
Place the receipt roll insideyourStar TSP-700 receipt printer and feeda small section ofthe
receiptrollout of theprinter. Close theprinter lid.
Please ensure you have installed theStarTSP printer driver before following the
configurationstepsbelow...
Open Devices andPrintersfromthe Start Menu,
Right click the StarTSP printer icon,
On the pop-upmenu, click Printing Preferences
Configuring the printer
Step 1 - clickthe “Advanced...” button Step 2
Set Paper Size to “80mmx Receipt”,
Set Print quality to“203 x 406 dotsper inch”,
Click “OK”.
Step 3
Open Devices andPrintersfromthe Start Menu,
Right click the StarTSP printer icon,
On the pop-upmenu, click Printer Properties,
Click the “DeviceSettings”tab,
Set Friction to “80mm xReceipt”,
Set Page Cut Type to“PartialCut”,
Set Document Cut Type to “FullCut”,
Set Print Speed to“Middle” for best qualityresults,
Set Print Density to“Standard”,
Click “OK”.
3
THERMAL TICKET PRINT SERVER
Citizen CL series printer set up
The Citizen CL seriesset up instructions cover the CL-P521,CL-S521 and CL-S531thermal ticket printers.
If you’re having difficulties installing the Windows printer driver for the Citizen CL series printer then the latest driver can be
downloaded and installed from: http://www.seagullscientific.com/drivers/citizen-windows-printer-drivers.aspx
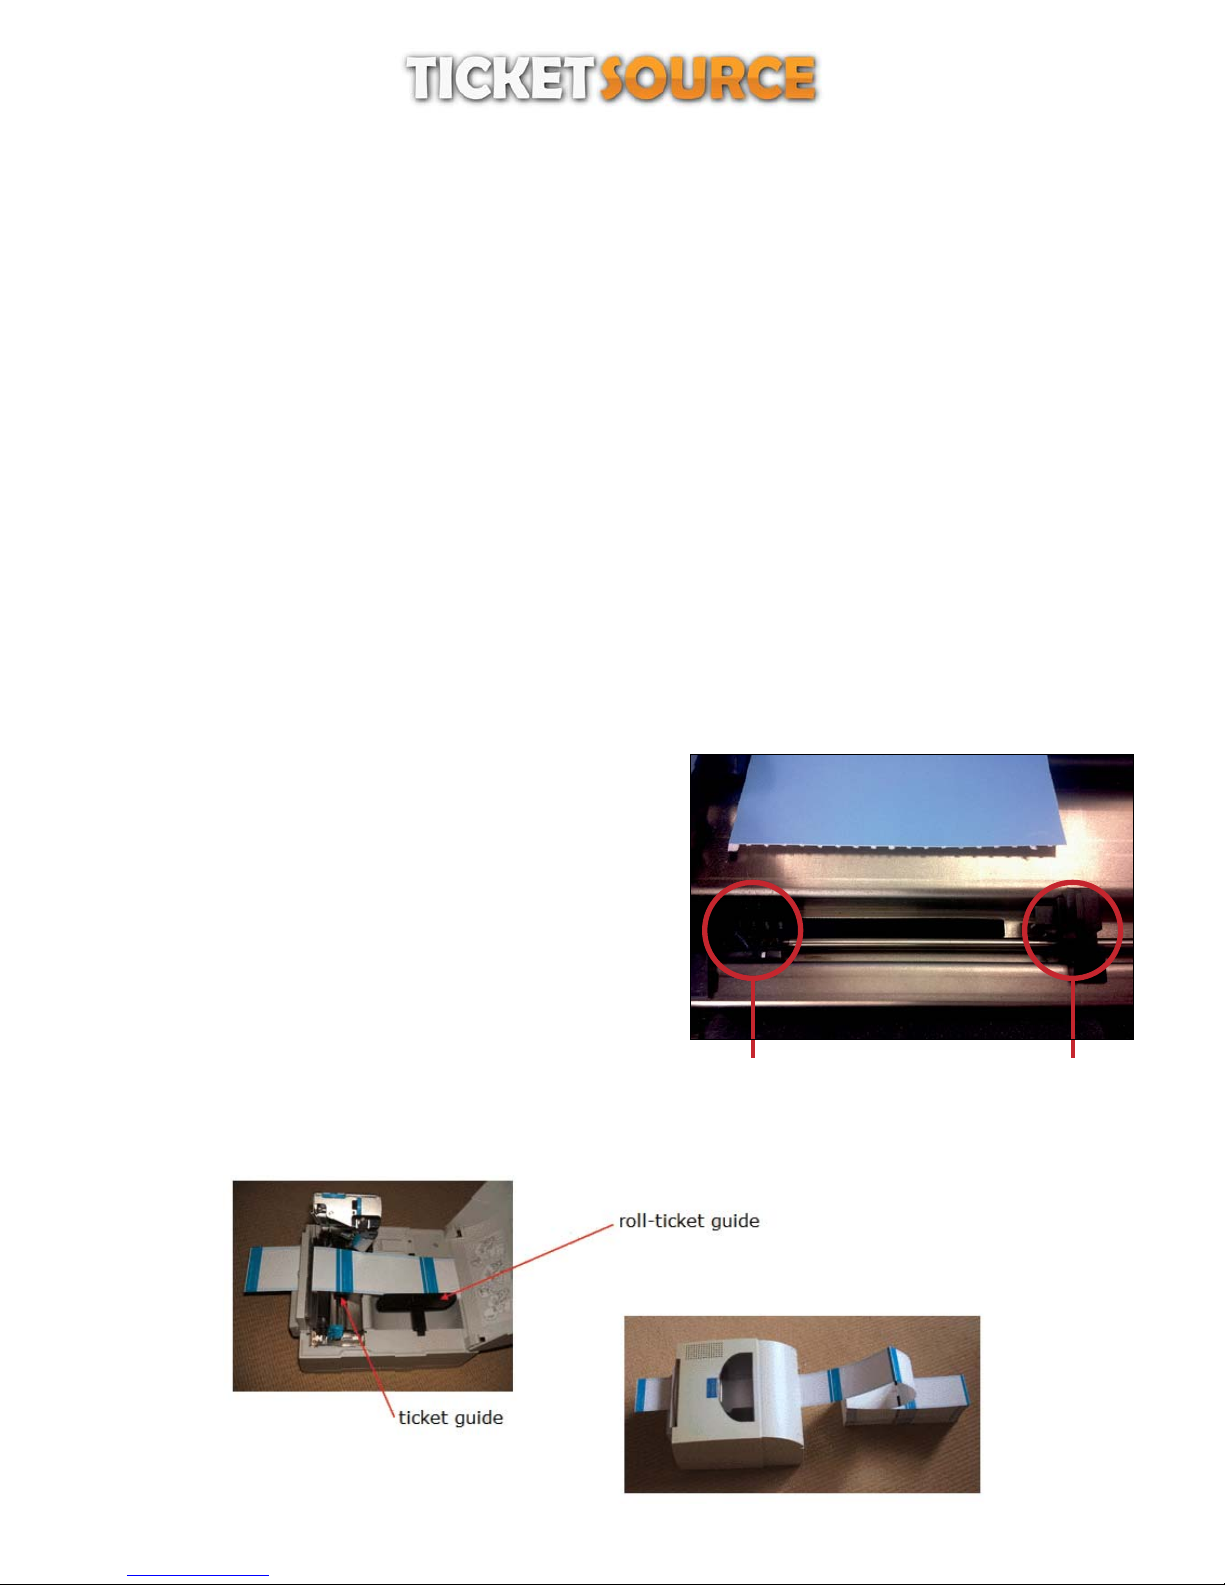
The Citizen CL series thermal ticket printers are usually shipped with the feed sensor set to ‘transparent’ mode. Tickets with a
black index mark on the reverse (i.e. most fan-fold tickets) require the feed sensor to operate in ‘reflective’ mode. The feed
sensor can bechangedfrom ‘transparent’ to ‘reflective’ mode byusing a combination ofthe buttons on thefrontof the printer.
Setting the feed sensorto‘reflective’mode
Enter the feed sensor adjustment mode by turning the power on while holding down the PAUSE, FEED and STOP buttons.
Release the buttons whentheCONDITION LED lights up.
To toggle the feed sensor between 'transparent' and 'reflective' mode, hold down the MODE/REPEAT button and press the
STOPbutton:
‘reflective’mode: the buzzer will soundtwice and thePRINTLED will flashslowly
‘transparent’ mode: the buzzerwill sound once andthe PRINT LEDwill light up constantly,
With the feedsensor set to 'reflective' mode, releasethe MODE/REPEATbutton and pressthe STOP button toexit the sensor
adjustment mode.
Adjusting the feed sensor
Adjust the position of the feed sensor so that the ‘eye’ of the sensor is
about half way across theblackmark on theback of the ticket.
Inserting the fan-fold tickets
Feed the fan-fold tickets through the back of the printer - front side
upwards, blank indexmark on reversepointing forwards - and position
to the left. Move the ticket guide to meet the tickets. Close the printassembly. Set bothadjustment wheels to ‘6’.
Switch on and press the feed button. The printer should feed just one
ticket. If the printer feeds several tickets, either the feed sensor is not
positioned correctly (missing the black index mark on the back of the
ticket)or the feed sensor isnot set to ‘reflective’ mode.
feed sensor
ticket guide
4
 Loading...