

Page 1
Building Networks for People
Quick Installation Guide
802.11n Unied Access Point
This document will guide you through the
basic installation process for your new
D-Link 802.11n Unied Access Point.
DWL-3600AP
Quick Installation Guide
Documentation also available
on CD and via the D-Link
Website
Page 2

About This Guide
RESET
5V
2.5A
This installation guide provides basic
instructions for installing the DWL-3600AP
802.11n Unied Access Point on your network.
ENGLISH
For additional information about how to use the
Access Point, please see the User Manual, which
is available on the CD included in this package or
from the D-Link support website.
System Requirements
- CD-ROM Drive
- Ethernet port or installed Ethernet adapter
- Internet Explorer 7.0, Safari 5.0, Firefox 4.0,
Chrome 20 or higher
Optional Accessories
- PoE Base Unit (Model: DPE-101GI)
Hardware Overview
LEDs
Figure 1. DWL-3600AP LEDs
Unpacking the Product
Open the shipping carton and carefully unpack its
contents. Please consult the packing list located
in following information to make sure all items are
present and undamaged. If any item is missing
or damaged, please contact your local D-Link
reseller for replacement.
- DWL-3600AP 802.11n Power over Ethernet
(PoE) Unied Access Point
- Mounting Ring
- Ethernet Cable
- Console Cable*
- CD-ROM
- Ceiling Bracket (3 sets, sizes are 9/16", 14/16",
and 1 1/2")
NOTE no PSU supplied. To power the units
use an D-Link PoE switch or the D-Link
DPE-101GI PoE injector.
*The console cable is an optional accessory and
not included in the package in Armenia, Azerbaijan,
Belarus, Georgia, Israel, Kaliningrad, Kazakhstan,
Kyrgyzstan, Latvia, Lithuania, Moldova, Mongolia,
Russia, Turkey, Turkmenistan, Ukraine, and
Uzbekistan. If a cable is required, please contact
your reseller to order it (Model: ACS-AP-CONSOLE).
2.4 GHz – When this LED is lit up, the access
LAN – When this LED is lit up, the device’s
POWER – When the LED is lit up, the access
point’s 2.4 GHz radio is enabled. It will
blink when there is wireless trafc.
Ethernet port is connected to an active
router or switch. The light will blink
when there is trafc going through
the port.
point is powered and ready for use.
Interfaces
Power Receptor
(*Note no longer
used, replaced
by PoE)
Figure 2. DWL-3600AP Rear Panel
Reset Port
LAN Port (PoE)
Console Port
2 D-Link DWL-3600AP Quick Install Guide
Page 3
Installation
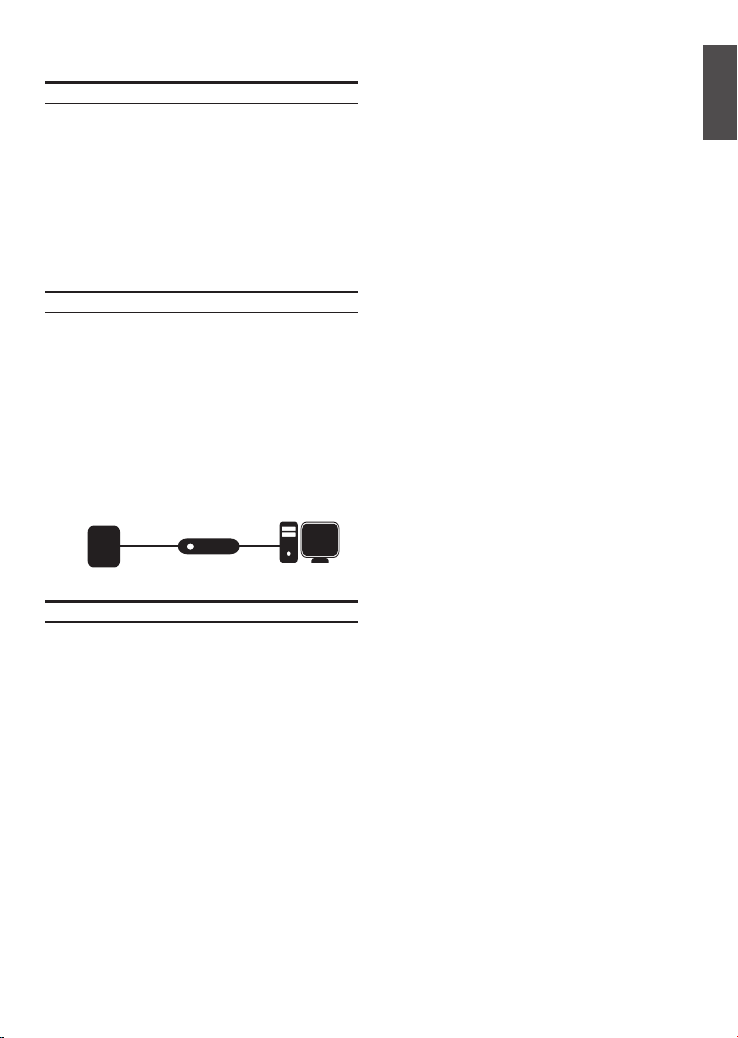
ComputerDWL-3600AP
ComputerDWL-3600AP
Power on the access point
To power on the DWL-3600AP, you can use ONE of
the following methods:
1. Plug one end of an Ethernet cable into the LAN
port of the DWL-3600AP and the other end into
a port on a PoE switch.
2. Purchase separately a DPE-101GI PoE injector
if you need to connect the Access Point without
a PoE Switch.
Congure the access point
To set up and manage the DWL-3600AP, please
follow the instructions below.
• Power up the access point by connecting
it to any one of the POE switch’s Ethernet
ports. The default IP address of the access
point is 10.90.90.91. You will be prompted
for an ID and password when you try to
log into the web management interface.
Enter admin as the ID, and admin as the
password.
PoE switch
Mounting Options
You can mount a DWL-3600AP access point on any
of the following types of surfaces:
• Solid surface wall or ceiling
• Tabletop
Cable Requirement
Use a CAT 5 cable with an even sheath.
The Ethernet ports on the DWL-3600AP access
point cannot accept a CAT 5 cable that has an
uneven sheath; the RJ-45 connector on the cable
will not fit properly into the receptacle on the access
point.
Wall Installation Recommendations
If you plan to install the DWL-3600AP on a wall or
other vertical surfaces, orient the top of the access
point (the side with the LEDs) toward the intended
coverage area. The radio antennas transmit through
the top of the access point but not through the
bottom (where the bracket is).
ENGLISH
Warning: The DWL-3600AP is designed to
receive PoE power only from an 802.3af compliant
source, or from a D-Link-approved power injector.
Connecting an access point to a Power over
Ethernet (PoE) device that is not approved by D-Link
can damage the equipment.
D-Link DWL-3600AP Quick Install Guide 3
Page 4

Solid Wall or Ceiling
Installation
ENGLISH
1. Place the plastic wall mounting ring on a
wall or ceiling.
2. Mark the points where you will insert the
screws. Take out the mounting ring.
3. Drill holes in the marked points and
insert the plastic wall anchors.
4. Use the supplied screws to attach the
mounting ring to the wall.
5. To attach the access point to the
mounting ring, rst locate the right side
of the access point that has a small lock
symbol on it, and make sure to line up
this side with the side of the mounting
ring that has Open - Close written on it.
Figure 4. Insert access point into mounting ring
Figure 3. Insert screws through mounting ring
4 D-Link DWL-3600AP Quick Install Guide
6. Twist counterclockwise to lock the access
point onto the ring. The lock symbol on
the access point must point directly to the
Close text on the mounting ring.
7. Plug the CAT 5 cable into the LAN port
on the access point.
Figure 5. Plug cable into access point
Page 5

Mounting With A Ceiling Bracket
Installation
1. Clip two ceiling brackets onto the ceiling
panels. Make sure both brackets are in
line with each other.
Ceiling crossbar
Ceiling bracket
2. Use the provided screws to attach the
mounting ring to the ceiling bracket.
ENGLISH
3. Place the DWL-3600AP’s male
bracket in the mounting ring’s female
bracket. Rotate the DWL-3600AP
counterclockwise to lock it in position.
4. Plug the CAT 5 cable into the LAN port on
the access point.
D-Link DWL-3600AP Quick Install Guide 5
Page 6

Appendix A - Statements
FCC Statement:
Federal Communication Commission Interference Statement
ENGLISH
This equipment has been tested and found to comply with the limits for a Class B digital device,
pursuant to Part 15 of the FCC Rules. These limits are designed to provide reasonable protection
against harmful interference in a residential installation. This equipment generates, uses and can radiate
radio frequency energy and, if not installed and used in accordance with the instructions, may cause
harmful interference to radio communications. However, there is no guarantee that interference will not
occur in a particular installation. If this equipment does cause harmful interference to radio or television
reception, which can be determined by turning the equipment off and on, the user is encouraged to try
to correct the interference by one of the following measures:
● Reorient or relocate the receiving antenna.
● Increase the separation between the equipment and receiver.
● Connect the equipment into an outlet on a circuit different from that to which the receiver is
connected.
● Consult the dealer or an experienced radio/TV technician for help.
FCC Caution: Any changes or modications not expressly approved by the party
responsible for compliance could void the user’s authority to operate this equipment.
This device complies with Part 15 of the FCC Rules. Operation is subject to the following two conditions:
(1) This device may not cause harmful interference, and (2) this device must accept any interference
received, including interference that may cause undesired operation.
For product available in the USA/Canada market, only channel 1~11 can be operated. Selection of other
channels is not possible.
This device and it's antennas(s) must not be co-located or operating in conjunction with any other
antenna or transmitter except in accordance with FCC multi-transmitter product procedures.
IMPORTANT NOTE:
FCC Radiation Exposure Statement:
This equipment complies with FCC radiation exposure limits set forth for an uncontrolled environment.
This equipment should be installed and operated with minimum distance 20cm between the radiator &
your body.
IC Statement:
This device complies with Industry Canada license-exempt RSS standard(s). Operation is subject to the
following two conditions: (1) this device may not cause interference, and (2) this device must accept any
interference, including interference that may cause undesired operation of the device.
Le présent appareil est conforme aux CNR d'Industrie Canada applicables aux appareils radio exempts
de licence. L'exploitation est autorisée aux deux conditions suivantes : (1) l'appareil ne doit pas produire
de brouillage, et (2) l'utilisateur de l'appareil doit accepter tout brouillage radioélectrique subi, même si
le brouillage est susceptible d'en compromettre le fonctionnement.
This device and it's antennas(s) must not be co-located or operating in conjunction with any other
antenna or transmitter except in accordance with IC multi-transmitter product procedures.
Cet appareil et son antenne (s) ne doit pas être co-localisés ou fonctionnement en association avec une
autre antenne ou transmetteur.
6 D-Link DWL-3600AP Quick Install Guide
Page 7

IMPORTANT NOTE:
IC Radiation Exposure Statement:
This equipment complies with IC RSS-102 radiation exposure limits set forth for an uncontrolled
environment. This equipment should be installed and operated with minimum distance 20cm between
the radiator & your body.
Cet équipement est conforme aux limites d'exposition aux rayonnements IC établies pour un
environnement non contrôlé. Cet équipement doit être installé et utilisé avec un minimum de 20cm de
distance entre la source de rayonnement et votre corps.
For product available in the USA/Canada market, only channel 1~11 can be operated. Selection of other
channels is not possible.
Pour les produits disponibles aux États-Unis / Canada du marché, seul le canal 1 à 11 peuvent être
exploités. Sélection d'autres canaux n'est pas possible.
低功率電波輻射性電機管理辦法
第十二條 經型式認證合格之低功率射頻電機,非經許可,公司、商號或使用者均不得擅自變更頻率、
加大功率或變更原設計之特性及功能。
第十四條 低功率射頻電機之使用不得影響飛航安全及干擾合法通信;經發現有干擾現象時,應立即停
用,並改善至無干擾時方得繼續使用。前項合法通信,指依電信法規定作業之無線電通信。低功率射頻電
機須忍受合法通信或工業、科學及醫療用電波輻射性電機設備之干擾。
CE Mark Warning:
This is a Class B product. In a domestic environment, this product may cause radio interference, in
which case the user may be required to take adequate measures.
Power Usage
This device is an Energy Related Product (ErP) with High Network Availability (HiNA), and automatically
switches to a power-saving Network Standby mode within 1 minute of no packets being transmitted. If it
is not needed during certain periods of time, it can be unplugged to save energy.
Network Standby: 6.4 watts
ENGLISH
D-Link DWL-3600AP Quick Install Guide 7
Page 8

TECHNICAL SUPPORT
TECHNISCHE UNTERSTÜTZUNG
ENGLISH
ASSISTANCE TECHNIQUE
ASISTENCIA TÉCNICA
SUPPORTO TECNICO
TECHNISCHE ONDERSTEUNING
POMOC TECHNICZNA
TECHNICKÁ PODPORA
TECHNICKÁ PODPORA
TECHNIKAI TÁMOGATÁS
TEKNISK SUPPORT
TEKNISK SUPPORT
TEKNISK STØTTE
TEKNINEN TUKI
dlink.com/support
ASSISTÊNCIA TÉCNICA
ΤΕΧΝΙΚΉ ΥΠΟΣΤΉΡΙΞΗ
TEHNIČKA PODRŠKA
TEHNIČNA PODPORA
SUPORT TEHNIC
ТЕХНИЧЕСКА ПОДДРЪЖКА
8 D-Link DWL-3600AP Quick Install Guide
Ver 1.10(EU) 2015/11/09
 Loading...