

Page 1
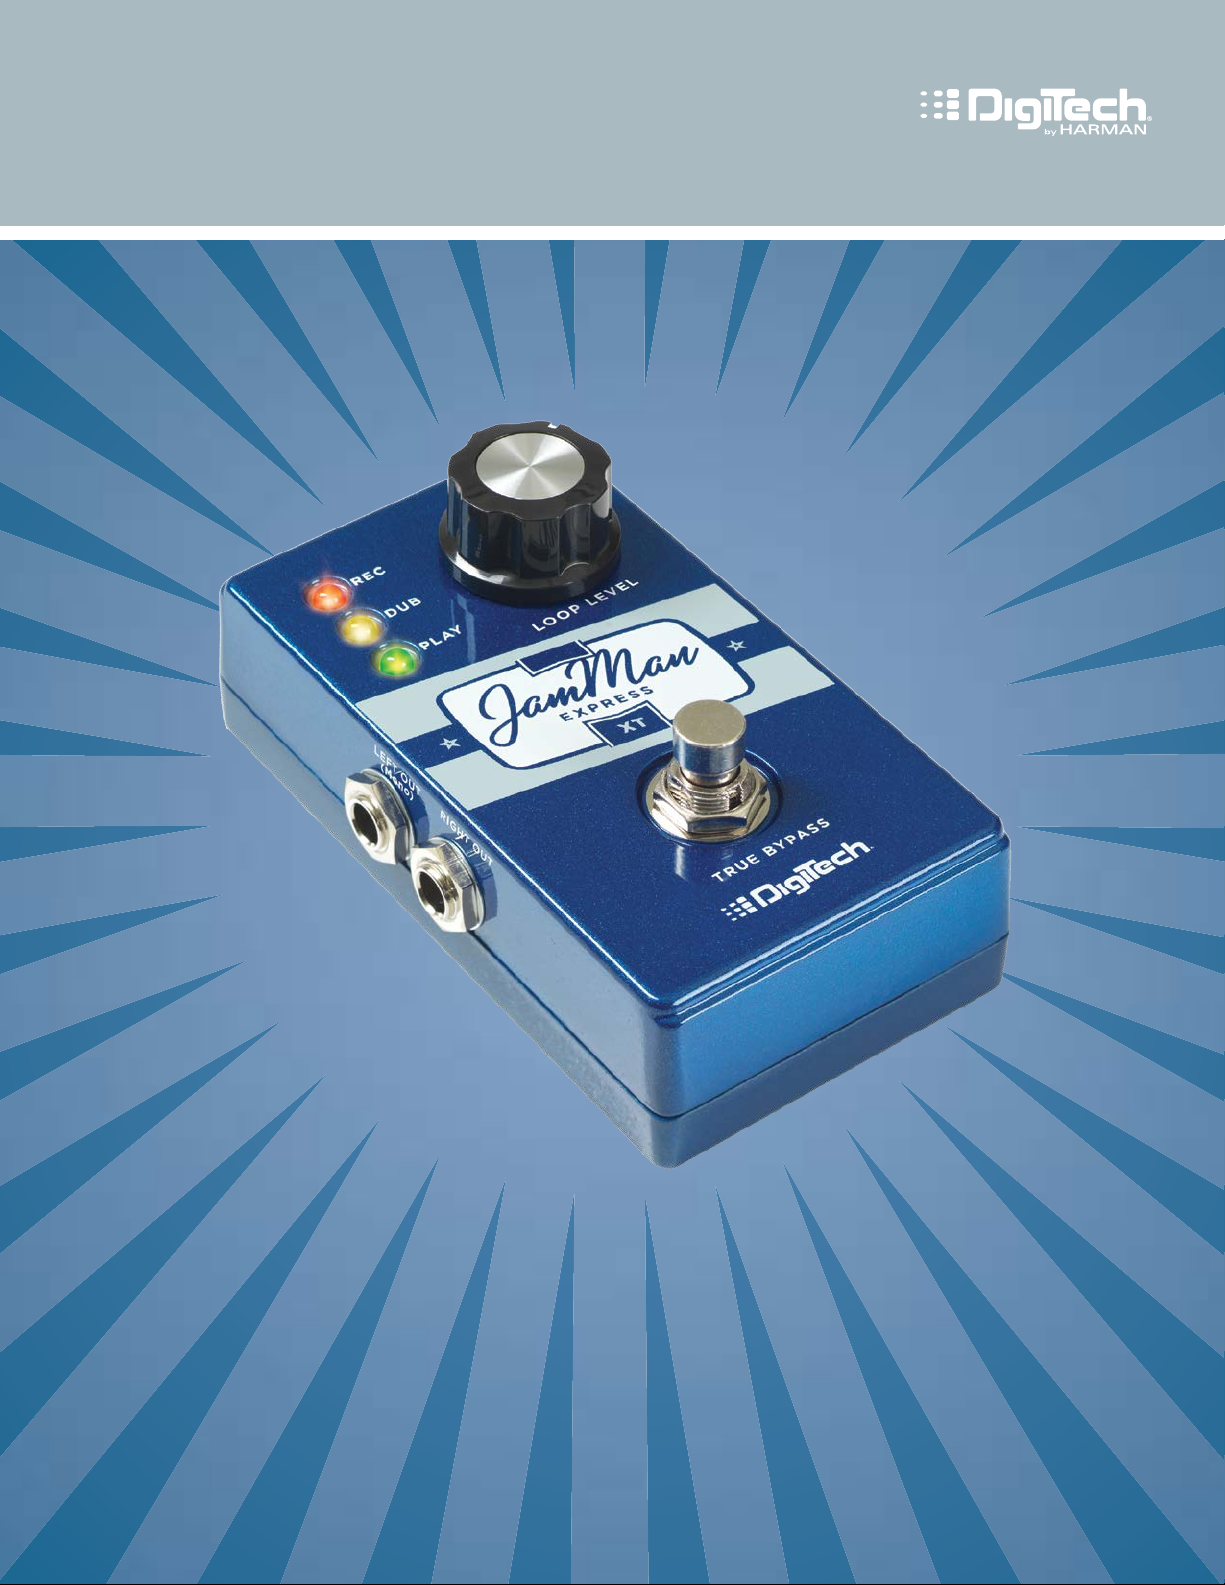
JamMan Express XT
Stereo Looper w/JamSync
Owner’s Manual
Page 2

Warranty
We at DigiTech® are very proud of our products and back-up each one we sell with the following warranty:
1. Please register online at digitech.com within ten days of purchase to validate this warranty. This warranty is valid only in
the United States.
2. DigiTech warrants this product, when purchased new from an authorized U.S. DigiTech dealer and used solely within the
U.S., to be free from defects in materials and workmanship under normal use and service. This warranty is valid to the
original purchaser only and is non-transferable.
3. DigiTech liability under this warranty is limited to repairing or replacing defective materials that show evidence of defect,
provided the product is returned to DigiTech WITH RETURN AUTHORIZATION, where all parts and labor will be covered up
to a period of one year (this warranty is extended to a period of six years when the product has been properly registered
through our website). A Return Authorization number may be obtained from DigiTech by telephone. The company shall not
be liable for any consequential damage as a result of the product’s use in any circuit or assembly.
4. Proof-of-purchase is considered to be the responsibility of the consumer. A copy of the original purchase receipt must be
provided for any warranty service.
5. DigiTech reserves the right to make changes in design, or make additions to, or improvements upon this product without
incurring any obligation to install the same on products previously manufactured.
6. The consumer forfeits the benefits of this warranty if the product’s main assembly is opened and tampered with by anyone
other than a certified DigiTech technician or, if the product is used with AC voltages outside of the range suggested by
the manufacturer.
7. The foregoing is in lieu of all other warranties, expressed or implied, and DigiTech neither assumes nor authorizes any
person to assume any obligation or liability in connection with the sale of this product. In no event shall DigiTech or its
dealers be liable for special or consequential damages or from any delay in the performance of this warranty due to causes
beyond their control.
NOTE: The information contained in this manual is subject to change at any time without notification. Some information
contained in this manual may also be inaccurate due to undocumented changes in the product since this version of the manual
was completed. The information contained in this version of the owner’s manual supersedes all previous versions.
Service Contact Info
If you require technical support, contact DigiTech Technical Support. Be prepared to accurately describe the problem. Know the
serial number of your device - this is printed on a sticker attached to the chassis. If you have not already taken the time to
register your product, please do so now at digitech.com.
Before you return a product to the factory for service, we recommend you refer to the manual. Make sure you have correctly
followed installation steps and operation procedures. For further technical assistance or service, please visit our support page
at digitech.com/en-US/support. If you need to return a product to the factory for service, you MUST first contact Technical
Support to obtain a Return Authorization Number.
No returned products will be accepted at the factory without a Return Authorization Number.
Please refer to the Warranty information, which extends to the first end-user. After expiration of the warranty, a reasonable
charge will be made for parts, labor, and packing if you choose to use the factory service facility. In all cases, you are
responsible for transportation charges to the factory. DigiTech will pay return shipping if the unit is still under warranty.
Use the original packing material if it is available. Mark the package with the name of the shipper and with these words in
red: DELICATE INSTRUMENT, FRAGILE! Insure the package properly. Ship prepaid, not collect. Do not ship parcel post.
Page 3

Table of Contents
Overview ���������������������������������������������������������������������� 1
Introduction ��������������������������������������������������������������������������������1
Features ����������������������������������������������������������������������������������������1
9V Battery Installation ����������������������������������������������� 1
The User Interface & Connectors ����������������������������� 2
The User Interface ��������������������������������������������������������������������2
Connectors ���������������������������������������������������������������������������������3
Connection Diagrams ������������������������������������������������� 4
Standard Looping �����������������������������������������������������������������������4
Multi-Track Looping Using JamSync ���������������������������������������4
Multi-Player/Multi-Track Looping Using JamSync ����������������5
Operation ��������������������������������������������������������������������� 6
Recording a Phrase �������������������������������������������������������������������� 6
Clearing a Phrase �����������������������������������������������������������������������6
Recording Overdubs ����������������������������������������������������������������� 7
Undoing/Redoing Overdubs ����������������������������������������������������7
Using JamSync ����������������������������������������������������������������������������� 8
Specications ������������������������������������������������������������� 11
Page 4

Overview
Introduction
The JamMan Express XT is a versatile, yet simple to operate stereo looper� With stereo
inputs/outputs, three LEDs to indicate looping status, and true bypass operation, the
JamMan Express XT allows you to record mono or stereo loops with ease and without
compromising your tone when bypassed�
Using the built-in JamSync feature, multiple JamMan Express XT devices can be
synchronized to provide multi-track looping capabilities! Cascade two or more JamMan
Express XTs for multi-track looping in your own rig or sync with your bandmates’ JamSync
compatible JamMan devices for multi-track looping with other members in the band!
With a small footprint, simplicity of operation, great sound quality, 10 minutes of stereo
loop recording time, and JamSync, the JamMan Express XT is sure to be the perfect looper
®
to compliment your rig� Thanks for choosing DigiTech
Features
�
• Stereo 1/4” Inputs & Outputs
• 10 Minutes of Loop Recording Time
• True Bypass Operation
• JamSync for Multi-Track Looping
• Silent Clear
• Intuitive User Interface
• Compatible w/ 9V Battery or PS0913DC Power Supply (Each Sold Separately)
™
Prevents Playback When Clearing Loops
9V Battery Installation
To install a 9V battery:
1� Remove the two screws in the bottom of the chassis using a Phillips screwdriver�
2� Locate the battery connection leads, connect the battery, then place the battery in the
battery compartment�
3� Place the bottom plate back on the chassis and replace the two screws� Make sure the
battery connection wires are clear of the chassis and screw mounting holes to avoid
pinching the wires and causing damage�
1
Page 5
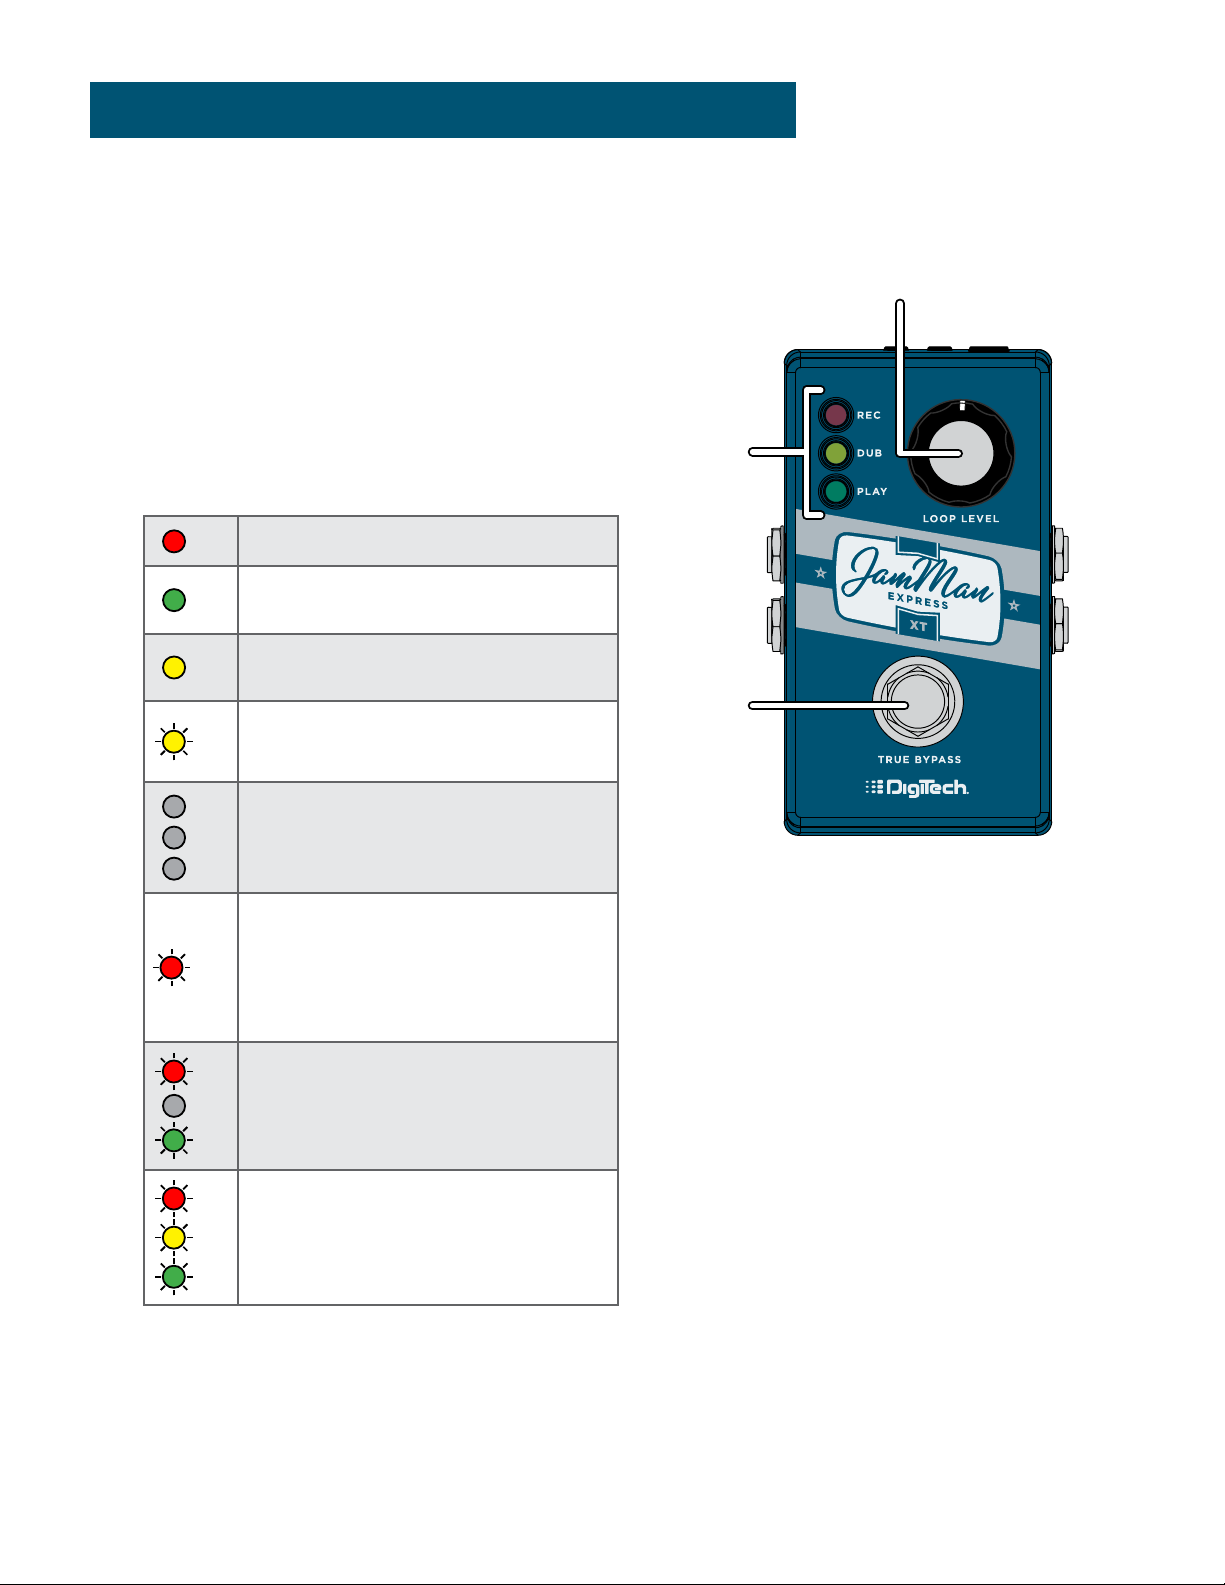
The User Interface & Connectors
1
3
2
4 5
6
9
10
The User Interface
1� LOOP LEVEL Knob
This knob controls the output level of the
loop�
2� Status LEDs
These LEDs indicate the status of the
pedal as shown in the below table�
LED Status
REC
Loop is being recorded.
PL AY
Loop is playing.
DUB
Overdub is being recorded.
DUB
Overdub is being undone/redone.
REC
Pedal is in standby
DUB
(recording/playback stopped).
PL AY
Loop is being cleared
(footswitch held).
REC
Slave armed for record
(connected as slave via JamSync).
REC
Slave synchronization established via
DUB
JamSync.
PL AY
REC
DUB
Low battery.
PL AY
3� Footswitch
The Footswitch is used to perform functions in the JamMan Express XT� It is used to
control all looping functions (record, play, overdub, undo/redo, stop, and loop clear)�
2
Page 6

Connectors
9
10
8
7
8
7
4� Power Jack
Connect an optional PS0913DC power
supply to this jack�
5� JAMSYNC OUT
Connect this jack to the JAMSYNC IN
jack on another JAMSYNC compatible
device for master control over loop
playback and stop functions�
6� JAMSYNC IN
Connect this jack to the JAMSYNC
OUT jack on another JAMSYNC
compatible device to slave loop
playback and stop functions to a master
device�
7� LEFT IN (Mono)
Connect your instrument or additional
pedal to this jack� The signal is fed to
both outputs when only the LEFT IN
(Mono) jack is used�
4 5
6
7
8
8� RIGHT IN
Connect a second input to this jack
for stereo operation� LEFT and RIGHT
inputs are processed separately through
the looper engine and then fed to the
LEFT and RIGHT outputs to maintain
true stereo separation between
channels�
9� LEFT OUT (Mono)
Connect this output to the input of a
single guitar amplier or another pedal
input�
10� RIGHT OUT
Connect this output to the input of a
second guitar amplier when a second
amp is being used�
9
10
3
Page 7

Connection Diagrams
AMP 1
JAMSYNC
Standard Looping
AMP 1
OUT
IN IN
OUT
ININ
AMP 2
HARMAN PS0913DC
POWER SUPPLY
GUITAR
OUT
In 1 (Mono)Out 1 (Mono)
In 2Out 2
OUT
IN
Optional
Multi-Track Looping Using JamSync
OUT
ININ
IN IN
OUT
OUT
MASTER
AMP 2
OUT
OUT
SLAVE
IN
IN
IN
OUT
HARMAN PS0913DC
POWER SUPPLIES
GUITAR
OUT
In 1 (Mono)Out 1 (Mono)
In 2Out 2
IN
JamSync
Optional
4
Page 8

Multi-Player/Multi-Track Looping Using JamSync
To PA Mixer (Right)
AMP 1
OUT
OUT
IN IN
OUT
MASTER
AMP 2
AMP 1
ININOUT
IN
HARMAN PS0913DC
POWER SUPPLY
GUITAR
ININ
OUT
In 1 (Mono)Out 1 (Mono)
In 2Out 2
OUT
IN
GUITAR PLAYER BASS PLAYER KEYBAORD PLAYER
HARMAN PS0913DC
POWER SUPPLY
BASS
To PA Mixer (Left)
JAMSYNC JAMSYNC
OUT
DI 1
DI 2
OUT
IN
OUT
In 1 (Mono)Out 1 (Mono)
INOUT
SLAVE 1
HARMAN PS0913DC
INPUTOUTPUT
IN
OUT
OUT
INPUTOUTPUT
IN
IN
POWER SUPPLY
KEYBOARD
OUTOUT
OUT
IN
SLAVE 2
JamSync
Optional
5
Page 9

Operation
The JamMan Express XT was designed to be very simple to use right out of the box� This
section of the manual describes how to perform the basic looping functions�
Recording a Phrase
The JamMan Express XT records a single phrase and then plays it back as a continuous loop�
To record a phrase:
1� Press the
FOOTSWITCH and begin playing to start recording� The REC LED will light
solid red and recording will begin�
2� When nished recording, press the
phrase will automatically begin playing back in a repeating loop and the
FOOTSWITCH once to set the loop end point� The
PLAY LED will
light solid green�
3� Press the
FOOTSWITCH 2 times quickly to stop loop playback�
NOTE: The maximum phrase recording length is 10 minutes�
Clearing a Phrase
Clear a phrase to re-record it or record a new phrase� The JamMan Express XT has a
™
unique feature, referred to as "Silent Clear
play it rst. Note that you cannot undo the process of clearing a phrase, so make sure you
want to proceed before performing this function�
To clear a recorded phrase:
", which clears a phrase without requiring you to
1� Stop loop playback if it is not already (all LEDs should be off)� If loop playback is active
PLAY LED is on), press the FOOTSWITCH 2 times to stop loop playback�
(the
2� Press and hold the
FOOTSWITCH for ~2 seconds� The REC LED will quickly ash red,
indicating the phrase has been cleared�
NOTE: When using a slave/master looper setup, if the master loop is ~3 seconds or less
and if pressing and holding the
clear on the slave device, you may need to initiate play then stop (3
FOOTSWITCH from a stopped state does not initiate
FOOTSWITCH
presses) and hold the footswitch on the 3rd press to clear its loop�
6
Page 10

Recording Overdubs
Once a phrase has been recorded, overdubs can be added on top of the phrase�
To record overdubs:
1� Press the
FOOTSWITCH to start loop playback� The PLAY LED will light solid green and
the phrase will begin playing�
2� Press the
FOOTSWITCH again to begin overdub recording� The DUB LED will light solid
yellow and audio will be recorded on top of the phrase�
3� When done overdub recording, press the
FOOTSWITCH to end the overdub recording
session� The loop will continue playing along with the newly recorded overdub�
4� You can now decide whether you would like to undo the last overdub and re-record
it (see "Undoing/Redoing Overdubs" in the following section) or proceed and record
additional overdubs by repeating steps 2-3�
5� Press the
FOOTSWITCH 2 times quickly to stop loop playback�
Undoing/Redoing Overdubs
When recording overdubs, you can choose to undo the last overdub recorded if you wish
to re-record it� If you change your mind or accidentally undo an overdub, you can then redo
the overdub to retrieve it�
To undo/redo an overdub:
1� Record an overdub as described in the previous section, "Recording Overdubs"�
2� Ensure the loop is playing (the
FOOTSWITCH 1 time to initiate loop playback� Once the loop is playing, press
the
and hold the
FOOTSWITCH for ~2 seconds� The DUB LED will quickly ash yellow,
PLAY LED should be on)� If the loop is not playing, press
indicating the overdub has been undone�
3� If you wish to restore the overdub, press and hold the
seconds to redo the overdub� The
DUB LED will quickly ash yellow, indicating the
FOOTSWITCH again for ~2
overdub has been redone�
NOTE: Each time an overdub is added, the last overdub is merged with the original loop
and can no longer be undone using the Undo feature� If the combined loop and overdub
length exceed 10 minutes (e�g�, a 6 minute loop and 6 minute overdub, etc�), the two
will automatically be merged and the overdub cannot be undone� Overdubs added to a
recorded loop of 5 minutes or less will not be automatically merged�
7
Page 11

Using JamSync
1/8” Stereo Cable (TRS)
JamSync
INOUT To Next JamSync Slave
OUT
Connection & Record Sequence
JamSync allows you to synchronize multiple JamSync compatible devices using optional 1/8”
mini stereo (TRS) cables (see below cable diagram)� This allows a JamSync master to control
the loop playback and stop functions for all connected JamSync slaves, providing multi-track
looping capabilities� You can cascade multiple JamMan Express XTs for single-player/multitrack looping or collaborate with other musicians, each recording and cueing their own
loops for expressive multi-player/multi-track looping�
Tip
Sleeve
(Ground)
Ring Ring
Record First Record Second
JamSync
Optional
1/8” Mini Stereo (TRS) Cable Diagram
Tip
Sleeve
Tip
Sleeve (Ground)
Ring
(Ground)
.
To use JamSync, connect the master device’s
JAMSYNC OUT jack to the JAMSYNC IN jack
of the rst slave device. The
REC and PLAY
LEDs on the slaved device will briey ash,
indicating the unit is in slave mode� Daisy chain
any remaining slaves in the same manner�
When cascading multiple JamMan Express XTs
SLAVEMASTER
in series and using JamSync, the last JamMan
Express XT device in the chain should be the
master� You will then want to record to the
last JamMan Expess XT device in the signal
chain (the master) rst, then the second to
last device, etc�, working your way backwards
through the signal chain� Performing these
actions will ensure you record only what you
intend to during each pass�
There are two methods for recording loops to a JamSync slaved JamMan device:
• Manual Slave Recording Method
Using this method, you can record to the master then wait until you’re ready to
record to the slave� This method works well if you do not wish to immediately
8
Page 12

record to the slave and instead wish to record to the slave at a later time in the song�
When using this method, you must arm the slave to record before the master device
reaches its loop start point� It’s at this loop start point that the master will send the
record command to the slave device(s), so the slave device must be armed in advance
to receive the record command�
• Sequential Slave Recording Method
Using this method, you can record to a JamSync slave immediately upon setting the
loop end point of the master� Use this method when you want to immediately begin
recording to the slave device after recording to the master device�
To record using the Manual Slave Recording Method:
1� Press the
FOOTSWITCH on the master device and begin playing� The REC LED will light
solid red and recording will begin�
2� When nished recording to the master, press the
FOOTSWITCH once to set the loop
end point� The phrase will automatically begin playing back in a repeating loop and the
PLAY LED will light solid green�
3� Press the
will begin once the master makes another pass of its loop start point (the
FOOTSWITCH on the slave device to arm the slave for recording� Recording
REC LED will
light solid red on the slave device when recording begins )� Once recording has begun,
play your part�
4� When nished recording to the slave, press the slave’s
FOOTSWITCH once to set the
loop end point� The phrase will automatically begin playing back along with the master
loop and the
5� Press the
PLAY LED will light solid green�
FOOTSWITCH on the master device 2 times quickly to stop loop playback on
both devices�
To record using the Sequential Slave Recording Method:
1� Press the
FOOTSWITCH on the slave device� The REC LED will ash red, indicating the
slave is armed for recording�
2� Press the
FOOTSWITCH on the master device and begin playing� The REC LED will light
solid red and recording on the master will begin�
3� When nished recording to the master, press the master
FOOTSWITCH once to set
the loop end point� The master device’s recorded phrase will begin playing back and the
armed slave device will immediately begin recording, indicated by the slave’s
REC LED
lighting solid red�
9
Page 13

4� Play your part�
5� When nished recording to the slave, press the slave’s
FOOTSWITCH once to set the
loop end point� The phrase will automatically begin playing back along with the master
loop and the
6� Press the
PLAY LED will light solid green�
FOOTSWITCH on the master device 2 times quickly to stop loop playback on
both devices�
10
Page 14

Specifications
DIGITAL
A/D/A Conversion: 24-bit
Max� Individual Loop Time: 10 minutes (stereo)
LEFT(MONO)/RIGHT INPUTS
Connector Type: ¼” Unbalanced (Tip-Sleeve)
Input Impedance: 550 kΩ Mono/1.1 MΩ Stereo
Unity Gain Input to Output: Loop Level knob set to 12 o’clock position
Max Input Level at Unity: +4 dBu DFS
Left and Right Audio Paths: Each channel maintains analog dry path
LEFT(MONO)/RIGHT OUTPUTS
Connector Type: ¼” Unbalanced (Tip-Sleeve)/Balanced (Tip-Ring-Sleeve)
Output Impedance: 100 Ω Unbalanced / 200 Ω Balanced
Playback Unity Gain: Loop Level knob set to 12 o’clock position
Maximum Output Level: +4 dBu DFS
PERFORMANCE
Frequency Response: +0/-3 dB 20-20 kHz
Signal to Noise Ratio: > -100 dB
POWER REQUIREMENTS
Consumption: < 2 Watts
Current Draw: < 150 mA
Battery Life: Approximately 2 hours of operation using 9V battery
POWER ADAPTER
Model: PS0913DC-01
Input: 100 VAC-240 VAC, 50/60 Hz
Output: 9 VDC 1�3 A
Polarity:
DIMENSIONS/WEIGHT
Dimensions: 4�5” (L) x 2�75” (W) x 2” (H)
112 mm (L) x 65 mm (W) x 33 mm (H)
Product Weight: 0�6 lb / 0�27 kg
Shipping Weight: 0�75 lb / 0�32 kg
Product specications are subject to change without notice.
DigiTech, Silent Clear, and JamSync are trademarks of Harman�
Page 15

PHONE: (801) 566-8800
WEB:
SUPPORT:
JamMan Express XT Owner's Manual
© 2015 Harman� All rights reserved�
DigiTech is a registered trademark of Harman�
digitech�com
digitech�com/en-US/support
5038282-B
 Loading...