

Page 1

Page 2
IMPORTANT SAFETY INFORMATION
WarnInG for your ProtectIon
reaD tHe foLLoWInG:
KEEP THESE INSTRUCTIONS
HEED ALL WARNINGS
FOLLOW ALL INSTRUCTIONS
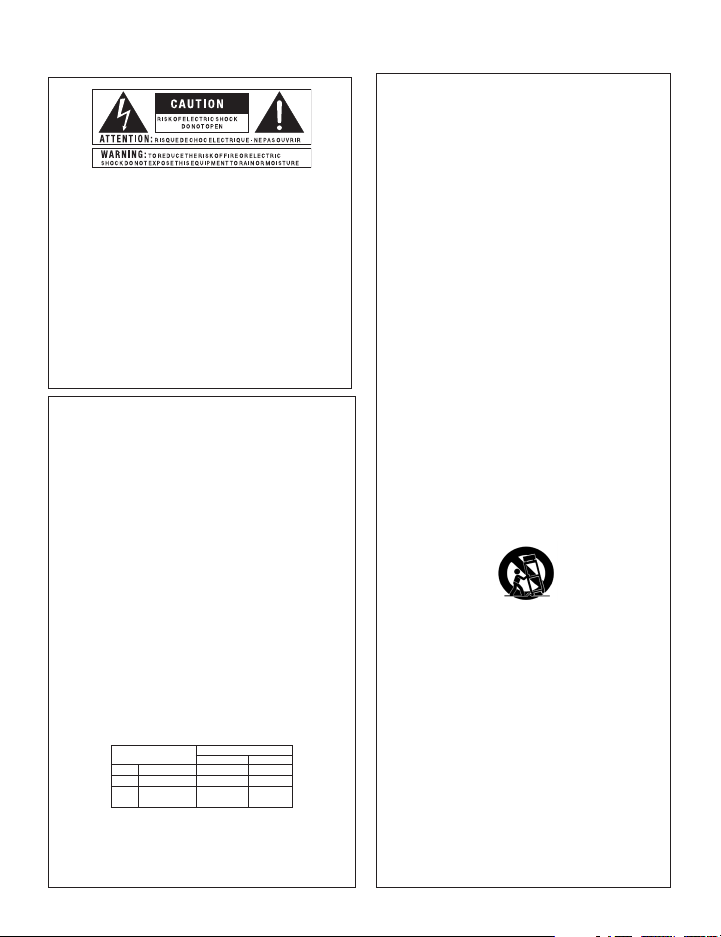
The symbols shown above are internationally accepted symbols that
warn of potential hazards with electrical products. The lightning flash
with arrowpoint in an equilateral triangle means that there are dangerous
voltages present within the unit. The exclamation point in an equilateral
triangle indicates that it is necessary for the user to refer to the owner’s
manual.
These symbols warn that there are no user ser viceable parts inside the
unit. Do not open the unit. Do not attempt to ser vice the unit yourself.
Refer all servicing to qualified personnel. Opening the chassis for any
reason will void the manufacturer’s warranty. Do not get the unit wet. If
liquid is spilled on the unit, shut it off immediately and take it to a dealer
for service. Disconnect the unit during storms to prevent damage.
Safety InStructIonS
NOTICE FOR CUSTOMERS IF YOUR UNIT IS EQUIPPED WITH A POWER CORD.
WARNING: THIS APPLIANCE SHALL BE CONNECTED TO A MAINS SOCKET OUTLET WITH A
PROTECTIVE EARTHING CONNECTION.
The cores in the mains lead are coloured in accordance with the following code:
GREEN and YELLOW - Earth BLUE - Neutral BROWN - Live
As colours of the cores in the mains lead of this appliance may not correspond with the
coloured markings identifying the terminals in your plug, proceed as follows:
•
The core which is coloured green and yellow must be connected to the terminal in the
plug marked with the letter E, or with the earth symbol, or coloured green, or green
and yellow.
•
The core which is coloured blue must be connected to the terminal marked N or coloured
black.
•
The core which is coloured brown must be connected to the terminal marked L or
coloured red.
This equipment may require the use of a different line cord, attachment plug, or both,
depending on the available power source at installation. If the attachment plug needs to
be changed, refer servicing to qualified service personnel who should refer to the table
below. The green/yellow wire shall be connected directly to the units chassis.
CONDUCTOR
L LIVE BROWN BLACK
N NEUTRAL BLUE WHITE
E EARTH GND
WARNING: If the ground is defeated, certain fault conditions in the unit or in the system
to which it is connected can result in full line voltage between chassis and earth ground.
Severe injury or death can then result if the chassis and earth ground are touched
simultaneously.
WIRE COLOR
Normal Alt
GREEN/
YEL
GREEN
THE APPARATUS SHALL NOT BE EXPOSED TO DRIPPING OR SPLASHING LIQUID
AND NO OBJECT FILLED WITH LIQUID, SUCH AS VASES, SHALL BE PLACED ON
THE APPARATUS
CLEAN ONLY WITH A DRY CLOTH.
DO NOT BLOCK ANY OF THE VENTILATION OPENINGS. INSTALL IN ACCORDANCE
WITH THE MANUFACTURER’S INSTRUCTIONS.
DO NOT INSTALL NEAR ANY HEAT SOURCES SUCH AS RADIATORS, HEAT REGISTERS,
STOVES, OR OTHER APPARATUS (INCLUDING AMPLIFIERS) THAT PRODUCE HEAT.
ONLY USE ATTACHMENTS/ACCESSORIES SPECIFIED BY THE MANUFACTURER.
UNPLUG THIS APPARATUS DURING LIGHTNING STORMS OR WHEN UNUSED FOR
LONG PERIODS OF TIME.
Do not defeat the safety purpose of the polarized or grounding-type plug. A polarized
plug has two blades with one wider than the other. A grounding type plug has two
blades and a third grounding prong. The wide blade or third prong are provided for
your safety. If the provided plug does not fit your outlet, consult an electrician for
replacement of the obsolete outlet.
Protect the power cord from being walked on or pinched particularly at plugs,
convenience receptacles, and the point where they exit from the apparatus.
Use only with the cart stand, tripod bracket, or table specified by the manufacture,
or sold with the apparatus. When a cart is used, use caution when moving the cart/
apparatus combination to avoid injury from tip-over.
Refer all servicing to qualified service personnel. Servicing is required when the apparatus
has been damaged in any way, such as power-supply cord or plug is damaged, liquid
has been spilled or objects have fallen into the apparatus, the apparatus has been
exposed to rain or moisture, does not operate normally, or has been dropped.
POWER ON/OFF SWITCH: For products provided with a power switch, the power
switch DOES NOT break the connection from the mains.
MAINS DISCONNECT: The plug shall remain readily operable. For rack-mount or
installation where plug is not accessible, an all-pole mains switch with a contact
separation of at least 3 mm in each pole shall be incorporated into the electrical
installation of the rack or building.
FOR UNITS EQUIPPED WITH EXTERNALLY ACCESSIBLE FUSE RECEPTACLE: Replace
fuse with same type and rating only.
MULTIPLE-INPUT VOLTAGE: This equipment may require the use of a different line
cord, attachment plug, or both, depending on the available power source at installation.
Connect this equipment only to the power source indicated on the equipment rear
panel. To reduce the risk of fire or electric shock, refer servicing to qualified service
personnel or equivalent.
Page 3

If you want to dispose this product, do not mix it with general hou sehold waste. There is a
separate collection system for used electronic produ cts in accordance with legislation th at
requires proper treatment, recovery and recycling.
Private household in the 25 member states of the EU,in Switzerland and Norway may return their used
electronic products freeof charge to designated collection facilities or to a retailer (if you purchase a similar
new one).
For Countries not mentioned above, please contact your local authorities for a correct method of disposal.
By doing so you will ensure that your disposed product undergoes the necessary treatment, recovery and
recycling and thus prevent potential negative effects on the environment and human health.
IMPORTANT SAFETY INFORMATION
eLectroMaGnetIc
coMPatIBILIty
This unit conforms to the Product Specifications noted on the
Declaration of Conformity. Operation is subject to the
following two conditions:
this device may not cause harmful
•
interference, and
this device must accept any interference received,
•
including interference that may cause undesired
operation.
Operation of this unit within significant
electromagnetic fields should be avoided.
use only shielded interconnecting cables.
•
u.K. MaInS PLuG WarnInG
A molded mains plug that has been cut off from the cord
is unsafe. Discard the mains plug at a suitable disposal
facility.
NEVER UNDER ANY CIRCUMSTANCES
SHOULD YOU INSERT A DAMAGED OR
CUT MAINS PLUG INTO A 13 AMP POWER
SOCKET.
Do not use the mains plug without the fuse cover in
place. Replacement fuse covers can be obtained from
your local retailer. Replacement fuses are 13 amps and
MUST be ASTA approved to BS1362.
DecLaratIon of
conforMIty
Manufacturer’s Name: DigiTech
Manufacturer’s Address: 8760 S. Sandy Parkway
Sandy, Utah 84070, USA
declares that the product:
Product name: HarmonyMan
Product option: all (requires Class II power
adapter that conforms
to the requirements of
EN60065, EN60742, or
equivalent.)
conforms to the following Product Specifications:
Safety: IEC 60065 (7th ed. 2001)
EMC: EN 55013 (2001+A1)
EN 55020 (1998)
Supplementary Information:
The product herewith complies with the requirements of the
Low Voltage Directive 2006/95/EC and the EMC Directive
2004/108/EC.
Vice-President of Engineering – MI
8760 S. Sandy Parkway
Sandy, Utah 84070, USA
Date: February 21, 2008
European Contact: Your local DigiTech Sales and Service Office or
Harman Music Group
8760 South Sandy Parkway
Sandy, Utah 84070, USA
Ph: (801) 566-8800
Fax: (801) 568-7583
Page 4

Warranty
We at DigiTech® are very proud of our products and back up each one we sell with the
following warranty:
1. The warranty registration card must be mailed within ten days after purchase date
to validate this warranty, or you can register via our website (www.digitech.com).
2. DigiTech warrants this product, when used solely within the U.S., to be free from
defects in materials and workmanship under normal use and service.
3. DigiTech liability under this warranty is limited to repairing or replacing defective
materials that show evidence of defect, provided the product is returned to
DigiTech WITH RETURN AUTHORIZATION, where all parts and labor will
be covered up to a period of one year (this warranty is extended to a period of
six years when the product has been properly registered by mail or through our
website). A Return Authorization number may be obtained from DigiTech by
telephone. The company shall not be liable for any consequential damage as a
result of the product’s use in any circuit or assembly.
4. Proof-of-purchase is considered to be the burden of the consumer.
5. DigiTech reserves the right to make changes in design, or make additions to, or
improvements upon this product without incurring any obligation to install the
same on products previously manufactured.
6. The consumer forfeits the benefits of this warranty if the product’s main assembly
is opened and tampered with by anyone other than a certified DigiTech technician
or, if the product is used with AC voltages outside of the range suggested by the
manufacturer.
7. The foregoing is in lieu of all other warranties, expressed or implied, and DigiTech
neither assumes nor authorizes any person to assume any obligation or liability in
connection with the sale of this product. In no event shall DigiTech or its dealers be
liable for special or consequential damages or from any delay in the performance of
this warranty due to causes beyond their control.
NOTE: The information contained in this manual is subject to change at any time without
notification. Some information contained in this manual may also be inaccurate due to
undocumented changes in the product or operating system since this version of the manual was
completed. The information contained in this version of the owner’s manual supersedes all
previous versions.
Page 5

Congratulations!
Table of Contents
Introduction ...............................................................................................1
Guided Tour - Front Panel ........................................................................2
Guided Tour - Rear Panel .........................................................................5
Using the HarmonyManTM .......................................................................7
Make Connections .............................................................................7
Adjust Levels and Tune Your Guitar .................................................7
Select a Voicing .................................................................................8
Setting the Key and Scale Automatically or Manually .....................8
Automatically Set the Key and Scale ................................................9
Manually Set the Key and Scale ........................................................9
Reset the musIQTM Feature’s Memory...............................................9
Play Your Solo ...................................................................................10
Store Settings to a Memory Location ................................................10
Load Settings from a Memory Location ............................................11
Types of Shifting .......................................................................................13
Triad-Centered Shifting ....................................................................12
Scalic Shifting ...................................................................................13
Fixed (Chromatic) Shifting ...............................................................14
Detune Shifting .................................................................................14
Shifting Example for the key of C Major / A Minor .........................15
Mode Reference Table ..............................................................................16
Using the Mode Reference Table ......................................................16
Using the musIQ Feature ..........................................................................17
One Guitar (No Sidechain) ................................................................17
Two Guitars (Sidechain) ....................................................................18
Page 6

Table of Contents
Connection Diagrams ................................................................................20
Electric Guitar with Pre-Harmony Distortion ....................................20
Single Guitar Using Amp Send/Return for Distortion ......................21
Two Guitars with Pre-Harmony Distortion .......................................22
Acoustic Guitar to Mixer/P.A. ...........................................................23
Troubleshooting ........................................................................................24
Specifications ............................................................................................25
Page 7

Introduction
Congratulations and thank you for purchasing the HarmonyManTM!
The HarmonyMan is the world’s first guitar pedal that produces multi-part
guitar harmonies on guitar solos by analyzing the chords you were playing
before the solo. Simply play a song and hit the Harmony On/Off footswitch
when you solo to get amazing multi-part guitar harmonies.
Included Items
HarmonyMan
PS0913-B Power Supply (9 VAC, 1300 mA)
This Manual
Registration Card
The HarmonyMan features include:
•
3-part guitar harmony with no programming.
•
Ultra clean, low-latency harmonies.
•
Unique Key Display updates dynamically in response to your playing.
A musically intelligent “Circle of 5ths” layout puts musically related
keys (that share most notes) beside each other.
•
Two independently selectable voicings including two intelligent shifting
modes, unison/detune, and straight chromatic shifts.
•
Strum Key lets you easily set the key and scale by simply strumming
your guitar—perfect for songs that start with a solo.
•
Sidechain Input lets you solo while the HarmonyMan harmonies
dynamically adapt to a rhythm/second guitarist’s chord changes.
•
Guitar tuner with easy-to-read indicator lights.
•
4 custom memory locations with footswitch access.
•
Programmable Mix knob controls the mix between the lead and the
harmonies. The mix can range from 100% dry to 100% wet.
•
Pre-Harmony Distortion Loop – ¼” distortion effects loop lets you
apply distortion before the harmonies are generated to create a
harmony-with-distortion sound.
•
Mono or Stereo Outputs.
•
True analog bypass.
1
Page 8

1 2 3 4
5
6
8
79
10
11
12
Guided Tour - Front Panel
Harmony Key Display
1.
The Harmony Key Display indicates the key and scale that will be used
for intelligent harmony note generation. When the musIQTM button
is enabled, the display shows the automatic harmony key based on the
chords that have recently been played. When the musIQ button is
disabled, the display shows the manual harmony key. When the display
shows a circling red LED, the HarmonyManTM is waiting for guitar chords
in order to identify the harmony key.
musIQTM Button
2.
When the musIQ button is enabled, the HarmonyMan overrides the
manual key with an automatic harmony key based on the chords that
have recently been played. When the musIQ button is disabled, the
HarmonyMan displays the most recent manual harmony key and uses this
key when generating scale-based harmonies. When you manually set the
key and scale (see page 8 for more information), the musIQ button light
flashes while the Memory Select footswitch (7) is held down to indicate
2
that the unit is listening for a new key.
Page 9

Guided Tour - Front Panel
3.
Memory Store Button
The Memory Store button stores the current voicings (Voice 1 and
Voice 2), mix setting, and key and scale to the active memory. Any time
changes are made to the Voice knobs (10) or Mix knob (5), the Memory
Store button lights to show that the changes have not yet been stored.
Additionally, the Memory Store button lights whenever the harmony key
has been manually changed using the Strum To Set Key function. (For
more information about saving and loading key and scale, see “Load
Settings from a Memory Location” on page 11.) When the Store button
is pressed, the new changes are stored to the active memory and the light
goes out.
4.
Signal LED
The Signal LED turns green when a guitar signal is detected in the Guitar
Clean Input or Distortion Return Input, yellow when the guitar signal is
approaching levels that may clip, and red when the signal may be clipping
and may degrade the ability of the HarmonyManTM to detect the guitar
notes. The Signal LED does not indicate Sidechain Input signal level.
5.
Mix Knob
The Mix knob controls the mix of the lead and harmony signals when the
effect is on. The mix can be stored as part of a custom harmony voicing to
any of the four memories (any time the Mix knob is adjusted, the Memory
Store button’s LED will illuminate, indicating that the change must be
stored to a memory, or it will be lost when the HarmonyMan is powered
down or the memory is changed). At the full minimum position only lead
dry (no effect) is heard. At the full maximum position, only harmony
signal (no lead dry) is heard.
6.
Memory LEDs
The Memory LEDs indicate which memory is currently active. From the
factory, different sets of voicings, mix settings, and harmony key have been
pre-programmed but you can customize each memory for your particular
needs. For example, Memory 1 could be set to a stereo detune, Memory 2
could be used for 3rds up intelligent harmony, Memory 3 could add a 5th
up harmony, and Memory 4 could have an octave-down voicing with mix
at maximum for a bass guitar sound.
3
Page 10

Guided Tour - Front Panel
7.
Memory Select Footswitch
The Memory Select footswitch cycles through the four available memories.
Each memory recalls the most recently stored voicings, mix level, and
manual harmony key making it easy to set up several different voicing
combinations and harmony keys for a single gig without having to touch
any other controls. Additionally, this footswitch can be used to manually
set the key and scale (see page 8 for more information).
8.
Tuner Display
When the tuner is active, the tuner LEDs show how sharp or flat the
current note is. The current note is displayed on the Voice 1 Display (12).
9.
Harmony On/Off Footswitch
The Harmony On/Off footswitch turns the harmony effect on and off.
Additionally, this footswitch can be held down to engage the guitar tuner
(the output is muted while the tuner is active). When the this footswitch is
off, the HarmonyManTM provides true analog bypass.
10.
Voice Knobs
The Voice Knobs set the voicing for each of the two harmonies which are
displayed above on the Voicing Displays (12). Voicings include two types
of intelligent shifting, detuning, and fixed chromatic shifts from –12 to 12
semitones, as well as a two octave down shift. See pages 12-14 for lists of
available voicings.
11.
On LED (Harmony Indicator Light)
When this LED is lit, harmonies are active and can be heard. When the
LED is off, the HarmonyManTM is bypassed. These states of the Harmony
LED are toggled by the Harmony On/Off footswitch (9). When this LED
is flashing, the tuner is active.
12.
Voicing Displays
The Voicing Displays show the currently selected voicing for the two
HarmonyManTM voices. See pages 12-14 for lists of available voicings. When
the tuner is active, the Voice 1 display shows the current note being tuned.
4
Page 11

Guided Tour - Rear Panel
1 2 3 4 5 6
Guitar Clean Input
1.
Connect your clean guitar signal here for chord recognition. This is the
same signal that will be shifted to generate harmonies if there is nothing
connected to the Distortion Return jack.
Distortion Send / Return
2.
Many guitarists prefer to add distortion before adding harmony signals. To
do this, connect the Dist Send jack to the input of your distortion pedal,
and connect the output of the distortion back to the Dist Return. Now
the musIQTM feature’s chord recognition will still be based on your clean
guitar signal, but the pitch shifting will be applied as a post-distortion
effect.
Sidechain Input / Thru
3.
Optionally connect a second clean guitar so another guitarist can play
chords while you solo over them – any of the triad-centered harmony
voicings will respond dynamically to the chord changes. The analog
Sidechain Thru provides a clean signal that can then be processed and sent
to the rhythm guitar amp.
5
Page 12

Guided Tour - Rear Panel
4.
Ground Lift
Eliminates most “hum” problems with having two guitars and amps
connected to the HarmonyManTM. If you hear hum or buzz coming from
your amp, try pressing this button.
5.
Main Outputs
Left only (mono) output, or stereo output. When stereo output is used, the
harmonies are hard panned left and right and the lead is panned center.
Power Supply Jack
6.
Connect only the included PS-0913B power supply here.
6
Page 13

Using the HarmonyManTM
The following section walks you through a basic setup and some basic use. For
additional setup options, refer to the diagrams on pages 20-23.
Make Connections
Before connecting the HarmonyManTM, make sure that the power to your
amplifier or P.A. is off and that the HarmonyMan is plugged into the wall
and powered on. There is no power switch on the HarmonyMan. To turn the
HarmonyMan on or off, connect or disconnect the included PS-0913B power
supply from the Power Supply jack.
Connect your guitar to the Clean Input jack.
1.
Make sure your amp or P.A. system volume is turned all the way down.
2.
Connect the Left (Mono) output jack to your amp or mixer input.
3.
Adjust Levels and Tune Your Guitar
Observe the Signal LED above the Mix knob and play your guitar. Adjust
1.
the output level of your guitar until the Signal LED stays lit green while
you play at performance level. (The Signal LED turns green when a guitar
signal is detected in the Guitar Clean Input, yellow when the guitar signal is
approaching levels that may clip, and red when the signal may be clipping
and may degrade the ability of the HarmonyMan to detect the guitar notes.)
Gradually increase the volume of your amp or PA until you reach a
2.
comfortable listening level.
Press and hold the Harmony On/Off footswitch until the On LED flashes
3.
and then release the Harmony On/Off footswitch.
Tune your guitar. The Voice 1 Display shows the note you’re playing, and
4.
the Tuner Display indicates if the note is sharp or flat.
When you’re finished tuning, press either footswitch to exit tuner mode.
5.
7
Page 14

Using the HarmonyMan
TM
Select a Voicing
1.
Turn the Voice 1 and Voice 2 knobs counter-clockwise until both Voicing
Displays read OF.
Now turn the Voice 1 knob clockwise to select a voicing. For this example,
2.
select 3H (a third up) for Voice 1, and leave Voice 2 OF. See pages 12-14
for descriptions of available voicings.
Setting the Key and Scale Automatically or Manually
Using its built-in musIQTM technology, the HarmonyManTM can determine
what key you’re in just by listening to the chords you’re playing. This is very
useful when you don’t want to set the key for every song. Just leave the musIQ
button enabled and the HarmonyMan will choose the best key automatically.
Alternatively, you can manually set the key and scale you want to use by
holding down the Memory Select footswitch and strumming a chord. Both
methods for setting the key are described on page 9.
When the musIQ button is enabled, the color of the LED in the Harmony
Key Display indicates how obvious the current key is, based on the chord
progression you’re playing.
Note: A chord progression provides better results than a single chord
when the musIQ feature is determining the key and scale automatically.
A green LED in the Harmony Key Display indicates the key and scale are
recognized and are set. A yellow LED means some ambiguity exists regarding
the key and scale, but harmonization continues using that key and scale.
A single red LED cycling around the Harmony Key Display indicates that the
HarmonyMan’s key recognition memory needs chord information to determine
the key and scale. Note that when this occurs and the harmony is turned on,
the most recent automatic harmony key and scale are displayed and used for
harmony. If the musIQ button is disabled, the most recent manually set key
and scale are used.
8
Page 15

Using the HarmonyMan
TM
Automatically Set the Key and Scale
Make sure the musIQTM button is lit. (If it’s not lit, press it once.)
1.
Make sure the On LED is not lit. If it is lit, press the Harmony On/Off
2.
footswitch once.
Play some chords until one of the Harmony Key Display LEDs turns
3.
yellow and then turns green. The key and scale have now been set. Note
that even when a Harmony Key LED is yellow, that key and scale will be
used if the harmonies are engaged.
Manually Set the Key and Scale
Press and hold the Memory Select footswitch for approximately 1 second.
1.
The musIQ button will flash and a red LED will cycle around the Harmony
Key Display.
Continue to hold down the footswitch and strum a chord to set the key
2.
and scale accordingly. For example, if you strum an Am chord, the C/Am
LED in the Harmony Key Display turns green. The output is muted when
manually setting the key and scale.
Release the Memory Select footswitch.
3.
Reset the musIQTM Feature’s Memory
If you have manually set the key, but want the HarmonyManTM to automatically
detect the key again, you can reset the musIQ feature’s memory and turn the
musIQ feature back on. Resetting the musIQ memory erases any chordal
history that previously existed.
Make sure the On LED is not lit. If it is lit, turn it off using the Harmony
1.
On/Off footswitch.
Press and hold the Memory Select footswitch for approximately 1 second.
2.
The musIQ button flashes and a red LED cycles around the Harmony Key
Display.
Release the Memory Select footswitch without strumming a chord. In this
3.
example, any previous note information in the musIQ feature’s memory
is cleared and the musIQ feature is enabled. This will result in faster key
tracking, for example, when starting a new song after a previous song has
ended.
9
Page 16

Using the HarmonyMan
TM
Play Your Solo
Once you have the key and scale recognized, you can then enable the
harmonies and play your solo.
1.
Press the Harmony On/Off footswitch so that the On LED is lit.
2.
Play a solo in the key and scale that is indicated by the Harmony Key
Display.
3.
Turn the Mix knob counter-clockwise to hear more lead guitar and less
harmony, or turn the knob clockwise to hear more harmony and less lead
guitar.
Note: Any time you change the voicing or mix from what’s stored in the
current memory, the Store button’s LED illuminates. Changes will be lost
when you switch to a new memory or turn off the HarmonyMan unless you
store the changes to the current memory location.
Store Settings to a Memory Location
1.
Press and release the Memory Select footswitch repeatedly until Memory 1
is selected.
Choose your harmony voicings for Voice 1 and Voice 2, and set the
2.
Mix knob to the desired level. If you want to store a key and scale that
is different from the key and scale that is currently displayed, set the
harmony key manually (see page 8). The Store button’s LED illuminates
when any of these settings are changed.
Press and release the Store button. The current settings have now been
3.
stored to Memory 1. You can now recall these settings at any time by
pressing the Memory Select footswitch until Memory 1 is selected.
10
Note: If the musIQTM button is illuminated when the Store button is
pressed, the automatic harmony key that is displayed is saved and used
as the manual harmony key. Also, when stepping through the different
memory locations, the position of the Mix knob does not necessarily
reflect the actual mix level since the mix is stored independently into each
memory.
Page 17

Using the HarmonyMan
TM
Load Settings from a Memory Location
Press and release the Memory Select footswitch repeatedly until the desired
memory location is selected. The previously stored mix, voice settings, and
harmony key are loaded.
Note: If the musIQTM button is lit, the displayed harmony key may not
match the recalled harmony key because when the musIQ feature is
enabled, the automatic key overrides the stored manual key. If you press
the musIQ button to turn this feature off, the recalled manual harmony
key will then be displayed.
11
Page 18

Types of Shifting
The HarmonyMan™ features four different types of shifting depending on the
voicing that is selected using the Voice Knobs. The Triad-Centered, Scalic, and
Fixed Shifting voicings use a new ultra-clean, low-latency shifter technology
optimized for single note guitar soloing. The Detune voicings are optimized for
multi-note input and sound great with full chords.
Triad-Centered Shifting
Triad-centered shifting creates musically correct harmonies that are based
around root, 3rd, and 5th chordal structure along with their inversions. Triadcentered voicings “favor” certain chordal structures. There are two sets of
triad-centered voicings (described below), indicated by uppercase (LL, for
example) and lowercase letters ( , for example) in the Voicing Displays. The
uppercase voicings are optimized for major scales, while the lowercase voicings
are optimized for minor scales.
When a rhythm guitar signal is plugged into the Sidechain Input jack, the triadcentered harmonies follow the chord progression of the rhythm guitar to create
the most dynamic harmony line possible.
Triad-Centered Voicings (Note: exact shifts vary depending on input note and
currently detected scale or chord when using the Sidechain Input).
Tonality Display Description
Lower - Input is shifted approximately a 6th scale tone down.
LL
Major
(Ionian
Mode)
Minor
(Aeolian
Mode)
Low - Input is shifted approximately a 3rd scale tone down.
L
High - Input is shifted approximately a 3rd scale tone up.
H
Higher - Input is shifted approximately a 6th scale tone up.
HH
Lower - Input is shifted approximately a 6th scale tone down.
Low - Input is shifted approximately a 3rd scale tone down.
High - Input is shifted approximately a 3rd scale tone up.
h
Higher - Input is shifted approximately a 6th scale tone up.
hh
12
Page 19

Types of Shifting
Scalic Shifting
Intelligent scalic shifting creates musically correct harmonies for which the
shift amount varies in order to create harmonies that are always in the current
harmony key. For example, if the current voicing is set to 3H and the harmony
key is G/Em, then an input note of B produces a shift of +3 semitones (minor
3rd interval) resulting in a harmony note of D. But an input note of D produces
a shift of +4 semitones (major 3rd interval) resulting in a harmony note of F#.
Note that although octave shifts are included in this category for convenience,
they result in fixed shifts for all notes and scales.
Scalic Voicings
Display Description
2o
8L
6L
5L
4L
3L
3H
4H
5H
6H
8H
Input is shifted down by 2 octaves.
Input is shifted down by 1 octave.
Input is shifted to the 6th scale tone down.
Input is shifted to the 5th scale tone down.
Input is shifted to the 4th scale tone down.
Input is shifted to the 3rd scale tone down.
Input is shifted to the 3rd scale tone up.
Input is shifted to the 4th scale tone up.
Input is shifted to the 5th scale tone up.
Input is shifted to the 6th scale tone up.
Input is shifted up by an octave.
13
Page 20

Types of Shifting
Fixed (Chromatic) Shifting
Fixed (or chromatic) shifting applies the same shift to all notes regardless of the
input note or harmony key, resulting in a shifted signal that is transposed from
the input by a fixed number of semitones.
Fixed (Chromatic) Shift Voicings
Display Description
-12 to -1
1 to 12
Detune Shifting
Detune shifting applies a very small fixed amount of pitch shifting to a voice
in order to produce a thicker overall sound. Typically each voice is detuned in
opposite directions. This is done automatically on the HarmonyManTM because
Voice 1 is always detuned up and Voice 2 is always detuned down. Four detune
shifts are provided ranging from 5 cents to 30 cents (one cent is 1/100 of a
semitone).
Detune Voicings
Display Description
d1
d2
d3
d4
Input is shifted down by the indicated number of semitones.
Input is shifted up by the indicated number of semitones.
Narrow Detune: Input is shifted up by 5 cents for Voice 1, and
down by 5 cents for Voice 2.
Medium Detune: Input is shifted up by 10 cents for Voice 1,
and down by 10 cents for Voice 2.
Wide Detune: Input is shifted up by 20 cents for Voice 1, and
down by 20 cents for Voice 2.
Very Wide Detune: Input is shifted up by 30 cents for Voice 1,
and down by 30 cents for Voice 2.
14
Page 21

Types of Shifting
Shifting Example for the key of C Major / A Minor
For all notes in the C major scale, the following table shows the harmony note
that would be generated for each Triad-Centered and Scalic voicing. The arrows
indicate whether the output note is above or below the input note. Two arrows
are used to indicate a two octave difference.
Triad-Centered Voicings *
C Major A Minor
LL L H HH
C
D
E
F
G
A
B
2o 8L 6L 5L 4L 3L 3H 4H 5H 6H 8H
C
C C E F G A E F G A C
D
D D F G A B F G A B D
E
E E G A B C G A B C E
F
F F A B C D A B C D F
G
G G B C D E B C D E G
A
A A C D E F C D E F A
B
B B D E F G D E F G B
G E G
E
F B F B
G C G C
A D A D
C E C E
C F C F
D G D G
Scalic Voicings (C Major)
A
C
B
D G D G
C
E A E A
D
F B F B
E
A C A C
F
A D A D
G
B E B E
h hh
E C E
* When a rhythm guitar is connected to the Sidechain Input, the triad-centered harmony notes
will vary depending on the chords being played on the rhythm guitar.
15
Page 22

Mode Reference Table
Using the Mode Reference Table
For musicians who utilize musical modes, the table below shows what keys and
scales on the Harmony Key Display correspond to the different modes and
their keys and scales. For example, if you want to play in the mode of C Lydian,
the correct HarmonyManTM key and scale is G Maj. See page 8 for more
information on setting the HarmonyMan key and scale.
Mode
Ionian
Key
(Natural
Major)
A
A Maj G Maj F Maj E Maj D Maj C Maj Bb Maj
B
B Maj A Maj G Maj Gb Maj E Maj D Maj C Maj
C
C Maj Bb Maj Ab Maj G Maj F Maj Eb Maj Db Maj
D
D Maj C Maj Bb Maj A Maj G Maj F Maj Eb Maj
E
E Maj D Maj C Maj B Maj A Maj G Maj F Maj
F
F Maj Eb Maj Db Maj C Maj Bb Maj Ab Maj Gb Maj
G
G Maj F Maj Eb Maj D Maj C Maj Bb Maj Ab Maj
Dorian Phrygian Lydian Mixolydian
Aeolian
(Natural
Minor)
Locrian
16
Page 23

Using the musIQTM Feature
When the musIQTM feature is enabled, it “listens” to your guitar playing in
order to automatically determine the best notes for harmonization with TriadCentered and Scalic Voicings. The way in which the HarmonyManTM does this
is slightly different depending on whether or not you have a guitar connected to
the Sidechain Input.
One Guitar (No Sidechain)
When only one guitar is plugged into the HarmonyMan (via the Clean Guitar
Input jack), the HarmonyMan uses this clean guitar signal to determine the
key and scale. In order for the HarmonyMan to actively follow the key of the
song, the musIQ button must be on and the Harmony Effect must be turned off.
During this time the musIQ feature analyzes the clean guitar signal and updates
the Harmony Key Display.
When the Harmony Key Display shows a circling red LED, the HarmonyMan
does not currently have any information to determine the key and scale. When
the key has been set, but some uncertainty exists, the Harmony Key Display
shows a yellow LED for that key. When the key is determined and certainty
exists, the LED turns green. Note that the key chosen for harmonies does not
always match what is considered to be the key of the song. An example would
be that a song in G that uses the Mixolydian mode would typically sound best
with harmonies in the key of Cmaj / Am.
Note that as soon as the harmony effect is turned on (by pressing and releasing
the Harmony On/Off footswitch), the current harmony key shown in the
Harmony Key Display (whether yellow or green) is locked in and will not
change, even if the musIQ button is illuminated. This ensures that the guitar
solo that is being harmonized will not cause the key to change inadvertently.
Once the harmony is turned off, the monitoring of the key by the musIQ
feature will continue.
17
Page 24

Using the musIQTM Feature
The following table summarizes how the musIQTM feature works when the
Sidechain Input is NOT used:
No Sidechain Signal Effect on Triad-Centered and Scalic Voicings
Harmony Effect OFF
Analyzes lead guitar signal to determine best
•
key for harmony.
Key is shown on the Harmony Key Display
•
in yellow (when uncertain) or green (when
certain).
Harmony Effect ON
Current key is locked, and chord analysis is
•
frozen until Harmony is turned off.
Two Guitars (Sidechain)
When the HarmonyManTM detects that a mono cable is connected to the
Sidechain input, the musIQ function determines the key and scale of the song
using the Sidechain Input instead of the Guitar Clean input. Furthermore, when
any of the Triad-Centered voicings are selected, the Sidechain signal is analyzed
in real-time to determine the chord progression, and this chord progression is
used to create the most dynamic harmonies possible. Typically, the Sidechain
signal comes from a live rhythm guitar player or a pre-recorded accompaniment
signal from a source like the DigiTech® JamManTM Looper.
Note: The Sidechain chord analysis has been optimized for rhythm guitar.
For best results, the Sidechain signal should contain full chords strummed
in a steady rhythm.
The Harmony Key Display functions differently when a Sidechain signal is
detected: the current key is shown as a green LED, and the current detected
chord is shown as a yellow LED. This is how the HarmonyMan tells you that
the rhythm guitar signal is affecting the harmonies. Note that when using the
Sidechain Input, the Harmony Key Display continues to react even when the
harmony is turned on.
18
Page 25

Using the musIQTM Feature
If you want to stop the harmonies from responding to the Sidechain signal,
press and hold the Memory Select footswitch and strum a chord to set a new
key and scale. This will automatically turn off musIQTM and cause all harmonies
to be based on the strummed scale rather than the Sidechain Input (See
“Manually Set the Key and Scale” on page 9 for more information).
The following table summarizes how the musIQ feature works when the
Sidechain Input is used:
Sidechain Signal
Connected
Harmony Effect
OFF
Harmony Effect
ON
Effect on Triad-Centered
Voicings
Analyzes Sidechain
•
Input Signal to
determine best key for
harmony.
Key is shown on the
•
Harmony Key Display
in green.
Current Sidechain
•
Input chord is shown
on the Harmony Key
Display in yellow.
Analysis of Sidechain
•
Input Signal continues.
Same display as when
•
Harmony is OFF.
Harmony reacts to
•
current key as well as
chord changes.
Effect on Scalic Voicings
Analyzes Sidechain
•
Input Signal to
determine best key for
harmony.
Key is shown on the
•
Harmony Key Display
in green.
Current Sidechain
•
Input chord is shown
on the Harmony Key
Display in yellow.
Analysis of Sidechain
•
Input Signal continues.
Same display as when
•
Harmony is OFF.
Harmony reacts to
•
current key only.
19
Page 26

Connection Diagrams
Electric Guitar with Pre-Harmony Distortion
20
Page 27

Connection Diagrams
From Amp Send
To Amp Return
Single Guitar Using Amp Send/Return for Distortion
Note: Be sure to set your amplifier’s loop level to –10dB when using the
HarmonyManTM in an Amp Send/Return setup.
21
Page 28

Connection Diagrams
Lead Guitar with
pre-harmony
distortion
Rhythm Guitar
(Sidechain)
Two Guitars with Pre-Harmony Distortion
22
Page 29

Connection Diagrams
Pan
Mute
-10
0
+5
+10
-20
-30
-
-5
L / R
Mute
L / R
Mute
L / R
Mute
L / R
-5
-4
-3
-2
-10+1
+2
+3
+4
+5
Pan
-5
-4
-3
-2
-10+1
+2
+3
+4
+5
Pan
-5
-4
-3
-2
-10+1
+2
+3
+4
+5
Pan
-5
-4
-3
-2
-10+1
+2
+3
+4
+5
Pan
-5
-4
-3
-2
-10+1
+2
+3
+4
+5
Pan
-5
-4
-3
-2
-10+1
+2
+3
+4
+5
Pan
-5
-4
-3
-2
-10+1
+2
+3
+4
+5
Pan
-5
-4
-3
-2
-10+1
+2
+3
+4
+5
1 2 3 4
-10
0
+5
+10
-20
-30
-
-5
-10
0
+5
+10
-20
-30
-
-5
-10
0
+5
+10
-20
-30
-
-5
Mute
L / R
5
-10
0
+5
+10
-20
-30
-
-5
Mute
L / R
6
-10
0
+5
+10
-20
-30
-
-5
Mute
L / R
-10
0
+5
+10
-20
-30
-
-5
Aux 1
0
2
4 6
8
10
Aux 2
0
2
4 6
8
10
Aux 1
0
2
4 6
8
10
Aux 2
0
2
4 6
8
10
Aux 1
0
2
4 6
8
10
Aux 2
0
2
4 6
8
10
Aux 1
0
2
4 6
8
10
Aux 2
0
2
4 6
8
10
Aux 1
0
2
4 6
8
10
Aux 2
0
2
4 6
8
10
Aux 1
0
2
4 6
8
10
Aux 2
0
2
4 6
8
10
Aux 1
0
2
4 6
8
10
Aux 2
0
2
4 6
8
10
Aux 1
0
2
4 6
8
10
Aux 2
0
2
4 6
8
10
Mute
L / R
-10
0
+5
+10
-20
-30
-
-5
Acoustic Guitar to Mixer/P.A.
23
Page 30

Troubleshooting
Why does the Harmony Key Display show that a key is set when I try to reset
the musIQTM feature’s memory (by pressing, holding, and releasing the Memory
Select footswitch without playing a chord)?
When the musIQ memory is reset while the Harmony Effect is on, the manual
harmony key and scale are shown in the display until the Harmony is turned
off.
Why does the HarmonyManTM suggest a different key from the one that I think
is correct for this song?
The musIQ feature will suggest the key that it determines will work best with
the current song. This may not always match the key and scale you would
choose for that song. If you want to try a different key and scale, you can
manually choose a key and scale (See “Manually Set the Key and Scale” on
page 9 for more information).
Why is the Harmony Key Display showing the same key instead of reacting to
my chord progression when using a single guitar (no Sidechain)?
Make sure the musIQ feature is enabled. The automatic key recognition is only
shown when the musIQ button is on.
Make sure the harmony function is turned off (by pressing and releasing the
Harmony On/Off footswitch until the On LED turns off). The key will not
change while the harmony function is engaged when no Sidechain signal is
connected.
Make sure there is no signal connected to the Sidechain Input. When a signal
is connected the Sidechain Input, the Sidechain signal is used to determine the
key and scale instead of the lead guitar signal.
24
Page 31

Specifications
Connections
Inputs/Outputs
Clean Guitar Input 1/4” mono
Maximum Input Level: +11 dBu
Input Impedance: 1 MW
Distortion Send 1/4” mono
Unity Gain buffered output of Clean Guitar Input
Distortion Return 1/4” mono
Maximum Input Level: +11 dBu
Input Impedance: 1 MW
Sidechain Input 1/4” mono
Maximum Input Level: +11 dBu
Input Impedance: 1 MW
Sidechain Thru 1/4” mono
Hardwired output from Sidechain Input
Left Output 1/4” mono
Maximum Output Level: +16.7 dBu
Output Impedance: 1 kW
Right Output 1/4” mono
Maximum Output Level: +16.7 dBu
Output Impedance: 1 kW
25
Page 32

Specifications
A/D Performance
Sample Rate Frequency 44.1 kHz
Bit Depth 24-bit Processing
Power
US and Canada: 120 VAC, 60 Hz Adapter: PS0913B - 120
Japan: 100 VAC, 50/60 Hz Adapter: PS0913B - 100
Europe: 230 VAC, 50 Hz Adapter: PS0913B - 230
UK: 240 VAC, 50 Hz Adapter: PS0913B - 240
Power Input: 9 VAC 1.3 A
Power Consumption: 7 Watts
General
Dimensions: 6.7” Width x 5.6” Length x 2.6” Height
Weight: 2.88 lbs
DigiTech® engineers are constantly working to improve the quality of our
products. Specifications are therefore subject to change without notice.
26
Page 33

272829
Page 34

Page 35

Page 36

DigiTech®
8760 South Sandy Parkway
Sandy, Utah 84070
PH (801) 566-8800
FAX (801) 566-7005
www.digitech.com
HarmonyManTM Owner’s Manual 18-6000-A
DigiTech® , HarmonyManTM and JamManTM are registered trademarks of Harman
International. All other product name and trademarks are the property of their respective
©2008 Harman International Industries, Incorporated. All rights reserved
owners, which are in no way associated with DigiTech.
musIQTM is a trademark of 3dB Research Ltd.
 Loading...