

Page 1
PROGRESSIVE
DVD
1 2
9
8
REMOTE SENSOR
OPEN/CLOSE
5
PROGRESSIVE SCAN
¢ON / STANDBY
£OFF
PLAY STOP
763
STILL / PAUSE
B
PURE DIRECT
MODE 1
MODE 2
OFF
AL24
POWER
DVD AUDIO-VIDEO PLAYER DVD-3800
4 5 6
ENTER
ON
OFF
REMOTE CONTROL UNIT RC-553
TOP MENU
DISPLAY
MARKERRANDOM
PAGE
A-B
ZOOM
DIMMER
REPEAT
SETUP
NTSC / PALOPEN / CLOSE
CALL RETURN
SKIP
SLOW / SEARCH
POWER
ANGLE SUBTITLE AUDIO SEARCH MODE
PLAY
STILL /
PAUSE
STOP
PIC.ADJ
1
7
0
2
8
+10
3
9
PROG / DIR
V.S.S.
CLEAR
P.D.MEMORY
MENU
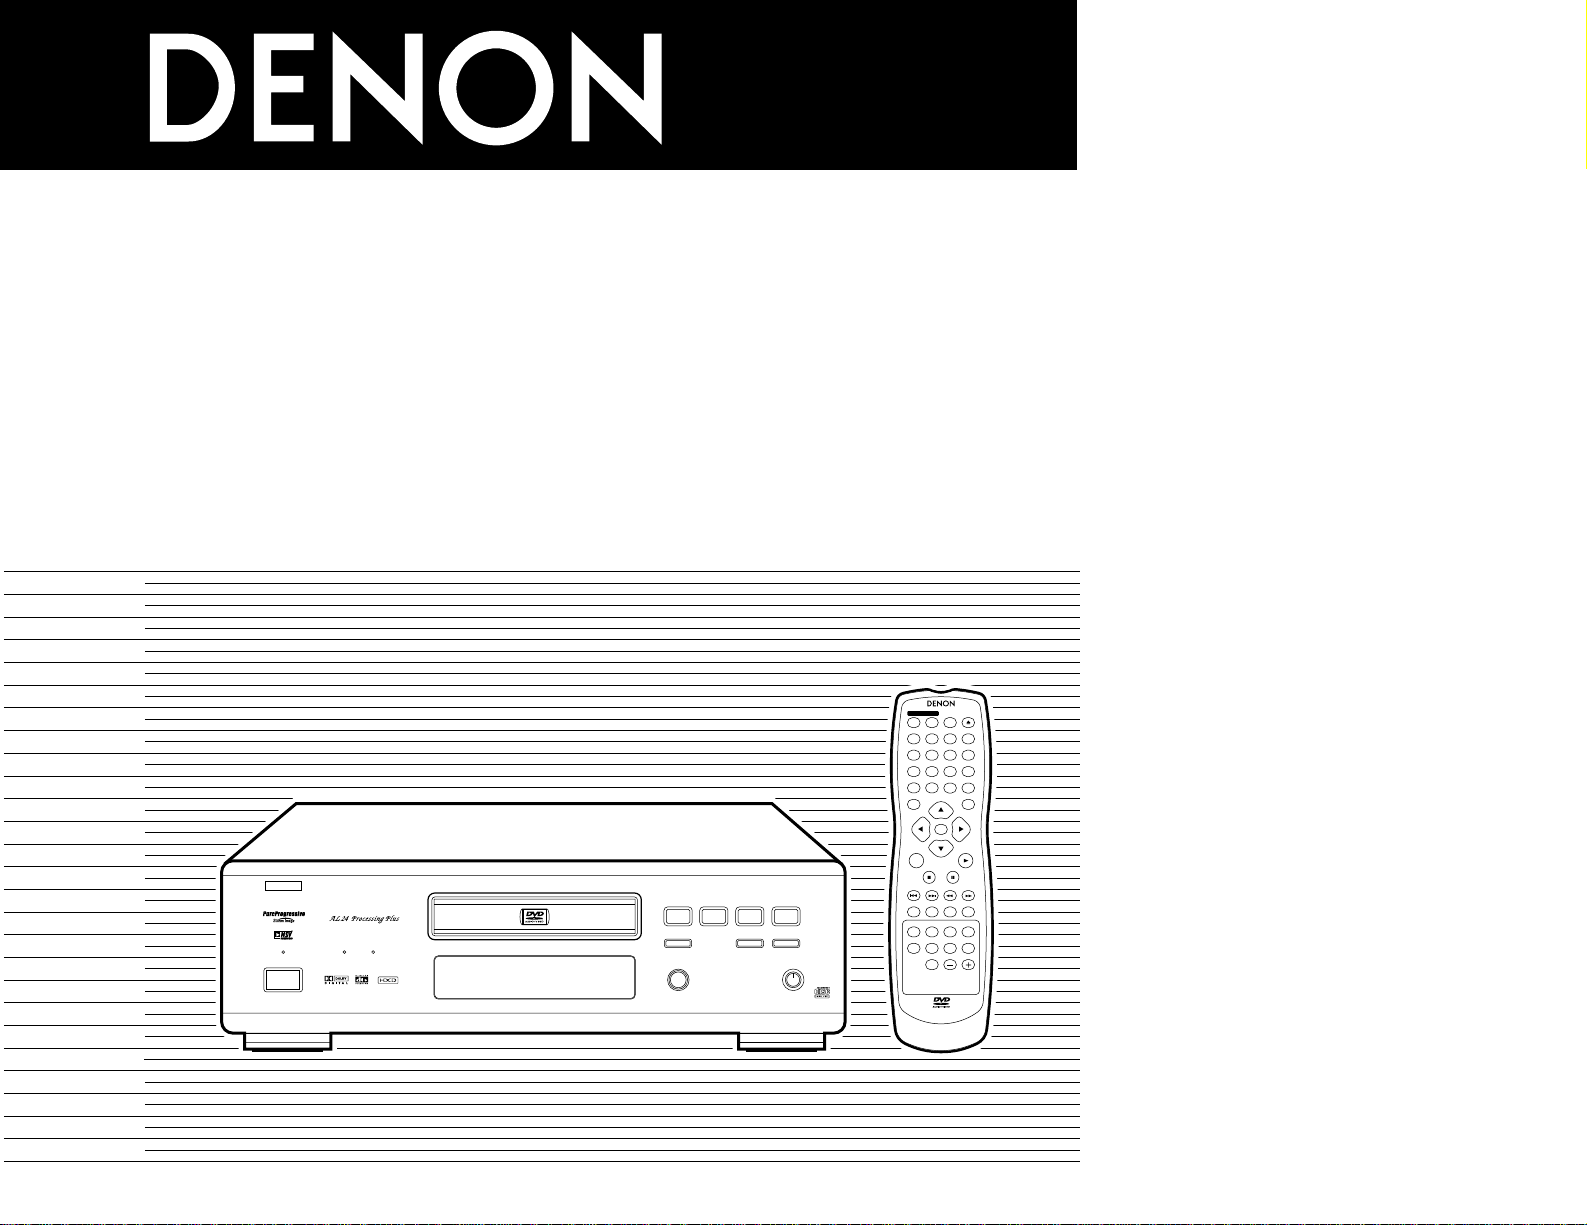
DVD AUDIO-VIDEO PLAYER
DVD-3800
OPERATING INSTRUCTIONS
BEDIENUNGSANLEITUNG
MODE D’EMPLOI
ISTRUZIONI PER L’USO
INSTRUCCIONES DE OPERACION
GEBRUIKSAANWIJZING
BRUKSANVISNING
FOR ENGLISH READERS PAGE 004 ~ PAGE 034
FÜR DEUTSCHE LESER SEITE 035 ~ SEITE 117
POUR LES LECTEURS FRANCAIS PAGE 037 ~ PAGE 118
PER IL LETTORE ITALIANO PAGINA 040 ~ PAGINA 119
PARA LECTORES DE ESPAÑOL PAGINA 121 ~ PAGINA 203
VOOR NEDERLANDSTALIGE LEZERS PAGINA 123 ~ PAGINA 204
FOR SVENSKA LÄSARE SIDA 126 ~ SIDA 205
Page 2
2
ENGLISHDEUTSCHFRANCAISITALIANO
NOTE ON USE / HINWEISE ZUM GEBRAUCH /
OBSERVATIONS RELATIVES A L’UTILISATION / NOTE SULL’USO
• Avoid high temperatures.
Allow for sufficient heat dispersion when installed on a
rack.
• Vermeiden Sie hohe Temperaturen.
Beachten Sie, daß eine ausreichend Luftzirkulation
gewährleistet wird, wenn das Gerät auf ein Regal gestellt
wird.
• Eviter des températures élevées
Tenir compte d’une dispersion de chaleur suffisante lors
de l’installation sur une étagère.
• Evitate di esporre l’unità a temperature alte.
Assicuratevi che ci sia un’adeguata dispersione del calore
quando installate l’unità in un mobile per componenti
audio.
• Handle the power cord carefully.
Hold the plug when unplugging the cord.
• Gehen Sie vorsichtig mit dem Netzkabel um.
Halten Sie das Kabel am Stecker, wenn Sie den Stecker
herausziehen.
• Manipuler le cordon d’alimentation avec précaution.
Tenir la prise lors du débranchement du cordon.
• Manneggiate il filo di alimentazione con cura.
Agite per la spina quando scollegate il cavo dalla presa.
• Keep the set free from moisture, water, and dust.
• Halten Sie das Gerät von Feuchtigkeit, Wasser und Staub
fern.
• Protéger l’appareil contre l’humidité, l’eau et lapoussière.
• Tenete l’unità lontana dall’umidità, dall’acqua e dalla
polvere.
• Unplug the power cord when not using the set for long
periods of time.
• Wenn das Gerät eine längere Zeit nicht verwendet
werden soll, trennen Sie das Netzkabel vom Netzstecker.
• Débrancher le cordon d’alimentation lorsque l’appareil
n’est pas utilisé pendant de longues périodes.
• Disinnestate il filo di alimentazione quando avete
l’intenzione di non usare il filo di alimentazione per un
lungo periodo di tempo.
• Do not obstruct the ventilation holes.
• Die Belüftungsöffnungen dürfen nicht verdeckt werden.
• Ne pas obstruer les trous d’aération.
• Non coprite i fori di ventilazione.
* (For sets with ventilation holes)
• Do not let foreign objects in the set.
• Keine fremden Gegenstände in das Gerät kommen
lassen.
• Ne pas laisser des objets étrangers dans l’appareil.
• E’ importante che nessun oggetto è inserito all’interno
dell’unità.
• Do not let insecticides, benzene, and thinner come in
contact with the set.
• Lassen Sie das Gerät nicht mit Insektiziden, Benzin oder
Verdünnungsmitteln in Berührung kommen.
• Ne pas mettre en contact des insecticides, du benzène et
un diluant avec l’appareil.
• Assicuratevvi che l’unità non venga in contatto con
insetticidi, benzolo o solventi.
• Never disassemble or modify the set in any way.
• Versuchen Sie niemals das Gerät auseinander zu nehmen
oder auf jegliche Art zu verändern.
• Ne jamais démonter ou modifier l’appareil d’une manière
ou d’une autre.
• Non smontate mai, nè modificate l’unità in nessun modo.
• DECLARATION OF CONFORMITY
We declare under our sole responsibility that this product, to
which this declaration relates, is in conformity with the following
standards:
EN60065, EN55013, EN55020, EN61000-3-2 and EN61000-3-3.
Following the provisions of 73/23/EEC, 89/336/EEC and
93/68/EEC Directive.
• ÜBEREINSTIMMUNGSERKLÄRUNG
Wir erklären unter unserer Verantwortung, daß dieses Produkt,
auf das sich diese Erklärung bezieht, den folgenden Standards
entspricht:
EN60065, EN55013, EN55020, EN61000-3-2 und EN61000-3-3.
Entspricht den Verordnungen der Direktive 73/23/EEC,
89/336/EEC und 93/68/EEC.
• DECLARATION DE CONFORMITE
Nous déclarons sous notre seule responsabilité que l’appareil,
auquel se réfère cette déclaration, est conforme aux standards
suivants:
EN60065, EN55013, EN55020, EN61000-3-2 et EN61000-3-3.
D’après les dispositions de la Directive 73/23/EEC, 89/336/EEC et
93/68/EEC.
• DICHIARAZIONE DI CONFORMITÀ
Dichiariamo con piena responsabilità che questo prodotto, al
quale la nostra dichiarazione si riferisce, è conforme alle seguenti
normative:
EN60065, EN55013, EN55020, EN61000-3-2 e EN61000-3-3.
In conformità con le condizioni delle direttive 73/23/EEC,
89/336/EEC e 93/68/EEC.
QUESTO PRODOTTO E’ CONFORME
AL D.M. 28/08/95 N. 548
ATTENZIONE: QUESTO APPARECCHIO E’ DOTATO DI
DISPOSITIVO OTTICO CON RAGGIO LASER.
L’USO IMPROPRIO DELL’APPARECCHIO PUO’ CAUSARE
PERICOLOSE ESPOSIZIONI A RADIAZIONI!
CLASS 1 LASER PRODUCT
LUOKAN 1 LASERLAITE
KLASS 1 LASERAPPARAT
ADVARSEL: USYNLIG LASERSTRÅLING VED ÅBNING, NÅR
SIKKERHEDSAFBRYDERE ER UDE AF FUNKTION.
UNDGÅ UDSAETTELSE FOR STRÅLING.
VAROITUS! LAITTEEN KÄYTTÄMINEN MUULLA KUIN TÄSSÄ
KÄYTTÖOHJEESSA MAINITULLA TAVALLA SAATTAA
ALTISTAA KÄYTTÄJÄN TURVALLISUUSLUOKAN 1
YLITTÄVÄLLE NÄKYMÄTTÖMÄLLE LASERSÄTEILYLLE.
VARNING- OM APPARATEN ANVÄNDS PÅ ANNAT SÄTT ÄN I DENNA
BRUKSANVISNING SPECIFICERATS, KAN ANVÄNDAREN
UTSÄTTAS FÖR OSYNLIG LASERSTRÅLNING SOM
ÖVERSKRIDER GRÄNSEN FÖR LASERKLASS 1.
,
CLASS 1
LASER
PRODUCT
,
,,
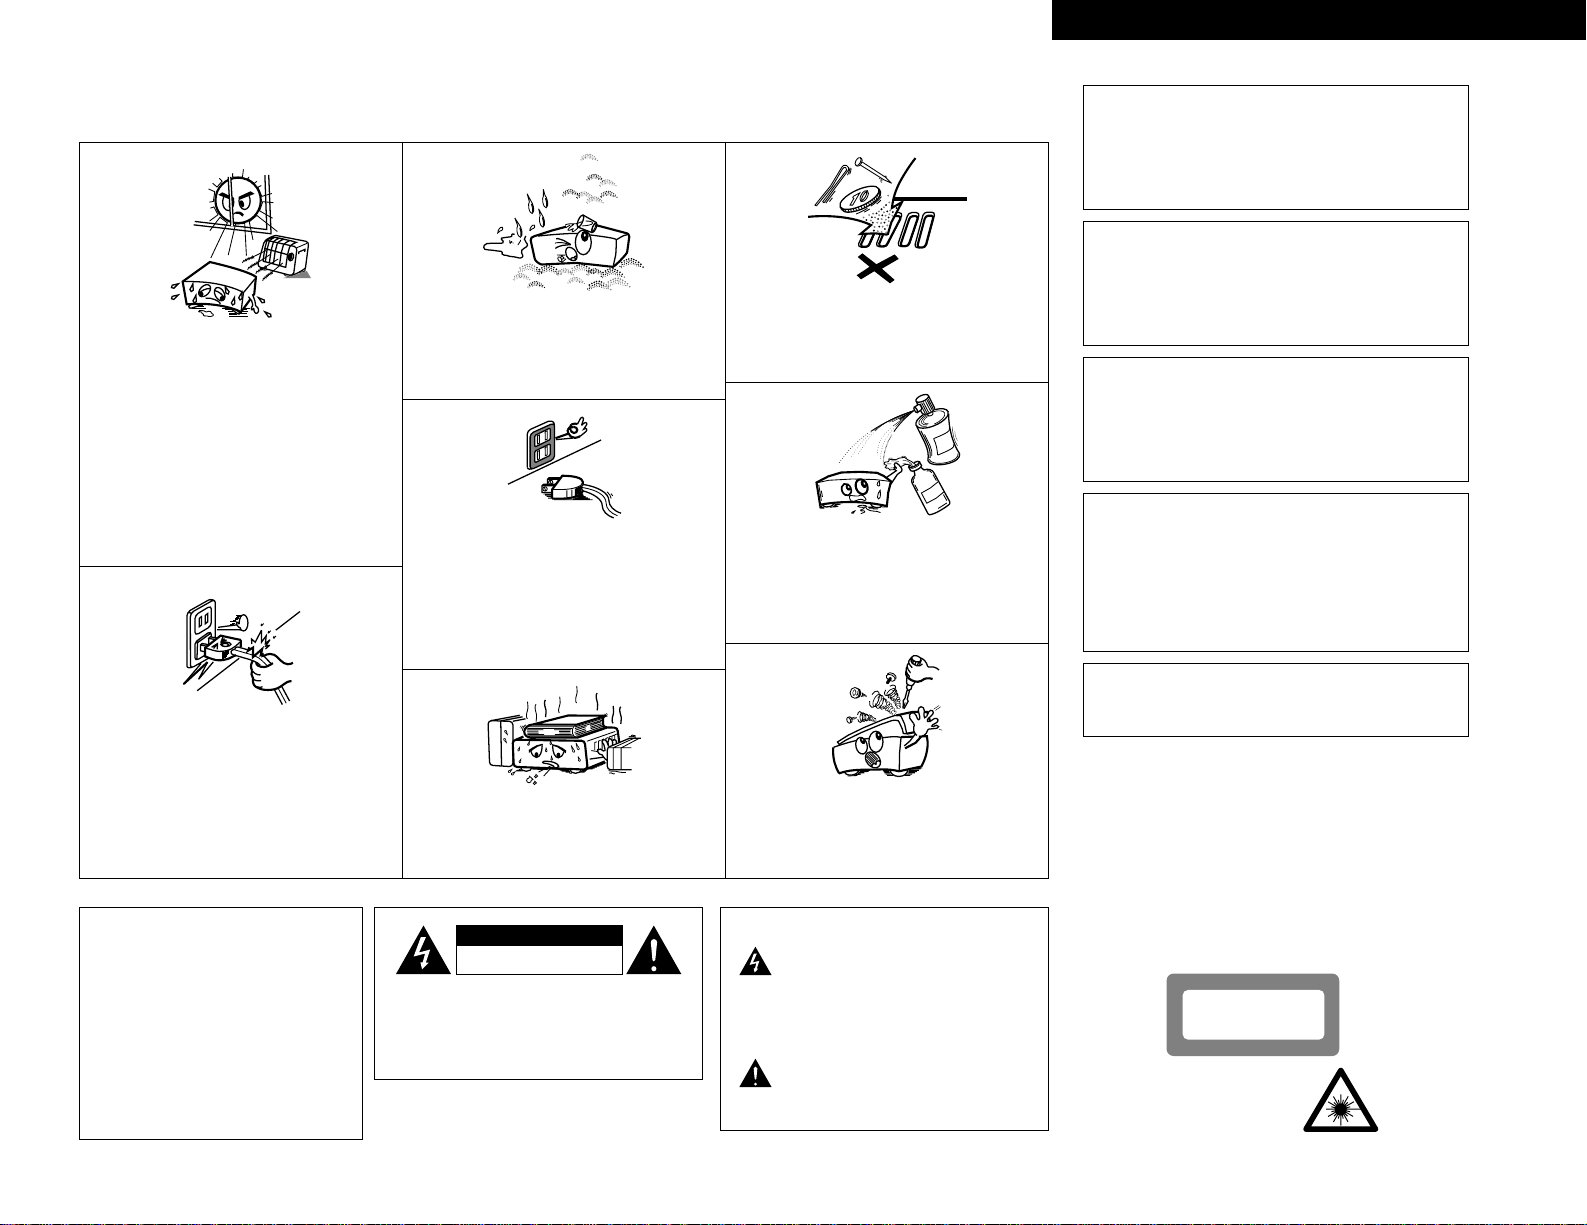
CAUTION:
TO REDUCE THE RISK OF ELECTRIC
SHOCK, DO NOT REMOVE COVER (OR
BACK). NO USER SERVICEABLE
PARTS INSIDE. REFER SERVICING TO
QUALIFIED SERVICE PERSONNEL.
The lightning flash with arrowhead symbol,
within an equilateral triangle, is intended to
alert the user to the presence of uninsulated
“dangerous voltage” within the product’s
enclosure that may be of sufficient magnitude
to constitute a risk of electric shock to
persons.
The exclamation point within an equilateral
triangle is intended to alert the user to the
presence of important operating and
maintenance (servicing) instructions in the
literature accompanying the appliance.
CAUTION
• The ventilation should not be impeded
by covering the ventilation openings
with items, such as newspapers, tablecloths, curtains, etc.
• No naked flame sources, such as
lighted candles, should be placed on
the apparatus.
• Please be care the environmental
aspects of battery disposal.
• The apparatus shall not be exposed to
dripping or splashing for use.
• No objects filled with liquids, such as
vases, shall be placed on the apparatus.
CAUTION
RISK OF ELECTRIC SHOCK
DO NOT OPEN
Page 3
3
FRONT PANEL
FRONTPLATTE
PANNEAU AVANT
PANNELLO FRONTALE
PANEL DELANTERO
VOORPANEEL
FRONT PANELEN
REAR PANEL
RÜCKWAND
PANNEAU ARRIERE
IL PANNELLO POSTERIORE
PANEL TRASERO
ACHTERPANEEL
BAKSIDAN
PROGRESSIVE
DVD
1 2
9
8
REMOTE SENSOR
OPEN/CLOSE
5
DVD AUDIO
¢ON / STANDBY
£OFF
PLAY STOP
763
STILL / PAUSE
B
PURE DIRECT
MODE 1
MODE 2
OFF
AL24 PLUS
DVD AUDIO-VIDEO PLAYER DVD-3800
qwe y u i o !0r t
!2 !3 !4 !5 !6!1
AC IN
RS-232C ROOM TO ROOM
IN OUT
REMOTE CONTROL
DIGITAL OUT
COAXIAL
FR1FR2SWSR
FL1FL2C
1
2
1
2
PB/C
B
Y
P
R/CR
SL
OPTICAL
(PCM / BIT STREAM)
AUDIO OUT
VIDEO OUT S-VIDEO OUT
COMPONENT
VIDEO OUT
AV1
AV2
!9!7 !8
@2@0 @3@7 @6@1 @4 @5
ENGLISH DEUTSCH FRANCAIS ITALIANO ESPAÑOL NEDERLANDS SVENSKA
Page 4
ENGLISH
4
ENGLISH
— TABLE OF CONTENTS —
z
Features...........................................................4, 5
x
Discs ....................................................................5
c
Cautions on Handling Discs .................................6
v
Connections....................................................6~ 9
b
Part Names and Functions.................................10
n
Remote Control Unit..........................................11
m
Loading Discs.....................................................12
,
Changing the Default Settings.....................12~20
.
Playback.......................................................21~23
⁄0
Using the Pure Direct Mode ..............................23
⁄1
Adjusting the Picture Quality .......................24, 25
⁄2
Using the On-Screen Display.............................25
⁄3
Playing Repeatedly.............................................26
⁄4
Playing Tracks in the Desired Order...................27
⁄5
Playing Tracks in the Random Order..................27
⁄6
MP3 Playback ....................................................28
⁄7
Playing Still Picture Files (JPEG format).......29, 30
⁄8
Using the Multiple Audio,
Subtitle and Angle Functions .......................30, 31
⁄9
Using the Menus ...............................................32
¤0 Marking Scenes you want to see again .............33
¤1 Playing in the Zoom Mode .................................33
¤2 Troubleshooting .................................................34
¤3 Main Specifications............................................34
• ACCESSORIES
Please check to make sure the following items are included with the main unit in the carton:
q Audio video cord …………………………………1
w Remote control unit (RC-553) …………………1
e R6P/AA batteries…………………………………2
r Ac cord ……………………………………………1
t Operating instructions ……………………………1
y Service station list…………………………………1
qwer
1. Newly developed AL24 Processing Plus
(1) AL24 Processing Plus, an advanced version of
conventional AL24 Processing, is a newly
developed analog waveform reproduction
technology, and offers compatibility with the
high number of bits and high sampling rates of
next generation media. AL24 Processing Plus
compensates the input digital data to
reproduce the sound with analog waveforms
as close as possible to those existing in nature
and with 24-bit quality. The result is increased
musical reproduction capabilities of
reverberations, etc., at low levels, for a sound
that seems to draw you into the concert hall.
(2) AL24 Processing Plus of course carries over
Adaptive Line Pattern Harmonized Algorithm &
Automatic Low Pass Filter Harmonic
Adjustment, the strong points of conventional
ALPHA Processing. On the DVD-3800 these
filters have been dramatically improved,
resulting in a filtered band attenuation of over
–115 dB and ripple within the passing band of
±0.00002 dB, a figure comparable to that of
professional recorders.
2. High precision multi 24-bit D/A converter
(1) The DVD-3800 is equipped with a multi 24-bit
D/A converter for faithful D/A conversion of
the high quality 24-bit data achieved through
AL24 Processing Plus. This further enhances
such aspects of audio performance as the S/N
ratio, dynamic range and distortion and makes
full use of the possibilities for high quality
sound provided by a high number of bits and
high sampling rates.
(2) The multi 24-bit D/A converter is little affected
by noise resulting from fluctuations in the
power supply voltage and current, and the
quantization distortion level within the band is
constant regardless of the frequency, resulting
in clear sound with little noise.
3. HDCD®(High Definition Compatible Digital®)
decoder (NOTE 1)
HDCD is an encoding/decoding technology that
greatly reduces the distortion occurring at the
time of digital recording while maintaining
compatibility with the conventional CD format.
HDCD allows 24-bit data to be converted into the
16-bit data of current CDs with no loss in sound
quality.
The use of this HDCD decoder makes it possible
to achieve the high resolution and low distortion
characteristic of HDCD when playing HDCDcompatible discs, and DENON’s digital technology
optimizes the high sound quality possibilities of
HDCD technology. Furthermore, normal CDs,
DVDs and HDCD-compatible CDs are
automatically identified, and the optimum digital
signal processing for that type of disc is used.
1
FEATURES
IMPORTANT TO SAFETY
WARNING:
TO PREVENT FIRE OR SHOCK HAZARD, DO
NOT EXPOSE THIS APPLIANCE TO RAIN OR
MOISTURE.
CAUTION:
1. Handle the power supply cord carefully
Do not damage or deform the power supply cord.
If it is damaged or deformed, it may cause electric
shock or malfunction when used. When removing
from wall outlet, be sure to remove by holding the
plug attachment and not by pulling the cord.
2. Do not open the top cover
In order to prevent electric shock, do not open the
top cover.
If problems occur, contact your DENON DEALER.
3. Do not place anything inside
Do not place metal objects or spill liquid inside the
DVD video player.
Electric shock or malfunction may result.
Please, record and retain the Model name and serial
number of your set shown on the rating label.
Model No. DVD-3800 Serial No.
NOTE:
This
DVD video player
uses the semiconductor laser.
To allow you to enjoy music at a stable operation, it is
recommended to use this in a room of 10°C (50°F) —
35°C (95°F).
Copyrights
2 It is prohibited by law to reproduce, broadcast, rent
or play discs in public without the consent of the
copyright holder.
For European For Oceanian
model model
4. Dolby Digital (AC-3)/DTS decoder (NOTE 2)
(NOTE 3)
The DVD-3800 is equipped with a built-in Dolby
Digital (AC-3) /DTS decoder, allowing you to
recreate the atmosphere of a movie theater or
concert hall when using the DVD-3800 in
combination with an AV amplifier and speakers.
5. Progressive Scan circuit “Pure Progressive
TM
”
(NOTE 4)
The DVD-3800 is equipped with a high precision
Progressive Scan circuit “Pure Progressive
TM
”
allowing it to reproduce movies and other images
on DVDs with a quality near that of the original.
6. 12-bit/108 MHz video D/A converter (NOTE 5)
The DVD-3800 uses a video D/A converter that
conducts D/A conversion of all video signals at 12
bits and allows 4X oversampling in the
progressive mode to achieve the high quality
picture that DVDs are meant to provide. In
addition, NSV technology reduces noise upon D/A
conversion.
7. Thorough vibration-resistant design
(1) Mechanism using a hybrid loader.
(2) The pickup mechanism is positioned at the
center to reduce the effects of external
vibrations.
(3) A heavyweight chassis and low center of
gravity make for a low vibration design.
8. Multiple functions
(
1) Picture CD playback function (NOTE 6)
Kodak Picture CDs can be played on the DVD-
3800.
Still images stored in JPEG format on CDR/RWs can also be played.
(2) Multiple audio function
Selection of up to 8 audio languages.
(The number of languages offered differs from
DVD to DVD.)
(3) Multiple subtitle function
Selection of up to 32 subtitle languages.
(The number of languages offered differs from
DVD to DVD.)
(4) Multiple angle function
The angle of view can be changed.
(For DVDs on which multiple angles are
recorded.)
(5) GUI (Graphical User Interface) function
The display button on the remote control unit
can be used to display player and disc
information on the TV screen.
(6) Marker function
The positions of up to five scenes can be
stored in the memory, so you can watch your
favorite scenes whenever you want.
(7) Playback disable function
This function can be used to disable playback
of DVDs you do not want children to watch.
REMOTE CONTR
ANGLE
SUBTITLE
REPEAT
A-B
SETUP
DIMMER
PIC.ADJ
ZO
OM
P.D.MEMORY
PAGE
POWER
O
N
OL UNIT RC-553
O
N
F
T
S
F
C
1
/
P
A
L
O
P
E
N
/
C
2
L
O
S
4
E
PROG / DIR
3
5
7
6
CLEAR
8
0
TOP MENU
9
+
V.S.S.
1
0
CALL
RETURN
DISPLAY
ENTER
MENU
STOP
PLAY
ST
ILL /
PA
SKIP
USE
SLOW / SEARCH
AUDIO
SEARCH MO
DE
MARKERRANDOM
Page 5
5
ENGLISH
2
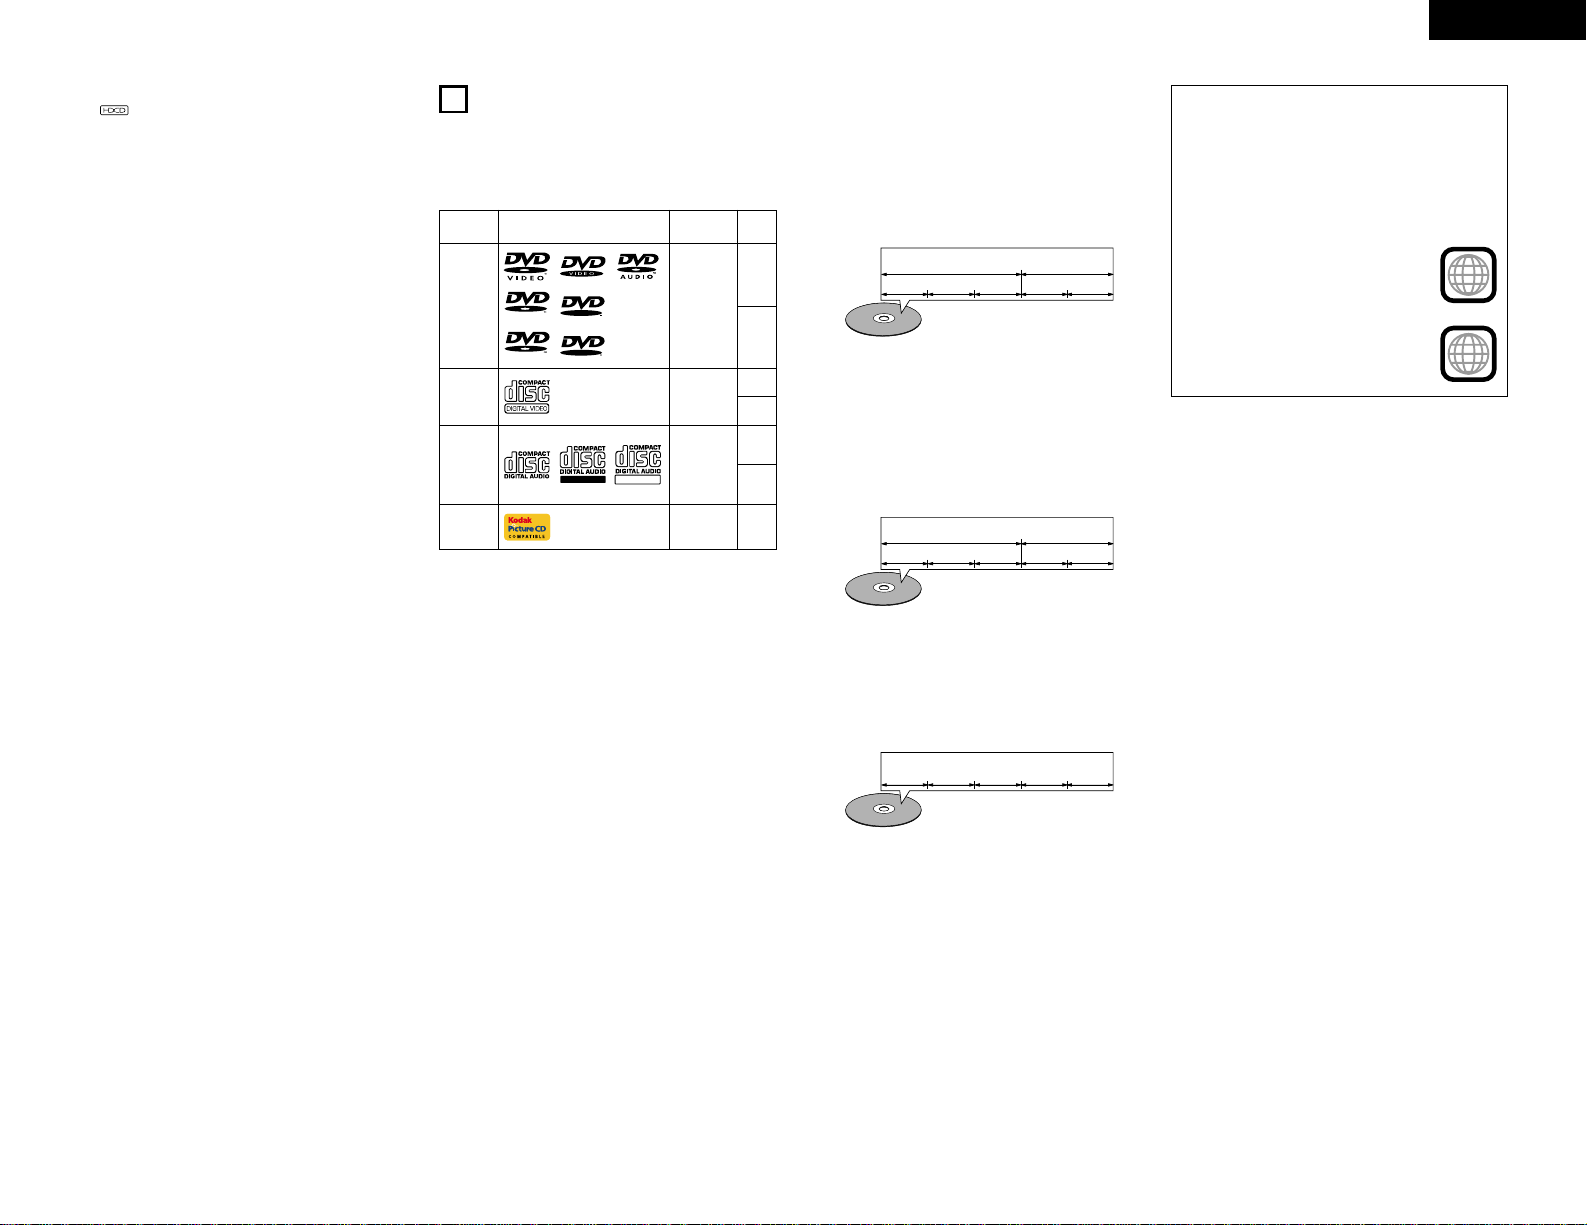
DISCS
• The types of discs listed on the table below can be
used on the DVD-3800.
The marks are indicated on the disc labels or
jackets.
Usable
discs
Mark (logo)
Recorded
signals
Disc
size
DVD video
DVD audio
(NOTE 1)
DVD-R
DVD-RW
(NOTE 2)
Digital audio
+
digital video
(MPEG2)
12 cm
8 cm
12 cm
8 cm
12 cm
8 cm
Digital audio
+
digital video
(MPEG1)
Digital audio
MP3
Digital picture
(JPEG)
Video CD
(NOTE 1)
CD
CD-R
CD-RW
(NOTE 3)
Recordable
ReWritable
12 cmJPEGPicture CD
R
R
R
W
R
W
2 The following types of discs cannot be played
on the DVD-3800:
• For European model:
DVDs with region numbers other than “2” or
“ALL”
For Oceanian, South American model:
DVDs with region numbers other than “4” or
“ALL”
• DVD-ROM/RAMs
• DVD+RW/DVD+R
• SACD
• CD-ROMs
• CDVs (Only the audio part can be played.)
• CD-Gs (Only the audio is output.)
• Photo CDs
NOTE 1: Some DVD audio, DVD video and video CD
discs do not operate as described in this
manual due to the intentions of the discs’
producers.
NOTE 2: Playing DVD-R and DVD-RW discs
DVD-R and DVD-RW discs recorded in video
format on a DVD recorder can be played on
the DVD-3800.
Discs that have not be finalized cannot be
played.
Depending on the disc’s recording status,
the disc may not be accepted or may not be
played normally (the picture or sound may be
not be smooth, etc.).
NOTE 3: According to recording quality, some CD-
R/RW cannot be played.
2 Disc terminology
• Groups and tracks (DVD-audios)
DVD-audios are divided into several large sections
called “groups” and smaller sections called
“tracks”.
Numbers are allotted to these sections. These
numbers are called “group numbers” and “track
numbers”.
For example:
Group 1
Group 2
Track 1
Track 2
Track 3 Track 1 Track 2
• Titles and chapters (DVD-videos)
DVD-videos are divided into several large sections
called “titles” and smaller sections called
“chapters”.
Numbers are allotted to these sections. These
numbers are called “title numbers” and “chapter
numbers”.
For example:
Title 1
Title 2
Chapter 1
Chapter 2
Chapter 3 Chapter 1 Chapter 2
• Tracks (video and music CDs)
Video and music CDs are divided into sections
called “tracks”.
Numbers are allotted to these sections. These
numbers are called “track numbers”.
For example:
Track 1
Track 2 Track 3 Track 4 Track 5
• Playback control (video CDs)
Video CDs including the words “playback control”
on the disc or jacket are equipped with a function
for displaying menus on the TV screen for
selecting the desired position, displaying
information, etc., in dialog fashion.
In this manual, playing video CDs using such
menus is referred to “menu playback”.
Video CDs with playback control can be used on
the DVD-3800.
NOTE:
• This DVD player is designed and manufactured
to respond to the Region Management
Information that is recorded on a DVD disc.
If the Region number described on the DVD disc
does not correspond to the Region number of
this DVD player, this DVD player cannot play this
disc.
2
4
For European model:
The Region number for this DVD
player is 2.
For Oceanian, South American
model:
The Region number for this DVD
player is 4.
NOTES:
1.
®
,HDCD®, High Definition Compatible
Digital®and Pacific Microsonics
TM
are either
registered trademarks or trademarks of Pacific
Microsonics, Inc. in the United States and/or other
countries. HDCD system manufactured under
license from Pacific Microsonics, Inc. This product
is covered by one or more of the following: In the
USA: 5,479,168, 5,638,074, 5,640,161, 5,808,574,
5,838,274, 5,854,600, 5,864,311, 5,872,531, and in
Australia: 669114. Other patents pending.
2. Manufactured under license from Dolby
Laboratories.
“Dolby” and the double-D symbol are trademarks
of Dolby Laboratories. Confidential unpublished
work. ©1992 – 1998 Dolby Laboratories. All rights
reserved.
3. “DTS” and “DTS Digital Surround” are registered
trademarks of Digital Theater Systems, Inc.
4. “Pure Progressive” is a trademark of Silicon
Image, Inc.
5. “NSV” is a trademark of Analog Devices, Inc.
6. “KODAK” is a trademark of Eastman Kodak
Company.
Page 6
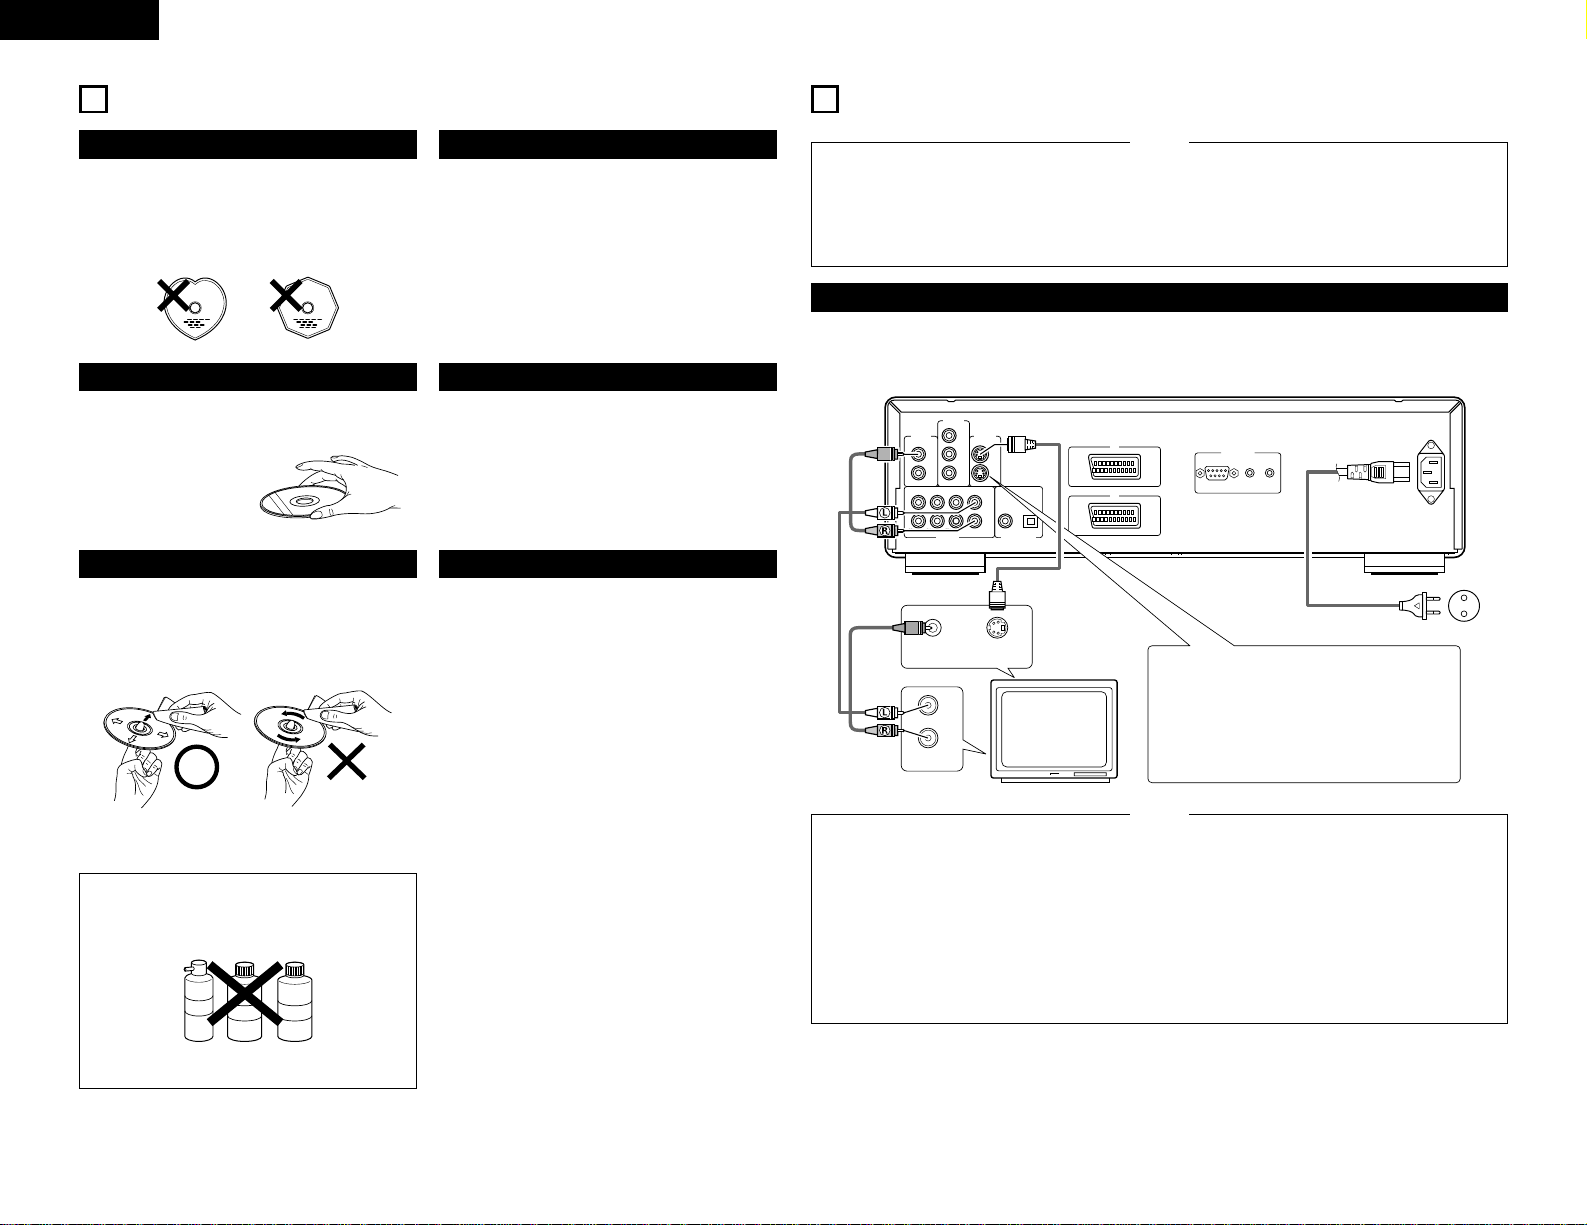
ENGLISH
3
CAUTIONS ON HANDLING DISCS
Discs
Only the discs including the marks shown on page 5
can be played on the DVD-3800.
Note, however, that discs with special shapes (heartshaped discs, hexagonal discs, etc.) cannot be played
on the DVD-3800. Do not attempt to play such discs,
as they may damage the player.
Holding Discs
Avoid touching the surface of discs when loading and
unloading them.
Be careful not to get
fingerprints on the signal
surface (the side which
shines in rainbow colors).
Cleaning Discs
2 Fingerprints or dirt on the disc may lower sound
and picture quality or cause breaks in playback.
Wipe off fingerprints or dirt.
2 Use a commercially available disc cleaning set or a
soft cloth to wipe off fingerprints or dirt.
Wipe gently from the middle
outwards.
Do not wipe with a
circular motion.
NOTE:
• Do not use record spray or antistatic. Also do
not use volatile chemicals such as benzene or
thinner.
Record
spray
Thinner Benzene
Cautions on Handling Discs
• Do not get fingerprints, grease or dirt on discs.
• Be especially careful not to scratch discs when
removing them from their cases.
• Do not bend discs.
• Do not heat discs.
• Do not enlarge the center hole.
• Do not write on the labeled (printed) side with a ballpoint pen or a pencil.
• Water droplets may form on the surface if the disc
is moved suddenly from a cold place to a warm one.
Do not use a hairdryer, etc., to dry the disc.
Cautions on Storing Discs
• Always eject discs after playing them.
• Keep discs in their cases to protect them from dust,
scratches and warping.
• Do not put discs in the following places:
1. Places exposed to direct sunlight for long periods
of time
2. Humid or dusty places
3. Places exposed to heat from heaters, etc.
Cautions on Loading Discs
• Only load one disc at a time. Loading one disc on
top of another may result in damage or scratch the
discs.
• Load 8 cm discs securely in the disc guide, without
using an adapter. If the disc is not properly loaded, it
may slip out of the guide and block the disc tray.
• Be careful not to let your fingers get caught when
the disc tray is closing.
• Do not place anything but discs in the disc tray.
• Do not load cracked or warped discs or discs that
have been fixed with adhesive, etc.
• Do not use discs on which the adhesive part of
cellophane tape or glue used to attach the label is
exposed, or discs with traces of tape or labels that
have been peeled off. Such discs may get stuck
inside the player, resulting in damage.
6
AC IN
RS-232C ROOM TO ROOM
IN OUT
REMOTE CONTROL
DIGITAL OUT
COAXIAL
FR1FR2SWSR
FL1FL2C
1
2
1
2
PB/C
B
Y
P
R/CR
SL
OPTICAL
(PCM / BIT STREAM)
AUDIO OUT
VIDEO OUT S-VIDEO OUT
COMPONENT
VIDEO OUT
AV1
AV2
VIDEO IN S-VIDEO IN
AUDIO IN
L
R
4
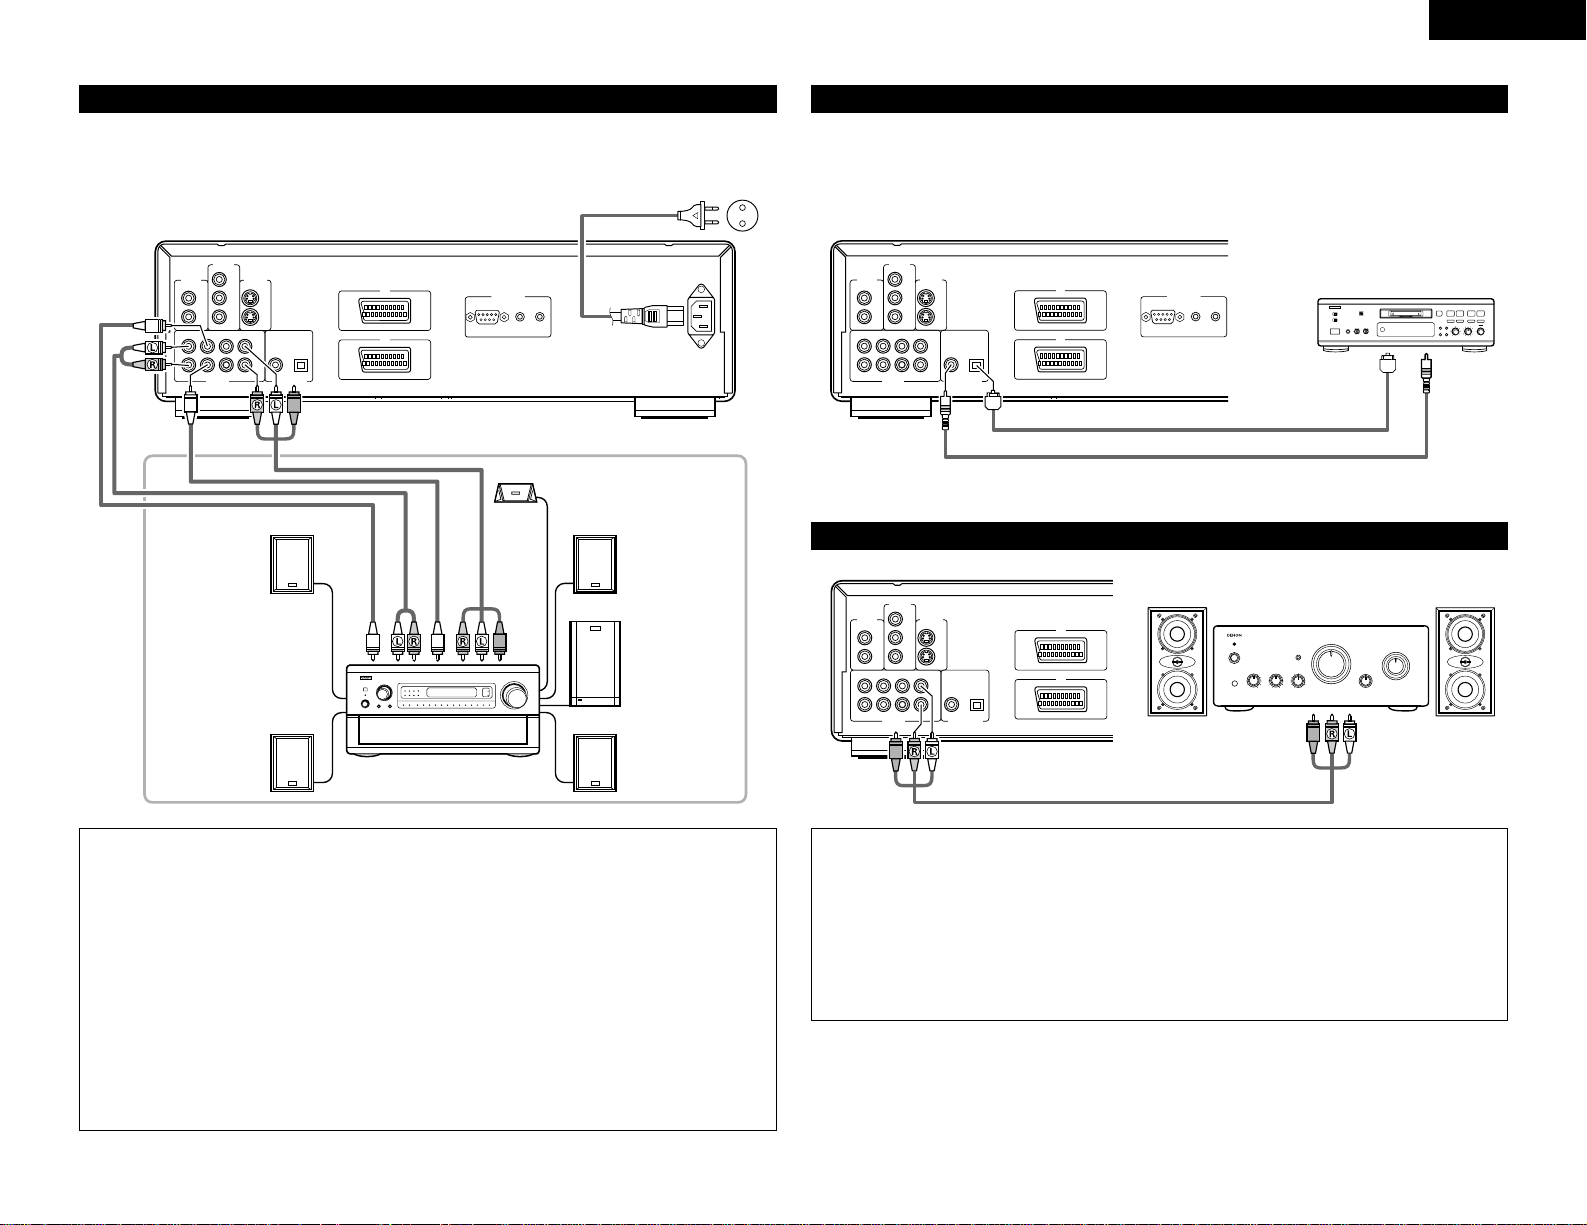
CONNECTIONS
•
Read the manuals of all the components when
making connections.
•
Keep the power cord unplugged until all
connections have been completed.
•
If the power is on when connections are made,
noise may be generated and damage the speakers.
NOTES:
•
Be sure to connect the left and right channels
properly, L (left) to L, R (right) to R.
•
Plug the power cord securely into the power
outlet. Incomplete connection may result in noise.
•
Binding the power cord together with connection
cords may result in humming or noise.
(1) Connecting a TV
• Use the included audio video cord to connect the TV’s video input connector and audio input connectors to
the DVD-3800’s VIDEO OUT or S-VIDEO OUT and AUDIO OUT.
DVD-3800
S-Video output connector
The video signals are divided into color (C) and
brightness (Y) signals, achieving a clearer
picture.
If the TV is equipped with an S-Video input
connector, we recommend connecting it to the
DVD-3800’s S-Video output connector using a
commercially available S-Video connection cord.
To power outlet
TV
•
Connect the DVD-3800’s video outputs to the TV
either directly or through an AV amplifier. Do not
connect it via a VCR (video cassette recorder).
Some discs contain copy prohibit signals. If such
discs are played via a VCR, the copy prohibit
system may cause disturbance in the picture.
• Set the “TV TYPE” in “VIDEO SETUP” in
“SETUP“ to comply with your TV's video format.
When the TV is PAL formated, set to PAL. (See
page 16.)
NOTES:
•
To use with 2-channel audio output, set “2
CHANNEL” in “AUDIO CHANNEL” in “AUDIO
SETUP” in “SETUP” at the initial settings. (See
page 17)
•
Set the “TV ASPECT” in “VIDEO SETUP” in
“SETUP” to comply with your TV’s aspect. (See
page 16)
•
To use with video out or s-video output, set
“INTERLACED” in “VIDEO OUT” in “VIDEO
SETUP” in “SETUP” at the initial settings. (See
page 16)
Page 7
ENGLISH
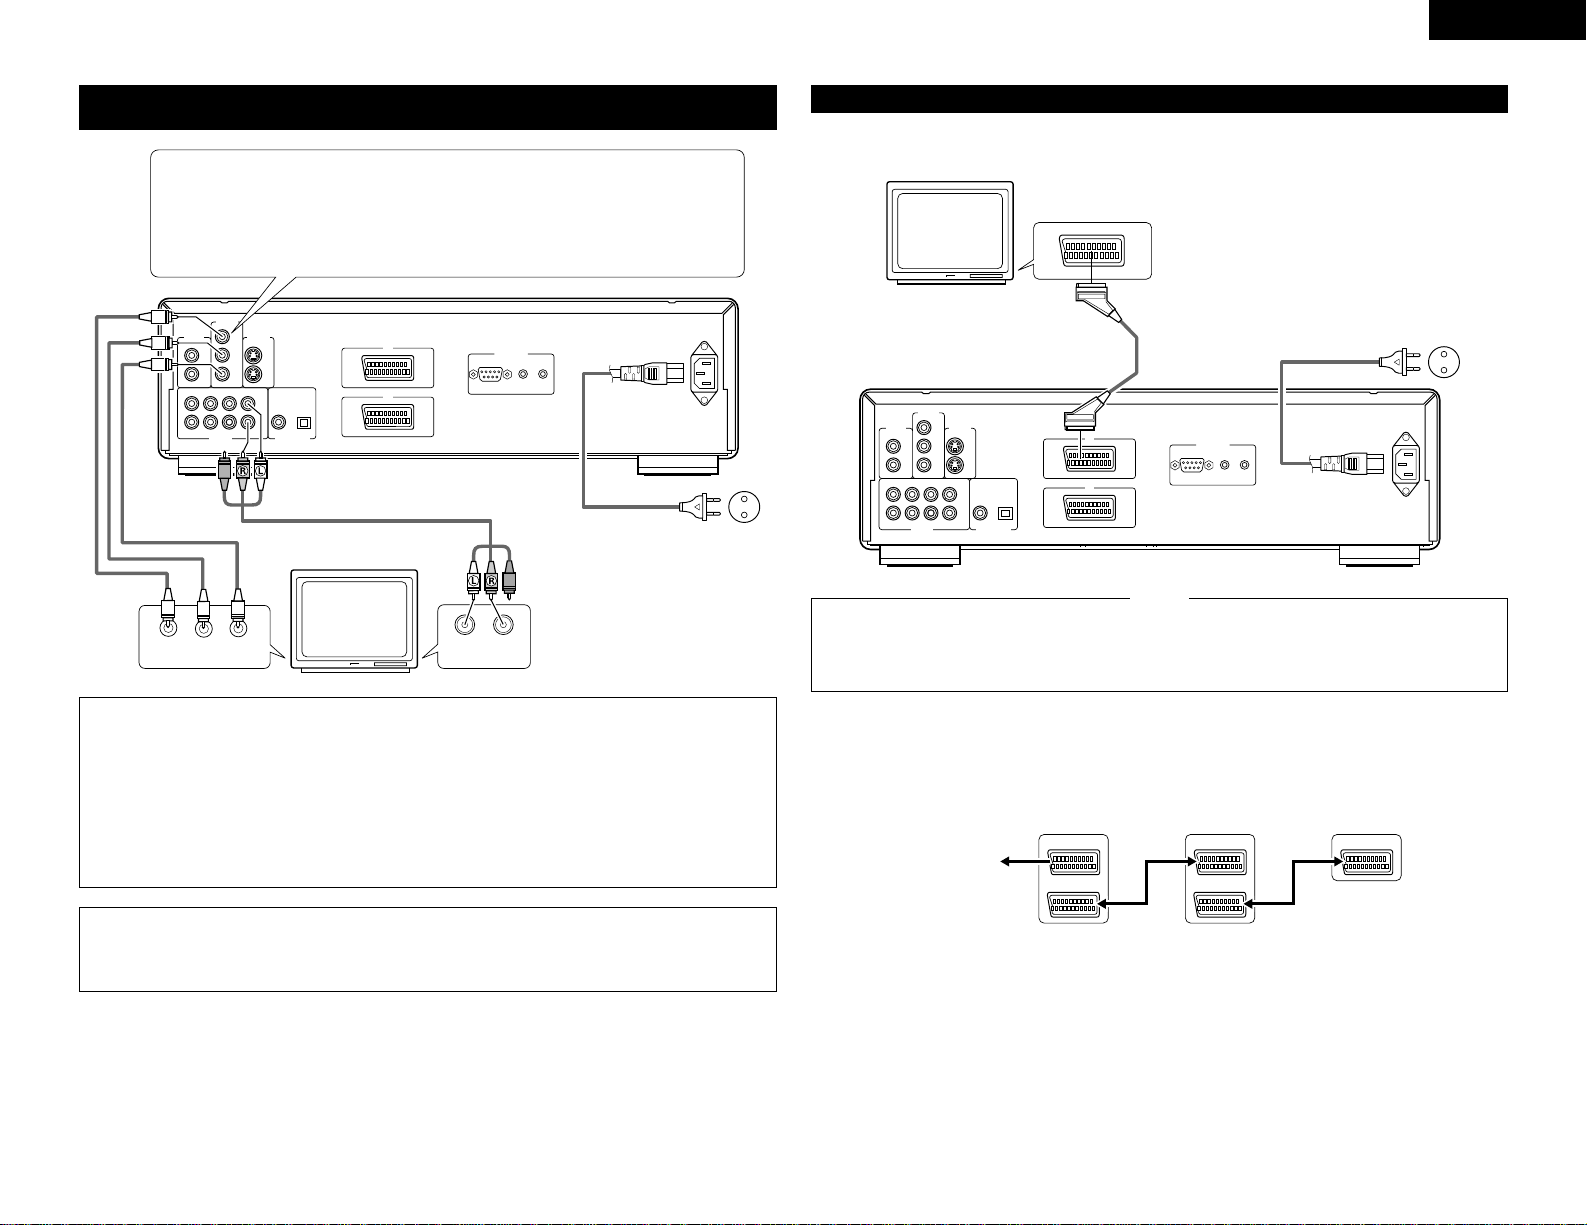
(2) Connecting to a TV or Monitor Equipped with Color Component Input
Connectors
AC IN
RS-232C ROOM TO ROOM
IN OUT
REMOTE CONTROL
DIGITAL OUT
COAXIAL
FR1FR2SWSR
FL1FL2C
1
2
1
2
PB/C
B
Y
P
R/CR
SL
OPTICAL
(PCM / BIT STREAM)
AUDIO OUT
VIDEO OUT S-VIDEO OUT
COMPONENT
VIDEO OUT
AV1
AV2
COMPONENT VIDEO IN
PB/CBPR/CRY
AUDIO IN
LR
Color component output connectors (PR/CR, PB/CB and Y)
The red (P
R/CR), blue (PB/CB) and brightness (Y) signals are output independently, achieving
more faithful reproduction of the colors.
• The color component input connectors may be marked differently on some TVs or
monitors (P
R
, PB and Y/R-Y, B-Y and Y/CR, CB and Y, etc.). For details, refer to the TV’s
operating instructions.
Connect in this way if your TV is compatible with Progressive Scan.
DVD-3800
To power outlet
NOTES:
•
Use the three commercially available video cords to connect the DVD-3800’s color component output
connectors to the TV or monitor.
• Set the “TV TYPE“ in “VIDEO SETUP“ in “SETUP“ to comply with your TV's video format. When the TV
is PAL formated, set to PAL. (See page 16.)
• Set the “VIDEO OUT” in “VIDEO SETUP” in “SETUP” to comply with Progressive TV. (NTSC formated
only)
•
To use with 2-channel audio output, set “2 CHANNEL” in “AUDIO CHANNEL” in “AUDIO SETUP” in
“SETUP” at the initial settings. (See page 17)
•
Set the “TV ASPECT” in “VIDEO SETUP” in “SETUP” to comply with your TV’s aspect. (See page 16)
TV
CONSUMERS SHOULD NOTE THAT NOT ALL HIGH DEFINITION TELEVISION SETS ARE FULLY
COMPATIBLE WITH THIS PRODUCT AND MAY CAUSE ARTIFACTS TO BE DISPLAYED IN THE PICTURE.
IN CASE OF 525 PROGRESSIVE SCAN PICTURE PROBLEMS, IT IS RECOMMENDED THAT THE USER
SWITCH THE CONNECTION TO THE “STANDARD DEFINITION” OUTPUT.
7
(3) Connecting to a TV with 21-pin SCART Terminal (For only European model)
• Use the commercially 21-pin SCART cable to connect the TV’s 21-pin SCART terminal to the DVD-3800’s 21pin SCART terminal (AV1 / AV2).
AC IN
RS-232C ROOM TO ROOM
IN OUT
REMOTE CONTROL
DIGITAL OUT
COAXIAL
FR1FR2SWSR
FL1FL2C
1
2
1
2
PB/C
B
Y
P
R/CR
SL
OPTICAL
(PCM / BIT STREAM)
AUDIO OUT
VIDEO OUT S-VIDEO OUT
COMPONENT
VIDEO OUT
AV1
AV2
DVD-3800
To power outlet
TV
21-pin SCART terminal
• Set the “TV TYPE“ in “VIDEO SETUP“ in
“SETUP“ to comply with your TV's video format.
When the TV is PAL formated, set to PAL. (See
page 16.)
NOTES:
•
Some discs contain copy prohibit signals. If such
discs are played via a VCR, the copy prohibit
system may cause disturbance in the picture.
• To improve picture quality, you can change the video signal output from the AV1 terminal from “Video“ to
either “S-Video“ or “RGB“ to suit the type of television you are using (See page 16).
• You can also connect other equipment to AV2.
AV1
AV2
AV1
AV2
VCR
SCART terminal
of TV set
This unit Video cassette recorder
Satellite receiver
or decoder
Page 8
ENGLISH
(4) Connecting to a AV amplifier with a Built-in decoder
When DVDs recorded in Dolby Digital or DTS are played, Dolby Digital or DTS bitstream signals are output from
the DVD player’s digital audio output connectors. If a Dolby Digital or DTS decoder is connected, you can
achieve sound with the power and sense of presence of a movie theater or concert hall.
AC IN
RS-232C ROOM TO ROOM
IN OUT
REMOTE CONTROL
DIGITAL OUT
COAXIAL
FR1FR2SWSR
FL1FL2C
1
2
1
2
PB/C
B
Y
P
R/CR
SL
OPTICAL
(PCM / BIT STREAM)
AUDIO OUT
VIDEO OUT S-VIDEO OUT
COMPONENT
VIDEO OUT
AV1
AV2
PHONES
DIRECT STEREO
ANALOG EXT. IN
DOLBY
SURROUND
DTS
SURROUND
WIDE
SCREEN
CINEMA /
MUSIC
6.1 / 7.1
SURROUND
VIDEO
ON / OFF
STATUS
M-ZONE 1
FUNCTION CONTROL
INPUT
MODE
5CH / 7CH
STEREO
DSP
SIMULATION
TONE
DEFEAT
MODE
SELECT
REC /
M-ZONE 2
SURROUND MODE
INPUT REC SELECT / M-ZONE
MULTI FUNCTION
DVD-3800
Digital audio input
connector
(OPTICAL)
Optical fiber cable
(commercially available)
75 Ω /ohms pin-plug
cable
(commercially available)
Front speaker (left)
Center speaker
Front speaker (right)
Digital audio input
connector (COAXIAL)
Subwoofer
Surround speaker (left)
AV amplifier with a built-in decoder
(AV control center)
Surround speaker (right)
2
Connecting an optical fiber cable (commercially available) to the digital audio input connector (OPTICAL)
Dust cap
Line up in proper direction
Remove the dust cap, line up the cable in the proper
directly, then insert it securely as far as it goes.
NOTE:
•
Store the dust cap in a safe place, and be careful
not to lose it.
When not using the terminal, attach the cap to
protect the terminal from dust.
NOTES:
•
Harsh noise that could harm your ears or damage the speakers is generated when a DVD recorded in DTS
is played while using a decoder, etc., that is not DTS-compatible.
• When playing copyright-protected linear PCM or packed PCM DVDs, in consideration of copyrights, no
digital signals are output for sources exceeding 48 kHz/16 bits. When playing such sources, either set
“LPCM (44.1 kHz/48 kHz)” under “AUDIO SETUP” at “SETUP” to “ON” (see page 18) or make analog
connections. (See page 9.)
• When making digital connections to an AV amplifier that is not compatible with 96 kHz/88.2 kHz signals,
set “LPCM (44.1 kHz/48 kHz)” under “AUDIO SETUP” at “SETUP” to “ON”. (See page 18.)
To power outlet
8
2 Sound output from the DVD-3800’s digital audio output connectors
In the case of bit stream output
NORMAL
Audio recording format
Dolby Digital
DTS
MPEG Audio
DIGITAL OUT
2 channels PCM
(48 kHz / 16 bit)
2 channels PCM
(48 kHz / 16 bit)
2 channels PCM
(48 kHz / 16 bit)
PCM
DVD video
Dolby Digital bitstream
DTS bitstream
2 channels PCM
(48 kHz / 16 bit)
Settings
In the case of PCM output
OFF
DVD
audio
Audio recording format
Linear
PCM
Video CD
Music CD
MP3 CD
44.1 kHz / 16 bit PCM
44.1 kHz / 16 bit PCM
192 kHz / 16 ~ 24 bit
176.4 kHz / 16 ~ 24 bit
MPEG 1
44.1 kHz / 16 bit Linear PCM
MP 3 (MPEG-1 Audio Layer 3)
96 kHz / 16 ~ 24 bit
88.2 kHz / 16 ~ 24 bit
48 kHz / 16 ~ 24 bit
44.1 kHz / 16 ~ 24 bit
96 kHz / 16 ~ 24 bit
48 kHz / 16 ~ 24 bit
LPCM SELECT
48 kHz / 16 bit PCM
44.1 kHz / 16 bit PCM
48 kHz / 16 bit PCM
44.1 kHz / 16 bit PCM
48 kHz / 16 bit PCM
44.1 kHz / 16 bit PCM
48 kHz / 16 bit PCM
48 kHz / 16 bit PCM
ON
DVD
video
44.1 kHz / 16 bit PCM
44.1 kHz / 16 bit PCM
No output data
No output data
No output data
No output data
No output data (*1)
No output data (*2)
No output data
No output data (*1)
32 ~ 48 kHz / 16 bit PCM
Copy protection ON
88.2 kHz / 16 ~ 24 bit PCM
96 kHz / 16 ~ 24 bit PCM
88.2 kHz / 16 ~ 24 bit PCM
48 kHz / 16 ~ 24 bit PCM
96 kHz / 16 ~ 24 bit PCM
Copy protection OFF
32 ~ 48 kHz / 16 bit PCM
48 kHz / 16 ~ 24 bit PCM
44.1 kHz / 16 ~ 24 bit PCM
96 kHz / 16 ~ 24 bit PCM
Linear PCM or
Packed PCM
Settings
*1 Only 48 kHz/16-bit sources are output.
*2 Only 44.1 kHz/16-bit sources are output.
• Down-mixed to 2 channels for multi-channel PCM sources. (Only the front left and right channels are output
for sources for which down-mixing is prohibited.)
• When “OFF” is selected, digital signals are not output from the digital audio output at this time.
• Linear PCM audio is a signal recording format used for music CDs.
While signals are recorded at 44.1 kHz/16 bit for music CDs, for DVDs they are recorded at 44.1kHz/16bit to
192kHz/24 bit, providing higher sound quality than music CDs.
• Packed PCM signals are high sound quality compressed PCM signals that are decompressed with virtually no
loss of data.
Page 9
9
ENGLISH
(6) Connecting to a Digital Recorder (MD Recorder, DAT Deck, etc.)
89
B
✽ Set the “AUDIO SETUP” default setting as shown below. (See page 18.)
•“DIGITAL OUT” → “PCM”
“LPCM (44.1 kHz / 48 kHz)” → “ON”
Playing DVDs with incorrect settings may result noise that could damage your ears or the speakers.
DVD-3800
75 Ω /ohms pin-plug cable (commercially available)
Optical fiber cable (commercially available)
Digital audio
input
connector
(COAXIAL)
Digital audio input
connector (OPTICAL)
(7) Connecting to a Stereo Component
DVD-3800
Stereo component
NOTES:
• When connecting to a 2-channel audio stereo device, set “AUDIO CHANNEL” under “AUDIO SETUP” at
“SETUP” to “2 CHANNEL” (see page 17). For multi-channel sources, the signals are down-mixed into two
channels (analog). (Only the front left and right channels are output for sources for which down-mixing is
prohibited.)
• Set “LPCM (44.1 kHz/48 kHz)” under “AUDIO SETUP” at “SETUP” to “OFF”. (See page 18.)
(If set to “ON”, analog audio signals converted to 48 kHz will be output for linear PCM or packed PCM
sources.)
• Set “DIGITAL OUTPUT” at “PURE DIRECT MODE” to “OFF”. (See page 23.)
(If set to “ON”, analog audio signals converted to 96 kHz/88.2 kHz will be output when playing sources
recorded at 196 kHz/176.4 kHz.)
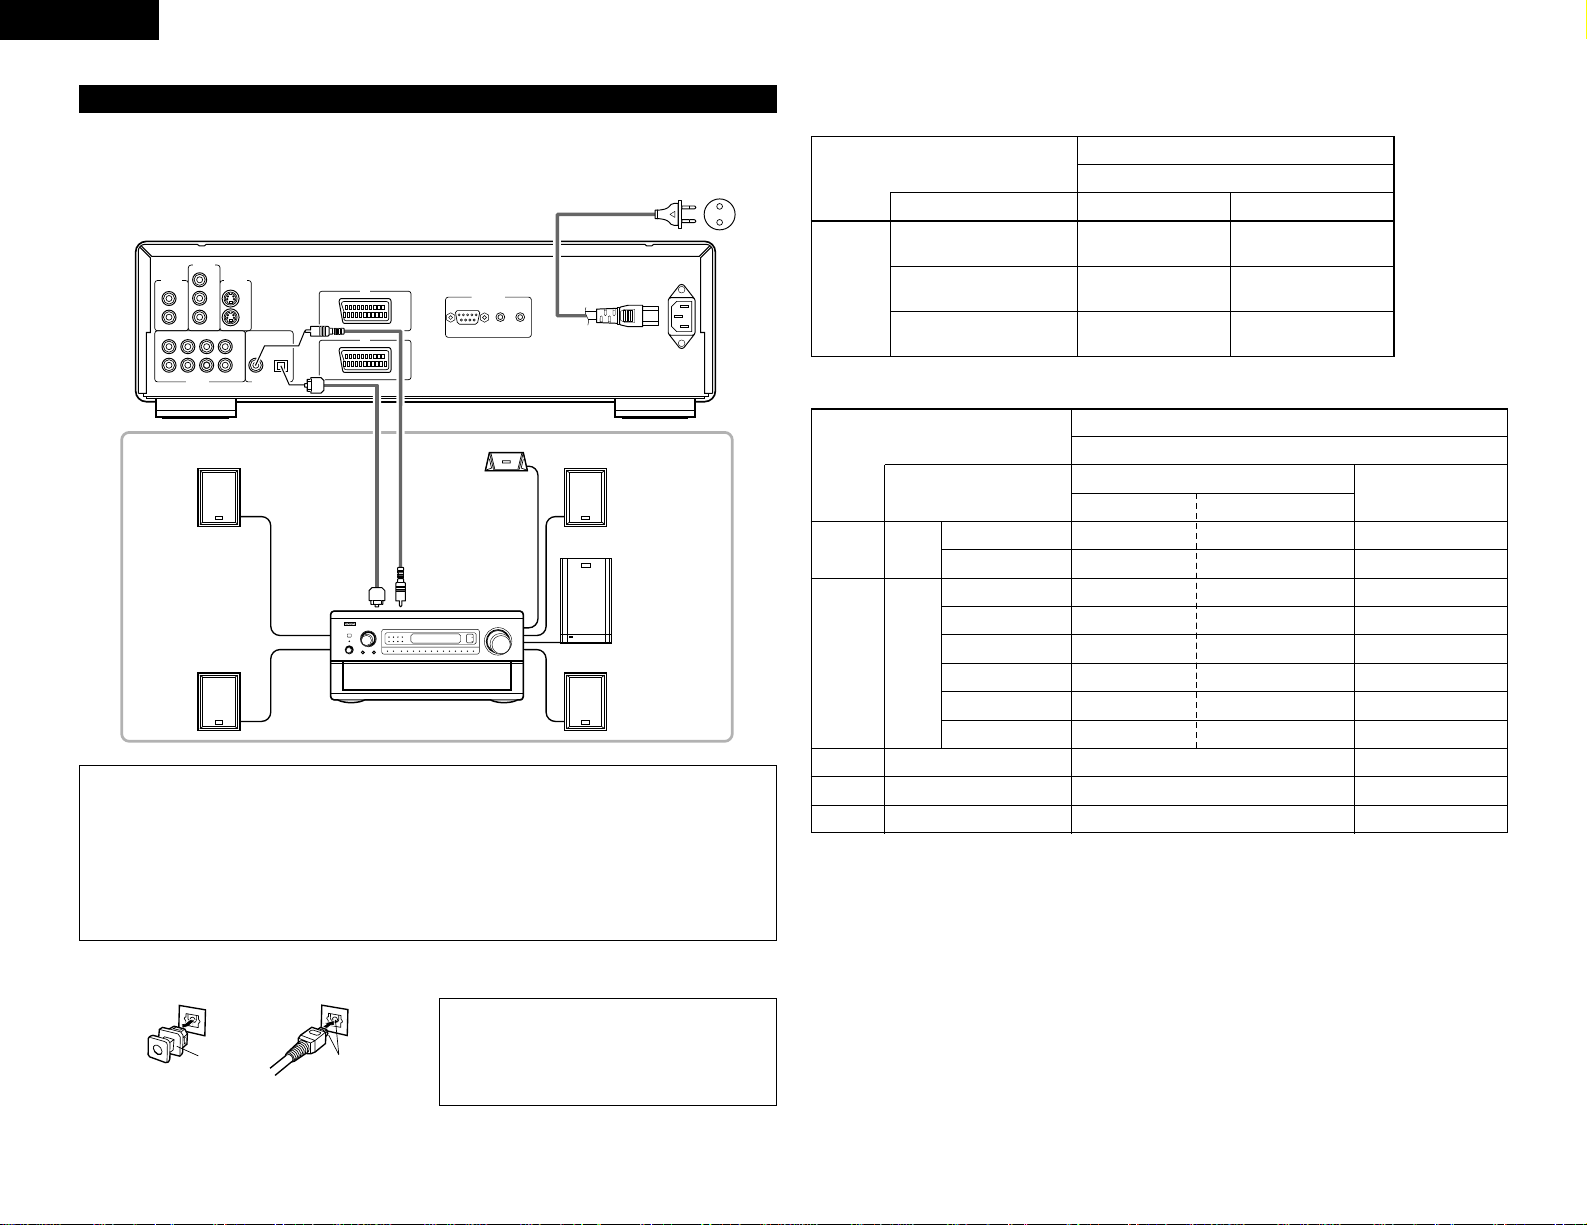
(5) Connecting a basic 5.1-channel surround system
Analog 5.1-channel audio signals can be output from the DVD-3800.
The multichannel audio signals recorded in packed PCM can be played when an AV amplifier equipped with
analog 5.1-channel audio inputs is connected.
AC IN
RS-232C ROOM TO ROOM
IN OUT
REMOTE CONTROL
DIGITAL OUT
COAXIAL
FR1FR2SWSR
FL1FL2C
1
2
1
2
PB/C
B
Y
P
R/CR
SL
OPTICAL
(PCM / BIT STREAM)
AUDIO OUT
VIDEO OUT S-VIDEO OUT
COMPONENT
VIDEO OUT
AV1
AV2
PHONES
DIRECT STEREO
ANALOG EXT. IN
DOLBY
SURROUND
DTS
SURROUND
WIDE
SCREEN
CINEMA /
MUSIC
6.1 / 7.1
SURROUND
VIDEO
ON / OFF
STATUS
M-ZONE 1
FUNCTION CONTROL
INPUT
MODE
5CH / 7CH
STEREO
DSP
SIMULATION
TONE
DEFEAT
MODE
SELECT
REC /
M-ZONE 2
SURROUND MODE
INPUT REC SELECT / M-ZONE
MULTI FUNCTION
DVD-3800
To power outlet
Front speaker (left)
Center speaker
Front speaker (right)
Subwoofer
Surround speaker (right)
AV amplifier with 5.1-channel
input terminals
Surround speaker (left)
FRONT
SUBWOOFER
SURROUND
CENTER
NOTES:
•
For multi-channel connections, set “AUDIO CHANNEL” under “AUDIO SETUP” at “SETUP” to “MULTI
CHANNEL” and make the “SPEAKER CONFIGURATION”, “CHANNEL LEVEL” and “DELAY TIME”
settings.
• Set “LPCM (44.1 kHz/48 kHz)” under “AUDIO SETUP” at “SETUP” to “OFF”. (See page 18.)
(If set to “ON”, analog audio signals converted to 96 kHz/88.2 kHz will be output when playing sources
recorded at 196 kHz/176.4 kHz.)
• When playing DVDs that are not copyright-protected and the unit is set to output digital and analog audio
signals simultaneously, for some discs only the signals below 96 kHz for the front two channels will be
output for the analog part.
When playing DVDs that are not copyright-protected, set “DIGITAL OUTPUT” at “PURE DIRECT MODE”
to “OFF”. (See page 23.)
• When playing DVDs recorded in MPEG audio format, the audio signals are down-mixed to 2 channels for
output.
• With the DVD-3800, we recommend turning the digital output off and only outputting analog signals in
order to keep interference from the digital output circuitry to the minimum and allow you to enjoy high bit,
high sampling frequency, high quality multi-channel sound.
COMPONENT
VIDEO OUT
VIDEO OUT S-VIDEO OUT
Y
1
2
SL
AUDIO OUT
1
PB/C
B
2
R/CR
P
COAXIAL
OPTICAL
FL1FL2C
FR1FR2SWSR
DIGITAL OUT
(PCM / BIT STREAM)
AV1
AV2
REMOTE CONTROL
RS-232C ROOM TO ROOM
IN OUT
COMPONENT
VIDEO OUT
VIDEO OUT S-VIDEO OUT
Y
1
PB/C
B
2
R/CR
P
FL1FL2C
SL
FR1FR2SWSR
AUDIO OUT
1
2
COAXIAL
(PCM / BIT STREAM)
DIGITAL OUT
OPTICAL
AV1
AV2
Page 10
10
ENGLISH
5
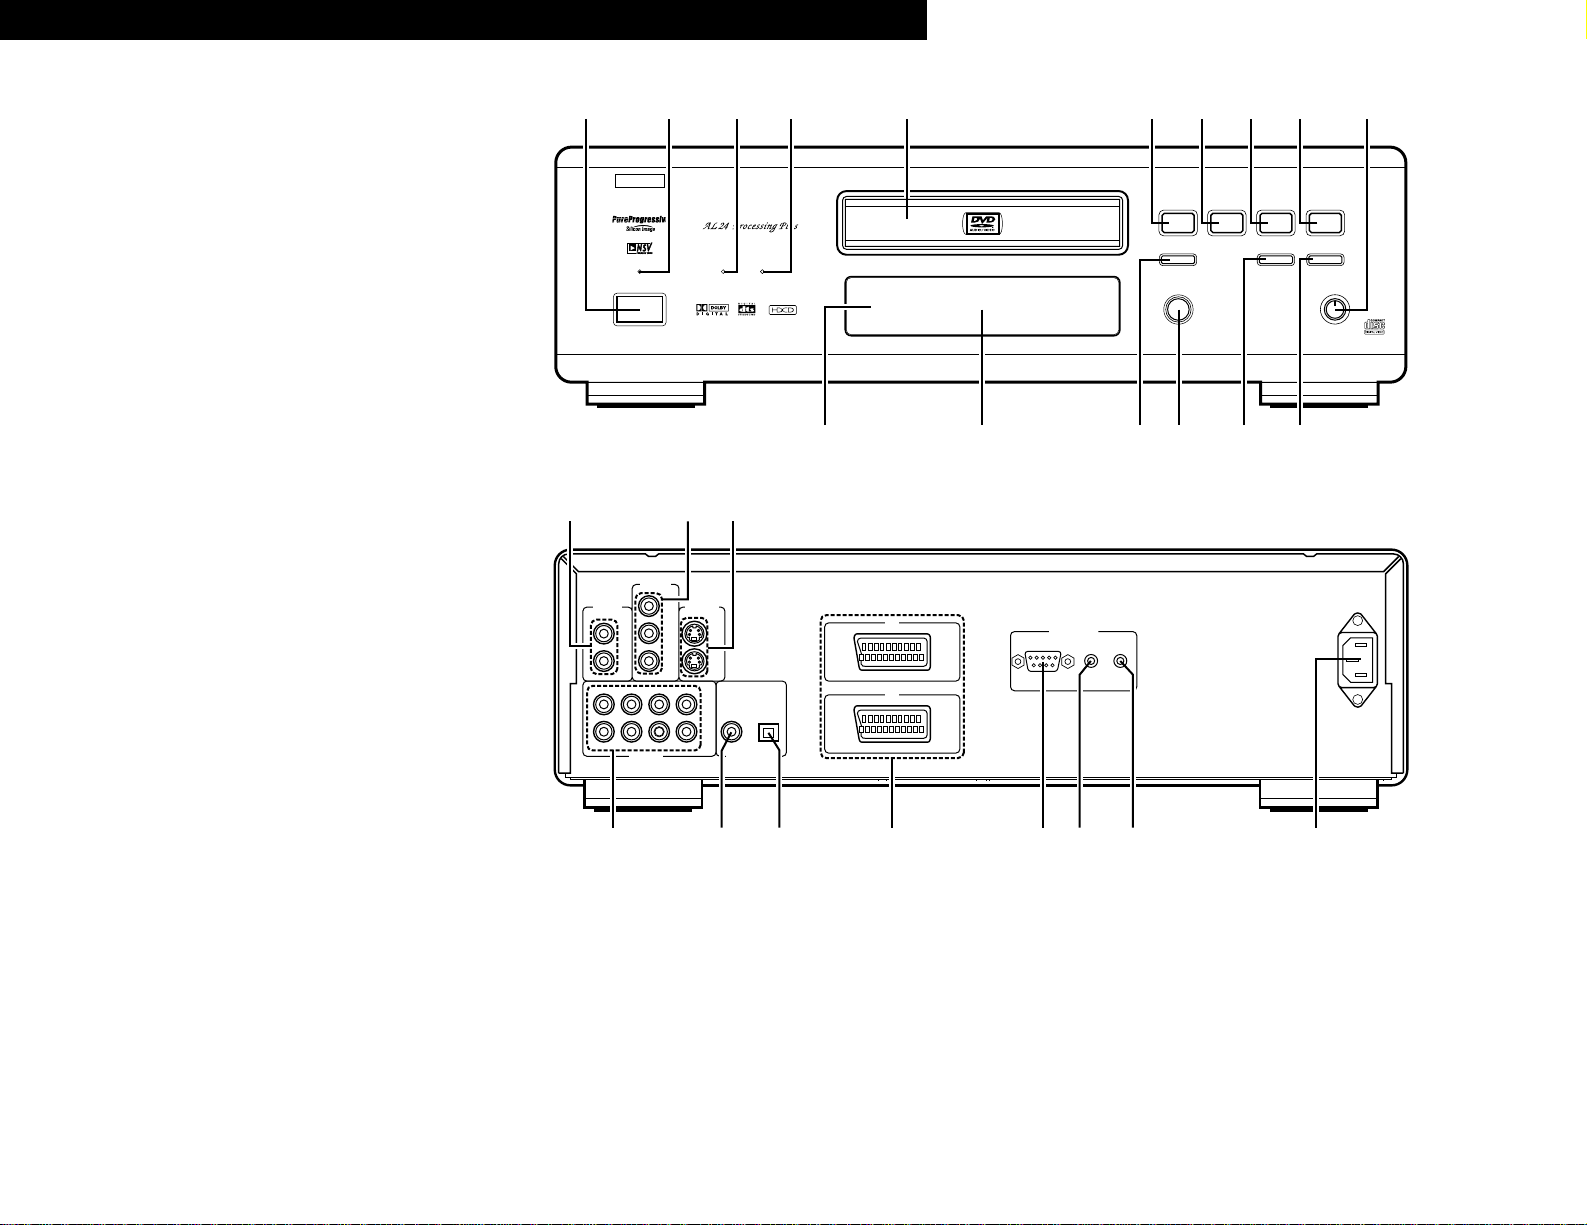
PART NAMES AND FUNCTIONS
(1) Front Panel
See page 3.
q
Power button
• Press once to turn the power on.
• Press again to set to the “OFF” position and
turn the power off.
• Set the power to the standby mode by
pressing the POWER OFF button on the
remote control unit while the power is on.
• Turn the power on from the standby mode by
pressing the POWER ON button on the
remote control unit.
w
Power indicator
• This indicator lights when the power is on and
when the power is in the standby mode.
e
AL24 PLUS indicator
• This indicator lights when the audio signals of
a DVD, etc., are being processed digitally with
the AL24 Processing Plus, a newly developed
analog waveform reproduction technology.
r
DVD AUDIO indicator
• This indicator lights when playing discs
recorded in DVD audio format.
t
Disc tray
• Load discs here. (See page 12.)
• Press the OPEN/CLOSE button
!4 to open
and close the disc tray.
• The disc tray is also closed when the PLAY
button
y is pressed.
y
PLAY button (PLAY)
• Press this button to play the disc. (See page
21.)
u
STOP button (STOP)
• Press this to stop the disc. (See page 22.)
i
Skip button (8)
• Press this to move back to the beginning of
the current track (or chapter).
• Press again to move back to the beginning of
the previous track (or chapter). (See page 22.)
o
Skip button (9)
• Press this to move ahead to the beginning of
the next track (or chapter). (See page 22.)
!0
PURE DIRECT selector
• Use this to select modes with specific movie
signal and digital audio signal output settings.)
!1
Remote control sensor
!2
Display
• Information on the disc that is currently playing
is shown on the display. (See page 10.)
!3
STILL/PAUSE button (3)
• Press this button to pause images or music or
to play images frame by frame. (See page 22.)
!4
OPEN/CLOSE button
(
5 OPEN/CLOSE)
• Press this button to open and close the disc
tray.(See page 12.)
!5
Slow/Search button (6)
• Press this to set the slow play mode and to
search in the reverse direction. (See page 22.)
!6
Slow/Search button (7)
• Press this to set the slow play mode and to
search in the forward direction. (See page 22.)
(2) Rear Panel
!7
Video output connector (VIDEO OUT)
• Connect using the included video cord.
!8
Component video output connectors
(COMPONENT VIDEO OUT)
• Connect using video cords (available in stores).
!9
S-Video output connector
(S-VIDEO OUT)
• Connect using an S-Video connection cord
(available in stores).
@0
Audio output connectors
(AUDIO OUT)
• Connect using the included audio cord.
@1
Digital audio output connector
(COAXIAL)
• Connect using an audio cord. Connect a
commercially available 75 Ω/ohms pin-plug
cord.
• Connect using the included audio video cord.
@2
Digital audio output connector
(OPTICAL)
• Connect using an optical fiber cable (available
in stores).
• Digital data is output from this connector.
@3
Control connector (RS-232C)
• This is a terminal for future system expansion.
@4
Control input connector
(ROOM TO ROOM/IN)
• This is the input connector for wired remote
control.
Consult your DENON dealer if you wish to use
this connector.
@5
Control output connector
(ROOM TO ROOM/OUT)
• This is the output connector for wired remote
control.
Consult your DENON dealer if you wish to use
this connector.
@6
Power input (AC IN)
• Connect to AC power supply using the
included AC cord.
@7
21-pin SCART terminal (AV1 / AV2)
(For only European model)
• Connect using a 21-pin SCART cable (available
in stores).
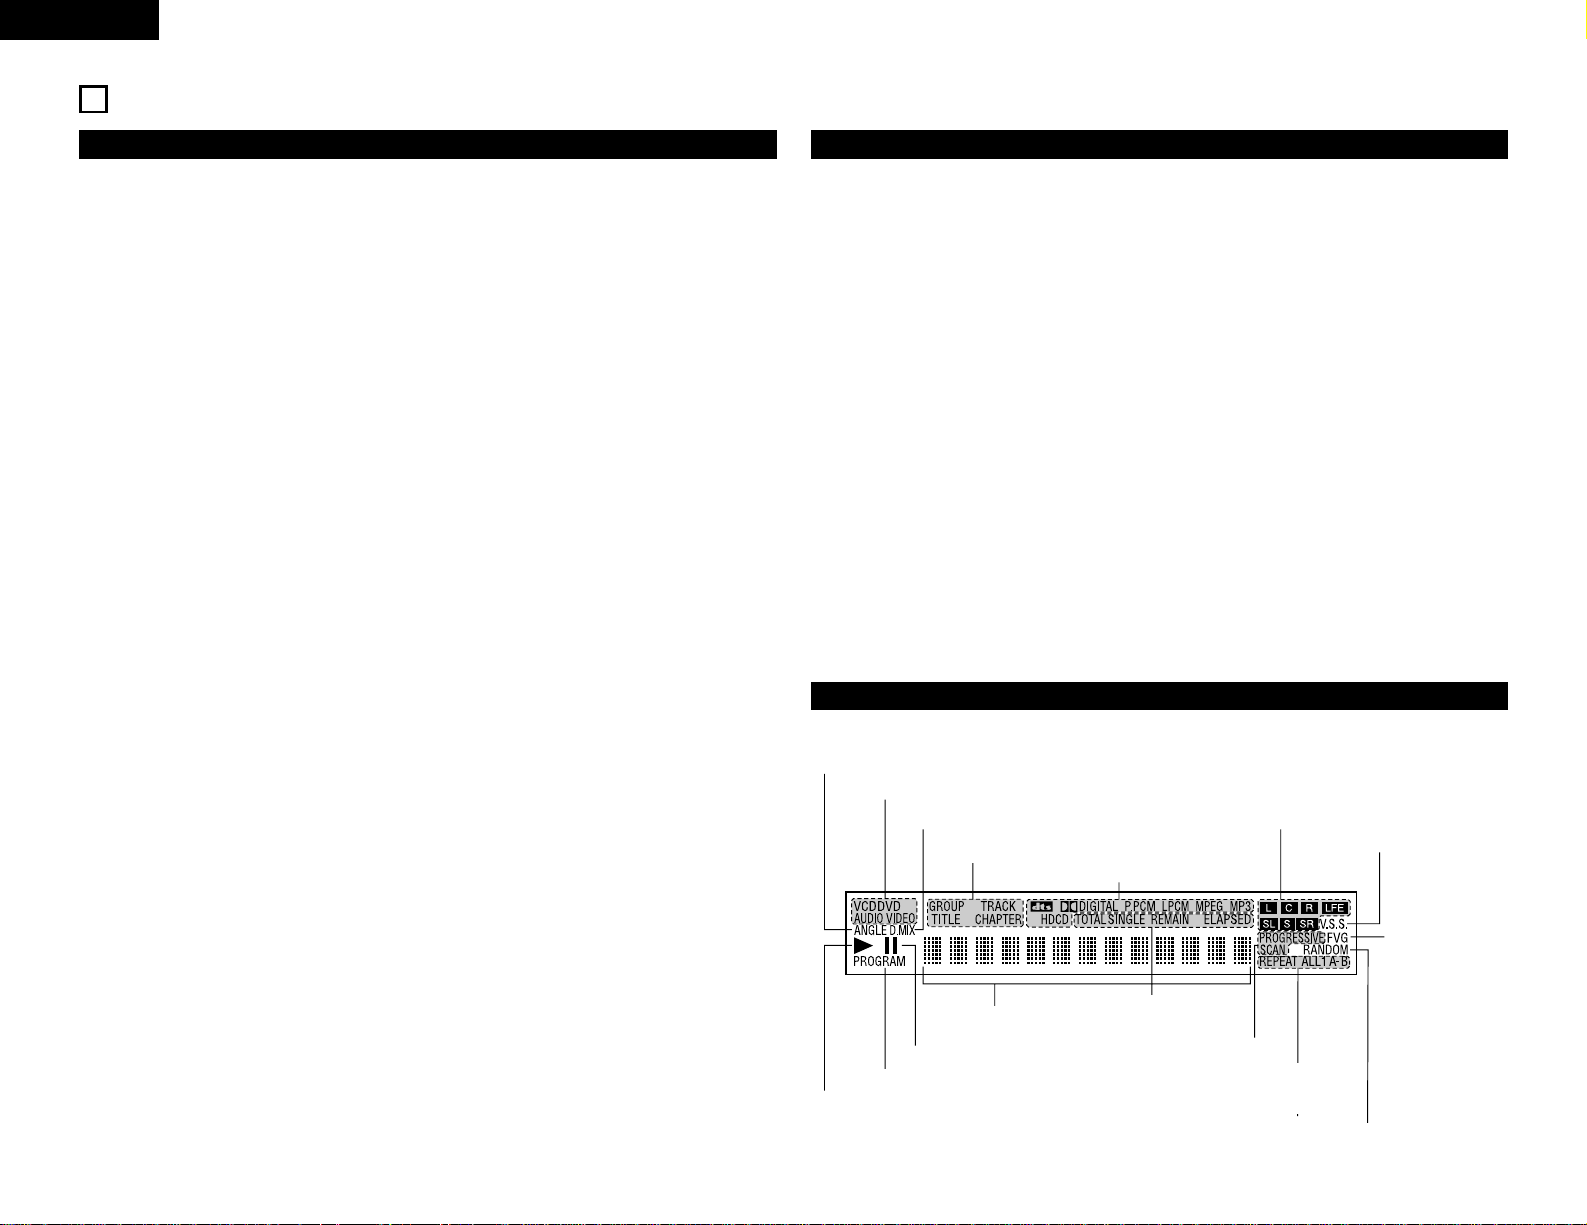
(3) Display
Lights during playback of multiple angles disc.
Lights to indicate the currently playing disc.
Lights when the audio signals can be down-mixed.
These light to indicate the names of the sections of the disc
being played.
Lights to indicate the currently playing audio format.
Lights to indicate the currently playing
audio channel.
Lights when in the virtual surround
mode.
Lights to indicate the
currently playing video
type.
F: Film source
V: Video source
G: Graphic source
Lights during playback, flashes when the resume play memory function is activated.
Lights in the programmed play mode.
Lights in the still/pause mode.
Displays the title, track number and
elapsed time during playback.
These light to indicate
the time display mode.
Lights when progressive video
signals are being output.
Lights in the
repeat play
mode.
Lights in the random play mode.
Page 11
11
ENGLISH
6
REMOTE CONTROL UNIT
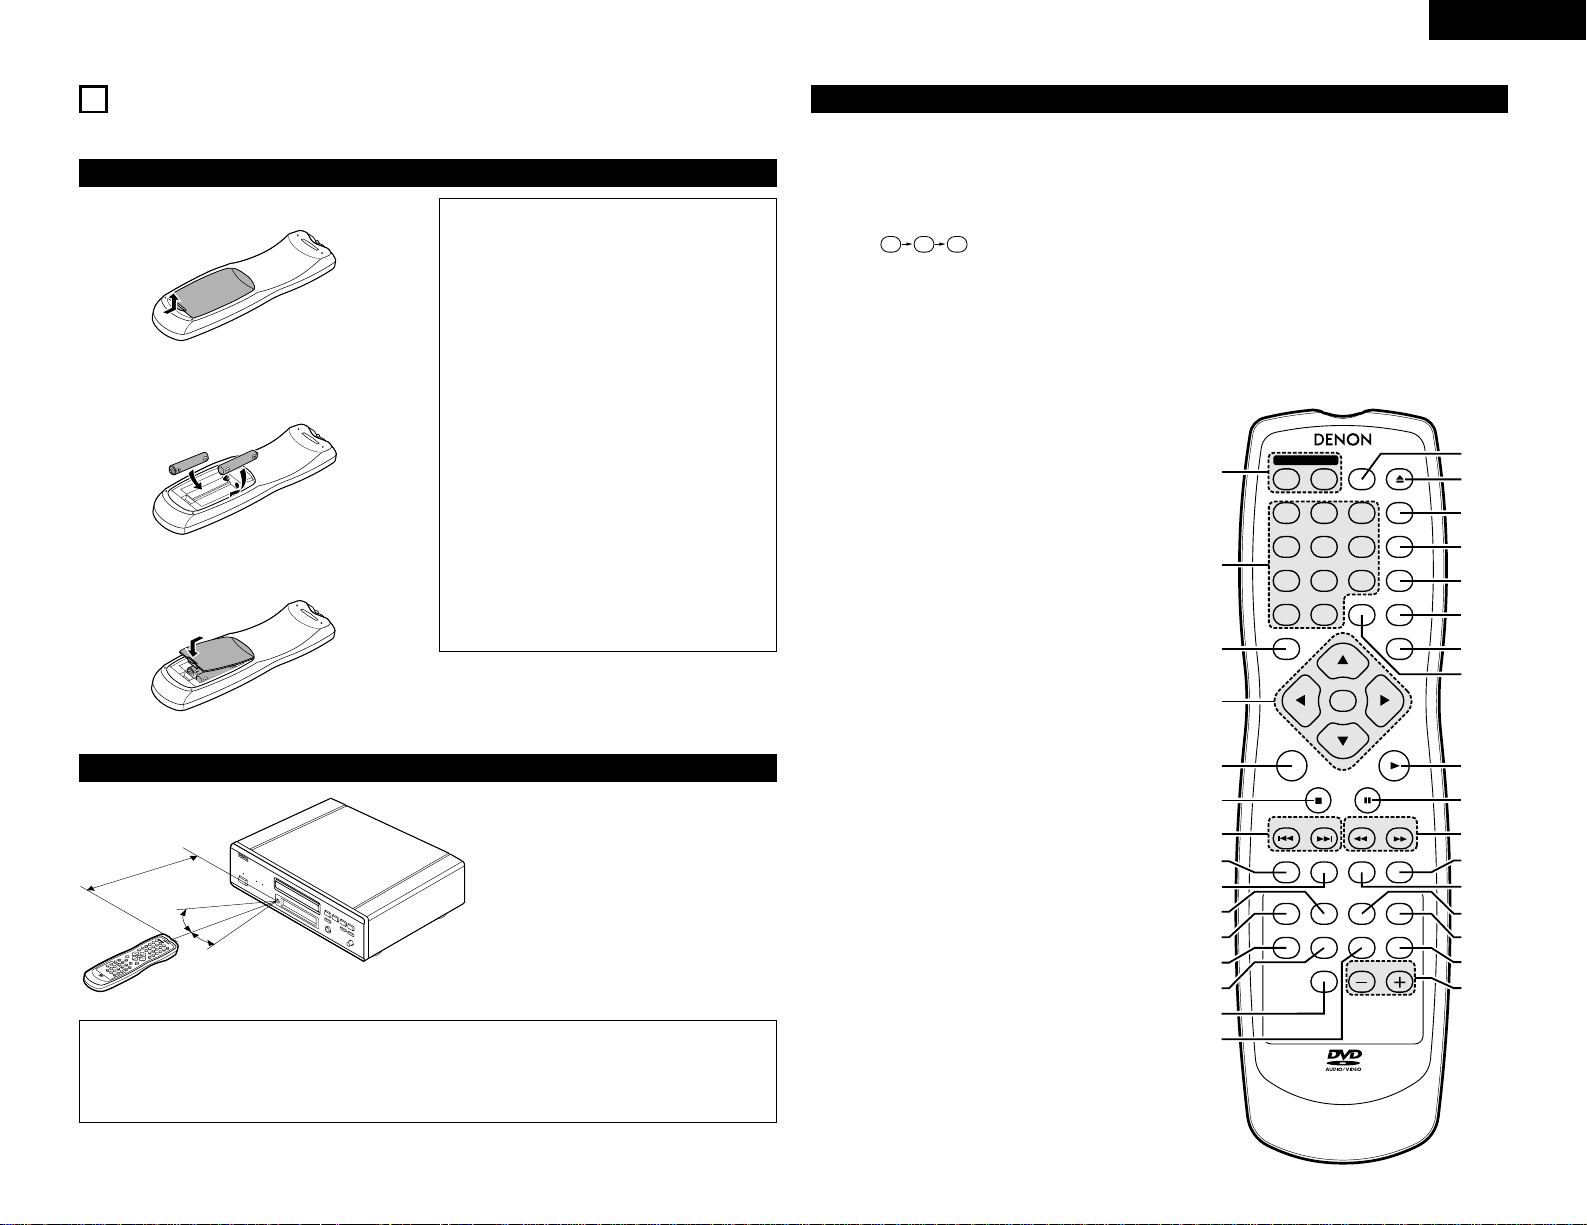
2 The DVD-3800 can be controlled from a distance using the included remote control unit (RC-553).
(1) Inserting Batteries
q Remove the remote control unit’s rear cover.
w Place two R6P/AA batteries in the battery
compartment in the direction indicated by the
marks.
e Close the rear cover.
Cautions On Batteries
• Use R6P/AA batteries in this remote control unit.
• Replace the batteries with new ones
approximately once a year, though this depends
on the frequency with which the remote control
unit is used.
• If the remote control unit does not operate from
close to the main unit, replace the batteries with
new ones, even if less than a year has passed.
• The included battery is only for verifying
operation.
Replace it with a new battery as soon as
possible.
• When inserting the batteries, be careful to do so
in the proper direction, following the < and >
marks in the remote control unit’s battery
compartment.
• To prevent damage or battery fluid leakage:
• Do not use a new battery with an old one.
• Do not use two different types of batteries.
• Do not short-circuit, disassemble, heat or
dispose of batteries in flames.
• Remove the batteries when not planning to use
the remote control unit for a long period of time.
• If the batteries should leak, carefully wipe off the
fluid from the inside of the battery compartment,
then insert new batteries.
(2) Using the Remote Control Unit
D
I
M
M
E
R
Z
O
O
M
P
.
D
.
M
E
M
O
R
Y
P
I
C
.
A
D
J
4
5
6
E
N
T
E
R
O
N
O
F
F
R
E
M
O
T
E
C
O
N
T
R
O
L
U
N
I
T
R
C
5
5
3
T
O
P
M
E
N
U
D
I
S
P
L
A
Y
M
A
R
K
E
R
R
A
N
D
O
M
P
A
G
E
A
B
R
E
P
E
A
T
S
E
T
U
P
N
T
S
C
/
P
A
L
O
P
E
N
/
C
L
O
S
E
C
A
L
L
R
E
T
U
R
N
S
K
I
P
S
L
O
W
/
S
E
A
R
C
H
P
O
W
E
R
A
N
G
L
E
S
U
B
T
I
T
L
E
A
U
D
I
O
S
E
A
R
C
H
M
O
D
E
P
L
A
Y
S
T
I
L
L
/
P
A
U
S
E
S
T
O
P
1
7
0
2
8
+
1
0
3
9
P
R
O
G
/
D
I
R
V
.
S
.
S
.
C
L
E
A
R
M
E
N
U
30°
30°
Approx. 7 meters
• When operating the remote control unit,
point it at the remote control sensor as
shown on the diagram.
• The remote control unit can be used from a
direct distance of approximately 7 meters.
This distance will be shorter, however, if
there are obstacles in the way or if the
remote control unit is not pointed directly at
the remote control sensor.
• The remote control unit can be operated at
a horizontal angle of up to 30° with respect
to the remote control sensor.
NOTES:
• It may be difficult to operate the remote control unit if the remote control sensor is exposed to direct
sunlight or strong artificial light.
• Do not press buttons on the main unit and on the remote control unit at the same time. Doing so will
result in malfunction.
(3) Names and Functions of Remote Control Unit Buttons
q
POWER ON/POWER OFF buttons
Press this to switch the power between on and standby.
w
Number buttons
Use these to input numbers.
Use the +10 button to input numbers of 10 or over.
Example: To input 25
e
TOP MENU button
The top menu stored on the disc is displayed.
r
Cursor buttons/ENTER button
Use the • and ª buttons to select in the vertical direction.
Use the 0and 1buttons to select in the horizontal
direction.
Press the ENTER button to select the item selected with
the cursor buttons.
t
MENU button
The DVD menu stored on the disc is displayed.
y
STOP button (2)
u
SKIP buttons
i
ANGLE button
Press this to switch the angle.
o
SUBTITLE button
Press this to switch the DVD’s subtitle language.
!0
A-B repeat button (A-B)
Use this to repeat sections between two specific points.
!1
REPEAT button
Press this to play tracks repeatedly.
!2
SETUP button
Press this to display the default setting screen.
!3
DIMMER button
Use this to adjust the brightness of the main unit’s display.
Can be switched in 4 steps, from OFF to always on.
!4
ZOOM button
Press this to enlarge the image.
!5
PICTURE ADJUST button (PIC. ADJ)
Press this to adjust the picture quality to suit your tastes.
!6
NTSC/PAL button
Use this to switch the set’s video output format
(NTSC/PAL).
!7
OPEN/CLOSE button
!8
PROGRAM/DIRECT button (PROG/DIR)
Press this to switch between the normal play,
programmed play.
!9
CLEAR button
Press this to clear numbers that you have input.
@0
V.S.S. button
Sets the virtual surround sound. (Functions when playing
DVDs recorded in Dolby Digital with two or more
channels.)
@1
RETURN button
Press this to return to the previous menu screen.
@2
DISPLAY button
Press this to display the ON-SCREEN.
@3
CALL button
Press this to check the program contents.
@4
PLAY button (1)
@5
STILL/PAUSE button (3)
@6
SLOW/SEARCH buttons
@7
SEARCH MODE button
Press this to change the search mode to search for
groups or titles, tracks or chapters when selecting
sections of discs directly using the number buttons.
5+10 +10
4 5 6
ENTER
ON
OFF
REMOTE CONTROL UNIT RC-553
TOP MENU
DISPLAY
MARKERRANDOM
PAGE
A-B
ZOOM
DIMMER
REPEAT
SETUP
NTSC / PAL OPEN / CLOSE
CALL RETURN
SKIP
SLOW / SEARCH
POWER
ANGLE SUBTITLE AUDIO SEARCH MODE
PLAY
STILL /
PAUSE
STOP
PIC.ADJ
1
7
0
2
8
+10
3
9
PROG / DIR
V.S.S.
CLEAR
P.D.MEMORY
MENU
q
!7
w
e
r
t
y
u
i
o
!0
!1
!2
!4
!5
!3
!8
!9
@0
@1
@2
@4
@5
@6
@7
@8
@9
#0
#1
#2
@3
!6
@8
AUDIO button
For DVDs, press this to switch the audio language. For
video CDs, press this to switch the channel between
“LR”, “L” and “R”.
@9
RANDOM button
Press this to play the tracks on the video or music CD in
random order.
#0
MARKER button
Press this to mark places you want to see again.
#1
PURE DIRECT MEMORY button
(P.D. MEMORY)
Use this to make various settings to achieve higher
quality sound.
#2
PAGE -/PAGE + buttons
Use these to selected the desired still picture on DVD
audio discs containing browseable still pictures.
2 Button not explained here function in the same way as the corresponding buttons on the main unit.
Page 12
NOTES:
• Be sure to turn on the power before opening
and closing the disc tray.
• Do not strike on the button with a pencil, etc.
12
ENGLISH
8
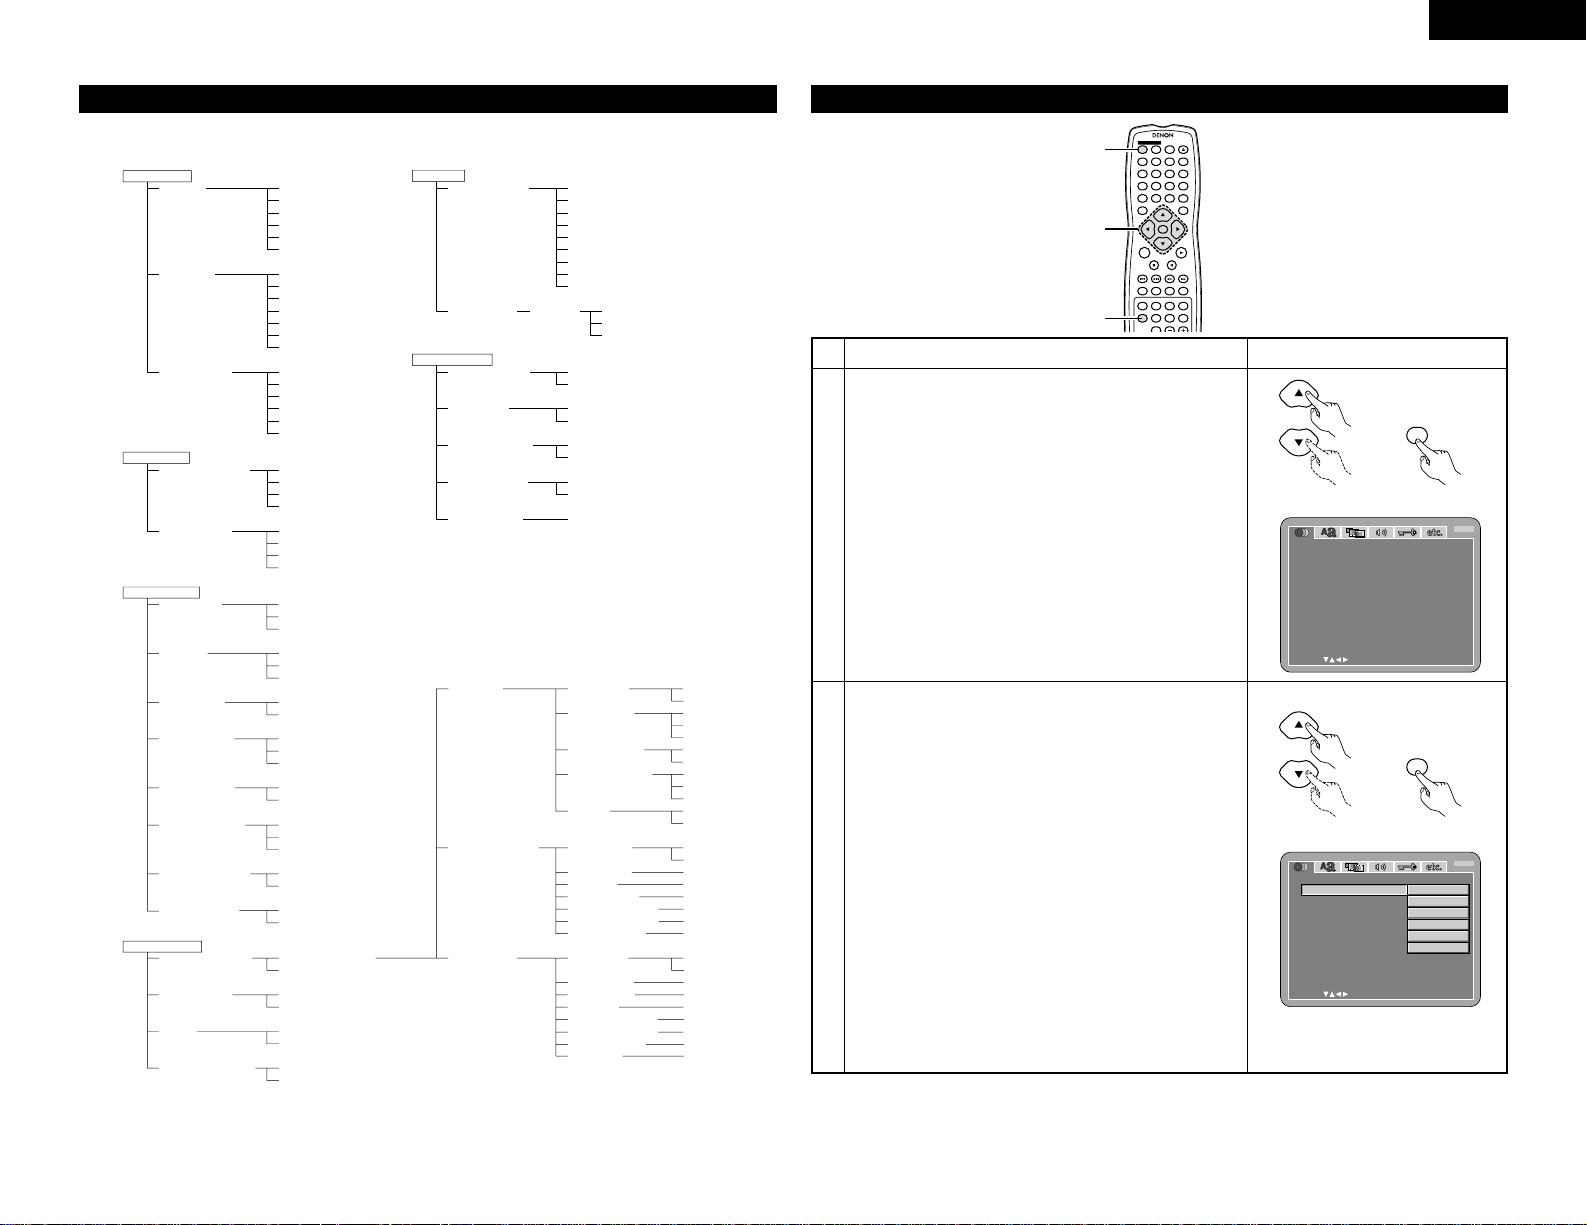
CHANGING THE DEFAULT SETTINGS
PROGRESSIVE
DVD
1 2
9
8
REMOTE SENSOR
OPEN/CLOSE
5
DVD AUDIO
¢ON / STANDBY
£OFF
PLAY STOP
763
STILL / PAUSE
B
PURE DIRECT
MODE 1
MODE 2
OFF
AL24 PLUS
DVD AUDIO-VIDEO PLAYER DVD-3800
1
2
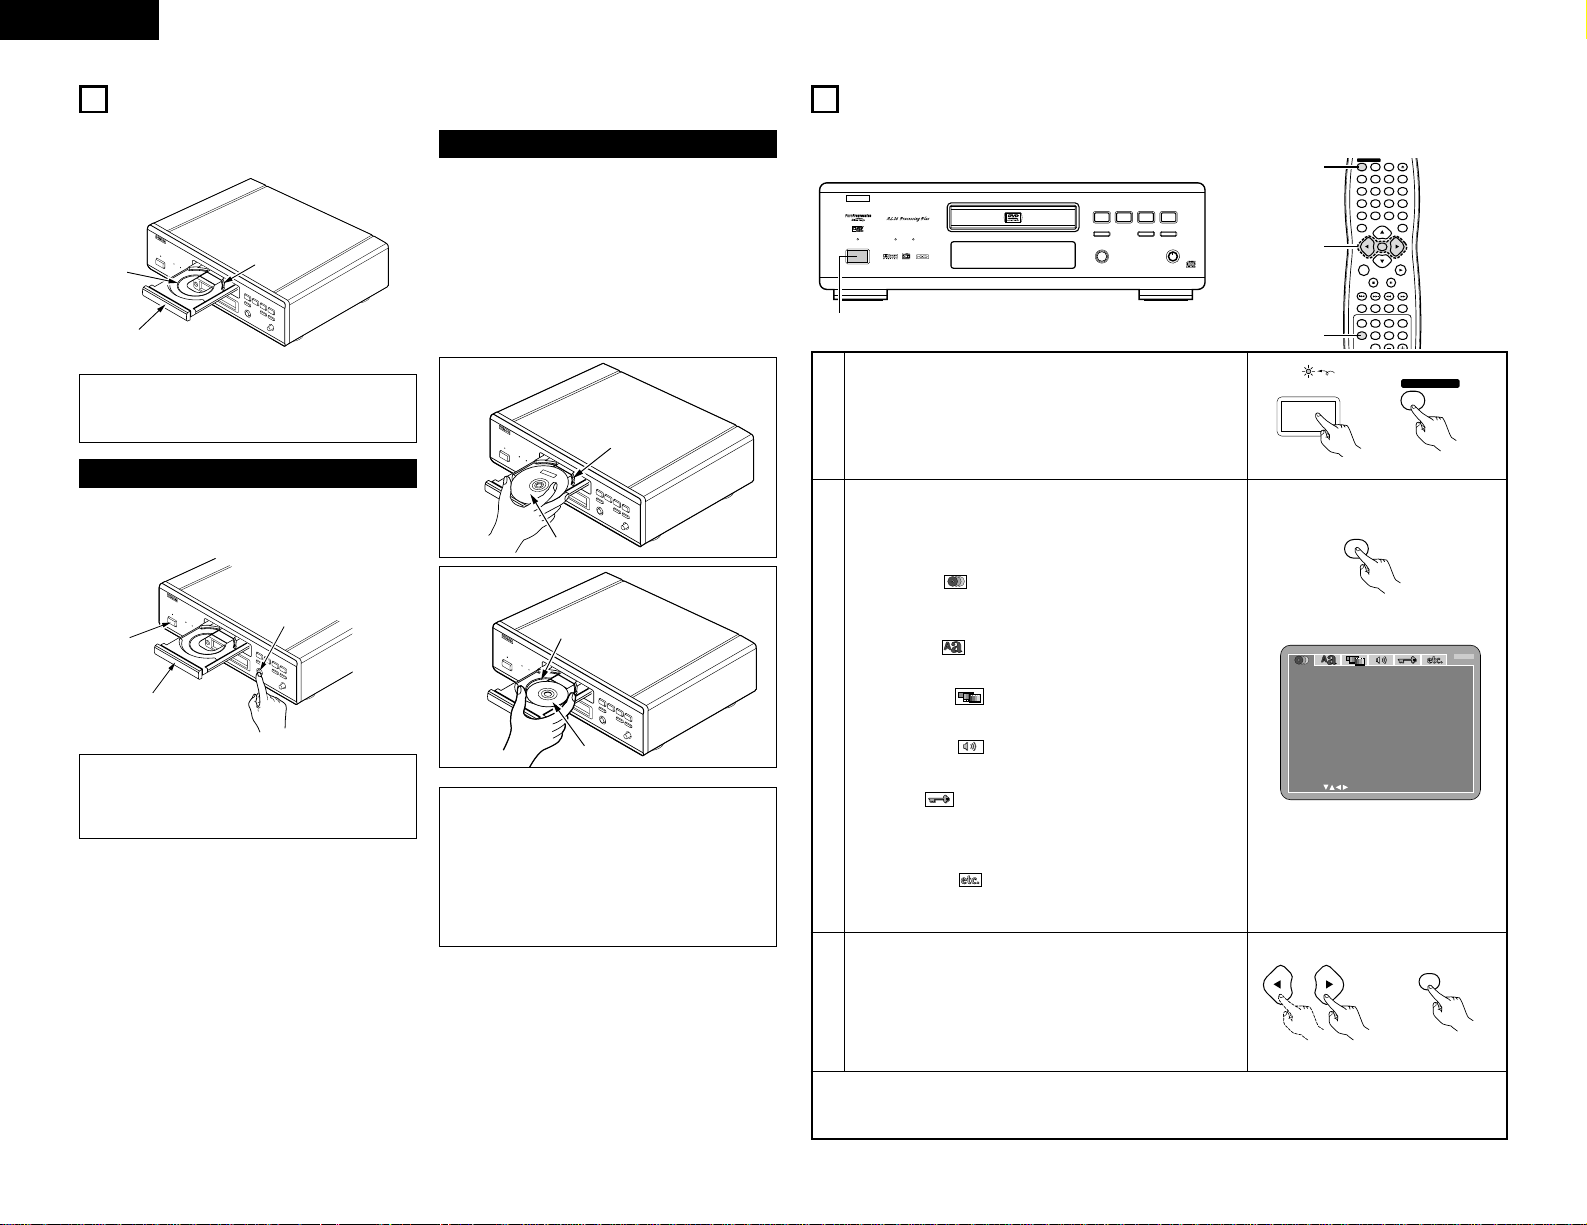
In the stop mode, press the SETUP button.
• The setup (default settings) screen appears.
NOTE:
• For some menus, the initial values can be changed during
playback.
DISC SETUP
Use this to set the language to be used when playing the disc.
If the set language is not offered on that disc, the discs
default language is set.
OSD SETUP
Use this to set the language for the default setting screen
and messages displayed on the TV screen (“PLAY”, etc.).
VIDEO SETUP
Use this to set the DVD-3800's screen mode.
(TV aspect, TV type and AV1 video output.)
AUDIO SETUP
Use this to set the DVD-3800's audio output mode.
(Digital and LPCM output settings.)
RATINGS
Use this to disable playback of adult DVDs so that children
cannot watch them. Note that playback of adult DVDs
cannot be disabled if the rating level is not recorded on the
DVD, but that it is possible to disable playback of all DVDs.
OTHER SETUP
These include special settings CAPTIONS and
COMPRESSION.
3
Use the 0 and 1 cursor buttons to select the desired
setting item, then press the ENTER button.
Select “DISC SETUP”. (See page 13.)
Select “OSD SETUP”. (See page 15.)
Select “VIDEO SETUP”. (See page 15.)
Select “AUDIO SETUP”. (See page 17.)
Select “RATINGS”. (See page 19.)
Select “OTHER SETUP” (See page 20.)
DI S C SE TUP
SELECT : DECISION:ENTER BUTTON
DI ALOG
DI SC MENUS
EXIT SETUP
SUBTI TL E
ENGLI SH
ENGLI SH
ENGLI SH
B
✽To exit the setup mode
Use the ª cursor button to select “EXIT SETUP”, then press the ENTER button. It is also possible to quit
by pressing the SETUP button on the remote control unit.
SETUP
Remote control unit
2 Make the initial settings to suit your usage conditions before starting playback.
The initial settings are retained until they are next changed, even if the power is turned off.
4 5 6
ENTER
ON
OFF
TOP MENU
DISPLAY
MARKERRANDOM
PAGE
A-B
ZOOM
DIMMER
REPEAT
SETUP
NTSC / PALOPEN / CLOSE
CALL RETURN
SKIP
SLOW / SEARCH
POWER
ANGLE SUBTITLE AUDIOSEARCH MODE
PLAY
STILL /
PAUSE
STOP
PIC.ADJ
1
7
0
2
8
+10
3
9
PROG / DIR
V.S.S.
CLEAR
P.D.MEMORY
MENU
3
1
2
ON
POWER
1
Turn on the power.
• Press the power button, the power indicator lights and the
power turns on.
¢ON / STANDBY
£OFF
Main unit Remote control unit
ENTER
Remote control unit
7
LOADING DISCS
2 Set discs in the disc tray with the labeled (printed)
side facing up.
8 cm disc
guide
12 cm disc guide
Disc tray
NOTE:
• Do not move the DVD-3800 while a disc is
playing. Doing so may scratch the disc.
(1) Opening and Closing the Disc Tray
q Turn on the power.
w Press the OPEN/CLOSE button.
Disc tray
Power button
OPEN/CLOSE button
(2) Loading Discs
Figure 1
Outer disc tray
12 cm disc
Figure 2
Inner disc tray
8 cm disc
NOTES:
• If your foreign object is caught in the disc tray
during closing, simply press the OPEN/CLOSE
button again and the tray will open.
• Do not press the disc tray in by hand when the
power is off. Doing so will damage it.
• Do not place foreign objects in the disc tray.
Doing so will damage it.
• Pick up the disc carefully so as not to touch the
signal surface and hold it with the labeled side
facing up.
• With the disc tray fully open, set the disc in the disc
tray.
• Set 12 cm discs in the outer tray guide (Figure 1), 8
cm discs in the inner tray guide (Figure 2).
• Press the OPEN/CLOSE button. The disc is
automatically loaded.
• The disc tray can also be closed automatically to
load the disc by pressing the PLAY button.
Light
Page 13
13
ENGLISH
When “DISC SETUP” is selected
4 5 6
ENTER
ON
OFF
REMOTE CONTROL UNIT RC-553
TOP MENU
DISPLAY
MARKERRANDOM
PAGE
A-B
ZOOM
DIMMER
REPEAT
SETUP
NTSC / PALOPEN / CLOSE
CALL RETURN
SKIP
SLOW / SEARCH
POWER
ANGLE SUBTITLE AUDIOSEARCH MODE
PLAY
STILL /
PAUSE
STOP
PIC.ADJ
1
7
0
2
8
+10
3
9
PROG / DIR
V.S.S.
CLEAR
P.D.MEMORY
MENU
1, 2, 3
1
1
2
Use the • and ª cursor buttons to select the desired setting,
then press the ENTER button.
DIALOG
Use this to set the language of the sound output from the
speakers.
SUBTITLE
Use this to set the language of the subtitles displayed on the
TV.
DISC MENUS
Use this to set the language of the menus recorded on the
disc (top menu, etc.).
DI S C SE TUP
SELECT : DECISION:ENTER BUTTON
DI ALOG
DI SC MENUS
EXIT SETUP
SUBTI TL E
ENGLI SH
ENGLI SH
ENGLI SH
B
1
See page 12.
Remote control unit
ENTER
Remote control unit
Remote control unit
ENTER
Remote control unit
3
Use the • and ª cursor buttons to select the desired setting,
then press the ENTER button.
q When “DIALOG” is selected:
ENGLISH (Factory default)
Select this when you want to play the DVD with the
sound in English.
FRENCH
Select this when you want to play the DVD with the
sound in French.
SPANISH
Select this when you want to play the DVD with the
sound in Spanish.
GERMAN
Select this when you want to play the DVD with the
sound in German.
ITALIAN
Select this when you want to play the DVD with the
sound in Italian.
OTHERS
Use the number buttons to input the language number.
(See “Language code list” on page 14.)
DI S C SE TUP
SELECT : DECISION:ENTER BUTTON
DI ALOG
DI SC MENUS
EXIT SETUP
SUBTI TL E
ENGLI SH
FRENCH
SPAN IS H
ITALIAN
GERMAN
OTHERS
B
Setup items for use
Bold characters indicate factory defaults.
DISC SETUP
DIALOG
SUBTITLE
DISC MENUS
ENGLISH
FRENCH
SPANISH
GERMAN
ITALIAN
OTHERS
OFF
ENGLISH
FRENCH
SPANISH
GERMAN
ITALIAN
OTHERS
ENGLISH
FRENCH
SPANISH
GERMAN
ITALIAN
OTHERS
OSD SETUP
OSD LANGUAGE
WALL PAPER
ENGLISH
FRANÇAIS
ESPAÑOL
DEUTSCH
BLUE
GRAY
BLACK
PICTURE
VIDEO SETUP
TV ASPECT
TV TYPE
VIDEO OUT
VIDEO MODE
BLACK LEVEL
AV1 VIDEO OUT
SQUEEZE MODE
PROGRESSIVE
MODE
4:3 PS
4:3 LB
WIDE (16:9)
NTSC
PAL
MULTI
PROGRESSIVE
INTERLACED
VIDEO
FILM
AUTO
DARKER
LIGHTER
VIDEO
S-VIDEO
RGB
OFF
ON
MODE 1
MODE 2
AUDIO SETUP
AUDIO CHANNEL
DIGITAL OUT
LPCM
(44.1 kHz/48 kHz)
BASS ENHANCER
(2 CHANNEL)
MULTI CHANNEL
2 CHANNEL
NORMAL
PCM
OFF
ON
OFF
ON
SPEAKER
CONFIGURATION
CHANNEL LEVEL
DELAY TIME
FRONT SP
CENTER SP
SUBWOOFER
SURROUND SP
FILTER
TEST TONE
FRONT Lch
CENTER
FRONT Rch
SURROUND Rch
SURROUND Lch
SUBWOOFER
DISTANCE
FRONT Lch
FRONT Rch
CENTER
SURROUND Lch
SURROUND Rch
SUBWOOFER
DEFAULT
LARGE
SMALL
LARGE
SMALL
NONE
YES
NO
LARGE
SMALL
NONE
ON
OFF
OFF
ON
0 dB
0 dB
0 dB
0 db
0 dB
0 dB
METERS
FEET
3.6 m
3.6 m
3.6 m
3.0 m
3.0 m
3.6 m
ON
RATINGS
RATING LEVEL
PASSWORD
CHANGE
0 (LOCK ALL)
1
2
3
4
5
6
7
8 (NO LIMIT)
OLD PASSWORD
NEW PASSWORD
COMFIRM PASSWORD
OTHER SETUP
PLAYER MODE
CAPTIONS
COMPRESSION
AUTO POWER
MODE
SLIDE SHOW
AUDIO
VIDEO
OFF
ON
OFF
ON
OFF
ON
5SEC
Page 14
14
ENGLISH
3
w When “ SUBTITLE” is selected:
OFF
Select this if you do not want to display the subtitles. (For
some discs it is not possible to turn off the subtitle
display.)
ENGLISH (Factory default)
Select this when you want to play the DVD with the
subtitles in English.
FRENCH
Select this when you want to play the DVD with the
subtitles in French.
SPANISH
Select this when you want to play the DVD with the
subtitles in Spanish.
GERMAN
Select this when you want to play the DVD with the
subtitles in German.
ITALIAN
Select this when you want to play the DVD with the
subtitles in Italian.
OTHERS
Use the number buttons to input the language number.
(See “Language code list” on page 14.)
e When “DISC MENUS” is selected:
ENGLISH (Factory default)
Select this when you want to display the menus in
English.
FRENCH
Select this when you want to display the menus in
French.
SPANISH
Select this when you want to display the menus in
Spanish.
GERMAN
Select this when you want to display the menus in
German.
ITALIAN
Select this when you want to display the menus in Italian.
OTHERS
Use the number buttons to input the language number.
(See “Language code list” on page 14.)
✽To exit the setup mode
Use the ª cursor button to select “EXIT SETUP”, then press the ENTER button. It is also possible to quit
by pressing the SETUP button on the remote control unit.
DI S C SE TUP
SELECT : DECISION:ENTER BUTTON
DI ALOG
DI SC MENUS
EXIT SETUP
SUBTI TL E
ENGLI SH
FRENCH
SPAN IS H
ITALIAN
GERMAN
OTHERS
OFF
B
DI S C SE TUP
SELECT : DECISION:ENTER BUTTON
DI ALOG
DI SC MENUS
EXIT SETUP
SUBTI TL E
ENGLI SH
FRENCH
SPAN IS H
ITALIAN
GERMAN
OTHERS
B
Language code list
Code
6565
6566
6570
6577
6582
6583
6588
6590
6665
6669
6671
6672
6678
6679
6682
6765
6779
6783
6789
6865
6869
6890
6976
6978
6979
6983
6984
6985
7065
7073
7074
Code
7079
7082
7089
7165
7168
7176
7178
7185
7265
7273
7282
7285
7289
7365
7378
7383
7384
7387
7465
7473
7487
7565
7575
7576
7577
7578
7579
7583
7585
7589
7665
Code
7678
7679
7684
7686
7771
7773
7775
7776
7778
7779
7782
7783
7784
7789
7865
7869
7876
7879
7982
8065
8076
8083
8084
8185
8277
8279
8285
8365
8368
8372
8373
Language
Afar
Abkhazian
Afrikaans
Ameharic
Arabic
Assamese
Aymara
Azerbaijani
Bashkir
Byelorussian
Bulgarian
Bihari
Bengali; Bangla
Tibetan
Breton
Catalan
Corsican
Czech
Welsh
Danish
German
Bhutani
Greek
English
Esperanto
Spanish
Estonian
Basque
Persian
Finnish
Fiji
Language
Faroese
French
Frisian
Irish
Scots Gaelic
Galician
Guarani
Gujarati
Hausa
Hindi
Croatian
Hungarian
Armenian
Interlingua
Indonesian
Icelandic
Italian
Hebrew
Japanese
Yiddish
Javanese
Georgian
Kazakh
Greenlandic
Cambodian
Kannada
Korean
Kashmiri
Kurdish
Kirghiz
Latin
Language
Lingala
Laothian
Lithuanian
Latvian, Lettish
Malagasy
Maori
Macedonish
Malayalam
Mongolian
Moldavian
Marathi
Malay
Maltese
Burmese
Nauru
Nepali
Dutch
Norwegian
Oriya
Panjabi
Polish
Pashto, Pushto
Portuguese
Quechua
Rhaeto-Romance
Romanian
Russian
Sanskrit
Sindhi
Serbo-Croatian
Singhalese
Code
8375
8376
8377
8378
8379
8381
8382
8385
8386
8387
8465
8469
8471
8472
8473
8475
8476
8479
8482
8484
8487
8575
8582
8590
8673
8679
8779
8872
8979
9072
9085
Language
Slovak
Slovenian
Samoan
Shona
Somali
Albanian
Serbian
Sundanese
Swedish
Swahili
Tamil
Telugu
Tajik
Thai
Tigrinya
Turkmen
Tagalog
Tonga
Turkish
Tatar
Twi
Ukrainian
Urdu
Uzbek
Vietnamese
Volapük
Wolof
Xhosa
Yoruba
Chinese
Zulu
Page 15
15
ENGLISH
When “OSD SETUP” is selected
4 5 6
ENTER
ON
OFF
REMOTE CONTROL UNIT RC-553
TOP MENU
DISPLAY
MARKERRANDOM
PAGE
A-B
ZOOM
DIMMER
REPEAT
SETUP
NTSC / PALOPEN / CLOSE
CALL RETURN
SKIP
SLOW / SEARCH
POWER
ANGLE SUBTITLE AUDIOSEARCH MODE
PLAY
STILL /
PAUSE
STOP
PIC.ADJ
1
7
0
2
8
+10
3
9
PROG / DIR
V.S.S.
CLEAR
P.D.MEMORY
MENU
1, 2, 3
1
1
2
Use the • and ª cursor buttons to select the desired setting,
then press the ENTER button.
OSD LANGUAGE
Use this to set the language for the default setting screen
and messages displayed on the TV screen (“PLAY”, etc.)
WALL PAPER
Use this to select the image to be shown on the screen in
the stop mode and CD play mode.
1
See page 12.
3
Use the • and ª cursor buttons to select the desired setting,
then press the ENTER button.
q When “OSD LANGUAGE” is selected:
ENGLISH (Factory default)
Select this to set the OSD language to English.
FRANÇAIS
Select this to set the OSD language to French.
ESPAÑOL
Select this to set the OSD language to Spanish.
DEUTSCH
Select this to set the OSD language to German.
3
Use the • and ª cursor buttons to select the desired setting,
then press the ENTER button.
w When “WALL PAPER” is selected:
BLUE (Factory default)
Select this to display a blue background on the TV display.
GRAY
Select this to display a gray background on the TV display.
BLACK
Select this to display a black background on the TV
display.
PICTURE
Select this to display the wallpaper on the TV display.
✽To exit the setup mode
Use the ª cursor button to select “EXIT SETUP”, then press the ENTER button. It is also possible to quit
by pressing the SETUP button on the remote control unit.
Remote control unit
ENTER
Remote control unit
OSD SETUP
SELECT : DECISION:ENTER BUTTON
OSD LANGUAGE
EXIT SETUP
W
ALL P APER
ENGLI SH
BUL E
B
Remote control unit
ENTER
Remote control unit
OSD SETUP
SELECT : DECISION:ENTER BUTTON
OSD LANGUAGE
EXIT SETUP
W
ALL P APER
B
ENGLI SH
FRANÇA IS
ESPAÑOL
When “VIDEO SETUP” is selected
4 5 6
ENTER
ON
OFF
REMOTE CONTROL UNIT RC-553
TOP MENU
DISPLAY
MARKERRANDOM
PAGE
A-B
ZOOM
DIMMER
REPEAT
SETUP
NTSC / PALOPEN / CLOSE
CALL RETURN
SKIP
SLOW / SEARCH
POWER
ANGLE SUBTITLE AUDIOSEARCH MODE
PLAY
STILL /
PAUSE
STOP
PIC.ADJ
1
7
0
2
8
+10
3
9
PROG / DIR
V.S.S.
CLEAR
P.D.MEMORY
MENU
1, 2, 3
1
1
2
Use the • and ª cursor buttons to select the desired
setting, then press the ENTER button.
TV ASPECT
Use this to set the shape of your TV’s screen.
TV TYPE
Use this to set your TV’s video format (NTSC, PAL or
MULTI).
VIDEO OUT
Use this to select either the progressive image output or
interlace image output.
VIDEO MODE
The play DVD video, select the desired video mode
(“VIDEO”, “FILM”, “AUTO”).
BLACK LEVEL
To select the black level of the picture, “DARKER” or
“LIGHTER”.
AV1 VIDEO OUT (For only European model)
To select whether composite video signals or S video
signals or RGB signals will be output from the AV1 SCART
terminals.
SQUEEZE MODE
Used to play 4:3 images on a wide (16:9) TV.
PROGRESSIVE MODE
Select the film source and video source detection method
recorded on the DVD.
Normally select “MODE 1” (level detection mode).
(only valid for progressive output during DVD video
playback)
1
See page 12.
Remote control unit
ENTER
Remote control unit
EXIT SETUP
BLAC K L EVE L
SQUEEZE MODE
PROGRES SI VE MODE
VI DEO SETUP
SELECT : DECISION:ENTER BUTTON
TV ASPECT
TV TYPE
VI DE O OUT
VI DE O
M
ODE
B
AV1 VI DEO OUT
W
IDE(16:9)
MULT I
PROGRESSI VE
VIDEO
VIDEO
LI GHTER
OFF
MODE 1
OSD SETUP
OSD LANGUAGE
W
ALL P APER
EXIT SETUP
BUL E
GRAY
BLAC K
PICTURE
B
SELECT : DECISION:ENTER BUTTON
Page 16
16
ENGLISH
3
Use the • and ª cursor buttons to select the desired
setting, then press the ENTER button.
q When “TV ASPECT” is selected:
4:3 PS
Select this to play wide DVDs in the pan & scan mode
(with the sides of the picture cut off). Discs for which
pan & scan is not specified are played in the letter box
mode.
4:3 LB
Select this to play wide DVDs in the letter box mode
(with black strips at the top and bottom).
WIDE (16:9) (Factory default)
Select this to play wide DVDs in the full-screen mode.
w When “TV TYPE” is selected:
NTSC
Select this when your TV’s video format is NTSC.
If NTSC is selected, output format is fixed to NTSC.
PAL
Select this when your TV’s video format is PAL.
If PAL is selected, output format is fixed to PAL.
MULTI (Factory default)
Select this when your TV is compatible with both the
NTSC and PAL formats.
If you play the disc recorded NTSC format, signal from
video output terminal will be switched to NTSC is
selected, output format is fixed to NTSC.
e When “VIDEO OUT” is selected: (NOTES)
PROGRESSIVE (Factory default)
Select this when using the DVD-3800 connected to a
progressive type TV.
INTERLACED
Select this when using the DVD-3800 connected to an
interlace type TV.
NOTES:
• For the component output only, it is possible to switch
between interlace image output and progressive image
output. It is not possible to specify progressive image
output for the Video output connectors or S-Video output
connector.
• When the progressive mode is selected, the interlaced
sound and picture may be slightly out of sync. To use the
interlaced output, set the setting to “INTERLACED”.
r When “VIDEO MODE” is selected:
VIDEO (Factory default)
This mode is best suited for playing discs containing
video material.
FILM
This mode is best suited for playing discs containing
film material or video material recorded with the
progressive scan method.
AUTO
The set identifies the type of material on the disc being
played (film or video) and selects the mode
automatically. This mode is suited for playing discs
containing both film and video material.
NOTE:
•
If stripes of noise appear on the picture or the picture is
unclear when playing a specific DVD video disc, try
changing the video mode.
EXIT SETUP
BLAC K L EVE L
SQUEEZE MODE
PROGRES SI VE MODE
VI DEO SETUP
SELECT : DECISION:ENTER BUTTON
TV ASPECT
TV TYPE
VI DE O OUT
VI DE O
M
ODE
NTSC
PAL
M
ULT I
B
AV1 VI DEO OUT
BLAC K L EVE L
SQUEEZE MODE
EXIT SETUP
PROGRES SI VE MODE
VI DEO SETUP
SELECT : DECISION:ENTER BUTTON
TV ASPECT
TV TYPE
VI DE O OUT
VI DE O
M
ODE
PROGRESSI VE
INTERLACED
B
AV1 VI DEO OUT
BLAC K L EVE L
SQUEEZE MODE
EXIT SETUP
PROGRES SI VE MODE
VI DEO SETUP
SELECT : DECISION:ENTER BUTTON
TV ASPECT
TV TYPE
VI DE O OUT
VI DE O
M
ODE
VIDEO
FILM
AUTO
B
AV1 VI DEO OUT
Remote control unit
ENTER
Remote control unit
EXIT SETUP
BLAC K L EVE L
SQUEEZE MODE
PROGRES SI VE MODE
VI DEO SETUP
SELECT : DECISION:ENTER BUTTON
TV ASPECT
TV TYPE
VI DE O OUT
VI DE O
M
ODE
4 : 3 PS
4 : 3 LB
W
IDE(16:9)
B
AV1 VI DEO OUT
3
t When “BLACK LEVEL” is selected:
DARKER (Factory default)
Sets the video output signal’s black level to the standard
level.
LIGHTER
Reduces the standard level of the video output signal’s
black level.
Set this if the image on the TV is far too dark.
y When “AV1 VIDEO OUT” is selected:
VIDEO (Factory default)
Composite video signals will be output from the AV1
SCART terminal.
S-VIDEO
S video signals will be output.
RGB
RGB signals will be output.
u When “SQUEEZE MODE” is selected:
“SQUEEZE MODE” - only effective for progressive
output.
OFF (Factory default)
Set this to display 4:3 video signals over the entire
screen of a 16:9 TV.
ON
Set this to display 4:3 video signals in the center of the
screen on a 16:9 TV.
i When “PROGRESSIVE MODE” is selected:
MODE 1 (level detection mode)
(Factory default)
This is a mode for high precision detection of the source
type from the level of the video signals recorded on the
DVD.
For DVDs on which the flag (identification signal) data is
recorded incorrectly, the picture quality may decrease
when flag detection is conducted.
This mode is effective in such cases.
MODE 2 (flag detection mode)
This is a mode for detecting the source type from the
source flag (identification signal) recorded on the DVD.
In dark scenes, distinguishing between video signals
and noise signals with level detection is difficult and the
picture quality may decrease.
This mode is effective in such cases.
BLAC K L EVE L
SQUEEZE MODE
EXIT SETUP
PROGRES SI VE MODE
VI DEO SETUP
SELECT : DECISION:ENTER BUTTON
TV ASPECT
TV TYPE
VI DE O OUT
VI DE O
M
ODE
DARKE R
LI GHTER
B
AV1 VI DEO OUT
BLAC K L EVE L
SQUEEZE MODE
EXIT SETUP
PROGRES SI VE MODE
VI DEO SETUP
SELECT : DECISION:ENTER BUTTON
TV ASPECT
TV TYPE
VI DE O OUT
VI DE O
M
ODE
VIDEO
S-VIDEO
RGB
B
AV1 VI DEO OUT
BLAC K L EVE L
SQUEEZE MODE
EXIT SETUP
PROGRES SI VE MODE
VI DEO SETUP
SELECT : DECISION:ENTER BUTTON
TV ASPECT
TV TYPE
VI DE O OUT
VI DE O
M
ODE
OFF
ON
B
AV1 VI DEO OUT
BLAC K L EVE L
SQUEEZE MODE
EXIT SETUP
PROGRES SI VE MODE
VI DEO SETUP
SELECT : DECISION:ENTER BUTTON
TV ASPECT
TV TYPE
VI DE O OUT
VI DE O
M
ODE
MODE 1
MODE 2
B
AV1 VI DEO OUT
✽To exit the setup mode
Use the ª cursor button to select “EXIT SETUP”, then press the ENTER button. It is also possible to quit
by pressing the SETUP button on the remote control unit.
Page 17
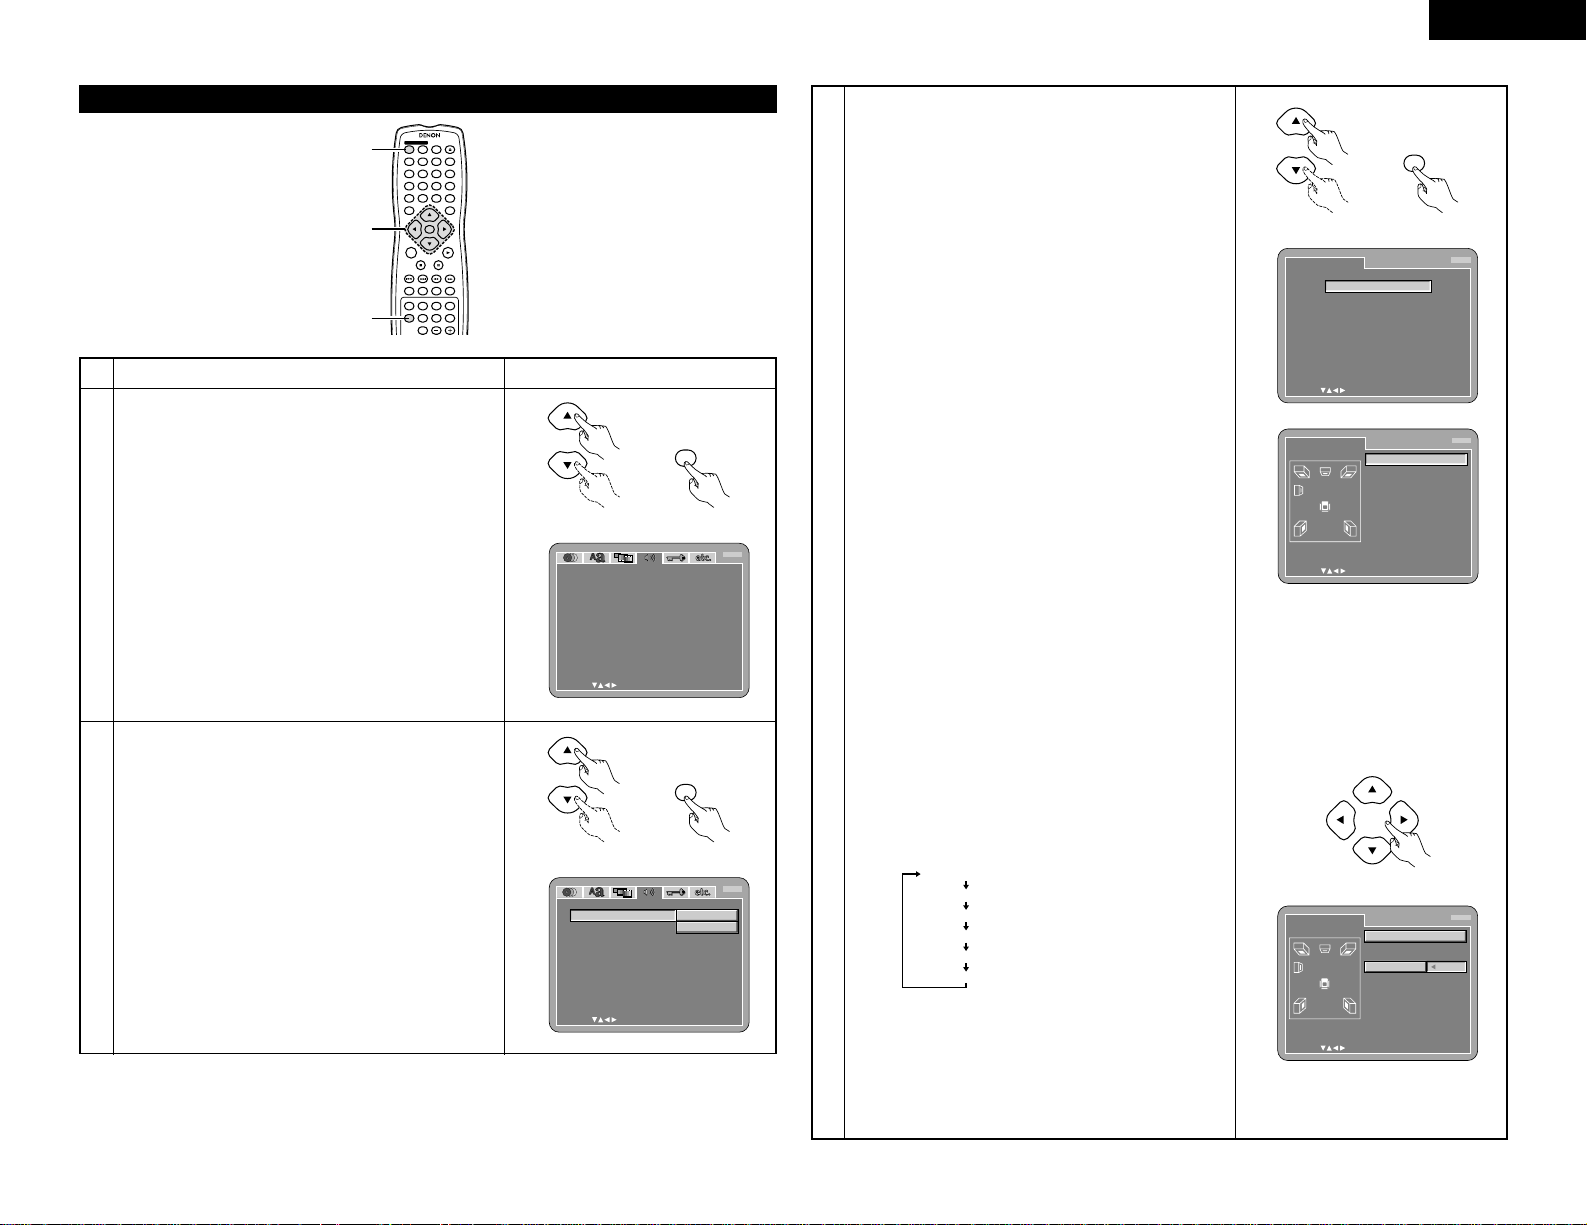
17
ENGLISH
When “AUDIO SETUP” is selected
4 5 6
ENTER
ON
OFF
REMOTE CONTROL UNIT RC-553
TOP MENU
DISPLAY
MARKERRANDOM
PAGE
A-B
ZOOM
DIMMER
REPEAT
SETUP
NTSC / PALOPEN / CLOSE
CALL RETURN
SKIP
SLOW / SEARCH
POWER
ANGLE SUBTITLE AUDIOSEARCH MODE
PLAY
STILL /
PAUSE
STOP
PIC.ADJ
1
7
0
2
8
+10
3
9
PROG / DIR
V.S.S.
CLEAR
P.D.MEMORY
MENU
1, 2, 3
1
1
2
Use the • and ª cursor buttons to select the desired
setting, then press the ENTER button.
AUDIO CHANNEL
Use this to adjust for the connected speaker systems.
DIGITAL OUT
Use this to select the digital output’s signal format.
LPCM (44.1 KHz / 48 kHz)
Use this to set the digital audio output when playing DVDs
recorded in linear PCM audio.
BASS ENHANCER (2 CHANNEL)
Set whether or not to output audio signals from the
subwoofer when playing two-channel audio signals.
3
Use the • and ª cursor buttons to select the desired
setting, then press the ENTER button.
q When “AUDIO CHANNEL” is selected:
B
Use the •and ªcursor buttons to select the item to
be set, then press the ENTER button.
MULTI CHANNEL (Factory default)
Select this for systems in which three or more
speakers are connected.
When MULTI CHANNEL is set, the speaker settings
(SPEAKER CONFIGURATION), speaker output level
adjustment (CHANNEL LEVEL) and speaker distances
(DELAY TIME) can be set.
2 CHANNEL
Select this for systems in which only two speakers
are connected.
1
See page 12.
Remote control unit
ENTER
Remote control unit
AUDI O SE TUP
SELECT : DECISION:ENTER BUTTON
AUDI O CHANNEL
DI G I TAL OUT
LPCM(44.1kHz/48kHz)
EXIT SETUP
BASS ENHANCE R(2 CHANNEL)
M
ULT I CHANNEL
NOR
M
AL
OFF
OFF
B
Remote control unit
ENTER
Remote control unit
AUDI O SE TUP
SELECT : DECISION:ENTER BUTTON
AUDI O CHANNEL
DI G I TAL OUT
LPCM(44.1kHz/48kHz)
EXIT SETUP
BASS ENHANCE R(2 CHANNEL)
M
ULT I CHANNEL
2 CHANNEL
B
3
B
When “MULTI CHANNEL” is selected, use the •and ªcursor
buttons to select the item to be set, then press the ENTER button.
SPEAKER CONFIGURATION
Use this to select the types of the different speakers.
CHANNEL LEVEL
Use this to adjust the output level of the different speakers.
DELAY TIME
Use this to set the distance from the different
speakers to the listening position.
✽
To exit the SPEAKER SETUP mode
Use the ªcursor button to select “AUDIO SETUP” then
press ENTER button.
B
When “SPEAKER CONFIGURATION” is selected,
use the •and ªcursor buttons to select the speaker
to be set then press the ENTER button.
•
The type of speaker used for the front speakers,
center speaker, subwoofer and surround speakers can
be set. Use the •and ªcursor buttons to select the
speaker type, then press the ENTER button.
LARGE:
Select this when a large speaker is connected.
SMALL:
Select this when a small speaker is connected.
NONE:
Select this when no speaker is connected.
YES:
Select this when a subwoofer is connected.
NO:
Select this when no subwoofer is connected.
When
“FILTER” is selected:
ON (Factory default)
Select this when connecting a subwoofer, for example
for playback in the Dolby Digital or DTS modes.
Set to “ON” for normal multi-channel playback.
OFF
Set this to play DVD audio 6-channel sources recorded
with “all channel full band frequency”.
When “OFF” is set, the speaker size is set to “LARGE” for all
the speakers and the subwoofer setting is set to “YES”.
To play this type of software, read the software’s
instructions carefully and make analog connections.
✽
Press the RETURN button to return to the
“SPEAKER SETUP” menu.
B
When “CHANNEL LEVEL” is selected, use the •and
ª
cursor buttons to select the speaker to be adjusted, then
use the
0
and 1cursor buttons to set the level.
TEST TONE
•
Use the 0and 1cursor buttons to select off, 2 seconds,
5 seconds or 10 seconds for the test tone, then output
the test tone using the procedure described below.
•
The volume level output from the front speakers (left and
right channels), center speaker, surround speakers (left
and right channels) and subwoofer can be adjusted.
•
The volume level can be adjusted between 0 and -10
dB in steps of 1 dB.
✽
Press the RETURN button to return to the
“SPEAKER SETUP” menu.
Front speaker (L)
Center speaker
Front speaker (R)
Surround speaker (R)
Surround speaker (L)
Subwoofer
Remote control unit
Remote control unit
ENTER
Remote control unit
SPEAKER SETUP
SELECT : DECISION:ENTER BUTTON
SPEAK ER CONF I GURAT I ON
CHANNEL L E VE L
DEL AY T I
M
E
AUDIO SETUP
B
SPEAKER SETUP
SELECT : DECISION:ENTER BUTTON
SPEAK ER CONF I GURAT I ON
FRONT SP
CENTER SP
SUB
W
OOFE R
SURR OUND SP
LARGE
LARGE
YES
LARGE
FILTER
ON
B
SPEAKER SETUP
SELECT : DECISION:ENTER BUTTON
CHANNEL L E VE L
TEST TONE
FRONT L ch
CENTER
FRONT Rch
OFF
0dB
0dB
0dB
0dB
0dB
0dB
SURR OUND Rc h
SURR OUND L ch
SUB
W
OOFE R
B
Page 18
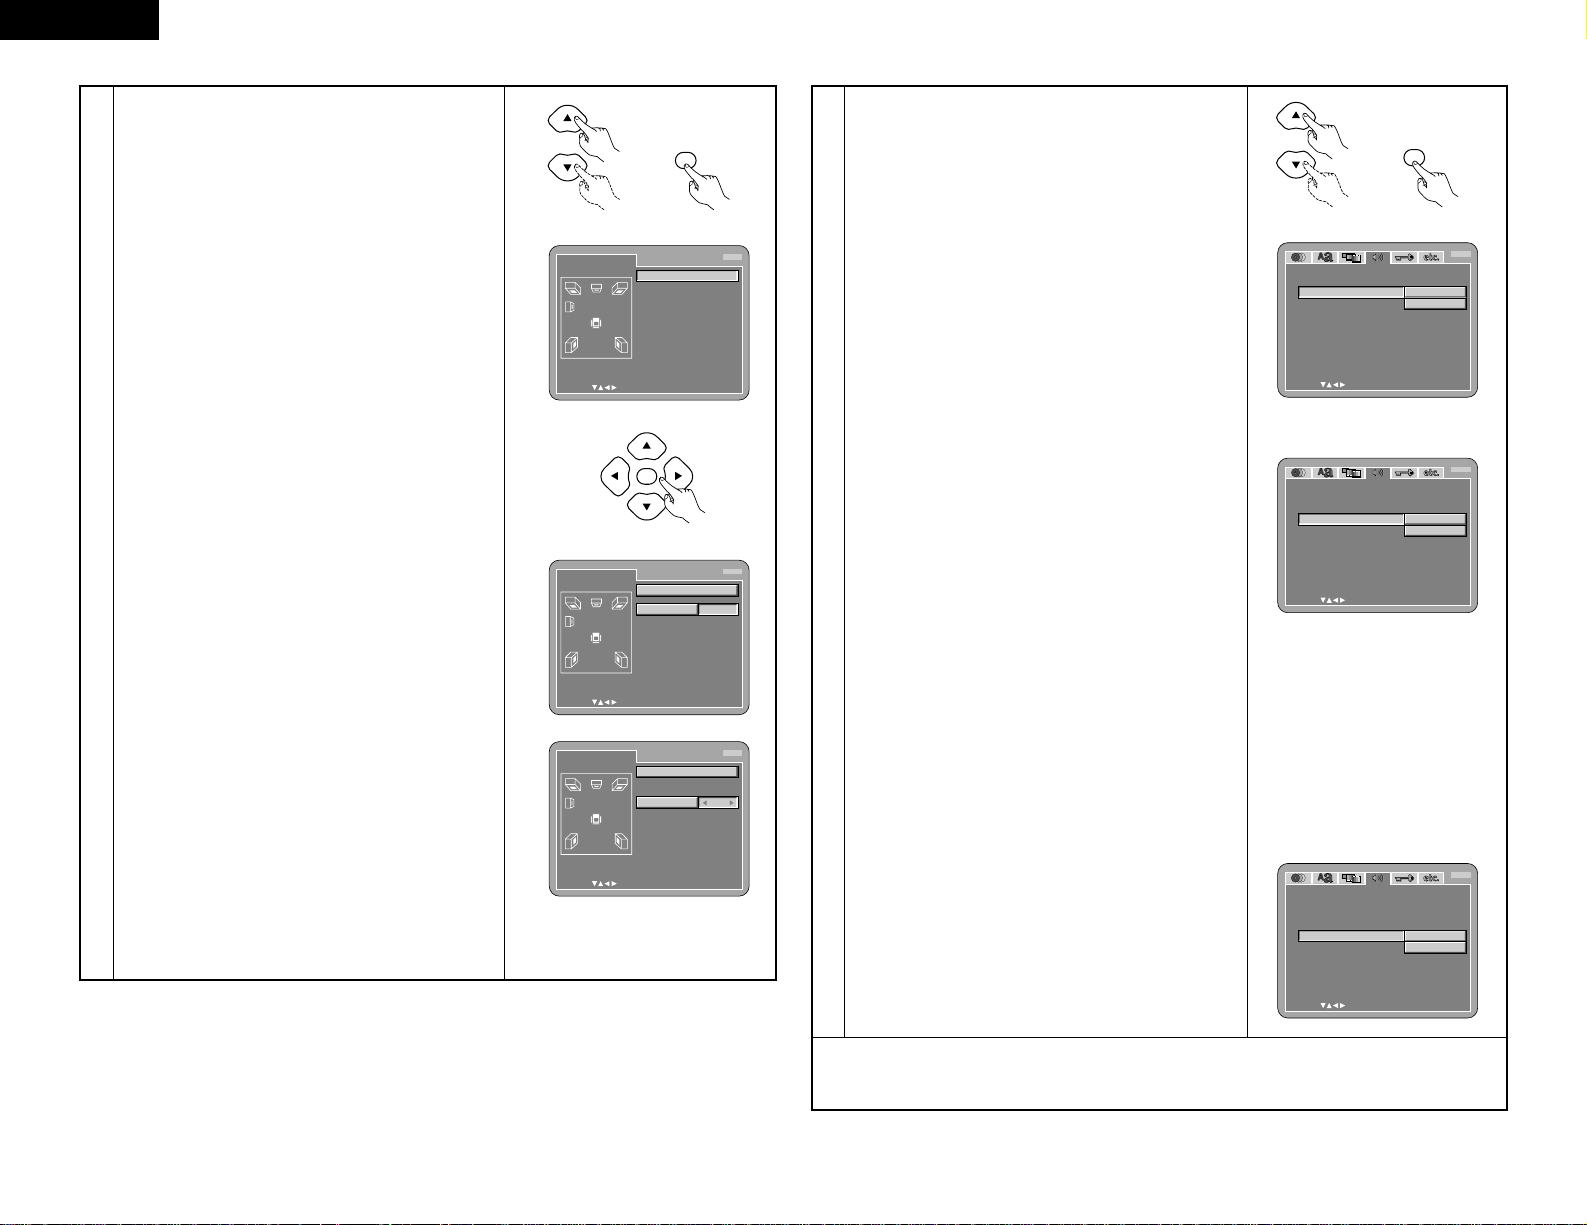
18
ENGLISH
3
B
When “DELAY TIME” is selected
With 5.1-channel surround sound, ideally the distance
between the listening position and all the speakers
aside from the subwoofer should be the same. The
delay time setting can be used to make the sound
from the different speakers reach the listening
position at the same time.
Use the •and ªcursor buttons to select the setting
item, then press the ENTER button.
• When “DISTANCE” is selected:
METERS (when the 0cursor button is pressed):
The unit of distance is set to meters (“m”).
FEET (when the 1cursor button is pressed):
The unit of distance is set to feet (“ft”).
• When “FRONT Lch”, “FRONT Rch”, “CENTER”,
“SURROUND Lch” , ”SURROUND Rch”,
“SUBWOOFER” is selected:
Use the 0and 1cursor buttons to set the
distance from the listening position to the different
speakers.
✽
The distance can be set within the range of 0 to
60 feet (18 meters).
✽
The maximum difference in speaker distance for
which adjustment is possible is 15 feet (4.5
meters).
• When “DEFAULT” is selected:
When “DEFAULT” is selected and the ENTER
button is pressed, all the items are restored to their
factory default settings.
✽
When digital connections are made with an AV
amplifier, make the speaker settings on the AV
amplifier.
For DVD audio discs, the disc’s settings are given
priority, so the sound may not be produced as set
with the above speaker mode setting.
✽
Press the RETURN button to return to the
“SPEAKER SETUP” menu.
Remote control unit
ENTER
Remote control unit
ENTER
Remote control unit
SPEAKER SETUP
SELECT : DECISION:ENTER BUTTON
DEL AY T IME
DI ST ANCE
FRONT L ch
CENTER
FRONT Rch
M
ETERS
3.6m
3.6m
3.6m
3.0m
3.0m
3.6m
ON
SURR OUND Rc h
SURR OUND L ch
SUB
W
OOFE R
DEFAUL T
B
SPEAKER SETUP
SELECT : DECISION:ENTER BUTTON
DEL AY T IME
DI ST ANCE
FRONT L ch
CENTER
FRONT Rch
ON
SURR OUND Rc h
SURR OUND L ch
SUB
W
OOFE R
DEFAUL T
B
3.6m
3.6m
3.6m
3.0m
3.0m
3.6m
M
ETERS
SPEAKER SETUP
SELECT : DECISION:ENTER BUTTON
DEL AY T I
M
E
DI ST ANCE
FRONT L ch
CENTER
FRONT Rch
ON
SURR OUND Rc h
SURR OUND L ch
SUB
W
OOFE R
DEFAUL T
B
3.6m
3.6m
3.6m
3.0m
3.0m
3.6m
M
ETERS
3
w When “DIGITAL OUT” is selected:
NORMAL (Factory default)
When playing DVDs recorded in Dolby Digital or DTS,
bitstream signals are output from the digital audio output
terminals. When playing DVDs recorded in linear PCM or
packed PCM, linear PCM signals are output.
Select “NORMAL” when making digital connections to an
AV amplifier with built-in Dolby Digital and DTS decoder.
PCM
When playing Dolby Digital/DTS bitstream signals or
DVDs recorded in linear PCM or packed PCM, the signals
are converted into 48 kHz/16-bit PCM (2-channel) signals
and output from the digital outputs. When playing DVDs
recorded in PCM, linear PCM signals are output.
e
When “LPCM (44.1 kHz / 48 kHz)” is selected:
OFF (Factory default)
When playing linear PCM or packed PCM DVDs that are not
copyright-protected, for 2-channel PCM audio signals up to
96 kHz, linear PCM signals are output as such without being
converted from the digital outputs. (176.2 kHz and 192 kHz
signals are converted to 88.2 kHz and 96 kHz, respectively.)
PCM signals of 48 kHz/16 bits and lower are output, regardless
of whether they are copyright-protected or not.
For DVDs containing multi-channel PCM signals, the digital
signals are down-mixed for output into two channels, front left
and right. (Only the front left and right channels are output for
sources for which down-mixing is prohibited.)
When playing copyright-protected linear PCM or packed
PCM DVDs, in consideration of copyrights, no digital
signals are output for sources exceeding 48 kHz/16 bits.
When playing such sources, either set to “ON” or make
analog connections. (See page 9.)
ON
Linear PCM and packed PCM signals are converted to 44.1
kHz or 48 kHz and output. (The PCM digital audio output
signals are converted to 48 kHz or less in consideration of
copyrights.) When making digital connections to an AV
amplifier that is not compatible with 96 kHz/88.2 kHz signals,
set to “ON”.
When playing DVDs recorded in linear PCM or packed
PCM and the unit is set to output digital and analog audio
signals simultaneously, the analog audio output signals
are also converted to 48 kHz or below, so we recommend
setting to “OFF” and also making analog connections.
r When “BASS ENHANCER (2 CHANNEL)” is selected:
OFF (Factory default)
No sound is produced from the subwoofer.
ON
Sound is produced from the subwoofer.
In this case, set the subwoofer to “YES” at the speaker
settings.
✽To exit the setup mode
Use the ª cursor button to select “EXIT SETUP”, then press the ENTER button. It is also possible to quit
by pressing the SETUP button on the remote control unit.
Remote control unit
ENTER
Remote control unit
AUDI O SE TUP
SELECT : DECISION:ENTER BUTTON
AUDI O CHANNEL
DI G I TAL OUT
DENON L I N K
LPCM(44.1kHz/48kHz)
EXIT SETUP
BASS ENHANCE R(2 CHANNEL)
NOR
M
AL
PC
M
B
AUDI O SE TUP
SELECT : DECISION:ENTER BUTTON
AUDI O CHANNEL
DI G I TAL OUT
DENON L I N K
LPCM(44.1kHz/48kHz)
EXIT SETUP
BASS ENHANCE R(2 CHANNEL)
ON
OFF
B
AUDI O SE TUP
SELECT : DECISION:ENTER BUTTON
AUDI O CHANNEL
DI G I TAL OUT
DENON L I N K
LPCM(44.1kHz/48kHz)
EXIT SETUP
BASS ENHANCE R(2 CHANNEL)
ON
OFF
B
Page 19

19
ENGLISH
When “RATINGS” is selected
4 5 6
ENTER
ON
OFF
REMOTE CONTROL UNIT RC-553
TOP MENU
DISPLAY
MARKERRANDOM
PAGE
A-B
ZOOM
DIMMER
REPEAT
SETUP
NTSC / PALOPEN / CLOSE
CALL RETURN
SKIP
SLOW / SEARCH
POWER
ANGLE SUBTITLE AUDIOSEARCH MODE
PLAY
STILL /
PAUSE
STOP
PIC.ADJ
1
7
0
2
8
+10
3
9
PROG / DIR
V.S.S.
CLEAR
P.D.MEMORY
MENU
1, 2, 3
3
1
1
2
Use the • and ª cursor buttons to select the desired
setting, then press the ENTER button.
RATING LEVEL
Use this to restrict playback of adult DVDs you do not want
children to view. Note that even with adult DVDs, viewing
cannot be restricted unless the restriction level is recorded
on the disc.
It is however possible to disable playback of all DVDs.
PASSWORD
Use this to change the password.
The set’s password is set to “0000” by default.
3
Use the • and ª cursor buttons to select the desired
setting, then press the ENTER button.
q When “RATING LEVEL” is selected:
0 (LOCK ALL)
Select this to disable playback of all DVDs.
Use this for example to disable playback of adult DVDs
on which the rating level is not recorded.
1
Select this to play only DVDs for children. (Adult and
general audience DVDs cannot be played.)
2 to 7
Select this to play DVDs for general audiences and
children. Adult DVDs cannot be played.
8 (NO LIMIT) (Factory default)
Select this to play all DVDs.
1
See page 12.
Remote control unit
ENTER
Remote control unit
RAT INGS
SELECT : DECISION:ENTER BUTTON
RAT I NG L E VE L
PASS
W
ORD
EXIT SETUP
8(NO LIMIT)
B
Remote control unit
ENTER
Remote control unit
RAT INGS
SELECT : DECISION:ENTER BUTTON
RAT I NG L E VE L
PASS
W
ORD
EXIT SETUP
0(LOCK ALL)
1
2
3
4
5
6
7
8(NO LIMIT)
B
RAT INGS
SELECT :0-9 DECISION:ENTER BUTTON
RAT I NG L E VE L
PASS
W
ORD
CURRENT PASS
W
ORD
PL EAS E ENT ER PAS S
W
ORD
----
B
3
w When “PASSWORD” is selected:
Use the number buttons to input a 4-digit password,
then press the ENTER button.
✽Do not forget the password.
✽The setting cannot be changed without inputting the
correct password.
✽The set’s password is set to “0000” by default.
Use the number buttons to input a 4-digit password, then
press the ENTER button.
✽The set's password is set to “0000” by default.
✽Do not forget the password.
✽The setting cannot be changed without inputting the
correct password.
RAT INGS
SELECT :0-9 DECISION:ENTER BUTTON
RAT I NG L E VE L
PASS
W
ORD
OLD PASS
W
ORD
PL EAS E ENT ER NE
W
PA SSWORD
XXXX
NEW PASSWORD
----
CONF I RM PAS S
W
ORD
----
B
RAT INGS
SELECT :0-9 DECISION:ENTER BUTTON
RAT I NG L E VE L
PASS
W
ORD
OLD PASS
W
ORD
PL EAS E ENT ER NE
W
PA SSWORD
XXXX
XXXX
NEW PASSWORD
CONF I RM PAS S
W
ORD
----
B
Remote control unit
4 5 6
1
7
0
283
9
ENTER
Remote control unit
RAT INGS
SELECT :0-9 DECISION:ENTER BUTTON
RAT I NG L E VE L
PASS
W
ORD
CURRENT PASS
W
ORD
PRE SS ENT ER TO CONT I NUE
XXXX
B
Remote control unit
4 5 6
1
7
0
283
9
ENTER
Remote control unit
RAT INGS
SELECT :0-9 DECISION:ENTER BUTTON
RAT I NG L E VE L
PASS
W
ORD
OLD PASS
W
ORD
PL EAS E ENT ER OL D PASS
W
ORD
----
NEW PASSWORD
----
CONF I RM PAS S
W
ORD
----
B
Page 20
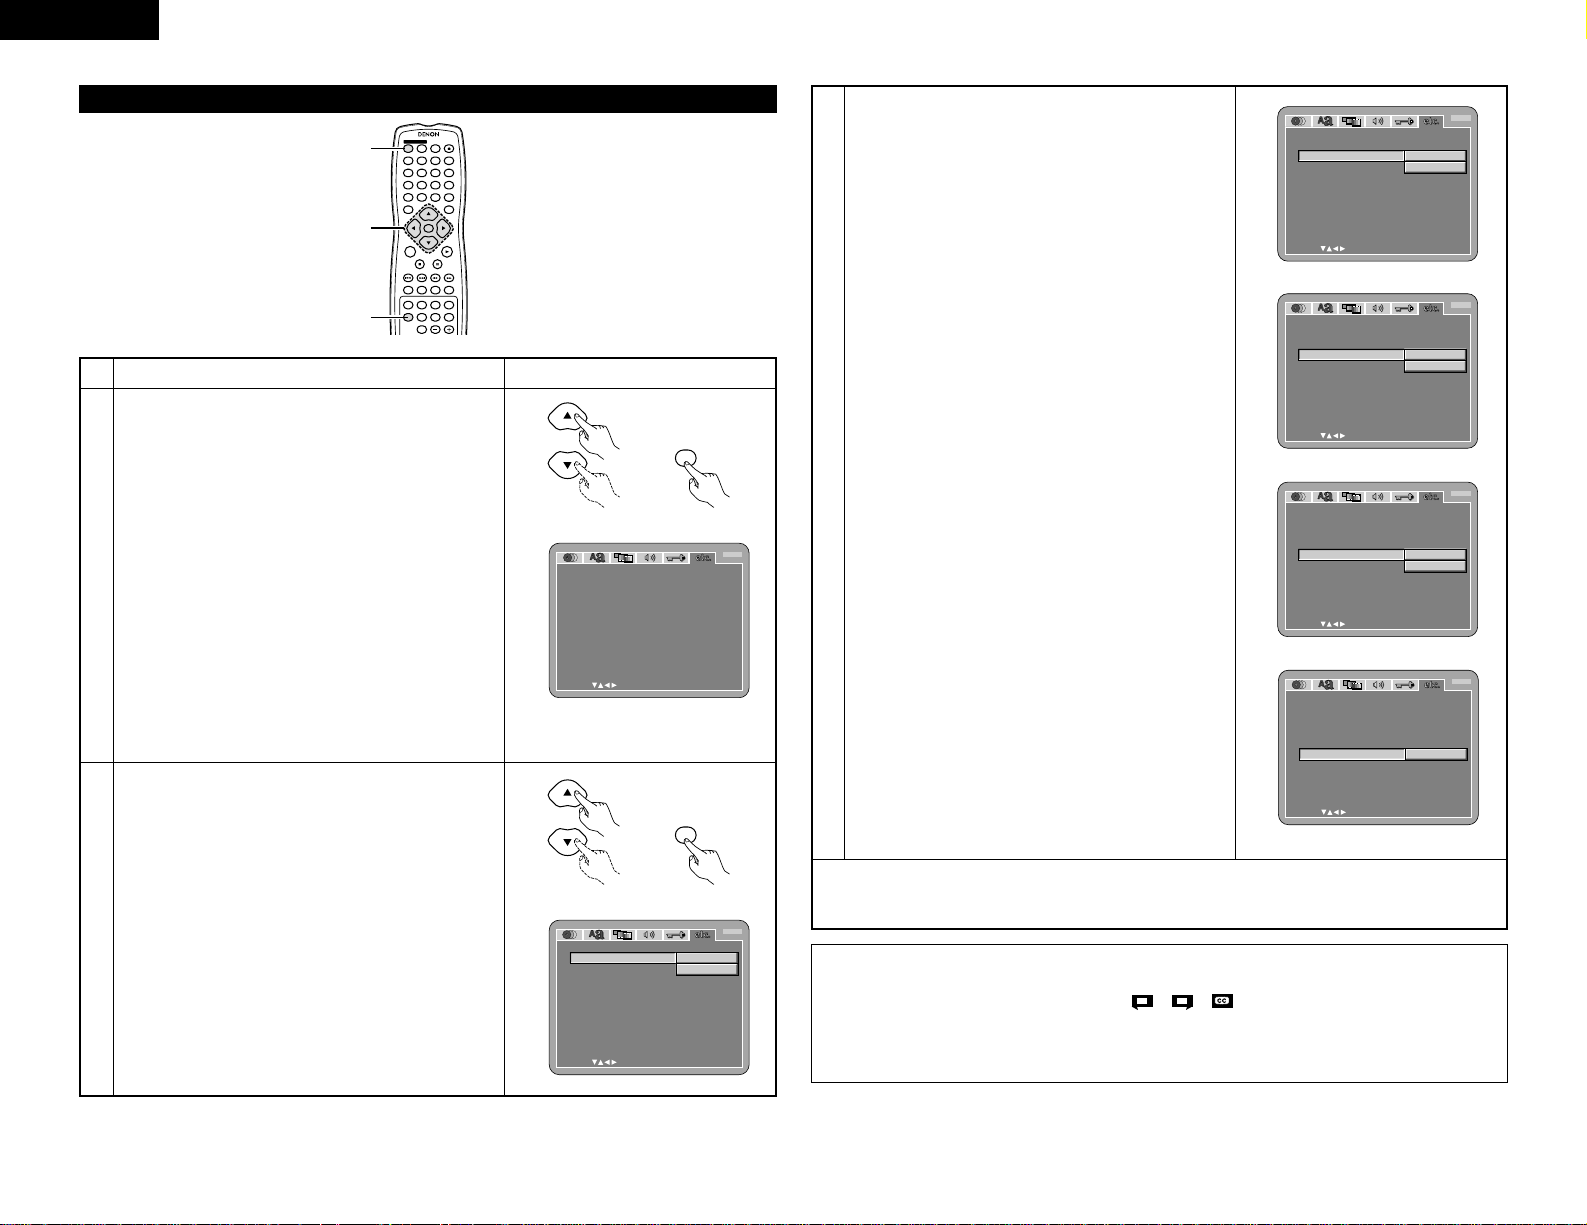
20
ENGLISH
When “OTHER SETUP” is selected
4 5 6
ENTER
ON
OFF
REMOTE CONTROL UNIT RC-553
TOP MENU
DISPLAY
MARKERRANDOM
PAGE
A-B
ZOOM
DIMMER
REPEAT
SETUP
NTSC / PALOPEN / CLOSE
CALL RETURN
SKIP
SLOW / SEARCH
POWER
ANGLE SUBTITLE AUDIOSEARCH MODE
PLAY
STILL /
PAUSE
STOP
PIC.ADJ
1
7
0
2
8
+10
3
9
PROG / DIR
V.S.S.
CLEAR
P.D.MEMORY
MENU
1, 2, 3
1
1
2
Use the • and ª cursor buttons to select the desired
setting, then press the ENTER button.
PLAYER MODE
The DVD video play mode can be set to play the DVD
video contents included on a DVD audio disc.
CAPTIONS
Use this to set whether or not to display the closed
captions recorded on DVDs.
COMPRESSION
Use this to set the dynamic range output when playing
discs.
AUTO POWER MODE
To save power, DVD-3800’s can automatically be set to
the standby mode when it is not used for long periods of
time.
SLIDE SHOW
The time interval for switching to the next still picture
when playing slide shows of still pictures (in JPEG format)
can be set.
3
Use the • and ª cursor buttons to select the desired
setting, then press the ENTER button.
q When “PLAYER MODE” is selected:
AUDIO (Factory default)
Set this to play the DVD audio signals as such.
VIDEO
Set this to play the DVD video contents included on a
DVD audio disc.
1
See page 12.
Remote control unit
ENTER
Remote control unit
OTHE R SE TUP
SELECT : DECISION:ENTER BUTTON
PLAYER
M
ODE
CAPT IONS
CO
M
PRESS I ON
AUTO PO
W
ER MODE
SL I DE SHO
W
EXIT SETUP
AUDIO
OFF
OFF
OFF
10SEC
B
Remote control unit
ENTER
Remote control unit
OTHE R SE TUP
SELECT : DECISION:ENTER BUTTON
PLAYER
M
ODE
CAPT IONS
CO
M
PRESS I ON
AUTO PO
W
ER MODE
SL I DE SHO
W
EXIT SETUP
AUDIO
VI DEO
B
3
w When “CAPTIONS” is selected:
OFF (Factory default)
Select this when you do not want to display the
captions on the screen when playing DVDs containing
English captions
ON
Select this to display the captions on the screen when
playing DVDs containing English captions.
e When “COMPRESSION” is selected:
OFF (Factory default)
Select this for the standard range.
ON
Select this to achieve powerful sound even when the
volume is low. This setting is suited for watching DVDs
late at night with the volume low. (This setting is only
valid for DVDs recorded in Dolby Digital.)
r When “AUTO POWER MODE” is selected:
OFF (Factory default)
The power does not automatically switch to the standby
mode.
ON
The DVD-3800’s power turns off and the standby mode
is set if the DVD-3800 remains in the stop mode for
approximately 30 minutes.
t When “SLIDE SHOW” is selected:
Use the •and ªcursor buttons to set the time interval.
The time interval can be set within 5 and 15 seconds.
(The factory default setting is 5 seconds.)
OTHE R SE TUP
SELECT : DECISION:ENTER BUTTON
PLAYER
M
ODE
CAPT IONS
CO
M
PRESS I ON
AUTO PO
W
ER MODE
SL I DE SHO
W
EXIT SETUP
OFF
ON
B
OTHE R SE TUP
SELECT : DECISION:ENTER BUTTON
PLAYER
M
ODE
CAPT IONS
CO
M
PRESS I ON
AUTO PO
W
ER MODE
SL I DE SHO
W
EXIT SETUP
OFF
ON
B
OTHE R SE TUP
SELECT : DECISION:ENTER BUTTON
PLAYER
M
ODE
CAPT IONS
CO
M
PRESS I ON
AUTO PO
W
ER MODE
SL I DE SHO
W
EXIT SETUP
OFF
ON
B
OTHE R SE TUP
SELECT : DECISION:ENTER BUTTON
PLAYER
M
ODE
CAPT IONS
CO
M
PRESS I ON
AUTO PO
W
ER MODE
SL I DE SHO
W
EXIT SETUP
5SEC
B
✽To exit the setup mode
Use the ª cursor button to select “EXIT SETUP”, then press the ENTER button. It is also possible to quit
by pressing the SETUP button on the remote control unit.
NOTES:
•
An English caption decoder is required to display English captions.
•
DVDs with caption signals are indicated by the , , , mark.
English captions cannot be displayed when playing DVDs which do not contain caption signals.
•
The characters in which the captions are displayed (capital letters, small letters, italics, etc.) depend on the
DVD and cannot be selected with the DVD-3800.
Page 21
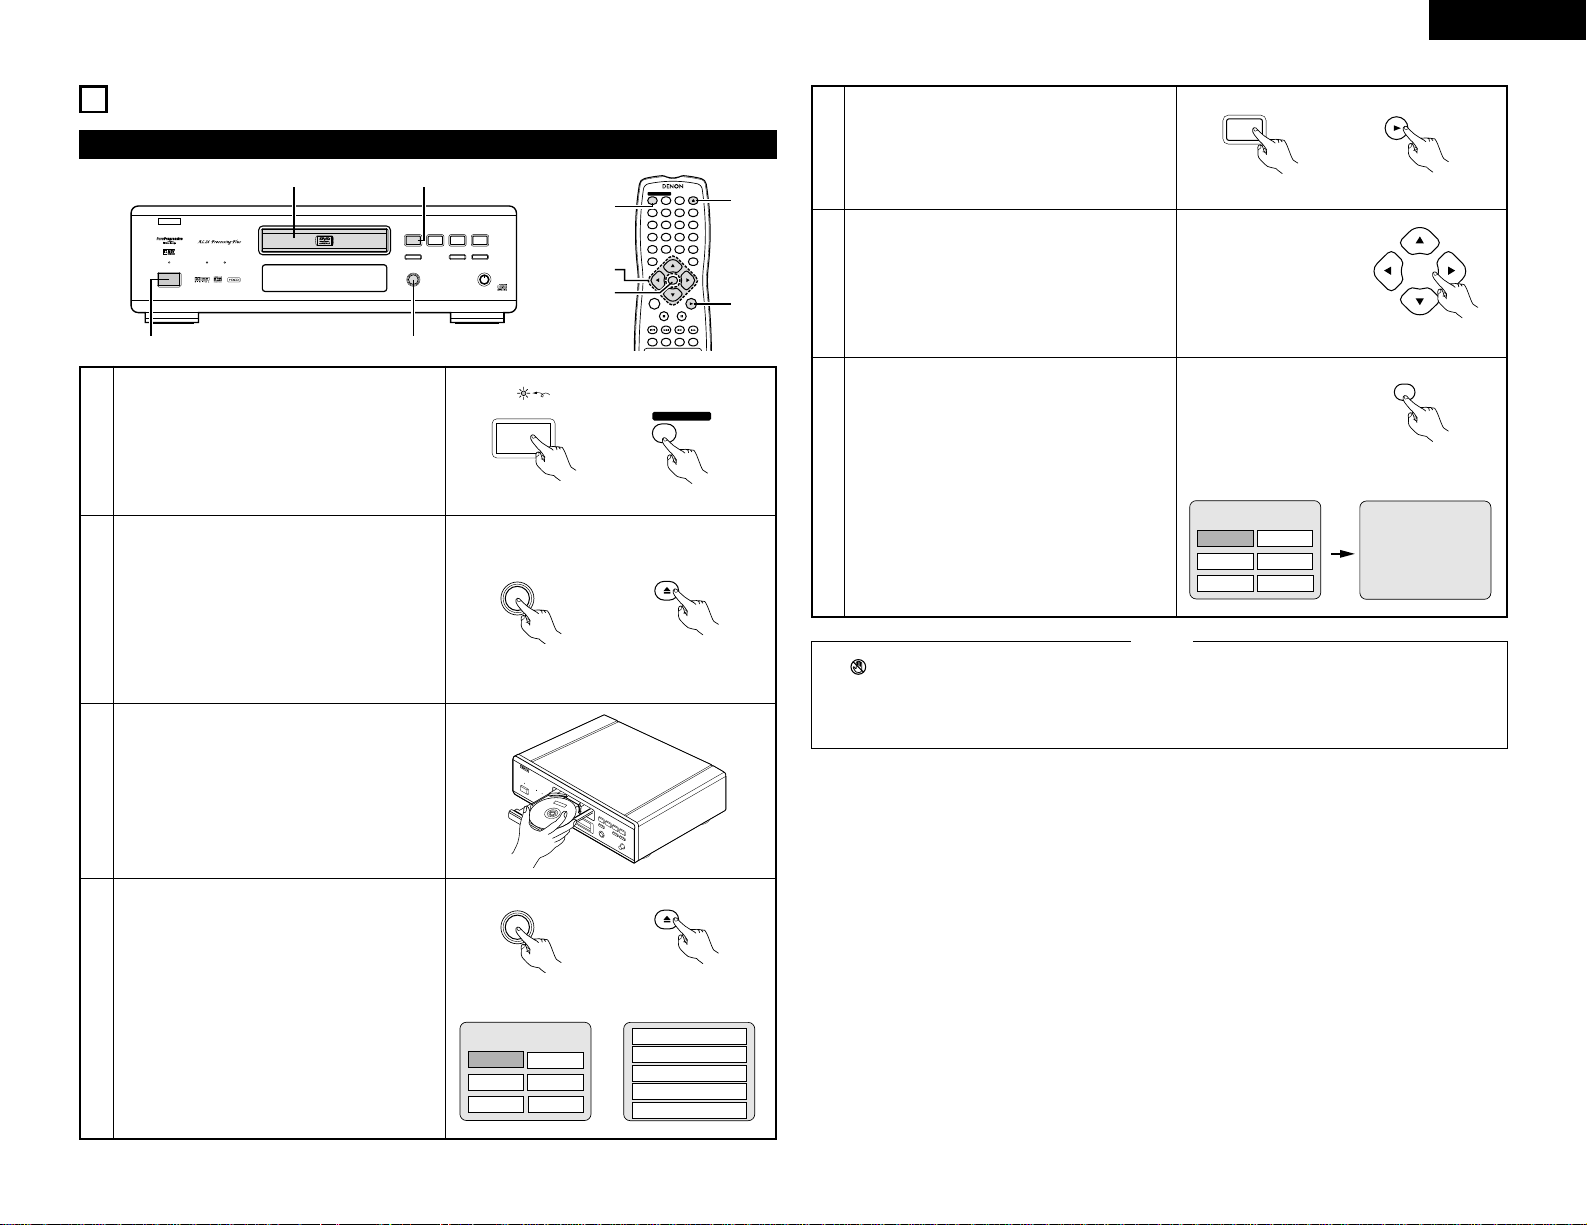
21
ENGLISH
9
PLAYBACK
(1) Playback
PROGRESSIVE
DVD
1 2
9
8
REMOTE SENSOR
OPEN/CLOSE
5
DVD AUDIO
¢ON / STANDBY
£OFF
PLAY STOP
763
STILL / PAUSE
B
PURE DIRECT
MODE 1
MODE 2
OFF
AL24 PLUS
DVD AUDIO-VIDEO PLAYER DVD-3800
1 2, 4
53
1
2
3
4
Turn on the power.
• Press the power button, the power indicator
lights and the power turn on.
• When standby mode, press the POWER ON
button of remote control unit.
Press the OPEN/CLOSE button to open the disc
tray.
Set the disc in the disc tray.
Press the OPEN/CLOSE button.
• For many interactive DVDs and video CDs with
playback control, a menu screen appears. In
this case use the procedure in step 6 to select
the desired item.
✽Interactive DVDs are DVDs including multiple
angles, stories, etc.
¢ON / STANDBY
£OFF
Main unit
Main unit Remote control unit
Example: For DVDs with
menu screens
Example: For video CDs with
playback control
1. Opening
2. 1st movement
3. 2nd movement
4. 3rd movement
5. Ending
OPEN/CLOSE
5
OPEN / CLOSE
4 5 6
ENTER
ON
OFF
REMOTE CONTROL UNIT RC-553
TOP MENU
DISPLAY
NTSC / PALOPEN / CLOSE
CALL RETURN
SKIP
SLOW / SEARCH
POWER
ANGLE SUBTITLE AUDIOSEARCH MODE
PLAY
STILL /
PAUSE
STOP
1
7
0
2
8
+10
3
9
PROG / DIR
V.S.S.
CLEAR
MENU
1
2, 4
5
6
7
Main unit Remote control unit
OPEN/CLOSE
5
OPEN / CLOSE
ON
POWER
Remote control unit
Apple
Banana
Orange Strawberry
Peach Pineapple
TOP MENU
5
Press the PLAY button.
6
Use the cursor buttons (•, ª, 0 and 1) to select
the desired item.
• For some discs there is a second menu screen.
If so, press the
9 button to display the next
menu screen. (See the disc’s jacket.)
✽The cursor buttons (•, ª,
0 and 1) do not
work for video CDs. Use the number buttons to
select the desired item.
Example: When “Apple” is
selected
Apple
Apple
Banana
Orange Strawberry
Peach Pineapple
TOP MENU
7
Press the ENTER button.
• The desired item is selected and playback
starts.
• You can return to the menu screen by pressing
the TOP MENU/MENU button while the DVD is
playing, though this depends on the disc.
• Press the RETURN button during playback of a
video CD to return to the menu screen.
• If appears on the TV screen while buttons are
being operated, that operation is not possible on
the DVD-3800 or with that disc.
• Set the disc in the disc guide.
NOTES:
• Do not place more than one disc in the disc tray.
• The disc keeps turning while the menu screen is
displayed on the TV screen.
Main unit Remote control unit
1
PLAY
PLAY
Remote control unit
ENTER
Remote control unit
Light
Page 22
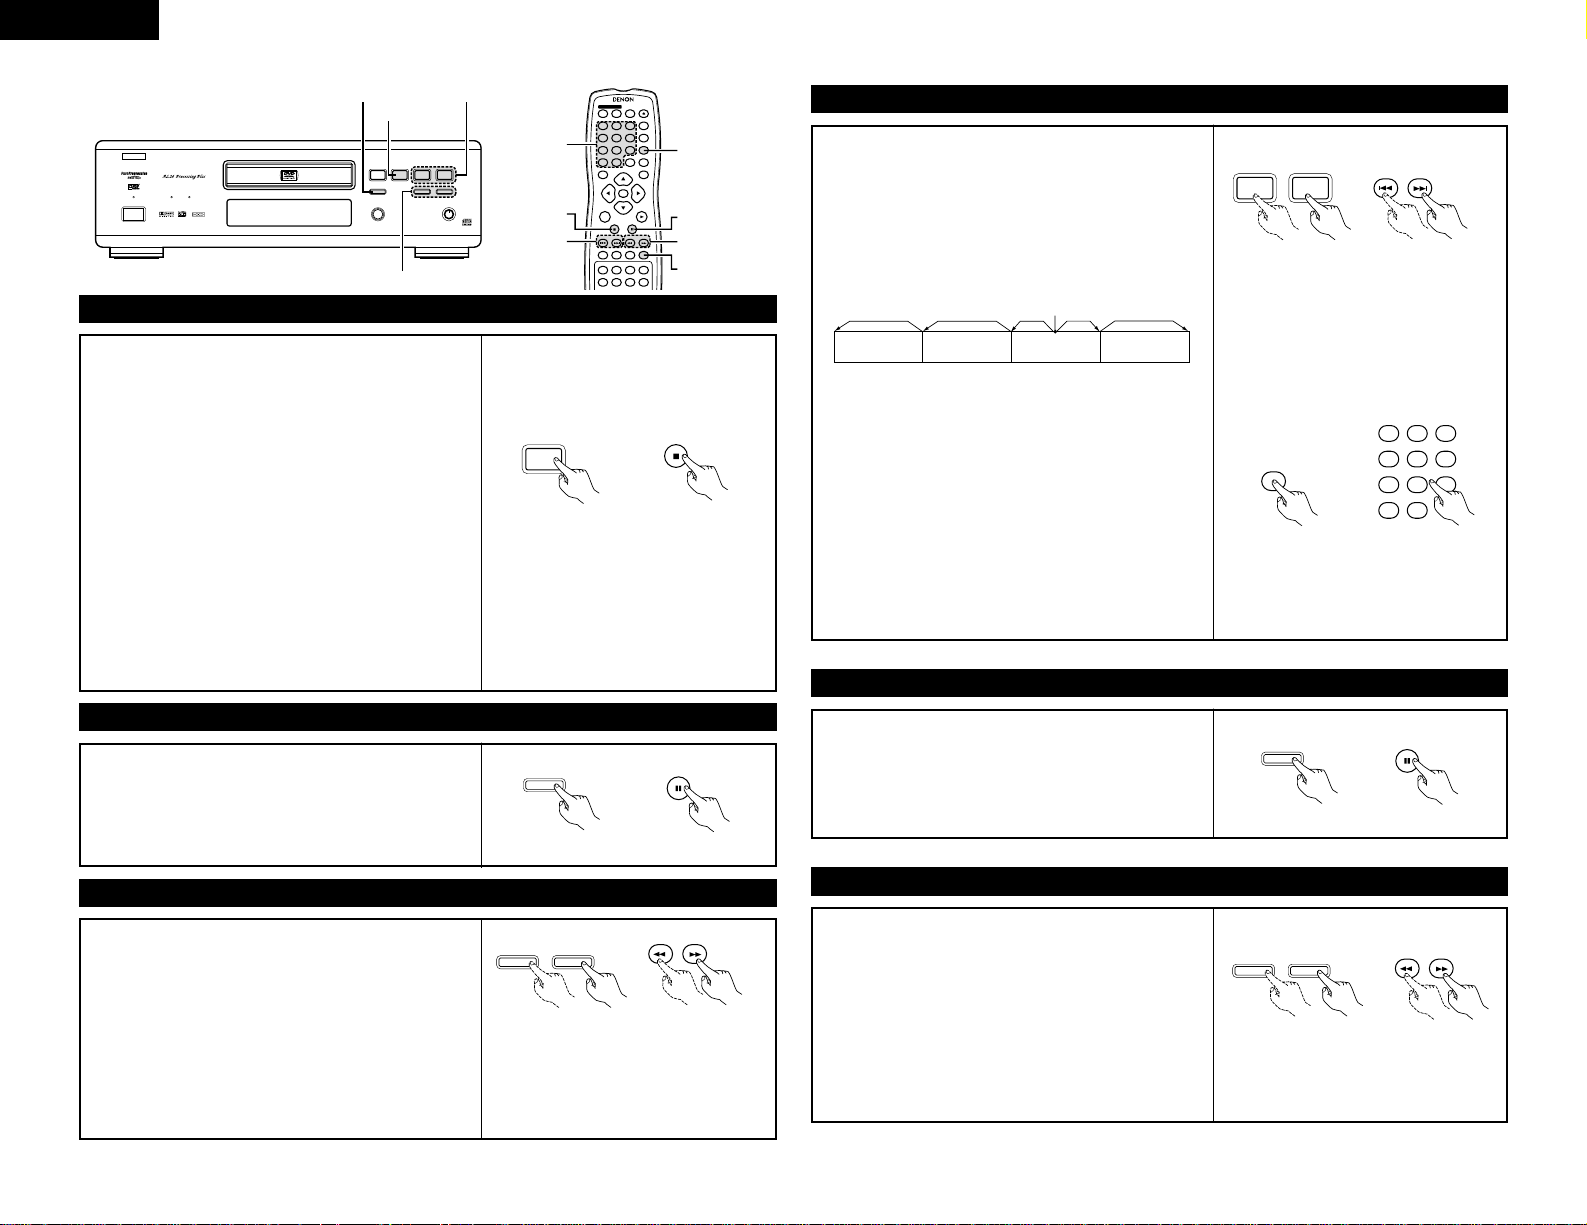
22
ENGLISH
4 5 6
ENTER
ON
OFF
REMOTE CONTROL UNIT RC-553
TOP MENU
DISPLAY
MARKERRANDOM
A-B
DIMMER
REPEAT
SETUP
NTSC / PALOPEN / CLOSE
CALL RETURN
SKIP
SLOW / SEARCH
POWER
ANGLE SUBTITLE AUDIOSEARCH MODE
PLAY
STILL /
PAUSE
STOP
PIC.ADJ
1
7
0
2
8
+10
3
9
PROG / DIR
V.S.S.
CLEAR
P.D.MEMORY
MENU
PROGRESSIVE
DVD
1 2
9
8
REMOTE SENSOR
OPEN/CLOSE
5
DVD AUDIO
¢ON / STANDBY
£OFF
PLAY STOP
763
STILL / PAUSE
B
PURE DIRECT
MODE 1
MODE 2
OFF
AL24 PLUS
DVD AUDIO-VIDEO PLAYER DVD-3800
STOP button
STILL/PAUSE button
SLOW/SEARCH buttons
Number button
STOP button
SKIP buttons
(2) Stopping Playback
During playback, press the STOP button on the main unit or
the remote control unit, playback stops and wall paper is
displayed.
Resume play memory function
• With the DVD-3800, when the STOP button is pressed,
that position is stored in the memory. At this time, “
1”
flashes on the display. (DVD only)
• When the PLAY button is pressed after pressing the STOP
button, playback resumes from the position at which it
was stopped. (DVD only)
• The resume play memory function is canceled if the disc
tray is opened or the STOP button is pressed a second
time. (DVD only)
• After 30 minutes in the stop mode, the DVD-3800’s power
automatically turns off and the standby mode is set. (Auto
Power Off)
• If you do not want to continue playing the disc, to save
electricity either press the POWER button on the main to
turn the power off or press the POWER OFF button on the
remote control unit to set the power to the standby mode.
Main unit
✽The resume play memory function only
works for discs for which the elapsed
time is shown on the display during
playback.
Remote control unit
(3) Playing Still Pictures (Pausing)
During playback, press the STILL/PAUSE button on the main
unit or the remote control unit.
• Press the PLAY button to resume normal playback.
(4) Forward/Reverse Searching
During playback, press one of the SLOW/SEARCH buttons
on the main unit or the remote control unit.
6 : Reverse direction
7 : Forward direction
• When pressed again, the search speed increases (in four
steps).
• Variable in 4 steps for CDs, 7 steps for DVD audio (movie
part), DVD video and video CD discs.
• Press the PLAY button to resume normal playback.
NOTE:
• In some cases the menu screen may
reappear when one of the
SLOW/SEARCH buttons is pressed
during menu playback on a video CD.
SKIP button
STILL/PAUSE button
V.S.S. button
SEARCH MODE button
SLOW/SEARCH buttons
2
STOP
Main unit
3
STILL / PAUSE
Main unit
76
STOP
Remote control unit
STILL /
PAUSE
Remote control unit
SLOW / SEARCH
(5) Skipping to the Beginning of Chapters or Tracks
During playback, press one of the skip buttons on the main
unit or the remote control unit.
8 : Reverse direction
9 : Forward direction
• A number of chapters or tracks equal to the number of
times the button is pressed is skipped.
• When the skip back button is pressed once, the pickup
returns to the beginning of the currently playing chapter or
track.
NOTE:
• In some cases the menu screen may
reappear when one of the SKIP buttons is
pressed during menu playback on a video
CD.
Playing position
Chapter/Track
Chapter/Track
Chapter/Track Chapter/Track
Reverse direction ,/Forward direction (direction of playback)
Main unit Remote control unit
9
8
SKIP
Cueing using the number buttons
Press the SEARCH MODE button during playback.
• The search mode switches each time the button is
pressed.
For DVD audio discs : Group Æ Track Æ (Group) Æ
For DVD video discs : Title Æ Chapter Æ (Title) Æ
For CDs and video CDs : Track only
✽The search mode set by pressing the SEARCH MODE
button is stored in the memory until the button is
pressed again.
However, the search mode returns to the default mode
when the power is turned off.
• Use the number buttons to input the number to be played.
4 5 6
1
7
0
2
8
+10
3
9
Remote control unit
SEARCH MODE
NOTE:
• Some DVD audio, DVD video and video
CD discs do not operate as described in
this manual due to the intentions of the
discs’ producers.
(6) Playing Frame by Frame (for DVDs and video CDs only)
During playback, press the STILL/PAUSE button on the main
unit or the remote control unit.
• The picture moves forward one frame each time the
button is pressed.
• Press the PLAY button to resume normal playback.
• With DVD audio discs, forward frame-by-frame skipping is
only possible for the video part.
(7) Slow Playback (for DVDs and video CDs only)
In the still mode, press one of the SLOW/SEARCH buttons
on the main unit or the remote control unit.
6 : Reverse direction
7 : Forward direction
• When pressed again, the slow play speed increases.
For video CDs there are three steps.
• Press the PLAY button to resume normal playback.
• If the STILL/PAUSE button is pressed when playing a disc
in the slow play mode in the reverse direction, press the
SLOW/SEARCH button again.
• With DVD audio discs, the forward slow play function can
only be used with the video part.
NOTE:
• Reverse slow play is not possible on
video CDs.
Remote control unit
STILL /
PAUSE
Remote control unit
SLOW / SEARCH
Main unit
3
STILL / PAUSE
Main unit
76
Page 23
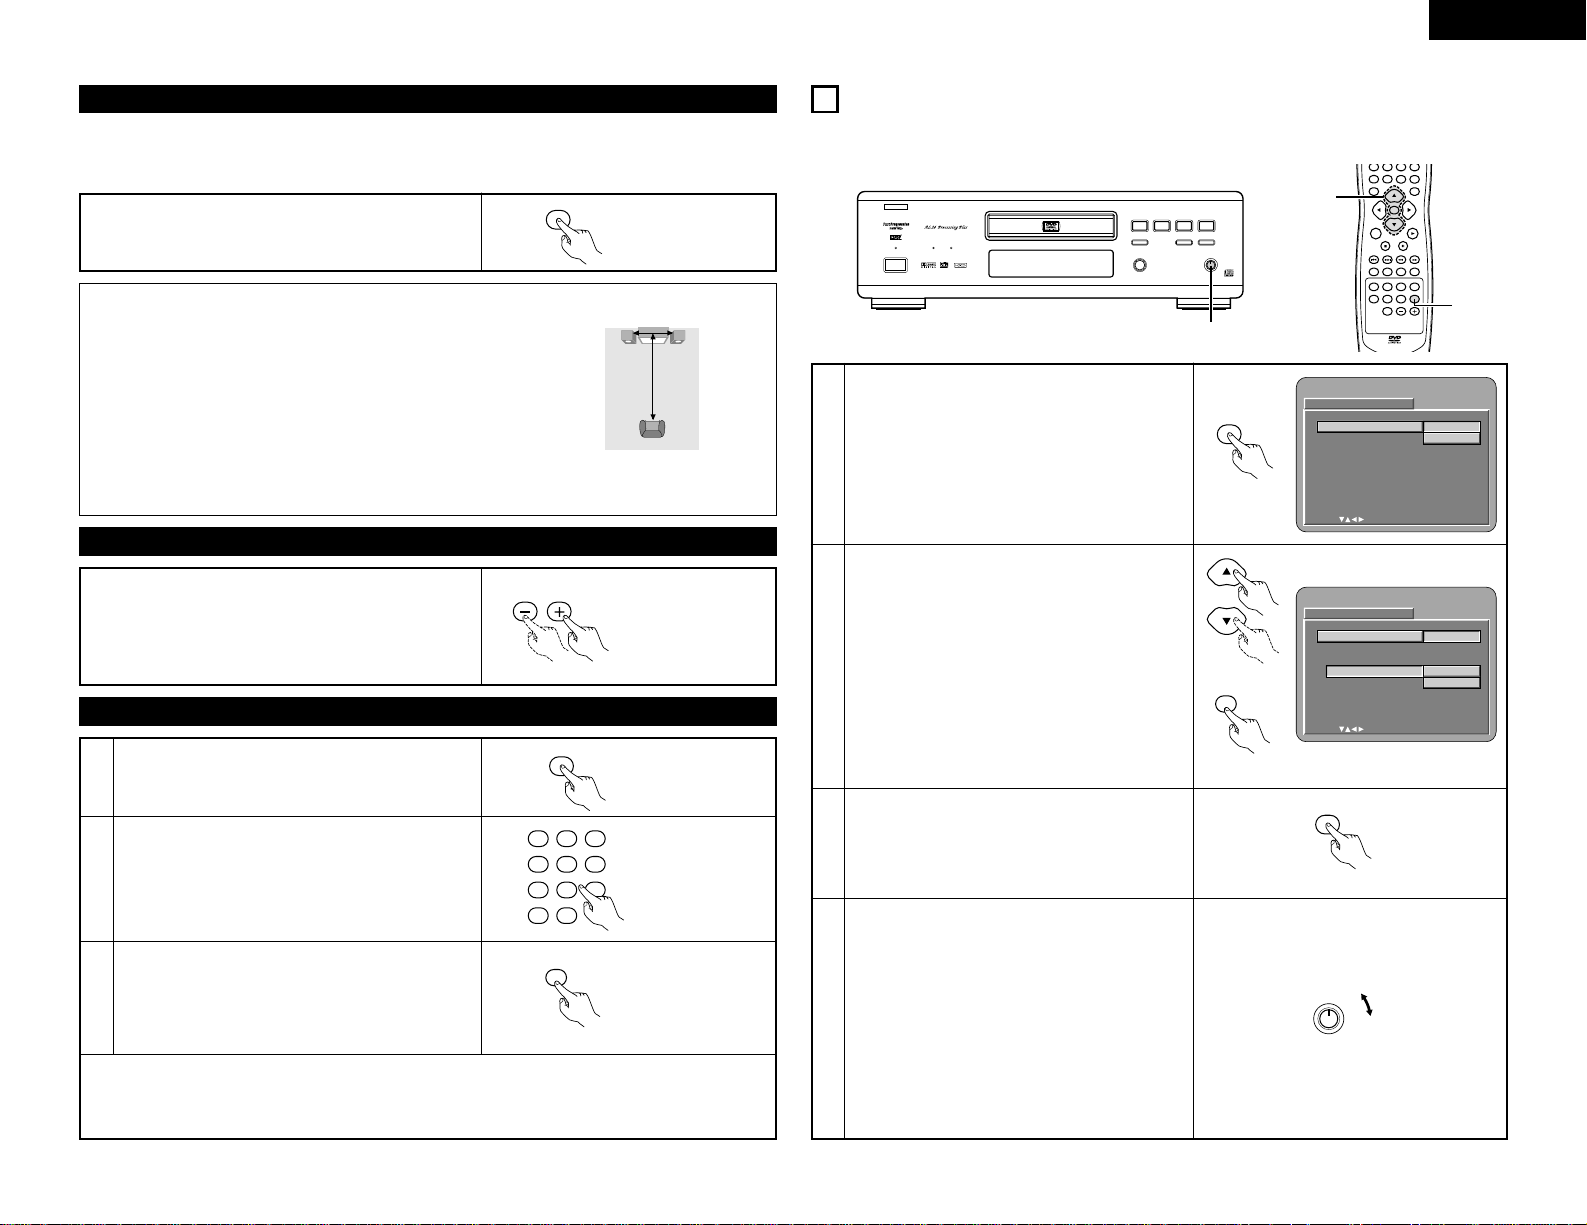
23
ENGLISH
(8) Using the V.S.S. (Virtual Surround Sound) function (only for DVDs)
During playback, press the V.S.S. button on the remote
control unit.
Remote control unit
V.S.S.
2 Using the V.S.S. (Virtual Surround Sound) function gives the sound a sense of expansion and allows you to
achieve surround effects even when only front speakers (left and right) are used. For discs with surround
signals, the V.S.S. function not only gives the sound expansion, it also makes it seem as if sound is coming
from the sides, even though there are no speakers there.
NOTES:
• This function only works with DVDs containing two or more
channels of Dolby Digital signals.
• The V.S.S. function does not work at the time of multi-channel setting.
Set “AUDIO CHANNEL” under “AUDIO SETUP” at “SETUP” to “2
CHANNEL”.
• Note that for some discs the effect will be weak or there will be no
effect.
• For some discs the sound may be distorted. If so turn the V.S.S.
function off.
• Turn off other surround functions (the TV’s surround mode, etc.).
• The effect is best when listening at a distance from the TV equal to
3 to 4 times the distance of the left and right speakers (distance
A).
Distance A
Listening position
3 to 4 times
distance A
Speaker
Speaker
(9) Selecting the still image
During playback, press the PAGE + or PAGE - button on the
remote control unit.
• For DVD audio discs with still images, the desired image
can be selected.
• On some discs the image cannot be selected due to the
intentions of the discs’ producers.
PAGE
Remote control unit
(10) Playing bonus groups
In the stop mode, press the SEARCH MODE button on
the remote control unit to set the search mode to
“GROUP”.
1
Use the number buttons to input the bonus group
number.
2
4 5 6
1
7
0
2
8
+10
3
9
Remote control unit
SEARCH MODE
Remote control unit
Use the number buttons on the remote control unit to
input the password (4 digits), then press the ENTER
button.
• Playback starts from the first track in the specified
group.
3
ENTER
Remote control unit
• In some cases the password must be input at the menu screen. In these cases, follow the instructions on
the screen.
• Once the password is input, the disc can be played as many times as you want until it is removed.
• If you make a mistake when inputting the password, press the CLEAR button on the remote control unit.
PROGRESSIVE
DVD
1 2
9
8
REMOTE SENSOR
OPEN/CLOSE
5
DVD AUDIO
¢ON / STANDBY
£OFF
PLAY STOP
763
STILL / PAUSE
B
PURE DIRECT
MODE 1
MODE 2
OFF
AL24 PLUS
DVD AUDIO-VIDEO PLAYER DVD-3800
4
10
USING THE PURE DIRECT MODE
2 In the pure direct mode, only analog audio signals (no video signals, etc.) are output, thereby achieving high
quality sound.
1
Press the P.D.MEMORY button on the remote
control unit.
• The output status of the video signals, etc., can be
stored at MODE 1 and MODE 2 as desired.
ENTER
TOP MENU
DISPLAY
MARKERRANDOM
PAGE
A-B
ZOOM
DIMMER
REPEAT
SETUP
CALL RETURN
SKIP
SLOW / SEARCH
ANGLE SUBTITLE AUDIOSEARCH MODE
PLAY
STILL /
PAUSE
STOP
PIC.ADJ
708
+10
9
P.D.MEMORY
MENU
1, 3
2
SETUP
SELECT : DECISION:ENTER BUTTON
PURE D I RE CT MODE
PUR E D I REC T MEMORY
PURE D I RE CT MODE 1
DIGITAL OUTPUT
V IDEO OUT
DISPLAY
M
ODE 1
M
ODE 2
ON
ON
ON
P.D.MEMORY
Remote control unit
2
Use the • and ª cursor buttons to select the mode,
then press the ENTER button.
DIGITAL OUTPUT
ON: Digital audio signals are output.
OFF: Digital audio signals are not output.
VIDEO OUT
ON: Video signals are output.
OFF: Video signals are not output.
DISPLAY
ON: It is indicate in Display of the main unit.
OFF: It is not indicate in Display of the main unit.
SETUP
SELECT : DECISION:ENTER BUTTON
PURE D I RE CT MODE
PUR E D I REC T MEMORY
PURE D I RE CT MODE 1
DIGITAL OUTPUT
V IDEO OUT
DISPLAY
M
ODE 1
ON
OFF
Remote control unit
ENTER
Remote control unit
Press the P.D.MEMORY button on the remote
control unit.
• All of the settings are stored in the memory.
3
Remote control unit
P.D.MEMORY
Switch the PURE DIRECT switch on the main unit.
OFF: All signals are output normally.
MODE 1: The settings stored for MODE 1 are
used.
The factory default settings are:
“DIGITAL OUT”: “ON”
“VIDEO OUT”: “ON”
“DISPLAY”: “ON”
MODE 2: The settings stored for MODE 2 are
used.
The factory default settings are:
“DIGITAL OUT”: “ON”
“VIDEO OUT”: “ON”
“DISPLAY”: “ON”
4
Main unit
PURE DIRECT
OFF
MODE 1
MODE 2
Page 24
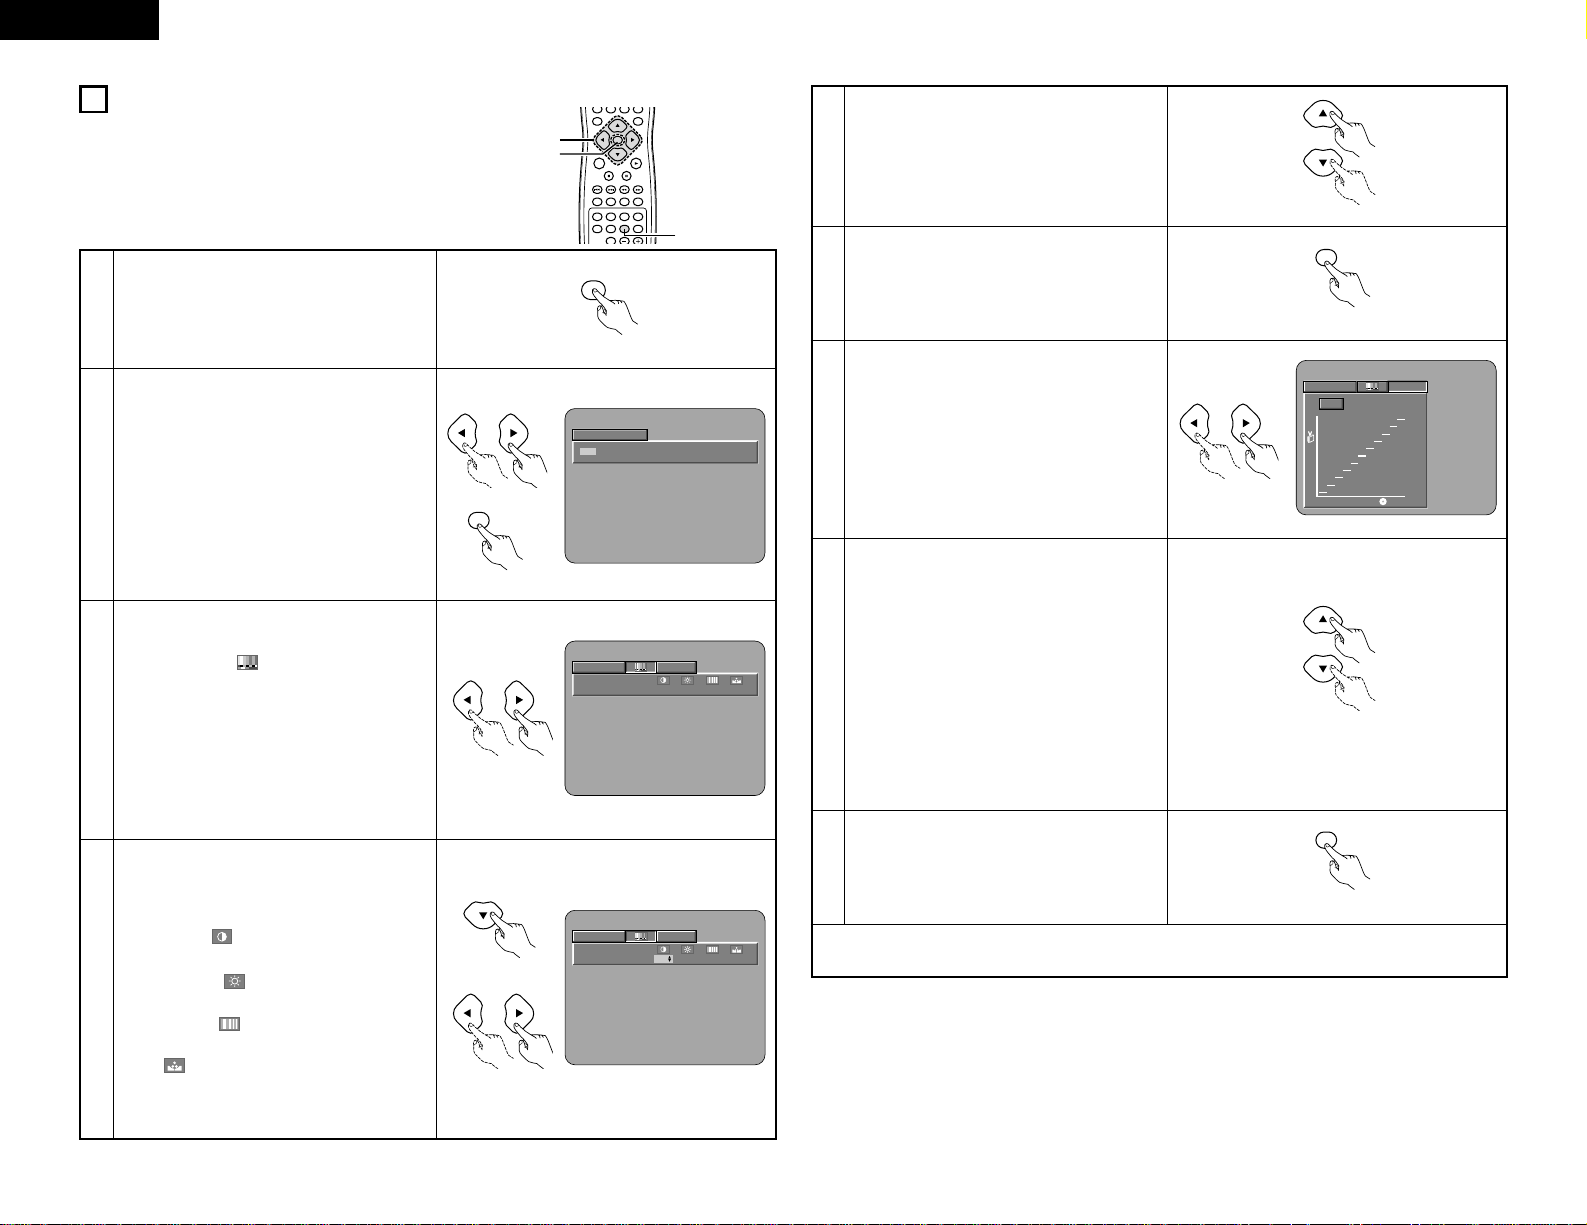
24
ENGLISH
11
ADJUSTING THE PICTURE QUALITY
ENTER
TOP MENU
DISPLAY
MARKERRANDOM
PAGE
A-B
ZOOM
DIMMER
REPEAT
SETUP
SKIP
SLOW / SEARCH
ANGLE SUBTITLE AUDIOSEARCH MODE
PLAY
STILL /
PAUSE
STOP
PIC.ADJ
0 +10
P.D.MEMORY
MENU
1
2, 3, 4, 5, 7, 8
2, 6, 9
3
Use the 0 and 1 cursor buttons to select the
picture memory, then press the ENTER button.
• The display switches as follows:
STD (STANDARD) ´ M1 (MEMORY 1) ´ M2
´ M3 ´ M4 ´ M5
STD (Factory default)
When this is selected, both the picture quality
and function are reset to normal.
M1 to M5
Picture quality settings you have adjusted can
be stored here.
2
P ICT URE MODE
STD M1 M2 M3 M4 M5
Remote control unit
ENTER
Remote control unit
Select the item to change using 0 and 1
buttons.
ADJUST MODE
• The contrast , brightness , sharpness and
color (HUE) can be adjusted.
• Perform steps 4 and 5 to adjust the picture
quality (ADJUST MODE).
GAMMA (-6 ~ +6)
• Select this if dark portions of the picture are
too dark or bright portions are too bright.
• Perform steps 7 and 8 to adjust the gamma
correction (GAMMA).
4
Press the ª cursor button to select the adjust
mode, then use the
0 and 1 cursor buttons to
select the image quality adjustment item.
CONTRAST (-6 ~ +6)
Adjusts the contrast of the image.
BRIGHTNESS (0 ~ +12)
Adjusts the picture’s brightness.
SHARPNESS (-6 ~ +6)
Adjusts the sharpness of the picture.
HUE (-6 ~ +6)
Adjusts the balance of the green and red. (This
does not affect Progressive Scan images.)
Remote control unit
Press the P.ADJ button during playback.
1
PIC.ADJ
MEMORY 1 GAMMA
0000
Remote control unit
MEMORY 1 GAMMA
CONTRAST
0 00 0
Remote control unit
Remote control unit
Remote control unit
Use the • and ª cursor buttons to set the
adjustment value.
5
Press the ENTER button.
• All the adjustments are stored in the memory.
6
7
Use the 0 and 1 cursor buttons to select the
point to be set.
Use the • and ª cursor buttons to adjust the
brightness level of the selected point.
(See “Reference” on page 25.)
• The level decreases (the picture gets darker)
when the ª cursor button is pressed and
increases (the picture gets brighter) when the
• cursor button is pressed.
• Values from 16 to 235 can be set. It is not
possible to set in such a way that the level of
dark sections exceeds that of bright sections.
NOTE:
• When the CLEAR button is pressed during
gamma correction, all the setting points are
set back to the standard level.
• Progressive images only effective for the first,
third and fifth points from the left.
8
Press the ENTER button.
• All the adjustments are stored in the memory.
9
✽
To exit the picture adjust mode
Press the PICTURE ADJUST button.
Remote control unit
ENTER
MEMORY 1 GAMMA
0
0
100
235
Remote control unit
Remote control unit
Remote control unit
ENTER
Page 25
25
ENGLISH
REFERENCE:
(1) On the gamma correction display, the horizontal axis indicates the
brightness level of the image as recorded on the disc, while the
vertical axis indicates the brightness level of the image when
output from the set.
MEMORY 1 GAMMA
0
0
100
235
(2) When a bright point on the disc side is adjusted to “dark” on the
output side as shown in the diagram at the right, normally the
details of bright sections that are hard to see become easier to
see.
MEMORY 1 GAMMA
0
0
100
235
(3) When a bright point on the disc side is adjusted to “bright” on the
output side as shown in the diagram at the right, normally the
details of dark sections that are hard to see become clearer.
MEMORY 1 GAMMA
0
0
100
235
12
USING THE ON-SCREEN DISPLAY
2 Use this function to display and change information on the
disc (titles, chapters, time, etc.)
1
In the play mode, press the DISPLAY button.
• The On-Screen Display appears.
• The picture on the TV screen switches each time the button is
pressed.
• The items displayed differ from disc to disc.
• Normal playback screen
• Disc information screen
• Disc information screen
2
3
Use the • and ª cursor buttons to select the item you wish to
change.
• The selected item is displayed with a yellow frame.
q For DVD audio discs
The elapsed time, etc., of groups and tracks can be
selected.
w For DVD video discs
The elapsed time, etc., of titles and chapters can be
selected.
e For video and music CDs
The elapsed time, etc., of tracks can be selected.
q Changing the elapsed time
Input using the number buttons, then press the ENTER
button.
Example: For 1 minute 26 seconds / “00126”
w Changing the title, track or chapter
• For DVDs
Input using the number buttons, then press the ENTER
button.
(For some discs it is not possible to change the title or
chapter.)
• For video and music CDs
Input using the number buttons. Playback starts from that
track.
ENTER
Remote control unit
TITLE 01/10
TITLE ELAPSED
CHAPTER 01 /10
00 : 00 : 01
SUBTITLE OFF
AUDIO 1/2 : DOLBY D3/2.1 ENGLISH
TITLE REMAIN 01 : 10 : 59
CHAPTER ELAPSED 00 : 00 : 01
CHAPTER REMAIN 00 : 40 : 59
• Normal playback screen
• Disc information screen
Example: For DVD video discs
4 5 6
ENTER
ON
OFF
REMOTE CONTROL UNIT RC-553
TOP MENU
DISPLAY
NTSC / PALOPEN / CLOSE
CALL RETURN
POWER
PLAY
STILL /
PAUSE
STOP
1
7
0
2
8
+10
3
9
PROG / DIR
V.S.S.
CLEAR
MENU
3
1
3
2
2
Remote control unit
DISPLAY
4 5 6
1
7
0
283
9
Example: For DVD audio discs
• Disc information screen
TRACK 01 / 10
SINGLE ELAPSED 26 : 11
SINGLE REMAIN 03 : 17
TOTAL ELAPSED 06 : 15
TOTAL REMAIN 32 : 05
• Normal playback screen
• Disc information screen
Example: For video and music CDs
Remote control unit
GROUP 01/02
GROUP ELAPSED
GROUP REMAIN 0 : 57 : 59
TRACK ELAPSED 0 : 00 : 01
TRACK REMAIN 0 : 05 : 59
AUDIO 1/1 : LPCM 2 ch/ 96 kHz/24BIT
TRACK 01 /10
0 : 00 : 01
Page 26
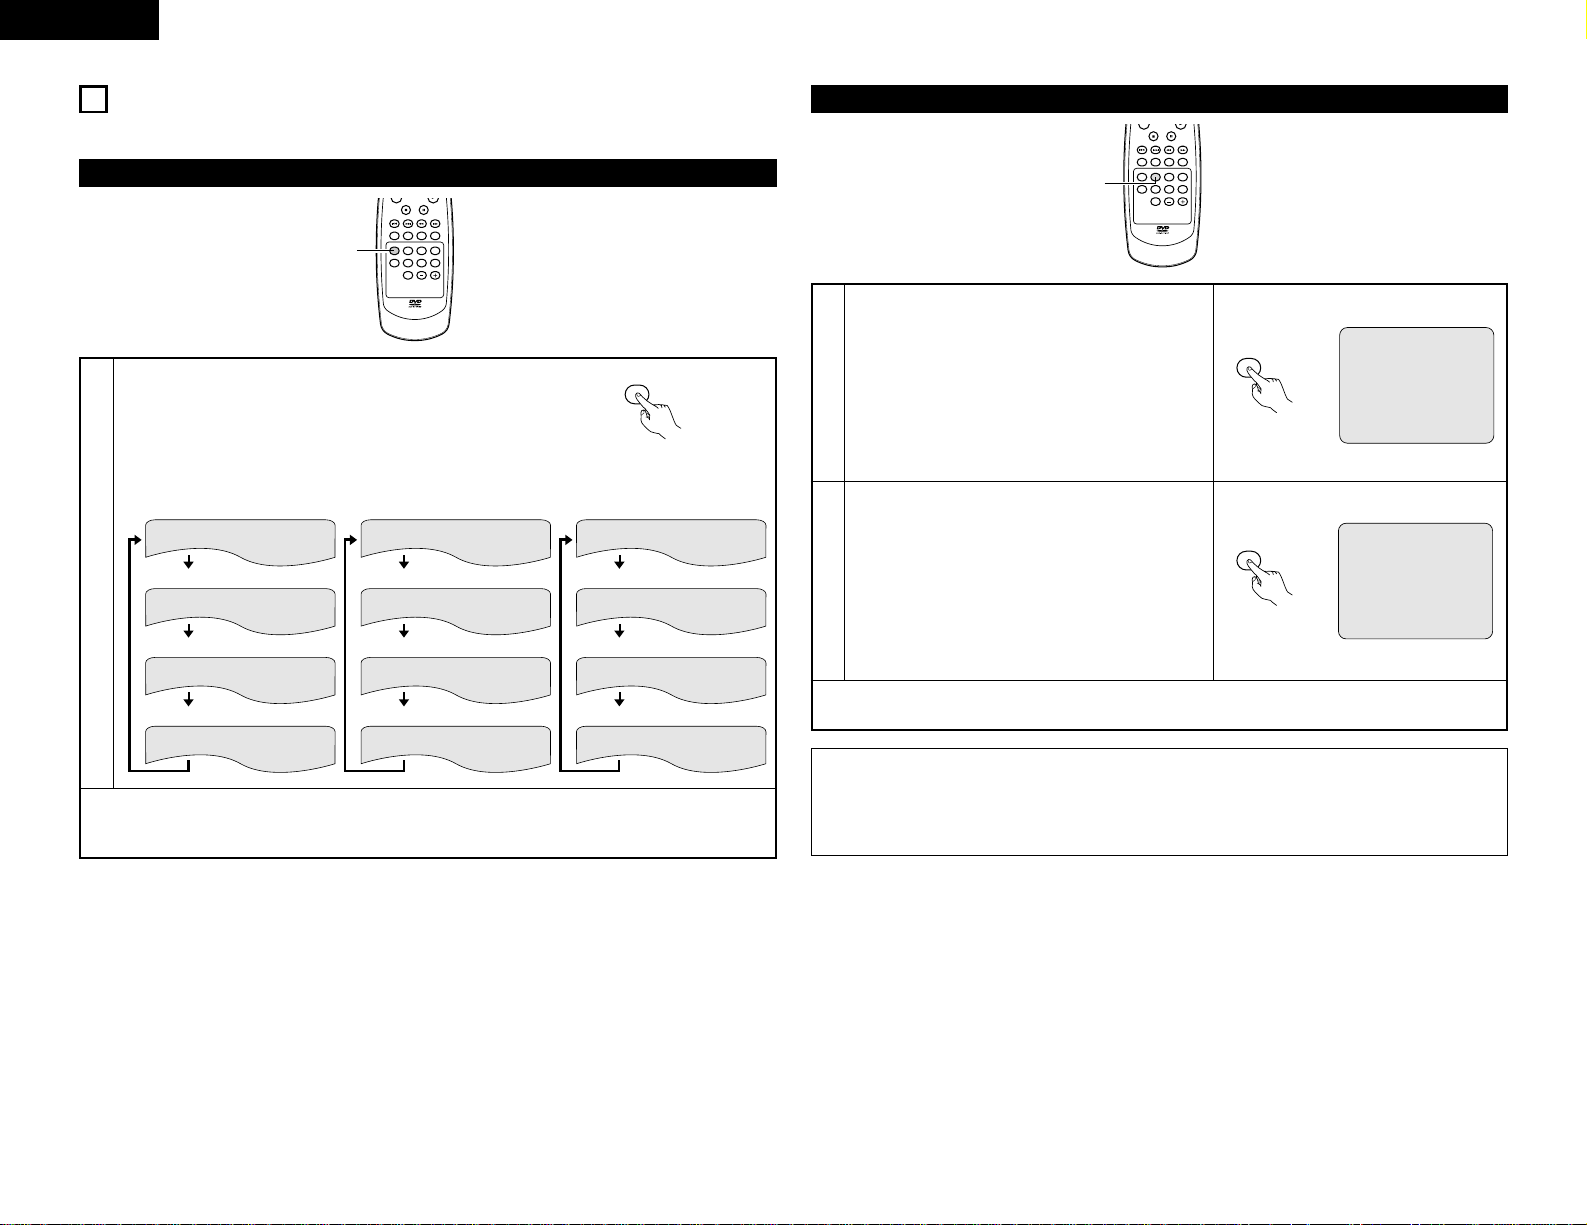
26
ENGLISH
13
PLAYING REPEATEDLY
2 Use this function to play your favorite audio or video sections repeatedly.
Playing Repeatedly (Repeat Playback)
MARKERRANDOM
PAGE
A-B
ZOOM
DIMMER
REPEAT
SETUP
SKIP
SLOW / SEARCH
ANGLE SUBTITLE AUDIOSEARCH MODE
STILL /
PAUSE
STOP
PIC.ADJ P.D.MEMORY
1
1
In the play mode, press the REPEAT button.
• The display on the TV screen switches each time the button is
pressed, and the corresponding repeat play or stop mode is
set.
• Normal playback
• Track repeated
• Group repeated
CHAPTER REPEAT
TITLE REPEAT
REPEAT OFF
• Normal playback
• Chapter repeated
w For DVD video discs
Remote control unit
REPEAT
q For DVD audio discs
• Repeat playback cancelled
TRACK REPEAT
DISC REPEAT
REPEAT OFF
e For video and music CDs
• Repeat playback cancelled
• Title repeated
• Normal playback
• Track repeated
• Repeat playback cancelled
• Entire disc repeated
✽To return to normal playback:
Return to normal playback by pressing the button REPEAT button until “REPEAT OFF” appears on the TV
screen.
Playing a Certain Section Repeatedly (A-B Repeat Playback)
MARKERRANDOM
PAGE
A-B
ZOOM
DIMMER
REPEAT
SETUP
SKIP
SLOW / SEARCH
ANGLE SUBTITLE AUDIOSEARCH MODE
STILL /
PAUSE
STOP
PIC.ADJ P.D.MEMORY
1, 2
1
2
During playback, press the A-B button.
• This sets start point A.
Press the A-B button again.
• This sets end point B, and repeat playback of the A-B
section starts.
A TO B SET A
✽To return to normal playback:
Press the A-B button until “A TO B CANCELED” appears on the TV screen.
NOTES:
• Repeat playback may not work for some DVDs.
• The repeat playback and A-B repeat playback functions will not work for DVDs and video CDs for which
the elapsed time is not shown on the display during playback.
• In some cases, subtitles may not be displayed near the A and B points during A-B repeat playback.
A-B
Remote control unit
A TO B SET B
A-B
Remote control unit
TRACK REPEAT
GROUP REPEAT
REPEAT OFF
Page 27
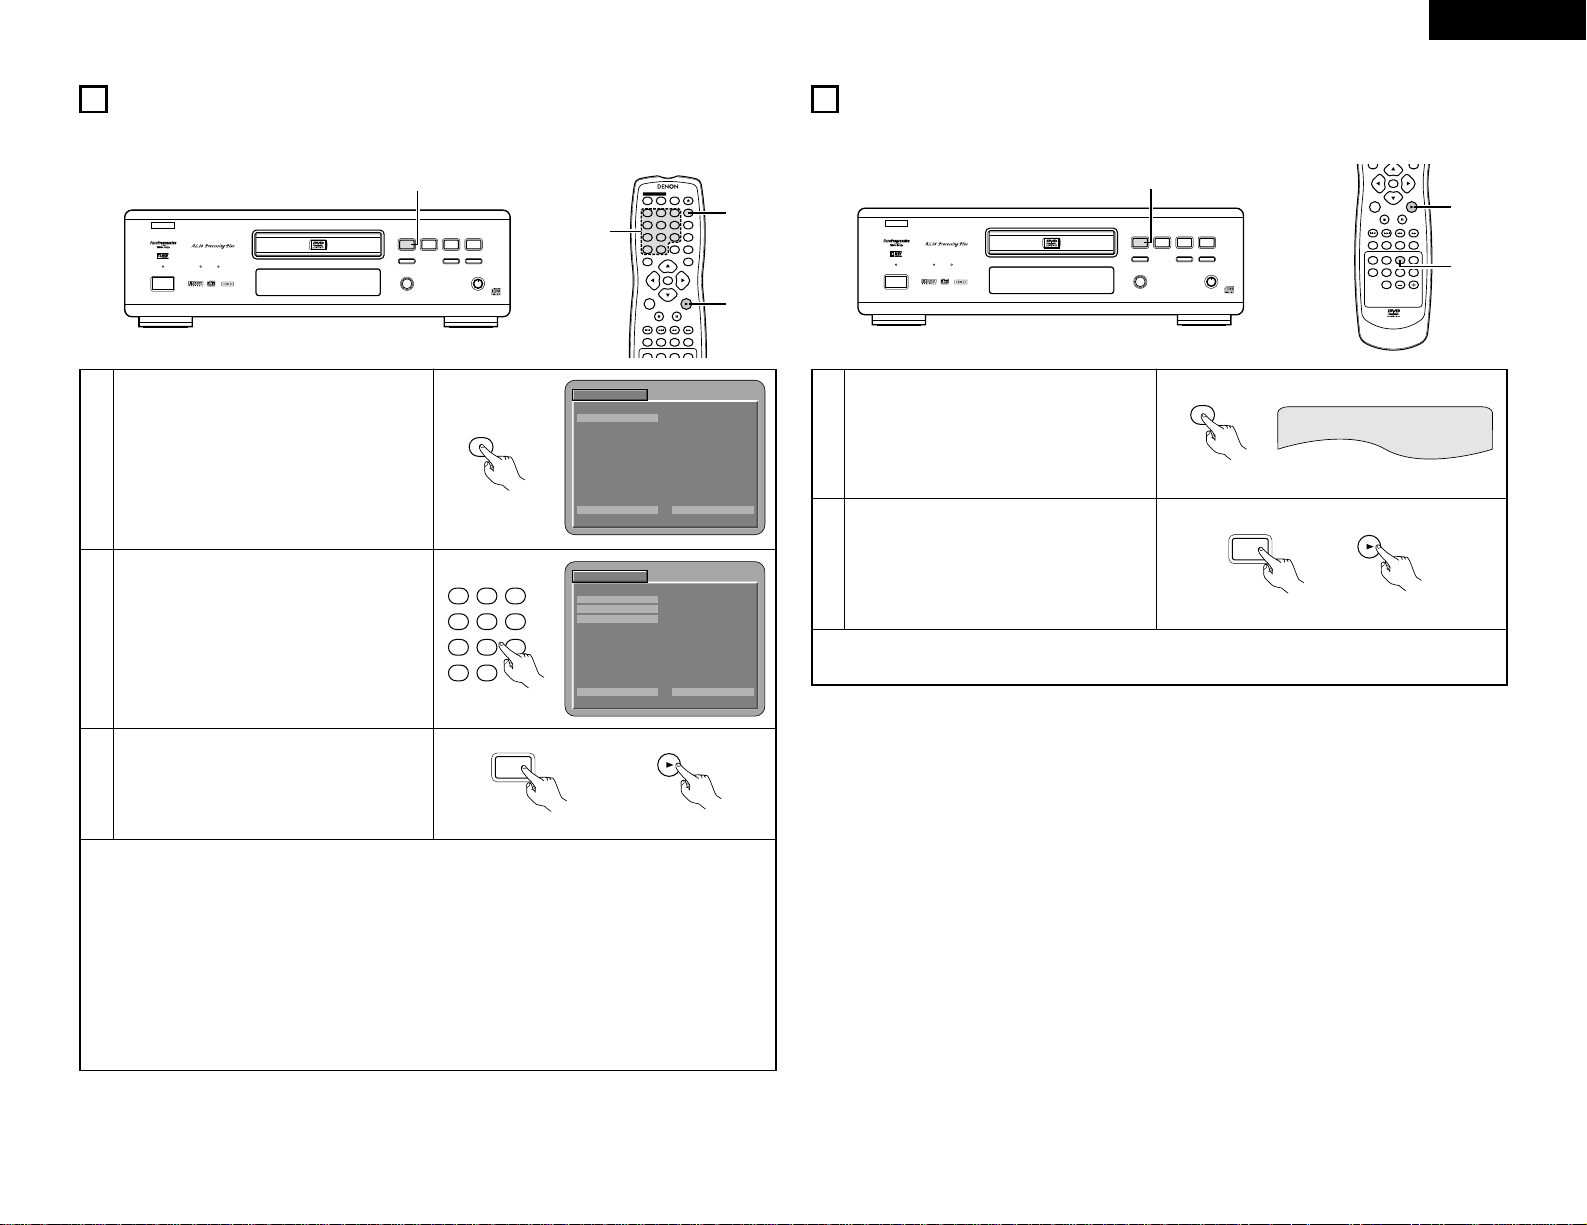
27
ENGLISH
PROGRESSIVE
DVD
1 2
9
8
REMOTE SENSOR
OPEN/CLOSE
5
DVD AUDIO
¢ON / STANDBY
£OFF
PLAY STOP
763
STILL / PAUSE
B
PURE DIRECT
MODE 1
MODE 2
OFF
AL24 PLUS
DVD AUDIO-VIDEO PLAYER DVD-3800
3
14
PLAYING TRACKS IN THE DESIRED ORDER
2 Use this function with video and music CDs to play the tracks in the desired order.
This function does not affect with DVD.
1
2
In the stop mode, press the PROG/DIR button
once.
• The program selection screen appears.
Use the number buttons to select the track
number you want to program.
EX: To program track 5 and track 12:
✽To return to normal playback:
Press the STOP button to stop programmed playback, then press the PROG/DIR button.
Now press the PLAY button to start normal playback from the beginning of the disc.
✽To clear tracks from the program:
Press the STOP button. The program play screen appears. Press the CLEAR button to clear the last track
in the program.
✽To clear the entire program:
The entire program is cleared when the power is turned off or the disc is ejected.
Also, when the STOP button is pressed to stop programmed playback and the PROG button is pressed,
the entire program is cleared.
✽To check the programmed contents, press the CALL button. The programmed contents are displayed step
by step.
✽Up to 20 tracks can be programmed.
3
Press the PLAY button.
• Playback of the tracks in the programmed
order begins.
PLAY
1
PLAY
Main unit Remote control unit
4 5 6
ENTER
ON
OFF
REMOTE CONTROL UNIT RC-553
TOP MENU
DISPLAY
MARKERRANDOMA-BREPEAT
NTSC / PALOPEN / CLOSE
CALL RETURN
SKIP
SLOW / SEARCH
POWER
ANGLE SUBTITLE AUDIOSEARCH MODE
PLAY
STILL /
PAUSE
STOP
1
7
0
2
8
+10
3
9
PROG / DIR
V.S.S.
CLEAR
MENU
3
1
2
PROGRAM
INPUT : 0 - 9, + 10 C LEAR : CL EAR BUTTON
NO. TRACK
1 _ _
MODE : NORMAL TOTA L T IME : - - : - -
B
PROG / DIR
Remote control unit
PROGRAM
INPUT : 0 - 9, + 10 C LEAR : CL EAR BUTTON
NO. TRACK
1 0 5
2 1 2
3 _ _
MODE : NORMAL TOTA L T IME : 10 : 3 5
B
4 5 6
1
7
0
2
8
+10
3
9
Remote control unit
15
PLAYING TRACKS IN THE RANDOM ORDER
2 Use this function with video and music CDs to play the tracks in random order.
This function does not affect with DVD.
1
2
In the stop mode, press the RANDOM button.
• The random play screen appears.
Press the PLAY button.
• The tracks start playing in random order.
✽To return to normal playback:
Press the STOP button to stop random playback, then press the RANDOM button once.
RANDOM
Remote control unit
1
PLAY
Main unit Remote control unit
ENTER
MARKERRANDOM
PAGE
A-B
ZOOM
DIMMER
REPEAT
SETUP
SKIP
SLOW / SEARCH
ANGLE SUBTITLE AUDIOSEARCH MODE
PLAY
STILL /
PAUSE
STOP
MENU
1
2
RANDOM ON
2
B
AL24 PLUS
DVD AUDIO
¢ON / STANDBY
£OFF
DVD
PROGRESSIVE
REMOTE SENSOR
PLAY STOP
1 2
STILL / PAUSE
OPEN/CLOSE
5
9
8
763
PURE DIRECT
OFF
MODE 1
MODE 2
DVD AUDIO-VIDEO PLAYER DVD-3800
PLAY
Page 28
28
ENGLISH
PROGRESSIVE
DVD
1 2
9
8
REMOTE SENSOR
OPEN/CLOSE
5
DVD AUDIO
¢ON / STANDBY
£OFF
PLAY STOP
763
STILL / PAUSE
B
PURE DIRECT
MODE 1
MODE 2
OFF
AL24 PLUS
DVD AUDIO-VIDEO PLAYER DVD-3800
1
31
16
MP3 PLAYBACK
2 There are many music distribution sites on the internet from which music files in MP3 format can be
downloaded. Music downloaded as instructed on the site and written onto a CD-R/RW disc can be played on
the DVD-3800.
If music recorded on commercially available music CDs is converted on a computer into MP3 files using an
MP3 encoder (conversion software), the data on a 12 cm CD is reduced into about 1/10 the amount of the
original data. Thus, when written in MP3 format, the data of about 10 music CDs can fit onto a single CDR/RW disc. A single CD-R/RW disc can contain over 100 tracks.
✽
Values when 5-minute tracks are converted with a standard bit rate of 128 kbps into MP3 files and using a
CD-R/RW disc with a capacity of 650 MB.
4 5 6
ENTER
ON
OFF
REMOTE CONTROL UNIT RC-553
TOP MENU
DISPLAY
MARKERRANDOMA-BREPEAT
NTSC / PALOPEN / CLOSE
CALL RETURN
SKIP
SLOW / SEARCH
POWER
ANGLE SUBTITLE AUDIOSEARCH MODE
PLAY
STILL /
PAUSE
STOP
1
7
0
2
8
+10
3
9
PROG / DIR
V.S.S.
CLEAR
MENU
3
1
2, 3
Listening to MP3 CD, CD-Rs and CD-RWs
1
Load the CD-R/RW disc on which the MP3
format music files have been written into the
DVD-3800. (See page 12.)
• When the disc is loaded in the DVD-3800, the
disc information screen appears.
• If there are multiple folders, proceed to step
2.
• If there are no folders on the disc, proceed to
step 3.
FOLDER1
FOLDER2
FOLDER3
FOLDER4
FOLDER5
DI SC INFO RMATION
SINGLE:
DECISION : ENTER BUTTON
0••
1MP3 _ 01
2MP3 _ 02
3MP3 _ 03
4MP3 _ 04
5MP3 _ 05
ROOT
PLAY MODE FOLDER
SIGNAL ELAPSED : --:--
B
Remote control unit
ENTER
Remote control unit
DI SC INFO RMATION
SINGLE:
DECISION : ENTER BUTTON
0ROOT
1FOLDER1
2FOL DER2
3FOL DER3
4FOL DER4
5FOL DER5
ROOT
PLAY MODE FOLDER
SIGNAL ELAPSED : --:--
B
Main unit
OPEN/CLOSE
5
OPEN / CLOSE
Remote control unit
2
Use the • and ª cursor buttons to select the
folder containing the file(s) you want to play,
then press the ENTER button.
• If there are multiple folders, proceed to step
2.
✽To change the folder
Use the • and ª cursor buttons to select
“ROOT” at the upper right of the screen, then
press the ENTER button. The screen in step 1
reappears. Select the desired folder.
3
Use the • and ª cursor buttons to select the
MP3 file you want to play, then press the PLAY
button or ENTER button.
• Playback starts.
✽The display can be switched between the
single elapsed time and the single remaining
time by pressing the DISPLAY button.
✽Programmed playback is not possible with
MP3 discs.
✽To change the MP3 file
Press the STOP button, then use the • and ª
cursor buttons to reselect the desired MP3
file.
✽To set the random play mode
In the stop mode, press the RANDOM button.
Then press the PLAY button or ENTER button.
✽To set the repeat mode
The repeat mode changes each time the
REPEAT button is pressed.
FOLDER Æ TRACK REPEAT Æ FOLDER REPEAT
≠
✽To return to the initial disc information
screen
Press the STOP button, use the • cursor
button to select “ROOT” at the upper right of
the screen, then press the ENTER button.
The screen in step 1 reappears.
FOLDER1
FOLDER2
FOLDER3
FOLDER4
FOLDER5
DI SC INFO RMATION
SINGLE:
DECISION : ENTER BUTTON
0••
1MP3 _ 01
2MP3 _ 02
3MP3 _ 03
4MP3 _ 04
5MP3 _ 05
ROOT
PLAY MODE FOLDER
SIGNAL ELAPSED : --:--
B
Remote control unit
1
PLAY
Main unit
PLAY
Remote control unitRemote control unit
ENTER
NOTES:
• The DVD-3800 is compatible with the “MPEG-1 Audio Layer 3” standards (sampling frequency of 32, 44.1
or 48 kHz). It is not compatible with such other standards as “MPEG-2 Audio Layer 3”, “MPEG-2.5 Audio
Layer 3”, MP1, MP2, etc.
• It may not be possible to play some CD-R/RW discs due to disc properties, dirt, warping, etc.
• The digital signals output when playing MP3 files are MP3 signals converted into PCM, regardless of
whether the audio output presetting is set to “normal” or “PCM”. The signals are output with the same
sampling frequency as that of the music source.
• In general, the higher an MP3 file’s bit rate, the better the sound quality. On the DVD-3800, we
recommend using MP3 files recorded with bit rates of 128 kbps or greater.
• MP3 files may not be played in the expected order, since the writing software may change the position of
the folders and the order of the files when writing them on the CD-R/RW.
• Programmed playback is not possible with MP3 discs.
• When writing MP3 files on CD-R/RW discs, select “ISO9660 level 1” as the writing software format. This
may not be possible with some types of writing software. For details, refer to the writing software’s
usage instructions.
• With the DVD-3800 it is possible to display folder names and file names on the screen like titles. The DVD3800 can display up to 8 characters, consisting of numbers, capital letters, and the “_” (underscore) mark.
• If recorded in a format other than “ISO9660 level 1”, normal display and playback may not be possible. In
addition, folder and file names including other symbols will not be displayed properly.
• Be sure to add the extension “.MP3” to MP3 files. Files cannot be played if they have any extension other
than “.MP3” or if they have no extension. (with Macintosh computers, MP3 files can be played by adding
the extension “.MP3” after the file name consisting of up to 8 capital or numbers and recording the files
on the CD-R/RW.)
• Do not apply stickers, tape, etc., to either the label side or the signal side of CD-R/RW discs. If adhesive
gets on the surface of a disc, the disc may get stuck inside the DVD-3800 and be impossible to eject.
• The DVD-3800 is not compatible with packet write software.
• The DVD-3800 is not compatible with ID3-Tag.
• The DVD-3800 is not compatible with play lists.
• Do not play CD-R/RW discs containing any files other than music CD files (in CDA format), MP3 and JPEG
files. Doing so may result in malfunction or damage, depending on the type of file.
Page 29
29
ENGLISH
17
PLAYING STILL PICTURE FILES (JPEG FORMAT)
2 JPEG files stored on Kodak picture CDs, CD-Rs and CD-RWs can be played as a slide show and enjoyed on
the DVD-3800.
1
2
Load the picture CD into the DVD-3800.
• When the disc is loaded, a slide show of the still
pictures begins automatically.
• The slide show continues until the STOP button is
pressed.
Press the STOP button.
• The slide show of the picture CD stops.
2
STOP
Main unit Remote control unit
OPEN / CLOSE
OPEN/CLOSE
5
Main unit Remote control unit
4 5 6
ENTER
ON
OFF
REMOTE CONTROL UNIT RC-553
TOP MENU
DISPLAY
NTSC / PALOPEN / CLOSE
CALL RETURN
SKIP
SLOW / SEARCH
POWER
ANGLE SUBTITLE AUDIOSEARCH MODE
PLAY
STILL /
PAUSE
STOP
1
7
0
2
8
+10
3
9
PROG / DIR
V.S.S.
CLEAR
MENU
1
2
2 Kodak picture CDs can be played on the DVD-3800.
When a picture CD is played, the photographs on the picture CD can be displayed on a TV.
(“Picture CD” is a service by which photographs taken on conventional silver film cameras are converted
into digital data and written on CDs. For details on Picture CD, contact a store that offers Kodak
development services.)
Playing picture CDs
Playing still pictures stored on CD-Rs/RWs
1
Load the CD-R/RW on which the still pictures
have been written into the DVD-3800.
• When the disc is loaded in the DVD-3800, the
disc information screen appears.
• If there are multiple folders proceed to step 2.
• If there are no folders on the disc, proceed to
step 3.
PROGRESSIVE
DVD
1 2
9
8
REMOTE SENSOR
OPEN/CLOSE
5
DVD AUDIO
¢ON / STANDBY
£OFF
PLAY STOP
763
STILL / PAUSE
B
PURE DIRECT
MODE 1
MODE 2
OFF
AL24 PLUS
DVD AUDIO-VIDEO PLAYER DVD-3800
311
DI SC INFO RMATION
SINGLE:
DECISION : ENTER BUTTON
0ROOT
1JPEG1
2JPEG2
3JPEG3
4JPEG4
5JPEG5
ROOT
PLAY MODE FOLDER
SIGNAL ELAPSED : --:--
B
4 5 6
ENTER
ON
OFF
REMOTE CONTROL UNIT RC-553
TOP MENU
DISPLAY
NTSC / PALOPEN / CLOSE
CALL RETURN
SKIP SLOW / SEARCH
POWER
PLAY
STILL /
PAUSE
STOP
1
7
0
2
8
+10
3
9
PROG / DIR
V.S.S.
CLEAR
MENU
3
1
2, 3
2
Use the •and ªcursor buttons to select the
folder containing the file(s) you want to play,
then press the ENTER button.
✽
To change the folder
Use the •cursor button to select “ROOT” at
the upper right of the screen, then press the
ENTER button. The screen in step 1
reappears. Select the desired folder.
DI SC INFO RMATION
SINGLE:
DECISION : ENTER BUTTON
0••
1A
2B
3C
4D
5E
JPEG1
JPEG2
JPEG3
JPEG4
JPEG5
ROOT
PLAY MODE FOLDER
SIGNAL ELAPSED : --:--
B
Remote control unit
3
Use the •and ªcursor buttons on the remote
control unit to select the still picture file from
which you want to start the slide show, then
press the PLAY button or the ENTER button on
the remote control unit.
• The slide show starts.
• Only the still picture files in the selected
folder are played.
✽
Once all the still picture files in the folder have
been played, the disc information screen
reappears.
DI SC INFO RMATION
SINGLE:
DECISION : ENTER BUTTON
0••
1A
2B
3C
4D
5E
JPEG1
JPEG2
JPEG3
JPEG4
JPEG5
ROOT
PLAY MODE FOLDER
SIGNAL ELAPSED : --:--
B
Remote control unit
ENTER
Remote control unit
✽
To view several of the still pictures stored on the disc at once:
• Press the MENU button to display up to 9 still pictures at once.
• To select and view a still picture (to start the slide show from a specific still picture), use the cursor
buttons (ª, •,
0
and 1) to select the desired still picture, then press the ENTER button.
✽
To temporarily stop the slide show:
• Press the PAUSE button.
• To resume the slide show, press the PLAY button.
✽
To cue a still picture you want to view (from which you want to start the slide show):
• During the slide show, press one of the SKIP (
8,9
) buttons. Press the SKIP 8button to cue
back to the previous still picture, the SKIP
9
button to cue ahead to the next still picture.
✽
Flipping and rotating still pictures:
• Use the cursor buttons (ª, •,
0
and 1) to flip the still picture.
•
cursor button: The currently displayed still picture is flipped vertically.
ª
cursor button: The currently displayed still picture is flipped horizontally.
0
cursor button: The currently displayed still picture is rotate 90° counterclockwise.
1
cursor button: The currently displayed still picture is rotate 90° clockwise.
✽
Play the image in the zoom mode.
• When the ZOOM button is pressed while playing a JPEG image (“ZOOM ON” is displayed on the
screen at this time) zoom in and zoom out using the search keys.
(
6
: zoom out, 7: zoom in)
• When the image is zoomed, use the cursor buttons (ª, •,
0
and 1) to move the zoomed picture.
• Continuous playback (SLIDE SHOW) is not possible in the zoom mode.
✽
The way of switching to the next image during continuous JPEG image playback (SLIDE SHOW) can be
selected.
• Press the V.S.S. button on the remote control unit.
• Select from SLIDE SHOW MODE 1 to MODE 11, RAND and NONE.
1
PLAY
Main unit
PLAY
Remote control unitRemote control unit
ENTER
21 1
B
AL24 PLUS
DVD AUDIO
¢ON / STANDBY
£OFF
DVD
PROGRESSIVE
REMOTE SENSOR
PLAY STOP
STILL / PAUSE
OPEN/CLOSE
1 2
5
9
8
763
PURE DIRECT
DVD AUDIO-VIDEO PLAYER DVD-3800
OFF
MODE 1
MODE 2
STOP
Page 30
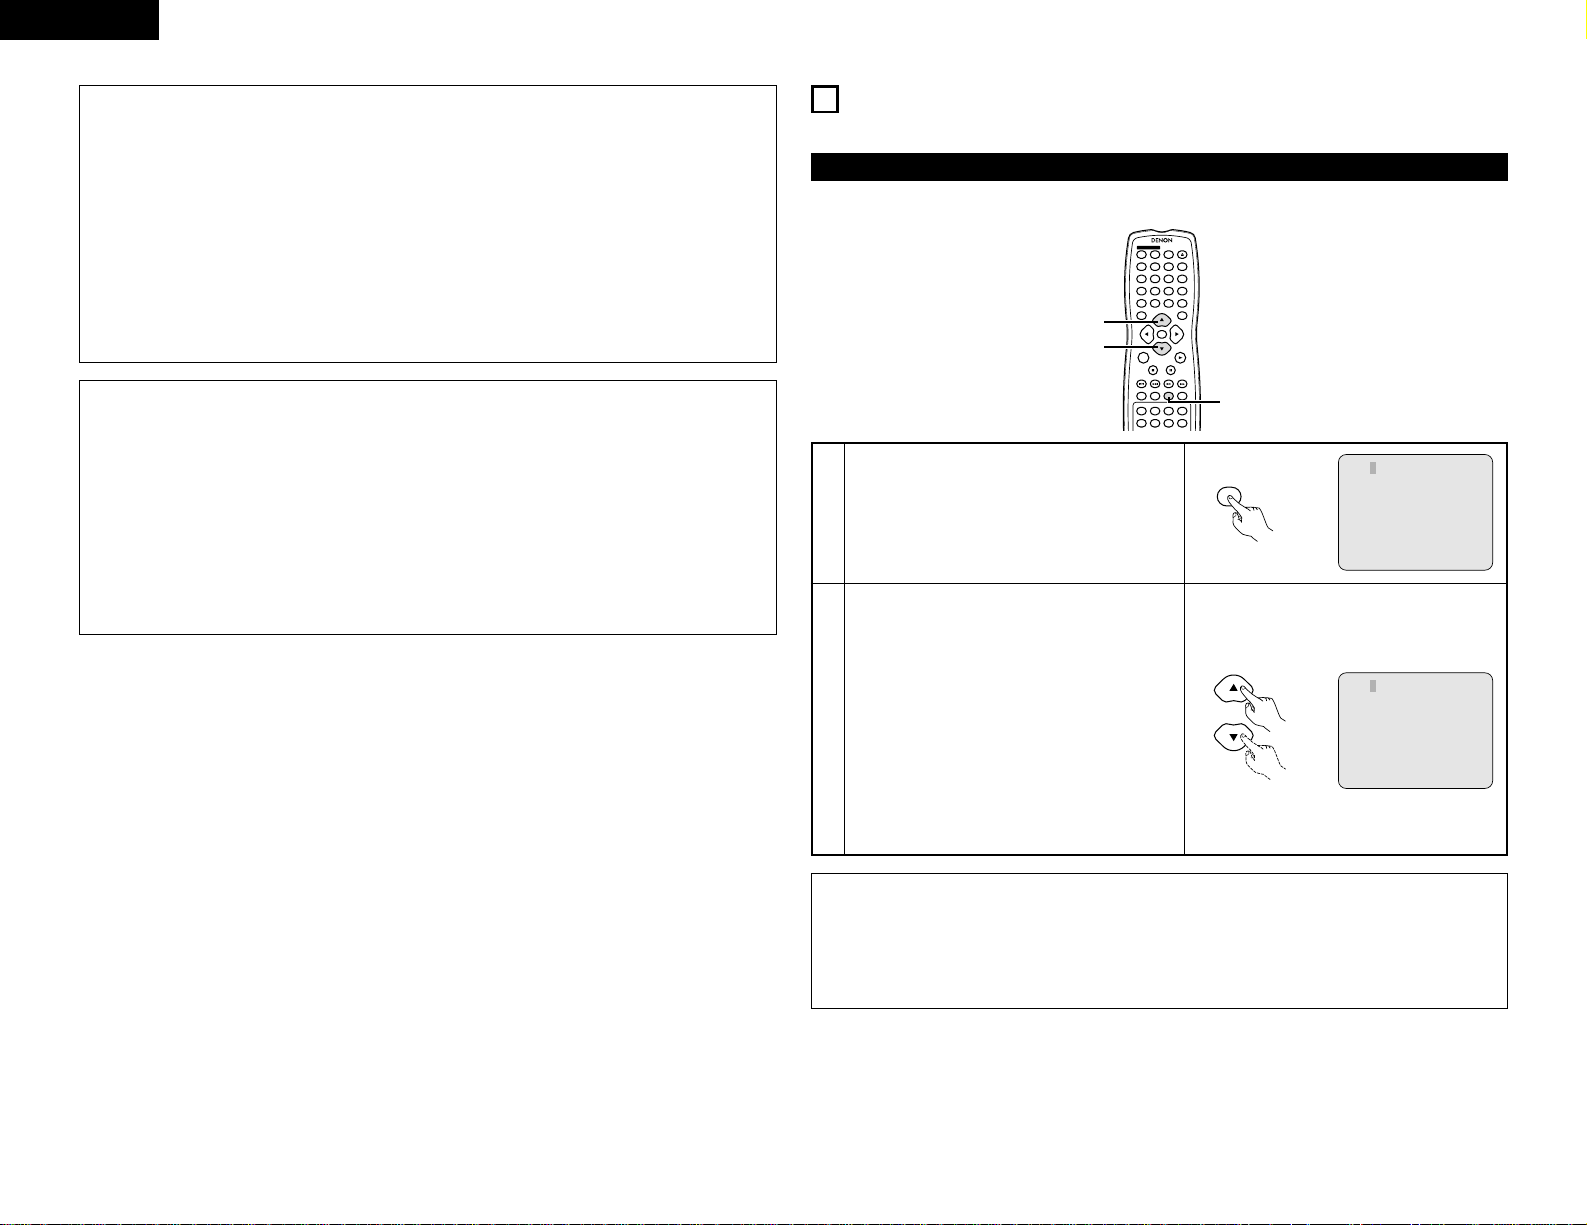
30
ENGLISH
Special play modes for MP3 and JPEG files
Use the
0 and 1 cursor buttons to select the play mode, the • and ª cursor buttons to select the special
play mode.
• FOLDER (the MP3 and JPEG files in the folder are played in order starting from the selected file)
• FOLDER REPEAT (all the MP3 and JPEG files in the folder are played repeatedly starting from the
selected file)
• DISC (all the MP3 and JPEG files on the disc are played in order starting from the selected file)
• DISC REPEAT (all the MP3 and JPEG files on the disc are played repeatedly starting from the selected file)
• RANDOM ON (all the MP3 and JPEG files in the folder are played in random order starting from the
selected file)
• JPEG PLAY1 (the JPEG files only are played in order starting from the selected JPEG file, and during this
time the MP3 files in the folder are played in order starting from the first MP3 file)
• JPEG PLAY2 (the MP3 files only are played in order starting from the selected MP3 file, and during this
time the JPEG files in the folder are played in order starting from the first JPEG file)
• TRACK REPEAT (the select MP3 or JPEG file is played repeatedly)
NOTES:
• The DVD-3800 is compatible with image data stored in JPEG format, but Denon does not guarantee that
all image data stored in JPEG format can be viewed.
• Pictures with resolutions of up to 2048 x 1536 pixels can be displayed.
• It may not be possible to play some CD-Rs/RWs due to disc properties, dirt, scratches, etc.
• When storing JPEG files on the CD-R/RW, set the writing program to store the files in the “ISO9660 level
1” format.
• Be sure to give JPEG files the extension “.JPG” and “.JPE”. Files with other extensions or with no
extensions cannot be viewed on the DVD-3800.
• Do not apply stickers, tape, etc., to either the label side or the signal side of CD-R/RW discs. If adhesive
gets on the surface of a disc, the disc may get stuck inside the DVD-3800 and be impossible to eject.
• Do not play CD-R/RW discs containing any files other than music CD files (in CDA format), MP3 and JPEG
files. Doing so may result in malfunction or damage, depending on the type of file.
• JPEG files written using Macintosh computers cannot be played.
18
USING THE MULTIPLE AUDIO, SUBTITLE AND ANGLE FUNCTIONS
2 With DVDs containing multiple audio language signals, the audio language can be switched during playback.
Switching the Audio Language (Multiple Audio Function)
4 5 6
ENTER
ON
OFF
REMOTE CONTROL UNIT RC-553
TOP MENU
DISPLAY
MARKERRANDOM
PAGE
A-B
ZOOM
DIMMER
REPEAT
SETUP
NTSC / PALOPEN / CLOSE
CALL RETURN
SKIP
SLOW / SEARCH
POWER
ANGLE SUBTITLE AUDIOSEARCH MODE
PLAY
STILL /
PAUSE
STOP
PIC.ADJ
1
7
0
2
8
+10
3
9
PROG / DIR
V.S.S.
CLEAR
P.D.MEMORY
MENU
1
2
2
1
2
During playback, press the AUDIO button.
• The current audio language number is displayed.
Use the • and ª cursor buttons to select the
desired language.
• The display turns off when the AUDIO button is
pressed.
AUDIO 1/3 :DOLBY D 3/ 2.1 ENGLISH
AUDIO
Remote control unit
Remote control unit
AUDIO 2/3 :DOLBY D3 /2.1 FRENCH
NOTES:
• With some discs it is not possible to change the audio language during playback. In such cases, select
from the DVD menu. (See page 32.)
• If the desired language is not set after pressing the
• and ª
cursor buttons several times, the disc does
not include that language.
• The language selected in the default settings (see page 13) is set when the power is turned on and when
the disc is replaced.
Page 31

31
ENGLISH
2 With DVDs containing multiple subtitle language signals, the subtitle language can be switched during
playback.
Switching the Subtitle Language (Multiple Subtitle Function)
4 5 6
ENTER
ON
OFF
REMOTE CONTROL UNIT RC-553
TOP MENU
DISPLAY
MARKERRANDOMA-B
DIMMER
REPEAT
SETUP
NTSC / PALOPEN / CLOSE
CALL RETURN
SKIP
SLOW / SEARCH
POWER
ANGLE SUBTITLE AUDIOSEARCH MODE
PLAY
STILL /
PAUSE
STOP
PIC.ADJ
1
7
0
2
8
+10
3
9
PROG / DIR
V.S.S.
CLEAR
P.D.MEMORY
MENU
2
2
1
1
2
During playback, press the SUBTITLE button.
• The current subtitle language number is
displayed.
Use the • and ª cursor buttons to select the
desired language.
• The display turns off when the SUBTITLE button
is pressed.
SUBTITLE 01/ 03 : ENGLISH
SUBTITLE
Remote control unit
Remote control unit
NOTES:
• If the desired language is not set after pressing the • and ª cursor buttons several times, the disc does
not include that language.
• The subtitle language set with the default settings (see page 14) is set when the power is turned on and
when the disc is replaced. If that language is not included on the disc, the disc’s default language is set.
• When the subtitle language is changed, several seconds may be required for the new language to appear.
• When a disc supporting the closed caption is played, the subtitle and the closed caption may overlap each
other on the TV monitor. In this case, turn the subtitle off.
SUBTITLE 02 /03 : FRENCH
2 With DVDs containing multiple angle signals, the angle can be switched during playback.
Switching the Angle (Multiple Angle Function)
4 5 6
ENTER
ON
OFF
REMOTE CONTROL UNIT RC-553
TOP MENU
DISPLAY
MARKERRANDOMA-B
DIMMER
REPEAT
SETUP
NTSC / PALOPEN / CLOSE
CALL RETURN
SKIP
SLOW / SEARCH
POWER
ANGLE SUBTITLE AUDIOSEARCH MODE
PLAY
STILL /
PAUSE
STOP
PIC.ADJ
1
7
0
2
8
+10
3
9
PROG / DIR
V.S.S.
CLEAR
P.D.MEMORY
MENU
2
2
1
1
2
During playback, press the ANGLE button.
• The current angle number is displayed.
Use the
• and ª
cursor buttons to select the
desired angle.
• The display turns off when the ANGLE button is
pressed.
3/5
ANGLE
Remote control unit
Remote control unit
4/5
NOTES:
• The multiple angle function only works with discs on which multiple angles are recorded.
•“ANGLE” lights on the main unit’s display when playing a section recorded in the multi-angle mode.
• At scenes where multiple angles are recorded, the angle can be switched.
Page 32

32
ENGLISH
19
USING THE MENUS
Using the Top Menu
2 For DVDs containing multiple titles, the desired title can be selected and played from the top menu.
1
2
3
During playback, press the TOP MENU button.
• The top menu appears.
Use the cursor or number buttons to select the desired
title.
• If you select the title number using the number
buttons, skip step 3 below.
Press the ENTER button.
• Playback starts.
• Playback also starts if the PLAY button is pressed.
Remote control unit
Example:
Apple Banana
Orange
Strawberry
Peach Pineapple
Example:
When “Orange” is selected
Apple Banana
Orange
Strawberry
Peach Pineapple
TOP MENU
TOP MENU
TOP MENU
4 5 6
1
7
0
2
8
+10
3
9
Remote control unit
Remote control unit
ENTER
Remote control unit
4 5 6
ENTER
ON
OFF
REMOTE CONTROL UNIT RC-553
TOP MENU
DISPLAY
MARKERRANDOM
PAGE
A-B
ZOOM
DIMMER
REPEAT
SETUP
NTSC / PALOPEN / CLOSE
CALL RETURN
SKIP
SLOW / SEARCH
POWER
ANGLE SUBTITLE AUDIOSEARCH MODE
PLAY
STILL /
PAUSE
STOP
PIC.ADJ
1
7
0
2
8
+10
3
9
PROG / DIR
V.S.S.
CLEAR
P.D.MEMORY
MENU
1
2
2
3
Using the DVD Menu
2 Some DVDs include special menus called DVD menus.
For example, DVDs with complex contents may contain guide menus, and DVDs with multiple languages
may contain audio and subtitle language menus.
These menus are called “DVD menus”.
Here we describe the general procedure for using DVD menus.
1
2
3
During playback, press the MENU button.
• The DVD menu appears.
Use the cursor or number buttons to select the desired
item.
• If you select the item using the number buttons, skip
step 3 below.
Press the ENTER button.
• The selected item is set.
• If more menus appear, repeat steps 2 and 3.
Example:
Example:
“AUDIO” is selected
DVD MENU
1. SUB TITLE
2. AUDIO
3. ANGLE
DVD MENU
1. SUB TITLE
2. AUDIO
3. ANGLE
4 5 6
ENTER
ON
OFF
REMOTE CONTROL UNIT RC-553
TOP MENU
DISPLAY
MARKERRANDOM
PAGE
A-B
ZOOM
DIMMER
REPEAT
SETUP
NTSC / PALOPEN / CLOSE
CALL RETURN
SKIP
SLOW / SEARCH
POWER
ANGLE SUBTITLE AUDIOSEARCH MODE
PLAY
STILL /
PAUSE
STOP
PIC.ADJ
1
7
0
2
8
+10
3
9
PROG / DIR
V.S.S.
CLEAR
P.D.MEMORY
MENU
1
2
2
3
ENTER
Remote control unit
Remote control unit
4 5 6
1
7
0
2
8
+10
3
9
Remote control unit
Remote control unit
MENU
Page 33

33
ENGLISH
20
MARKING SCENES YOU WANT TO SEE AGAIN
2 Set marks at scenes you want to see again so that you can start playback from the marked position
whenever you want.
1
During playback, press the MARKER button.
• Use the
0 and 1 cursor buttons to select the
“*” marks.
• The marker screen appears.
•“*” is displayed if the mark is not set.
MARKER
Remote
control unit
2
Press the ENTER button at the scene you want
to mark.
• A number is displayed.
• Up to five marks can be set.
(To select another marker, use the cursor
buttons (
0, 1).)
ENTER
Remote
control unit
Setting Marks (DVD-AUDIO / DVD-VIDEO)
ENTER
TOP MENU
DISPLAY
MARKERRANDOM
PAGE
A-B
ZOOM
DIMMER
REPEAT
SETUP
CALL RETURN
SKIP
SLOW / SEARCH
ANGLE SUBTITLE AUDIOSEARCH MODE
PLAY
STILL /
PAUSE
STOP
PIC.ADJ
708
+10
9
P.D.MEMORY
MENU
1
1,3
1,3
2,3
Calling Out Marked Scenes and Clearing Marks
3
Use the 0 and 1 cursor buttons to select the marker
number and press the ENTER button.
• If the marker screen is not displayed during playback,
press the MARKER button to display it.
✽
To clear the marker display:
Press the MAKER button.
✽
To clear a marker:
Use the
0 and 1 cursor buttons to select a marker
number and press the CLEAR button.
• You can clear existing markers, but they are restored
when you open the disc tray or switch the unit to
standby.
Remote control unit Remote control unit
NOTE:
• All the markers added with this unit are cleard when the unit is switched to standby or the disc tray is
opened.
1
In the play or pause mode, press the ZOOM button.
• The zoom rate increases each time the ZOOM button is
pressed.
For DVD video discs and video CDs:
OFF Æ x1.5 Æ x2 Æ x4 Æ OFF
For DVD audio discs:
OFF Æ x2 Æ x4 Æ OFF
• When “PLAYER MODE” at “OTHER SETTING” in
“SETUP” is set to “AUDIO”, zooming is not possible at
the top menu or with still pictures.
• When “PLAYER MODE” at “OTHER SETTING” in
“SETUP” is set to “VIDEO”, zooming is not possible at
the top menu.
ENTER
TOP MENU
DISPLAY
MARKERRANDOM
PAGE
A-B
ZOOM
DIMMER
REPEAT
SETUP
CALL RETURN
SKIP
SLOW / SEARCH
ANGLE SUBTITLE AUDIOSEARCH MODE
PLAY
STILL /
PAUSE
STOP
PIC.ADJ
708
+10
9
P.D.MEMORY
MENU
1
2
21
PLAYING IN THE ZOOM MODE
2
Use the cursor buttons (ª, •, 0 and 1) to move the zoomed
picture.
ZOOM
Remote control unit
Remote control unit
NOTES:
• Zooming is not possible with some discs.
• The zoom function may not work properly at some scenes.
• Zooming is not possible at the top menu or the menu screen.
ENTER
Page 34

34
ENGLISH
22
TROUBLESHOOTING
Check again before assuming the player is malfunctioning.
2 Are all the connections correct ?
2 Are you following the instructions in the manual ?
2 Are the amplifier and speakers operating properly ?
If the DVD-3800 does not seem to be functioning properly, check the table below. If this does not solve the
problem, the DVD-3800 may be damaged. Turn off the power, unplug the power cord from the power outlet,
and contact your store of purchase or nearest DENON sales office.
Symptom
Power does not turn on.
Playback does not start when
PLAY button is pressed.
Playback stops immediately.
Picture does not appear.
Sound is not produced or
sound quality is poor.
Menu playback of video CD’s
is not possible.
Picture is disturbed during the
search operation.
Buttons do not operate.
No subtitles are displayed.
Audio (or subtitle) language
does not switch.
Angle does not switch.
Playback does not start when
the title is selected.
The password for rating level
has been forgotten.
Reset all the setting to
Factory Preset.
The disc is not played with the
audio or subtitle language set
as the default setting.
Picture is not displayed in 4:3
(or 16:9).
Menu screen messages for
the desired language do not
display.
Remote control unit does not
operate.
Check Page
•
Plug the power cord securely into the power outlet.
•
Is there condensation on the disc or player ? (Let stand for 1 or 2 hours.)
•
Discs other than DVDs, video CDs and music CDs cannot be played.
•
Disc is dirty. Wipe off the dirt.
• Check the connections.
• Check that VIDEO OUT has not been set to OFF for PURE DIRECT MODE.
• Set the TV’s input to “video”.
• Check the connections.
• Properly set the input of the TV, stereo, etc.
• Check the “DIGITAL OUT” and “COMPRESSION” settings.
• Menu playback is not possible with anything but video CDs with playback control.
• Some disturbance is normal.
• Some operations are disabled for some discs.
• Subtitles are not displayed for DVDs not containing subtitles.
• Subtitles are turned off. Turn the subtitles setting on.
• The audio (or subtitle) language does not switch for discs which do not include multiple audio (or
subtitle) languages.
• For some discs the audio (or subtitle) language cannot be switched when the operation to switch it
is performed, but can be switched on the menu screens.
• The angle cannot be switched for DVDs which do not contain multiple angles. In some cases
multiple angles are only recorded for specific scenes.
• Check the “RATINGS” setting.
• While the player is in the stop mode, hold the player's SKIP (9) button and the PLAY button
down simultaneously and then hold the OPEN/CLOSE button down for longer than 3 seconds (until
“INITIALIZE” disappears from the TV monitor).
The lock will be released and all default settings and picture settings will return to the default values.
• The disc does not play with the selected audio or subtitle language if that audio or subtitle language
is not included on that DVD.
• Set the “TV ASPECT” default setting to the proper setting for the connected TV.
• Check the default setting for the disc language’s menu language.
• Check that the batteries are inserted in the proper “<” and “>” directions.
• The batteries are dead. Replace them with new batteries.
• Point the remote control unit at the remote control sensor when operating it.
• Operate the remote control unit within a distance of 7 meters from the remote control sensor.
• Remove the obstacle between the remote control unit and remote control sensor.
6~10
—
5
6
6~9
23
—
6~9
—
17,18,20
21
—
21
—
14
—
32
31
19
—
13, 14
16
13, 14
11
11
11
11
11
✽ Design and specifications are subject to change without notice in the course of product improvement.
MAIN SPECIFICATIONS
Signal system: NTSC/PAL
Applicable discs: (1)DVD discs
1-layer 12 cm single-sided discs, 2-layer 12 cm single-sided discs, 2-layer 12 cm
double-sided discs (1 layer per side)
1-layer 8 cm single-sided discs, 2-layer 8 cm single-sided discs, 2-layer 8 cm
double-sided discs (1 layer per side)
(2)Compact discs (CD-DA, Video CD)
12 cm discs, 8 cm discs
S-Video output: Y output level: 1 Vp-p (75 Ω/ohms) C output level: 0.3 Vp-p
Output connectors: S connectors, 2 sets / AV 1, 1 set
Video output: Output level: 1 Vp-p (75 Ω/ohms)
Output connector: Pin-plug jacks, 2 sets / AV 1, 1 se t / AV 2, 1 set
Component output: Y output level: 1 Vp-p (75 Ω/ohms)
P
B
/CB output level: 0.7 Vp-p (75 Ω/ohms) P
R/CR output level: 0.7 Vp-p (75 Ω/ohms)
Output connector: Pin jack, 1 set
RGB output: Output level: 0.7 Vp-p (75 Ω/ohms)
Output connector: AV 1, 1 set
Audio output: Output level: 2 Vrms
2 channel (FL, FR) output connector: Pin jacks, 2 sets
Multi channel (C, SW, SL, SR) output connector: Pin jack, 1 set / AV 1, 1 set / AV 2, 1 set
Audio output
properties: (1)Frequency response
q DVDs (linear PCM) : 2 Hz to 22 kHz (48 kHz sampling)
: 2 Hz to 44 kHz (96 kHz sampling)
: 2 Hz to 88 kHz (192 kHz sampling)
w CDs : 2 Hz to 20 kHz
(2)S/N ratio
q DVDs : 118 dB
w CDs : 118 dB
(3)Total harmonic distortion
q DVDs : 0.0018%
w CDs : 0.0018%
(4)Dynamic range
q DVDs : 108 dB
w CDs : 100 dB
Digital audio output: Optical digital output : Optical connector, 1 set
Coaxial digital output : Pin jack, 1 set
Power supply: AC 230 V, 50 Hz
Power consumption: 32 W
Maximum external
dimensions: 434 (width) x 132 (height) x 339 (depth) mm (including protruding parts)
Mass: 10.0 kg
2Remote control unit: RC-553
Type: Infrared pulse
Power supply: DC 3 V, 2 R6P/AA batteries
23
This product incorporates copyright protection technology that is protected by method claims of certain
U.S. patents and other intellectual property rights owned by Macrovision Corporation and other rights
owners. Use of this copyright protection technology must be authorized by Macrovision Corporation, and
is intended for home and other limited viewing uses only unless otherwise authorized by Macrovision
Corporation. Reverse engineering or disassembly is prohibited.
Page 35

DEUTSCH
35
— INHALT —
z
Ausstattungsmerkmale................................35, 36
x
Discs ..................................................................36
c
Vorsichtsmassnahmen zur
Handhabung von Discs ......................................37
v
Anschlüsse ..................................................43~50
b
Bezeichnung der Teile und
deren Funktionen.........................................51~53
n
Fernbedienung.............................................54, 55
m
Einlegen von Discs.............................................58
,
Änderung der Standard-Einstellungen.........59~82
.
Wiedergabe .................................................83~88
⁄0
Verwendung des Pure Direct-Modus...........89, 90
⁄1
Einstellung der Bildqualität ..........................91~94
⁄2
Anwendung des On-Screen-Displays ..........95, 96
⁄3
Wiederholung der Wiedergabe .......................
97, 98
⁄4
Wiedergabe von Titeln in
beliebiger Reihenfolge .......................................99
⁄5
Wiedergabe von Titeln in
zufallsgesteuerter Reihenfolge ........................100
⁄6
MP3-Wiedergabe.....................................101~104
⁄7
Wiedergabe von Standbild-Dateien
(JPEG-Format) .........................................105~108
⁄8
Anwendung der Multiplen Audio-, Untertitel- und
Winkel-Funktione.....................................109~111
⁄9
Anwendung der Menüs ...........................112, 113
¤0 Markierung von Szenen, die Sie sich noch
einmal anschauen wollen.........................114, 115
¤1 Wiedergabe im Zoom-Modus ..........................116
¤2 Fehlersuche .....................................................117
¤3 Technische Daten ............................................117
• ZUBEHÖR
Bitte stellen Sie sicher, dass alle nachfolgend aufgeführten Zubehörteile vorhanden sind:
q Audio-Videokabel…………………………………1
w Fernbedienung (RC-553) ………………………1
e R6P/AA-Batterien ………………………………2
r AC-Kabel ………………………………………1
t Bedienungsanleitung ……………………………1
y Kundendienst-Verzeichnis ………………………1
WICHTIG FÜR DIE SICHERHEIT
WARNUNG:
UM FEUER ODER GEFAHR DURCH
ELEKTRISCHEN SCHLAG ZU VERMEIDEN,
DIESES GERÄT WEDER REGEN NOCH
FEUCHTIGKEIT AUSSETZEN.
ACHTUNG:
1. Netzkabel vorsichtig behandeln
Das Netzkabel nicht beschädigen oder verformen.
Wenn es beschädigt oder verformt ist, kann es bei
Benutzung einen elektrischen Schlag oder eine
Fehlfunktion verursachen. Wenn es aus der
Steckdose gezogen wird, halten Sie es am Stecker
und ziehen Sie nicht an der Schnur.
2. Nicht die obere Abdeckung öffnen
Um einen elektrische Schlag zu verhindern, nicht
die obere Abdeckung öffnen.
Wenn Probleme auftreten, setzen Sie sich mit
Ihrem DENON HÄNDLER in Verbindung.
3. Nichts in das Innere plazieren
Keine Metallgegenstände in den DVDVideospielers plazieren oder Flüssigkeiten
verschütten.
Die Folge kann eine elektrischer Schlag oder eine
Fehlfunktion sein.
Bitte die Modellbezeichnung und die Seriennummer
Ihres Sets, die auf dem Leistungsschild gezeigt wird,
aufschreiben und behalten.
Modell Nr. DVD-3800 Seriennummer:
HINWEIS:
Der CD Transport verwendet einen Halbleiterlaser. Um
einen gleichbleibend guten Betrieb zu gewährleisten,
empfehlen wir Ihnen, den
DVD-Videospielers
ausschließlich in Räumen mit einer Temperatur von
10°C (50°F) – 35°C (95°F) zu betreiben.
Urheberrechte
2 Die Reproduktion, Ausstrahlung, der Verleih sowie
die öffentliche Wiedergabe von Discs erfordern die
Zustimmung des Urheberrechtinhabers.
Für euorpäische Für Übersee-
Modelle Modelle
Auflösung und geringe Verzerrung, voll
ausgespielt und die Digital-Technologie von
DENON optimiert die hohe TonqualitätMöglichkeiten der HDCD-Technologie. Außerdem
werden normale CDs, DVDs und HDCDkompatible CDs automatisch identifiziert, und die
optimale Digitalsignalverarbeitung für diesen DiscTyp wird verwendet.
4. Dolby Digital (AC-3)/DTS-Decoder (HINWEIS 2)
(HINWEIS 3)
Im DVD-3800 ist ein Dolby Digital (AC-3)/DTSDecoder integriert, mit dem Sie Kino- oder
Konzerthallen-Atmosphäre hervorrufen, wenn der
DVD-3800 zusammen mit einem AV-Verstärker
und Lautsprechern verwendet wird.
5. Progressive Scan-Schaltung “Pure
Progressive
TM
” (HINWEIS 4)
Der DVD-3800 ist mit der hochpräzisen
Progressive Scan-Schaltung “Pure Progressive
TM
”
ausgestattet, mit der DVD-Filme und andere Bilder mit einer Qualität reproduziert werden, die
nah an das Original heranreicht.
6.
12-Bit/108 MHz Video-D/A-Wandler (HINWEIS 5)
Der DVD-3800 bedient sich für die Aufrechterhaltung
der hohen DVD-Bildqualität eines Video-D/AWandlers, um alle 12-Bit-Videosignale einer D/AKonvertierung zu unterziehen und ermöglicht im
Progressiv-Modus das vierfache Oversampling.
Außerdem reduziert die NSV-Technologie D/AKonvertierungsrauschen.
7. Durchdachtes vibrationshemmendes Design
(1) Mechanismus unter Verwendung eines
Hybridladers.
(2) Der Abtastkopf-Mechanismus ist in der Mitte
angeordnet und reduziert den Einfluss
externer Vibrationen.
(3) Durch das schwere Chassis und den niedrigen
Schwerpunkt wird das vibrationshemmendes
Design erzielt.
8. Multi-Funktionen
(1) Picture-CD-Wiedergabefunktion (HINWEIS 6)
Kodak Picture-CDs können auf dem DVD-3800
abgespielt werden.
Standbilder, die im JPEG-Format auf CDR/RWs gespeichert wurden, können ebenfalls
wiedergegeben werden.
2) Multi-Audiofunktion
Bis zu 8 Audio-Sprachen können ausgewählt
werden.
(Die Anzahl der angebotenen Sprachen ist von
DVD zu DVD unterschiedlich.)
(3) Multi-Untertitelfunktion
Bis zu 32 Untertitel-Sprachen können
ausgewählt werden.
(Die Anzahl der angebotenen Sprachen ist von
DVD zu DVD unterschiedlich.)
1
AUSSTATTUNGSMERKMALE
1. Neu entwickeltes AL24 Processing Plus
(1) AL24 Processing Plus, eine Nachfolgeversion
der herkömmlichen AL24 ProcessingFunktion, ist eine neu entwickelte
Technologie, mit der analoge Wellenformen
reproduziert werden und die mit einer Vielzahl
von Bit- und hohen Abtastfrequenzraten der
nächsten Media-Generation kompatibel ist.
AL24 Processing Plus kompensiert digitale
Eingangsdaten, um den Sound mit analogen
Wellenformen, die so nah wie möglich an die
in der Natur vorkommenden heranreichen,
und mit 24-Bit-Qualität wiederzugeben. Das
Ergebnis ist eine musikalische Reproduktion
mit z. B. niedrigem Nachhall-Pegel, die Sie in
eine Konzerthallen-Atmosphäre versetzt.
(2) AL24 Processing Plus hat natürlich Adaptive
Line Pattern Harmonized Algorithm &
Automatic Low Pass Filter Harmonic
Adjustment übernommen, die Eckpfeiler der
herkömmlichen ALPHA Processing-Funktion.
Beim DVD-3800 wurden diese Filter drastisch
verbessert und warten mit einer gefilterten
Banddämpfung von über –115 dB und einem
Rauschen innerhalb des Übergangsbands von
of ±0,00002 dB auf, ein Wert, der mit dem
von Profi-Recordern verglichen werden kann.
2. Hochpräziser Multi-24-Bit D/A-Wandler
(1) Der DVD-3800 ist mit einem Multi-24-Bit D/A-
Wandler ausgestattet, der die durch AL24
Processing Plus erhaltenen Hochqualitäts-24Bit-Daten einer zuverlässigen D/AKonvertierung unterzieht. Auf diese Weise
werden auch die Audio-Leistungen, wie
Rauschabstand, Dynamikbereich und
Verzerrung, verbessert und die Möglichkeiten
für Hochqualitäts-Sound, erzeugt durch eine
hohe Bit-Anzahl und hohe
Abtastfrequenzraten, voll ausgenutzt.
(2) Der Multi-24-Bit D/A-Wandler wird ein wenig
von Rauschen, aufgrund von Fluktuationen in
der Netzspannung und Strom, beeinflusst und
der Pegel der Quantisierungsverzerrung bleibt
ungeachtet der Frequenz innerhalb des Bands
konstant, und liefert somit einen klaren Sound
mit ein klein wenig Rauschen.
3. HDCD®(High Definition Compatible Digital®)Decoder (HINWEIS 1)
HDCD ist eine Codier-/Decodiertechnologie, die
die Verzerrungen während der Digitalaufnahme
größtenteils reduziert und die Kompatibilität mit
dem herkömmlichen CD-Format aufrechterhält.
Mit HDCD können 24-Bit-Daten in 16-Bit-Daten
herkömmlicher CDs konvertiert werden, ohne
dass die Tonqualität beeinträchtigt wird.
Wenn HDCD-kompatible Discs wiedergegeben
werden, werden bei Einsatz dieses HDCDDecoders die HDCD-Hauptmerkmale, hohe
qwer
ANGLE
SUBTITLE
REPEAT
A-B
SETUP
DIMMER
PIC.ADJ
ZOOM
P.D.MEMORY
PAGE
REMOTE CONTR
POWER
O
N
OL UNIT RC-553
O
N
F
T
S
F
C
1
/
P
A
L
O
P
E
N
/
C
2
L
O
S
4
E
PROG / DIR
3
5
7
6
CLEAR
8
0
TOP MENU
9
+
V.S.S.
1
0
CALL
RETURN
DISPLAY
ENTER
MENU
STOP
PLAY
STILL /
PAUSE
SKIP
SLOW / SEARCH
AUDIO
SEARCH MODE
MARKERRANDOM
Page 36

DEUTSCH
36
(4) Multi-Winkelfunktion
Der Betrachtungswinkel kann gewechselt
werden.
(Bei DVDs, auf denen multiple Winkel
aufgezeichnet wurden.)
(5) GUI (Graphical User Interface)-Funktion
Mit der Display-Taste auf der Fernbedienung
kann die Player- und Disc-Information auf dem
Fernsehbildschirm angezeigt werden.
(6) Markierungs-Funktion
Die Positionen von bis zu 5 Szenen können im
Speicher gespeichert werden, damit Sie Ihre
Lieblingsszenen zu jedem beliebigen Zeitpunkt
anschauen können.
(7) Wiedergabe-Deaktivierungsfunktion
Mit dieser Funktion kann die Wiedergabe von
DVDs gesperrt werden, damit sich Kinder
diese nicht anschauen können.
2 Disc-Terminologie
• Gruppen und Titel (DVD-Audio-Discs)
DVD-Audio-Discs sind in einige große Sektionen, den
sogenannten “Gruppen”, und in einige kleinere
Sektionen, den sogenannten “Titel”, unterteilt.
Diesen Sektionen wurden Nummern zugewiesen.
Diese Nummern werden “Gruppennummern”
und “Titelnummern” genannt.
Beispiel:
Gruppen
1
Gruppen
2
Titel 1
Titel 2
Titel 3 Titel 1 Titel 2
• Titel und Kapitel (DVD-Videos)
DVD-Videos sind in verschiedene große und kleine
Abschnitte unterteilt. Die großen Abschnitte bezeichnet
man als “Titel” und die kleinen als “Kapitel”.
Diesen Abschnitten sind Zahlen zugeordnet. Diese
Zahlen bezeichnet man als “Titelnummern” und
“Kapitelnummern”.
Beispiel:
Titel 1
Titel 2
Kapitel 1
Kapitel 2
Kapitel 3 Kapitel 1 Kapitel 2
• Titel (Video- und Musik-CDs)
Video- und Musik-CDs sind in Abschnitte
unterteilt, die man als “Titel” bezeichnet.
Diesen Abschnitten sind Zahlen zugeordnet. Diese
Zahlen bezeichnet man als “Titelnummern”.
Beispiel:
Titel 1
Titel 2
Titel 3
Titel 4 Titel 5
• Wiedergabesteuerung (Video-CDs)
Video-Discs, bei denen entweder auf der Disc
oder an der Buchse das Wort
“Wiedergabesteuerung” zu lesen ist, verfügen
über eine Funktion zum Anzeigen von Menüs auf
dem Fernsehschirm. Mit Hilfe dieser Menüs
können Sie gewünschte Positionen anwählen,
Informationen in Dialogform anzeigen lassen
usw..
Informationen über die Wiedergabe von VideoCDs mit Hilfe derartiger Menüs finden Sie in
dieser Betriebsanleitung im Kapitel “MenüWiedergabe”.
Video-CDs mit Wiedergabesteuerung können auf
diesem DVD-3800 abgespielt werden.
HINWEIS:
• Dieser DVD-Spieler wurde konstruiert und
hergestellt, um den auf der DVD-Disc
aufgenommenen Region Management
Informationen zu entsprechen.
Wenn die auf der DVD-Disc beschriebene
Regionnummer nicht der Regionnummer dieses
DVD-Spieler entspricht, kann dieser DVD-Spieler
die Disc nicht abspielen.
2
4
Für euorpäische Modelle:
Die Regionnummer für diesen
DVD-Spieler lautet 2.
Für Übersee- und asiatische
Modelle:
Die Regionnummer für diesen
DVD-Spieler lautet 4.
HINWEISE:
1.
®
,HDCD®, High Definition Compatible
Digital®und Pacific Microsonics
TM
sind entweder
eingetragene Warenzeichen oder Warenzeichen
von Pacific Microsonics, Inc. in den USA und/oder
anderen Ländern. Das HDCD-System wurde unter
der Lizenz von Pacific Microsonics, Inc. hergestellt.
Dieses Produkt ist durch mindestens eines der
folgenden Patente abgedeckt: In den USA:
5.479.168, 5.638.074, 5.640.161, 5.808.574,
5.838.274, 5.854.600, 5.864.311, 5.872.531 und in
Australien: 669114. Andere Patente angemeldet.
2. Hergestellt unter der Lizenz von Dolby
Laboratories.
“Dolby” und das Doppel-D Symbol sind
Warenzeichen der Dolby Laboratories. Vertrauliche
unveröffentlichte ausgabe. ©1992 – 1998 Dolby
Laboratories. Alle Rechte vorbehalten.
3. “DTS” und “DTS Digital Surround” sind
eingetragene Warenzeichen von Digital Theater
Systems, Inc.
4. “Pure Progressive” ist ein Warenzeichen der
Silicon Image, Inc.
5. “NSV” ist ein Warenzeichen der Analog Devices,
Inc.
6. “KODAK” ist ein Warenzeichen der Eastman
Kodak Company.
2
DISCS
• Die in nachfolgender Tabelle aufgeführten Discs
können mit dem DVD-3800 verwendet werden.
Die entsprechenden Zeichen sind auf den DiscEtiketten oder an den Buchsen aufgeführt.
Anwendbare
Discs
Markierung (logo)
Aufgenommene
Signale
Disc-
Größe
DVD-Video
DVD-Audio
(HINWEIS 1)
DVD-R
DVD-RW
(HINWEIS 2)
Digital-Audio
+
Digital-Video
(MPEG2)
12 cm
8 cm
12 cm
8 cm
12 cm
8 cm
Digital-Audio
+
Digital-Video
(MPEG1)
Digital-Audio
MP3
Digitalbild
(JPEG)
Video-CD
(HINWEIS 1)
CD
CD-R
CD-RW
(HINWEIS 3)
Recordable
ReWritable
12 cmJPEG
Picture-CD
R
R
R
W
R
W
2
Die nachfolgend aufgeführten Disc-Typen können
nicht auf dem DVD-3800 abgespielt werden:
• Für euorpäische Modelle:
DVDs mit anderen Regionnummern als “2” oder
“ALL”
Für Übersee- und asiatische Modelle:
DVDs mit anderen Regionnummern als “4” oder
“ALL”
• DVD-ROM/RAMs
• DVD+RW/DVD+R
• SACD
• CD-ROMs
•
CDVs (Nur der Audioteil kann wiedergegeben werden.)
•
CD-Gs (Nur der Audioteil kann wiedergegeben werden.)
• Foto-CDs
HINWEISE:
1. Einige der DVD-Audio-, DVD-Video- und Video-CD-
Discs funktionieren aufgrund der von einigen DiscHerstellern ergriffenen Maßnahmen nicht wie in
diesem Handbuch beschrieben.
2. Wiedergabe von DVD-R- und DVD-RW-Discs
DVD-R- und DVD-RW-Discs, die auf einem DVDRecorder im Videoformat aufgenommen wurden,
können auf dem DVD-3800 abgespielt werden.
Nicht fertiggestellte Discs können nicht abgespielt
werden.
Je nach Disc-Aufnahmestatus wird die Disc
möglicherweise nicht akzeptiert oder werden nicht
einwandfrei wiedergegeben (das Bild oder der Ton
ist nicht eben, usw.).
3. Entsprechend der Aufnahme-Qualität können
einige CD-R/RWs nicht wiedergegeben werden.
Page 37

DEUTSCH FRANÇAIS
37
3
VORSICHTSMASSNAHMEN ZUR HANDHABUNG VON DISCS
Discs
Auf dem DVD-3800 können nur die Discs abgespielt
werden, die mit dem auf Seite 36 aufgeführten
Zeichen versehen sind.
Beachten Sie darüber hinaus, daß Discs mit
besonderer Form (z.B. herzförmige Discs,
sechseckige Discs usw.) nicht auf dem DVD-3800
abgespielt werden können. Der Versuch derartige
Discs wiederzugeben kann Beschädigungen des
Gerätes verursachen.
Handhabung von Discs
Vermeiden Sie beim Einlegen und Herausnehmen von
Discs das Berühren der Disc-Oberflächen.
Achten Sie darauf, daß
keine Fingerabdrücke auf
die Signalfläche gelangen
(die in Regenbogenfarben
schimmernde Seite).
Reinigung von Discs
2 Fingerabdrücke oder Staub auf der Disc können zu
einer Verschlechterung der Ton- und Bildqualität
führen und Wiedergabeausfälle verursachen.
Beseitigen Sie möglicherweise vorhandene
Fingerabdrücke und Schmutz mit einem Tuch.
2
Verwenden Sie für die Reinigung ein im Handel erhältliches
Reinigungsset oder wischen Sie Fingerabdrücke und
Schmutz einfach mit einem weichen Tuch ab.
Wischen Sie sanft von der
Mitte der Disc nach außen hin.
Wischen Sie nicht in
kreisförmigen Bewegungen.
HINWEIS:
• Verwenden Sie weder Schallplatten- noch
Antistatiksprays. Auch flüchtige Chemikalien wie
z.B. Benzin oder Farbverdünner dürfen nicht für
die Reinigung benutzt werden.
Schallplatten-
spray
Farbver-
dünner
Benzin
Vorsichtsmaßnahmen zur Handhabung
von Discs
• Achten Sie darauf, daß weder Fingerabdrücke, Fett
noch Schmutz auf die Discs gelangen.
•
Achten Sie insbesondere darauf, daß die Discs beim
Herausnehmen aus ihrer Box nicht zerkratzt werden.
• Verbiegen Sie Discs nicht.
• Erhitzen Sie Discs nicht.
• Vergrößern Sie die Öffnung in der Mitte der Disc
nicht.
• Beschriften Sie die etikettierte (bedruckte) Seite der
Disc nicht mit einem Kugelschreiber oder Bleistift.
•
Auf der Oberfläche der Disc können sich
Wassertropfen bilden, wenn die Disc plötzlich von
einem kalten an einen warmen Ort gebracht wird.
Benutzen Sie in der Nähe von Discs keinen Fön usw..
Vorsichtsmaßnahmen zur
Aufbewahrung von Discs
• Werfen Sie Discs nach der Wiedergabe immer aus
dem Gerät aus.
• Bewahren Sie Discs in ihren dazugehörigen Boxen
auf, um sie so vor Staub, Kratzern und
Verformungen zu schützen.
• Bewahren Sie Discs an keinem der nachfolgend
aufgeführten Orte auf:
1. Orte, an denen die Discs über einen längeren
Zeitraum hinweg direktem Sonnenlicht
ausgesetzt wären.
2. An feuchten oder staubigen Orten.
3. Orte, an denen die Discs Wärme von z.B.
Heizkörpern ausgesetzt wären usw..
Vorsichtsmaßnahmen zur Einlegen
von Discs
• Legen Sie immer nur eine Disc zur Zeit ein. Das
Einlegen von mehreren Discs übereinander kann
sowohl Beschädigungen als auch ein Zerkratzen der
Discs zur Folge haben.
• Legen Sie 8 cm Discs ohne Zuhilfenahme eines
Adapters fest in die Disc-Führung ein. Wenn die
Disc nicht richtig eingelegt ist, kann sie aus der
Führung rutschen und das Disc-Fach blockieren.
• Achten Sie darauf, daß Sie sich beim Schließen des
Disc-Faches nicht die Finger klemmen.
• Legen Sie ausschließlich Discs und keinerlei
anderen Gegenstände in das Disc-Fach ein.
• Legen Sie weder zerbrochene, verbogene noch mit
Klebe reparierte Discs in das Gerät ein.
• Verwenden Sie keine Discs, bei denen der Kleber
vom Etikett freiliegt oder bei denen sich das Etikett
teilweise gelöst hat. Derartige Discs könnten sich
im Spieler verklemmen und Beschädigungen
verursachen.
— TABLE DES MATIERES —
z
Caractéristiques .................................................38
x
Disques........................................................38, 39
c
Précautions de manipulations des disques........39
v
Connexions..................................................43~50
b
Noms des composants et fonctions...........51~ 53
n
Télécommande ............................................54, 56
m
Chargement des disques...................................58
,
Modification des réglages par défaut ..........59~82
.
Lecture ........................................................83~88
⁄0
Utilisation du mode Pure Direct...................89, 90
⁄1
Réglage de la qualité de l’image..................91~94
⁄2
Utilisations des affichage ON-SCREEN........95, 96
⁄3
Lecture répétée ...........................................97, 98
⁄4
Lecture des pistes dans l’ordre souhaite...........99
⁄5
Lecture des pistes dans un ordre aléatoire......100
⁄6
Lecture de MP3.......................................101~104
⁄7
Lecture de fichiers d’image fixe
(format JPEG ) .........................................105~108
⁄8
Utilisation des founctions multi-audio,
sous-titre et angle de vue........................109~111
⁄9
Utilisation des menus ..............................112, 113
¤0 Marquage de scènes à revoir ..................114, 115
¤1 Lecture en mode Zoom ...................................116
¤2 Localisation des pannes...................................118
¤3 Caractéristiques principales .............................118
• ACCESSORIES
Veuillez contrôler que les articles suivants sont bien joints à l’appareil principal dans le carton:
q Cordon audio vidéo………………………………1
w Télécommande (RC-553) ………………………1
e Piles “AA” (R6P) …………………………………2
r Cordon Secteur …………………………………1
t Mode d’emploi …………………………………1
y Liste des points de SAV …………………………1
ATTENTION:
1. Manier soigneusement le cordon
d’alimentation
Ne pas endommager ou déformer le cordon
d’alimentation. S’il est endommagé ou déformé,
une décharge électrique ou un mauvais
fonctionnement risque de se produire en cas
d’utilisation d’un tel cordon. Lors du retrait de la
prise murale, retirer le cordon en le tenant par la
fiche, mais ne pas tirer sur le cordon lui-même.
2. Ne pas ouvrir le couvercle supérieur
Afin d’éviter une décharge électrique, ne pas
ouvrir le couvercle supérieur.
En cas de probème, prendre contact avec votre
REVENDEUR DENON.
3. Ne rien placer à l’intérieur de l’appareil
Ne pas placer d’objets métalliques ou renverser du
liquide à l’intérieur de lecteur DVD video.
Une décharge électrique ou un mauvais
fonctionnement risque de se produire
Noter et conserver le nom du modèle et le numéro
de série inscrits sur la plaque signalétique.
No. de modèle: DVD-3800 No. de série:
REMARQUE:
Ce lecteur DVD video utilise un laser semiconducteur. Il est recommandé de l’utiliser dans une
pièce où la température est de 10°C (50°F) à 35°C
(95°F) pour obtenir un fonctionnement stable et
apprécier au maximum la musique.
Droits d’auteur
2 La reproduction, la diffusion, la location, le prêt ou
la lecture publique de ces disques sont interdits
sans le consentement du détenteur des droits
d’auteur.
Pour un modèle Pour un modèle
Européen Oceania
IMPORTANTES REMARQUES CONCERNANT
LA SECURITE
MISE EN GARDE:
AFIN DE REDUIRE LES RISQUES D’INCENDIE
OU DE DECHARGE ELECTRIQUE, NE PAS
EXPOSER CET APPAREIL A LA PLUIE OU A
L’HUMIDITE.
qwer
ANGLE
SUBTITLE
REPEAT
A-B
SETUP
DIMMER
PIC.ADJ
ZOOM
P.D.MEMORY
PAGE
REMOTE CO
POWER
O
N
NTROL UNIT RC-553
O
N
F
T
S
F
C
1
/
P
A
L
O
P
E
N
/
C
2
L
O
S
4
E
PROG / DIR
3
5
7
6
CLEAR
8
0
TOP MENU
9
+
V.S.S.
1
0
CALL
RETURN
DISPLAY
ENTER
MENU
STOP
PLAY
STILL /
PAUSE
SKIP
SLOW / SEARCH
AUDIO
SEARCH MODE
MARKERRANDOM
Page 38

DEUTSCH FRANÇAIS ITALIANO
43
AC IN
RS-232C ROOM TO ROOM
IN OUT
REMOTE CONTROL
DIGITAL OUT
COAXIAL
FR1FR2SWSR
FL1FL2C
1
2
1
2
PB/C
B
Y
P
R/CR
SL
OPTICAL
(PCM / BIT STREAM)
AUDIO OUT
VIDEO OUT S-VIDEO OUT
COMPONENT
VIDEO OUT
AV1
AV2
VIDEO IN S-VIDEO IN
AUDIO IN
L
R
4
ANSCHLÜSSE
• Lesen Sie sich zur Durchführung der Anschlüsse
die Betriebsanleitungen von allen Komponenten
durch.
• Schließen Sie das Netzkabel erst an, wenn Sie alle
anderen Anschlüsse vorgenommen haben.
• Wenn der Strom während des Anschließens
eingeschaltet ist, könnten Störungen auftreten
und die Lautsprecher beschädigt werden.
HINWEISE:
•
Achten Sie auf den richtigen Anschluß der linken und
rechten Kanäle; L (links) an L und R (rechts) an R.
• Schließen Sie das Netzkabel fest an die
Netzsteckdose an. Lose Anschlüsse können
Nebengeräusche verursachen.
• Das Zusammenbinden von Netz- und
Anschlußkabeln kann Brummen oder
Nebengeräusche verursachen.
(1)
Anschluss an ein Fernsehgerät
• Schließen Sie den Video-Eingangsanschluss des Fernsehgerätes mit Hilfe des mitgelieferten AudioVideokabels an die Audio-Eingangsanschlüsse des DVD-3800s VIDEO OUT oder S-VIDEO OUT und AUDIO
OUT an.
DVD-3800
S-Video-Ausgangsanschluß
Die Videosignale werden in Farb- (C) und Helligkeitssignale
(Y) unterteilt, um ein klares Bild zu erhalten.
Wenn das Fernsehgerät mit einem S-VideoEingangsanschluß ausgestattet ist, empfehlen wir
den Anschluß an den S-Video-Ausgangsanschluß des
DVD-3800 mit einem handelsüblichen S-VideoAnschlußkabel vorzunehmen.
q An eine Netzsteckdose
w TV
• Schließen Sie den Video-Ausgang des DVD-3800
entweder direkt oder über einen AV-Verstärker an
das Fernsehgerät an. Schließen Sie den VideoAusgang nicht über einen VCR (VideoCassettenrekorder) an. Einige Discs beinhalten
Kopierverbotssignale. aWenn derartige Discs über
einen VCR abgespielt werden, kann das
Kopierverbotssystem Bildstörungen verursachen.
• Stellen Sie “FARBFERNSEHNORM” in “VIDEO-
OPTIONEN EINSTELLEN
” in “
EINSTELLUNGEN
”
entsprechend des Videoformates Ihres
Fernsehgerätes ein. Wenn das Fernsehgerät PALformatiert ist, wählen Sie PAL. (Siehe Seite 69.)
HINWEISE:
• Stellen Sie für die Verwendung des 2-KanalAudioausgangs in den Anfangseinstellungen “2KANAL” unter “LAUTSPRECHER” im “AUDIOEINSTELLUNGEN” des “EINSTELLUNGEN” ein.
(Siehe Seite 72)
•
Stellen Sie in “VIDEO-OPTIONEN EINSTELLEN”
unter “
EINSTELLUNGEN
” die Option “TV
BILDSCHIRMFORMAT” ein, damit eine
Übereinstimmung mit dem Bildseitenverhältnis
Ihres Fernsehgerätes besteht. (Siehe Seite 68)
•
Stellen Sie in “VIDEO-AUSGANG” in “VIDEOOPTIONEN EINSTELLEN” unter
“EINSTELLUNGEN” die Option “INTERLACED”
bei den Anfangseinstellungen ein. (Siehe Seite 69)
4
CONNEXIONS
Connecteur de sortie S-Vidéo
Les signaux vidéo sont divisés en signaux de
couleur (C) et de luminosité (Y) pour obtenir une
image plus nette.
Si la télévision a une entrée S-Vidéo, nous
recommandons de la connecter au connecteur SVidéo du DVD-3800 avec un cordon S-Vidéo
disponible dans le commerce.
• Consulter les manuels de tous les éléments
avant d’effectuer les raccordements.
• Ne brancher le cordon d’alimentation au secteur
qu’une fois les raccordements terminés.
•
Si l’appareil est alimenté pendant les raccordements,
du bruit risque de se faire entendre et même
d’endommager les haut-parleurs.
•
Prendre soin de connecter correctement les canaux
droit et gauche, R (Right) à droite, L (Left) à gauche.
• Brancher le câble d’alimentation sur le secteur
correctement. Une prise mal mise peut causer
des bruits parasites.
• Attacher le câble d’alimentation aux autres
câbles de raccordements cordons peut causer
des bourdonnements ou bruits parasites.
REMARQUES:
(1) Raccordement à une télévision
• Utiliser le câble de raccordement vidéo inclus pour
raccorder le connecteur d’entrée vidéo de la
télévision aux connecteurs de sortie “VIDEO OUT”,
“S-VIDEO OUT” et “AUDIO OUT” du DVD-3800.
q Vers la prise secteur
w
TV
• Raccorder les sorties vidéo du DVD-3800
directement au téléviseur ou par l’intermédiaire
d’un amplificateur AV. Ne pas la connecter par
l’intermédiaire d’un magnétoscope. Certains
disques comportent des signaux d’interdiction à
la copie. Si ces signaux passent par un
magnétoscope ils risquent de provoquer des
déformations de l’image.
•
Régler le “TYPE DE TV” dans “MENU REGLAGE
VIDEO” du menu de configuration
“INSTALLATION” en fonction du format vidéo de
votre télévision. Lorsque la télévision est formée
en PAL, régler à PAL. (Voir à la page 69.
)
•
Pour utiliser la sortie audio à 2 canaux, régler “2
CANAUX” dans “CANALES AUDIO” dans
“CONFIGURATION AUDIO” dans “INSTALLATION”
sur les réglages initiaux. (Voir page 72)
•
Régler le paramètre “TYPE D’ECRAN” dans “MENU
REGLAGE VIDEO” sur “INSTALLATION” pour être en
conformité avec le format de votre TV. (Voir page 68)
• Afin de pouvoir utiliser les sorties vidéo ou s-
vidéo, régler le paramètre “ENTRELACE” dans
“SORTIE VIDEO” de “MENU REGLAGE
VIDEO” de “INSTALLATION” à sa valeur par
défaut. (Voir page 69)
REMARQUES:
4
COLLEGAMENTI
Connettore uscite S-video
Per ottenere un’immagine più nitida, i segnali
video vengono divisi in segnali colore (C) e
luminosità (Y).
Se il televisore è dotato di connettore di ingresso
S-Video, si raccomanda di collegarlo al connettore
di uscita S-Video del DVD-3800 utilizzando un cavo
di collegamento S-Video disponibile in commercio.
• Prima di effettuare i collegamenti, leggete i
manuali di tutti i componenti.
• Non collegate il cavo di alimentazione finché non
sono stati effettuati tutti i collegamenti.
• Qualora i collegamenti vengano effettuati con il
cavo di alimentazione collegato, si possono
generare disturbi in grado di danneggiare gli
altoparlanti.
•
Accertatevi di collegare correttamente i canali destro
e sinistro. L (sinistra) con L e R (destra) con R
• Collegate correttamente il cavo di alimentazione
alla presa a muro. Un errato collegamento può
provocare disturbi.
• Non fissate il cavo di alimentazione insieme ai
cavi di collegamento, altrimenti si possono
verificare ronzii o disturbi.
NOTE:
(1) Collegamento ad un televisore
•
Utilizzate il cavo audio video incluso per collegare il
connettore di entrata audio e video del televisore al
DVD-3800 VIDEO OUT o S-VIDEO OUT e AUDIO
OUT.
q
Alla presa di alimentazione
w
Televisore
• Collegate le uscite video del DVD-3800 al
televisore direttamente oppure mediante un
amplificatore AV. Non collegatele mediante un
VCR (videoregistratore). Alcuni dischi
contengono segnali di inibizione della copia.
Durante la riproduzione di questi dischi tramite
un VCR, il sistema di divieto può provocare
alcuni disturbi di immagine.
• Impostate il “TV TYPE” di “VIDEO SETUP” in
“SETUP” per farlo aderire con il formato video
della vostra televisione. Se il vostro televisore è
in formato PAL, impostate su PAL (Vedere
pagina 69.)
• Per usare l'uscita audio a 2 canali, impostate “2
CHANNEL” in “AUDIO CHANNEL” in “AUDIO
SETUP” in “SETUP” alle impostazioni iniziali.
(Vedere pagina 72)
• Impostate “TV ASPECT” in “VIDEO SETUP” in
“SETUP” per combaciare l’aspetto del vostro
televisore. (Vedere pagina 68)
•
Per utilizzarlo con l’uscita video o l’uscita s-video,
impostate “INTERLACED” in “VIDEO OUT” in
“VIDEO SETUP” in “SETUP” alle impostazioni
iniziali. (
Vedere pagina 69.
)
NOTE:
Page 39

DEUTSCH FRANÇAIS ITALIANO
44
(2)
Anschluss an ein mit Farbkomponenten-Eingangsklemmen ausgestattetes
Fernsehgerät oder Monitor
AC IN
RS-232C ROOM TO ROOM
IN OUT
REMOTE CONTROL
DIGITAL OUT
COAXIAL
FR1FR2SWSR
FL1FL2C
1
2
1
2
PB/C
B
Y
P
R/CR
SL
OPTICAL
(PCM / BIT STREAM)
AUDIO OUT
VIDEO OUT S-VIDEO OUT
COMPONENT
VIDEO OUT
AV1
AV2
COMPONENT VIDEO IN
PB/CBPR/CRY
AUDIO IN
LR
Farbkomponenten-Ausgangsklemmen (P
R/CR, PB/CB und Y)
Die Rot- (P
R/CR), Blau- (PB/CB) und Helligkeitssignale (Y) werden unabhängig voneinander
ausgegeben, was in einer noch getreueren Farbreproduktion resultiert.
•
Bei einigen Fernsehgeräten oder Monitoren sind die Farbkomponenten-Eingangsklemmen
möglicherweise unterschiedlich markiert (P
R
, PB und Y/R-Y, B-Y und Y/CR, CB und Y, usw.).
Einzelheiten hierzu entnehmen Sie bitte der Bedienungsanleitung Ihres Fernsehgerätes.
Schließen Sie auf diese Weise an, wenn Ihr Fernsehgerät mit Progressive Scan kompatibel ist.
DVD-3800
q An eine Netzsteckdose
HINWEISE:
• Schließen Sie die Farbkomponenten-Ausgangsklemmen des DVD-3800s mit handelsüblichen Videokabeln
an das Fernsehgerät oder den Monitor an.
• Stellen Sie “FARBFERNSEHNORM” in “VIDEO-OPTIONEN EINSTELLEN” in “EINSTELLUNGEN”
entsprechend des Videoformates Ihres Fernsehgerätes ein. Wenn das Fernsehgerät PAL-formatiert ist,
wählen Sie PAL. (Siehe Seite 69.)
• Stellen Sie “VIDEO-AUSGANG” in “VIDEO-OPTIONEN EINSTELLEN” in “EINSTELLUNGEN”
entsprechend von Progressive TV ein. (Nur NTSC)
• Stellen Sie für die Verwendung des 2-Kanal-Audioausgangs in den Anfangseinstellungen “2-KANAL” unter
“LAUTSPRECHER” im “AUDIO-EINSTELLUNGEN” des “EINSTELLUNGEN” ein. (Siehe Seite 72)
• Stellen Sie in “
VIDEO-OPTIONEN EINSTELLEN” unter “EINSTELLUNGEN” die Option “TV
BILDSCHIRMFORMAT” ein, damit eine Übereinstimmung mit dem Bildseitenverhältnis Ihres
Fernsehgerätes besteht. (Siehe Seite 68)
w
TV
NEHMEN SIE BITTE ZUR KENNTNIS, DASS NICHT ALLE HIGH DEFINITION-FERNSEHGERÄTE MIT
DIESEM PRODUKT VOLLSTÄNDIG KOMPATIBEL SIND UND AUFGRUND DESSEN BILDSTÖRUNGEN
AUFTRETEN KÖNNTEN. FALLS SOLCHE PROBLEME IM ZUSAMMENHANG MIT DEM 525-BILDZEILENPROGRESSIVE SCAN AUFTRETEN SOLLTEN, WIRD EMPFOHLEN, DASS DER BENUTZER DEN
ANSCHLUSS IN “STANDARD-DEFINITION”-AUSGANG UMSCHALTET.
Connecteurs de sortie de composantes couleur
(P
R/C
R, PB/CB et Y)
Les signaux rouge (P
R/C
R), bleu (PB/CB) et de
luminosité (Y) sont transmis séparément pour
obtenir une reproduction plus fidèle des couleurs.
•
Les connecteurs d’entrée de composantes couleur
peuvent être repérés différemment sur certaines TV
ou certains moniteurs (P
R, P
B et Y/R-Y, B-Y et Y/CR,
C
B et Y, etc.). Pour plus de détails, consulter les
manuels d’utilisation de ces appareils.
Effectuer le raccordement de cette façon si
votre tél évision est compatible avec le
“Balayage progressif”.
(2)
Connexion à une TV ou un
moniteur équipé de connecteurs
d’entrée de composantes couleur
q Vers la prise secteur
w
TV
REMARQUES:
• Utilisez les trois cordons vidéo (disponibles dans
le commerce) pour brancher les connecteurs de
sortie par composants de couleur du DVD-3800
sur une télévision ou un moniteur.
•
Régler le “TYPE DE TV” dans “MENU REGLAGE
VIDEO” du menu de configuration
“INSTALLATION” en fonction du format vidéo de
votre télévision. Lorsque la télévision est formée
en PAL, régler à PAL. (Voir à la page 69.)
•
Régler la sortie vidéo “SORTIE VIDEO” dans “MENU
REGLAGE VIDEO” du menu de configuration
“INSTALLATION” pour l’accorder avec le système
Progressive TV. (uniquement formée en NTSC)
•
Pour utiliser la sortie audio à 2 canaux, régler “2
CANAUX” dans “CANALES AUDIO” dans
“CONFIGURATION AUDIO” dans “INSTALLATION”
sur les réglages initiaux. (Voir page 72)
•
Régler le paramètre “TYPE D’ECRAN” dans “MENU
REGLAGE VIDEO” sur “INSTALLATION” pour être
en conformité avec le format de votre TV. (Voir page
68)
LES CONSOMMATEURS DEVRAIENT NOTER
QUE LES ENSEMBLES DE TELEVISION A HAUTE
DEFINITION NE SONT PAS TOUS
COMPLETEMENT COMPATIBLES AVEC CE
PRODUIT ET PEUVENT CAUSER L’AFFICHAGE
D’ARTEFACTS SUR L’IMAGE. EN CAS DE
PROBLEMES D’IMAGE BALAYEE PROGRESSIVE
525, IL EST RECOMMANDE QUE L’UTILISATEUR
COMMUTE LA CONNEXION A LA SORTIE
“STANDARD DEFINITION”.
Connettori di uscita dei componenti a colori
(P
R/C
R, PB/CB e Y)
I segnali del rosso (P
R/C
R), del blu (PB/CB) e della
luminosità (Y) vengono emessi in modo
indipendente, ottenendo così una riproduzione più
naturale dei colori.
•
I connettori di ingresso del componente del colore
possono essere marcati in modo diverso su alcuni
televisori o monitor (
PR
, PB
e Y/R-Y, B-Y e Y/CR,
C
B
e
Y, ecc.). Per ulteriori informazioni, fate riferimento al
manuale delle istruzioni del televisore.
Collegate in questa maniera se il vostro televisore
è compatibile alla Scansione Progressiva.
(2)
Collegamento ad un televisore o ad
un monitor dotato di connettori di
inserimento dei componenti a colori
q
Alla presa di alimentazione
w
Televisore
NOTE:
• Usate i cavi video venduti separatamente per
collegare i connettori di uscita del componente
dei colori al televisore o al monitor.
• Impostate il “TV TYPE” di “VIDEO SETUP” in
“SETUP” per farlo aderire con il formato video
della vostra televisione. Se il vostro televisore è
in formato PAL, impostate su PAL (Vedere
pagina 69.)
• Impostate il “VIDEO OUT” del “VIDEO SETUP”
in “SET UP” per farlo aderire con Progressive
TV. (Solo NTSC)
• Per usare l'uscita audio a 2 canali, impostate “2
CHANNEL” in “AUDIO CHANNEL” in “AUDIO
SETUP” in “SETUP” alle impostazioni iniziali.
(Vedere pagina 72)
• Impostate “TV ASPECT” in “VIDEO SETUP” in
“SETUP” per combaciare l’aspetto del vostro
televisore. (Vedere pagina 68)
I CONSUMATORI DOVREBBERO NOTARE CHE
NON TUTTI I TELEVISORI AD ALTA DDEFINIZIONE
SONO TOTALMENTE COMPATIBILI CON QUESTO
PRODOTTO E POSSONO CAUSARE
L’APPARIZIONE DI ARTIFATTI NELL’IMMAGINE.
NEL CASO DI PROBLEMI DI SCANSIONE DELLE
IMMAGINI PROGRESSIVE 525, E’ CONSIGLIABILE
CHE L’UTILIZZATORE CAMBI IL COLLEGAMENTO
ALL’USCITA “STANDARD DEFINITION“.
Page 40

DEUTSCH FRANÇAIS ITALIANO
45
(3) Anschluss an ein Fernsehgerät, das mit einer 21-poligen SCART-Buchse
ausgestattet ist (Nur für europäische Modelle)
• Schließen Sie die 21-polige SCART-Buchse des Fernsehgerätes mit einem handelsüblichen 21-poligen
SCART-Kabel an die 21-polige SCART-Buchse (AV1 / AV2) des DVD-3800s an.
AC IN
RS-232C ROOM TO ROOM
IN OUT
REMOTE CONTROL
DIGITAL OUT
COAXIAL
FR1FR2SWSR
FL1FL2C
1
2
1
2
PB/C
B
Y
P
R/CR
SL
OPTICAL
(PCM / BIT STREAM)
AUDIO OUT
VIDEO OUT S-VIDEO OUT
COMPONENT
VIDEO OUT
AV1
AV2
DVD-3800
e An eine Netzsteckdose
w
TV
q 21-polige SCART-Buchse
• Stellen Sie “FARBFERNSEHNORM” in “VIDEOOPTIONEN EINSTELLEN” in “EINSTELLUNGEN”
entsprechend des Videoformates Ihres
Fernsehgerätes ein. Wenn das Fernsehgerät PALformatiert ist, wählen Sie PAL. (Siehe Seite 69.)
HINWEISE:
• Einige Discs beinhalten Kopierverbotssignale.
Wenn derartige Discs über einen VCR abgespielt
werden, kann das Kopierverbotssystem
Bildstörungen verursachen.
(3) Connexion sur une télévision avec
une borne SCART (Pour le modèle
Européen seulement)
•
Utiliser un câble SCART (péritel) à 21 broches
disponible dans le commerce pour brancher la borne
SCART (péritel) à 21 broches de la télévision sur la
borne SCART à 21 broches du DVD-3800 (AV1 / AV2).
q Borne SCART (péritel) à 21 broches
w TV
e Vers la prise secteur
REMARQUES:
• Certains disques comportent des signaux
d’interdiction à la copie. Si ces signaux passent
par un magnétoscope ils risquent de provoquer
des déformations de l’image.
•
Régler le “TYPE DE TV” dans “CONFIGURATION
VIDEO”
du menu de configuration
“INSTALLATION” en fonction du format vidéo
de votre télévision. Lorsque la télévision est
formée en PAL, régler à PAL. (Voir à la page 69.)
(3)
Collegamento ad un televisore dotato
di un terminale SCART da 21 perni
(Solo per modelli europei)
• Usate il cavo SCART da 21 perni, venduto
separatamente, per collegare il terminale SCART da
21 perni del televisore al terminale SCART da 21
perni del DVD-3800 (AV1 / AV2).
q
Terminale SCART da 21 perni
w
Televisore
e
Alla presa di alimentazione
NOTE:
• Alcuni dischi contengono segnali di inibizione
della copia. Durante la riproduzione di questi
dischi tramite un VCR, il sistema di divieto può
provocare alcuni disturbi di immagine.
• Impostate il “TV TYPE” di “VIDEO SETUP” in
“SETUP” per farlo aderire con il formato video
della vostra televisione. Se il vostro televisore è
in formato PAL, impostate su PAL (Vedere
pagina 69.)
• Um die Bildqualität zu verbessern, können Sie die Videosignal-Ausgabe von der Buchse AV1 von “Video“ auf
entweder “S-Video“ oder “RGB“ umschalten, um sie dem Typ des angeschlossenen Fernseh gerätes
optimale anzupassen (Siehe Seite 71).
• An die Buchse AV2 kann auch ein anderes Gerät angeschlossen werden.
AV1
AV2
AV1
AV2
VCR
r
21-polige SCART-Buchse
des Fernsehgerätes
t
Player
y
Video-recorder
u
Satellitenempfänger
oder Decoder
• Afin d'améliorer la qualité de l'image, vous pouvez
modifier la sortie du signal vidéo de la borne AV1,
de “Video“ à “S-Video“ ou “RVB“, selon le type de
téléviseur que vous utilisez (Voir à la page 71).
• Vous pouvez également raccorder un autre appareil
à AV2.
r Prise Péritel du téléviseur
t Ce lecteur
y Magnétoscope
u Récepteur ou décodeur satellite
r Terminale SCART televisore
t Questa unità
y Videoregistratore
u Ricevitore satellitare o decoder
• Per migliorare la qualità delle immmagini, si può
cambiare l'uscita del segnale video dal terminale
AV1 da “Video“ a “S-Video“ o “RGB“, secondo il
tipo di televisore usato (Vedere pagina 71).
• A AV2 si può anche collegare un altro componente.
Page 41

DEUTSCH FRANÇAIS ITALIANO
46
(4) Anschluss an einen AV-Verstärker mit eingebautem Dekoder
Bei der Wiedergabe von in Dolby Digital oder DTS aufgenommenen DVDs werden Dolby Digital- oder DTSBitstromsignale von den digitalen Audio-Ausgangsanschlüssen des DVD-Spielers ausgegeben. Wenn ein Dolby
Digital- oder DTS-Dekoder angeschlossen ist, haben Sie das Gefühl, sich in einem Filmtheater oder einer
Konzerthalle zu befinden.
AC IN
RS-232C ROOM TO ROOM
IN OUT
REMOTE CONTROL
DIGITAL OUT
COAXIAL
FR1FR2SWSR
FL1FL2C
1
2
1
2
PB/C
B
Y
P
R/CR
SL
OPTICAL
(PCM / BIT STREAM)
AUDIO OUT
VIDEO OUT S-VIDEO OUT
COMPONENT
VIDEO OUT
AV1
AV2
PHONES
DIRECT STEREO
ANALOG EXT. IN
DOLBY
SURROUND
DTS
SURROUND
WIDE
SCREEN
CINEMA /
MUSIC
6.1 / 7.1
SURROUND
VIDEO
ON / OFF
STATUS
M-ZONE 1
FUNCTION CONTROL
INPUT
MODE
5CH / 7CH
STEREO
DSP
SIMULATION
TONE
DEFEAT
MODE
SELECT
REC /
M-ZONE 2
SURROUND MODE
INPUT REC SELECT / M-ZONE
MULTI FUNCTION
DVD-3800
u Digitaler
AudioEingangsanschluß
(OPTICAL)
w Vorderer
Lautsprecher (links)
e Mittellautsprecher
r Vorderer Lautsprecher (rechts)
i Digitaler Audio-
Eingangsanschluß
(COAXIAL)
o Subwoofer
!0 Surround-
Lautsprecher
(links)
!1 AV-Verstärker mit eingebautem
Dekoder (AV-Steuerungscenter)
!2 Surround-Lautsprecher (rechts)
2
Anschluß eines Lichtleitfaserkabels (handelsüblich) an den digitalen Audio-Eingangsanschluß (OPTICAL)
Staubschutzkappe
Richtig herum angleichen
Entfernen Sie die Staubschutzkappe, gleichen Sie das
Kabel richtig herum ab und stecken Sie den Stecker
soweit wie möglich ein.
HINWEIS:
•
Bewahren Sie die Staubschutzkappe an einem
sicheren Ort auf und achten Sie darauf, daß Sie sie
nicht verlieren. Setzen Sie die Staubschutzkappe
bei Nichtbenutzung der Buchse auf, um die
Anschlußklemme vor Staub zu schützen.
HINWEISE:
• Wenn Sie eine in DTS aufgenommene DVD mit einem nicht DTS-kompatiblen Rekorder abspielen, wird
ein Misston erzeugt, der sowohl Ihr Gehör als auch die Lautsprecher schädigen kann.
• Unter Beachtung der Urheberrechte werden bei der Wiedergabe durch das Urheberrecht geschützter
linearer PCM- oder komprimierter PCM-DVDs keinerlei digitale Signale bei Quellen mit über 48 kHz/16 Bit
ausgegeben. Stellen Sie bei der Wiedergabe solcher Quellen entweder die Option “LPCM (44.1 kHz/48
kHz)” unter “AUDIO-EINSTELLUNGEN” bei “EINSTELLUNGEN” auf “EIN” (Siehe Seiten 76, 77) oder
führen Sie analoge Anschlüsse durch. (Siehe Seite 49.)
• Stellen Sie beim Durchführen digitaler Anschlüsse an einen AV-Verstärker, der keine Kompatibilität mit 96
kHz/88,2 kHz-Signalen aufweist, die Option “LPCM (44.1 kHz/48 kHz)” unter “AUDIO-EINSTELLUNGEN”
bei “EINSTELLUNGEN” auf “EIN”. (Siehe Seiten 76, 77.)
q An eine Netzsteckdose
(4)
Connecter à un amplificateur AV
avec un décodeur intégré
Quand des DVD enregistrés en Dolby Digital ou DTS
sont lus, des trains de bits Dolby Digital ou DTS sont
produits aux sorties audio numériques du lecteur
DVD. Si un décodeur Dolby Digital ou DTS est
connecté, le son produit a une puissance et une
présence comparable à celui d’une salle de cinéma ou
de concert.
q Vers la prise secteur
w Haut-parleur avant (gauche)
e Haut-parleur central
r Haut-parleur avant (droit)
t Câble à fibre optique (disponible dans le
commerce)
y Câble à fiche à broche de 75 Ω/ohms (disponible
dans le commerce)
u Connecteur d’entrée audio numérique (OPTICAL)
i Connecteur d’entrée audio numérique (COAXIAL)
o Subwoofer (Haut-parleur grave)
!0 Haut-parleur surround (gauche)
!1 Amplificateur AV avec un décodeur intégré (Centre
de contrôle AV)
!2 Haut-parleur surround (droit)
REMARQUES:
•
Un bruit violent qui pourrait heurter vos oreilles ou
endommager les haut-parleurs est généré lorsqu’un
disque DVD enregistré au format DTS est lu avec un
décodeur ou autre qui n’est pas compatible DTS.
•
Lors de la lecture de DVD protégés par copyright de
type PCM linéaire ou PCM compressé, étant donné les
règles sur le copyright, aucun signal numérique ne sera
généré pour les sources dépassant 48 kHz/16 bits.
Lors de la lecture de telles sources, veuillez régler
“LPCM (44.1 kHz/48 kHz)” dans “CONFIGURATION
AUDIO” dans “INSTALLATION” sur “ACTIF” (voir
pages 76, 77) ou faites des connexions analogiques.
(Voir page 49.)
•
Lors de connexions numériques à un amplificateur
AV qui n’est pas compatible avec les signaux 96
kHz/88,2 kHz, réglez “LPCM (44.1 kHz/48 kHz)”
dans “ CONFIGURATION AUDIO” dans
“INSTALLATION” sur “ACTIF”. (Voir pages 76, 77.)
2 Connecter un câble en fibre optique (disponible
dans le commerce) au connecteur de Entrée
audio numérique (OPTICAL)
Cache-poussière
Aligner dans la bonne
direction
Enlever le cache-poussière, l’aligner dans la bonne
direction et l’introduire le plus loin possible.
REMARQUE:
•
Mettre le cache-poussière de côté pour ne pas
le perdre. Lorsque la borne n’est pas utilisée,
remettre le cache-poussière pour protéger la
borne.
(4)
Collegamento ad un amplificatore
AV con decodificatore incorporato
Durante la riproduzione dei DVD registrati in Dolby
Digital o DTS, i segnali Bitstream Dolby Digital o DTS
vengono emessi dai connettori di uscita audio digitali
del lettore DVD. Collegando un decoder Dolby Digital
o DTS è possibile ottenere un suono dalla potenza ed
atmosfera di un cinema oppure di un teatro.
q Alla presa di alimentazione
w Altoparlante anteriore (destro)
e Altoparlante centrale
r Altoparlante anteriore (sinistro)
t Cavo a fibre ottiche (venduto separatamente)
y Cavo con la spina pin 75 Ω/ohms (venduto
separatamente)
u Connettore di ingresso audio digitale (OPTICAL)
i Connettore di ingresso audio digitale (COAXIAL)
o Subwoofer
!0 Altoparlante surround (destro)
!1 Amplificatore AV con decodificatore incorporato
(centro di controllo AV).
!2 Altoparlante surround (sinistro)
NOTE:
• Se riproducete un DVD non compatibile, registrato
in DTS mentre usate un decodificatore, ecc., verrà
generato un forte rumore che può recare danni alle
vostre orecchie o agli altoparlanti.
• Quando riproducete PCM lineari protetti dal diritto
d'autore o DVD PCM compatti, in considerazione dei
diritti d'autore, nessun segnale digitale viene
emesso per le fondi che eccedono 48 kHz/16 bits.
Quando riproducete tali fonti, impostate su “LPCM
(44.1 kHz/48 kHz)” sotto “ AUDIO SETUP” in
“SETUP” su “ON” (Vedere paginas 76, 77) o
effettuate dei collegamenti analogici. (Vedere pagina
49.)
• Quando effettuate dei collegamenti digitali ad un
amplificatore AV non compatibile con i segnali 96
kHz/88,2 kHz , impostate su “LPCM (44.1 kHz/48
kHz)” sotto “AUDIO SETUP” in “SETUP” su "ON".
(Vedere paginas 76, 77.)
2 Collegamento di un cavo a fibre ottiche
(disponibile in commercio) al connettore di
ingresso audio digitale (OPTICAL)
Tappo
antipolvere
Collegare nella direzione
corretta
Togliete il tappo antipolvere, posizionate il cavo nella
direzione corretta e collegatelo a fondo.
NOTA:
• Conservate il tappo antipolvere in un luogo
sicuro e fate attenzione a non perderlo.
Quando non utilizzate il terminale, proteggetelo
dalla polvere con il tappo.
t Lichtleiter-
Kabel (im
Handel
erhältlich)
y 75 Ω/Ohm Stift-
Stecker-Kabel (im
Handel erhältlich)
Page 42

47
DEUTSCH FRANÇAIS
2 Tonausgang von den digitalen Audio-Ausgangsklemmen des DVD-3800s
Bitstream-Ausgang
NORMAL
Audio-Aufnahmeformat
Dolby Digital
DTS
MPEG audio
DIGITAL OUT
2-Kanäle PCM
(48 kHz / 16 bit)
2-Kanäle PCM
(48 kHz / 16 bit)
2-Kanäle PCM
(48 kHz / 16 Bit)
PCM
DVD-Video
Dolby Digital Bitstrom
DTS-Bitstrom
2-Kanäle PCM
(48 kHz / 16 bit)
Einstellung
PCM-Ausgang
AUS
DVDAudio
Audio-Aufnahmeformat
Linear
PCM
Video-CD
Musik-CD
MP3-CD
44.1 kHz / 16 Bit PCM
44.1 kHz / 16
Bit
PCM
192 kHz / 16 ~ 24 Bit
176.4 kHz / 16 ~ 24
Bit
MPEG 1
44.1 kHz / 16 Bit Linear PCM
MP 3 (MPEG-1 Audio Layer 3)
96 kHz / 16 ~ 24
Bit
88.2 kHz / 16 ~ 24 Bit
48 kHz / 16 ~ 24 Bit
44.1 kHz / 16 ~ 24
Bit
96 kHz / 16 ~ 24 Bit
48 kHz / 16 ~ 24 Bit
LPCM SELECT
48 kHz / 16 Bit PCM
44.1 kHz / 16 Bit PCM
48 kHz / 16
Bit
PCM
44.1 kHz / 16 Bit PCM
48 kHz / 16 Bit PCM
44.1 kHz / 16
Bit
PCM
48 kHz / 16 Bit PCM
48 kHz / 16 Bit PCM
EIN
DVDVideo
44.1 kHz / 16 Bit PCM
44.1 kHz / 16
Bit
PCM
Keine Ausgangsdaten
Keine Ausgangsdaten
Keine Ausgangsdaten
Keine Ausgangsdaten
Keine Ausgangsdaten (*1)
Keine Ausgangsdaten (*2)
Keine Ausgangsdaten
Keine Ausgangsdaten (*1)
32 ~ 48 kHz / 16 Bit PCM
Kopierschutz EIN
88.2 kHz / 16 ~ 24 Bit PCM
96 kHz / 16 ~ 24
Bit
PCM
88.2 kHz / 16 ~ 24 Bit PCM
48 kHz / 16 ~ 24 Bit PCM
96 kHz / 16 ~ 24 Bit PCM
Kopierschutz AUS
32 ~ 48 kHz / 16 Bit PCM
48 kHz / 16 ~ 24 Bit PCM
44.1 kHz / 16 ~ 24
Bit
PCM
96 kHz / 16 ~ 24 Bit PCM
Linear PCM oder
Gepacktes PCM
Einstellung
*1 Es werden nur 48 kHz/16-Bit-Quellen ausgegeben.
*2 Es werden nur 44,1 kHz/16-Bit Quellen ausgegeben.
• Für Multikanal-PCM-Quellen auf 2 Kanäle heruntergemischt. (Bei Quellen, bei denen ein Heruntermischen
untersagt ist, werden nur die vorderen linken und rechten Kanäle ausgegeben.)
• Wenn “AUS” angewählt ist, zu diesem Zeitpunkt werden vom digitalen Audio-Ausgang keine digitalen Signale
ausgegeben.
• Bei linearem PCM-Audio handelt es sich um ein Signalaufnahme-Format, das für Musik-CDs verwendet wird.
Während Signale bei Musik-CDs mit 44,1 kHz/16 Bit aufgenommen werden, werden sie bei DVDs mit
44,1kHz/16 Bit bis zu 192kHz/24 Bit aufgenommen, was eine höhere Klangqualität als bei Musik-CDs
gewährleistet.
• Bei komprimierten PCM-Signalen handelt es sich um gepackte PCM-Signale mit hoher Klangqualität, die
praktisch ohne Datenverlust dekomprimiert werden können.
2 Son produit aux connecteurs audio numérique du DVD-3800
Cas d’une sortie bit stream (Train de bit)
NORMALFormat de l’enregistrement audio
Dolby Digital
DTS
Audio MPEG
DIGITAL OUT
PCM à 2 canaux
(48 kHz / 16 bit)
PCM à 2 canaux
(48 kHz / 16 bit)
PCM à 2 canaux
(48 kHz / 16 bit)
PCM
Vidéo DVD
Train de bit Dolby Digital
Train de bit DTS
PCM à 2 canaux
(48 kHz / 16 bit)
Réglages
Cas d’une sortie PCM
NON
Audio
DVD
Format de l’enregistrement audio
PCM
linéaire
CD vidéo
CD musicaux
CD MP3
44.1 kHz / 16 bit PCM
44.1 kHz / 16 bit PCM
192 kHz / 16 ~ 24 bit
176.4 kHz / 16 ~ 24 bit
MPEG 1
44.1 kHz / 16 bit PCM linéaire
MP 3 (Couche audio 3 MPEG-1)
96 kHz / 16 ~ 24 bit
88.2 kHz / 16 ~ 24 bit
48 kHz / 16 ~ 24 bit
44.1 kHz / 16 ~ 24 bit
96 kHz / 16 ~ 24 bit
48 kHz / 16 ~ 24 bit
LPCM SELECT
48 kHz / 16 bit PCM
44.1 kHz / 16 bit PCM
48 kHz / 16 bit PCM
44.1 kHz / 16 bit PCM
48 kHz / 16 bit PCM
44.1 kHz / 16 bit PCM
48 kHz / 16 bit PCM
48 kHz / 16 bit PCM
OUI
Vidéo
DVD
44.1 kHz / 16 bit PCM
44.1 kHz / 16 bit PCM
Pas de sortie de données
Pas de sortie de données
Pas de sortie de données
Pas de sortie de données
Pas de sortie de données (*1)
Pas de sortie de données (*2)
Pas de sortie de données
Pas de sortie de données (*1)
32 ~ 48 kHz / 16 bit PCM
Protection contre la
duplication sur OUI
88.2 kHz / 16 ~ 24 bit PCM
96 kHz / 16 ~ 24 bit PCM
88.2 kHz / 16 ~ 24 bit PCM
48 kHz / 16 ~ 24 bit PCM
96 kHz / 16 ~ 24 bit PCM
Protection contre la
duplication sur NON
32 ~ 48 kHz / 16 bit PCM
48 kHz / 16 ~ 24 bit PCM
44.1 kHz / 16 ~ 24 bit PCM
96 kHz / 16 ~ 24 bit PCM
PCM linéaire or
PCM compressé
Réglages
*1 Seules les sources de 48 kHz/16-bit sont générées.
*2 Seules les sources de 44,1 kHz/16-bit sont générées.
• Mélange à la baisse jusqu'à 2 canaux pour les sources PCM multi-canaux. (Seuls les canaux avant gauche et
droit sont générés pour les sources pour lesquelles le mélange à la baisse est interdit.)
• Lorsque “NON” est sélectionné, a ce moment, les signaux numériques ne sont pas délivrés par la sortie
audio numérique.
• Le son PCM linéaire est un format d'enregistrement de signaux utilisé pour les CD de musique.
Alors que les signaux sont enregistrés à 44,1 kHz/16 bit pour les CD de musique, pour les DVD, ils sont
enregistrés de 44,1kHz/16bit à 192kHz/24 bit, offrant ainsi une qualité de son supérieure à celle des CD de
musique.
• Les signaux PCM compressé sont des signaux PCM compressé de qualité de son élevée qui sont
décompressés sans presque aucune perte de données.
Page 43

DEUTSCH FRANÇAIS ITALIANO
49
(5) Anschluss eines gängigen 5.1-Kanal-Surround-Systems
Analoge 5.1-Kanal-Audiosignale können von dem DVD-3800 ausgegeben werden.
Mehrkanal-Audiosignale, die mit gepacktem PCM aufgenommen wurden, können wiedergegeben werden,
wenn ein AV-Verstärker angeschlossen ist, der mit analogen 5.1-Kanal-Audiosignaleingänge ausgestattet ist.
AC IN
RS-232C ROOM TO ROOM
IN OUT
REMOTE CONTROL
DIGITAL OUT
COAXIAL
FR1FR2SWSR
FL1FL2C
1
2
1
2
PB/C
B
Y
P
R/CR
SL
OPTICAL
(PCM / BIT STREAM)
AUDIO OUT
VIDEO OUT S-VIDEO OUT
COMPONENT
VIDEO OUT
AV1
AV2
PHONES
DIRECT STEREO
ANALOG EXT. IN
DOLBY
SURROUND
DTS
SURROUND
WIDE
SCREEN
CINEMA /
MUSIC
6.1 / 7.1
SURROUND
VIDEO
ON / OFF
STATUS
M-ZONE 1
FUNCTION CONTROL
INPUT
MODE
5CH / 7CH
STEREO
DSP
SIMULATION
TONE
DEFEAT
MODE
SELECT
REC /
M-ZONE 2
SURROUND MODE
INPUT REC SELECT / M-ZONE
MULTI FUNCTION
DVD-3800
q An eine Netzsteckdose
e Vorderer Lautsprecher (links)
w Mittellautsprecher
r Vorderer Lautsprecher (rechts)
o Subwoofer
!2 Surround-Lautsprecher (rechts)
!1 AV-Verstärker mit 5.1-
Kanaleingangsanschlüsse
!0 Surround-Lautsprecher
(links)
t MITTEL
y SURROUND
u SUBWOOFER
i VORDERER
HINWEISE:
•
Stellen Sie bei Mehrkanal-Anschlüsse “LAUTSPRECHER” unter “AUDIO-EINSTELLUNGEN” im
“EINSTELLUNGEN” auf “MULTI-KANAL” und nehmen Sie die “LAUTSPRECHER-KONFIG.”-, “PEGEL-
EINSTELLUNG”- und “VERZÖGERUNGSZEIT”-Einstellungen vor.
• Stellen Sie die Option “LPCM (44.1 kHz/48 kHz)” unter “AUDIO-EINSTELLUNGEN” bei
“EINSTELLUNGEN” auf “AUS”. (Siehe Seiten 76, 77.)
(Wenn diese Option auf “EIN” gestellt wird, werden bei linearen PCM- oder komprimierten PCM-Quellen
auf 48 kHz konvertierte analoge Audiosignale ausgegeben.)
• Wenn DVDs wiedergegeben werden, die nicht durch das Urheberrecht geschützt sind, und wenn das
Gerät auf die gleichzeitige Ausgabe digitaler und analoger Audiosignale eingestellt ist, werden bei einigen
Discs nur die Signale unter 96 kHz bei den vorderen zwei Kanälen für den analogen Bereich ausgegeben.
Stellen Sie bei der Wiedergabe von DVDs, die nicht durch das Urheberrecht geschützt sind, die Option
“DIGITAL-AUSGANG” bei “PURE DIRECT-MODUS” auf “AUS”. (Siehe Seiten 89, 90.)
• Bei der Wiedergabe von im Audioformat MPEG aufgenommenen DVDs werden die Audiosignale auf 2
Kanäle für die Ausgabe abgemischt.
• Beim DVD-3800 empfehlen wir Ihnen, die digitale Ausgabe auszuschalten und ausschließlich analoge
Signale ausgeben zu lassen, damit die Interferenzen vom digitalen Ausgabe-Schaltkreis auf einem
Minimum gehalten werden und es Ihnen möglich ist, eine hohe Abtastfrequenz mit einer hohen Bit-Zahl
und einem hochwertigen Mehrfachkanal-Klang zu genießen.
(5)
Connexion d’un système
d’ambiance de base à 5.1 canaux
Des signaux audio 5.1 canaux analogiques peuvent
être émis par le DVD-3800.
Les signaux audio multicanaux enregistrés en PCM
peuvent être lus lorsqu’un amplificateur AV équipé
d’entrées audio 5.1 canaux analogiques est connecté.
q Vers la prise secteur
w Haut-parleur central
e Haut-parleur avant (gauche)
r Haut-parleur avant (droit)
t CENTRAL
y SURROUND
u SUBWOOFER
i AVANT
o Subwoofer (Haut-parleur grave)
!0 Haut-parleur surround (gauche)
!1
Amplificateur AV avec des bornes d'entrée à 5.1 canaux
!2 Haut-parleur surround (droit)
REMARQUES:
• Pour les connexions multi canaux, régler
“CANALES AUDIO” sous “CONFIGURATION
AUDIO” dans “INSTALLATION” sur “MULTI
CANAUX” et effectuer les ré glages
“CONFIGURATION HP” , “REGLAGE DES
NIVEAUX” et “TEMPS DE RETARD”.
• Réglez “ LPCM (44.1 kHz/48 kHz)” dans
“CONFIGURATION AUDIO” dans
“INSTALLATION” sur “ETEINT”. (Voir pages 76,
77.)
• Lorsque l’on lit des DVD qui ne sont pas
protégés par le copyright et que l’appareil est
réglé sur les signaux audio de sortie numériques
et analogiques à la fois, pour certains disques,
seuls les signaux inférieurs à 96 kHz pour les
deux canaux avant seront générés pour la partie
analogique.
Lors de la lecture de DVD qui ne sont pas
protégés par le copyright, réglez “SORTIE
AUDIO NUMÉRIQUE” dans “MODE PURE
DIRECT” sur “NON”. (Voir pages 89, 90.)
• En cas de lecture de DVDs portant un signal
codé au format MPEG audio, les signaux audio
seront mixés vers le bas sur 2 canaux en sortie.
• Avec le DVD-3800, nous recommandons de
désactiver la sortie numérique et de ne générer
que des signaux analogiques afin de minimiser
les interférences provenant du circuit de sortie
numérique et pour vous permettre de profiter du
haut débit, de la fréquence d'échantillonage
élevée et du son multi-canaux haute qualité.
(5)
Collegamento del sistema
surround a 5.1 canali basilare
Potete emettere dei segnali audio analogici a 5.1
canali dal DVD-3800.
I segnali audio multicanali registrati nei PCM possono
essere riprodotti se avete collegato un amplificatore
AV dotato di entrate audio analogiche a 5.1 canali.
q Alla presa di alimentazione
w Altoparlante centrale
e Altoparlante anteriore (destro)
r Altoparlante anteriore (sinistro)
t CENTRALE
y SURROUND
u SUBWOOFER
i ANTERIORE
o Subwoofer
!0 Altoparlante surround (destro)
!1
Amplificatore AV con terminali d'entrata a 5.1 canali
!2 Altoparlante surround (sinistro)
NOTE:
• Per i collegamenti multicanali, impostate
“AUDIO CHANNEL” sotto “AUDIO SETUP” a
“SETUP” a “MULTI CHANNEL” ed effettuate le
impostazioni “SPEAKER CONFIGURATION”,
“CHANNEL LEVEL” e “DELAY TIME”.
• Impostate su “LPCM (44.1 kHz/48 kHz)” sotto
“AUDIO SETUP” in “SETUP” su “OFF” .
(Vedere paginas 76, 77)
(Se impostato su “ON”, i segnali audio analogici
convertiti a 48 kHz verranno emessi per PCM
lineari o fonti PCM compatti.)
• Quando riproducete DVD ceh non sono protetti
dal diritto d'autore e l'unità è impostata sui
segnali di emissione audio digitali e analogici allo
stesso tempo, solamente per alcuni dischi, i
segnali al di sotto di 96 kHz per i due canali
frontali verranno emessi per la parte analogica.
Quando riproducete DVD non protetti dal diritto
d'autore, impostate “DIGITAL OUTPUT” su
“PURE DIRECT MODE” su “OFF”. (Vedere
paginas 89, 90)
• Quando riproducete DVD registrati nel formato
audio MPEG, i segnali audio vengono mescolati
verso 2 canali per l’uscita.
• Con il DVD-3800, vi consigliamo di spegnere
l'uscita digitale e di emettere segnali analogici
per mantenere le interferenze lontane dal
circuito di emissione digitale e permettendovi
quindi di godervi bit alti, frequenze di
campionamento alto, suono multicanale ad alta
qualità.
Page 44

DEUTSCH FRANÇAIS ITALIANO
50
(6) Anschluss an einen digitalen Rekorder (MD-Recorder, DAT-Deck usw.)
89
B
✽ Stellen Sie die “AUDIO-
EINSTELLUNGEN
”-Standard-Einstellung wie nachfolgend gezeigt ein. (Siehe Seiten
76, 77)
•“AUDIO AUSGANG” → “PCM”
“LPCM (44.1 kHz / 48 kHz)” → “EIN”
Die Wiedergabe von DVDs mit falschen Einstellungen kann Geräusche verursachen, die sowohl Ihr Gehör als
auch die Lautsprecher schädigen können.
DVD-3800
w Digitaler Audio-
Eingangsanschluß
(COAXIAL)
q Digitaler Audio-
Eingangsanschl
uß (OPTICAL)
(7)
Anschluss einer Stereo-Komponente
DVD-3800
q Stereo-Komponente
HINWEISE:
• Stellen Sie beim Anschluss an ein 2-Kanal-Audiostereogerät die Option “LAUTSPRECHER” unter “AUDIO-
EINSTELLUNGEN” bei “EINSTELLUNGEN” auf “2-KANAL” (siehe Seite 72). Bei Mehrfachkanal-Quellen
werden die Signale auf zwei Kanäle (analog) heruntergemischt. (Bei Quellen, bei denen ein
Heruntermischen untersagt ist, werden nur die vorderen linken und rechten Kanäle ausgegeben.)
• Stellen Sie die Option “LPCM (44.1 kHz/48 kHz)” unter “AUDIO-EINSTELLUNGEN” bei
“EINSTELLUNGEN” auf “AUS”. (Siehe Seiten 76, 77.)
(Wenn diese Option auf “EIN” gestellt wird, werden bei linearen PCM- oder komprimierten PCM-Quellen
auf 48 kHz konvertierte analoge Audiosignale ausgegeben.)
•
Stellen Sie die Option “DIGITAL-AUSGANG” bei “PURE DIRECT-MODUS”auf “AUS”. (Siehe Seiten 89, 90.)
(Wenn diese Option auf “EIN” gestellt wird, werden bei der Wiedergabe von mit 196 kHz/176,4 kHz
aufgenommenen Quellen auf 96 kHz/88,2 kHz konvertierte analoge Audiosignale ausgegeben.)
(6)
Connecter à un enregistreur
numérique (Enregistreur MD, DAT
Deck, etc.)
✽ Modifier les ré glages par défaut de
“CONFIGURATION
AUDIO” comme suit. (Voir
pages 76, 77.)
•“SORTIE AUDIO NUMÉRIQUE” → “PCM”
“LPCM (44.1kHz/48kHz)” → “ACTIF”
Le fait de lire des DVD avec des réglages incorrects
peut produire des bruits qui pourraient blesser les
oreilles ou endommager les haut-parleurs.
q
Connecteur d’entrée audio numérique (OPTICAL)
w
Connecteur d’entrée audio numérique (COAXIAL)
e
Câble à fibre optique (disponible dans le
commerce)
r Câble à fiche à broche de 75 Ω/ohms (disponible
dans le commerce)
(7) Connexion à un composant stéréo
q Composant stéréo
REMARQUES:
• Lors de la connexion à un appareil audio stéréo à
deux canaux, réglez “CANALES AUDIO” dans
“CONFIGURAITON AUDIO” dans
“INSTALLATION” sur “2 CANAUX” (voir page
72). Pour les sources multi-canaux, les signaux
sont mélangés à la baisse dans deux canaux
(analogiques). (Seuls les canaux gauche et droit
sont générés pour les sources pour lesquelles le
mélange à la baisse est interdit.)
•
Ré glez “LPCM (44.1 kHz/48 kHz)” dans
“CONFIGURATION AUDIO” dans “INSTALLATION”
sur “ETEINT”. (Voir pages 76, 77.)
(En cas de réglage sur “ACTIF”, des signaux
audio analogiques convertis à 48 kHz seront
générés pour les sources PCM linéaire ou PCM
compressé.)
• Réglez “SORTIE AUDIO NUMÉRIQUE” dans
“MODE PURE DIRECT” sur “NON”. (Voir pages
89, 90.)
(En cas de réglage sur “OUI”, des signaux audio
analogiques convertis à 96 kHz/88,2 kHz seront
gé né ré s lors de la lecture de sources
enregistrées à 196 kHz/176,4 kHz.)
(6)
Collegamento ad un registratore
digitale (registratore MD, piastra
DAT, ecc.)
✽ Impostate l'impostazione default “AUDIO SETUP”
nel seguente modo. (Vedere paginas 76, 77)
•“DIGITAL OUT” → “PCM”
“LPCM (44.1 kHz/48 kHz)” → “ON”
La riproduzione dei DVD con un'impostazione errata
può generare del rumore che può causare danni alle
vostre orecchie o agli altoparlanti.
q
Connettore di ingresso audio digitale (OPTICAL)
w
Connettore di ingresso audio digitale (COAXIAL)
e
Cavo a fibre ottiche (venduto separatamente)
r Cavo con la spina pin 75 Ω/ohms (venduto
separatamente)
(7) Collegamento ad un componente
stereo
q
Componente stereo
NOTE:
• Quando collegate ad un apparecchio audio
stereo a 2 canali, impostate “AUDIO
CHANNEL” sotto “AUDIO SETUP” in “SETUP”
su “ 2 CHANNEL” (Vedere pagina 72) o
effettuate dei collegamenti analogici. Per fonti
multicanale, i segnali sono sotto mixati in due
canali (analogico). (Solamente i canali frontale
sinistro e destro vengono emessi per fonti per le
quali il sotto mixaggio è proibito.)
• Impostate su “LPCM (44.1 kHz/48 kHz” sotto
“AUDIO SETUP” in “SETUP” su “OFF” .
(Vedere paginas 76, 77)
(Se impostato su “ON”, i segnali audio analogici
convertiti a 48 kHz verranno emessi per PCM
lineari o fonti PCM compatti.)
• Impostate “ DIGITAL OUTPUT” su “ PURE
DIRECT MODE” su “OFF”. (Vedere paginas 89,
90.)
(Se impostato su “ON”, i segnali analogici audio
convertiti a 96 kHz/88.2 kHz verranno emessi
riproducendo fonti registrate a 196 kHz/176.4
kHz.)
e Lichtleiter-Kabel (im Handel erhältlich)
r 75 Ω/Ohm Stift-Stecker-Kabel (im Handel erhältlich)
COMPONENT
VIDEO OUT
VIDEO OUT S-VIDEO OUT
Y
1
2
SL
AUDIO OUT
1
PB/C
B
2
R/CR
P
COAXIAL
OPTICAL
FL1FL2C
FR1FR2SWSR
DIGITAL OUT
(PCM / BIT STREAM)
COMPONENT
VIDEO OUT
VIDEO OUT S-VIDEO OUT
Y
1
2
SL
AUDIO OUT
1
PB/C
B
2
R/CR
P
COAXIAL
FL1FL2C
FR1FR2SWSR
OPTICAL
DIGITAL OUT
(PCM / BIT STREAM)
AV1
AV2
AV1
AV2
REMOTE CONTROL
RS-232C ROOM TO ROOM
IN OUT
Page 45

DEUTSCH FRANÇAIS ITALIANO
51
5
BEZEICHNUNG DER TEILE UND DEREN FUNKTIONEN
(1) Vorderseite
Siehe Seite 3.
q
Netztaste
• Drücken Sie diese Taste einmal, um das Gerät
einzuschalten.
• Drücken Sie die Taste noch einmal auf die “OFF”Position, um das Gerät auszuschalten.
• Setzen Sie das eingeschaltete Gerä t durch
Betätigung der sich auf der Fernbedienung
befindlichen POWER OFF-Taste in den StandbyModus.
• Schalten Sie das Gerät vom Standby-Modus aus
durch Betätigung der sich auf der Fernbedienung
befindlichen POWER ON-Taste ein.
w
Netzanzeige
• Diese Anzeige leuchtet, wenn das Gerä t
eingeschaltet ist und sich im Standby-Modus
befindet.
e
AL24 PLUS-Anzeige
• Diese Anzeige leuchtet, wenn die Audiosignale
einer DVD, usw. mit dem AL24 Processing Plus
digital bearbeitet werden, eine neu entwickelte
Technologie, mit der analoge Wellenformen
reproduziert werden.
r
DVD AUDIO-Anzeige
• Diese Anzeige leuchtet, wenn Discs abgespielt
werden, die mit dem DVD-Audio-Format
aufgenommen wurden.
t
Disc-Fach
• Legen Sie hier die Discs ein. (Siehe Seite 58.)
• Sie zum Öffnen und Schließen des Disc-Faches
die OPEN/CLOSE-Tast
!4.
• Das Disc-Fach wird auch bei Betätigung der PLAYTaste
y geschlossen.
y
Wiedergabetaste (PLAY)
• Drü cken Sie diese Taste zum Starten der
Wiedergabe. (Siehe Seite 84.)
u
Stopptaste (STOP)
• Drücken Sie diese Tasten zum Stoppen der Disc.
(Siehe Seite 85.)
i
Sprungtaste (8)
• Drücken Sie diese Taste, um an den Anfang des
gegenwärtig wiedergegebenen Titels (oder
Kapitels) zu gelangen.
• Drücken Sie die Taste noch einmal, um an den
Anfang des vorherigen Titels (oder Kapitels) zu
gelangen. (Siehe Seite 86.)
o
Sprungtaste (9)
• Drücken Sie diese Taste, um an den Anfang des
nächsten Titels (oder Kapitels) zu springen. (Siehe
Seite 86.)
!0
PURE DIRECT-Wähler
• Wählen Sie mit diesem Wähler die spezifischen
Filmsignal- und Digital-AudiosignalausgangsEinstellungen aus.
!1
Fernbedienungssensor
5
NOMS DES COMPOSANTS
ET FONCTIONS
(1) Panneau avant
Voir à la page 3.
q
Touche d’alimentation
• Appuyer une fois sur ce touche pour mettre
l’appareil en marche.
•
Appuyer une nouvelle fois sur ce touche pour le
mettre en position Arrêt “OFF” et arrêter l’appareil.
• Appuyer sur la touche Alimentation (POWER OFF)
de la télécommande pour passer en mode veille
pendant que l’appareil est en marche.
• Remettre l’appareil en marche à partir du mode
veille en appuyant sur la touche Alimentation
(POWER ON) de la télécommande.
w
Indicateur de marche
• Cet indicateur s’allume quand l’appareil est en
marche ou en mode veille.
e
Indicateur AL24 PLUS
• Cet indicateur s’allume lorsque les signaux audio
d’un DVD, etc., sont en cours de traitement
numérique avec le AL24 Processing Plus, un
produit de la technologie de reproduction de la
forme d’onde récemment mise au point.
r
Indicateur DVD AUDIO
• Cet indicateur s’ allume lors de la lecture de
disques enregistrés en format DVD audio.
t
Tiroir de disque
•
Charger les disques dans ce tiroir. (Voir à la page 58.)
•
Appuyer sur la touche ouverture/fermeture (OPEN/CLOSE)
!4
pour ouvrir et fermer le tiroir de disque.
• Le tiroir de disque se referme quand on appuie sur
la touche de lecture (PLAY)
y.
y
Touche de lecture (PLAY)
• Appuyer sur ce touche pour commencer la lecture
du disque. (Voir à la page 84.)
u
Touche d’arrêt (STOP)
•
Appuyer sur ce touche pour arrêter la lecture du disque.
(Voir à la page 85.)
i
Touche de saut (8)
• Appuyer sur ce touche pour reprendre le début de
la piste (ou du chapitre) en cours de lecture.
• Appuyer de nouveau sur ce touche pour reprendre
le début de la piste (ou du chapitre) précédente.
(
Voir à la page 86.)
o
Touche de saut (9)
• Appuyer sur ce touche pour atteindre le début de
la prochaine piste (ou du prochain chapitre).
(
Voir à la page 86.)
!0
Sélecteur PURE DIRECT
• Utiliser ce sélecteur pour sélectionner les modes
avec des réglages de sortie de signal d’un film
spécifique et de signal audio numérique.
!1
Capteur de la télécommande
5
NOMI E FUNZIONI DELLE
PARTI
(1) Pannello anteriore
Vedere pagina 3.
q
Tasto di accensione (POWER)
•
Premete questo tasto una volta per accendere la corrente.
• Premete lo stesso tasto nuovamente nella
posizione “OFF” per spegnere la corrente.
•
Impostate il modo di attesa premendo il tasto POWER
OFF sul telecomando quando la corrente è accesa.
•
Accendete la corrente nel modo di attesa premendo
il tasto POWER ON sul telecomando.
w
Indicatore di accensione
• Questo indicatore si illumina quando la corrente è
accesa o quando è attivato il modo di attesa.
e
Indicatore AL24 PLUS
• Questo indicatore si illumina quando i segnali
audio del DVD, ecc., vengono elaborati in modo
digitale con il AL24 Processing Plus, una nuova
tecnologia di riproduzione ad ondulazioni,
recentemente sviluppata.
r
Indicatore DVD AUDIO
• Quest'indicatore si illumina quando riproducete
dei dischi registrati nel formato audio DVD.
t
Piatto portadischi
• Inserite i dischi qui. (Vedere pagina 58.)
• Premete il tasto OPEN/CLOSE
!4 per aprire e
chiudere il piatto portadischi.
• Il piatto portadischi si chiude anche quando si
preme il tasto PLAY
y.
y
Tasto di riproduzione (PLAY)
• Premete questo tasto per riprodurre il disco.
(Vedere pagina 84.)
u
Tasto di arresto (STOP)
• Premete questo tasto per fermare il disco.
(Vedere pagina 85.)
i
Tasto di salto (8)
• Premete questo tasto per ritornare all'inizio del
brano (o della sezione) in fase di riproduzione.
• Premete lo stesso nuovamentte per ritornare
all'inizio del brano (o della sezione) precedente.
(Vedere pagina 86.)
o
Tasto di salto (9)
•
Premete questo tasto per avanzare all'inizio del brano
(o della sezione) che segue. (
Vedere pagina 86.
)
!0
Selettore PURE DIRECT
• Usate questo selettore per selezionarei modi con
un particolare segnale cinematografico e con le
impsotazioni d'uscita dei segnali audio digitali.
!1
Schermo di controllo a distanza
Page 46

DEUTSCH FRANÇAIS ITALIANO
52
!2
Display
• Auf diesem Display werden Information über die
derzeit wiedergegebene Disc angezeigt. (Siehe
Seite 54.)
!3
Standbild-/Pausetaste (3)
• Drücken Sie diese Taste, um die Bilder oder die
Musik zeitweilig anzuhalten oder um die Bilder
Bild-für-Bild anzeigen zu lassen. (Siehe Seiten 85,
86.)
!4
Öffnen-/Schließen-Taste
(
5 OPEN/CLOSE)
• Drü cken Sie diese Taste zum Öffnen und
Schließen des Disc-Faches. (Siehe Seite 58.)
!5
Zeitlupen-/Suchlauftaste (6)
• Mit dieser Taste können Sie den Modus für die
Zeitlupenwiedergabe einstellen und den
Rückwärtssuchlauf starten. (Siehe Seiten 85, 87.)
!6
Zeitlupen-/Suchlauftaste (7)
• Mit dieser Taste können Sie den Modus für die
Zeitlupenwiedergabe einstellen und den
Vorwärtssuchlauf starten. (Siehe Seiten 85, 87.)
(2) Rückseite
!7
Video-Ausgangsklemme
(VIDEO OUT)
• Benutzen Sie für den Anschluss das mitgelieferte
Videokabel.
!8
Komponenten-VideoAusgangsklemmen
(COMPONENT VIDEO OUT)
• Benutzen Sie für den Anschluss Videokabel (im
Fachhandel erhältlich).
!9
S-Video-Ausgangsklemme
(S-VIDEO OUT)
• Benutzen Sie fü r den Anschluss ein S-VideoAnschlusskabel (im Fachhandel erhältlich).
@0
Audio-Ausgangsklemmen
(AUDIO OUT)
• Benutzen Sie für den Anschluss das mitgelieferte
Audio-Videokabel.
@1
Digitale Audio-Ausgangsklemme
(COAXIAL)
• Benutzen Sie für den Anschluss ein Audiokabel.
Schließen Sie ein handelsübliches 75Ω/Ohm
Stiftsteckerkabel an.
• Von dieser Klemme werden digitale Daten
ausgegeben.
@2
Digitale Audio-Ausgangsklemme
(OPTICAL)
• Benutzen Sie fü r den Anschluss ein
Lichtleitfaserkabel (im Fachhandel erhältlich).
• Von dieser Klemme werden digitale Daten
ausgegeben.
@3
Steuer-Anschluss (RS-232C)
• Dies ist ein Anschluss fü r eine spätere
Systemerweiterung.
!2
Affichage
• Les informations du disque en cours de lecture y
sont affichées. (
Voir à la page
54.)
!3
Touche d’arrêt sur image/pause
(3)
• Appuyer sur cette touche pour mettre l’image ou
la musique en pause ou encore, pour effectuer
une lecture image par image. (Voir à la pages 85,
86.)
!4
Touche d’ouverture/fermeture
(
5 OPEN/CLOSE)
• Appuyer sur ce touche pour ouvrir et fermer le
tiroir du disque. (
Voir à la page 58.)
!5
Touche de ralenti/recherche (6)
• Appuyez sur cette touche pour régler le mode
lecture lente et pour effectuer une recherche en
arrière. (Voir à la pages 85, 87.)
!6
Touche de ralenti/recherche (7)
• Appuyez sur cette touche pour régler le mode
lecture lente et pour effectuer une recherche en
avant. (Voir à la pages 85, 87.)
(2) Panneau arrière
!7
Connecteur de sortie (VIDEO OUT)
• Connecter en utilisant le câble vidéo fourni avec
l’appareil.
!8
Connecteurs de sortie vidéo d’un
élément externe
(COMPONENT VIDEO OUT)
• Connecter en utilisant des câ bles vidéo
disponibles dans le commerce.
!9
Les connecteur de sortie de la S-Vidéo
(S-VIDEO OUT)
• Connecter en utilisant un câble S-Vidéo (disponible
dans le commerce).
@0
Connecteurs de sortie audio
(AUDIO OUT)
• Connecter en utilisant le câble audio fourni avec
l’appareil.
@1
Le connecteur de sortie audio numérique
(COAXIAL)
• Connecter en utilisant un câble audio. Utiliser un
câ ble de raccordement à fiches DIN de 75
Ω/ohms disponible dans le commerce.
• Des donné es numériques passent par ce
connecteur.
@2
Le connecteur de sortie audio numérique
(OPTICAL)
• Connecter en utilisant un câble à fibre optique
disponible dans le commerce.
• Des donné es numériques passent par ce
connecteur.
@3
Connecteur de télécommande
(RS-232C)
• C’est une borne pour une extension future du
système.
!2
Display
• Appaiono sul display le informazioni sul disco in
fase di riproduzione. (Vedere pagina 54.)
!3
Tasto di fermo immagine/pausa
(
3)
• Premete questo tasto per fermare le immagini o la
musica o per riprodurre le immagini cornice per
cornice. (Si veda paginas 85, 86.)
!4
Tasto di apertura/chiusura
(
5 OPEN/CLOSE)
• Premete questo tasto per aprire e chiudere il
piatto portadischi. (Vedere pagina 58.)
!5
Tasto di moviola/ricerca (6)
• Premete questo tasto per impostare il modo di
riproduzione a moviola e per effettuare una ricerca
all'indietro. (Si veda paginas 85, 87.)
!6
Tasto di moviola/ricerca (7)
• Premete questo tasto per impsotare il modo di
riproduzione a moviola e per effettuare una ricerca
in avanti. (Si veda paginas 85, 87.)
(2) Pannello posteriore
!7
Connettore di uscita video
(VIDEO OUT)
• Vanno collegati usando il cavo video in dotazione.
!8
Connettori di uscita video del
componente
(COMPONENT VIDEO OUT)
• Effettuate il collegamento usando dei cavi video
(Venduto separatamente).
!9
Connettore di uscita S-Video
(S-VIDEO OUT)
• Vanno collegati usando un cavo di connessione svideo (Venduto separatamente).
@0
Connettori di uscita audio (AUDIO OUT)
• Vanno collegati usando il cavo audio in dotazione.
@1
Connettore di uscita audio digitale
(COAXIAL)
• Effettuate il collegamento usando un cavo audio.
Collegate un cavo da 75 Ω/ohms dalla spina a
perni, venduto separatamente.
• Vanno collegati usando il cavo audio/video in
dotazione.
@2
Connettore di uscita audio digitale
(OPTICAL)
• Effettuate il collegamento usando un cavo di fibre
ottiche (Venduto separatamente).
• I dati digitali vengono emessi da questo
connettore.
@3
Connettore di controllo
(RS-232C)
• Questo terminale serve per le future espansioni
del sistema.
Page 47

DEUTSCH FRANÇAIS ITALIANO
53
@4
Steuereingangsanschluss
(ROOM TO ROOM/IN)
• Dies ist ein Eingangsanschluss für eine KabelFernbedienung.
Wenn Sie diesen Anschluss verwenden wollen,
dann wenden Sie sich an Ihren DENON-Händler.
@5
Steuerausgangsanschluss
(ROOM TO ROOM/OUT)
• Dies ist ein Ausgangsanschluss für eine KabelFernbedienung.
Wenn Sie diesen Anschluss verwenden wollen,
dann wenden Sie sich an Ihren DENON-Händler.
@6
Netzeingang (AC IN)
• Schließen Sie mit Hilfe des mitgelieferten ACKabels an eine AC-Netzsteckdose an.
@7
21-pol. SCART-Buchse (AV1 / AV2)
(nur für europäisches Modell)
• F ühren Sie den Anschluss mit einem 21-pol.
SCART-Kabel (im Handel erhältlich) aus.
(3) Display
q Leuchtet während der Wiedergabe einer Disc, auf der Szenen aus mehreren Winkeln aufgenommen wurden.
w Leuchtet, um die gegenwärtig abgespielte Disc anzuzeigen.
e Leuchtet, wenn die Audiosignale abgemischt werden.
t Leuchtet, um die Bezeichnungen der Sektionen der
wiedergegebenen Disc anzuzeigen.
u Leuchtet, um das gegenwärtige Audioformat anzuzeigen.
r Leuchtet, um den gegenwärtigen
Audiokanal anzuzeigen.
y Leuchtet, wenn der Virtual
Surround-Modus aktiviert ist.
i Leuchtet, um den
gegenwärtig
wiedergegebenen
Videotyp
anzuzeigen.
F: Filmquelle
V: Videoquelle
G: Graphikquelle
!5 Leuchtet während der Wiedergabe; blinkt, wenn die Wiedergabefortsetzungs-
Speicherfunktion aktiviert ist.
!3 Leuchtet im programmierten Wiedergabemodus.
!1 Leuchtet im Stand-/Pause-Modus.
o Zeigt den Titel, die Titelnummer und
verstrichene Wiedergabezeit an.
!0 Leuchtet im
ZeitanzeigeModus.
!2 Leuchtet, wenn Progress-
Videosignale ausgegeben werden.
!4
Leuchtet im
WiedergabewiederholungsModus.
!6 Leuchtet im Zufallswiedergabe-Modus.
(3) Affichage
q
S’allume pendant la lecture d'un disque multiple
angles.
w
S’allume pour indiquer le disque en cours de lecture.
e
S’allume lorsque les signaux audio peuvent être
mélangés en arrière.
r
S’allume pour indiquer le canal audio en cours de
lecture.
t
S’allument pour indiquer les noms des sections du disque
en cours de lecture.
y
S’allume en mode d’ambiance virtuel.
u
S’allume pour indiquer le format audio en cours de
lecture.
i
S’allume pour indiquer le type de vidéo en cours de
lecture.
F: Source Film
V: Source vidéo
G: Source graphique
o
Affiche le titre, le numéro de plage et le temps écoulé
pendant la lecture.
!0
S’allument pour indiquer le mode d’affichage du temps.
!1
S'allume en mode d'arrêt sur image/pause.
!2
S’allume lorsque des signaux vidéo progressifs sont en
cours d’émission.
!3
S’allume en mode de lecture programmée.
!4
S’allume en mode de lecture répétitive.
!5
S’allume pendant la lecture, clignote lorsque la fonction
de reprise de lecture mémorisée est activée.
!6
S’allume en mode de lecture aléatoire.
@4
Connecteur d’entrée de télécommande
(ROOM TO ROOM/IN)
• C ’est le connecteur d’entré e pour la
télécommande à câble.
Consulter votre revendeur DENON avant d’utiliser
ce connecteur.
@5
Connecteur de sortie de télécommande
(ROOM TO ROOM/OUT)
• C ’est le connecteur de sortie pour la
télécommande à câble.
Consulter votre revendeur DENON avant d’utiliser
ce connecteur.
@6
Connecteur d’entrée alimentation secteur
(AC IN)
• Connecter l’alimentation secteur en utilisant le
câble inclus prévu à cet effet.
@7
21-pol. SCART-Buchse (AV1 / AV2)
(nur für europäisches Modell)
• F ühren Sie den Anschluss mit einem 21-pol.
SCART-Kabel (im Handel erhältlich) aus.res).
(3) Display
q
Si illumina durante la riproduzione di dischi con più
angolazioni registrate.
w
Si illumina per indicare il disco in fase di riproduzione.
e
Si illumina quando i segnali audio possono essere
mescolati.
r
Si illumina per indicare il canale audio in fase di
riproduzione.
t
SI illuminano per indicare i nomi delle sezioni del disco
in fase di riproduzione.
y
Si illumina nel modo surround virtuale.
u
Si illumina per indicare il formato audio in fase di
riproduzione.
i
Si illumina per indicare il tipo di video in fase di
riproduzione.
F: Fonte film
V: Fonte video
G: Fonte grafica
o
Visualizza il titolo, il numero del brano e il tempo
trascorso durante la riproduzione.
!0
Si illuminano per indicare la modalità di visualizzazione
del tempo.
!1
Si illumina nella modalità fermo immagine/pausa.
!2
Si illumina quando sono emessi dei segnali video
progressivi.
!3
Si illumina nella modalità di riproduzione programmata.
!4
Si illumina nel modo di riproduzione ripetuta.
!5
Si illumina durante la riproduzione, lampeggia quando
attivate la funzione di ripresa riproduzione dalla
memoria.
!6
Si illumina nel modo di riproduzione casuale.
@4
Connettore dell'entrata di controllo
(ROOM TO ROOM/IN)
• Questo è il connettore d'entrata per il
telecomando cablato.
Rivolgetevi al vostro rivenditore DENON per usare
questo connettore.
@5
Connettore d'uscita di controllo
(ROOM TO ROOM/OUT)
• Questo è il connettore d'uscita per il telecomando
cablato.
Rivolgetevi al vostro rivenditore DENON per usare
questo connettore.
@6
Entrata di corrente (AC IN)
• Collegate all'alimentazione elettrica utilizzando il
cavo CA incluso.
@7
Terminale SCART a 21 pin
(AV1 / AV2)
(solo per modelli europei)
• Eseguite il collegamento con un cavo SCART a 21
pin (acquistabile nei negozi).
Page 48

DEUTSCH FRANÇAIS ITALIANO
54
6
FERNBEDIENUNG
2 Der DVD-3800 kann mit Hilfe des mitgelieferten Fernbedienunges (RC-553) bequem aus dem Sessel bedient
werden.
(1) Einlegen der Batterien
q Entfernen Sie die sich auf der Rückseite des
Fernbedienunges befindliche Abdeckung.
w Legen Sie die beiden R6P/AA-Batterien
entsprechend der Markierungen in das Batteriefach
ein.
e Setzen Sie die Abdeckung wieder auf.
Vorsichtsmaßnahmen zu Batterien
• Verwenden Sie in diesem Fernbedienung R6P/AABatterien.
• Tauschen Sie die Batterien ca. einmal im Jahr aus, wobei
der Zeitpunkt, an dem ein Austausch der Batterien
erforderlich ist, von der Häufigkeit der FernbedienungBenutzung abhängt.
• Wenn der Betrieb mit dem Fernbedienung selbst aus
kurzer Entfernung nicht möglich ist, mü ssen die
Batterien auch dann ausgetauscht werden, wenn sie
weniger als ein Jahr in Benutzung sind.
• Die beiliegende Batterie ist ausschieß lich für den
Testbetrieb vorgesehen. Tauschen Sie diese so bald wie
möglich gegen eine neue Batterie aus.
• Achten Sie beim Einlegen der Batterien auf die richtige
Ausrichtung der im Batteriefach aufgeführten <- und >-
Polaritäten.
• Um Beschä digungen und Auslaufen von
Batterieflüssigkeit zu vermeiden:
• Verwenden Sie niemals eine alte und eine neue
Batterie zusammen.
• Verwenden Sie nicht zwei Batterien unterschiedlichen
Typs.
• Schließ en Sie Batterien nicht kurz, zerlegen und
erhitzen Sie sie nicht und werfen Sie sie auch nicht in
offenes Feuer.
• Nehmen Sie die Batterien aus dem Batteriefach heraus,
wenn sie beabsichtigen, das Fernbedienung über einen
längeren Zeitraum hinweg nicht zu benutzen.
• Sollte einmal Batterieflüssigkeit auslaufen, reinigen Sie
das Batteriefach sofort und legen Sie neue Batterien ein.
q
w
e
(2) Benutzung des Fernbedienunges
D
I
M
M
E
R
Z
O
O
M
P
.
D
.
M
E
M
O
R
Y
P
I
C
.
A
D
J
4
5
6
E
N
T
E
R
O
N
O
F
F
R
E
M
O
T
E
C
O
N
T
R
O
L
U
N
I
T
R
C
5
5
3
T
O
P
M
E
N
U
D
I
S
P
L
A
Y
M
A
R
K
E
R
R
A
N
D
O
M
P
A
G
E
A
B
R
E
P
E
A
T
S
E
T
U
P
N
T
S
C
/
P
A
L
O
P
E
N
/
C
L
O
S
E
C
A
L
L
R
E
T
U
R
N
S
K
I
P
S
L
O
W
/
S
E
A
R
C
H
P
O
W
E
R
A
N
G
L
E
S
U
B
T
I
T
L
E
A
U
D
I
O
S
E
A
R
C
H
M
O
D
E
P
L
A
Y
S
T
I
L
L
/
P
A
U
S
E
S
T
O
P
1
7
0
2
8
+
1
0
3
9
P
R
O
G
/
D
I
R
V
.
S
.
S
.
C
L
E
A
R
M
E
N
U
30°
30°
Ca. 7 Meter
Environ 7 mètres
Circa 7 metri
• Richten Sie das Fernbedienung während des Betriebes -wie
im Diagramm gezeigt - auf den Fernbedienungssensor.
• Die Reichweite des Fernbedienunges beträgt aus gerader
Entfernung ca. 7 Meter, verringert sich jedoch, wenn
Hindernisse im Weg sind oder das Fernbedienung nicht
direkt auf den Fernbedienungssensor gerichtet wird.
• Das Fernbedienung kann in einem horizontalen Winkel von
bis zu 30° zum Fernbedienungssensor betrieben werden.
HINWEISE:
• Der Betrieb des Fernbedienunges ist möglicherweise
schwierig, wenn der Fernbedienungssensor direktem
Sonnenlicht oder starkem Kunstlicht ausgesetzt ist.
• Drücken Sie niemals Tasten am Hauptgerät und auf dem
Fernbedienung gleichzeitig, da dies Fehlfunktionen zur
Folge hätte.
6
TELECOMMANDE
2 Le DVD-3800 peut être commandé à distance à l’aide
de la télécommande fournie avec l’appareil (RC-553).
(1) Insertion des piles
q Enlever la trappe à l’arrière de la télécommande.
w Placer deux piles “AA” (R6P) dans le compartiment
dans le sens indiqué par les marques.
e Refermer la trappe.
Précautions à prendre avec les piles
• N ’utiliser que des piles “AA” (R6P) dans cette
télécommande.
• Remplacer les piles quand cela est nécessaire et au
moins une fois par an.
• Si la télécommande ne fonctionne pas à proximité
de l’appareil, remplacer les piles par des neuves,
même si moins d’une année s’est écoulée.
• La pile fournie ne sert que pour la vérification du
fonctionnement. La remplacer par une neuve le plus
tôt possible.
• Lors de l’insertion des piles, prendre garde de les
remettre dans le bon sens indiqué par les signes <
et > à l’intérieur du compartiment des piles de la
télécommande.
• Pour éviter les problèmes ou les fuites de liquide de
pile:
• Ne pas utiliser de pile neuve avec une vieille.
• Ne pas mélanger différents types de piles.
• Ne pas court-circuiter, démonter, chauffer ou jeter
les piles dans des flammes.
• Enlever les piles si la télécommande ne va pas être
utilisée pendant une longue période de temps.
• Si les piles ont fui, essuyer soigneusement l’intérieur
du compartiment des piles et en installer de
nouvelles.
(2) Utilisation de la télécommande
• Lors de l’utilisation de la télécommande, la diriger vers
le capteur indiqué sur le schéma.
• La télécommande peut être utilisée à une distance
d’environ 7 mètres sans obstacle. Cependant, cette
distance sera plus courte, s’il y a un obstacle ou si la
télécommande n’est pas pointée directement vers le
capteur.
• La té lé commande peut être utilisée à un angle
horizontal allant jusqu’à 30° par rapport au capteur.
REMARQUES:
• La télécommande risque de ne pas fonctionner
correctement si le capteur est exposé au soleil ou à
une source de lumière puissante.
• Ne pas appuyer en même temps sur les touches de
l’appareil et sur les touches de la télécommande,
cela risque de provoquer des défauts de
fonctionnement.
6
TELECOMANDO
2 Il DVD-3800 può essere controllato a distanza
utilizzando il telecomando (RC-553).
(1) Inserimento delle batterie
q Togliete il coperchio sul retro del telecomando.
w Inserite due batterie R6P/AA nel vano batterie
rispettando le polarità.
e Chiudete il coperchio.
.
Precauzioni per le batterie
• Utilizzate esclusivamente batterie R6P/AA.
• Sostituite le batterie dopo circa un anno, a seconda
della frequenza di utilizzo del telecomando.
• Se il telecomando non funziona a breve distanza
dall’unità principale, sostituite le batterie anche se
non è trascorso un anno.
• La batteria inclusa è solo per verificare il
funzionamento. Sostituitela con una nuova batteria
prima possibile.
• Inserite le batterie nelle direzioni corrette,
rispettando i simboli < e > nel vano batterie del
telecomando.
• Per prevenire danni o perdite di liquido:
• Non utilizzate una batteria nuova insieme ad una
batteria vecchia.
• Non utilizzate due tipi di batterie differenti.
• Non cortocircuitate, smontate, riscaldate o gettate
le batterie nel fuoco.
• Togliete le batterie se prevedete di non utilizzare il
telecomando per un periodo prolungato.
• In caso di perdite dalle batterie, rimuovete
accuratamente il liquido dal vano batterie ed inserite
nuove batterie.
(2) Utilizzo del telecomando
• Puntate il telecomando come indicato in figura.
• Il telecomando può essere utilizzato ad una distanza di
circa 7 metri. Questa distanza può essere minore
qualora vi siano oggetti tra il telecomando e l’unità
principale oppure se il telecomando non viene puntato
direttamente verso il sensore del telecomando.
• Il telecomando può essere utilizzato ad un’inclinazione
max di 30° rispetto al sensore del telecomando.
NOTE:
• Se il sensore del telecomando è stato esposto alla
luce solare diretta oppure ad un’intensa luce
artificiale, il telecomando può risultare difficile da
utilizzare.
• Non premete contemporaneamente i tasti sul
telecomando e sull’unità principale. In caso contrario
possono insorgere anomalie.
Page 49

55
DEUTSCH
4 5 6
ENTER
ON
OFF
REMOTE CONTROL UNIT RC-553
TOP MENU
DISPLAY
MARKERRANDOM
PAGE
A-B
ZOOM
DIMMER
REPEAT
SETUP
NTSC / PAL OPEN / CLOSE
CALL RETURN
SKIP
SLOW / SEARCH
POWER
ANGLE SUBTITLE AUDIO SEARCH MODE
PLAY
STILL /
PAUSE
STOP
PIC.ADJ
1
7
0
2
8
+10
3
9
PROG / DIR
V.S.S.
CLEAR
P.D.MEMORY
MENU
q
!7
w
e
r
t
y
u
i
o
!0
!1
!2
!4
!5
!3
!8
!9
@0
@1
@2
@4
@5
@6
@7
@8
@9
#0
#1
#2
@3
!6
(3) Bezeichnung und Funktionen der Fernbedienungstasten
2
Tasten, die in diesem Kapitel nicht erläutert werden, haben
dieselbe Funktion wie die gleich gekennzeichneten Tasten
am Hauptgerät.
q
POWER ON/POWER OFF -Tasten
Schalten Sie mit dieser Taste das Gerät und den StandbyBetrieb ein.
w
Nummerntasten
Geben Sie mit diesen Tasten Nummern ein.
Benutzen Sie zur Eingabe der 10 und höhren Zahlen die
+10-Taste.
Beispiel: Eingabe von 25
e
TOP MENU-Taste
Das auf der Disc gespeicherte obere Menü wird
angezeigt.
r
Cursor-Tasten/ENTER-Taste
Betätigen Sie für die Auswahl in vertikaler Richtung die •
und ª Tasten.
Betätigen Sie für die Auswahl in horizontaler Richtung die
Tasten 0 und 1.
Drücken Sie die ENTER-Taste, um die mit den Cursor-Tasten
angewählte Funktion zu aktivieren.
t
Menü-Taste
Das auf der Disc gespeicherte DVD-Menü wird angezeigt.
y
Stopptaste
(2)
u
SKIP -Tasten
i
Winkeltaste
Drücken Sie diese Taste zum Verändern des Blickwinkels.
o
Untertitel-Taste
Drücken Sie diese Taste zum Umschalten der DVDUntertitel-Sprache.
!0
A-B-Wiederholungstaste
(A-B)
Drücken Sie diese Taste für die Wiederholung der
Wiedergabe eines festgelegten Abschnittes zwischen
zwei Punkten.
!1
Wiederholungstaste
Drücken Sie diese Taste, um die Wiedergabe der Titel zu
wiederholen.
!2
SETUP -Taste
Drücken Sie diese Taste, um den GrundeinstellungsBildschirm aufzurufen.
!3
DIMMER -Taste
Stellen Sie mit dieser Taste die Helligkeit des Displays auf
der Hauteinheit ein. Zwischen OFF und ON sind 4
Umschaltmöglichkeiten vorhanden.
!4
ZOOM -Taste
Drücken Sie diese Taste, um ein Bild zu vergrößern.
!5
PICTURE ADJUST -Tasten (PIC. ADJ)
Drücken Sie diese Taste, um die Bildqualität auf Ihren
Geschmack einzustellen.
!6
NTSC/PAL-Taste
Drücken Sie diese Taste zum Ä ndern des VideoAusgangsformates.
!7
Öffnen-/Schließen-Taste
!8
PROGRAM/DIRECT-Taste
(PROG/DIR)
Drücken Sie diese Taste zum Umschalten zwischen
normaler und programmierter Wiedergabe.
!9
Löschtaste
Drücken Sie diese Taste zum Löschen eingegebener
Nummern.
5+10 +10
@0
Taste für virtuellen Surroundklang
Einstellung des virtuellen Surroundklangs. (Aktiviert bei
der Wiedergabe von DVDs, die im Dolby Digital-Format
auf zwei oder mehr Kanälen aufgezeichnet sind.)
@1
Rücktaste
Drücken Sie diese Taste zum Zurückkehren auf den zuvor
angezeigten Menüschirm.
@2
Display-Taste
Drücken Sie diese Taste, um das ON-SCREEN-Display
anzeigen zu lassen.
@3
Abruftaste
Drücken Sie diese Taste zur Überprüfung der
Programminhalte.
@4
Wiedergabetaste
(1)
@5
Standbild-/Pausetaste
(3)
@6
SLOW/SEARCH -Tasten
@7
SEARCH MODE -Taste
Drücken Sie diese Taste, um den Suchmodus für das
Suchen von Gruppen oder Titeln, Stücke oder Kapiteln zu
wechseln, wenn Disc-Sektionen mit den Nummerntasten
direkt angewählt werden.
@8
Audio-Taste
Drücken Sie diese Taste bei der Benutzung von DVDs
zum Umschalten der Audio-Sprache und bei der
Benutzung von Video-CDs zum Umschalten des Kanals
zwischen “LR”, “L” und “R”.
@9
Zufallswiedergabetaste
Drücken Sie diese Taste, um die Titel auf der Video- oder
Musik-CD in zufalssgesteuerter Reihenfolge
wiederzugeben.
#0
MARKER -Taste
Drücken Sie diese Taste, um Szenen zu markieren, die
Sie sich noch einmal anschauen möchten.
#1
PURE DIRECT MEMORY -Taste
(P.D. MEMORY)
Nehmen Sie mit dieser Taste verschiedene Einstellungen
vor, um eine bessere Tonqualität zu erzielen.
#2
PAGE -/PAGE + -Tasten
Wählen Sie mit diesen Tasten das gewünschte Standbild
auf DVD-Audio-Discs, auf der auswählbare Standbilder
enthalten sind.
Page 50

DEUTSCH FRANÇAIS ITALIANO
58
7
EINLEGEN VON DISCS
2 Legen Sie die Discs mit der etikettierten
(bedruckten) Seite nach oben zeigend ein.
8 cm Disc-Führung
Guide disque 8 cm
Guida disco 8 cm
12 cm Disc-Führung
Guide 12 cm
Guida disco 12 cm
Disc-Fach
Tiroir de disque
Piatto
HINWEIS:
• Bewegen Sie den DVD-3800 nicht während der
Disc-Wiedergabe, da dadurch die Disc
zerkratzen könnte.
(1) Öffnen und Schließen des Disc-Faches
q Schalten Sie das Gerät ein.
w Drücken Sie die OPEN/CLOSE-Taste.
Disc-Fach
Tiroir de disque
Piatto
OPEN/CLOSE-Taste
Touche OPEN/CLOSE
Tasto OPEN/CLOSE
HINWEISE:
• Schalten Sie unbedingt das Gerät ein, bevor Sie
das Disc-Fach öffnen oder schließen.
• Drücken Sie die Tasten nicht mit einem Bleistift
o.ä..
(2) Einlegen von Discs
Abbildung 1 / Figure 1 / Figura 1
Äußeres Disc-Fach
Tiroir de disque extérieur
Guida esterna
12 cm Disc
Disque 12 cm
Disco 12 cm
Abbildung 2 / Figure 2 / Figura 2
Inneres Disc-Fach
Tiroir de disque intérieur
Guida interna
8 cm Disc
Disque 8 cm
Disco 8 cm
HINWEISE:
•
Wenn sich während des Schließ ens ein
Fremdgegenstand im Disc-Fach verklemmt hat,
drücken Sie einfach noch einmal die OPEN/CLOSETaste, um das Disc-Fach zu öffnen.
• Drücken Sie das Disc-Fach nicht mit der Hand
hinein, wenn das Gerät eingeschaltet ist. Dies
könnte Beschädigungen verursachen.
•
Legen Sie keine Fremdgegenstände in das DiscFach. Dies könnte Beschädigungen verursachen.
• Nehmen Sie die Disc vorsichtig hoch, ohne dabei
die Signalfläche zu berühren und halten Sie sie mit
der etikettierten Seite nach oben.
• Legen Sie die Disc in das Disc-Fach ein, wenn
dieses vollständig geöffnet ist.
• Legen Sie 12 cm in die äußere Disc-Fü hrung
(Abbildung 1) und 8 cm Discs in die innere DiscFührung (Abbildung 2).
• Drücken Sie die OPEN/CLOSE-Taste. Die Disc wird
automatisch geladen.
• Das Disc-Fach kann zum Laden einer Disc auch
automatisch durch Betätigung der PLAY-Taste
geschlossen werden.
7
CHARGEMENT DES
DISQUES
2 Placer les disques dans le tiroir, face imprimée
(étiquette) vers le haut.
REMARQUE:
• Ne pas déplacer le DVD-3800 lorsqu’un disque
est en cours de lecture, car cela peut rayer le
disque.
(1) Ouverture et fermeture du tiroir
de disque
q Mettre le lecteur en marche.
w Appuyer sur la touche ouverture/fermeture
(OPEN/CLOSE).
REMARQUES:
• Vérifier que le lecteur est mis sous tension avant
d’ouvrir et de fermer le tiroir de disque.
• Ne pas appuyer sur la touche avec un crayon,
etc.
(2) Chargement des disques
REMARQUES:
• Si un objet étranger se fait coincer par la
fermeture du plateau de disque, appuyer tout
simplement à nouveau sur la touche
d’ouverture/fermeture “OPEN/CLOSE” et le
plateau rouvrira.
• Ne pas rentrer le tiroir de disque à la main
lorsque le lecteur est hors tension, car cela
risque de l’endommager.
• Ne pas placer d’objets étrangers sur le tiroir de
disque, car cela risque de l’endommager.
• Manipuler le disque avec soin sans toucher la
surface du signal et le tenir face imprimée vers le
haut.
• Lorsque le tiroir de disque est complètement
ouvert, placer le disque sur le plateau.
• Placer les disques 12 cm sur le guide plateau
extérieur (Figure 1), les disques 8 cm sur le guide
plateau intérieur (Figure 2).
• Appuyer sur la touche ouverture/fermeture
(OPEN/CLOSE). Le disque est chargé
automatiquement.
• Le tiroir de disque peut aussi être fermé
automatiquement pour charger le disque en
appuyant sur la touche de lecture (PLAY).
7
INSERIMENTO DEI DISCHI
2 Inserite i dischi sul piatto con il lato etichetta
(stampato) verso l’alto.
NOTA:
• Non spostate il DVD-3800 mentre la
riproduzione è in corso. In caso contrario si può
graffiare il disco.
(1) Apertura e chiusura del piatto
q Accendete l’unità.
w Premete il tasto OPEN/CLOSE.
NOTE:
• Prima di aprire e chiudere il piatto, accertatevi
che il lettore sia acceso.
• Non utilizzate matite, ecc. per premere i tasti.
(2) Inserimento dei dischi
NOTE:
• Se un oggetto estraneo entra in contatto con il
cassetto del disco durante la sua chiusura,
premete semplicemente il tasto OPEN/CLOSE
di nuovo e il cassetto si riaprirà.
• Non chiudete manualmente il piatto con il lettore
spento, altrimenti si può danneggiare.
• Non posizionate corpi estranei sul piatto,
altrimenti si può danneggiare.
• Sollevate il disco con cautela facendo attenzione a
non toccare la superficie registrata e tenetelo con il
lato etichetta verso l’alto.
• Aprite completamente il piatto, quindi inserite il
disco.
• Inserite i dischi da 12 cm nella guida esterna (Figura
1) ed i dischi da 8 cm nella guida interna (Figura 2).
• Premete il tasto OPEN/CLOSE. Il disco viene
caricato automaticamente.
• Il piatto può anche essere chiuso automaticamente
premendo il tasto PLAY.
Netztaste
Touche
d’alimentation
Tato di accensione
Page 51

DEUTSCH FRANÇAIS ITALIANO
59
8
ÄNDERUNG DER STANDARD-EINSTELLUNGEN
2 Nehmen Sie vor Beginn der Wiedergabe die Anfangseinstellungen entsprechend
Ihrer Nutzungsbedingungen vor. Die Anfangseinstellungen bleiben bis zur nächsten
Änderung gespeichert, auch wenn die Stromversorgung ausgeschaltet wird.
1
2
3
Schalten Sie den Strom ein.
•
Drücken Sie die Power-Taste - die Stromanzeige
leuchtet und die Stromversorgung wird eingeschaltet.
Drücken Sie im Stoppmodus die SETUP-Taste.
• Der Bildschirm mit den Standard-Einstellungen
erscheint.
HINWEIS:
• Bei einigen Menü s können die Anfangswerte
während der Wiedergabe geändert werden.
EINSTELLUNGEN DVD-DISC
Wählen Sie hiermit die Sprache aus, in der die Disc
wiedergegeben werden soll.
Wenn die verwendete Disc die eingestellte Sprache
nicht anbietet, wird die Standardsprache der Disc
eingestellt.
OSD-EINSTELLUNGEN ÄNDERN
Stellen Sie hiermit die Sprache für den Bildschirm mit
den Standard-Einstellungen und die auf dem
Fernsehschirm angezeigten Meldungen
(“WIEDERGABE” usw.) ein.
VIDEO-OPTIONEN EINSTELLEN
Stellen Sie hiermit den Bildschirmmodus des
DVD-
3800 ein (AUSWAHL BILDSCHIRMFORMAT
,
FARBFERNSEHNORM und AV1 Video-Ausgang).
AUDIO-EINSTELLUNGEN
Stellen Sie hiermit den Audio-Ausgangsmodus des
DVD-3800 ein. (Analoge oder digitale und LPCM
Ausgangs-Einstellungen.)
KINDERSICHERUNG
Mit Hilfe dieser Werte können Sie verhindern, daß
sich Kinder für Erwachsene bestimmte DVDs
ansehen. Dies ist nur möglich, wenn die Bewertung
auf die DVD aufgenommen wurde. Ohne Aufnahme
der Bewertung kann lediglich die Wiedergabe
sämtlicher DVDs gesperrt werden.
SONSTIGE EINSTELLUNGEN
Dies beinhaltet spezielle Einstellungen
BILDUNTERSCHRIFT und DYNAMIKKOMPRESSION.
Wählen Sie die gewünschte Einstellung mit den 0
und 1 Cursortasten an und drücken Sie dann die
ENTER-Taste.
• Wählen Sie “EINSTELLUNGEN DVD-DISC”. (Siehe
Seite 62.)
• Wählen Sie “OSD-EINSTELLUNGEN ÄNDERN”.
(Siehe Seite 66.)
• Wählen Sie “VIDEO-OPTIONEN EINSTELLEN”.
(Siehe Seite 68.)
• Wählen Sie “AUDIO-EINSTELLUNGEN”. (Siehe
Seite 72.)
• Wählen Sie “KINDERSICHERUNG”. (Siehe Seite
78.)
• W ählen Sie “SONSTIGE EINSTELLUNGEN”.
(Siehe Seite 80.)
✽ Verlassen des Systemeinrichtungsmodus
Wählen Sie mit den ª Cursor-Tasten “EINSTELLUNGEN
BEENDEN” an, und drücken Sie dann die SELECT-Taste.
Sie können die Funktion auch durch Drücken der ENTERTaste auf der Fernbedienung verlassen.
REMOTE S
DVD AUDIO
¢ON / STANDBY
£OFF
B
AL24 PLUS
1
4 5 6
ENTER
ON
OFF
REMOTE CONTROL UNIT RC-553
TOP MENU
DISPLAY
MARKERRANDOM
PAGE
A-B
ZOOM
DIMMER
REPEAT
SETUP
NTSC / PALOPEN / CLOSE
CALL RETURN
SKIP
SLOW / SEARCH
POWER
ANGLE SUBTITLE AUDIOSEARCH MODE
PLAY
STILL /
PAUSE
STOP
PIC.ADJ
1
7
0
2
8
+10
3
9
PROG / DIR
V.S.S.
CLEAR
P.D.MEMORY
MENU
3
1
2
1
2
3
ON
POWER
¢ON / STANDBY
£OFF
Hauptgerät
Unité principale
Unità principale
Fernbedienung
Télécommande
Telecomando
E INSTE LLUNGEN DVD -DI SC
NAVIGATION: AUSWAHL: ENTER -TASTE
DI ALOGE
DI SC -MENÜS
EINSTELLUNGEN BEENDEN
UNTERTI TEL
ENGLI SCH
ENGLI SCH
ENGLI SCH
B
PRE F ERE NCE D I SQUE
REGLAGES: DECISION:BOUTTON ENTER
DIALOGUES
M
ENUS DU DI SQ UE
QUI TT E R LA C ONF I GUR AT I ON
SOUS - T I TR ES
A
N
GLAIS
A
N
GLAIS
A
N
GLAIS
B
DI S C SE TUP
SELECT : DECISION:ENTER BUTTON
DI ALOG
DI SC MENUS
EXIT SETUP
SUBTI TL E
ENGLI SH
ENGLI SH
ENGLI SH
B
Fernbedienung
Télécommande
Telecomando
SETUP
ENTER
Fernbedienung
Télécommande
Telecomando
8
MODIFICATION DES
REGLAGES PAR DEFAUT
2 Effectuer les réglages initiaux adaptés à vos conditions
d’utilisation avant de commencer la lecture.
Les réglages initiaux sont conservés jusqu'à ce qu’ils
soient modifiés, même si le lecteur est éteint.
1
2
3
Allumer le lecteur.
•
Appuyer sur la touche d’alimentation, l’indicateur
d’alimentation s’allume et le lecteur s’allume.
En mode arrêt (STOP), appuyer sur la touche
SETUP.
• L’écran des réglages par défaut s’affiche.
REMARQUE:
• Dans certains menus, les valeurs initiales
peuvent être changées en cours de lecture.
PREFERENCE DISQUE
Utiliser cette fonction pour activer la langue
devant être utilisée lors de la lecture du disque.
Si la langue sélectionnée ne se trouve pas sur ce
disque, la langue par défaut est sélectionnée.
MENU DE REGLAGE OSD
Utiliser cette fonction pour programmer la langue
de l’écran de réglages par défaut et les messages
affichés sur l’écran TV (“Lecture”, etc.).
MENU REGLAGE VIDEO
Utiliser celle-ci pour régler le mode d’écran du
DVD-3800. (Aspect de la télévision et type de
télévision.)
CONFIGURATION AUDIO
Utiliser celle-ci pour régler le mode de sortie
audio du DVD-3800. (Réglages de sortie Digitaux
et LPCM.)
MENU NIVEAU DE PROTECTION
Utiliser cette fonction pour désactiver la lecture
des DVD pour adultes afin que les enfants ne
puissent pas les regarder. Noter que la lecture
des DVD adultes ne peut pas être désactivée si
la gestion d’accès n’est pas enregistrée sur le
DVD, mais qu’il est possible de désactiver la
lecture de tous les DVD.
CHOIX DE MENU
Celles-ci incluent les réglages spéciaux SOUS
TITRES et COMPRESSION.
Utiliser les touches curseurs 0 et 1 pour
sélectionner le réglage souhaité, puis appuyer sur
la touche ENTER.
•
Sélectionne les “PREFERENCE DISQUE”. (Voir page 62.)
•
Sélectionne les “MENU DE REGLAGE OSD”. (Voir pages 66.)
•
Sélectionne les “MENU REGLAGE VIDEO”. (Voir page 68.)
•
Sélectionne les “CONFIGURATION AUDIO”. (Voir page 72.)
•
Sélectionne les “MENU NIVEAU DE PROTECTION”. (Voir
page 78.)
•
Sélectionne les “CHOIX DE MENU”. (Voir page 80.)
✽Pour quitter le mode Paramétrage
Utilisez les touche ª pour sélectionner “QUITTER LA
CONFIGURATION” et appuyez ensuite sur la touche
ENTER pour confirmer. Il est aussi possible de
quitter en appuyant sur la touche SETUP sur la
télécommande.
8
PER CAMBIARE LE
IMPOSTAZIONI DEFAULT
2 Fate le impostazioni iniziali secondo le condizioni
d'utilizzo prima di iniziare la riproduzione.
Le impostazioni iniziali rimangono inalterate fino al
prossimo cambiamento, anche se spegnete la corrente.
1
2
3
Accendete la corrente.
•
Premete il tasto d'accensione. S'illumina
l'indicatore d'accensione e si accende la corrente.
Nel modo di pausa, premete il tasto SETUP.
• Appare la videata delle impostazioni
predefinite.
NOTA:
• Per alcuni menu, ti valori iniziali possono venire
cambiati durante la riproduzione.
DISC SETUP
Si utilizza per definire la lingua da utilizzare per la
riproduzione del disco.
Se la lingua impostata non è presente sul disco,
viene utilizzata la lingua predefinita del disco.
OSD SETUP
Si utilizza per impostare la lingua delle videate
delle impostazioni predefinite e dei messaggi
visualizzati sullo schermo del televisore (“PLAY”,
ecc.).
VIDEO SETUP
Per mezzo di questo menù impostate il modo
dello schermo DVD-3800 (aspetto TV, tipo TV, e
uscita video AV 1).
AUDIO SETUP
Per mezzo di questo menù impostate il modo di
uscita audio DVD-3800 (impostazioni Digitale e
uscita LPCM).
RATINGS
Si utilizza per disabilitare la riproduzione dei DVD
per adulti da parte dei bambini. Se il livello di
rating non è memorizzato nel DVD questa
funzione non è disponibile, ma è comunque
possibile disabilitare la riproduzione di tutti i DVD.
OTHER SETUP
Questo menù include le funzioni speciali
CAPTION e COMPRESSION.
Utilizzate i tasti cursore 0 e 1 per selezionare
l’impostazione desiderata, quindi premete il tasto
ENTER.
•
Selezionate “DISC SETUP”. (Vedere pagina 62.)
•
Selezionate “OSD SETUP”. (Vedere pagina 66.)
•
Selezionate “VIDEO SETUP”. (Vedere pagina 68.)
•
Selezionate “AUDIO SETUP”. (Vedere pagina 72.)
•
Selezionate “RATINGS”. (Vedere pagina 78.)
•
Selezionate “OTHER SETUP”. (Vedere pagina
80.)
✽Per uscire dal modo di impostazione
Dovete usare i tasto del cursore ª per selezionare
“EXIT SETUP”, poi premete il tasto ENTER. E’ inoltre
possibile uscire premendo il tasto SETUP sul
telecomando.
Leuchtet
S’allume
Illumina
Page 52

DEUTSCH FRANÇAIS
60
Zu verwendende Setup-Punkte
Fettdruck-Zeichen zeigen die werkseitigen Grundeinstellungen an.
EINSTELLUNGEN DVD-DISC
DIALOGE
UNTERTITEL
DISC-MENÜS
ENGLISCH
FRANZÖSISCH
SPANISCH
DEUTSCH
ITALIENISCH
SONSTIGE
AUS
ENGLISCH
FRANZÖSISCH
SPANISCH
DEUTSCH
ITALIENISCH
SONSTIGE
ENGLISCH
FRANZÖSISCH
SPANISCH
DEUTSCH
ITALIENISCH
SONSTIGE
OSD-EINSTELLUNGEN ÄNDERN
OSD-SPRACHE
HINTERGRUND
ENGLISH
FRANÇAIS
ESPAÑOL
DEUTSCH
BLAU
GRAU
SCHWARZ
MOTIV
VIDEO-OPTIONEN EINSTELLEN
TV
BILDSCHIRMFORMAT
FARBFERNSEHNORM
VIDEO-AUSGANG
VIDEO-MODUS
SCHWARZPEGEL
AV1 VIDEOAUSGANG (SCART)
SQUEEZE-MODUS
PROGRESSIVEMODUS
4:3 PS
4:3 LB
16:9
NTSC-TV
PAL-TV
MULTINORM
PROGRESSIVE
INTERLACED
VIDEO
FILM
AUTO
DUNKLER
HELLER
VIDEO
S-VIDEO
RGB
AUS
EIN
MODUS 1
MODUS 2
AUDIO-EINSTELLUNGEN
LAUTSPRECHER
DIGITAL-AUSGANG
LPCM
(44.1 kHz/48 kHz)
BASS ENHANCER
MULTI-KANALL
2-KANAL
NORMAL
PCM
AUS
EIN
AUS
EIN
LAUTSPRECHERKONFIG.
PEGELEINSTELLUNG
VERZÖGERUNGSZEIT
FRONT
CENTER
SUB
SURROUND
FILTER
TESTTON
FRONT L
CENTER
FRONT R
SURR R
SURR L
SUB
ENTFERNUNG
FRONT L
FRONT R
CENTER
SURR L
SURR R
SUB
STANDARD
GROß
KLEIN
GROß
KLEIN
NEIN
JA
NEIN
GROß
KLEIN
NEIN
EIN
AUS
AUS
EIN
0 dB
0 dB
0 dB
0 db
0 dB
0 dB
METER
FEET
3.6 m
3.6 m
3.6 m
3.0 m
3.0 m
3.6 m
EIN
KINDERSICHERUNG
EINSTUFEN
DERZ.
KENNWORT
ANDERN
0 - SPERRT ALLE
1
2
3
4
5
6
7
8 - KEIN LIMIT
ALTES KENNWORT
NEUES KENNWORT
KENNWORT BESTÄTIGEN
SONSTIGE EINSTELLUNGEN
PLAYER-MODUS
BILDUNTERSCHRIFT
DYNAMIKKOMPRESSION
AUTO.
ABSCHALTUNG
DIASHOW
AUDIO
VIDEO
AUS
EIN
AUS
EIN
AUS
EIN
5SEK
Eléments de réglage pour l’utilisation
Les caractères en gras indiquent les réglages d’origine.
PREFERENCE DISQUE
DIALOGUES
SOUS-TITRES
MENUS DU DISQUE
ANGLAIS
FRANÇAIS
ESPAGNOL
ALLEMAND
ITALIEN
AUTRE
NON
ANGLAIS
FRANÇAIS
ESPAGNOL
ALLEMAND
ITALIEN
AUTRE
ANGLAIS
FRANÇAIS
ESPAGNOL
ALLEMAND
ITALIEN
AUTRE
MENU DE REGLAGE OSD
LANGAGE OSD
FOND D'ECRAN
ENGLISH
FRANÇAIS
ESPAÑOL
DEUTSCH
BLEU
GRIS
NOIR
IMAGE
MENU REGLAGE VIDEO
TYPE D'ECRAN
TYPE DE TV
SORTIE VIDEO
MODE VIDEO
NIVEAU DU NOIR
AV1 SORTIE VIDEO
SQUEEZE MODE
MODE
PROGRESSIVE
4:3 PS
4:3 LB
16:9
NTSC
PAL
MULTI
PROGRESSIVE
ENTRELACE
VIDEO
FILM
AUTO
PLUS SOMBRE
PLUS CLAIR
VIDEO
S-VIDEO
RVB
NON
OUI
MODE 1
MODE 2
CONFIGURATION AUDIO
CANALES AUDIO
SORTIE AUDIO
NUMÉRIQUE
LPCM
(44.1 kHz/48 kHz)
GESTION DES
BASSES 2CH
MULTI CANAUX
2 CANAUX
NORMAL
PCM
ETEINT
ACTIF
ETEINT
ACTIF
CONFIGURATION
HP
REGLAGE DES
NIVEAUX
TEMPS DE
RETARD
HP FRONTAL
HP CENTRALE
SUBWOOFER
SURROUND
FILTRE
TEST TONALITE
AVANT G
CENTRALE
AVANT D
SURROUND D
SURROUND G
SUBWOOFER
DISTANCE
AVANT G
AVANT D
CENTRALE
SURROUND D
SURROUND G
SUBWOOFER
DEFAUT
GRAND
PETIT
GRAND
PETIT
NON
OUI
NON
GRAND
PETIT
NON
ACTIF
ETEINT
ETEINT
ACTIF
0 dB
0 dB
0 dB
0 db
0 dB
0 dB
METRES
PIEDS
3.6 m
3.6 m
3.6 m
3.0 m
3.0 m
3.6 m
OUI
MENU NIVEAU DE PROTECTION
RESTRICTION
MOT DE
PASSE ACTUEL
MODIFICATION
0
1
2
3
4
5
6
7
8 (NO LIMIT)
ANCIEN MOT DE PASSE
NOUVEAU MOT DE PASS
CONFIRMER MOT DE PASSE
CHOIX DE MENU
MODE DE
LECTURE
SOUS TITRES
COMPRESSION
VEILLE
AUTOMATIQUE
DIAPORAMA
MODE AUDIO
MODE VIDEO
NON
OUI
NON
OUI
NON
OUI
5SEC
Page 53

DEUTSCH FRANÇAIS ITALIANO
62
Wenn “EINSTELLUNGEN DVD-DISC” angewählt ist
2
Wählen Sie die gewünschte Einstellung mit den • und ª
Cursortasten an und drücken Sie dann die ENTER-Taste.
DIALOGE
Stellen Sie hiermit die Sprache des Tonausgangs von
den Lautsprechern ein.
UNTERTITEL
Stellen Sie hiermit die Sprache der auf dem
Fernsehschirm eingeblendeten Untertitel ein.
DISC-MENÜS
Stellen Sie hiermit die Sprache des Titel-Menüs ein
(auf den Discs aufgenommene Menüs) usw..
E INSTE LLUNGEN DVD -DI SC
NAVIGATION: AUSWAHL: ENTER -TASTE
DI ALOGE
DISC-MENÜS
EINSTELLUNGEN BEENDEN
UNTERTI TEL
ENGLI SCH
ENGLI SCH
ENGLI SCH
B
1
Siehe Seite 59.
4 5 6
ENTER
ON
OFF
REMOTE CONTROL UNIT RC-553
TOP MENU
DISPLAY
MARKERRANDOM
PAGE
A-B
ZOOM
DIMMER
REPEAT
SETUP
NTSC / PALOPEN / CLOSE
CALL RETURN
SKIP
SLOW / SEARCH
POWER
ANGLE SUBTITLE AUDIOSEARCH MODE
PLAY
STILL /
PAUSE
STOP
PIC.ADJ
1
7
0
2
8
+10
3
9
PROG / DIR
V.S.S.
CLEAR
P.D.MEMORY
MENU
1, 2, 3
1
1
2
3
ENTER
Fernbedienung
Télécommande
Telecomando
ENTER
Fernbedienung
Télécommande
Telecomando
3
Wählen Sie die gewünschte Einstellung mit den • und ª
Cursortasten an und drücken Sie dann die ENTER-Taste.
q Wenn “DIALOGE” angewählt ist:
ENGLISCH (Standard-Einstellung)
Wählen Sie diese Einstellung für die Wiedergabe
von DVDs in englischer Sprache.
FRANZÖSISCH
Wählen Sie diese Einstellung für die Wiedergabe
von DVDs in französischer Sprache.
SPANISCH
Wählen Sie diese Einstellung für die Wiedergabe
von DVDs in spanischer Sprache.
DEUTSCH
Wählen Sie diese Einstellung für die Wiedergabe
von DVDs in deutscher Sprache.
ITALIENISCH
Wählen Sie diese Einstellung für die Wiedergabe
von DVDs in italienischer Sprache.
SONSTIGE
Wä hlen Sie mit den Nummerntasten die
Sprachen-Nummer aus. (Siehe “SprachencodeListe” auf Seite 64.)
ENGLI SCH
FRANZ ÖSISCH
SPANISCH
ITAL IENI SCH
DEUTSCH
SONST IGE
B
EINSTELLUNGEN DVD-DISC
NAVIGATION: AUSWAHL: ENTER -TASTE
DI ALOGE
DISC-MENÜS
EINSTELLUNGEN BEENDEN
UNTERTI TEL
Lorsque “PREFERENCE DISQUE” est
sélectionnée
2
Utiliser les touches curseurs • et ª pour sélectionner
le réglage souhaité, puis appuyer sur la touche ENTER.
DIALOGUES
Utilisez cette option pour sélectionner la langue du
son à la sortie enceintes
SOUS-TITRES
Utilisez cette option pour sélectionner la langue des
sous-titres affichés sur la TV.
MENUS DU DISQUE
Utiliser ceci pour programmer la langue des menus
titre (menus enregistrés sur le disque), etc.
PRE F ERE NCE D I SQUE
REGLAGES: DECISION:BOUTTON ENTER
DIALOGUES
M
ENUS DU DI SQ UE
QUI TT E R LA C ONF I GUR AT I ON
SOUS - T I TR ES
A
N
GLAIS
A
N
GLAIS
A
N
GLAIS
B
1
Voir page 59.
3
Utiliser les touches curseurs • et ª pour sélectionner
le réglage souhaité, puis appuyer sur la touche
ENTER.
q Lorsque le “DIALOGUES” est sélectionnée:
ANGLAIS (Réglage usine par défaut)
Sélectionnez cette option lorsque vous souhaitez
lire un DVD avec le son en anglais.
FRANÇAIS
Sélectionnez cette option lorsque vous souhaitez
lire un DVD avec le son en français.
ESPAGNOL
Sélectionnez cette option lorsque vous souhaitez
lire un DVD avec le son en espagnol.
ALLEMAND
Sélectionnez cette option lorsque vous souhaitez
lire un DVD avec le son en Allemand.
ITALIEN
Sélectionnez cette option lorsque vous souhaitez
lire un DVD avec le son en italienne.
AUTRE
Utiliser les touches numériques pour entrer le
numéro de la langue. (Voir “Liste des codes de
langue” à la page 64.)
PRE F ERE NCE D I SQUE
REGLAGES: DECISION:BOUTTON ENTER
DIALOGUES
M
ENUS DU DI SQ UE
QUI TT E R LA C ONF I GUR AT I ON
SOUS - T I TR ES
A
N
GLAIS
FRA
N
ÇAIS
ESPAG
N
OL
ITALIEN
ALLE
M
AND
AUTRE
B
Qunado si seleziona “DISC SETUP”
2
Utilizzate i tasti cursore • e ª per selezionare
l’impostazione desiderata, quindi premete il tasto
ENTER.
DIALOG
Usate questa voce per impostare la lingua dell'uscita
sonora proveniente dagli altoparlanti.
SUBTITLE
Usate questa voce per impostare la lingua dei
sottotitoli visualizzati sul televisore.
DISC MENUS
Si utilizza per impostare la lingua dei menu (menu
registrati sul disco), ecc.
DI S C SE TUP
SELECT : DECISION:ENTER BUTTON
DI ALOG
DI SC MENUS
EXIT SETUP
SUBTI TL E
ENGLI SH
ENGLI SH
ENGLI SH
B
1
Vedere pagina 59.
3
Utilizzate i tasti cursore • e ª per selezionare
l’impostazione desiderata, quindi premete il tasto
ENTER.
q Selezionando “DIALOG”:
ENGLISH (Impostazione di fabbrica)
Selezionate questa posizione per riprodurre il DVD
con il suono in inglese.
FRENCH
Selezionate questa posizione per riprodurre il DVD
con il suono in francese.
SPANISH
Selezionate questa posizione per riprodurre il DVD
con il suono in spagnolo.
GERMAN
Selezionate questa posizione per riprodurre il DVD
con il suono in tedesca.
ITALIAN
Selezionate questa posizione per riprodurre il DVD
con il suono in itariano.
OTHERS
Usate i tasti numerici per inserire il numero della
lingua. (Vedere alla sezione “Lista dei codici delle
lingue” pagina 65.)
DI S C SE TUP
SELECT : DECISION:ENTER BUTTON
DI ALOG
DI SC MENUS
EXIT SETUP
SUBTI TL E
ENGLI SH
FRENCH
SPAN IS H
ITALIAN
GERMAN
OTHERS
B
Page 54

DEUTSCH FRANÇAIS ITALIANO
63
3
w Wenn “UNTERTITEL” angewählt ist:
AUS
Wählen Sie diese Einstellung für die Wiedergabe
ohne Untertitel. (Bei einigen Discs ist es nicht
möglich, die Untertitel-Anzeige auszuschalten.)
ENGLISCH (Standard-Einstellung)
Wählen Sie diese Einstellung für die Wiedergabe
der DVD mit englischen Untertiteln.
FRANZÖSISCH
Wählen Sie diese Einstellung für die Wiedergabe
der DVD mit französischen Untertiteln.
SPANISCH
Wählen Sie diese Einstellung für die Wiedergabe
der DVD mit spanischen Untertiteln.
DEUTSCH
Wählen Sie diese Einstellung für die Wiedergabe
der DVD mit deutschen Untertiteln.
ITALIENISCH
Wählen Sie diese Einstellung für die Wiedergabe
der DVD mit italienischen Untertiteln.
SONSTIGE
Wä hlen Sie mit den Nummerntasten die
Sprachen-Nummer aus. (Siehe “SprachencodeListe” auf Seite 64.)
e Wenn “DISC-MENÜS” angewählt ist:
ENGLISCH (Standard-Einstellung)
Wählen Sie diese Einstellung, wenn Sie die
Menüs in englischer Sprache anzeigen lassen
möchten.
FRANZÖSISCH
Wählen Sie diese Einstellung, wenn Sie die
Menüs in französischer Sprache anzeigen lassen
möchten.
SPANISCH
Wählen Sie diese Einstellung, wenn Sie die
Menüs in spanischer Sprache anzeigen lassen
möchten.
DEUTSCH
Wählen Sie diese Einstellung, wenn Sie die
Menüs in deutscher Sprache anzeigen lassen
möchten.
ITALIENISCH
Wählen Sie diese Einstellung, wenn Sie die
Menüs in italienischer Sprache anzeigen lassen
möchten.
SONSTIGE
Wä hlen Sie mit den Nummerntasten die
Sprachen-Nummer aus. (Siehe “SprachencodeListe” auf Seite 64.)
B
E INSTE LLUNGEN DVD -DI SC
NAVIGATION: AUSWAHL: ENTER -TASTE
DI ALOGE
DISC-MENÜS
EINSTELLUNGEN BEENDEN
UNTERTI TEL
ENGLI SCH
FRANZ ÖSISCH
SPANISCH
ITAL IENI SCH
DEUTSCH
SONST IGE
AUS
B
NAVIGATION: AUSWAHL: ENTER -TASTE
DI ALOGE
DISC-MENÜS
EINSTELLUNGEN BEENDEN
UNTERTI TEL
ENGLI SCH
FRANZ ÖSISCH
SPANISCH
ITAL IENI SCH
DEUTSCH
SONST IGE
E INSTE LLUNGEN DVD -DI SC
3
ENTER
Fernbedienung
Télécommande
Telecomando
✽ Verlassen des Systemeinrichtungsmodus
Wählen Sie mit den ª Cursor-Tasten “EINSTELLUNGEN
BEENDEN” an, und drücken Sie dann die SELECT-Taste.
Sie können die Funktion auch durch Drücken der ENTERTaste auf der Fernbedienung verlassen.
3
w Lorsque le “SOUS-TITRES” est sélectionnée:
NON
Sélectionner cela pour ne pas afficher les soustitres. (Pour quelques disques il n’est pas possible
de désactiver l’affichage du sous-titre.)
ANGLAIS (Réglage usine par défaut)
Sélectionnez cette option lorsque vous souhaitez lire
un DVD avec les sous-titres en anglais.Sélectionnez
cette option lorsque vous souhaitez lire un DVD
avec les sous-titres en anglais.
FRANÇAIS
Sélectionnez cette option lorsque vous souhaitez
lire un DVD avec les sous-titres en français.
ESPAGNOL
Sélectionnez cette option lorsque vous souhaitez
lire un DVD avec les sous-titres en espagnol.
ALLEMAND
Sélectionnez cette option lorsque vous souhaitez
lire un DVD avec le son en Allemand.
ITALIEN
Sélectionnez cette option lorsque vous souhaitez
lire un DVD avec les sous-titres en italienne
AUTRE
Utiliser les touches numériques pour entrer le
numéro de la langue. (Voir “Liste des codes de
langue” à la page 64.)
e Lorsque le “MENUS DU DISQUE” est
sélectionnée:
ANGLAIS (Réglage usine par défaut)
Sélectionnez cette option lorsque vous souhaitez
afficher les menus en anglais.
FRANÇAIS
Sélectionnez cette option lorsque vous souhaitez
afficher les menus en français.
ESPAGNOL
Sélectionnez cette option lorsque vous souhaitez
afficher les menus en espagnol.
ALLEMAND
Sélectionnez cette option lorsque vous souhaitez
afficher les menus en Allemand.
ITALIEN
Sélectionnez cette option lorsque vous souhaitez
afficher les menus en italienne.
AUTRE
Utiliser les touches numériques pour entrer le
numéro de la langue. (Voir “Liste des codes de
langue” à la page 64.)
PRE F ERE NCE D I SQUE
REGLAGES: DECISION:BOUTTON ENTER
DIALOGUES
M
ENUS DU DI SQ UE
QUI TT E R LA C ONF I GUR AT I ON
SOUS - T I TR ES
A
N
GLAIS
FRA
N
ÇAIS
ESPAG
N
OL
ITALIEN
ALLE
M
AND
AUTRE
B
PRE F ERE NCE D I SQUE
REGLAGES: DECISION:BOUTTON ENTER
DIALOGUES
M
ENUS DU DI SQ UE
QUI TT E R LA C ONF I GUR AT I ON
SOUS - T I TR ES
A
N
GLAIS
FRA
N
ÇAIS
ESPAG
N
OL
ITALIEN
ALLE
M
AND
AUTRE
NON
B
✽ Pour quitter le mode Paramétrage
Utilisez les touche ª pour sélectionner “QUITTER LA
CONFIGURATION” et appuyez ensuite sur la touche
ENTER pour confirmer. Il est aussi possible de quitter en
appuyant sur la touche SETUP sur la télécommande.
3
w Selezionando “SUBTITLE”:
OFF
Selezionate questa posizione se non desiderate
visualizzare i sottotitoli. (Per alcuni dischi non è
possibile spegnere la visualizzazione del sottotitolo.)
ENGLISH (Impostazione di fabbrica)
Selezionate questa posizione per riprodurre il DVD
con i sottotitoli in inglese.
FRENCH
Selezionate questa posizione per riprodurre il DVD
con i sottotitoli in francese.
SPANISH
Selezionate questa posizione per riprodurre il DVD
con i sottotitoli in spagnolo.
GERMAN
Selezionate questa posizione per riprodurre il DVD
con i sottotitoli in tedesca.
ITALIAN
Selezionate questa posizione per riprodurre il DVD
con i sottotitoli in itariano.
OTHERS
Usate i tasti numerici per inserire il numero della
lingua. (Vedere alla sezione “Lista dei codici delle
lingue” pagina 65.)
e Selezionando “DISC MENUS”:
ENGLISH (Impostazione di fabbrica)
Selezionate questa opzione per visualizzare i
menù in inglese.
FRENCH
Selezionate questa opzione per visualizzare i
menù in francese.
SPANISH
Selezionate questa opzione per visualizzare i
menù in spagnolo.
GERMAN
Selezionate questa opzione per visualizzare i
menù in tedesca.
ITALIAN
Selezionate questa opzione per visualizzare i
menù in itariano.
OTHERS
Usate i tasti numerici per inserire il numero della
lingua. (Vedere alla sezione “Lista dei codici delle
lingue” pagina 65.)
DI S C SE TUP
SELECT : DECISION:ENTER BUTTON
DI ALOG
DI SC MENUS
EXIT SETUP
SUBTI TL E
ENGLI SH
FRENCH
SPAN IS H
ITALIAN
GERMAN
OTHERS
B
DI S C SE TUP
SELECT : DECISION:ENTER BUTTON
DI ALOG
DI SC MENUS
EXIT SETUP
SUBTI TL E
ENGLI SH
FRENCH
SPAN IS H
ITALIAN
GERMAN
OTHERS
OFF
B
✽ Per uscire dal modo di impostazione
Dovete usare i tasto del cursore ª per selezionare “EXIT
SETUP”, poi premete il tasto ENTER. E’ inoltre possibile
uscire premendo il tasto SETUP sul telecomando
.
Page 55

DEUTSCH FRANÇAIS
64
Sprachencode-Liste
Code
6565
6566
6570
6577
6582
6583
6588
6590
6665
6669
6671
6672
6678
6679
6682
6765
6779
6783
6789
6865
6869
6890
6976
6978
6979
6983
6984
6985
7065
7073
7074
Code
7079
7082
7089
7165
7168
7176
7178
7185
7265
7273
7282
7285
7289
7365
7378
7383
7384
7387
7465
7473
7487
7565
7575
7576
7577
7578
7579
7583
7585
7589
7665
Code
7678
7679
7684
7686
7771
7773
7775
7776
7778
7779
7782
7783
7784
7789
7865
7869
7876
7879
7982
8065
8076
8083
8084
8185
8277
8279
8285
8365
8368
8372
8373
Sprache
Afar
Abkhazian
Afrikaans
Ameharic
Arabic
Assamese
Aymara
Azerbaijani
Bashkir
Byelorussian
Bulgarian
Bihari
Bengali; Bangla
Tibetan
Breton
Catalan
Corsican
Czech
Welsh
Danish
German
Bhutani
Greek
English
Esperanto
Spanish
Estonian
Basque
Persian
Finnish
Fiji
Sprache
Faroese
French
Frisian
Irish
Scots Gaelic
Galician
Guarani
Gujarati
Hausa
Hindi
Croatian
Hungarian
Armenian
Interlingua
Indonesian
Icelandic
Italian
Hebrew
Japanese
Yiddish
Javanese
Georgian
Kazakh
Greenlandic
Cambodian
Kannada
Korean
Kashmiri
Kurdish
Kirghiz
Latin
Sprache
Lingala
Laothian
Lithuanian
Latvian, Lettish
Malagasy
Maori
Macedonish
Malayalam
Mongolian
Moldavian
Marathi
Malay
Maltese
Burmese
Nauru
Nepali
Dutch
Norwegian
Oriya
Panjabi
Polish
Pashto, Pushto
Portuguese
Quechua
Rhaeto-Romance
Romanian
Russian
Sanskrit
Sindhi
Serbo-Croatian
Singhalese
Code
8375
8376
8377
8378
8379
8381
8382
8385
8386
8387
8465
8469
8471
8472
8473
8475
8476
8479
8482
8484
8487
8575
8582
8590
8673
8679
8779
8872
8979
9072
9085
Sprache
Slovak
Slovenian
Samoan
Shona
Somali
Albanian
Serbian
Sundanese
Swedish
Swahili
Tamil
Telugu
Tajik
Thai
Tigrinya
Turkmen
Tagalog
Tonga
Turkish
Tatar
Twi
Ukrainian
Urdu
Uzbek
Vietnamese
Volapük
Wolof
Xhosa
Yoruba
Chinese
Zulu
Liste des codes de langue
Code
6565
6566
6570
6577
6582
6583
6588
6590
6665
6669
6671
6672
6678
6679
6682
6765
6779
6783
6789
6865
6869
6890
6976
6978
6979
6983
6984
6985
7065
7073
7074
Code
7079
7082
7089
7165
7168
7176
7178
7185
7265
7273
7282
7285
7289
7365
7378
7383
7384
7387
7465
7473
7487
7565
7575
7576
7577
7578
7579
7583
7585
7589
7665
Code
7678
7679
7684
7686
7771
7773
7775
7776
7778
7779
7782
7783
7784
7789
7865
7869
7876
7879
7982
8065
8076
8083
8084
8185
8277
8279
8285
8365
8368
8372
8373
Langue
Afar
Abkhazian
Afrikaans
Ameharic
Arabic
Assamese
Aymara
Azerbaijani
Bashkir
Byelorussian
Bulgarian
Bihari
Bengali; Bangla
Tibetan
Breton
Catalan
Corsican
Czech
Welsh
Danish
German
Bhutani
Greek
English
Esperanto
Spanish
Estonian
Basque
Persian
Finnish
Fiji
Langue
Faroese
French
Frisian
Irish
Scots Gaelic
Galician
Guarani
Gujarati
Hausa
Hindi
Croatian
Hungarian
Armenian
Interlingua
Indonesian
Icelandic
Italian
Hebrew
Japanese
Yiddish
Javanese
Georgian
Kazakh
Greenlandic
Cambodian
Kannada
Korean
Kashmiri
Kurdish
Kirghiz
Latin
Langue
Lingala
Laothian
Lithuanian
Latvian, Lettish
Malagasy
Maori
Macedonish
Malayalam
Mongolian
Moldavian
Marathi
Malay
Maltese
Burmese
Nauru
Nepali
Dutch
Norwegian
Oriya
Panjabi
Polish
Pashto, Pushto
Portuguese
Quechua
Rhaeto-Romance
Romanian
Russian
Sanskrit
Sindhi
Serbo-Croatian
Singhalese
Code
8375
8376
8377
8378
8379
8381
8382
8385
8386
8387
8465
8469
8471
8472
8473
8475
8476
8479
8482
8484
8487
8575
8582
8590
8673
8679
8779
8872
8979
9072
9085
Langue
Slovak
Slovenian
Samoan
Shona
Somali
Albanian
Serbian
Sundanese
Swedish
Swahili
Tamil
Telugu
Tajik
Thai
Tigrinya
Turkmen
Tagalog
Tonga
Turkish
Tatar
Twi
Ukrainian
Urdu
Uzbek
Vietnamese
Volapük
Wolof
Xhosa
Yoruba
Chinese
Zulu
Page 56

DEUTSCH FRANÇAIS ITALIANO
66
Wenn “OSD-EINSTELLUNGEN ÄNDERN” angewählt ist
2
Wählen Sie die gewünschte Einstellung mit den
• und ª Cursortasten an und drücken Sie dann
die ENTER-Taste.
OSD-SPRACHE
Stellen Sie hier die Sprache für die StandardEinstellbildschirm und die auf dem
Fernsehschirm angezeigten Meldungen ein.
(“WIEDERGABE”, usw.)
HINTERGRUND
Wählen Sie dies zum Auwählen des Bildes, das
im Stoppmodus und CD-Wiedergabemodus auf
dem Bildschirm erscheinen soll.
OSD -E I NST EL L UNGEN ÄNDERN
OSD-SPRACHE
EINSTELLUNGEN BEENDEN
HI NTERGRUND
DEUTSCH
BLAU
B
NAVIGATION: AUSWAHL: ENTER -TASTE
1
Siehe Seite 59.
4 5 6
ENTER
ON
OFF
REMOTE CONTROL UNIT RC-553
TOP MENU
DISPLAY
MARKERRANDOM
PAGE
A-B
ZOOM
DIMMER
REPEAT
SETUP
NTSC / PALOPEN / CLOSE
CALL RETURN
SKIP
SLOW / SEARCH
POWER
ANGLE SUBTITLE AUDIOSEARCH MODE
PLAY
STILL /
PAUSE
STOP
PIC.ADJ
1
7
0
2
8
+10
3
9
PROG / DIR
V.S.S.
CLEAR
P.D.MEMORY
MENU
1, 2, 3
1
1
2
3
ENTER
Fernbedienung
Télécommande
Telecomando
ENTER
Fernbedienung
Télécommande
Telecomando
3
Wählen Sie die gewünschte Einstellung mit den
• und ª Cursortasten an und drücken Sie dann
die ENTER-Taste.
q Wenn “OSD-SPRACHE” angewählt ist:
ENGLISH (Standard-Einstellung)
Wä hlen Sie diese Einstellung, wenn Sie
Englisch als OSD-Sprache einstellen möchten.
FRANÇAIS
Wä hlen Sie diese Einstellung, wenn Sie
Französisch als OSD-Sprache einstellen
möchten.
ESPAÑOL
Wä hlen Sie diese Einstellung, wenn Sie
Spanisch als OSD-Sprache einstellen
möchten.
DEUTSCH
Wä hlen Sie diese Einstellung, wenn Sie
Deutsch als OSD-Sprache einstellen möchten.
B
ENGLI SH
FRANÇAIS
ESPAÑOL
DEUTSCH
OSD -E I NST EL L UNGEN ÄNDERN
OSD-SPRACHE
EINSTELLUNGEN BEENDEN
HI NTERGRUND
NAVIGATION: AUSWAHL: ENTER -TASTE
Lorsque “MENU DE REGLAGE OSD“
est sélectionnée
2
Utiliser les touches curseurs • et ª pour
sélectionner le réglage souhaité, puis appuyer sur
la touche ENTER.
LANGAGE OSD
Utiliser cette fonction pour sélectionner la langue
pour l’écran des réglages par défaut et pour les
messages affichés sur l’écran de TV
(“LECTURE”, etc.)
FOND D’ECRAN
Utiliser cette fonction afin de choisir une image
servant d’arrière-plan sur l’écran en mode stop
ou lors de la lecture d’un CD.
M
ENU DE RE GLAG E OSD
REGLAGES: DECISION:BOUTTON ENTER
LANGAGE OSD
QUI TT E R LA C ONF I GUR AT I ON
FO
N
D D' E CRA
N
FRANÇAIS
BL EU
B
1
Voir page 59.
3
Utiliser les touches curseurs • et ª pour
sélectionner le réglage souhaité, puis appuyer sur
la touche ENTER.
q
Lorsque le “LANGAGE OSD” est sélectionnée:
ENGLISH (Réglage usine par défaut)
Sélectionner cela pour régler la langue OSD
sur Anglais.
FRANÇAIS
Sélectionner cela pour régler la langue OSD
sur Français.
ESPAÑOL
Sélectionner cela pour régler la langue OSD
sur Espagnol.
DEUTSCH
Sélectionner cela pour régler la langue OSD
sur Allemand.
M
ENU DE RE GLAG E OSD
REGLAGES: DECISION:BOUTTON ENTER
LANGAGE OSD
QUI TT E R LA C ONF I GUR AT I ON
FO
N
D D' E CRA
N
B
ENGLISH
FRA
N
ÇAIS
ESPAÑOL
DEUTSCH
Quando si seleziona “OSD SETUP”
2
Utilizzate i tasti cursore • e ª per selezionare
l’impostazione desiderata, quindi premete il tasto
ENTER.
OSD LANGUAGE
Usate quest'opzione per selezionare la lingua dello
schermo di impostazione default e di quella
visualizzata sullo schermo televisivo (“PLAY”, ecc.)
WALL PAPER
Usate questo modo per selezionare l'immagine
da visualizzare sullo schermo nel modo di arresto
e nel modo di riproduzione del CD.
OSD SETUP
SELECT : DECISION:ENTER BUTTON
OSD LANGUAGE
EXIT SETUP
W
ALL P APER
ENGLI SH
BUL E
B
1
Vedere pagina 59.
3
Utilizzate i tasti cursore • e ª per selezionare
l’impostazione desiderata, quindi premete il tasto
ENTER.
q Selezionando “OSD LANGUAGE”:
ENGLISH (Impostazione di fabbrica)
Selezionate questa voce per impostare la
lingua inglese per l'OSD.
FRANÇAIS
Selezionate questa voce per impostare la
lingua francese per l'OSD.
ESPAÑOL
Selezionate questa voce per impostare la
lingua spagnola per l'OSD.
DEUTSCH
Selezionate questa voce per impostare la
lingua tedesca per l'OSD.
OSD SETUP
SELECT : DECISION:ENTER BUTTON
OSD LANGUAGE
EXIT SETUP
W
ALL P APER
B
ENGLI SH
FRANÇAIS
ESPAÑOL
DEUTSCH
Page 57

DEUTSCH FRANÇAIS ITALIANO
67
3
Wählen Sie die gewünschte Einstellung mit den
• und ª Cursortasten an und drücken Sie dann
die ENTER-Taste.
w Wenn “HINTERGRUND” angewählt ist:
BLAU (Standard-Einstellung)
Wählen Sie dies für einen blauen Hintergrund.
GRAU
Wählen Sie diese Einstellung, wenn ein grauer
TV-Bildschirmhintergrund angezeigt werden
soll.
SCHWARZ
Wä hlen Sie diese Einstellung, wenn ein
schwarzer TV-Bildschirmhintergrund angezeigt
werden soll.
MOTIV
Wählen Sie dies, um das Hintergrundbild auf
dem Display anzeigen zu lassen.
B
BLAU
GRAU
SCHWARZ
MOTIV
OSD -E I NST EL L UNGEN ÄNDE RN
OSD-SPRACHE
EINSTELLUNGEN BEENDEN
HI NTERGRUND
NAVIGATION: AUSWAHL: ENTER -TASTE
3
ENTER
Fernbedienung
Télécommande
Telecomando
✽Verlassen des Systemeinrichtungsmodus
Wä hlen Sie mit den ª Cursor-Tasten
“EINSTELLUNGEN BEENDEN” an, und drücken Sie
dann die SELECT-Taste. Sie können die Funktion
auch durch Drücken der ENTER-Taste auf der
Fernbedienung verlassen.
3
Utiliser les touches curseurs • et ª pour
sélectionner le réglage souhaité, puis appuyer sur
la touche ENTER.
w Lorsque le “FOND D’ ECRAN” est
sélectionnée:
BLEU (Réglage usine par défaut)
Choisissez cette fonction afin d’afficher un
arrière-plan bleu.
GRIS
Sélectionner cette couleur pour afficher un
fond gris sur l’écran du téléviseur.
NOIR
Sélectionner cette couleur pour afficher un
fond noir sur l’écran du téléviseur.
IMAGE
Sélectionnez cette fonction pour afficher le
papier peint.
M
ENU DE RE GLAG E OSD
SELECT : DECISION:ENTER BUTTON
LANGAGE OSD
QUI TT E R LA C ONF I GUR AT I ON
FO
N
D D' E CRA
N
B
BL EU
GRIS
NOIR
I
M
AGE
✽Pour quitter le mode Paramétrage
Utilisez les touche ª pour sélectionner “QUITTER LA
CONFIGURATION” et appuyez ensuite sur la touche
ENTER pour confirmer. Il est aussi possible de
quitter en appuyant sur la touche SETUP sur la
télécommande.
3
Utilizzate i tasti cursore • e ª per selezionare
l’impostazione desiderata, quindi premete il tasto
ENTER.
w Selezionando “WALL PAPER”:
BLUE (Impostazione di fabbrica)
Selezionate questo modo per visualizzare uno
sfondo blu sul display.
GRAY
Selezionate questo per visualizzare uno
sfondo grigio sul display televisivo.
BLACK
Selezionate questo per visualizzare uno
sfondo nero sul display televisivo.
PICTURE
Selezionate questo modo per visualizzare lo
sfondo sul display.
OSD SETUP
SELECT : DECISION:ENTER BUTTON
OSD LANGUAGE
EXIT SETUP
W
ALL P APER
B
BUL E
GRAY
BLAC K
PICTURE
✽Per uscire dal modo di impostazione
Dovete usare i tasto del cursore ª per selezionare
“EXIT SETUP”, poi premete il tasto ENTER. E’ inoltre
possibile uscire premendo il tasto SETUP sul
telecomando.
Page 58

DEUTSCH FRANÇAIS ITALIANO
68
Wenn “VIDEO-OPTIONEN EINSTELLEN” angewählt ist
2
Wählen Sie die gewünschte Einstellung mit den • und ª
Cursortasten an und drücken Sie dann die ENTER-Taste.
TV BILDSCHIRMFORMAT
Stellen Sie hiermit die Form Ihres
Fernsehbildschirmes ein.
FARBFERNSEHNORM
Stellen Sie hiermit das Videoformat Ihres
Fernsehgerätes ein (NTSC, PAL oder MULTI).
VIDEO-AUSGANG
Wählen Sie dies, um entweder den progressiven
Bildausgang oder Interlace-Bildausgang auszuwählen.
VIDEO-MODUS
Wählen Sie für die Wiedergabe von DVD-Video den
gewünschten Videomodus aus (“VIDEO”, “FILM”,
“AUTO”).
SCHWARZPEGEL
Für die Einstellung des Schwarzpegels “DUNKLER”
oder “HELLER”.
AV1 VIDEO-AUSGANG (SCART)
(Nur für europäische Modelle)
Dient zur Wahl, ob ein FBAS-, ein S-Video-Signal oder
ein RGB-Signal vom Euro-AV-Anschluß AV1
ausgegeben wird.
SQUEEZE-MODUS
Fü r die Wiedergabe von 4:3-Bildern auf einem
Breitbildschirm-TV (16:9).
PROGRESSIVE-MODUS
Wählen Sie die Erkennungsmethode der Filmquelle
und Videoquelle aus, die auf die DVD aufgenommen
worden ist.
Wä hlen Sie normalerweise “MODUS 1”
(Pegelerkennungs-Modus).
(nur gültig für den progressiven Ausgang während
der DVD-Video-Wiedergabe)
VIDEO - OPTIONEN E INSTE LLEN
TV BI LDSCHIRMFORMA T
FARBFERNSE HNORM
VID EO- AUSGANG
VIDO - MODUS
16: 9
MULT I NORM
PROGRESSI VE
VIDEO
VIDEO
SCHWARZPEGEL
DUNKLE R
SQUEEZE- MODUS
AUS
PROGRESSI VE -MODUS
MODUS 1
AV1 VI DEO- AUSGANG (SCART)
B
EINSTELLUNGEN BEENDEN
NAVIGATION: AUSWAHL: ENTER -TASTE
1
Siehe Seite 59.
4 5 6
ENTER
ON
OFF
REMOTE CONTROL UNIT RC-553
TOP MENU
DISPLAY
MARKERRANDOM
PAGE
A-B
ZOOM
DIMMER
REPEAT
SETUP
NTSC / PALOPEN / CLOSE
CALL RETURN
SKIP
SLOW / SEARCH
POWER
ANGLE SUBTITLE AUDIOSEARCH MODE
PLAY
STILL /
PAUSE
STOP
PIC.ADJ
1
7
0
2
8
+10
3
9
PROG / DIR
V.S.S.
CLEAR
P.D.MEMORY
MENU
1, 2, 3
1
1
2
3
ENTER
Fernbedienung
Télécommande
Telecomando
3
Wählen Sie die gewünschte Einstellung mit den •
und ª Cursortasten an und drücken Sie dann die
ENTER-Taste.
q Wenn “TV BILDSCHIRMFORMAT” angewählt ist:
4:3 PS
Wählen Sie diese Einstellung für die Wiedergabe
von Breitbild-DVDs im Pan & Scan-Modus (mit
abgeschnittenen Bildkanten). Discs, für die der
Pan & Scan-Modus nicht festgelegt worden ist,
werden im Letter Box-Modus wiedergegeben.
4:3 LB
Wählen Sie diese Einstellung für die Wiedergabe
von Breitbild-DVDs im Letter Box-Modus (mit
schwarzen Streifen oben und unten).
16:9 (Standard-Einstellung)
Wählen Sie diese Einstellung für die Wiedergabe
von DVDs im Full-Screen-Modus (Vollbild).
4 : 3 PS
4 : 3 LB
16: 9
B
VIDEO - OPTIONEN E INSTE LLEN
TV BI LDSCHIRMFORMA T
FARBFERNSE HNORM
VID EO- AUSGANG
VID EO-MODUS
SCHWARZPEGEL
SQUEEZE- MODUS
PROGRESSI VE -MODUS
AV1 VI DEO- AUSGANG (SCART)
EINSTELLUNGEN BEENDEN
NAVIGATION: AUSWAHL: ENTER -TASTE
QUI TT E R LA C ONF I GUR AT I ON
N
I VEAU DU NOIR
AV 1 SO RT I E V I DE O
MEN
U REG LAGE V I DEO
REGLAGES: DECISION:BOUTTON ENTER
TYPE D'ECRA
N
TYPE DE TV
SORT IE VIDEO
M
ODE V I DEO
SQUEEZ E
M
ODE
M
ODE PROGR ESS I VE
4 : 3 PS
4 : 3 LB
16: 9
B
EXIT SETUP
BLAC K L EVE L
SQUEEZE MODE
PROGRES SI VE MODE
VI DEO SETUP
SELECT : DECISION:ENTER BUTTON
TV ASPECT
TV TYPE
VI DE O OUT
VI DE O
M
ODE
4 : 3 PS
4 : 3 LB
W
IDE(16:9)
B
AV1 VI DEO OUT
Fernbedienung
Télécommande
Telecomando
ENTER
Fernbedienung
Télécommande
Telecomando
Lorsque “MENU REGLAGE VIDEO”
est sélectionnée
2
Utiliser les touches curseurs • et ª pour sélectionner
le réglage souhaité, puis appuyer sur la touche ENTER.
TYPE D’ÉCRAN
Utiliser cette fonction pour régler la forme de l’écran
de votre télévision.
TYPE DE TV
Utiliser cette option pour régler le format vidéo de
votre TV (NTSC, PAL ou MULTI).
SORTIE VIDÉO
Utiliser cette fonction pour choisir soit la sortie d’images
progressives soit la sortie d’images entrelacées.
MODE VIDÉO
Pour lire un DVD vidéo, sélectionner le mode vidéo
désiré (“VIDEO”, “FILM”, “AUTO”).
NIVEAU DU NOIR
Pour sélectionner le niveau noir de l’image, “PLUS
CLAIR” ou “PLUS SOMBRE”.
AV1 SORTIE VIDEO
(Pour le modèle Européen seulement)
Pour sélectionner si les signaux vidéo composites,
les signaux S vidéo ou les signaux RGB seront
envoyés par les prises AV1 SCART.
SQUEEZE MODE
Utilisé pour lire des images en format 4:3 sur un
téléviseur grand écran (16:9).
MODE PROGRESSIVE
Sélectionner la source du film ainsi que la méthode
de détection de source vidéo enregistrée sur le DVD.
Sélectionner normalement “MODE1” (mode de
détection de niveau).
(valide uniquement pour une sortie progressive
durant la lecture vidéo DVD)
MEN
U REG LAGE V I DEO
REGLAGES: DECISION:BOUTTON ENTER
TYPE D'ECRA
N
TYPE DE TV
SORT IE VIDEO
QUI TT E R LA C ONF I GUR AT I ON
M
ODE V I DEO
4 : 3 PS
M
ULT I
PROGRESSI VE
VIDEO
AV 1 SO RT I E V I DE O
VIDEO
N
I VEAU DU NOIR
PL US CL A IR
SQUEEZ E
M
ODE
NON
M
ODE PROGR ESS I VE
MODE 1
B
1
Voir page 59.
3
Utiliser les touches curseurs • et ª pour sélectionner
le réglage souhaité, puis appuyer sur la touche
ENTER.
q Lorsque le “TYPE D'ECRAN” est sélectionnée:
4:3 PS
Sélectionnez cette option pour lire les images
larges de DVD en mode Image étroite (avec les
bords de l’image coupés). Les disques pour
lesquels le mode Image étroite n’est pas spécifié
sont lus en mode Boîte à lettre.
4:3 LB
Sélectionnez cette option pour lire les images
larges de DVD en mode Boîte à lettre (avec des
bandes noires en haut et en bas de l’image).
16:9 (Réglage usine par défaut)
Sélectionnez cette option pour lire les images
larges de DVD en mode plein écran.
Quando si seleziona “VIDEO SETUP”
2
Utilizzate i tasti cursore • e ª per selezionare
l’impostazione desiderata, quindi premete il tasto
ENTER.
TV ASPECT
Utilizzatelo per impostare la forma del vostro
schermo televisivo.
TV TYPE
Usate questa voce per impostare il formato video del
televisore (NTSC, PAL o MULTI).
VIDEO OUT
Usate quest'uscita per selezionare o l'uscita
dell'immagine progressiva oppure l'uscita
dell'immagine per interallacciare.
VIDEO MODE
Per riprodurre un video DVD; selezionate il modo
video desiderato (“VIDEO”, “FILM”, “AUTO”).
BLACK LEVEL
Per selezionare il livello nero dell'immagine
“DARKER” o “LIGHTER”.
AV1 VIDEO OUT (Solo per modelli europei)
Per selezionare se emettere dai terminali AV1 SCART
i segnali video compositi, i segnali S video o i segnali
RGB.
SQUEEZE MODE
Usato per riprodurre immagini 4:3 su un televisore a
schermo ampio (16:9).
PROGRESSIVE MODE
Selezionate la fonte del film e del metodo di
rilevazione del video registrati sul DVD.
Selezionate “MODE 1” normalmente (modo di
rilevazione del livello).
(valido solamente per uscite progressive durante la
riproduzione video DVD)
EXIT SETUP
BLAC K L EVE L
SQUEEZE MODE
PROGRES SI VE MODE
VI DEO SETUP
SELECT : DECISION:ENTER BUTTON
TV ASPECT
TV TYPE
VI DE O OUT
VI DE O
M
ODE
B
AV1 VI DEO OUT
W
IDE(16:9)
MULT I
PROGRESSI VE
VIDEO
VIDEO
LI GHTER
OFF
MODE 1
1
Vedere pagina 59.
3
Utilizzate i tasti cursore • e ª per selezionare
l’impostazione desiderata, quindi premete il tasto
ENTER.
q Selezionando “TV ASPECT”:
4:3 PS
Selezionate questa per riprodurre dei DVD nel
modo pan & scan (con i lati dell'immagine
rimossi). I dischi per i quali pan & scan non è stato
specificati vengono riprodotti nel modo
incorniciato.
4:3 LB
Selezionate questa voce per riprodurre i DVD nel
modo incorniciato (con delle strisce nere in alto e
in basso).
WIDE (16:9)
(Impostazione di fabbrica)
Selezionate questa voce per riprodurre i DVD nel
modo a schermo pieno.
Page 59

DEUTSCH FRANÇAIS ITALIANO
69
3
w Wenn “FARBFERNSEHNORM” angewählt ist:
NTSC-TV
Wä hlen Sie diese Einstellung, wenn das
Videoformat Ihres Fernsehgerätes NTSC ist.
Wenn NTSC angewählt ist, ist das
Ausgangsformat auf NTSC festgelegt.
PAL-TV
Wä hlen Sie diese Einstellung, wenn das
Videoformat Ihres Fernsehgerätes PAL ist.
Wenn PAL angewählt ist, ist das Ausgangsformat
auf PAL festgelegt.
MULTINORM (Standard-Einstellung)
Wä hlen Sie diese Einstellung, wenn Ihr
Fernsehgerät sowohl mit dem NTSC- als auch
PAL-Format kompatibel ist.
Bei der Wiedergabe einer im NTSC-Format
aufgenommenen Disc von der VideoAusgangsbuchse, erfolgt die Umschaltung auf
NTSC. (Im Falle einer PAL-Disc ist das Videosignal
im PAL-Format.)
e Wenn “VIDEO-AUSGANG” angewählt ist:
(HINWEIS)
PROGRESSIVE (Standard-Einstellung)
Wählen Sie dies, wenn Ihr DVD-3800 an ein
progressives Fernsehgerät angeschlossen ist.
INTERLACED
Wählen Sie dies, wenn Ihr DVD-3800 an ein
Interlace-Fernsehgerät angeschlossen ist.
HINWEISE:
•
Nur für den Komponenten-Ausgang ist es möglich,
zwischen dem Interlace-Bildausgang und
progressiven Bildausgang umzuschalten. Für den
Video-Ausgangsklemme (VIDEO OUT) oder SVideo-Ausgangsklemme (S-VIDEO OUT) kann der
progressive Bildausgang nicht festgelegt werden.
•
Wenn der Progressiv-Modus aktiviert ist, sind
Zeilensprung-Ton und Zwischenzeilen-Gesamtbild
möglicherweise nicht synchron. Stellen Sie für die
Verwendung des Zwischenzeilen-Ausgangs
“INTERLACED” ein.
PROGRESSI VE
INTERLACED
B
VIDEO - OPTIONEN E INSTE LLEN
TV BI LDSCHIRMFORMA T
FARBFERNSE HNORM
VID EO- AUSGANG
VID EO-MODUS
SCHWARZPEGEL
SQUEEZE- MODUS
PROGRESSI VE -MODUS
AV1 VI DEO- AUSGANG (SCART)
EINSTELLUNGEN BEENDEN
NAVIGATION: AUSWAHL: ENTER -TASTE
NTSC- TV
PAL - TV
MUL TI NORM
B
VIDEO - OPTIONEN E INSTE LLEN
TV BI LDSCHIRMFORMA T
FARBFERNSE HNORM
VID EO- AUSGANG
VID EO-MODUS
SCHWARZPEGEL
SQUEEZE- MODUS
PROGRESSI VE -MODUS
AV1 VI DEO- AUSGANG (SCART)
EINSTELLUNGEN BEENDEN
NAVIGATION: AUSWAHL: ENTER -TASTE
3
ENTER
Fernbedienung
Télécommande
Telecomando
3
w Lorsque le “TYPE DE TV” est sélectionnée:
NTSC
Sélectionnez cette option si le format vidéo de
votre télévision est le NTSC.
PAL
Sélectionnez cette option si le format vidéo de
votre télévision est le PAL.
Si PAl est sélectionnée, le format de sortie est
fixé en PAL.
MULTI (Réglage usine par défaut)
Sé lectionnez cette option si votre TV est
compatible NTSC et PAL.
En cas de lecture d’un disque enregistré en
format NTSC, le terminal de sortie vidéo sera
commuté en format NTSC. (Pour le disque PAL, le
signal vidéo est de format PAL.)
e Lorsque le “SORTIE VIDÉO” est sélectionnée:
(REMARQUES)
PROGESSIVE (Réglage usine par défaut)
Sélectionner cette fonction lorsque le DVD-3800
est connecté à une télévision de type progressif.
ENTRELACE
Sélectionner cette fonction lorsque le DVD3800est connecté à une tél évision de type
entrelacé.
REMARQUES:
• Pour la sortie de composants uniquement, il est
possible de commuter entre une sortie d’images
entrelacées et une sortie d’images progressives. Il
n’est pas possible de choisir la sortie d’image
progressive pour connecteur de sortie ou pour Les
connecteur de sortie de la S-Vidéo.
• Lorsque le mode progressif est sélectionné, le son
entrelacé et l’image risque d’être légèrement hors
sync. Pour utiliser la sortie entrelacé, mettre le
réglage sur “ENTRELACE”.
QUI TT E R LA C ONF I GUR AT I ON
N
I VEAU DU NOIR
AV 1 SO RT I E V I DE O
MEN
U REG LAGE V I DEO
REGLAGES: DECISION:BOUTTON ENTER
TYPE D'ECRA
N
TYPE DE TV
SORT IE VIDEO
M
ODE V I DEO
M
ODE SQUE EZ E
M
ODE PROGR ESS I VE
PROGRESSI VE
ENTRE LACE
B
QUI TT E R LA C ONF I GUR AT I ON
N
I VEAU DU NOIR
AV 1 SO RT I E V I DE O
MEN
U REG LAGE V I DEO
REGLAGES: DECISION:BOUTTON ENTER
TYPE D'ECRA
N
TYPE DE TV
SORT IE VIDEO
M
ODE V I DEO
SQUEEZ E
M
ODE
M
ODE PROGR ESS I VE
NTSC
PAL
M
ULT I
B
3
w Selezionando “TV TYPE”:
NTSC
Selezionate questa voce quando il formato video
del televisore è quello NTSC.
Selezionando NTSC, il formato di uscita si fissa su
NTSC.
PAL
Selezionate questa voce quando il formato video
del televisore è quello PAL.
Selezionando PAL il formato di uscita si fissa su
PAL.
MULTI (Impostazione di fabbrica)
Selezionate questa voce se il vostro televisore è
compatibile con i formati NTSC e PAL.
Se riproducete un disco registrato in formato
NTSC, il formato del terminale di uscita video
cambia automaticamente a NTSC (nel caso di un
disco PAL, il segnale video è in formato PAL).
e Selezionando “VIDEO OUT”: (NOTE)
PROGRESSIVE (Impostazione di fabbrica)
Selezionate questo modo se avete collegato il
DVD-3800 ad un televisore di tipo progressivo.
INTERLACED
Selezionate questo modo se avete collegato il
DVD-3800 ad un televisore con interallaccio.
NOTE:
•
Per l'uscita del componente è possibile commutare
tra l'uscita dell'immagine di interallaccio e l'uscita
dell'immagine progressiva. Non è possibile
specificare l'uscita dell'immagine progressiva per
Connettore di uscita video (VIDEO OUT) oppure
Connettore di uscita S-Video (S-VIDEO OUT).
•
Quando selezionate il modo progressivo, il suono e
l'immagine interlacciati possono essere
leggermente fuori sincronizzazione. Per usare
l'uscita interlacciata, impostate l'impostazione
“INTERLACED”.
BLAC K L EVE L
SQUEEZE MODE
EXIT SETUP
PROGRES SI VE MODE
VI DEO SETUP
SELECT : DECISION:ENTER BUTTON
TV ASPECT
TV TYPE
VI DE O OUT
VI DE O
M
ODE
PROGRESSI VE
INTERLACED
B
AV1 VI DEO OUT
EXIT SETUP
BLAC K L EVE L
SQUEEZE MODE
PROGRES SI VE MODE
VI DEO SETUP
SELECT : DECISION:ENTER BUTTON
TV ASPECT
TV TYPE
VI DE O OUT
VI DE O
M
ODE
NTSC
PAL
M
ULT I
B
AV1 VI DEO OUT
Page 60

DEUTSCH FRANÇAIS ITALIANO
70
3
r Wenn “VIDEO-MODUS” angewählt ist:
VIDEO (Standard-Einstellung)
Dieser Modus ist am Besten für die Wiedergabe
von Discs geeignet, die Videomaterial enthalten.
FILM
Dieser Modus ist am Besten für die Wiedergabe
von Discs geeignet, die Filmmaterial oder mit dem
Progressiv-Abtastverfahren aufgenommenes
Videomaterial enthalten.
AUTO
Das Gerät identifiziert den Material-Typ der
abgespielten Disc (Film oder Video) und stellt den
Modus automatisch ein. Dieser Modus ist für die
Wiedergabe von Discs geeignet, die Film- und
Videomaterial enthalten.
HINWEIS:
•
Falls bei der Wiedergabe einer spezifischen DVDVideo-Disc Streifen auf dem Bild erscheinen oder
das Bild unklar angezeigt wird, dann ändern Sie den
Videomodus.
t Wenn “SCHWARZPEGEL” angewählt ist:
DUNKLER (Standard-Einstellung)
Stellt den Videoausgangssignal-Schwarzpegel auf
den Standardpegel.
HELLER
Reduziert den Standardpegel des
Videoausgangssignal-Schwarzpegels.
Diese Einstellung vornehmen, falls das TV-Bild viel
zu dunkel ist.
DUNKL ER
HELLER
B
VIDEO - OPTIONEN E INSTE LLEN
TV BI LDSCHIRMFORMA T
FARBFERNSE HNORM
VID EO- AUSGANG
VID EO-MODUS
SCHWARZPEGEL
SQUEEZE- MODUS
PROGRESSI VE -MODUS
AV1 VI DEO- AUSGANG (SCART)
EINSTELLUNGEN BEENDEN
NAVIGATION: AUSWAHL: ENTER -TASTE
VIDEO
FILM
AUTO
B
VIDEO - OPTIONEN E INSTE LLEN
TV BI LDSCHIRMFORMA T
FARBFERNSE HNORM
VID EO- AUSGANG
VID EO-MODUS
SCHWARZPEGEL
SQUEEZE- MODUS
PROGRESSI VE -MODUS
AV1 VI DEO- AUSGANG (SCART)
EINSTELLUNGEN BEENDEN
NAVIGATION: AUSWAHL: ENTER -TASTE
3
ENTER
Fernbedienung
Télécommande
Telecomando
3
r Lorsque le “MODE VIDÉO” est sélectionnée:
VIDÉO (Réglage usine par défaut)
Ce mode est le mieux adapté à la lecture de
disques contenant de la vidéo.
FILM
Ce mode est le mieux adapté à la lecture de
disques contenant un film ou de la vidéo
enregistrée avec la mé thode de balayage
progressif.
AUTO
L’appareil identifie le type de matériau sur le
disque en cours de lecture (film ou vidéo) et
sélectionne automatiquement le mode. Ce mode
est adapté à la lecture disques contenant un film
et de la vidéo.
REMARQUE:
•
Si des bandes de bruit apparaissent sur l’image ou
si l’image n’est pas nette lors de la lecture d’un
disque DVD vidéo spé cifique, essayer de
commuter au mode vidéo.
t Lorsque le “NIVEAU DU NOIR” est sélectionnée:
PLUS SOMBRE (Réglage usine par défaut)
Régle le niveau noir du signal de sortie vidéo au
niveau standard.
PLUS CLAIR
Réduit le niveau standard du niveau noir du signal
de sortie vidéo.
Régler ce niveau si l’image sur le téléviseur est
loin d’être sombre.
QUI TT E R LA C ONF I GUR AT I ON
N
I VEAU DU NOIR
MEN
U REG LAGE V I DEO
REGLAGES: DECISION:BOUTTON ENTER
TYPE D'ECRA
N
TYPE DE TV
SORT IE VIDEO
AV 1 SO RT I E V I DE O
M
ODE V I DEO
SQUEEZ E
M
ODE
M
ODE PROGR ESS I VE
PLUS SO
M
BRE
PLUS CLAIR
B
QUI TT E R LA C ONF I GUR AT I ON
N
I VEAU DU NOIR
AV 1 SO RT I E V I DE O
MEN
U REG LAGE V I DEO
REGLAGES: DECISION:BOUTTON ENTER
TYPE D'ECRA
N
TYPE DE TV
SORT IE VIDEO
M
ODE V I DEO
SQUEEZ E
M
ODE
M
ODE PROGR ESS I VE
VIDEO
FILM
AUTO
B
3
r Quando selezionate “VIDEO MODE”:
VIDEO (Impostazione di fabbrica)
Questo modo è adatto per la riproduzione di dischi
che contengono del materiale video.
FILM
Questo modo è adatto per la riproduzione di dischi
che contengono del materiale cinematografico o
video registrato con il metodo di scansione
progressiva.
AUTO
L'unità identifica il tipo di materiale del disco in
fase di riproduzione (film o video) e seleziona il
modo automaticamente. Questo modo è adatto
per la riproduzione di dischi che contengono
materiale cinematografico e video.
NOTA:
•
Se appaiono delle strisce di rumore nell'immagine
o se l'immagine è poco nitido durante la
riproduzione di un disco video DVD specifico,
cambiate il modo video.
t Quando selezionate “BLACK LEVEL”:
DARKER (Impostazione di fabbrica)
Imposta il livello nero del segnale d'uscita video al
livello standard.
LIGHTER
Riduce il livello standard, del livello nero del
segnale di uscita video.
Impostate questo valore se l'immagine sul
televisore è troppo scuro.
BLAC K L EVE L
SQUEEZE MODE
EXIT SETUP
PROGRES SI VE MODE
VI DEO SETUP
SELECT : DECISION:ENTER BUTTON
TV ASPECT
TV TYPE
VI DE O OUT
VI DE O
M
ODE
DARKE R
LI GHTER
B
AV1 VI DEO OUT
BLAC K L EVE L
SQUEEZE MODE
EXIT SETUP
PROGRES SI VE MODE
VI DEO SETUP
SELECT : DECISION:ENTER BUTTON
TV ASPECT
TV TYPE
VI DE O OUT
VI DE O
M
ODE
VIDEO
FILM
AUTO
B
AV1 VI DEO OUT
Page 61

DEUTSCH FRANÇAIS ITALIANO
71
3
y Wenn “ AV1 VIDEO-AUSGANG (SCART)”
angewählt ist:
VIDEO (Standard-Einstellung)
Ein FBAS-Videosignal wird vom Euro-AV-Anschluß
AV1 ausgegeben.
S-VIDEO
Ein S-Video-Signal wird ausgegeben.
RGB
Ein RGB-Signal wird ausgegeben.
u Wenn “SQUEEZE-MODUS” angewählt ist:
“SQUEEZE-MODUS” - nur im progressiven
Ausgang wirksam.
AUS (Standard-Einstellung)
Diese Einstellung wählen, wenn 4:3-Videosignale
über den gesamten Bildschirm eines 16:9-
Fernsehgeräts angezeigt werden sollen.
EIN
Diese Einstellung wählen, wenn 4:3-Videosignale
in der Bildschirmmitte eines 16:9-Fernsehgeräts
angezeigt werden sollen.
i Wenn “PROGRESSIVE-MODUS” angewählt ist:
MODUS 1 (Pegelerkennungs-Modus)
(Standard-Einstellung)
Dies ist ein Modus zur hochpräzisen Erkennung
der Quellenart vom Pegel der auf die DVD
aufgenommenen Videosignale.
Bei DVDs, auf die die Kennzeichnungsdaten
(Identifikationssignal) nicht ordnungsgemäß
aufgenommen worden sind, nimmt die
Bildqualität unter Umstä nden ab, wenn die
Erkennung der Kennzeichnung durchgeführt wird.
Dieser Modus wird in solchen Fällen wirksam.
MODUS 2 (KennzeichnungserkennungsModus)
Dies ist ein Modus zur Erkennung der Quellenart
der auf die DVD aufgenommenen
Quellenkennzeichnung (Identifikationssignal).
Bei dunklen Szenen ist die Unterscheidung
zwischen Videosignalen und Geräuschsignalen
durch die Pegelerkennung schwierig, und die
Bildqualität nimmt unter Umständen ab.
Dieser Modus wird in solchen Fällen wirksam.
AUS
EIN
B
VIDEO - OPTIONEN E INSTE LLEN
TV BI LDSCHIRMFORMA T
FARBFERNSE HNORM
VID EO- AUSGANG
VID EO-MODUS
SCHWARZPEGEL
SQUEEZE- MODUS
PROGRESSI VE -MODUS
AV1 VI DEO- AUSGANG (SCART)
EINSTELLUNGEN BEENDEN
NAVIGATION: AUSWAHL: ENTER -TASTE
VIDEO
S-VIDEO
RGB
B
VIDEO - OPTIONEN E INSTE LLEN
TV BI LDSCHIRMFORMA T
FARBFERNSE HNORM
VID EO- AUSGANG
VID EO-MODUS
SCHWARZPEGEL
SQUEEZE- MODUS
PROGRESSI VE -MODUS
AV1 VI DEO- AUSGANG (SCART)
EINSTELLUNGEN BEENDEN
NAVIGATION: AUSWAHL: ENTER -TASTE
3
ENTER
Fernbedienung
Télécommande
Telecomando
✽ Verlassen des Systemeinrichtungsmodus
Wählen Sie mit den ª Cursor-Tasten “EINSTELLUNGEN
BEENDEN” an, und drücken Sie dann die SELECT-Taste.
Sie können die Funktion auch durch Drücken der ENTERTaste auf der Fernbedienung verlassen.
MODUS 1
MODUS 2
B
VIDEO - OPTIONEN E INSTE LLEN
TV BI LDSCHIRMFORMA T
FARBFERNSE HNORM
VID EO- AUSGANG
VID EO-MODUS
SCHWARZPEGEL
SQUEEZE- MODUS
PROGRESSI VE -MODUS
AV1 VI DEO- AUSGANG (SCART)
EINSTELLUNGEN BEENDEN
NAVIGATION: AUSWAHL: ENTER -TASTE
QUI TT E R LA C ONF I GUR AT I ON
N
I VEAU DU NOIR
AV 1 SO RT I E V I DE O
MEN
U REG LAGE V I DEO
REGLAGES: DECISION:BOUTTON ENTER
TYPE D'ECRA
N
TYPE DE TV
SORT IE VIDEO
M
ODE V I DEO
SQUEEZ E
M
ODE
M
ODE PROGR ESS I VE
MODE 1
MODE 2
B
BLAC K L EVE L
SQUEEZE MODE
EXIT SETUP
PROGRES SI VE MODE
VI DEO SETUP
SELECT : DECISION:ENTER BUTTON
TV ASPECT
TV TYPE
VI DE O OUT
VI DE O
M
ODE
MODE 1
MODE 2
B
AV1 VI DEO OUT
3
y
Lorsque le “AV1 SORTIE VIDEO” est sélectionnée:
VIDEO (Réglage usine par défaut)
Les signaux vidéo composites seront envoyés par
la prise AV1 SCART.
S-VIDEO
Les signaux S-vidéo seront envoyés.
RVB
Les signaux RVB seront envoyés.
u Lorsque le “SQUEEZE MODE” est sélectionnée:
“SQUEEZE MODE” – Utile seulement pour la
sortie progressive.
NON (Réglage usine par défaut)
Régler ce mode pour afficher les signaux vidéo
4:3 sur l’écran entier d’un téléviseur 16:9.
OUI
Régler ce mode pour afficher les signaux vidéo
4:3 au centre de l’écran d’un téléviseur 16:9.
i Lorsque le “MODE PROGRESSIVE” est
sélectionnée:
MODE 1 (mode de détection de niveau)
(Réglage usineÏ par défaut)
Il s’agit d’un mode pour la dé tection à haute
précision du type de la source à partir du niveau
des signaux vidéo enregistrés sur le DVD.
Pour les DVDs sur lesquels la vignette (signal
d’identification) est enregistrée d’une façon
incorrecte, la qualité de l’image risque d’être
dégradée lors de la procédure de détection de
vignette.
Ce mode est utile dans les cas suivants.
MODE 2 (mode de détection de vignette)
Il s’agit d’un mode pour la détection du type de la
source à partir de la vignette de source (signal
d’identification) enregistrée sur le DVD.
Lors des scènes sombres, la différentiation entre
le signal vidéo et le bruit à l’aide de la méthode de
détection par niveau est difficile et la qualité de
l’image risque d’en pâtir.
Ce mode est utile dans les cas suivants.
QUI TT E R LA C ONF I GUR AT I ON
N
I VEAU DU NOIR
AV 1 SO RT I E V I DE O
MEN
U REG LAGE V I DEO
REGLAGES: DECISION:BOUTTON ENTER
TYPE D'ECRA
N
TYPE DE TV
SORT IE VIDEO
M
ODE V I DEO
SQUEEZ E
M
ODE
M
ODE PROGR ESS I VE
NON
OUI
B
QUI TT E R LA C ONF I GUR AT I ON
N
I VEAU DU NOIR
MEN
U REG LAGE V I DEO
REGLAGES: DECISION:BOUTTON ENTER
TYPE D'ECRA
N
TYPE DE TV
SORT IE VIDEO
AV 1 SO RT I E V I DE O
M
ODE V I DEO
SQUEEZ E
M
ODE
M
ODE PROGR ESS I VE
VIDEO
S-VIDEO
RVB
B
✽ Pour quitter le mode Paramétrage
Utilisez les touche ª pour sélectionner “QUITTER LA
CONFIGURATION” et appuyez ensuite sur la touche
ENTER pour confirmer. Il est aussi possible de quitter en
appuyant sur la touche SETUP sur la télécommande.
3
y Selezionando “AV1 VIDEO OUT”:
VIDEO (Impostazione di fabbrica)
Dal terminale AV1 SCART saranno inviati dei
segnali video compositi.
S-VIDEO
Saranno inviati dei segnali S-video.
RGB
Saranno inviati dei segnali RGB.
u Quando selezionate “SQUEEZE MODE”:
“SQUEEZE MODE” - effettivo solamente per le
uscite progressive.
OFF (Impostazione di fabbrica)
Impostate questo valore per visualizzare dei
segnali video 4:3 sull'intero schermo di un
televisore 16:9.
ON
Impostate questo valore per visualizzare dei
segnali video 4:3 al centro dello schermo su un
televisore 16:9.
i Quando “PROGRESSIVE MODE” è selezionato:
MODE 1 (modo di rilevazione del livello)
(impostazione di fabbrica)
Questo è un modo per la rilevazione ad alta
precisione del tipo della fonte dal livello dei segnali
video registrati sul DVD.
Per i DVD nei quali il segno (segnale di
identificazione) dei dati è registrato in maniera
scorretta, la qualità dell’immagine potrebbe
decrescere quando la rilevazione del segnale
viene condotta.
Questo modo è effettivo in questi casi.
MODE 2 (modo di rilevazione del segno)
Questo è un modo per la rilevazione del tipo della
fonte dal segno della fonte (segnale della fonte
registrato sul DVD.
In scene scure, la distinzione tra segnali video e
segnali rumorosi con il livello di rilevazione è
difficile e la qualità dell’ immagine potrebbe
diminuire.
Questo modo è effettivo in questi casi.
BLAC K L EVE L
SQUEEZE MODE
EXIT SETUP
PROGRES SI VE MODE
VI DEO SETUP
SELECT : DECISION:ENTER BUTTON
TV ASPECT
TV TYPE
VI DE O OUT
VI DE O
M
ODE
OFF
ON
B
AV1 VI DEO OUT
BLAC K L EVE L
SQUEEZE MODE
EXIT SETUP
PROGRES SI VE MODE
VI DEO SETUP
SELECT : DECISION:ENTER BUTTON
TV ASPECT
TV TYPE
VI DE O OUT
VI DE O
M
ODE
VIDEO
S-VIDEO
RGB
B
AV1 VI DEO OUT
✽ Per uscire dal modo di impostazione
Dovete usare i tasto del cursore ª per selezionare “EXIT
SETUP”, poi premete il tasto ENTER. E’ inoltre possibile
uscire premendo il tasto SETUP sul telecomando.
Page 62

DEUTSCH FRANÇAIS ITALIANO
72
Wenn “AUDIO-EINSTELLUNGEN” angewählt ist
2
3
Wählen Sie die gewünschte Einstellung mit den •
und ª Cursortasten an und drücken Sie dann die
ENTER-Taste.
LAUTSPRECHER
Diese Einstellung wählen, um die angeschlossenen
Lautsprecher-Systeme zu justieren.
DIGITAL-AUSGANG
Hiermit können Sie das digitale
Ausgangssignalformat anwählen.
LPCM (44.1 KHz / 48 kHz)
Stellen Sie hiermit bei der Wiedergabe von in
liniearem PCM Audio aufgenommen DVDs den
digitalen Audio-Ausgang ein.
BASS ENHANCER
Einstellen, ob die Audiosignale von Subwoofer
ausgegeben werden soll, wenn ZweikanalAudiosignale wiedergegeben werden.
AUD IO - E INS TEL L UNGEN
LAUTSPRECHER
DI G I TAL - AUSGANG
LPCM(44.1kHz/48kHz)
EINSTELLUNGEN BEENDEN
BASS ENHANCER
MUL T I - KANAL
NORMAL
EIN
AUS
B
NAVIGATION: AUSWAHL: ENTER -TASTE
Wählen Sie die gewünschte Einstellung mit den •
und ª Cursortasten an und drücken Sie dann die
ENTER-Taste.
q Wenn “LAUTSPRECHER” angewählt ist:
B
Wählen Sie mit den Cursor-Tasten •und
ª
den gewünschten Einstellungspunkt aus,
drücken Sie anschließend die ENTER-Taste.
MULTI-KANAL (Standard-Einstellung)
Diese Einstellung bei Anlagen wählen, an
denen drei oder mehr Lautsprecher
angeschlossen sind.
Wenn MULTI CHANNEL eingestellt ist, können
die Lautsprecher-Einstellungen
(LAUTSPRECHER-KONFIG.), LautsprecherAusgabepegel-Einstellung (PEGELEINSTELLUNG) und die LautsprecherAbstandseinstellung (VERZÖGERUNGSZEIT)
vorgenommen werden.
2-KANAL
Diese Einstellung bei Anlagen wählen, an denen
nur zwei Lautsprecher angeschlossen sind.
MUL T I - KA NAL
2
-KANAL
B
AUD IO - E INS TEL L UNGEN
LAUTSPRECHER
DI G I TAL - AUSGANG
LPCM(44.1kHz/48kHz)
EINSTELLUNGEN BEENDEN
BASS ENHANCER
NAVIGATION: AUSWAHL: ENTER -TASTE
1
Siehe Seite 59.
4 5 6
ENTER
ON
OFF
REMOTE CONTROL UNIT RC-553
TOP MENU
DISPLAY
MARKERRANDOM
PAGE
A-B
ZOOM
DIMMER
REPEAT
SETUP
NTSC / PALOPEN / CLOSE
CALL RETURN
SKIP
SLOW / SEARCH
POWER
ANGLE SUBTITLE AUDIOSEARCH MODE
PLAY
STILL /
PAUSE
STOP
PIC.ADJ
1
7
0
2
8
+10
3
9
PROG / DIR
V.S.S.
CLEAR
P.D.MEMORY
MENU
1, 2, 3
1
1
2
3
ENTER
Fernbedienung
Télécommande
Telecomando
ENTER
Fernbedienung
Télécommande
Telecomando
Lorsque “CONFIGURATION AUDIO”
est sélectionnée
2
3
Utiliser les touches curseurs • et ª pour sélectionner
le réglage souhaité, puis appuyer sur la touche
ENTER.
CANALES AUDIO
Utiliser ce mode pour ajuster pour les systèmes
d'enceinte connectés.
SORTIE AUDIO NUMÉRIQUE
Utilisez cette fonction afin de sélectionner le format
numérique de signal de sortie.
LPCM (44.1 kHz / 48 kHz)
Utilisez cette option pour régler la sortie audio
numérique pour la lecture de DVD enregistrés en
audio PCM linéaire.
GESTION DES BASSES 2CH
Régler pour envoyer ou non des signaux audio du
subwoofer lors de la lecture de signaux audio à deux
canaux.
CONFI GURATI ON AUDI O
REGLAGES: DECISION:BOUTTON ENTER
CANAL ES AUD IO
SORT I E AUD IO NU
M
ÉR IQUE
LPCM(44.1kHz/48kHz)
QUI TT E R LA C ONF I GUR AT I ON
GES T ION DE S BASS ES 2 CH
MUL T I CANA UX
NORMAL
ETEINT
ETEINT
B
Utiliser les touches curseurs • et ª pour sélectionner
le réglage souhaité, puis appuyer sur la touche ENTER.
q Lorsque le “CANALES AUDIO” est sélectionnée:
B
Utiliser les touches de déplacement du curseur
•
et ªpour sélectionner l’élément à régler,
ensuite appuyer sur la touche ENTER.
MULTI CANAUX (Réglage usine par défaut)
Sélectionner ce réglage pour des systèmes
dans lesquels trois ou plusieurs enceintes sont
connectées.
Lorsque MULTI CANAUX est réglé, les réglages
d’enceinte (CONFIGURATION HP), l’ajustement
du niveau de sortie d’enceinte (REGLAGE DES
NIVEAUX) et les distances d’enceinte (TEMPS
DE RETARD) peuvent être réglés.
2 CANAUX
Sélectionner ce réglage pour des systèmes
dans lesquels seulement deux enceintes sont
connectées.
CONFI GURATI ON AUDI O
REGLAGES: DECISION:BOUTTON ENTER
CANAL ES AUD IO
SORT I E AUD IO NU
M
ÉR IQUE
LPCM(44.1kHz/48kHz)
QUI TT E R LA C ONF I GUR AT I ON
GES T I ON DE S BASS ES 2 CH
MUL T I CANA UX
2 CANAUX
B
1
Voir page 59.
Quando si seleziona “AUDIO SETUP”
2
3
Utilizzate i tasti cursore • e ª per selezionare
l’impostazione desiderata, quindi premete il tasto
ENTER.
AUDIO CHANNEL
Usate questo per regolare il sistema degli altoparlanti
collegati.
DIGITAL OUT
Usate quest'uscita per selezionare il formato di uscita
nel formato digitale.
LPCM (44.1 kHz / 48 kHz)
Usate questa voce per impostare l'uscita audio
digitale per riprodurre i DVD registrato in modo audio
PCM lineare.
BASS ENHANCER (2 CHANNEL)
Imposta se emettere i segnali audio dal subwoofer
quando riproducete segnali audio a due canali.
AUDI O SE TUP
SELECT : DECISION:ENTER BUTTON
AUDI O CHANNEL
DI G I TAL OUT
LPCM(44.1kHz/48kHz)
EXIT SETUP
BASS ENHANCE R(2 CHANNEL)
M
ULT I CHANNEL
NOR
M
AL
OFF
OFF
B
Utilizzate i tasti cursore • e ª per selezionare
l’impostazione desiderata, quindi premete il tasto
ENTER.
q Quando selezionate “AUDIO CHANNEL”:
B
Usate i tasti •e ªper selezionare la voce da
impostare, poi premete il tasto ENTER.
MULTI CHANNEL (Impostazione di fabbrica)
Selezionate questo per i sistemi in cui sono
collegati tre o più altoparlanti.
Quando impostate MULTI CHANNEL, potete
regolare le impostazioni degli altoparlanti
(SPEAKER CONFIGURATION), effettuare la
regolazione del livello d'uscita degli altoparlanti
(CHANNEL LEVEL) e della distanza tra gli
altoparlanti (DELAY TIME).
2 CHANNEL
Selezionate questo per i sistemi in cui solo due
altoparlanti sono stati collegati.
AUDI O SE TUP
SELECT : DECISION:ENTER BUTTON
AUDI O CHANNEL
DI G I TAL OUT
LPCM(44.1kHz/48kHz)
EXIT SETUP
BASS ENHANCE R(2 CHANNEL)
M
ULT I CHANNEL
2 CHANNEL
B
1
Vedere pagina 59.
Page 63

DEUTSCH FRANÇAIS ITALIANO
73
3
B
Wenn “MULTI-KANAL” eingestellt ist, wählen
Sie mit den Cursor-Tasten
•
und
ª
den
Einstellpunkt und drücken Sie anschließend die
ENTER-Taste.
LAUTSPRECHER-KONFIG.
Wählen Sie hier die Typen der verschiedenen
Lautsprecher aus.
PEGEL-EINSTELLUNG
Stellen Sie hier den Ausgabepegel der
verschiedenen Lautsprecher ein.
VERZÖGERUNGSZEIT
Stellen Sie hier den Abstand der verschiedenen
Lautsprecher zur Sitzposition ein.
✽
Um den SPEAKER SETUP-Modus zu
verlassen
Wä hlen Sie mit den Cursor-Tasten
ª
“AUDIO-EINSTELLUNGEN” aus, drücken
Sie anschließend die ENTER-Taste.
B
Wenn “LAUTSPRECHER-KONFIG.” eingestellt ist,
wählen Sie mit den Cursor-Tasten •und ªden
Lautsprecher aus, der eingestellt werden soll, und
drücken Sie anschließend die ENTER-Taste.
• Der für die Front-Lautsprecher, der für den
Center-Lautsprecher und Subwoofer und der
für die Surround-Lautsprecher verwendete
Lautsprecher-Typ kann eingestellt werden.
Wählen Sie mit den Cursor-Tasten
•
und
ª
den Lautsprecher-Typ aus, drücken Sie
anschließend die ENTER-Taste.
GROß: Wählen Sie diese Einstellung, wenn
ein großer Lautsprecher
angeschlossen ist.
KLEIN: Wählen Sie diese Einstellung, wenn
ein kleiner Lautsprecher
angeschlossen ist.
NONE: Wählen Sie diese Einstellung, wenn
kein Lautsprecher angeschlossen
ist.
JA: Wählen Sie diese Einstellung, wenn
kein Subwoofer angeschlossen ist.
NEIN: Wählen Sie diese Einstellung, wenn
kein Subwoofer angeschlossen ist.
• Wenn “FILTER” angewählt ist:
EIN (Standard-Einstellung)
Wählen Sie diese Schalterstellung, wenn Sie
einen Subwoofer anschließen,
beispielsweise für die Wiedergabe in den
Modi Dolby Digital oder DTS.
Stellen Sie für die Multikanal-Wiedergabe auf “EIN”.
AUS
Wä hlen Sie diese Schalterstellung für die
Wiedergabe von 6-Kanal-DVD-Audioquellen, die
mit “Mehrkanal-Vollbandfrequenz” aufgenommen
wurden.
Wenn “AUS” eingestellt wurde, ist die Lautsprechergröße
auf “GROß” eingestellt, da alle Lautsprecher- und
Subwoofer-Einstellungen auf “JA” lauten.
Stellen Sie sicher, dass Sie die Bedienungsanleitung
des DVD-Gerätes lesen, bevor Sie die analogen
Anschlüsse zur Wiedergabe dieser Arten von DVDs
durchführen.
✽
Drücken Sie die RETURN-Taste, um zum
“LAUTSPRECHER SETUP” -Menü
zurückzukehren.
LAUTSPRECHER SETUP
LAUT SPREC HER- KONF I G.
PEGEL - EI NSTEL LUNG
VERZÖGERUNGSZE I T
AUDI O - E I NSTE L LUNGEN
B
NAVIGATION: AUSWAHL: ENTER -TASTE
3
ENTER
Fernbedienung
Télécommande
Telecomando
3
B
Lorsque le “MULTI CANAUX” est
sé lectionnée, utiliser les touches de
dé placement du curseur •et ªpour
sé lectionner l’élément à régler, ensuite
appuyer sur la touche ENTER
CONFIGURATION HP
Utiliser ce réglage pour sélectionner les types
des différentes enceintes.
REGLAGE DES NIVEAUX
Utiliser ce réglage pour ajuster le niveau de
sortie des différentes enceintes.
TEMPS DE RETARD
Utiliser ce réglage pour régler la distance entre
les différentes enceintes et la position d'écoute.
✽
Pour quitter le mode CONFIGURATION HP
Utiliser la touche de déplacement du
curseur
ª
pour sélectionner
“CONFIGURATION AUDIO” ensuite,
appuyer sur la touche ENTER.
B
Lorsque le “CONFIGURATION HP” est
sé lectionnée, utiliser les touches de
dé placement du curseur •et ªpour
sé lectionner l’enceinte à ré gler, ensuite
appuyer sur la touche ENTER.
• Le type d’ enceinte utilisée pour les
enceintes frontales, l'enceinte centrale, le
subwoofer et les enceintes d'ambiance
peuvent être réglés. Utiliser les touches de
dé placement du curseur •et ªpour
sélectionner le type d’enceinte, ensuite
appuyer sur la touche ENTER.
GRAND: Sélectionner ce réglage lorsqu’une
grande enceinte est connectée.
PETIT: Sélectionner ce réglage lorsqu’une
petite enceinte est connectée.
NON: Sé lectionner ce réglage lorsque
aucune enceinte n'est connectée.
OUI: Sé lectionner ce réglage lorsqu’un
subwoofer est connecté.
NON: Sélectionner cette valeur si aucun
subwoofer n’est connecté.
• Lorsque le “FILTRE” est sélectionnée:
ACTIF (Réglage usine par défaut)
Sélectionner ce réglage en cas de connexion
d’un subwoofer, pour une reproduction en
mode Dolby Numérique ou DTS par exemple.
Régler sur “ACTIF” pour une reproduction à
canaux multiples normale.
ETEINT
Sé lectionner ce réglage pour une
reproduction de sources DVD audio à 6
canaux enregistrées avec une “bande de
fréquences totale pour tous les canaux”.
Lorsque “ ETEINT” est réglé, la taille de
l’enceinte est réglée sur “GRAND” pour
toutes les enceintes et le réglage du
subwoofer est sur “OUI”.
Veuillez lire le mode d’emploi du lecteur DVD
afin d’effectuer les connexions analogiques
pour lire ces types de DVD.
✽
Appuyer sur la touche RETURN pour
retourner au menu “CONFIGURATION HP”.
CONF I GURAT I ON HP
REGLAGES: DECISION:BOUTTON ENTER
CONF I GURAT I ON HP
CONF I GURAT I ON AUDI O
REGL AGE D ES NI V EAUX
TEMPS DE RE TARD
B
3
B
Quando selezionate
“MULTI CHANNEL”
, usate i
tasti del cursore
•e ª
per selezionare la voce
da impostare, poi premete il tasto ENTER.
SPEAKER CONFIGURATION
Usate questo per selezionare il tipo dei vari
altoparlanti.
CHANNEL LEVEL
Usate questo per regolareillivello d'uscita dei
vari altoparlanti.
DELAY TIME
Usate questo per impostare la distanza dai vari
altoparlanti alla posizione d'ascolto.
✽
Per uscire dalla modalità SPEAKER SETUP
Usate il tasto del cursore
ª
per selezionare
“AUDIO SETUP”
, poi premete il tasto
ENTER.
B
Quando selezionate “SPEAKER
CONFIGURATION”, usate i tasti del cursore
•
e ªper selezionare l'altoparlante da impostare,
poi premete il tasto ENTER.
• Potete impostare il tipo dell'altoparlante da
usare per gli altoparlanti anteriore,
l'altoparlante centrale, il subwoofer e gli
altoparlanti surround. Usate i tasti del
cursore
•e ª
per selezionare il tipo
d'altoparlante, poi premete il tasto ENTER.
LARGE: Selezionate questo quando avete
collegato un grande altoparlante.
SMALL: Selezionate questo quando avete
collegato un altoparlante piccolo.
NONE: Selezionate questo quando non
avete collegato nessun altoparlante
YES: Selezionate questo quando avete
collegato un subwoofer.
NO: Selezionatelo quando non viene
collegato nessun subwoofer.
• Quando selezionate “FILTER”:
ON (Impostazione di fabbrica)
Selezionate questo quando collegate a un
subwoofer, ad esempio per la riproduzione
nei modi Dolby Digital o DTS.
Impostate su “ON” per una riproduzione a
canali multipli normale.
OFF
Impostate questo per riprodurre DVD audio a
6 fonti di canale registrati con “tutti i canali
con banda di frequenza completa”.
Quando “OFF” è impostato, la grandezza
dell’altoparlante è impostata su “LARGE” per
tutti gli altoparlanti e l’impostazione del
subwoofer è impostata su “YES”.
Assicuratevi di leggere il manuale delle
istruzioni del DVD per effettuare dei
collegamenti analogici per riprodurre questi
tipi di DVD.
✽
Premete il tasto RETURN per ritornare al
menù “SPEAKER SETUP.
SPEAKER SETUP
SELECT : DECISION:ENTER BUTTON
SPEAK ER CONF I GURAT I ON
CHANNEL L E VE L
DEL AY T I
M
E
AUDIO SETUP
B
LAUTSPRECHER SETUP
LAUT SPREC HER- KONF I G.
FRONT
CENTER
SUB
SURR OUND
GROß
GROß
JA
GROß
FILTER EIN
B
NAVIGATION: AUSWAHL: ENTER -TASTE
CONF I GURAT I ON HP
REGLAGES: DECISION:BOUTTON ENTER
CONF I GURAT I ON HP
HP FRONTAL
HP CENTRALE
CAI SS.BASSE
SURROUND
GRANDS
GRAND
OU I
GRANDS
FILTRE
ACT I F
B
SPEAKER SETUP
SELECT : DECISION:ENTER BUTTON
SPEAK ER CONF I GURAT I ON
FRONT SP
CENTER SP
SUB
W
OOFE R
SURR OUND SP
LARGE
LARGE
YES
LARGE
FILTER
ON
B
Page 64

DEUTSCH FRANÇAIS ITALIANO
74
3
B
Wenn “PEGEL-EINSTELLUNG” eingestellt ist,
wählen Sie den einzustellenden Lautsprecher
mit den Cursor-Tasten •und ª, stellen Sie
anschließend den Pegel mit den0und
1
Cursor-Tasten ein.
TESTTON
•
Wählen Sie mit den Cursor-Tasten 0und
1
OFF, 2 Sekunden, 5 Sekunden oder 10
Sekunden für die Prüfton-Einstellung, und
geben Sie anschließend den Prüfton mit Hilfe
des unten beschriebenen Verfahrens aus.
• Der von den Frontlautsprechern (linker und
rechter Kanal), vom Center-Lautsprecher,
von den Surround-Lautsprechern (linker und
rechter Kanal) und vom Subwoofer
ausgegebene Lautstärkepegel kann
eingestellt werden.
• Der Lautstärkepegel kann in 1 dB-Schritten
zwischen 0 und –10 dB eingestellt werden.
✽
Drücken Sie die RETURN-Taste, um zum
“LAUTSPRECHER SETUP” -Menü
zurückzukehren.
B
Wenn “VERZÖGERUNGSZEIT” angewählt ist:
Idealerweise sollte bei 5.1-KanalSurroundsound der Abstand zwischen der
Sitzposition und allen Lautsprechern,
abgesehen vom Subwoofer, gleich groß sein.
Mit der Verzögerungszeit-Einstellung kann es
so eingerichtet werden, dass der Ton der
verschiedenen Lautsprecher die Sitzposition
gleichzeitig erreicht.
Wählen Sie mit den Cursor-Tasten •und
ª
den Einstellungspunkt aus, drücken Sie
anschließend die ENTER-Taste.
LAUTSPRECHER SETUP
VERZÖGERUNGSZE I T
ENT F ER NUNG
FRONT L
CENTER
FRONT R
M
ETER
3.6m
3.6m
3.6m
3.0m
3.0m
3.6m
EIN
SURR R
SURR L
SUB
ST ANDARD
B
NAVIGATION: AUSWAHL: ENTER -TASTE
Front (L)
Center
Front (R)
Surround (R)
Surround (L)
Subwoofer
LAUTSPRECHER SETUP
PEGEL - EI NSTEL LUNG
TESTTON
FRONT L
CENTER
FRONT R
AUS
0dB
0dB
0dB
0dB
0dB
0dB
SURR R
SURR L
SUB
B
NAVIGATION: AUSWAHL: ENTER -TASTE
3
ENTER
Fernbedienung
Télécommande
Telecomando
Fernbedienung
Télécommande
Telecomando
3
B
Lorsque “ REGLAGE DES NIVEAUX” est
sé lectionné, utiliser les touches de
dé placement du curseur •et ªpour
sélectionner l'enceinte à ajuster, ensuite
utiliser les touches de déplacement du curseur
0
et 1pour régler le niveau.
TEST TONALITE
• Utiliser les touches de dé placement du
curseur 0et 1pour sélectionner désactivé,
2 secondes, 5 secondes ou 10 secondes
pour la tonalité test, ensuite envoyer la
tonalité test en utilisant la procédure décrite
ci-dessous.
• Le niveau de volume envoyé des enceintes
frontales (canaux gauche et droit), de
l’ enceinte centrale, des enceintes
d’ambiance (canaux gauche et droit) et du
subwoofer peut être ajusté.
• Le niveau de volume peut être ajusté entre 0
et –10 dB par pas de 1 dB.
✽
Appuyer sur la touche RETURN pour
retourner au menu “CONFIGURATION
HP”.
B
Lorsque le “TEMPS DE RETARD” est
sélectionnée:
Avec un son d'ambiance à 5.1 canaux, la
distance idéale entre la position d’écoute et
toutes les enceintes excepté du subwoofer
doit être identique. Le réglage du temps de
retard peut être utilisé pour que le son des
différentes enceintes atteigne la position
d’écoute en même temps.
Utiliser les touches de déplacement du curseur
•
et ªpour sélectionner l'élément de réglage,
ensuite appuyer sur la touche ENTER.
CONF I GURAT I ON HP
REGLAGES: DECISION:BOUTTON ENTER
TE
M
PS DE RE TARD
D IS TANC E
AVANT G
CENTRALE
AVANT D
M
ETRES
3.6m
3.6m
3.6m
3.0m
3.0m
3.6m
OUI
SURR OUND D
SURR OUND G
CAI SS . BASSE
DEFAUT
B
Avant (G)
Centrale
Avant (D)
Surround (D)
Surround (G)
Caiss. basse
CONF I GURAT I ON HP
REGLAGES: DECISION:BOUTTON ENTER
REGL AGE DE S NI V EAUX
TEST TONALI TE
AVANT G
CENTRALE
AVANT D
NON
0dB
0dB
0dB
0dB
0dB
0dB
SURROUND D
SURR OUND G
CAISS .BASSE
B
3
B
Quando selezionate “CHANNEL LEVEL” ,
usate i tasti del cursore •e ªper selezionare
l'altoparlante da regolare, poi usate i tasti del
cursore 0e 1per impostareil livello.
TEST TONE
• Usate i tasti del cursore 0e 1per
selezionare la disattivazione, 2 secondi, 5
secondi o 10 secondi per il tono di prova, poi
emettete il tono di prova usando la
procedura descritta qui sotto.
• Potete regolare il livello del volume emesso
dagli altoparlanti anteriori (canali sinistro e
destro), l'altoparlante centrale, gli altoparlanti
surround (canali sinistro e destro) e il
subwoofer.
• Potete regolare il livello del volume tra 0 e
–10 dB in passi da 1 dB.
✽
Premete il tasto RETURN per ritornare al
menù “SPEAKER SETUP.
B
Quando selezionate “DELAY TIME”:
Con il suono surround a 5.1 canali, è bene se la
distanza tra la posizione d'ascolto e tutti gli
altoparlanti, tranne il subwoofer, è uguale.
L'impostazione del tempo del ritardo può
essere usato per far sì che il suono dai vari
altoparlanti raggiunga la posizione d'ascolto allo
stesso tempo.
Usate i tasti •e ªper selezionare la voce da
impostare, poi premete il tasto ENTER.
SPEAKER SETUP
SELECT : DECISION:ENTER BUTTON
DEL AY T I
M
E
DI ST ANCE
FRONT L ch
CENTER
FRONT Rch
M
ETERS
3.6m
3.6m
3.6m
3.0m
3.0m
3.6m
ON
SURR OUND Rc h
SURR OUND L ch
SUB
W
OOFE R
DEFAUL T
B
Front speaker (L)
Center speaker
Front speaker (R)
Surround speaker (R)
Surround speaker (L)
Subwoofer
SPEAKER SETUP
SELECT : DECISION:ENTER BUTTON
CHANNEL L E VE L
TEST TONE
FRONT L ch
CENTER
FRONT Rch
OFF
0dB
0dB
0dB
0dB
0dB
0dB
SURR OUND Rc h
SURR OUND L ch
SUB
W
OOFE R
B
Page 65

DEUTSCH FRANÇAIS ITALIANO
75
3
• Wenn “ENTFERNUNG” angewählt ist:
METER (wenn die 0-Cursor-Taste gedrückt
wird):
Die Abstands-Einheit wird in Metern (“m”)
eingestellt.
FEET (wenn die 1-Cursor-Taste gedrückt
wird):
Die Abstands-Einheit wird in Fuß (“ft”)
eingestellt.
• Wenn “FRONT L”, “FRONT R”, “CENTER”,
“SURR L”, “SUR R”, “SUB” angewählt ist:
Stellen Sie den Abstand zwischen der
Sitzposition und den verschiedenen
Lautsprechern mit den 0- und 1-CursorTasten ein.
✽
Der Abstand kann zwischen 0 und 18
Metern (0 bis 60 Fuß) eingestellt werden.
✽
Die maximale Abweichung in den
Lautsprecher-Abständen ist 4,5 Meter (15
Fuß).
• Wenn “STANDARD” angewählt ist:
Wenn “STANDARD” eingestellt und die
ENTER-Taste gedrückt wird, werden alle
Punkte auf ihre werkseitigen
Grundeinstellungen zurückgestellt.
✽
Wenn am AV-Verstärker digitale Anschlüsse
gemacht werden, nehmen Sie die
Lautsprecher-Einstellungen am AV-Verstärker
vor.
Bei DVD-Audio-Discs haben die Einstellungen
der Disc Vorrang, es kann also vorkommen,
dass der Ton nicht mit der obigen
Lautsprecher-Moduseinstellung ausgegeben
wird.
✽
Drücken Sie die RETURN-Taste, um zum
“LAUTSPRECHER SETUP” -Menü
zurückzukehren.
LAUTSPRECHER SETUP
VERZÖGERUNGSZE I T
ENT F ER NUNG
FRONT L
CENTER
FRONT R
EIN
SURR R
SURR L
SUB
ST ANDARD
B
3.6m
3.6m
3.6m
3.0m
3.0m
3.6m
M
ETER
NAVIGATION: AUSWAHL: ENTER -TASTE
LAUTSPRECHER SETUP
VERZÖGERUNGSZE I T
ENT F ER NUNG
FRONT L
CENTER
FRONT R
EIN
SURR R
SURR L
SUB
ST ANDARD
B
3.6m
3.6m
3.6m
3.0m
3.0m
3.6m
M
ETER
NAVIGATION: AUSWAHL: ENTER -TASTE
3
ENTER
Fernbedienung
Télécommande
Telecomando
3
• Lorsque le “DISTANCE” est sélectionnée:
METRES (lorsque la touche curseur 0est
enfoncée):
L’unité de distance est réglée en mètres
(“m”).
PIEDS (lorsque la touche de déplacement du
curseur 1est enfoncée):
L’unité de of distance est réglée en pieds
(“ft”).
• Lorsque le “ AVANT G”, “AVANT D” ,
“CENTRALE” , “SURROUND G” ,
“SURROUND D” , “ SUBWOOFER” est
sélectionnée:
Utiliser les touches de déplacement du
curseur 0et 1pour régler la distance entre
la position d’écoute et les différentes
enceintes.
✽
La distance peut être ré glée dans
l’intervalle limite de 0 à 18 mètres (0 à 60
pieds).
✽
La différence de distance d’ enceinte
maximale pour laquelle le réglage est
possible est de 4,5 m (15 pieds).
• Lorsque le “DEFAUT” est sélectionnée:
Lorsque le “DEFAUT” est sélectionnée et la
touche ENTER est enfoncée, tous les
éléments sont restauré s à leurs réglages
d'origine.
✽
Lorsque des connexions numériques sont
effectuées avec un amplificateur AV,
effectuer les réglages d’ enceinte sur
l’amplificateur AV.
Pour les disques DVD audio, les réglages de
disque ont la priorité, ainsi le son risque de
ne pas être reproduit comme avec le réglage
de mode d’enceinte décrit ci-dessus.
✽
Appuyer sur la touche RETURN pour
retourner au menu “CONFIGURATION HP”.
CONF I GURAT I ON HP
REGLAGES: DECISION:BOUTTON ENTER
TE
M
PS DE RE TARD
DI ST ANCE
AVANT G
CENTRALE
AVANT D
M
ETRES
3.6m
3.6m
3.6m
3.0m
3.0m
3.6m
OUI
SURR OUND D
SURR OUND G
CAI SS . BASSE
DEFAUT
B
CONF I GURAT I ON HP
REGLAGES: DECISION:BOUTTON ENTER
TE
M
PS DE RE TARD
D IS TANC E
AVANT G
CENTRALE
AVANT D
M
ETRES
3.6m
3.6m
3.6m
3.0m
3.0m
3.6m
OUI
SURR OUND D
SURR OUND G
CAI SS . BASSE
DEFAUT
B
3
• Quando selezionate “DISTANCE”:
METERS (quando premete il tasto del
cursore 0):
L'unità della distanza è impostata a metri
(“m”).
FEET (quando premete il tasto del cursore
1
):
L'unità della distanza è impostata a piedi
(“ft”).
• Quando selezionate “FRONT Lch”, “FRONT
Rch”, “CENTER” , “ SURROUND Lch”,
”SURROUND Rch”, “SUBWOOFER”:
Usate i tasti del cursore 0e 1per
impostare la distanza dalla posizione
d'ascolto ai vari altoparlanti.
✽
La distanza può essere impostata all'inteno
del campo da 0 a 18 metri (da 0 a 60 piedi).
✽
La differenza massima nella distanza degli
altoparlanti per la regolazione è di 4,5 metri
(15 piedi).
• Quando selezionate “DEFAULT”:
Quando selezionate “DEFAULT” e premete
il tasto ENTER, tutte le voci vengono
ripristinate ai valori default di fabbrica.
✽
Quando effettuate i colelgamenti digitali con
un amplificatore AV, effettuate le impostazioni
dell'altoparlante nell'amplificatore AV.
Per i dischi audio DVD, le impostazioni del
disco hanno la priorità, per cui il suono può
non essere riprodotto in conformità con le
impostazioni nel modo dell'altoparlante.
✽
Premete il tasto RETURN per ritornare al
menù “SPEAKER SETUP.
SPEAKER SETUP
SELECT : DECISION:ENTER BUTTON
DEL AY T IME
DI ST ANCE
FRONT L ch
CENTER
FRONT Rch
ON
SURR OUND Rc h
SURR OUND L ch
SUB
W
OOFE R
DEFAUL T
B
3.6m
3.6m
3.6m
3.0m
3.0m
3.6m
M
ETERS
SPEAKER SETUP
SELECT : DECISION:ENTER BUTTON
DEL AY T IME
DI ST ANCE
FRONT L ch
CENTER
FRONT Rch
ON
SURR OUND Rc h
SURR OUND L ch
SUB
W
OOFE R
DEFAUL T
B
3.6m
3.6m
3.6m
3.0m
3.0m
3.6m
M
ETERS
Page 66

DEUTSCH FRANÇAIS ITALIANO
76
3
w Wenn “DIGITAL-AUSGANG” angewählt ist:
NORMAL (Standard-Einstellung)
Bei der Wiedergabe von in Dolby Digital oder DTS
ausfgenommenen DVDs werden BitstreamSignales von den digitalen AudioAusgabeanschlüssen ausgegeben. Bei der
Wiedergabe von in linearem PCM- oder
komprimiertem PCM-Format aufgenommenen
DVDs werden lineare PCM-Signale ausgegeben.
Wä hlen Sie beim Durchführen digitaler
Anschlüsse an einen AV-Verstä rker mit
integriertem Dolby Digital- und DTS-Decoder die
Option “NORMAL” aus.
PCM
Bei der Wiedergabe von Dolby Digital-/DTSBitstream-Signalen oder bei der Wiedergabe von
in linearem PCM- oder komprimiertem PCMFormat aufgenommenen DVDs werden die
Signale in 48 kHz/16-Bit PCM (2-Kanal)-Signale
konvertiert und an den digitalen Ausgängen
ausgegeben. Bei der Wiedergabe von im PCMFormat aufgenommenen DVDs werden lineare
PCM-Signale ausgegeben.
e Wenn “
LPCM (44.1 kHz / 48 kHz)
” angewählt ist:
AUS (Standard-Einstellung)
Bei der Wiedergabe nicht durch das Urheberrecht
geschützter linearer PCM- oder komprimierter
PCM-DVDs werden für 2-Kanal-PCM-Audiosignale
mit bis zu 96 kHz lineare PCM-Signale als solche
ausgegeben, ohne dass sie von den digitalen
Ausgängen konvertiert würden. (176,2 kHz- und
192 kHz-Signale werden zu 88,2 kHz- bzw. 96
kHz-Signalen konvertiert.)
PCM-Signale mit 48 kHz/16 Bit und weniger
werden ungeachtet der Tatsache, ob sie durch
das Urheberrecht geschützt sind oder nicht,
ausgegeben.
Bei DVDs, die Mehrfachkanal-PCM-Signale
enthalten, werden die digitalen Signale für die
Ausgabe über die zwei Kanäle vorne links und
vorne rechts heruntergemischt. (Bei Quellen, bei
denen ein Heruntermischen untersagt ist, werden
nur die vorderen linken und rechten Kanäle
ausgegeben.)
Unter Beachtung der Urheberrechte werden bei
der Wiedergabe durch das Urheberrecht
geschützter linearer PCM- oder komprimierter
PCM-DVDs keinerlei digitale Signale bei Quellen
mit über 48 kHz/16 Bit ausgegeben. Stellen Sie
bei der Wiedergabe solcher Quellen entweder die
Option “EIN” ein oder fü hren Sie analoge
Anschlüsse durch. (Siehe Seite 49.)
AUS
EIN
B
AUD IO - E INS TEL L UNGEN
LAUTSPRECHER
DI G I TAL - AUSGANG
DENON L I N K
LPCM(44.1kHz/48kHz)
EINSTELLUNGEN BEENDEN
BASS ENHANCER
NAVIGATION: AUSWAHL: ENTER -TASTE
NORMAL
PC
M
B
AUD IO - E INS TEL L UNGEN
LAUTSPRECHER
DI G I TAL - AUSGANG
DENON L I N K
LPCM(44.1kHz/48kHz)
EINSTELLUNGEN BEENDEN
BASS ENHANCER
NAVIGATION: AUSWAHL: ENTER -TASTE
3
ENTER
Fernbedienung
Télécommande
Telecomando
3
w Lorsque le “SORTIE AUDIO NUMÉRIQUE” est
sélectionnée:
NORMAL (Réglage usine par défaut)
Lors de la lecture de DVD enregistrés en Dolby
Digital ou DTS, des signaux bitstream sont
gé nérés par les bornes de sortie audio
numériques. Lors de la lecture de DVD
enregistrés en PCM linéaire ou PCM compressé,
des signaux PCM linéaire sont générés.
Sélectionnez “NORMAL” lors de l’exécution de
connexions numériques à un amplificateur AV
avec décodeur Dolby Digital et DTS intégré.
PCM
Lors de la lecture de signaux bitstream Dolby
Digital/DTS ou de DVD enregistrés en PCM
linéaire ou PCM compressé, les signaux sont
convertis en signaux PCM 48 kHz/16-bit (2canaux) et générés par les sorties numériques.
Lors de la lecture de DVD enregistrés en PCM,
des signaux PCM linéaires sont générés.
e Lorsque le “LPCM (44.1 kHz / 48 kHz)” est
sélectionnée:
ETEINT (Réglage usine par défaut)
Lors de la lecture de DVD PCM linéaire ou PCM
compressé qui ne sont pas proté gés par
copyright, pour les signaux audio PCM 2 canaux
allant jusqu'à 96 kHz, des signaux PCM linéaire
sont gén érés tels quels par les sorties
numériques sans être convertis. (Les signaux de
176,2 kHz et 192 kHz sont convertis
respectivement en signaux de 88,2 kHz et 96
kHz.)
Des signaux PCM de 48 kHz/16 bits et moins sont
gén érés, peu importe s’ ils sont protégés par
copyright ou non.
Pour les DVD contenant des signaux multi-canaux
PCM, les signaux numériques sont mélangés à la
baisse pour être générés dans deux canaux, le
canal avant gauche et le canal avant droit. (Seuls
les canaux avant gauche et droit sont générés
pour les sources pour lesquelles le mélange à la
baisse est interdit.)
Lors de la lecture de DVD protégés par copyright
de type PCM linéaire ou PCM compressé, étant
donné les règles sur le copyright, aucun signal
numérique ne sera généré pour les sources
dépassant 48 kHz/16 bits. Lors de la lecture de
telles sources, réglez sur “ACTIF” ou faites des
connexions analogiques. (Voir page 49.)
CONFI GURATI ON AUDI O
REGLAGES: DECISION:BOUTTON ENTER
CANAL ES AUD IO
SORT I E AUD IO NU
M
ÉR IQUE
LIAISON DENON
LPCM(44.1kHz/48kHz)
QUI TT E R LA C ONF I GUR AT I ON
GES T I ON DE S BASS ES 2 CH
ACTIF
ETEINT
B
CONFI GURATI ON AUDI O
REGLAGES: DECISION:BOUTTON ENTER
CANAL ES AUD IO
SORT I E AUD IO NU
M
ÉR IQUE
LIAISON DENON
LPCM(44.1kHz/48kHz)
QUI TT E R LA C ONF I GUR AT I ON
GES T I ON DE S BASS ES 2 CH
NOR
M
AL
PC
M
B
3
w Selezionando “DIGITAL OUT”:
NORMAL (Impostazione di fabbrica)
Quando riproducete DVD registrati in Dolby Digital o
DTS, i segnali bitstream vengono immessi dai
terminali di uscita audio dogitale. Quando
riproducete DVD registrati in PCM compatti o PCM
lineari, i segnali lineari PCM vengono emessi.
Selezionate “ NORMAL” quando effettuate
collegamenti digitali ad un amplificatore AV con
Dolby Digital e decoder DTS incorporati.
PCM
Quando riproducete segnali Dolby Digital/DTS
bitstream o DVD registrati in PCM lineare o PCM
compatto, i segnali vengono convertiti in segnali
PCM (a 2 canali) 48kHz/16 bit, e immessi dalle
uscite digitali Quando riproducete DVD registrati in
PCM, segnali lineari PCM vengono emessi.
e
Selezionando “LPCM (44.1 kHz / 48 kHz)”:
OFF (Impostazione di fabbrica)
Quando riproducete segnali DVD PCM lineare o
PCM compatto non protetti dal diritto d'autore,
per i segnali a 2 canali PCM audio fino a 96 kHz, i
segnali PCM lineari vengono emessi senza essere
convertiti dalle entrate analogiche (I segnali 176.2
kHz e 192 kHz sono convertiti verso 88.2 kHz e 96
kHz, rispettivamente.) I segnali PCM da 48
kHz/16 bits e meno, vengono emessi senza tener
conto della protezione dei diritti d'autore .
Per i DVD contenenti segnali PCM multicanale, i
segnali digitali vengono sotto mixati per l'uscita a
due canali, frontale e destro. (Solamente i canali
frontale sinistro e destro vengono emessi per
fonti per le quali il sotto mixaggio è proibito.)
Quando riproducete PCM lineari protetti dal diritto
d'autore o DVD PCM compatti, in considerazione dei
diritti d'autore, nessun segnale digitale viene emesso
per le fondi che eccedono 48 kHz/16 bits. Quando
riproducete tali fonti, impostate su “ON” o effettuate
delle connessioni analogiche. (Vedere pagina 49.)
AUDI O SE TUP
SELECT : DECISION:ENTER BUTTON
AUDI O CHANNEL
DI G I TAL OUT
DENON L I N K
LPCM(44.1kHz/48kHz)
EXIT SETUP
BASS ENHANCE R(2 CHANNEL)
ON
OFF
B
AUDI O SE TUP
SELECT : DECISION:ENTER BUTTON
AUDI O CHANNEL
DI G I TAL OUT
DENON L I N K
LPCM(44.1kHz/48kHz)
EXIT SETUP
BASS ENHANCE R(2 CHANNEL)
NOR
M
AL
PC
M
B
Page 67

DEUTSCH FRANÇAIS ITALIANO
77
3
EIN
Lineare PCM- und komprimierte PCM-Signale
werden auf 44,1 kHz oder 48 kHz konvertiert und
dann ausgegeben. (Unter Beachtung des
Urheberrechtes werden die digitalen PCM-AudioAusgangssignale auf 48 kHz oder weniger
konvertiert.) Stellen Sie diese Option auf “EIN”,
wenn Sie digitale Anschlüsse an einen AVVerstärker durchführen, der nicht mit 96 kHz/88,2
kHz-Signalen kompatibel ist.
Wenn in linearem PCM- oder komprimiertem
PCM-Format aufgenommene DVDs
wiedergegeben werden und das Gerät auf
gleichzeitige Ausgabe digitaler und analoger
Audio-Signale eingestellt worden ist, werden die
analogen Audio-Ausgangsssignale ebenfalls auf
48 kHz oder darunter konvertiert, so dass wir eine
Einstellung dieser Option auf “AUS” und die
Durchführung analoger Anschlüsse empfehlen.
r Wenn “BASS ENHANCER” angewählt ist:
AUS (Standard-Einstellung)
Es wird kein Ton vom Subwoofer ausgegeben.
EIN
Ton wird vom Subwoofer ausgegeben.
Stellen Sie in diesem Fall den Subwoofer in den
Lautsprecher-Einstellungen auf “JA”.
EIN
AUS
B
AUD IO - E INS TEL L UNGEN
LAUTSPRECHER
DI G I TAL - AUSGANG
DENON L I N K
LPCM(44.1kHz/48kHz)
EINSTELLUNGEN BEENDEN
BASS ENHANCER
NAVIGATION: AUSWAHL: ENTER -TASTE
3
ENTER
Fernbedienung
Télécommande
Telecomando
✽ Verlassen des Systemeinrichtungsmodus
Wählen Sie mit den ª Cursor-Tasten “EINSTELLUNGEN
BEENDEN” an, und drücken Sie dann die SELECT-Taste.
Sie können die Funktion auch durch Drücken der ENTERTaste auf der Fernbedienung verlassen.
3
ACTIF
Les signaux PCM linéaire ou PCM compressé
sont convertis en signaux de 44,1 kHz ou 48 kHz
et gén érés. (Les signaux de sortie audio
numérique PCM sont convertis en signaux de 48
kHz ou moins, étant donné les règles du
copyright.) Lors de l’exécution de connexions
numériques à un amplificateur AV qui n’est pas
compatible avec les signaux 96 kHz/88,2 kHz,
réglez sur “ACTIF”.
Lors de la lecture de DVD enregistrés en PCM
linéaire ou PCM compressé et lorsque l’appareil
est réglé pour générer des signaux audio
numériques et analogiques à la fois, les signaux
de sortie audio analogiques sont également
convertis en signaux de 48 kHz ou moins. Nous
recommandons donc de régler sur “ETEINT” et
également de faire des connexions analogiques.
r Lorsque le “GESTION DES BASSES 2CH” est
sélectionnée:
ETEINT (Réglage usine par défaut)
Aucun son n’est produit par le subwoofer.
ACTIF
Le son est produit par le subwoofer.
Si cela se produit, placer le subwoofer en position
“OUI” pour les réglages d’enceinte.
CONFI GURATI ON AUDI O
REGLAGES: DECISION:BOUTTON ENTER
CANAL ES AUD IO
SORT I E AUD IO NU
M
ÉR IQUE
LIAISON DENON
LPCM(44.1kHz/48kHz)
QUI TT E R LA C ONF I GUR AT I ON
GES T I ON DE S BASS ES 2 CH
ACTIF
ETEINT
B
✽ Pour quitter le mode Paramétrage
Utilisez les touche ª pour sélectionner “QUITTER LA
CONFIGURATION” et appuyez ensuite sur la touche
ENTER pour confirmer. Il est aussi possible de quitter en
appuyant sur la touche SETUP sur la télécommande.
3
ON
PCM lineare e PCM compatto sono convertiti a 44.1
o 48 kHz verranno e emessi (I segnali digitali
d'imissione TCM sono convertiti in 48 kHz o
menon a seconda dei diritti d'autore.) Quando
effettuate dei collegamenti digitali ad un
amplificatore AV non compatibile con i segnali 96
kHz/88,2 kHz ,
impostazione
su “ON”.
Quando riproducete DVD registrati in PCM lineare
o PCM compatto e l'unità è impostato per emettere
segnali audio digitali e analogici simultaneamente , i
segnali di emissione analogici audio sono anche
convertiti in 48 kHz o meno, perciò vi consigliamo
l'impostazione su “OFF” oltre che a effettuare i
collegamenti analogici.
r Quando selezionate “BASS ENHANCER (2
CHANNEL)”:
OFF (Impostazione di fabbrica)
Non viene riprodotto nessun suono dal
subwoofer.
ON
II suono del subwoofer viene riprodotto.
In questo caso, impostate il subwoofer su “YES”
alle impostazioni degli altoparlanti.
AUDI O SE TUP
SELECT : DECISION:ENTER BUTTON
AUDI O CHANNEL
DI G I TAL OUT
DENON L I N K
LPCM(44.1kHz/48kHz)
EXIT SETUP
BASS ENHANCE R(2 CHANNEL)
ON
OFF
B
✽ Per uscire dal modo di impostazione
Dovete usare i tasto del cursore ª per selezionare “EXIT
SETUP”, poi premete il tasto ENTER. E’ inoltre possibile
uscire premendo il tasto SETUP sul telecomando.
Page 68

DEUTSCH FRANÇAIS ITALIANO
78
Wenn “KINDERSICHERUNG” angewählt ist
2
Wählen Sie die gewünschte Einstellung mit den •
und ª Cursortasten an und drücken Sie dann die
ENTER-Taste.
EINSTUFEN
Stellen Sie hiermit die Kindersicherung für die
Wiedergabe von nicht für Kinder geeigneten
Erwachsenen-Videos ein. Beachten Sie bitte, dass
auch die Wiedergabe von Erwachsenen-Videos erst
dann blockiert werden kann, wenn der
entsprechende Sicherungswert auf die Disc
aufgenommen worden ist.
Dennoch ist es möglich die Wiedergabe aller DVDs
zu sperren.
DREZ. KENNWORT
Ändern Sie hiermit das Passwort.
Die Standard-Einstellung des Passwortes ist “0000”.
1
Siehe Seite 59.
4 5 6
ENTER
ON
OFF
REMOTE CONTROL UNIT RC-553
TOP MENU
DISPLAY
MARKERRANDOM
PAGE
A-B
ZOOM
DIMMER
REPEAT
SETUP
NTSC / PALOPEN / CLOSE
CALL RETURN
SKIP
SLOW / SEARCH
POWER
ANGLE SUBTITLE AUDIOSEARCH MODE
PLAY
STILL /
PAUSE
STOP
PIC.ADJ
1
7
0
2
8
+10
3
9
PROG / DIR
V.S.S.
CLEAR
P.D.MEMORY
MENU
1, 2, 3
3
1
1
2
3
ENTER
Fernbedienung
Télécommande
Telecomando
3
Wählen Sie die gewünschte Einstellung mit den •
und ª Cursortasten an und drücken Sie dann die
ENTER-Taste.
q Wenn “EINSTUFEN” angewählt ist:
0-SPERRT ALLE
Wählen Sie diese Einstellung zum Sperren der
Wiedergabe aller DVDs.
Sperren Sie mit dieser Einstellung z.B. die
Wiedergabe von Erwachsenen-Videos, für die
keine Bemessungsstufe aufgenommen worden
ist.
1
Wä hlen Sie diese Einstellung für die
ausschließliche Wiedergabe von Kinder-DVDs.
(DVDs für Erwachsene sowie Familien-DVDs
können nicht abgespielt werden.)
2 bis 7
Wählen Sie diese Einstellung für die Wiedergabe
von Famielen- und Kinder-DVDs. ErwachsenenDVDs können nicht abgespielt werden.
8-KEIN LIMIT (Standard-Einstellung)
Wä hlen Sie diese Einstellung für die
uneingeschränkte Wiedergabe aller DVDs.
KI NDERSI CHERUNG
NAVIGATION: 0- 9 AUSWAHL :ENTE R-TASTE
EINSTUFEN
DRE Z. K ENNWORT
DRE Z. K ENNWORT
KENNWORT E I NGE BEN
----
B
0 - SPE RRT ALL E
1
2
3
4
5
6
7
8 - KEI N LI M I T
B
KI NDERSI CHERUNG
EINSTUFEN
DRE Z. K ENNWORT
EINSTELLUNGEN BEENDEN
NAVIGATION: AUSWAHL: ENTER -TASTE
KI NDERSI CHERUNG
EINSTUFEN
DRE Z. K ENNWORT
EINSTELLUNGEN BEENDEN
8 - KEI N LI M I T
B
NAVIGATION: AUSWAHL: ENTER -TASTE
M
ENU N I VE AU DE PR OTE CT I ON
REGLAGES: DECISION:BOUTTON ENTER
RESTRI CTI ON
M
OT DE PASSE ACTUEL
QUI TT E R LA C ONF I GUR AT I ON
8(NO LIMIT)
B
RAT INGS
SELECT : DECISION:ENTER BUTTON
RAT I NG L E VE L
PASS
W
ORD
EXIT SETUP
8(NO LIMIT)
B
Fernbedienung
Télécommande
Telecomando
ENTER
Fernbedienung
Télécommande
Telecomando
Lorsque “MENU NIVEAU DE
PROTECTION ” est sélectionnée
2
Utiliser les touches curseurs • et ª pour sélectionner
le réglage souhaité, puis appuyer sur la touche
ENTER.
RESTRICTION
Utilisez cette option pour restreindre la lecture de
DVD réservés aux adultes. Pour que la restriction soit
possible, il faut que le niveau de restriction soit
enregistré sur le disque réservé aux adultes.
Il est cependant possible d’empêcher la lecture de
tout DVD.
MOT DE PASSE ACTUEL
Utiliser ceci pour changer le mot de passe.
Le mot de passe de l’appareil est réglé à “0000” par
défaut.
1
Voir page 59.
3
Utiliser les touches curseurs • et ª pour sélectionner
le réglage souhaité, puis appuyer sur la touche
ENTER.
q Lorsque le “RESTRICTION” est sélectionnée:
0
Sélectionner ceci pour désactiver la lecture de
tous les DVD.
Utiliser ce niveau par exemple pour désactiver la
lecture des DVD pour adultes pour lesquels le
niveau d’estimation n’est pas enregistré.
1
Sélectionner ceci pour jouer uniquement les DVD
pour enfants. (Les DVD pour adultes et public ne
peuvent pas être joués.)
2 à 7
Sélectionner ceci pour jouer les DVD pour un
public général et les enfants. Les DVD pour
adultes ne peuvent pas être joués.
8 (NO LIMIT) (Réglage usine par défaut)
Sélectionner ceci pour jouer tous les DVD.
M
ENU N I VEAU DE P ROT EC T ION
REGLAGES: 0-9 DECISION:BOUTTON ENTER
RESTRI CTI ON
M
OT DE PASSE ACTUEL
M
OT DE PASSE ACTUEL
SVP E NTRE R
M
OT DE P ASSE
----
B
M
ENU N I VEAU DE P ROT EC T ION
REGLAGES: DECISION:BOUTTON ENTER
RESTRI CTI ON
M
OT DE PASSE ACTUEL
QUI TT E R LA C ONF I GUR AT I ON
0
1
2
3
4
5
6
7
8(NO LIMIT)
B
Quando si seleziona “RATINGS”
2
Utilizzate i tasti cursore • e ª per selezionare
l’impostazione desiderata, quindi premete il tasto
ENTER.
RATING LEVEL
Usate questa voce per limitare la riproduzione di DVD
per adulti per prevenirne l'utilizzo da parte dei
bambini. Osservate che anche con i DVD per adulti, la
visione non può essere limitata a meno ché il livello di
limitazione sia stato registrato sul disco. Tuttavia è
possibile disabilitare la riproduzione di tutti i DVD.
PASSWORD
Usate questa voce per cambiare la password.
La password è stata impostata su “0000” come
valore standard.
1
Vedere pagina 59.
3
Utilizzate i tasti cursore • e ª per selezionare
l’impostazione desiderata, quindi premete il tasto
ENTER.
q Selezionando “RATING LEVEL”:
0 (LOCK ALL)
Selezionate questa voce per disabilitare la
riproduzione di tutti i DVD. Usate questa voce per
esempio per disabilitare la riproduzione di DVD per
adulti su cui il livello nominale non è stato
registrato.
1
Selezionate questa voce per riprodurre solo dei
DVD per cambini. (Non è possibile riprodurre dei
DVD per adulti e per un pubblico generale.)
2 a 7
Selezionate questa voce per riprodurre dei DVD
per un pubblico generale e per bambini. Non è
possibile riprodurre dei DVD per adulti.
8 (NO LIMIT) (Impostazione di fabbrica)
Selezionate questa voce per riprodurre tutti i DVD.
RAT INGS
SELECT :0-9 DECISION:ENTER BUTTON
RAT I NG L E VE L
PASS
W
ORD
CURRENT PASS
W
ORD
PL EAS E ENT ER PAS S
W
ORD
----
B
RAT INGS
SELECT : DECISION:ENTER BUTTON
RAT I NG L E VE L
PASS
W
ORD
EXIT SETUP
0(LOCK ALL)
1
2
3
4
5
6
7
8(NO LIMIT)
B
Page 69

DEUTSCH FRANÇAIS ITALIANO
79
3
Geben Sie mit den Nummerntasten ein vierstelliges
Passwort ein und drücken Sie dann die ENTER-Taste.
✽ Standardmäßig ist das Passwort auf “0000”
eingestellt.
✽ Vergessen Sie das Passwort nicht..
✽ Ohne Eingabe des richtigen Passwortes kann die
Einstellung nicht geändert werden.
w Wenn “DREZ. KENNWORT” angewählt ist:
Geben Sie mit den Nummerntasten ein
vierstelliges Passwort ein und drücken Sie dann
die ENTER-Taste.
✽ Vergessen Sie das Passwort nicht.
✽ Ohne Eingabe des richtigen Passwortes kann
die Einstellung nicht geändert werden.
✽ Standardmäßig ist das Passwort auf “0000”
eingestellt.
KI NDERSI CHERUNG
NAVIGATION: 0- 9 AUSWAHL :ENTE R-TASTE
EINSTUFEN
DRE Z. K ENNWORT
ALTES KENNWORT
KENNWORT NOCHMALS E INGE BEN
XXXX
XXXX
NEUES KENNWORT
KENNWORT BESTÄTIGEN
----
B
KI NDERSI CHERUNG
NAVIGATION: 0- 9 AUSWAHL :ENTE R-TASTE
EINSTUFEN
DRE Z. K ENNWORT
ALTES KENNWORT
NEUES KENNWORT E INGE BEN
XXXX
NEUES KENNWORT
----
KENNWORT BESTÄTIGEN
----
B
KI NDERSI CHERUNG
NAVIGATION: 0- 9 AUSWAHL :ENTE R-TASTE
EINSTUFEN
DRE Z. K ENNWORT
ALTES KENNWORT
AL TES KENNWORT E INGE BEN
----
NEUES KENNWORT
----
KENNWORT BESTÄTIGEN
----
B
KI NDERSI CHERUNG
NAVIGATION: 0- 9 AUSWAHL :ENTE R-TASTE
EINSTUFEN
DRE Z. K ENNWORT
DRE Z. K ENNWORT
ZUR FOR TS . ENTER DRÜCKEN
XXXX
B
3
ENTER
4 5 6
1
7
0
283
9
Fernbedienung
Télécommande
Telecomando
ENTER
4 5 6
1
7
0
283
9
Fernbedienung
Télécommande
Telecomando
3
Utiliser les touches numérotées pour entrer un mot
de passe à 4 chiffres, puis appuyer sur la touche
ENTER.
✽ Le mot de passe est réglé vers à “0000” par
défaut.
✽ Ne pas oublier le mot de passe.
✽ Le réglage ne peut pas être modifié sans entrer le
mot de passe correct.
w Lorsque le “MOT DE PASSE ACTUEL” est
sélectionnée:
Utiliser les touches numérotées pour entrer un
mot de passe à 4 chiffres, puis appuyer sur la
touche ENTER.
✽ Ne pas oublier le mot de passe.
✽ Le réglage ne peut pas être modifié sans entrer
le mot de passe correct.
✽ Le mot de passe de l’appareil est réglé à
“0000” par défaut.
M
ENU N I VEAU DE P ROT EC T ION
SELECT :0-9 DECISION:BOUTTON ENTER
RESTRI CTI ON
M
OT DE PASSE ACTUEL
ANC I E N
M
OT DE PASSE
RE- ENTRER
M
OT DE PASSE
XXXX
XXXX
NOUVEAU MOT DE PASS
CONF I R
M
ER MOT DE PASSE
----
B
M
ENU N I VEAU DE P ROT EC T ION
SELECT :0-9 DECISION:BOUTTON ENTER
RESTRI CTI ON
M
OT DE PASSE ACTUEL
ANC I E N
M
OT DE PASSE
ENTRER N .
M
OT DE P ASSE
XXXX
NOUVEAU MOT DE PASS
----
CONF I R
M
ER MOT DE PASSE
----
B
M
ENU N I VEAU DE P ROT EC T ION
SELECT :0-9 DECISION:BOUTTON ENTER
RESTRI CTI ON
M
OT DE PASSE ACTUEL
ANC I E N
M
OT DE PASSE
ENT RER
M
OT DE PASSE
----
NOUVEAU MOT DE PASS
----
CONF I R
M
ER MOT DE PASSE
----
B
M
ENU N I VEAU DE P ROT EC T ION
REGLAGES: 0-9 DECISION:BOUTTON ENTER
RESTRI CTI ON
M
OT DE PASSE ACTUEL
M
OT DE PASSE ACTUEL
ENTER . DE PASSE CONTI NUER
XXXX
B
3
Usate i tasti numerici per inserire una password di 4
caratteri, poi premete il tasto ENTER.
✽ La parola d’ordine per le impostazioni è definita
“0000" per default.
✽ Non dimenticate la password.
✽ Potete solo cambiare l'impostazione se digitate la
password.
w Selezionando “PASSWORD”:
Usate i tasti numerici per inserire una password di
4 caratteri, poi premete il tasto ENTER.
✽ Non dimenticate la password.
✽ Potete solo cambiare l'impostazione se digitate
la password.
✽ La password dell'unità è impostata su “0000”
come valore standard.
RAT INGS
SELECT :0-9 DECISION:ENTER BUTTON
RAT I NG L E VE L
PASS
W
ORD
OLD PASS
W
ORD
PL EAS E ENT ER NE
W
PA SSWORD
XXXX
XXXX
NEW PASSWORD
CONF I RM PAS S
W
ORD
----
B
RAT INGS
SELECT :0-9 DECISION:ENTER BUTTON
RAT I NG L E VE L
PASS
W
ORD
OLD PASS
W
ORD
PL EAS E ENT ER NE
W
PA SSWORD
XXXX
NEW PASSWORD
----
CONF I RM PAS S
W
ORD
----
B
RAT INGS
SELECT :0-9 DECISION:ENTER BUTTON
RAT I NG L E VE L
PASS
W
ORD
OLD PASS
W
ORD
PL EAS E ENT ER OL D PASS
W
ORD
----
NEW PASSWORD
----
CONF I RM PAS S
W
ORD
----
B
RAT INGS
SELECT :0-9 DECISION:ENTER BUTTON
RAT I NG L E VE L
PASS
W
ORD
CURRENT PASS
W
ORD
PRE SS ENT ER TO CONT I NUE
XXXX
B
Page 70

DEUTSCH FRANÇAIS ITALIANO
80
Wenn “SONSTIGE EINSTELLUNGEN” angewählt ist
2
3
Wählen Sie die gewünschte Einstellung mit den •
und ª Cursortasten an und drücken Sie dann die
ENTER-Taste.
PLAYER-MODUS
Der DVD-Video-Wiedergabemodus kann aktiviert
werden, um die auf der DVD-Audio-Disc enthaltenen
DVD-Videoinhalte wiederzugeben.
BILDUNTERSCHRIFT
Legen Sie hiermit fest, ob die auf DVDs
aufgenommenen geschlossenen Untertitel angezeigt
werden sollen oder nicht.
DYNAMIKKOMPRESSION
Stellen Sie hiermit den Dynamikbereich bei der DiscWiedergabe ein.
AUTO. ABSCHALTUNG
Um Strom zu sparen, kann der DVD-3800
automatisch in den Standby-Modus geschaltet
werden, wenn er längere Zeit nicht verwendet wird.
DIASHOW
Das Zeitintervall für die Weiterschaltung zum
nächsten Standbild kann eingestellt werden, wenn
Standbild-Dias (im JPEG-Format) angezeigt werden.
SONST IGE E I NSTE LLUNGE N
PL AYE R-MODUS
BILDUNTERSCHRIFT
DYNAMIKKOMPRESSION
AUTO . ABSCHALTUNG
DIASHOW
EINSTELLUNGEN BEENDEN
AUDIO
AUS
AUS
AUS
5SEK
B
NAVIGATION: AUSWAHL: ENTER -TASTE
Wählen Sie die gewünschte Einstellung mit den •
und ª Cursortasten an und drücken Sie dann die
ENTER-Taste.
q Wenn “PLAYER-MODUS” angewählt ist:
AUDIO (Standard-Einstellung)
Nehmen Sie diese Einstellung vor, um DVDAudiosignale als solche wiederzugeben.
VIDEO
Nehmen Sie diese Einstellung vor, um die auf der
DVD-Audio-Disc enthaltenen DVD-Videoinhalte
wiederzugeben.
AUDIO
VI DEO
B
SONST IGE E I NSTE LLUNGE N
PL AYE R-MODUS
BILDUNTERSCHRIFT
DYNAMIKKOMPRESSION
AUTO . ABSCHALTUNG
DIASHOW
EINSTELLUNGEN BEENDEN
NAVIGATION: AUSWAHL: ENTER -TASTE
1
Siehe Seite 59.
4 5 6
ENTER
ON
OFF
REMOTE CONTROL UNIT RC-553
TOP MENU
DISPLAY
MARKERRANDOM
PAGE
A-B
ZOOM
DIMMER
REPEAT
SETUP
NTSC / PALOPEN / CLOSE
CALL RETURN
SKIP
SLOW / SEARCH
POWER
ANGLE SUBTITLE AUDIOSEARCH MODE
PLAY
STILL /
PAUSE
STOP
PIC.ADJ
1
7
0
2
8
+10
3
9
PROG / DIR
V.S.S.
CLEAR
P.D.MEMORY
MENU
1, 2, 3
1
1
2
3
ENTER
Fernbedienung
Télécommande
Telecomando
ENTER
Fernbedienung
Télécommande
Telecomando
2
3
Utiliser les touches curseurs • et ª pour sélectionner
le réglage souhaité, puis appuyer sur la touche
ENTER.
MODE DE LECTURE
Le mode de lecture de DVD vidéo peut être réglé
pour lire le contenu d’un DVD vidéo inclus sur un
DVD audio.
SOUS TITRES
Utilisez cette option pour activer ou désactiver les
légendes enregistrées sur le DVD.
COMPRESSION
Utilisez cette option pour régler la plage de la sortie
son pour la lecture de disques.
VEILLE AUTOMATIQUE
Pour économiser l’énergie, le DVD-3800 peut être
réglé automatiquement en mode d’attente lorsqu’il
n’est pas utilisé pendant de longues périodes.
DIAPORAMA
L’intervalle de temps pour commuter à l’image fixe
suivante lors de la lecture d’images fixes d’un
diapositive (en format JPEG) peut être réglé.
CHOI X DE MENU
REGLAGES: DECISION:BOUTTON ENTER
M
ODE DE LE CTURE
SOUS T I TRES
COMPRE SS ION
VE I L L E AUTO
M
AT I QUE
DIAPORA
M
A
QUI TT E R LA C ONF I GUR AT I ON
M
ODE AUDI O
NON
NON
NON
5SEC
B
Utiliser les touches curseurs • et ª pour sélectionner
le réglage souhaité, puis appuyer sur la touche
ENTER.
q Lorsque le “MODE DE LECTURE” est
sélectionnée:
MODE AUDIO (Réglage usine par défaut)
Choisir ce réglage pour lire les signaux de DVD
audio tels quels.
MODE VIDEO
Choisir ce réglage pour lire le contenu de DVD
vidéo inclus dans un disque DVD audio.
CHOI X DE MENU
REGLAGES: DECISION:BOUTTON ENTER
M
ODE DE LE CTURE
SOUS T I TRES
COMPRE SSI ON
VE I L L E AUTO
M
AT I QUE
DIAPORA
M
A
QUI T TE R LA C ONF IG URAT I ON
M
ODE AUDI O
M
ODE VI DE O
B
1
Voir page 59.
Lorsque “'CHOIX DE MENU” est
sélectionnée
2
3
Utilizzate i tasti cursore • e ª per selezionare
l’impostazione desiderata, quindi premete il tasto
ENTER.
PLAYER MODE
Potete impostare il modo di riproduzione video DVD
per riprodurre i contenuti video DVD del disco audio
DVD.
CAPTIONS
Usate questa voce per impostare la visualizzazione o
non visualizzazione dei caption registrati sui DVD.
COMPRESSION
Usate questa voce per impostare l'uscita della
gamma dinamica durante la riproduzione dei dischi.
AUTO POWER MODE
Per risparmiare corrente, il DVD-3800 può essere
impostato automaticamente nel modo d'attesa
quando non viene usato per lunghi periodi di tempo.
SLIDE SHOW
Potete impostare l'intervallo di tempo per la
commutazione al fermo immagine successivo
quando riproducete delle immagini (nel formato
JPEG).
OTHE R SE TUP
SELECT : DECISION:ENTER BUTTON
PLAYER
M
ODE
CAPT IONS
CO
M
PRESS I ON
AUTO PO
W
ER MODE
SL I DE SHO
W
EXIT SETUP
AUDIO
OFF
OFF
OFF
10SEC
B
Utilizzate i tasti cursore • e ª per selezionare
l’impostazione desiderata, quindi premete il tasto
ENTER.
q Quando selezionate “PLAYER MODE”:
AUDIO (Impostazione di fabbrica)
Impostate questo per riprodurre i segnali audio
DVD come tali.
VIDEO
Impostate questo per riprodurre i contenuti video
del DVD del disco audio DVD.
OTHE R SE TUP
SELECT : DECISION:ENTER BUTTON
PLAYER
M
ODE
CAPT IONS
CO
M
PRESS I ON
AUTO PO
W
ER MODE
SL I DE SHO
W
EXIT SETUP
AUDIO
VI DEO
B
1
Vedere pagina 59.
Quando si seleziona “OTHER SETUP”
Page 71

DEUTSCH FRANÇAIS ITALIANO
81
3
w Wenn “BILDUNTERSCHRIFT” angewählt ist:
AUS (Standard-Einstellung)
Wä hlen Sie diese Einstellung, wenn bei der
Wiedergabe von DVDs, die englische Untertitel
beinhalten, keine Untertitel angezeigt werden sollen.
EIN
Wä hlen Sie diese Einstellung, um bei der
Wiedergabe von DVDs, die englische Untertitel
beinhalten, diese englischen Untertitel auf dem
Bildschirm anzeigen zu lassen.
e Wenn “DYNAMIKKOMPRESSION” angewählt ist:
AUS (Standard-Einstellung)
Wä hlen Sie diese Einstellung für den
Standardbereich.
EIN
Wählen Sie diese Einstellung, um auch bei niedrig
eingestellter Lautstärke einen kraftvollen Klang zu
erzielen. Diese Einstellung bietet sich an, wenn
Sie sich zum Beispiel spät am Abend DVDs mit
niedrig eingestellter Lautstärke ansehen möchten.
(Diese Einstellung ist nur für in Dolby Digital
aufgenommene DVDs gültig.)
r Wenn “AUTO. ABSCHALTUNG” angewählt ist:
AUS (Standard-Einstellung)
Der Strom wird nicht automatisch in den StandbyModus geschaltet.
EIN
Die Stromversorgung des DVD-3800 wird ausgeschaltet
und der Standby-Modus wird aktiviert, falls der DVD3800 ca. 30 Minuten lang nicht bedient wird.
AUS
EIN
B
SONST IGE E I NSTE LLUNGE N
PL AYE R-MODUS
BILDUNTERSCHRIFT
DYNAMIKKOMPRESSION
AUTO . ABSCHALTUNG
DIASHOW
EINSTELLUNGEN BEENDEN
NAVIGATION: AUSWAHL: ENTER -TASTE
AUS
EIN
B
SONST IGE E I NSTE LLUNGE N
PL AYE R-MODUS
BILDUNTERSCHRIFT
DYNAMIKKOMPRESSION
AUTO . ABSCHALTUNG
DIASHOW
EINSTELLUNGEN BEENDEN
NAVIGATION: AUSWAHL: ENTER -TASTE
AUS
EIN
B
SONST IGE E I NSTE LLUNGE N
PL AYE R-MODUS
BILDUNTERSCHRIFT
DYNAMIKKOMPRESSION
AUTO . ABSCHALTUNG
DIASHOW
EINSTELLUNGEN BEENDEN
NAVIGATION: AUSWAHL: ENTER -TASTE
3
3
w Lorsque le “SOUS TITRES” est sélectionnée:
NON (Réglage usine par défaut)
Sé lectionnez cette option lorsque vous ne
souhaitez pas afficher les légendes à l’écran
lorsque le DVD contient des légendes en anglais.
OUI
Sé lectionnez cette option pour afficher les
légendes à l’écran lorsque le DVD contient des
légendes en anglais.
e Lorsque le “COMPRESSION” est sélectionnée:
NON (Réglage usine par défaut)
Sélectionner ce réglage pour la gamme standard.
OUI
Sélectionner ce réglage pour obtenir un son puissant
même lorsque le volume est bas. Ce réglage convient
pour la lecture de DVD à des heures tardives avec le
volume bas. (Ce réglage est valide uniquement pour
les DVD enregistrés en Dolby Digital.)
r
Lorsque le “VEILLE AUTOMATIQUEE” est sélectionnée:
NON (Réglage usine par défaut)
L’alimentation ne commute pas automatiquement
au mode d’attente.
OUI
Le DVD-3800 s’éteint et le mode d’attente est
ré glé si le DVD-3800 reste en mode d’arrê t
pendant environ 30 minutes.
CHOI X DE MENU
REGLAGES: DECISION:BOUTTON ENTER
M
ODE DE LE CTURE
SOUS T I TRES
CO
M
PRESS I ON
VE I L L E AUTO
M
AT I QUE
DIAPORA
M
A
QUI TT E R LA C ONF I GUR AT I ON
NON
OUI
B
CHOI X DE MENU
REGLAGES: DECISION:BOUTTON ENTER
M
ODE DE LE CTURE
SOUS T I TRES
COMPRE SS ION
VE I L L E AUTO
M
AT I QUE
DIAPORA
M
A
QUI TT E R LA C ONF I GUR AT I ON
NON
OUI
B
CHOI X DE MENU
REGLAGES: DECISION:BOUTTON ENTER
M
ODE DE LE CTURE
SOUS T I TRES
COMPRE SS ION
VE I L L E AUTO
M
AT I QUE
DIAPORA
M
A
QUI TT E R LA C ONF I GUR AT I ON
NON
OUI
B
3
w Selezionando “CAPTIONS”:
OFF (Impostazione di fabbrica)
Selezionate questa voce se non desiderate
visualizzare le didascalie sullo schermo durante la
riproduzione dei DVD che contengono delle
didascalie in inglese.
ON
Selezionate questa voce per visualizzare le
didascalie sullo schermo durante la riproduzione di
DVD che contengono delle didascalie in inglese.
e Selezionando “COMPRESSION”:
OFF (Impostazione di fabbrica)
Selezionate questa voce per la gamma standard.
ON
Selezionate questa voce per ottenere un suono
potente anche quando il volume è basso.
Quest'impostazione è adatta per guardare dei DVD
tardi alla sera con un livello basso del volume.
(Quest'impostazione è valida solo per i DVD che
sono stati registrati nel modo Dolby Digital.)
r Quando selezionate “AUTO POWER MODE”:
OFF (Impostazione di fabbrica)
La corrente non cambia automaticamente al modo
di attesa.
ON
Il DVD-3800 si spegne e viene impostato il modo
di attesa se il DVD-3800 rimane nel modo di
arresto per 30 minuti circa.
OTHE R SE TUP
SELECT : DECISION:ENTER BUTTON
PLAYER
M
ODE
CAPT IONS
CO
M
PRESS I ON
AUTO PO
W
ER MODE
SL I DE SHO
W
EXIT SETUP
OFF
ON
B
OTHE R SE TUP
SELECT : DECISION:ENTER BUTTON
PLAYER
M
ODE
CAPT IONS
CO
M
PRESS I ON
AUTO PO
W
ER MODE
SL I DE SHO
W
EXIT SETUP
OFF
ON
B
OTHE R SE TUP
SELECT : DECISION:ENTER BUTTON
PLAYER
M
ODE
CAPT IONS
CO
M
PRESS I ON
AUTO PO
W
ER MODE
SL I DE SHO
W
EXIT SETUP
OFF
ON
B
ENTER
Fernbedienung
Télécommande
Telecomando
Page 72

DEUTSCH FRANÇAIS ITALIANO
82
3
t Wenn “DIASHOW” angewählt ist:
Stellen Sie mit den Cursor-Tasten • und ª das
Zeitintervall ein.
Das Zeitintervall kann zwischen 5 und 15
Sekunden eingestellt. (Die werkseitige Einstellung
lautet 5 Sekunden.)
5SEK
B
SONST IGE E I NSTE LLUNGE N
PL AYE R-MODUS
BILDUNTERSCHRIFT
DYNAMIKKOMPRESSION
AUTO . ABSCHALTUNG
DIASHOW
EINSTELLUNGEN BEENDEN
NAVIGATION: AUSWAHL: ENTER -TASTE
✽ Verlassen des Systemeinrichtungsmodus
Wählen Sie mit den ª Cursor-Tasten “EINSTELLUNGEN
BEENDEN” an, und drücken Sie dann die SELECT-Taste.
Sie können die Funktion auch durch Drücken der ENTER-
Taste auf der Fernbedienung verlassen.
3
t Lorsque le “DIAPORAMA” est sélectionnée:
Utiliser les touches de déplacement du curseur
•
et ªpour régler l’intervalle de temps.
L’intervalle de temps peut être réglé entre 5 et 15
secondes. Le réglage d’origine est sur 5 secondes.)
CHOI X DE MENU
REGLAGES: DECISION:BOUTTON ENTER
M
ODE DE LE CTURE
SOUS T I TRES
COMPRE SS ION
VE I L L E AUTO
M
AT I QUE
DIAPORA
M
A
QUI TT E R LA C ONF I GUR AT I ON
5SEC
B
✽ Pour quitter le mode Paramétrage
Utilisez les touche ª pour sélectionner “QUITTER LA
CONFIGURATION” et appuyez ensuite sur la touche
ENTER pour confirmer. Il est aussi possible de quitter en
appuyant sur la touche SETUP sur la télécommande.
3
t Quando selezionate “SLIDE SHOW”:
Usate i tasti del cursore •e ªper impostare
l'intervallo di tempo.
Potete impostare l'intervallo di tempo tra 5 e 15
secondi. (L'impostazione di fabbrica è 5 secondi.)
OTHE R SE TUP
SELECT : DECISION:ENTER BUTTON
PLAYER
M
ODE
CAPT IONS
CO
M
PRESS I ON
AUTO PO
W
ER MODE
SL I DE SHO
W
EXIT SETUP
5SEC
B
✽ Per uscire dal modo di impostazione
Dovete usare i tasto del cursore ª per selezionare “EXIT
SETUP”, poi premete il tasto ENTER. E’ inoltre possibile
uscire premendo il tasto SETUP sul telecomando.
HINWEISE:
• Zum Anzeigen englischer Untertitel ist ein
Dekoder für Untertitel in englischer Sprache
erforderlich.
• DVDs mit Untertitelsignalen sind mit dem
,
, ,
Zeichen gekennzeichnet.
Bei der Wiedergabe von DVDs, die keine
Untertitelsignale enthalten, können keine
englischen Untertitel angezeigt werden.
• Mit welchen Zeichen (Großbuchstaben,
Kleinbuchstaben, Schriftart usw.) die Untertitel
angezeigt werden hängt von der einzelnen DVD
ab und kann nicht mit dem DVD-3800 eingestellt
werden.
REMARQUES:
•
Un décodeur de sous-titres en anglais est
nécessaire pour afficher les sous-titres dans
cette langue.
•
Les DVD comportant des signaux de légendes
sont repérés par la marque , , .
Les légendes en anglais ne peuvent être affichées
si le DVD ne contient pas de signaux de légende
enregistrés.
•
Les caractères d’ affichage des légendes
(majuscules, petites lettres, italiques, etc.)
dé pendent du DVD et ne peuvent être
sélectionné avec le DVD-3800.
NOTE:
• Occorre usare un decodificatore inglese per
visualizzare le didascalie in inglese.
• DVD che contengono dei segnali delle didascalie
sono indicaati dal marchio
, , .
Non è possibile visualizzare le didascalie in
inglese durante la riproduzione di DVD che non
contengono tali segnali.
• I caratteri in cui le didascalie sono visualizzati
(lettere in maiuscola, in minuscola, ecc.)
dipendono dal DVD e non possono essere
selezionati con il DVD-3800.
3
ENTER
Fernbedienung
Télécommande
Telecomando
Page 73

DEUTSCH FRANÇAIS ITALIANO
83
9
WIEDERGABE
(1) Wiedergabe
PROGRESSIVE
DVD
1 2
9
8
REMOTE SENSOR
OPEN/CLOSE
5
DVD AUDIO
¢ON / STANDBY
£OFF
PLAY STOP
763
STILL / PAUSE
B
PURE DIRECT
MODE 1
MODE 2
OFF
AL24 PLUS
DVD AUDIO-VIDEO PLAYER DVD-3800
1 2, 4
53
4 5 6
ENTER
ON
OFF
REMOTE CONTROL UNIT RC-553
TOP MENU
DISPLAY
MARKERRANDOMA-BREPEAT
NTSC / PALOPEN / CLOSE
CALL RETURN
SKIP
SLOW / SEARCH
POWER
ANGLE SUBTITLE AUDIOSEARCH MODE
PLAY
STILL /
PAUSE
STOP
1
7
0
2
8
+10
3
9
PROG / DIR
V.S.S.
CLEAR
MENU
1
2, 4
5
6
7
1
2
3
4
Schalten Sie das Gerät ein.
• Drücken Sie die Netztaste. Die Netzanzeige
leuchtet und das Gerät schaltet sich ein.
• Drücken Sie im Standby-Modus die
POWER ON-Taste auf dem
Fernbedienungsgerät.
Drücken Sie die OPEN/CLOSE-Taste, um das
Disc-Fach zu öffnen.
Legen Sie die Disc in das Disc-Fach ein.
Drücken Sie die OPEN/CLOSE-Taste.
• Für viele interaktive DVDs und Video-CDs
mit Wiedergabesteuerung erscheint ein
Menüschirm. Wählen Sie die gewünschte
Funktion in einem derartigen Fall wie in
Schritt 6 beschrieben aus.
✽Interaktive DVDs sind DVDs mit mehreren
Blickwinkeln, Geschichten usw..
¢ON / STANDBY
£OFF
Hauptgerät
Unité principale
Unità principale
Fernbedienung
Télécommande
Telecomando
OPEN/CLOSE
5
Fernbedienung
Télécommande
Telecomando
OPEN / CLOSE
OPEN/CLOSE
5
OPEN / CLOSE
Beispiel: Für DVDs mit
Menüschirmen
Beispiel: Für Video-CDs mit
Wiedergabesteuerung
Hauptgerät
Unité principale
Unità principale
Fernbedienung
Télécommande
Telecomando
Hauptgerät
Unité principale
Unità principale
1
2
3
4
ON
POWER
Apfel
Banane
Orange Erdbeere
Pfirsich Ananas
TOP-MENÜ
1. Öffnen
2. 1. Bewegung
3. 2. Bewegung
4. 3. Bewegung
5. Beenden
9
LECTURE
(1) Lecture
1
2
3
4
Mettre sous tension.
• Appuyer sur la touche d’alimentation. Le
voyant d’alimentation s’allume et l’appareil
se met sous tension.
• En mode veille, appuyer sur la touche
d’ alimentation “POWER ON” de la
télécommande.
Appuyer sur la touche ouverture/fermeture
(OPEN/CLOSE) pour ouvrir le tiroir de disque.
Placer le disque dans le tiroir de disque.
Appuyer sur la touche ouverture/fermeture
(OPEN/CLOSE).
• Pour un grand nombre de DVD et CD vidéo
interactifs avec commande de lecture, un
écran menu s’affiche. Dans ce cas, utiliser
la procédure de l’étape 6 pour sélectionner
le paramètre souhaité.
✽Les DVD interactifs sont des DVD
comprenant les angles multiples, histoires,
etc.
Exemple: Pour les DVD avec
des écrans menu
Exemple: Pour les CD vidéo avec
commande de lecture
Pomme
Banane
Orange Fraise
Pêche Ananas
1. Ouverture
2. 1er mouvement
3. 2e mouvement
4. 3e mouvement
5. Final
BARRE DE MENU
9
RIPRODUZIONE
(1) Riproduzione
1
2
3
4
Accendete la corrente.
• Premete il tasto di corrente, l'indicatore si
illumina e la corrente si spegne.
• Nel modo stand by, premete il tasto
POWER ON dell'unità telecomando.
Premete il tasto OPEN/CLOSE per aprire il
piatto portadisco.
Posizionate il disco sul piatto portadischi.
Premete il tasto OPEN/CLOSE.
• Per molti DVD interattivi e CD video con
controllo di riproduzione appare uno
schermo menù. In tal caso, usate la
procedura della fase 6 per selezionare la
voce desiderata.
✽I DVD interattivi sono dei DVD che
includono degli angoli multipli, storie, ecc.
Esempio: Per i DVD con degli
schermi menù
Esempio:
Per i CD video con
controllo di riproduzione
Mela
Banana
Arancio Fragola
Pesca Ananas
MENÚ SUPERIORE
1. Inizio
2.
1° movimento
3.
2° movimento
4.
3° movimento
5.
Fine
Leuchtet
S’allume
Illumina
Page 74

DEUTSCH FRANÇAIS ITALIANO
84
5
Drücken Sie die PLAY-Taste.
6
Wählen Sie die gewünschten Funktionen mit
den Cursor-Tasten (•, ª,
0 und 1) an.
• Für einige Discs gibt es einen zweiten
Menüschirm. Drü cken Sie in einem
derartigen Fall die Taste
9 , um den
nächsten Menüschirm anzeigen zu lassen.
(Beziehen Sie sich auf die Disc-Hülle).
✽Bei der Benutzung von Video-CDs sind die
Cursor-Tasten (• , ª ,
0 und 1) außer
Funktion. Bei Video-CDs werden die
einzelnen Funktionen mit den
Nummerntasten angewählt.
Beispiel: Wenn “Apfel” angewählt ist
Apfel
Apfel
Banane
Orange Erdbeere
Pfirsich Ananas
TOP-MENÜ
7
Drücken Sie die ENTER-Taste.
• Die gewünschte Funktion wird angewählt
und die Wiedergabe beginnt.
• Während der Wiedergabe können Sie
durch Betätigung der TOP MENU/MENUTaste - abnhängig von der jeweiligen Disc zum Menüschirm zurückkehren.
• Drücken Sie wä hrend der Wiedergabe
einer Video-CD die RETURN-Taste, um zum
Menüschirm zurückzukehren.
• Wenn während der Bedienung der Tasten
auf dem Fernsehschirm erscheint, ist der
beabsichtigte Betrieb mit dem DVD-3800 oder
der verwendeten Disc nicht möglich.
• Legen Sie die Disc in die Disc-Führung.
• Legen Sie immer nur eine Disc zur Zeit in das
Disc-Fach ein.
• Die Discs drehen sich weiter, während das
Menü auf dem Fernsehschirm angezeigt wird.
HINWEISE:
Hauptgerät
Unité principale
Unità principale
Fernbedienung
Télécommande
Telecomando
1
PLAY
PLAY
Fernbedienung
Télécommande
Telecomando
ENTER
Fernbedienung
Télécommande
Telecomando
5
6
7
Exemple: Lorsque “Pomme” est sélectionné
Pomme
Pomme
Banane
Orange Fraise
Pêche Ananas
BARRE DE MENU
Esempio: Quando è stata selezionata la voce “Mela” is selected
Mela
Mela
Banana
Arancio Fragola
Pesca Ananas
MENÚ SUPERIORE
5
Appuyer sur la touche de lecture (PLAY).
6
Utiliser les touches curseurs (•, ª, 0 et 1)
pour sélectionner le paramètre souhaité.
• Sur certains disques, il existe un deuxième
écran menu. Si c’est le cas, appuyer sur la
touche
9 pour afficher l’écran menu
suivant. (Voir le boîtier du disque.)
✽Les touches curseurs (•, ª,
0 et 1) ne
fonctionnent pas pour les CD vidéo. Utiliser
les touches numérotées pour sélectionner
le paramètre souhaité.
7
Appuyer sur la touche ENTER.
• La sélection est confirmée et la lecture
commence.
• Certains disques DVD permettent de
retourner à l’écran menu en appuyant sur la
touche TOP MENU/MENU pendant la
lecture.
• Appuyer sur la touche retour (RETURN)
pendant la lecture d’un CD vidéo pour
revenir à l’écran menu.
• Si s’affiche sur l’écran TV pendant que les
touches sont activés, cette opération n’est pas
possible sur les DVD-3800 ou avec ce disque.
• Placer le disque dans le guide.
• Ne pas mettre plus d’un disque dans le tiroir.
• Le disque continue à tourner pendant que
l’écran menu s’affiche sur l’écran TV.
REMARQUES:
5
Premete il tasto PLAY.
6
Usate i tasti del cursore (•, ª, 0 e 1) per
selezionare la voce desiderata.
• Per alcuni dischi esiste uno schermo menù
secondario. In tal caso, premete il tasto
9 per visualizzare lo schermo menù
successivo. (Fate riferimento alla custodia
del disco.)
✽I tasti del cursore (•, ª, 0 e 1) non
funzionano per i CD video. Usate i tasti
numerici per selezionare la voce desiderata.
7
Premete il tasto ENTER.
• Viene selezionata la voce desiderata e ha
inizio la riproduzione.
• Potete ritornare allo schermo del menù
premendo il tasto TOP MENU/MENU
durante la riproduzione del DVD, anche se
questo dipende dal disco.
• Premete il tasto RETURN durante la
riproduzione di un CD video per ritornare
allo schermo del menù.
• Se appare l'indicazione sullo schermo
televisivo durante la pressione dei tasti,
l'operazione in questione non è possibile nel
DVD-3800 o nel disco.
• Posizionate il disco nella guida del disco.
• Non posizionate mai più di un disco sul piatto
portadischi.
• Il disco continua a girare mentre è visualizzato lo
schermo del menù sullo schermo televisivo.
NOTE:
Page 75

DEUTSCH FRANÇAIS ITALIANO
85
PROGRESSIVE
DVD
1 2
9
8
REMOTE SENSOR
OPEN/CLOSE
5
DVD AUDIO
PLAY STOP
763
STILL / PAUSE
PURE DIRECT
MODE 1
MODE 2
OFF
AL24 PLUS
DVD AUDIO-VIDEO PLAYER DVD-3800
!1 SEARCH MODE-Taste
(2)
Beenden der Wiedergabe
Hauptgerät
Unité principale
Unità principale
Fernbedienung
Télécommande
Telecomando
i Taste für virtuellen
Surroundklang
2
STOP
STOP
4 5 6
ENTER
ON
OFF
REMOTE CONTROL UNIT RC-553
TOP MENU
DISPLAY
MARKERRANDOMA-B
DIMMER
REPEAT
SETUP
NTSC / PALOPEN / CLOSE
CALL RETURN
SKIP
SLOW / SEARCH
POWER
ANGLE SUBTITLE AUDIOSEARCH MODE
PLAY
STILL /
PAUSE
STOP
PIC.ADJ
1
7
0
2
8
+10
3
9
PROG / DIR
V.S.S.
CLEAR
P.D.MEMORY
MENU
e SKIP-Tasten
w STOP-Taste
r SLOW/SEARCH-Tasten
q STILL/PAUSE-Taste
(4) Vorwärts-/Rückwärtssuchlauf
Fernbedienung
Télécommande
Telecomando
SLOW / SEARCH
(3) Wiedergabe von Standbildern (Zeitweilige Unterbrechung)
Fernbedienung
Télécommande
Telecomando
STILL /
PAUSE
Drücken Sie während der Wiedergabe die STOP-Taste
am Hauptgerät oder auf dem Fernbedienungsgerät.
Die Wiedergabe stoppt und es erscheint das
Hintergrundbild.
• Bei Benutzung des DVD-3800s wird diese Position
bei Betätigung der STOP-Taste gespeichert. Zu
diesem Zeitpunkt blinkt “
1” auf dem Display. (nur
DVD)
• Wenn Sie nach Betätigung der STOP-Taste die
PLAY-Taste drücken, setzt die Wiedergabe an der
Stelle wieder ein, an der Sie zuvor unterbrochen
worden ist. (nur DVD)
• Die Speicherfunktion für die Wiederaufnahme der
Wiedergabe wird entaktiviert, wenn das Disc-Fach
geöffnet oder die STOP-Taste ein zweites Mal
gedrückt wird. (nur DVD)
• Nach 30 Minuten im Stoppmodus schaltet sich der
DVD-3800 automatisch aus und der Standby-Modus
ist eingestellt. (Automatische Abschaltung)
• Wenn Sie die Wiedergabe der Disc nicht fortsetzen
möchten, können Sie das Gerät, um Energie zu
sparen, mit der POWER-Taste am Hauptgerät
ausschalten. Sie können den Standby-Modus auch
durch Betätigung der sich auf der Fernbedienung
befindlichen POWER OFF-Taste einstellen.
✽Die Speicherfunktion zur Wiederaufnahme der
Wiedergabe kann nur für Discs angewenet werden,
bei denen die bereits ausgeführte Wiedergabezeit
während der Wiedergabe auf dem Display angezeigt
wird.
Drücken Sie wä hrend der Wiedergabe die
STILL/PAUSE-Taste am Hauptgerät oder auf der
Fernbedienung.
• Drücken Sie zur Wiederaufnahme der Wiedergabe
die PLAY-Taste.
Drücken Sie während der Wiedergabe eine der SLOW/SEARCHTasten am Hauptgerät oder auf der Fernbedienung.
6 :Rückwärts
7 : Vorwärts
• Bei nochmaliger Betätigung der Taste erhöht sich
die Suchgeschwindigkeit (in vier Stufen).
•
Bei CDs in 4 regelbar, bei DVD-Audio-Discs (Filmpassagen),
DVD-Video und Video-CD-Discs in 7 Stufen regelbar.
• Drücken Sie zur Wiederaufnahme der normalen
Wiedergabe die PLAY-Taste.
HINWEIS:
• In einigen Fällen erscheint möglicherweise noch
einmal der Menüschirm, nachdem eine der
SLOW/SEARCH-Tasten während der Menü -
Wiedergabe einer Video-CD gedrückt worden ist.
qTouche d’arrêt sur image/pause (STILL/PAUSE)
w Touche d’arrêt (STOP)
e Touches de saut arrière/avant (SKIP)
r
Touche de ralenti/recherche (SLOW/SEARCH)
t Touches numérotées
y Touche d’arrêt (STOP)
u Touches de saut arrière/avant (SKIP)
i
T
ouche V.S.S.
oTouche d’arrêt sur image/pause (STILL/PAUSE)
!0
Touche de ralenti/recherche (SLOW/SEARCH)
!1
Touch SEARCH MODE
(2)
Arrêt de la lecture
En cours de lecture, appuyer sur la touche STOP sur
l’appareil ou la télécommande, la lecture s’arrête et le
papier peint s’affiche.
Fonction de lecture mémorisée
• Avec les DVD-3800, lorsque le touche d’ arrêt
(STOP) est enfoncé, cette position est mémorisée.
A ce moment, “
1” clignote sur l’affichage.
• Lorsque le touche de lecture (PLAY) est enfoncé
après avoir appuyé sur le touche d’arrêt (STOP), la
lecture reprend là où elle s’était arrêtée.
• La fonction de lecture mémorisée est annulée si le
tiroir de disque est ouvert ou si le touche d’arrêt
(STOP) est enfoncé une deuxième fois.
• Au bout de 30 minutes en mode arrêt, l’alimentation
du DVD-3800 s’éteint et le mode veille est activé.
(Mise hors tension automatique)
•
Si l’on ne souhaite pas continuer la lecture du disque,
pour maintenir l’électricité, soit appuyer sur le touche
d’alimentation (POWER) de l’unité principale pour
mettre hors tension, soit appuyer sur la touche
d’alimentation (POWER OFF) de la télécommande
pour mettre l’alimentation en mode veille.
✽La fonction de lecture mémorisée est activée
uniquement sur les disques dont la durée est
indiquée sur l’affichage pendant la lecture.
(4)
Recherche avant/arrière
Pendant la lecture, appuyer sur l’une des touches de
ralenti/recherche (SLOW/SEARCH) de l’unité
principale ou de la télécommande.
6 : Marche arrière
7 : Marche avant
• Lorsque la touche est enfoncé e à nouveau, la
vitesse de recherche augmente (en quatre paliers).
• Variable in 4 steps for CDs, 7 steps for DVD audio
(movie part), DVD video and video CD discs.
• Variable en 4 étapes pour les CD, 7 étapes pour les
DVD (partie film), DVD vidéo et disques CD vidéo.
REMARQUE:
• Dans certains cas, l’écran menu peut s’afficher à
nouveau lorsqu’un des touches de ralenti/recherche
(SLOW/SEARCH) est enfoncé pendant la lecture de
menu sur un CD vidéo.
(3)
Lecture d’arrêt sur image (Pause)
Pendant la lecture, appuyer sur la touche Arrêt-surImage/Pause (STILL/PAUSE) de l’unité principale ou
de la télécommande.
• Appuyer sur le touche de lecture (PLAY) pour
reprendre la lecture normale.
(2)
Arresto della riproduzione
Durante la riproduzione, premete il tasto STOP
sull'unità principale o sull'unità del telecomando, la
riproduzione si ferma e appare sul display lo sfondo.
• Quando premete il tasto STOP del DVD-3800, la
posizione attuale viene memorizzata. A questo
punto, sul display lampeggia “
1”. (Solo DVD)
• Quando premete il tasto PLAY dopo aver premuto il
tasto STOP, la riproduzione riprende dalla posizione
in cui si è fermata. (Solo DVD)
• La funzione di ripresa riproduzione dalla memoria
viene cancellata se si apre il piatto portadischi
oppure se preme il tasto STOP una seconda volta.
(Solo DVD)
• Dopo 30 minuti nel modo di arresto, la corrente del
DVD-3800 si spegne automaticamente e viene
impostato il modo di attesa. (Spegnimento
automatico)
• Se non desiderate continuare la riproduzione del
disco per risparmiare energia, premete il tasto
POWER sull'unità principale per spegnere la
corrente oppure premete il tasto POWER OFF sul
telecomando per impostare il modo di attesa.
✽La funzione di ripresa della riproduzione dalla
memoria funziona per i dischi il cui tempo trascorso
è visualizzato sul display durante la riproduzione.
(4) Ricerca in avanti/all'indietro
Durane la riproduzione, dovete premere uno dei tasto
SLOW/SEARCH dell'unità principale o del
telecomando.
6 : Direzione all'indietro
7 : Direzione in avanti
• Alla seconda pressione del tasto, aumenta la
velocità di ricerca (in quattro passi).
• Variabile in 4 passi peri CD, 7 passi per i DVD audio
(parte film), per i DVD video e per i CD video.
• Premete il tasto PLAY per riprendere la riproduzione
normale.
NOTA:
• In certi casi, lo schermo del menù può riapparire
quando si preme uno dei tasti SLOW/SEARCH
durante la riproduzione del menù di un CD video.
(3)
Riproduzione di un fermo immagine (pausa)
Premete il tasto STILL/PAUSE sull'unità principale o
sul telecomando durante la riproduzione.
• Premete il tasto PLAY per riprendere la riproduzione
normale.
q
Tasto di fermo immagine/pausa (STILL/PAUSE)
w
Tasto di arresto (STOP)
e
Tasti SKIP
r
Tasti SLOW/SEARCH
t
Tasti numerici
y
Tasto di arresto (STOP)
u
Tasti SKIP
i
Tasto V.S.S.
o
Tasto di fermo immagine/pausa (STILL/PAUSE)
!0
Tasti SLOW/SEARCH
!1
Tasto SEARCH MODE
t Nummerntasten
y STOP-Taste
u SKIP-Tasten
o STILL/PAUSE-Taste
!0 SLOW/SEARCH-Tasten
Hauptgerät
Unité principale
Unità principale
3
STILL / PAUSE
Hauptgerät
Unité principale
Unità principale
76
Page 76

DEUTSCH FRANÇAIS ITALIANO
86
(5) An den Anfang von Kapiteln oder Titeln springen
Drücken Sie wä hrend der Wiedergabe eine der
Sprungtasten am Hauptgerät oder auf der
Fernbedienung.
8 :Rückwärts
9 : Vorwärts
• Es werden so viele Kapitel oder Titel übersprungen,
so oft Sie die Taste drücken.
• Bei einmaliger Betä tigung der
Rückwärtssprungtaste setzt sich der Tonabnehmer
zurück an den Anfang des gegenwä rtig
wiedergegebenen Kapitels oder Titels.
HINWEIS:
•
In einigen Fällen erscheint noch einmal der
Menüschirm, wenn eine der SKIP-Tasten während der
Menü-Wiedergabe einer Video-CD gedrückt wird.
Wiedergabeposition
Kapitel/Titel
Kapitel/Titel
Kapitel/Titel Kapitel/Titel
Rückwärts ,/Vorwärts (Wiedergaberichtung)
Hauptgerät
Unité principale
Unità principale
Fernbedienung
Télécommande
Telecomando
9
8
SKIP
Durchschalten mit den Nummerntasten
Drücken Sie während der Wiedergabe die SEARCH
MODE-Taste.
• Bei jeder Betätigung dieser Taste ändert sich der
Suchmodus.
Bei DVD-Audio-Discs : Gruppe Æ Spur Æ
(Gruppe)Æ
Bei DVD-Video-Discs : Titel Æ Kapitel Æ (Titel)
Æ
Bei CDs und Video-CDs : Nur Spur
✽Der mit der SEARCH MODE-Taste eingestellte
Suchmodus bleibt solange im Speicher
gespeichert, bis die Taste noch einmal gedrückt
wird.
Der Suchmodus wird jedoch nach Ausschalten der
Stromversorgung auf den Standard-Suchmodus
zurückgestellt.
• Geben Sie mit den Nummerntasten die
abzuspielende Nummer ein.
HINWEIS:
• Einige der DVD-Audio-, DVD-Video- und Video-CDDiscs funktionieren aufgrund der von einigen DiscHerstellern ergriffenen Maßnahmen nicht wie in
diesem Handbuch beschrieben.
4 5 6
1
7
0
2
8
+10
3
9
Fernbedienung
Télécommande
Telecomando
SEARCH MODE
(6) Bild-für-Bild-Wiedrgabe (nur für DVDs und Video-CDs)
Drücken Sie wä hrend der Wiedergabe die
STILL/PAUSE-Taste am Hauptgerät oder auf der
Fernbedienung.
• Bei Betä tigung dieser Taste werden die Bilder
nacheinander Bild-für-Bild angezeigt.
• Drücken Sie zur Wiederaufnahme der normalen
Wiedergabe die PLAY-Taste
• Bei DVD-Audio-Discs ist die Rahmen-für-RahmenWeiterschaltung nur in Videopassagen möglich.
Fernbedienung
Télécommande
Telecomando
STILL /
PAUSE
(5)
Atteindre le début de
chapitres ou de pistes
Pendant la lecture, appuyer sur l’un des touches de
saut (SKIP) de l’unité principale ou de la
télécommande.
8 : Marche arrière (PRECEDENT)
9 : Marche avant (SUIVANT)
• Chaque pression sur le touche équivaut à un saut de
chapitre de piste.
• Lorsque le touche de saut arrière est enfoncé une
fois, la tête de lecture revient au début du chapitre
ou de la piste en cours de lecture.
REMARQUE:
• Dans certains cas, l’écran menu peut s’afficher à
nouveau lorsqu’un des touches de saut (SKIP) est
enfoncé pendant la lecture de menu sur un CD
vidéo.
Repérage utilisant les touches numériques
Appuyer sur la touche SEARCH MODE pendant la
lecture.
• Le mode de recherche commute chaque fois que la
touche est enfoncée.
Pour les disques DVD audio : Groupe Æ Plage
Æ (Groupe) Æ
Pour les disques DVD vidéo : Titre Æ Chapitre
Æ (Titre) Æ
Pour les CD et CD vidéo : Plage uniquement
✽Le mode de recherche réglé en appuyant sur la
touche SEARCH MODE est mis en mémoire
jusqu’à ce que la touche soit enfoncée à nouveau.
Toutefois, le mode de recherche retourne au
mode par défaut lorsque l’appareil est éteint.
• Utiliser les touches numé riques pour entrer le
numéro à lire.
REMARQUE:
• Certains disques DVD audio, DVD vidéo et CD vidéo
ne fonctionnent pas comme décrit dans ce manuel
due aux intentions des producteurs de disques.
(6) Lecture image par image
(pour les DVD et les CD vidéo
uniquement)
Pendant la lecture, appuyer sur la touche d’arrêt sur
image/pause (STILL/PAUSE) de l’unité principale ou
de la télécommande.
• La lecture avance d’une image chaque fois que la
touche est enfoncée.
• Appuyer sur la touche de lecture (PLAY) pour
reprendre la lecture normale.
• Avec des disques DVD audio, le saut en avant trame
par trame est possible uniquement pour la partie
vidéo.
Position de lecture
Chapitre/Piste
Chapitre/Piste
Chapitre/Piste Chapitre/Piste
Marche arrière ,/Marche avant (sens de la lecture)
(5) Per saltare all'inizio delle
sezioni o dei brani
Durante la riproduzione, premete uno dei tasti di salto
dell'unità principale o del telecomando.
8 : Direzione all'indietro
9 : Direzione in avanti
• Viene saltato un numero di sezioni o brani che
corrisponde al numero di volte premete il tasto.
• Quando premete il tasto di salto all'indietro una
volta, il pickup ritorna all'inizio della sezione o del
brano in fase di riproduzione.
NOTA:
• In certi casi, lo schermo del menù può riapparire
quando premete uno dei tasti SKIP durante la
riproduzione del menù su un CD video.
Posizione di riproduzione
Sezione/Brano
Sezione/Brano
Sezione/Brano Sezione/Brano
Direzione all'indietro ,/Direzione in avanti (direzione di riproduzione)
Ricerca usando i tasti numerici
Premete il tasto SEARCH MODE durante la
riproduzione.
• La modalità di ricerca cambia ogni volta che premete
il tasto.
Per i DVD audio : Gruppo Æ Brano Æ
(Gruppo) Æ
Per i DVD video : Titolo Æ Capitolo Æ
(Titolo) Æ
Per i CD e CD video : solo brano
✽Il modo di ricerca impostato premendo il tasto
SEARCH MODE viene memorizzato fino alla
prossima pressione del tasto.
Tutavia, il modo di ricerca ritorna al modo default
quando spegnete la corrente.
• Usate i tasti numerici per inviare il numero da
riprodurre.
NOTA:
• Alcuni DVD audio, video DVD e CD video non
funzionano come viene descritto in questo manuale
per via delle intenzioni dei fabbricanti dei dischi.
(6) Riproduzione posa per posa
(solo per i DVD ed i CD video)
Premete il tasto STILL/PAUSE dell'unità principale o
del telecomando nel modo di riproduzione.
• L'immagine viene spostata in avanti di una posa ad
ogni pressione del tasto.
• Premete il tasto PLAY per riprendere la riproduzione
normale.
• Con i DVD audio, il salto in avanti per immagini è
possibile solo per la parte video.
Hauptgerät
Unité principale
Unità principale
3
STILL / PAUSE
Page 77

87
DEUTSCH FRANÇAIS ITALIANO
(7) Zeitlupenwiedergabe (nur für DVDs und Video-CDs)
Drücken Sie im Standbild-Modus eine der
SLOW/SEARCH-Tasten am Hauptgerät oder auf der
Fernbedienung.
6 :Rückwärts
7 : Vorwärts
• Bei nochmaliger Betätigung der Taste erhöht sich
die Geschwindigkeit der Zeitlupenwiedergabe.
Bei Video-CDs lässt sich die Geschwindigkeit in drei
Stufen erhöhen.
• Drücken Sie zur Wiederaufnahme der normalen
Wiedergabe die PLAY-Taste.
• Drücken Sie noch einmal die SLOW/SEARCH-Taste,
wenn während der Zeitlupen-Rückwärtswiedergabe
einer Disc die STILL/PAUSE-Taste gedrückt wurde.
• Bei DVD-Audio-Discs kann die Funktion für die
langsame Vorwärtswiedergabe nur in
Videopassagen verwendet werden.
HINWEIS:
• Die Zeitlupen-Rückwärtswiedergabe von Video-CDs
ist nicht möglich.
Fernbedienung
Télécommande
Telecomando
SLOW / SEARCH
(8) Anwendung der V.S.S.-Funktion (Virtueller Surround-Klang) (nur für DVDs)
Drücken Sie während der Wiedergabe die V.S.S.Taste auf dem Fernbedienungsgerät.
2 Die Anwendung der V.S.S.-Funktion (virtueller
Surround-Klang) verleiht dem Klang ein Hauch von
Weite und ermöglicht auch dann das Erzielen von
Surround-Effekten, wenn nur Frontlautsprecher (links
und rechts) benutzt werden. Bei Discs mit SurroundSignalen verleiht die V.S.S.-Funktion dem Klang nicht
nur Weite, sondern vermittelt darüber hinaus das
Gefühl, der Ton würde von allen Seiten kommen,
obwohl sich dort gar keine Lautsprecher befinden.
HINWEISE:
• Diese Funktion kann nur für DVDs angewendet
werden, die zwei oder mehr Kanäle oder Dolby
Digital-Signale enthalten.
•
Zum Zeitpunkt der Multikanal-Einstellung
arbeitet die V.S.S.-Funktion nicht.
Stellen Sie die Option “LAUTSPRECHER” unter
“AUDIO-EINSTELLUNGEN” bei
“EINSTELLUNGEN” auf “2-KANAL”.
• Beachten Sie bitte, dass der Effekt bei einigen
Discs nur schwach oder gar nicht vorhanden ist.
• Bei einigen Discs ist der Klang möglicherweise
verzerrt. Schalten Sie in sochen Fällen die
V.S.S.-Funktion aus.
• Schalten Sie andere Surround-Funktionen
(Surround-Modus des Fernsehgerätes usw.)
aus.
• Der Effekt ist am deutlichsten, wenn das
Fernsehgerät drei- bis viermal soweit von der
Zuhörposition entfernt ist wie die linken und
rechten Lautsprecher (Entfernung A).
r Zuhörposition
Fernbedienung
Télécommande
Telecomando
V.S.S.
q Entfernung A
e Drei- bis vierfache Entfernung A
w Lautsprecherw Lautsprecher
q Distance A
w Enceinte
e 3 ou 4 fois la distance A
r Position d’écoute
(7)
Lecture ralentie (pour les DVD
et les CD vidéo uniquement)
En mode arrêt sur image, appuyer sur l’une des
touches de ralenti/recherche (SLOW/SEARCH) de
l’unité principale ou de la télécommande.
6 : Marche arrière
7 : Marche avant
• Lorsque la touche est enfoncé e à nouveau, la
vitesse de lecture ralentie augmente.
Pour les CD Vidéo il existe 3 étapes.
• Appuyer sur la touche de lecture (PLAY) pour
reprendre la lecture normale.
• Si la touche STILL/PAUSE (FIXE/PAUSE) est
enfoncé pendant le mode de lecture lente d’un
disque en sens inverse, appuyer à nouveau sur la
touche SLOW/SEARCH (RALENTI/RECHERCHE).
• Avec des disques DVD audio, la fonction de lecture
normale au ralenti peut être utilisée uniquement
avec la partie vidéo.
REMARQUE:
• La lecture ralentie en marche arrière n’est pas
possible sur les CD vidéo.
(8) Utilisation de la fonction V.S.S.
(Son Surround Virtuel)
de la télécommande
(Uniquement pour DVD)
2
L’utilisation de la fonction V.S.S. (Son Surround Virtuel)
procure une sensation d’expansion et vous permet
d’obtenir des effets surround même en n’utilisant que
des enceintes avant (gauche et droite). Pour les
disques enregistrés en signaux surround, la fonction
V.S.S. procure non seulement une expansion sonore
mais donne également l’ impression que le son
provient des côtés même si il ne s’y trouve pas
d’enceintes.
En cours de lecture, appuyer sur la touche V.S.S.
de la télécommande.
REMARQUES:
• Cette fonction n’est opérationnelle qu’avec les
DVD contenant au moins deux canaux de
signaux Dolby Digital.
• La fonction V.S.S. ne fonctionne pas lors du
réglage multi canaux.
Ré glez “CANALES AUDIO” dans
“CONFIGURAITON AUDIO” dans
“INSTALLATION” sur “2 CANAUX”.
• Pour certains disques, les effets seront faibles
ou même nuls.
• Avec certains disques, le son peut être
déformé. Dans ce cas, désactiver la fonction
V.S.S.
• Désactiver les autres fonctions surround (Mode
surround de la télévision, etc.).
• Le meilleur effet s’obtient à la distance de la
télévision égale à 3 ou 4 fois celle séparant les
enceintes gauche et droite (distance A).
q Distanza A
w Amplificatore
e Da 3 a 4 volte la distanza A
r Posizione d'ascolto
(7) Riproduzione a moviola
(solo per i DVD ed i CD video)
Premete uno dei tasti SLOW/SEARCH dell'unità
principale o del telecomando nel modo del fermo
immagine.
6 : Direzione all'indietro
7 : Direzione in avanti
• Alla seconda pressione del tasto, la velocità della
riproduzione a moviola aumenta.
Ci sono tre passi per i CD video.
• Premete il tasto PLAY per riprendere la riproduzione
normale.
• Se premete il tasto STILL/PAUSE durante la
riproduzione di un disco nel modo della riproduzione
a moviola nella direzione all'indietro, dovete premere
il tasto SLOW/SEARCH nuovamente.
• Con i DVD audio, la riproduzione in avanti a moviola
può essere usata solo con la parte video.
NOTA:
• La riproduzione a moviola all'indietro non è
disponibile sui CD video.
(8) Utilizzo della funzione V.S.S.
(Virtual Surround Sound)
(solo per DVD)
2 L'utilizzo della funzione V.S.S. (Virtual Surround
Effect) dona al suono un senso di espansione e vi
permette di acquisire effetti surround anche
quando solamente gli altoparlanti frontali (sinistro e
destro) sono utilizzati. Per i dischi a segnali
surround, la funzione V.S.S., non solo dona un
espansione al suono, ma anche fa in modo tale da
rendere il suono come proveniente dai lati anche
se non ci sono altoparlanti.
Durante la riproduzione, premete il tasto V.S.S.
dell'unità telecomando.
NOTE:
• Questa funzione funziona solamente con i DVD
contenenti due o più canali di segnali Dolby
Digital.
• La funzione V.S.S. non funziona al momento
dell’impostazione multicanale.
Impostate “AUDIO CHANNEL” sotto “AUDIO
SETUP” in “SETUP” su “2 CHANNEL”.
• Notate che per alcuni dischi l'effetto potrebbe
essere debole o non ci potrebbe essere alcun
effetto.
• Per alcuni dischi il suono potrebbe risultare
distorto. Se così fosse, spegnete la funzione
V.S.S.
• Spegnete le altre funzioni surround (il modo
surround del televisore, ecc.).
• L'effetto è migliore quando ascoltate da una
distanza dal televisore equivalente da 3 a 4
volte la distanza degli altoparlanti destro e
sinistro (distanza A).
Hauptgerät
Unité principale
Unità principale
76
Page 78

DEUTSCH FRANÇAIS ITALIANO
88
(9) Auswahl des Standbilds
Drücken Sie während der Wiedergabe die Taste
PAGE + oder PAGE - auf der Fernbedienung.
• Bei DVD-Audio-Discs mit Standbildern kann das
gewünschte Bild ausgewählt werden.
• Bei einigen Discs kann aufgrund der von DiscHerstellern ergriffenen Maßnahmen das Bild
nicht ausgewählt werden.
PAGE
Fernbedienung
Télécommande
Telecomando
(10) Abspielen von Bonus-Gruppen
Drücken Sie im Stopp-Modus die SEARCH
MODE-Taste auf der Fernbedienung, um den
Suchmodus auf “GRUPPEN” zu stellen.
1
Geben Sie mit den Nummerntasten die
Bonus-Gruppen-Nummer ein.
2
4 5 6
1
7
0
2
8
+10
3
9
Fernbedienung
Télécommande
Telecomando
SEARCH MODE
Fernbedienung
Télécommande
Telecomando
Geben Sie mit den Nummerntasten auf der
Fernbedienung das Kennwort (4-stellig) ein,
drücken Sie anschließend die ENTER-Taste.
• Die Wiedergabe startet mit dem ersten
Titel der spezifizierten Gruppe.
3
ENTER
Fernbedienung
Télécommande
Telecomando
• In einigen Fällen muss das Kennwort im
Menübildschirm eingegeben werden. Befolgen
Sie in dieser Situation die Anleitungen auf dem
Bildschirm.
• Wurde das Kennwort eingegeben, kann die Disc
bis zu ihrer Herausnahme so oft wie gewünscht
abgespielt werden.
• Falls Sie beim Eingeben des Kennworts einen
Fehler gemacht haben, drücken Sie die
CANCEL-Taste auf der Fernbedienung.
1
2
3
(10) Lecture de groupes de bonus
En mode d’arrêt, appuyer sur la touche
SEARCH MODE de la télécommande pour
régler le mode de recherche sur “GROUPE”.
1
Utiliser les touches numériques pour entrer
le numéro du groupe de bons.
2
Utiliser les touches numériques de la
télécommande pour entrer le mot de passe
(4 chiffres), ensuite appuyer sur la touche
ENTER.
• La lecture commence à partir de la
première plage du groupe spécfié.
3
• Dans certains cas le mot de passe doit être
entré sur l’écran du menu. Dans ces cas,
suivre les instructions sur l’écran.
• Dès que le mot de passe est entré, le disque
peut être lu autant de fois désiré jusqu’à ce qu’il
soit enlevé.
• En cas d’erreur los de la saisie du mot de
passe, appuyer sur la touche CLEAR de la
télécommande.
(9) Sélection de ‘limage fixe
Pendant la lecture, appuyer sur la touche PAGE
+ ou PAGE - de la télécommande.
• Pour les disques DVD audio avec des images
fixes, l’image désirée peut être sélectionnée.
• Sur certains disques l’image ne peut pas être
sé lectionnées due aux intentions des
producteurs de disques.
(10) Riproduzione dei gruppi
Nel modo d'arresto, premete il tasto
SEARCH MODE sul telecomando per
impostare la modalità di ricerca “GROUP”.
1
Usate i tasti numerici per inserireil numero
del gruppo.
2
Usate i tasti numerici sul telecomando per
inviare la password (4 cifre) e poi premete il
tasto ENTER.
• La riproduzione inizia dal primo brano nel
gruppo specificato.
3
• In certi casi, la password va inserita sullo
schermo del menù. In questo caso, seguite le
istruzioni fornite sullo schermo.
• Sopo aver inserito la password, il disco può
essere riprodotto tante volte quanto desiderate
fino alla rimozione dello stesso.
• Se fate qualche errore durante l'inserimento
della password, premete il tasto CLEAR sul
telecomando.
(9) Selezione del fermo immagine
Durante la riproduzione, premete il tasto PAGE + o
PAGE - sul telecomando.
• Per i dischi audio DVD con fermi immagine,
potete selezionare l'immagine desiderata.
• In alcuni dischi, l'immagine non può essere
selezionata per via delle intenzioni del
fabbricante del disco.
Page 79

DEUTSCH FRANÇAIS ITALIANO
89
10
VERWENDUNG DES PURE DIRECT-MODUS
2 Im Pure Direct-Modus werden nur analoge Audiosignale (keine Videosignale, usw.) ausgegeben, wodurch
hohe Tonqualität erzielt wird.
1
Drücken Sie die P.D.MEMORY-Taste auf der
Fernbedienung.
• Der Ausgangsstatus der Videosignale,
usw. kann wie gewünscht unter MODE 1
und MODE 2 gespeichert werden.
E INST EL LUNGEN
PURE D I RE CT MODUS
PUR E D I REC T MEMORY
PURE D I RE CT MODUS 1
DIGITAL-AUSGANG
VIDEO-AUSGANG
DISPLAY
M
ODUS 1
M
ODUS 2
AUS
EIN
EIN
NAVIGATION: AUSWAHL: ENTER -TASTE
2
Wählen Sie mit den Cursor-Tasten • und ª
den Modus aus, drücken Sie anschließend
die ENTER-Taste.
E INST EL LUNGEN
PURE D I RE CT MODUS
PUR E D I REC T MEMORY
PURE D I RE CT MODUS 1
DIGITAL-AUSGANG
VIDEO-AUSGANG
DISPLAY
M
ODUS 1
EIN
AUS
NAVIGATION: AUSWAHL: ENTER -TASTE
DIGITAL-AUSGANG
EIN: Digitale Audiosignale werden
ausgegeben.
AUS: Digitale Audiosignale werden nicht
ausgegeben.
VIDEO-AUSGANG
EIN: Videosignale werden ausgegeben.
AUS: Videosignale werden nicht
ausgegeben.
DISPLAY
EIN: Wird im Display der Haupteinheit
angezeigt.
AUS: Wird nicht im Display der
Haupteinheit angezeigt.
1 2
9
8
OPEN/CLOSE
5
PLAY STOP
763
STILL / PAUSE
PURE DIRECT
MODE 1
MODE 2
OFF
DVD AUDIO-VIDEO PLAYER DVD-3800
4
4 5 6
ENTER
TOP MENU
DISPLAY
MARKERRANDOM
PAGE
A-B
ZOOM
DIMMER
REPEAT
SETUP
CALL RETURN
SKIP
SLOW / SEARCH
ANGLE SUBTITLE AUDIOSEARCH MODE
PLAY
STILL /
PAUSE
STOP
PIC.ADJ
708
+10
9
V.S.S.
P.D.MEMORY
MENU
1, 3
2
ENTER
1
2
Fernbedienung
Télécommande
Telecomando
P.D.MEMORY
Fernbedienung
Télécommande
Telecomando
10
UTILISATION DU MODE
PURE DIRECT
2 En mode Pure Direct, seules les signaux audio
analogiques (pas de les signaux vidéo, etc.) sont
émis, produisant ainsi une haute qualité sonore.
1
Appuyer sur la touche P.D.MEMORY de la
télécommande.
• L’état de sortie des signaux vidéo, etc.,
peut être mémorisé dans MODE 1 et
MODE 2 à votre convenance.
CONF IGURATION
REGLAGES: DECISION:BOUTTON ENTER
M
ODE PURE D I RE CT E
MEM
OI RE PURE D I RECTE
M
ODE PURE D I RE CT E 1
SOR T I E AUD I O NUMÉRIQUE
SORTIE V IDEO
AFF ICHEUR
M
ODE 1
M
ODE 2
OUI
OUI
OUI
2
Utiliser les touches de déplacement du
curseur • et ª pour sélectionner le mode,
ensuite appuyer sur la touche ENTER.
CONF IGURATION
REGLAGES: DECISION:BOUTTON ENTER
M
ODE PURE D I RE CT E
MEM
OI RE PURE D I RECTE
M
ODE PURE D I RE CT E 1
SOR T I E AUD I O NUMÉRIQUE
SORTIE V IDEO
AFF ICHEUR
M
ODE 1
OUI
NON
SORTIE AUDIO NUMÉRIQUE
OUI: Les signaux audio numérique sont
émis.
NON: Les signaux audio numérique ne
sont pas émis.
SORTIE VIDÉO
OUI: Les signaux vidéo sont émis.
NON: Les signaux vidéo ne sont pas émis.
AFFICHEUR
OUI: Est indiqué sur l’affichage de l’unité
principale.
NON: N’est pas indiqué sur l’affichage de
l’unité principale.
10
USO DEL MODO PURE
DIRECT
2 In questo modo, solo i segnali audio analogici (non
quelli video, ecc.) vengono emessi, acquistando
così un'alta qualità sonora.
1
Premete il tasto P.D.MEMORY sul
telecomando.
• Lo stato d'uscita dei segnali video, eccl.
può essere memorizzato a MODE 1 e
MODE 2 se desiderate.
SETUP
SELECT : DECISION:ENTER BUTTON
PURE D I RE CT MODE
PUR E D I REC T MEMORY
PURE D I RE CT MODE 1
DIGITAL OUTPUT
V IDEO OUT
DISPLAY
M
ODE 1
M
ODE 2
ON
ON
ON
2
Usate i tasti del cursore • e ª per
selezionare la modalità, poi premete il tasto
ENTER.
SETUP
SELECT : DECISION:ENTER BUTTON
PURE D I RE CT MODE
PUR E D I REC T MEMORY
PURE D I RE CT MODE 1
DIGITAL OUTPUT
V IDEO OUT
DISPLAY
M
ODE 1
ON
OFF
USCITA DIGITALE(DIGITAL OUTPUT)
ON: Vengono emessi i segnali audio
digitali.
OFF: Non vengono emessi i segnali audio
digitali.
USCITA VIDEO (VIDEO OUT)
ON: Vengono emessi i segnali video.
OFF: Non vengono emessi i segnali video.
DISPLAY
ON: Serve per idicare il display dell'unità
principale.
OFF: Non indica il display dell'unità
principale.
Page 80

DEUTSCH FRANÇAIS ITALIANO
90
Drücken Sie die P.D.MEMORY-Taste auf der
Fernbedienung .
• Alle Einstellungen werden im Speicher
abgelegt.
3
Betätigen Sie den PURE DIRECT-Schalter
auf der Haupteinheit.
AUS: Alle Signale werden normal
ausgegeben.
MODUS 1:
Die unter MODE 1
gespeicherten Einstellungen
werden verwendet.
Die werkseitigen
Grundeinstellungen lauten:
“DIGITAL-AUSGANG”: “EIN”
“VIDEO-AUSGANG”: “EIN”
“DISPLAY”: “EIN”
MODUS 2
:Die unter MODE 2
gespeicherten Einstellungen
werden verwendet.
Die werkseitigen
Grundeinstellungen lauten:
“DIGITAL-AUSGANG”: “EIN”
“VIDEO-AUSGANG”: “EIN”
“DISPLAY”: “EIN”
4
3
P.D.MEMORY
Fernbedienung
Télécommande
Telecomando
4
PURE DIRECT
OFF
MODE 1
MODE 2
Hauptgerät
Unité principale
Unità principale
Appuyer sur la touche P.D.MEMORY de la
télécommande.
• Tous les réglages sont mis en mémoire.
3
Enfoncer le commutateur PURE DIRECT de
l’unité principale.
OFF: Tous les signaux sont émis
normalement.
MODE 1: Les réglages mémorisés pour
le MODE 1 sont utilisés.
Les réglages d’origine sont:
“SORTIE AUDIO
NUMÉRIQUE”: “OUI”
“SORTIE VIDÉO”: “OUI”
“AFFICHEUR”: “OUI”
MODE 2: Les réglages mémorisés pour
le MODE 2 sont utilisés.
Les réglages d’origine sont:
“SORTIE AUDIO
NUMÉRIQUE”: “OUI”
“SORTIE VIDÉO”: “OUI”
“AFFICHEUR”: “OUI”
4
Premete il tasto P.D.MEMORY sul
telecomando.
• Tutte le impostazioni vengono
memorizzate.
3
Commutate l'interruttore PURE DIRECT
dell'unità principale.
OFF: Tutti i segnali vengono emessi in
modo normale.
MODE 1: Vengono usate le impostazioni
memorizzate per MODE 1.
Le impostazioni di fabbrica sono:
“DIGITAL OUT”: “ON”
“VIDEO OUT”: “ON”
“DISPLAY”: “ON”
MODE 2: Vengono usate le impostazioni
memorizzate per MODE 2.
Le impostazioni di fabbrica sono:
“DIGITAL OUT”: “ON”
“VIDEO OUT”: “ON”
“DISPLAY”: “ON”
4
Page 81

91
DEUTSCH FRANÇAIS ITALIANO
• Das Display ändert sich wie folgt
STD (STANDARD) ´ M1 (SPEICHER 1) ´
M2 ´ M3 ´ M4 ´ M5
STD (Standard-Einstellung)
Wenn dies angewählt ist, wird sowohl die
Bildqualität als auch die Funktion auf die
werkseitige Einstellung zurückgesetzt.
M1 bis M5
Hier können die von Ihnen durchgeführten
Bildeinstellungen gespeichert werden.
2
Drücken Sie während der Wiedergabe die
P.ADJ-Taste.
1
Wählen Sie den Bildspeicher mit den 0 und
1 Cursor-Tasten an und drücken Sie dann
die ENTER-Taste.
Wählen Sie die zu ändernde Position mit
den
0 und 1 Tasten an.
BI LDMODUS
STD M1 M2 M3 M4 M5
SPEI CH 1 GAMMA
0000
3
BILDMODUS
• Kontrast, Helligkeit, Bildschärfe Farbe
(HUE) können eingestellt werden.
• Führen Sie die Verfahrensschritte 4 und 5
aus, um die Bildqualität einzustellen
(ADJUST MODE).
GAMMA (-6 ~ +6)
• Wählen Sie dies, wenn dunkle Teile des
Bildes zu dunkel oder helle Bildteile zu hell
sind.
• Führen Sie die Verfahrensschritte 7 und 8
aus, um die Gamma-Korrektur einzustellen
(GAMMA).
11
EINSTELLUNG DER BILDQUALITÄT
ENTER
TOP MENU
DISPLAY
MARKERRANDOM
PAGE
A-B
ZOOM
DIMMER
REPEAT
SETUP
SKIP
SLOW / SEARCH
ANGLE SUBTITLE AUDIOSEARCH MODE
PLAY
STILL /
PAUSE
STOP
PIC.ADJ P.D.MEMORY
MENU
1
2, 3, 4, 5, 7, 8
2, 6, 9
1
Fernbedienung
Télécommande
Telecomando
PIC.ADJ
2
ENTER
Fernbedienung
Télécommande
Telecomando
3
Fernbedienung
Télécommande
Telecomando
11
RÉGLAGE DE LA QUALITÉ
DE L’IMAGE
• L’affichage change comme ceci:
STD (Standard) ´ M1 (Mémoire 1) ´ M2
´ M3 ´ M4 ´ M5
STD (Réglage usine par défaut)
Lorsque cette option est sélectionnée, la
qualité d’image et les fonctions sont remises
aux valeurs de réglages usine par défaut.
M1 à M5
Les réglages de qualité de l’image que
vous avez réalisés peuvent etre mémorisés
à l’aide de cette fonction.
2
Appuyer sur la touche P.ADJ pendant la
lecture.
1
Utiliser les touches de curseur 0 et 1 pour
sélectionner la mémoire d’image et appuyez
ensuite sur la touche ENTER.
Sélectionner l’élément à modifier en utilisant
les touches
0 et 1.
M
ODE D 'A FF I CHAGE
STD M1 M2 M3 M4 M5
MEMOI RE 1 GAMMA
0000
3
MODE DE IMAGE
• Le contraste, la luminosite, le finesse et la
teinte peuvent être ajustés.
• Effectuer les étapes 4 et 5 pour ajuster la
qualité de l’image (mode de image).
GAMMA (-6 ~ +6)
• Choisissez cette fonction si les parties
sombres de l’image sont trop sombres ou
les parties claires trop claires.
• Effectuer les étapes 7 et 8 pour ajuster la
correction gamma (GAMMA).
11
REGOLAZIONE DELLA
QUALITÀ DELL’IMMAGINE
• Il display cambia come segue:
STD (STANDARD) ´ M1 (MEMORY 1) ´
M2 ´ M3 ´ M4 ´ M5
STD (Impostazione di fabbrica)
Quando questo è selezionato, sia la qualità
dell'immagine e la funzione vengono
reimpostate alle impostazioni di
fabbricazione.
M1 a M5
Potete memorizzare qui le impostazioni
della qualità dell'immagine regolate.
2
Premete il tasto P.ADJ durante la
riproduzione.
1
Utilizzate i tasti cursori 0 e 1 per selezionare
la memoria dell'immagine, dopodiché
premete il tasto ENTER.
Selezionate l'articolo da cambiare utilizzando i
tasti
0 e 1.
P ICT URE MODE
STD M1 M2 M3 M4 M5
MEMORY 1 GAMMA
0000
3
ADJUST MODE
• Potete regolare il contrasto, la luminosità, la
nitidezza e il colore (HUE).
• Effettuate i passi 4 e 5 per regolare la
qualità dell'immagine (ADJUST MODE).
GAMMA (-6 ~ +6)
• Selezionate questo modo se le parti scure
dell'immagine sono troppo scure oppure se
le parti chiare sono troppo chiare.
• Effettuate i passi 7 e 8 per regolare la
correzione gamma (GAMMA).
Page 82

DEUTSCH FRANÇAIS ITALIANO
92
4
KONTRAST (-6 ~ +6)
Stellt den Bildkontrast ein.
HELLIGKEIT (0 ~ +12)
Stellt die Bildhelligkeit ein.
SCHÄRFE (-6 ~ +6)
Stellt die Bildschärfe ein.
FARBE (-6 ~ +6)
Stellt die Balance zwischen grün und rot ein.
(Dies hat keinen Einfluss auf Progressive
Scan-Bilder.)
Drücken Sie die Cursor-Taste ª , um den
Einstellmodus auszuwählen, wählen Sie
anschließend den Bildqualitäts-Einstellpunkt
mit den Cursor-Tasten
0 und 1.
4
Fernbedienung
Télécommande
Telecomando
5
Stellen Sie mit den Cursor-Tasten • und ª
den Einstellwert ein.
5
Drücken Sie die ENTER-Taste.
• Alle Einstellungen werden im Speicher
festgehalten.
6
7
Wählen Sie den Einstellpunkt mit den CursorTasten
0 und 1 aus.
SPEI CH 1 GAMMA
0
0
100
235
Fernbedienung
Télécommande
Telecomando
Fernbedienung
Télécommande
Telecomando
ENTER
Fernbedienung
Télécommande
Telecomando
6
7
4
CONTRASTE (-6 ~ +6)
Règle le contraste de l’image.
LUMINOSITE (0 ~ +12)
Règle la luminosité de l’image.
FINESSE (-6 ~ +6)
Règle la définition de l’image.
TEINTE (-6 ~ +6)
Règle l’équilibre entre le rouge et le vert.
(Cette fonction n’affecte pas les images à
balayage progressif.)
Appuyer sur la touche de déplacement du
curseur ª pour sélectionner le mode de
ré glage, ensuite utiliser les touches de
dé placement du curseur
0 et 1 pour
sélectionner l’élément de réglage de la
qualité d’image.
Utiliser les touches de déplacement du
curseur • et ª pour régler la valeur de
réglage.
5
Appuyer sur la touche ENTER.
• Tous les réglages sont mémorisés.
6
7
Utiliser les touches de déplacement du
curseur
0 et 1 pour sélectionner le point à
régler.
MEMOI RE 1 GAMMA
0
0
100
235
4
CONTRAST (-6 ~ +6)
Regola il contrasto dell'immagine.
BRIGHTNESS (0 ~ +12)
Regola la luminosità dell'immagine.
SHARPNESS (-6 ~ +6)
Regola la nitidezza dell'immagine.
HUE (-6 ~ +6)
Regola il bilanciamento del verde e del rosso.
(Non funziona con le immagini a Scansione
Progressiva.)
Premete il tasto del cursore ª per selezionare
il modo di regolazione, poi usate i tasti del
cursore
0 e 1 per selezionare la voce di
regolazione della qualità dell'immagine.
Usate i tasti del cursore • e ª per impostare
il valore di regolazione.
5
Premete il tasto ENTER.
•
Tutte le regolazioni vengono memorizzate.
6
7
Usate i tasti del cursore 0 e 1 per
selezionare la voce da impostare.
MEMORY 1 GAMMA
0
0
100
235
SPEI CH 1 GAMMA
KONTRAST
0 00 0
MEMOI RE 1 GAMMA
CONTRASTE
0 00 0
MEMORY 1 GAMMA
CONTRAST
0 00 0
Page 83

DEUTSCH FRANÇAIS ITALIANO
93
Stellen Sie mit den Cursor-Tasten • und ª
die Helligkeitsstufe des ausgewählten
Punktes ein. (Siehe “Referenz” auf Seite 94.)
• Sie wird verringert (der Bild wird dunkler),
wenn die Cursor-Taste ª gedrückt wird, sie
wird erhöht (das Bild wird heller), wenn die
Cursor-Taste • gedrückt wird.
• Werte von 16 bis 235 können eingestellt
werden. Es ist nicht möglich, die
Einstellung so vorzunehmen, dass die
Helligkeitsstufe von dunklen Bereichen die
der hellen Bereiche übertrifft.
HINWEISE:
• Wenn die CLEAR-Taste während der
Gamma-Korrektur gedrückt wird, werden
sämtliche Einstellungspunkte auf die
Standard-Anfangseinstellung
zurückgesetzt.
• Progressiv-Bilder werden nur beim ersten,
dritten und fünften Punkt von links aus
gesehen wirksam.
8
Drücken Sie die ENTER-Taste.
• Alle Einstellungen werden im Speicher
festgehalten.
9
✽
Um den Bildeinstellungs-Modus zu verlassen
Drücken Sie die PICTURE ADJUST-Taste.
Fernbedienung
Télécommande
Telecomando
Fernbedienung
Télécommande
Telecomando
ENTER
8
9
Utiliser les touches de déplacement du
curseur • et ª pour ajuster le niveau de
luminance du point sélectionné . (Voir
“Référence” à la page 94.)
• Le niveau diminue (l’image devient plus
foncée) Lorsque la touche de déplacement
du curseur ª est enfoncée et le niveau
augmente (l’image devient plus claire)
lorsque la touche de déplacement du
curseur • est enfoncée.
• Des valeurs situées entre 16 et 235
peuvent être réglées. Il n’est pas possible
de régler de telle sorte que le niveau des
sections sombres dépasse celui des
sections claires.
REMARQUES:
• Lorsque l'on appuie sur le bouton CLEAR
pendant la correction des gammas, tous les
éléments paramétrés sont remis à leur
niveau standard.
• Les images progressives sont efficaces
uniquement pour le premier, le troisième et
le cinquième point à partir de la gauche.
8
Appuyer sur la touche ENTER.
• Tous les réglages sont mémorisés.
9
✽
Pour quitter le mode de réglage d’image
Appuyer sur la touche PICTURE ADJUST.
Usate i tasti del cursore • e ª per regolare il
livello della luminosità del punto selezionato.
(
Vedere a “Riferimento” pagina 94.)
• Il livello diminuisce (l'immagine diventa più
scura) quando premete il tasto del cursore ª
ed aumenta (l'immagine diventa più chiara)
quando premete il tasto del cursore •.
• Potete impostare dei valori da 16 a 235.
Non è possibile effettuare l'impostazione in
modo tale che il livello delle sezioni scure
eccede quello delle sezioni chiare.
NOTE:
• Quando il tasto CLEAR vieen premuto
durante la correzione gamma, tutti i punti
dell'impostazione vengono impostati al
livello standard.
• Le immagini progressive sono effettive per
il primo, terzo e quinto punto da sinistra.
8
Premete il tasto ENTER.
•
Tutte le regolazioni vengono memorizzate.
9
✽
Per uscire dal modo di regolazione
dell'immagine
Premete il tasto PICTURE ADJUST.
Page 84

DEUTSCH FRANÇAIS ITALIANO
94
REFERENZ:
(1) Auf dem Gamma-Korrektur-Display zeigt die
horizontale Achse die Helligkeitsstufe des auf
der Disc gespeicherten Bilds an, während die
vertikale Achse die Helligkeitsstufe des Bildes
anzeigt, wenn es vom Gerät ausgegeben wird.
SPEI CH 1 GAMMA
0
0
100
235
(2) Wenn ein heller Punkt auf der Disc-Seite an
der Ausgangs-Seite auf “dunklen” eingestellt
wird, wie rechts im Diagramm gezeigt, sind
die Einzelheiten heller Sektionen, die
schwierig zu sehen sind, normalerweise
einfacher zu sehen.
SPEI CH 1 GAMMA
0
0
100
235
(3) Wenn ein heller Punkt auf der Disc-Seite an
der Ausgangs-Seite auf “hell” eingestellt wird,
wie rechts im Diagramm gezeigt, sind die
Einzelheiten dunkler Sektionen, die schwierig
zu sehen sind, normalerweise klarer zu sehen.
SPEI CH 1 GAMMA
0
0
100
235
RÉFÉRENCE:
(1) Sur l’affichage de correction gamma, l’axe
horizontal indique le niveau de luminance de
l’image enregistré sur le disque, tandis que
l’axe vertical indique le niveau de luminance de
l’image envoyée de l’appareil.
MEMOI RE 1 GAMMA
0
0
100
235
(2) Lorsqu’un point clair sur le disque est ajusté
sur “foncé” côté sortie comme indiqué sur le
schéma à droite, normalement les détails des
sections claires qui sont difficiles à voir
deviennent plus faciles à voir.
MEMOI RE 1 GAMMA
0
0
100
235
(3) Lorsqu’un point clair sur le disque est ajusté
sur “clair” côté sortie comme indiqué sur le
schéma à droite, normalement les détails des
sections sombres qui sont difficiles à voir
deviennent plus claires.
MEMOI RE 1 GAMMA
0
0
100
235
RIFERIMENTO:
(1) Sul display di correzione gamma, l'asse
orizzontale indica il livello di luminosità
dell'immagine registrata sul disco, mentre
l'asse verticale indica il livello della luminosità
dell'immagine emessa dall'unità.
MEMORY 1 GAMMA
0
0
100
235
(2) Quando regolate un punto chiaro sul disco su
“dark” nel lato d'uscita come nell'illustrazione
qui a destra, i dettagli delle sezioni chiare
difficili da vedere diventano più visibili.
MEMORY 1 GAMMA
0
0
100
235
(3)
Quando regolate un punto chiaro sul disco su
“bright” nel lato d'uscita come nell'illustrazione
qui a destra, i dettagli delle sezioni scure difficili
da vedere diventano più visibili.
MEMORY 1 GAMMA
0
0
100
235
Page 85

DEUTSCH FRANÇAIS ITALIANO
95
12
ANWENDUNG DES ON-SCREEN-DISPLAYS
2 Wenden Sie diese Funktion an, um Informationen auf der Disc (Titel, Kapitel, Zeit usw.) anzeigen zu lassen
und zu ändern.
4 5 6
ENTER
ON
OFF
REMOTE CONTROL UNIT RC-553
TOP MENU
DISPLAY
NTSC / PALOPEN / CLOSE
CALL RETURN
SKIP
SLOW / SEARCH
POWER
ANGLE SUBTITLE AUDIOSEARCH MODE
PLAY
STILL /
PAUSE
STOP
1
7
0
2
8
+10
3
9
PROG / DIR
V.S.S.
CLEAR
MENU
3
1
3
2
2
Drücken Sie im Wiedergabemodus die
DISPLAY-Taste.
• Das On-Screen-Display erscheint.
• Bei jeder Betätigung der Taste ändert sich das
auf dem Fernsehschirm angezeigte Bild.
• Die angezeigten Funktionen variieren von Disc
zu Disc.
• Bildschirm für
die normale
Wiedergabe
• DiscInformationss
chirm
• DiscInformationss
chirm
Beispiel: Bei DVD-Audio-Discs
TITEL 01/10
ABGELAUFEN TITEL
KAPITEL 01 /10
00 : 00 : 01
UNTERTITEL: AUS
AUDIO 1/2 : DOLBY D3/2.1 ENGLISH
VERBLEIBEND TITEL 01 : 10 : 59
ABGELAUFEN CHAPTER 00 : 00 : 01
VERBLEIBEND CHAPTER 00 : 40 : 59
• Bildschirm für
die normale
Wiedergabe
• DiscInformationss
chirm
Beispiel: Bei DVD-Videodiscs
• DiscInformationss
chirm
DISPLAY
1
Fernbedienung
Télécommande
Telecomando
TRACK 01/ 10
ABGELAUFEN SINGLE 26 : 11
VERBLEIBEND SINGLE 03 : 17
ABGELAUFEN GESAMT 06 : 15
VERBLEIBEND GESAMT 32 : 05
• Bildschirm für
die normale
Wiedergabe
Beispiel: Bei Video- und Musik-CDs
• DiscInformationss
chirm
1
12
UTILISATION DES
AFFICHAGE ON-SCREEN
2
Utiliser cette fonction pour afficher et modifier les
informations sur le disque (titres, chapitres, durée, etc.)
En mode de lecture, appuyer sur le touche
d’affichage (DISPLAY).
• D’affichage On-Screen s’affiche.
• L’image sur l’écran TV change chaque fois
que la touche est enfoncée.
•
Les paramètres affichés diffèrent d’un disque à l’autre.
• Ecran de
lecture
normale
• Ecran des
informations
du disque
• Ecran des
informations
du disque
Exemple: Pour les disques DVD audio
TITRE 01/10
TITRE ÉCOULÉES
CHAPITRE 01 /10
00 : 00 : 01
SOUS-TITRES NON
AUDIO 1/2 : DOLBY D3/2.1 ENGLISH
TITRE RESTANTS 01 : 10 : 59
CHAPITRE ÉCOULÉ 00 : 00 : 01
CHAPITRE RESTANT 00 : 40 : 59
• Ecran de
lecture
normale
• Ecran des
informations
du disque
Exemple: Pour les disques DVD vidéo
• Ecran des
informations
du disque
PLAGE 01 /10
PLAGES ÉCOULÉS 26 : 11
PLAGES RESTANTES 03 : 17
TOTAL ÉCOULÉ 06 : 15
TOTAL RESTANTE 32 : 05
• Ecran de
lecture
normale
Exemple: Pour les CD vidéo et musicaux disque
• Ecran des
informations
du disque
1
12
USO DEL DISPLAY DI
VISUALIZZAZIONE SULLO
SCHERMO
2
Usate questa funzione per visualizzare e modificare
le informazioni del disco (titoli, sezioni, tempo, ecc.).
Premete il tasto DISPLAY nel modo di riproduzione.
• Appare il display sullo schermo.
• L'immagine sullo schermo televisivo cambia
ad ogni pressione del tasto.
• Le voci visualizzate dipendono dal disco.
• Normale
schermo di
riproduzione
• Schermo di
informazioni
sul disco
• Schermo di
informazioni
sul disco
Esempio: Per i DVD audio
TITLE 01/10
TITLE ELAPSED
CHAPTER 01 /10
00 : 00 : 01
SUBTITLE OFF
AUDIO 1/2 : DOLBY D3/2.1 ENGLISH
TITLE REMAIN 01 : 10 : 59
CHAPTER ELAPSED 00 : 00 : 01
CHAPTER REMAIN 00 : 40 : 59
• Normale
schermo di
riproduzione
• Schermo di
informazioni
sul disco
Esempio: Per i dischi video DVD
• Schermo di
informazioni
sul disco
TRACK 01 /10
SINGLE ELAPSED 26 : 11
SINGLE REMAIN 03 : 17
TOTAL ELAPSED 06 : 15
TOTAL REMAIN 32 : 05
• Normale
schermo di
riproduzione
Esempio: Per i CD video e musicali
• Schermo di
informazioni
sul disco
1
GROUPPE 01/02
ABGELAUFEN GROUP
VERBLEIBEND GROUP 0 : 57 : 59
ABGELAUFEN TRACK 0 : 00 : 01
VERBLEIBEND TRACK 0 : 05 : 59
AUDIO 1/1 : LPCM 2 ch/ 96 kHz/24BIT
TRACK 01 /10
0 : 00 : 01
GROUPE 01/02
GROUPE ÉCOULÉ
GROUPE RESTANT 0 : 57 : 59
PLAGES ÉCOULÉS 0 : 00 : 01
PLAGES RESTANTES 0 : 05 : 59
AUDIO 1/1 : LPCM 2 ch/ 96 kHz/24BIT
PLAGE 01 /10
0 : 00 : 01
GROUP 01/02
GROUP ELAPSED
GROUP REMAIN 0 : 57 : 59
TRACK ELAPSED 0 : 00 : 01
TRACK REMAIN 0 : 05 : 59
AUDIO 1/1 : LPCM 2 ch/ 96 kHz/24BIT
TRACK 01 /10
0 : 00 : 01
Page 86

DEUTSCH FRANÇAIS ITALIANO
96
2
3
Wählen Sie die Funktion, die Sie ändern
möchten, mit den • und ª Cursor-Tasten an.
• Die angewählte Funktion wird in einem
gelben Rahmenangezeigt.
q Bei DVD-Audio-Discs
Die verstrichene Zeit, usw. der Gruppen
und Spuren kann ausgewählt werden.
w Bei DVD-Videodiscs
Die verstrichene Zeit, usw. der Titel und
Kapitel kann ausgewählt werden.
e Bei Video- und Musik-CDs
Die verstrichene Zeit, usw. der Spuren
kann ausgewählt werden.
q Ändern der verstrichenen Zeit
Fü hren Sie Ihre Eingabe unter
Verwendung der Nummerntasten durch
und drücken Sie anschließend die ENTERTaste.
Beispiel: Für 1 Minute und 26 Sekunden
/ “00126”
w Ändern des Titels, der Spur oder des
Kapitels
• Für DVDs
Fü hren Sie Ihre Eingabe unter
Verwendung der Nummerntasten durch
und drücken Sie anschließ end die
ENTER-Taste.
(Bei einigen Discs ist es nicht möglich,
den Titel oder das Kapitel zu verändern.)
• Bei Video- und Musik-CDs
Fü hren Sie Ihre Eingabe unter
Verwendung der Nummerntasten durch.
Die Wiedergabe startet von dieser Spur.
2
Fernbedienung
Télécommande
Telecomando
3
ENTER
Fernbedienung
Télécommande
Telecomando
4 5 6
1
7
0
283
9
2
3
Utiliser les touches curseurs • et ª pour
sélectionner le paramètre que l’on souhaite
modifier.
• Le paramètre sélectionné est affiché dans
un cadre jaune.
q Pour les disques DVD audio
Le temps écoulé, etc., de groupes et
plages peut être sélectionné.
w Pour les disques DVD vidéo
Lle temps écoulé , etc., of titres et
chapitres peut être sélectionné.
e Pour les CD vidéo et musicaux
Le temps écoulé, etc., des plages peut
être sélectionné.
q Changement du temps écoulé.
Entrez en utilisant les boutons de numéros,
puis appuyez sur le bouton ENTER.
Exemple: Pour 1 minute 26 secondes /
“00126”
w Changement du titre, plage ou chapitrer
• Pour les DVD
Entrez en utilisant les boutons de
numéros, puis appuyez sur le bouton
ENTER.
(Pour certains disques il n'est pas
possible de changer le titre ou le
chapitre.)
• Pour les CD de musique et vidéo
E
ntrez en utilisant les boutons de
numéros. La lecture débute à partir de
cette plage.
2
3
Usate i tasti del cursore • e ª per
selezionare la voce da modificare.
• La voce selezionata appare con una cornice
gialla.
q Per i DVD audio
Potete selezionare il tempo trascorso ecc.
dei gruppi e dei brani.
w Per i dischi video DVD
Potete selezionare il tempo trascorso,
ecc. dei titoli e dei capitoli.
e Per i CD video e musicali
Potete selezionare il tempo trascorso,
ecc. dei brani.
q Cambio del tempo impiegato
Inserite il valore usando i tasti numerici,
poi premete il tasto ENTER.
Esempio: Per 1 minuto e 26 secondi /
“00126”
w Cambio del titolo, del brano o del capitolo
• Per DVD
Inserite il valore usando i tasti numerici,
poi premete il tasto ENTER.
(Per alcuni dischi non è possibile
cambiare il titolo o il capitolo.)
• Per CD musicali e video
Inserite il valore usando i tasti numerici.
La riproduzione ha inizio da quel brano.
Page 87

DEUTSCH FRANÇAIS ITALIANO
97
13
WIEDERHOLUNG DER WIEDERGABE
2 Wenden Sie diese Funktion an, um Ihre Lieblings- Audio- und Videoausschnitte mehrfach wiederzugeben.
MARKERRANDOM
PAGE
A-B
ZOOM
DIMMER
REPEAT
SETUP
SKIP
SLOW / SEARCH
ANGLE SUBTITLE AUDIOSEARCH MODE
STILL /
PAUSE
STOP
PIC.ADJ P.D.MEMORY
1
1
Drücken Sie im Wiedergabemodus die REPEAT-Taste.
•
Bei jeder Betätigung dieser Taste ändert sich die Anzeige
auf dem Fernsehschirm und der entsprechende
Wiederholungs- oder Stoppmodus ist eingestellt.
q Bei DVD-Audio-Discs
Wiederholen der Wiedergabe (Wiedergabe-Wiederholung)
TRACK-WIEDERHOLUNG
GRUPPE-WIEDERHOLU
WIEDERHOLUNG AUS
• Normale
Wiedergabe
• TitelWiederholung
• Wiederholte
Gruppe
•
Entaktivierung
der
WiedergabeWiederholung
KAPITEL WIEDERHOLUNG
TITEL WIEDERHOLUNG
WIEDERHOLUNG AUS
• Normale
Wiedergabe
• KapitelWiederholung
w Bei DVD-Videodiscs
•
Entaktivierung
der
WiedergabeWiederholung
• TitelWiederholung
REPEAT
1
Fernbedienung
Télécommande
Telecomando
TRACK-WIEDERHOLUNG
DISC-WIEDERHOLUNG
WIEDERHOLUNG AUS
e Bei Video- und Musik-CDs
• Normale
Wiedergabe
• TitelWiederholung
•
Entaktivierung
der
WiedergabeWiederholung
• Wiederholung
der gesamten
Disc
✽ Zurückkehren zur normalen Wiedergabe:
Kehren Sie zur normalen Wiedergabe zurück, indem Sie
die REPEAT-Taste so lange drücken, bis auf dem
Fernsehschirm “WIEDERHOLUNG AUS” erscheint.
13
LECTURE REPETEE
2 Utiliser cette fonction pour lire de façon ré pétée les
morceaux audio et vidéo préférés.
Lecture répétée (Repeat Playback)
1
En mode de lecture, appuyer sur la touche REPEAT.
•
L’affichage à l’écran de télévision commute chaque
fois que la touche est appuyée, et le mode de
lecture répétitive ou d’arrêt correspondant est réglé.
q Pour les disques DVD audio
RÉPÉTITION DE PLAGE
RÉPÉTITION DE GROUPE
RÉPÉTITION : NON
• Lecture
normale
• Piste répétée
• Groupe
répétée
• Lecture
répétée
annulée
RÉPÉTITION DE CHAPITRE
RÉPÉTITION DE TITRE
RÉPÉTITION : NON
• Lecture
normale
• Chapitre
répété
w Pour les disques DVD vidéo
• Lecture
répétée
annulée
• Titre répété
RÉPÉTITION DE CHAPITRE
RÉPÉTITION DE TITRE
RÉPÉTITION : NON
e Pour les CD vidéo et musicaux
• Lecture
normale
• Piste répétée
• Lecture
répétée
annulée
• Disque entier
répété
✽ Pour revenir en mode lecture normale:
Retourner au mode lecture normal en appuyant sur la
touche rép étition (REPEAT) jusqu’à ce que
“REPETITON:DESACTIVE” apparaisse sur l’écran TV.
13
RIPRODUZIONE RIPETUTA
2 Usate questa funzione per riprodurre ripetutamente le
vostre sezioni audio o video preferite.
Per ripetere la riproduzione dei brani
(Riproduzione ripetuta)
1
Premete il tasto REPEAT nel modo di riproduzione.
• Il display sullo schermo del televisore cambia ad ogni
pressione del tasto e si imposta il il modo di riproduzione
ripetuta o di stop in maniera corrispondente.
q Per i DVD audio
TRACK REPEAT
GROUP REPEAT
REPEAT OFF
• Riproduzione
normale
• Ripetizione
del brano
• Ripetizione di
gruppo
• Cancellazione
della
riproduzione
ripetuta
CHAPTER REPEAT
TITLE REPEAT
REPEAT OFF
• Riproduzione
normale
• Ripetizione
della sezione
w Per i dischi video DVD
• Cancellazione
della
riproduzione
ripetuta
• Ripetizione
del brano
TRACK REPEAT
DISC REPEAT
REPEAT OFF
e Per i CD video e musicali
• Riproduzione
normale
• Ripetizione
del brano
• Cancellazione
della
riproduzione
ripetuta
• Ripetizione
dell'intero
disco
✽ Per ritornare alla riproduzione normale:
Ritornate alla riproduzione normale premendo il tasto
REPEAT fino a quando l'indicazione “REPEAT OFF” non
appare sullo schermo televisivo.
Page 88

DEUTSCH FRANÇAIS ITALIANO
98
Wiederholen der Wiedergabe eines festgelegten Abschnittes (A-B-WiedergabeWiederholung)
1
2
Drücken Sie während der Wiedergabe die AB-Taste.
• Dies stellt den Startpunkt A ein.
Drücken Sie noch einmal die A-B-Taste.
• Dies stellt den Endpunkt B ein und die
Wiederholung der Wiedergabe des A-BAbschnittes beginnt.
✽Zurückkehren zur normalen Wiedergabe:
Drücken Sie die A-B-Taste so lange, bis “A / B
FREIGEBEN” auf dem Fernsehschirm erscheint.
HINWEISE:
• Bei einigen DVDs ist die WiedergabeWiederholung möglicherweise nicht möglich.
• Die Wiedergabe-Wiederholungs- und A-BWiedergabe-Wiederholungsfunktion kann nicht
für DVDs und Video-CDs angewendet werden,
fü r die während der Wiedergabe nicht die
bereits ausgeführte Wiedergabezeit angezeigt
wird.
• In einigen Fällen werden die sich in der Nähe der
A-B-Punkte befindlichen Untertitel während der
A-B-Wiedergabe-Wiederholung möglicherweise
nicht angezeigt.
A-B
A-B
MARKERRANDOM
PAGE
A-B
ZOOM
DIMMER
REPEAT
SETUP
SKIP
SLOW / SEARCH
ANGLE SUBTITLE AUDIOSEARCH MODE
PAUSE
PIC.ADJ P.D.MEMORY
1, 2
A BIS B SET A
A BIS B SET B
1
2
Fernbedienung
Télécommande
Telecomando
Fernbedienung
Télécommande
Telecomando
Lecture répétée d’une section
particulière A-B (A-B repeat Playback)
1
2
En cours de lecture, appuyer sur la touche
A-B.
• Cela sélectionne le point de départ A.
Appuyer à nouveau sur la touche A-B.
• Cela sélectionne le point d’arrêt B et la
lecture rép ét ée de la section A-B
commence.
✽Pour revenir en mode lecture normale:
Appuyer sur la touche A-B jusqu’à ce que “A à
B : ANNULER” s’affiche sur l’écran TV.
REMARQUES:
• La lecture répétée peut ne pas fonctionner
pour certains DVD.
• Les fonctions de lecture répétée et de lecture
répétée A-B ne peuvent pas être activées sur
les DVD et les CD vidéo pour lesquels la durée
ne s’affiche pas en cours de lecture.
• Dans certains cas, les sous-titres peuvent ne
pas être affichés près des points A et B durant
la lecture répétée A-B.
A á B : SÉLECTIONNER A
A á B : SÉLECTIONNER B
Riproduzione ripetuta di una certa sezione
(Riproduzione ripetuta A-B)
1
2
Premete il tasto A-B durante la riproduzione.
• Viene impostato il punto A.
Premete nuovamente il tasto A-B.
• Viene impostato il punto finale B e ha inizio
la riproduzione ripetuta della sezione A-B.
✽Per ritornare alla riproduzione normale:
Premete il tasto A-B fino a quando l'indicazione “A TO B
CANCELED” non appare sullo schermo televisivo.
NOTE:
• La riproduzione ripetuta può non funzionare per
alcuni DVD.
• La riproduzione ripetuta e la riproduzione ripetuta
A-B non funzionano per i DVD e i CD video per i
quali il tempo trascorso non è visualizzato sul
display durante la riproduzione.
• In certi casi, i sottotitoli possono non venire
visualizzati vicino ai punti A e B durante la
riproduzione ripetuta A-B.
A TO B SET A
A TO B SET B
Page 89

DEUTSCH FRANÇAIS ITALIANO
99
14
WIEDERGABE VON TITELN IN BELIEBIGER REIHENFOLGE
2 Wenden Sie diese Funktion bei der Benutzung von Video- und Musik-CDs an, um die Titel in beliebiger
Reihenfolge wiederzugeben.
Diese Funktion hat auf DVDs keinerlei Effekt.
1 2
9
8
OPEN/CLOSE
5
PLAY STOP
763
STILL / PAUSE
PURE DIRECT
MODE 1
MODE 2
OFF
DVD AUDIO-VIDEO PLAYER DVD-3800
3
4 5 6
ENTER
ON
OFF
REMOTE CONTROL UNIT RC-553
TOP MENU
DISPLAY
MARKERRANDOMA-BREPEAT
NTSC / PALOPEN / CLOSE
CALL RETURN
SKIP
SLOW / SEARCH
POWER
ANGLE SUBTITLE AUDIOSEARCH MODE
PLAY
STILL /
PAUSE
STOP
1
7
0
2
8
+10
3
9
PROG / DIR
V.S.S.
CLEAR
MENU
3
1
2
PROG / DIR
1
2
Fernbedienung
Télécommande
Telecomando
4 5 6
1
7
0
2
8
+10
3
9
Fernbedienung
Télécommande
Telecomando
3
PLAY
1
PLAY
Hauptgerät
Unité principale
Unità principale
Fernbedienung
Télécommande
Telecomando
1
Drücken Sie im Stoppmodus einmal die
PROG/DIR-Taste.
• Der Programm-Auswahlschirm erscheint.
PROGRAMM
EI NGANG: 0 - 9 , + 1 0 LÖSCHEN: C L EAR - TAST E
NR. TRACK
1 _ _
MODUS : NORMAL GESAMTZE I T : - - : - -
B
2
Wä hlen Sie die Titelnummer, die Sie
programmieren möchten, mit den
Nummerntasten an.
Bsp.: Programmieren der Titel 5 und 12
PROGRAMM
EI NGANG: 0 - 9 , + 1 0 LÖSCHEN: C L EAR - TAST E
NR. TRACK
1 0 5
2 1 2
3 _ _
MODUS : NORMAL GESAMTZE I T : 10 : 3 5
B
3
Drücken Sie die PLAY-Taste.
• Die Wiedergabe der Titel in der
programmierten Reihenfolge beginnt.
✽Zurückkehren zur normalen Wiedergabe:
Drücken Sie zum Beenden der programmierten
Wiedergabe zunächst die STOP-Taste und dann die
PROG/DIR-Taste.
Drücken Sie jetzt die PLAY-Taste, um die normale
Wiedergabe vom Anfang der Disc an zu starten.
✽Titel aus dem Programm löschen:
Drücken Sie die STOP-Taste. Der ProgrammWiedergabeschirm erscheint. Drücken Sie die
CLEAR-Taste, um den letzten Titel des Programms
zu löschen.
✽Löschen des gesamten Programms:
Das gesamte Programm wird gelöscht, wenn
entweder das Gerät ausgeschaltet oder die Disc
ausgeworfen wird.
Sie können das Programm auch löschen, indem Sie
nach Betätigung der STOP-Taste zum Beenden der
programmierten Wiedergabe die PROG/DIRECTTaste drücken.
✽Drücken Sie zum Überprüfen des Programms die
CALL-Taste. Die einzelnen Programmpunkte
werden nacheinander angezeigt.
✽Bis zu 20 Spuren können programmiert werden.
14
LECTURE DES PISTES
DANS L’ORDRE SOUHAITE
2 Utiliser cette fonction avec les CD vidéo et
musicaux pour lire les pistes dans l’ordre souhaité.
Cette fonction n’a aucun effet avec les DVD.
1
En mode arrêt, appuyer une fois sur la
touche de PROG/DIR.
• L’écran de sélection de programme
s’affiche.
PROGRAMME
ENTR EE : 0 - 9 , + 1 0 E F FAC ER : BOUT TON CL EAR
NO. PL AGE
1 _ _
MODE : NORMAL TEMPS TO TAL : - - : - -
B
2
Utiliser les touches numéroté es pour
sélectionner le numéro de piste à programmer.
EX: Pour programmer la plage 5 et la
plage 12
PROGRAMME
ENTR EE : 0 - 9 , + 1 0 E F FAC ER : BOUT TON CL EAR
NO. PL AGE
1 0 5
2 1 2
3 _ _
MODE : NORMAL TEMPS TO TAL : 10 : 3 5
B
3
Appuyer sur la touche de lecture (PLAY).
• La lecture des pistes dans l’ordre
programmé commence.
✽Pour revenir en mode lecture normale:
Appuyer sur la touche d’arrêt (STOP) pour
arrêter la lecture programmée, puis appuyer fois
sur la touche de PROG/DIR.
Appuyer alors sur la touche de lecture (PLAY)
pour démarrer la lecture normale à partir du
début du disque.
✽Pour annuler des pistes du programme:
Appuyer fois sur la touche d’arrêt (STOP).
L’écran de lecture de programme s’affiche.
Appuyer sur la touche d’effacer (CLEAR) pour
annuler la dernière piste du programme.
✽Pour annuler le programme entier:
Le programme entier est annulé lors de la mise
hors tension ou de l’éjection du disque.
De même, quand la touche STOP est enfoncé pour
arrêter la lecture programmée et que la touche PROG
est enfoncé, toute la programmation est effacée.
✽Pour vérifier le contenu des programmes,
appuyez sur le bouton CALL (appel). Le contenu
des programmes est affiché un par un.
✽Jusqu’à 20 plages peuvent être programmées.
14
RIPRODUZIONE DEI BRANI
NELL'ORDINE DESIDERATO
2 Usate questa funzione con i CD video e musicali
per riprodurre i brani nell'ordine desiderato.
Questa funzione non concerne i DVD.
1
Premete il tasto PROG/DIR una volta nel
modo di arresto.
• Appare lo schermo di selezione del
programma.
PROGRAM
INPUT : 0 - 9, + 10 C LEAR : CL EAR BUTTON
NO. TRACK
1 _ _
MODE : NORMAL TOTA L T IME : - - : - -
B
2
Usate i tasti numerici per selezionare il
numero del brano da programmare.
Es: per programmare i brani 5 e 12:
PROGRAM
INPUT : 0 - 9, + 10 C LEAR : CL EAR BUTTON
NO. TRACK
1 0 5
2 1 2
3 _ _
MODE : NORMAL TOTA L T IME : 10 : 3 5
B
3
Premete il tasto PLAY.
• Ha inizio la riproduzione dei brani
nell'ordine programmato.
✽Per ritornare alla riproduzione normale:
Premete il tasto STOP per fermare la
riproduzione programmata, poi premete il tasto
PROG/DIR.
Ora premete il tasto PLAY per iniziare la
riproduzione normale dall'inizio del disco.
✽Per cancellare dei brani dal programma:
Premete il tasto STOP. Appare lo schermo della
riproduzione programmata. Premete il tasto
CLEAR per cancellare l'ultimo brano del
programma.
✽Cancellazione dell'intero programma:
L'intero programma viene cancellato quando si
spegne lac orrente o si espelle il disco.
Inoltre, quando premete il tasto STOP per
fermare la riproduzione programmata e si preme
il tasto PROG, viene cancellato l'intero
programma.
✽Per controllare i contenuti programmati, premete
il tasto CALL. I contenuti programmati vengono
visualizzati passo per passo.
✽Si possono programmare fino a 20 brani.
Page 90

DEUTSCH FRANÇAIS ITALIANO
100
15
WIEDERGABE VON TITELN IN ZUFALLSGESTEUERTER REIHENFOLGE
2 Wenden Sie diese Funktion bei der Benutzung von Video- und Musik-CDs an, um die Titel in
zufallsgesteuerter Reihenfolge wiederzugeben.
Diese Funktion hat auf DVDs keinerlei Effekt.
1
2
Drücken Sie im Stoppmodus die RANDOMTaste.
• Der Zufallswiedergabe-Bildschirm
erscheint.
Drücken Sie die PLAY-Taste.
• Die Wiedergabe der Titel in
zufallsgesteuerter Reihenfolge beginnt.
✽Zurückkehren zur normalen Wiedergabe:
Drücken Sie zum Beenden der
Zufallswiedergabe zunächst die STOP-Taste und
dann einmal die RANDOM-Taste.
ZUFALLSWIEDERGABE:EIN
ENTER
MARKERRANDOM
PAGE
A-B
ZOOM
DIMMER
REPEAT
SETUP
SKIP
SLOW / SEARCH
ANGLE SUBTITLE AUDIOSEARCH MODE
PLAY
STILL /
PAUSE
STOP
MENU
1
2
PLAY
1
PLAY
1
2
Fernbedienung
Télécommande
Telecomando
Hauptgerät
Unité principale
Unità principale
RANDOM
Fernbedienung
Télécommande
Telecomando
15
LECTURE DES PISTES
DANS UN ORDRE
ALEATOIRE
2 Utiliser cette fonction avec les CD vidéo et
musicaux pour lire les pistes dans un ordre
aléatoire.
Cette fonction n’a aucun effet avec les DVD.
1
2
En mode arrêt, appuyer sur la touche
d’aléatoire (RANDOM).
• L’écran de lecture aléatoire s’affiche.
Appuyer sur la touche de lecture (PLAY).
• La lecture des pistes dans un ordre
aléatoire commence.
✽Pour revenir en mode lecture normale:
Appuyer sur la touche d’arrêt (STOP) pour
mettre fin à la lecture aléatoire puis appuyer une
fois sur la touche d’aléatoire (RANDOM).
ALÉATO IRE :OUI
15
RIPRODUZIONE DEI
BRANI IN ORDINE
CASUALE
2 Usate questa funzione con i CD video e musicali
per riprodurre i brani in ordine casuale.
Questa funzione non concerne i DVD.
1
2
Premete il tasto RANDOM nel modo di
arresto.
• Appare lo schermo di riproduzione casuale.
Premete il tasto PLAY.
• Ha inizio la riproduzione dei brani in ordine
casuale.
✽Per ritornare alla riproduzione normale:
Premete il tasto STOP per fermare la
riproduzione casuale, poi premete il tasto
RANDOM.
RANDOM ON
2
PLAY STOP
1 2
STILL / PAUSE
OPEN/CLOSE
5
8
DVD AUDIO-VIDEO PLAYER DVD-3800
PURE DIRECT
9
763
OFF
MODE 1
MODE 2
Page 91

DEUTSCH FRANÇAIS ITALIANO
101
PROGRESSIVE
DVD
1 2
OPEN/CLOSE
5
PLAY STOP
3
STILL / PAUSE
1
31
16
MP3-WIEDERGABE
2 Im Internet gibt es viele Musik-Verteilungssites,
von denen Musikdatein im MP3-Format
heruntergeladen werden können. Musik, die wie
beschrieben von der Site heruntergeladen und auf
eine CD-R/RW-Disc geschrieben wurde, kann vom
DVD-3800 wiedergegeben werden.
Wenn auf herkömmliche Musik-CDs
aufgenommene Musik auf einem Computer mit
Hilfe eines MP3-Enkoders
(Konvertierungssoftware) in MP3-Datein
konvertiert wurde, werden die Daten auf einer 12
cm CD auf 1/10 der Originaldaten verkleinert.
Dadurch passen die Daten von ca. 10 Musik-CDs
auf eine einzige CD-R/RW-Disc. Eine einzelne CDR/RW-Disc kann mehr als 100 Titel beinhalten.
✽
Werte, bei einer Konvertierung von 5-Minuten
langen Titeln mit einer Standard-Bitrate von 128
kbps in MP3-Datein und bei Benutzung einer CDR/RW-Disc mit einer Kapazität von 650MB.
4 5 6
ENTER
ON
OFF
REMOTE CONTROL UNIT RC-553
TOP MENU
DISPLAY
MARKERRANDOMA-B
DIMMER
REPEAT
SETUP
NTSC / PALOPEN / CLOSE
CALL RETURN
SKIP
SLOW / SEARCH
POWER
ANGLE SUBTITLE AUDIOSEARCH MODE
PLAY
STILL /
PAUSE
STOP
1
7
0
2
8
+10
3
9
PROG / DIR
V.S.S.
CLEAR
MENU
3
1
2, 3
Anhören von MP3 CD, CD-Rs und CD-RWs
1
Legen Sie die CD-R/RW-Disc in den DVD3800 ein, auf die die MP3-FormatMusikdatein geschrieben worden sind.
(Siehe Seite 58.)
• Nach dem Einlegen der Disc in den DVD3800 erscheint der DiscInformationsbildschirm.
• Fahren Sie mit Schritt 2 fort, wenn
mehrere Ordner vorhanden sind.
• Wenn die Disc keine Ordner enthält,
fahren Sie bitte mit Schritt 3 fort.
DI SC INFO RMATION
0ROOT
1FOL DER 1
2FOL DER 2
3FOL DER 3
4FOL DER 4
5FOL DER 5
ROOT
WIEDERGABEMODUS ORDNER
ABGELAUFEN SIGNAL: --:--
B
NAVIGATION: AUSWAHL: ENTER -TASTE
16
LECTURE DE MP3
2 Il existe de nombreux sites Internet musicaux à
partir desquels il est possible de télécharger des
fichiers musicaux dans le format MP3. Les
musiques téléchargées selon les instructions du
site et gravées sur des disques CD-R ou CD-RW
peuvent être lues par le DVD-3800.
Si une musique enregistrée sur un CD musical du
commerce est convertie en fichiers MP3 par un
ordinateur à l’aide d’un encodeur MP3 (logiciel de
conversion), les données contenues sur un CD de
12 cm sont alors réduites au 1/10 de la quantité de
données originales. Ainsi lorsque les données
contenues dans 10 CD musicaux sont converties
en format MP3, elles peuvent être enregistrées sur
un seul disque CD-R ou CD-RW. Un seul disque
CD-R ou CD-RW peut contenir plus de 100 pistes.
✽
Valeurs lorsque des pistes de 5 minutes sont
converties en fichiers MP3 avec un débit binaire
standard de 128 kilobits par seconde et en
utilisant un disque CD-R ou CD-RW d’une
capacité de 650 mégaoctets.
Ecouter des disques CD, CD-R et CDRW de format MP3
1
Placez le disque CD-R/RW sur lequel sont
inscrits les fichiers musicaux de format MP3
dans le lecteur de DVD-3800. (Voir page 58.)
• Lorsque le disque est chargé dans le DVD3800, l’écran contenant des informations
sur le disque apparaît.
• S’il y a plusieurs dossiers, passez à l’étape
2.
• Si le disque ne contient aucun dossier,
passez à l’étape 3.
INFORMAT ION D I SQUE
REGLAGES :
DECISION:BOUTTON ENTER
0ROOT
1FICHIER1
2FICHIER2
3FICHIER3
4FICHIER4
5FICHIER5
ROOT
M
ODE L E CTUR E F I CH I E R
PLAGE S ÉCOUL ÉS : --:--
B
16
RIPRODUZIONE MP3
2 Esistono molti siti di distribuzione musicale in
Internet e da essi si possono caricare dei file
musicali nel formato MP3. Il download musicale
viene richiesto presso il sito e poi il materiale viene
inciso su un CD-R/RW per essere poi riprodotto sul
DVD-3800.
Se convertite in file MP3 i segnali musicali registrati
sui CD musicali disponibili sul mercati usando un
computer ed un codificatore MP3 (software di
conversione), i dati sui CD da 12 cm vengono
ridotti ad 1/10 circa della quantità originale dei dati.
Quindi, quando i dati vengono scritti nel formato
MP3, un singolo disco CD-R/RW può contenere i
dati di circa 10 CD musicali. Un singolo disco CDR/RW può contenere più di 100 brani.
✽Valori quando un brano da 5 minuti viene
convertito in un file MP3 ad una velocità bit
standard di 128 kpbs su un CD-R/RW con una
capacità di 650 MB.
Ascolto dei CD, CD-R e CD-RW MP3
1
Inserite nel DVD-3800 il disco CD-R/RW su
cui i file musicali sono stati incisi nel formato
MP3. (
Vedere pagina 58.)
• Quando inserite il disco nel Il DVD-3800,
appare lo schermo di informazioni sul
disco.
•
Se ci sono più cartelle, procedete al passo 2.
• Se non ci sono delle cartelle sul disco ,
procedete al passo 3.
DI SC INFO RMATION
SINGLE:
DECISION : ENTER BUTTON
0ROOT
1FOLDER1
2FOL DER2
3FOL DER3
4FOL DER4
5FOL DER5
ROOT
PLAY MODE FOLDER
SIGNAL ELAPSED : --:--
B
OPEN / CLOSE
OPEN/CLOSE
5
1
Fernbedienung
Télécommande
Telecomando
Hauptgerät
Unité principale
Unità principale
Page 92

DEUTSCH FRANÇAIS ITALIANO
102
2
Betätigen Sie die • und ª Cursor-Tasten und
wählen Sie den Ordner aus, der den/die
Datein(n) enthält, die Sie wiedergeben
möchten. Drücken Sie dann die ENTERTaste.
FOLDER1
FOLDER2
FOLDER3
FOLDER4
FOLDER5
DI SC INFO RMATION
0••
1MP3 _ 01
2MP3 _ 02
3MP3 _ 03
4MP3 _ 04
5MP3 _ 05
ROOT
WIEDERGABEMODUS ORDNER
ABGELAUFEN SIGNAL: --:--
B
NAVIGATION: AUSWAHL: ENTER -TASTE
• Fahren Sie mit Schritt 2 fort, wenn
mehrere Ordner vorhanden sind.
✽Ordner-Wechsel
Betätigen Sie die • und ª Cursor-Tasten
oben rechts auf dem Bildschirm “ROOT”
an und drücken Sie dann die ENTER-Taste.
Es erscheint wieder der Bildschirm wie in
Schritt 1. Wählen Sie den gewünschten
Ordner.
ENTER
2
Fernbedienung
Télécommande
Telecomando
2
Utiliser les curseurs • et ª pour sélectionner
le dossier comprenant le(s) fichier(s) que
vous souhaitez écouter, puis appuyer sur la
touche ENTER.
FICHIER1
FICHIER2
FICHIER3
FICHIER4
FICHIER5
INFOR
M
AT ION D I SQUE
REGLAGES :
DECISION:BOUTTON ENTER
0••
1MP3 _ 01
2MP3 _ 02
3MP3 _ 03
4MP3 _ 04
5MP3 _ 05
ROOT
M
ODE L E CTUR E F I CH I E R
PLAGE S ÉCOUL ÉS : --:--
B
• S’il y a plusieurs dossiers, passez à l’étape
2.
✽Pour changer de fichier
Utiliser les curseurs • et ª pour
sé lectionner “ROOT” dans la partie
supérieure droite de l’écran, puis appuyez
sur la touche ENTER. L’écran de l’étape 1
apparaît à nouveau. Sélectionnez le dossier
souhaité.
2
Usate i tasti del cursore • e ª per
selezionare la cartella che contiene il file da
riprodurre, poi premete il tasto ENTER.
FOLDER1
FOLDER2
FOLDER3
FOLDER4
FOLDER5
DI SC INFO RMATION
SINGLE:
DECISION : ENTER BUTTON
0••
1MP3 _ 01
2MP3 _ 02
3MP3 _ 03
4MP3 _ 04
5MP3 _ 05
ROOT
PLAY MODE FOLDER
SIGNAL ELAPSED : --:--
B
•
Se ci sono più cartelle, procedete al passo 2.
✽Per cambiare cartella
Usate il tasto del cursore • e ª per
selezionare “ROOT” nell'angolo superiore
destro dello schermo, poi premete il tasto
ENTER. Lo schermo del passo 1 riappare.
Page 93

DEUTSCH FRANÇAIS ITALIANO
103
3
Betätigen Sie die • und ª Cursor-Tasten, um
die MP3-Datei anzuwählen, die Sie
wiedergeben möchten, und drücken Sie
dann die PLAY-Taste oder ENTER-Taste.
• Die Wiedergabe beginnt.
FOLDER1
FOLDER2
FOLDER3
FOLDER4
FOLDER5
DI SC INFO RMATION
0••
1MP3 _ 01
2MP3 _ 02
3MP3 _ 03
4MP3 _ 04
5MP3 _ 05
ROOT
WIEDERGABEMODUS ORDNER
ABGELAUFEN SIGNAL: --:--
B
NAVIGATION: AUSWAHL: ENTER -TASTE
✽Das Display kann durch Betätigung der
DISPLAY-Taste während der Wiedergabe
zwischen der einzelnen bereits
ausgeführten und der einzelnen noch
verbleibenden Wiedergabezeit
umgeschaltet werden.
✽Eine programmierte Wiedergabe ist mit
MP3-Discs nicht möglich.
✽Ändern der MP3-Datei
Drücken Sie die STOP-Taste und betätigen
Sie dann die • und ª Cursor-Tasten, um
die gewünschte MP3-Datei erneut
anzuwählen.
✽Einstellen des Zufallswiedergabemodus
Drücken Sie im Stoppmodus die
RANDOM-Taste.
Drücken Sie dann die PLAY- oder ENTERTaste.
✽Einstellen des Wiederholungsmodus
Der Wiederholungsmodus ändert sich bei
jeder Betätigung der REPEAT-Taste.
Fernbedienung
Télécommande
Telecomando
1
PLAY
Hauptgerät
Unité principale
Unità principale
PLAY
Fernbedienung
Télécommande
Telecomando
ENTER
3
ORDNER TRACK-WIEDERHOLUNG
ORDNER-WIEDERHOLUNG
✽Zurückkehren zum ursprünglichen Disc-
Informationsbildschirm
Drücken Sie die STOP-Taste, betätigen Sie
die • Cursor-Taste, um oben rechts auf
dem Bildschirm “ROOT” anzuwählen und
drücken Sie dann die ENTER-Taste. Es
erscheint wieder der Bildschirm wie in
Schritt 1.
3
Utiliser les curseurs • et ª pour sélectionner
le fichier MP3 que vous souhaitez écouter,
puis appuyez soit sur la touche PLAY ou
ENTER.
• La lecture commence.
FICHIER1
FICHIER2
FICHIER3
FICHIER4
FICHIER5
INFOR
M
AT ION D I SQUE
REGLAGES :
DECISION:BOUTTON ENTER
0••
1MP3 _ 01
2MP3 _ 02
3MP3 _ 03
4MP3 _ 04
5MP3 _ 05
ROOT
M
ODE L E CTUR E F I CH I E R
PLAGE S ÉCOUL ÉS : --:--
B
✽L’affichage peut être commuté entre le
temps unitaire écoulé et le temps unitaire
restant en appuyant sur la touche
DISPLAY.
✽Une lecture programmée n’est pas
possible avec les disques MP3.
✽Pour changer de fichier MP3
Appuyer sur la touche STOP, puis utiliser
les curseurs • et ª afin de sélectionner le
fichier MP3 souhaité.
✽Pour activer le mode de lecture
aléatoire
En mode stop, appuyez sur la touche
RANDOM.
Appuyer ensuite sur la touche PLAY ou
ENTER.
✽Pour activer le mode de lecture à
répétition
Le mode de lecture à ré pé tition se
commute à chaque pression sur la touche
REPEAT de la façon suivante
✽Pour retourner à l’écran initial
d’informations sur le disque
Appuyer sur la touche STOP, et à l’aide du
curseur •, sélectionnez “ROOT” dans la
partie supérieure droite de l’écran, puis
appuyer sur la touche ENTER. L’écran de
l’étape
1
apparaît à nouveau.
FICHIER RÉPÉTITION DE PLAGE
RÉPÉTITION DE FICHIERS
3
Usate i tasti del cursore • e ª per
selezionare il file MP3 da riprodurre, poi
premete il tasto PLAY o il tasto ENTER.
• Ha inizio la riproduzione.
FOLDER1
FOLDER2
FOLDER3
FOLDER4
FOLDER5
DI SC INFO RMATION
SINGLE:
DECISION : ENTER BUTTON
0••
1MP3 _ 01
2MP3 _ 02
3MP3 _ 03
4MP3 _ 04
5MP3 _ 05
ROOT
PLAY MODE FOLDER
SIGNAL ELAPSED : --:--
B
✽Il display può passare dal tempo singolo
trascorso al tempo singolo rimanente
premendo il tasto display.
✽Non è possibile effettuare una riproduzione
programmata con i dischi MP3.
✽Per cambiareil file MP3
Premete il tasto STOP, poi usate i tasti del
cursore • e ª per riselezionareil file MP3
desiderato.
✽Per impostare il modo di riproduzione
casuale
Nel modo di stop, premete il tasto
RANDOM.
Dopodiché premete il tasto PLAY o
ENTER.
✽Per impostare il modo di ripetizione
Il modo di ripetizione cambia ogni volta che
il tasto REPEAT viene premuto.
FOLDER Æ TRACK REPEAT Æ FOLDER REPEAT
≠
✽Per ritornare allo schermo delle
informazioni iniziali del disco
Premete il tasto STOP, usate il tasto del
cursore • per selezionare “ROOT”
nell'angolo superiore destro dello schermo,
poi premete il tasto ENTER. Lo schermo
del passo 1 riappare.
Fernbedienung
Télécommande
Telecomando
Page 94

DEUTSCH FRANÇAIS ITALIANO
104
HINWEISE:
• Der DVD-3800 ist mit dem “MPEG-1 Audio Layer
3”-Standard kompatibel (Sampling-Frequenz von 32,
44.1 oder 48 kHz). Er ist nicht kompatibel mit
anderen Standards wie “MPEG-2 Audio Layer 3”,
“MPEG-2.5 Audio Layer 3”, MP1, MP2, etc.
• Einige CD-R/RW-Discs kö nnen aufgrund von
bestimmten Disc-Eigenschaften, Verschmutzungen,
Verformungen etc. nicht wiedergegeben werden.
• Die bei der Wiedergabe von MP3-Datein
ausgegebenen digitalen Signale werden in PCM
konvertiert; dies unabhängig davon, ob die
Voreinstellung des Audio-Ausgangs auf “normal”
oder “PCM” eingestellt ist. Die Signale werden mit
derselben Sampling-Frequenz wie die der
Musikquelle ausgegeben.
• Grundsätzlich gilt: je höher die Bitrate einer MP3Datei ist, desto besser ist die Klangqualität. Für den
DVD-3800 empfehlen wir die Verwendung von
MP3-Datein, die mit Bitraten von 128 kbps oder
höher aufgenommen wurden.
• MP3-Datein werden möglicherweise nicht in der
erwarteten Reihenfolge wiedergegeben, da die
Schreibsoftware die Position der Ordner und die
Reihenfolge der Datei beim Schreiben auf die CDR/RW unter Umständen ändert.
• Bei MP3-Discs ist weder der noch die
programmierte Wiedergabe möglich.
• Beim Schreiben von MP3-Datein auf CD-R/RWDiscs müssen Sie als Schreibformat “ISO9660 level
1” auswählen. Bei einigen Schreibsoftwares ist dies
unter Umständen nicht möglich. Beziehen Sie sich
für Einzelheiten auf die Anwendungsbeschreibung
der Schreibsoftware.
• Mit dem DVD-3800 ist es möglich, Ordnernamen
und Dateinamen auf dem Bildschirm wie Titel
anzeigen zu lassen. Der DVD-3800 kann bis zu 8
Zeichen – bestehend aus Zahlen, Großbuchstaben
und das “_”-Zeichen (Unterstrich)anzeigen.
• Bei der Aufnahme in einem anderen Format als
“ISO9660 level 1”, sind die normale Anzeige und
Wiedergabe unter Umständen nicht mö glich.
Darüber hinaus werden Ordner und Dateinamen, die
andere Symbole enthalten, möglicherweise nicht
richtig angezeigt.
• Ergä nzen Sie MP3-Datein immer mit der
Erweiterung “.MP3”. Datein mit einer anderen
Erweiterung als “.MP3” oder ohne Erweiterung
kö nnen nicht wiedergegeben werden. (Bei
Macintosh-Computern können MP3-Datein
wiedergegeben werden, indem nach der Eingabe
des aus 8 Großbuchstaben und Zahlen bestehenden
Dateinamens und Aufnahme der Datein auf die CDR/RW die Erweiterung “.MP3” angefügt wird.)
• Bringen Sie weder auf der beschrifteten Seite noch
auf der Signalseite von CD-R-Discs Sticker,
Klebeband usw. an. Wenn auf die Oberfläche einer
Disc Kleber gelangt, kann die Disc im DVD-3800
verklemmen, so dass kein Auswerfen der Disc
mehr möglich ist.
• Der DVD-3800 ist nicht mit Paket-Schreibsoftware
kompatibel.
• Der DVD-3800 ist nicht mit ID3-Tag kompatibel.
• Der DVD-3800 ist nicht mit Wiedergabelisten
kompatibel.
• Spielen Sie keine CD-R/RW-Discs ab, die andere
Dateien als Musik-CD-Dateien (im CDA-Format),
MP3 und JPEG-Dateien enthalten. Anderenfalls
können je nach Datei-Typ Fehlfunktionen oder
Schäden verursacht werden.
REMARQUES:
• Le DVD-3800 est compatible avec les normes du
“MPEG-1 Audio Layer 3” (fréquences
d’échantillonnage de 32, 44.1 ou 48 kHz). Il n’est
pas compatible avec d’autres normes telles que
“MPEG-2 Audio Layer 3”, “MPEG-2.5 Audio Layer
3”, MP1, MP2, etc.
• Il se peut que certains disques CD-R/RW ne
puissent pas être lus à cause des propriétés du
disque, de saleté, de gondolement, etc.
• Lorsque vous passez des fichiers MP3, les sorties
de signaux numériques sont des signaux MP2
convertis en MIC (modulation par impulsions
codées), sans tenir compte du fait que le
préréglage de sortie audio soit réglé sur “normal”
ou sur “MIC”. Les signaux sont envoyés avec la
même fréquence d’échantillonnage que pour la
source de musique.
• En général, plus le débit binaire d’un fichier MP3
est élevé, meilleure sera la qualité du son. Avec le
DVD-3800 nous vous conseillons d’utiliser des
fichiers MP3 enregistrés avec un débit binaire de
128 kilobits par seconde ou plus.
• Il se peut que les fichiers MP3 ne soient pas lus
dans l’ordre attendus car le logiciel d’écriture risque
de changer la position des dossiers et l’ordre des
fichiers lors de leur inscription sur le disque CD-R
ou CD-RW.
• Les disques MP3 ne permettent pas la lecture
programmée.
• Lorsque vous inscrivez des fichiers MP3 sur des
disques CD-R ou CD-RW, choisissez “ISO9660
niveau 1” comme format du logiciel d’écriture. Ceci
n’est pas possible avec tous les types de logiciels
d’écriture. Pour plus d’informations, reportez-vous
à la notice d’utilisation du logiciel d’écriture.
• Le DVD-3800 permet d’ afficher les noms des
dossiers et des fichiers à l’écran, comme des
titres. Le DVD-3800 peut afficher jusqu’à 8
caractères, comprenant des nombres, des
majuscules, et le signe “_” (soulignement).
• Si vous avez choisi un format autre que “ISO9660
niveau 1”, l’affichage normal et la lecture ne seront
peut être pas possibles. De plus, les noms des
dossiers et des fichiers incluant d’autres symboles
ne seront pas affichés correctement.
• Veillez à ajouter l’extension “.MP3” aux fichiers
MP3. Les fichiers ne comportant pas l’extension
“.MP3” ou ne comportant aucune extension ne
pourront pas être lus. (Pour les ordinateurs
Macintosh, les fichiers MP3 peuvent être lus en
ajoutant l’extension “.MP3” après le nom du fichier
comprenant jusqu’à 8 lettres majuscules ou
chiffres et en enregistrant les fichiers sur un disque
CD-R ou CD-RW.)
• Ne collez pas d’autocollants, d’adhésif, etc. sur les
disques CD-R/RW; ni sur la face comportant
l’étiquette ni sur la face comportant les signaux. Si
la face d’un disque est recouverte d’adhésif, le
disque risque de rester coincé dans le DVD-3800 et
de ne pas pouvoir etre éjecté.
• Le DVD-3800 n’ est pas compatible avec les
logiciels d’écriture par paquets.
•
Le DVD-3800 n’est pas compatible avec les ID3-Tags.
• Le DVD-3800 n’est pas compatible avec les listes
d’écoute.
• Ne pas lire des disques CD-R/RW contenant des
fichiers autres que des fichiers de CD musique (en
format CDA), les fichiers MP3 et JPEG. A défaut
d’une telle précaution, le lecteur risque de mal
fonctionner ou d’être endommagé, selon le type de
fichier.
NOTE:
• Il DVD-3800 è compatibile con gli standard
“MPEG-1 Audio Layer 3” (frequenza di
campionatura 32, 44.1 o 48 kHz). Non è
compatibile con altri standard, ad esempio
“MPEG-2 Audio Layer 3”, “MPEG-2.5 Audio
Layer 3”, MP1, MP2, ecc.
• Può non essere possibile riprodurre alcuni dischi
CD-R/RW per via delle proprietà del disco,
sporcizia, deformazioni, ecc.
• I segnali digitali emessi quando riproducete i file
MP3 vengono convertiti in PCM,
indipendentemente se l'uscita audio è stato
impostato su “normal” o “PCM”. I segnali
vengono emessi con la stessa frequenza di
campionatura della fonte musicale.
• In genere, più è alta la velocità bit del file MP3,
più sarà elevata la qualità sonora. Nel DVD-3800,
vi raccomandiamo di usare i file MP3 registrati
con una velocità bit di 128 kbps o superiore.
• I file MP3 possono non venire riprodotti
nell'ordine atteso, poiché il software di scrittura
può cambiare la posizione delle cartelle e
l'ordine dei file durante la scrittura degli stessi
sul CD-R/RW.
• La riproduzione programmata non sono possibili
con i dischi MP3.
• Quando scrivete i file MP3 sui dischi CD-R/RW,
selezionate “ISO9660 level 1” come formato di
software di scrittura. Questo può non essere
possibile con alcuni tipi di software di scrittura.
Per ulteriori informazioni, fate riferimento alle
istruzioni per l'uso del software di scrittura.
• Con il DVD-3800 è possibile visualizzare i nomi
delle cartelle ed i nomi dei file sullo schermo,
come con i titoli. Il DVD-3800 può visualizzare
fino ad 8 caratteri, composti da numeri, lettere in
maiuscola e il simbolo “_”(sottolineamento).
• Se effettuate la registrazione in un formato
diverso da quello “ISO9660 level 1”, può non
essere possibile effettuare la normale
visualizzazione e la riproduzione. Inoltre, non
verranno visualizzati correttamente i nomi delle
cartelle e dei file che includono altri simboli.
• Assicuratevi di aggiungere l'estensione “.MP3”
ai file MP3. Non sarà possibile riprodurre i file
se hanno un'estensione diversa da quella
“.MP3” oppure se non hanno alcuna
estensione. Con i computer Macintosh, potete
riprodurre i file MP3 aggiungendo l'estensione
“.MP3” dopo il nome del file composto da 8
lettere in maiuscola o numeri, registrando i file
sul CD-R/RW.)
•
Non applicate delle etichette, del nastro adesivo
ecc. sul lato etichettato o sul lato contenente i
segnali dei dischi CD-R. Se il nastro adesivo viene
in contatto con la superficie del disco, quest'ultimo
può rimanere inceppato all'interno del DVD-3800 e
può essere impossibile espellere il disco.
• Il DVD-3800 non è compatibile pacchetti di
scrittura software.
• Il DVD-3800 non è compatibile i simboli ID3.
• Il DVD-3800 non è compatibile con le liste di
riproduzione.
• Non riproducete i dischi CD-R/RW contenenti
file diversi dai file CD musicali (nel formato
CDA), file MP3 e JPEG. Altrimenti si possono
verificare malfunzionamenti o danni, a seconda
del tipo del file.
Page 95

DEUTSCH FRANÇAIS ITALIANO
105
17
WIEDERGABE VON STANDBILD-DATEIEN (JPEG-FORMAT)
2 Auf Kodak Picture-CDs, CD-Rs und CD-RWs enthaltene JPEG-Dateien können als Dias wiedergegeben und
auf dem DVD-3800 genossen werden.
2 Kodak Picture-CDs können auf dem DVD-3800
abgespielt werden.
Wenn eine Picture-CD abgespielt wird, können die
auf der Picture-CD enthaltenen Fotografien auf
einem TV angezeigt werden. (“Picture CD” ist ein
Service, mit dem Fotografien von herkömmlichen
Silberfilm-Kameras in digitale Daten konvertiert und
auf CDs geschrieben werden. Wenden Sie sich
hinsichtlich der Picture-CD-Einzelheiten an eine
Verkaufsstelle, die Kodak-Entwicklungen anbietet.)
Wiedergabe von Picture-CDs
1
2
Legen Sie die Picture-CD in den DVD-3800 ein.
• Wenn die Disc eingelegt ist, beginnt die
Dia-Show von Standbildern automatisch.
• Die Dia-Show wird fortgesetzt, bis die
STOP-Taste gedrückt wird.
Drücken Sie die STOP-Taste.
• Die Dia-Show der Picture-CD stoppt.
STOP
2
STOP
2
Fernbedienung
Télécommande
Telecomando
Hauptgerät
Unité principale
Unità principale
OPEN / CLOSE
OPEN/CLOSE
5
1
Fernbedienung
Télécommande
Telecomando
Hauptgerät
Unité principale
Unità principale
PROGRESSIVE
DVD
1 2
8
EMOTE SENSOR
OPEN/CLOSE
5
PLAY STOP
63
STILL / PAUSE
DVD AU
21 1
4 5 6
ENTER
ON
OFF
REMOTE CONTROL UNIT RC-553
TOP MENU
DISPLAY
MARKERRANDOMA-BREPEAT
NTSC / PALOPEN / CLOSE
CALL RETURN
SKIP
SLOW / SEARCH
POWER
ANGLE SUBTITLE AUDIOSEARCH MODE
PLAY
STILL /
PAUSE
STOP
1
7
0
2
8
+10
3
9
PROG / DIR
V.S.S.
CLEAR
MENU
1
2
1
Legen Sie die CD-R/RW, auf der die
Standbilder gespeichert sind, in den DVD-3800.
• Nach dem Einlegen der Disc in den DVD3800 erscheint der DiscInformationsbildschirm..
PROGRESSIVE
DVD
1 2
SOR
OPEN/CLOSE
5
PLAY ST
3
STILL / PAUSE
311
4 5 6
ENTER
ON
OFF
REMOTE CONTROL UNIT RC-553
TOP MENU
DISPLAY
MARKERRANDOMA-BREPEAT
NTSC / PALOPEN / CLOSE
CALL RETURN
SKIP
SLOW / SEARCH
POWER
ANGLE SUBTITLE AUDIOSEARCH MODE
PLAY
STILL /
PAUSE
STOP
1
7
0
2
8
+10
3
9
PROG / DIR
V.S.S.
CLEAR
MENU
3
1
2, 3
Wiedergabe von auf CD-Rs/RWs gespeicherten Standbildern
DI SC INFO RMATION
0ROOT
1JPEG1
2JPEG2
3JPEG3
4JPEG4
5JPEG5
ROOT
WIEDERGABEMODUS ORDNER
ABGELAUFEN SIGNAL: --:--
B
NAVIGATION: AUSWAHL: ENTER -TASTE
• Fahren Sie mit Schritt 2 fort, wenn
mehrere Ordner vorhanden sind.
• Wenn die Disc keine Ordner enthält,
fahren Sie bitte mit Schritt 3 fort.
17
LECTURE DE FICHIERS
D’IMAGE FIXE
(FORMAT JPEG)
2 Les fichiers JPEG mémorisés sur des CD, CD-R et
CD-RW d’image Kodak peuvent être lus comme un
diapositive et lus sur le DVD-3800.
2
Des CD image Kodak peuvent être lus sur le DVD-3800.
Lorsqu’un CD image est lu, les photographies sur
le CD image peuvent être affiché es sur un
téléviseur. (“Picture CD” est un service par lequel
des photos prises avec des appareils à film
d’argent conventionnels sont convertis en données
numériques et écrites sur les CD. Pour plus de
détails sur les CD image, contacter un magasin qui
offre des services de développement de films
Kodak.)
Lecture de CD image
1
2
Charger le CD image dans le DVD-3800.
• Lorsque le disque est chargé, une
présentation de diapositives des images
fixes commence automatiquement.
• La présentation de dispositives continue
jusqu’à ce que la touche STOP soit
enfoncée.
Appuyer sur la touche STOP.
• La présentation de diapositives du CD
image s’arrête.
1
Charger le CD-R/RW sur lesquel les images
fixes ont été gravées dans le DVD-3800.
• Lorsque le disque est chargé dans le DVD-
3800, l’écran contenant des informations
sur le disque apparaît.
Lecture d’images fixes mémorisées
sur des CD-R/RW
INFORMAT ION D I SQUE
REGLAGES :
DECISION:BOUTTON ENTER
0ROOT
1JPEG1
2JPEG2
3JPEG3
4JPEG4
5JPEG5
ROOT
M
ODE L E CTUR E F I CH I E R
PLAGE S ÉCOUL ÉS : --:--
B
• S’il y a plusieurs dossiers, passez à l’étape
2.
• Si le disque ne contient aucun dossier,
passez à l’étape 3.
17
RIPRODUZIONE DI FILES
DI FERMO IMMAGINE
(FORMATO JPEG)
2
I files JPEG memorizzati nei CD immagine della Kodak,
nei CD-R e nei CD-RW possono essere riprodotti come
una sequenza di diapositive e visualizzate nel DVD-3800.
2
Potete riprodurre i CD immagine Kodak nel DVD-
3800.
Quando riproducete un'immagine, le fotografie nel
CD per immagini possono essere visualizzate su un
televisore.
(“Picture CD” è un servizio in cui le foto prese con
convenzionali cineprese vengono convertiti in dati
digitali e scritti sui CD. Per ulteriori informazioni
sulla funzione Picture CD, rivolgetevi ad un
negozio che offre i servizi di sviluppo Kodak.)
Riproduzione di CD con immagini
1
2
Caricate l'immagine CD nel DVD-3800.
• Quando inserite il disco, ha inizio una
visualizzazione delle immagini in modo
automatico.
• La visualizzazione continua finché premete
il tasto STOP.
Premete il tasto STOP.
• Si ferma la visualizzazione dell'immagine
CD.
1
Inserite nel DVD-3800 il CD-R/RW su cui
sono state memorizzate dei fermi immagine.
•
Quando inserite il disco nel Il DVD-3800,
appare lo schermo di informazioni sul disco.
Riproduzione di fermi immagine
memorizzate nei CD-R/RW
DI SC INFO RMATION
SINGLE:
DECISION : ENTER BUTTON
0ROOT
1JPEG1
2JPEG2
3JPEG3
4JPEG4
5JPEG5
ROOT
PLAY MODE FOLDER
SIGNAL ELAPSED : --:--
B
•
Se ci sono più cartelle, procedete al passo 2.
• Se non ci sono delle cartelle sul disco,
procedete al passo 3.
Page 96

DEUTSCH FRANÇAIS ITALIANO
106
2
Betätigen Sie die • und ª Cursor-Tasten und
wä hlen Sie den Ordner aus, der den/die
Datein(n) enthält, die Sie wiedergeben
möchten. Drücken Sie dann die ENTER-Taste.
DI SC INFO RMATION
0••
1A
2B
3C
4D
5E
JPEG1
JPEG2
JPEG3
JPEG4
JPEG5
ROOT
WIEDERGABEMODUS ORDNER
ABGELAUFEN SIGNAL: --:--
B
NAVIGATION: AUSWAHL: ENTER -TASTE
✽Ordner-Wechsel
Betätigen Sie die • Cursor-Taste oben
rechts auf dem Bildschirm
“HAUPTVERZEICHNIS” an und drücken
Sie dann die ENTER-Taste. Es erscheint
wieder der Bildschirm wie in Schritt 1.
Wählen Sie den gewünschten Ordner.
3
Wählen Sie mit den Cursor-Tasten • und ª
auf der Fernbedienung die Standbild-Datei
aus, mit der Sie starten möchten, und
drücken Sie anschließend die PLAY-Taste
oder die ENTER-Taste auf der
Fernbedienung .
• Die Dia-Show beginnt.
• Nur die in dem angewählten Ordner
befindlichen Standbild-Dateien werden
angezeigt.
DI SC INFO RMATION
0••
1A
2B
3C
4D
5E
JPEG1
JPEG2
JPEG3
JPEG4
JPEG5
ROOT
WIEDERGABEMODUS ORDNER
ABGELAUFEN SIGNAL: --:--
B
NAVIGATION: AUSWAHL: ENTER -TASTE
✽
Wurden alle Standbild-Dateien in dem
Ordner angezeigt, erscheint wieder der
Disc-Informationsbildschirm.
ENTER
2
Fernbedienung
Télécommande
Telecomando
3
Fernbedienung
Télécommande
Telecomando
2
Utiliser les curseurs •et ªpour sélectionner
le dossier comprenant le(s) fichier(s) que
vous souhaitez écouter, puis appuyer sur la
touche ENTER.
INFORMAT ION D I SQUE
REGLAGES :
DECISION:BOUTTON ENTER
0••
1A
2B
3C
4D
5E
JPEG1
JPEG2
JPEG3
JPEG4
JPEG5
ROOT
M
ODE L E CTUR E F I CH I E R
PLAGE S ÉCOUL ÉS : --:--
B
✽
Pour changer de fichier
Utiliser le curseur •afin de sélectionner
“RACINE” dans la partie supérieure droite
de l’écran, puis appuyez sur la touche
ENTER. L’écran de l’étape 1 apparaît à
nouveau. Sélectionnez le dossier souhaité.
3
Utiliser les touches de déplacement du
curseur •et ªde la télécommande pour
sélectionner le fichier d’image fixe à partir
desquels on veut commencer la
présentation de diapositives, ensuite
appuyer sur la touche PLAY ou sur la touche
ENTER de la télécommande.
• La présentation de diapositives
commence.
• Seuls les fichiers d’image fixe dans le
dossier sélectionné sont lus.
INFORMAT ION D I SQUE
REGLAGES :
DECISION:BOUTTON ENTER
0••
1A
2B
3C
4D
5E
JPEG1
JPEG2
JPEG3
JPEG4
JPEG5
ROOT
M
ODE L E CTUR E F I CH I E R
PLAGE S ÉCOUL ÉS : --:--
B
✽
Dès que tous les fichiers d’image fixe dans
le dossier ont été lus, l’écran d’information
sur le disque réapparaît.
2
Usate i tasti del cursore • e ª per
selezionare la cartella che contiene il file da
riprodurre, poi premete il tasto ENTER.
DI SC INFO RMATION
SINGLE:
DECISION : ENTER BUTTON
0••
1A
2B
3C
4D
5E
JPEG1
JPEG2
JPEG3
JPEG4
JPEG5
ROOT
PLAY MODE FOLDER
SIGNAL ELAPSED : --:--
B
✽
Per cambiare cartella
Usate il tasto del cursore • per selezionare
“ROOT”nell'angolo superiore destro dello
schermo, poi premete il tasto ENTER. Lo
schermo del passo 1 riappare.
3
Usate i tasti del cursore • e ª csul
telecomando per selezionare il file del fermo
immagine da cui desiderate iniziare la
visualizzazione delle diapositive, poi premete
il tasto PLAY o quello ENTER sul
telecomando.
• Ha inizio la visualizzazione delle diapositive.
• Sono riprodotti solo i file dei fermi
immagini nella cartella selezionata.
DI SC INFO RMATION
SINGLE:
DECISION : ENTER BUTTON
0••
1A
2B
3C
4D
5E
JPEG1
JPEG2
JPEG3
JPEG4
JPEG5
ROOT
PLAY MODE FOLDER
SIGNAL ELAPSED : --:--
B
✽
Dopo la riproduzione di tutti i file dei fermi
immagini nella cartella, riappare lo schermo
delle informazioni sul disco.
1
PLAY
Hauptgerät
Unité principale
Unità principale
PLAY
Fernbedienung
Télécommande
Telecomando
ENTER
Fernbedienung
Télécommande
Telecomando
Page 97

DEUTSCH FRANÇAIS ITALIANO
107
✽
Um einige der auf der Disc gespeicherten
Standbilder gleichzeitig anzuzeigen:
• Drücken Sie die MENU-Taste, um bis zu 9
Standbilder gleichzeitig anzeigen zu lassen.
• Für die Auswahl und Anzeige eines
Standbildes (um die Dia-Show bei einem
bestimmten Standbild zu starten), das
gewünschte Standbild mit den Cursor-Tasten
(ª, •,
0
und 1) auswählen, und anschließend
die ENTER-Taste drücken.
✽
Um die Dia-Show vorübergehend zu
unterbrechen:
• Drücken Sie die PAUSE-Taste.
• Drücken Sie die PLAY-Taste, um mit der Dia-
Show fortzufahren.
✽
Um zu einem Standbild durchzuschalten, das Sie
sich anschauen möchten (mit dem Sie die DiaShow starten möchten):
• Drücken Sie während der Dia-Show eine der
SKIP-Tasten (
8,9
) Drücken Sie die SKIP
8
-Taste, um zurück zum vorherigen
Standbild zu schalten; drücken Sie die SKIP
9
-Taste, um zum nächsten Standbild
weiterzuschalten.
✽
Standbilder wenden und drehen:
• Wenden Sie das Standbild mit den CursorTasten (ª, •,
0
und 1).
•
Cursor-Taste: Das gegenwä rtig
angezeigte Standbild wird
vertikal gewendet.
ª
Cursor-Taste: Das gegenwä rtig
angezeigte Standbild wird
horizontal gewendet.
0
Cursor-Taste: Das gegenwärtig
angezeigte Standbild wird
um 90° gegen den
Uhrzeigersinn gedreht.
1
Cursor-Taste: Das gegenwärtig
angezeigte Standbild wird
um 90° im Uhrzeigersinn
gedreht.
✽
Lassen Sie das Bild im Zoom-Modus
wiedergeben.
• Wenn die ZOOM-Taste während der
Wiedergabe eines JPEG-Bildes gedrückt wird
(“ZOOM AN” wird zu diesem Zeitpunkt auf
dem Bildschirm angezeigt), können Sie unter
Verwendung der Suche-Tasten heran- und
wegzoomen.
(
6
: Heranzoomen, 7: Wegzoomen)
• Verwenden Sie beim Zoomen des Bildes die
Cursor-Tasten (ª, •, 0und 1), um das
gezoomte Bild zu verschieben.
• Im Zoom-Modus ist die kontinuierliche
Wiedergabe (SLIDE SHOW) nicht möglich.
✽
Die Art und Weise des Umschaltens zum
folgenden Bild während der kontinuierlichen
JPEG-Bildwiedergabe (SLIDE SHOW) kann
ausgewählt werden.
• Drücken Sie die V.S.S.-Taste auf der
Fernbedienung.
• Wählen Sie aus DIASHOW MODUS 1 bis
MODUS 11, RAND und NONE aus.
✽
Pour visualiser instantanément plusieurs images
fixes mémorisées sur le disque:
• Appuyer sur la touche MENU pour afficher
simultanément 9 images fixes.
• Pour sélectionner et visualiser une image fixe
(pour commencer la présentation de
diapostives à partir d’ une image fixe
spécifique), utiliser les touches de
déplacement du curseur (ª, •, 0et 1) pour
sé lectionner image fixe désirée, ensuite
appuyer sur la touche ENTER.
✽
Pour arrêter momentanément la présentation de
diapositives:
• Appuyer sur la touche PAUSE.
• Pour reprendre la présentation de diapositives,
appuyer sur la touche PLAY
✽
Pour repérer une image fixe à visualiser (à partir
de la quelle on veut commencer la présentation
de diapositives):
• Pendant la présentation de diapositives,
appuyer sur une des touches SKIP (
8,9
).
Appuyer sur la touche SKIP
8
pour un
repérage en arriè re vers l’image fixe
précédente,appuyer sur la touche SKIP
9
pour un repérage en avant vers l’image fixe
suivante.
✽
Basculement et rotation d’images fixes:
• Utiliser les touches de déplacement du
curseur (ª, •,
0
et 1) pour bacsuler l’image
fixe.
Touche de •curseur: L’image fixe en cours
d’affichage est basculée
verticalement.
Touche de ªcurseur: L’image fixe en cours
d’affichage est basculée
horizontalement.
Touche de 0curseur: L’ image fixe en cours
d’affichage est tournée
90° dans le sens contraire
des aiguilles d’une
montre.
Touche de 1curseur: L’ image fixe en cours
d’affichage est tournée
90° dans le sens des
aiguilles d’une montre
✽
Lire l’image en mode de zoom.
• Si la touche de ZOOM est enfoncée lors de lal
ecture d’une image JPEG (“ZOOM ACTIVE”
est affichée à l’écran à ce moment-là)
l’agrandissement et le rétrécissement à l’aide
des touches de recherche.
(
6
: rétrécissement, 7: agrandir)
• Lors du zoom de l’image, utiliser les touches
du curseur (ª, •, 0et 1) pour déplacer
l’image zoomée.
• La lecture en continu (SLIDE SHOW) n’est pas
possible en mode de zoom.
✽
Il est possible de choisir la méthode de
commutation vers la prochaine image durant
une lecture en continu d’images JPEG (SLIDE
SHOW).
• Appuyer sur la touche V.S.S. sur la
télécommande.
• Sélectionner les modes de lecture en continu
MODE DIAPORAMA 1 à 11, RAND et NONE.
✽
Per visualizzare vari fermi immagine memorizzati
sul disco in una sola volta:
• Premete il tasto MENU per visualizzare fino a
9 fermi immagini in una sola volta.
• Per selezionare e visualizzareun fermo
immagine (per avviare la visualizzazione da
un'immagine particolare), usate i tasti del
cursore (ª, •,
0e 1
) per selezionare
l'immagine desiderata, poi premete il tasto
ENTER.
✽
Per fermare la visualizzazine temporaneamente:
• Premete il tasto PAUSE
• Per riprendere la visualizzazione, premete il
tasto PLAY.
✽
Per avanzare rapidamente ad un'immagine da
visualizzare (da cui iniziare la visualizzazione delle
immagini):
• Durante la visualizzazione, premete uno dei
tasti SKIP (
8,9
). Premete il tasto SKIP
8
per ritornare indietro all'immagine
precedente o il tasto SKIP
9
per avanzare a
quella successiva.
✽
Per ribaltare e girare le immagini:
• Usate i tasti del cursore (ª, •,
0e 1
) per
ribaltare l'immagine.
•
Tasto del cursore
: Viene ribaltata in
verticale l'immagine in
fase di riproduzione.
ª
Tasto del cursore
: Viene ribaltata in
orizzontale l'immagine
in fase di riproduzione.
0
Tasto del cursore
:
L'immagine attualmente
visualizzata viene girata
di 90° in senso antiorario.
1
Tasto del cursore
:
L'immagine attualmente
visualizzata viene girata
di 90° in senso orario.
✽
Riproducete l’immagine nel modo zoom.
• Quando il tasto ZOOM sta riproducendo in
immagine JPEG (“ZOOM ON” appare sul
display in questo caso) zoomate verso e da
utilizzando i tasti di ricerca.
(
6
: zooma da, 7: zooma verso)
• Quando l’immagine è zoomata, utilizzate i tasti
cursori (ª, •,
0e 1
) per muovere l’immagine
zoomata.
• La riproduzione continua (SLIDE SHOW) non è
possibile nel modo zoom.
✽
Il modo per passare all’immagine successiva
durante la riproduzione continua JPEG (SLIDE
SHOW) può essere selezionato.
• Premete il tasto V.S.S. sul telecomando.
• Selezionate da SLIDE SHOW MODE 1 a
MODE 11, RAND e NONE.
Page 98

DEUTSCH FRANÇAIS ITALIANO
108
Besondere Wiedergabemodi für MP3- und
JPEG-Dateien
Wä hlen Sie den Wiedergabemodus mit den
Cursor-Tasten
0 und 1; wä hlen Sie den
besonderen Wiedergabemodus mit den CursorTasten • und ª.
• ORDNER (die MP3- und JPEG-Dateien in dem
Ordner werden von der angewählten Datei aus
der Reihe nach angezeigt)
• ORDNER WIEDERHOLUN (alle MP3- und JPEGDateien in dem Ordner werden von der
angewählten Datei aus wiederholt angezeigt)
• DISC (alle MP3- und JPEG-Dateien auf der Disc
werden von der angewählten Datei aus der
Reihe nach angezeigt)
• DISC-WIEDERHOLUNG (alle MP3- und JPEGDateien auf der Disc werden von der
angewählten Datei aus wiederholt angezeigt)
• ZUFALLSWIEDERGABE (alle MP3- und JPEGDateien in dem Ordner werden von der
angewählten Datei aus in zufälliger Reihenfolge
angezeigt)
• JPEG WIEDERGABE1 (nur die JPEG-Datei
werden von der angewählten JPEG-Datei aus
der Reihe nach angezeigt, währenddessen
werden die MP3-Dateien im Ordner von der
ersten MP3-Datei aus der Reihe nach angezeigt)
• JPEG WIEDERGABE2 (nur die JPEG-Datei
werden von der angewählten MP3-Datei aus der
Reihe nach angezeigt, währenddessen werden
die JPEG-Dateien im Ordner von der ersten
JPEG-Datei aus der Reihe nach angezeigt)
• TRACK-WIEDERHOLUNG (die angewählte MP3oder JPEG-Datei wird wiederholt angezeigt)
HINWEISE:
• Der DVD-3800 ist mit JPEG-Bilddaten kompatibel,
Denon übernimmt jedoch keine Garantie dafür, dass
alle im JPEG-Format gespeicherten Bilddaten
angezeigt werden können.
• Bilder mit Auflösungen von bis zu 2048 x 1536
Pixels können angezeigt werden.
• M öglicherweise können einige CD-Rs/RWs
aufgrund von Disc-Eigenschaften, Schmutz, Kratzer,
usw. nicht abgespielt werden.
• Wenn JPEG-Dateien auf einer CD-R/RW
gespeichert werden, rufen Sie das
Schreibprogramm auf, um die Dateien im “ISO9660
level 1”-Format zu speichern.
• Den JPEG-Dateien unbedingt mit der Erweiterung
“.JPEG” und “.JPG” abspeichern. Dateien mit einer
anderen Erweiterung oder Dateien ohne
Erweiterungen können nicht vom DVD-3800
angezeigt werden.
• Kleben Sie keinerlei Aufkleber, Bänder usw. auf eine
der Etikettierungsseiten oder auf die Signalseite der
CD-R/RW-Discs. Sololte Klebemittel auf die
Oberfläche der Disc geraten, könnte die Disc im
DVD-3800 eingeklemmt werden, was einen
Auswurf unmöglich machen würde.
• Lassen Sie keinerlei CD-R/RW-Discs, die andere
Dateien außer Musik-CD-Dateien (im CDA-Format),
MP3- und JPEG-Datein enthalten, wiedergeben.
Anderenfalls können je nach Datei-Typ
Fehlfunktionen oder Schäden verursacht werden.
• JPEG-Dateien, die unter Verwendung eines
Macintosh-Computers geschrieben worden sind,
können nicht wiedergegeben werden.
Modes de lecture spéciaux pour les fichiers
MP3 et JPEG
Utiliser les touches de déplacement du curseur 0
et 1 pour sélectionner le mode de lecture,
appuyer sur les touches de déplacement du
curseur • et ª pour sélectionner le mode de
lecture spécial.
• FICHIER (les fichiers MP3 et JPEG dans le
dossier sont lus dans l’ordre en commençant
par le fichier sélectionné)
• RÉPÉTITION DE FICH (tous les fichiers MP3 et
JPEG dans le dossier sont lus répétitivement en
commençant par le fichier sélectionné)
• DISQUE (tous les fichiers MP3 et JPEG sur le
disque sont lus dans l’ordre en commençant par
le fichier sélectionné)
• RÉPÉTITION DE DISQ (tous les fichiers MP3 et
JPEG sur le disque sont lus répétitivement en
commençant par le fichier sélectionné)
•
ALÉATOIRE : OUI (tous les fichiers MP3 et JPEG
dans le dossier sont lus dans un ordre aléatoire en
commençant par le fichier sélectionné)
•
LECTURE JPEG1 (les fichiers JPEG seulement
sont lus dans l’ordre en commençant par le fichier
JPEG sélectionné , et pendant ce temps les
fichiers MP3 dans le dossier sont lus dans l’ordre
en commençant par le premier fichier MP3 )
•
LECTURE JPEG2 (les fichiers MP3 seulement
sont lus dans l’ordre en commençant par le fichier
MP3 sélectionné, et pendant ce temps les fichiers
JPEG dans le dossier sont lus dans l’ordre en
commençant par le premier fichier JPEG)
• RÉPÉTITION DE PLAG (le fichier MP3 ou JPEG
sélectionné est lu répétitivement)
REMARQUES:
• Le DVD-3800 est compatible avec des données
d’image mémorisées en format JPEG, mais Denon
ne garantit pas que toutes les données d’image
mé morisées en format JPEG peuvent être
visualisées.
• Des images avec des résolutions jusqu’à 2048 x
1536 pixels peuvent être affichées.
• Il peut être impossible de lire certains CD-R/RW due
aux propriétés du disque, la saleté, les rayures, etc.
• Lors de la mémorisation des fichiers JPEG sur le
CD-R/RW, régler le programme d’écriture pour
mémoriser les fichiers en format “ISO9660”.
• S'assurer d’attriber aux fichiers JPEG l’extension
“.JPG” et “.JPE”. Des fichiers avec d’ autres
extensions ou sans extension ne peuvent pas être
visualisés sur le DVD-3800.
• Ne collez pas d’autocollants, d’adhésif, etc. sur les
disques CD-R/RW; ni sur la face comportant
l’étiquette ni sur la face comportant les signaux. Si
la face d’un disque est recouverte d’adhésif, le
disque risque de rester coincé dans le DVD-3800 et
de ne pas pouvoir etre éjecté.
• Ne pas lire des disques CD-R/RW contenant des
fichiers autres que des fichiers de CD musique (en
format CDA), les fichiers MP3 et JPEG. A défaut
d’une telle précaution, le lecteur risque de mal
fonctionner ou d’être endommagé, selon le type de
fichier.
• Les fichiers JPEG créés sur Macintosh ne peuvent
pas être lus.
Particolari modi di riproduzione per i files MP3
e JPEG
Usate i tasti del cursore
0 e 1 per selezionare il
modo di riproduzione e i tasti del cursore • e ª
per selezionare il modo di riproduzione speciale.
• FOLDER (i files MP3 e JPEG nella cartalla
vengono riprodotti nell'ordine iniziando dal file
selezionato)
• FOLDER REPEAT (tutti i files MP3 e JPEG nella
cartella vengono riprodotti ripetutamente
iniziando dal file selezionato)
• DISC (tutti i files MP3 e JPEG nella cartalla
vengono riprodotti nell'ordine iniziando dal file
selezionato)
• DISC REPEAT (tutti i files MP3 e JPEG nella
cartella vengono riprodotti ripetutamente
iniziando dal file selezionato)
• RANDOM ON (tutti i files MP3 e JPEG nella
cartalla vengono riprodotti in ordine casuale
nell'ordine iniziando dal file selezionato)
• JPEG PLAY1 (i files JPEG vengono riprodotti in
ordine iniziando dal file JPEG selezionato e
durante questa riproduzione i files MP3 nella
cartella vengono riprodotti in ordine iniziando dal
primo file MP3)
• JPEG PLAY2 (i files MP3 vengono riprodotti in
ordine iniziando dal file MP3 selezionato e
durante questa riproduzione i files JPEG nella
cartella vengono riprodotti in ordine iniziando dal
primo file JPEG)
• TRACK REPEAT (i file MP3 o JPEG selezionato
viene riprodotto ripetutamente)
NOTE:
• Il DVD-3800 è compatibile con i dati
dell'immagine memorizzati nel formato JPEG,
ma la Denon non garantisce che tutti i dati
dell'immagine memorizzati nel formato JPEG
possano essere visualizzati.
• Potete riprodure delle immagini con una
risoluzione fino a 2048 x 1536 pixels.
• Può non essere possibile riprodurre alcuni dischi
CD-R/CD-RW per via delle proprietà del disco,
sporcizia o graffi, ecc.
• Quando memorizzate dei files JPEG sul CDR/RW, impostate il programma di scrittura per
memorizzare i files nel formato “ISO9660”.
•
Assicuratevi di dare ai files JPEG l'estensione
“.JPG” e “.JPE”. I file con altre estensioni o senza
estensione non possono essere visualizzati nel
DVD-3800.
•
Non mettete adesivi, nastri adesivi, ecc. sul lato
dell'etichetta o sul lato dei dischi CD-R/RW . Se del
nastro dovesse venire attaccato sulla superficie del
disco, il disco potrebbe bloccarsi nel DVD-3800 e
risultare impossibile da emettere .
• Non riproducete dischi CD-R/RW contenenti file
che non siano musicali CD (nel formato CDA),
MP3 e JPEG file. Altrimenti si possono verificare
malfunzionamenti o danni, a seconda del tipo del
file.
• I file JPEG scritti usando i computer Macintosh
non possono essere riprodotti.
Page 99

DEUTSCH FRANÇAIS ITALIANO
109
1
2
Drücken Sie während der Wiedergabe die
AUDIO-Taste.
• Die Nummer der derzeit eingestellten
Audio-Sprache wird angezeigt.
Wählen Sie die gewünschte Sprache mit den
• und ª Cursor-Tasten aus.
• Bei Betätigung der AUDIO-Taste schaltet
sich das Display aus.
AUDIO 1/3 :DOLBY D 3/ 2.1 ENGLISH
AUDIO
AUDIO 2/3 :DOLBY D3 /2.1 FRENCH
HINWEISE:
•
Bei einigen Discs ist es nicht möglich, die AudioSprache während der Wiedergabe zu ändern.
Wählen Sie in solchen Fällen aus dem DVDMenü aus. (Siehen Seite 113.)
•
Wenn die gewünschte Sprache nach
mehrmaliger Betätigung der • und ª CursorTasten nicht eingestellt wird, enthält die Disc die
ausgewählte Sprache nicht.
•
Die bei der Systemeinrichtung ausgewählte
Sprache (Siehe Seite 62) wird beim Einschalten
des Gerätes oder nach dem Austauschen einer
Disc eingestellt.
4 5 6
ENTER
ON
OFF
REMOTE CONTROL UNIT RC-553
TOP MENU
DISPLAY
MARKERRANDOM
PAGE
A-B
ZOOM
DIMMER
REPEAT
SETUP
NTSC / PALOPEN / CLOSE
CALL RETURN
SKIP
SLOW / SEARCH
POWER
ANGLE SUBTITLE AUDIOSEARCH MODE
PLAY
STILL /
PAUSE
STOP
PIC.ADJ
1
7
0
2
8
+10
3
9
PROG / DIR
V.S.S.
CLEAR
P.D.MEMORY
MENU
1
2
2
1
2
Fernbedienung
Télécommande
Telecomando
Fernbedienung
Télécommande
Telecomando
18
ANWENDUNG DER MULTIPLEN AUDIO-, UNTERTITELUND WINKEL-FUNKTIONE
2 Bei der Benutzung von DVDs, die multiple Audio-Sprachsignale enthalten, kann die Audio-Sprache während
der Wiedergabe geändert werden.
Umschalten der Audio-Sprache (Multiple Audio-Funktion)
18
UTILISATION DES
FONCTIONS MULTIAUDIO, SOUS-TITRE ET
ANGLE DE VUE
2 Avec les DVD contenant des signaux de langue
multi-audio, la langue peut être changée en cours
de lecture.
Changement de langue – Fonction
multi-audio (Multiple Audio Function)
1
2
En cours de lecture, appuyer sur la touche
de autio (AUDIO).
• Le numéro de la langue en cours est
affiché.
Utiliser les touches curseurs • et ª pour
sélectionner la langue souhaitée.
• L’affichage s’éteint lorsque la touche de
audio (AUDIO) est enfoncée.
AUDIO 1/3 :DOLBY D 3/ 2.1 ENGLISH
AUDIO 2/3 :DOLBY D3 /2.1 FRENCH
REMARQUES:
• Pour certains disques il n’est pas possible de
changer la langue audio en cours de lecture.
Dans ces cas, sélectionnez à partir du menu
DVD. (Voir en page 113.)
• Si la langue souhaitée n’est pas activée après
avoir appuyé plusieurs fois sur les touches
curseurs • et ª, cette langue ne figure pas sur
le disque.
• La langue sélectionnée lors du paramétrage,
(voir page 62) est celle utilisée lors de la mise
sous tension ou lors d’un changement de
disque.
18
UTILIZZO DELLE
FUNZIONI AUDIO
MULTIPLA, SOTTOTITOLI
ED ANGOLO
2 Se il DVD contiene dei segnali di lingue audio
multipli, potete commutare la lingua audio durante
la riproduzione.
Commutazione della lingua audio
(Funzione audio multipla)
1
2
Premete il tasto AUDIO durante la
riproduzione.
• Appare sul display l'attuale numero della
lingua audio.
Usate i tasti del cursore • e ª per
selezionare la lingua desiderata.
• Il display si spegne quando premete il
tasto AUDIO.
AUDIO 1/3 :DOLBY D 3/ 2.1 ENGLISH
AUDIO 2/3 :DOLBY D3 /2.1 FRENCH
NOTE:
•
Con alcuni dischi non è possibile cambiare il
linguaggio audio durante la riproduzione. In
questo caso, selezionatelo dal menu DVD. (Fate
riferimento alla pagina 113.)
•
Se la lingua desiderata non viene impostata
dopo aver premuto i tasti del cursore • e ª
alcune volte, il disco non include quella lingua.
•
La lingua selezionata nel menù delle
impostazioni (Vedi pagina 62) viene impostata
quando si accende la corrente e si sostituisce il
disco.
Page 100

DEUTSCH FRANÇAIS ITALIANO
110
2 Bei der Benutzung von DVDs, die multiple Untertitel-Sprachsignale enthalten, kann die Untertitel-Sprache
während der Wiedergabe umgeschaltet werden.
Umschalten der Untertitel-Sprache (Multiple Untertitel-Funktion)
1
2
Drücken Sie während der Wiedergabe die
SUBTITLE-Taste.
• Die Nummer der derzeit eingestellten
Untertitel-Sprache wird angezeigt.
Wählen Sie die gewünschte Sprache mit den
• und ª Cursor-Tasten aus.
• Nach Betätigung der SUBTITLE-Taste
schaltet sich das Display aus.
SUBTITLE
HINWEISE:
•
Wenn die gewünschte Sprache nach
mehrmaliger Betätigung der
• und ª
CursorTasten nicht eingestellt wird, enthält die Disc die
ausgewählte Sprache nicht.
•
Die bei der Systemeinrichtung ausgewählte
Sprache (Siehe Seite 63) wird beim Einschalten
des Gerätes oder nach dem Austauschen einer
Disc eingestellt. Wenn diese Sprache nicht auf
der Disc enthalten ist, wird die Standardsprache
der Disc eingestellt.
•
Nach dem Ändern der Untertitel-Sprache dauert
es einige Sekunden, bis die neue Sprache
erscheint.
• Bei der Wiedergabe einer Disc, die das
geschlossene Einfangen unterstützt,
überschneiden sich mö glicherweise der
Untertitel und das eingefangene Bild auf dem
Fernsehschirm. Schalten Sie die UntertitelFunktion in einem derartigen Fall aus.
4 5 6
ENTER
ON
OFF
REMOTE CONTROL UNIT RC-553
TOP MENU
DISPLAY
MARKERRANDOM
PAGE
A-B
ZOOM
DIMMER
REPEAT
SETUP
NTSC / PALOPEN / CLOSE
CALL RETURN
SKIP
SLOW / SEARCH
POWER
ANGLE SUBTITLE AUDIOSEARCH MODE
PLAY
STILL /
PAUSE
STOP
PIC.ADJ
1
7
0
2
8
+10
3
9
PROG / DIR
V.S.S.
CLEAR
P.D.MEMORY
MENU
2
2
1
UNTERTITEL 01/ 03 : ENGLISCH
UNTERTITEL 01/ 03 : DEUTSCH
1
2
Fernbedienung
Télécommande
Telecomando
Fernbedienung
Télécommande
Telecomando
2 Avec les DVD contenant des signaux de langue
multi sous-titres, la langue des sous-titres peut être
modifiée en cours de lecture.
Changement de la langue des soustitres – Fonction multi sous-titre
(Multiple Subtitle Function)
1
2
En cours de lecture, appuyer sur la touche
sous-titre (SUBTITLE).
• Le numéro de la langue en cours est
affiché.
Utiliser les touches curseurs • et ª pour
sélectionner la langue souhaitée.
• L’affichage s’éteint lorsque la touche soustitre (SUBTITLE) est enfoncée.
REMARQUES:
•
Si la langue souhaitée n’est pas activée après
avoir appuyé plusieurs fois sur les touches
curseurs • et ª, cette langue ne figure pas sur
le disque.
•
Le groupe de langues de sous-titres avec les
réglages par défaut (voir page 63) est activé lors
de la mise sous tension et lorsque le disque est
remplacé. Si cette langue ne figure pas sur le
disque, la langue par défaut du disque est
activée.
•
Lorsque la langue de sous-titres est modifiée,
quelques secondes sont nécessaires pour
l’activation de la nouvelle langue.
•
Lorsqu’un disque incorpore l’affichage de bulles,
ces dernières et le sous-titrage peuvent se
superposer à l’écran TV; dans ce cas, désactiver
le sous-titrage.
SOUS-TITRES 01/ 03 : ENGLISH
SOUS-TITRES 02 /03 : FRENCH
2 Con i DVD che contengono segnali di sottotitoli in
più lingue, la lingua dei sottotitoli può essere
commutata durante la riproduzione.
Commutazione della lingua dei
sottotitoli
(Funzione di Sottotitoli Multipli)
1
2
Premete il tasto SUBTITLE durante la
riproduzione.
• Appare sul display il numero dell'attuale
lingua dei sottotitoli.
Usate i tasti del cursore • e ª per
selezionare la lingua desiderata.
• Il display si spegne alla pressione del tasto
SUBTITLE.
NOTE:
• Se la lingua desiderata non è stata impostata
dopo aver premuto i tasti del cursore • e ª
alcune volte, il disco non includerà quella lingua.
• La lingua dei sottotitoli impostata con le
impostazioni default (vedi pagina 63) viene
impostata quando si accende la corrente o si
sostituisce il disco. Se quella lingua non è stata
inclusa sul disco, viene impostata la lingua
default del disco.
• Quando si cambia la lingua dei sottotitoli, ci
vogliono alcuni secondi prima che la nuova
lingua appare sul display.
• Quando un disco che supporta una legenda
viene riprodotto, i sottotitoli e la legenda
potrebbero sovrapporsi sullo schermo televisivo.
In questo caso, spegnete i sottotitoli.
SUBTITLE 01/ 03 : ENGLISH
SUBTITLE 02 /03 : FRENCH
 Loading...