

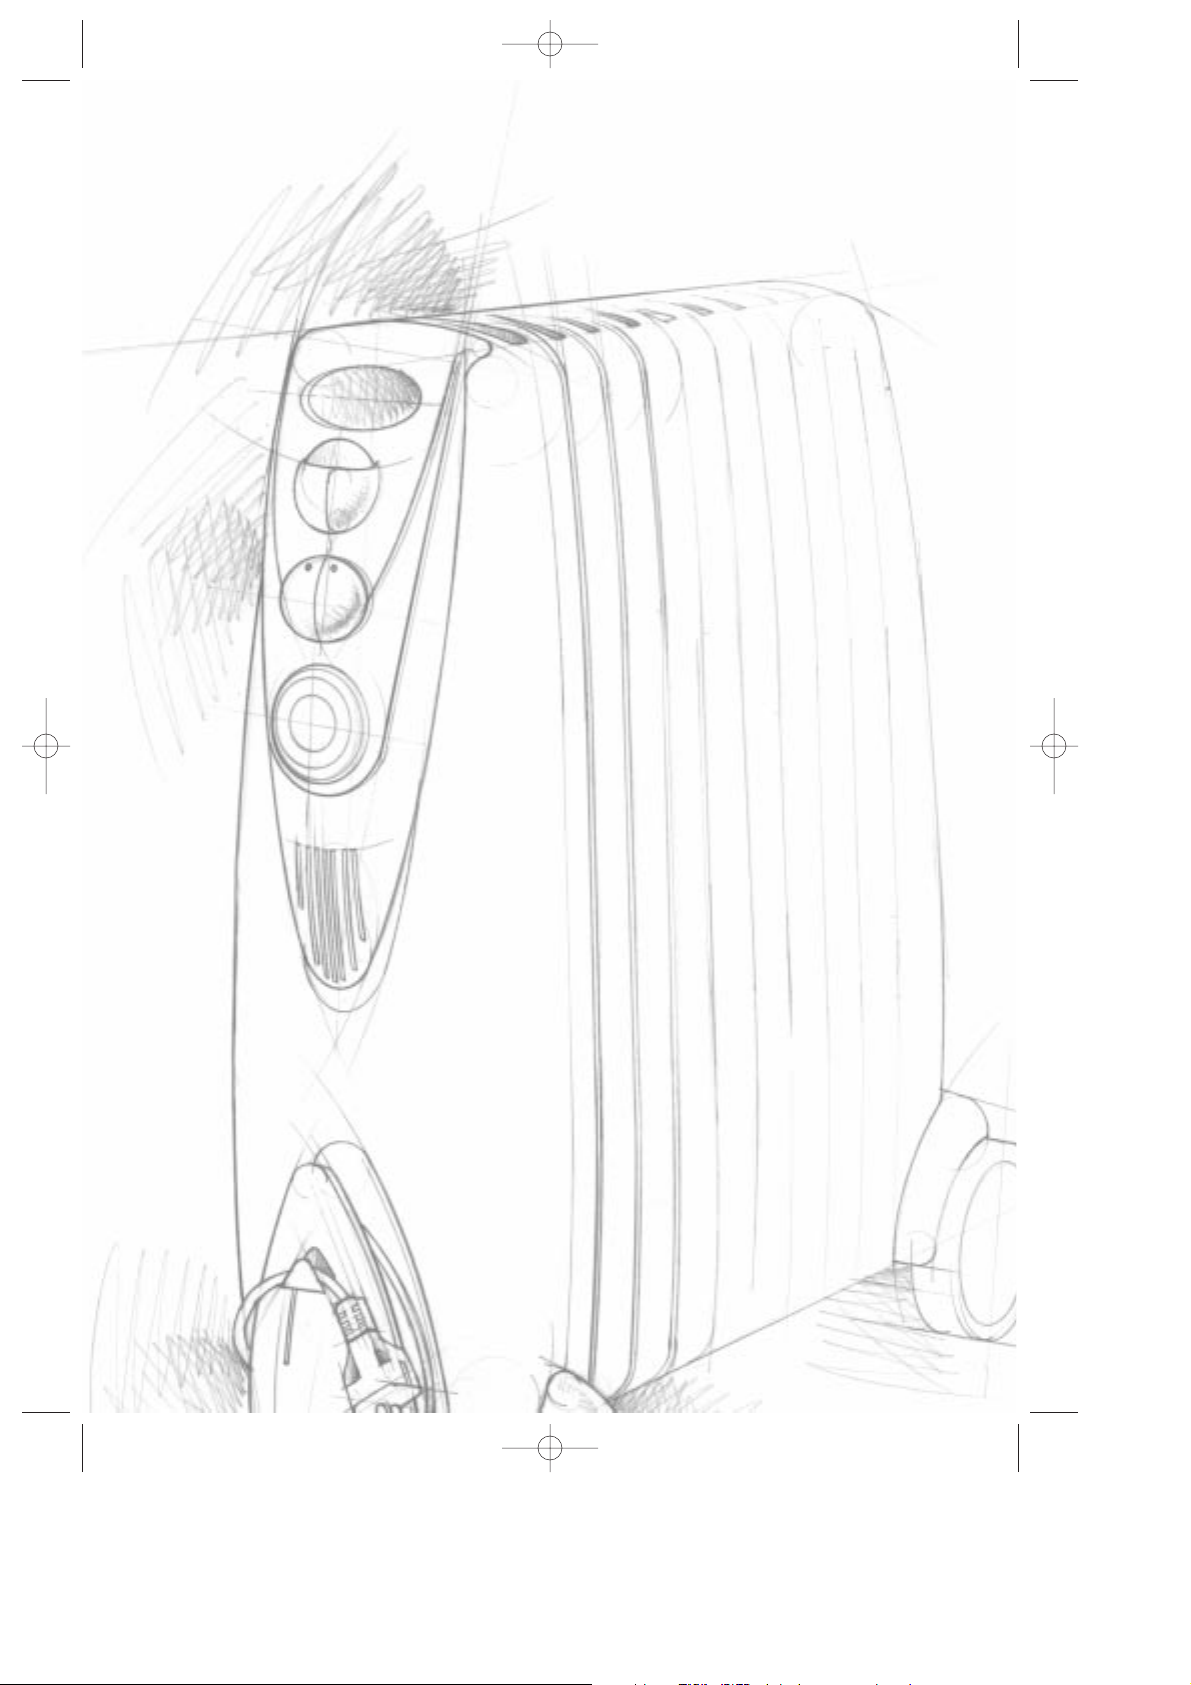
OIL FILLED RADIATOR
RADIATEUR A BAIN D'HUILE
RADIADOR DE ACEITE
RADIADOR ELÉCTRICO A ÓLEO
Instruction for use
Mode d’emploi
Instrucciones para el uso
Instruções para o uso
HRG5786000800 30-01-2001 09:24 Pagina 1
IMPORTANT SAFEGUARDS
When using electrical appliances, basic precautions should always be followed to reduce risk of fire, electric
shock, and injury to persons, including the following:
1. Read all instructions before using this heater.
2. Never for any reason cover the appliance during operation as this could lead to dangerous overheating.
3. This heater is hot when in use. To avoid burns, do not let bare skin touch hot surfaces. Use handle when
moving this heater. Keep combustible materials, such as furniture, pillows, bedding, papers, clothes, and
curtains at least 3 feet (0,9 m) from the front and top of the heater and keep them away from the sides
and rear.
4. Extreme caution is necessary when any heater is used by or near children or invalids and whenever the
heater is left operating and unattended.
5. Always unplug heater when not in use.
6.
Do not operate any heater with a damaged cord or plug or after the heater malfunctions, has been dropped or
damaged in any manner. If heater has leaked any oil, discontinue using the heater and contact the service center
as indicated in this instructions leaflet. Return heater to authorized service facility for examination, electrical or
mechanical adjustment, or repair.
7. Do not use outdoors.
8. This heater is not intended for use in bathrooms, laundry areas and similar indoor locations. Never locate heater where it may fall into a bathtub or other water container.
9.
Do not run cord under carpeting. Do not cover cord with throw rugs, runners, or the like. Arrange cord
away from traffic area and where it will not be tripped over.
10.To disconnect heater, turn controls to off, then remove plug from outlet.
11.Connect to properly polarized outlets only.
12.Do not insert or allow foreign objects to enter any ventilation or exhaust opening as this may cause an
electric shock, fire, or damage the heater.
13.To prevent a possible fire, do not block air intakes or exhaust in any manner. Do not use on soft surfaces, like a bed, where openings may become blocked.
14.
A heater has hot or arcing or sparking parts inside. Do not use it in areas where gasoline, paint, or
flammable liquids are used or stored.
15.Use this heater only as described in this manual. Any other use not recommended by the manufacturer
may cause fire, electric shock, or injury to persons.
16.To prevent overload and blown fuses, be sure that no other appliance is plugged into the same outlet
(receptacle) or into anolher outlet (receptacle) wired into the same circuit.
17. It is normal for the heater’s plug and cord to feel warm to the touch. A plug or cord which becomes hot to the
touch or becomes distorted in shape may be a result of a worn electrical outlet. Worn outlets or receptacles
should be replaced prior to further use of the heater. Plugging heater into a worn outlet /receptacle/ may result
in overheating of the power cord or fire.
18.
Do not use an extension cord because it may overheat and cause a risk of fire. However, if you have to use an extension cord, the cord shall be properly grounded No. 1 4 AWG minimum size and rated not less than 1875 watts, and
has to be used only for supplying power to this heater.
19. Be sure that the plug is fully inserted into an appropriate receptacle in order to prevent any danger of overheating or
arcing. Please remember that receptacles also deteriorate due to aging and continuous use: check periodically if signs
of overheating or deformations are evidenced by the plug. Do not use the receptacle and CALL your electrician.
20.Check that neither the appliance nor the power cable have been damaged in any way during transportation.
21.Make sure that no pieces of polystyrene or other packaging material have been left between one element
of the appliance and another. It may be necessary to pass over the appliance with a vacuum cleaner.
22.When switching on the appliance for the first time, allow it to run at full power for about two hours to
get rid of the unpleasant smell. Make sure that the room in which the appliance is located is well ventilated during this operation. It is normal for the appliance to emit small cracking sounds when you turn
it on for the first time.
SAVE THESE INSTRUCTIONS
2
HRG5786000800 30-01-2001 09:24 Pagina 2

fig. 1
1
2
3
4
5
6
7
8
9
10
11
12
13
14
15
16
17
18
19
20
21
22
23
24
fig. 3
P
I
II
T
fig. 2b
fig. 2a
ASSEMBLY OF THE BASE (bottom view)
CONTROL PANEL
HRG5786000800 30-01-2001 09:24 Pagina 3
The Rapido heater is an extremely versatile oil filled radiator with three selectable power levels.
The Rapido ensures that the optimum comfort level is achieved in any given situation.
In order to use this heater to its maximum potential we suggest to carefully read the instructions that follow.
1. GENERAL INSTRUCTIONS
Remove the appliance from its box and packaging and turn it over resting it on the protective polystyrene
packaging. Check that the appliance is intact, complete with the power cable and that it hasn't suffered
damage during transportation. Do not use the appliance if it is damaged.
2. ASSEMBLY OF THE BASE
Remove the castors, wheels and assemblies from the polystyrene packaging
Insert the castors into the pins of the plastic castors holder and push them all the way in until a click can be
heard (fig1) Make sure that they are in tightly by pulling the wheels gently.
Attach the castor assembly into the base of the unit by inserting the guiding ridges between the control panel
and the first heating element; insert the two location lugs into their housings and lock the castor assembly to
the product by inserting the eye screws, screwing them in tightly. (fig1)
Fit the two rear wheels onto the rear wheel metal bar. Allocate the metal bar with mounted wheels into the
grooves (2a). The slots of the internal part of the wheels must fit into the appropriate housing (2b).
Check that the wheels can turn freely.
Finally turn the heater over to its upright position, ensuring you do not damage the wheels.
3. LOCATION
Place heater on floor beneath coldest window in the room or any desired location. Your heater will minimize the effect of cold drafts.
The heater must not be located immediately below a socket-outlet.
Do not use this radiator in rooms having a surface area less than 42 sq. ft (4m
2
).
4. CONNECTION
The radiator must be connected to a properly polarized A/C 110/120 V household outlet in perfect working
conditions.
Keep loose clothing or bedding, furniture and flammable material away from the wall outlet where the heater plug is fitted in.
5. USING THE FUNCTIONS
In order to use all the functions of this heater to their maximum potential follow carefully the instructions below
and those shown in the table on page 5.
4
HRG5786000800 30-01-2001 09:24 Pagina 4
POWER MODULATION FUNCTION
By turning on switches l and ll, the power regulation function is activated.
With this function, your heater will be able to select the power level most comfortable to suit your needs (see
chart below).
Turning the appliance on
Insert the plug into the electrical socket; turn the thermostat until it stops at the maximum position (6); turn on
the heater using one or a combination of switches as indicated in the table.
Regulation of the thermostat (Fig. 3-P)
When the room has reached the desired temperature, turn the thermostat slowly in an anticlockwise direction until it arrives at the position where a click can be heard and not beyond this point.
The temperature selected in this way will be automatically regulated and maintained.
Anti-frost Function
With the thermostat in the *position and the l and /or ll switches pressed down the room temperature is
maintained and does not fall below 41°F (5°C), whilst using minimum energy.
REMINDER
To completely shut unit off, ON/OFF switches must be placed in OFF position.
Your product is equipped with a polarized alternating current line plug (a plug having one blade wider than the other).
This plug will fit into the power outlet only one way. This is a safety feature. If you are unable to insert the plug fully
into the outlet, try reversing the plug. If the plug should still fail to fit, contact your electrician to replace your obsolete
outlet. Do not defeat the safety purpose of the polarized plug.
5
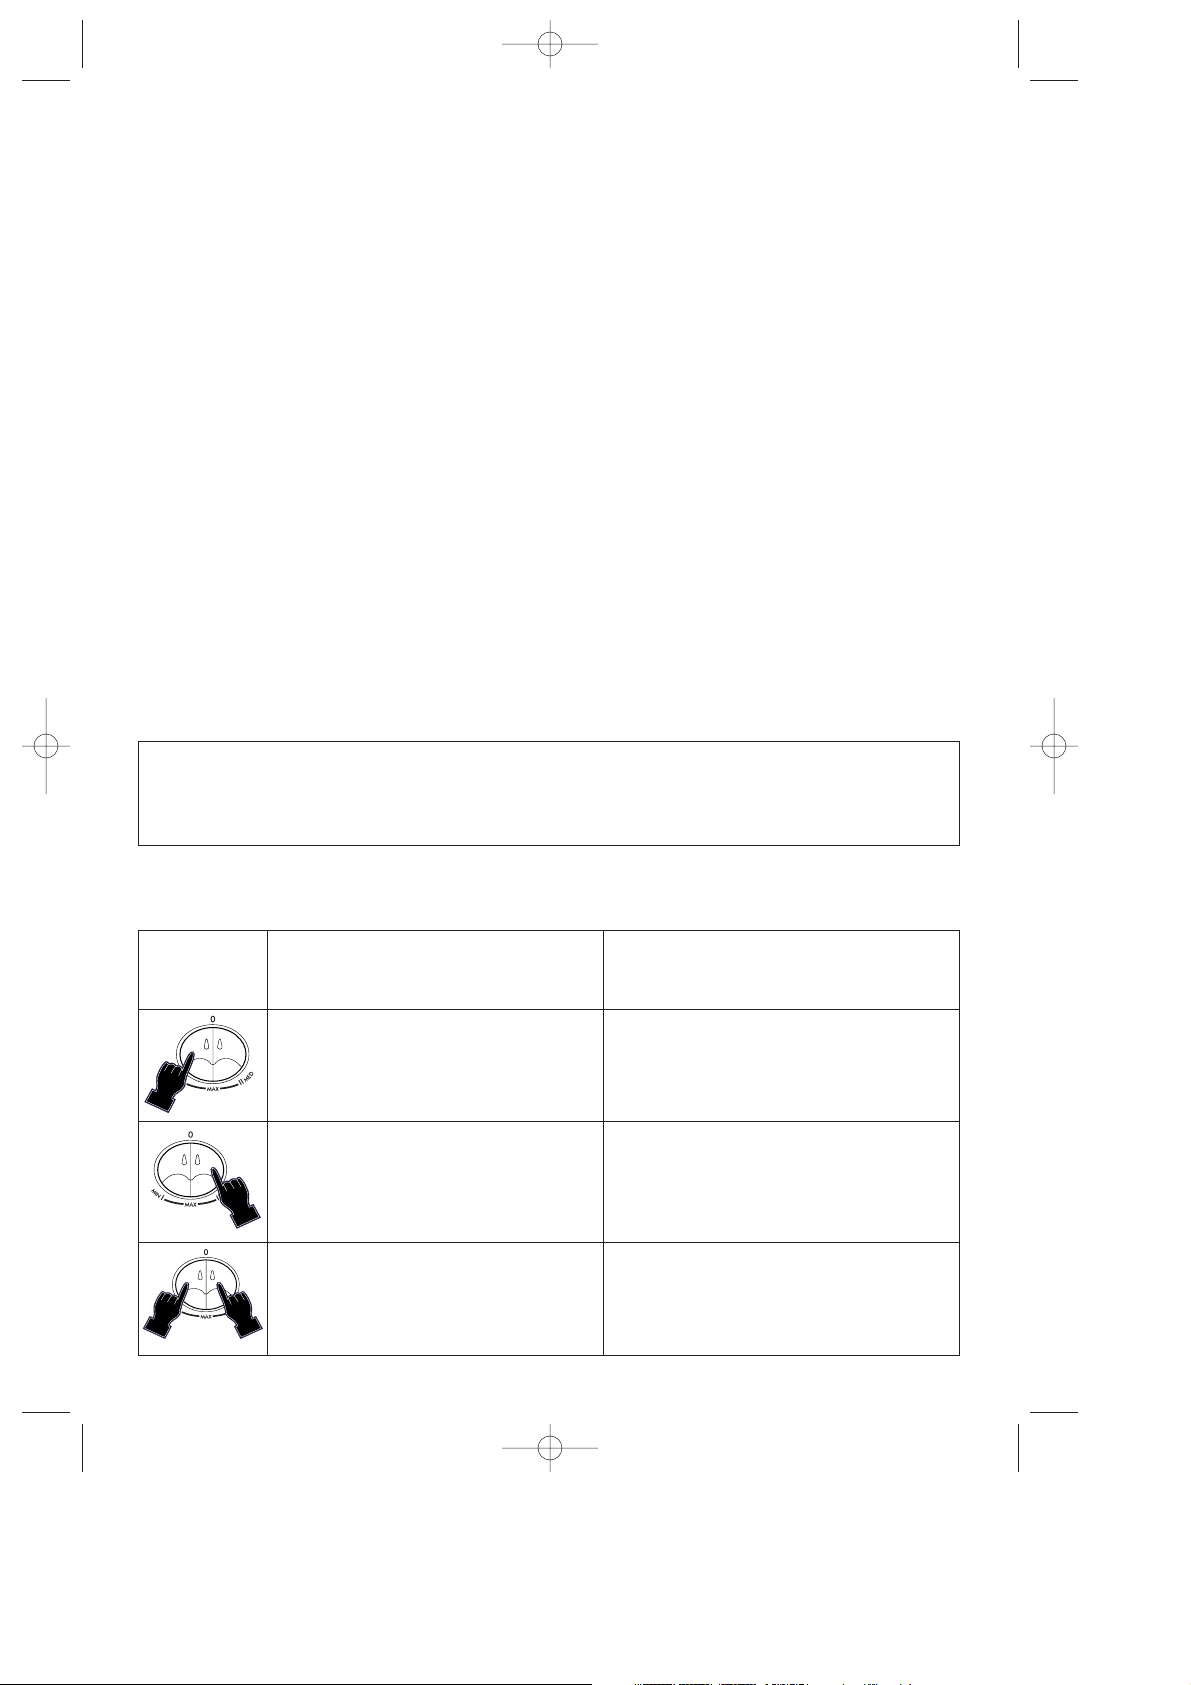
Selected
Buttons Functions Additional functions
Press the I button for normal heating In this mode, it is possible to activate
at minimum power the Anti-Frost function. (see page 4
Anti-Frost function)
Press the
II button for normal heating In this mode, it is possible to activate
at medium power the Anti-Frost function. (see page 4
Anti-Frost function)
Press both the
I and II buttons for normal In this mode, it is possible to activate
heating at the maximum power available the Anti-Frost function. (see page 4
without the instant heat system Anti-Frost function)
HRG5786000800 30-01-2001 09:24 Pagina 5
6
6. UNITS WITH TIMER
Clock setting
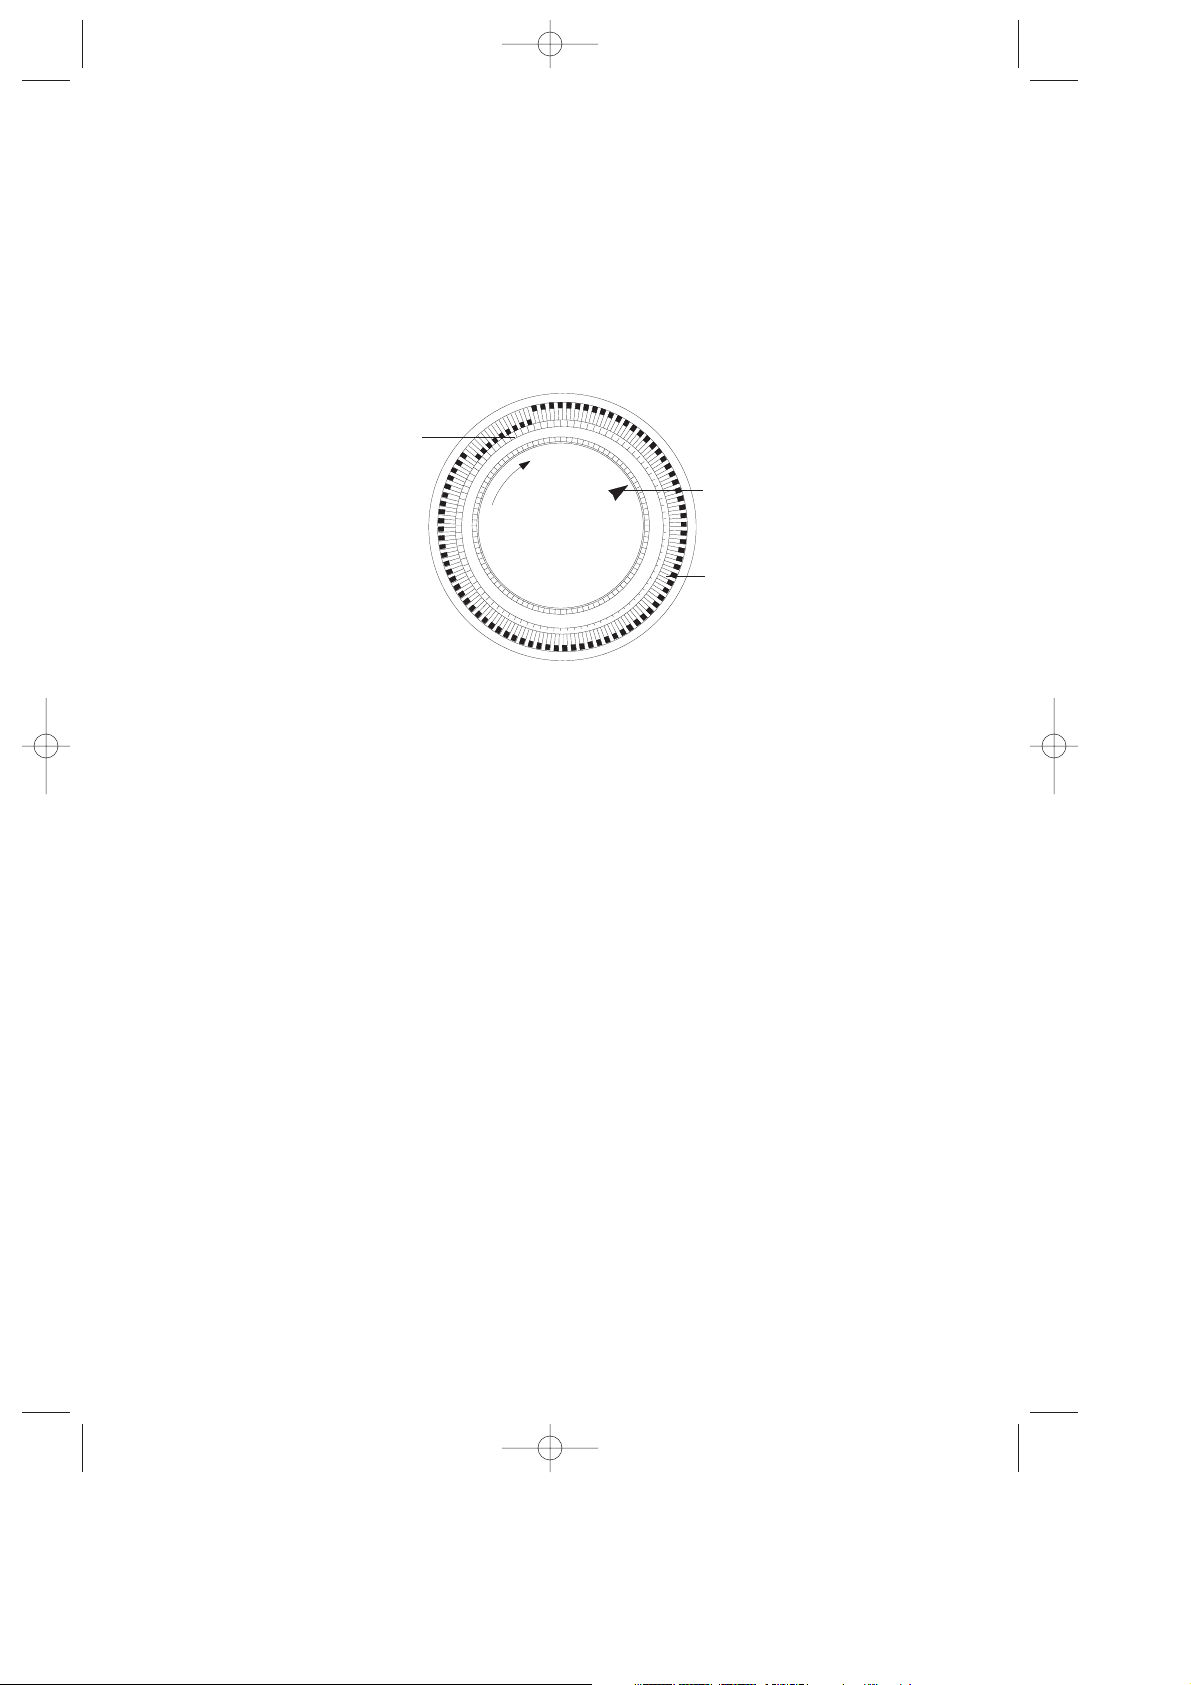
The programme/timer, as in all clocks, must be set to the correct time. If for example the time is 9.30 a.m.
(day zone), rotate the dial clockwise (following the direction of the arrow) until 9.30 is aligned with the triangular pointer.
IMPORTANT:
DO NOT ROTATE CLOCK DIAL COUNTER CLOCKWISE.
The timer is in effect an electric clock and only works while plug is connected to the power supply.
Whenever the plug is disconnected, the timer stops and must be re-set.
HOW TO USE THE TIMER
Please refer to the illustration below:
IMPORTANT: There are 96 tabs around the dial. Each tab represents a 1/4 hour
(15 minutes) and there is a tab for every quarter hour of the 24 hour day. Your appliance can be programmed to switch itself ON and OFF at the time you want. With the timer you can approximate your setting to
within 15 minutes and program up to 48 cycles (1 cycle = 1 “ON” + 1 “OFF”) over a period of 24 hours
(12 hours a.m.+12 hours p.m.).
The tabs can be pushed inwards or pulled outwards by merely using your fingers. When the tab is in the
inward position (towards the center of the dial), the heater
will operate during that 15 minute period. If the
tab is in the outward position, the heater
will not operate during this period.
Please note when you first use your heater, all the tabs are outwards. You must push in those tabs for the
period that you want the heater to work. (If you want to bypass the timer you must push all 96 tabs inward).
Timer operation
a). Plug in the heater.
b). Turn timer dial clockwise to set clock with the current time of day (see CLOCK SETTING).
c). Push tabs inwards for the period you want the heater to operate. For example, the illustration shows that
appliance will operate from 2 a.m. to 4.30 a.m.
d). Push switch(-es) in.
e). Once you have set the tabs for the desired heating periods, your heater will cycle on and off according
to these settings.
f ). As long as you keep the heater plugged in, the timer will continue to keep proper time.
6. MAINTENANCE AND SERVICE
Always remove the plug from the power socket and allow the radiator to cool. Wipe radiator with a soft
damp cloth, do not use detergents and abrasives.
Should the radiator not be in use over a certain length of time, wind the cable round the holder and store it
in a dry place (see fig. in front page).
This appliance has been built to give many years of trouble free service.
In case of malfunction or doubt, do not try to repair the heater by yourself: it may result in fire hazard or
electric shock.
Call nearest Service Center (see attached list of Service Centers).
1
2
3
4
5
6
7
8
9
10
11
12
13
14
15
16
17
18
19
20
21
22
23
24
Set like this it is 9p.m.
Single tab
Appliance is working
from 2 to 4.30 a.m.
HRG5786000800 30-01-2001 09:24 Pagina 6
7
PROTECT YOUR INVESTMENT WITH DELONGHI’S EXTENDED SERVICE PLAN
For your convenience and protection an optional Extended Service Plan is available!
At a small cost you may be sure that if your small appliance needs repari, it will be repaired at no
cost for parts and labor, for a period of two years beyond the manufacturer’s limited warranty.
If you choose to enroll, please detach and fill out this form and mail with payment (check or money
order only) in this envelope. Your extended service plan certificate will be sent to you by return
mail.
PLEASE PRINT
Name:
____________________________________________________________________________
Address: __________________________________________________________________________
City: __________________________________State:___________________Zip: _______________
TWO YEARS EXTENDED SERVICE PLAN
Food processor . . . . . . . . . . . . . . . . . . . . . . . . . . . . . . . . . . . . . . . . . . . . . . . . . $ 15.00
Toasters . . . . . . . . . . . . . . . . . . . . . . . . . . . . . . . . . . . . . . . . . . . . . . . . . . . . . . $ 10.00
Espresso . . . . . . . . . . . . . . . . . . . . . . . . . . . . . . . . . . . . . . . . . . . . . . . . . . . . . . $ 16.00
Toaster ovens . . . . . . . . . . . . . . . . . . . . . . . . . . . . . . . . . . . . . . . . . . . . . . . . . . $ 12.00
Deep fryers & barbecues & contact-grills . . . . . . . . . . . . . . . . . . . . . . . . . . . . . . . $ 12.00
Heaters . . . . . . . . . . . . . . . . . . . . . . . . . . . . . . . . . . . . . . . . . . . . . . . . . . . . . . $ 10.00
NJ - CA - NY - WA residents please add sales tax __________
(check for money order for this amount total: __________
Date of purchase: ______________________Model: ______________________________________
Small appliance serial no. ____________________________________________________________
Signature: _________________________________________________________________________
MAIL TO:
DeLonghi America, Inc.
P
ARK 80 WEST, PLAZA ONE
SADDLE BROOK
, NJ 07663
A
TTN. CONSUMER SERVICE DEPT.
✂
HRG5786000800 30-01-2001 09:24 Pagina 7
✂
HRG5786000800 30-01-2001 09:24 Pagina 8

9
LIMITED WARRANTY
What DoesThis Warranty Cover? We warrant each appliance to be free from defects in material and workmanship. Our obligation under
this warranty is limited to replacement or repair, free of charge at our factory or authorized service centers, of any defective part or parts
thereof other than parts damaged in transit, which shall be returned to us, transportation prepaid. This warranty shall apply only if the
appliance is used in accordance with the factory directions which accompany it, and on an Alternating Current (AC) circuit.
How Long Does The Coverage Last? This warranty runs for one year from the date of delivery and applies only to the original purchaser for use.
What Does This Warranty Not Cover? This warranty does not cover defects or damage of the appliance which result from repairs
or alterations to the appliance outside our factory or authorized service centers, nor shall it apply to any appliance which has been
subject to abuse, misuse, negligence or accidents. Also, consequential and incidental damages resulting from the use of this product
or arising out of any breach of contract or breach of this warranty are not recoverable under this warranty. Some states do not allow
the exclusion or limitation of incidental or consequential damages, so the above limitation may not apply to you.
How Do You Get Service? If repairs become necessary or spare parts are needed, please write to:
De’ Longhi America Inc.
Park 80 West Plaza One
4th floor
Saddle Brook, NJ 07663
or call Service Tel. No. 1-800-322-3848
or visit our internet site www.delonghi.com
The above warranty is in lieu of all other express warranties and representations. All implied warranties are limited to the applicable warranty period set forth above. This limitation does apply if you enter into an extended warranty with De’ Longhi. Some states
do not allow limitations on how long an implied warranty lasts, so the above exclusions may not apply to you. De’ Longhi does not
authorize any other person or company to assume for it any liability in connection with the sale or use of its appliance.
How Does State Law Apply? This warranty gives you specific legal rights, and you may also have other rights which vary from state
to state.
HRG5786000800 30-01-2001 09:24 Pagina 9

10
PRÉCAUTIONS IMPORTANTES
Quand on utilise des appareils électriques, il faut prendre certaines précautions pour éviter tout risque d'incendie, de décharges électriques ou de blessures.
1. Lire les instructions dans leur totalité avant d'utiliser le radiateur.
2.
Ne jamais couvrir l'appareil pendant qu'il fonctionne car cela pourrait entraîner une surchauffe de
l'appareil.
3. Ce radiateur est très chaud quand il fonctionne. Afin d'éviter les brûlures, éviter de toucher les parties
chaudes. Se servir de la poignée pour déplacer le radiateur. Ne pas laisser d'objets et matériaux inflammables, tels que meubles, coussins, literies, papiers, vêtements et rideaux devant ou sur le radiateur (pas
à moins de 1m). Les côtés et l'arrière de l'appareil doivent rester libres.
4. Faire très attention quand le radiateur est utilisé par ou près d'enfants ou d'handicapés, et chaque fois
que le radiateur fonctionne sans surveillance.
5. Débrancher toujours le radiateur quand il n'est pas utilisé.
6.
Ne pas utiliser le radiateur si le cordon d'alimentation ou la prise sont abîmés, s'il fonctionne mal, si on
l'a fait tomber ou s'il est endommagé. Si le radiateur perd de l'huile, ne pas l'utiliser et contacter un centre S.A.V. Renvoyer le radiateur au centre S.A.V. pour les contrôles, réglages et réparations nécessaires.
7. Ne pas utiliser à l'extérieur.
8. Ce radiateur ne doit pas être utilisé dans les salles de bains et buanderies. Ne jamais placer le radia-
teur près d'une baignoire ou tout autre récipient plein d'eau dans lequel il pourrait tomber.
9. Ne pas faire passer le cordon d'alimentation sous la moquette. Ne pas le couvrir avec des tapis, descentes de
lit, chemins de couloir ou autres. Faire en sorte qu'on ne puisse pas piétiner ou trébucher sur le cordon.
10. Pour éteindre le radiateur, ramener le bouton sur off et débrancher la fiche de la prise de courant.
11. Brancher uniquement sur une prise avec terre.
12. Ne pas introduire ou éviter que des corps étrangers puissent pénétrer dans les fentes d'aération car cela
pourrait provoquer une décharge électrique, un feu ou endommager le radiateur.
13. Ne pas boucher les fentes d'aération, l'appareil pourrait prendre feu. Ne pas utiliser sur une surface
molle, un lit par exemple, qui pourrait boucher les ouïes.
14.
Un radiateur contient des pièces incandescentes, à arc électrique ou à étincelle. Ne pas utiliser dans
des endroits où sont stockés ou utilisés de l'essence, des peintures ou des liquides inflammables.
15. Respecter le mode d'emploi de l'appareil. Toute utilisation anormale pourrait provoquer un feu, une
décharge électrique ou causer des blessures.
16. Pour éviter les surcharges ne pas brancher d'autres appareils sur la même prise ou sur une autre prise
installée sur le même circuit.
17. Il est normal que la fiche et le cordon du radiateur semblent chauds au toucher. Si la fiche ou le cordon
deviennent trop chauds ou se déforment c'est peut-être dû à une prise en mauvais état. Remplacer les
prises en mauvais état. Une prise de courant en mauvais état peut provoquer un échauffement excessif
du cordon d'alimentation et entraîner un risque d'incendie.
18.
Ne pas utiliser de prolongateur car cela peut provoquer un échauffement du cordon et causer un
risque d'incendie. Toutefois, si nécessaire, utiliser un prolongateur avec prise de terre incorporée,
d'une dimension de No. 14 AWG minimum et d'une puissance de 1875 watts, qui ne doit être utilisé que pour alimenter le radiateur.
19. Vérifier que la fiche est bien insérée dans la prise de courant afin d'éviter tout risque de surchauffe ou
d'arc. Ne pas oublier que les prises se détériorent à la longue: contrôler périodiquement si la fiche présente des signes de surchauffe ou si elle est déformée. Ne pas utiliser la prise et faire venir un électricien.
20. Contrôler que ni l'appareil ni le câble n'ont été endommagés pendant le transport.
21. Vérifier qu'il n'y a aucun morceau de polystyrène ou autre matériau d'emballage coincé entre les élé-
ments de l'appareil. Si nécessaire, passer l'aspirateur sur l'appareil.
22.
Quand on allume l'appareil pour la première fois, le faire fonctionner à la puissance maximum pen-
dant environ deux heures afin d'éliminer les mauvaises odeurs. Aérer la pièce pendant cette opération. Il est normal que l'appareil "craque" légèrement quand on l'allume pour la première fois.
CONSERVER CES INSTRUCTIONS
HRG5786000800 30-01-2001 09:24 Pagina 10

11
Le radiateur Rapido est un appareil de chauffage extrêmement polyvalent grâce à ses trois niveaux de
puissances. Le Rapido assure un confort optimal. Nous vous conseillons de lire attentivement cette notice
pour utiliser au mieux votre radiateur.
1. INSTRUCTIONS GÉNÉRALES
Sortez l'appareil de sa boîte et de son emballage, retournez-le et posez-le sur le polystyrène. Assurez-vous
que l'appareil est intact, complet, avec son cordon d'alimentation, et qu'il n'a pas subi de dommages pendant le transport. Ne pas utiliser l'appareil s'il est endommagé.
2. MONTAGE DE LA BASE
Sortez les roulettes pivotantes, les roues et la visserie de l'emballage.
Emboîtez les roulettes sur les axes des pieds et appuyez à fond jusqu'à entendre un déclic (fig.1). Tirez,
sans forcer, sur les roulettes pour vérifier si elles sont bien emboîtées.
Montez les pieds avec les roulettes dans la base de l’appareil en glissant les guides entre le panneau de
commande et le premier élément chauffant; placez les deux pattes de fixation dans leurs logements, introduisez les vis à œillet, vissez à fond. (fig.1)
Montez les deux roues arrières sur les axes de roue arrière (fig. 2a et 2b). Assurez-vous que les roues
tournent librement. Retournez le radiateur et remettez-le en position verticale en vérifiant que vous n'avez
pas endommagé les roulettes.
3. EMPLACEMENT
Placer le radiateur par terre sous la fenêtre la plus froide de la pièce. Le radiateur minimisera les courants
d'air froids.
Le radiateur ne doit pas être placé juste au –dessous d'une prise de courant fixe.
Ne pas utiliser le radiateur dans des pièces dont la superficie est inférieure à 4 m
2
.
4. BRANCHEMENT
Le radiateur doit être branché sur une prise avec terre 220V ca, en parfait état.
Ne pas poser de vêtements, meubles ou produits inflammables près de la prise où est branché le radiateur.
5. FONCTIONS
Afin d'utiliser au mieux toutes les fonctions de ce radiateur lire soigneusement les instructions ci-dessous et
celles qui sont indiquées dans le tableau page 12.
FONCTION DE MODULATION DE PUISSANCE
Si on appuie sur les interrupteurs I et II , on active la fonction de régulation de puissance.
Cette fonction permet de sélectionner la puissance qui convient le mieux à vos exigences (voir le tableau à
la page 12).
Allumer l'appareil
Brancher la fiche dans la prise de courant; tourner le thermostat à fond (6); Allumer le radiateur à l'aide
de l'interrupteur ou des interrupteurs comme indiqué dans le tableau.
Réglage du thermostat (fig. 3-P)
Quand la pièce a atteint la température désirée, tourner le thermostat lentement dans le sens inverse des
aiguilles d'une montre jusqu'à la butée.
La température ainsi sélectionnée sera réglée automatiquement et maintenue constante.
HRG5786000800 30-01-2001 09:24 Pagina 11

12
6. UNITÉS AVEC HORLOGE
Réglage de l'horloge
Mettre à l'heure le programmateur/horloge. Si par exemple il est 9h30 du matin, tourner le boîtier dans le
sens des aiguilles d'une montre (dans le sens de la flèche) jusqu'à ce que 9.30 coïncide avec la flèche
gravée sur le cadran.
IMPORTANT
NE PAS TOURNER LE CADRAN DANS LE SENS INVERSE DES AIGUILLES D'UNE MONTRE
Le temporisateur est une horloge électrique et ne fonctionne que quand la fiche est branchée. Quand l'appareil est débranché le temporisateur s'arrête et doit être réglé de nouveau.
COMMENT UTILISER L'HORLOGE
Se référer à ce illustration:
Boutons Fonctions activées Modes de fonctionnement
enfoncés
Appuyer sur le bouton I pour le chauffage De cette façon il est possible d'activer la fonc
normal à la puissance minimum tion hors-gel (voir page 4 Fonction hors-gel).
Appuyer sur le bouton II pour le chauffage De cette façon il est possible d'activer la fonc
normal à la puissance moyenne. tion hors-gel (voir page 4 Fonction hors-gel).
Fonction hors-gel
Quand le thermostat est sur * et l'interrupteur I et/ou II sont enfoncés, la température de la pièce est maintenue constante et ne descend pas au-dessous de 5°C environ, avec une consommation d'énergie réduite.
RAPPELEZ-VOUS
Pour arrêter complètement l'appareil, les interrupteurs ON/OFF doivent être sur OFF.
Votre appareil est équipé d'une fiche avec terre (fiche ayant une broche plus large que l'autre). Cette fiche
ne peut entrer dans la prise que dans un sens. C'est un dispositif de sécurité. Si vous n'arrivez pas à mettre
la fiche complètement dans la prise, essayer de retourner la fiche. Si la fiche n'entre toujours pas contacter
votre électricien pour remplacer votre prise. Ne démontez surtout pas le dispositif de sécurité de la fiche.
1
2
3
4
5
6
7
8
9
10
11
12
13
14
15
16
17
18
19
20
21
22
23
24
L'horloge est
réglée sur 21h.
Cliquet.
L'appareil fonctionne
de 2h à 4h30
Appuyer sur les deux boutons I et II pour
le chauffage normal à la puissance
maximale disponible, sans le système de
chauffage instantané.
De cette façon il est possible d'activer la
fonction hors-gel (voir page 4 Fonction horsgel).
HRG5786000800 30-01-2001 09:24 Pagina 12

IMPORTANT: il y a 96 cliquets autour du boîtier. Chaque cliquet correspond à un 1/4 h. (15 minutes). Votre
appareil peut être programmé pour se mettre en marche ou s'arrêter automatiquement à l'heure que vous
voulez. Vous pouvez programmer, par sections de 15 minutes, jusqu'à 48 cycles (1 cycle = 1 "ON" +
1"OFF") sur une période de 24 heures (12 heures matin + 12 heures après-midi).
Les cliquets peuvent être poussés vers l'intérieur ou tirés vers l'extérieur (uniquement avec les doigts). Quand
le cliquet est vers l'intérieur (vers le centre du boîtier) le radiateur fonctionnera pendant cette période de 15
minutes. Si le cliquet est vers l'extérieur, le radiateur ne fonctionnera pas pendant cette période.
Remarquer que lorsque vous utilisez votre radiateur pour la première fois les cliquets sont à l'extérieur. Vous
devez pousser les cliquets vers l'intérieur pour programmer la durée pendant laquelle l'appareil fonctionnera (si vous voulez désactiver le temporisateur vous devez pousser les 96 cliquets vers l'intérieur).
Fonctionnement du temporisateur
a)brancher le radiateur
b)tourner le boîtier dans le sens des aiguilles d'une montre pour mettre l'horloge à l'heure (voir RÉGLAGE
DE L'HORLOGE)
c) pousser vers l'intérieur le nombre de cliquets correspondant à la durée pendant laquelle le radiateur doit
fonctionner. Par exemple, sur le dessin l'appareil fonctionnera de 2 h à 4h30 du matin.
d)appuyer sur le/les interrupteur(s)
e) votre radiateur fonctionnera ou s'arrêtera selon les périodes que vous aurez programmées à l'aide des cli-
quets.
f) tant que le radiateur est branché l'horloge reste à l'heure.
7. MAINTENANCE ET RÉPARATION
Débrancher la fiche et faire refroidir le radiateur. Nettoyer le radiateur avec un chiffon doux, ne pas utiliser
de détergents ou d'abrasifs.
Si le radiateur ne doit pas fonctionner pendant un certain temps, enrouler le cordon autour de son support
et le ranger dans un endroit sec (voir fig. ci-contre).
Cet appareil a été conçu pour fonctionner pendant plusieurs années sans entretien.
En cas de mauvais fonctionnement ou de doutes, ne pas essayer de réparer soi-même le radiateur: cela pourrait être dangereux.
Appeler le centre S.A.V le plus proche (voir la liste des centres SAV).
13
HRG5786000800 30-01-2001 09:24 Pagina 13

14
Warranty
All DE’LONGHI electrical appliances are guaranteed to be free from defects in material and workmanship. Our obbligation under this warranty is limited to replacment or repair, free of charge, at
our factory or authorized Service Centers, on any defective part or parts thereof other than parts
damaged in transit, which shall be returned to us, transportation pre-paid, within one year from the
date of delivery to the purchaser/user. This warranty shall apply only if the appliance is used in
accordance with the factory directions which accompany and representations and any other obbligation or responsibility of the manufacturer. No other person or company is authorized to assume
for us any liability in connection with the sale or use of our products.
This warranty does not cover appliances that have been repaired or modified outside our factory,
nor to appliances which have been subject to misuse, negligence or accidents.
If repairs become necessary or spare parts are needed, please write to:
DE’ LONGHI CANADA
5610 Timberlea bldv
Mississauga, Ontario
L4W4M6 CANADA
Garantie
Nus garantissons que tous les APPAREILS ELECTRIQUES DE’LONGHI sont exempts de tout défaut de
matériaux de fabrication. Notre obligation vis-à-vis de cette garantie est limitée au remplacement
ou à la réparation, gratuite dans notre usine, de toutes le pièces défectueuses autres que les pièces
endommagées durant le transport, qui nous seront retournées - transport payé d’avance - endéans
un an après la livraison à fabricant lesquelles accompagnent l’appareil, et si l’appareil a été utilisé sur courant alternatif (AC). Cette garantie remplace toutes les autres garanties et représentations,
exprimées ou impliquées, et toutes autres obligations ou responsabilités de notre part. Nous n’autorisons aucune autre personne ou compagnie à assumer pour nous une quelconque responsabilité
pour la vente ou l’utilisation de notre appareil.
Cette garantie ne s’appliquera ni aux appareils qui seront réparès ou endommagés hors de notre usine, ni
aux appareils qui auront fait l’objet d’une mauvaise utilisation, d’une négligence ou d’un accident.
Si des réparations ou des pièces de rechange sont nécessaires, veuillez écrire à:
DE’ LONGHI CANADA
5610 Timberlea bldv
Mississauga, Ontario
L4W4M6 CANADA
HRG5786000800 30-01-2001 09:24 Pagina 14

15
PRECAUCIONES IMPORTANTES
Cuando utilice aparatos eléctricos deberá siempre tomar unas precauciones básicas para evitar todo riesgo de incendio, electrocución y
daños personales, que incluyen lo siguiente:
1. Leer atentamente las instrucciones antes de utilizar este calefactor.
2.
En ningún caso y bajo ninguna circunstancia cubra el aparato mientras esté en funcionamiento, dado que podría dar lugar a
un sobrecalentamiento muy peligroso.
3. Este aparato se calienta cuando está en funcionamiento. Para evitar quemaduras no tocar nunca la superficie del aparato. Utilizar
el asa para transportar el aparato. Mantener todo material combustible - como muebles, cojines, ropa de cama, papeles, ropas y
cortinas - como mínimo a unos 3 pies (0,9 m) de distancia de la parte delantera y superior del calefactor y alejado de los laterales
y de la parte posterior.
4. Extremar las precauciones cuando se utilice el calefactor en una habitación con niños o personas inválidas. No dejar nunca el apa-
rato en funcionamiento sin vigilancia.
5. Desenchufar el aparato cuando no esté en funcionamiento.
6.
No poner nunca en marcha ningún aparato con el cable o el enchufe en mal estado o tras haber detectado cualquier problema
en su funcionamiento. En caso de producirse pérdidas de aceite, dejar de utilizarlo y ponerse en contacto con el centro de asistencia indicado en este manual de instrucciones. Remitir el calefactor a un distribuidor autorizado para inspección del sistema
eléctrico o mecánico y/o su reparación.
7. No utilizar en exteriores
8. Este calefactor no está diseñado para ser utilizado en cuartos de baño, zonas de lavandería y emplazamientos interiores de carac-
terísticas similares. No situar nunca el calefactor junto a bañeras u otros depósitos de agua.
9.
No pasar el cable por debajo de alfombras. No cubrir el cable con alfombrillas, tapetes, mantas o similares. Disponer el cable
fuera de la zona de paso y donde no pueda ser pisado.
10. Para desconectar el calefactor apagar los conmutadores y desenchufar de la toma de corriente.
11. Conectar únicamente a tomas de corriente correctamente polarizadas.
12. No introducir ni permitir el paso de ningún objeto extraño en las salidas de ventilación o las aberturas de escape dado que podría
dar lugar a electrocución, incendio o daños al calentador.
13. Para evitar cualquier riesgo de incendio no bloquear las entradas de aire ni las salidas de escape en modo alguno. No utilizar sobre
superficies blandas, como una cama, en que las aberturas pueden quedar bloqueadas.
14.
El calefactor dispone de elementos conductores, emisores de calor o productores de chispas en su interior. No utilizar en lugares
junto a recipientes con gasolina, pintura o líquidos inflamables.
15. Utilizar este calefactor solo en el modo descrito en este manual. Todo uso diferente al recomendado por el fabricante puede dar lugar
a incendio, electrocución o daños personales.
16. Para evitar una sobrecarga de fusibles, asegurarse de que no hay ningún otro aparato conectado a la misma toma (receptáculo) u
otra toma (receptáculo) conectada al mismo circuito.
17. Es normal que el cable y el enchufe del calentador se calienten ligeramente durante el funcionamiento. Un cable o un enchufe dema-
siado calientes o deformados pueden ser el resultado de una toma eléctrica en mal estado. En tal caso, cambiar inmediatamente la
toma / receptáculo, ya que de lo contrario podría producirse un sobrecalentamiento del cable eléctrico y riesgo de incendio.
18.
No emplear alargos o extensiones porque pueden dar lugar a sobrecalentamiento y conllevan un riesgo de incendio. Sin embargo, en caso de tener que emplear un alargo, el cable del mismo deberá disponer de una puesta a tierra correcta de un tamaño
mínimo de 14 AWG (calibrador americano) y de una potencia no inferior a 1875 vatios, y deberá ser empleado únicamente
para suministrar energía a dicho calentador.
19. Asegurarse de que el enchufe esté correctamente conectado a la toma adecuada para evitar cualquier riesgo de sobrecalentamiento
o emisión de chispas. Recuerde que los receptáculos también se deterioran con el uso y el paso del tiempo: compruébelos periódicamente si detectara cualquier signo de sobrecalentamiento o deformación en el enchufe. En tal caso, no lo siga utilizando y avise
a un electricista.
20. Compruebe que ni el aparato ni el cable hayan sufrido ningún deterioro durante el transporte.
21. Asegúrese de retirar todo resto de poliestireno u otro material de embalaje al sacar el aparato. Puede resultar necesario pasar el
aspirador por encima del aparato para eliminar todo resto.
22.
Cuando conecte el aparato por primera vez, déjelo funcionar a la máxima potencia durante unas dos horas para que deje de
emitir posibles malos olores. Compruebe la ventilación de la habitación en la que se va a situar el calefactor para realizar esta
operación. Al conectarlo por primera vez es normal que el aparato emita algunos chasquidos.
GUARDE ESTAS INSTRUCCIONES
HRG5786000800 30-01-2001 09:24 Pagina 15

El calefactor Rapido es un aparato de calefacción extremadamente versátil, que dispone de 3 niveles de
potencia seleccionables. El Rapido garantiza el nivel de confort óptimo en cualquier situación. Para aprovechar todo el potencial de este aparato, le recomendamos que lea atentamente las instrucciones aquí facilitadas.
1. INSTRUCCIONES GENERALES
Extraiga el aparato de su caja y embalaje y colóquelo de modo que repose sobre el embalaje protector de
poliestireno. Compruebe que esté intacto, así como el cable, y que no haya sufrido ningún daño durante el
transporte. No utilice el aparato si piensa que no está intacto.
2. MONTAJE DE LA BASE
Extraiga las horquillas, las ruedas y los accesorios del embalaje de poliestireno
Inserte las horquillas en las clavijas del pie y empújelas hasta que perciba un chasquido (fig.1). Asegúrese
de que están bien fijas tirando suavemente de las ruedas.
Monte el conjunto de la horquilla en la base del panel de control insertando las acanaladuras de guía entre
el panel de control y el primer elemento calentador; inserte las dos patas en sus alojamientos y fije el conjunto de la horquilla al aparato insertando las arandelas roscadas y roscándolas firmemente (fig 1).
Coloque las dos ruedas traseras en el eje de rueda posterior (fig. 2a/2b). Compruebe que las ruedas giren
libremente. Finalmente, dele la vuelta al calefactor y colóquelo de pie, comprobando que las ruedas se mantienen en su lugar.
3. EMPLAZAMIENTO
Coloque el calefactor sobre el suelo bajo una ventana o en el lugar que desee. El calefactor reduce los efectos de las filtraciones de aire frío.
El calefactor no debe colocarse inmediatamente debajo de una toma de corriente.
No emplear este radiador en habitaciones con una superficie inferior a 4m
2
.
4. CONEXIÓN
El radiador debe estar conectado a una toma de corriente adecuadamente polarizada A/C de 110/120V
en excelentes condiciones.
Mantenga alejado de la toma de corriente todo tejido, ropa de cama y material inflamable una vez enchufado el aparato.
5. EMPLEO DE LAS FUNCIONES
Para aprovechar todas las funciones de que dispone este calefactor, siga cuidadosamente las instrucciones
siguientes y las indicadas en la tabla de la página 17.
FUNCIÓN DE MODULACIÓN DE POTENCIA
Activando los conmutadores I y II, se activa la función de regulación de potencia.
Mediante esta función, además del sistema de calefacción instantánea, su calefactor podrá seleccionar el
nivel de potencia más adecuado para sus necesidades (tabla de la página 17).
Puesta en marcha del aparato
Insertar el enchufe en la toma eléctrica; girar el termostato hasta el tope de la posición máxima (6); encender el calefactor mediante uno o varios conmutadores, según lo indicado en la tabla.
Regulación del termostato (fig.3-p)
Una vez que la habitación ha alcanzado la temperatura deseada, girar lentamente el termostato en sentido
contrario a las agujas del reloj, hasta percibir un chasquido, y nunca sobrepasar este punto.
La temperatura así seleccionada quedará automáticamente regulada y mantenida.
16
HRG5786000800 30-01-2001 09:24 Pagina 16

17
Función anti-escarcha
Con el termostato en posición * y los conmutadores I y II pulsados, se garantiza que la temperatura de la
habitación se mantiene y que no desciende por debajo de los 5ºC, utilizando el mínimo de energía.
RECUERDE
Para apagar completamente la unidad, los conmutadores ON/OFF deben situarse en posición OFF.
Este producto está provisto de un enchufe polarizado de corriente alterna (un enchufe que tiene una clavija
más ancha que la otra). Este enchufe encaja en la toma de corriente únicamente en un sentido. Constituye
una característica de seguridad. Si no puede insertar el enchufe completamente en la toma, intente hacerlo
al revés. Si sigue sin ajustar, póngase en contacto con su electricista para cambiar su toma de corriente anticuada. No anule la característica de seguridad del enchufe polarizado mediante ningún tipo de modificación.
Botones Funciones activadas Modalidades de funcionamiento
pulsados
Pulse el botón I para calefacción normal En esta modalidad se puede activar la función
a la mínima potencia.. Anti-escarcha. (ver pág. 4 Función Anti-
Escarcha).
Pulse el botón II para calefacción normal En esta modalidad se puede activar la función
a una potencia media. Anti-escarcha. (ver pág. 4 Función Anti-
Escarcha)..
Pulse los botones I y II al mismo tiempo
para calefacción normal a la máxima
potencia disponible sin sistema de calefacción instantánea.
En esta modalidad se puede activar la función Anti-escarcha. (ver pág. 4 Función
Anti-Escarcha).
HRG5786000800 30-01-2001 09:24 Pagina 17

6. UNIDADES CON PROGRAMADOR
Reloj
El programador / medidor, como todos los relojes, debe ser correctamente puesto en hora. Si, por ejemplo,
la hora es las 9:30 a.m. (diurnas), gire el dial en sentido de las agujas del reloj (siguiendo la dirección de
la flecha) hasta que las 9.30 se alineen con la aguja triangular.
IMPORTANTE:
NO GIRE EL DIAL DEL CONTADOR DEL RELOJ EN SENTIDO CONTRARIO A LAS AGUJAS DEL RELOJ.
El programador es de hecho un reloj eléctrico y solamente funcionará si el enchufe está conectado a la corriente. Cuando desenchufe el aparato el programador se detendrá y deberá volver a ajustarse en posteriores usos.
CÓMO EMPLEAR EL PROGRAMADOR
Consulte la ilustración
siguiente:
IMPORTANTE: El dial está dividido en 96 aletas. Cada aleta representa _ de hora (15 minutos) y hay una
aleta para cada cuarto de hora en un día de 24 horas. El aparato puede ser programado para que se
encienda o apague por sí mismo a la hora que Ud. establezca. Mediante el programador podrá establecer
la hora desde en 15 minutos hasta un máximo de 48 ciclos (1 ciclo = 1 “ON” + 1 “OFF”) durante un período de 24 horas (12 horas a.m. + 12 horas p.m.).
Las aletas pueden empujarse hacia adentro o tirarse hacia afuera con los dedos. Cuando la aleta está en
posición hacia adentro (hacia el centro del dial), el calefactor funcionará durante ese período de 15 minutos. Si la aleta está hacia afuera el calefactor no funcionará durante ese período.
Tenga en cuenta que cuando utilice su calefactor por primera vez todas las aletas se hallarán hacia afuera.
Deberá empujar aquellas aletas correspondientes al período durante el que desee que el calefactor funcione. (Si desea omitir la función del programador deberá empujar las 96 aletas hacia adentro)
Funcionamiento del programador
a) Enchufe el calefactor
b) Gire el dial del programador en el sentido de las agujas del reloj con la hora del día correcta (ver
RELOJ).
c) Empuje las aletas correspondientes al período en que desee que el calefactor funcione hacia adentro.
Por ejemplo, la ilustración muestra que el aparato funcionará desde las 2 a.m hasta las 4:30 a.m.
d) Pulse el/los conmutador/es
18
1
2
3
4
5
6
7
8
9
10
11
12
13
14
15
16
17
18
19
20
21
22
23
24
Así son las 9 p.m.
Una aleta
El aparato funciona
desde las 2 hasta las
4:30 a.m.
HRG5786000800 30-01-2001 09:24 Pagina 18

19
GARANTÍA LIMITADA
Garantizamos todo producto DE’LONGHI por defectos de material y mano de obra.
Nuestra obligación dentro de esta garantía es proporcionar gratuitamente las refacciones y el servicio durante un año a partir de la fecha de compra. Esta garantía se aplicará únicamente si el producto se utiliza de acuerdo con las anexas instrucciones del
fabricante y con un circuito de corriente alterna (AC). Esta garantía reemplaza a cualquier otra garantía y acuerdo, expreso o implícito y a todas las demás obligaciones o
responsabilidades de nuestra parte. No autorizamos a ninguna otra persona o compañía a asumir nuestras responsabilidades relacionadas con la venta y el uso de nuestro producto. Esta garantía no implica ninguna responsabilidad de parte nuestra en
relación con la venta o el uso de nuestro producto. Esta garantía no es válida para los
producto que hayan sido reparados o alterados fuera de nuestra fábrica ni tampoco
para los productos que hayan sido sometidos a uso inadecuado, negligencia o accidentes. Si se necesitan reparaciones o refacciones, se ruega escribir a:
TEL. DE SERVICIO DEMOTECNIC S.A.
5 - 6657432 Blvd. Adolfo Ruiz Cortinez
(Periferico Sur) n° 5379
Col Isidro Fabela
14030 MEXICO, D.F.
e) Una vez establecidos los períodos de funcionamiento deseados, el calefactor se encenderá o apagará
en función de dichos valores.
f) Mientras el aparato esté enchufado el programador seguirá manteniendo la hora correcta.
6. MANTENIMIENTO Y SERVICIO
Desenchufe siempre el aparato de la toma de corriente y déjelo enfriar. Pase un paño suave húmedo sobre
el radiador y no utilice detergentes ni productos abrasivos.
Si el radiador debe permanecer fuera de servicio durante un cierto período de tiempo, enrolle el cable alrededor del soporte y guarde el aparato en un lugar seco (ver fig. cubierta)
Este aparato ha sido diseñado y construido para que funcione correctamente durante muchos años sin necesidad de servicio.
En caso de mal funcionamiento o duda no intente reparar el aparato Ud. mismo: podría originar un incen-
HRG5786000800 30-01-2001 09:24 Pagina 19

20
AVISOS DE SEGURANÇA IMPORTANTES
Quando se usam aparelhos eléctricos devem-se tomar sempre precauções para evitar o perigo de incêndio, choque eléctrico e danos em pessoas, incluindo as seguintes:
1. Ler atentamente as instruções antes de utilizar este radiador.
2.
Nunca cobrir o radiador quando está a funcionar pois isso pode levar a um perigoso aquecimento excessivo.
3. Este radiador está quente quando está a funcionar. Para evitar queimaduras, não tocar com a pele nas superfícies
quentes. Usar as pegas quando se desloca o radiador. Manter os materiais combustíveis, tais como mobílias, almofadas, camas, papeis, roupas, e cortinas pelo menos a 1 metro da parte da frente e superior deste radiador e afastá-los
das partes laterais e traseira.
4. É necessário muito cuidado quando qualquer tipo de radiador for usado por ou próximo de crianças ou inválidos e
quando o radiador é deixado ligado sem vigilância.
5. Desligar sempre o radiador da tomada de corrente quando não está a ser usado.
6.
Não pôr a funcionar o radiador se o cabo de alimentação ou a ficha estiverem danificados ou se este apresenta
anomalias, tombou no chão ou apresentar danos de qualquer tipo. Se o radiador tiver fugas de óleo, não usá-lo
e contactar o Serviço de Assistência como indicado neste manual de instruções. Entregar o radiador a um Centro
de Assistência Técnica autorizado para verificação, regulação eléctrica ou mecânica, ou para reparação.
7. Não usar no exterior.
8. Este radiador não está preparado para ser utilizado em casas de banho, áreas de lavandaria ou locais interiores
semelhantes. Nunca colocar o radiador onde possa cair dentro de uma banheira ou qualquer outro recipiente com
água.
9.
Não passar o fio por baixo dos tapetes. Não cobrir o fio com capachos, passadeiras ou semelhantes. Colocar o fio
fora na zona de passagem de modo que não seja pisado.
10. Para desligar o radiador, girar o botão para off e retirar a ficha da tomada.
11. Ligar apenas a tomadas adequadas.
12. Não introduzir nem deixar que objectos estranhos entrem nas aberturas de ventilação pois podem provocar um cho-
que eléctrico, incêndio, ou danos no radiador.
13. Para evitar a possibilidade de incêndio, não tapar as entradas de ar de modo nenhum. Não usar em superfícies
macias, tais como em cima da cama, onde as aberturas podem ficar tapadas.
14.
O radiador tem no seu interior partes quentes, incandescentes ou que produzem faíscas. Não usá-lo em locais onde
são usados ou estão armazenados líquidos inflamáveis tais como gasolina ou tintas.
15. Usar este radiador exclusivamente como descrito neste manual. Qualquer outra utilização não recomendada pelo
fabricante pode provocar incêndio, choques eléctricos ou ferimentos em pessoas.
16. Para evitar sobrecarga e fusíveis fundidos, certificar-se que não esteja ligado mais nenhum aparelho à mesma toma-
da ou a outra tomada ligada ao mesmo circuito.
17. É normal que a ficha e o cabo de alimentação do radiador estejam quentes quando se toca. Uma ficha ou cabo de
alimentação que fica quente ou que apresente deformação pode ser o resultado de uma tomada eléctrica avariada.
As tomadas avariadas devem ser substituídas antes de utilizar novamente o radiador. A ligação do radiador a uma
tomada avariada pode provocar o aquecimento excessivo ou mesmo o incendiar do cabo de alimentação.
18.
Não usar uma extensão pois esta pode aquecer e provocar um incêndio. Contudo, se for necessário utilizar uma
extensão, esta deve ter uma ligação à terra adequada No. 1 4 AWG de secção mínima e com uma capacidade
não inferior a 1875 watts, e só deve ser utilizada para alimentar este radiador.
19. Certificar-se que a ficha esteja bem introduzida na tomada adequada de modo a evitar o perigo de aquecimento
excessivo ou a formação de faíscas. Recordar-se que as tomadas também se deterioram com o tempo e com o uso
contínuo: verificar periodicamente se há sinais de aquecimento excessivo ou se a ficha apresenta deformação. Não
usar a tomada e chamar um electricista.
20. Verificar se o aparelho ou o fio de alimentação sofreram danos durante o transporte.
21. Certificar-se que não tenham ficado pedaços de esferovite ou outro material de embalagem entre os elementos do apa-
relho. Pode ser necessário passar com o aspirador no aparelho.
2 2.
Quando se liga o aparelho pela primeira vez, regulá-lo para a potência máxima durante cerca de duas horas para
eliminar os cheiros desagradáveis a novo. Certificar-se que o local onde se encontra o aparelho está bem arejado
durante esta operação. É normal que o aparelho emita “crepitações” quando se liga pela primeira vez.
CONSERVAR ESTAS INSTRUÇÕES
HRG5786000800 30-01-2001 09:24 Pagina 20

21
dio o electrocutarse.
Póngase en contacto con el Centro de Servicio más próximo (consulte la lista adjunta)
O radiador Rapido é um radiador muito versátil com 3 níveis de potência. Rapido assegura um óptimo
nível de conforto em qualquer condição. De modo a utilizar melhor as potencialidades deste radiador,
aconselhamos uma leitura atenta das instruções fornecidas.
1. INSTRUÇÕES GERAIS
Tirar o aparelho a caixa e da embalagem e virá-lo ao contrário mantendo-o dentro da embalagem de esferovite. Verificar se o aparelho está completo, com o cabo de alimentação e se não sofreu danos durante o
transporte. Não utilizar o aparelho se estiver danificado.
2. MONTAGEM DA BASE
Remover os rodízios, rodas e acessórios da embalagem de esferovite
Introduzir os rodízios nos pinos do pé e empurrá-los até que se sinta um estalido (fig1) Certificar-se que as
rodas estejam bem fixadas puxando-as com cuidado.
Encaixar o conjunto dos rodízios na base do painel de controlo introduzindo as arestas de guia entre o painel de controlo e o primeiro elemento de aquecimento; introduzir os dois encaixes nas suas bases e apertar
o conjunto dos rodízios ao aparelho introduzindo os parafusos de olhal e apertando-os bem. (fig1)
Fixar as duas rodas traseiras no eixo da roda traseira (fig 2a/2b). Verificar se as rodas giram livremente.
Finalmente virar o radiador para a sua posição correcta, tendo o cuidado de não danificar as rodas.
3. LOCALIZAÇÃO
Colocar o radiador no chão por baixo da janela mais fria do local ou em qualquer outro lugar. Este radiador reduzirá o efeito das correntes de ar.
O radiador não deve ser colocado logo por baixo de uma tomada de corrente.
Não utilizar este radiador em locais com uma área inferior a 4 m
2
.
4. LIGAÇÃO
O radiador deve ser ligado a uma tomada de corrente doméstica 220/230 V CA que esteja em bom estado de funcionamento.
Manter vestuário ou roupas da cama, móveis e materiais inflamáveis afastados da tomada onde a ficha do
radiador está ligada.
5. UTILIZAÇÃO DAS FUNÇÕES
De modo a utilizar todas as funções deste radiador com todas as suas potencialidades, seguir atentamente
as instruções abaixo e as que se encontram na tabela da página 22.
FUNÇÃO DE MODULAÇÃO DE POTÊNCIA
Accionando os interruptores l e ll, acciona-se a função de regulação de potência.
Com esta função o radiador poderá seleccionar o nível de potência mais confortável para satisfazer as vossas necessidades (tabela da página 22).
Ligação do aparelho
Introduzir a ficha na tomada de corrente eléctrica; girar o termóstato até que este pare na posição máxima
(6); ligar o radiador usando um interruptor ou uma combinação de interruptores como indicado na tabela.
Regulação do termóstato ( Fig 3-P)
HRG5786000800 30-01-2001 09:24 Pagina 21

22
ADVERTÊNCIAS
Para desligar totalmente o aparelho, os interruptores ON/OFF devem estar na posição OFF.
6. APARELHOS COM TEMPORIZADOR
Programação do relógio
O programador/temporizador, tal como em todos os relógios, deve ser regulado para a hora correcta. Por
exemplo, se forem as 9.30 da manhã, girar o mostrador no sentido dos ponteiros do relógio (seguindo a
direcção da seta) até que as 9.30 estejam alinhadas com o ponteiro triangular.
IMPORTANTE:
NÃO GIRAR O MOSTRADOR DO RELÓGIO NO SENTIDO CONTRÁRIO AOS PONTEIROS DO RELÓGIO.
De facto, o temporizador é um relógio eléctrico e só funciona se a ficha estiver ligada á tomada de corrente. Quando a ficha é desligada, o temporizador pára e deve ser novamente regulado.
COMO UTILIZAR
O TEMPORIZADOR
Consultar a
ilustração
abaixo:
Quando o ambiente alcançou a temperatura desejada, girar o termóstato lentamente no sentido contrário
aos ponteiros do relógio até chegar à posição em que se sente um estalido e não para além desse ponto.
A temperatura seleccionada deste modo será regulada e mantida automaticamente.
Função Anti-gelo
Com o termóstato na posição * e com os interruptores I e/ou ll carregados a temperatura do ambiente é
mantida e não desce abaixo de cerca de 5°C, consumindo o mínimo de energia.
1
2
3
4
5
6
7
8
9
10
11
12
13
14
15
16
17
18
19
20
21
22
23
24
Programado assim são as
21h.
Dente individual
O aparelho está a
funcionar entre as 2 e
as 4.30 da manhã.
Botões Funções activadas Modalidades de funcionamento
carregados
Carregar no botão I para aquecimento Nesta modalidade é possível activar a
normal à potência mínima função Anti-gelo. (ver página 4 Função Anti-
gelo)
Carregar no botão II para aquecimento Nesta modalidade é possível activar a
normal à potência média função Anti-gelo. (ver página 4 Função Anti-
gelo)
Carregar nos botões I e II para aquecimento normal à potência máxima
disponível sem o sistema de aquecimento
instantâneo
Nesta modalidade é possível activar a
função Anti-gelo. (ver página 4 Função
Anti-gelo)
HRG5786000800 30-01-2001 09:24 Pagina 22

IMPORTANTE: Existem 96 dentes em redor do mostrador. Cada dente representa 1/4 de hora (15 minutos)
e existe um dente para cada quarto de hora das 24 horas do dia. O aparelho pode ser programado para
passar automaticamente para ON ou OFF à hora que se deseja. Com o programador pode-se aproximar
a programação a cada 15 minutos e programar até 48 ciclos (1 ciclo = 1 “ON” + 1 “OFF”) durante o período das 24 horas.
Os dentes podem ser empurrados para dentro ou puxados para fora com os dedos. Quando o dente está
na posição interna (em direcção ao centro do mostrador), o radiador funcionará durante um período de 15
minutos. Se o dente estiver puxado para fora, o radiador não funcionará durante esse período de tempo.
Recordar-se que quando se usa o aparelho pela primeira vez, os dentes estão todos puxados para fora.
Devem-se empurrar para dentro os dentes relativos ao período em que se pretende que o radiador funcione. (Se desejar pôr o aparelho a funcionar sem programação, deve empurrar todos os 96 dentes para dentro)..
Funcionamento do temporizador
a). Ligar a ficha do radiador à tomada.
b). Girar o mostrador do temporizador no sentido dos ponteiros do relógio para regular o relógio na hora
corrente (ver PROGRAMAÇÃO DO RELÓGIO).
c). Empurrar para dentro os dentes relativos ao período em que se pretende que funcione o radiador. Por
exemplo, a ilustração mostra que o aparelho funcionará entre as 2 e as 4.30 da manhã.
d). Carregar no(s) interruptor(es).
e). Depois de se terem empurrado os dentes que correspondem aos períodos de aquecimento desejados, o
radiador iniciará os ciclos de ON e OFF de acordo com a programação efectuada.
f ). Enquanto o radiador estiver ligado à tomada de corrente, o temporizador manterá a hora correcta.
6. MANUTENÇÃO E REPARAÇÃO
Garantia
A DLB
solicita a todas as pessoas que, ao abrir a embalagem do produto De’Longhi, antes de qualquer atitude com relação
a ele, leiam atenciosamente o manual por inteiro e principalmente verifiquem se a voltagem do aparelho é compativel com
a da sua tomada.
Nòs garantimos que todos os aparelhos elétricos De’Longhi são isentos de quaisquer defeitos de materiais bem como
de sua manufatura.
Nossa obrigação sobre este termo de Garantia està limitada à troca ou conserto gratuito, desde que executados em nossa
rede autorizada de assistência técnica, da peças ou dos conjuntos que apresentem defeitos de fabricação, bem como problemas ocorridos durante o transporte até o revendedor de sua escolha, valendo sempre a data da venda ao consumidor.
Esta garantia não se aplica caso seja comprovado o uso indevido do produto.
Este produto De’Longhi é fabricado para uso doméstico, não se recomenda sua utilização em locais comercias sob pena
de perda de sua Garantia.
Não autorizamos qualquer outra pessoa ou empresa, que não seja posto autorizado De’Longhi a efetuar conserto em
nossos produtos, bem como não autorizamos quaisquer terceiros a assumir em nosso nome qualquer responsabilidade
em relação à venda ou quanto ao uso de qualquer produto.
Esta garantia tem prazo de validade de doze meses (Hum Ano) a partir da data de sua venda ao primeiro consumidor,
com a obrigatoriedade de constar na nota fiscal o número do CPF do mesmo.
ATENÇÃO: A NOTA FISCAL deverá ser apresentada com a garantia no exercício dos seus direitos.
DLB INDUSTRIA E COMERCIO LTDA
Rua Alcides Lourenço da rocha, 167-6° ANDR,
BROOKLIN NOVO
04571-110
SÃO PAULO-SP
TEL: ++(55.11) 5503-3131
23
HRG5786000800 30-01-2001 09:24 Pagina 23

Desligar sempre a ficha da tomada de corrente e deixar que o radiador arrefeça. Limpar o radiador com
um pano macio e enxuto e não usar detergentes e abrasivos.
Se o radiador não for utilizado durante um certo tempo, enrolar o cabo de alimentação no suporte e
arrumá-lo num local seco (ver a fig. na página frontal).
Este aparelho foi concebido para trabalhar diversos anos sem manutenção.
Em caso de mau funcionamento ou dúvidas, não tentar reparar o radiador pessoalmente: pode provocar
incêndio ou choque eléctrico.
Contactar o Centro de Assistência Técnica mais próximo (consultar a lista dos Centros de Assistência em
anexo).
24
HRG5786000800 30-01-2001 09:24 Pagina 24
 Loading...