

Dell PowerEdge Rack Enclosure 4620S User Manual [en, fr, de, es]
IK»LL*
Die in diesem Dokument enthaltenen Informationen können ohne vorherige
Ankündigung jederzeit geändert werden.
© 1994-1995 Dell Computer Corporation. Alle Rechte Vorbehalten.
Jegliche Reproduktion auf irgendeine Weise ist ohne schriftliche Genehmigung von Dell
Computer Corporation strengstens untersagt.
In diesem Text verwendete Warenzeichen: Dell, das DELL Logo und DellWare sind einge
tragene Warenzeichen. Latitude ist ein Warenzeichen und TechFax ist ein Servicezeichen
von Dell Computer Corporation: MS-DOS. Microsoft und Windows sind eingetragene
Warenzeichen und Windows NT und Windows for Workgroups sind Warenzeichen von
Microsoft Corporation: Pentium ist ein eingetragenes Warenzeichen und lntelDX4 und
Intel386 sind Warenzeichen von Intel Corporation: CompuServe ist ein eingetragenes
Warenzeichen von CompuServe. Inc.: PRODIGY \st. ein eingetragenes Warenzeichen von
Prodigy Services Co.: Lotus ist ein eingetragenes Warenzeichen von Lotus Development
Corporation. OS/2 ist ein eingetragenes Warenzeichen von International Business
Machines Corporation: UNIX lsX ein eingetragenes Warenzeichen von UNIX System
Laboratories, Inc.. einer hundertprozentigen Tochtergesellschaft von Novell. Inc.: VESA ist
ein eingetragenes Warenzeichen von Video Electronics Standards Association.
Andere Warenzeichen und Handelsnamen wurden in diesem Dokument eventuell benutzt,
um entweder auf die Unternehmen, die diese Zeichen und Namen beanspruchen, oder
auf deren Produkte zu verweisen.
Dell Computer Corporation erhebt keinerlei Eigentumsansprüche auf fremde
Warenzeichen und Handelsnamen.
August 1999 P/N 7163U
07163UA00
P/N 7163U
www.dGll.com
www.dell.com

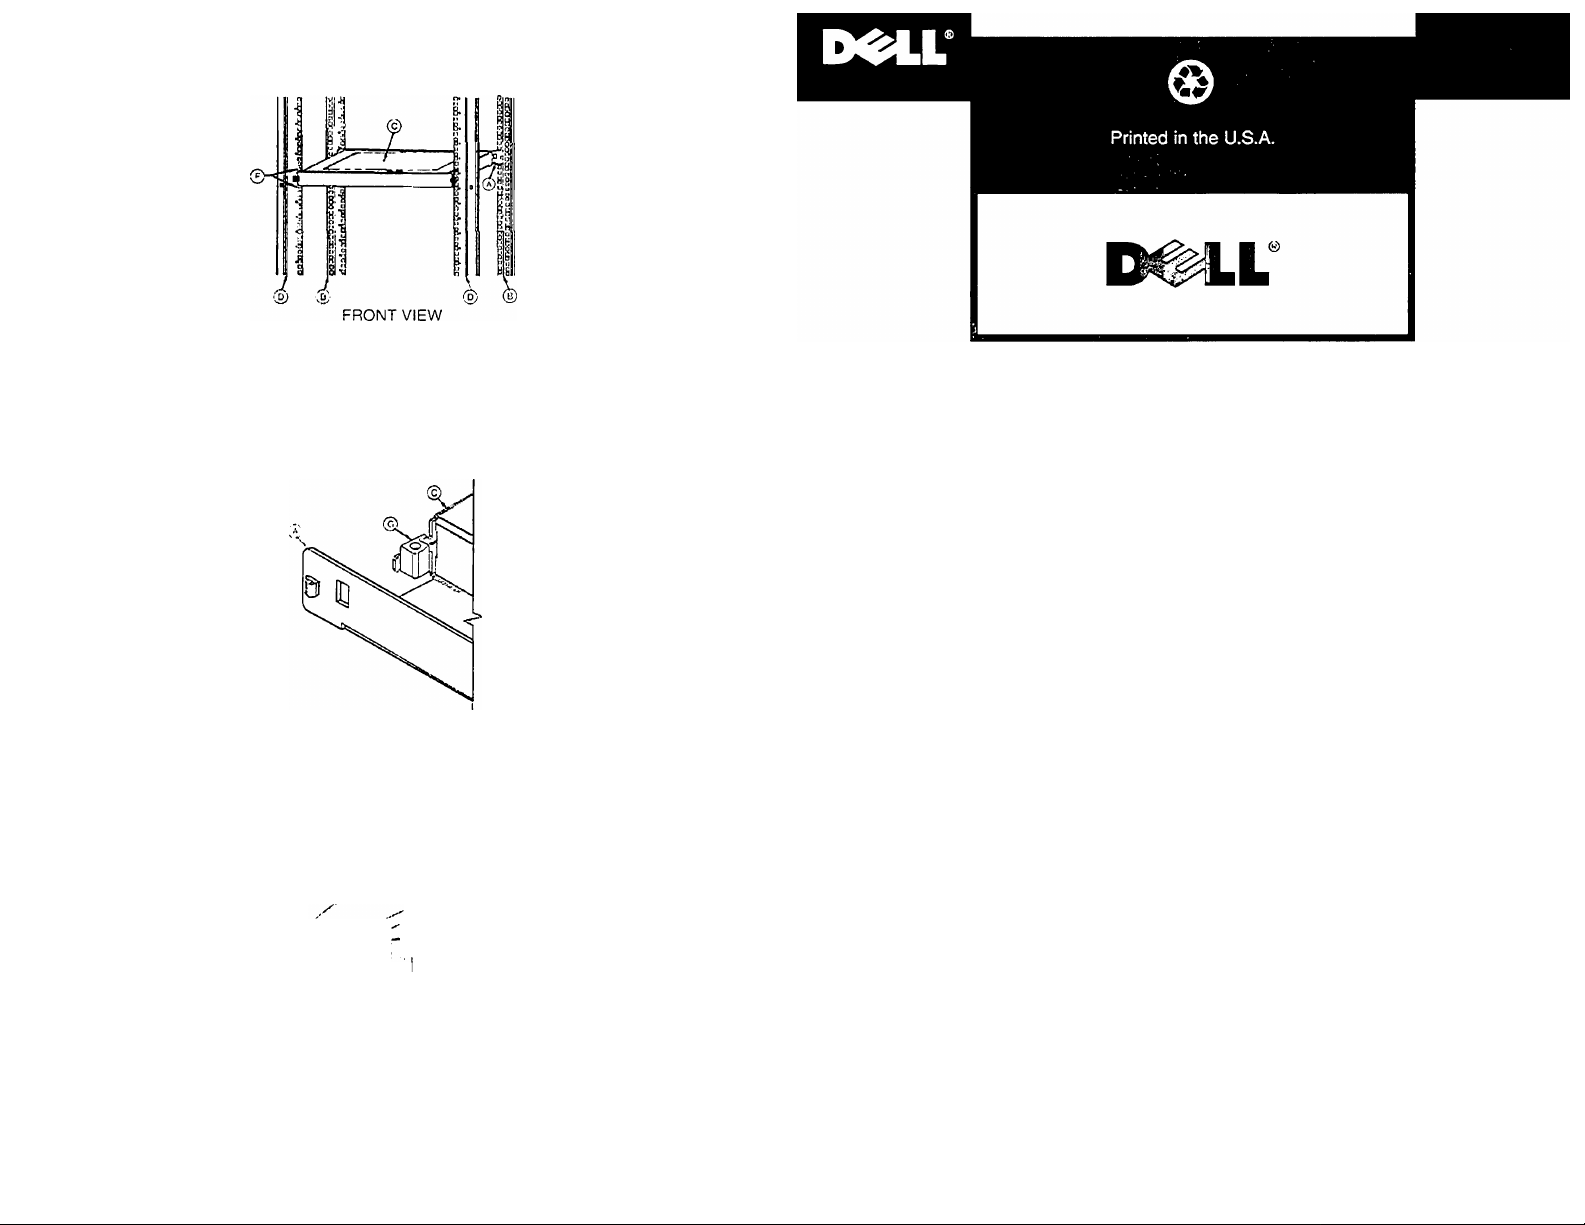
installation of Shelf Support Bracket
1. Install Shelf Support Bracket [A] to the Rear Panel Mount [B], Position the Shelf
Support Bracket [A] so the clips (short leg) face the inside of the Rear Panel Mount.
2. Center the Shelf Support Bracket [A] between the “U" Height Indicator [F] on the Rear
Panel Mount [B].
Note: A 'Vis a standard term used in electronic packaging which denotes useable
vertióle space within an enclosure.
For more information, see the Dell Rack Advisor software available oh the DELL Web
site at htto://www. dell, com
3. Press the horizontal clip into the center square cutout of the Rear Panel Mount [B]
and slide it towards the outside of the cabinet.
^ TAP DOWN TOWARDS
BOTTOM OF CABINET
4. Press the vertical clip on the opposite side of Shelf Support Bracket [A] into the
Vertical Panel Mount [B] and tap down until the locking clip engages.
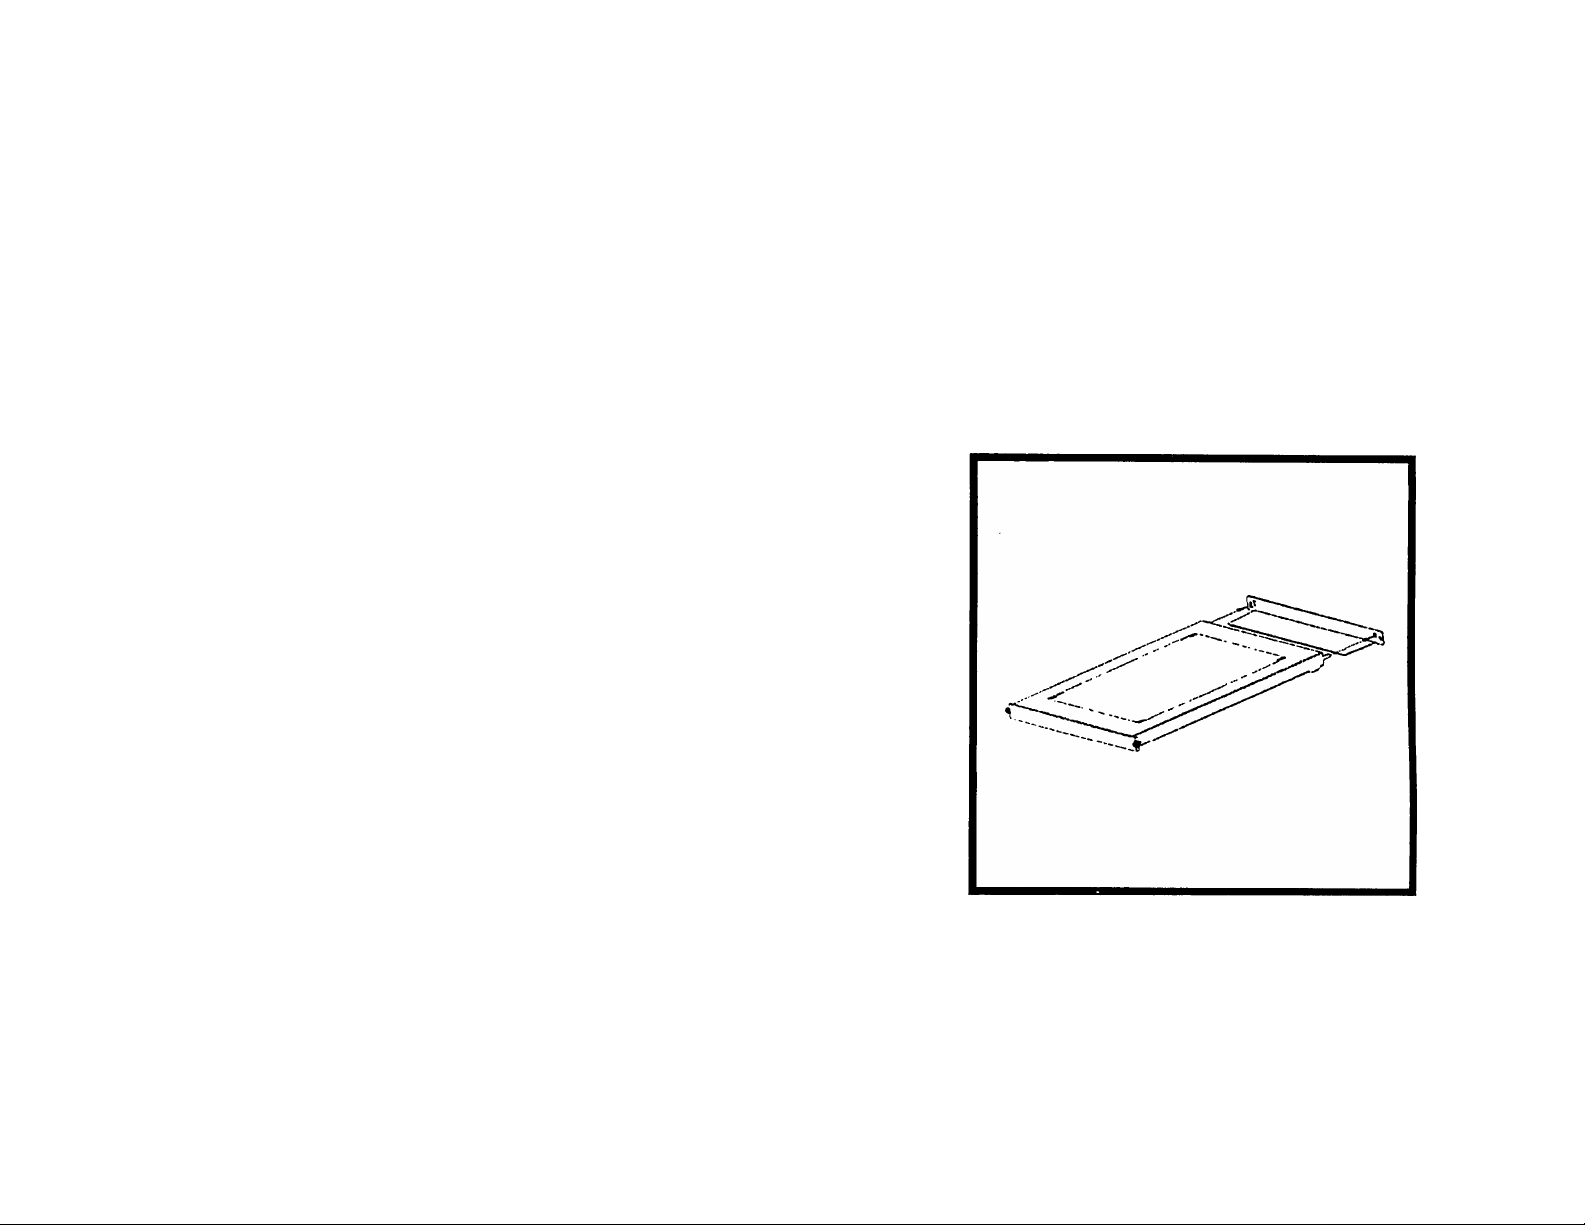
Installation of Equipment Shelf
If the distance between the EIA mounting flanges, front to back, is more than 28.75”
then the Plastic Spacers [G] may be needed between the Shelf [C] and the Rear
Mounting Angle [A]. Install Plastic Spacers (narrow end first) into the rectangular
cutouts in the rear flange of Shelf [Cj. The cutouts are located just inside the rear
alignment tabs. Large end of Spacer to protrude rear of Shelf.
6. Position Shelf [C] with flanges down and tabs extending toward the rear, use radius
tabs on bottom to align Shelf [C] with Rear Mounting Angle [A]. Install alignment tabs
at the back of the Shelf [C] into the rectangular slots on the Rear Mounting Angle [A].
7. Center front panel of Shelf [C] between ’U' height indicator holes [F] of the Front Panel
Mounts [D], Push to engage tabs.
\
Information in this document is subject to change without notice.
© 1994-1995 Dell Computer Corporation. All rights reserved.
Reproduction in any manner whatsoever without the written permission of Dell
Computer Corporation is strictly forbidden.
Trademarks used in this text: Dell, the DELL logo, and DellWare are registered trade
marks, Latitude is a trademark, and TechFax is a service mark of Dell Computer
Corporation: MS-DOS. Microsoft and Windows are registered trademarks and
Windows NT and Windows for Workgroups are trademarks of Microsoft Corporation:
Pentium is a registered trademark and lntelDX4 and lntel3S6 are trademarks of Intel
Corporation: CompuServe is a registered trademark of CompuServe. Inc.: PRODIGY
a registered trademark of Prodigy Services Co.: Lotus is a registered trademark of
Lotus Development Corporation, OS/2 is a registered trademark of International
Business Machines Corporation: UNIX \s a registered trademark of UNIX System
Laboratories, Inc., a wholly owned subsidiary of Novell. Inc.: VESA is a registered
trademark of Video Electronics Standards Association.
Other trademarks and trade names may be used in this document to refer to either
the entities claiming the marks and names or their products.
Dell Computer Corporation disclaims any proprietary interest in trademarks and trade
names other than its own.
August 1999 P/N 7163U
' "n ll
RED • 1 I
rSlINtjl I
MARKING J[lj
V
-'Kj.
8. Push and turn fasteners [E] clockwise 1/4 turn with coin or flat head screwdriver. In
locked position, red markings will not show. P/N 7163U
www.dell.com
 Loading...