

Page 1

Dell™ 1355cn/1355cnw Multifunction
Color Printer
User's Guide
www.dell.com | support.dell.com
Page 2

Page 3

Contents
Dell™ 1355cn/1355cnw Multifunction Color
Printer ............................................................1
User's Guide .................................................1
Before Beginning .......................................19
A Notes, Notices, and Cautions . . . . . . . . . 21
1 Dell™ 1355cn/1355cnw Multifunction Color Printer
User's Guide 23
2 Finding Information . . . . . . . . . . . . . . . . . 25
3 Product Features
. . . . . . . . . . . . . . . . . . . 29
4 About the Printer . . . . . . . . . . . . . . . . . . . 33
Front View . . . . . . . . . . . . . . . . . . . . . . . . 33
Rear View
Space Requirements
. . . . . . . . . . . . . . . . . . . . . . . . 34
. . . . . . . . . . . . . . . . . . 34
Contents 1
Page 4

Automatic Document Feeder (ADF) . . . . . . . . . . . 36
Operator Panel
Securing the Printer
. . . . . . . . . . . . . . . . . . . . . . 36
. . . . . . . . . . . . . . . . . . . 36
Ordering Supplies . . . . . . . . . . . . . . . . . . . . 37
Setting Up Printer (Printer Setup) ...........39
5 Removing Packaging Material . . . . . . . . 41
6 Connecting Your Printer . . . . . . . . . . . . . 43
Connecting Printer to Computer or Network . . . . . . 44
Direct Connection
Network Connection . . . . . . . . . . . . . . . . 45
Turning On the Printer
Connecting the Telephone Line . . . . . . . . . . . . . 48
. . . . . . . . . . . . . . . . . 44
. . . . . . . . . . . . . . . . . . 47
7 Setting the IP Address . . . . . . . . . . . . . . 51
2 Contents
Setting Initial Settings on the Operator Panel . . . . . 51
Assigning an IP Address (for IPv4 Mode)
The Operator Panel
The Tool Box
Verifying the IP Settings
. . . . . . . . . . . . . . . . . 54
. . . . . . . . . . . . . . . . . . . . 55
. . . . . . . . . . . . . . . . . 56
Printing and Checking the Printer Settings Page
The Operator Panel
. . . . . . . . . . . . . . . . . 57
. . . . . . . . 53
. . . . 57
Page 5

The Tool Box . . . . . . . . . . . . . . . . . . . . 57
8 Loading Paper . . . . . . . . . . . . . . . . . . . . . 59
Loading Print Media in the Multipurpose Feeder (MPF) 59
Loading Print Media in the Priority Sheet Inserter (PSI)
66
9 Installing Printer Drivers on Computers Running
Windows 69
Identifying Printer Driver Pre-install Status (For Network Connection
Setup) . . . . . . . . . . . . . . . . . . . . . . . . . . 69
The Operator Panel
The Tool Box
Disabling the firewall before installing your printer 70
Inserting the Drivers and Utility CD . . . . . . . . . . . 70
Direct Connection Setup
For installing host-based printer driver
For installing XML Paper Specification (XPS) printer driver 71
Network Connection Setup . . . . . . . . . . . . . . . 74
Network Printer Setup on a Local Network
Network Printer Setup on a Remote Network . . . 79
Configuring Wireless Settings (Dell 1355cnw Multifunction Color
Printer Only)
. . . . . . . . . . . . . . . . . . . . . . . 85
Using Wizard Setup to Configure Wireless Settings
Using Advanced Setup to Configure Wireless Settings
Setting up a New Wireless Network Environment for Your
Computer (When you need to setup your wireless connectivity
with your computer) . . . . . . . . . . . . . . . . 97
. . . . . . . . . . . . . . . . 69
. . . . . . . . . . . . . . . . . . . . 69
. . . . . . . . . . . . . . . . 71
. . . . . . 71
. . . . 74
86
88
Setting Up for Shared Printing
. . . . . . . . . . . . . 107
Contents 3
Page 6

Point and Print . . . . . . . . . . . . . . . . . . . 109
Peer-to-Peer . . . . . . . . . . . . . . . . . . . . 112
10 Installing Printer Drivers on Computers Running
Macintosh 117
Installing the Drivers and Software . . . . . . . . . . . 117
Adding a Printer on Mac OS X 10.5 or Later Version(s)
Adding a Printer on Mac OS X 10.4.11
. . . . . . . 118
Using Your Printer ...................................121
11 Dell Printer Configuration Web Tool . . . 123
Overview . . . . . . . . . . . . . . . . . . . . . . . . . 123
117
4 Contents
Using the Dell Printer Configuration Web Tool
. . . . . 125
Setting Up the Dell Printer Configuration Web Tool
Setting Up From Web Browser
Setting Up From Operator Panel
Page Display Format
Top Frame
Left Frame
Right Frame
. . . . . . . . . . . . . . . . . . . 129
. . . . . . . . . . . . . . . . . . . . . . 129
. . . . . . . . . . . . . . . . . . . . . 130
. . . . . . . . . . . . . . . . . . . . . 132
Changing the Settings of the Menu Items
Details of the Menu Items
Printer Status
Printer Jobs
Printer Settings
Print Server Settings
. . . . . . . . . . . . . . . . . . . . 135
. . . . . . . . . . . . . . . . . . . . . 137
. . . . . . . . . . . . . . . . . . . 138
. . . . . . . . . . . . . . . . 160
. . . . . . . . . . . 127
. . . . . . . . . . 129
. . . . . . . . 133
. . . . . . . . . . . . . 133
. . 126
Page 7

Print Volume . . . . . . . . . . . . . . . . . . . . 179
Address Book . . . . . . . . . . . . . . . . . . . 179
Tray Settings
. . . . . . . . . . . . . . . . . . . . 186
12 Print Media Guidelines . . . . . . . . . . . . . 189
Paper . . . . . . . . . . . . . . . . . . . . . . . . . . 189
Paper Characteristics
Recommended Paper
Unacceptable Paper
Selecting Paper . . . . . . . . . . . . . . . . . . 191
Selecting Preprinted Media and Letterhead
Printing on Letterhead
Loading Letterhead . . . . . . . . . . . . . . . . . 193
Selecting Pre-Punched Paper
. . . . . . . . . . . . . . . 189
. . . . . . . . . . . . . . . 190
. . . . . . . . . . . . . . . . 191
. . . . 192
. . . . . . . . . . . . . . . 192
. . . . . . . . . . . 193
Envelopes
. . . . . . . . . . . . . . . . . . . . . . . . 194
Labels . . . . . . . . . . . . . . . . . . . . . . . . . . 195
Storing Print Media
Identifying Print Media and Specifications
Supported Paper Sizes
Supported Paper Types
. . . . . . . . . . . . . . . . . . . 196
. . . . . . 196
. . . . . . . . . . . . . . . 196
. . . . . . . . . . . . . . 198
Paper Type Specifications . . . . . . . . . . . . . 199
13 Loading Print Media . . . . . . . . . . . . . . . 201
Capacity . . . . . . . . . . . . . . . . . . . . . . . . . 201
Print Media Dimensions
Loading Print Media in the Multipurpose Feeder (MPF)
Loading an Envelope in the Multipurpose Feeder (MPF)
. . . . . . . . . . . . . . . . 201
202
Contents 5
207
Page 8

Loading Letterhead . . . . . . . . . . . . . . . . . 210
Loading Print Media in the Priority Sheet Inserter (PSI)
Loading an Envelope in the Priority Sheet Inserter (PSI)
Loading Letterhead
. . . . . . . . . . . . . . . . . 217
Manual Duplex Printing (Windows Printer Driver Only)
The Multipurpose Feeder (MPF)
The Priority Sheet Inserter (PSI)
Using the Output Tray Extension
. . . . . . . . . . 218
. . . . . . . . . . 219
. . . . . . . . . . . . 221
211
214
218
14 Operator Panel . . . . . . . . . . . . . . . . . . . 223
Using the Operator Panel Buttons . . . . . . . . . . . . 223
Printing a Panel Settings Page . . . . . . . . . . . . . 225
The Operator Panel
. . . . . . . . . . . . . . . . . 225
The Tool Box . . . . . . . . . . . . . . . . . . . . 225
Printing, Copying, Scanning, and Faxing 227
15 Printing . . . . . . . . . . . . . . . . . . . . . . . . . 229
6 Contents
Tips for Successful Printing . . . . . . . . . . . . . . . 229
Tips on Storing Print Media
Avoiding Paper Jams
Sending a Job to Print
Canceling a Print Job
. . . . . . . . . . . . . . . . . . 229
. . . . . . . . . . . . . . . . . . 230
Canceling From the Operator Panel
. . . . . . . . . . . . 229
. . . . . . . . . . . . . . . . 229
. . . . . . . . 230
Canceling a Job From the Computer Running Windows
230
Page 9

Direct Print Using the USB Storage Device . . . . . . 231
Supported File Formats
. . . . . . . . . . . . . . 231
Printing a Report Page
Printing a System Settings Page
The Operator Panel
Printer Settings
Using the Tool Box to Change the Printer Settings
Adjusting the Language
. . . . . . . . . . . . . . . . . 232
. . . . . . . . . . 232
. . . . . . . . . . . . . . . . 232
. . . . . . . . . . . . . . . . . . . . . 233
233
. . . . . . . . . . . . . . 233
16 Copying . . . . . . . . . . . . . . . . . . . . . . . . . 235
Loading Paper for Copying . . . . . . . . . . . . . . . 235
Preparing a Document
Making Copies From the Document Glass . . . . . . . 235
Making Copies From the ADF
Setting Copy Options
Number of Copies
Color
. . . . . . . . . . . . . . . . . . . . . . . . 238
Collated . . . . . . . . . . . . . . . . . . . . . . . 239
Reduce/Enlarge
Document Size
Original Type . . . . . . . . . . . . . . . . . . . . 242
Lighter/Darker
Sharpness
Auto Exposure . . . . . . . . . . . . . . . . . . . 244
Multiple-Up
Margin Top/Bottom
Margin Left/Right
Margin Middle
. . . . . . . . . . . . . . . . . 235
. . . . . . . . . . . . . . 237
. . . . . . . . . . . . . . . . . . 238
. . . . . . . . . . . . . . . . . 238
. . . . . . . . . . . . . . . . . . 240
. . . . . . . . . . . . . . . . . . . 241
. . . . . . . . . . . . . . . . . . . 243
. . . . . . . . . . . . . . . . . . . . . 244
. . . . . . . . . . . . . . . . . . . . . 245
. . . . . . . . . . . . . . . . . 247
. . . . . . . . . . . . . . . . . . 248
. . . . . . . . . . . . . . . . . . . 249
Contents 7
Page 10

Changing the Default Settings . . . . . . . . . . . . . 250
Setting the Power Saver Timer Option
. . . . . . . . . 250
17 Scanning . . . . . . . . . . . . . . . . . . . . . . . . 253
Scanning Overview . . . . . . . . . . . . . . . . . . . 253
Scanning From the Operator Panel . . . . . . . . . . . 254
Scanning Using the TWAIN Driver
Scanning Using the Windows Image Acquisition (WIA) Driver
Using a Scanner on the Network . . . . . . . . . . . . 259
Overview
. . . . . . . . . . . . . . . . . . . . . . 259
Confirming a Login name and Password . . . . . . 261
Specifying a Destination to Store the Document
Configuring the Printer Settings
Sending the Scanned File on the Network . . . . . 279
Scanning to USB Storage Device
Sending an E-Mail with the Scanned Image . . . . . . 281
Setting an E-Mail Address Book
Sending an E-mail With the Scanned File . . . . . 282
. . . . . . . . . . . 255
. 262
. . . . . . . . . . 271
. . . . . . . . . . . . 280
. . . . . . . . . . 281
257
18 Faxing . . . . . . . . . . . . . . . . . . . . . . . . . . 285
8 Contents
Using the Numeric Keypad to Enter Characters . . . . 285
Keypad Letters and Numbers
Changing Numbers or Names
Inserting a Pause
. . . . . . . . . . . . . . . . . . 286
Configuring Fax Initial Settings
Setting Your Country
. . . . . . . . . . . . . . . . 286
. . . . . . . . . . . 285
. . . . . . . . . . . 286
. . . . . . . . . . . . . 286
Page 11

Setting the Printer ID . . . . . . . . . . . . . . . . 287
Setting the Time and Date . . . . . . . . . . . . . 288
Changing the Clock Mode
. . . . . . . . . . . . . 289
Setting Sounds
Speaker Volume
Ringer Volume
Specifying the Fax Settings
Changing the Fax Settings Options
Available Fax Settings Options
Advanced Fax Settings
Sending a Fax
Loading an Original Document on the ADF
. . . . . . . . . . . . . . . . . . . . . 289
. . . . . . . . . . . . . . . . . . 289
. . . . . . . . . . . . . . . . . . . 290
. . . . . . . . . . . . . . . 290
. . . . . . . . 290
. . . . . . . . . . . 291
. . . . . . . . . . . . . . . 294
. . . . . . . . . . . . . . . . . . . . . . 296
. . . . 296
Loading an Original Document on the Document Glass
Resolution . . . . . . . . . . . . . . . . . . . . . 298
Document Type
Lighter/Darker
. . . . . . . . . . . . . . . . . . . 298
. . . . . . . . . . . . . . . . . . . 299
Sending a Fax Automatically . . . . . . . . . . . . 299
Sending a Fax Manually
. . . . . . . . . . . . . . 300
Confirming Transmissions . . . . . . . . . . . . . 301
Automatic Redialing
Sending a Delayed Fax
Sending a Fax from the Driver (Direct Fax)
Example
. . . . . . . . . . . . . . . . . . . . . . 303
. . . . . . . . . . . . . . . . 302
. . . . . . . . . . . . . . . . . 302
. . . . . . . 303
296
Receiving a Fax
About Receiving Modes
Loading Paper for Receiving Faxes
Receiving a Fax Automatically in the Fax Mode
. . . . . . . . . . . . . . . . . . . . . 308
. . . . . . . . . . . . . . 308
. . . . . . . . 308
. . 309
Receiving a Fax Manually in the Telephone Mode
Receiving a Fax Automatically in the Telephone/Fax or Ans/Fax
Mode . . . . . . . . . . . . . . . . . . . . . . . . 309
Contents 9
309
Page 12

Receiving a Fax Manually Using an External Telephone 309
Receiving Faxes Using the DRPD Mode . . . . . . 310
Receiving Faxes in the Memory
Polling Receive
. . . . . . . . . . . . . . . . . . . 311
. . . . . . . . . . 311
Automatic Dialing
Speed Dialing
Storing a Number for Speed Dialing
. . . . . . . . . . . . . . . . . . . . 311
. . . . . . . . . . . . . . . . . . . . 311
. . . . . . . . 311
Sending a Fax Using a Speed Dial . . . . . . . . . 312
Group Dialing
Setting Group Dial
. . . . . . . . . . . . . . . . . . . . 313
. . . . . . . . . . . . . . . . . 314
Editing Group Dial . . . . . . . . . . . . . . . . . 314
Sending a Fax Using Group Dialing (Multi-address Transmission)
316
Printing an Address Book List . . . . . . . . . . . 316
Other Ways to Fax . . . . . . . . . . . . . . . . . . . . 316
Using the Secure Receiving Mode
. . . . . . . . . 316
Using an Answering Machine . . . . . . . . . . . 318
Using a Computer Modem
Printing a Report
. . . . . . . . . . . . . . . . . . . . . 319
Changing Setting Options
. . . . . . . . . . . . . 319
. . . . . . . . . . . . . . . . 320
Know Your Printer ...................................321
19 Understanding the Tool Box Menus . . . 323
10 Contents
Printer Settings Report . . . . . . . . . . . . . . . . . 323
Printer Information
Menu Settings
Reports
. . . . . . . . . . . . . . . . . . . . . . . 327
. . . . . . . . . . . . . . . . . 323
. . . . . . . . . . . . . . . . . . . 324
Page 13

TCP/IP Settings . . . . . . . . . . . . . . . . . . . 328
Tray Settings . . . . . . . . . . . . . . . . . . . . 328
Defaults Settings
Fax Settings
. . . . . . . . . . . . . . . . . . 329
. . . . . . . . . . . . . . . . . . . . 331
Printer Maintenance
System Settings
Date & Time
. . . . . . . . . . . . . . . . . . 333
. . . . . . . . . . . . . . . . . . 333
. . . . . . . . . . . . . . . . . . . . 336
Paper Density . . . . . . . . . . . . . . . . . . . 336
Adjust BTR
Adjust Fuser
. . . . . . . . . . . . . . . . . . . . . 337
. . . . . . . . . . . . . . . . . . . . 338
Registration Adjustment . . . . . . . . . . . . . . 338
Adjust Altitude
Reset Defaults
. . . . . . . . . . . . . . . . . . . 340
. . . . . . . . . . . . . . . . . . . 340
Non-Dell Toner . . . . . . . . . . . . . . . . . . . 341
BTR Refresh Mode
Web Link Customization
. . . . . . . . . . . . . . . . . 341
. . . . . . . . . . . . . . 342
TCP/IP Settings . . . . . . . . . . . . . . . . . . . 342
Tray Settings
. . . . . . . . . . . . . . . . . . . . 343
EWS (Embedded Web Server or Dell Printer Configuration Web
Tool) . . . . . . . . . . . . . . . . . . . . . . . . 345
Scan Defaults
. . . . . . . . . . . . . . . . . . . 345
Fax Defaults . . . . . . . . . . . . . . . . . . . . 347
Copy Defaults
Fax Settings
Diagnosis
. . . . . . . . . . . . . . . . . . . . . . . . 356
Chart Print
Environment Sensor Info
. . . . . . . . . . . . . . . . . . . 348
. . . . . . . . . . . . . . . . . . . . 351
. . . . . . . . . . . . . . . . . . . . . 356
. . . . . . . . . . . . . . 356
Clean Developer . . . . . . . . . . . . . . . . . . 356
Refresh Mode
. . . . . . . . . . . . . . . . . . . 357
Resetting Defaults
. . . . . . . . . . . . . . . . . . . . 357
Contents 11
Page 14

20 Understanding the Printer Menus . . . . . 359
Defaults Settings . . . . . . . . . . . . . . . . . . . . 359
Copy Defaults
Scan Defaults
Fax Defaults . . . . . . . . . . . . . . . . . . . . 369
USB Print Defaults
. . . . . . . . . . . . . . . . . . . . 359
. . . . . . . . . . . . . . . . . . . . 364
. . . . . . . . . . . . . . . . . 371
Tray Settings
MPF
. . . . . . . . . . . . . . . . . . . . . . . 371
. . . . . . . . . . . . . . . . . . . . . . . . . 371
Reports/List . . . . . . . . . . . . . . . . . . . . . . . 373
System Settings
. . . . . . . . . . . . . . . . . . 373
Panel Settings . . . . . . . . . . . . . . . . . . . 373
Job History
Error History
. . . . . . . . . . . . . . . . . . . . . 374
. . . . . . . . . . . . . . . . . . . . 374
Color Test Page . . . . . . . . . . . . . . . . . . . 374
Protocol Monitor
Address Book
. . . . . . . . . . . . . . . . . . 374
. . . . . . . . . . . . . . . . . . . . 374
Fax Activity . . . . . . . . . . . . . . . . . . . . . 374
Admin Menu
Phone Book
Network
Fax Settings
. . . . . . . . . . . . . . . . . . . . . . . 374
. . . . . . . . . . . . . . . . . . . . . 375
. . . . . . . . . . . . . . . . . . . . . . 375
. . . . . . . . . . . . . . . . . . . . . 381
System Settings . . . . . . . . . . . . . . . . . . 391
Maintenance
Secure Settings
. . . . . . . . . . . . . . . . . . . . 396
. . . . . . . . . . . . . . . . . . 402
Scan to EMail . . . . . . . . . . . . . . . . . . . . 404
USB Settings
. . . . . . . . . . . . . . . . . . . . 404
12 Contents
Panel Language
. . . . . . . . . . . . . . . . . . . . . 405
Panel Lock Function
Enabling the Panel Lock
. . . . . . . . . . . . . . . . . . . 405
. . . . . . . . . . . . . . 405
Page 15

Disabling the Panel Lock . . . . . . . . . . . . . . 406
Resetting Defaults
. . . . . . . . . . . . . . . . . . . . 407
21 Understanding Your Printer Software (Windows
Only) 409
Printer Status Window . . . . . . . . . . . . . . . 409
Status Monitor Console
Dell Supplies Management System
. . . . . . . . . . . . . . 409
. . . . . . . . 409
Software Update . . . . . . . . . . . . . . . . . . 410
Quick Launch Utility
Address Book Editor
. . . . . . . . . . . . . . . . 410
. . . . . . . . . . . . . . . . 412
ScanButton Manager . . . . . . . . . . . . . . . 413
ScanDirect
User Setup Disk Creating Tool
. . . . . . . . . . . . . . . . . . . . . 413
. . . . . . . . . . . 413
22 Understanding Printer Messages . . . . . 415
23 Printing with Web Services on Devices (WSD) 425
Adding Roles of Print Services . . . . . . . . . . . . . 425
Printer Setup
. . . . . . . . . . . . . . . . . . . . . . 426
Installing a Printer Driver Using the Add Printer Wizard
24 Specifications . . . . . . . . . . . . . . . . . . . . 429
Operating System Compatibility . . . . . . . . . . . . 429
Power Supply
Dimensions
. . . . . . . . . . . . . . . . . . . . . . 429
. . . . . . . . . . . . . . . . . . . . . . . 430
Contents 13
426
Page 16

Memory . . . . . . . . . . . . . . . . . . . . . . . . . 430
Page Description Language (PDL)/Emulation, Operating System, and
Interface
. . . . . . . . . . . . . . . . . . . . . . . . . 430
MIB Compatibility
Environment
. . . . . . . . . . . . . . . . . . . . 430
. . . . . . . . . . . . . . . . . . . . . . . 431
Cables . . . . . . . . . . . . . . . . . . . . . . . . . . 431
Copier Specifications
Scanner Specifications
. . . . . . . . . . . . . . . . . . 432
. . . . . . . . . . . . . . . . . 433
Facsimile Specifications . . . . . . . . . . . . . . . . 434
Maintaining Your Printer .......................437
25 Maintaining Your Printer . . . . . . . . . . . . 439
Determining the Status of Supplies . . . . . . . . . . . 439
Conserving Supplies . . . . . . . . . . . . . . . . . . . 439
Storing Print Media
Storing Consumables
. . . . . . . . . . . . . . . . . . . 440
. . . . . . . . . . . . . . . . . . 440
14 Contents
Replacing Toner Cartridges . . . . . . . . . . . . . . . 441
Removing the Toner Cartridges
. . . . . . . . . . 441
Installing a Toner Cartridge . . . . . . . . . . . . 442
Cleaning Inside the Printer
Cleaning the Color Toner Density (CTD) Sensor
Adjusting Color Registration
. . . . . . . . . . . . . . . 444
. . . . 448
. . . . . . . . . . . . . . 450
Page 17

Performing Auto Adjust . . . . . . . . . . . . . . 450
Printing the Color Registration Chart . . . . . . . 451
Determining Values
Entering Values
. . . . . . . . . . . . . . . . 452
. . . . . . . . . . . . . . . . . . . 453
Cleaning the Scanner
Cleaning the ADF Feed Roller
. . . . . . . . . . . . . . . . . . 454
. . . . . . . . . . . . . . 456
26 Clearing Jams . . . . . . . . . . . . . . . . . . . . 459
Avoiding Jams . . . . . . . . . . . . . . . . . . . . . . 459
Identifying the Location of Paper Jams
Clearing Paper Jams From the ADF
. . . . . . . . . 460
. . . . . . . . . . . 461
Clearing Paper Jams From the Front of the Printer . . . 465
Clearing Paper Jams From the Back of the Printer
Clearing Paper Jams From the Output Tray
. . . 467
. . . . . . . 470
Troubleshooting .......................................475
27 Troubleshooting . . . . . . . . . . . . . . . . . . 477
Basic Printer Problems . . . . . . . . . . . . . . . . . 477
Display Problems
Printing Problems
Print Quality Problems
The output is too light
Toner smears or print comes off/Stain on back side
. . . . . . . . . . . . . . . . . . . . 477
. . . . . . . . . . . . . . . . . . . . 478
. . . . . . . . . . . . . . . . . 480
. . . . . . . . . . . . . . . 480
481
Contents 15
Page 18

Random spots/Blurred images . . . . . . . . . . . 482
The entire output is blank . . . . . . . . . . . . . 483
Streaks appear on the output
Pitched color dots
. . . . . . . . . . . . . . . . . 484
. . . . . . . . . . . 483
Vertical blanks . . . . . . . . . . . . . . . . . . . 484
Ghosting
Fog
. . . . . . . . . . . . . . . . . . . . . . 485
. . . . . . . . . . . . . . . . . . . . . . . . . 486
Bead-Carry-Out (BCO) . . . . . . . . . . . . . . . 487
Auger mark
Wrinkled/Stained paper
. . . . . . . . . . . . . . . . . . . . . 487
. . . . . . . . . . . . . . 488
The top margins is incorrect . . . . . . . . . . . . 489
Color registration is out of alignment
Protrudent / Bumpy paper
. . . . . . . . . . . . . . . . . . . . . . . . . . . . 492
Jam
Misfeed jam
Multi-feed jam
. . . . . . . . . . . . . . . . . . . . 492
. . . . . . . . . . . . . . . . . . . 493
. . . . . . . . . . . . . 491
. . . . . . . 490
Copy Problem
Fax Problems
Scanning Problems
. . . . . . . . . . . . . . . . . . . . . . 494
. . . . . . . . . . . . . . . . . . . . . . 494
. . . . . . . . . . . . . . . . . . . 496
Scanner Driver/Printer Utility Problems . . . . . . . . 499
Other Problems
Contacting Service
. . . . . . . . . . . . . . . . . . . . . 500
. . . . . . . . . . . . . . . . . . . 500
Appendix ...................................................501
B Appendix . . . . . . . . . . . . . . . . . . . . . . . . 503
Dell Technical Support Policy . . . . . . . . . . . . . . 503
16 Contents
Page 19

Online Services . . . . . . . . . . . . . . . . . . 503
Warranty and Return Policy
Recycling Information
Contacting Dell
. . . . . . . . . . . . . . . . . . . . . 504
. . . . . . . . . . . . . . . 504
. . . . . . . . . . . . . . . 504
Contents 17
Page 20

18 Contents
Page 21

Before Beginning
19
Page 22

20
Page 23

Notes, Notices, and Cautions
NOTE: A NOTE indicates important information that helps you make better use of
your printer.
NOTICE: A NOTICE indicates either potential damage to hardware or loss of data
and tells you how to avoid the problem.
CAUTION: A CAUTION indicates a potential for property damage, personal injury,
or death.
Information in this document is subject to change without notice.
© 2010 Dell Inc. All rights reserved.
Reproduction of these materials in any manner whatsoever without the written permission of
Dell Inc. is strictly forbidden.
Trademarks used in this text:
Windows
Microsoft Corporation in the United States and/or other countries; Adobe is either a registered
trademark or a trademark of Adobe Systems Incorporated in the United States and/or other
countries; Wi-Fi is a registered trademarks of the Wi-Fi Alliance.
XML Paper Specification (XPS)
Microsoft Corporation. The terms and conditions upon which Microsoft is licensing such
intellectual property may be found at http://go.microsoft.com/fwlink/?LinkId=52369;
product includes software developed by Eric Young (eay@mincom.oz.au);
2003, Dr Brian Gladman, Worcester, UK. All rights reserved. This product uses published AES
software provided by Dr Brian Gladman under BSD licensing terms;
1988-1997 Sam Leffler and Copyright © 1991-1997 Silicon Graphics, Inc.;
cms)
Other trademarks and trade names may be used in this document to refer to either the entities
claiming the marks and names or their products. Dell Inc. disclaims any proprietary interest in
trademarks and trade names other than its own.
Our printer software uses some of the codes defined by the Independent JPEG Group.
,
Windows Server, and Windows Vista
: Copyright © 1998-2004 Marti Maria.
Dell
and the
DELL
logo are trademarks of Dell Inc.;
are either trademarks or registered trademarks of
: This product may incorporate intellectual property owned by
TIFF (libtiff)
Microsoft,
AES
ICC Profile (Little
DES
: Copyright ©
: Copyright ©
: This
____________________
Notes, Notices, and Cautions 21
Page 24

UNITED STATES GOVERNMENT RESTRICTED RIGHTS
This software and documentation are provided with RESTRICTED RIGHTS. Use, duplication,
or disclosure by the Government is subject to restrictions as set forth in subparagraph (c)(1)(ii)
of the Rights in Technical Data and Computer Software clause at DFARS 252.227-7013 and in
applicable FAR provisions: Dell Inc., One Dell Way, Round Rock, Texas, 78682, USA.
November 2010 Rev. A00
22 Notes, Notices, and Cautions
Page 25

1
Dell™ 1355cn/1355cnw Multifunction Color Printer User's Guide
Click the links to the left for information on the features, options, and
operation of your printer. For information on other documentation included
with your printer, see "Finding Information" on page 25.
To order replacement toner cartridges or supplies from Dell:
1
Double-click the icon on your desktop.
If you cannot find the icon on your desktop, follow the procedure below.
a
Navigate to
Printer\Reorder
software is installed.
b
Click the file
c
Click
d
Choose
Desktop(create shortcut)
x:\abc\Dell Printers\Dell 1355 Multifunction Color
dl1armm.exe
File
on the toolbar.
Send To
, where
x:\abc
is the location where the printer
.
from the drop-down menu, and then click
on the submenu that appears.
2
Visit the Dell Printer Supplies website at
Dell printer supplies by phone.
For best service, have your Dell printer Service Tag ready.
To locate the Service Tag of your printer, see "Express Service Code and
Service Tag" on page 27.
Dell™ 1355cn/1355cnw Multifunction Color Printer User's Guide 23
www.dell.com/supplies
, or order
Page 26

24 Dell™ 1355cn/1355cnw Multifunction Color Printer User's Guide
Page 27
Finding Information
NOTE: The USB cable and the Ethernet cable are not shipped with your printer.
What are you looking for? Find it here
• Drivers for my printer
User's Guide
•My
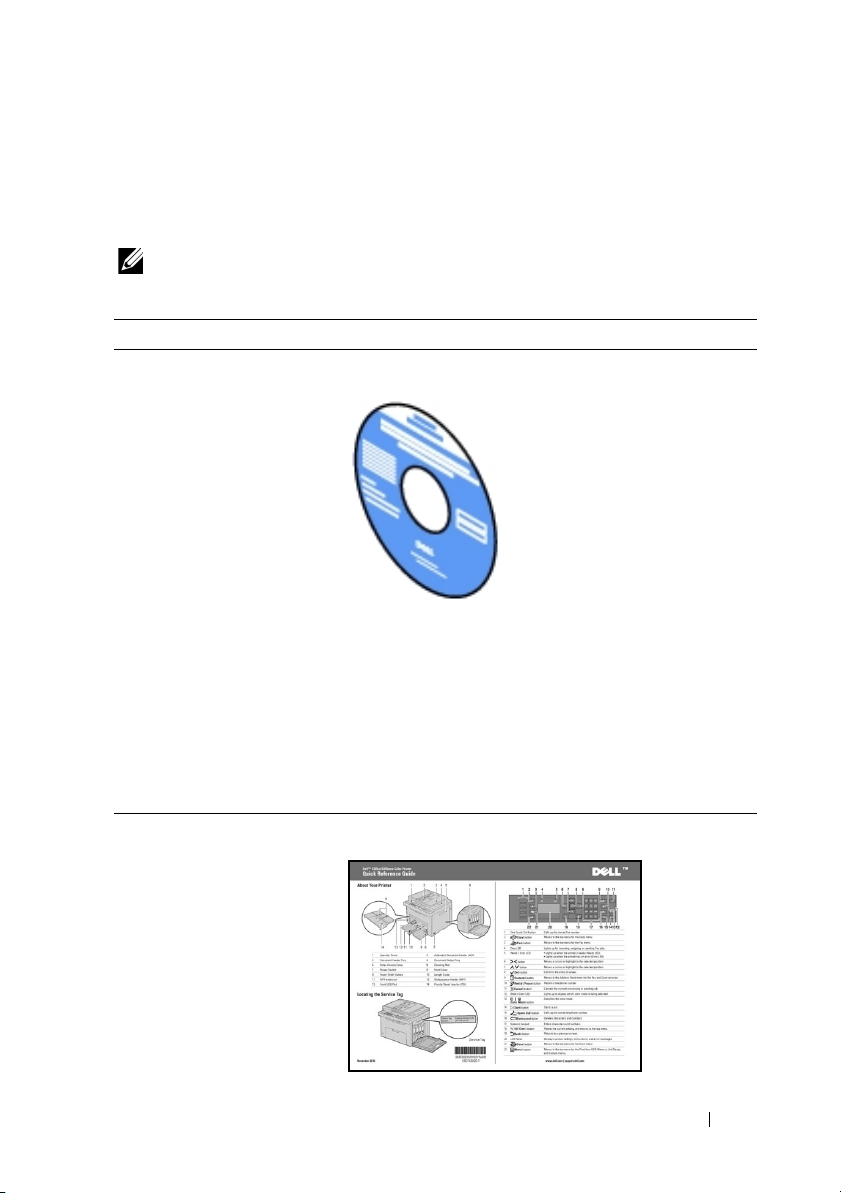
Drivers and Utilities
The
Drivers and Utilities
documentation, and drivers for your printer. You can
use the CD to install/re-install drivers or access your
setup video and documentation.
CD
CD contains setup video,
2
• How to use my printer
Readme files may be included on your CD to provide
last-minute updates about technical changes to your
printer or advanced technical reference material for
experienced users or technicians.
Quick Reference Guide
Finding Information 25
Page 28
What are you looking for? Find it here
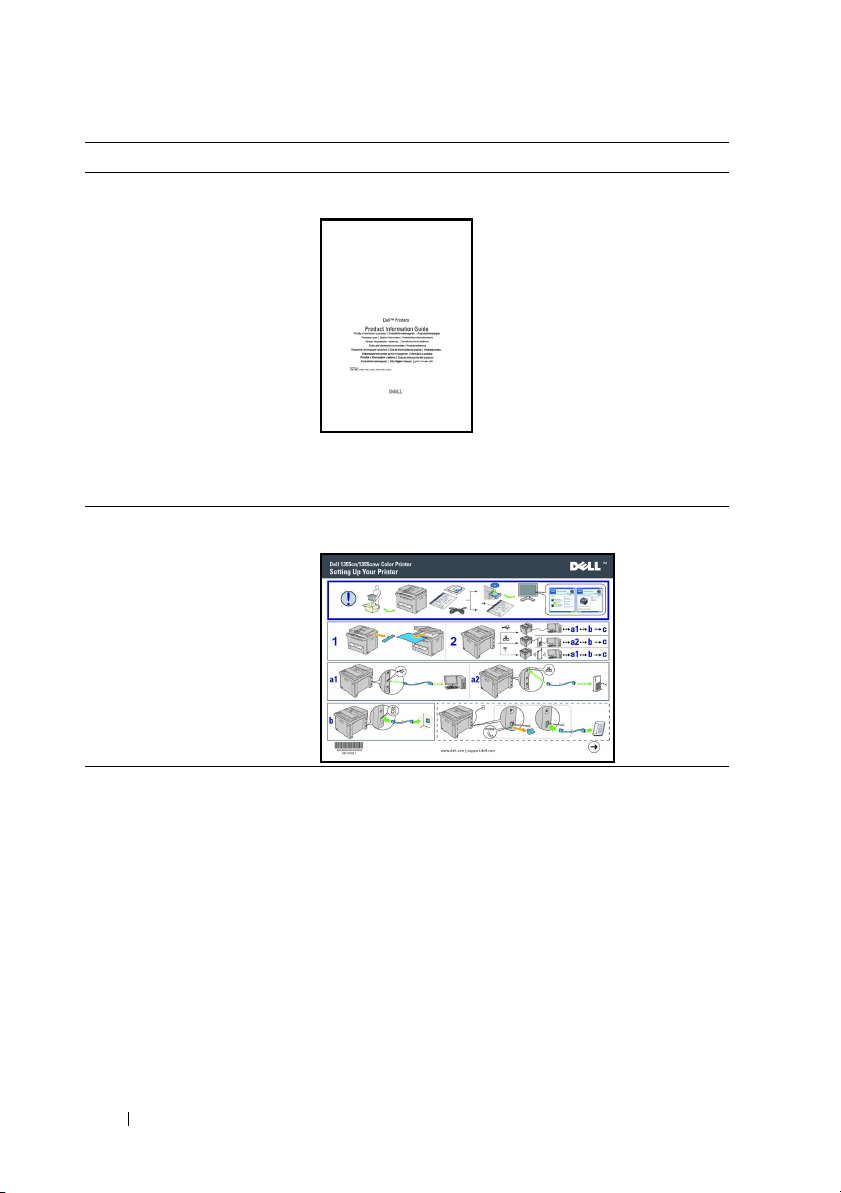
• Safety information
•Warranty information
Product Information Guide
CAUTION: Read and follow all safety instructions in
your
Product Information Guide
operating your printer.
How to set up my printer
Setup diagram
prior to setting up and
Troubleshooting "Troubleshooting" on page 477
26 Finding Information
Page 29
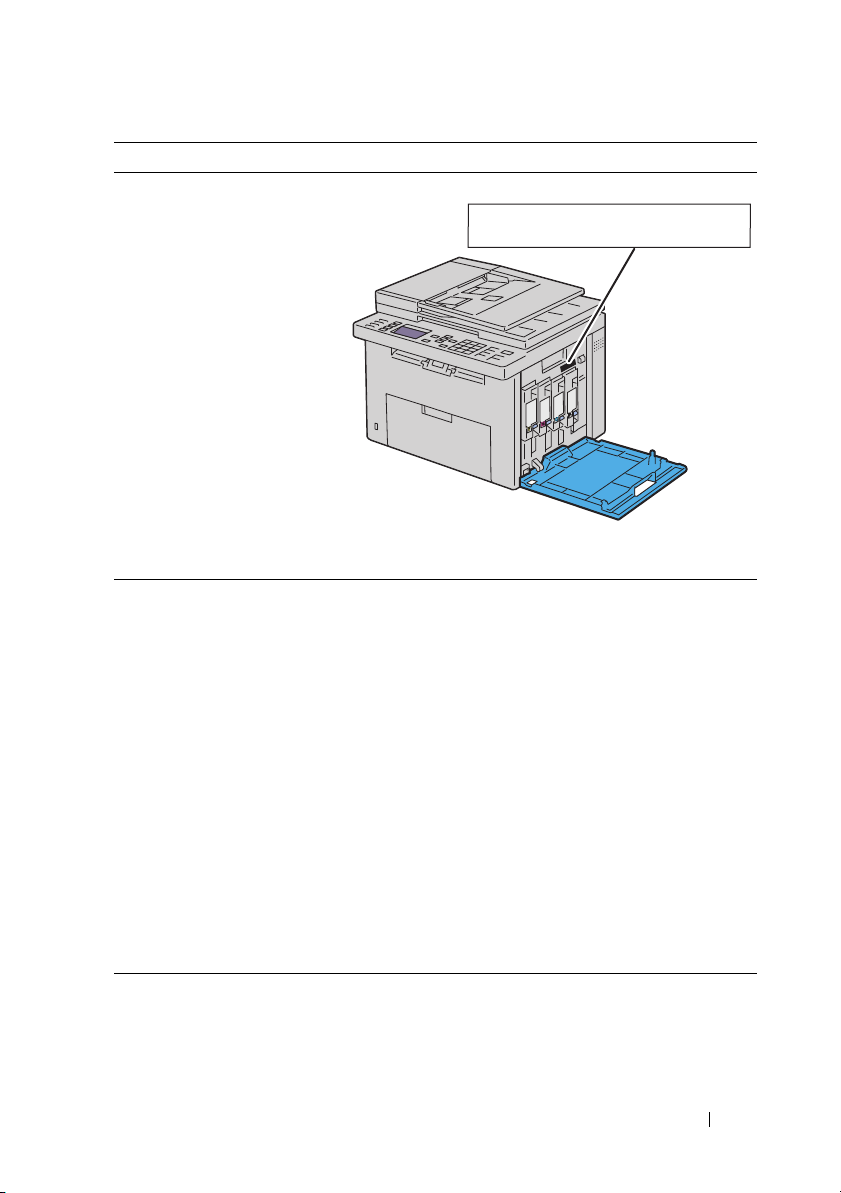
What are you looking for? Find it here
Express Service Code and
Service Tag
The Express Service Code and Service Tag are located
inside the side door of your printer.
• Latest drivers for my printer
• Answers to technical service
and support questions
• Documentation for my
printer
Go to support.dell.com
support.dell.com provides several online tools,
including:
• Solutions — Troubleshooting hints and tips,
articles from technicians, and online courses
• Upgrades — Upgrade information for
components, such as printer driver
• Customer Care — Contact information, order
status, warranty, and repair information
•Downloads — Drivers
• Manuals — Printer documentation and product
specifications
Go to support.dell.com. Select your region and fill in
the requested details to access help tools and
information.
Service Tag Express Service Code
xxxxxxx 000 000 000 00
Finding Information 27
Page 30

28 Finding Information
Page 31

Product Features
This chapter describes the product features and indicates their links.
3
Scanning to a USB Storage Device
With Dell 1355cn/1355cnw
Multifunction Color Printer, you don't
need a PC to connect your USB storage
device to save the scanned data. Insert
your USB storage device in the port on
the printer, and save the scanned data
directly to your USB storage device.
For more information, see "Scanning to
USB Storage Device" on page 280.
Multiple-Up (2-in-1 Copy)
N-up Print enables you to print multiple
pages on a single sheet of paper. This
feature allows you to reduce the paper
consumption.
For more information, see "Multiple-Up"
on page 245.
Product Features 29
Page 32

2-Sided (Manual Duplex Print)
Print From USB Memory
(USB Direct Print)
Manual Duplex Print is to print two or
more pages on the front and back
side of a single sheet of paper manually.
This feature allows you to reduce the
paper consumption.
For more information, see "Manual
Duplex Printing (Windows Printer
Driver Only)" on page 218.
Print From USB Memory feature allows
you to print directly from your USB
storage device without starting your
computer. Without requiring you to
start your computer and an application,
this feature allows quick printing with
simple procedures.
For more information, see "Direct Print
Using the USB Storage Device" on
page 231.
30 Product Features
Page 33

Printing Through Wireless Connection
(Wireless Print)
The Wireless LAN feature on your
printer allows you to install the printer at
any location, and enables printing
without a wired connection to your
computer.
For more information, see "Configuring
Wireless Settings (Dell 1355cnw
Multifunction Color Printer Only)" on
page 85.
Product Features 31
Page 34

32 Product Features
Page 35

4
1
9
79101114 8
65234
1213
About the Printer
This chapter provides an overview of your Dell™ 1355cn/1355cnw Color
Multifunction Printer.
Front View
1 Operator Panel 2 Automatic Document Feeder (ADF)
3 Document Feeder Tray 4 Document Output Tray
5 Toner Ac c e s s Co ve r 6 Print Head Cleaning Rod
7 Power Switch 8 Front Cover
9 Pap er Width Guid es 10 Length Guide
11 MPF Extension 12 Multipurpose Feeder (MPF)
13 Front USB Port 14 Priority Sheet Inserter (PSI)
About the Printer 33
Page 36

Rear View
7
8
9
10
11
12
1
2
3
6
4
5
1 ADF Cover 2 Ethernet Port
3 USB Port 4 Wall Jack Connector
5 Phone Connector 6 Security Slot
7 Rear Cover 8 Transfer Roller
9 Paper Chute 10 Paper Feed Roller
11 Tr a ns f er Be l t 12 Fuser Release Lever
Space Requirements
Place the printer at a location such that there is adequate space for using the
printer feeder and covers.
34 About the Printer
Page 37

100 mm/3.94 inches
596 mm/23.46 inches
132 mm/5.20 inches
410 mm/16.14 inches
338 mm/13.31 inches
292.5 mm/11.52 inches
262.5 mm/10.33 inches
379 mm/14.92 inches
To avoid irregular screen image or malfunctioning of your printer, avoid
placing the printer in direct sunlight with the single sheet feeder opened.
About the Printer 35
Page 38

Automatic Document Feeder (ADF)
3
1 2
4
1 ADF Cover
2 Document Guides
3 Document Glass
4 Document Feeder Tray
Operator Panel
For more information on the operator panel, see "Operator Panel" on
page 223.
Securing the Printer
To protect your printer from theft, you can use the optional Kensington lock.
36 About the Printer
Page 39

Attach the Kensington lock to the security slot on your printer.
Security slot
For details, see the operating instructions supplied with the Kensington lock.
Ordering Supplies
You can order consumables from Dell on the Internet when using a networked
printer. Enter the IP address of your printer in your web browser, launch the
Dell Printer Configuration Web Tool, and click the Order Supplies at: to
order toner for your printer.
You can also order toner cartridges by the following method:
1
Click
Start All Programs Dell Printers Additional Color Software
Dell Supplies Management System
Dell Supplies Management System
The
.
window appears.
2
Select your printer from the
3
If ordering from the web:
a
Select a web address from the
b
Click the
The
screen appears.
c
Enter the Service Tag, and then click OK.
The Service Tag is located inside the toner access cover of your printer.
Visit Dell printer supplies ordering web site
Dell 1355 Color MFP - Dell Supplies Management System
Select Printer Model
Select Reorder URL
About the Printer 37
list.
list.
.
Page 40

Dell supplies web site appears.
Service Tag Express Service Code
xxxxxxx 000 000 000 00
If you order by phone, call the number that appears in the Order by Phone
section.
38 About the Printer
Page 41

Setting Up Printer (Printer Setup)
39
Page 42

40
Page 43

Removing Packaging Material
1
Remove the packaging material from the printer.
2
Lift and open the document cover.
5
3
Remove the protective sheet from the ADF Glass.
Removing Packaging Material 41
Page 44

42 Removing Packaging Material
Page 45

6
1
2
3
4
Connecting Your Printer
Your Dell™ 1355cn/1355cnw Color Multifunction Printer interconnection
cable must meet the following requirements:
Connection type Connection specifications
Wireless IEEE 802.11b/802.11g
USB USB 2.0 compatible
Ethernet 10 Base-T/100 Base-TX compatible
Wall jack connector RJ11
Phone connector RJ11
Connecting Your Printer 43
Page 46

1 Ethernet Port
2 USB Port
3 Wall Jack Connector
4 Phone Connector
Connecting Printer to Computer or Network
Direct Connection
A local printer is a printer which is directly attached to your computer using
the USB cable. If your printer is attached to a network instead of your
computer, skip this section and go to "Network Connection" on page 45.
USB Cable
The following operating systems support USB connection:
•Microsoft® Windows® XP
• Microsoft Windows XP 64-bit Edition
®
®
2003
•Windows Server
• Windows Server 2003 x64 Edition
• Windows Server 2008
• Windows Server 2008 64-bit Edition
• Windows Server 2008 R2
•Windows Vista
• Windows Vista 64-bit Edition
44 Connecting Your Printer
Page 47

•Windows 7
USB port
• Windows 7 64-bit Edition
•Mac OS
®
X 10.4.11/10.5/10.6
To attach the printer to a computer:
1
Ensure that the printer, computer, and any other attached devices are
turned off and unplugged from the power source/outlet.
2
Connect the smaller USB connector into the USB port at the back of the
printer.
3
Connect the other end of the cable into a USB port of the computer.
NOTE: Do not connect the printer USB cable to the USB connector available
on the keyboard.
Network Connection
To connect the printer to a network:
1
Ensure that the printer, computer and any other connected devices have
been turned off and all cables have been disconnected.
2
Connect the Ethernet cable.
Connecting Your Printer 45
Page 48

NOTE: Connect the Ethernet cable, only if you need to setup a wired connection.
Ethernet port
To connect the printer to the network, connect one end of an Ethernet cable
into the Ethernet port at the rear of the printer, and the other end to a LAN
drop or hub.
To setup a wireless connection, see "Configuring Wireless Settings (Dell
1355cnw Multifunction Color Printer Only)" on page 85.
46 Connecting Your Printer
Page 49

Turning On the Printer
CAUTION: Do not use extension cords or power strips.
CAUTION: The printer should not be connected to a UPS system.
1
Connect the power cable to the wall jack connector on the rear of your
printer (see "Rear View" on page 34).
2
Connect the other end of the cable to the power source.
3
Turn on the printer.
4
Follow the on-screen instructions in the operator panel to configure the
initial settings of your printer.
Connecting Your Printer 47
Page 50

Connecting the Telephone Line
Phone connector
Blue plug
NOTE: Do not connect your printer directly to a DSL (digital subscriber line). This
may damage the printer. To use a DSL, you will need to use an appropriate DSL filter.
Contact your service provider for the DSL filter.
1
Plug one end of a telephone line cord to the wall jack connector and the
other end to an active wall jack.
Wall jack connector
To the wall jack
2
Remove the blue plug from the phone connector.
3
To connect a telephone and/or answering machine to your printer, plug the
telephone or answering machine line cord into the phone connector ( ).
48 Connecting Your Printer
Page 51

If the phone communication is serial in your country (such as Germany,
Phone connector
To an external telephone
or answering machine
Phone connector
Yellow terminator
Sweden, Denmark, Austria, Belgium, Italy, France and Switzerland), and
you are supplied with a yellow terminator, insert the yellow terminator into
the phone connector ( ).
Connecting Your Printer 49
Page 52

50 Connecting Your Printer
Page 53

7
Setting the IP Address
Setting Initial Settings on the Operator Panel
You need to set the printer language, country, clock date, and time when you
turn on printer for the first time.
When you turn on the printer, a wizard appears on the operator panel. Follow
the steps below to set the initial settings.
NOTE: If you do not start configuring the initial settings, Ready appears on the
operator panel in three minutes. After that, you can set the following initial setup by
enabling Power on Wizard on the operator panel or Dell™ Printer Configuration
Web Tool if needed.
For more information on operator panel, see "Understanding the Printer Menus" on
page 359.
For more information on Dell Printer Configuration Web Tool, see "Dell Printer
Configuration Web Tool" on page 123.
1
Ensure that
select the language you want to use on the operator panel from the
following drop-down list, and then press the button.
Please Select Language
is highlighted, and then
English
Français
Italiano
Deutsch
Español
Dansk
Nederlands
Norsk
Svenska
2
Press the button to start setting the country.
Setting the IP Address 51
Page 54

3
Ensure that
Please Select Country
is highlighted. Select your
country from the drop-down list, and then press the button.
4
Ensure that
Please Select Time Zone
is highlighted. Select the
appropriate time zone from the following drop-down list, and then press
the button.
UTC -12:00
UTC -11:00
UTC -10:00
UTC -09:00
UTC -08:00
UTC -07:00
UTC -06:00
UTC -05:00
UTC -04:00
UTC -03:30
UTC -03:00
UTC -02:00
UTC -01:00
UTC 00:00
UTC +01:00
UTC +02:00
UTC +03:00
UTC +03:30
UTC +04:00
UTC +04:30
UTC +05:00
UTC +05:30
UTC +05:45
UTC +06:00
52 Setting the IP Address
Page 55

UTC +06:30
UTC +07:00
UTC +08:00
UTC +09:00
UTC +09:30
UTC +10:00
UTC +11:00
UTC +12:00
UTC +13:00
5
Press the button until
Please Enter Date
is highlighted. Specify
the current date, and then press the button.
6
Press the button until
Please Enter Time
is highlighted. Specify
the current time, and then press the button.
7
Press the button for Fax Setup.
If you want to skip the Fax Setup, press the
(Start)
button and then
restart the printer.
8
Press the button until
Please Enter Fax Number
highlighted. enter your fax number, and then press the button.
9
Press the button until
Please Enter Name
is highlighted. Enter a
name, and then press the button.
10
Press the button, and then restart the printer.
is
Assigning an IP Address (for IPv4 Mode)
NOTE: When you assign an IP address manually in IPv6 Mode, use the Dell Printer
Configuration Web Tool. To open the Dell Printer Configuration Web Tool, use the
link local address. To check a link local address, see "Printing and Checking the
Printer Settings Page" on page 57.
An IP address is a unique number that consists of four sections that are
delimited by a period and can include up to three digits in each section, for
example, 111.222.33.44.
Setting the IP Address 53
Page 56

Assigning an IP address that is already in use can cause network performance
issues.
NOTE: Assigning an IP address is considered as an advanced function and is
normally done by a system administrator.
NOTE: Depending on the address class, the range of the IP address assigned may
be different. On Class A, for example, an IP address in the range from 0.0.0.0 to
127.255.255.255 will be assigned. For assignment of IP addresses, contact
your system administrator.
You can assign the IP address by using the operator panel or using the tool
box.
The Operator Panel
For more information on using your operator panel, see "Operator Panel" on
page 223.
1
Turn on the printer.
Ensure that
2
Press the
3
Press the button until
button.
4
Press the button until
the button.
5
Press the button until
button.
6
Press the button until
button.
7
Press the button until
button.
8
Ensure that
button.
9
Ensure that
10
Ensure that
11
Press the button until
the button.
Ready
message appears on the LCD panel.
(Menu)
button.
System
Admin Menu
Network
TCP/IP
IPv4
Get IP Address
Panel
is highlighted, and then press the button.
Get IP Address
IP Address
is highlighted, and then press the
is highlighted, and then press
is highlighted, and then press the
is highlighted, and then press the
is highlighted, and then press the
is highlighted, and then press the
is highlighted.
is highlighted, and then press
54 Setting the IP Address
Page 57

The cursor is located at the first three digits of the IP address.
12
Enter the value of the IP address using the numeric keypad.
13
Press the button.
The next three digits are highlighted.
14
Repeat step 12 and step 13 to enter all of the digits in the IP address, and
then press the button.
15
Ensure that
16
Press the button until
IP Address
is highlighted.
Subnet Mask
is highlighted, and then press
the button.
The cursor is located at the first three digits of the subnet mask.
17
Enter the value of the subnet mask using the numeric keypad.
18
Press the button.
The next three digits are highlighted.
19
Repeat step 17 and step 18 to set subnet mask, and then press the
button.
20
Press the button and ensure that
21
Press the button until
Gateway Address
Subnet Mask
is highlighted, and then
is highlighted.
press the button.
The cursor is located at the first three digits of the gateway address.
22
Enter the value of the gateway address using the numeric keypad.
23
Press the button.
The next three digits are highlighted.
24
Repeat step 22 and step 23 to set gateway address, and then press the
button.
25
Turn off and turn on the printer.
The Tool Box
NOTE: When you use IPv6 Mode for network printing, the Tool Box cannot be used
to assign an IP address.
Setting the IP Address 55
Page 58

1
Click
Start
All Programs
Color Printer
NOTE: The Select Printer dialog box opens in this step, when multiple printer
drivers are installed on your computer. In this case, click the name of Dell 1355
Multifunction Color Printer listed in Printer Name, and then click OK.
The
Tool Box
2
Click the
3
Select
The
TCP/IP Settings
4
Select the mode from
Address,
5
Press the
The IP address is assigned to your printer. To verify the setting, open the web
browser on any computer connected to the network and enter the IP address
into the address bar on the browser. If the IP address is set up correctly, the
Dell Printer Configuration Web Tool displays in your browser.
You can also assign the IP address to the printer when installing the printer
drivers with installer. When you use the Network Installation feature, and the
Get IP Address is set to AutoIP on the operator panel menu, you can
set the IP address from 0.0.0.0 to the desired IP address on the printer
selection window.
Tool Box
opens.
Printer Maintenance
TCP/IP Settings
Subnet Mask
Apply New Settings
Dell Printers
.
tab.
from the list at the left side of the page.
page is displayed.
IP Address Mode
, and
Gateway Address
button to take effect.
Dell 1355 Multifunction
, and then enter the values in IP
.
Verifying the IP Settings
1
Print the printer settings page.
See "Printing and Checking the Printer Settings Page" on page 57.
2
Look under the
that the IP address, subnet mask, and gateway are appropriate.
To verify if the printer is active on the network, run the ping command in
your computer:
1
Click
Start
2
Ty p e
cmd
A black window is displayed.
56 Setting the IP Address
TCP/IP
, and select
, and then press OK.
heading on the printer settings page to ensure
Run
.
Page 59

3
Type ping
your printer).
4
Reply from the IP address denotes printer is active on the network.
xx.xx.xx.xx
(where
xx.xx.xx.xx
is the IP address of
Printing and Checking the Printer Settings Page
Print the printer settings page and check your printer's IP address.
The Operator Panel
1
Press the
2
Press the button until
button.
3
Press the button until
the button.
4
Ensure that
button.
The system settings page is printed.
5
Confirm the IP address next to
printer settings page. If the IP address is
to resolve the IP address automatically, and then print the system settings
page again.
If the IP address is not resolved automatically, see "Assigning an IP Address
(for IPv4 Mode)" on page 53.
(Menu)
System Settings
button.
System
Report/List
IP Address
is highlighted, and then press the
is highlighted, and then press
is highlighted, and then press the
under
0.0.0.0
Wired Network
, wait for a few minutes
on the
The Tool Box
NOTE:
Click
1
2
3
Start
Color Printer
NOTE: The Select Printer dialog box opens in this step, when multiple printer drivers
are installed on your computer. In this case, click the name of Dell 1355 Multifunction
Color Printer listed in Printer Name, and then click OK.
The
Tool Box
Click the
Select
Reports
All Programs
Tool Box
opens.
Printer Settings Report
from the list at the left side of the page.
Dell Printers
.
tab.
Setting the IP Address 57
Dell 1355 Multifunction
Page 60

The
Reports
4
Click the
The printer settings page is printed.
page is displayed.
Printer Settings
button.
If the IP address is
an IP address has not been assigned. To assign an IP address for your
printer, see "Assigning an IP Address (for IPv4 Mode)" on page 53.
0.0.0.0
(the factory default) or
169.254.xx.xx
,
58 Setting the IP Address
Page 61

8
Loading Paper
NOTE: To avoid paper jams, do not remove the priority sheet inserter while a
printing is in progress.
NOTE: Use only laser print media. Do not use ink jet paper in your printer.
NOTE: For printing envelopes, see "Loading Print Media" on page 201.
Loading Print Media in the Multipurpose Feeder (MPF)
1
Open the front cover by pulling out the instruction sheet.
2
Pull the priority sheet inserter (PSI) out.
Loading Paper 59
Page 62

3
Remove the instruction sheet attached to the PSI with adhesive tape.
NOTE: Read the instruction sheet before you use the PSI.
4
Pull the length guide forward until it stops.
60 Loading Paper
Page 63

5
Pull the MPF extension forward until it stops.
6
Adjust the paper width guides to their maximum width.
Loading Paper 61
Page 64

7
Before loading the print media, flex the sheets back and forth, and then
fan them. Straighten the edges of the stack on a level surface.
8
Load paper on the MPF with the top edge first and with the recommended
print side facing up.
62 Loading Paper
Page 65

9
Adjust the width guides and length guides until they rest lightly against
the edges of the stack of print media.
10
Slide the length guide towards the printer until it touches the print media.
Loading Paper 63
Page 66

NOTE: Depending on the size of print media, first slide the MPF extension
backward until it stops, and then pinch the length guide and slide it backward
until it touches print media.
64 Loading Paper
Page 67

11
Insert the PSI into the printer and then align the PSI to the marking on
the paper tray.
Loading Paper 65
Page 68

12
Select the paper type from the printer driver if the loaded print media is
not standard plain paper. If a user-specified print media is loaded in the
MPF, you must specify the paper size setting by using the printer driver.
Loading Print Media in the Priority Sheet Inserter (PSI)
1
Open the front cover.
2
Slide the PSI forward, and then align the PSI to the marking on the paper
tray.
66 Loading Paper
Page 69

3
Before loading the print media, flex the sheets back and forth, and then
fan them. Straighten the edges of the stack on a level surface.
4
Load print media on the PSI with the top edge first and with the
recommended print side facing up.
Loading Paper 67
Page 70

5
Adjust the width guides until they rest lightly against the edges of the
stack of print media.
6
Select the paper type from the printer driver if the loaded print media is
not standard plain paper. If a user-specified print media is loaded in the
PSI, you must specify the paper size setting by using the printer driver.
68 Loading Paper
Page 71

9
Installing Printer Drivers on Computers Running Windows
Identifying Printer Driver Pre-install Status (For Network Connection Setup)
Before installing the printer driver on your computer, print the printer
settings page to check the IP address of your printer.
The Operator Panel
1
Press the (
2
Press the button until
button.
3
Press the button until
the button.
4
Ensure that
button.
The system settings page is printed.
Menu)
button.
System
Report/List
System Settings
is highlighted, and then press the
is highlighted, and then press
is highlighted, and then press the
5
Find the IP address under Wired Network/Wireless Network on the printer
settings page.
If the IP address is
address automatically, and then print the system settings page again.
If the IP address is not resolved automatically, see "Assigning an IP Address
(for IPv4 Mode)" on page 53.
The Tool Box
1
Click
Start
Color Printer
0.0.0.0
All Programs
Tool Box
.
Installing Printer Drivers on Computers Running Windows
, wait for a few minutes to resolve the IP
Dell Printers
Dell 1355 Multifunction
Page 72

NOTE: When multiple printer drivers are installed on your computer, the
Select Printer window opens. In this case, click the name of Dell 1355cnw
Color MFP listed in Printer Name.
The
Tool Box
2
Select
The
TCP/IP Settings
If the IP address shows 0.0.0.0 (the factory default) or 169.254.xx.xx,
an IP address has not been assigned. To assign one for your printer, see
"Assigning an IP Address (for IPv4 Mode)" on page 53.
opens.
TCP/IP Settings
page appears.
from the list on the left side of the page.
Disabling the firewall before installing your printer
NOTE: For Windows XP, Service Pack 2 or 3 must be installed.
If you are running one of the following operating systems, you must disable
the firewall before installing the Dell printer software:
•Windows 7
•Windows Vista
• Windows Server 2008 R2
• Windows Server 2008
•Windows XP
1
Click
Start
Help and Support
.
NOTE: For Windows Server 2008 R2 and Windows 7 operating systems, if you
use Online Help, switch to Offline Help on Windows Help and Support
window.
2
In the
Search
box, type
In the list, click
instructions on the screen.
Enable the firewall after the installation of the Dell printer software is
complete.
Turn Windows Firewall on or off
firewall
and then press
and then follow the
Enter
Inserting the Drivers and Utility CD
1
Insert the
Navigator
70 Installing Printer Drivers on Computers Running Windows
Drivers and Utilities
.
CD into your computer to start
.
Easy Setup
Page 73

NOTE: If the CD does not automatically launch, click Start All Programs (for
Windows Vista and Windows 7)
Windows 7) Run, and then type D:\setup_assist.exe (where D is
the drive letter of your CD), and then click OK.
Accessories (for Windows Vista and
Direct Connection Setup
For installing host-based printer driver
1
Click
Software Installation
2
Select
Personal Installation
3
Follow the on-screen instructions to connect the computer and the printer
with a USB cable, and then turn the printer on.
The Plug and Play installation starts and the installation software proceeds
to the next page automatically.
NOTE: If the installation software does not automatically proceed to the next
page, click Install.
4
Click
Finish
to exit the wizard when the
If necessary, click
USB Printing
Print Test Page
A personal printer is a printer attached to your computer or a print server
using a USB. If your printer is attached to a network and not your computer,
see "Network Connection Setup" on page 74.
.
, and then click
to print a test page.
Next
.
Congratulations!
screen appears.
For installing XML Paper Specification (XPS) printer driver
NOTE: Download and install the XPS printer driver at support.dell.com/support.
NOTE: XPS driver is supported on the following operating systems: Windows 7,
Windows 7 64-bit Edition, Windows Vista, Windows Vista 64-bit Edition, Windows
Server 2008 R2, Windows Server 2008, and Windows Server 2008 64-bit Edition.
Windows Vista or Windows Vista 64-bit Edition
1
Extract the zip file you downloaded to your desired location.
2
Click
3
Start
Click
Add a printer
Control Panel
Hardware and Sound
Printers
.
Installing Printer Drivers on Computers Running Windows 71
.
Page 74

4
Click
Add a local printer
5
Select the port connected to this product, and then click
6
Click
Have Disk
7
Click
Browse
8
Click OK.
9
Select your printer name and click
10
To change the printer name, enter the printer name in the
to display the
, and then select the extracted folder in step 1.
.
Install From Disk
Next
dialog box.
.
box. To use this printer as the default printer, select the check box
displayed under the
Printer name
. Click
Next
.
Installation starts.
If the
User Account Control
NOTE: If you are an administrator on the computer, click Continue; otherwise,
contact your administrator to continue the desired action.
11
As the driver installation is completed, click
dialog box appears, click
Print a test page
page.
12
Click
Finish
.
Windows Server 2008 or Windows Server 2008 64-bit Edition
NOTE: You must log in as an administrator.
1
Extract the zip file you downloaded to your desired location.
2
Click
Start
3
Click
Add a printer
4
Click
Add a local printer
5
Select the port connected to this product, and then click
6
Click
Have Disk
7
Click
Browse
8
Click OK.
9
Select your printer name and click
10
To change the printer name, enter the printer name in the
Control Panel
Hardware and Sound
.
.
to display the
Install From Disk
dialog box.
, and then select the extracted folder in step 1.
Next
.
box.
Next
.
Printer name
Continue
to print a test
Printers
Next
.
Printer name
.
.
72 Installing Printer Drivers on Computers Running Windows
Page 75

To use this printer as the default printer, select the
printer
check box. Click
Next
.
Set as the default
Installation starts.
11
If you do not share your printer, select
share your printer, select
can find and use it
12
As the driver installation is completed, click
Share this printer so that others on your network
. Click
Next
.
Do not share this printer
Print a test page
page.
13
Click
Finish
.
Windows 7, Windows 7 64-bit Edition, or Windows Server 2008 R2
1
Extract the zip file you downloaded to your desired location.
2
Click
Start
3
Click
Add a printer
4
When you use Windows Server 2008 R2, click
printer as an administrator
If the
User Account Control
NOTE: If you are an administrator on the computer, click Ye s; otherwise,
contact your administrator to continue the desired action.
5
Click
Add a local printer
6
Select the port connected to this product, and then click
7
Click
Have Disk
8
Click
Browse
9
Click OK.
10
Select your printer name and click
11
To change the printer name, enter the printer name in the Printer name
box, and then click
Devices and Printers
.
.
Add a local or network
.
dialog box appears, click
Yes
.
.
Next
to display the
Install From Disk
dialog box.
, and then select the extracted folder in step 1.
Next
.
Next
.
Installation starts.
. If you
to print a test
.
12
If you do not share your printer, select
share your printer, select
can find and use it
Installing Printer Drivers on Computers Running Windows 73
Share this printer so that others on your network
. Click
Next
Do not share this printer
. If you
.
Page 76

13
As the driver installation is completed, click
page. To use this printer as the default printer, select the
printer
check box.
14
Click
Finish
.
Print a test page
Set as the default
to print a test
Network Connection Setup
Network Printer Setup on a Local Network
For installing host-based printer driver
1
Click
Software Installation
2
Select
Network Installation
3
Select
Local Installation
4
Select the printer you want to install from the printer list, and then click
Next
. If the target printer is not displayed on the list, click
refresh the list or click
You may specify the IP address and port name at this point.
If you have installed this printer on the server computer, select
setting up this printer on a server
NOTE: When using AutoIP, 0.0.0.0 is displayed in the installer. Before you can
continue, you must enter a valid IP address.
NOTE: If you are running any of the following operating systems, a Windows
Security Alert is displayed:
• Windows Vista
• Windows Vista 64-bit Edition
• Windows Server 2008
• Windows Server 2008 64-bit Edition
• Windows Server 2008 R2 64-bit Edition
• Windows 7
• Windows 7 64-bit Edition
To continue installing the host-based printer driver, click
Allow access
(for Windows Server 2008 R2 and Windows 7).
.
, and then click
, and then click
Add Printer
check box.
Next
.
Next
.
Refresh
to add a printer to the list manually.
Unblock
I am
to
or
5
Specify the printer settings, and then click
Next
.
74 Installing Printer Drivers on Computers Running Windows
Page 77

a
Enter the printer name.
b
If you want other users on the network to access this printer, select
Share this printer
with other computers on the network, and then
enter a share name that users can identify.
c
If you want to set a printer as the default, select the
Set this printer
default check box.
6
Select the software and documentation you want to install, and then click
Next
. You can specify folders in which to install the Dell software and
documentation. To change the folders, click
7
Click
Finish
to exit the wizard when the
If necessary, click
For installing XML Paper Specification (XPS) printer driver
NOTE: Download and install the XPS printer driver at support.dell.com/support.
NOTE: XPS driver is supported on the following operating systems: Windows 7,
Windows 7 64-bit Edition, Windows Vista, Windows Vista 64-bit Edition, Windows
Server 2008 R2, Windows Server 2008, and Windows Server 2008 64-bit Edition.
Print Test Page
to print a test page.
Browse
.
Congratulations!
screen appears.
Windows Vista or Windows Vista 64-bit Edition
1
Extract the zip file you downloaded to your desired location.
2
Click
Start
3
Click
Add a printer
4
Click
Add a network, wireless or Bluetooth printer
5
Select printer or click
6
Select
Next
.
7
Select
Hostname or IP address
User Account Control Continue
If the
Continue
Control Panel
Hardware and Sound
Printers
.
.
The printer that I want isn't listed
Add a printer using a TCP/IP address or hostname
TCP/IP Device
for
Device type
, and then click
, and enter the IP address for
Next
.
dialog box appears, click
.
.
, and then click
as
.
NOTE: If you are an administrator on the computer, click Continue; otherwise,
contact your administrator to continue the desired action.
8
Click
9
Click
Have Disk
Browse
to display the
Install From Disk
dialog box.
, then select the extracted folder in step 1, and then click OK.
Installing Printer Drivers on Computers Running Windows 75
Page 78

10
Select your printer name and click
11
To change the printer name, enter the printer name in the
box, and then click
Next
.
To use this printer as the default printer, select the
printer
check box.
Next
.
Set as the default
Installation starts.
If the
User Account Control
NOTE: If you are an administrator on the computer, click Continue; otherwise,
contact your administrator to continue the desired action.
12
As the driver installation is completed, click
dialog box appears, click
Print a test page
Continue
page.
13
Click
Finish
.
Windows Server 2008 or Windows Server 2008 64-bit Edition
NOTE: You must log in as an administrator.
1
Extract the zip file you downloaded to your desired location.
2
Click
Start
3
Click
Add a printer
4
Click
Add a network, wireless or Bluetooth printer
5
Select your printer or click
Control Panel
.
The printer that I want isn't listed
Hardware and Sound
.
When you select your printer, go to step 8.
Printer name
.
to print a test
Printers
.
.
When you click
6
Select
Add a printer using a TCP/IP address or hostname
Next
.
7
Select
TCP/IP Device
Hostname or IP address
User Account Control Continue
If the
Continue
8
Click
Have Disk
9
Click
Browse
10
Select your printer name and click
The printer that I want isn't listed
from
Device type
, and then click
, and enter the IP address for
Next
, go to step 6.
.
dialog box appears, click
.
to display the
Install From Disk
dialog box.
, then select the extracted folder in step 1, and then click OK.
Next
.
76 Installing Printer Drivers on Computers Running Windows
, and then click
Page 79

11
To change the printer name, enter the printer name in the
box, and then click
Next
.
To use this printer as the default printer, select the
printer
check box.
Installation starts.
12
If you do not share your printer, select
share your printer, select
can find and use it
13
As the driver installation is completed, click
Share this printer so that others on your network
. Click
Next
.
Do not share this printer
Print a test page
page.
14
Click
Finish
.
Windows Server 2008 R2
1
Extract the zip file you downloaded to your desired location.
2
Click
Start
3
Click
Add a printer
4
Click
Add a network, wireless or Bluetooth printer
5
Select your printer or click
NOTE: When you click The printer that I want isn't listed, Find a printer by
name or TCP/IP address screen appears. Find your printer on this screen.
If the
User Account Control
Devices and Printers
.
The printer that I want isn't listed
dialog box appears, click
.
Printer name
Set as the default
. If you
to print a test
.
.
Yes
.
NOTE: If you are an administrator on the computer, click Ye s; otherwise,
contact your administrator to continue the desired action.
6
Click
Have Disk
7
Click
Browse
8
Select your printer name and click
9
To change the printer name, enter the printer name in the
box, and then click
10
If you do not share your printer, select
share your printer, select
can find and use it
11
Click
Next
to display the
Install From Disk
, then select the extracted folder in step 1, and then click OK.
Next
.
Next
.
Do not share this printer
Share this printer so that others on your network
.
.
Installing Printer Drivers on Computers Running Windows 77
dialog box.
Printer name
. If you
Page 80

Installation starts.
12
As the driver installation is completed, click
Print a test page
page. To use this printer as the default printer, select the
printer
check box.
13
Click
Finish
.
Windows 7 or Windows 7 64-bit Edition
1
Extract the zip file you downloaded to your desired location.
2
Click
Start
3
Click
Add a printer
4
Click
Add a network, wireless or Bluetooth printer
5
Select your printer or click
Devices and Printers
.
The printer that I want isn't listed
.
When you select your printer, go to step 8.
to print a test
Set as the default
.
.
When you click
6
Select
Add a printer using a TCP/IP address or host name
Next
.
7
Select
TCP/IP Device
Hostname or IP address
If the
User Account Control
NOTE: If you are an administrator on the computer, click Ye s; otherwise,
contact your administrator to continue the desired action.
8
Click
Have Disk
9
Click
Browse
10
Select your printer name and click
11
To change the printer name, enter the printer name in the
box, and then click
The printer that I want isn't listed
from
Device type
, and then click
, and enter the IP address for
Next
.
dialog box appears, click
to display the
Install From Disk
, then select the extracted folder in step 1, and then click OK.
Next
.
Next
.
Installation starts.
12
As the driver installation is completed, click
Print a test page
page. To use this printer as the default printer, select the
printer
check box.
13
Click
Finish
.
, go to step 6.
, and then click
Ye s
.
dialog box.
Printer name
Set as the default
to print a test
78 Installing Printer Drivers on Computers Running Windows
Page 81

NOTE: You can set up the Dell Printer Configuration Web Tool to send you an e-mail
when the printer needs supplies or intervention.
For more information about E-Mail Alert, see "E-Mail Alert" on page 126.
Network Printer Setup on a Remote Network
Before Installation
Before you start remote installation, perform the following procedures.
Allow Print Spooler to Accept Client Connections
NOTE: This step is required for Windows XP 64-bit Edition, Windows Vista,
Windows Vista 64-bit Edition, Windows Server 2003, Windows Server 2003 x64
Edition, Windows Server 2008, Windows Server 2008 64-bit Edition, Windows Server
2008 R2, Windows 7, and Windows 7 64-bit Edition.
For Windows XP 64-bit Edition, Windows Vista, Windows Server 2003, and
Windows Server 2008:
1
Click
Start
All Programs
Windows Vista only)
2
Ty p e
gpedit.msc
3
Click
Computer Configuration
4
Right-click
Properties
5
On the
6
Restart the computer.
Allow Print Spooler to accept client connections
.
Setting
, and then click OK.
tab, select
For Windows Server 2008 R2 and Windows 7:
1
Click
Start All Programs
Windows 7 only)
2
Ty p e
gpedit.msc
3
Click
Computer Configuration Administrative Templates Printers
4
Right-click
Edit
.
5
Select
Enabled
6
Restart the computer.
Run
, and then click OK.
Allow Print Spooler to accept client connections
, and then click OK.
(for Windows Vista only)
Run
.
Administrative Templates
Enabled
, and then click OK.
(for Windows 7 only) Accessories
.
Accessories
Printers
and select
(for
and select
(for
.
.
Installing Printer Drivers on Computers Running Windows 79
Page 82

Share the Firewall File and Printer
NOTE: This step is required for Windows XP, Windows XP 64-bit Edition, Windows
Vista, Windows Vista 64-bit Edition, Windows Server 2008, Windows Server 2008 64bit Edition, Windows Server 2008 R2, Windows 7, and Windows 7 64-bit Edition.
For Windows XP:
1
Click
2
Select
3
Click
4
On the
then click
start Control Panel
Security Center
Windows Firewall
Exceptions
OK
tab, check the
.
.
.
.
File and Printer Sharing
check box, and
For Windows Vista:
1
Click
2
Select
3
Click
4
Click
5
Click
6
On the
then click
Start Control Panel
Security
.
Windows Firewall
Change settings
Continue
Exceptions
OK
.
tab, check the
.
.
.
.
File and Printer Sharing
check box, and
For Windows Server 2008:
1
Click
2
Double-click
3
Click
4
On the
then click
Start Control Panel
Windows Firewall
Change settings
Exceptions
OK
tab, check the
.
.
.
.
File and Printer Sharing
check box, and
For Windows Server 2008 R2 and Windows 7:
1
Click
Start Control Panel
2
Select
System and Security
3
Click
Windows Firewall
4
Click
Allow a program or feature through Windows Firewall
5
If the check boxes under
click Change settings, and then click
.
.
.
Allowed programs and features:
Yes
.
.
are dimmed,
80 Installing Printer Drivers on Computers Running Windows
Page 83

6
Check the
Name
check box.
Home/Work (Private) or Public
check box is
automatically selected according to your settings.
If
File and Printer Sharing Properties
7
Click OK.
Start Remote Registry
NOTE: This step is required for Windows Vista, Windows Vista 64-bit Edition,
Windows 7, and Windows 7 64-bit Edition.
1
Click
Start Control Panel
2
Select
System and Maintenance (System and Security
3
Click
Administrative Tools
4
Double-click
5
Click
Continue
6
Right-click
7
Right-click
8
Change
Disable User Account Control
NOTE: Disabling the User Account Control might leave the system vulnerable to
virus attacks.
Services
(for Windows Vista only).
Remote Registry
Remote Registry
Startup type: to Automatic
.
.
.
and select
and select
dialog box appears, click OK.
for Windows 7).
Start
.
Properties
.
, and then click OK.
NOTE: This step is required for Windows Vista, Windows Vista 64-bit Edition,
Windows Server 2008, Windows Server 2008 64-bit Edition, Windows Server 2008
R2, Windows 7, and Windows 7 64-bit Edition.
For Windows Vista:
1
Click
2
Select
3
Click
4
Click
5
Click
6
Clear the
computer
7
Click OK.
Start Control Panel
User Accounts
User Accounts
.
.
Turn User Account Control on or off
Continue
.
Use User Account Control (UAC) to help protect your
check box.
Installing Printer Drivers on Computers Running Windows 81
.
.
Page 84

8
Restart the computer.
For Windows Server 2008:
1
Click
Start Control Panel
2
Double-click
3
Click
4
Click
5
Clear the
computer
6
Click OK.
7
Restart the computer.
For Windows Server 2008 R2:
1
Click
2
Select
3
Click
4
Click
5
Move the slider to the bottom, and then click OK.
6
Click
7
Click OK.
8
Click
9
Restart the computer.
For Windows 7:
1
Click
2
Select
3
Click
4
Click
5
Move the slider to the bottom, and then click OK.
6
Click
7
Restart the computer.
User Accounts
Turn User Account Control on or off
Continue
Start Control Panel
User Accounts
User Accounts
Change User Account Control settings
Yes
Yes
Start Control Panel
User Accounts and Family Safety
User Accounts
Change User Account Control Settings
Yes in User Account Control
.
Use User Account Control (UAC) to help protect your
check box.
.
.
.
.
.
.
.
.
.
dialog box.
.
.
.
.
82 Installing Printer Drivers on Computers Running Windows
Page 85

Enable Network Discovery and File Sharing for all Public Networks
NOTE: This step is required when you use Windows Vista, Windows Vista 64-bit
Edition, Windows Server 2008, Windows Server 2008 64-bit Edition, Windows Server
2008 R2, Windows 7, and Windows 7 64-bit Edition for the server computer.
For Windows 7, and Windows 7 64-bit Edition, Windows Server 2008 R2
1
Click
Start Control Panel Network and Internet Network and
Sharing Center
2
To allow your computer to be found on the network, and to allow other
Change advanced sharing settings
.
computers on the network to share the files and folders on your computer,
click
Turn on network discovery
3
Click
4
If you see the
Save changes
User Account Control
.
.
dialog box, click
Yes
.
For Windows Vista, Windows Vista 64-bit Edition, Windows Server 2008,
Windows Server 2008 64-bit Edition:
1
Click
Start Network
2
Right-click
The
3
Click the down arrow button next to either
4
To allow your computer to be found on the network, and to allow other
Network
Network an Sharing Center
.
and select
Properties
.
screen appears.
Network discovery
.
computers on the network to share the files and folders on your computer,
click
5
6
Turn on network discovery
Click
Apply
.
If the
User Account Control
.
dialog box appears, click
Continue
.
Disable Simple File Sharing
NOTE: This step is required for Windows XP, and Windows XP 64-bit Edition.
1
Click
Start Control Panel
2
Select
Appearance and Themes
3
Select
Folder Options
4
On the
View
box, and then click
5
Click
Start Control Panel
tab, clear the
OK
Installing Printer Drivers on Computers Running Windows 83
.
.
.
Use simple file sharing (Recommended)
.
.
check
Page 86

6
Select
Performance and Maintenance
7
Select
Administrative Tools
8
Double-click
9
Click
10
Right-click
and select
11
Ensure that
12
Click OK.
Installing the Printer Driver
NOTE: Installation on Windows XP Home Edition, Windows Vista Home Basic,
Windows Vista Home Premium, Windows Vista x64 Home Basic, Windows Vista x64
Home Premium, Windows 7 Starter, Windows 7 Home Basic, Windows 7 Home
Premium, Windows 7 x64 Home Basic, and Windows 7 x64 Home Premium is not
supported.
1
Insert the
computer. The
2
Click
The
Install Printer Driver and Software
3
Select
4
Select
5
Enter the Administrator user name and password of the client computer,
Local Security Policy
Local Policies Security Options
Network access: Sharing and security model for local accounts
Properties
Classic - local users authenticate as themselves
Drivers and Utilities
Easy Setup Navigator
Software Installation
Network Installation
Remote Installation
.
.
CD provided with the printer in your
.
, and then click
, and then click
then select the clients or servers, and then
.
.
.
file launches automatically.
screen appears.
Next
.
Next
.
Next
.
is selected.
NOTE: If you are running any of the following operating systems, a Windows
Security Alert is displayed:
• Windows Vista
• Windows Vista 64-bit Edition
• Windows Server 2008
• Windows Server 2008 64-bit Edition
• Windows Server 2008 R2 64-bit Edition
• Windows 7
• Windows 7 64-bit Edition
84 Installing Printer Drivers on Computers Running Windows
Page 87

To continue installing the host-based printer driver, click
Allow access
6
Check if the printer to be installed is listed in
Next
.
NOTE: If the printer to be installed is not listed in Select Printer, try the
following steps:
• Click Refresh to update the information.
• Click Add Printer, and then enter a port name (any alphanumeric string)
and an existing IP address for the printer.
7
Select the required items on the
click
Install
8
Click
Finish
(for Windows Server 2008 R2 and Windows 7).
Select Printer
Software and Documentation
.
to exit this tool.
Unblock or
, and then click
, and then
Configuring Wireless Settings (Dell 1355cnw Multifunction Color Printer Only)
This section describes how to configure wireless settings through Easy Setup
Navigator.
The specifications of wireless setting function are described below:
Item Specification
Connectivity Wireless
Connectivity Standard IEEE 802.11b/802.11g compliant
Bandwidth 2.4 GHz
Data Transfer Rate 802.11g: 54, 48, 36, 24, 18, 12, 9, 6 Mbps
802.11b: 11, 5.5, 2, 1 Mbps
Security WEP (64/128bits), WPA-PSK (TKIP, AES), WPA-
2PSK (AES)
Certifications Wifi, WPA2.0 (Personal)
Wifi Protected Setup(WPS) Push Button Configuration (PBC), Personal
Identification Number (PIN)
You can select a method to configure a wireless setting from the following:
Installing Printer Drivers on Computers Running Windows 85
Page 88

Wizard Setup through USB connection
Advanced Setup through
Ethernet connection
Operator Panel
Dell Printer Configuration Web Tool
WPS-PIN
WPS-PBC
*1
WPS-PIN (Wi-Fi® Protected Setup-Personal Identification Number) is a method to
authenticate and register devices required for wireless configuration, by entering
PIN assignments in the printer and computer. This setting, performed through
access point, is available only when the access points of your wireless router
supports WPS.
*2
WPS-PBC (Wi-Fi Protected Setup-Push Button Configuration) is a method to
authenticate and register devices required for wireless configuration, by pressing
the button provided on the access point via wireless routers, and then performing
WPS-PBC setting on the operator panel. This setting is available only when the
access point supports WPS.
*1
*2
NOTE: For information on how to install a wireless, see "Using Wizard Setup to
Configure Wireless Settings" on page 86 or "Using Advanced Setup to Configure
Wireless Settings" on page 88.
Using Wizard Setup to Configure Wireless Settings
1
Insert the
computer. The
Drivers and Utilities
Easy Setup Navigator
CD provided with the printer in your
file launches automatically.
86 Installing Printer Drivers on Computers Running Windows
Page 89

2
Click
3
Guided Setup
Click
Connect Your Printer
.
.
Select your type of connection screen appears.
4
Select
Wireless Connection
, and then click
The setting method selection window appears.
5
Ensure that
6
Follow the instructions until the
Wizard
is selected, and then click
Check Setup
Next
.
Next
.
screen appears.
Installing Printer Drivers on Computers Running Windows 87
Page 90

7
Confirm there are no errors displayed in the operator panel, and then click
NO
.
If you see any errors, click
8
Click
Start installation
9
Select
Local Installation
10
Check if the printer to be installed is listed in the
and then click
NOTE: If the printer to be installed is not listed in the Select Printer screen, try
the following steps:
• Click Refresh to update the information.
• Click Add Printer, and then enter the details of the printer manually.
11
Select the required items on the
click
Next
12
Select the software to be installed, and then click
The
Congratulations!
13
Click
Finish
Next
.
to exit this tool.
YES
and follow the instruction.
.
, and then click
.
screen appears.
Next
.
Select Printer
Enter Printer Settings
Install
screen,
screen, and then
.
The wireless configuration is complete.
Using Advanced Setup to Configure Wireless Settings
To use the Advanced Setup, display the Configuration Wireless Setting
screen.
Displaying Configure Wireless Settings Screen
1
Insert the
computer. The
Drivers and Utilities
Easy Setup Navigator
CD provided with the printer in your
file launches automatically.
88 Installing Printer Drivers on Computers Running Windows
Page 91

2
Click
3
4
Guided Setup
Click
Connect Your Printer
Select
Wireless Connection
.
.
, and then click
The setting method selection window appears.
5
Select
Advanced
Select a connection method from the following
.
• Ethernet Cable
•WPS-PIN
Next
.
Installing Printer Drivers on Computers Running Windows 89
Page 92

•WPS-PBC
• Operator Panel
• Dell Printer Configuration Web Tool
Ethernet Cable
1
Select
Ethernet Cable
2
Follow the instructions, and then click
The
Advanced Configuration Tool
3
Select the printer to be configured in the
click
Next
.
NOTE: If the printer to be configured is not listed in the Select Printer screen,
try the following steps:
• Click Refresh to update the information.
• Click Enter IP Address, and then enter the IP address of your printer.
4
Enter the SSID.
5
Select
Type of wireless network
6
Configure the security setting, and then click
The
IP Address Settings
7
Select
IP Mode
When
IPv4
is selected:
, and then click
.
screen appears.
depending on your network scheme.
Next
.
Next
.
screen appears.
Select Printer
Next
screen, and then
.
Configure the following:
a
Select
Ty p e
.
b
Enter the following items:
IP address
•
of your printer
•Subnet Mask
• Gateway Address
When
IPv6
is selected:
Configure the following:
a
Select
Use Manual Address
b
Enter IP address of your printer.
.
90 Installing Printer Drivers on Computers Running Windows
Page 93

c
Enter the gateway address of your network.
When
Dual Stack
is selected:
Configure the
8
Click
Next
.
9
Ensure that the wireless settings are displayed, and then click
The
Complete configuration
10
Click
Next
.
11
Follow the instructions until the
click
Next
.
12
Confirm there are no errors displayed on the operator panel, and then click
NO
on the
NOTE: If you see any errors, click YES and follow the instruction.
IPv4 Settings
Check Setup
and
screen appears.
Check Setup
screen.
IPv6 Settings
screen appears, and then
.
Apply
.
13
Click
Start Installation
14
Select
Local Installation
15
Check if the printer to be installed is listed in the
and then click
NOTE: If the printer to be installed is not listed in the Select Printer screen, try
the following steps:
•Click
Next
Refresh
Installing Printer Drivers on Computers Running Windows 91
.
, and then click
.
to update the information.
Next
.
Select Printer
screen,
Page 94

•Click
Add Printer
, and then enter the details of the printer
manually.
16
Configure the required items on the
then click
17
Select the software to be installed, and then click
The
18
Click
Next
.
Congratulations!
Finish
to exit this tool.
screen appears.
Enter Printer Settings
Install
.
screen, and
The wireless configuration is complete.
WPS-PIN
NOTE: WPS-PIN (Wi-Fi Protected Setup-Personal Identification Number) is a
method to authenticate and register devices required for wireless configuration, by
entering PIN assignments to a printer and computer. This setting, performed
through access point, is available only when the access points of your wireless
router supports WPS.
1
Select
WPS-PIN
2
Follow the instructions until the
3
Confirm there are no errors displayed on the operator panel, and then click
NO
on the
NOTE: If you see any errors, click YES and follow the instruction.
, and then click
Check Setup
screen.
Next
.
Check Setup
screen appears.
92 Installing Printer Drivers on Computers Running Windows
Page 95

4
Select
Local Installation
5
Check if the printer to be installed is listed in the
click
Next
.
NOTE: If the printer to be installed is not listed in the Select Printer, try the
following steps:
• Click Refresh to update the information.
• Click Add Printer, and then enter the details of the printer manually.
6
Configure the required items on the
then click
7
Select the software to be installed, and then click
The
8
Click
Next
.
Congratulations!
Finish
to exit this tool.
, and then click
screen appears.
Next
.
Select Printer
Enter Printer Settings
Install
.
, and then
screen, and
The wireless configuration is complete.
When the WPS-PIN operation is successful and the printer is rebooted,
wireless LAN connection is completed.
WPS-PBC
NOTE: WPS-PBC (Wi-Fi Protected Setup-Push Button Configuration) is a method to
authenticate and register devices required for wireless configuration, by pressing
the button provided on the access point via wireless routers, and then performing
WPS-PBC setting on the operator panel. This setting is available only when the
access point supports WPS.
1
Select
WPS-PBC
2
Follow the instructions until the
3
Confirm there are no errors displayed on the operator panel, and then click
NO
on the
, and then click
Check Setup
screen.
Next
.
Check Setup
screen appears.
NOTE: If you see any errors, click YES and follow the instruction.
Installing Printer Drivers on Computers Running Windows 93
Page 96

4
Select
Local Installation
5
Check if the printer to be installed is listed in the
and then click
NOTE: If the printer to be installed is not listed in the Select Printer screen, try
the following steps:
• Click Refresh to update the information.
• Click Add Printer, and then enter the details of the printer manually.
6
Configure the required items on the
then click
7
Select the software to be installed, and then click
Congratulations!
The
8
Click
Finish
Next
Next
.
to exit this tool.
, and then click
.
screen appears.
Next
.
Select Printer
Enter Printer Settings
Install
.
screen,
screen, and
The wireless configuration is complete.
NOTE: For WPS-PBC operation on the wireless LAN access point, refer to the
manual supplied with the wireless LAN access point.
When the WPS-PBC operation is successful and the printer is rebooted,
wireless LAN connection is completed.
Operator Panel
1
Select
Operator Panel
, and then click
Next
.
94 Installing Printer Drivers on Computers Running Windows
Page 97

2
Follow the instructions until the
3
Confirm there are no errors displayed on the operator panel, and then click
NO
on the
NOTE: If you see any errors, click YES and follow the instruction.
4
Select
5
Check if the printer to be installed is listed in the
and then click
NOTE: If the printer to be installed is not listed in the Select Printer screen,
Check Setup
Local Installation
Next
.
try the following steps:
•Click
•Click
Refresh
Add Printer
screen.
, and then click
to update the information.
Check Setup
screen appears.
Next
.
Select Printer
screen,
, and then enter the details of the printer
manually.
6
Configure the required items on the
then click
7
Select the software to be installed, and then click
The
Next
.
Congratulations!
screen appears.
Enter Printer Settings
Install
.
screen, and
8
Click
Finish
to exit this tool.
The wireless configuration is complete.
Installing Printer Drivers on Computers Running Windows 95
Page 98

Dell Printer Configuration Web Tool
1
Select
Dell Printer Configuration Web Tool
2
Follow the instructions until the
3
Confirm there are no errors displayed on the operator panel, and then click
NO
on the
NOTE: If you see any errors, click YES and follow the instruction.
4
Select
5
Check if the printer to be installed is listed in the
and then click
Check Setup
Local Installation
Next
.
screen.
, and then click
Check Setup
, and then click
screen appears.
Next
.
Select Printer
Next
.
screen,
NOTE: If the printer to be installed is not listed in the Select Printer screen, try
the following steps:
• Click Refresh to update the information.
• Click Add Printer, and then enter the details of the printer manually.
6
Configure the required items on the
then click
7
Select the software to be installed, and then click
The
8
Click
Next
.
Congratulations!
Finish
to exit this tool.
screen appears.
Enter Printer Settings
Install
The wireless configuration is complete.
96 Installing Printer Drivers on Computers Running Windows
screen, and
.
Page 99

When the Dell Printer Configuration Web Tool operation is successful and
the printer is rebooted, wireless LAN connection is completed.
Setting up a New Wireless Network Environment for Your Computer (When you need to setup your wireless connectivity with your computer)
For DHCP network:
1
Setting up your computer for wireless connectivity:
NOTE: You can also change the wireless settings using the wireless
application that may be installed in your computer.
For Windows XP and Windows Server 2003:
a
Select
Network Connections
b
Right-click
c
Select the
d
Ensure that the check box for
network settings
Click the
e
f
Select
Advanced
g
Click the
h
On the
Wireless Network Connection
Wireless Networks
is checked.
NOTE: Make note of the wireless settings on the Advanced window
(step f) and the Wireless Network Properties window (step g). You may
require these settings later.
Advanced
button.
Computer to Computer (ad hoc) networks only
dialog box.
Add
button to display
Association
tab, enter the following information and click OK.
Network name (SSID): dell_device
from
Control Panel
.
and select
Properties
.
tab.
Use Windows to configure my wireless
and close the
Wireless network properties
.
Network Authentication
Data encryption
Ad hoc network
Installing Printer Drivers on Computers Running Windows 97
:
:
checked
:
Disabled
Open
Page 100

i
Click the
Move up
button to move the newly added SSID to the top
of the list.
j
Click OK to close the
For Windows Vista:
a
Open
Control Panel
b
Select
Network and Internet
c
Select
Network and Sharing Center
d
Select
Connect to a network
e
Select
f
dell_device
network
Select
.
Connect Anyway in the warning
from the network items listed in
entering an unsecured area.
g
Click
Close
in the dialog box after confirming the connection is a
success.
For Windows Server 2008:
a
Open
Control Panel
b
Select
Network and Sharing Center
c
Select
Connect to a network
d
Select
e
dell_device
network
Select
.
Connect Anyway in the warning
from the network items listed in
entering an unsecured area.
Property
.
.
dialog box.
.
.
.
Connect to a
dialog box indicating you are
.
.
Connect to a
dialog box indicating you are
98 Installing Printer Drivers on Computers Running Windows
 Loading...