

Page 1

WordPerfect
Page 2

Page 3

Table of contents
WordPerfect
Getting started in WordPerfect. . . . . . . . . . . . . . . . . . . . . . . . . . . . . . . . . .1
Discovering WordPerfect . . . . . . . . . . . . . . . . . . . . . . . . . . . . . . . . . . . . . . . . . . 1
Exploring the work area . . . . . . . . . . . . . . . . . . . . . . . . . . . . . . . . . . . . . . . . . . . 2
Creating and opening documents . . . . . . . . . . . . . . . . . . . . . . . . . . . . . . . . . . . . 3
Entering and inserting text . . . . . . . . . . . . . . . . . . . . . . . . . . . . . . . . . . . . . . . . . 4
Selecting and deleting text . . . . . . . . . . . . . . . . . . . . . . . . . . . . . . . . . . . . . . . . . 6
Performing Web searches powered by Yahoo! . . . . . . . . . . . . . . . . . . . . . . . . . . . 7
Working with files . . . . . . . . . . . . . . . . . . . . . . . . . . . . . . . . . . . . . . . . . . . .9
Inserting files into active documents . . . . . . . . . . . . . . . . . . . . . . . . . . . . . . . . . . 9
Counting words. . . . . . . . . . . . . . . . . . . . . . . . . . . . . . . . . . . . . . . . . . . . . . . . . 10
Converting multiple files . . . . . . . . . . . . . . . . . . . . . . . . . . . . . . . . . . . . . . . . . . 11
Saving documents . . . . . . . . . . . . . . . . . . . . . . . . . . . . . . . . . . . . . . . . . . . . . . . 12
Viewing and navigating . . . . . . . . . . . . . . . . . . . . . . . . . . . . . . . . . . . . . .15
Switching document views . . . . . . . . . . . . . . . . . . . . . . . . . . . . . . . . . . . . . . . . 15
Using Reveal Codes . . . . . . . . . . . . . . . . . . . . . . . . . . . . . . . . . . . . . . . . . . . . . . 16
Formatting pages . . . . . . . . . . . . . . . . . . . . . . . . . . . . . . . . . . . . . . . . . . .19
Setting page margins. . . . . . . . . . . . . . . . . . . . . . . . . . . . . . . . . . . . . . . . . . . . . 19
Choosing page size and orientation . . . . . . . . . . . . . . . . . . . . . . . . . . . . . . . . . . 20
Customizing page sizes . . . . . . . . . . . . . . . . . . . . . . . . . . . . . . . . . . . . . . . . . . . 21
Making text fit a specific number of pages. . . . . . . . . . . . . . . . . . . . . . . . . . . . . 24
Creating and deleting columns . . . . . . . . . . . . . . . . . . . . . . . . . . . . . . . . . . . . . 25
Formatting text . . . . . . . . . . . . . . . . . . . . . . . . . . . . . . . . . . . . . . . . . . . . .29
Modifying font settings . . . . . . . . . . . . . . . . . . . . . . . . . . . . . . . . . . . . . . . . . . . 29
Copying the format of text . . . . . . . . . . . . . . . . . . . . . . . . . . . . . . . . . . . . . . . . 32
Formatting paragraphs . . . . . . . . . . . . . . . . . . . . . . . . . . . . . . . . . . . . . . .35
Indenting text . . . . . . . . . . . . . . . . . . . . . . . . . . . . . . . . . . . . . . . . . . . . . . . . . . 35
Justifying text . . . . . . . . . . . . . . . . . . . . . . . . . . . . . . . . . . . . . . . . . . . . . . . . . . 36
Changing the spacing between lines and paragraphs . . . . . . . . . . . . . . . . . . . . . 38
Table of contents iii
Page 4

Adding tab stops . . . . . . . . . . . . . . . . . . . . . . . . . . . . . . . . . . . . . . . . . . . . . . . . 39
Changing the alignment of tab stops . . . . . . . . . . . . . . . . . . . . . . . . . . . . . . . . . 41
Moving tab stops . . . . . . . . . . . . . . . . . . . . . . . . . . . . . . . . . . . . . . . . . . . . . . . . 42
Removing and restoring tab stops . . . . . . . . . . . . . . . . . . . . . . . . . . . . . . . . . . . 42
Editing documents . . . . . . . . . . . . . . . . . . . . . . . . . . . . . . . . . . . . . . . . . .45
Finding and replacing text . . . . . . . . . . . . . . . . . . . . . . . . . . . . . . . . . . . . . . . . . 45
Cutting, copying, and pasting text and graphics . . . . . . . . . . . . . . . . . . . . . . . . 48
Copying and pasting text from a Web browser . . . . . . . . . . . . . . . . . . . . . . . . . 49
Moving text and graphics. . . . . . . . . . . . . . . . . . . . . . . . . . . . . . . . . . . . . . . . . . 49
Reviewing documents . . . . . . . . . . . . . . . . . . . . . . . . . . . . . . . . . . . . . . . . . . . . 50
Routing documents . . . . . . . . . . . . . . . . . . . . . . . . . . . . . . . . . . . . . . . . . . . . . . 52
Comparing documents . . . . . . . . . . . . . . . . . . . . . . . . . . . . . . . . . . . . . . . . . . . . 54
Controlling document comparisons . . . . . . . . . . . . . . . . . . . . . . . . . . . . . . . . . . 56
Working with footnotes and endnotes. . . . . . . . . . . . . . . . . . . . . . . . . . .59
Inserting footnotes and endnotes . . . . . . . . . . . . . . . . . . . . . . . . . . . . . . . . . . . . 59
Finding footnotes and endnotes . . . . . . . . . . . . . . . . . . . . . . . . . . . . . . . . . . . . . 61
Modifying the display of footnotes and endnotes on a page . . . . . . . . . . . . . . . . 63
Numbering . . . . . . . . . . . . . . . . . . . . . . . . . . . . . . . . . . . . . . . . . . . . . . . .65
Numbering pages . . . . . . . . . . . . . . . . . . . . . . . . . . . . . . . . . . . . . . . . . . . . . . . 65
Changing the appearance of page numbers . . . . . . . . . . . . . . . . . . . . . . . . . . . . 67
Printing . . . . . . . . . . . . . . . . . . . . . . . . . . . . . . . . . . . . . . . . . . . . . . . . . . .69
Setting up a printer . . . . . . . . . . . . . . . . . . . . . . . . . . . . . . . . . . . . . . . . . . . . . . 69
Setting up a print job . . . . . . . . . . . . . . . . . . . . . . . . . . . . . . . . . . . . . . . . . . . . . 72
Previewing a print job . . . . . . . . . . . . . . . . . . . . . . . . . . . . . . . . . . . . . . . . . . . . 73
Printing documents . . . . . . . . . . . . . . . . . . . . . . . . . . . . . . . . . . . . . . . . . . . . . . 75
Controlling a print job . . . . . . . . . . . . . . . . . . . . . . . . . . . . . . . . . . . . . . . . . . . . 76
Printing double-sided pages . . . . . . . . . . . . . . . . . . . . . . . . . . . . . . . . . . . . . . . . 78
Printing document sections and comments . . . . . . . . . . . . . . . . . . . . . . . . . . . . 79
Printing file details. . . . . . . . . . . . . . . . . . . . . . . . . . . . . . . . . . . . . . . . . . . . . . . 81
Printing envelopes and labels . . . . . . . . . . . . . . . . . . . . . . . . . . . . . . . . . . . . . . . 82
Printing graphics . . . . . . . . . . . . . . . . . . . . . . . . . . . . . . . . . . . . . . . . . . . . . . . . 83
Laying out a print job . . . . . . . . . . . . . . . . . . . . . . . . . . . . . . . . . . . . . . . . . . . . 85
iv Table of contents
Page 5

Saving print settings . . . . . . . . . . . . . . . . . . . . . . . . . . . . . . . . . . . . . . . . . . . . . 88
Using printer commands . . . . . . . . . . . . . . . . . . . . . . . . . . . . . . . . . . . . . . . . . . 90
Printing to a file . . . . . . . . . . . . . . . . . . . . . . . . . . . . . . . . . . . . . . . . . . . . . . . . 91
Sending faxes. . . . . . . . . . . . . . . . . . . . . . . . . . . . . . . . . . . . . . . . . . . . . . . . . . . 92
Reference: Printing . . . . . . . . . . . . . . . . . . . . . . . . . . . . . . . . . . . . . . . . . . . . . . 93
Merging documents . . . . . . . . . . . . . . . . . . . . . . . . . . . . . . . . . . . . . . . . .97
Creating data for a merge . . . . . . . . . . . . . . . . . . . . . . . . . . . . . . . . . . . . . . . . . 97
Working with form documents for a merge. . . . . . . . . . . . . . . . . . . . . . . . . . . 100
Associating merge files . . . . . . . . . . . . . . . . . . . . . . . . . . . . . . . . . . . . . . . . . . 105
Performing a merge. . . . . . . . . . . . . . . . . . . . . . . . . . . . . . . . . . . . . . . . . . . . . 107
Converting merge files . . . . . . . . . . . . . . . . . . . . . . . . . . . . . . . . . . . . . . . . . . 110
Sorting, viewing, and finding data in data files . . . . . . . . . . . . . . . . . . . . . . . . 111
Editing merge data files. . . . . . . . . . . . . . . . . . . . . . . . . . . . . . . . . . . . . . . . . . 112
Selecting specific data for merges. . . . . . . . . . . . . . . . . . . . . . . . . . . . . . . . . . . 116
Merging with address books . . . . . . . . . . . . . . . . . . . . . . . . . . . . . . . . . . . . . . 117
Changing merge options . . . . . . . . . . . . . . . . . . . . . . . . . . . . . . . . . . . . . . . . . 121
Using merge commands . . . . . . . . . . . . . . . . . . . . . . . . . . . . . . . . . . . . . . . . . 122
Merge programming commands . . . . . . . . . . . . . . . . . . . . . . . . . . . . . . . . . . . 125
Working with levels, loops, and merge variables . . . . . . . . . . . . . . . . . . . . . . . 169
Working with merge expressions. . . . . . . . . . . . . . . . . . . . . . . . . . . . . . . . . . . 174
Expression terms . . . . . . . . . . . . . . . . . . . . . . . . . . . . . . . . . . . . . . . . . . . . . . . 180
Reference: The Merge toolbar and programming commands . . . . . . . . . . . . . . 184
Recordings, macros, and automation features. . . . . . . . . . . . . . . . . . . .191
Using QuickMacros. . . . . . . . . . . . . . . . . . . . . . . . . . . . . . . . . . . . . . . . . . . . . 192
Recording, saving, and storing macros. . . . . . . . . . . . . . . . . . . . . . . . . . . . . . . 193
Playing macros . . . . . . . . . . . . . . . . . . . . . . . . . . . . . . . . . . . . . . . . . . . . . . . . 195
Using macros included with WordPerfect . . . . . . . . . . . . . . . . . . . . . . . . . . . . 196
Using toolbars for macros . . . . . . . . . . . . . . . . . . . . . . . . . . . . . . . . . . . . . . . . 198
Using template macros . . . . . . . . . . . . . . . . . . . . . . . . . . . . . . . . . . . . . . . . . . 200
Editing and deleting template macros . . . . . . . . . . . . . . . . . . . . . . . . . . . . . . . 202
Triggering macros from templates. . . . . . . . . . . . . . . . . . . . . . . . . . . . . . . . . . 203
Customizing WordPerfect macros . . . . . . . . . . . . . . . . . . . . . . . . . . . . . . . . . . 206
Assigning template macros to keystrokes, menus, and toolbars . . . . . . . . . . . . 209
Table of contents v
Page 6

Associating toolbars with template features . . . . . . . . . . . . . . . . . . . . . . . . . . . 212
Writing and editing macros by using PerfectScript . . . . . . . . . . . . . . . . . . . . . 212
Understanding macro commands and syntax . . . . . . . . . . . . . . . . . . . . . . . . . . 214
Using macro conventions and formatting macros . . . . . . . . . . . . . . . . . . . . . . . 216
Recording macro commands in macros. . . . . . . . . . . . . . . . . . . . . . . . . . . . . . . 218
Inserting codes in macros . . . . . . . . . . . . . . . . . . . . . . . . . . . . . . . . . . . . . . . . . 218
Using macros from earlier versions of WordPerfect . . . . . . . . . . . . . . . . . . . . . 219
Using programming commands in macros . . . . . . . . . . . . . . . . . . . . . . . . . . . . 219
Using parameters in macros . . . . . . . . . . . . . . . . . . . . . . . . . . . . . . . . . . . . . . . 220
Using variables in PerfectScript . . . . . . . . . . . . . . . . . . . . . . . . . . . . . . . . . . . . 222
Using the macro command browser . . . . . . . . . . . . . . . . . . . . . . . . . . . . . . . . . 223
Using macro commands to retrieve information . . . . . . . . . . . . . . . . . . . . . . . . 224
Using OLE object commands in macros . . . . . . . . . . . . . . . . . . . . . . . . . . . . . . 225
Compiling macros . . . . . . . . . . . . . . . . . . . . . . . . . . . . . . . . . . . . . . . . . . . . . . 225
Working from the PerfectScript utility. . . . . . . . . . . . . . . . . . . . . . . . . . . . . . . 228
Testing for errors from PerfectScript . . . . . . . . . . . . . . . . . . . . . . . . . . . . . . . . 229
Editing and deleting macros. . . . . . . . . . . . . . . . . . . . . . . . . . . . . . . . . . . . . . . 230
Searching in macros . . . . . . . . . . . . . . . . . . . . . . . . . . . . . . . . . . . . . . . . . . . . . 231
Integrating with Microsoft Visual Basic for Applications . . . . . . . . . . . . . . . . . 232
Using the PerfectScript class to change WordPerfect documents . . . . . . . . . . . 239
Working with VBA methods . . . . . . . . . . . . . . . . . . . . . . . . . . . . . . . . . . . . . . 242
Accessing and manipulating applications from other applications. . . . . . . . . . . 244
Using OLE Automation . . . . . . . . . . . . . . . . . . . . . . . . . . . . . . . . . . . . . . . . . . 246
Understanding OLE Automation . . . . . . . . . . . . . . . . . . . . . . . . . . . . . . . . . . . 247
Using files with DDE Execute from previous versions of WordPerfect . . . . . . . 250
Getting online Help for macros . . . . . . . . . . . . . . . . . . . . . . . . . . . . . . . . . . . . 251
vi Table of contents
Page 7

Getting started in WordPerfect
This chapter tells you how to perform basic operations in WordPerfect. You can explore
the work area and gain a better understanding of the basic tools and features available
for creating powerful word processing documents.
In this section, you’ll learn about
• discovering WordPerfect
• exploring the work area
• creating and opening documents
• entering and inserting text
• selecting and deleting text
• performing Web searches powered by Yahoo!®
Discovering WordPerfect
WordPerfect X3 provides exceptional ease of use and complete formatting control for
producing newsletters, articles, reports, proposals, books, and other documents. The
popular Reveal Codes, Corel® RealTime Preview™, and Legal features help reduce the
amount of time you spend on document formatting, freeing you to focus on creating
content. WordPerfect X3 also provides enhanced compatibility with Microsoft Word,
the new ability to import PDFs, and robust PDF publishing capabilities that ensure you
can freely exchange information with colleagues and clients, regardless of the software
they use.
Here’s a list of some of the new and enhanced features:
• New! Import PDF files with WordPerfect
For more information, see “Working with PDF files” in the online Help.
• Enhanced! Publish to PDF
For more information, see “Working with PDF files” in the online Help.
• New & Enhanced! Wo rd C ou n t
For more information, see “Counting words” in the online Help.
Getting started in WordPerfect 1
Page 8
• Enhanced! Document Routing
For more information, see “Routing documents” in the online Help.
• Enhanced! Pasting and exporting HTML
For more information, see “Copying and pasting text from a Web browser” on
page 49 and “Working with HTML files” on page 27.
• New! Online Resources
For more information, see “Performing Web searches powered by Yahoo!” on
page 7.
• New! Removing metadata
For more information, see “Excluding metadata when saving documents” in the
online Help.
• New! Label formats
For more information, see “Creating labels” in the online Help.
Exploring the work area
The work area in WordPerfect includes everything you see on your screen when you
start the application. The large open area is the document window.
The menu bar, located at the top of the work area just below the title bar, provides
access to most of the WordPerfect commands.
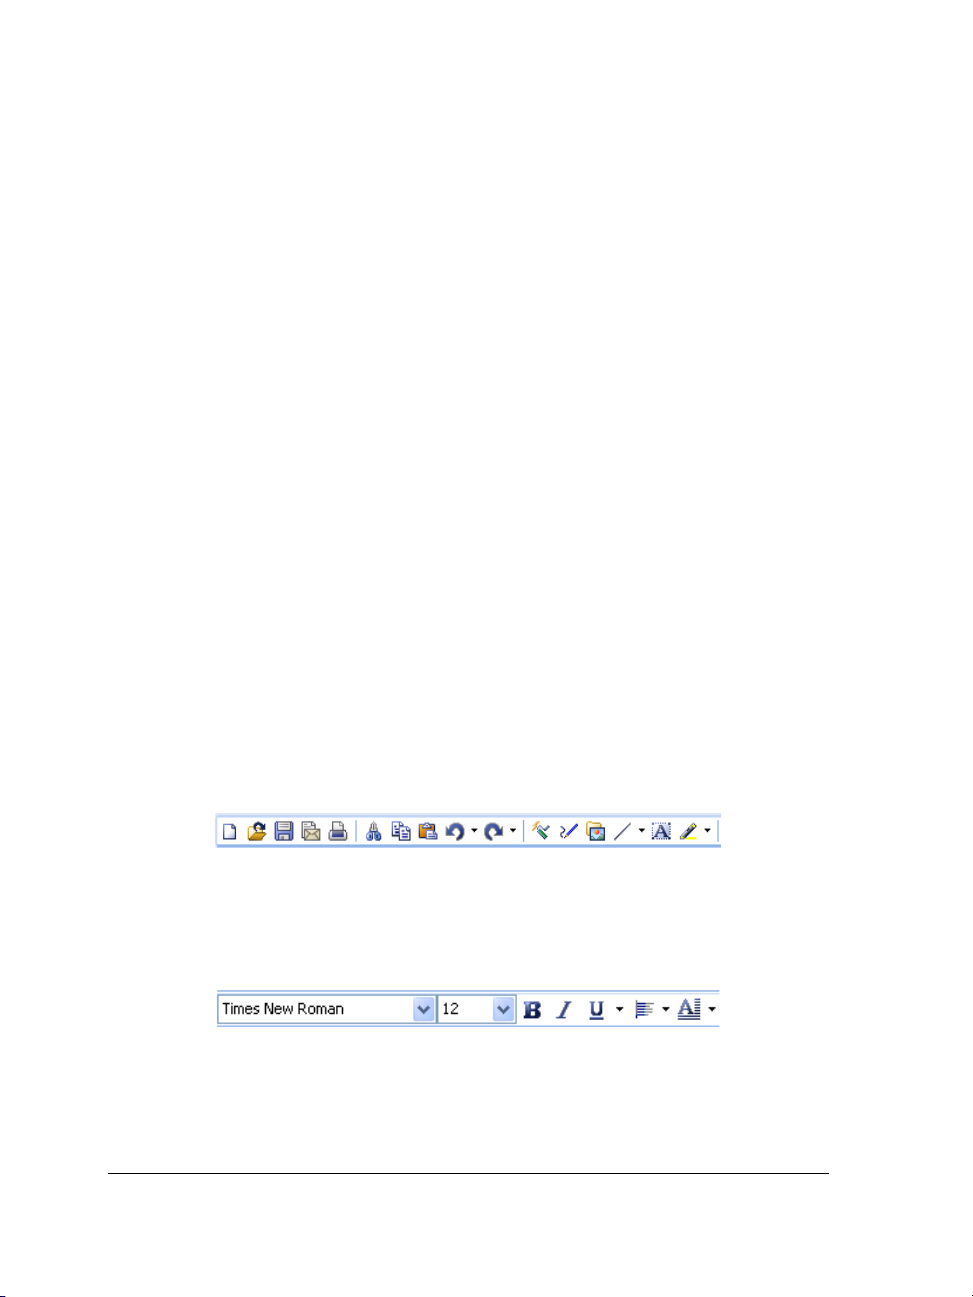
Toolba rs
Many menu commands can be accessed through toolbars, located below the menu bar.
This is the WordPerfect toolbar.
The property bar is a context-sensitive toolbar that displays buttons and options related
to the task you are performing. For example, when text is selected, the property bar
contains only text-related commands.
This is the property bar.
By default, the property bar is located above the document window.
2 WordPerfect X3 User Guide
Page 9
The application bar
The application bar displays information about the status of the active WordPerfect
document. By default, the application bar is located below the document window.
When you open a file, a document button with the name of the file appears on the
application bar. You can use document buttons to quickly move between the
documents. For more information about moving between documents, see “Navigating
documents” in the online Help.
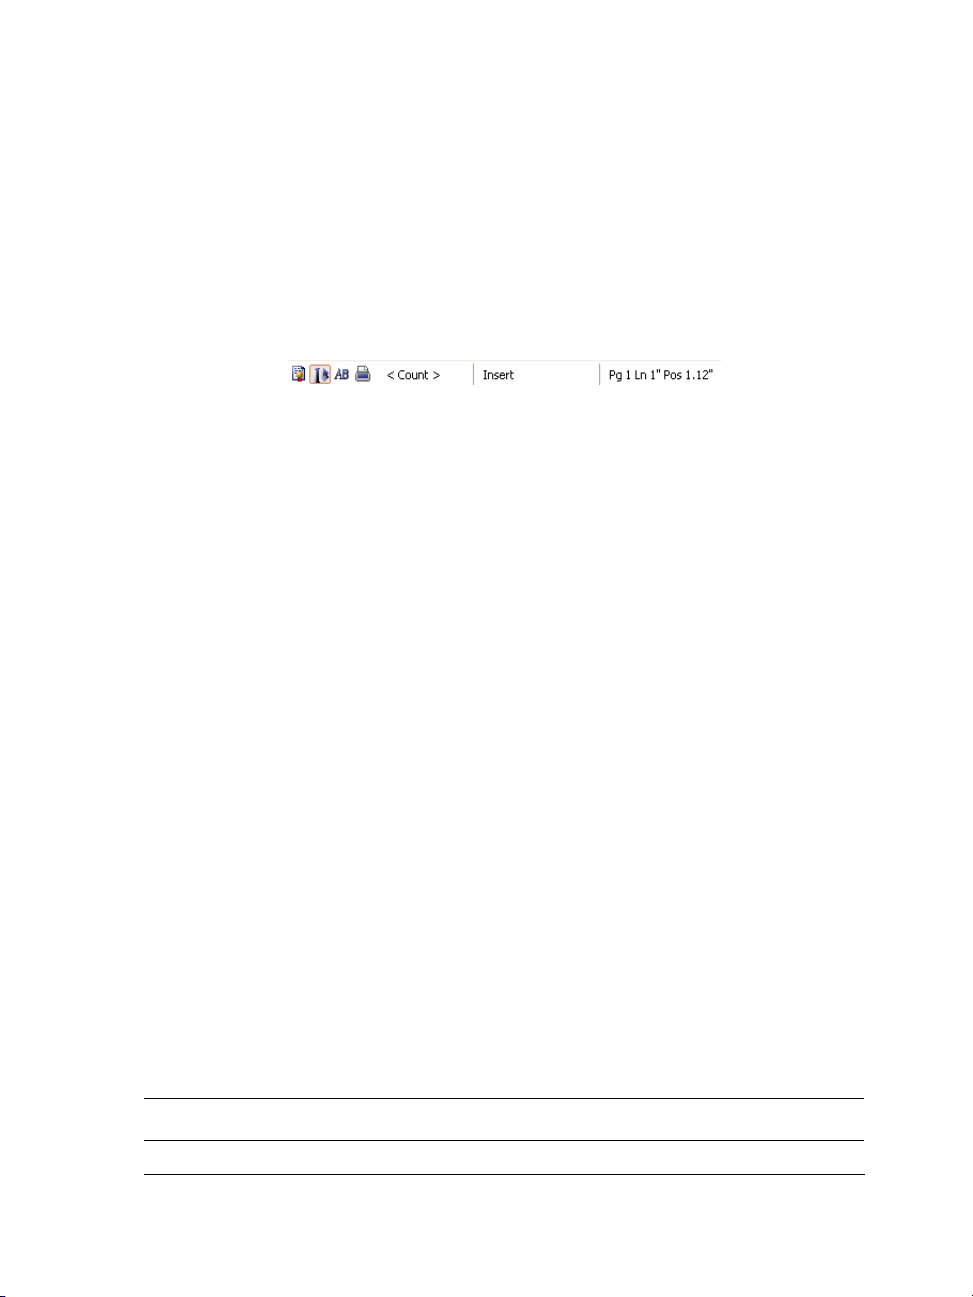
These items appear on the right side of the application bar.
Creating and opening documents
You can create a document in WordPerfect by using the default template, a blank
document that includes formatting elements such as margin settings, tab settings, and
toolbars. WordPerfect also includes ready-made project templates that you can open
and use to create a wide range of documents, including letters, fax cover sheets,
calendars, and business cards.
For more information about templates, see “Creating documents using project
templates” in the online Help.
You can open word-processing documents that were created in WordPerfect or in
another application. The advantage of opening, rather than importing a document
created in another application, is that many of the formatting attributes in the original
document, such as page size, margins, font properties, bullets, and underlining are
preserved. Some of the features not supported include embedded pictures, hidden text,
interline spacing, kerning, macros, multiple page layouts (the first one in the document
is used throughout), and OLE objects. For more information about importing files, see
“Import and export file formats for WordPerfect” in the reference information section
of the online Help.
To create a document by using the default template
•Click File ` New.
You can also
Create a document from a project template
Getting started in WordPerfect 3
Click File
` New from project.
Page 10

You can also apply the default template to a new document by clicking the
New blank document button on the toolbar.
To open a document
1 Click File ` Open.
2 Choose the drive and folder where the document is stored.
3 Choose a file.
4 Click Open.
You can also open a document by clicking the Open button on the toolbar.
If you know where a file is located, you can type the full path and filename in
the File name list box.
Entering and inserting text
You can enter text in the document window. You can use the shadow cursor to show
where the text will be positioned.
You can also enter text in a text box so that it appears in a separate frame.
You can insert text from another file.
If you have more than one document opened, you can use the application bar to insert
text from one document to another document.
For information about selecting and deleting text, see “Selecting and deleting text” on
page 6.
To enter text in a document window
1 Click in the document window.
2 Ty p e t ex t .
To enter text by using the shadow cursor
1 Click View ` Shadow cursor.
4 WordPerfect X3 User Guide
Page 11

A check mark next to the menu command indicates that the shadow cursor is
enabled.
2 Click anywhere on the page.
3 Ty p e t ex t .
The shadow cursor changes appearance to show how text will be aligned when
you start typing. Small arrows beside the shadow cursor point in different
directions when text is left-justified, centered, or right-justified.
To enter text in a text box
1 Click Insert ` Te x t b ox .
2 Ty p e t ex t .
To insert text from another document
1 Click where you want to insert the text.
2 Click Insert ` File.
3 Choose the drive and folder where the document is stored.
4 Choose a file.
5 Click Insert.
To insert text from another document by using the application bar
1 Select the text you want to insert.
2 Drag the selected text to the button on the application bar that displays the name
of the document into which you want to insert the text, but don’t release the mouse
button.
This document opens in the document window.
3 Point to where you want to insert the text, and release the mouse button.
For more information about using the application bar, see “Customizing the
application bar” in the online Help.
Getting started in WordPerfect 5
Page 12
The text you select is removed from the document. You can copy the text by
holding down Ctrl while dragging.
Selecting and deleting text
You can select text, a tabular column, a rectangular block of text, or a range of text. You
can also deselect text and delete text. You can also set selection options.
To select text
To select Do the following
A character or word Drag across a character or word.
A sentence
A paragraph
A page
A document
Click in a sentence. Click Edit
Sentence.
Click in a paragraph. Click Edit
Paragraph.
Click on a page. Click Edit
Click Edit
` Select ` All.
` Select ` Page.
` Select `
` Select `
To select a tabular column
1 Select the text from the first character in the tabular column to the last character in
the tabular column.
2 Click Edit ` Select ` Tabular column.
To select a rectangular block of text
1 Select the text from the upper left corner to the lower left corner of the block.
2 Click Edit ` Select ` Rectangle.
To select a range of text in a document
1 Click Edit ` Select ` Section.
2 From the Select list, choose one of the following options:
6 WordPerfect X3 User Guide
Page 13

• Page — lets you select certain pages
• Secondary page — lets you select certain secondary pages
• Chapter — lets you select certain chapters
• Vol um e — lets you select certain volumes
3 Type a value in the Range box.
To deselect text
• Click anywhere outside the selected text.
To delete text
1 Select the text you want to delete.
2 Press Delete.
You can also delete text by clicking after the text you want to delete and
pressing Backspace.
To set the selection options for a document
1 Click To o l s ` Settings.
2 Click Environment.
3 In the Environment settings dialog box, click the General tab.
4 Enable the Automatically select whole words when dragging to select text
check box.
Performing Web searches powered by Yahoo!
WordPerfect features searching technology powered by Yahoo!, which allows you to
perform a Web search directly from a document. You can choose to display or hide the
Yahoo! Search bar. You can search either by selecting text or by using the Yahoo! Search
bar. Using the Yahoo! Search bar gives you access to various online sites and services.
Getting started in WordPerfect 7
Page 14
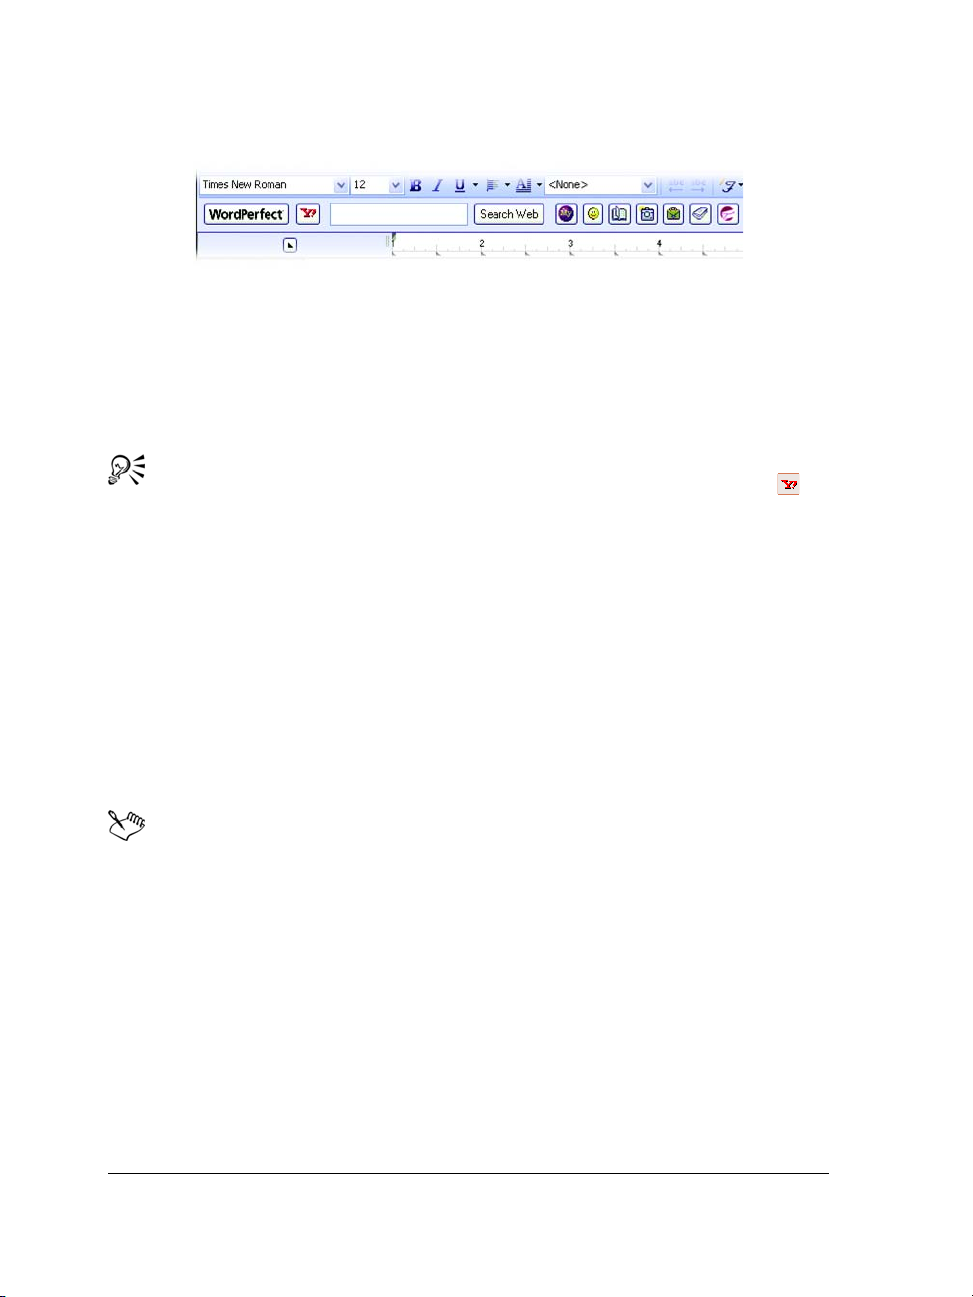
The new Yahoo! Search bar lets you quickly search the Web and access important online
resources.
To display or hide the Yahoo! Search bar
•Click View ` Ya h oo ! S e a r c h .
You can also hide or display the Yahoo! Search bar clicking the Ya h o o !
button on the toolbar.
To perform a Web search by using the Yahoo! Search bar
1 In the search box on the Yahoo! Search bar, type the term you want to search.
2 Click the Search Web button.
To perform a Web search by selecting text
1 Select the term you want to search.
2 Right-click, and click Search with Yahoo!.
You can perform a Web search by selecting text when the Yahoo! Search bar
is hidden.
8 WordPerfect X3 User Guide
Page 15

Working with files
File management is an important part of any project. You can insert files into
documents, count words in a document, and convert multiple files to the WordPerfect
file format. You can save files to earlier versions of WordPerfect or to other file formats.
In this section, you’ll learn about
• inserting files into active documents
• counting words
• converting multiple files
• saving documents
Inserting files into active documents
You can insert a copy of a file into an active document.
To insert a file into an active document
1 Click where you want to insert the file.
2 Click Insert ` File.
3 Choose All files from the File type list box.
4 Choose the drive and folder in which the file is stored.
5 Click a file.
6 Click Insert.
For information about opening files, see “Opening and previewing files” in the
online Help.
Working with files 9
Page 16

Counting words
With WordPerfect, you can find out how many words are in a document or in selected
text. You can also verify the number of pages, paragraphs, sentences, and lines that are
in the document. In addition, you have the ability to exclude various elements, such as
headers, footers, footnotes, endnotes, or comments, from the word count.
The new <Count> button appears on the Application bar, making it easier than ever
to count words in a document.
To count words in a document
1 Click To o l s ` Wo rd co u nt .
2 Disable any of the following check boxes to exclude document elements from the
count:
• Headers
• Footers
• Comments
• Footnotes
• Endnotes
• Watermarks
• Text boxes
• Box captions
3 Click Update.
The word count summary appears in the Statistics area.
While working in a document, you can perform or refresh a word count by
clicking the <Count> button on the Application bar.
To count words in selected text
1 Select the text.
2 Click To o l s ` Wo rd co u nt .
The word count summary appears in the Statistics area.
While working in a document, you can perform or refresh a word count by
clicking the <Count> button on the Application bar.
10 WordPerfect X3 User Guide
Page 17

Converting multiple files
The WordPerfect Office Conversion Utility lets you convert various types of files, such
as files created in older versions of WordPerfect, or Microsoft Word files, to one of five
WordPerfect file formats.
If you chose the standard installation of WordPerfect Office, the WordPerfect Office
Conversion Utility is available by default. If the utility is not available, you can add it
by modifying the installation.
For more information about using the WordPerfect Conversion Utility, see the
WordPerfect Conversion Utility Help.
To install the WordPerfect Office Conversion Utility
1 Close any open applications.
2 On the Windows taskbar, click Start ` Settings ` Control panel.
If your operating system is Windows XP, click Settings ` Control panel.
3 Double-click the Add/Remove programs icon.
4 Choose WordPerfect Office X3 from the Currently installed programs list, and
then click Change.
5 In the InstallShield wizard, enable the Modify option, and click Next.
6 In the list of features, open the WordPerfect Office X3 ` Utilities category.
7 Click the icon next to the WordPerfect Conversion Utility item, and click This
feature will be installed on local hard drive.
8 Click Next.
9 Click Install.
To convert multiple files
1 On the Windows taskbar, click Start ` Programs ` WordPerfect Office X3 `
Utilities ` Conversion utility.
2 Click Add.
3 Choose the drive and folder in which the files you want to convert are stored.
If you can’t see the files, choose All files from the File type box.
4 Click Add all.
Working with files 11
Page 18

If you want to convert the files in the folders within the folder, enable the Include
subfolders check box.
5 From the Convert to list box, choose a version of WordPerfect.
Saving documents
By default, you can save documents in WordPerfect 6/7/8/9/10/11/12/X3 format. This
ensures cross-platform compatibility for documents saved in WordPerfect 6.x and later,
and lets you save a document in an earlier version of WordPerfect. You can also save
documents in formats other than WordPerfect, such as Microsoft Word.
WordPerfect lets you save documents in compound file format. When you save a
document in compound file format, OLE compound document information is wrapped
around the WordPerfect document, which lets you open the document more quickly.
However, saving a document containing embedded objects in compound file format
increases both the file size and the time required to open and save the file.
You can save selected text or graphics in a new WordPerfect document.
WordPerfect lets you create backup copies of documents. Creating backup copies helps
prevent the loss of your work if you close a document before saving it, or if a power
failure occurs.
To save a document
1 Click File ` Save.
2 Choose the drive and folder in which you want to save the file.
To save a file in a format other than WordPerfect, choose a file format from the File
type list box.
3 Ty p e a na m e i n t h e Filename box.
To embed the fonts in the document, enable the Embed fonts using TrueDoc®
check box.
4 Click Save.
You can also
Save changes to a document
12 WordPerfect X3 User Guide
Click File
` Save.
Page 19
You can also
Rename a file Right-click the file, and click Rename. Type
a new name in the Filename box.
If you have already saved the document, you will not be prompted to specify
the drive, folder, and filename.
Embedding ensures that the information for all fonts used in a document is
saved with the document. You may want to embed fonts if you are using an
unusual font, or if you want to ensure that the font you are using is displayed
properly.
A filename cannot exceed 255 characters.
You can also save a document by pressing F3 or by clicking the Save button
on the toolbar.
To save a document to a new location
1 Click File ` Save as.
2 From the Save in list box, choose the drive and folder in which you want to store
the document.
If you want to embed the fonts in the document, enable the Embed fonts using
Tr u e D o c check box.
3 Click Save.
Embedding ensures that the information for all fonts used in a document is
saved with the document. You may want to embed fonts if you are using an
unusual font, or if you want to ensure that the font you are using is displayed
properly.
To save selected text or a graphic in a new document
1 Select the text or graphic you want to save in a new document.
2 Click File ` Save.
3 In the Save area, enable one of the following options:
• Selected text
Working with files 13
Page 20

• Selected graphic
4 Click OK.
5 In the Save file dialog box, choose the drive and folder in which you want to save
the file.
6 Ty p e a na m e i n t h e Filename box.
7 Click Save.
To save a document in compound file format
1 Click File ` Save as.
2 Ty p e a na m e i n t h e Filename box.
3 Choose WordPerfect compound file from the File type list box.
4 Click Save.
If a file is password protected, WordPerfect saves OLE object information in
WordPerfect format, rather than in compound file format. Saving files in
WordPerfect format prevents others from using an OLE-enabled application to
viewing embedded objects in a password-protected file.
To set timed document backups
1 Click To o l s ` Settings.
2 Click Files.
3 On the Document page, enable the Timed document backup every check box.
4 Type a value in the minutes box.
14 WordPerfect X3 User Guide
Page 21

Viewing and navigating
WordPerfect lets you switch document views. You can also use Reveal Codes, which
lets you quickly format long or complex documents by viewing and editing formatting
codes.
In this section, you’ll learn about
• switching document views
•using Reveal Codes
Switching document views
In WordPerfect, you can view documents in four ways: draft, page, two pages, and
browser preview.
In draft view, WordPerfect displays the body text of a document the way it will look
when it is printed. Draft view does not display formatting such as headers, footers, and
watermarks.
Page view displays a document with all of its formatting, the way it will look when it is
printed.
Two pages view displays the same formatting as page view, except that two consecutive
pages display side by side in the document window.
The browser preview displays a document in HTML format, suitable for an intranet or
for the Web; however, WordPerfect codes with no equivalent HTML tags are either
modified or deleted from the document. For more information about creating HTML
documents, see “Publishing to HTML” in the online Help.
To switch the document view
•Click View, and click one of the following:
• Draft — to hide some document elements such as footers, page breaks, margins,
and watermarks
Viewing and navigating 15
Page 22
• Page — to display the document the way it will look when printed
• Tw o p a g es — to display two consecutive pages in a document side by side
• Preview in browser — to display a document in HTML format
You can also
Switch between Preview in browser and
Page view
Display the ruler in Tw o p a g e s view
Click the Change view button.
In Tw o p a g e s view, click View
` Ruler.
Using Reveal Codes
Formatting codes are inserted when you add text and formatting to a document. Reveal
Codes gives you full control over document formatting, especially when copying and
pasting text from various sources. For example, to remove bold formatting, you can turn
on Reveal Codes, locate the
window. You can also double-click any code in the Reveal Codes window to make
advanced alterations to the settings or styles. Codes are hidden by default; however,
they can be displayed in a separate window below the active document.
This is how the text is displayed in the Reveal Codes window.
<Bold> code, and then just drag it out of the Reveal Codes
You can hide or display formatting codes. You can also customize the display of the
codes; for example, you can specify the font style and color, and several other formatting
options. In addition, you can print the contents of the Reveal Codes window.
For more information about printing Reveal Codes, see
To hide or display formatting codes
•Click View ` Reveal Codes.
A check mark beside Reveal Codes indicates that formatting codes are displayed.
16 WordPerfect X3 User Guide
Page 23

To customize the display of formatting codes
1 Click To o l s ` Settings.
2 Click Display.
3 Click the Reveal Codes tab.
4 In the Format area, enable or disable any of the following check boxes:
• Wrap lines at window — to continue codes on the next line
• Show spaces as bullets — to display a bullet for each space character
• Show codes in detail — to display formatting information with codes
• Auto-display codes in Go to dialog — to display the Reveal Codes window
when a code match is found in a specific section of the document
You can also
Change the font Click Font, and choose a font from the Face
list box.
Change the font size Choose a font size from the Size list box.
Change the font color In the Color area, disable the Use system
colors check box. Open the Te x t color
flyout, and click a color.
Change the background color In the Color area, disable the Use system
colors check box. Open the Background
color flyout, and click a color.
Use Windows system colors In the Color area, enable the Use system
colors check box.
Viewing and navigating 17
Page 24

Page 25

Formatting pages
WordPerfect lets you format a document by modifying the physical arrangement of
information on pages. For example, you can adjust page size and margins. You can also
add columns to documents. When formatting pages, you can modify the format of an
entire page or a portion of a page.
In this section, you’ll learn about
• setting page margins
• choosing page size and orientation
• customizing page sizes
• making text fit a specific number of pages
• creating and deleting columns
Setting page margins
WordPerfect lets you set margins using various methods. You can set margins by using
guidelines. Guidelines are vertical or horizontal dotted lines that are displayed on pages.
You can also set margins using exact measurements or the ruler.
All margin settings affect the current page and subsequent pages until you change
them.
To set the margins using the margin guidelines
1 Click View ` Guidelines.
2 Enable the Margins check box.
3 Point to one of the following guidelines:
• left vertical dotted guideline
• right vertical dotted guideline
• upper horizontal dotted guideline
• lower horizontal dotted guideline
Formatting pages 19
Page 26
The pointer changes to a double-sided arrow.
4 Drag the guideline to a new position.
To set the margins using exact measurements
1 Click in the document where you want the margin changes to start.
2 Click Format ` Margins.
3 Click the Page setup tab.
4 In the Document margins area, type values in any of the following boxes:
• Left — lets you specify where the left margin starts
• Right — lets you specify where the right margin starts
• To p — lets you specify where the top margin starts
• Bottom — lets you specify where the bottom margin starts
You can also
Set all margins to the last margin value
edited
Set all margins to the minimum size allowed
by the current printer
In the Document margins area, click
Equal.
In the Document margins area, click
Minimum.
You can also set margins by clicking File ` Page setup.
To set the margins using the ruler
1 Point to the Margin marker to the left or right of the ruler.
The pointer changes to a double-sided arrow.
2 Drag the Margin marker to a new location on the ruler.
Choosing page size and orientation
When creating documents, you can choose the size and orientation of pages. The page
size and orientation determine how a printer formats and prints pages. You can choose
from preset page sizes, or you can create your own. For more information about creating
custom page sizes, see “Customizing page sizes” on page 21.
20 WordPerfect X3 User Guide
Page 27

Page sizes are matched to the printer you have selected. A size may not be available
when you change to another printer or a different computer. If the same size is not
available, WordPerfect finds the best match for a page size, selecting from those
available with the other printer. If the match does not work, you may need to customize
a page size.
To select a preset page size
1 Click File ` Page setup.
2 Click the Page setup tab.
3 From the Page definition list box, choose one of the following:
• Printer page types — lists all page size options for installed printers
• Standard page types — lists all page size options for most printers
4 Choose a page definition from the Page definition list.
5 In the Page definition applies to area, enable one of the following options:
• Current and following pages — applies the page definitions to the current and
following pages
• Current page only — applies the page definitions to the current page only
If you apply the page size definition to the current page only, WordPerfect
inserts a delay code in the next page. For more information about delay codes,
see “Inserting and editing delay codes” in the online Help.
To specify page orientation
1 Click File ` Page setup.
2 Click the Page setup tab.
3 In the Orientation area, enable one of the following options:
• Portrait — prints the document on pages that have greater length than width
• Landscape — prints the document on pages that have greater width than
height
Customizing page sizes
If you require a page size that is not available in WordPerfect, you can create a custom
page size. You can do this by creating a page size or modifying a preset page size. When
you create a custom page size, it is added to the printer’s page size selection as a preset.
Formatting pages 21
Page 28

Therefore, you can apply the custom size to more than one document. If you no longer
require the custom or modified page sizes, you can delete the page size or restore the
default page sizes.
In addition, you can divide a physical page into several logical pages. Dividing pages is
useful when you want to create small documents, such as pamphlets, raffle tickets, or
business cards.
These are examples of how you can divide pages.
As you edit a document, each logical page is treated as a separate page. The document
window also changes to show the dimensions of the logical page. After you fill a logical
page, the text continues on the next logical page.
To create a custom page size
1 Click File ` Page setup.
2 Click the Page setup tab.
3 Click Add.
4 In the Add new form dialog box, type a name for the new page size in the Name
box.
5 Choose a predefined paper type from the Ty p e list box.
6 Choose a predefined paper size from the Size list box.
If you want to create a page size definition from a nonstandard paper size, choose
User defined size from the Size list box.
7 Type values in the following boxes:
• Width
• Height
8 Choose a paper source from the Source list box.
22 WordPerfect X3 User Guide
Page 29
You can also
Display the available page size definitions for
all the installed printers
Display the available page size definitions for
the printer you have selected
Specify a vertical printing adjustment In the Printing adjustment area, choose an
Specify a horizontal printing adjustment In the Printing adjustment area, choose an
In the Show page size for area, enable the
All printers option.
In the Show page size for area, enable the
Current printer only option.
adjustment from the Ve rt ic al list box. Type a
value in the box.
adjustment from the Horizontal list box.
Type a value in the box.
The paper source is not saved as part of the document. It must be redefined for
each document.
All printers have a nonprintable zone. If information is formatted to print in
this area, it will not print. To shift information out of the nonprintable zone,
you must specify printing adjustments.
To modify a preset page size
1 Click File ` Page setup.
2 Click the Page setup tab.
3 Choose a page definition from the Page definition list.
4 Click Edit.
5 Modify any of the settings.
To delete a page size
1 Click File ` Page setup.
2 Click the Page setup tab.
3 From the Page definition list box, choose one of the following:
• Printer page types — lists all page size options for installed printers
• Standard page types — lists all page size options for most printers
4 Choose a page definition from the Page definition list box.
Formatting pages 23
Page 30

5 Click Delete.
When you delete a page size definition, you can no longer use that definition;
a document can print with a similar page definition, but it may not be an exact
match.
To restore default page sizes
1 Click File ` Page setup.
2 Click the Page setup tab.
3 From the Page definition list box, choose one of the following:
• Printer page types — lists all page size options for installed printers
• Standard page types — lists all page size options for most printers
4 Click Restore.
To divide a page
1 Click File ` Page setup.
2 Click the Layout tab.
3 In the Divide pages area, type a value in one of the following boxes:
• Columns — lets you divide a page into a specified number of columns
• Rows — lets you divide a page into a specified number of rows
Making text fit a specific number of pages
You can make selected text or all text in a document fit a specific number of pages.
To make text f it a specific number of pages
1 Click in a document.
2 Click Format ` Make It Fit.
3 Type a value in the Desired number of pages box.
The number of pages you set must be within 50 percent of the document’s current
page count.
4 In the Items to adjust area, enable any of the following check boxes:
• Left margin
24 WordPerfect X3 User Guide
Page 31

• Right margin
• Top margin
• Bottom margin
• Font size
• Line spacing
5 Click Make it fit.
To make only a certain block of text fit, select the text.
Creating and deleting columns
You can use columns to divide text vertically on a page. You can use four types of
columns in documents: newspaper, balanced newspaper, parallel, and parallel with
block protect. You can add columns to documents to create newsletters, glossaries,
scripts, or inventory lists. You can discontinue columns when they are complete. You
can also delete columns and quickly move through columns.
Text in newspaper columns flows down the column to the bottom of a page or column
break and starts again at the top of the next column.
Balanced newspaper columns are similar to regular newspaper columns, but each
column is adjusted on the page so that all columns are equal in length.
These are examples of pages with columns. The left page displays newspaper columns.
The right page displays balanced newspaper columns.
The parallel column text is grouped across the page in a row. The next row starts below
the longest column of the previous row. Parallel columns are useful for resumes, scripts,
charts, inventory lists, or lists where columns span multiple pages.
Formatting pages 25
Page 32

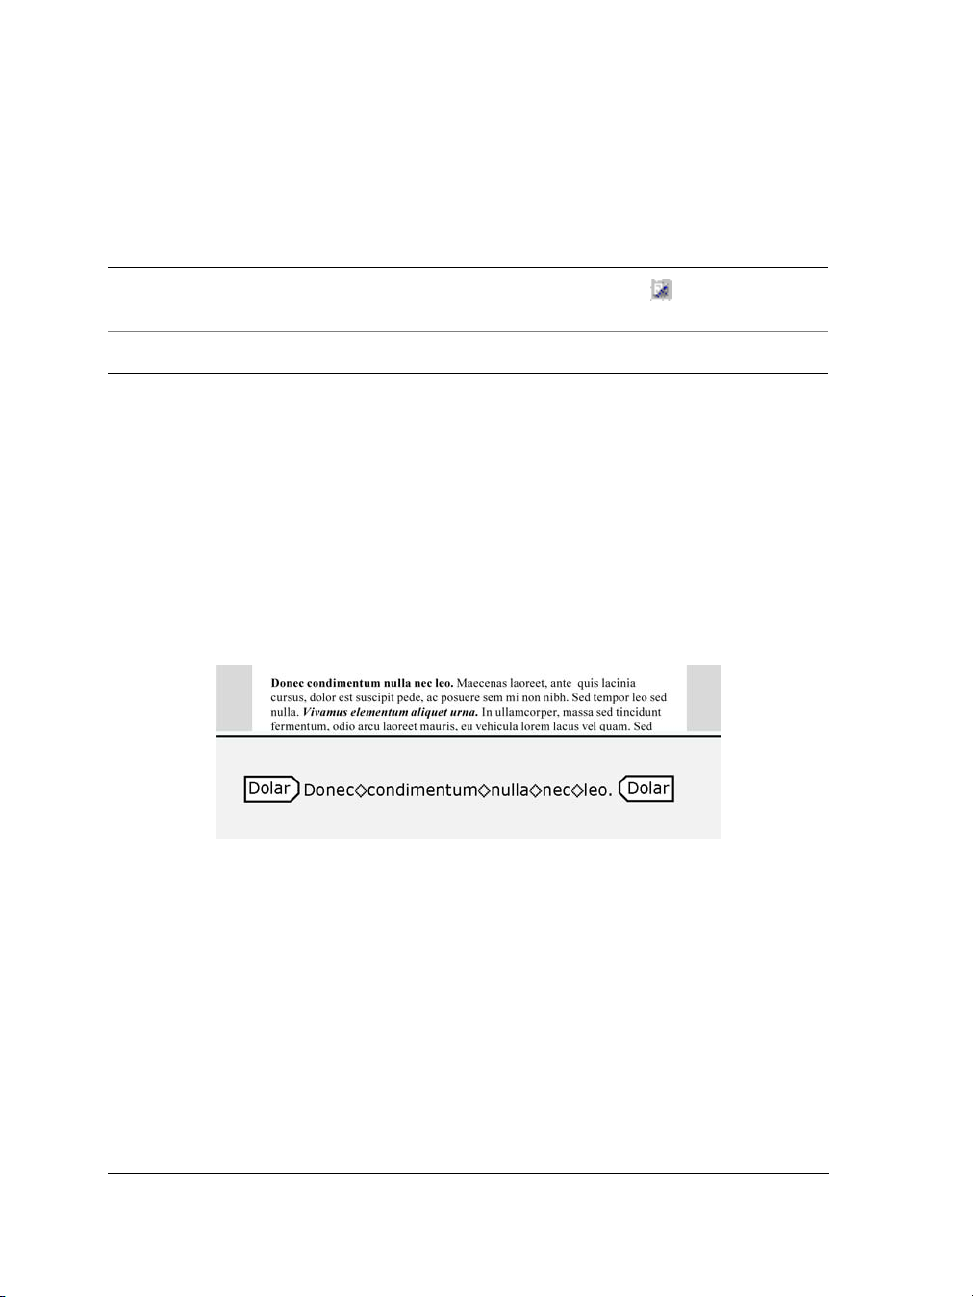
This is an example of parallel columns.
Parallel columns with block protect keep each row of columns together. If a column in
one row becomes so long that it moves across a page break, the entire row moves to the
next page. You can also use tables to create this type of column. For information about
working with tables, see “Using tables and charts” in the online Help.
This is an example of parallel columns with block protect.
To create columns
1 Click a page.
2 Click Format ` Columns.
3 Type a value in the Number of columns box.
4 In the Ty p e of c o l u m n s area, enable one of the following options:
• Newspaper — makes text flow down a column to the bottom of a page or
column break and continues it at the top of the next column
• Balanced newspaper — adjusts newspaper columns so that columns are of
equal length
• Parallel — groups columns across the page in rows, and starts subsequent rows
below the longest column of the previous row
• Parallel w/block protect — keeps all rows of the columns together across page
breaks
26 WordPerfect X3 User Guide
Page 33

You can also apply columns to a page by clicking the Columns button on
the toolbar.
To discontinue columns
1 Click where you want columns to discontinue.
2 Click Format ` Columns.
3 Click Discontinue.
Press Ctrl + Enter to end one column and start the next column.
To delete all columns
1 Click in the top-left corner of the first column.
2 Click Format ` Columns.
3 Click Discontinue.
You can also delete columns by dragging the [Col Def] code out of the Reveal
Codes window.
To navigate columns
To m o v e t o P r es s
The top of a column Alt + Home
The last line of a column Alt + End
The previous column Alt + Left Arrow
The next column Alt + Right Arrow
Formatting pages 27
Page 34

Page 35

Formatting text
In WordPerfect, you can use a variety of formatting tools to control the look of text.
In this section, you’ll learn about
• modifying font settings
•copying the format of text
Modifying font settings
You can apply formatting to text to change the font and its attributes, such as style, size,
and color.
You can also apply relative font sizes, which allows you to format text relative to the
specified font size. Suppose you want to add a heading to a document that has a 12point paragraph font. If you select the heading text and specify a large relative font size,
the text displays proportionately larger than the 12-point font.
This is an example of different fonts.
Using Corel RealTime Preview lets you view text fonts and sizes before you apply them.
For example, you can view text as it will display in various fonts before choosing which
is the most suitable. If you do not want to preview fonts and their sizes, you can disable
Corel RealTime Preview.
WordPerfect lets you format text using recent font settings, including the font and its
size. You can also change the default font and font size for the active document or for
all documents.
Formatting text 29
Page 36

This is an example of different font sizes.
To change the font
1 Click in the document.
2 Click Format ` Font.
3 Click the Font tab.
4 Choose a font from the Face list.
You can also
Change the font size Choose a font size from the Size list box.
Change the relative font size Click Relative size, and click a font size.
Change the font color Open the Color picker, and click a color.
You can also change the font color by clicking the Font color button on the
property bar, and clicking a color.
You can also change the underline font style by opening the Underline
picker on the property bar and clicking an underline style.
To change the font appearance
1 Select the text you want to modify.
2 Click Format ` Font.
3 Click the Font tab.
4 In the Appearance area, enable one or more of the following check boxes:
• Bold — Applies bold formatting to the selected text
• Italic — Applies italic formatting to the selected text
• Underline — Applies a single underline to the selected text
30 WordPerfect X3 User Guide
Page 37

• Outline — Outlines the selected text
• Shadow — Applies a shadow to the selected text
• Small caps — Applies small capitals to the selected text
• Redline — Applies the color red to the selected text
• Strikeout — Applies a line through the selected text
• Hidden — Applies the hidden format to the selected text
To change the font using Corel RealTime Preview
1 Click in a document.
2 Open the Font face list box on the property bar, and point to a font.
Changes to the font display in the font face preview window.
3 Choose a font from the Font face list box.
You can change the font size using Corel RealTime Preview by opening the
Font size list box on the property bar, viewing the font sizes in the font size
preview window, and choosing a font size.
To disable Corel RealTime Preview
1 Click To o l s ` Settings.
2 Click the Display icon.
3 Click the Document tab.
4 In the Show area, disable the RealTime Preview check box.
Corel RealTime Preview is enabled by default.
To reuse a recent font
1 Select the text you want to format.
If the Fonts toolbar is not displayed, click View ` To o l b a r s . In the To o l b a r s
dialog box, enable the Fonts check box.
2 Click the QuickFonts button on the font toolbar, and choose a font from the
list.
The QuickFonts list displays the 10 most recently used fonts.
Formatting text 31
Page 38

To change the default font and font size
1 Click File ` Document ` Default font.
2 Choose a font from the Face list.
3 Choose a font size from the Size list box.
If you want to change the default font and font size for all new documents, click
Settings, and click Set as default for all documents.
You must install a printer before you can change the default font.
If you specify a default printer font and distribute the file to others, the file may
not display or print correctly if their printer doesn’t have the specified default
font.
You can view the available attributes for each font by clicking the plus sign (+)
to the left of a font in the Face list.
Copying the format of text
You can copy the format of text and apply it to other text in a document. If you want
to copy selected text, then formatting attributes, such as font, font size, and font style,
are all copied. If you want to copy the heading in a paragraph, the paragraph style as
well as the font and its attributes are copied.
When you copy the format of text, you automatically create a text style. Changing text
that has been formatted using a text style also changes other text in the document that
uses that style. For information about text styles, see “Applying and editing text styles”
in the online Help.
To copy the format of text
1 Click in the text whose format you want to copy.
2 Click Format ` QuickFormat.
3 Enable one of the following options:
• Selected characters — copies the format of the font and its attributes
• Headings — copies the format of the paragraph and its styles, and the font and
its attributes
4 Click OK.
32 WordPerfect X3 User Guide
Page 39

5 Drag the QuickFormat paintbrush pointer over the text to which you want to
copy the format.
6 Click Format ` QuickFormat.
QuickFormat is disabled when no check mark displays beside the QuickFormat
menu command.
You can also enable or disable QuickFormat by clicking the QuickFormat
button.
Formatting text 33
Page 40

Page 41

Formatting paragraphs
WordPerfect allows you to control the look of documents by formatting paragraphs.
By changing the paragraph formatting, including justification, tab stops, and line
spacing, you can control the placement of paragraphs on a page.
In this section, you’ll learn about
• indenting text
• justifying text
• changing the spacing between lines and paragraphs
•adding tab stops
• changing the alignment of tab stops
• moving tab stops
• removing and restoring tab stops
Indenting text
Indenting arranges text on a page by moving one or more lines to the left or the right
of the paragraph margin. You can indent a line or paragraph manually or you can indent
lines or paragraphs using the ruler or automatically.
To move the first line of a paragraph farther to the left than subsequent lines, you can
apply a hanging indent. To indent an entire paragraph one tab stop from both the left
and right margins, you can apply a double indent. A double indent is often used to
format lengthy quotations.
Formatting paragraphs 35
Page 42

These are examples of indenting text.
To apply a single indent to text
To apply a hanging or double indent
1 Click at the beginning of a paragraph.
2 Click Format ` Paragraph, and click one of the following:
• Hanging indent — indents all but the first line in the paragraph
• Double indent — indents the paragraph equally from both margins
You can also apply a hanging indent by clicking at the beginning of any line
in a paragraph, except the first line, and pressing Ta b .
To remove an indent
1 Click at the beginning of a line of text.
2 Press Shift + Ta b .
Justifying text
You can justify text in a document. Doing so aligns the text horizontally between the
left and right margins of the page.
36 WordPerfect X3 User Guide
Page 43

This is an example of a left-justified paragraph (1), a right-justified paragraph (2),
a center-aligned paragraph (3), a fully justified paragraph (4), and a fully justified
paragraph that includes the last line (5).
To justif y text
1 Click in a paragraph.
2 Click Format ` Justification, and click one of the following:
• Left — aligns text evenly with the left margin
• Right — aligns text evenly with the right margin
• Center — centers text between the right and left margins
• Full — aligns text, excluding the last line, along both the right and left margins
• All — aligns text, including the last line, along both the right and left margins
Justification is applied to all text from the cursor location forward. If you want
to apply justification to a word, line, or paragraph, you must first select the
text.
You can also justify text by clicking the Justification picker on the
property bar and clicking a justification.
Formatting paragraphs 37
Page 44

Changing the spacing between lines and paragraphs
The space between lines, or the amount of white space that appears between the bottom
of one line and the top of the next line, is referred to as leading.
This is an example of changing spacing between lines.
You can change the leading by changing the line spacing and changing the line height.
This is an example of changing the line height.
You can also control the amount of space between paragraphs.
To adjust the leading
1 Click in a paragraph.
2 Click Format ` Typesetting ` Word/Letter spacing.
3 Enable the Adjust leading check box.
4 Type a value in the Between lines box.
A positive value increases the leading; a negative value decreases it.
To change the line spacing
1 Click in a paragraph.
2 Click Format ` Line ` Spacing.
3 Type a value in the Spacing box.
38 WordPerfect X3 User Guide
Page 45

You can also change the line spacing of selected text.
To change the line height
1 Click in the line of text where you want the line height change to begin.
If you want to limit the line height change to a specific section of text, select the
text.
2 Click Format ` Line ` Height.
3 Enable one of the following options:
• Automatic — defines the line height according to the font being used
• Fixed — lets you specify the height of the line regardless of the font being used
• At least — lets you specify the minimum height of the line
Line height is determined by multiplying the current line height by the
number you specify.
You can also change the line height of selected text.
To change the space between paragraphs
1 Click in a paragraph.
2 Click Format ` Paragraph ` Format.
3 In the Spacing between paragraphs area, enable one of the following options:
• Number of lines — inserts the number of lines you specify
• Distance in points — inserts the spacing you specify measured in points
There are 72 points in 1 inch.
Adding tab stops
Tab stops let you determine where the cursor moves to when you tab forward or tab
back in a document. You can add tab stops to a document using exact measurements or
using the ruler. You can also copy a tab stop using the ruler or add tab stops at evenly
spaced intervals.
Formatting paragraphs 39
Page 46

To add a tab stop using exact measurements
1 Click a paragraph.
2 Click Format ` Line ` Ta b s e t.
3 Choose a tab type from the Tab type list box.
4 Type a value in the Tab position box.
5 Enable one of the following options:
• From left margin (relative) — measures the distance of the tab stop relative to
the left margin. When the left margin changes, the tab stop adjusts accordingly.
• From left edge of paper (absolute) — measures the distance of the tab stop
from the left edge of the page. When the left margin changes, the tab stop
remains fixed.
6 Click Set.
To add a tab stop using the ruler
1 Click a paragraph.
2 Click the Ta b button , and choose a tab style.
3 On the tab bar, which displays under the ruler, click where you want to add a tab
stop.
For the tab bar to appear, the ruler must be displayed.
To copy a tab stop using the ruler
1 Click a paragraph.
2 Hold down Ctrl, and drag the tab stop to another position on the ruler.
To add tab stops at evenly spaced intervals
1 Click a paragraph.
2 Click Format ` Line ` Ta b s e t.
3 Click Clear all.
4 Enable the Repeat every check box, and type a value in the box.
5 Click Set.
40 WordPerfect X3 User Guide
Page 47

When you add a tab stop, the Margin icon is displayed in the left margin.
Clicking the Margin icon displays a ruler with the settings for the
paragraph.
For information about displaying the margin icon, see “To hide or display
nonprinting items” in the online Help.
You can also set tab stop intervals by double-clicking a tab stop on the ruler.
Changing the alignment of tab stops
When using a tab stop, you can specify the tab alignment, which is useful when you
want to arrange a column of text in a specific way, such as right-justified or left-justified.
You can also specify a decimal alignment. For example, you can align a column of
numbers at the decimal point. Tab alignment is also used to create dot leaders. For more
information about dot leaders, see “Inserting leaders and specifying leader characters”
in the online Help.
To change the alignment of a tab stop
1 Click a paragraph.
2 Click Format ` Line ` Ta b s e t.
3 Choose a tab type from the Ta b ty p e list box.
4 Click Set.
You can also change the alignment of a tab stop by double-clicking the tab
stop on the ruler, choosing a tab type from the Tab type list box, and clicking
Set.
To specify a decimal alignment
1 Click a paragraph.
2 Click Format ` Line ` Ta b s e t.
3 Choose Decimal from the Tab type list box.
4 In the Decimal alignment area, type a character in the Character to align on
box.
Formatting paragraphs 41
Page 48

5 Click Set.
Moving tab stops
WordPerfect lets you move a tab stop. You can position a tab stop relative to the left
margin or from the left edge of a page. You can also move a tab stop or multiple tab
stops. As you move a tab stop, you can make it automatically align to the ruler gridlines;
this is referred to as snapping.
To move a tab stop
1 Click in a paragraph.
2 Drag the tab stop to a new position on the ruler.
You can also change the position of a tab stop by double-clicking the tab stop
on the ruler.
To move multiple tab stops
1 Click in a paragraph.
2 Hold down Shift and drag across the tab stops on the tab bar to select them.
3 Drag the tab stops to a new position.
To make a tab st op snap to ruler gridlines
1 Click To o l s ` Settings.
2 Click Display.
3 In the Display settings dialog box, click the Ruler tab.
4 Enable the Tabs snap to ruler grid check box.
Removing and restoring tab stops
You can remove one tab stop or multiple tab stops. If you’ve modified the tab stops, you
can restore the default tab settings.
42 WordPerfect X3 User Guide
Page 49

To remove a tab stop
1 Click a paragraph.
2 Click Format ` Line ` Ta b s e t.
3 Click one of the following:
• Clear — clears the first tab stop to the left edge of the ruler
• Clear all — clears all tab stops
4 Click Set.
You can remove a tab stop by dragging it off the ruler.
You can also remove all tab stops by right-clicking a tab stop, and clicking
Clear all tabs.
To restore the default tab settings
• Right-click a paragraph, and click Default tab settings.
Formatting paragraphs 43
Page 50

Page 51

Editing documents
After you create a document, you can edit it by using a variety of methods.
In this section, you’ll learn about
• finding and replacing text
• cutting, copying, and pasting text and graphics
• copying and pasting text from a Web browser
• moving text and graphics
• reviewing documents
•routing documents
• comparing documents
• controlling document comparisons
Finding and replacing text
WordPerfect lets you find and replace text. You can search for words, phrases, or
individual characters in a document. Once the text is found, you can replace some or all
occurrences of the text with other text, or you can delete the text.
You can search for text that is displayed in a specific font or case. You can also find and
replace forms of a word. For example, you can replace forms of the word “entry” with
the word “insertion.” Therefore, if the plural form, “entries,” is found, it is replaced with
the word “insertions.” Furthermore, you can search for occurrences of words that are
whole words, and not part of a larger word. For example, if you do a default search for
the word “sum,” you will find “sum,” “summer,” and “summit.” If you do a whole-word
search for the word “sum,” you will find only occurrences of the word “sum.
To find and replace text
1 Click Edit ` Find and replace.
2 In the Find box, type the text you want to search for.
Editing documents 45
Page 52

3 Type the replacement text in the Replace with box.
4 Click one of the following:
• Find next — finds the next occurrence of the search text
• Find prev — finds the previous occurrence of the search text
• Replace — finds and replaces the next occurrence of the search text
• Replace all — finds and replaces all occurrences of the search text
You can also
Find the next occurrence of the search text Press Ctrl + Alt + N.
Find the previous occurrence of the search
text
Press Ctrl + Alt + P.
You can delete all occurrences of a text string by typing the text you want to
delete in the Find box and leaving the Replace with box empty.
You can search for a word or phrase you searched for previously by choosing
the word or phrase from the Find list box.
To find text in a specific font
1 Click Edit ` Find and replace.
2 In the Find box, type the text you want to find.
3 Click Match ` Font.
4 Enable the Font check box.
5 Choose a font from the Font list box.
6 Click one of the following:
• Find next — finds the next occurrence of the search text
• Find prev — finds the previous occurrence of the search text
You can also
Search for a font style Choose a font style from the Font style list
box.
Search for a specific point size Enable the Point size check box. Type a
point size in the Point size box.
46 WordPerfect X3 User Guide
Page 53

You can also
Search for specific font attributes In the Attributes area, enable one or more
of the attribute check boxes.
To find and replace case-specific text
1 Click Edit ` Find and replace.
2 Click Match ` Case.
3 In the Find box, type the text you want to find.
4 Type the replacement text in the Replace with box.
5 Click one of the following:
• Find next — finds the next occurrence of the search text
• Find prev — finds the previous occurrence of the search text
• Replace — finds and replaces the next occurrence of the search text
• Replace all — finds and replaces all occurrences of the search text
To find and replace a form of a word
1 Click Edit ` Find and replace.
2 Click Ty p e ` Word forms.
3 In the Find box, type the word you want to find.
4 Type the replacement word in the Replace with box.
5 Click one of the following:
• Find next — finds the next occurrence of the word
• Find prev — finds the previous occurrence of the word
• Replace — finds and replaces the next occurrence of the word
• Replace all — finds and replaces all occurrences of the word
To find and replace a whole word
1 Click Edit ` Find and replace.
2 Click Match ` Whole word.
3 In the Find box, type the word you want to find.
4 Type the replacement word in the Replace with box.
5 Click one of the following:
Editing documents 47
Page 54

• Find next — finds the next occurrence of the word
• Find prev — finds the previous occurrence of the word
• Replace — finds and replaces the next occurrence of the word
• Replace all — finds and replaces all occurrences of the word
Cutting, copying, and pasting text and graphics
You can cut or copy text or graphics and paste them to a new location in a document.
When you cut or copy information, it is stored on the Clipboard. You can paste it in the
active document, in another document, or in another application.
Clipboard contents are available only until you cut or copy something else, or until you
quit Windows. However, instead of replacing the information already stored, you can
append the Clipboard contents so that new information is added to the existing
contents.
You can also choose a specific format when you paste information from the Clipboard
into WordPerfect. For example, you can copy text from another application as Rich Text
Format (.rtf) or as simple text (.txt).
To cut, copy, and paste text and graphics
To Do the following
Copy text or graphics to the Clipboard
Cut text or graphics and move to the
Clipboard
Paste text or graphics in a document Click where you want to insert the text or
Add a selection to the current Clipboard
contents
Select the text or graphic, and click Edit
Copy.
Select the text or graphic, and click Edit
Cut.
graphic, and click Edit
Select the text to add to the Clipboard, and
click Edit
` Append.
` Paste.
`
`
You can also copy, cut, or paste text or graphics by clicking Copy , Cut ,
or Paste on the toolbar.
You can link copied information to a document by enabling the Paste link
option. The changes you make to the linked information in the active file are
48 WordPerfect X3 User Guide
Page 55

reflected in the original file. The changes made to the original file also appear
in the active file.
To paste Clipboard contents in a specified format
1 Select the text or graphic.
2 Click Edit, and click one of the following:
• Copy
• Cut
3 Click Edit ` Paste special.
4 Enable the Paste option.
5 Choose a format from the As list.
You can paste text as unformatted by pressing Ctrl + Alt + V.
Copying and pasting text from a Web browser
You can copy text from a Web browser and paste it into a WordPerfect document.
To copy and paste text from a Web browser
1 In the Web browser, select the text to copy.
2 Click Edit ` Copy.
3 In the WordPerfect document, click where you want to insert the text.
4 Right-click, and click Paste unformatted text.
You can paste text as unformatted by pressing Ctrl + Alt + V.
Moving text and graphics
You can move text and graphics by dragging them within a document or between
documents.
Editing documents 49
Page 56

To move text or graphics by dragging within a document
• Select a text or graphic, and drag it to a new position.
To move text or graphics by dragging to another document
1 Click Window, and click one of the following:
• Tile top to bottom — arranges the windows so that the documents are
displayed above or below one another
• Tile side by side — arranges the windows so that the documents are displayed
side by side
2 Select the text or graphic, and drag it to the other document.
Reviewing documents
Using WordPerfect, you can send a document to a reviewer, or multiple reviewers, to
add changes or make revisions to the document. These changes and revisions are also
referred to as annotations. If you authored the document, you can open it to accept or
reject the annotations.
If you send the document to multiple reviewers, the annotations of each reviewer are
displayed in a unique color. All revisions are displayed as strikeout text , and
comments are displayed as redline text. However, you can modify the way annotations
are displayed. For more information about modifying the display of annotation text, see
“Changing the settings for document review and comparison” in the online Help.
To review a document
1 Click File ` Document ` Review.
2 Click Reviewer.
3 Ty p e y o ur na m e i n t h e User name box.
4 Type your initials in the User initials box.
5 Open the color picker on the feature bar, and click a color. All changes you make to
the document are displayed in the color you choose.
To avoid choosing the same color as another reviewer, view the color selections of
other reviewers by choosing their names from the Reviewer list box.
6 Edit the document.
7 Click File ` Save.
50 WordPerfect X3 User Guide
Page 57

8 Click Close.
You can use all WordPerfect features except Sort to edit a document. Only
text editing changes, however, are marked with a color.
You can edit the additions made by previous reviewers; however, you cannot
edit or undo the deletions made by previous reviewers.
To incorporate reviewers’ changes
1 Click File ` Document ` Review.
2 Click Author.
3 Choose a reviewer from the View annotations from list box.
4 Only changes made by the selected reviewer are displayed. To display the changes
made by all reviewers, choose All reviewers from the View annotations from list
box.
5 Click one of the following:
• Go to previous — moves to the previous change
• Go to next — moves to the next change
6 Click one of the following:
• Show/hide — displays or hides margin markers
• Display annotations — shows the edited text with or without color
markings
• Insert current annotation — incorporates the current annotation
• Insert all annotations — inserts all annotations
• Delete the current annotation — deletes the current annotation
• Delete all annotations — deletes all the annotations in the document
7 Save the document.
When moving through the document from change to change, you cannot
move through subsections, such as headers, footers, and footnotes.
If you save a reviewed document in another file format — for example, Rich
Text Format (.rtf files) — the document will not be in review mode when you
open it. The reviewer’s remarks will be lost because the added text (red) and
the deleted text (strikeout) revert to regular text. Therefore, make sure that all
Editing documents 51
Page 58

changes are incorporated before you save the document to a different file
format.
You can also incorporate a reviewer’s changes in a subdocument by clicking in
the subdocument and then clicking the Next button to move from change
to change.
Routing documents
Routing a document allows you to send a document for an online review to several
reviewers in a specified order. In this routing process, the document is sent to one
reviewer at a time, so that each reviewer sees the changes made by each of the previous
reviewers. When you route a document, it is inserted in an e-mail as an attachment. You
must have an e-mail client, such as WordPerfect MAIL, installed on your computer for
this option to work.
To route a document, you must create a routing slip. The routing slip allows you to
specify the recipients of the document and the order in which they will receive the
document.
A reviewer who receives a routed document can make changes and revisions to the
document. The reviewer can then save the changes, close the document, and send it to
the next reviewer listed on the routing slip. Alternatively, a reviewer can wait before
sending the document to the next reviewer or can reassign a routed document to
another reviewer listed on the routing slip.
To create a routing slip
1 Click File ` Document ` Routing slip.
2 Type a subject name in the Subject box.
The subject name that you type in the box appears in the subject box of the e-mail
to be sent.
3 Type a message in the Message box.
The text that you type in the Message box appears in the message area of the email to be sent.
4 Click Addresses to add reviewers to the Reviewers list box.
The WordPerfect or Outlook address book opens to allow you to choose the
reviewers’ e-mail addresses.
52 WordPerfect X3 User Guide
Page 59

You can also
Change the e-mail address from which the
routing slip is initially sent
Specify a new default e-mail address
Move a reviewer up in the routing order Choose a reviewer from the Reviewers list,
Move a reviewer down in the routing order Choose a reviewer from the Reviewers list,
In the Author’s e-mail address text box,
type the e-mail address from which to send
the routing slip.
Enable the Store as default
box.
and click the Up arrow.
and click the Down arrow.
address check
When you create the first routing slip for a document, the e-mail address
specified in the environment settings automatically appears in the Author’s e-
mail address text box. If you insert a different e-mail address in the box, the
new e-mail address becomes the default address the next time you create a
routing slip for the same document. If you enable the Store as default address
check box, this e-mail address appears every time you create a routing slip.
If you are using WordPerfect MAIL as the e-mail client and you want to add
addresses from the WordPerfect MAIL address book, you need to access these
addresses through the WordPerfect address book. When you click the
Addresses button, the WordPerfect address book opens, and the
WordPerfect MAIL address book item appears in the Tree view pane.
To review a routed document
1 In an e-mail message, double-click the attached document.
If you want, you can save the document and then open the saved document to
review it.
2 In the Reviewer mode options dialog box, click Review.
3 Ty p e y o ur na m e i n t h e Reviewer list box.
4 Open the color picker on the feature bar, and click a color. All changes you make to
the document are displayed in the color you choose.
To see another reviewer’s color selection, choose the reviewer’s name from the
Reviewer list box.
Editing documents 53
Page 60

5 Edit the document.
6 Click Close.
You can edit the additions made by previous reviewers; however, you cannot
edit or undo the deletions made by previous reviewers.
To reassign a routed document
1 In the e-mail, double-click the attached document.
2 In the Reviewer mode options dialog box, click Reassign.
3 In the Reassign document review dialog box, choose a reviewer from the list.
4 Click Send.
Comparing documents
You can compare a current version of a document with an earlier version to see what
changes have been made. When comparing documents, you can generate a comparison
summary and a list of changes. A comparison summary describes the color and the
attributes used to display deletions and insertions. It also lists the number of deletions,
insertions, and moves that were made. The list of changes details all of the changes
made in the document.
When you compare and review a document, the document that contains the
comparison markings is opened in review mode. In addition, you can restore a
document to the way it was before the comparison. For more information about
reviewing documents, see “Reviewing documents” on page 50.
To compare a document
1 Click File ` Document ` Compare.
2 In the With box, type the folder and filename of the file you want to compare.
To browse for the file, click the Browse button.
3 In the Show markings in area, enable one of the following options:
• New document — displays comparison results in a new document
• Current document — displays comparison results in the active document
4 Click Compare only.
54 WordPerfect X3 User Guide
Page 61

To generate a comparison summary
1 Click File ` Document ` Compare.
2 Click Settings ` Compare only.
3 In the Document compare settings dialog box, click the Options tab.
4 In the Summary of comparison area, enable one of the following options:
• None — inserts no comparison summary
• Insert at beginning — inserts the comparison summary at the beginning of the
document
• Insert at end — inserts the comparison summary at the end of the document
To generate a list of changes
1 Click File ` Document ` Compare.
2 Click Settings ` Compare only.
3 In the Document compare settings dialog box, click the Options tab.
4 In the List of changes area, enable one of the following options:
• None — displays no revision list
• Show surrounding context — displays a revision list that details the changes in
the context of the document
• Show change only — displays a revision list that includes only the changes
made to the document
To compare and review the differences between documents
1 Click File ` Document ` Compare.
2 In the With box, type the folder and filename of the file with which you want to
compare the active document.
To browse for the file, click the Browse button.
3 In the Show markings in area, enable one of the following options:
• New document — displays comparison results in a new document
• Current document — displays comparison results in the active document
4 Click Compare/Review.
To restore a document
1 Click File ` Document ` Remove markings.
Editing documents 55
Page 62

2 Enable one of the following options:
• Remove redline markings and strikeout text — restores the current
document to its condition before the comparison
• Remove strikeout text only — keeps the markings for added and moved text,
but removes markings for deleted text
• Remove document compare deletions only — removes only markings for
deleted text
• Remove all document compare markings — removes all markings,
insertions, deletions, and moves
Controlling document comparisons
When comparing documents, you can control how the comparison is done. You can
choose to compare document text word by word or character by character. You can also
include substructure text in a document comparison. For example, you can include
headers, footers, and comments in a comparison. Conversely, you can exclude text from
a document comparison.
To compare document text by word or by character
1 Click File ` Document ` Compare.
2 Click Settings ` Compare only.
3 In the Document compare settings dialog box, click the Options tab.
4 In the Marking precision area, enable one of the following options:
• Wo rd — compares document text word by word
• Character — compares document text character by character
If you plan to review the document after the comparison, you can specify the
marking precision — word by word or character by character — by clicking
Settings ` Compare then review.
To include substructure text in a document comparison
1 Click File ` Document ` Compare.
2 Click Settings ` Compare only.
3 In the Document compare settings dialog box, click the Options tab.
4 In the Include in comparison area, enable any the following check boxes:
56 WordPerfect X3 User Guide
Page 63

• Headers/Footers — includes headers and footers in a document comparison
• Comments — compares information in comments
• Expand master documents — expands all subdocuments associated with the
file
If you plan to review the document after the comparison, you can specify which
text to include in the comparison by clicking Settings ` Compare then
review.
To exclude text from a document comparison
1 Click File ` Document ` Compare.
2 Click Settings ` Compare only.
3 In the Document compare settings dialog box, click the Options tab.
4 In the Characters to enclose text to skip in comparison box, type a character.
If you plan to review the document after the comparison, you can specify which
text to exclude from a document by clicking Settings ` Compare then
review.
Editing documents 57
Page 64

Page 65

Working with footnotes and
endnotes
Footnotes and endnotes allow you to add reference information to a document, such as
additional notes that accompany a topic or that provide references. Footnotes are
displayed at the bottom of a page, while endnotes are found at the end of a document.
In this section, you’ll learn about
• inserting footnotes and endnotes
• finding footnotes and endnotes
• modifying the display of footnotes and endnotes on a page
Inserting footnotes and endnotes
When creating a document, WordPerfect allows you to insert footnotes or endnotes. A
footnote is found below the text on a page or at the bottom of a page, whereas an
endnote displays at the end of a document. When you insert endnotes or footnotes, a
reference number or mark is inserted in the document text. That number or mark is
linked to the corresponding information in the endnote or footnote. For more
information about modifying footnote and endnote numbering, see “Numbering
footnotes and endnotes” in the online Help.
This is an example of footnotes.
To insert a footnote
1 Click where you want the footnote reference mark to display.
Working with footnotes and endnotes 59
Page 66

2 Click Insert ` Footnote/Endnote.
3 Enable the Footnote number option.
If you want to restart the footnote numbering at a specific number, type the
number in the Footnote number box.
4 Click Create.
5 Type the footnote text.
If you want to align the footnotes with the document margins, enable the Align
with document margins check box.
6 Click File ` Close.
While working with a footnote, you do not have access to all available
WordPerfect functions until you return to the body of the text.
You can restore a deleted footnote number by clicking the Note number
button on the property bar.
To insert an endnote
1 Click where you want the endnote reference mark to display.
2 Click Insert ` Footnote/Endnote.
3 Enable the Endnote number option.
4 Click Endnote placement.
5 Enable the Insert endnotes at insertion point option.
6 Click Create.
7 Type the endnote text.
If you want to align the endnotes with the document margins, enable the Align
with document margins check box.
8 Click File ` Close.
While working with a endnote, you do not have access to all the available
WordPerfect functions until you return to the body of the text.
60 WordPerfect X3 User Guide
Page 67

You can restart the endnote numbering at a specific number by typing the
number in the Endnote number box. When you enable the Insert endnotes
at insertion point and restart numbering option, all endnotes up to the
number you’ve specified display on one page, and then a note numbering starts
over with 1 on a new page.
You can restore a deleted footnote number by clicking the Note number
button on the property bar.
Finding footnotes and endnotes
WordPerfect lets you find specific footnotes or endnotes in a document. You can also
search for footnote and endnote codes while in Reveal Codes. This provides you with a
faster way of modifying specific footnote settings. For example, if you want to change
the length of a footnote separator line, you can search for the “Footnote Sep Ln” code.
To find a footnote
1 Click Insert ` Footnote/Endnote.
2 Enable the Footnote number option.
3 In the Footnote number box, type the number of the footnote you want to find.
4 Click Edit.
To find an endnote
1 Click Insert ` Footnote/Endnote.
2 Enable the Endnote number option.
3 In the Endnote number box, type the number of the endnote you want to find.
4 Click Edit.
To find footnote codes
1 Press Alt + F3 to display the Reveal Codes window.
2 Click Edit ` Find and replace.
3 Click Match ` Codes.
4 Choose one of the following codes from the Find codes list:
Working with footnotes and endnotes 61
Page 68

• Footnote — represents a footnote
• Footnote Cont Msg — represents a footnote “continued” message
• Footnote Min — represents the minimum vertical space that is available for
footnotes at the bottom of a page
• Footnote Num Dec — represents the decrease footnote numbering setting for
footnotes
• Footnote Num Disp — represents footnote number style
• Footnote Num Each Pg — represents the restart of footnote numbering on
each page
• Footnote Num Inc — represents the increase footnote numbering setting for
footnotes
• Footnote Num Meth — represents the footnote numbering method
• Footnote Num Set — specifies new footnote number
• Footnote Sep Ln — represents the footnote separator line
• Footnote Space — represents the space between footnotes
• Footnote Txt Pos — represents footnote text position
To find endnote codes
1 Press Alt + F3 to display the Reveal Codes window.
2 Click Edit ` Find and replace.
3 Click Match ` Codes.
4 Choose one of the following codes from the Find codes list:
• Endnote — represents an endnote
• Endnote Min — represents the minimum amount of space that is available for
an endnote at the bottom of a page
• Endnote Num Dec — represents decrease endnote numbering setting for
endnotes
• Endnote Num Disp — represents endnote number style
• Endnote Num Inc — represents increase endnote numbering setting for
endnotes
• Endnote Num Meth — represents the endnote numbering method
• Endnote Num Set — specifies new endnote number
• Endnote Placement — represents endnote placement
• Endnote Space — represents space between endnotes
62 WordPerfect X3 User Guide
Page 69

Modifying the display of footnotes and endnotes on a page
WordPerfect lets you modify the way footnotes and endnotes display on a page. You can
change the amount of space between footnotes or endnotes. You can also change the
position of footnotes on a page. For example, you can display footnotes immediately
following the corresponding text on a page or at the bottom of a page. You can also
choose to continue footnotes on the following page if there isn’t enough room on a page.
As well, you can adjust the separator line between document text and footnotes.
To change the amount of space between footnotes or endnotes
1 Click Insert ` Footnote/Endnote.
2 Enable one of the following options:
• Footnote number
• Endnote number
3 Click Options, and click Advanced.
4 Type a value in the Space between notes box.
To change the position of footnotes on a page
1 Click Insert ` Footnote/Endnote.
2 Enable the Footnote number option.
3 Click Options, and click Advanced.
4 In the Position area, enable one of the following options:
• Place notes below text
• Place notes at bottom of page
To continue footnotes on the following page
1 Click Insert ` Footnote/Endnote.
2 Enable the Footnote number option.
3 Click Options, and click Advanced.
4 In the Continued notes area, type a value in the Amount of note to keep
together box.
This value specifies the minimum distance allowed for a footnote at the bottom of a
page before the note is moved to the next page.
Working with footnotes and endnotes 63
Page 70

If you want to include a “continued...” message on the last footnote line of a page
and the first footnote line of a new page, enable the Insert (continued...) message
check box.
To adjust the separator line between document text and footnotes
1 Click Insert ` Footnote/Endnote.
2 Enable the Footnote number option.
3 Click Options, and click Separator.
4 In the Add space area, type a value in the Above line box.
This value specifies the amount of white space between the separator line and the
document text above it.
5 Type a value in the Below line box.
This value specifies the amount of white space between the separator line and the
footnote text below it.
6 In the Line format area, choose one of the following positions for the line from the
Line position list box:
• Left
• Center
• Right
7 Choose a line length from the Length of line list box.
8 Open the Line style picker, and click a line style on the line style palette.
You can also
Position the separator line between margins Choose Full from the Line position list box.
Specify a specific line position Choose Set from the Line position list box.
Ty p e a v al ue in th e From left edge box.
64 WordPerfect X3 User Guide
Page 71

Numbering
WordPerfect allows you to count elements of a document. You can also change the
appearance of numbering and use counters to count elements of a document.
WordPerfect allows you to number pages and change the appearance of numbering.
In this section, you’ll learn about
• numbering pages
• changing the appearance of page numbers
Numbering pages
WordPerfect allows you to insert page numbers in a document and to choose where to
position page numbers on a page. When you begin page numbering, you can also
specify which number to begin with. For example, you may want the first page of a
document to be labeled page 3 instead of page 1.
You can also insert secondary page numbers, which allow you to start a new page
numbering scheme in a document. For example, suppose you are creating a document
in WordPerfect, but in the middle of the document, you need to add maps that were
not created in WordPerfect. The WordPerfect document is 10 pages, but the maps need
to be added as pages 7 and 8. To accomplish this, you can start page numbering at 1 at
the beginning of the document and insert a secondary page number, number 9, on the
document’s page 7. This would allow for the addition of the maps without disrupting
the page numbering.
Numbering 65
Page 72

These are examples of various page numbering options: 1) no page number, 2) page
number in the bottom-right corner, 3) page number at the bottom center, and 4) page
number in the top-right corner.
To insert page numbers
1 Click Format ` Page ` Numbering.
2 From the Position list box, choose a position for the page numbers.
3 From the Page numbering format list, choose a format for the page numbers.
To specify an alternate starting page
1 Click Format ` Page ` Numbering.
2 Click Set value.
3 In the Va lu es dialog box, click the Page tab.
4 Type a new page number in the Set page number box.
5 Enable one of the following options:
• Always keep number the same — ensures that the number remains the same
when the document is edited
• Let number change as pages are added or deleted — lets the number change
as the document is edited
When you merge a multiple-page form document, you can restart the page
numbering for each merged record by enabling the Always keep number the
same option.
To insert a secondary page number
1 Click Format ` Page ` Insert page number.
2 Choose Secondary page from the list.
66 WordPerfect X3 User Guide
Page 73

3 Click Va lu e/ Ad ju st .
4 In the Va lu es dialog box, click the Secondary tab.
5 Choose a numbering format from the Secondary page number method list box.
6 Type a value in the Set secondary page number box.
7 Click Insert.
Changing the appearance of page numbers
You can change the font size and style, which includes attributes, such as bold or italic,
of page numbers. In addition, you can also create custom page numbering formats. For
example, you can add the name of a document or a chapter number to a page number.
If you no longer need the custom format, you can delete it. However, you cannot delete
the default page numbering formats provided with WordPerfect.
To change the font attributes of page numbers
1 On a page, click where you want the font change to begin.
2 Click Format ` Page ` Numbering.
3 Click Font.
4 In the Page numbering font dialog box, choose a font from the Face list.
5 Choose a font size from the Size list box.
You can also
Change page number style In the Appearance area, enable one or more
check boxes.
Change page number color Open the color picker, and click a color.
Change page number shading Type a value in the Shading box.
To customize a page number format
1 Click Format ` Page ` Numbering.
2 Click Custom format.
3 In the Custom page numbering dialog box, delete the text that displays in the
Custom page numbering format (numbering codes with text) box.
Numbering 67
Page 74

4 Choose a number format from one of the following lists:
• Page
• Total pgs
• Chapter
• Volume
• Secondary pg
5 Click Insert in format.
6 Repeat steps 4 and 5 until the Custom page numbering format (numbering
codes with text) box contains the numbers you want.
7 In the Custom page numbering format (numbering codes with text) box, type
the text that you want to display with the number codes.
Examples
• If you wanted to display the name of a document, Snowboarding 101, with the
chapter number and page number, you would type Snowboarding 101 beside the
number codes in the Custom page numbering format (numbering codes
with text) box. The text in the box would appear as: Snowboarding 101 [Chpt
#] [Page #].
• If you wanted to include the words Chapter and Page in the customized format,
you would type Snowboarding 101, Chapter, and Page beside the number codes
in the Custom page numbering format (numbering codes with text) box.
The text in the box would appear as: Snowboarding 101 Chapter [Chpt #] Page
[Page #].
The five most recently used formats display at the top of the Page numbering
format list box so that you can quickly apply them to a document.
For each custom format you create, you can choose only one type of number
from each list box.
To delete a page numbering format
1 Click Format ` Page ` Numbering.
2 Choose a format from the Page numbering format list box.
3 Press Delete.
68 WordPerfect X3 User Guide
Page 75

Printing
WordPerfect allows you to print a variety of documents, including envelopes and
labels.
In this section, you’ll learn about
• setting up a printer
• setting up a print job
• previewing a print job
•printing documents
• controlling a print job
• printing double-sided pages
• printing document sections and comments
• printing file details
• printing envelopes and labels
• printing graphics
• laying out a print job
• saving print settings
• using printer commands
•printing to a file
•sending faxes
For more information about printing, see “Reference: Printing” on page 93.
Setting up a printer
If you have access to different printers, you can set them up in the application so you
can print to any of them, and, before printing a file, you can choose the printer you want
use. Once you install one or more printers, you can configure them in a number of ways.
You can also select a printer as the default printer for WordPerfect. In addition, you can
change printer properties and reformat documents for the default printer.
Printing 69
Page 76

For more information about installing a printer, refer to the Windows documentation.
In addition, many printer settings are printer-specific; therefore, not all printer settings
may be available for your printer. Consult your printer manual for more information.
You can also disable printer metrics. Printer metrics are used to determine line endings.
If you disable printer metrics, printer fonts will not be visible in the list of fonts.
To add a printer
1 Click File ` Print.
2 On the Main page, click Printers.
3 In the Printers and faxes or Printers dialog box, double-click the Add printer
icon.
4 Follow the steps in the Add printer wizard.
To select a printer
1 Click File ` Print.
2 On the Main page, choose a printer from the Name list box.
To change the application default printer
1 Click File ` Print.
2 On the Main page, choose the printer you want as the default from the Name list
box.
3 Click Edit settings.
4 From the Named settings dialog box, choose Application default from the
Name for current settings list box.
5 Click Save.
If you disabled the Reformat documents for the WordPerfect default
printer on open check box in the Environment settings dialog box,
WordPerfect ignores the default printer settings and retrieves the settings for
the application default printer with which the document was formatted.
By enabling both the Use printer properties from currently selected
printer check box and the Retrieve properties from printer each time
setting is retrieved option, the settings from the application default printer
70 WordPerfect X3 User Guide
Page 77

are automatically updated every time you choose Application default setting.
This works only for the printer saved as the application default printer.
To reformat documents for the default printer
1 Click To o l s ` Settings.
2 Click Environment.
3 In the Environment settings dialog box, click the General tab.
4 Enable the Reformat documents for the WordPerfect default printer on open
check box.
When you disable the Reformat documents for the WordPerfect default
printer on open check box, WordPerfect looks for the printer with which the
document was formatted. If that printer is not available, WordPerfect
reformats the document for the current printer if necessary.
To change printer properties
1 Click File ` Print.
2 On the Main page, choose the printer for which you want to change the properties
from the Name list box.
3 Click Properties.
4 Change the printer properties.
WordPerfect no longer uses WordPerfect printer drivers (.prs files). When you
retrieve documents created with old printer drivers, documents are reformatted
for the Windows printer that is selected.
If you choose a paper source, enable collating, or specify the number of copies
to print directly in the printer’s properties dialog box, the settings are detected
by WordPerfect.
You can also specify the paper source by clicking the Paper/Quality tab and
choosing a paper source from the Paper source list box.
Printing 71
Page 78

To disable printer metrics
1 Click To o l s ` Settings.
2 Click Convert.
3 In the Convert settings dialog box, click the Compatibility tab.
4 In the Options area, enable the Do not format document using print metrics
check box.
Setting up a print job
You can set the printing orientation to landscape or portrait. In addition, you can print
documents in reverse order. You can also specify where paper is fed into the printer.
Before printing, you must choose and properly configure the appropriate printing
device driver. To find out how best to set up the printing device driver, consult the
manufacturer’s documentation for the printing device, the Windows documentation, or
the service bureau that will print the work.
To set landscape or portrait orientation
1 Click File ` Page setup.
2 In the Orientation area, enable one of the following options:
• Portrait — prints text and graphics on a page whose height is greater than its
width
• Landscape — prints text and graphics on a page whose width is greater than its
height
To print document pages in reverse order
1 Click File ` Print.
2 On the Main page, enable the Print in reverse order check box from the Copies
area.
To specify where paper is fed into the printer
1 Click File ` Print.
2 Click the Advanced tab.
72 WordPerfect X3 User Guide
Page 79

3 In the Advanced options area, choose one of the following options from the Paper
feed list box:
• Left — specifies that the paper is being inserted at the left of the printer
• Center — specifies that the paper is being inserted at the center of the printer
• Right — specifies that the paper is being inserted at the right of the printer
Previewing a print job
Documents sometimes print differently than they appear on the screen. You can,
however, view a document the way it would print, without having to print it. You can
also increase or decrease the zoom level while previewing a print job. In addition, you
can edit text, adjust margins, and print a document.
To preview a print job
•Click File ` Print preview.
A check mark beside the Print preview command indicates that the print job is in
Print Preview mode.
You can close the preview window by clicking File ` Print preview.
You can also preview a print job by clicking the Mini preview button in
the Print dialog box.
To edit text in Print Preview mode
1 In Print Preview mode, click the beginning of the text you want to edit.
2 Click View ` Zoom.
3 Enable the 150% option.
4 Click OK.
5 Edit the text.
You can revert to the default Print Preview zoom level by clicking View `
Zoom, and typing 52 in the Other box.
Printing 73
Page 80

To increase or decrease the zoom level while previewing a print job
1 Click File ` Print preview.
2 Click the Zoom picker on the toolbar, and click a zoom option.
To adjust margins in Print Preview mode
1 Click the paragraph or page where you want the margin changes to start.
Adjustments to margins apply to the line in which the cursor is located and all
subsequent lines.
2 Click Format ` Margins.
3 Click the Page setup tab.
4 In the Document margins area, type values in the following boxes:
• Left
• Right
• Top
• Bottom
You can also
Set all margins equal to the last margin
value edited
Set all margins to the minimum size allowed
by the current printer
In the Document margins area, click
Equal.
In the Document margins area, click
Minimum.
Most printers have an area around the edge of the page where they cannot
print. WordPerfect does not allow smaller margins than your printer can
accommodate.
If you want to change the margins for specified text, select the text.
To print from Print Preview
1 In Print Preview mode, click the Print button on the property bar.
2 Click Print.
74 WordPerfect X3 User Guide
Page 81

Printing documents
In addition to printing a file, you can print multiple copies of a file and print a document
saved on disk or on a network drive.
To print a document
1 Click File ` Print.
2 On the Main page, choose a printer from the Name box.
3 In the Print range area, enable one of the following options:
• Full document — prints the entire file
• Current page — prints the page where the cursor is located
• Pages — prints the pages specified in the page box
• Selected text — prints the selected text in the document (available only if text is
selected)
• Document summary — prints only the document summary (available only if
there is a document summary)
If you enables the Pages option, type the pages you want to print in the Pages box.
A hyphen (-) between numbers defines a range of sequential pages (for example, 1-
5 prints pages 1 to 5). A comma (,) between numbers defines a series of nonsequential pages (for example, 1, 5 prints pages 1 and 5 only). Any combination of
hyphens and commas is supported (for example, 1-3, 5, 7, 10-12 prints the
following pages: 1, 2, 3, 5, 7, 10, 11, and 12).
4 Click Print.
For information about printing specific pages, see “Printing multiple pages” on
page 93.
If there is no document summary created for the document you are using, the
Document summary option is grayed. For information about creating
document summaries, see “Using document summaries” in the online Help.
To print multiple copies
1 Click File ` Print.
2 On the Main page, type the number of copies you want to print in the Number of
copies box.
If you want the copies collated, enable the Collate option.
Printing 75
Page 82

3 Click Print.
To print a document saved on disk or on a network drive
1 Click File ` Print.
2 Click the Advanced tab.
3 Enable the Document on disk check box.
4 Click Browse.
5 In the Open file dialog box, choose the drive and folder where the document is
stored.
6 Double-click the document name.
7 Click Print.
Controlling a print job
Once you have created a print history and submitted a print job, you can control the
print job.
You can view the status of print jobs, so that you know where they are in the print queue
and whether they are progressing normally.
In addition, you can view the history of print jobs sent to the printer during your current
session. Print jobs display in the history list in the order they were sent to the printer,
with the most recent job at the top.
You can also pause print jobs, although on network printers you can only pause your
own print jobs. You can resume printing a paused print job.
You can cancel a print job.
To view the status or history of a print job
1 Click File ` Print.
2 On the Main page, click Status.
If you cannot view the history, make sure the Hide completed jobs command
is disabled. In the Print history and status dialog box, click Display. The
76 WordPerfect X3 User Guide
Page 83

absence of a check mark next to the Hide completed jobs command indicates
that the command is disabled.
To pause a print job
1 Click File ` Print.
2 On the Main page, click Status.
3 In the Print history and status dialog box, choose a file from the list.
4 Click Document ` Pause printing.
To resume a print job
1 Click File ` Print.
2 On the Main page, click Status.
3 In the Print history and status dialog box, choose a document from the list.
4 Click Printer ` System printers.
5 In the Printers and faxes or Printers dialog box, double-click the active printer.
6 Click Document ` Resume.
To cancel a print job
1 Click File ` Print.
2 On the Main page, click Status.
3 On the Print page, click Status.
4 In the Print history and status dialog box, choose a document from the list.
5 Click Document ` Cancel printing.
On a network printer, you can cancel only your own print jobs.
You can cancel the job in the Windows print queue, in your network print
queue, or at your printer. But if your printer has a large memory buffer,
printing may continue for a few moments after you cancel the print job. For
more information about each of these options, see the respective product
documentation.
Printing 77
Page 84

Printing double-sided pages
If your printer supports printing on both sides of a page, you can print double-sided
directly from the application. If your printer doesn’t support double-sided printing, you
can still print double-sided manually.
If a file contains printing codes specifying that it is to be printed double-sided, but you
want to print single-sided, you can override the codes.
You can also print a document in a booklet style. When you divide pages to print in a
booklet style (with pages folded in half), you can print with the pages numbered and
ordered automatically.
To print double-sided pages automatically
1 Click File ` Print.
Make sure that the printer you want to use is displayed in the Name list box. If it is
not, choose the correct printer.
2 Click the Layout tab.
3 In the Two-sided printing area, enable one of the following Automatic (printer
supports two-sided printing) options:
• Flip on long edge — prints the document for binding the long edge of the page
(for example, a book)
• Flip on short edge — prints the document for binding the short edge of the
page (for example, a flip chart or tablet)
4 Click Print.
To print double-sided pages manually
1 Click File ` Print.
Make sure that the printer you want to use is displayed in the Name list box. If it is
not, choose the correct printer.
2 Click the Layout tab.
3 In the Two-sided printing area, enable one of the following Manual (two steps)
options:
• Step 1: print odd pages
• Step 2: print even pages
If you are printing the second side of the document, enable the option not used for
the first side of the document.
78 WordPerfect X3 User Guide
Page 85

4 Click Print.
5 When printing is complete, turn the pages over and reload them in the paper tray.
6 Repeat steps 1 to 4.
Before printing, you may want to print a double-sided test page.
Some printer manufacturers discourage reinserting a page into the printer if it
has been used for printing. Please refer to your printer documentation for more
information.
To override two-sided printing codes
1 Click File ` Print.
2 Click the Layout tab.
3 In the Two-sided printing area, enable the Off option.
To print a booklet
1 Click File ` Print.
2 Click the Layout tab.
3 In the Two-sided printing area, enable the Use document settings option.
4 Enable the Print as booklet check box.
5 Click Print.
The booklet option is available only when the document has divided pages.
In order to print a booklet properly, the physical page must be subdivided into
two logical pages. For information about dividing pages, see “Specifying singlesided or double-sided pages for a document” in the online Help.
Printing document sections and comments
WordPerfect allows you to print sections of a document, such as specific volumes or
chapters. Additionally, you can print comments that were inserted in the document. For
more information about comments, see “Adding, editing, and deleting comments” in
the online Help.
Printing 79
Page 86

To print sections of a document
1 Click File ` Print.
2 Click the Advanced tab.
3 Type a number or a combination of numbers in any of the following list boxes:
• Page(s)/Label(s) — prints the specified pages
• Secondary pages — prints the specified secondary pages
• Chapters — prints the specified pages in the specified chapters
• Vol um es — prints the specified pages in the specified volumes
4 Click Print.
The Vol um es setting takes precedence over all other settings, followed by
chapters, secondary pages, and then page(s)/label(s). For example, if you type
2 in the Vol um es box, only pages and chapters within volume 2 will print,
even if you have specified pages and chapters that are located in other parts of
the document.
For more information about printing pages in sections, see “Printing sections”
on page 94.
You can click the down arrow in the Secondary pages, Chapters, or Vol um es
list boxes to see a list of range patterns. Click the pattern you want, delete the
supplied page numbers, and type the pages you want. You can also type a page
range yourself if you are familiar with the patterns.
To print a comment
1 Click immediately after the comment.
2 Click Insert ` Comment ` Edit.
3 Click File ` Print.
Any comments that have been converted to document text will print when the
document is printed.
80 WordPerfect X3 User Guide
Page 87

Printing file details
You can print file information for a file, such as the file path, at the bottom of the page.
In addition, you can show crop/fold marks when you print a file, so that you can clearly
identify the edges of the printed area for such purposes as using a paper cutter.
In addition, you can print documents with codes displayed. Documents will print as
they display in Reveal Codes view. This is useful for analyzing the document formatting.
For more information on displaying Reveal Codes, see “Using Reveal Codes” on
page 16.
To print file information
1 Click File ` Print.
2 Click the Layout tab.
3 In the Details area, enable the Print file information check box.
4 Click Print.
By default, the file path is printed. You can add information by typing in the
Print file information list box. The information you add overwrites the file
path and cannot exceed 168 characters.
To print crop/fold marks
1 Click File ` Print.
2 Click the Layout tab.
3 In the Details area, enable the Show crop/fold marks check box.
4 Click Print.
To print codes in a document
1 Click File ` Print.
2 Click the Advanced tab.
3 In the Advanced options area, enable the Print Reveal Codes check box.
Printing 81
Page 88

When you print codes in a document, the printed document does not contain
any information other than the codes and the text. For example, graphics and
file information are not printed.
For information on displaying Reveal Codes, see “Using Reveal Codes” on
page 16.
Printing envelopes and labels
To print on different sizes of paper, you must select a page size definition so the printer
can format and print a document as you want. For information about creating page size
definitions, see “Choosing page size and orientation” on page 20.
You can print envelopes in WordPerfect. WordPerfect allows you to print different sizes
of envelopes. For information about creating envelopes, see “Creating and editing
labels” in the online Help.
You can select a label size. You can also print labels.
For more information about printing labels, see “Printing labels” on page 95.
To print an envelope
1 Click the page of a document that is set up as an envelope.
2 Click File ` Print.
3 Click the Main tab.
4 Click Print.
You can also print an envelope by clicking the Print current envelope
button on the property bar.
To select a label size
1 Click the page where you want labels to begin.
2 Click Format ` Labels.
3 In the List labels for area, enable one of the following options:
• Laser printed — if you are using a laser printer
• Tractor-fed — if you are using a tractor-fed printer
82 WordPerfect X3 User Guide
Page 89

• Both — if you are using a tractor-fed laser printer
4 Choose a label definition from the Labels list.
5 Click Select.
To print a label
1 Click File ` Print.
2 Click the Advanced tab.
3 In the Page(s)/Label(s) list box, type the number of each label or a range of labels.
For example, to print label 3, type 3; to print labels 3 and 8, type 3, 8; to print
label 3 through the end of the document, type 3-.
4 Click Print.
The screen changes so that the first label is displayed and the rest of the
document window is shaded. As you fill the labels with text, more label “pages”
display in the window.
Labels that reach the edge of the sheet may not print correctly on printers with
a wide nonprinting zone. You must adjust the label size to account for the
printer’s nonprinting zone. Also, printing the same label on different printers
may give different results.
Printing graphics
The appearance of the graphics you print is determined partly by a process called
dithering, which combines several differently colored pixels to create a new color or
shade. With WordPerfect, you can change the dither method, the dither source, and
halftone options for printing graphics. For more information about dithering, see
“Dithering methods” on page 95.
To change the dither method used for printing graphics
1 Right-click a graphic, and click Image tools.
2 Click Edit attributes.
3 In the Image settings dialog box, click Print parameters.
4 In the Dither method area, enable one of the following options:
Printing 83
Page 90

• Error diffusion — prints using a random pattern of dots, which provides
superior blending and image detail in bitmap images
• Ordered dither — prints using an ordered pattern of dots, which works well
with both bitmap and vector images
• Halftoning — prints using evenly spaced dots of variable diameter, which
provides sharper image detail with bitmap images
Some dither method options are available only from certain printers.
To change the dither source used for printing graphics
1 Right-click a graphic, click Image tools.
2 Click Edit attributes.
3 In the Image settings dialog box, click Print parameters.
4 In the Dither source area, enable one of the following options:
• WordPerfect
• Printer
You should use the printer’s settings as the dither source, which are enabled by
default, unless these settings provide poor printing results.
To change a graphic’s halftone options
1 Right-click a graphic, and click Image tools.
2 Click Edit attributes.
3 In the Image settings dialog box, click Print parameters.
4 In the Dither method area, enable the Halftoning option.
5 In the Halftone options area, type a value in any of the following boxes:
• Angle — changes the angle of the line screening
• Lines per inch — changes the number of lines per inch in the halftone option
Either option may be unavailable, depending on the printer driver selected.
Halftone options are available only for PostScript printers.
84 WordPerfect X3 User Guide
Page 91

Laying out a print job
You have different options for laying out a print job. For example, you can scale a print
job, so that the printed area on the page is smaller or larger than normal. When scaling,
you can choose to maintain the aspect ratio, so that the page height and width increase
or decrease proportionally and the output is not distorted.
You can scale a print job, so that the printed area on the page is smaller or larger than
normal. When scaling, you can choose to maintain the aspect ratio, so that the page
height and width increase or decrease proportionally and the output is not distorted.
You can also adjust a print job to fit the output page by specifying the output
orientation and margins.
You can tile a print job, so that portions of each page are printed on separate sheets of
paper. You can then assemble the pages into one large sheet. This is useful for printing
documents, such as banners, that are larger than the printer paper.
You can also print a document in thumbnail format. Thumbnails are miniature pictures
of individual pages. Several thumbnails are printed on each piece of printer paper.
If you need greater control when printing, you can specify advanced printing options
such as printing in color or printing text as graphics.
To scale a print job
1 Click File ` Print.
2 Click the Layout tab.
3 Enable the Scale/Tiling option.
4 In the Size area, type a value in the Width box.
If you do not want to maintain the aspect ratio, disable the Maintain aspect ratio
check box, and type a value in the Length box.
5 Click Print.
If you enlarge a document by more than 100%, the document will be printed
on multiple pages. The # of tiles box shows the number of pages that will be
used when you print the document.
To adjust a print job to fit the selected page
1 Click File ` Print.
Printing 85
Page 92

2 Click the Layout tab.
3 Enable the Fit to output page option.
4 Click Output page.
5 In the Page setup dialog box, choose a page definition from the list.
6 In the Orientation area, enable one of the following options:
• Portrait — prints text and graphics on a page whose height is greater than its
width
• Landscape — prints text and graphics on a page whose width is greater than its
height
7 In the Document margins area, type values in the following boxes:
• Left
• Right
• Top
• Bottom
8 Click OK.
9 Click Print.
To tile a print job
1 Click File ` Print.
2 Click the Layout tab.
3 Enable the Scale/Tiling option.
4 Enable the Print tiled pages check box.
5 In the # of tiles area, type values in the following boxes:
• Row
• Column
6 Click Print.
If the # of tiles column box is grayed, disable the Maintain aspect ratio check
box.
You can specify the size of the page you are tiling by clicking the Output page
button.
86 WordPerfect X3 User Guide
Page 93

To print a document in thumbnail format
1 Click File ` Print.
2 Click the Layout tab.
3 Enable the Thumbnails option.
4 Type a value in the Thumbnail boxes, to specify the number of thumbnails.
5 In the Page ordering area, enable one of the following options:
• Down — prints thumbnails consecutively in columns
• Across — prints thumbnails consecutively in rows
6 Enable any of the following check boxes:
• Show borders — prints page borders around each thumbnail
• Show index — prints the page number for each thumbnail
7 Click Print.
To adjust the advanced print options
1 Click File ` Print.
2 Click the Advanced tab.
3 Enable any of the following check boxes:
• Print in color — prints file in color
• Print text only — prints only the text of a document
• Print text as graphics — prints text as graphics rather than as fonts
downloaded to the printer. This option can also be useful if you are having
trouble printing reversed text (white text on a black background).
• Use graphic transparency — allows you to apply a transparency for a graphic if
the printer used does not provide support for a transparency
• Keep print history — keeps a record of print jobs
• Reset number of copies each time — resets the number of copies after each
print job is complete
The Use graphic transparency option is enabled by default.
The Print in color check box may be enabled by default when you choose a
color printer.
If you have a color printer selected, but the Print in color check box is grayed,
click Properties on the Main page, and make sure that the color settings are
correct for your printer.
Printing 87
Page 94

Saving print settings
You can save print settings so you can retrieve them and apply them to other
documents. Print settings are made up of printing properties such as the number of
copies to print or printing text as graphics. You may require different print settings for
different types of documents or printers. For example, you may use one for printing
letters and another for printing envelopes.
By default, the properties are retrieved from the printer you have selected and then the
printer settings are applied. The default settings are in effect until you change them or
you close the file. You can, however, save a selected printer’s settings and specify not to
retrieve the settings from the printer each time you apply the settings. Therefore, if the
printer’s settings are changed, the settings you saved do not change.
If you no longer need the settings, you can delete them. You can also restore the factory
application default settings.
To save print set tings
1 Click File ` Print.
2 On the Main page, choose a printer from the Name list box.
3 Choose the printing options you want to save from the Main, Layout, and
Advanced pages.
4 On the Main page, click Edit settings.
5 In the Settings to save list, enable the check boxes next to the settings you want to
save.
If you disable a setting’s check box, the setting is not saved.
6 Type a name for the settings in the Name for current settings list box.
7 Disable the Use printer properties from currently selected printer check box.
8 Click Save.
To automatically detect and save a printer's settings
1 Click File ` Print.
2 On the Main page, choose a printer from the Name list box.
3 Click Edit settings.
4 In the Edit settings dialog box, type a name for the settings in the Name for
current settings list box.
88 WordPerfect X3 User Guide
Page 95

5 Enable the Use printer properties from currently selected printer check box.
6 Enable the Save current printer properties with setting option.
When you enable the Save current printer properties with setting option, the
current printer properties are retrieved before saving, but they are not retrieved
from the printer every time the setting is retrieved. Therefore, if the printer’s
settings change, the settings you save do not change.
7 Click Save.
If you disable any or all of the following check boxes: Number of copies,
Collate, Two-sided printing, or Print in color, the settings are not retrieved
from the printer and the settings specified in the Print dialog box are not
saved. In order for the settings to be retrieved from the printer, the printer
must have the specified settings available.
If you disable a setting’s check box in the Settings to save list, the setting is
not saved.
To retrieve print settings
1 Click File ` Print.
2 Click the Main tab.
3 From the Settings list box, choose the saved settings you want to retrieve.
If you are in the Edit settings dialog box, you can retrieve saved settings by
choosing the settings from the Name for current settings list box and
clicking Retrieve.
To delete print settings
1 Click File ` Print.
2 Click the Main tab.
3 From the Settings list box, choose the settings you want to delete.
4 Click Edit settings.
5 Click Delete.
Printing 89
Page 96

You can’t delete the Application default settings. You can, however, restore
the Application default factory settings. For more information about
restoring the Application default settings, see “To restore the application
default print settings” on page 90.
To restore the application default print settings
1 Click File ` Print.
2 Click the Main tab.
3 From the Settings list box, choose Application default.
4 Click Edit settings.
5 Click Restore.
Using printer commands
You can control your printer using printer commands. Printer commands vary
according to the printer installed. Check your printer documentation for information
about printer commands to let you use the special functions of your printer.
You can insert printer commands into a document from a printer command file. For
more information about printer commands, see “Printer commands” on page 96.
WordPerfect allows you to insert a code that pauses the printer at the cursor.
After you send a printer command to the printer, you can reset the printer (using
another printer command) to the printer’s default values to restore normal printer
functions. For more information about your printer’s default values, see the printer
manual.
To insert printer commands into a document from a printer command file
1 Click where you want to insert the printer command.
2 Click Format ` Ty p e s e t t i n g ` Printer command.
3 In the Printer command dialog box, enable the Printer command filename
option.
4 Click Browse.
5 Choose the drive and folder where the printer command file is stored.
90 WordPerfect X3 User Guide
Page 97

6 Double-click the printer command filename.
To pause the printer at the cursor
1 Click where you want to pause the printer.
2 Click Format ` Ty p e s e t t i n g ` Printer command.
3 Enable the Pause printer check box.
To reset the printer
1 Click where you want to insert the printer command.
2 Click Format ` Ty p e s e t t i n g ` Printer command.
3 In the Printer command dialog box, enable the Command option.
4 In the Command box, type the printer’s default values to insert in the document.
Printing to a file
You can print to a file instead of to a printer. This is useful if you don’t have a printer
attached to your computer, or if you want to print the document on a printer other than
the one attached to your computer.
For more information about printing files to disk, see “Printing to files” on page 96.
To print to a file
1 Click File ` Print.
2 On the Main page, choose a printer from the Name list box.
3 Enable the Print to file check box.
4 Click Print.
5 In the Print to file dialog box, choose the drive and folder where you want to save
the file.
6 Type the name for the file in the File name box.
7 Click Save.
When you print to a file, you can print directly from DOS to the printer it was
formatted for. For example, if the file you printed to is named LETTER, saved
Printing 91
Page 98

to C:\, and the computer you are using is printing to LPT1, type copy/b
c:\letter at a DOS prompt, then press Enter. You can also print the file using
the DOS Print command. See the DOS reference manual for more information.
Sending faxes
If the fax driver for your modem is installed, you can fax a file to others. For information
about installing fax drivers, consult the documentation included with your fax program.
Before you can send a fax, you must select a fax driver.
When you send a fax, you can choose to fax the entire file or fax only specific pages or
sections.
You can monitor the progress of a fax and view a list of the faxes sent during the current
session. You can pause a fax. When you pause a fax, any other faxes in the list continue
to transmit.
To send a fax
1 Click Send to ` Fax.
2 On the Main page, choose a fax driver from the Name list box.
3 In the Print range area, enable one of the following options:
• Full document — sends the entire document
• Current page — sends the page where the cursor is located
• Pages — sends the range of pages specified in the page box
• Selected text — sends the selected text in the document (only available if text is
selected)
• Document summary — sends only the document summary (only available if a
summary is created)
4 Click Fax.
Your fax program should open to guide you through the faxing process.
To view the status of a fax
1 Click File ` Print.
2 On the Main page, click Status.
92 WordPerfect X3 User Guide
Page 99

To pause a fax
1 Click File ` Print.
2 On the Main page, click Status.
3 In the Print history and status dialog box, choose a fax from the document list.
4 Click Document ` Pause printing.
A check mark beside the Pause printing command indicates the fax is paused.
You can also
Resume sending a fax Choose a fax from the document list. Click
Document
Cancel a fax Choose a fax from the document list. Click
Document
` Pause printing.
` Cancel printing.
Fax jobs display in the order they were sent, with the current job at the top of
the list.
Reference: Printing
This topic provides additional information about printing multiple pages, printing
sections, printing labels, dithering methods, printer commands, and printing
WordPerfect files to a disk.
Printing multiple pages
Some examples for printing multiple pages are listed in the table below.
To p r in t Ty p e
Pages 3, 5, and 8 3,5,8
Pages 3 and 8 3,8
Page 3 through the end of the document 3-
The beginning of the document through
page 3
Pages 1 through 3 and 8 1-3,8
Printing 93
-3
Page 100

Pages 3, 5, and 9 through 15 3,5,9-15
You must type the page numbers in numerical order. For example, if you type 10, 1, 2,
only page 10 will print. You can also print pages in reverse order. For more information
about printing pages in reverse order, see “To print document pages in reverse order”
on page 72.
Printing sections
You can specify the current page, chapter, or volume number in a document and then
print specific pages from each section.
For example, suppose a document has sections and page numbers as listed in the table
below.
Section Pages
Preface i-vii
Chapter 1 1-12
Chapter 2 1-20
Chapter 3 1-10
Index i-iii
Some examples for printing sections of this document are listed in the table below.
If no number is specified in the Vo lu me s, Chapters, and Secondary pages list
boxes, the first page of the document matching the page number (in Roman or
Arabic) is printed.
A hyphen (-) between numbers defines a range of sequential pages (for
example, 1-5 prints pages 1 to 5). A comma (,) between numbers defines a
series of non-sequential pages (for example, 1, 5 prints pages 1 and 5 only).
Any combination of hyphens and commas is supported (for example, 1-3, 5, 7,
10-12 prints the following pages: 1, 2, 3, 5, 7, 10, 11, and 12). A colon
between numbers defines a specific page number, where the first number
indicates the chapter, and the second indicates the page (for example, 2:3
prints chapter 2, page 3).
94 WordPerfect X3 User Guide
 Loading...