

Page 1
Bedienungsanleitung/Garantie
Gebruiksaanwijzing/Garantie • Mode d’emploi/Garantie
Instrucciones de servicio/Garantía • Manual de instruções/Garantia
Istruzioni per l’uso/Garanzia • Bruksanvisning/Garanti
Instruction Manual/Guarantee • Instrukcja obsługi/Gwarancja
Návod k použití/Záruka • A használati utasítás/Garancia
Руководство по эксплуатации/Гарантия
Dampfbügelautomat
Stoomstrijkijzer • Fer à repasser à vapeur
Autómata de vapor • Autómata de vapor
Ferro da stiro a vapore • Dampstrykejern
Automatic Steam Iron • Automatyczne żelazko parowe
Napařovací žehlička • Gőzölős vasaló
Паровой утюг
DB 2971
6....-05-DB 2971 1 23.12.2004, 10:55:41 Uhr
Page 2

Inhalt
Inhoud • Sommaire • Indice • Índice • Indice • Innhold
Contents • Spis treści • Obsah • Tartalom • Содержание
Übersicht Bedienelemente . . . . . . . . . . . . . . . . . . . . . . . . . . Seite 3
D
Bedienungsanleitung . . . . . . . . . . . . . . . . . . . . . . . . . . . . . . . Seite 4
Garantie . . . . . . . . . . . . . . . . . . . . . . . . . . . . . . . . . . . . . . . . . Seite 7
Overzicht bedieningselementen . . . . . . . . . . . . . . . . . . . . . . Pagina 3
NL
Gebruiksaanwijzing . . . . . . . . . . . . . . . . . . . . . . . . . . . . . . . . Pagina 8
Garantie . . . . . . . . . . . . . . . . . . . . . . . . . . . . . . . . . . . . . . . . . Pagina 11
Aperçu des éléments de commande . . . . . . . . . . . . . . . . . . Page 3
F
Mode d’emploi . . . . . . . . . . . . . . . . . . . . . . . . . . . . . . . . . . . . Page 12
Garantie . . . . . . . . . . . . . . . . . . . . . . . . . . . . . . . . . . . . . . . . . Page 15
Vista de conjunto Elementos de mando . . . . . . . . . . . . . . . . Página 3
E
Instrucciones de servicio . . . . . . . . . . . . . . . . . . . . . . . . . . . . Página 16
Garantia . . . . . . . . . . . . . . . . . . . . . . . . . . . . . . . . . . . . . . . . . Página 19
Vista geral dos elemntos de comando . . . . . . . . . . . . . . . . . Página 3
P
Manual de instruções . . . . . . . . . . . . . . . . . . . . . . . . . . . . . . . Página 21
Garantía . . . . . . . . . . . . . . . . . . . . . . . . . . . . . . . . . . . . . . . . . Página 24
I Descrizione dei singoli pezzi . . . . . . . . . . . . . . . . . . . . . . . . Pagina 3
Istruzioni per l’uso . . . . . . . . . . . . . . . . . . . . . . . . . . . . . . . . . Pagina 26
Garanzia . . . . . . . . . . . . . . . . . . . . . . . . . . . . . . . . . . . . . . . . . Pagina 29
Oversikt over betjeningselementer . . . . . . . . . . . . . . . . . . . . Side 3
N
Bruksanvisning . . . . . . . . . . . . . . . . . . . . . . . . . . . . . . . . . . . . Side 30
Garanti . . . . . . . . . . . . . . . . . . . . . . . . . . . . . . . . . . . . . . . . . . Side 33
Control element overview . . . . . . . . . . . . . . . . . . . . . . . . . . . Page 3
GB
Instruction Manual . . . . . . . . . . . . . . . . . . . . . . . . . . . . . . . . . Page 34
Guarantee . . . . . . . . . . . . . . . . . . . . . . . . . . . . . . . . . . . . . . . Page 37
Przegląd elemetów obsługi . . . . . . . . . . . . . . . . . . . . . . . . . . Strona 3
PL
Instrukcja obsługi . . . . . . . . . . . . . . . . . . . . . . . . . . . . . . . . . . Strona 38
Gwarancja . . . . . . . . . . . . . . . . . . . . . . . . . . . . . . . . . . . . . . . Strona 41
Přehled obsluhovací prvky . . . . . . . . . . . . . . . . . . . . . . . . . . Strana 3
CZ
Návod k použití . . . . . . . . . . . . . . . . . . . . . . . . . . . . . . . . . . . Strana 43
Záruka . . . . . . . . . . . . . . . . . . . . . . . . . . . . . . . . . . . . . . . . . . Strana 46
A hasznalt elemek megtekintése . . . . . . . . . . . . . . . . . . . . . . Oldal 3
H
A hasznalati utasítás . . . . . . . . . . . . . . . . . . . . . . . . . . . . . . . Oldal 47
Garancia . . . . . . . . . . . . . . . . . . . . . . . . . . . . . . . . . . . . . . . . . Oldal 50
Обзор управляющих элементов . . . . . . . . . . . . . . . . . . . . . стр. 3
RUS
Руководство по эксплуатации . . . . . . . . . . . . . . . . . . . . . . . стр. 51
Гарантия . . . . . . . . . . . . . . . . . . . . . . . . . . . . . . . . . . . . . . . . стр. 54
2
6....-05-DB 2971 2 23.12.2004, 10:55:45 Uhr
Page 3
Übersicht der Bedienelemente
Overzicht van de bedieningselementen • Liste des différents éléments de commande
Indicación de los elementos de manejo • Descrição dos elementos
Elementi di comando • Oversikt over betjeningselementene
Overview of the Components • Przegld elementów obłsugi
Přehled ovládacích prvků • A kezelő elemek áttekintéseé
Обзор деталей прибора
3
6....-05-DB 2971 3 23.12.2004, 10:55:46 Uhr
Page 4

D
• Lesen Sie vor Inbetriebnahme dieses Gerätes die Bedienungsanleitung sehr
sorgfältig durch und bewahren Sie diese inkl. Garantieschein, Kassenbon und
nach Möglichkeit den Karton mit Innenverpackung gut auf.
• Benutzen Sie das Gerät ausschließlich für den privaten und den dafür vorgesehenen Zweck. Dieses Gerät ist nicht für den gewerblichen Gebrauch bestimmt.
Benutzen Sie es nicht im Freien (außer es ist für den bedingten Einsatz im
Freien vorgesehen). Halten Sie es vor Hitze, direkter Sonneneinstrahlung,
Feuchtigkeit (auf keinen Fall in Flüssigkeiten tauchen) und scharfen Kanten
fern. Benutzen Sie das Gerät nicht mit feuchten Händen. Bei feucht oder nass
gewordenem Gerät sofort den Netzstecker ziehen. Nicht ins Wasser greifen.
• Schalten Sie das Gerät aus und ziehen Sie immer den Stecker aus der
Steckdose (ziehen Sie am Stecker, nicht am Kabel) wenn Sie das Gerät nicht
benutzen, Zubehörteile anbringen, zur Reinigung oder bei Störung.
• Betreiben Sie das Gerät nicht unbeaufsichtigt. Sollten Sie den Arbeitsplatz
verlassen, schalten Sie das Gerät bitte immer aus, bzw. ziehen Sie den Stecker aus der Steckdose (ziehen Sie am Stecker, nicht am Kabel).
• Um Kinder vor Gefahren elektrischer Geräte zu schützen, sorgen Sie bitte
dafür, dass das Kabel nicht herunter hängt und Kinder keinen Zugriff auf das
Gerät haben.
• Prüfen Sie Gerät und Kabel regelmäßig auf Schäden. Ein beschädigtes Gerät
bitte nicht in Betrieb nehmen.
• Reparieren Sie das Gerät nicht selbst, sondern suchen Sie bitte einen
autorisierten Fachmann auf. Um Gefährdungen zu vermeiden, ein defektes
Netzkabel bitte nur vom Hersteller, unserem Kundendienst oder einer ähnlich
qualifi zierten Person durch ein gleichwertiges Kabel ersetzen lassen.
• Verwenden Sie nur Original-Zubehör.
• Beachten Sie bitte die nachfolgenden „Speziellen Sicherheitshinweise...“.
Allgemeine Sicherheitshinweise
Spezielle Sicherheitshinweise
• Vorsicht! Die Bügelsohle (10) wird schnell heiß und benötigt lange Zeit zum
Abkühlen. Bitte diese nicht berühren.
• Bei Nichtgebrauch bitte den Bügelautomat senkrecht auf den Standfuß (9)
stellen.
• Vor dem Befüllen des Wassertanks (8) Netzstecker ziehen. Füllen Sie den
Wassertank nicht weiter als bis zur MAX Marke (ca. 130 ml).
Übersicht der Bedienelemente
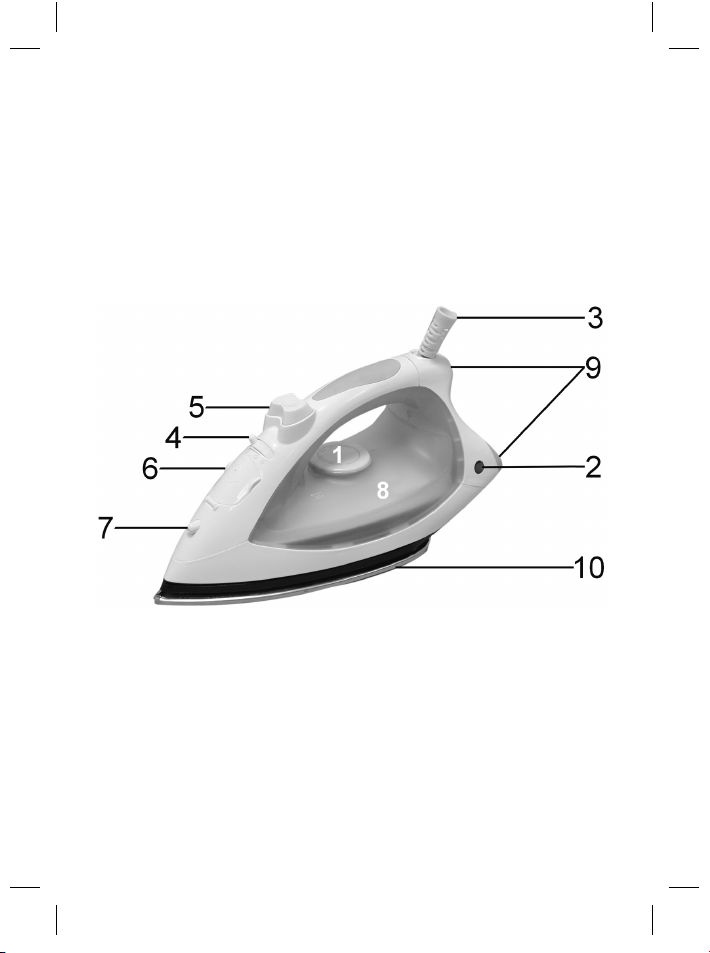
1 Stufenloser Temperaturregler 6 Einfüllöffnung Wassertank
2 Kontrollleuchte 7 Sprühdüse
3 Flexible Netzkabeleinführung 8 Transparenter Wassertank
4 Dampfmengenregler 9 Standfuß
5 Sprühknopf 10 Edelstahl-Bügelsohle
4
6....-05-DB 2971 4 23.12.2004, 10:55:46 Uhr
Page 5
Inbetriebnahme des Gerätes
• Reinigen Sie die Bügelsohle mit einem leicht feuchten Tuch.
• Befüllen Sie den Wassertank an der Einfüllöffnung (6). Nehmen Sie einen
Füllbehälter zu Hilfe. Verwenden Sie möglichst destilliertes Wasser oder klares
Leitungswasser bis zum Härtegrad 2. Bei härterem Wasser verwenden Sie nur
destilliertes Wasser.
• Batteriewasser, Wasser aus dem Wäschetrockner und Wasser mit Zusätzen
(wie Stärke, Parfüm, Weichspüler oder andere Chemikalien) dürfen nicht in
den Wassertank eingefüllt werden. Das Gerät könnte dadurch beschädigt
werden, da sich Rückstände in der Dampfkammer bilden könnten. Diese
Rückstände können beim Ausfallen durch die Dampfaustrittsöffnungen das
Bügelgutes verunreinigen.
Benutzung des Gerätes
Hinweis: Bügeln Sie mit diesem Gerät nur Kleidungsstücke.
• Entfernen Sie eventuell vorhandene Schutzfolien und Aufkleber von der Edelstahl-Bügelsohle, bevor Sie das Gerät benutzen.
• Wickeln Sie das Kabel bitte komplett ab.
Bügeln ohne Dampf (Dampfmengenregler auf O)
1. Stellen Sie das Gerät auf seinen Standfuß.
2. Stellen Sie den Dampfmengenregler (4) auf O.
3. Elektrischer Anschluss:
Vergewissern Sie sich, dass Gerätespannung (siehe Typenschild) und Netzspannung übereinstimmen.
4. Stellen Sie den Temperaturregler immer auf „0“, bevor Sie das Gerät an der
Steckdose anschließen bzw. vom Netz trennen.
5. Sortieren Sie die Wäschestücke nach Bügeltemperaturen. Beginnen Sie mit
der niedrigsten Temperatur. Diese stellen Sie am Temperaturregler (1) ein:
• Synthetik, Seide niedrige Temperatur
• • Wolle, mittlere Temperatur
• • • Baumwolle, Leinen hohe Temperatur
MAX höchste Temperatur
6. Stecken Sie den Stecker in eine vorschriftsmäßig installierte SchutzkontaktSteckdose 230 V, 50 Hz.
7. Die Kontrollleuchte (2) leuchtet. Sobald diese erlischt, ist die Betriebstemperatur erreicht. Nun können Sie beginnen zu bügeln.
8. Ziehen Sie stets den Netzstecker nach Gebrauch des Gerätes.
D
5
6....-05-DB 2971 5 23.12.2004, 10:55:47 Uhr
Page 6
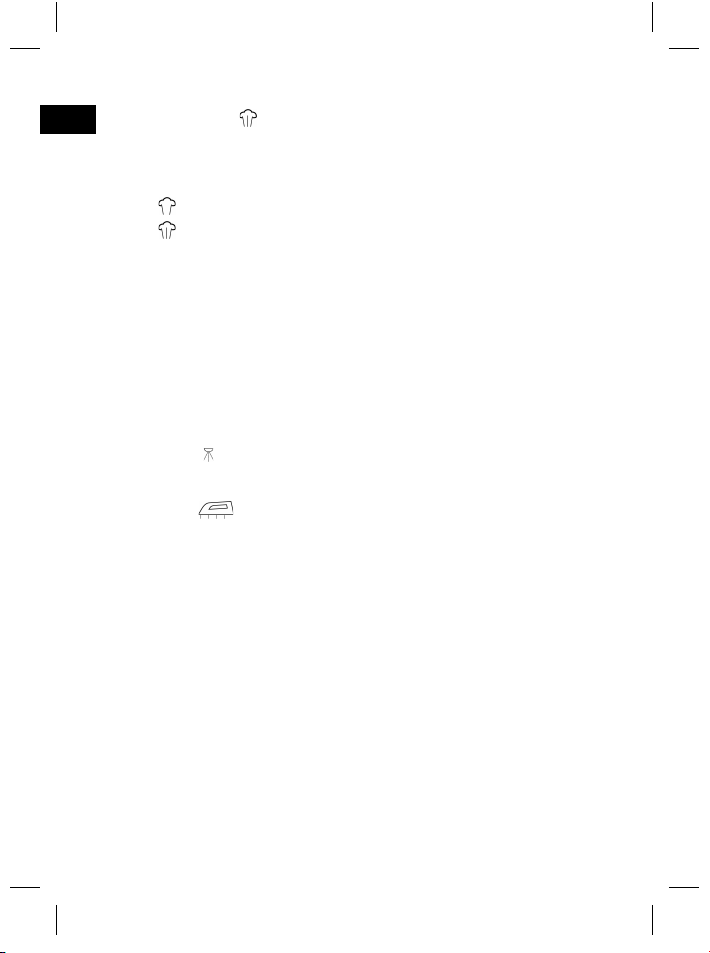
Dampfbügeln (
D
Hierzu ist eine hohe Temperatur nötig (Baumwolle, Leinen).
Die Dampfmenge regeln Sie mittels Dampfmengenregler (4).
O kein Dampf
Achtung: Der Dampf ist heiß. Verbrennungsgefahr!
Beim Bügeln mit niedrigen Temperaturen, achten Sie bitte darauf, die Dampfmenge zu reduzieren oder bügeln Sie ohne Dampf. Bei zu niedriger Temperatur ist es
üblich das Wasser aus der Bügelsohle austritt.
Nachfüllen des Wassertanks
• Ziehen Sie immer den Netzstecker, bevor Sie Wasser nachfüllen.
• Stellen Sie bitte den Dampfmengenregler (4) auf die Position „O“ (kein Dampf).
Öffnen Sie den Deckel der Einfüllöffnung (6) und füllen Sie vorsichtig Wasser
ein. Füllen Sie den Wassertank nur bis zur MAX-Marke.
Sprüh-Funktion (
Zum Anfeuchten einer Bügelstelle drücken Sie den Sprühknopf (5).
Selbstreinigung (
1. Füllen Sie den Wassertank zur Hälfte mit Wasser.
2. Heizen Sie das Gerät auf max. Temperatur auf. Nach Erlöschen der Kontrollleuchte trennen Sie das Gerät bitte vom Netz.
3. Halten Sie das Gerät nun waagerecht über ein Spülbecken. Halten Sie den
Dampfmengenregler auf die Position „Selbstreinigung“. Nun schaukeln Sie das
Gerät hin und her bis der Tank leer ist. Stellen Sie den Regler anschließend
wieder zurück auf „O“.
4. Stellen Sie das Gerät wieder auf den Standfuß und heizen es erneut auf.
Bügeln Sie nun zur Reinigung der Sohle über ein sauberes Baumwolltuch.
)
kleine Dampfmenge
große Dampfmenge
)
)
Reinigung und Lagerung
• Ziehen Sie immer den Netzstecker vor der Reinigung.
• Reinigen Sie das Gehäuse mit einem trockenen Tuch.
• Die Sohle mit einem leicht feuchten Tuch reinigen.
• Stellen Sie den Dampfmengenregler nach der Anwendung immer auf die Position „O“ und entleeren Sie den Wassertank, um ein Auslaufen des Tankinhaltes zu vermeiden.
6
6....-05-DB 2971 6 23.12.2004, 10:55:47 Uhr
Page 7

Garantie
Wir übernehmen für das von uns vertriebene Gerät eine Garantie von 24 Monaten
ab Kaufdatum (Kassenbon).
Innerhalb der Garantiezeit beseitigen wir unentgeltlich die Mängel des Gerätes
oder des Zubehörs*), die auf Material- oder Herstellungsfehler beruhen, durch
Reparatur oder, nach unserem Ermessen, durch Umtausch. Garantieleistungen
bewirken weder eine Verlängerung der Garantiefrist, noch beginnt dadurch ein
Anspruch auf eine neue Garantie!
Als Garantienachweis gilt der Kaufbeleg. Ohne diesen Nachweis kann ein kostenloser Austausch oder eine kostenlose Reparatur nicht erfolgen.
Im Garantiefall geben Sie bitte das komplette Gerät in der Originalverpackung
zusammen mit dem Kassenbon an Ihren Händler.
*) Schäden an Zubehörteilen führen nicht automatisch zum kostenlosen Umtausch
des kompletten Gerätes. Wenden Sie sich in diesem Fall bitte an unsere Hotline!
Glasbruchschäden bzw. Brüche von Kunststoffteilen sind grundsätzlich kostenpfl ichtig!
Sowohl Defekte an Verbrauchszubehör bzw. Verschleißteilen (z.B. Motorkohlen,
Knethaken, Antriebsriemen, Ersatzfernbedienung, Ersatzzahnbürsten, Sägeblättern usw.), als auch Reinigung, Wartung oder der Austausch von Verschleißteilen,
fallen nicht unter die Garantie und sind deshalb kostenpfl ichtig!
Die Garantie erlischt bei Fremdeingriff.
Nach der Garantie
Nach Ablauf der Garantiezeit können Reparaturen kostenpfl ichtig vom entsprechenden Fachhandel oder Reparaturservice ausgeführt werden.
D
7
6....-05-DB 2971 7 23.12.2004, 10:55:48 Uhr
Page 8

NL
• Lees vóór de ingebruikname van dit apparaat de handleiding uiterst zorgvuldig
door en bewaar deze goed, samen met het garantiebewijs, de kassabon en zo
mogelijk de doos met de binnenverpakking.
• Gebruik het apparaat uitsluitend privé en uitsluitend voor de voorgeschreven
toepassing. Dit apparaat is niet geschikt voor commercieel gebruik (tenzij het
bedoeld is voor beperkt gebruik in de buitenlucht). Bescherm het tegen hitte,
directe zonnestralen, vocht (i geen geval in vloeistoffen dompelen) en scherpe
kanten. Gebruik het apparaat niet met vochtige handen. Bij vochtig of nat geworden apparaat onmiddellijk de stroomtoevoer onderbreken. Niet in het water
grijpen.
• Schakel het apparaat uit en onderbreek altijd de stroomtoevoer (trek aan de
steker, nooit aan de kabel) wanneer u het apparaat niet gebruikt, hulpstukken
aanbrengt, reinigt of wanneer storingen optreden.
• Laat het ingeschakelde apparaat niet zonder toezicht werken. Schakel het
apparaat altijd uit of trek de steker uit de contactdoos (trek aan de steker, niet
aan de kabel) voordat u de werkplek verlaat.
• Bescherm kinderen tegen gevaren en zorg ervoor dat kabels nooit los omlaag
hangen en dat het apparaat buiten het bereik van kinderen blijft.
• Controleer regelmatig of het apparaat beschadigingen vertoont. Een beschadigd apparaat mag niet in gebruik worden genomen.
• Repareer het apparaat nooit zelf, maar breng het naar een geautoriseerde
vakman. Voorkom gevaren en laat een defecte kabel altijd alleen door de
fabrikant, onze technische dienst of een eender gekwalifi ceerde persoon
vervangen door een soortgelijke kabel.
• Gebruik alleen originele reserveonderdelen.
• Neem de onderstaande “Speciale veiligheidsinstructies“ in acht.
Algemene veiligheidsinstructies
Speciale veiligheidsinstructies
• Voorzichtig! De strijkzool (10) wordt snel heet en heeft lange tijd nodig om af
te koelen. De strijkzool niet aanraken!
• Zet de strijkautomaat a.u.b. verticaal op de standvoet (9) wanneer u hem niet
gebruikt.
• Trekt u de stekker uit de contactdoos voordat u water in de tank (8) vult. Vult u
de tank nooit verder dan de MAX-markering (ca. 130 ml).
Nummering van de bedieningselementen
1 Variabele temperatuurregelaar 6 Vulopening watertank
2 Controlelampje 7 Sproeier
3 Flexibele netkabeldoorvoer 8 Transparante watertank
4 Stoomregelaars 9 Standvoet
5 Sproeiknop 10 Edelstalen strijkzool
8
6....-05-DB 2971 8 23.12.2004, 10:55:49 Uhr
Page 9

Inbedrijfstelling van het strijkijzer
• U reinigt de strijkzool met een vochtige doek.
• Vul de watertank via de vulopening (6). Gebruik een vulbeker voor het vullen.
Gebruik zo mogelijk gedestilleerd water of zuiver leidingwater tot hardheidsgraad 2. Bij harder water dient u alleen gedestilleerd water te gebruiken.
• Accuwater, water uit de wasdroger en water met additieven (zoals stijfsel, parfum, wasverzachter of andere chemicaliën) mogen niet inde watertank worden
gevuld. Het apparaat zou daardoor kunnen worden beschadigd omdat zich
in de stoomkamer resten kunnen vormen. Deze resten kunnen het te strijken
wasgoed verontreinigen wanneer deze resten uit de stoomuitlaatopening
vallen.
Bediening van het apparaat
Aanwijzing: Stnjkt u met dit apparaat uitsluitend kledingstukken.
• Verwijder eventueel voorhanden beschermfolies en stickers van de edelstalen
strijkzool voordat u het apparaat gebruikt.
• Wikkel de kabel a.u.b. compleet af.
Strijken zonder stoom (stoomregelaar op O)
1. Plaats het apparaat op de steunvoet.
2. Zet de regelaar voor de stoomhoeveelheid (4) op O.
3. Elektrische aansluiting
Controleer of de apparaatspanning (zie typeplaat) correspondeert met de
netspanning.
4. Zet de temperatuurregelaar altijd op „0“ voordat u het apparaat op de contactdoos aansluit of de stroomtoevoer naar het apparaat onderbreekt.
5. Sorteer het strijkgoed naar strijktemperaturen. Begin met de laagste temperatuur. Deze stelt u in aan de temperatuurregelaar (1):
• synthetisch weefsel, zijde lage temperatuur
• • wol matige temperatuur
• • • katoen, linnen hoge temperatuur
MAX hoogste temperatuur
6. Sluit het apparaat alleen aan op een volgens de voorschriften geïnstalleerd
geaard stopcontact, 230V/50Hz.
7. Het controlelampje (2) brandt. Zodra dit lampje dooft, is de gewenste temperatuur bereikt. Nu kunt u beginnen te strijken.
8. Trek na gebruik altijd de netstekker uit de contactdoos.
NL
9
6....-05-DB 2971 9 23.12.2004, 10:55:49 Uhr
Page 10
Strijken met stoom (
NL
Hiervoor is een hoge temperatuur vereist (katoen, linnen).
U regelt de stoomhoeveelheid door middel van de stoomregelaar (4).
O geen stoom
Let op: de stoom is heet. Gevaar voor verbranding!
Let bij het strijken met lage temperaturen op dat u de stoomhoeveelheid vermindert of zonder stoom strijkt. Bij een te lage temperatuur is het normaal dat water
uit de strijkzool druppelt.
Bijvullen van de watertank
• Trek altijd de netstekker uit de contactdoos voordat u water bijvult.
• Zet de regelaar voor de stoomhoeveelheid (4) op de stand “0” (geen stoom).
Open het deksel van de invulopening (6) en vul voorzichtig het water in. Vul de
watertank alleen tot de MAX-markering.
Sproeifunctie (
Om het strijkgoed plaatselijk in te vochten, drukt u op de sproeiknop (5).
Zelfreiniging (
1. Vul de watertank tot de helft met water.
2. Verwarm het apparaat tot de maximum temperatuur. Na het doven van de
controlelamp onderbreekt u de stroomtoevoer naar het apparaat.
3. Houd het apparaat nu horizontaal boven een spoelbak. Houd de stoomregelaar op de stand „Zelfreiniging “. Schud het apparaat nu licht heen en weer
totdat de tank leeg is. Zet de regelaar vervolgens weer terug op 0.
4. Zet het apparaat weer op de voet en verwarm het opnieuw. Om de zool te
reinigen, strijkt u nu over een schone katoenen doek.
)
kleine stoomhoeveelheid
grote stoomhoeveelheid
)
)
Reinigen en opbergen
• Trekt u vóór de reiniging altijd eerst de netstekker uit de contactdoos!
• U reinigt de buitenzijde van het apparaat met een droge doek.
• Voor de reiniging van de zool gebruikt u een enigszins vochtige doek.
• Zet de regelaar voor de stoomhoeveelheid na ieder gebruik weer terug naar
de positie „O“ en leeg de watertank om het uitlekken van de tankinhoud te
voorkomen.
10
6....-05-DB 2971 10 23.12.2004, 10:55:49 Uhr
Page 11

Dit apparaat is gekeurd conform de op dit moment van toepassing zijnde CErichtlijnen zoals bijvoorbeeld elektromagnetische compatibiliteit en laagspanningsvoorschriften en is geconstrueerd volgens de nieuwste veiligheidstechnische
voorschriften.
Technische wijzigingen voorbehouden!
Garantie
Voor het door ons geleverde apparaat verlenen wij een garantie van 24 maanden
vanaf koopdatum (kassabon).
Eventuele gebreken aan het apparaat of aan het toebehoren*) die zijn ontstaan
door productie- of materiaalfouten verhelpen wij binnen deze periode kosteloos
door middel van reparatie of, naar ons oordeel, door vervanging. Eventuele
garantiegevallen verlengen noch de geldigheidsduur van de garantie, noch begint
daardoor een nieuwe garantieperiode!
Het koopbewijs geldt als garantiebewijs. Zonder dit bewijs kan geen kosteloze
reparatie of vervanging plaatsvinden.
Geef in garantiegevallen het complete apparaat in de originele verpakking samen
met de kassabon af bij uw handelaar.
*) Schade aan onderdelen leidt niet automatisch tot kosteloze vervanging van het
complete apparaat. Neem in dit geval contact op met onze hotline! De reparatie
van glasbreuk of breuk van kunststofonderdelen wordt altijd berekend!
Niet defecten aan de hulpstukken of aan de slijtende onderdelen (bijv. koolborstels, deeghaken, drijfriemen, reserveafstandsbediening, reservetandenborstels,
zaag bladen enz.), maar ook reiniging, onderhoud of de vervanging van slijtende
delen vallen niet onder de garantie en geschieden altijd tegen berekening!
Bij ingrepen door derden komt de garantieverlening te vervallen.
Na de garantieperiode
Na afl oop van de garantieperiode kunnen reparaties tegen berekening worden
uitgevoerd door de betreffende vakhandelaar of de technische dienst.
NL
11
6....-05-DB 2971 11 23.12.2004, 10:55:50 Uhr
Page 12

F
• Lisez attentivement ce mode d’emploi avant de mettre l’appareil en marche
pour la première fois. Conservez le mode d’emploi ainsi que le bon de garantie, votre ticket de caisse et si possible, le carton avec l’emballage se trouvant
à l’intérieur.
• N’utilisez cet appareil que pour un usage privé et pour les taches auxquelles il
est destiné. Cet appareil n’est pas prévu pour une utilisation professionnelle.
Ne l’utilisez pas en plein air (sauf s’il est indiqué que vous pouvez le faire).
Protégez-le de la chaleur, des rayons directs du soleil, de l’humidité (ne le
plongez en aucun cas dans l’eau) et des objets tranchants. N’utilisez pas cet
appareil avec des mains humides. S’il arrive que de l’humidité ou de l’eau
atteignent l’appareil, débranchez aussitôt le câble d’alimentation. Ne touchez
pas les parties mouillées.
• Arrêtez l’appareil et débranchez toujours le câble d’alimentation de la prise de
courant (tirez sur la fi che, pas sur le câble) si vous n’utilisez pas l’appareil, si
vous installez les accessoires, pour le nettoyage ou en cas de panne.
• Ne laissez jamais fonctionner l’appareil sans surveillance. Arrêtez toujours
l’appareil ou débranchez le câble d’alimentation (en tirant sur la fi che et non
pas sur le câble) si vous devez vous absenter.
• Pour protéger les enfants des risques engendrés par les appareils électriques
, veillez à ce que le câble ne pende pas de l’appareil et que l’appareil ne soit
pas à portée des enfants.
• Contrôlez régulièrement l’appareil et le câble. Ne mettez pas l’appareil en
marche s’il est endommagé.
• Ne réparez pas l’appareil vous-même. Contactez plutôt un technicien qualifi é.
Pour éviter toute mise en danger, ne faites remplacer le câble défectueux que
par un câble équivalent et que par le fabricant, notre service après-vente ou
toute personne de qualifi cation similaire.
• N’utilisez que les accessoires d’origine.
• Respectez les „conseils de sécurité spécifi ques à cet appareil“ ci-dessous ...
Conseils généraux de sécurité
Conseils de sécurité propres à cet appareil
• Attention! La semelle du fer (10) devient rapidement chaude et ne refroidit
que très lentement. Ne pas la toucher.
• Il est recommandé de placer le fer à repasser à l’horizontale sur son support
(9) lorsque vous ne l’utilisez pas.
• Débranchez le fer avant de remplir le réservoir d’eau (8). Ne remplissez votre
fer audelà de la marque MAX (env. 130 ml).
12
6....-05-DB 2971 12 23.12.2004, 10:55:51 Uhr
Page 13

Description des éléments de commande
1 Thermostat à réglage progressif 6 Orifi ce de remplissage
2 Lampe témoin du réservoir d’eau
3 Câble d’alimentation souple 7 Gicleur
4 Vapeur à réglage progressif 8 Réservoir à eau transparent
5 Pulvérisateur 9 Pied support
10 Semelle en inox
Avant la première utilisation
• Nettoyez la semelle du fer avec un torchon légèrement humide.
• Remplissez le réservoir par l’orifi ce de remplissage (6). Utilisez pour cela un
petit récipient. Il est recommandé de verser de l’eau distillée ou de l’eau du
robinet jusqu’à un degré de dureté 2. Si votre eau est plus dure, n’utilisez que
de l’eau distillée.
• N’utilisez en aucun cas d’eau de batterie, de sèche-linge ni d’eau avec des
produits ajoutés (comme de l’amidon, du parfum, de l’adoucissant ou des
produits chimiques). Vous risquez sinon d’endommager l’appareil en raison
des dépôts pouvant se former dans la cuve à vapeur. Ces dépôts risquent de
s’échapper par les ouvertures de sortie de vapeur et de salir votre repassage.
Utilisation de l’appareil
Attention: Ne repassez avec ce fer que des vêtements.
• Retirez, avant utilisation, les fi lms de protection et étiquettes pouvant se trouver sur la semelle en inox du fer.
• Déroulez complètement le câble.
Repassage sans vapeur (variateur de vapeur sur O)
1. Placez l’appareil sur son support.
2. Réglez le variateur de vapeur (4) sur O.
3. Alimentation électrique:
Assurez-vous que la tension électrique de l’appareil (voir plaque signalétique)
correspondent à la tension du réseau.
4. Placez toujours le thermostat sur ”0” avant de brancher ou débrancher le câble
d’alimentation.
5. Séparez votre linge selon les températures de repassage. Commencez par les
températures les plus faibles. Vous pouvez régler les températures grâce au
variateur de températures (1):
• synthétique, soie température faible
• • laine température moyenne
• • • coton, lin température élevée
MAX température maximum
F
13
6....-05-DB 2971 13 23.12.2004, 10:55:51 Uhr
Page 14

6. Branchez l‘appareil uniquement dans une prise de courant de 230 V, 50 Hz en
F
bon état.
7. La lampe témoin (2) s’allume. Dès qu’elle s’éteint, la température sélectionnée
est atteinte. Vous pouvez alors commencer à repasser.
8. N’oubliez jamais de débrancher l’appareil lorsque vous avez terminé de repasser.
Repassage à vapeur (
Il faut pour cela une température élevée (coton, lin). Vous pouvez régler la quantité de vapeur à l’aide du bouton de réglage de la vapeur (4).
O sans vapeur
Attention: la vapeur est brûlante. Risque de brûlure!
Pour un repassage à basse température, veillez à réduire la quantité de vapeur
ou à repasser sans vapeur. En cas de température trop faible, il est normal que de
l’eau coule de la semelle du fer.
Remplissage du réservoir d’eau
• Débranchez toujours le câble d’alimentation avant de remplir l’appareil.
• Placez le variateur de vapeur (4) sur la position ”O” (sans vapeur). Ouvrez le
couvercle de l’ouverture de remplissage (6) puis versez doucement de l’eau.
Ne remplissez le réservoir d’eau que jusqu’à la marque MAX.
Vaporisateur (
Pour humidifi er un endroit à repasser, appuyez sur le bouton vaporisateur (5).
Autonettoyant (
1. Remplissez le réservoir à eau à moitié.
2. Laissez chauffer l’appareil à la température maximum. Lorsque la lampe
témoin s’éteint, débranchez l’appareil.
3. Tenez maintenant l’appareil à l’horizontale au dessus d’un évier. Placez le variateur de vapeur sur la position « Autonettoyant ». Agitez maintenant l’appareil
de l’avant vers l’arrière jusqu’à ce que le réservoir soit vide. Placez ensuite le
variateur à nouveau sur la position O.
4. Placez à nouveau l’appareil sur son socle et laissez-le chauffer. Pour nettoyer
la semelle, repassez d’abord un torchon en coton propre.
)
peu de vapeur
vapeur forte
)
)
14
6....-05-DB 2971 14 23.12.2004, 10:55:52 Uhr
Page 15

Nettoyage et stockage
• Débrancher toujours le fer avant de le nettoyer.
• Essuyez l’extérieur avec un torchon sec.
• Nettoyez la semelle avec un torchon légèrement humide.
• Placez toujours le variateur de vapeur sur la position O après chaque utilisation et videz le réservoir d’eau pour éviter que l’eau ne coule.
Cet appareil a été contrôlé d’après toutes les directives européennes actuelles
applicables, comme par exemple concernant la compatibilité électromagnétique
et la basse tension. Cet appareil a été fabriqué en respect des réglementations
techniques de sécurité les plus récentes.
Sous réserve de modifi cations techniques.
Garantie
Nous accordons une garantie de 24 mois à dater de la date d’achat (ticket de
caisse) pour l’appareil que nous vendons.
Pendant la durée de la garantie, nous éliminons gratuitement les défauts de l’appareil ou des accessoires *) découlant d’un vice de matériau ou de fabrication au
moyen d’une réparation ou, selon notre estimation, au moyen d’un remplacement.
Les prestations dans le cadre de la garantie n’entraînent aucune prorogation de la
durée de garantie et ne donnent pas droit à une nouvelle garantie !
Le justifi catif de garantie est le reçu. Sans ce justifi catif, aucun remplacement
gratuit ni aucune réparation gratuite ne peuvent être effectués.
En cas de recours à la garantie, ramenez votre appareil complet, dans son
emballage d‘origine, accompagné de votre preuve d‘achat, à votre revendeur.
*) Les endommagements de pièces d’accessoires ne justifi ent pas automatiquement l’échange gratuit de l’appareil complet. Contactez alors notre centrale
téléphonique! La casse de pièces en verre ou en plastique est dans tous les cas
à votre charge!
Les défauts sur les accessoires ou les pièces d’usure (p.ex. les charbons de moteurs, crochets, courroies d’entraînement, télécommande de rechange, brosses
à dents de rechange, lames de scies etc.) ainsi que le nettoyage, l’entretien ou le
remplacement de pièces d’usure ne sont pas garantis et sont donc payants !
En cas d’intervention étrangère, la garantie devient caduque.
F
Après la garantie
Après écoulement de la durée de garantie, les réparations peuvent être effectuées, contre paiement, par le commerce spécialisé ou le service de réparation.
15
6....-05-DB 2971 15 23.12.2004, 10:55:52 Uhr
Page 16

E
• Antes de la puesta en servicio de este aparato lea detenidamente el manual
de instrucciones y guarde este bien incluido la garantía, el recibo de pago y si
es posible también el cartón de embalaje con el embalaje interior.
• Solamente utilice el aparato para el uso privado y para el fi n previsto. Este
aparato no está destinado para el uso profesional. No lo utilice al aire libre (en
excepto que esté destinado para el uso limitado al aire libre). No lo exponga
al calor, a la entrada directa de rayos de sol, a la humedad ( en ningún caso
sumerja el aparato en agua) y a los cantos agudos. No utilice el aparato con
las manos húmedas. En caso de que el aparato esté húmedo o mojado retire
de momento la clavija de la caja de enchufe. No tocar el agua.
• Desconecte el aparato y siempre retire la clavija de la caja de enchufe (tire de
la clavija no del cable), cuando no quiera utilizar el aparato, montar piezas o
en caso de limpieza o defectos.
• No utilice el aparato sin vigilancia. En caso de que tenga que dejar su lugar de
trabajo, desconecte siempre el aparato o retire la clavija de la caja de enchufe
(por favor tire de la clavija y no del cable).
• Para evitar que los niños se hagan daños eléctricos, siempre tenga atención,
que el cable no cuelgue hacia abajo y que los niños no tengan acceso al
aparato.
• Controle regularmente si el aparato o el cable tiene defectos. No ponga en
servicio un aparato defecto.
• No repare el aparato por su cuenta, sino vaya a un establecimiento autorizado. Para evitar peligros, deje sustituir un cable defecto por uno de la misma
calidad solamente por el fabricante, nuestro servicio al cliente o una similar
persona cualifi cada.
• Solamente utilice accesorios originales.
• Por favor tenga atención a las “Indicaciones especiales de seguridad…“ indicadas a continuación.
Indicaciones generales de seguridad
Observaciones especiales de seguridad
• Atención! La base de la plancha (10) está rapidamente caliente y necesita
bastante tiempo para enfriarse. No la toque.
• Al no utilizar la plancha, por favor coloque ésta de forma vertical sobre el pie
(9).
• Desconecte la plancha antes de llenar el depósito de agua (8). No llene la
plancha más que hasta la marca MAX (aprox.130 ml).
16
6....-05-DB 2971 16 23.12.2004, 10:55:53 Uhr
Page 17

Descripción de los elementos de mando
1 Regulador continuo de temperatura 6 Orifi cio de relleno del depósito
2 Lámpara indicadora de agua
3 Flexible entrada de cables de la red 7 Surtidor del rociador
4 Regulador de volumen de vapor 8 Depósito de agua transparente
5 Rociador 9 Pie
10 Suela de plancha en acero fi no
Primera puesta en marcha
• Limpie la base de la plancha con un trapo ligeramente húmedo.
• Llene el depósito de agua a través de la abertura de llenado (2). Ayúdese con
un recipiente de llenado. Si es posible, utilice agua destilada o agua clara de
grifo hasta el grado hidrotimétrico 2. En caso de que su agua tenga grados
superiores, utilice solamente agua destilada.
• Agua de batería, agua de la secadora de ropa y agua con aditivos (como almidón, perfume, suavizantes u otros químicos) no se debe llenar en el depósito
de agua. El aparato se podría estropear, ya que se podrían originar residuos
en el depósito de vapor. Estos residuos, al escapar de las aberturas de salida
de vapor, podrían ensuciar la ropa preparada para planchar.
Manipulación del aparato
Atención: Planche con este aparato sólo ropa.
• Aparte las hojas antiabrasión que pueda haber y etiquetas adhesivas de la
suela de plancha de acero fi no, antes de utilizar el aparato.
• Por favor desenrolle el cable por completo.
Planchar sin vapor (regulador de la cantidad de vapor en posición O)
1. Coloque el aparato encima de su base.
2. Ajuste el regulador de la cantidad de vapor (4) a la posición O.
3. Conexión eléctrica:
Asegúrese que la tensión del aparato (véa la indicación de tipo) sea la misma
que la tensión de red.
4. Siempre ajuste el regulador de temperatura a la posición ”0”, antes de conectar el aparato a la caja de enchufe, es decir retirarlo de la red.
5. Seleccione la ropa por temperaturas de planchar. Empiece con la temperatura
más baja. Regule la temperatura con el regulador de temperatura (1):
• Sintética, seda temperatura baja
• • Lana temperatura media
• • • Algodón, lino temperatura alta
MAX temperatura máxima
E
17
6....-05-DB 2971 17 23.12.2004, 10:55:53 Uhr
Page 18
6. Conecte el aparato solamente a una caja de enchufe con contacto de protec-
E
ción, 230V/50 Hz, instalada reglamentariamente.
7. La lámpara de control (2) se enciende. Cuando se apague se ha alcanzado la
temperatura para planchar. Ahora puede empezar a planchar.
8. Después de cada uso saque el enchufe de la caja de enchufe.
Planchado con vapor (
Se necesita una temperatura alta (algodón, lino).
Se puede ajustar la cantidad de vapor con el botón de ajuste del vapor (4).
O Ningún vapor
Cantidad de vapor pequeña
Cantidad de vapor grande
Atención: El vapor está caliente. ¡Existe peligro de quemarse!
Al planchar con temperaturas bajas, tenga atención de reducir la cantidad de vapor o planche sin vapor. Al seleccionar temperaturas demasiado bajas es normal
que salga agua de la suela de plancha.
Rellenado del depósito de agua
• Retire la clavija de la red, antes de rellenar agua.
• Ajuste el regulador de la cantidad de vapor (4) a la posición “O” (ningún vapor). Abra la tapadera de la abertura de llenado (6) y vierta agua con cuidado.
Llene el depósito de agua solamente hasta la marca-MAX.
Rociador (
Para humedecer un espacio, apreten el botón rociador (5).
Autolimpieza (
1. Llene el tanque hasta la mitad con agua.
2. Caliente el aparato hasta la temperatura máxima. Después de apagarse la luz
de control, desconecte el aparato de la red.
3. Mantenga el aparato ahora de forma horizontal sobre el fregadero. Mantenga el regulador de vapor en la posición ”Autolimpieza ”. Ahora balancee el
aparato de un lado para otro hasta que esté vacío el depósito. A continuación
reajuste el regulador a la posición O.
4. Coloque el aparato sobre el pedestal y caliéntelo nuevamente. Planche primero sobre un paño de algodón para limpiar la suela de la plancha.
)
)
)
18
6....-05-DB 2971 18 23.12.2004, 10:55:54 Uhr
Page 19

Limpieza y almacenamiento
• Desconecte siempre el aparato antes de limpiarlo.
• Limpie el exterior con un trapo seco.
• Limpie la base de la plancha con un trapo ligeramente húmedo.
• Después del uso ponga el regulador de la cantidad de vapor siempre a la
posición “O” y vacíe el depósito de agua, para evitar un derrame del contenido
del depósito.
Este aparato se ha examinado según las normativas actuales y vigentes de la
Comunidad Europea, como p.ej. compatibilidad electromagnética y directiva de
baja tensión y se ha construido según las más nuevas especifi caciones en razón
de la seguridad.
No reservamos el derecho de efectuar modifi caciones técnicas.
Garantía
Para el aparato comercializado por nosotros nos responsabilizamos con una
garantía de 24 meses a partir de la fecha de compra (factura de compra).
Durante el período de garantía nos encargamos gratuítamente de los defectos del
aparato y de los accesorios*), que se hayan originado por defectos del material o
de la fabricación. Dependiendo de nuestra estimación se realizará una reparación
o un cambio. ¡Los servicios de garantía no prolangan la garantía, ni se incia por
ello un período nuevo de garantía!
Como comprobante para la garantía es válido la factura de compra. Sin este
comprobante no se podrá realizar un cambio o una reparación gratuíta.
En caso de garantía entregue el aparato completo en su embalaje original
junto con la factura a su agente comerciante.
*) Defectos en las piezas de accesorio, no signifi can automáticamente el recambio
gratuito del aparato completo. ¡En este caso dirijase por favor a nuestra linea
de atención al cliente! ¡Rotos de vidrio o roturas en las piezas de plástico deben
pagarse siempre por el cliente !
Defectos en los accesorios de uso o en las piezas de desgaste (p.ej. escobillas de
carbón del motor, varillas amasadoras, correas de transmisión, mando a distancia
de repuesto, cepillos de dientes de repuesto, hojas de sierra etc.), como también
la limpieza, mantenimiento o el recambio de piezas de desgaste no recaen en la
garantía e irán al cargo del cliente!
En caso de intervención ajena se expira la garantía.
E
19
6....-05-DB 2971 19 23.12.2004, 10:55:55 Uhr
Page 20

E
Después de haber expirado la garantía se pueden realizar las reparaciones por
el concesionario o por el servicio de reparaciones. Los gastos irán al cargo del
cliente.
Después de la garantía
20
6....-05-DB 2971 20 23.12.2004, 10:55:55 Uhr
Page 21

Instruções gerais de segurança
• Antes de pôr este aparelho a funcionar, leia muito atentamente as instruções
de emprego e guarde-as muito bem, juntamente com o talão de garantia, o
talão de compra e, tanto quanto possível, a embalagem com os elementos
interiores.
• Utilize o aparelho exclusivamente para fi ns privados e para a fi nalidade para a
qual o mesmo foi concebido. Este aparelho não se destina a fi ns comerciais.
Não o utilize ao ar livre (a não ser que o mesmo possa ser usado ao ar livre
sob determinadas condições). Mantenha-o protegido do calor, de irradiação
solar directa, da humidade (não o imergir de forma alguma em quaisquer líquidos) e de arestas aguçadas. Não utilize o aparelho com as mãos molhadas.
No caso de o aparelho fi car húmido ou molhado, retire imediatamente a fi cha
da tomada. Não tocar na água.
• Sempre que não utilizar o aparelho, ou desejar montar acessórios, ou queira
limpá-lo, ou ainda em caso de avarias, deverá desligá-lo e retirar a fi cha da
tomada (puxe pela fi cha e não pelo fi o).
• O aparelho não deverá funcionar sem vigilância. No caso de ter de se ausen-
tar do local onde o aparelho estiver a funcionar, desligue-o sempre ou retire a
fi cha da tomada (puxe pela fi cha e não pelo fi o).
• Para proteger as crianças dos perigos relacionados com aparelhos eléctricos,
nunca deixe os fi os pendurados e atente em que as crianças não possam
chegar a tais aparelhos.
• Verifi que regularmente se o aparelho ou o fi o têm alguns danos. Nunca ponha
a funcionar um aparelho com quaisquer danos.
• Não tente reparar o aparelho, dirija-se a um técnico da especialidade,
devidamente autorizado. Para evitar quaisquer perigos, é favor substituir um
fi o danifi cado por um fi o da mesma qualidade. Tal deverá ser efectuado pelo
fabricante, pelos nossos serviços de assistência ou por outra pessoa com as
mesmas qualifi cações.
• Utilize apenas acessórios de origem.
• É favor observar as seguintes „Instruções especiais de segurança...“.
Instruções de segurança especiais
• Cuidado! A base do ferro (10) aquece muito rapidamente e leva muito tempo
a arrefecer. É favor não tocar nela.
• Quando a não utilizar coloque por favor a máquina automática de engomar
verticalmente no dispositivo de pé (9).
• Antes de se encher o depósito da água (8), retirar a fi cha da tomada. A água
que se deita no depósito não deverá ultrapassar a marcação MAX (ca. 130 ml).
P
21
6....-05-DB 2971 21 23.12.2004, 10:55:55 Uhr
Page 22

P
1 Regulador da temperatura 6 Orifício para introdução
sem escalonamento da água no depósito
2 Lâmpada de controlo 7 Pulverizador
3 Metida fl exivel do cabo de rede 8 Deposito transparente
4 Regulador da quantidade do vapor 9 Descanso
5 Botão pulverizador 10 Base de engomar em aço fi no
Numeração dos elementos
Primeira utilização do ferro
• A base do ferro deverá ser limpa com um pano húmido.
• Encha o tanque de água pela abertura de enchimento (6). Utilise como ajuda
um recipiente para o enchimento. Se possivel empregue só água destilada ou
água limpa da torneira até um grau de dureza de 2. No caso da água ser mais
dura utilize só água destilada.
• Não se deve encher o tanque com água de baterias, água do secador de
roupa ou água com produtos adicionais (produtos para gomar, para amaciar a
roupa, perfumes ou outros produtos quimicos). Desta forma o aparelho poderia se estragar uma vez que na câmara de vapor seria possivel formarem-se
residuos. Estes residuos, no caso de eles cairem pela abertura de saida de
vapor poderiam sujar a roupa a engomar.
Utilização do ferro de engomar
Nota: Engomar apenas roupa.
• Antes de utilizar a máquina retire a folha prateada de protecção bem como
o rótulo gomado que eventualmente se encontrem na base de aço fi no da
máquina de engomar.
• Por favor desdobre o cabo completamente.
Engomar sem vapor (regulador do volume de vapor na pos. O)
1. Colocar o ferro na vertical.
2. Coloque o regulador da quantidade do vapor (4) em O.
3. Ligação à electricidade:
Verifi car se a tensão do ferro (ver a placa de características) corresponde à
tensão da corrente.
4. Coloque o regulador de temperatura sempre a ”0”, antes de ligar o aparelho à
tomada de corrente ou de o separar da rede.
5. Seleccionar as peças de vestuário de acordo com as temperaturas para engomar. Comece com as temperaturas mais baixas. Estas serão seleccionadas
no regulador de temperaturas (1) da forma seguinte:
22
6....-05-DB 2971 22 23.12.2004, 10:55:56 Uhr
Page 23

• Tecidos sintécticos, seda temperatura baixa
• • Lã temperatura média
• • • Algodão, linho temperatura alta
MAX temperatura máxima
6. Ligar o aparelho apenas a uma tomada de 230 V, 50 Hz, com protecção de
contacto, instalada devidamente.
7. A lâmpada de controle (2) acender-se-á. Logo que esta se apagar, terá sido
atingida a temperatura que se seleccionou. Poderá agora começar-se a engomar.
8. Retirar a fi cha da tomada, logo que se acabe de utilizar o ferro.
Engomar a vapor (
Para tal, é necessária uma temperatura alta (algodões, linhos).
A quantidade do vapor será seleccionada através do regulador do vapor (4).
O falta o vapor
Atenção: o vapor é muito quente. Perigo de queimaduras!
Quando engomar a temperaturas baixas, reduza a quantidade do vapor ou engome sem vapor. No caso de uma temperatura muito baixa é normal que venha a
sair água da base da máquina.
Reenchimento do tanque de água
• Retire sempre a fi cha antes de voltar a meter água.
• Por favor ponha o regulador da quantidade de vapor (4) em posição ”O” (sem
vapor). Abra a tampa do orifi cio de enchimento (6) e ponha àgua com cuidado. Encha o tanque de água só até à marcação MAX.
Função de spray (
Para humedecer uma determinada parte da roupa que esteja a ser engomada,
pressionar o botão pulverizador (5).
Autolimpeza (
1. Encher o depósito da água até ao meio.
2. Colocar a temperatura no máximo. Depois de a lâmpada de controle se apagar, tirar a fi cha da tomada.
3. Ponha então o aparelho horizontalmente sobre um lava-louças. Conserve o
regulador de quantidade de vapor na posição ”Autolimpeza ”. Balance então o
aparelho de um lado para o outro, até o depósito fi car vazio. No fi nal, coloque
o regulador novamente na posição „O“.
)
pequena quantidade de vapor
grande quantidade de vapor
)
)
P
23
6....-05-DB 2971 23 23.12.2004, 10:55:56 Uhr
Page 24

4. Colocar o ferro na vertical e voltar a aquecê-lo. Para limpar a base, engomar
P
um pano de algodão limpo.
Limpeza e arrecadamento
• Antes de se limpar o ferro, retirar sempre a fi cha da tomada!.
• Limpar a parte exterior com um pano seco.
• Limpar a base com um pano húmido
• Depois de acabar de utilizar o aparelho, coloque sempre o regulador da quantidade do vapor na posição „O“ e deite fora a água que ainda se encontrar no
depósito, para evitar que haja um derramamento.
Este aparelho foi controlado nos termos das actuais directivas da CEE aplicáveis,
tais como inocuidade electromagnética e directiva sobre baixa tensão, e fabricado
de acordo com as mais novas prescrições da segurança técnica.
Reserva-se o direito de alterações!
Garantia
O aparelho vendido pela nossa empresa tem uma garantia de 24 meses a partir
da data da compra (talão).
Durante o período de garantia, procederemos à remoção grátis - por reparação,
ou, segundo a nossa decisão, por substituição - das defi ciências do aparelho
ou dos acessórios*) que provenham de erros de material ou de fabricação. A
prestação de serviços relacionados com a garantia não prolongarão a mesma,
nem iniciarão um novo prazo de garantia!
O talão de compra consistirá prova desta garantia. Sem o mesmo, não será
possível proceder-se a qualquer troca ou reparação grátis.
Em caso de garantia, entregue o aparelho completo, juntamente com o talão de
compra, na loja onde o mesmo foi comprado.
*) No caso de danos em quaisquer acessórios, não será efectuada automáticamente uma substituição completa do aparelho. Contacte neste caso a nossa
hotline! Danos causados por quebras de peças de vidro ou de plástico terão de
ser pagos pelo cliente!
Não estão incluídos na garantia quaisquer defeitos de acessórios ou de peças
que se desgastem (como, por exemplo, carvões do motor, varinhas, correias do
motor, telecomandos, escovas de dentes, folhas de serra, etc.), nem a limpeza, a
manutenção ou a substituição de peças que se desgastem, devendo tais despesas ser reembolsadas!
A garantia terminará sempre que tenha havido intervenção alheia nos aparelhos.
24
6....-05-DB 2971 24 23.12.2004, 10:55:57 Uhr
Page 25

Após a garantia
Após a expiração do prazo de garantia, poderão ser efectuados arranjos por pessoal especializado, ou pelos nossos serviços de reparações, contra reembolso.
P
25
6....-05-DB 2971 25 23.12.2004, 10:55:57 Uhr
Page 26

I
• Prima di mettere in funzione questo apparecchio, leggere molto attentamente
le istruzioni per l’uso e conservarle con cura unitamente al certifi cato di garanzia, allo scontrino e, se possibile, alla scatola di cartone con la confezione
interna.
• Utilizzare l’apparecchio esclusivamente per scopi privati e conformemente al
tipo di applicazione previsto. Questo prodotto non è stato concepito ai fi ni di
un impiego in ambito industriale. Non utilizzarlo all’aperto (a meno che non
sia contemplato un particolare tipo di uso all’aperto nel rispetto di specifi che
condizioni). Proteggerlo dal calore, nonché dall’esposizione diretta ai raggi solari e dall’umidità (non immergerlo mai in sostanze liquide) e tenerlo a distanza
da oggetti con spigoli affi lati. Non utilizzare l’apparecchio con le mani umide.
Nel caso in cui si bagni o si inumidisca l’apparecchio, staccare immediatamente la spina. Evitare il contatto con l’acqua.
• Disattivare l’apparecchio e staccare sempre la spina dalla relativa presa
(si raccomanda di afferrare il connettore e non il cavo quando si effettua
questa operazione) allorché non si utilizza l’apparecchio, quando si applicano
degli accessori oppure nel caso in cui lo si debba pulire o si siano manifestate
anomalie.
• Non mettere in funzione l’ apparecchio senza sorveglianza. Se si dovesse assentarsi dal posto di lavoro, spegnere e disconnettere sempre l’ apparecchio,
(prendendo in mano la spina, non tirando il cavo).
• Allo scopo di proteggere i bambini contro i pericoli che possono derivare dagli
apparecchi elettrici, accertarsi che non vi siano cavi pendenti e che i bambini
non possano accedere in alcun modo all’apparecchio stesso.
• Controllare periodicamente l’apparecchio per verifi care che non vi siano danni.
Non mettere in funzione l’apparecchio nel caso in cui sia guasto.
• Non tentare di riparare l’apparecchio, bensì rivolgersi a un tecnico autorizzato. Al fi ne di evitare l’insorgere di situazioni di pericolo, si raccomanda di
contattare il costruttore, il nostro servizio di assistenza tecnica o un tecnico
ugualmente qualifi cato per la sostituzione del cavo di alimentazione difettoso
con un cavo equivalente.
• Utilizzare esclusivamente accessori originali.
• Rispettare le seguenti “Speciali norme di sicurezza...“.
Norme di sicurezza generali
Avvertenze di sicurezza speciali
• Attenzione! La suola del ferro (10) da stiro si riscalda in breve tempo e richiede molto tempo per raffreddare. Non toccare!
• Quando il ferro da stiro automatico non viene usato, metterlo sul piede
d’appoggio (9) in posizione verticale.
• Prima di riempire il serbatoio (8) togliere la spina. Riempire il serbatoio solo
fi no al segno MAX (ca.130 ml).
26
6....-05-DB 2971 26 23.12.2004, 10:55:58 Uhr
Page 27

Componenti
1 Regolatore per 6 Foro riempimento serbatoio
temperatura continuo dell‘ acqua
2 Spia di controllo 7 Getto spray
3 Introduzione fl essibile del cavo 8 Serbatoio per acqua trasparente
di alimentazione 9 Piede
4 Regolatore per la quantità di vapore 10 Piastra in acciaio inossidabile
5 Pulsante spray
Messa in funzione dell’apparecchio
• Pulire la piastra con un panno leggermente umido.
• Riempire il serbatoio dell’acqua attraverso l’apertura di riempimento (6) servendosi di una brocca. Possibilmente usare acqua distillata o acqua corrente
limpida fi no al grado di durezza 2. Nel caso di acqua più dura usare solo
acqua distillata.
• Non versare nel serbatoio acqua di batterie, acqua dell’asciugatrice e acqua
con additivi (come amido, profumo, ammorbidente o altre sostanze chimiche).
L’apparecchio potrebbe risultarne danneggiato perché nella camera vapore
potrebbero depositarsi residui. Uscendo dai fori di fuoriuscita vapore questi
residui possono sporcare i tessuti da stirare.
Utilizzo dell‘ apparecchio
Avvertenza: Adoperare questo apparecchio esclusivamente per stirare capi di
abbigliamento.
• Prima di usare l’apparecchio rimuovere eventuali fi lm protettivi e adesivi dalla
piastra in acciaio inox.
• Svolgere completamente il cavo.
Stiratura senza vapore (regolatore uscita vapore su O)
1. Mettete l’apparecchio sul suo appoggio.
2. Mettere il regolatore per la quantità di vapore (4) sulla posizione O.
3. Collegamento elettrico:
Accertatevi che la tensione dell’apparecchio (v. targhetta) e la tensione di rete
coincidano.
4. Mettere il regolatore di temperatura sempre su ”0” prima di collegare o staccare l’apparecchio dalla rete elettrica.
5. Selezionate i capi di abbigliamento e la biancheria da stirare a seconda della
temperatura. Iniziate con la temperatura più bassa. Impostatela con il termostato (1):
I
27
6....-05-DB 2971 27 23.12.2004, 10:55:58 Uhr
Page 28

• Capi sintetici, seta temperatura bassa
I
• • Lana temperatura media
• • • Cotone, lino temperatura alta
MAX temperatura massima
6. Collegare l’apparecchio solo ad una presa con contatto di terra regolarmente
installata, 230 V/50 Hz.
7. La spia luminosa (2) lampeggia. Non appena si spegne, la temperatura
d’esercizio è raggiunta. Ora potete cominciare a stirare.
8. Togliete sempre la spina dopo l’uso.
Stirare con vapore (
Per questo è necessaria una temperatura molto elevata (cotone, lino).
Il regola-vapore (4) regola la quantità di vapore.
O Nessun vapore
Attenzione: il vapore scotta. Pericolo di ustione!
Per stirare a basse temperature ridurre la quantità di vapore o stirare senza vapore. Se la temperatura è troppo bassa, è normale che dalla piastra fuoriesca acqua.
Ricaricare il serbatoio dell’acqua
• Staccare sempre la spina prima di aggiungere acqua.
• Mettere il regolatore della quantità di vapore (4) sulla posizione ”O” (no
vapore). Sollevare il coperchio dell’apertura di riempimento (6) e con cautela
versare acqua. Riempire il serbatoio solo fi no alla tacca MAX.
Funzione spray (
Per inumidire una zona di tessuto da stirare premere il tasto spray (5).
Autopulizia (
1. Riempire il serbatoio solo per metà con acqua.
2. Riscaldare l‘ apparecchio con temperatura massima. Quando la spia è spenta,
3. Ora tenere l’apparecchio in posizione orizzontale sopra un lavello. Tenere il
4. Rimettere l‘ apparecchio nuovamente sul piedistallo e riscaldarlo di nuovo. Per
togliere l‘ apparecchio dalla rete.
regolatore della quantità di vapore sulla posizione ”Autopulizia ”. Scuotere leggermente l’ apparecchio affi nchè il serbatoio non sia vuoto. Mettere in seguito
il regolatore nuovamente in posizione „O“.
pulire la suola, stirare su un panno di cotone pulito.
)
Quantità di vapore minore
Quantità di vapore maggiore
)
)
28
6....-05-DB 2971 28 23.12.2004, 10:55:58 Uhr
Page 29

Pulizia e magazzinaggio
• Togliere la spina prima di pulire!
• Pulire esternamente con una pezza asciutta.
• La suola va pulita con una pezza leggermente umida.
• Dopo l’ uso mettere il rogolatore per la quantità di vapore sempre in posizione
“O” e svuotare completamente il serbatoio per evitare una fuoriuscita d’ acqua
dal serbatoio.
Questo apparecchio è stato controllato sulla base di tutte le direttive CE attuali in
vigore in questo settore, quali per esempio la normativa in materia di compatibilità
elettromagnetica e la direttiva in materia di bassa tensione, ed è stato costruito
conformemente alle norme di sicurezza più moderne.
Con riserva di apportare modifi che tecniche.
Garanzia
Per l’apparecchio da noi messo in commercio ci assumiamo una garanzia di
24 mesi dalla data di acquisto (scontrino).
Durante la garanzia noi ci impegniamo ad eliminare gratuitamente i guasti
dell’apparecchio o degli accessori*), dovuti a difetti di materiale o di fabbricazione,
riparandoli o, a nostra discrezione, sostituendoli. Le prestazioni in garanzia danno
luogo a una proroga della garanzia né danno diritto ad una nuova garanzia!
Per la garanzia è suffi ciente lo scontrino di acquisto. Senza questo scontrino non
sussiste il diritto né ad una sostituzione né ad una riparazione gratuita.
Nel caso si ricorra alla garanzia, restituire al rivenditore l’apparecchio completo in
ogni sua parte, nell’imballaggio originale unitamente allo scontrino.
*) Danni agli accessori non giustifi cano automaticamente lo scambio gratuito
dell’apparecchio completo. Si prega di mettersi in contatto con la nostra centrale
telefonica. Danni alle parti di vetro oppure fratture ai pezzi di materia plastica sono
obbligatoriamente a spese del cliente.
La riparazione di pezzi d’uso ovvero soggetti a logoramento (cursori, ganci
impastatori, cinghie di trasmissione, telecomandi di ricambio, spazzolini di ricambio, lame di seghe ecc.) come anche operazioni di pulizia e manutenzione o la
sostituzione di pezzi soggetti a logoramento non rientrano nella garanzia e quindi
sono a pagamento!
La garanzia si annulla nel caso di intervento da parte di terzi.
I
Dopo la garanzia
Al termine della garanzia le riparazioni possono essere eseguite dietro pagamento
dal corrispettivo negozio specializzato o servizio riparazioni.
29
6....-05-DB 2971 29 23.12.2004, 10:55:59 Uhr
Page 30

N
• Les nøye gjennom bruksanvisningen før du tar apparatet i bruk. Ta godt vare
på bruksanvisningen, garantibeviset, kassalappen og helst også esken med
innvendig emballasje.
• Apparatet må bare brukes til private formål og de formål det der er beregnet
på. Dette apparatet er ikke ment for industriell bruk. Det må ikke benyttes
utendørs (bortsett fra hvis det bare er beregnet på utendørs bruk). Hold det
unna varme, direkte solskinn, fuktighet (senk det aldri ned i væsker) og skarpe
kanter. Ikke bruk apparatet hvis du er fuktig på hendende. Hvis apparatet har
blitt fuktig eller vått, må du trekke ut støpselet med en gang. Ikke kom borti
vannet.
• Slå av apparatet og trekk alltid støpselet ut av stikkontakten (trekk i støpselet,
ikke i ledningen) når du ikke bruker apparatet, fest tilbehørsdeler for rengjøring
eller ved feil.
• Ikke bruk apparatet uten oppsikt. Hvis du forlater arbeidsplassen, må du alltid
slå apparatet av eller trekke støpselet ut av stikkontakten (trekk i støpselet,
ikke i ledningen.
• For å beskytte barn mot farer forbundet med elektriske apparater, må du alltid
sørge for at ledningen ikke henger ned, og at apparatet ikke er tilgjengelig for
barn.
• Kontroller jevnlig om det er skader på apparat og ledning. Skadede apparater
må ikke brukes.
• Ikke reparer apparatet selv. Oppsøk en autorisert fagmann. Hvis en nettledning er defekt, må du sørge for at den kun skiftes ut med en lik ledning, for
slik å unngå farer. Dette må gjøres av produsenten, vår kundetjeneste eller en
lignende kvalifi sert person.
• Bruk bare originaltilbehør.
• Legg merke til “Spesielle sikkerhetsanvisninger” nedenfor.
Generelle sikkerhetsanvisninger
Spesielle sikkerhetsanvisninger
• Forsiktig! Strykesålen (10) blir raskt varm og trenger lang tid på å avkjøles.
Ikke ta på sålen.
• Sett strykejernet loddrett på sokkelen (9) når det ikke er i bruk.
• Trekk ut støpselet før du fyller på vanntanken (8). Ikke fyll på mer enn til MAXmerket (ca. 130 ml).
Oversikt over betjeningselementene
1 Trinnløs termostat 6 Påfyllingsåpning vanntank
2 Kontrollampe 7 Spraydyse
3 Fleksibel ledningsinnføring 8 Gjennomsiktig vanntank
4 Dampregulator 9 Sokkel
5 Sprayknapp 10 Strykesåle i edelstål
30
6....-05-DB 2971 30 23.12.2004, 10:56:00 Uhr
Page 31

Å ta i bruk apparatet
• Rengjør strykesålen med en lett fuktig klut.
• Fyll på vanntanken gjennom påfyllingsåpningen (6). Bruk en påfyllingsbeholder
til hjelp. Om mulig bør du bruke destillert vann, eventuelt rent vann fra springen
opptil hardhetsgrad 2. Hvis vannet er hardere, må du kun bruke destillert vann.
• Batterivann, vann fra tørketrommelen og vann med tilsetningsstoffer (som
stivelse, parfyme, tøymykner eller andre kjemikalier) må ikke fylles i vanntanken. Dette kan skade apparatet fordi det kan danne seg rester i dampkammeret. Disse restene kan komme ut gjennom dampåpningene og skitne til tøyet.
Å bruke apparatet
Tips: Dette apparatet må bare brukes til å stryke klær med.
• Fjern eventuelle beskyttelsesfolier og etiketter fra edelstål-strykesålen før du
tar apparatet i bruk.
• Vikle ledningen helt ut.
Stryking uten damp (dampregulatoren på O)
1. Sett apparatet på sokkelen.
2. Sett dampregulatoren (4) på O.
3. Elektrisk tilkobling:
Forsikre deg om at apparatets spenning (se merkeplaten) og nettspenningen
stemmer overens.
4. Sett alltid termostaten på ”0” før du stikker inn eller tar ut støpselet.
5. Sorter klærne etter stryketemperaturer. Begynn med den laveste temperaturen. Denne stiller du inn med termostaten (1):
• syntetisk, silke lav temperatur
• • ull middels temperatur
• • • bomull, lin høy temperatur
MAX høyeste temperatur
6. Stikk støpselet inn i en forskriftsmessig installert jordet kontakt, 230V, 50 Hz.
7. Kontrollampen (2) lyser. Når denne slukkes, har strykejernet riktig temperatur.
Nå kan du begynne å stryke.
8. rekk alltid ut støpselet når du er ferdig med å bruke apparatet.
)
lite damp
mye damp
Dampstryking (
Dette krever høy temperatur (bomull, lin).
Dampmengden regulerer du ved hjelp av dampregulatoren (4).
O ingen damp
N
31
6....-05-DB 2971 31 23.12.2004, 10:56:00 Uhr
Page 32

OBS: Dampen er varm. Fare for forbrenning!
N
Når du stryker med lave temperaturer, må du passe på å redusere dampmengden
eller stryke uten damp. Ved for lav temperatur er det vanlig at det kommer vann ut
av strykesålen.
Etterfylling av vanntanken
• Trekk alltid ut støpselet før du etterfyller vann.
• Sett dampregulatoren (4) i posisjonen ”O” (ingen damp). Åpne lokket på påfyllingsåpningen (6) og fyll forsiktig på vann. Ikke fyll vanntanken lenger opp enn
til MAX-merket.
Sprayfunksjon (
Trykk på sprayknappen for å fukte tøyet (5).
Selvrens (
1. Fyll vanntanken halvveis opp med vann.
2. Varm apparatet opp til maks. temperatur. Når kontrollampen slukkes, trekker
du ut støpselet.
3. Hold så apparatet vannrett over en oppvaskkum. Hold dampregulatoren i
posisjonen ”Selvrens ”. Nå rister du apparatet fram og tilbake til tanken er tom.
Sett deretter regulatoren tilbake til „O“.
4. Sett apparatet på sokkelen igjen og varm det opp igjen på nytt. Stryk så over
en ren bomullsklut for å rengjøre sålen.
)
)
Rengjøring og lagring
• Trekk alltid ut støpselet før rengjøring.
• Rengjør huset med en tørr klut.
• Rengjør sålen med en lett fuktig klut.
• Sett alltid dampregulatoren i posisjon “O“ etter bruk og tøm vanntanken for å
hindre at innholdet i tanken renner ut.
Dette apparatet har blitt testet i henhold til alle aktuelle CE-retningslinjer som det
rammes av, f.eks. elektromagnetisk toleranse og direktiver om lavspenning. Det er
laget i henhold til dagens nyeste sikkerhetstekniske forskrifter.
Med forbehold om tekniske endringer!
32
6....-05-DB 2971 32 23.12.2004, 10:56:01 Uhr
Page 33

Garanti
For apparat som vi har solgt, påtar vi oss en garanti på 24 måneder fra kjøpsdato
(kassalapp).
Innenfor garantitiden fjerner vi mangler på apparat eller tilbehør*) uten omkostninger hvis manglene skyldes material- eller produksjonsfeil. Dette gjør vi ved
reparasjon eller – etter vår vurdering – bytting.
Garantiytelser medfører ingen forlengelse av garantitiden, og det oppstår heller
ikke noe krav på en ny garanti på grunn av dette!
Som garantibevis gjelder kjøpsbeviset. Uten dette beviset kan du ikke få byttet
eller reparert apparatet gratis.
I forbindelse med garanti ber vi om at du gir hele apparatet i originalemballasjen
sammen med kassalappen til din forhandler.
*) Skader på tilbehørsdeler fører ikke automatisk til at du får byttet hele apparatet
gratis. I slike tilfeller ber vi deg om å henvende deg til vår hotline! Glasskader eller
sprekker i plastdeler er i prinsippet kostnadspliktige!
Verken defekter på forbrukstilbehør og slitasjedeler (for eksempel motorkull, eltekroker, drivremmer, ekstra fjernbetjening, ekstra tannbørster, sagblader osv.) eller
rengjøring, vedlikehold og utskifting av slitasjedeler går inn under garantien. Slike
ting er derfor kostnadspliktige!
Garantien utgår ved inngrep utenfra.
Etter garantien
Etter at garantitiden har gått ut, kan reparasjoner utføres av den aktuelle faghandelen eller reparasjonsservice mot betaling.
N
33
6....-05-DB 2971 33 23.12.2004, 10:56:02 Uhr
Page 34

GB
• Read the operating instructions carefully before putting the appliance into
operation and keep the instructions including the warranty, the receipt and, if
possible, the box with the internal packing.
• The appliance is designed exclusively for private use and for the envisaged
purpose. This appliance is not fi t for commercial use. Do not use it outdoors
(except if it is designed to be used outdoors). Keep it away from sources of
heat, direct sunlight, humidity (never dip it into any liquid) and sharp edges. Do
not use the appliance with wet hands. If the appliance is humid or wet, unplug
it immediately. Do not put it in water.
• When cleaning or putting it away, switch off the appliance and always pull out
the plug from the socket (pull on the plug, not the cable) if the appliance is not
being used and remove the attached accessories.
• Do not operate the machine without supervision. If you should leave the work-
place, always switch the machine off or remove the plug from the socket (pull
the plug itself, not the lead).
• To protect children from the dangers posed by electrical appliances, make
sure that the cable is hanging low and that children do not have access to the
appliance.
• Check the appliance and the cable for damage on a regular basis. Do not use
the appliance if it is damaged.
• Do not try to repair the appliance on your own. Always contact an authorized
technician. To avoid the exposure to danger, always have a faulty cable be
replaced only by the manufacturer, by our customer service or by a qualifi ed
person and with a cable of the same type.
• Use only original spare parts.
• Pay careful attention to the following “Special Safety Instructions“.
General Safety Instructions
Special Safety Instructions
• Warning! The ironing base (10) becomes hot very quickly and takes a long
time to cool down. Please do not touch it.
• When not using the iron, always place the appliance vertically on its base (9).
• Before fi lling the water tank (8) remove the mains lead. Please do not fi ll the
water tank higher than the MAX mark (approx. 130 ml).
Numbering of the Controls
1 Continuously adjustable 6 Filler opening for the water tank
temperature regulator 7 Spray nozzle
2 Control lamp 8 Transparent water containe
3 Flexible line cord entry 9 Base
4 Steam volume regulator 10 Stainless Steel Soleplate
5 Spray button
34
6....-05-DB 2971 34 23.12.2004, 10:56:02 Uhr
Page 35

First Use of the Machine
• Clean the ironing base with a slightly damp cloth.
• Fill the water reservoir at the refi ll opening (6), using a fi lling container. Preferably use distilled water or clear tap water (maximum water hardness level 2).
If water is harder, used distilled water only.
• Do not fi ll battery water, water from the clothes dryer and water containing additives
(such as starch, perfume, softener or other chemicals) into the water reservoir. This
could damage the iron due to residues forming in the steam chamber. These residues
may cause impurities to the fabric when dropping out of the holes in the soleplate.
Using the Machine
Note: Only clothes should to be ironed with this machine.
• Remove any protective fi lms and adhesive labels from the stainless steel
soleplate before using the appliance.
• Completely unwind the line cord.
Ironing without steam (steam jet regulator on O)
1. Place the iron on its stand.
2. Turn the steam regulator (4) to O.
3. Electrical connection
Make sure that the iron voltage (see name plate) and the line voltage match.
4. Always set the temperature control to „0“ before connecting the appliance to a
power point, or before disconnecting it.
5. Sort out the garments according to their ironing temperatures. Start with the
lower temperatures. It is set with the thermostat (1):
• Synthetics, silk low temperature
• • Wool medium temperature
• • • Cotton, linen high temperature
MAX maximum temperature
6. Only connect the machine to a properly installed safety socket, 230 V/50 Hz.
7. The control lamp (2) lights up. As soon as it shuts off, the set temperature is
reached. Now you can start to iron.
8. Always pull the plug out of the socket after using the iron.
Steam Ironing (
For this a high temperature is needed (cotton, linen).
The quantity of steam can be regulated using the steam quantity regulator (4).
O no steam
)
Small steam volume
Large steam volume
GB
35
6....-05-DB 2971 35 23.12.2004, 10:56:03 Uhr
Page 36

Caution: the steam is hot. Danger of scalding!
GB
When ironing at low temperatures, make sure that you reduce the quantity of
steam or iron without steam. If the temperature is too low water may leak from the
soleplate.
Refi lling the water tank
• Always disconnect the mains plug before refi lling water.
• Set the steam control (4) to “O” (no steam). Open the lid of the refi ll inlet (6)
and carefully pour in the water. Do not exceed the maximum line as marked on
the water reservoir.
Spray Function (
In order to moisten a section to be ironed press the spray button (5).
Self-Cleaning (
1. Half fi ll the water tank with water.
2. Heat the machine up to its maximum temperature. After the control lamp goes
off remove the machine from the mains supply.
3. Now hold the iron horizontally over a sink. Hold the steam control in the „SelfCleaning “ position. Now rock the device backwards and forwards until the
tank is empty. Then return the regulator to the O position.
4. Place the machine back on its stand and heat it up again. To clean the base
now iron over a clean cotton cloth.
)
)
Cleaning and Storage
• Always remove the mains lead before cleaning!
• Clean the casing with a slightly damp cloth.
• Clean the iron with a slightly humid cloth.
• Always return the steam regulator to the „O“ position after use and empty the
water tank in order to prevent any leaks.
This device has been tested according to all relevant current CE guidelines,
such as electromagnetic compatibility and low voltage directives, and has been
constructed in accordance with the latest safety regulations.
Subject to technical changes without prior notice!
36
6....-05-DB 2971 36 23.12.2004, 10:56:03 Uhr
Page 37

Guarantee
The device supplied by our Company is covered by a 24 month guarantee starting
on the date of purchase (receipt).
During the life of the guarantee any fault of the device or its accessories *) ascribable to material or manufacturing defects will be eliminated free of charge by
repairing or, at our discretion, by replacing it. The guarantee services do not entail
an extension of the life of the guarantee nor do they give rise to any right to a new
guarantee!
Proof of the guarantee is provided by the proof of purchase. Without proof of
purchase no free replacement or repair will be carried out.
If you wish to make a claim under the guarantee please return the entire machine
in the original packaging to your dealer together with the receipt.
*) Damage to accessories does not mean automatic free replacement of the whole
machine. In such cases please contact our hotline. Broken glass or breakage of
plastic parts are always subject to a charge.
Defects to consumables or parts subject to wearing (e.g. motor pistons, kneading
blades, drive shafts, spare remote control, spare toothbrushes, saw blades, etc.)
as well as cleaning, maintenance or the replacement of said parts are not covered
by the guarantee and hence are to be paid!
The guarantee lapses in case of unauthorized tampering.
After the expiry of the guarantee
After the expiry of the guarantee repairs can be carried by the competent dealer or
repair service against the payment of the ensuing costs.
GB
37
6....-05-DB 2971 37 23.12.2004, 10:56:04 Uhr
Page 38

PL
• Przed uruchomieniem urządzenia proszę bardzo dokładnie przeczytać
instrukcję obsługi.Proszę zachować ją wraz z kartą gwarancyjną, paragonem i
w miarę możliwości również kartonem z opakowaniem wewnętrznym.
• Proszę wykorzystywać urządzenie jedynie dla prywatnego celu,jaki został
przewidziany dla urządzenia.Urządzenie to nie zostało przewidziane do użytku
w ramach działalności gospodarczej.Proszę nie korzystać z urządzenia na
zewnątrz (chyba że w określonych warunkach).Proszę trzymać urządzenie
z daleka od ciepła,bezpośredniego promieniowania słonecznego,wilgoci
(w żadnym wypadku nie zanurzać w substancjach płynnych)oraz ostrych
krawędzi.Proszę nie obsługiwać urządzenia wilgotnymi dłońmi.Jeżeli
urządzenie jest wilgotne lub mokre,proszę natychmiast wyciągnąć wtyczkę.
• Jeżeli nie korzystacie Państwo z urządzenia,jeżeli chcecie Państwo
zamontować jakieś akcesoria,w celu wyczyszczenia lub w przypadku jakichkolwiek zakłóceń,proszę zawsze wyłączyć urządzenie i wyjąć wtyczkę z gniazdka
(proszę pociągnąć za wtyczkę,nie za przewód zasilający).
• Pracującego urządzenia nie należy pozostawiać bez nadzoru. Jeżeli
opuszczają Państwo miejsce pracy, należy zawsze pamiętać o wyłączeniu
urządzenia, wzgl. wyjęciu wtyczki z gniazda (należy ciągnąć za wtyczkę, nie
za przewód).
• Aby uchronić dzieci przed niebezpieczeństwem związanym z elektrycznymi
urządzeniami,proszę zadbać o to,aby przewód zasilający nigdy nie wisiał
luźno,oraz aby dzieci nie miały dostępu do urządzenia.
• Proszę regularnie kontrolować urządzenie pod kątem uszkodzeń.Proszę nie
uruchamiać uszkodzonego urządzenia.
• W razie awarii proszę nie naprawiać urządzenia samemu lecz skorzystać z
pomocy autoryzowanego specjalisty. Jeżeli przewód zasilający nieodłączalny
ulegnie uszkodzeniu, to powinien on być wymieniony u producenta lub w
specjalnym zakładzie naprawczym albo przez wykwalifi kowaną osobę w celu
uniknięcia zagrożenia.
• Proszę stosować tylko oryginalne akcesoria.
• Prosimy pamiętać o podanych dalej „Specjalnych wskazówkach dotyczących
bezpiecznego użytkowania“.
Ogólne wskazówki bezpieczeństwa
Specjalne wskazówki bezpieczeństwa
• Uwaga! Stopa żelazka (10) nagrzewa się bardzo szybko, natomiast do jej
schłodzenia potrzeba znacznie więcej czasu. Proszę jej zatem nie dotykać.
• Nieużywany automat do prasowania proszę stawiać pionowo na podstawce
(9).
• Przed napełnieniem zbiornika z wodą (8) należy odłączyć żelazko od sieci.
Proszę napełnić zbiornik tak, aby linia wody nie przekroczyła znaku MAX
(ok.130 ml).
38
6....-05-DB 2971 38 23.12.2004, 10:56:04 Uhr
Page 39

Numeracja elementów obsługi
1 Bezstopniowy regulator 5 Przycisk rozpylacza
temperatury 6 Otwór wlewczy do zbiornika wody
2 Lampka kontrolna 7 Rozpylacz
3 Elastyczne doprowadzenie 8 Przezroczysty zbiorniczek na wodę
kabla sieciowego 9 Podstawka
4 Regulator ilości pary 10 Płyta żelazka ze stali szlachetnej
Uruchomienie żelazka
• Proszę wyczyścić stopę żelazka lekko wilgotną ściereczką.
• Wlać przez otwór (6) wodę do zbiornika. Skorzystać przy tym z kubka
do napełniania. Do napełniana przeznaczyć możliwie wodę destylowaną
lub wodociągową o twardości do 2 stopni. Przy większej twardości wody
stosować tylko wodę destylowaną.
• Do zbiornika wody nie wolno wlewać wody z baterii, z suszarki do bielizny lub wody z
dodatkami (takimi jak krochmal, perfumy, płyny do zmiękczania bielizny lub inne środki
chemiczne). Można przez to doprowadzić do uszkodzenia żelazka z powodu tworzenia się osadów w pojemnikach pary. Resztkowe osady mogą podczas wypływu pary
przez dyszę parową doprowadzić do zanieczyszczenia prasowanej bielizny.
Obsługa żelazka
Uwaga! Żelazkiem należy prasować wyłącznie ubrania.
• Przed użyciem urządzenia z płyty żelazka ze stali szlachetnej proszę usunąć
ewentualnie obecne folie ochronne i naklejki.
• Proszę kompletnie rozwinąć kabel.
Prasowanie bez pary (regulator pary na pozycji O)
1. Proszę ustawić żelazko na podstawie.
2. Regulator ilości pary (4) proszę ustawić na O.
3. Podłączenie elektryczne:
Proszę się upewnić, że napięcie urządzenia (patrz tabliczka identyfi kacyjna) i
napięcie sieci są zgodne.
4. Przed podłączeniem urządzenia do gniazdka lub wyłączeniem go z sieci regulator temperatury proszę zawsze ustawiać na “0”.
5. Proszę posegregować elementy odzieży według temperatury prasowania.
Proszę rozpocząć od najniższej temperatury. Można ją ustawić przy pomocy
regulatora temperatury (1):
• syntetyk, jedwab niska temperatura
• • wełna średnia temperatura
• • • bawełna, len wysoka temperatura
MAX najwyższa temperatura
PL
39
6....-05-DB 2971 39 23.12.2004, 10:56:05 Uhr
Page 40

6. Urządzenie wolno podłączyć tylko i wyłącznie do przepisowo zamontowanego
PL
gniazdka wtykowego ze stykiem ochrennym z prądem 230V, 50Hz.
7. Zaświeci się lampka kontrolna (2). Gdy lampka zgaśnie oznacza to, że wymagana temperatura została osiągnięta. Mogą Państwo rozpocząć prasowanie.
8. Proszę zawsze po zakończeniu prasowania wyciągać wtyczkę z sieci.
Prasowanie z użyciem pary (
W tym celu niezbędna jest wysoka temperatura (bawełna, len).
Ilość pary można uregulować za pomocą regulatora pary (4).
O brak pary
mała ilości pary
duża ilości pary
Uwaga: para jest gorąca. Niebezpieczeństwo poparzenia!
W przypadku prasowania przy ustawieniu niskiej temperatury proszę pamiętać o
tym, żeby zredukować ilość pary lub prasować bez pary. Przy za niskiej temperaturze normalnym zjawiskiem jest wydobywanie się wody z płyty żelazka.
Uzupełnianie zbiornika na wodę
• Przed uzupełnieniem wody proszę zawsze wyciągać wtyczkę z sieci.
• Regulator ilości pary (4) proszę ustawić w pozycji “0” (bez pary). Proszę
otworzyć pokrywkę otworu do nalewania (6) i ostrożnie nalać wody. Proszę
napełnić zbiornik na wodę tylko do znaku MAX.
Funkcja rozpylacza (
W celu zroszenia miejsca do prasowania proszę nacisnąć przycisk rozpylacza (5).
Samoczynne oczyszczanie (
1. Proszę do połowy napełnić wodą pojemnik na wodę.
2. Proszę podgrzać urządzenie do temperatury maksymalnej. Po zgaśnięciu
lampki kontrolnej proszę odłączyć urządzenie od sieci.
3. Żelazko trzymać poziomo nad umywalką. Trzymać przełącznik ilości
pary naciśnięty w pozycji “Samoczynne oczyszczanie “. Proszę kołysać
urządzeniem w tę i z powrotem, aż pojemnik się opróżni. Następnie proszę
ustawić regulator z powrotem na „O“.
4. Proszę ponownie postawić urządzenie na stopce i rozgrzać je. W celu
oczyszczenia powierzchni prasującej proszę przeprasować czysty bawełniany
materiał.
)
)
)
40
6....-05-DB 2971 40 23.12.2004, 10:56:05 Uhr
Page 41

Czyszczenie i przechowywanie
• Przed czyszczeniem żelazka należy zawsze wyjąć wtyczkę z gniazdka!
• Proszę wyczyścić obudowę żelazka suchą ściereczką.
• Stopę żelazka należy wyczyścić ściereczką wilgotną.
• Zawsze po użyciu proszę ustawiać regulator ilości pary w pozycji „O” i
opróżniać pojemnik na wodę, by uniknąć wylania się jego zawartości.
Niniejsze urządzenie odpowiada wymaganiom normy bezpieczeństwa
użytkowania oraz spełnia wymagania dyrektywy niskonapięciowej i
kompatybilności elektromagnetycznej.
Zastrzega się prawo do zmian technicznych!
WARUNKI GWARANCJI
Przyznajemy 24 miesiące gwarancji na produkt licząc od daty zakupu.
W tym okresie będziemy bezpłatnie usuwać w terminie 14 dni od daty dostarc-
zenia wadliwego sprzętu z kartą gwarancyjną do miejsca zakupu wszystkie uszkodzenia powstałe w tym urządzeniu na skutek wady materiałów lub wadliwego
wykonania, naprawiając oraz wymieniając wadliwe części lub (jeśli uznamy za
stosowne) wymieniając całe urządzenie na nowe.
Sprzęt do naprawy powinien być dostarczony w komplecie wraz z dowodem
zakupu oraz z ważną kartą gwarancyjną do sprzedawcy w miarę możliwości
w oryginalnym opakowaniu lub innym odpowiednim dla zabezpieczenia przed
uszkodzeniem. W razie braku kompletnego opakowania fabrycznego, ryzyko uszkodzenia sprzętu podczas transportu do i z miejsca zakupu ponosi reklamujący.
Naprawa gwarancyjna nie dotyczy czynności przewidzianych w instrukcji obsługi,
do wykonania których zobowiązany jest użytkownik we własnym zakresie i na
własny koszt.
Gwarancja nie obejmuje:
• mechanicznych, termicznych, chemicznych uszkodzeń sprzętu i wywołanych
nimi wad,
• uszkodzeń powstałych w wyniku działania sił zewnętrznych takich jak
wyładowania atmosferyczne, zmiana napięcia zasilania i innych zdarzeń
losowych,
• nieprawidłowego ustawienia wartości napięcia elektrycznego, zasilanie z
nieodpowiedniego gniazda zasilania,
• sznurów połączeniowych, sieciowych, żarówek, baterii, akumulatorów,
• uszkodzeń wyrobu powstałych w wyniku niewłaściwego lub niezgodnego z
instrukcją jego użytkowania, przechowywania, konserwacji, samowolnego
zrywania plomb oraz wszelkich przeróbek i zmian konstrukcyjnych dokonanych
przez użytkownika lub osoby niepowołane,
PL
41
6....-05-DB 2971 41 23.12.2004, 10:56:06 Uhr
Page 42

• roszczeń z tytułu parametrów technicznych wyrobu, o ile są one zgodne z
PL
podanymi przez producenta,
• prawidłowego zużycia i uszkodzeń, które mają nieistotny wpływ na wartość lub
działanie tego urządzenia.
Karta gwarancyjna bez pieczątki sklepu, daty sprzedaży, nie wypełniona,
źle wypełniona, ze śladami poprawek, nieczytelna wskutek zniszczenia, bez
możliwości ustalenia miejsca sprzedaży oraz dołączonego dowodu zakupu jest
nieważna.
Korzystanie z usług gwarancyjnych nie jest możliwe po upływie daty ważności
gwarancji. Gwarancja na części lub całe urządzenie, które są wymieniane kończy
się, wraz z końcem gwarancji na to urządzenie.
Wszystkie inne roszczenia, wliczając w to odszkodowania są wykluczone chyba,
że prawo przewiduje inaczej. Roszczenia wykraczające poza tą umowę nie są
uwzględniane przez tą gwarancję.
Gwarancja na sprzedany towar konsumpcyjny nie wyłącza, nie ogranicza ani
nie zawiesza uprawnień kupującego wynikających z niezgodności towaru z
umową.
Gwarancja oraz zawarte w niej warunki obowiązują na terenie Rzeczpospolitej
Polskiej.
42
6....-05-DB 2971 42 23.12.2004, 10:56:07 Uhr
Page 43

Všeobecné bezpečnostní pokyny
• Před uvedením tohoto přístroje do provozu si velmi pozorně přečtěte návod k
obsluze a tento návod spolu se záručním listem, pokladním blokem a podle
možností i s obalem a vnitřním vybavením obalu dobře uschovejte.
• Používejte tento přístroj výlučně pro soukromou potřebu a pro stanovené
účely. Tento přístroj není určen pro komerční použití. Nepoužívejte jej v
otevřeném prostoru (s výjimkou přístrojů, které jsou podmíněné používání
venku určeny). Chraňte jej před horkem, přímým slunečním zářením, vlhkostí
(v žádném případě jej neponořujte do kapalin) a stykem s ostrými hranami.
Nepoužívejte přístroj v případě, že máte vlhké ruce. Jestliže dojde k navlhčení
nebo namočení přístroje, okamžitě vytáhněte zástrčku ze zásuvky. Vyvarujte
se styku s vodou.
• Přístroj vypněte a vždy vytáhněte zástrčku ze zásuvky (tahejte jen za zástrčku,
nikdy ne za kabel), jestliže nebudete přístroj používat, chcete-li namontovat
příslušenství, přístroj vyčistit nebo v případě poruchy.
• Přístroj nesmí zůstat v provozu bez dozoru. Jestliže musíte pracoviště opustit,
vždy přístroj vypněte, resp. vytáhněte zástrčku ze zásuvky (vždy tahejte za
zástrčku, nikdy ne za kabel).
• Abyste ochránili děti před riziky spojenými s elektrickými přístroji, postarejte se
o to, aby kabel nevisel dolů a děti na přístroj nedosáhly.
• Pravidelně kontrolujte přístroj a přívodní kabel z hlediska poškození. Jestliže
přístroj vykazuje nějakou závadu, neuvádějte jej do provozu.
• Neopravujte přístroj vlastními silami, nýbrž vyhledejte autorizovaného
opraváře. Abyste eliminovali rizika, nechejte poškozený přívodní kabel nahradit
kabelem se stejnými hodnotami a to jen výrobcem, naším servisem pro zákazníky nebo jinou kvalifi kovanou osobou.
• Používejte jen originální příslušenství.
• Respektujte, prosím, následující „Speciální bezpečnostní pokyny ...“.
Zvláštní bezpečnostní pokyny
• Pozor! Žehlící plocha (10) se velmi rychle zahřeje a k jejímu zchladnutí je
třeba dlouhé doby. Prosíme, nedotýkejte se jí!
• Jestliže žehlící automat nepoužíváte, postavte jej svisle na stojan (9).
• Před plněním nádržky vodou (8) vždy žehličku odpojte od elektrické sítě.
Nádržku plňte jen do výše rysky označené MAX (přibl. 130 ml).
CZ
Číslování ovládacích prvků
1 Regulátor teploty s plynulým 6 Plnící otvor nádržky na vodu
nastavováním 7 Tryska pro kropení prádla
2 Kontrolka 8 Průhledná nádrěka na vodu
3 Flexibilní vedení kabelu 9 Ákladna
4 Regulátor množství páry 10 Žehlící plocha z ušlechtilé ocele
5 Tlačítko pro ovládání sprejování
43
6....-05-DB 2971 43 23.12.2004, 10:56:07 Uhr
Page 44

CZ
• Žehlící plochu čistěte lehce navlhčeným hadříkem.
• Naplňte nádržku na vodu pomocí plnícího otvoru (6). Použijte k tomu plnící
nádobku. Používejte pokud možno destilovanou vodu nebo čistou vodovodní
vodu do stupně tvrdosti 2. V případě, že máte k dispozici vodovodní vodu
s větším stupněm tvrdosti, používejte jen destilovanou vodu.
• Nesmí být používána akumulátorová voda, voda ze sušičky prádla a voda
s přísadami (jako jsou škrob, parfémy, změkčovadla nebo jiné chemikálie).
Mohlo by tím dojít k poškození přístroje, protože by se v parní komoře mohly
vytvářet zbytky. Tyto zbytky mohou při vypadávání z výstupů parních trysek
znečistit žehlené textilie.
Uvedení přístroje do provozu
Používání žehličky
Upozornění: Žehlička je určena jen pro žehlení částí oděvů.
• Před použitím přístroje je nutno ze žehlící plochy z ušlechtilé ocele odstranit
eventuálně použité ochranné fólie a nálepky
• Kabel zcela odviňte.
Normální žehlení – bez napařování (regulátor množství páry nastaven na O)
1. Postavte žehličku na její odstavnou plochu.
2. Regulátor množství páry (4) nastavte do polohy O.
3. Elektrické připojení:
Přesvědčte se, že typová hodnota napětí přístroje (viz typový štítek) souhlasí
se síťovým napětím.
4. Před připojením, resp. odpojením od elektrické sítě nastavte regulátor teploty
vždy do polohy “0”.
5. Roztřiďte prádlo podle teploty žehlení. Začínejte žehlit vždy na nejnižší teplotu.
Teplotu nastavte pomocí regulátoru teploty (1) takto:
• syntetická vlákna, hedvábí nízká teplota
• • vlna střední teplota
• • • bavlna, len vysoká teplota
MAX nejvyšší teplota
6. Přístroj zapněte jenom do zásuvky o 230 V / 50 Hz, s ochranním kontaktem,
instalované podle předpisů.
7. Rozsvítí se kontrolní svítilna (2). Jakmile tato kontrolní svítilna zhasne, znamená to, že bylo dosaženo provozní teploty. Nyní můžete začít žehlit.
8. Po skončení používání přístroje vždy vytáhněte zástrčku ze zásuvky.
Napařování (
Pro tento proces je vždy potřebná vysoká teplota (bavlna, plátno).
Množství páry nastavte pomocí regulátoru množství páry (4).
)
44
6....-05-DB 2971 44 23.12.2004, 10:56:07 Uhr
Page 45

O žádná pára
malé množství páry
velké množství páry
Pozor! Pára je horká. Nebezpečí opaření!
Při žehlení s nízkými teplotami dbejte na to, že je nutno snížit množství páry nebo
žehlete bez páry. Při příliš nízké teplotě je běžné, že ze žehlící plochy vystupuje
voda.
Plnění vodní nádržky
• Před plněním nádržky vždy vatáhněte zástrčku ze zásuvky.
• Regulátor množství páry (4) nastavte do polohy “O” (žádná pára). Otevřete
víko plnícího otvoru (6) a opatrně nalijte vodu. Nádržka na vody plňte jen po
značku MAX.
Funkce Spray (
K navlhčení žehleného místa stisknéte tlačítko Spray (5).
Samočistící funkce (
1. Naplňte nádržku na vodu do poloviny vodou.
2. Zahřejte žehličku na maximální teplotu. Po zhasnutí kontrolní žárovky odpojte
přístroj od el. sítě.
3. Nyní podržte přístroj ve vodorovné poloze nad dřezem. Regulátor množství
páry podržte v poloze “Samočistící funkce ”. Nyní pohupujte přístrojem sem a
tam, až se nádržka vyprázdní. Poté regulátor opět nastavte do polohy „O“.
4. Nyní postavte žehličku opět na podstavec a znovu jej zahřejte. Pak přežehlete
čistý kus bavlněné látky, aby se vyčistila žehlící plocha.
)
)
Čištění a přechovávání
• Vždy před zahájením čištění vytáhněte zástrčku ze zásuvky!
• Těleso žehličky čistěte vlhkým hadříkem.
• Žehlící plochu čistěte jen lehce navlhčeným hadříkem.
• Po použití vždy nastavte regulátor množství páry do polohy „O“ a vyprázdněte
nádržku na vodu, abyste tak předešli nechtěnému vylití obsahu nádržky.
CZ
Tento přístroj byl testován podle všech příslušných, v současné době platných směrnic CE, jako je např. elektromagnetická kompatibilita a direktiva o
nízkonapěťové bezpečnosti, a byl zkonstruován podle nejnovějších bezpečnostnětechnických předpisů.
Vyhrazujeme si technické změny!
45
6....-05-DB 2971 45 23.12.2004, 10:56:08 Uhr
Page 46

CZ
Na námi prodaný přístroj poskytujeme záruku v trvání 24 měsíců od data prodeje
(pokladní doklad).
Během záruční lhůty odstraníme bezplatně všechny vady přístroje nebo
příslušenství*), které vzniknou v důsledku vad materiálu nebo výrobních vad, a to
opravou nebo, podle našeho uvážení, formou výměny. Záruční plnění nemají za
následek ani prodloužení záruční doby ani tím nevzniká nárok na novou záruku!
Jako záruční doklad slouží doklad o koupi. Bez tohoto dokladu nelze uskutečnit
bezplatnou výměnu nebo bezplatnou opravu.
V případě uplatnění záruky předejte, prosím, kompletní přístroj v originálním obalu
spolu s pokladním dokladem Vašemu obchodníkovi.
*) Poškození příslušenství není automaticky důvodem pro bezplatnou výměnu
kompletního přístroje. V takovém případě se obraťte na naši Hotline! Prasklé
skleněné resp. plastové díly zásadně podléhají povinnosti úhrady!
Jak na vady na spotřebním příslušenství, resp. dílech podléhajících rychlému
opotřebení (např. uhlíky motoru, hnětací háky, hnací řemeny, náhradní dálkové
ovládání, náhradní zubní kartáčky, pilové listy atd.), tak i na čištění, údržbu nebo
výměnu dílů podléhajících rychlému opotřebení se záruka nevztahuje a je proto
nutno je uhradit!
Záruka zaniká v případě, že dojde k zásahu neautorizovanou osobou.
Záruka
Po uplynutí záruky
Po uplynutí záruční doby je možno za úplatu provést opravy v příslušném odborném obchodě nebo opravně.
46
6....-05-DB 2971 46 23.12.2004, 10:56:09 Uhr
Page 47

Általános biztonsági rendszabályok
• A készülék használatba vétele előtt gondosan olvassa végig a használati
utasítást, és őrizze meg a garancialevéllel, a pénztári nyugtával és lehetőleg a
csomagolókartonnal, ill. az abban lévő bélésanyaggal együtt!
• Kizárólag személyi célra használja a készüléket, és csupán arra, amire való!
A készülék nem ipari jellegű használatra készült. Ne használja a szabadban
(hacsak nem a szabadban való, meghatározott korlátok közötti használatra
van szánva)! Ne tegye ki erős hőhatásnak, közvetlen napsugárzásnak és
nedvességnek (semmi esetre se mártsa folyadékba), és óvja az éles szélektől!
Ne használja a készüléket vizes kézzel! Ha a készülék vizes vagy nedves lett,
azonnal húzza ki a konnektorból! Ne nyúljon bele a vízbe!
• Kapcsolja ki a készüléket, és amikor nem használja, tartozékokat helyez rá,
tisztítja, vagy ha zavart észlel, mindig húzza ki a csatlakozó dugaszt a konnektorból!
• Ne működtesse a készüléket felügyelet nélkül! Ha elhagyja a munkahelyet,
mindig kapcsolja ki a készüléket, ill. húzza ki a dugaszt a konnektorból (a
dugasznál, és nem a kábelnél fogva)!
• Annak érdekében, hogy a gyermekeket megvédje az elektromos készülékek
okozta veszélyektől, soha ne hagyja a kábeleket szabadon lógva, és olyan
helyre tegye a készüléket, ahol gyermekek nem férhetnek hozzá!
• Rendszeresen ellenőrizze, hogy nincs-e a készüléken vagy a kábelen sérülés!
Sérült készüléket soha ne helyezzen üzembe!
• A kockázatok elkerülése végett ne maga javítsa a készüléket, hanem keressen fel egy erre kiképzett szakembert! Ha hibás a csatlakozó kábel, csak a
gyártótól, a vevőszolgálatunktól vagy hasonló képzettségű személytől kérjen
helyette azonos értékű másik kábelt!
• Csak eredeti tartozékokat használjon!
• Tartsa be az itt következő „Speciális biztonsági rendszabályokat“ ...
A biztonsági hasznalátra vonatkozó különkeges írányelvei
• Figyelem ovatosan! A vasaló (10) göző felülete gyorsan felmelegszik és
sokaig kihül. Nem szabad hozzányulni!
• Használaton kívül állítsa az automata vasalót függőleges helyzetben a lábra (9)!
• A viztartó (8) betöltése előtt tessék kihuzni dugót a konnektorból. Ne
tessék betölteni a víztartót magassabbig, mint a MAX kijelölése mutat
(kb. 130 ml).
H
Használati tartozékok
1 Fokozat nélküli hőfokszabályozó 6 Vízfeltöltő nyílás
2 Kontroll lámpa 7 Gőzőlő fúvóka
3 Rugalmas kábelbevezetés 8 Átlátszó víztartály
4 Gőzmennyiségszabályozó 9 Talp
5 Spray gomb 10 Nemesacél vasalótalp
47
6....-05-DB 2971 47 23.12.2004, 10:56:09 Uhr
Page 48

H
• Tessék tisztítani a nedves ronggyal a vasaló ezt a részét, amellyel vasalunk.
• A töltőnyíláson (6) öntsön vizet a víztartályba! Használjon hozzá töltőtartályt.
Lehetőleg desztillált vizet vagy legfeljebb 2-es keménységi fokozatú tiszta
vezetékes vizet használjon! Ha a vezetékes víz ennél keményebb, desztillált
vizet kell használni.
• Nem szabad a víztartályba keverőcsaptelepből, fehérnemű-szárítóból való
vizet és olyan vizet tölteni, amely adalékanyagokat (pl. keményítő, parfüm,
fehérítő vagy egyéb vegyszerek) tartalmaz. Ez károsíthatja a készüléket, mivel
lerakodások képződhetnek miatta a gőzkamrában. Ezek a lerakodások aztán,
ha kipotyognak a gőzkieresztő nyílásokon, beszennyezhetik a vasalandó
ruhát.
A berendezés megindítása
A berendezés használata
Kioktatás: ezzel a vasalóval tessék csak a ruhát vasalni!
• Mielőtt használatba venné a készüléket, távolítsa el a nemesacél vasalótalpról
az esetleg rajta maradt védőfóliát és címkét!
• Tekerje le a kábelt teljes hosszúságában!
Vasalás gőzölés nélkül (a gőzmennyiség-szabályzó O-án áll)
1. Tegye a készüléket az állványára.
2. Állítsa a gőzmennyiség-szabályozót (4) O-ra!
3. Elektromos csatlakozás:
Bizonyosodjék meg róla, hogy egyezik-e a készülék feszültsége a hálózati
feszültséggel (lásd: típuscímke).
4. Mielőtt a készülék dugaszát a konnektorba dugná, ill. onnan kihúzná, állítsa a
hőfokszabályozót mindig “0”-ra!
5. Válogassa szét a ruhadarabokat vasalási hőmérséklet szerint. Kezdje a legalacsonyabb hőmérséklettel. A kívánt hőfokot a hőfokszabályozón (1) állíthatja
be:
• műszál, selyem alacsony hőmérséklet
• • gyapjú közepes hőmérséklet
• • • pamut, vászon magas hőmérséklet
MAX legmagasabb hőmérséklet
6. Dugja a hálózati csatlakozó dugaszt előírásszerűen szerelt, földelt,
230 V, 50 Hz-es konnektorba!
7. Az ellenőrző lámpa (2) kigyullad. Mihelyt kialszik, a készülék elérte az üzemi
hőmérsékletet. Most lehet elkezdeni a vasalást.
8. Használat végeztével mindig húzza ki a készüléket a konnektorból.
48
6....-05-DB 2971 48 23.12.2004, 10:56:10 Uhr
Page 49

Vasalás a göz funkció hasznalátával (
Ez igényli a magas hőfokat (pamut,len).
A gőz mennyiségét szabályozzuk a göz szabályozó (4) segítségével.
O nincs gőz
kis mennyiségű gőz
nagy mennyiségű
Vigyázat: A gőz forró. Égési sérülést szenvedhet!
Ha alacsonyabb hőfokon vasal, ügyeljen arra, hogy csökkentse a gőzmennyiséget,
vagy vasaljon gőz nélkül! Túlságosan alacsony hőmérséklet esetén a víz rendszerint kilép a vasalótalpból.
A víztartály utántöltése
• Mielőtt vizet töltene a vasalóba, mindig húzza ki a dugaszt a konnektorból!
• Állítsa a gőzmennyiség-szabályozót (4) “O” helyzetbe (nincs gőz)! Vegye le
a fedelet a töltőnyílásról (6), és óvatosan öntsön bele vizet! Csak a MAX jelig
töltse fel a víztartályt!
Spray funkció (
A vasalt hely megnedvesítése céljából kell bekapcsolni a „spray“ funkciót (5).
Öntisztítás (
1. Töltse meg a víztartályt félig vízzel.
2. Fűtse fel a készüléket maximális hőmérsékletre. Ha kialudt az ellenőrző lámpa, húzza ki a készüléket a hálózatból.
3. Tartsa a készüléket vízszintesen mosogatótál fölé! Állítsa a gőzmennyiség-szabályozót “Öntisztítás ” állásba! Lóbálja a készüléket, míg csak ki nem ürül a
tartály. Utána állítsa a szabályozót ismét O állásba! .
4. Tegye a készüléket újra a tartójára, és ismét hevítse fel. A talp tisztítása végett
vasaljon végig egy tiszta pamutkendőt.
)
)
)
Tisztítás és tárolás
• A tisztítás előtt mindig kell kihuzni dugót a konnektorból!
• A száráz ronttyal lehet tisztítani a tartót.
• Az alátétet kell tisztítani nedves ronttyal.
• Használat után állítsa a gőzmennyiség-szabályozót mindig „O“ állásba, és
ürítse ki a víztartályt, nehogy kifusson a tartalma!
H
49
6....-05-DB 2971 49 23.12.2004, 10:56:10 Uhr
Page 50

Ezt a készüléket az Európa Tanács minden vonatkozó aktuális irányelve szerint
H
(pl. elektromágnesesség-elviselő képesség vagy kisfeszültség-elviselő képesség)
ellenőriztük, és a legújabb biztonságtechnikai előírások szerint készült.
Megjegyezzük az esetleges müszaki változásokat!
Garancia
Az általunk forgalmazott készülékre a vétel időpontjától (pénztári nyugta) számított
24 havi garanciát vállalunk.
A garanciális időn belül saját mérlegelésünk szerint javítással vagy cserével
díjtalanul megszüntetjük a készülék vagy a tartozék *) olyan hiányosságait, amelyek anyaghibára vagy gyártási hibára vezethetők vissza. A garanciális szolgáltatások sem a garanciális idő meghosszabbítását nem eredményezik, sem nem
alapoznak meg újabb garanciára való igényt!
A garancia igazolására a pénztári nyugta szolgál. E nélkül az igazolás nélkül sem
díjmentes csere, sem díjtalan javítás nem végezhető.
Garanciális esetben szíveskedjék az alapkészüléket eredeti csomagolásában a
pénztári nyugtával együtt átadni a kereskedőjének!
*) A tartozékok a jogszabályban előírt szavatossági kötelezettség (6 hónap)
hatálya alá tartoznak, és nem vezetnek az egész készülék díjtalan cseréjére. Ilyen
esetben ne a készüléket küldje be, ill. rendelje meg, hanem vevőszolgálatunkkal
egyeztetve csak a hibás tartozékot! Az üvegtörés okozta hibák mindig térítéskötelesek!
Sem az elhasználódó tartozékokban, ill. kopó alkatrészekben (pl. szénkefe,
dagasztóhorog, hajtószíj, póttávvezérlő, pótfogkefe, fűrészlap stb.) bekövetkező
hibák, sem a tisztítás, karbantartás vagy a kopó alkatrészek cseréje nem esik a
garancia hatálya alá, következésképp térítésköteles.
Illetéktelen beavatkozás a garancia megszűnését eredményezi.
A garanciális idő után
A garanciális idő eltelte után a megfelelő szakkereskedésben vagy javítószolgálatnál végeztethet térítésköteles javításokat.
50
6....-05-DB 2971 50 23.12.2004, 10:56:11 Uhr
Page 51

Общие указания по технике безопасности
• Перед началом эксплуатации прибора внимательно прочитайте
прилагаемую инструкцию по эксплуатации и сохраните ее в надежном
месте, вместе с гарантийным талоном, кассовым чеком и, по
возможности, картонной коробкой с упаковочным материалом.
• Пользуйтесь прибором только частным образом и по назначению. Прибор
не предназначен для коммерческого использования. Не пользуйтесь
прибором под открытым небом (исключая приборы, эксплуатация
которых под открытым небом допустима). Предохраняйте прибор
от жары, прямых солнечных лучей, влажности (ни в коем случае не
погружайте его в воду) и ударов об острые углы. Не прикасайтесь к
прибору влажными руками. Если прибор увлажнился или намок, тут же
выньте вилку из розетки. Не прикасайтесь к мокрым местам.
• После эксплуатации, монтаже принадлежностей, чистке или поломке
прибора всегда вынимайте вилку из розетки (тяните за вилку, а не за
кабель).
• Не оставляйте включенные электроприборы без присмотра. Если
возникнет необходимость отлучиться, то выключите электроприбор или
выньте вилку из розетки (тяните за вилку, а не за кабель).
• Для защиты детей от поражений электротоком, следите за тем, чтобы
кабель не висел где попало и дети не имели доступа к прибору.
• Регулярно осматривайте прибор и кабель на предмет возможных
повреждений. Ни в коем случае не включайте прибор, имеющий
повреждения.
• Ни в коем случае не ремонтируйте прибор самостоятельно, а
обращайтесь в таком случае за помощью к специалисту, имеющему
соответствующий допуск. Из соображений безопасности, замена сетевого
шнура на равнозначный допускается только через завод-изготовитель,
нашу сервисную мастерскую или соответствующего квалифицированного
специалиста.
• Используйте только оригинальные запчасти.
• Пожалуйста, соблюдайте нижеследующие „Специальные указания по
технике безопасности ...“.
Специальные меры предосторожности
• Внимание! Подошва утюга быстро (10) нагревается и долго
охлаждается. Пожалуйста не прикасайтесь к ней.
• Если утюг не используется, ставьте его вертикально на опору (9).
• Перед наполнением водяного бачка (8) выключайте утюг из сети. Не
наполняйте бачок выше метки MAX (прим. 130 мл).
RUS
51
6....-05-DB 2971 51 23.12.2004, 10:56:12 Uhr
Page 52

RUS
1 Безступенчатый 6 Отверстие для наполнения
регулятор температуры водяного бачка
2 Kонтрольная лампочка 7 Сопло распылителя
3 Гибкий подвод сетевого шнура 8 Прозрачный водяной бачок
4 Подач пара 9 Подставка под утюг
5 Kнопка- Аэрозоль 10 Подошва утюга из
Нумерация элементов
высококачественной стали
Ключение утюга
• Протрите подошву утюга слегка влажной тряпкой.
• Наполните водяной бачок водой через наполнительное отверстие (6).
Воспользуйтесь меркой. Используйте по возможности дистиллированную
воду или чистую водопроводную воду до максимальной жесткости 2.
Если жесткость воды выше, используйте только дистиллированную воду.
• Запрещается наливать в водяной бачок воду из отопительной
системы, сушильных автоматов или воду с добавками (как крахмал,
ароматизирующие средства, размягчитель или другие химикаты).
Изделие может испортиться от этого, так как в паровой камере могут
образоваться отложения. Кроме этого эти отложения могут выйти через
паровые отверстия и загрязнить белье.
Пользование прибором
Примечание! Гладьте утюгом только одежду.
• Перед включением удалите с подошвы утюга защитную фольгу и
наклейки, если таковые имеются.
• Полностью размотайте сетевой шнур.
Глажение без пара (регулятор пара в положении O)
1. Установите утюг в вертикальное положение.
2. Установите регулятор подачи пара (4) на ”O“.
3. Электросеть:
Убедитесь в том, что напряжение сети прибора ( смотри типовой ярлык)
соответствует напряжению вашей сети.
4. Каждый раз, перед включением или выключением утюга из сети,
переводите регулятор температуры в положение «0».
5. Рассортируйте белье по температуре глажения. Начинайте с самой
низкой температуры. Установите ее на утюге при помощи регулятора
температуры (1):
52
6....-05-DB 2971 52 23.12.2004, 10:56:12 Uhr
Page 53

• синтетика, шелк низкая температура
• • шерсть средняя температура
• • • х/б, лен высокая температура
MAX наивысшая температура
6. Включайте прибор только в розетку с защитными контактами
и напряжением 230 В, 50 Гц, установленную в соответствии с
предписаниями.
7. Контрольная лампочка (2) светится. Как только она потухнет, рабочая
температура достигнута. Теперь вы можете начать гладит белье.
8. После работы не забудьте вынуть вилку из розетки.
RUS
Глажение с паром (
ля этого необходима высокая температура (хлопок, лён).
Oличество пара регулируется при помощи регулятора подачи пара (4).
O пара нет
Внимание! Горячий пар! Опасность получения ожогов!
Если глажение производится на низких темературах, то необходимо
уменьшить подачу пара или гладить вообще без него. Обычно, если утюг
недостаточно горячий, возможно вытекание воды из подошвы.
Наполнение водяного бачка
• Перед наполнением водяного бачка выньте вилку из розетки.
• Установите регулятор подачи пара (4) в положение «0» (без пара).
Откройте наполнительное отверстие (6) в крышке и осторожно залейте
воду. Не наполняйте водяной бачок выше метки «MAX».
Режим - Аэрозоль (
ля увлажнения отдельных частей одежды нажимайте кнопку (5) Аэрозоль.
Режим самоочистки (
1. Наполните водяной бачок на половину водой.
2. Разогрейте прибор до максимальной температуры. После того, как
контрольная лампочка погаснет, отключите его, пожалуйста, от сети.
3. Возьмите утюг в руки и держите его горизонтально над умывальником.
Переведите регулятор подачи пара в положение ”Режим самоочистки“ и
держите его. Болтайте утюг туда-сюда пока бачок не опорожнится.
В заключении установите регулятор в положение „O“.
)
малая подача пара
сильная подача пара
)
)
53
6....-05-DB 2971 53 23.12.2004, 10:56:13 Uhr
Page 54

4. Установите прибор обратно на подставку и разогрейте его ещё раз. Для
RUS
очистки подошвы утюга прогладьте какое-нибудь хлопчатобумажное
полотенце.
Уход за прибором и хранение
• Перед чисткой всегда вынимайте вилку из розетки!
• Протирайте корпус слегка влажной тряпкой.
• Подошву протирайте также слегка влажной тряпкой.
• По окончании работы всегда возвращайте регулятор подачи пара в
положение ”O“ и сливайте остатки воды из бачка, чтобы предотвратить ее
вытекание.
Это изделение прошло все необходимые и актуальные проверки,
предписанные директивой СЕ, к прим. на электромагнитную совместимость
и соответствие требованиям к низковольтной технике, оно было также
сконструировано и построено с учетом последних требований по технике
безопасности.
Мы оставляем за собой право на технические изменения!
Гарантийное обязательство
Гарантийный срок на территории Российской Федерации устанавливается
полномочными представителями.
Кассовый чек является гарантийным талоном. Без него невозможен
бесплатный ремонт или замена изделия.
В случае возникновжния притензий по гарантии, предъявите изделие в
полнойкомплектации, с оригинальной упаковкой и кассовым чеком торговой
точке, продавшей это изделие.
*) Дефекты принадлежностей не служат причиной для автоматической
замены всего изделия. В этом случае позвоните нам, пожалуйста, по
горячей линии! Разбитые стеклянные и поломаные пластмассовые детали
возмещаются только за дополнительную оплату!
Дефекты изнашиваемых принадлежностей или трущихся деталей (например
контактные щетки моторов, смесительные крюки, приводные ремни,
запасные пульты управления, запасные зубные щетки, пильные полотна
и т.д.), а также чистка, техобслуживание или замена трущихся деталей не
попадают под гарантию, и поэтому проводятся за отдельную оплату!
Гарантия теряется при вскрытии изделия посторонними лицами.
54
6....-05-DB 2971 54 23.12.2004, 10:56:14 Uhr
Page 55

После гарантии
После окончания срока гарантии, ремонт изделий производится за оплату,
соответствующими мастерскими или пунктами сервисного обслуживания.
RUS
55
6....-05-DB 2971 55 23.12.2004, 10:56:15 Uhr
Page 56

6....-05-DB 2971 56 23.12.2004, 10:56:15 Uhr
Page 57

6....-05-DB 2971 57 23.12.2004, 10:56:15 Uhr
Page 58

Technische Daten
Modell: DB 2971
Spannungsversorgung: 230 V, 50 Hz
Leistungsaufnahme: 1600 W
Schutzklasse: Ι
Dieses Gerät wurde nach allen zutreffenden, aktuellen CE-Richtlinien geprüft, wie
z.B. elektromagnetische Verträglichkeit
und Niederspannungsdirektive und wurde
nach den neuesten sicherheitstechnischen Vorschriften gebaut.
Technische Änderungen vorbehalten!
Bitte führen Sie das ausgediente Gerät
einer umweltgerechten Entsorgung zu.
D-47906 Kempen/Germany · Industriering Ost 40
Telefon 02152/20 06-888
Internet: http://www.clatronic.de · email: info@clatronic.de
6....-05-DB 2971 58 23.12.2004, 10:56:15 Uhr
Stünings Medien, Krefeld • 12/04
 Loading...