

Page 1
BS 1235
Bedienungsanleitung/Garantie
Gebruiksaanwijzing/Garantie • Mode d’emploi/Garantie
Instrucciones de servicio/Garantía • Manual de instruções/Garantia
Istruzioni per l’uso/Garanzia • Bruksanvisning/garanti
Instruction Manual/Guarantee • Instrukcja obsługi/Gwarancja
Návod k použití/Záruka • A használati utasítás/garancia
Руководство по эксплуатации/Гарантия
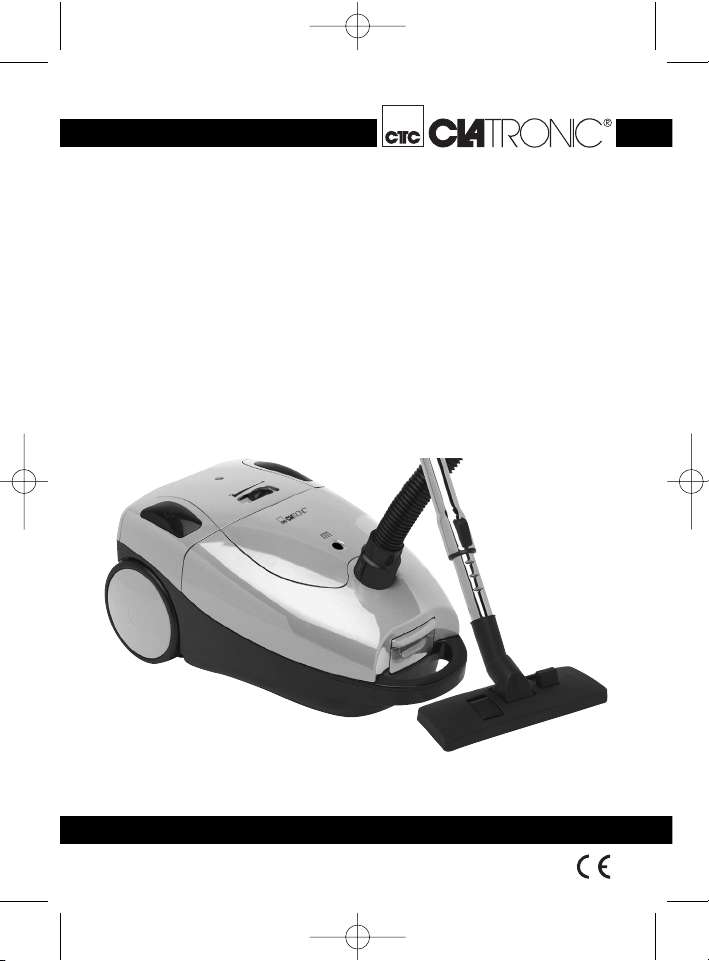
Bodenstaubsauger
Stofzuiger • Aspirateur-traîneau
Aspiradora • Aspirador
Aspirapolvere a carrello • Gulvstøvsuger
Floor-type vacuum cleaner • Odkurzacz
Porszívó • Vysavač koberců
Пылесос
5....-05-BS 1235 17.10.2003 11:41 Uhr Seite 1
Page 2
Inhalt
Inhoud • Sommaire • Indice • Índice • Indice • Innhold
Contents • Spis treści • Obsah • Tartalom • Содержание
D
Übersicht Bedienelemente . . . . . . . . . . . . . . . . . . . . . . . . . . . .Seite 3
Bedienungsanleitung . . . . . . . . . . . . . . . . . . . . . . . . . . . . . . . .Seite 4
Garantie . . . . . . . . . . . . . . . . . . . . . . . . . . . . . . . . . . . . . . . . . .Seite 7
NL
Overzicht bedieningselementen . . . . . . . . . . . . . . . . . . . . . . . .Pagina 3
Gebruiksaanwijzing . . . . . . . . . . . . . . . . . . . . . . . . . . . . . . . . .Pagina 9
Garantie . . . . . . . . . . . . . . . . . . . . . . . . . . . . . . . . . . . . . . . . . .Pagina 12
F
Aperçu des éléments de commande . . . . . . . . . . . . . . . . . . . .Page 3
Mode d’emploi . . . . . . . . . . . . . . . . . . . . . . . . . . . . . . . . . . . . .Page 14
Garantie . . . . . . . . . . . . . . . . . . . . . . . . . . . . . . . . . . . . . . . . . .Page 18
E
Vista de conjunto Elementos de mando . . . . . . . . . . . . . . . . .Página 3
Instrucciones de servicio . . . . . . . . . . . . . . . . . . . . . . . . . . . . .Página 19
Garantia . . . . . . . . . . . . . . . . . . . . . . . . . . . . . . . . . . . . . . . . . .Página 23
P
Vista geral dos elemntos de comando . . . . . . . . . . . . . . . . . .Página 3
Manual de instruções . . . . . . . . . . . . . . . . . . . . . . . . . . . . . . . .Página 24
Garantía . . . . . . . . . . . . . . . . . . . . . . . . . . . . . . . . . . . . . . . . . .Página 28
I Descrizione dei singoli pezzi . . . . . . . . . . . . . . . . . . . . . . . . .Pagina 3
Istruzioni per l’uso . . . . . . . . . . . . . . . . . . . . . . . . . . . . . . . . . .Pagina 29
Garanzia . . . . . . . . . . . . . . . . . . . . . . . . . . . . . . . . . . . . . .Pagina 33
N
Oversikt over betjeningselementer . . . . . . . . . . . . . . . . . . . . . .Side 3
Bruksanvisning . . . . . . . . . . . . . . . . . . . . . . . . . . . . . . . . . . . . .Side 34
Garanti . . . . . . . . . . . . . . . . . . . . . . . . . . . . . . . . . . . . . . . . . . .Side 37
GB
Control element overview . . . . . . . . . . . . . . . . . . . . . . . . . . . . .Page 3
Instruction Manual . . . . . . . . . . . . . . . . . . . . . . . . . . . . . . . . . .Page 39
Guarantee . . . . . . . . . . . . . . . . . . . . . . . . . . . . . . . . . . . . . . . .Page 42
PL
Przegląd elemetów obsługi . . . . . . . . . . . . . . . . . . . . . . . . . .Strona 3
Instrukcja obsługi . . . . . . . . . . . . . . . . . . . . . . . . . . . . . . . . . .Strona 44
Gwarancja . . . . . . . . . . . . . . . . . . . . . . . . . . . . . . . . . . . . .Strona 48
CZ
Přehled obsluhovací prvky . . . . . . . . . . . . . . . . . . . . . . . . . . .Strana 3
Návod k použití . . . . . . . . . . . . . . . . . . . . . . . . . . . . . . . . . . . .Strana 50
Záruka . . . . . . . . . . . . . . . . . . . . . . . . . . . . . . . . . . . . . . .Strana 53
H
A hasznalt elemek megtekintése . . . . . . . . . . . . . . . . . . . . . .Oldal 3
A hasznalati utasítás . . . . . . . . . . . . . . . . . . . . . . . . . . . . . . . .Oldal 55
Garancia . . . . . . . . . . . . . . . . . . . . . . . . . . . . . . . . . . . . . . . . . .Oldal 58
RUS
Обзор управляющих элементов . . . . . . . . . . . . . . . . . . . . .стр. 3
Руководство по эксплуатации . . . . . . . . . . . . . . . . . . . . . . .стр. 60
Гарантия . . . . . . . . . . . . . . . . . . . . . . . . . . . . . . . . . . . . . . . . . . .стр. 64
5....-05-BS 1235 17.10.2003 11:41 Uhr Seite 2
Page 3
3
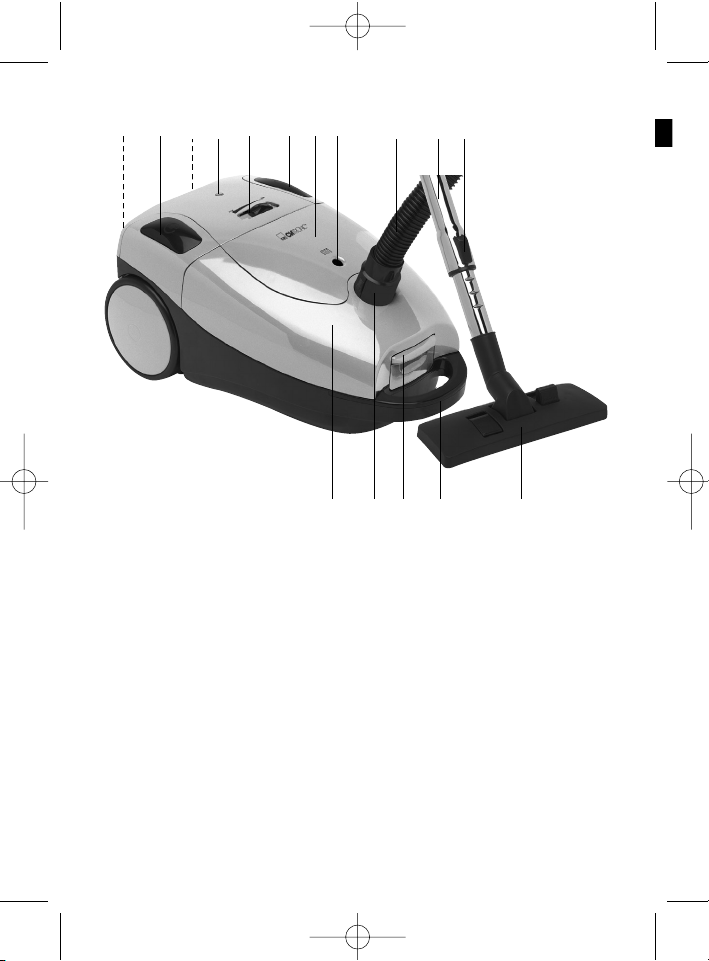
Übersicht der Bedienelemente
1 Kabel 10 Schlauchanschluss
2 Ein/Aus-Schalter 11 Saugschlauch
3 Saugleistungsregler 12 Parkhilfe
4 Tragegriff 13 Teleskop-Saugrohr
5 Taste zur Kabelaufwicklung 14 Taste Teleskop-Saugrohr
6 Zubehörfach 15 Bodendüse
7 Anzeige für Staubbeutelwechsel 16 Netzeingangsleuchte
8 Staubbeutelfach
9 Taste zum Öffnen des Zubehör:
Staubbeutelfachs Fugendüse, Polsterdüse
1
5 12 3 2 6 7 11 13 14
8
10
9 4
15
16
5....-05-BS 1235 17.10.2003 11:41 Uhr Seite 3
Page 4
Allgemeine Sicherheitshinweise
• Lesen Sie vor Inbetriebnahme dieses Gerätes die Bedienungsanleitung sehr
sorgfältig durch und bewahren Sie diese inkl. Garantieschein, Kassenbon und
nach Möglichkeit den Karton mit Innenverpackung gut auf.
• Benutzen Sie das Gerät ausschließlich für den privaten und den dafür
vorgesehenen Zweck. Dieses Gerät ist nicht für den gewerblichen Gebrauch
bestimmt. Benutzen Sie es nicht im Freien (außer es ist für den bedingten
Einsatz im Freien vorgesehen). Halten Sie es vor Hitze, direkter
Sonneneinstrahlung, Feuchtigkeit (auf keinen Fall in Flüssigkeiten tauchen) und
scharfen Kanten fern. Benutzen Sie das Gerät nicht mit feuchten Händen. Bei
feucht oder nass gewordenem Gerät sofort den Netzstecker ziehen.Nicht ins
Wasser greifen.
• Schalten Sie das Gerät aus und ziehen Sie immer den Stecker aus der
Steckdose (ziehen Sie am Stecker, nicht am Kabel) wenn Sie das Gerät nicht
benutzen, Zubehörteile anbringen, zur Reinigung oder bei Störung.
• Betreiben Sie das Gerät nicht unbeaufsichtigt. Sollten Sie den Arbeitsplatz verlassen, schalten Sie das Gerät bitte immer aus, bzw. ziehen Sie den Stecker
aus der Steckdose (ziehen Sie am Stecker, nicht am Kabel).
• Um Kinder vor Gefahren elektrischer Geräte zu schützen, sorgen Sie bitte
dafür, dass das Kabel nicht herunter hängt und Kinder keinen Zugriff auf das
Gerät haben.
• Prüfen Sie Gerät und Kabel regelmäßig auf Schäden. Ein beschädigtes Gerät
bitte nicht in Betrieb nehmen.
• Reparieren Sie das Gerät nicht selbst, sondern suchen Sie bitte einen autorisierten Fachmann auf. Um Gefährdungen zu vermeiden, ein defektes Netzkabel
bitte nur vom Hersteller, unserem Kundendienst oder einer ähnlich qualifizierten
Person durch ein gleichwertiges Kabel ersetzen lassen.
• Verwenden Sie nur Original-Zubehör.
• Beachten Sie bitte die nachfolgenden ”Speziellen Sicherheitshinweise...”.
Spezielle Sicherheitshinweise
• Saugen Sie keine Feuchtigkeit, bzw. Flüssigkeiten auf!
• Saugen Sie keine heiße Asche, spitze oder scharfe Gegenstände!
• Benutzen Sie das Gerät nicht in Feuchträumen!
• Saugen Sie niemals ohne Filter. Prüfen Sie stets den korrekten Sitz der Filter
nach dem Einsetzen!
• Halten Sie während des Betriebes Haare, Kleidung und Körperteile von der
Staubsaugerdüse fern!
• Halten Sie den Staubsauger von Wärmequellen wie Radiatoren, Öfen usw. fern!
Inbetriebnahme
1. Stecken Sie den Verbindungskopf des Saugschlauches (11) in den
Schlauchanschluss (10), bis er mechanisch einrastet.
2. Um den Schlauch wieder zu lösen, drücken Sie gleichzeitig beide Knöpfe, seit-
4
D
5....-05-BS 1235 17.10.2003 11:41 Uhr Seite 4
Page 5

lich am Saugschlauch.
3. Halten Sie die Knöpfe gedrückt und ziehen Sie dann den Schlauch heraus.
Benutzen des Gerätes
1. Montieren Sie die Bodendüse (15) bzw. das Zubehör.
2. Wickeln Sie die benötigte Kabellänge (1) ab.
3. Stecken Sie den Netzstecker in eine vorschriftsmäßig installierte
Schutzkontaktsteckdose 230 V, 50 Hz und schalten Sie das Gerät mit dem Ein-/
Ausschalter (2) ein.
4. Stellen Sie die Saugleistung mit dem Saugleistungsregler (3) ein.
5. Saugen Sie nun mit gleichmäßiger Geschwindigkeit. Andrücken ist nicht nötig.
6. Hinweis: Achten Sie auf die durch die Kabellänge begrenzte Reichweite!
Zubehörfach (6):
Das integrierte Zubehör (Fugen-, Polsterdüse) finden Sie unter dem Deckel des
Zubehörfachs.
Düsenaufsätze:
Fugendüse: Zum Saugen in Ecken und Schlitzen.
Polsterdüse: Zur Reinigung von Polstern, Vorhängen usw.
Bodendüse (15): Zur Reinigung von Teppichen oder glatten Flächen.
Glatte Böden: Drücken Sie den Hebel mit dem Bürsten-
symbol mit dem Fuß nieder. Die Bürsten
sind jetzt sichtbar.
Teppiche: Drücken Sie den gegenüber liegenden
Hebel nieder.
Lösen der Aufsätze:
Ziehen Sie diese unter leichtem Drehen auseinander.
Saugleistungsregler (3):
Niedrige Saugleistung: Für Gardinen, empfindliche Stoffe.
Mittlere Saugleistung: Für hochflorige Veloursteppiche und Textilböden.
Hohe Saugleistung: Für robuste Teppiche und Fußböden.
Teleskop-Saugrohr (13):
Durch das höhenverstellbare Saugrohr, wird eine individuelle Anpassung auf Ihre
Körpergröße ermöglicht. Entriegeln Sie die Kupplung, indem Sie die Taste (14)
nach unten drücken.Verschieben Sie das Teleskop-Saugrohr auf die gewünschte
Höhe. Zum Verriegeln ziehen Sie das Saugrohr bis es deutlich hörbar einrastet.
5
D
5....-05-BS 1235 17.10.2003 11:41 Uhr Seite 5
Page 6
Aufwickelvorrichtung für Netzkabel:
Bitte ziehen Sie das Netzkabel (1) max. bis zur gelben Markierung. Ziehen Sie das
Kabel auf keinen Fall bis zur roten Markierung, da die Kabelaufwicklung Schaden
nehmen kann. Solche Schäden fallen nicht in den Garantieanspruch.
Aufwickeln:
Drücken Sie die Taste (5) für Kabelaufwicklung und führen Sie das Kabel nach.
Halten Sie das Kabel fest, um ein herumschlagen zu vermeiden.
Luftschieber:
Öffnen Sie den Luftschieber am Schlauchgriff zur Luftregulierung oder, um an der
Düse haftende Teile zu lösen.
Anzeige Staubbeutelwechsel (7):
Halten Sie den Saugschlauch unbelastet in die Luft. Leuchtet die Anzeige für
Staubbeutelwechsel, ist der Beutel voll. Wechseln Sie ihn bitte aus.
Auswechseln des Staubbeutels:
Ziehen Sie den Netzstecker aus der Steckdose. Öffnen Sie mit der Taste (9) den
Deckel des Staubbeutelfachs (bis er einrastet).Entnehmen Sie den Beutelträger
und ziehen Sie den Staubbeutel aus dem Träger. Schieben Sie einen neuen Beutel
ein. Setzen Sie den Beutelträger wieder ein. Schließen Sie den Deckel, so dass er
einrastet.
Filter: Ihr Gerät verfügt über zwei Filter.
Motorschutzfilter (Einlassfilter)
Den Einlassfilter finden Sie, im Staubbeutelraum. Öffnen Sie mit der Taste (9) den
Deckel des Staubbeutelfachs.Der Filter sitzt senkrecht im hinteren Teil des
Staubgehäuses. Ziehen Sie den Filter nach oben heraus. Reinigen Sie den
Motorschutzfilter nach ca. jedem 10. Staubbeutelwechsel. Bei Bedarf können Sie
den Filter in warmem Wasser, ohne Zusätze reinigen. Setzen Sie diesen nur vollständig getrocknet wieder ein!
A
uslassfilter
Des Weiteren verfügt Ihr Gerät über einen Auslassfilter. Sie finden diesen Filter am
hinteren Teil Ihres Gerätes hinter einem Lüftungsgitter. Öffnen Sie das Lüftungsgitter durch Drücken des Knopfes oberhalb des Lüftungsgitters. Ziehen Sie dann
das Gitter nach vorne heraus. Entnehmen Sie den Filter und reinigen Sie diesen,
wie bereits beschrieben. Setzen Sie den Filter wieder ein und schließen Sie das
Lüftungsgitter in umgekehrter Reihenfolge.
Ersatz Staubbeutel sowie Motorschutz- und Auslassfilter erhalten Sie über unsere
Hotline.
6
D
5....-05-BS 1235 17.10.2003 11:41 Uhr Seite 6
Page 7

Alternativ zum Clatronic Produkt SSB 101 können Sie auch den Melitta
Staubbeutel Swirl Y93 oder Y95 verwenden.
Reinigung und Aufbewahrung
Reinigung:
• Ziehen Sie vor der Reinigung den Netzstecker aus der Steckdose!
• Reinigen Sie das Gehäuse mit einem trockenen Tuch.
Aufbewahrung:
• Lassen Sie das Gerät vollständig abkühlen.
• Rollen Sie das Kabel komplett ein.
• Den Haken am Saugrohr können Sie in die Parkhilfe (12) auf der Rückseite
oder auf der Unterseite des Gerätes einhängen.
Garantie
Wir übernehmen für das von uns vertriebene Gerät eine Garantie von 24 Monaten
ab Kaufdatum (Kassenbon).
Innerhalb der Garantiezeit beseitigen wir unentgeltlich die Mängel des Gerätes oder
des Zubehörs*), die auf Material- oder Herstellungsfehler beruhen, durch Reparatur
oder, nach unserem Ermessen, durch Umtausch. Garantieleistungen bewirken
weder eine Verlängerung der Garantiefrist, noch beginnt dadurch ein Anspruch auf
eine neue Garantie!
Als Garantienachweis gilt der Kaufbeleg. Ohne diesen Nachweis kann ein kostenloser Austausch oder eine kostenlose Reparatur nicht erfolgen.
Im Garantiefall geben Sie bitte komplette Gerät in der Originalverpackung zusammen mit dem Kassenbon an Ihren Händler.
*) Schäden an Zubehörteilen führen nicht automatisch zum kostenlosen Umtausch
des kompletten Gerätes. Wenden Sie sich in desem Fall bitte an unsere Hotline!
Glasbruchschäden bzw. Brüche von Kunststoffteilen sind grundsätzlich kostenpflichtig!
Sowohl Defekte an Verbrauchszubehör bzw.Verschleißteilen (z.B. Motorkohlen,
Knethaken, Antriebsriemen, Ersatzfernbedienung, Ersatzzahnbürsten, Sägeblättern
usw.), als auch Reinigung, Wartung oder der Austausch von Verschleißteilen, fallen
nicht unter die Garantie und sind deshalb kostenpflichtig!
Die Garantie erlischt bei Fremdeingriff.
Nach der Garantie
Nach Ablauf der Garantiezeit können Reparaturen kostenpflichtig vom entsprechenden Fachhandel oder Reparaturservice ausgeführt werden.
7
D
5....-05-BS 1235 17.10.2003 11:41 Uhr Seite 7
Page 8

8
D
Service für unsere
Haushaltsartikel
Verschleißteile für Haushaltsartikel
(soweit diese nicht vom Fachmann
ausgewechselt werden müssen),
Ersatzkannen, Staubsaugerfilterbeutel
usw.können Sie mit Angabe des
Gerätetyps unter folgender TelefonHotline bestellen:
0 21 52 / 2006 – 888
Service für unsere
Unterhaltungselektronik
Verschleißteile und Ersatzteile für
unsere Unterhaltungselektronik (soweit
diese nicht vom Fachmann ausgewechselt werden müssen) wie z. B.
Fernbedienungen, Bedienteilklappen,
Lautsprecherblenden usw. können Sie
mit Angabe des Gerätetyps unter folgender Telefon-Hotline bestellen:
0 21 52 / 2006 – 666
Für technische Fragen haben wir für Sie folgende e-mail-Adresse eingerichtet:
hotline@clatronic.de
Interessieren Sie sich für weitere Clatronic-Produkte?
Besuchen Sie doch einmal unsere Homepage unter
www.clatronic.de oder www.clatronic.com
5....-05-BS 1235 17.10.2003 11:41 Uhr Seite 8
Page 9

Algemene veiligheidsinstructies
• Lees vóór de ingebruikname van dit apparaat de handleiding uiterst zorgvuldig
door en bewaar deze goed, samen met het garantiebewijs, de kassabon en zo
mogelijk de doos met de binnenverpakking.
• Gebruik het apparaat uitsluitend privé en uitsluitend voor de voorgeschreven
toepassing. Dit apparaat is niet geschikt voor commercieel gebruik (tenzij het
bedoeld is voor beperkt gebruik in de buitenlucht). Bescherm het tegen hitte,
directe zonnestralen, vocht (i geen geval in vloeistoffen dompelen) en scherpe
kanten. Gebruik het apparaat niet met vochtige handen. Bij vochtig of nat geworden apparaat onmiddellijk de stroomtoevoer onderbreken. Niet in het water grijpen.
• Schakel het apparaat uit en onderbreek altijd de stroomtoevoer (trek aan de
steker, nooit aan de kabel) wanneer u het apparaat niet gebruikt, hulpstukken
aanbrengt, reinigt of wanneer storingen optreden.
• Laat het ingeschakelde apparaat niet zonder toezicht werken. Schakel het
apparaat altijd uit of trek de steker uit de contactdoos (trek aan de steker, niet
aan de kabel) voordat u de werkplek verlaat.
• Bescherm kinderen tegen gevaren en zorg ervoor dat kabels nooit los omlaag
hangen en dat het apparaat buiten het bereik van kinderen blijft.
• Controleer regelmatig of het apparaat beschadigingen vertoont. Een beschadigd apparaat mag niet in gebruik worden genomen.
• Repareer het apparaat nooit zelf, maar breng het naar een geautoriseerde vakman. Voorkom gevaren en laat een defecte kabel altijd alleen door de fabrikant,
onze technische dienst of een eender gekwalificeerde persoon vervangen door
een soortgelijke kabel.
• Gebruik alleen originele reserveonderdelen.
• Neem de onderstaande “Speciale veiligheidsinstructies“ in acht.
Speciale veiligheidsinstructies
• Zuig nooit vocht of vloeistoffen op.
• Zuig nooit hete as, spitse of scherpe voorwerpen op!
• Gebruik het apparaat niet in vochtige ruimten!
• Zuig nooit zonder filter. Controleer altijd of de filter en na het plaatsen correct
zit!.
• Houd tijdens het zuig in haar een, kleding en lichaamsdelen van de zuigmond
verwijderd!
• Houd de stofzuiger ver verwijderd van warmtebronnen zoals radiatoren, kachels
enz.!
Overzicht van de bedieningselementen
1 Kabel 4 Handvat
2 Aan-/uitschakelaar 5 Toets voor kabeloprolling
3 Zuigkrachtregelaar 6 Hulpstukkenvakje
9
NL
5....-05-BS 1235 17.10.2003 11:41 Uhr Seite 9
Page 10

7 Indicatie vulgraad van de stofzak 13 Telescoop-zuigstang
8 Stofvak 14 Toets telescoop-zuigstang
9 Toets voor het openen van het 15 Vloermondstuk
stofvak 16 Power-lampje
10 Slangaansluiting
11 Zuigslang Toebehoren:
12 Parkeerhulp Voegenmondstuk, Kussenmondstuk
Ingebruikname
1. Steek de verbindingskop van de zuigslang (11) in de slangaansluiting (10) totdat deze mechanisch inklikt.
2. Druk de twee knoppen aan opzij aan de zuigstang om de slang weer te verwijderen.
3. Houd de toetsen ingedrukt en trek de slang eruit.
Bediening van het apparaat
1. Monteer het vloermondstuk (15) of het hulpstuk.
2. Rol de benodigde kabellengte (1) af.
3. Steek de steker in een correct gemonteerde en geaarde contactdoos 230 V,
50 Hz en schakel het apparaat in met de AAN/UIT-schakelaar (2).
4. Stel de zuigkracht in met behulp van de zuigkrachtregelaar (3).
5. Zuig nu met gelijkmatige snelheid. U hoeft geen druk uit te oefenen.
6. Opmerking: let erop dat de kabel slechts een beperkte reikwijdte heeft!
Hulpstukkenvakje (6):
De geïntegreerde hulpstukken (kussenmondstuk, voegenmondstuk) vindt u door
aan het deksel van het hulpstukkenvakje te trekken.
Hulpmondstukken:
Voegenmondstuk: voor het zuigen in hoeken en gleuven.
Kussenmondstuk: voor het reinigen van kussens, gordijnen enz.
Vloermondstuk (15): voor het reinigen van tapijten of gladde oppervlakken.
Gladde vloeren: druk de hendel met het borstelsymbool
met de voet omlaag. De borstels zijn nu
zichtbaar.
Tapijten: druk op de tegenover liggende hendel.
Hulpstukken verwijderen:
Draaien deze enigszins en trek ze uit elkaar.
10
NL
5....-05-BS 1235 17.10.2003 11:41 Uhr Seite 10
Page 11
Zuigkrachtregelaar (3):
Geringe zuigkracht: voor gordijnen en gevoelige stoffen
Gemiddelde zuigkracht: voor hoogpolige tapijten en textiele vloerbedekkingen
Hoge zuigkracht: voor robuuste tapijten en men vloerbedekking in
Telescoop-zuigstang (13):
De in de hoogte instelbare zuigstang maakt een individuele aanpassing aan uw
lichaamslengte mogelijk. Ontgrendel de koppeling door de toets (14) naar beneden
te drukken. Stel de telescoop-zuigstang in op de gewenste hoogte. Voor de vergrendeling trekt u aan de zuigstang totdat deze duidelijk hoorbaar inklikt.
Oprolvoorziening voor netkabel:
Trek de netkabel (1) maximaal uit tot de gele markering. Trek de netkabel in geen
geval uit tot de rode markering, omdat daardoor de kabeloprolling beschadigd kan
worden. Dergelijke schade valt niet onder de garantieverlening.
Oprollen:
Druk op de toets (5) voor de kabeloprolling en voer de kabel met u mee. Houd de
kabel vast zodat hij niet rondslingert.
Luchtregelschuif:
Open de luchtregelschuif aan de slanggreep om de luchtaanzuiging te regelen of
aan het mondstuk hechtende delen te verwijderen.
Indicator voor het vervangen van de stofzak (7):
Houd de zuigslang onbelast in de lucht. Wanneer de indicatie voor de vervanging
van de stofzak brandt, is de stofzak vol en moet hij vervangen worden.
De stofzak vervangen:
Trek de netsteker uit de contactdoos. Open het deksel van het stofvak met de toets
(9) (totdat deze inklikt). Neem de stofzakhouder uit het vak en trek de stofzak uit de
houder. Plaats een nieuwe stofzak. Breng een nieuwe stofzak aan en plaats de
houder weer in het stofvak. Sluit het deksel zodanig dat het inklikt.
Filter: uw apparaat heeft twee filters.
Motorfilter (inlaatfilter)
De inlaatfilter bevindt zich in het stofvak. Open het deksel van het stofvak met de
toets (9). De filter zit verticaal in het achterste gedeelte van het stofvak.Trek de filter
naar boven uit het apparaat. Reinig de motorfilter steeds na ca. tien maal vervangen van de stofzak. Desgewenst kunt u de filter in warm water zonder toevoegingen reinigen. Plaats de filter pas nadat hij volledig gedroogd is!
11
NL
5....-05-BS 1235 17.10.2003 11:41 Uhr Seite 11
Page 12

Uitlaatfilter
Uw apparaat beschikt tevens over een uitlaatfilter. Deze filter bevindt zich aan het
achterste gedeelte van uw apparaat achter een luchtrooster. Open het ventilatierooster door de knop boven het ventilatierooster in te drukken.Trek daarna het filter
naar voor uit. Verwijder de filter en reinig deze op de reeds beschreven wijze. Plaats
de filter meer in het apparaat. Sluit het luchtrooster in de omgekeerde volgorde.
Reinigen en bewaren
Reinigen
• Trek vóór de reiniging eerst de netsteker uit de contactdoos!
• Reinig de buitenkant met een droge doek.
Bewaren
• Laat het apparaat volledig afkoelen.
• Rol de kabel volledig op.
• De haak aan de zuigstang kunt u in de parkeerhulp (12) aan de achterzijde of
aan de onderzijde van het apparaat hangen.
Dit apparaat is gekeurd conform de op dit moment van toepassing zijnde CErichtlijnen zoals bijvoorbeeld elektromagnetische compatibiliteit en laagspanningsvoorschriften en is geconstrueerd volgens de nieuwste veiligheidstechnische voorschriften.
Technische wijzigingen voorbehouden!
Garantie
Voor het door ons geleverde apparaat verlenen wij een garantie van 24 maanden
vanaf koopdatum (kassabon).
Eventuele gebreken aan het apparaat of aan het toebehoren*) die zijn ontstaan
door productie- of materiaalfouten verhelpen wij binnen deze periode kosteloos
door middel van reparatie of, naar ons oordeel, door vervanging. Eventuele garantiegevallen verlengen noch de geldigheidsduur van de garantie, noch begint daardoor een nieuwe garantieperiode!
Het koopbewijs geldt als garantiebewijs. Zonder dit bewijs kan geen kosteloze
reparatie of vervanging plaatsvinden.
Geef in garantiegevallen het complete apparaat in de originele verpakking samen
met de kassabon af bij uw handelaar.
12
NL
5....-05-BS 1235 17.10.2003 11:41 Uhr Seite 12
Page 13

*) Schade aan onderdelen leidt niet automatisch tot kosteloze vervanging van het
complete apparaat. Neem in dit geval contact op met onze hotline! De reparatie van
glasbreuk of breuk van kunststofonderdelen wordt altijd berekend!
Niet defecten aan de hulpstukken of aan de slijtende onderdelen (bijv. koolborstels,
deeghaken, drijfriemen, reserveafstandsbediening, reservetandenborstels, zaagbladen enz.), maar ook reiniging, onderhoud of de vervanging van slijtende delen
vallen niet onder de garantie en geschieden altijd tegen berekening!
Bij ingrepen door derden komt de garantieverlening te vervallen.
Na de garantieperiode
Na afloop van de garantieperiode kunnen reparaties tegen berekening worden uitgevoerd door de betreffende vakhandelaar of de technische dienst.
13
NL
5....-05-BS 1235 17.10.2003 11:41 Uhr Seite 13
Page 14

Conseils généraux de sécurité
• Lisez attentivement ce mode d’emploi avant de mettre l’appareil en marche
pour la première fois. Conservez le mode d’emploi ainsi que le bon de garantie,
votre ticket de caisse et si possible, le carton avec l’emballage se trouvant à
l’intérieur.
• N’utilisez cet appareil que pour un usage privé et pour les taches auxquelles il
est destiné. Cet appareil n’est pas prévu pour une utilisation professionnelle. Ne
l’utilisez pas en plein air (sauf s’il est indiqué que vous pouvez le faire).
Protégez-le de la chaleur, des rayons directs du soleil, de l’humidité (ne le plongez en aucun cas dans l’eau) et des objets tranchants. N’utilisez pas cet
appareil avec des mains humides. S’il arrive que de l’humidité ou de l’eau atteignent l’appareil, débranchez aussitôt le câble d’alimentation. Ne touchez pas
les parties mouillées.
• Arrêtez l’appareil et débranchez toujours le câble d’alimentation de la prise de
courant (tirez sur la fiche, pas sur le câble) si vous n’utilisez pas l’appareil, si
vous installez les accessoires, pour le nettoyage ou en cas de panne.
• Ne laissez jamais fonctionner l’appareil sans surveillance. Arrêtez toujours l’appareil ou débranchez le câble d’alimentation (en tirant sur la fiche et non pas
sur le câble) si vous devez vous absenter.
• Pour protéger les enfants des risques engendrés par les appareils électriques ,
veillez à ce que le câble ne pende pas de l’appareil et que l’appareil ne soit pas
à portée des enfants.
• Contrôlez régulièrement l’appareil et le câble. Ne mettez pas l’appareil en marche s’il est endommagé.
• Ne réparez pas l’appareil vous-même. Contactez plutôt un technicien qualifié.
Pour éviter toute mise en danger, ne faites remplacer le câble défectueux que
par un câble équivalent et que par le fabricant, notre service après-vente ou
toute personne de qualification similaire.
• N’utilisez que les accessoires d’origine.
• Respectez les „conseils de sécurité spécifiques à cet appareil“ ci-dessous ...
Conseils de sécurité spécifiques à cet appareil
• N’aspirez jamais d’emplacement humide ou de liquide !
• N’aspirez jamais de cendres chaudes, d’objets pointus ou tranchants !
• N’utilisez jamais cet appareil dans des endroits humides !
• N’aspirez jamais sans filtre. Vérifiez toujours que le filtre est correctement
installé !
• N’approchez jamais les embouts de l’appareil en utilisation de cheveux, vêtements et parties du corps !
• Maintenez l’aspirateur à l’écart de sources de chaleur comme radiateurs, fours,
etc. !
14
F
5....-05-BS 1235 17.10.2003 11:41 Uhr Seite 14
Page 15
Liste des différents éléments de commande
1 Câble 11 Tuyau d’aspiration
2 Bouton Marche / Arrêt 12 Position parking
3 Variateur de puissance d’aspiration 13 Tube d’aspirateur télescopique
4 Poignée 14 Bouton de tube d’aspirateur
5 Bouton de rangement du câble télescopique
6 Compartiment à accessoires 15 Embout pour les sols
7 Témoin de sac plein 16 Lampe entrée alimentation
8 Compartiment à sac à poussière
9 Bouton d’ouverture du Accessoire:
compartiment à poussière Embout suceur,
10 Raccordement du tuyau buse pour meubles rembourrés
Avant la première utilisation
1. Introduisez la tête de raccordement du flexible (11) dans le raccord de tube
(10), jusqu’au clic.
2. Pour libérer à nouveau le flexible, enfoncez simultanément les deux boutons
situés sur les côtés.
3. Maintenez les boutons enfoncés puis tirez sur le flexible.
Utilisation de l’appareil
1. Fixez la brosse pour les sols (15) ou tout autre accessoire.
2. Déroulez la longueur de câble (1) nécessaire.
3.
Branchez le câble dans une prise de courant en bon état de fonctionnement de
230 V, 50 Hz et mettez l’appareil en marche à l’aide du bouton Marche/Arrêt (2).
4. Réglez la puissance d’aspiration à l’aide du variateur de puissance (3).
5. Aspirez maintenant avec régularité. Il est inutile d’exercer une pression pendant
que vous aspirez.
6. Remarque : tenez compte du rayon d’action limité dû à la longueur de câble!
Compartiment à accessoires (6) :
Vous trouverez les accessoires intégrés (embout suceur, buse pour meubles
rembourrés) en ouvrant le couvercle du compartiment.
Embouts:
Embout suceur: pour aspirer dans les coins et les fentes
Buse pour meubles
rembourrés: pour le nettoyage des canapés, rideaux, etc.
Brosse pour les sols (15): pour le nettoyage des tapis et surfaces lisses.
Surfaces lisses: rabattez, à l’aide du pied, le levier
marqué avec une brosse. Les brosses sont maintenant visibles.
15
F
5....-05-BS 1235 17.10.2003 11:41 Uhr Seite 15
Page 16
Tapis: rabattez le levier situé du côté
opposé.
Pour libérer les accessoires:
Dévissez-les doucement les uns des autres.
Variateur de puissance d’aspiration (3):
Faible puissance: pour rideaux, tissus fragiles.
Puissance moyenne: pour tapis à poil long et revêtements de sol textiles
Forte puissance: pour tapis et moquettes robustes
Tube télescopique (13) :
Grâce au tube réglable en hauteur, un réglage individuel pour chacun est possible.
Pour déverrouiller le dispositif d’accouplement abaissez le bouton (14). Réglez le tube
télescopique à la hauteur désirée. Pour le verrouiller, tirez sur le tube jusqu’au clic.
Dispositif de rangement du câble d’alimentation:
Vous êtes priés de ne dérouler le câble (1) d’alimentation que jusqu’à la marque
jaune. Ne le déroulez en aucun cas jusqu’à la marque rouge, cela risque d’endommager le dispositif. Tout endommagement de ce type n’est pas couvert par la
garantie.
Rangement du câble:
Appuyez sur le bouton (5) de rangement du câble tout en guidant le câble.
Maintenez le câble fermement entre vos doigts pour éviter qu’il ne s’agite de façon
incontrôlée.
Régulateur d’air:
Ouvrez le régulateur d’air situé sur la poignée du flexible pour réguler l’air ou pour
libérer des objets ayant pu se fixer sur l’embout.
Témoin de sac plein (7):
Maintenez le tuyau d’aspirateur non obstrué en l’air. Si l’indicateur de remplissage
du sac s’allume, le sac de poussière est plein. Il est temps de le changer.
Changement du sac de poussière:
Débranchez le câble d’alimentation de la prise de courant. Ouvrez le couvercle du
compartiment à sac à poussière avec le bouton (9) (jusqu’au clic). Retirez le support du sac et retirez le sac à poussière du support. Introduisez un nouveau sac
dans l’appareil. Placez le support à nouveau dans l’appareil. Refermez le couvercle
jusqu’à au clic.
16
F
5....-05-BS 1235 17.10.2003 11:41 Uhr Seite 16
Page 17

Filtre: Cet appareil est équipé de deux filtres.
Filtre de protection du moteur (filtre d’aspir
ation):
Le filtre d’aspiration se trouve au niveau du sac à poussière. Ouvrez le couvercle
du compartiment à sac à poussière avec le bouton (9). Le filrte se trouve à la verticale au fond du compartiment à poussière. Soulevez le filtre pour le sortir. Nettoyez
le filtre de protection du moteur après env. 10 changements de sac à poussière.
Vous pouvez, si nécessaire, laver le filtre à l’eau chaude sans détergent. Placez-le
à nouveau dans l’appareil lorsqu’il est complètement sec!
Filtre d’échappement:
Votre appareil est en outre équipé d’un filtre d’échappement. Ce filtre se trouve à
l’arrière de votre appareil derrière une grille d’aération. Ouvrez la grille de ventilation en appuyant sur le bouton situé au-dessus de la grille. Tirez alors sur la grille
pour l’enlever. Retirez le filtre et nettoyez-le comme décrit précédemment. Placez à
nouveau le filtre dans l’appareil et refermez la grille en procédant dans l’ordre inverse.
Entretien et rangement
Entretien:
• Débranchez toujours le câble d’alimentation de la prise de courant avant le net-
toyage!
• Nettoyez les parois de l’appareil avec un torchon sec.
Rangement:
• Laissez l’appareil refroidir complètement.
• Enroulez complètement le câble.
• Vous pouvez introduire le crochet du tube d’aspirateur dans la position d’attente
(12) située au dos de l’appareil et en dessous.
Cet appareil a été contrôlé d’après toutes les directives européennes actuelles
applicables, comme par exemple concernant la compatibilité électromagnétique et
la basse tension. Cet appareil a été fabriqué en respect des réglementations techniques de sécurité les plus récentes.
Sous réserve de modifications techniques.
17
F
5....-05-BS 1235 17.10.2003 11:41 Uhr Seite 17
Page 18

Garantie
Nous accordons une garantie de 24 mois à dater de la date d’achat (ticket de
caisse) pour l’appareil que nous vendons.
Pendant la durée de la garantie, nous éliminons gratuitement les défauts de l’appareil ou des accessoires *) découlant d’un vice de matériau ou de fabrication au
moyen d’une réparation ou, selon notre estimation, au moyen d’un remplacement.
Les prestations dans le cadre de la garantie n’entraînent aucune prorogation de la
durée de garantie et ne donnent pas droit à une nouvelle garantie !
Le justificatif de garantie est le reçu. Sans ce justificatif, aucun remplacement
gratuit ni aucune réparation gratuite ne peuvent être effectués.
En cas de recours à la garantie, ramenez votre appareil complet, dans son
emballage d'origine, accompagné de votre preuve d'achat, à votre revendeur.
*) Les endommagements de pièces d’accessoires ne justifient pas automatiquement l’échange gratuit de l’appareil complet. Contactez alors notre centrale téléphonique! La casse de pièces en verre ou en plastique est dans tous les cas à votre
charge!
Les défauts sur les accessoires ou les pièces d’usure (p.ex.les charbons de
moteurs, crochets, courroies d’entraînement, télécommande de rechange, brosses
à dents de rechange, lames de scies etc.) ainsi que le nettoyage, l’entretien ou le
remplacement de pièces d’usure ne sont pas garantis et sont donc payants !
En cas d’intervention étrangère, la garantie devient caduque.
Après la garantie
Après écoulement de la durée de garantie, les réparations peuvent être effectuées,
contre paiement, par le commerce spécialisé ou le service de réparation.
18
F
5....-05-BS 1235 17.10.2003 11:41 Uhr Seite 18
Page 19

Indicaciones generales de seguridad
• Antes de la puesta en servicio de este aparato lea detenidamente el manual de
instrucciones y guarde este bien incluido la garantía, el recibo de pago y si es
posible también el cartón de embalaje con el embalaje interior.
• Solamente utilice el aparato para el uso privado y para el fin previsto. Este
aparato no está destinado para el uso profesional. No lo utilice al aire libre
(en excepto que esté destinado para el uso limitado al aire libre). No lo exponga al calor, a la entrada directa de rayos de sol, a la humedad ( en ningún caso
sumerja el aparato en agua) y a los cantos agudos. No utilice el aparato con las
manos húmedas. En caso de que el aparato esté húmedo o mojado retire de
momento la clavija de la caja de enchufe. No tocar el agua.
• Desconecte el aparato y siempre retire la clavija de la caja de enchufe (tire de
la clavija no del cable), cuando no quiera utilizar el aparato, montar piezas o en
caso de limpieza o defectos.
• No utilice el aparato sin vigilancia. En caso de que tenga que dejar su lugar de
trabajo, desconecte siempre el aparato o retire la clavija de la caja de enchufe
(por favor tire de la clavija y no del cable).
• Para evitar que los niños se hagan daños eléctricos, siempre tenga atención,
que el cable no cuelgue hacia abajo y que los niños no tengan acceso al aparato.
• Controle regularmente si el aparato o el cable tiene defectos. No ponga en ser-
vicio un aparato defecto.
• No repare el aparato por su cuenta, sino vaya a un establecimiento autorizado.
Para evitar peligros, deje sustituir un cable defecto por uno de la misma calidad
solamente por el fabricante, nuestro servicio al cliente o una similar persona
cualificada.
• Solamente utilice accesorios originales.
• Por favor tenga atención a las “Indicaciones especiales de seguridad…“
indicadas a continuación.
Indicaciones especiales
• ¡No aspiren nunca agua u otro líquido!
• ¡No aspiren nunca cenizas calientes, objetos agudos o cortantes!
• ¡No utilice el aparato en locales húmedos!
• Nunca aspire sin filtro. ¡Siempre compruebe el correcto ajuste de la bolsa que
acaba de colocar!
• ¡Durante el funcionamiento mantenga apartado de la boquilla del aspirador, el
pelo, piezas de ropa o extremidades del cuerpo!
• ¡Mantenga la aspiradora apartada de fuentes de calor como radiodores, estufas
etc.!
19
E
5....-05-BS 1235 17.10.2003 11:41 Uhr Seite 19
Page 20

Vista general de los elementos de mando
1 Cable 10 Conexión de la manguera
2 Conectador / desconectador 11 Manguera aspirante
3 Regulador de poder de aspiración 12 Ayuda para estacionar el aspirador
4 Asa de transporte de suelo
5 Tecla para el enrollamiento de cable 13 Tubo de aspiración telescópico
6 Compartimiento para el accesorio 14 Tecla tubo de aspiración telescópico
7 Indicador del llenado de la bolsa de 15 Boquilla para el suelo
aspirador 16 Lámpara alimentada por la red
8 Compartimiento para la bolsa de
aspirador Accesorio:
9 Tecla para abrir el compartimiento Tobera para juntas,
de la bolsa de llenado de polvo Tobera para tapicería
Puesta en marcha
1. Introduzca el botón de unión del tubo flexible de aspiración (11) en la conexión
del tubo (10), hasta que éste encaje mecánicamente.
2. Para soltar el tubo de nuevo, presione ambos botones a la vez, lateralmente en
el tubo flexible de aspiración.
3. Mantenga los botones presionados y extraiga el tubo.
Uso del aparato
1. Monte la tobera de suelo (15) es decir el accesorio.
2. Desenrolle el cable (1) necesitado.
3. Introduzca la clavija de red en la caja de enchufe con tomatierra 230V, 50Hz y
conecte el aparato con el conectador / desconectador (2).
4. Ajuste el poder de aspiración con el regulador de poder de aspiración (3).
5. Aspire ahora en una velocidad constante. No es necesario apretar.
6. Nota: ¡Tenga atención con el alcanze del cable, ya que es limitado!
Compartimiento para el accesorio (6):
El accesorio integrado (tobera para juntas, tobera para tapicería) lo encuentra tirando de la tapadera del compartimiento para el accesorio.
Boquillas:
Tobera para juntas: Para la aspiración en esquinas y ranuras.
Tobera para tapicería: Para la limpieza de tapicería, de cortinas etc.
Tobera de suelo (15): Para la limpieza de alfombras o superficies planas.
Suelos lisos: Presione la palanca con el símbolo de
cepillo hacia abajo con el pie. Ahora
están visibles los cepillos.
Moquetas: Presione la palanca que se encuentra enfrente.
20
E
5....-05-BS 1235 17.10.2003 11:41 Uhr Seite 20
Page 21

Soltar las piezas sobrepuestas:
Separelas girando levemente.
Regulador de poder de aspiración (3):
Poder de aspiración bajo: Para cortinas, telas delicadas.
Poder de aspiración medio: Para moquetas de terciopelo con pelo alto o suelos de
textil.
Poder de aspiración alto: Para moquetas robustas y suelos.
Tubo de aspiración telescópico (13):
Mediante el tubo flexible de aspiración puede lograr una adaptación individual a su
altura de cuerpo. Desbloquee el enganche presionando la tecla (14) hacia abajo.
Desplace el tubo de aspiración telescópico a la altura deseada. Para el bloqueo tire
del tubo hasta que encaje mecánicamente.
Dispositivo para el enrollamiento de cable:
Por favor tire del cable (1) solamente hasta la marcación amarilla. Nunca tire hasta
la marcación roja, ya que el enrollamiento de cable se podría estropear.Dichos
daños no caen en la garantía.
Enrollamiento:
Presione la tecla (5) para el enrollamiento de cable y guie el cable. Mantenga el
cable para evitar que se enrolle.
Regulador de admisión:
Abra el regulador de admisión que se encuentra en la empuñadura del tubo flexible, para su regulación de aire o para soltar piezas que se hayan pegado en la
tobera.
Indicación para el recambio de la bolsa de llenado de polvo (7):
Mantenga la manguera de aspiración sin peso en el aire. En caso de que se ilumine el indicador para el cambio de la bolsa de aspirador, significa que la bolsa está
llena. Por favor cambie la bolsa llena por una vacía.
Cambiar la bolsa de aspirador:
Retire la clavija de la caja de enchufe. Abra con la tecla (9) la tapadera del compartimiento de la bolsa de llenado (hasta que encaje). Retire el soporte de la bolsa y
saque la bolsa de polvo del soporte. Coloque una bolsa nueva. Coloque de nuevo
el soporte de la bolsa. Cierre la tapadera de manera que encaje.
21
E
5....-05-BS 1235 17.10.2003 11:41 Uhr Seite 21
Page 22

Filtro: Su aparato dispone de dos filtros.
Filtro protector del motor (filtro de entr
ada):
El filtro de entrada se encuentra en el compartimiento de la bolsa de aspirador.
Abra con la tecla (9) la tapadera del compartimiento de la bolsa de llenado. El filtro
está ubicado de forma vertical en la parte posterior de la caja de polvo. Extraiga el
filtro hacia arriba. Limpie el filtro protector del motor al cabo de cada décimo cambio de la bolsa de aspirador. En caso de que sea necesario, puede lavar el filtro en
agua caliente, sin aditivos. ¡Solamente coloque de nuevo el filtro, cuando está seco
por completo!
Filtro de salida:
Su aparato también dispone de un filtro de salida. Este se encuentra en la parte
trasera de su aparato, detrás de una rejilla de ventilación.Abra la rejilla de ventilación presionando el botón que se encuentra sobre la rejilla de ventilación. Ahora
retire la rejilla tirando de ella hacia delante. Aparte el filtro y limpie esté como ya
indicado. Introduzca de nuevo el filtro y cierre la rejilla de ventilación en orden inverso.
Limpieza y almacenamiento
Limpieza
• ¡Antes de cada limpieza retire la clavija de la caja de enchufe!
• Limpie la carcasa de motor con un paño húmedo.
Almacenamiento
• Debe dejar enfriar por completo el aparato.
• Enrolle el cable por completo.
• El gancho en el tubo de aspiración puede engancharlo en la ayuda de estacio-
namiento (12) en el dorso o en la parte inferior del aparato.
Este aparato se ha examinado según las normativas actuales y vigentes de la
Comunidad Europea, como p.ej. compatibilidad electromagnética y directiva de
baja tensión y se ha construido según las más nuevas especificaciones en razón
de la seguridad.
No reservamos el derecho de efectuar modificaciones técnicas.
22
E
5....-05-BS 1235 17.10.2003 11:41 Uhr Seite 22
Page 23

Garantía
Para el aparato comercializado por nosotros nos responsabilizamos con una
garantía de 24 meses a partir de la fecha de compra (factura de compra).
Durante el período de garantía nos encargamos gratuítamente de los defectos del
aparato y de los accesorios*), que se hayan originado por defectos del material o
de la fabricación. Dependiendo de nuestra estimación se realizará una reparación
o un cambio. ¡Los servicios de garantía no prolangan la garantía, ni se incia por
ello un período nuevo de garantía!
Como comprobante para la garantía es válido la factura de compra. Sin este comprobante no se podrá realizar un cambio o una reparación gratuíta.
En caso de garantía entregue el aparato completo en su embalaje original
junto con la factura a su agente comerciante.
*) Defectos en las piezas de accesorio, no significan automáticamente el recambio
gratuito del aparato completo. ¡En este caso dirijase por favor a nuestra linea de
atención al cliente! ¡Rotos de vidrio o roturas en las piezas de plástico deben
pagarse siempre por el cliente !
Defectos en los accesorios de uso o en las piezas de desgaste (p.ej. escobillas de
carbón del motor, varillas amasadoras, correas de transmisión, mando a distancia
de repuesto, cepillos de dientes de repuesto, hojas de sierra etc.), como también la
limpieza, mantenimiento o el recambio de piezas de desgaste no recaen en la
garantía e irán al cargo del cliente!
En caso de intervención ajena se expira la garantía.
Después de la garantía
Después de haber expirado la garantía se pueden realizar las reparaciones por el
concesionario o por el servicio de reparaciones. Los gastos irán al cargo del cliente.
23
E
5....-05-BS 1235 17.10.2003 11:41 Uhr Seite 23
Page 24

Instruções gerais de segurança
• Antes de pôr este aparelho a funcionar, leia muito atentamente as instruções
de emprego e guarde-as muito bem, juntamente com o talão de garantia, o
talão de compra e, tanto quanto possível, a embalagem com os elementos interiores.
• Utilize o aparelho exclusivamente para fins privados e para a finalidade para a
qual o mesmo foi concebido. Este aparelho não se destina a fins comerciais.
Não o utilize ao ar livre (a não ser que o mesmo possa ser usado ao ar livre
sob determinadas condições). Mantenha-o protegido do calor, de irradiação
solar directa, da humidade (não o imergir de forma alguma em quaisquer líquidos) e de arestas aguçadas. Não utilize o aparelho com as mãos molhadas. No
caso de o aparelho ficar húmido ou molhado, retire imediatamente a ficha da
tomada. Não tocar na água.
• Sempre que não utilizar o aparelho, ou desejar montar acessórios, ou queira
limpá-lo, ou ainda em caso de avarias, deverá desligá-lo e retirar a ficha da
tomada (puxe pela ficha e não pelo fio).
• O aparelho não deverá funcionar sem vigilância. No caso de ter de se ausentar
do local onde o aparelho estiver a funcionar, desligue-o sempre ou retire a ficha
da tomada (puxe pela ficha e não pelo fio).
• Para proteger as crianças dos perigos relacionados com aparelhos eléctricos,
nunca deixe os fios pendurados e atente em que as crianças não possam chegar a tais aparelhos.
• Verifique regularmente se o aparelho ou o fio têm alguns danos. Nunca ponha
a funcionar um aparelho com quaisquer danos.
• Não tente reparar o aparelho, dirija-se a um técnico da especialidade, devida-
mente autorizado. Para evitar quaisquer perigos, é favor substituir um fio danificado por um fio da mesma qualidade. Tal deverá ser efectuado pelo fabricante,
pelos nossos serviços de assistência ou por outra pessoa com as mesmas
qualificações.
• Utilize apenas acessórios de origem.
• É favor observar as seguintes „Instruções especiais de segurança...“.
Instruções especiais de segurança
• Não aspire humidades nem líquidos!
• Não aspire cinzas quentes, nem objectos pontiagudos ou aguçados!
• Não utilize o aparelho em divisões com solos molhados!
• Não aspire nunca sem saco. Após substituição do saco, verifique sempre se o
mesmo se encontra na posição correcta!
• Durante o funcionamento, mantenha a roupa, o corpo e os cabelos afastados
do bocal do aspirador!
• Mantenha o aspirador afastado de fontes de calor, tais como radiadores,
fogões, etc.!
24
P
5....-05-BS 1235 17.10.2003 11:41 Uhr Seite 24
Page 25

Elementos do aparelho
1 Fio 11 Tubo flexível
2 Interruptor 12 Dispositivo para estacionamento
3
Regulador da potência de aspiração
13 Tubo de aspiração telescópico
4 Punho para transporte 14 Tecla do tubo de aspiração
5 Botão para enrolamento do fio telescópico
6 Compartimento de acessórios 15 Peça para aspirar o chão
7 Indicador do conteúdo do saco 16 Lâmpada de entrada de corrente
8 Compartimento do saco
9 Tecla para abrir o compartimento Acessórios:
do saco Bocal para frestas,
10 Ligação para o tubo flexível Bocal para estofos
Primeira utilização
1. Introduza a cabeça de junção para o tubo flexível (11) na ligação do mesmo
(10), até este ficar mecanicamente encaixado.
2. Para voltar a soltar o tubo flexível, pressione simultaneamente ambos os
botões que se encontram nos lados do mesmo tubo.
3. Mantenha os botões pressionados e retire o tubo.
Utilização do aparelho
1. Monte a peça para aspirar o chão (15), nomeadamente os acessórios.
2. Desenrole o comprimento necessário de fio (1).
3. Introduza a ficha numa tomada com protecção de contactos, convenientemente
instalada, de 230 voltes, 50 Hz e ligue o aparelho, accionando o interruptor (2).
4. Seleccione a potência de aspiração no respectivo regulador (3).
5. Aspire agora a uma velocidade constante. Não é necessário exercer qualquer
pressão.
6. Nota: tome em consideração que o comprimento do fio é limitado!
Compartimento de acessórios (6):
Encontrará os acessórios integrados (bocal para frestas, bocal para estofos) puxando pela tampa do respectivo compartimento.
Bocais:
Bocal para frestas: para aspirar cantos e frestas.
Bocal para estofos: para aspirar estofos, cortinados, etc.
Peça para aspirar o chão (15): para carpetes, alcatifas e superfícies lisas.
Solos lisos: Carregue com o pé na ala-
vanca com o símbolo para
escovas. Estas ficarão
agora à vista.
25
P
5....-05-BS 1235 17.10.2003 11:41 Uhr Seite 25
Page 26

Carpetes e alcatifas: Carregue na alavanca que
fica em frente da mencionada acima.
Soltar as peças:
Puxe-as, girando-as ligeiramente.
Regulador da potência de aspiração (3):
Potência de aspiração baixa: para cortinas, tecidos delicados.
Potência de aspiração média: para alcatifas de pelo alto e solos têxteis.
Potência de aspiração elevada: para alcatifas, tapetes e solos robustos.
Tubo de aspiração telescópico (13):
Este tubo, cujo comprimento é ajustável, permite uma adaptação individual à altura
de cada utente. Desbloqueie o acoplamento, deslocando a tecla (14) para baixo.
Deslize o tubo até ficar com a altura pretendida. Para o tornar a bloquear, puxe o
tubo, até ficar engatado.
Dispositivo de enrolamento do fio:
Para desenrolar o fio (1), é favor puxá-lo, no máximo, até à marcação amarela. Não
o puxe até à marcação vermelha, pois o dispositivo poderá estragar-se.Tais estragos não estão incluídos na garantia.
Enrolamento:
Pressione o botão (5) para enrolamento e vá puxando o fio. Segure neste para evitar que o mesmo bate contra qualquer lado.
Ventilador:
Abra o ventilador que se encontra no punho do tubo flexível para regulação do ar,
ou para soltar objectos que se tenham ficado presos ao bocal.
Indicador para substituição do saco (7):
Segure o tubo flexível no ar. No caso de o indicador para substituição do saco se
iluminar, o mesmo estará cheio e terá de ser substituído.
Substituićčo do saco:
Retire a ficha da tomada. Abra a tampa do compartimento do saco com a tecla (9),
até aquela ficar fixa. Retire o suporte do saco e remova este do suporte. Introduza
um saco novo.Torne a colocar o suporte do saco no compartimento. Feche a
tampa, de forma a ficar engatada.
26
P
5....-05-BS 1235 17.10.2003 11:41 Uhr Seite 26
Page 27

Filtros: o aspirador dispõe de dois filtros.
Filtro par
a protecção do motor (filtro de admissão):
O filtro de admissão encontra-se no compartimento do saco. Abra a tampa do compartimento do saco com a tecla (9). O filtro encontra-se em posição vertical na
parte traseira do compartimento do saco. Retire o filtro, puxando-o para cima.
Limpe o filtro de protecção do motor aproximadamente de 10 em 10 vezes que
proceda à substituição do saco. Poderá lavá-lo em água quente, sem usar detergentes. Volte a colocá-lo só depois de estar completamente enxuto!
Filtro de saída:
O aspirador dispõe ainda de um filtro de saída. Este encontra-se na parte traseira
do aspirador, por detrás de uma grelha de ventilação. Abra a grelha de ventilação,
premendo o botão que se encontra por cima da mesma. Remova-a então, puxando-a para a frente. Retire o filtro e proceda à sua limpeza da forma descrita acima.
Torne a colocar o filtro e feche a grelha de ventilação na sequência inversa.
Limpeza e arrecadação
Limpeza:
• Antes de limpar o aspirador, retire a ficha da tomada.
• Limpe a caixa com um pano seco.
Arrecadação:
• Deixar o ferro arrefecer completamente.
• Enrole o fio até ao fim.
• O gancho que se encontra no tubo de aspiração pode ser pendurado no dispo-
sitivo de arrumação (12) que se encontra nas costas ou na parte inferior do
aparelho.
Este aparelho foi controlado nos termos das actuais directivas da CEE
aplicáveis, tais como inocuidade electromagnética e directiva sobre baixa
tensão, e fabricado de acordo com as mais novas prescrições da segurança
técnica.
Reserva-se o direito de alterações!
27
P
5....-05-BS 1235 17.10.2003 11:41 Uhr Seite 27
Page 28

Garantia
O aparelho vendido pela nossa empresa tem uma garantia de 24 meses a partir
da data da compra (talão).
Durante o período de garantia, procederemos à remoção grátis - por reparação,
ou, segundo a nossa decisão, por substituição - das deficiências do aparelho ou
dos acessórios*) que provenham de erros de material ou de fabricação. A prestação de serviços relacionados com a garantia não prolongarão a mesma, nem
iniciarão um novo prazo de garantia!
O talão de compra consistirá prova desta garantia. Sem o mesmo, não será possível proceder-se a qualquer troca ou reparação grátis.
Em caso de garantia, entregue o aparelho completo, juntamente com o talão de
compra, na loja onde o mesmo foi comprado.
*) No caso de danos em quaisquer acessórios, não será efectuada automáticamente uma substituição completa do aparelho. Contacte neste caso a nossa hotline! Danos causados por quebras de peças de vidro ou de plástico terão de ser
pagos pelo cliente!
Não estão incluídos na garantia quaisquer defeitos de acessórios ou de peças que
se desgastem (como, por exemplo, carvões do motor, varinhas, correias do motor,
telecomandos, escovas de dentes, folhas de serra, etc.), nem a limpeza, a manutenção ou a substituição de peças que se desgastem, devendo tais despesas ser
reembolsadas!
A garantia terminará sempre que tenha havido intervenção alheia nos aparelhos.
Após a garantia
Após a expiração do prazo de garantia, poderão ser efectuados arranjos por pessoal especializado, ou pelos nossos serviços de reparações, contra reembolso.
28
P
5....-05-BS 1235 17.10.2003 11:41 Uhr Seite 28
Page 29

Norme di sicurezza generali
• Prima di mettere in funzione questo apparecchio, leggere molto attentamente le
istruzioni per l’uso e conservarle con cura unitamente al certificato di garanzia,
allo scontrino e, se possibile, alla scatola di cartone con la confezione interna.
• Utilizzare l’apparecchio esclusivamente per scopi privati e conformemente al
tipo di applicazione previsto. Questo prodotto non è stato concepito ai fini di un
impiego in ambito industriale. Non utilizzarlo all’aperto (a meno che non sia
contemplato un particolare tipo di uso all’aperto nel rispetto di specifiche
condizioni). Proteggerlo dal calore, nonché dall’esposizione diretta ai raggi solari e dall’umidità (non immergerlo mai in sostanze liquide) e tenerlo a distanza
da oggetti con spigoli affilati. Non utilizzare l’apparecchio con le mani umide.
Nel caso in cui si bagni o si inumidisca l’apparecchio, staccare immediatamente
la spina. Evitare il contatto con l’acqua.
• Disattivare l’apparecchio e staccare sempre la spina dalla relativa presa
(si raccomanda di afferrare il connettore e non il cavo quando si effettua questa
operazione) allorché non si utilizza l’apparecchio, quando si applicano degli accessori oppure nel caso in cui lo si debba pulire o si siano manifestate anomalie.
• Non mettere in funzione l’ apparecchio senza sorveglianza. Se si dovesse
assentarsi dal posto di lavoro, spegnere e disconnettere sempre l’apparecchio,
(prendendo in mano la spina, non tirando il cavo).
• Allo scopo di proteggere i bambini contro i pericoli che possono derivare dagli
apparecchi elettrici, accertarsi che non vi siano cavi pendenti e che i bambini
non possano accedere in alcun modo all’apparecchio stesso.
• Controllare periodicamente l’apparecchio per verificare che non vi siano danni.
Non mettere in funzione l’apparecchio nel caso in cui sia guasto.
• Non tentare di riparare l’apparecchio, bensì rivolgersi a un tecnico autorizzato.
Al fine di evitare l’insorgere di situazioni di pericolo, si raccomanda di contattare
il costruttore, il nostro servizio di assistenza tecnica o un tecnico ugualmente
qualificato per la sostituzione del cavo di alimentazione difettoso con un cavo
equivalente.
• Utilizzare esclusivamente accessori originali.
• Rispettare le seguenti “Speciali norme di sicurezza...“.
Speciali norme di sicurezza
• Non utilizzare l’apparecchio per aspirare sostanze liquide o umide.
• Non utilizzare l’apparecchio per aspirare ceneri ancora calde oppure oggetti
affilati o acuminati.
• Non utilizzare l’apparecchio in ambienti umidi.
• Non utilizzare mai l’apparecchio senza filtro. Dopo aver usato l’aspirapolvere,
accertarsi sempre che il filtro sia installato correttamente nella posizione corrispondente.
• Durante l’utilizzo dell’apparecchio, tenere la bocchetta dell’aspiratore lontana da
capelli, abiti e da altre parti del corpo.
• Tenere l’aspiratore lontano dalle fonti di calore quali i radiatori, il forno, ecc.
29
I
5....-05-BS 1235 17.10.2003 11:41 Uhr Seite 29
Page 30

Schema degli elementi di comando
1 Cavo 10 Collegamento del tubo flessibile
2 Interruttore ON/OFF 11 Tubo flessibile di aspirazione
3 Regolatore della potenza 12 Scocca portaccessori
di aspirazione 13 Tubo di aspirazione a telescopio
4 Impugnatura 14 Tasto tubo di aspirazione
5 Pulsante del sistema avvolgicavo a telescopio
6 Vano accessori 15 Bocchetta per pavimenti
7 Display del livello di riempimento 16 Spia per entrata rete
del sacchetto di spolvero
8 Scomparto del sacchetto Accessori:
di spolvero Lancia,
9 Pulsante per aprire il vano del Bocchetta divani
sacchetto per la polvere
Messa in funzione
1. Inserire la testina di collegamento del flessibile di aspirazione (11) nel collega-
mento del flessibile (10) fino al punto di arresto meccanico.
2. Per staccare di nuovo il flessibile, premere contemporaneamente entrambi i
tasti a lato del flessibile di aspirazione.
3. Tenere premuti i tasti e togliere poi il flessibile.
Utilizzo dell’apparecchio
1. Montare la bocchetta pavimenti (15) ovvero gli accessori.
2. Srotolare il cavo nella lunghezza necessaria (1).
3. Inserire la spina in una presa con contatto di terra regolarmente installata da
230 V, 50 Hz e accendere l’apparecchio con l’interruttore On/Off (2).
4. Regolare la potenza di aspirazione servendosi dell’apposito regolatore di
potenza (3).
5. Utilizzare quindi l’apparecchio operando in modo da usare una velocità sempre
costante. Non è necessario esercitare pressione sull’apparecchio.
6. Avvertenza: prestare attenzione al raggio d’azione consentito, il quale dipende
dalla lunghezza del cavo!
Vano accessori (6):
Troverete gli accessori integrati (lancia fughe, bocchetta divani) aprendo il
coperchio del vano accessori.
Bocchette:
Lancia: per la pulizia di angoli e fessure.
Bocchetta divani:
per la pulizia di divani, tende ecc.
30
I
5....-05-BS 1235 17.10.2003 11:41 Uhr Seite 30
Page 31

Spazzola pavimenti
(15):
per la pulizia di tappeti o superfici lisce.
Pavimenti lisci: Premere con il piede la leva con il
simbolo della spazzola. Le spazzole
sono così visibili.
Tappeti: Premere la leva opposta.
Sbloccaggio degli accessori:
Separarli l’uno dall’altro, facendoli ruotare leggermente.
Regolatore della potenza di aspirazione (3):
Potenza di aspirazione bassa: per tende e materiali delicati
Potenza di aspirazione media: per tappeti in velluto a pelo lungo e
per pavimenti in tessuto
Potenza di aspirazione elevata: per pavimenti e tappeti robusti
Tubo di aspirazione a telescopio (13):
Grazie al tubo di aspirazione regolabile in altezza, è possibile un adeguamento individuale alla vostra statura. Sganciare l’attacco premendo il tasto (14) verso il basso.
Spingere il tubo di aspirazione a telescopio fino all’altezza desiderata. Per bloccare
tirare il tubo di aspirazione finché si sente chiaramente l’incastro meccanico.
Dispositivo avvolgicavo per il cavo di allacciamento alla rete:
Si raccomanda di estrarre il cavo (1) soltanto fino al contrassegno in colore giallo.
Non tirare mai, in nessun caso, il cavo sino al contrassegno rosso, in quanto il dispositivo avvolgicavo potrebbe danneggiarsi. I danni di questo genere non sono
coperti da garanzia.
Riavvolgimento del cavo:
Premere il pulsante (5) relativo al dispositivo avvolgicavo e accompagnare il cavo
con la mano. Si consiglia di tenere il cavo, in modo da impedire movimenti violenti e
disordinati del medesimo.
Grata di ventilazione:
Aprire la grata di aerazione sull’impugnatura del flessibile per la regolazione dell’aria o per staccare pezzi che aderiscono alla bocchetta.
Visore sostituzione sacchetto polvere (7):
Tenere all’aria il tubo flessibile di aspirazione senza sottoporlo a carico. Nel caso in
cui il display relativo alla sostituzione del sacchetto di spolvero si illumini, questo
significa che il sacchetto è pieno. Provvedere pertanto immediatamente alla sua
sostituzione.
31
I
5....-05-BS 1235 17.10.2003 11:41 Uhr Seite 31
Page 32

Sostituzione del sacchetto di spolvero:
Staccare la spina dalla presa di rete. Aprire con il tasto (9) il coperchio del vano
sacchetto (fino al punto di arresto meccanico). Estrarre il supporto del sacchetto e
tirare il sacchetto di spolvero in modo da staccarlo dal relativo supporto. Inserire un
nuovo sacchetto.Montare nuovamente il dispositivo di supporto del sacchetto.
Chiudere il coperchio in modo che si innesti in posizione.
Filtri: l’apparecchio dispone di due filtri.
Filtro di protezione del motore (filtro di aspir
azione):
Il filtro di aspirazione si trova nello scomparto del sacchetto di spolvero. Aprire con il
tasto (9) il coperchio del vano sacchetto. Il filtro è situato in posizione verticale nella
parte posteriore dell’alloggiamento destinato alla raccolta della polvere. Estrarre il
filtro tirandolo verso l’alto. Pulire il filtro di protezione del motore dopo ca. 10 sostituzioni del sacchetto di spolvero. In caso di necessità, è possibile pulire il filtro utilizzando dell’acqua calda senza additivi. Si raccomanda di inserire il filtro esclusivamente dopo averlo asciugato perfettamente.
Filtro di scar
ico:
L’apparecchio dispone inoltre di un filtro di scarico. Questo filtro è situato nella parte
posteriore dell’apparecchio, dietro la griglia di areazione. Aprire la grata di ventilazione sull’impugnatura premendo il tasto sopra la grata medesima.Togliere quindi
la grata tirandola in avanti. Estrarre il filtro e pulirlo rispettando le indicazioni già fornite in precedenza. Applicare nuovamente il filtro e chiudere la griglia di aerazione,
effettuando nella sequenza inversa le operazioni descritte.
Pulizia e conservazione
Pulizia:
• Prima di procedere alla pulizia, è indispensabile staccare la spina dalla presa di
rete.
• Pulire l’alloggiamento servendosi di un panno asciutto.
Conservazione:
• Lasciate raffreddare completamente l’apparecchio.
• Riavvolgere completamente il cavo.
• Il gancio che si trova nel tubo aspiratorio può essere appeso nel dispositivo di
sosta (12) sul retro o sulla parte inferiore dell’ apparecchio.
Questo apparecchio è stato controllato sulla base di tutte le direttive CE attuali in
vigore in questo settore, quali per esempio la normativa in materia di compatibilità
elettromagnetica e la direttiva in materia di bassa tensione, ed è stato costruito
conformemente alle norme di sicurezza più moderne.
Con riserva di apportare modifiche tecniche.
32
I
5....-05-BS 1235 17.10.2003 11:41 Uhr Seite 32
Page 33

Garanzia
Per l’apparecchio da noi messo in commercio ci assumiamo una garanzia di
24 mesi dalla data di acquisto (scontrino).
Durante la garanzia noi ci impegniamo ad eliminare gratuitamente i guasti dell’apparecchio o degli accessori*), dovuti a difetti di materiale o di fabbricazione, riparandoli o, a nostra discrezione, sostituendoli. Le prestazioni in garanzia danno luogo a
una proroga della garanzia né danno diritto ad una nuova garanzia!
Per la garanzia è sufficiente lo scontrino di acquisto. Senza questo scontrino non
sussiste il diritto né ad una sostituzione né ad una riparazione gratuita.
Nel caso si ricorra alla garanzia, restituire al rivenditore l’apparecchio completo in
ogni sua parte, nell’imballaggio originale unitamente allo scontrino.
*) Danni agli accessori non giustificano automaticamente lo scambio gratuito dell’apparecchio completo. Si prega di mettersi in contatto con la nostra centrale telefonica. Danni alle parti di vetro oppure fratture ai pezzi di materia plastica sono obbligatoriamente a spese del cliente.
La riparazione di pezzi d’uso ovvero soggetti a logoramento (cursori, ganci impastatori, cinghie di trasmissione, telecomandi di ricambio, spazzolini di ricambio,
lame di seghe ecc.) come anche operazioni di pulizia e manutenzione o la sostituzione di pezzi soggetti a logoramento non rientrano nella garanzia e quindi sono a
pagamento!
La garanzia si annulla nel caso di intervento da parte di terzi.
Dopo la garanzia
Al termine della garanzia le riparazioni possono essere eseguite dietro pagamento
dal corrispettivo negozio specializzato o servizio riparazioni.
33
I
5....-05-BS 1235 17.10.2003 11:41 Uhr Seite 33
Page 34

34
N
Generelle sikkerhetsanvisninger
• Les nøye gjennom bruksanvisningen før du tar apparatet i bruk.Ta godt vare på
bruksanvisningen, garantibeviset, kassalappen og helst også esken med innvendig emballasje.
• Apparatet må bare brukes til private formål og de formål det der er beregnet på.
Dette apparatet er ikke ment for industriell bruk. Det må ikke benyttes utendørs
(bortsett fra hvis det bare er beregnet på utendørs bruk). Hold det unna varme,
direkte solskinn, fuktighet (senk det aldri ned i væsker) og skarpe kanter. Ikke
bruk apparatet hvis du er fuktig på hendende. Hvis apparatet har blitt fuktig eller
vått, må du trekke ut støpselet med en gang. Ikke kom borti vannet.
• Slå av apparatet og trekk alltid støpselet ut av stikkontakten (trekk i støpselet,
ikke i ledningen) når du ikke bruker apparatet, fest tilbehørsdeler for rengjøring
eller ved feil.
• Ikke bruk apparatet uten oppsikt. Hvis du forlater arbeidsplassen, må du alltid
slå apparatet av eller trekke støpselet ut av stikkontakten (trekk i støpselet, ikke
i ledningen.
• For å beskytte barn mot farer forbundet med elektriske apparater, må du alltid
sørge for at ledningen ikke henger ned, og at apparatet ikke er tilgjengelig for
barn.
• Kontroller jevnlig om det er skader på apparat og ledning. Skadede apparater
må ikke brukes.
• Ikke reparer apparatet selv. Oppsøk en autorisert fagmann. Hvis en nettledning
er defekt, må du sørge for at den kun skiftes ut med en lik ledning, for slik å
unngå farer. Dette må gjøres av produsenten, vår kundetjeneste eller en lignende kvalifisert person.
• Bruk bare originaltilbehør.
• Legg merke til “Spesielle sikkerhetsanvisninger” nedenfor.
Spesielle sikkerhetsanvisninger
• Ikke sug opp fuktighet eller væsker!
• Ikke sug opp varm aske, spisse eller skarpe gjenstander!
• Ikke bruk apparatet i våtrom!
• Bruk aldri støvsugeren uten filter. Kontroller at filteret sitter korrekt etter at du
har satt det inn!
• Hold hår, klær og kroppsdeler borte fra støvsugermunnstykket når støvsugeren
er i drift!
• Hold støvsugeren borte fra varmekilder som radiatorer, ovner osv.!
Oversikt over betjeningselementer
1 Ledning 5 Knapp til ledningsoppkveiling
2 Bryter 6 Rom til tilbehør
3 Sugeeffektregulator 7 Indikator for skifting av støvsugerpose
4 Bærehåndtak 8 Rom til støvsugerpose
5....-05-BS 1235 17.10.2003 11:41 Uhr Seite 34
Page 35

35
N
9 Knapp til åpning av rommet 14 Knapp for teleskoprør
til støvsugerposen 15 Gulvmunnstykke
10 Slangetilkobling 16 Strøminngangslampe
11 Slange
12 Parkeringshjelp Tilbehør:
13 Teleskoprør Fugemunnstykke, Tekstilunnstykke
Ta i bruk apparatet
1. Stikk forbindelseshodet på slangen (11) inn i slangetilkoblingen (10). Den skal
gå mekanisk i lås.
2. For å løsne slangen igjen trykker du samtidig på de to knappene på siden av
slangen.
3. Hold knappene inne og trekk så slangen ut.
Bruke apparatet
1. Monter gulvmunnstykket (15) eller tilbehøret.
2. Kveile ut nødvendig ledningslengde (1).
3. Stikk deretter støpselet inn i en forskriftsmessig installert jordet kontakt, 230 V,
50 Hz, og slå apparatet på med bryteren (2).
4. Still inn sugeeffekten med sugeeffektregulatoren.
5. Arbeid med jevn hastighet. Det er ikke nødvendig å presse.
6. Tips: Husk på at lengden på ledningen gir deg begrenset rekkevidde!
Rom til tilbehør (6):
Det integrerte tilbehøret (fuge-, møbelmunnstykke) finner du under lokket til rommet
til tilbehøret.
Munnstykkeelement:
Fugemunnstykke: Til suging i hjørner og spalter.
Tekstilunnstykke: Til rengjøring av puter, gardiner osv.
Gulvmunnstykke (15): Til rengjøring av tepper eller glatte flater.
Glatte gulv: Trykk spaken med børstesymbolet ned
med foten. Børstene er nå synlige.
Tepper: Trykk ned spaken som ligger overfor
denne.
Løsning av deler:
Trekk disse fra hverandre ved å dra lett.
Sugeeffektregulator (3):
Lav sugeeffekt: til gardiner, ømfintlige stoffer.
Middels sugeeffekt: til langhårede velurtepper og tekstilgulv.
Høy sugeeffekt: til robuste tepper og gulv.
5....-05-BS 1235 17.10.2003 11:41 Uhr Seite 35
Page 36

36
N
Teleskoprør (13):
Røret kan justeres i høyden og dermed tilpasses individuelt til din kroppshøyde.
Løsne sammenkoblingen ved å trykke knappen (14) ned.
Skyv teleskoprøret til ønsket lengde. For å låse det drar du i røret til du kan høre
tydelig at det går i lås.
Oppkveilingsmekanisme for ledningen:
Ledningen (1) må bare trekkes ut til det gule merket. Trekk aldri ledningen helt til
det røde merket, da ledningsoppkveilingen kan ta skade av det. Slike skader går
ikke inn under garantien.
Oppkveiling:
Trykk på knappen (5) for ledningsoppkveiling og styr ledningen i riktig retning. Hold
fast ledningen for å unngå at den slår rundt.
Luftspjeld:
Åpne luftspjeldet på slangehåndtaket for å regulere luften eller for å løsne deler
som har festet seg til munnstykket.
Indikator for skifting av støvsugerpose (7):
Hold slangen i luften uten å belaste den. Hvis indikatoren for skifting av støvsugerpose lyser, er posen full og må da skiftes.
Skifting av støvsugerposer:
Trekk støpselet ut av stikkontakten. Åpne lokket til rommet til støvsugerposen med
knappen (9) (til det går i lås). Ta ut poseholderen og trekk støvsugerposen ut av
holderen. Skyv inn en ny pose.Sett poseholderen inn igjen. Lukk lokket slik at det
går i lås.
Filter: Dette apparatet har to filter.
Motorbeskyttelsesfilter (inntaksfilter)
Inntaksfilteret finner du i rommet til støvsugerposen. Åpne rommet til støvsugerposen med knappen (9). Filteret står loddrett i den bakre delen av støvhuset. Trekk filteret opp og ut. Rengjør motorbeskyttelsesfilteret ca. hver 10. gang du bytter støvsugerpose. Ved behov kan filteret rengjøres i varmt vann, uten tilsetningsstoffer. Det
må være fullstendig tørt før det settes inn igjen!
Utgangsfilter
I tillegg har apparatet et utgangsfilter. Dette filteret finner du på den bakre delen av
apparatet, bak et ventilasjonsgitter. Åpne ventilasjonsgitteret ved å trykke på knappen over gitteret.Trekk så gitteret forover og ut.Ta bort filteret og rengjør det slik det
er beskrevet ovenfor. Sett filteret inn igjen og lukk ventilasjonsgitteret i motsatt rekkefølge.
5....-05-BS 1235 17.10.2003 11:41 Uhr Seite 36
Page 37

37
N
Rengjøring og oppbevaring
Rengjøring:
• Trekk støpselet ut av stikkontakten før rengjøring!
• Rengjør kassen med en tørr klut.
Oppbevaring:
• La apparatet kjøles helt ned.
• Rengjør kassen med en tørr klut.
• Kroken på røret kan du hekte inn i parkeringshjelpen (12) på baksiden eller på
undersiden av apparatet.
Dette apparatet har blitt testet i henhold til alle aktuelle CE-retningslinjer som det
rammes av, f.eks. elektromagnetisk toleranse og direktiver om lavspenning. Det er
laget i henhold til dagens nyeste sikkerhetstekniske forskrifter.
Garanti
For apparat som vi har solgt, påtar vi oss en garanti på 24 måneder fra kjøpsdato
(kassalapp).
Innenfor garantitiden fjerner vi mangler på apparat eller tilbehør*) uten omkostninger hvis manglene skyldes material- eller produksjonsfeil. Dette gjør vi ved reparasjon eller – etter vår vurdering – bytting.
Garantiytelser medfører ingen forlengelse av garantitiden, og det oppstår heller ikke
noe krav på en ny garanti på grunn av dette!
Som garantibevis gjelder kjøpsbeviset. Uten dette beviset kan du ikke få byttet eller
reparert apparatet gratis.
I forbindelse med garanti ber vi om at du gir hele apparatet i originalemballasjen
sammen med kassalappen til din forhandler.
*) Skader på tilbehørsdeler fører ikke automatisk til at du får byttet hele apparatet
gratis. I slike tilfeller ber vi deg om å henvende deg til vår hotline! Glasskader eller
sprekker i plastdeler er i prinsippet kostnadspliktige!
Verken defekter på forbrukstilbehør og slitasjedeler (for eksempel motorkull, eltekroker, drivremmer, ekstra fjernbetjening, ekstra tannbørster, sagblader osv.) eller
rengjøring, vedlikehold og utskifting av slitasjedeler går inn under garantien. Slike
ting er derfor kostnadspliktige!
Garantien utgår ved inngrep utenfra.
5....-05-BS 1235 17.10.2003 11:41 Uhr Seite 37
Page 38

38
N
Etter garantien
Etter at garantitiden har gått ut, kan reparasjoner utføres av den aktuelle faghandelen eller reparasjonsservice mot betaling.
5....-05-BS 1235 17.10.2003 11:41 Uhr Seite 38
Page 39

General Safety Instructions
• Read the operating instructions carefully before putting the appliance into ope-
ration and keep the instructions including the warranty, the receipt and, if possi-
ble, the box with the internal packing.
• The appliance is designed exclusively for private use and for the envisaged pur-
pose. This appliance is not fit for commercial use. Do not use it outdoors (except
if it is designed to be used outdoors). Keep it away from sources of heat, direct
sunlight, humidity (never dip it into any liquid) and sharp edges. Do not use the
appliance with wet hands. If the appliance is humid or wet, unplug it immediate-
ly. Do not put it in water.
• When cleaning or putting it away, switch off the appliance and always pull out
the plug from the socket (pull on the plug, not the cable) if the appliance is not
being used and remove the attached accessories.
• Do not operate the machine without supervision. If you should leave the work-
place, always switch the machine off or remove the plug from the socket (pull
the plug itself, not the lead).
• To protect children from the dangers posed by electrical appliances, make sure
that the cable is hanging low and that children do not have access to the appli-
ance.
• Check the appliance and the cable for damage on a regular basis. Do not use
the appliance if it is damaged.
• Do not try to repair the appliance on your own. Always contact an authorized
technician. To avoid the exposure to danger, always have a faulty cable be
replaced only by the manufacturer, by our customer service or by a qualified
person and with a cable of the same type.
• Use only original spare parts.
• Pay careful attention to the following “Special Safety Instructions“.
Special Safety Instructions
• Do not suck up liquids!
• Do not suck up hot ashes or pointed or sharp objects!
• Do not use the appliance in humid rooms!
• Never use without the filter. Check that the filter is inserted correctly!
• hair, clothing and body parts away from the vacuum nozzle during use!
• Keep the vacuum cleaner away from sources of heat like radiators, ovens, etc.!
Overview of the Components
1 Cable 7 Dust bag filling display
2 On/off switch 8 Dust bag compartment
3 Vacuum power regulator 9 Button for opening the dust bag
4 Carrying handle compartment
5 Cable-winding key 10 Hose connection
6 Accessory compartment 11 Vacuum hose
39
GB
5....-05-BS 1235 17.10.2003 11:41 Uhr Seite 39
Page 40

12 Parking assistance 16 Mains control lamp
13 Telescopic suction tube
14 Telescopic suction tube button Accessories:
15 Floor nozzle Crevice nozzle, Upholstery nozzle
Start-up
1. Insert the connection head of the suction hose (11) into the hose connection
(10) until its locks in place.
2. In order to release the hose again, press the two buttons on the side of the suction hose at the same time.
3. Keep the buttons pressed and then pull the hose out.
Using the Appliance
1. Attach the floor nozzle (15) or the accessory.
2. Unwind the length of cable (1) you require.
3. Insert the mains plug into a correctly installed safety socket (230 V, 50 Hz) and
then switch the machine on using the on/off switch (2).
4. Set the vacuum power with the vacuum power regulator (3).
5. Vacuum at a steady speed.There is no need to exert pressure.
6. Attention: pay attention to the range that can be covered with the cable length.
Accessory Compartment (6):
The integrated accessories (crevice nozzle, upholstery nozzle) can be found by pulling the lid of the accessory compartment.
Nozzle accessories:
Crevice nozzle: For vacuuming in corners and crevices.
Upholstery nozzle: For cleaning upholstery, curtains etc.
Floor nozzle (15): For cleaning carpets or smooth surfaces.
Smooth floors: Press the lever with the brush symbol
down with your foot.The brushes are
now visible.
Carpets: Press down the opposite lever.
Releasing the accessories:
Pull them apart while turning slightly.
Vacuum power regulator (3):
Low vacuum power: For curtains and delicate fabrics
Medium vacuum power: For long-pile velour carpets and textile flooring
High vacuum power: For sturdy rugs and floors
40
GB
5....-05-BS 1235 17.10.2003 11:41 Uhr Seite 40
Page 41

Telescopic Suction Tube (13):
As the length of the suction tube can be adjusted it can be adapted to your own
personal height. Unlock the coupling by pressing the button (14) downwards.Then
move the telescopic suction tube to the desired height.To fix the suction tube in
position, pull it until it is heard to lock in place.
Cable winding device:
Pull out the cable (1) up to the maximum length indicated with the yellow mark.
Never pull the cable out up to the red mark as the cable winding can be damaged.
Said damages are not covered by the warranty.
Winding:
Press the cable
(5)
winding button and guide the cable. Hold the cable to avoid wrap-
ping.
Air Slide:
Open the air slide on the hose handle in order to regulate the airflow or to clear any
particles sticking to the nozzle.
Dust bag replacement display (7):
Hold the hose up into air. If the dust bag change display lights up, the bag is full.
Please change it.
Changing the dust bag:
Pull the plug out of the socket. Press the button (9) to open the lid of the dust bag
compartment (until its locks in place). Remove the dust bag holder and pull the dust
bag out of the holder. Insert a new dust bag. Reinsert the dust bag holder. Close
the cover so that it snaps into place.
Filter: Your appliance has two filters.
Motor protection filter (inlet filter):
The inlet filter is located in the dust bag compartment. Press the button (9) to open the
lid of the dust bag compartment. The filter is located vertically in the rear section of the
dust housing. Remove the filter by pulling upwards. Clean the engine protection filter
after 10 dust bag changes. If necessary, the filter can also be washed in warm water
without any additives. Place it back into place only once it is completely dry!
Outlet filter
:
The appliance is also equipped with an outlet filter. It is located on the rear part of
your appliance behind a ventilation grid. Open the ventilation grille by pressing the
button above it.Then pull the grille out towards the front. Remove the filter and clean
as described above. Fit the filter back into place and close the ventilation grid by following the steps above in the opposite order.
41
GB
5....-05-BS 1235 17.10.2003 11:41 Uhr Seite 41
Page 42

Cleaning and storage
Cleaning
• Pull the plug out of the socket before cleaning!
• Clean the casing with a dry cloth.
Storage
• Let the iron cool down completely.
• Wind the cable completely.
• The hook on the suction tube can be suspended in the parking assistance (12)
on the rear or on the bottom of the device.
This device has been tested according to all relevant current CE guidelines,
such as electromagnetic compatibility and low voltage directives, and has been
constructed in accordance with the latest safety regulations.
Subject to technical changes without prior notice!
Guarantee
The device supplied by our Company is covered by a 24 month guarantee starting
on the date of purchase (receipt).
During the life of the guarantee any fault of the device or its accessories *) ascribable to material or manufacturing defects will be eliminated free of charge by repairing or, at our discretion, by replacing it.The guarantee services do not entail an
extension of the life of the guarantee nor do they give rise to any right to a new
guarantee!
Proof of the guarantee is provided by the proof of purchase.Without proof of
purchase no free replacement or repair will be carried out.
If you wish to make a claim under the guarantee please return the entire machine
in the original packaging to your dealer together with the receipt.
*) Damage to accessories does not mean automatic free replacement of the whole
machine. In such cases please contact our hotline.Broken glass or breakage of
plastic parts are always subject to a charge.
Defects to consumables or parts subject to wearing (e.g. motor pistons, kneading
blades, drive shafts, spare remote control, spare toothbrushes, saw blades, etc.) as
well as cleaning, maintenance or the replacement of said parts are not covered by
the guarantee and hence are to be paid!
The guarantee lapses in case of unauthorized tampering.
42
GB
5....-05-BS 1235 17.10.2003 11:41 Uhr Seite 42
Page 43

After the expiry of the guarantee
After the expiry of the guarantee repairs can be carried by the competent dealer or
repair service against the payment of the ensuing costs.
43
GB
5....-05-BS 1235 17.10.2003 11:41 Uhr Seite 43
Page 44

Ogólne wskazówki bezpieczeństwa
• Przed uruchomieniem urządzenia proszę bardzo dokładnie przeczytać
instrukcję obsługi.Proszę zachować ją wraz z kartą gwarancyjną, paragonem i w miarę możliwości również kartonem z opakowaniem wewnętrznym.
• Proszę wykorzystywać urządzenie jedynie dla prywatnego celu,jaki został
przewidziany dla urządzenia.Urządzenie to nie zostało przewidziane do
użytku w ramach działalności gospodarczej.Proszę nie korzystać z urządzenia na zewnątrz (chyba że w określonych warunkach).Proszę trzymać urządzenie z daleka od ciepła,bezpośredniego promieniowania słonecznego,wilgoci (w żadnym wypadku nie zanurzać w substancjach płynnych)oraz
ostrych krawędzi.Proszę nie obsługiwać urządzenia wilgotnymi
dłońmi.Jeżeli urządzenie jest wilgotne lub mokre,proszę natychmiast
wyciągnąć wtyczkę.
• Jeżeli nie korzystacie Państwo z urządzenia,jeżeli chcecie Państwo zamontować jakieś akcesoria,w celu wyczyszczenia lub w przypadku jakichkolwiek
zakłóceń,proszę zawsze wyłączyć urządzenie i wyjąć wtyczkę z gniazdka
(proszę pociągnąć za wtyczkę,nie za przewód zasilający).
• Pracującego urządzenia nie należy pozostawiać bez nadzoru. Jeżeli opuszczają Państwo miejsce pracy, należy zawsze pamiętać o wyłączeniu urządzenia, wzgl. wyjęciu wtyczki z gniazda (należy ciągnąć za wtyczkę, nie za
przewód).
• Aby uchronić dzieci przed niebezpieczeństwem związanym z elektrycznymi
urządzeniami,proszę zadbać o to,aby przewód zasilający nigdy nie wisiał
luźno,oraz aby dzieci nie miały dostępu do urządzenia.
• Proszę regularnie kontrolować urządzenie pod kątem uszkodzeń.Proszę nie
uruchamiać uszkodzonego urządzenia.
• W razie awarii proszę nie naprawiać urządzenia samemu lecz skorzystać z
pomocy autoryzowanego specjalisty. Jeżeli przewód zasilający nieodłączalny ulegnie uszkodzeniu, to powinien on być wymieniony u producenta lub
w specjalnym zakładzie naprawczym albo przez wykwalifikowaną osobę w
celu uniknięcia zagrożenia.
• Proszę stosować tylko oryginalne akcesoria.
• Prosimy pamiętać o podanych dalej „Specjalnych wskazówkach dotyczących bezpiecznego użytkowania“
Specjalne wskazówki dotyczące bezpieczeństwa
pracy odkurzacza
• Proszę nie wciągać odkurzaczem cieczy lub wilgoci!
• Proszę nie wciągać odkurzaczem gorącego popiołu, przedmiotów ostrych i
ostro zakończonych!
• Proszę nie używać urządzenia w wilgotnych pomieszczeniach!
• Proszę nigdy nie odkurzać bez filtra. Po włożeniu filtra proszę sprawdzić,
czy został założony prawidłowo!
44
PL
5....-05-BS 1235 17.10.2003 11:41 Uhr Seite 44
Page 45

• Podczas pracy odkurzacza proszę trzymać włosy, ubranie i części ciała z
daleka od końcówki!
• Proszę trzymać odkurzacz z daleka od źródeł ciepła takich jak promienniki,
piece itd.!
Zestawienie elementów obsługi
1 Kabel 10 Przyłączenie węża
2 Wyłącznik 11 Wąż odkurzacza
3 Regulator siły ssania 12 Element ułatwiający parkowanie
4 Uchwyt do przenoszenia 13 Teleskopowa rura zasysająca
5 Przycisk zwijania kabla 14 Przycisk teleskopowej rury
6 Kieszeń na akcesoria zasysającej
7 Wskaźnik stopnia napełnienia 15 Dysza podłogowa
worka do kurzu 16 Lampka podłączenia do sieci
8 Pojemnik na worki do kurzu
9 Przycisk do otwierania kieszeni Akcesoria: Dysza do fug,
na worek kurzowy Dysza do mebli tapicerowanych
Uruchomienie
1. Proszę wsunąć głowicę złączenia zasysającej rury giętkiej (11) w podłączenie dla rury giętkiej (10), do wyczucia oporu.
2. Aby ponownie poluzować rurę giętką proszę jednocześnie nacisnąć oba
przyciski znajdujące się z boku zasysającej rury giętkiej.
3. Proszę przytrzymać oba przyciski a następnie wyciągnąć rurę giętką.
Używanie urządzenia
1. Proszę zamontować dyszę podłogową (15) ewent. inne akcesoria.
2. Proszę odwinąć wymagany odcinek kabla (1).
3. Proszę umieścić wtyczkę prawidłowo zainstalowanym gniazdku z zestykiem
ochronnym 230 V, 50 Hz i włączyć urządzenie przy pomocy włącznika/
wyłącznika (2).
4. Siłę ssania proszę ustawić regulatorem siły ssania (3).
5. Teraz można rozpocząć odkurzanie w równomiernym tempie. Nie ma
konieczności dociskania końcówek do odkurzanej powierzchni.
6. Wskazówka: proszę pamiętać, że zasięg odkurzacza ograniczony jest
długością kabla!
Kieszeń na akcesoria (6):
Zintegrowane akcesoria (dysza do fug, dysza do mebli tapicerowanych) znajdą
Państwo odciągając pokrywę kieszeni na akcesoria.
45
PL
5....-05-BS 1235 17.10.2003 11:41 Uhr Seite 45
Page 46

Końcówki odkurzacza:
Dysza do fug: do odkurzania w kątach i szczelinach
Dysza do mebli
tapicerowanych: do czyszczenia mebli tapicerowanych, zasłon itp.
Dysza podłogowa (15): do czyszczenia dywanów i powierzchni gładkich
Gładkie podłogi: Proszę wcisnąć stopą w dół
dźwignię z symbolem szczotki.
Szczotki są teraz widoczne.
Dywany: Proszę wcisnąć do dołu znajdu-
jącą się naprzeciw dźwignię.
Wyjmowanie nasadki:
Proszę ją wyciągnąć lekko nią pokręcając.
Regulator siły ssania (3):
Niski stopień ssania: Do firanek, materiałów delikatnych.
Średni stopień ssania: Dywany welurowe i wykładziny dywanowe.
Wysoki stopień ssania: Do mocnych dywanów i podłóg.
Teleskopowa rura zasysająca (13):
Dzięki regulacji wysokości rury zasysania możliwe jest indywidualne dopasowanie rury do wzrostu osoby odkurzającej. Proszę odblokować łączenie naciskając
przycisk (14). Proszę rozsunąć teleskopową rurę zasysającą do wymaganej
wysokości. W celu ponownego zablokowania proszę pociągnąć za rurę zasysającą do usłyszenia charakterystycznego trzasku.
Zwijarka do kabla sieciowego:
Kabel (1) sieciowy można wyciągać maksymalnie do żółtego znacznika.
W żadnym wypadku proszę nie wyciągać kabla do czerwonego znacznika, gdyż
można w ten sposób uszkodzić funkcję zwijania kabla. Tego typu uszkodzenia
nie są objęte gwarancją.
Zwijanie:
Proszę wcisnąć przycisk (5) zwijania kabla i wprowadzać przewód do odkurzacza. Proszę mocno trzymać przewód, żeby zapobiec jego niekontrolowanym
ruchom.
Zasuwa powietrzna:
W celu regulacji przepływu powietrza lub odczepienia elementów przylegających do dyszy proszę otworzyć zasuwę powietrzną.
46
PL
5....-05-BS 1235 17.10.2003 11:41 Uhr Seite 46
Page 47

Wskaźnik wymiany worka kurzowego (7):
Wąż ssący proszę trzymać w powietrzu nie odkurzając nim. Gdy wskaźnik
napełnienia worka do kurzu świeci się, oznacza to, że worek jest pełny. Proszę
go wymienić na nowy.
Wymienianie worka do kurzu:
Proszę wyciągnąć wtyczkę z gniazdka. Przy pomocy przycisku (9) proszę otworzyć pokrywę kieszeni worka kurzowego (do wyczucia oporu). Proszę zdjąć uchwyt worka i wyjąć z niego worek kurzowy. Proszę założyć nowy worek. Proszę
umieścić uchwyt worka z powrotem wewnątrz urządzenia. Proszę zamknąć
pokrywę, tak, że słyszalne będzie „kliknięcie”.
Filtr: Urządzenie wyposażone jest w dwa filtry.
Filtr ochronny silnika (filtr wlotowy):
Filtr wlotowy znajduje się w kasetce na worek do kurzu. Przy pomocy przycisku
(9) proszę otworzyć pokrywę kieszeni worka kurzowego. Filtr osadzony jest pionowo w tylnej części obudowy kurzowej.Proszę wyjąć filtr ciągnąc go do góry.
Filtr ochronny silnika należy czyścić mniej więcej po 10 wymianach worka. W
razie konieczności można umyć filtr w ciepłej wodzie bez dodawania środków
czyszczących. Tylko całkowicie suchy filtr można wsadzić do odkurzacza!
Filtr wylotowy:
Dodatkowo urządzenie wyposażone jest w filtr wylotowy. Filtr ten znajduje się w
tylnej części urządzenia za kratką wentylacyjną. Kratkę wentylacyjną można
otworzyć naciskając przycisk znajdujący się powyżej kratki wentylacyjnej.
Następnie proszę wyjąć kratkę odciągając ją do przodu. Proszę wyjąć filtr i
wyczyścić go jak opisano powyżej. Proszę wsadzić filtr i zamknąć kratkę wentylacyjną wykonując czynności w odwrotnej kolejności.
Czyszczenie i przechowywanie
Czyszczenie:
• Przed przystąpieniem do czyszczenia urządzenia proszę wyciągnąć wtyczkę
z gniazda!
• Obudowę należy czyścić suchą szmatką.
Przechowywanie:
• Proszę poczekać, aż żelazko zupełnie ostygnie.
• Proszę w całości schować przewód.
• Haczyk przy rurze ssącej mogą Państwo zaczepić w służącym do przechowywania miejscu (12) na odwrocie lub na spodzie urządzenia.
47
PL
5....-05-BS 1235 17.10.2003 11:41 Uhr Seite 47
Page 48

Niniejsze urządzenie odpowiada wymaganiom normy bezpieczeństwa użytkowania oraz spełnia wymagania dyrektywy niskonapięciowej i kompatybilności elektromagnetycznej.
Zastrzega się prawo do zmian technicznych!
WARUNKI GWARANCJI
Przyznajemy 24 miesiące gwarancji na produkt licząc od daty zakupu.
W tym okresie będziemy bezpłatnie usuwać w terminie 14 dni od daty dostarczenia wadliwego sprzętu z kartą gwarancyjną do miejsca zakupu wszystkie uszkodzenia powstałe w tym urządzeniu na skutek wady materiałów lub wadliwego
wykonania, naprawiając oraz wymieniając wadliwe części lub (jeśli uznamy za stosowne) wymieniając całe urządzenie na nowe.
Sprzęt do naprawy powinien być dostarczony w komplecie wraz z dowodem
zakupu oraz z ważną kartą gwarancyjną do sprzedawcy w miarę możliwości w
oryginalnym opakowaniu lub innym odpowiednim dla zabezpieczenia przed uszkodzeniem. W razie braku kompletnego opakowania fabrycznego, ryzyko uszkodzenia sprzętu podczas transportu do i z miejsca zakupu ponosi reklamujący.
Naprawa gwarancyjna nie dotyczy czynności przewidzianych w instrukcji obsługi,
do wykonania których zobowiązany jest użytkownik we własnym zakresie i na
własny koszt.
Gwarancja nie obejmuje:
• mechanicznych, termicznych, chemicznych uszkodzeń sprzętu i wywołanych
nimi wad,
• uszkodzeń powstałych w wyniku działania sił zewnętrznych takich jak wyładowania atmosferyczne, zmiana napięcia zasilania i innych zdarzeń losowych,
• nieprawidłowego ustawienia wartości napięcia elektrycznego, zasilanie z nieodpowiedniego gniazda zasilania,
• sznurów połączeniowych, sieciowych, żarówek, baterii, akumulatorów,
• uszkodzeń wyrobu powstałych w wyniku niewłaściwego lub niezgodnego z
instrukcją jego użytkowania, przechowywania, konserwacji, samowolnego
zrywania plomb oraz wszelkich przeróbek i zmian konstrukcyjnych dokonanych
przez użytkownika lub osoby niepowołane,
• roszczeń z tytułu parametrów technicznych wyrobu, o ile są one zgodne z
podanymi przez producenta,
• prawidłowego zużycia i uszkodzeń, które mają nieistotny wpływ na wartość
lub działanie tego urządzenia.
Karta gwarancyjna bez pieczątki sklepu, daty sprzedaży, nie wypełniona, źle
wypełniona, ze śladami poprawek, nieczytelna wskutek zniszczenia, bez możliwości ustalenia miejsca sprzedaży oraz dołączonego dowodu zakupu jest nieważna.
48
PL
5....-05-BS 1235 17.10.2003 11:41 Uhr Seite 48
Page 49

Korzystanie z usług gwarancyjnych nie jest możliwe po upływie daty ważności
gwarancji. Gwarancja na części lub całe urządzenie, które są wymieniane kończy
się, wraz z końcem gwarancji na to urządzenie.
Wszystkie inne roszczenia, wliczając w to odszkodowania są wykluczone chyba, że
prawo przewiduje inaczej. Roszczenia wykraczające poza tą umowę nie są
uwzględniane przez tą gwarancję.
Gwarancja na sprzedany towar konsumpcyjny nie wyłącza, nie ogranicza ani
nie zawiesza uprawnień kupującego wynikających z niezgodności towaru z umową.
Gwarancja oraz zawarte w niej warunki obowiązują na terenie Rzeczpospolitej
Polskiej.
49
PL
5....-05-BS 1235 17.10.2003 11:41 Uhr Seite 49
Page 50

Všeobecné bezpečnostní pokyny
• Před uvedením tohoto přístroje do provozu si velmi pozorně přečtěte návod
k obsluze a tento návod spolu se záručním listem, pokladním blokem a
podle možností i s obalem a vnitřním vybavením obalu dobře uschovejte.
• Používejte tento přístroj výlučně pro soukromou potřebu a pro stanovené
účely. Tento přístroj není určen pro komerční použití. Nepoužívejte jej v
otevřeném prostoru (s výjimkou přístrojů, které jsou podmíněné používání
venku určeny). Chraňte jej před horkem, přímým slunečním zářením, vlhkostí (v žádném případě jej neponořujte do kapalin) a stykem s ostrými hranami. Nepoužívejte přístroj v případě, že máte vlhké ruce. Jestliže dojde k navlhčení nebo namočení přístroje, okamžitě vytáhněte zástrčku ze zásuvky.
Vyvarujte se styku s vodou.
• Přístroj vypněte a vždy vytáhněte zástrčku ze zásuvky (tahejte jen za zástrčku, nikdy ne za kabel), jestliže nebudete přístroj používat, chcete-li
namontovat příslušenství, přístroj vyčistit nebo v případě poruchy.
• Přístroj nesmí zůstat v provozu bez dozoru. Jestliže musíte pracoviště opustit, vždy přístroj vypněte, resp. vytáhněte zástrčku ze zásuvky (vždy tahejte
za zástrčku, nikdy ne za kabel).
• Abyste ochránili děti před riziky spojenými s elektrickými přístroji, postarejte
se o to, aby kabel nevisel dolů a děti na přístroj nedosáhly.
• Pravidelně kontrolujte přístroj a přívodní kabel z hlediska poškození. Jestliže
přístroj vykazuje nějakou závadu, neuvádějte jej do provozu.
• Neopravujte přístroj vlastními silami, nýbrž vyhledejte autorizovaného
opraváře. Abyste eliminovali rizika, nechejte poškozený přívodní kabel
nahradit kabelem se stejnými hodnotami a to jen výrobcem, naším servisem
pro zákazníky nebo jinou kvalifikovanou osobou.
• Používejte jen originální příslušenství.
• Respektujte, prosím, následující „Speciální bezpečnostní pokyny ...“.
Speziální bezpečnostní pokyny
• Nevysávejte zádnou vlhkost, resp. kapaliny!
• Nevysávejte horký popel, špičaté nebo ostré předměty!
• Nepouzívejte přístroj ve vlhkých prostorech!
• Nikdy nevysávejte bez filtrů. Vzdy po nasazení zkontrolujte správné usazení
filtrů!
• Během provozu vysavače dbejte na to, aby se do blízkosti sacích nástavců
nedostaly vlasy, části oblečení nebo těla!
• Neukládejte vysavač do blízkosti zdrojů tepla, jako jsou např. radiátory,
kamna atd.!
50
CZ
5....-05-BS 1235 17.10.2003 11:41 Uhr Seite 50
Page 51

Ovládací prvky
1 Kabel 10 Připojení hadice
2
Vypínač Zapnuto/Vypnuto (Ein/Aus)
11 Sací hadice
3 Regulátor sacího výkonu 12 Parkovací pomůcka
4 Transportní rukojeť 13 Teleskopická sací trubka
5 Tlačítko pro navíjení přívodního 14 Tlačítko teleskopické sací trubky
kabelu 15 Podlahový nástavec
6 Přihrádka pro uložení příslušenství 16 Kontrolní svítilna připojení k el. síti
7 Indikace naplnění pytlíku na prach
8 Přihrádka pro pytlík na prach Příslušenství:
9 Tlačítko pro otevření přihrádky pro Spárová hubice ,
pytlík na prach Kartáčový nástavec
Uvedení do provozu
1. Spojovací hlavici sací hadice (11) zastrčte do přípoje hadice (10) tak, aby
mechanicky zaklapla.
2. K uvolnění hadice stiskněte současně obě tlačítka na bocích hadice.
3. Podržte tato tlačítka stlačená a hadici vytáhněte.
Pouzívání přístroje
1. Namontujte podlahový nástavec (15), resp. příslušenství.
2. Odviňte požadovanou délku kabelu (1).
3. Zastrčte zástrčku do předpisově instalované zásuvky s ochranným kolíkem
230 V, 50 Hz, a pomocí vypínače (2) přístroj zapněte.
4. Pomocí regulátoru sacího výkonu nastavte pozadovaný sací výkon (3).
5. Vysávejte nyní rovnoměrnou rychlostí. Přitlačování nástavce k podkladu není
nutné.
6. Upozornění: Mějte na paměti, ze délka dosah vysavače je omezen délkou
kabelu!
Přihrádka pro uložení příslušenství (6):
Integrované příslušenství (spárová hubice, kartáčový nástavec) najdete pod
víkem přihrádky pro uložení příslušenství, které se otevře tak, že za něj zatáhnete.
Nástavce:
Spárová hubice: Pro vysávání v rozích a štěrbinách.
Kartáčový nástavec: Pro čištění čalounění, závěsů/záclon atd.
Podlahový nástavec (15): Pro čištění koberců nebo hladkých ploch.
Hladká podlaha: Sešlápnutím stiskněte páčku se
symbolem kartáče. Kartáč se vysune.
Koberce: Stlačte protilehlou páčku.
51
CZ
5....-05-BS 1235 17.10.2003 11:41 Uhr Seite 51
Page 52

Uvolnění nástavců:
Za lehkého otáčení je rozpojte.
Regulátor sacího výkonu (3):
Nízký sací výkon: pro záclony, citlivé materiály.
Střední sací výkon: pro velurové koberce a textilní podlahové krytinyVysoký sací výkon: pro robustní koberce a podlahy.
Teleskopická sací trubka (13):
Díky výškově přestavitelné sací trubce je umožněno individuální přizpůsobení
délky trubky podle Vaší tělesné výšky. Odjistěte spojku tak, že tlačítko (14)
stlačíte směrem dolů. Nastavte požadovanou délku teleskopické trubky. Pro
zajištění trubky za ni zatáhněte tak, aby slyšitelně zaklapla.
Zařízení pro navíjení přívodního kabelu:
Prosíme, vytahujte kabel (1) maximálně jen ke zlutému označení. Nevytahujte
kabel v zádném případě az k červenému označení, protoze by mohlo dojít k
poškození samonavíjecího zařízení. Takovéto závady pak nespadají do záručního
plnění.
Navíjení:
Stiskněte tlačítko (5) pro navíjení kabelu a “doveďte” kabel az do tělesa přístroje. Drzte jej pevně, aby nedošlo k nezádoucímu úderu do přístroje.
Vzduchový regulátor:
Otevírejte vzduchový regulátor na rukojeti k regulaci sacího tahu nebo pro
uvolnění věcí, ulpívajících na hubici.
Indikátor výměny pytlíku na prach (7):
Podrzte hadici volně ve vzduchu, bez zatízení. Jestlize indikátor nutnosti výměny
pytlíku svítí, je pytlík plný. Vyměňte jej.
Výměna pytlíku na prach:
Vytáhněte zástrčku ze zásuvky. Pomocí tlačítka (9) otevřete víko přihrádky pro
pytlík na prach (až zaklapne). Vyjměte nosič pytlíku a vytáhněte z něj pytlík na
prach. Vsuňte nový pytlík. Nasaďte nosič pytlíku opět zpět. Zavřete víko tak, aby
zaklaplo.
Filtry: Váš přístroj je vybaven dvěma filtry.
Ochranný filtr motoru (filtr nasávaného vzduchu):
Filtr nasávaného vzduchu najdete v přihrádce pro pytlík na prach. Pomocí tlačítka (9) otevřete víko přihrádky pro pytlík na prach. Filtr je umístěn svisle v zadní
52
CZ
5....-05-BS 1235 17.10.2003 11:41 Uhr Seite 52
Page 53

části tělesa.Vytáhněte filtr směrem nahoru. Ochranný filtr motoru vyčistěte po
kazdé 10. výměně pytlíku na prach. V případě potřeby jej můzete vyčistit v teplé
vodě, bez přísad. Filtr vlozte zpět jen tehdy, kdyz je uz zcela suchý!
Filtr odpadního vzduchu:
Váš přístroje je dále vybaven filtrem odpadního vzduchu. Tento filtr se nachází
na zadní části Vašeho přístroje za větrací mřízkou. Větrací mřížku otevřete stisknutím tlačítka nad ní. Poté mřížku vytáhněte směrem dopředu. Vyjměte filtr a
vyčistěte jej způsobem popsaným výše. Filtr znovu nasaďte a zavřete mřízku.
Postupujte v obráceném pořadí kroků.
Čištění a ulození
Čištění:
• Před čištěním vytáhněte zásuvku ze zástrčky!
• Těleso přístroje čistěte suchým hadříkem.
Ulození:
• Nechte žehličku úplně vychladnout.
• Zcela naviňte kabel.
• Háček na sací trubce můžete zavěsit do parkovací pomůcky (12) na zadní
nebo spodní straně přístroje.
Tento přístroj byl testován podle všech příslušných, v současné době platných
směrnic CE, jako je např. elektromagnetická kompatibilita a direktiva o nízkonapěťové bezpečnosti, a byl zkonstruován podle nejnovějších bezpečnostnětechnických předpisů.
Vyhrazujeme si technické změny!
Záruka
Na námi prodaný přístroj poskytujeme záruku v trvání 24 měsíců od data prodeje (pokladní doklad).
Během záruční lhůty odstraníme bezplatně všechny vady přístroje nebo
příslušenství*), které vzniknou v důsledku vad materiálu nebo výrobních vad, a to
opravou nebo, podle našeho uvážení, formou výměny. Záruční plnění nemají za
následek ani prodloužení záruční doby ani tím nevzniká nárok na novou záruku!
Jako záruční doklad slouží doklad o koupi. Bez tohoto dokladu nelze uskutečnit
bezplatnou výměnu nebo bezplatnou opravu.
V případě uplatnění záruky předejte, prosím, kompletní přístroj v originálním
obalu spolu s pokladním dokladem Vašemu obchodníkovi.
53
CZ
5....-05-BS 1235 17.10.2003 11:41 Uhr Seite 53
Page 54

*) Poškození příslušenství není automaticky důvodem pro bezplatnou výměnu
kompletního přístroje. V takovém případě se obraťte na naši Hotline! Prasklé
skleněné resp. plastové díly zásadně podléhají povinnosti úhrady!
Jak na vady na spotřebním příslušenství, resp. dílech podléhajících rychlému
opotřebení (např. uhlíky motoru, hnětací háky, hnací řemeny, náhradní dálkové
ovládání, náhradní zubní kartáčky, pilové listy atd.), tak i na čištění, údržbu nebo
výměnu dílů podléhajících rychlému opotřebení se záruka nevztahuje a je proto
nutno je uhradit!
Záruka zaniká v případě, že dojde k zásahu neautorizovanou osobou.
Po uplynutí záruky
Po uplynutí záruční doby je možno za úplatu provést opravy v příslušném
odborném obchodě nebo opravně.
54
CZ
5....-05-BS 1235 17.10.2003 11:41 Uhr Seite 54
Page 55

Általános biztonsági rendszabályok
• A készülék használatba vétele előtt gondosan olvassa végig a használati
utasítást, és őrizze meg a garancialevéllel, a pénztári nyugtával és lehetőleg
a csomagolókartonnal, ill. az abban lévő bélésanyaggal együtt!
• Kizárólag személyi célra használja a készüléket, és csupán arra, amire való!
A készülék nem ipari jellegű használatra készült. Ne használja a szabadban
(hacsak nem a szabadban való, meghatározott korlátok közötti használatra
van szánva)! Ne tegye ki erős hőhatásnak, közvetlen napsugárzásnak és
nedvességnek (semmi esetre se mártsa folyadékba), és óvja az éles
szélektől! Ne használja a készüléket vizes kézzel! Ha a készülék vizes vagy
nedves lett, azonnal húzza ki a konnektorból! Ne nyúljon bele a vízbe!
• Kapcsolja ki a készüléket, és amikor nem használja, tartozékokat helyez rá,
tisztítja, vagy ha zavart észlel, mindig húzza ki a csatlakozó dugaszt a
konnektorból!
• Ne működtesse a készüléket felügyelet nélkül! Ha elhagyja a munkahelyet,
mindig kapcsolja ki a készüléket, ill. húzza ki a dugaszt a konnektorból (a
dugasznál, és nem a kábelnél fogva)!
• Annak érdekében, hogy a gyermekeket megvédje az elektromos készülékek
okozta veszélyektől, soha ne hagyja a kábeleket szabadon lógva, és olyan
helyre tegye a készüléket, ahol gyermekek nem férhetnek hozzá!
• Rendszeresen ellenőrizze, hogy nincs-e a készüléken vagy a kábelen
sérülés! Sérült készüléket soha ne helyezzen üzembe!
• A kockázatok elkerülése végett ne maga javítsa a készüléket, hanem
keressen fel egy erre kiképzett szakembert! Ha hibás a csatlakozó kábel,
csak a gyártótól, a vevőszolgálatunktól vagy hasonló képzettségű személytől
kérjen helyette azonos értékű másik kábelt!
• Csak eredeti tartozékokat használjon!
• Tartsa be az itt következő "Speciális biztonsági rendszabályokat" ...
Speciális biztonsági rendszabályok
• Ne szívjon fel a készülékkel nedvességet, ill. folyadékokat!
• Ne szívjon fel forró hamut, hegyes vagy éles tárgyakat!
• Ne használja a készüléket vizeshelyiségekben!
• Soha ne porszívózzon filter nélkül! Behelyezés után mindig ellenőrizze, hogy
a filter megfelelően fekszik-e fel.
• Működés közben tartsa távol a porszívófejet a hajától, ruházatától és a
testrészeitől!
• Tartsa távol a porszívót olyan hőforrásoktól, mint pl. a radiátorok, kályha
stb.!
55
H
5....-05-BS 1235 17.10.2003 11:41 Uhr Seite 55
Page 56

A kezelőelemek áttekintése
1 Kábel 10 Tömlőcsatlakozó
2 Be-/kikapcsológomb 11 Szívótömlő
3 Szívóteljesítmény-szabályzó 12 Leállító támasz
4 Hordozófül 13 Teleszkópos szívócső
5 Kábelfelcsévélő gomb 14 A teleszkópos szívócső gombja
6 Tartozékfiók 15 Padlószívó fej
7 Porzsáktelítettség-kijelző 16 Hálózati bemenő lámpa
8 Porzsáktartó rekesz
9 A porzsáktartó rekesz Tartozékok:
nyitógombja Résszívó fej, Párnaszívófej
Használatba vétel
1. Dugja bele a szívótömlő (11) összekötő fejét a tömlőcsatlakozóba (10), úgy,
hogy mechanikusan bekattanjon!
2. Amikor a tömlőt ki akarja oldani, nyomja meg egyszerre mindkét gombot a
szívótömlő oldalán!
3. Tartsa a gombokat lenyomva, és így húzza ki a tömlőt!
A készülék használata
1. Szerelje fel a padlószívó fejet (15), ill. a tartozékot!
2. Tekerje le a kábelt a szükséges hosszúságban (1)!
3. Dugja a hálózati csatlakozó dugaszt előírásszerűen szerelt, 230 V, 50 Hz-es
földelt konnektorba, és a ki-/bekapcsoló gombbal kapcsolja be a készüléket!
4. Állítsa be a szabályozóval a kívánt szívóteljesítményt (3)!
5. Porszívózzon egyenletes sebességgel! A porszívót nem kell rányomni a
felületre!
6. Figyelem: Ügyeljen a kábel hosszúsága által megszabott hatótávolságra!
Tartozékfiók (6):
A tartozékokat (résszívó fej, párnaszívófej) megtalálja, ha elhúzza a tartozékfiók
fedelét.
Szívófejek:
Résszívó fej: sarkok és rések porszívózására
Párnaszívófej: párnásbútor, függönyök stb. tisztítására
Padlószívó fej (15): szőnyegek vagy sima felületek tisztítására
Sima padlózatok: Nyomja le a lábával a kefeszimbólum-
mal jelölt kart! A kefék előbukkannak.
Szőnyegek: Nyomja le a szemben lévő kart!
56
H
5....-05-BS 1235 17.10.2003 11:41 Uhr Seite 56
Page 57

A fejek kioldása:
Enyhén elfordítva húzza ki őket!
Szívóteljesítmény-szabályozó (3):
Kis szívóteljesítmény: függönyökhöz, érzékeny anyagokhoz
Közepes szívóteljesítmény: erősen bolyhos velúrszőnyegekhez és
szőnyegpadlóhoz
Nagy szívóteljesítmény: masszív szőnyegekhez és padlóhoz.
Teleszkópos szívócső (13):
Az állítható hosszúságú szívócső lehetővé teszi, hogy egyedileg hozzá lehessen
igazítani készülékhasználó testmagasságához. A gomb (14) lenyomásával
reteszelje ki a csőkötést! Húzza ki a teleszkópos csövet a kívánt magasságra! A
reteszeléshez húzza meg a csövet, míg jól hallhatóan be nem kattan!
Kábelfelcsévélő szerkezet:
A hálózati kábelt (1) csak a sárga jelölésig húzza ki! Semmi esetre se húzza
egészen a piros jelölésig, mert megsérülhet a kábelfelcsévélő. Az ilyen meghibásodásokra nem érvényes a garancia!
Felcsévélés:
Nyomja meg a kábelfelcsévélő gombot (5), és vezesse meg kézzel a begördülő
kábelt! Tartsa biztosan, hogy nehogy összetekeredjen!
Légelzáró:
A légáram szabályozása vagy a fejre tapadt részek leválasztása céljából nyissa
ki a légelzárót!
Porzsákcsere-kijelző (7):
Terhelés nélkül tartsa fel a szívótömlőt a levegőbe! Ha ég a porzsákcsere-jelző,
a zsák tele van. Cserélje újra!
A porzsák kicserélése:
Húzza ki a csatlakozó dugaszt a konnektorból! Nyissa ki a gombbal (9) a porzsáktartó rekesz fedelét (úgy, hogy bekattanjon)! Vegye ki a porzsáktartót, és
húzza ki belőle a porzsákot! Dugjon be helyette egy újat! Tegye vissza a porzsáktartót! Csukja vissza a fedelet úgy, hogy bekattanjon!
Filter: Porszívójának két filtere van.
Motorvédő filter (beszívófilter):
A beszívófilter a porzsáktérben található. Nyissa ki a gombbal (10) a porzsáktartó rekesz fedelét! A szűrő függőlegesen van elhelyezve a porház hátsó részé-
57
H
5....-05-BS 1235 17.10.2003 11:41 Uhr Seite 57
Page 58

ben. Felfelé húzza ki a szűrőt! Tisztítsa meg kb. minden 10. porzsákcsere után!
Ha szükséges, kimoshatja meleg vízben, adalékanyag nélkül. Csak akkor helyezze vissza, amikor már teljesen megszáradt!
Kibocsátófilter:
A porszívónak van még egy kibocsátófiltere is. Ez a filter a készülék hátsó részében, a szellőzőrács mögött található. A szellőzőrács felett lévő gomb megnyomásával nyissa fel a szellőzőrácsot! Utána húzza ki előre a rácsot! Vegye ki a
filtert, és tisztítsa meg a már leírt módon! Tegye vissza a filtert, és fordított sorrendben eljárva, zárja le a szellőzőrácsot!
Tisztítás és tárolás
Tisztítás:
• Tisztítás előtt húzza ki a dugaszt a konnektorból!
• A külső burkolatot száraz ruhával törölve tisztára!
Tárolás:
• Hagyja a készüléket teljesen kihűlni.
• Csévélje fel teljesen a kábelt!
• A szívócsövön lévő kampót be lehet akasztani a készülék hátoldalán vagy
alján lévő letámasztóba (12).
Ezt a készüléket az Európa Tanács minden vonatkozó aktuális irányelve szerint
(pl. elektromágnesesség-elviselő képesség vagy kisfeszültség-elviselő képesség) ellenőriztük, és a legújabb biztonságtechnikai előírások szerint készült.
Megjegyezzük az esetleges müszaki változásokat!
Garancia
Az általunk forgalmazott készülékre a vétel időpontjától (pénztári nyugta)
számított 24 havi garanciát vállalunk.
A garanciális időn belül saját mérlegelésünk szerint javítással vagy cserével
díjtalanul megszüntetjük a készülék vagy a tartozék *) olyan hiányosságait, amelyek anyaghibára vagy gyártási hibára vezethetők vissza. A garanciális szolgáltatások sem a garanciális idő meghosszabbítását nem eredményezik, sem nem
alapoznak meg újabb garanciára való igényt!
A garancia igazolására a pénztári nyugta szolgál. E nélkül az igazolás nélkül sem
díjmentes csere, sem díjtalan javítás nem végezhető.
Garanciális esetben szíveskedjék az alapkészüléket eredeti csomagolásában a
pénztári nyugtával együtt átadni a kereskedőjének!
58
H
5....-05-BS 1235 17.10.2003 11:41 Uhr Seite 58
Page 59

*) A tartozékok a jogszabályban előírt szavatossági kötelezettség (6 hónap)
hatálya alá tartoznak, és nem vezetnek az egész készülék díjtalan cseréjére.
Ilyen esetben ne a készüléket küldje be, ill. rendelje meg, hanem
vevőszolgálatunkkal egyeztetve csak a hibás tartozékot! Az üvegtörés okozta
hibák mindig térítéskötelesek!
Sem az elhasználódó tartozékokban, ill. kopó alkatrészekben (pl. szénkefe,
dagasztóhorog, hajtószíj, póttávvezérlő, pótfogkefe, fűrészlap stb.) bekövetkező
hibák, sem a tisztítás, karbantartás vagy a kopó alkatrészek cseréje nem esik a
garancia hatálya alá, következésképp térítésköteles.
Illetéktelen beavatkozás a garancia megszűnését eredményezi.
A garanciális idő után
A garanciális idő eltelte után a megfelelő szakkereskedésben vagy javítószolgálatnál végeztethet térítésköteles javításokat.
59
H
5....-05-BS 1235 17.10.2003 11:41 Uhr Seite 59
Page 60

Общие указания по технике безопасности
• Перед началом эксплуатации прибора внимательно прочитайте
прилагаемую инструкцию по эксплуатации и сохраните ее в надежном
месте, вместе с гарантийным талоном, кассовым чеком и, по
возможности, картонной коробкой с упаковочным материалом.
• Пользуйтесь прибором только частным образом и по назначению.
Прибор не предназначен для коммерческого использования. Не
пользуйтесь прибором под открытым небом (исключая приборы,
эксплуатация которых под открытым небом допустима). Предохраняйте
прибор от жары, прямых солнечных лучей, влажности (ни в коем случае
не погружайте его в воду) и ударов об острые углы. Не прикасайтесь к
прибору влажными руками. Если прибор увлажнился или намок, тут же
выньте вилку из розетки. Не прикасайтесь к мокрым местам.
• После эксплуатации, монтаже принадлежностей, чистке или поломке
прибора всегда вынимайте вилку из розетки (тяните за вилку, а не за
кабель).
• Не оставляйте включенные электроприборы без присмотра. Если
возникнет необходимость отлучиться, то выключите электроприбор или
выньте вилку из розетки (тяните за вилку, а не за кабель).
• Для защиты детей от поражений электротоком, следите за тем, чтобы
кабель не висел где попало и дети не имели доступа к прибору.
• Регулярно осматривайте прибор и кабель на предмет возможных
повреждений. Ни в коем случае не включайте прибор, имеющий
повреждения.
• Ни в коем случае не ремонтируйте прибор самостоятельно, а
обращайтесь в таком случае за помощью к специалисту, имеющему
соответствующий допуск. Из соображений безопасности, замена
сетевого шнура на равнозначный допускается только через заводизготовитель, нашу сервисную мастерскую или соответствующего
квалифицированного специалиста.
• Используйте только оригинальные запчасти.
• Пожалуйста, соблюдайте нижеследующие "Специальные указания по
технике безопасности ...".
Специальные указания по технике безопасности
• Не пользуйтесь пылесосом для удаления влажной пыли или жидкостей!
• Не пылесосьте горячую золу, острые или режущие предметы!
• Не пользуйтесь электроприбором во влажных помещениях!
• Ни в коем случае не работайте без фильтра. После каждой cмены
фильтра обязательно проверьте его правильную посадку!
• Во время работы держите пылесосную трубу на расстоянии от волос,
одежды и частей тела!
• Держите пылесос на расстоянии от источников тепла таких как:
радиаторы, печи и т.д..
60
RUS
5....-05-BS 1235 17.10.2003 11:41 Uhr Seite 60
Page 61

Перечень деталей прибора
1 Сетевой шнур 11 Пылесосный шланг
2 Выключатель ВКЛ/ВЫКЛ 12 Механизм крепления
3 Регулятор мощности пылесосной трубы
4 Ручка для переноски 13 Телескопическая пылесосная
5 Кнопка механизма сматывания труба
сетевого шнура 14 Кнопка телескопической
6 Отсек принадлежностей пылесосной трубы
7 Индикатор наполнения меш 15 Пылесосная щетка
капылесборника 16 Свтоиндикатор сти
8 Отсек для мешка-пылесборника
9 Кнопка открывания отсека
пылесборника Принадлежности:
10 Разъем для подключения Узкое сопло,
пылесосного шланга Щетка для мягкой мебели
Подготовка к работе
1. Вставьте соединительную головку пылесосного шланга (11) в гнездо
(10), до механической фиксации.
2. Для снятия шланга нажмите одновременно две кнопки на пылесосном
шланге.
3. Держите кнопки нажатыми и вытяните пылесосный шланг.
Порядок работы с электроприбором
1. Вставьте щетку (15) или какую-либо другую насадку.
2. Отмотайте сетевой шнур на необходимую длину (1).
3. Вставьте вилку в розетку с напряжением сети 230 V, 50 Hz,
установленную в соответствии с предписаниями, и включите пылесос
при помощи переключателя ВКЛ/ВЫКЛ (2).
4. При помощи регулятора установите необходимую мощность (3).
5. Пылесосьте с равномерной скоростью. Давить нет необходимости.
6. Внимание: следите за радиусом захвата пылесоса, ограниченного
длиной отмотанного кабеля!
Отсек принадлежностей (6):
Встроенные принадлежности (узкое сопло, щетка для мягкой мебели)
находятся под крышкой отсека принадлежностей.
Сопла-насадки:
Узкое сопло: для удаления пыли из труднодоступных углов
и щелей.
61
RUS
5....-05-BS 1235 17.10.2003 11:41 Uhr Seite 61
Page 62

Щетка для мягкой мебели: для удаления пыли с мягкой мебели,
занавесей и тд.
Щетка для полов (15): для удаления пыли с ковров и гладких
поверхностей.
Гладки полы: : нажмит но"ой на рычажок с
символом щтки. Тпрь щтки
становятся видимыми.
Ковры: нажмит на рычажок
находящийся напротив.
Снятие насадки:
Потяните ее с легким проворачиванием.
Регулятор мощности (3):
Слабая мощность: для занавесей, тонкой материи
Средняя мощность: для велюровых и текстильных полов
с длинным ворсом
Большая мощность: для грубых ковров и полов
Телескопическая пылесосная труба (13):
Благодаря наличию пылесосной трубы, регулируемой по длине, имеется
возможность приспособить ее под рост. Разблокируйте сочленение, нажав
вниз кнопку (14). Вдвигая или выдвигая сегменты трубы, отрегулируйте ее
на необходимую длину. Для фиксации длины потяните трубу до четко
слышимого щелчка.
Механизм сматывания сетевого шнура:
Пожалуйста не вытягивайте сетевой шнур (1) далее желтой метки. И ни в
коем случае не вытягивайте его до красной метки, это может привести к
поломке механизма сматывания. Подобные поломки не попадают под
гарантию.
Сматывание:
Нажмите на кнопку (5) механизма сматывания и помаленьку подавайте
кабель. Держите кабель крепко в руках, чтобы предотвратить его хлестание.
Воздушная заслонка:
Открывая воздушную заслонку на рукоятке пылесоса можно регулировать
силу потока воздуха или освободить сопло от присосавшихся к нему
предметов.
62
RUS
5....-05-BS 1235 17.10.2003 11:41 Uhr Seite 62
Page 63

Индикатор смены мешка-пылесборника (7):
Подымите пылесосную трубу в воздух. Если индикатор смены мешкапылесборника светится, то он полон. Пожалуйста смените его.
Смена мешка-пылесборника:
Выньте сетевую вилку из розетки. Откройте при помощи кнопки (9) крышку
отсека пылесборника (до фиксации). Выньте контейнер пылесборника
наружу и выньте из него пылесборник. Вставьте новый мешок. Вставьте
контейнер обратно. Закройте крышку обратно, до фиксации.
Фильтр: Электроприбор оснащен двумя фильтрами.
Защитный филь
тр мотора (входной фильтр):
Входной фильтр находится в отсеке мешка-пылесборника. Откройте при
помощи кнопки (9) крышку отсека пылесборника. Фильтр размещен
вертикально в задней части корпуса пылесоса. Вытяните фильтр вверх.
Прочищайте его примерно после каждой 10 смены мешка-пылесборника.
При необходимости его можно промыть в теплой воде, без добавок.
Вставляйте его обратно только после полной просушки!
Выпускной филь
тр:
Кроме всего электроприбор оснащен выпускным фильтром. Этот фильтр
находится на задней части прибора за вентиляционной решеткой. Откройте
вентиляционную решетку, нажав кнопку над ней. После этого вытяните
решетку вперед. Выньте фильтр и прочистите его, как это уже было
описано. Вставьте фильтр обратно и закройте вентиляционную решетку в
обратной последовательности.
Чистка и хранение
Чистка:
• Перед чисткой выньте сетевую вилку из розетки!
• Протрите корпус сухой тряпкой.
Хранение:
• Дайте утюгу полностью остыть.
• Полностью смотайте кабель.
• Крюк пылсосной трубы можно вставить в вспомо"атльно приспособлни
(12), находящся на обратной или нижнй сторон пылсоса.
63
RUS
5....-05-BS 1235 17.10.2003 11:41 Uhr Seite 63
Page 64

Это изделение прошло все необходимые и актуальные проверки,
предписанные директивой СЕ, к прим. на электромагнитную
совместимость и соответствие требованиям к низковольтной технике, оно
было также сконструировано и построено с учетом последних требований
по технике безопасности.
Мы оставляем за собой право на технические изменения!
Гарантийное обязательство
Гарантийный срок на территории Российской Федерации устанавливается
полномочными представителями.
Кассовый чек является гарантийным талоном. Без него невозможен
бесплатный ремонт или замена изделия.
В случае возникновжния притензий по гарантии, предъявите изделие в
полнойкомплектации, с оригинальной упаковкой и кассовым чеком
торговой точке, продавшей это изделие.
*) Дефекты принадлежностей не служат причиной для автоматической
замены всего изделия. В этом случае позвоните нам, пожалуйста, по
горячей линии! Разбитые стеклянные и поломаные пластмассовые детали
возмещаются только за дополнительную оплату!
Дефекты изнашиваемых принадлежностей или трущихся деталей (например
контактные щетки моторов, смесительные крюки, приводные ремни,
запасные пульты управления, запасные зубные щетки, пильные полотна и
т.д.), а также чистка, техобслуживание или замена трущихся деталей не
попадают под гарантию, и поэтому проводятся за отдельную оплату!
Гарантия теряется при вскрытии изделия посторонними лицами.
После гарантии
После окончания срока гарантии, ремонт изделий производится за оплату,
соответствующими мастерскими или пунктами сервисного обслуживания.
64
RUS
5....-05-BS 1235 17.10.2003 11:41 Uhr Seite 64
Page 65

Stünings Medien, Krefeld • 10/03
D-47906 Kempen/Germany · Industriering Ost 40
Internet: http://www.clatronic.de · email: info@clatronic.de
Technische Daten
Modell: BS 1235
Bemessungsspannung/-frequenz: 230 V, 50 Hz
Leistungsaufnahme: P
nom.
1400 W
P
max.
1800 W
Schutzklasse: ΙΙ
Dieses Gerät wurde nach allen zutreffenden,
aktuellen CE-Richtlinien geprüft, wie z.B.
elektromagnetische Verträglichkeit und
Niederspannungsdirektive und wurde nach den
neuesten sicherheitstechnischen Vorschriften
gebaut.
Technische Änderungen vorbehalten!
Bitte führen Sie das ausgediente Gerät
einer umweltgerechten Entsorgung zu.
5....-05-BS 1235 17.10.2003 11:41 Uhr Seite 65
 Loading...