

Page 1
Page 2
English
Thank you for purchasing this Clarion product.
• Please read this owner’s manual in its entirety before operating this equipment.
• After reading this manual, be sure to keep it in a handy place (e.g., glove compartment).
• Check the contents of the enclosed warranty card and keep it carefully with this manual.
• This manual includes the operating procedures of the CD changer, DAB and TV tuner connected via the
CeNET cable. The CD changer and TV tuner have their own manuals, but no explanations for operating
them are described.
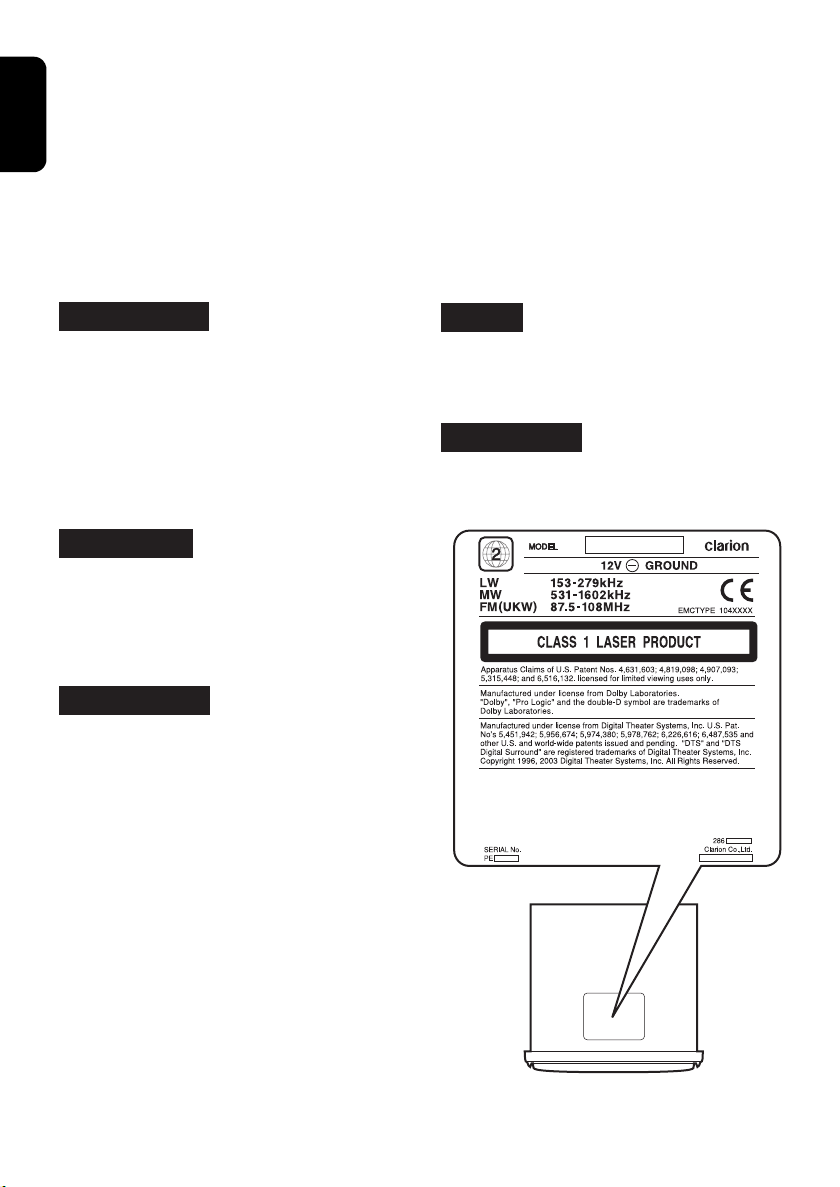
CAUTIONS:
This appliance contains a laser system and
is classified as a “CLASS 1 LASER
PRODUCT”. To use this model properly,
read this Owner’s Manual carefully and keep
this manual for your future reference. In
case of any trouble with this player, please
contact your nearest “AUTHORIZED service
station”. To prevent direct exposure to the
laser beam, do not try to open the enclosure.
!CAUTION
USE OF CONTROLS OR ADJUSTMENTS OR
PERFORMANCE OF PROCEDURES OTHER
THAN THOSE SPECIFIED IN THE OWNER’S
MANUAL MAY RESULT IN HAZARDOUS
RADIATION EXPOSURE.
ADVARSEL.
Denne mærking er anbragt udvendigt på
apparatet og indikerer, at apparatet arbejder
med laserstråler af klasse 1, hvilket betyder,
at der anvendes laserstråler af svageste
klasse, og at man ikke på apparatets
yderside kan blive udsat for utilladelig
kraftig stråling.
APPARATET BØR KUN ÅBNES AF
FAGFOLK MED SÆRLIGT KENDSKAB TIL
APPARATER MED LASERSTRÅLER!
Indvendigt i apparatet er anbragt den her
gengivne advarselsmækning, som advarer
imod at foretage sådanne indgreb i
apparatet, at man kan komme til at udsaætte
sig for laserstråling.
OBS!
Apparaten innehåller laserkomponenten
som avger laserstrålning överstigande
gränsen för laserklass 1.
VAROITUS
Suojakoteloa si saa avata. Laite sisältää
laserdiodin, joka lähettää näkymätöntä
silmille vaarallista lasersäteilyä.
2 VXZ768R
Page 3

Contents
1. PRECAUTIONS................................................................................................................................ 3
Flip Down Panel................................................................................................................................ 4
Handling Compact Discs .................................................................................................................. 4
2. CONTROLS...................................................................................................................................... 5
3. NOMENCLATURE ........................................................................................................................... 6
Names of the Buttons and their Functions ....................................................................................... 6
Major Button Operations When External Equipment is Connected to This Unit............................... 7
Display Items .................................................................................................................................... 8
Display Screen.................................................................................................................................. 8
4. DCP .................................................................................................................................................. 9
5. DVD VIDEO SYSTEM .................................................................................................................... 10
6. REMOTE CONTROL...................................................................................................................... 12
Buttons Used in the DVD Mode (During DVD/VCD playback)........................................................ 13
Buttons Used in Other Modes ........................................................................................................ 14
Operation Range of the Remote Control Unit................................................................................. 15
Inserting the Batteries .................................................................................................................... 15
7. OPERATIONS ................................................................................................................................ 16
Basic Operations ............................................................................................................................ 16
Radio Operations............................................................................................................................ 19
RDS Operations ............................................................................................................................. 20
DVD Operations.............................................................................................................................. 25
Watching a DVD-Video................................................................................................................... 26
Watching a video CD (V-CD) .......................................................................................................... 28
Listening to a CD ............................................................................................................................ 30
Listening to an MP3/WMA .............................................................................................................. 31
Changing Initial Settings such as Menu Language, etc.................................................................. 34
Different Pieces of Music Heard by Plural Listeners (2-ZONE function)......................................... 43
Common Operations ...................................................................................................................... 44
8. OPERATIONS OF ACCESSORIES............................................................................................... 48
CD Changer Operations ................................................................................................................. 48
TV Operations ................................................................................................................................ 50
Digital Radio / DAB Operations ...................................................................................................... 52
9. TROUBLE SHOOTING .................................................................................................................. 55
10. ERROR DISPLAYS ........................................................................................................................ 56
11. SPECIFICATIONS.......................................................................................................................... 57
English
1. PRECAUTIONS
1. When the inside of the car is very cold and
the player is used soon after switching on the
heater moisture may form on the disc or the
optical parts of the player and proper
playback may not be possible. If moisture
forms on the disc, wipe it off with a soft cloth.
If moisture forms on the optical parts of the
player, do not use the player for about one
hour. The condensation will disappear
naturally allowing normal operation.
2. Driving on extremely bumpy roads which
cause severe vibration may cause the sound
to skip.
INFORMATION FOR USERS:
CHANGES OR MODIFICATIONS TO THIS
PRODUCT NOT APPROVED BY THE
MANUFACTURER WILL VOID THE
WARRANTY.
VXZ768R 3
Page 4
Flip Down Panel
PRECAUTIONS
English
This unit uses a flip-down structure that makes
possible large-size displays.
!
CAUTION
When opening and closing the FLIP DOWN
PANEL, be careful not to catch your fingers.
They could be injured.
1. Always use this unit with the FLIP DOWN
PANEL closed.
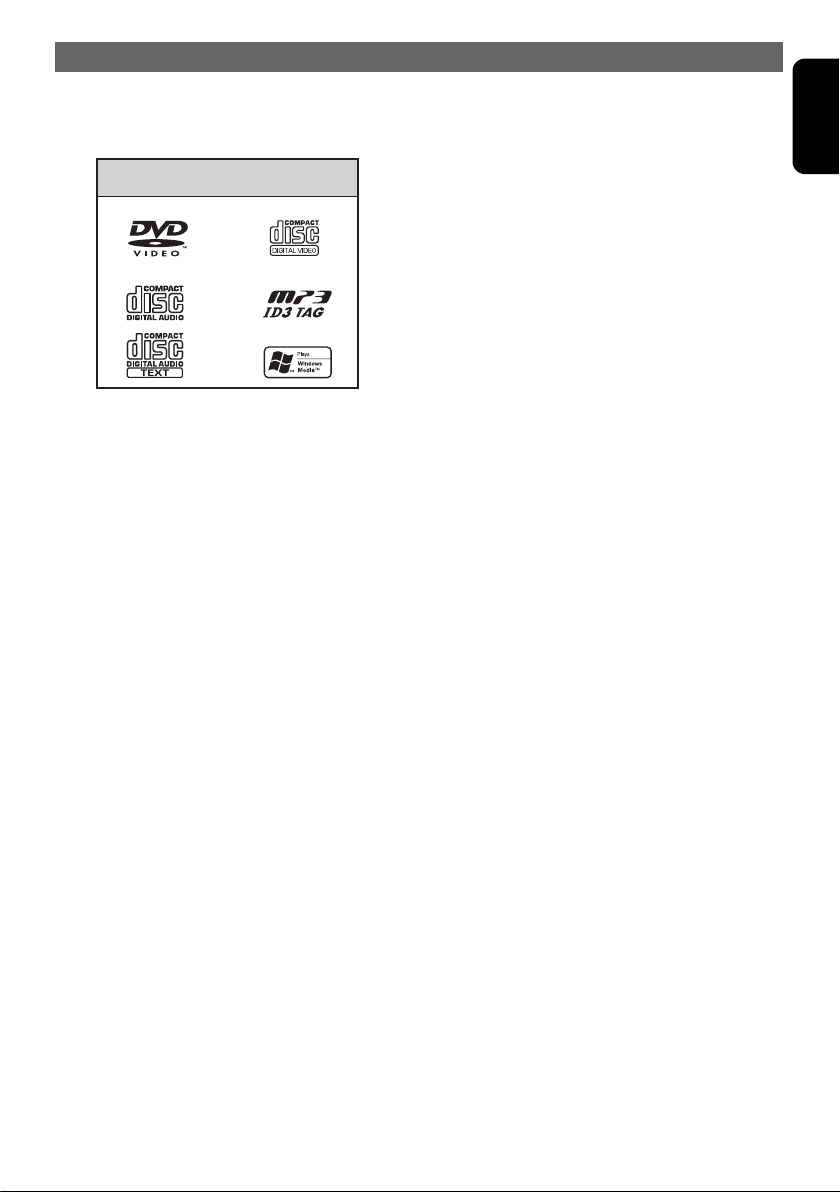
Handling Compact Discs
Use only compact discs bearing the or
mark.
Do not play heart-shaped, octagonal, or other
specially shaped compact discs.
Some CDs recorded in CD-R/CD-RW mode
may not be usable.
Handling
• Compared to ordinary music CDs, CD-R and
CD-RW discs are both easily affected by high
temperature and humidity and some of CD-R and
CD-RW discs may not be played.
Therefore, do not leave them for a long time in the
car.
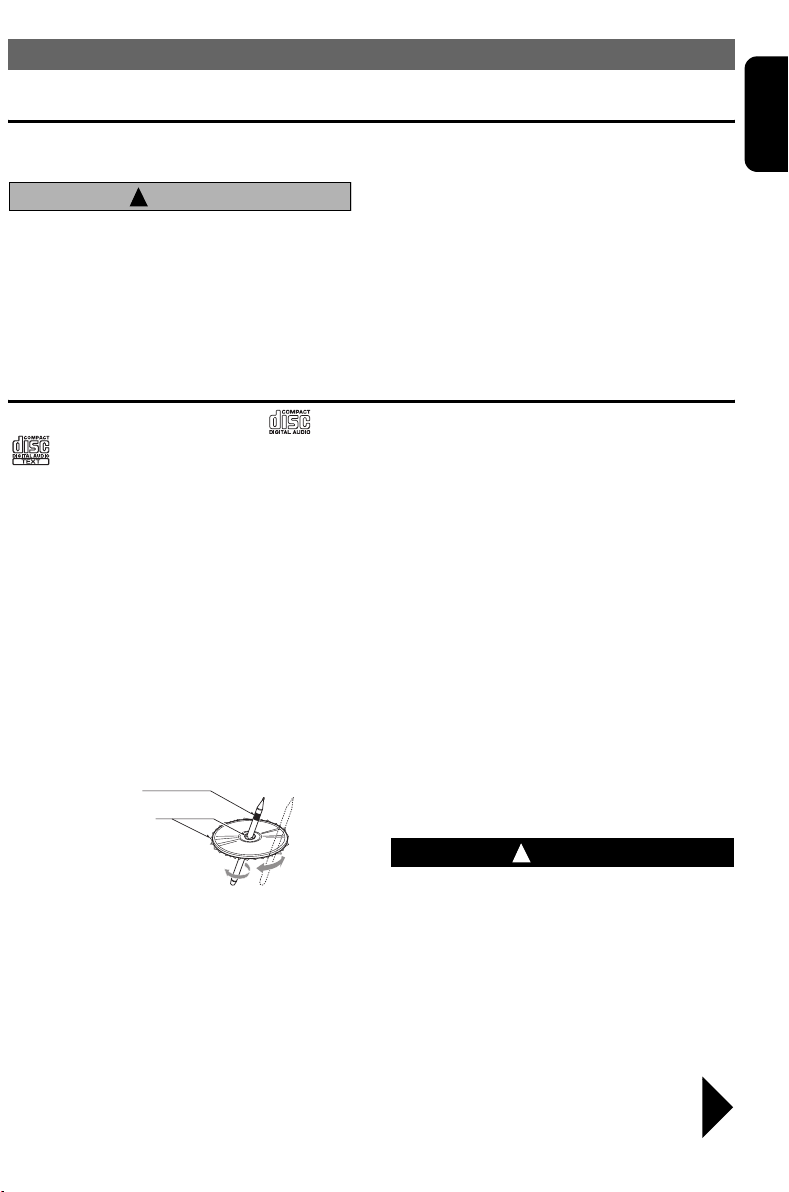
• New discs may have some roughness around the
edges. If such discs are used, the player may not
work or the sound may skip. Use a ball-point pen
or the like to remove any roughness from the edge
of the disc.
Ball-point pen
Roughness
2. Do not force operations or use this device
abnormally when opening or closing the FLIP
DOWN PANEL.
3. Do not use the FLIP DOWN PANEL as a tray
to place objects on when it is open.
4. When closing the FLIP DOWN PANEL, do
not press the [OPEN] button.
5. Strong impacts to the operating or display
section can cause damage or deformation.
6. If the FLIP DOWN PANEL does not open
fully, gently open it with your hand.
• To remove a compact disc from its storage case,
press down on the center of the case and lift the
disc out, holding it carefully by the edges.
• Do not use commercially available CD protection
sheets or discs equipped with stabilizers, etc.
These may damage the disc or cause breakdown
of the internal mechanism.
Storage
• Do not expose compact discs to direct sunlight or
any heat source.
• Do not expose compact discs to excess humidity
or dust.
• Do not expose compact discs to direct heat from
heaters.
Cleaning
• To remove fingermarks and dust, use a soft cloth
and wipe in a straight line from the center of the
compact disc to the circumference.
• Do not use any solvents, such as commercially
available cleaners, anti-static spray, or thinner to
clean compact discs.
• After using special compact disc cleaner, let the
compact disc dry off well before playing it.
!
WARNING
• Never stick labels on the surface of the compact
disc or mark the surface with a pencil or pen.
• Never play a compact disc with any cellophane
tape or other glue on it or with peeling off marks. If
you try to play such a compact disc, you may not
be able to get it back out of the CD player or it may
damage the CD player.
• Do not use compact discs that have large
scratches, are misshapen, cracked, etc. Use of
such discs may cause misoperation or damage.
Be sure to unfold and read the next page. / Veuillez déplier et vous référer à la page suivante.
Bitte ausbreiten und die nächste Seite lesen. / Assicurarsi di aprire e leggere la pagina successiva.
Volgende pagina uitvouwen en doorlezen a.u.b. / Cerciórese de desplegar y de leer la página siguiente.
Glöm inte att vika ut och läsa nästa sida. / Não deixe de abrir e ler a próxima página.
About a Single CD (8cm CD)
• Since the unit is not compatible with a
single CD, do not load it into the unit.
• Keep in mind the fact that a single CD
cannot be played even using a single CD
adaptor for the unit.
• If you try to push it into the unit forcibly
without removing it, the CD cannot be
ejected. This will result in damage to the
mechanism. Please never do this.
VXZ768R 4
Page 5
2. CONTROLS / LES COMMANDES / REGLER / CONTROLLI
English Français Deutsch Italiano
REGELAARS / CONTROLES / KONTROLLER / CONTROLOS
Main unit / Appareil principal / Hauptgerät / Apparecchio principale
Hoofdtoestel / Unidad principal / Huvudenhet / Unidade principal
Nederlands
Español Svenska
Português
Note: Be sure to unfold this page and refer to the front diagrams as you read each chapter.
Remarque: Veuillez déplier cette page et vous référer aux schémas quand vous lisez chaque chapitre.
Hinweis: Bitte diese Seite ausfalten und beim Lesen der einzelnen Kapitel die Frontdiagramme
beachten.
Nota: Assicurarsi di aprire questa pagina e fare riferimento a questi diagrammi quando si legge
ciascun capitolo.
Opmerking: Vouw deze pagina uit en zie tevens de afbeeldingen van het voorpaneel tijdens het
doorlezen van de volgende hoofdstukken.
Nota: Cuando lea los capítulos, despliegue esta página y consulte los diagramas.
Observera: Vik ut denna sida för att kunna se figurerna över bilstereons framsida medan du läser de
olika kapitlen.
Nota: Certifique-se de abrir esta página e consulte os diagramas frontais conforme realiza a leitura de
cada capítulo.
5 VXZ768R
Page 6
English
3. NOMENCLATURE
Note:
•
Be sure to read this chapter referring to the front diagrams of chapter “2. CONTROLS” on page 5 (unfold).
Names of the Buttons and their Functions
[OPEN] button
• Deeply push in the button to unlock the flip down
panel.
[ADJ] button
• Switches to the adjust mode.
• Press and hold for 1 second or longer to switch to
the RDS mode. (radio, DAB mode only)
• Press and hold for 1 second or longer to display
the setup main menu while in the DVD mode.
[PS/AS], [ ] button
• Plays or pauses a CD or DVD while in the DVD
mode.
• Press and hold for 1 second or longer in the DVD
mode to stop playback.
• Performs preset scan in the radio mode.
• Press and hold for 2 seconds or longer to perform
auto store in the radio mode.
• Confirms various settings.
[TA] button
• TA (Traffic Announcement) on and off.
[ ] button
• Press and hold for 1 second or longer to turn on or
off the 2-ZONE mode.
• Press to switch the control zone between main
zone or sub zone while 2-ZONE mode on.
[Z+] button
• Use the button to select one of the 4 types of
sound characteristics already stored in memory.
• Press and hold for 1 second or longer to return to
“FLAT” the default value.
[MENU] button
• The DVD menu is displayed while a DVD is
playing.
• Pressing and holding for 1 second or longer also
displays the DVD title screen.
• The VCD MENU is displayed while a Video CD is
playing (when PBC is ON).
[TITLE] button
• Switches the titles.
• Press and hold for 1 second or longer to input or
scroll the title.
[DISP] button
• Switches the display indication (main display,
clock display).
• Press and hold for 1 second or more but less than
4 seconds to switch to the display adjust mode.
• Press and hold for 4 seconds or longer to turn off
the display.
[BND] button
• Switches the band.
• Press and hold for 1 second or longer to switch
seek or manual tuning.
• Returns to a first scene or track while in the DVD
mode.
[UP], [DN] buttons
• Selects the folder while an MP3/WMA disc is
playing.
IR-Receiver
• Receiver for remote control unit. (Operating range:
30° in all directions)
[DIRECT] buttons
• Stores a station into memory or recalls it directly
while in the radio mode.
[RDM] button
• Performs random play while in the DVD mode.
• Press and hold for 1 second or longer to perform
folder random play while an MP3/ WMA disc is
playing.
[RPT] button
• Repeats play while in the DVD mode.
• Press and hold for 1 second or longer to perform
folder repeat play while an MP3/ WMA disc is
playing.
[SCN] button
• Performs scan play for 10 seconds of each track
while in the DVD mode.
• Press and hold for 1 second or longer to perform
folder scan play while an MP3/WMA disc is
playing.
[SRC] button
• Press to turn on the power.
• Press and hold for 1second or longer to turn off
the power.
• Switches the operation mode among the radio
mode, etc.
[A-M] button
• Switches to the audio mode (CENTER-VOL,
SUB-WOOF VOL, Z-Enhancer Plus, BASS,
TREBLE, BALANCE, FADER).
• Press and hold for 1 second or longer to turn on or
off the MAGNA BASS EXTENED.
6 VXZ768R
Page 7

NOMENCLATURE
[] / [] lever
• Select a station while in the radio mode or select a
scene or a track while in the DVD mode.
• This lever is used to make various settings.
• Move for 1 second or longer to switch the
fast-forward/fast-rewind.
[ROTARY] knob
• Turn to adjust the volume.
• Performs various settings.
[DVD/CD SLOT]
• Disc insertion slot.
[ ] button
• Ejects a disc loaded in the unit.
Major Button Operations When External Equipment is
Connected to This Unit
English
zWhen the CD changer is connected
• For details, see the section “CD Changer
Operations” (P. 48).
[ ] button
• Plays or pauses a CD.
[TITLE] button
• Switches the titles.
• Press and hold for 1 second or longer to input or
scroll the title.
[DISP] button
• Switches the display indication (main display,
clock display).
• Press and hold for 1 second or more but less than
4 seconds to switch to the display adjust mode.
• Press and hold for 4 seconds or longer to turn off
the display.
[BND] button
• Advances to next disc.
[UP], [DN] buttons
• Selects the disc.
[RDM] button
• Performs random play.
• Press and hold for 1 second or longer to perform
disc random play.
[RPT] button
• Performs repeat play.
• Press and hold for 1 second or longer to perform
disc repeat play.
[SCN] button
• Performs scan play for 10 seconds of each track.
• Press and hold for 1 second or longer to perform
disc scan play.
[] / [] lever
• Repeats or advances a track when listening to a
disc.
• Move for 1 second or longer to switch the
fast-forward/fast-rewind.
zWhen the TV/DAB is connected
• For details, see the section “TV Operations”
(P. 50) or “Digital Radio / DAB Operations”
(P. 52).
[ADJ] button
• Press and hold for 1 second or longer to switch
the TV picture mode or VTR (external) picture
mode.
• Press and hold for 1 second or longer to switch to
the RDS mode. (radio, DAB mode only)
[PS/AS] button
• Performs preset scan in the TV mode.
• Press and hold for 2 seconds or longer to perform
auto store in the TV mode.
• Performs service scan while in the DAB mode.
[TA] button
• Sets the TA (Traffic Announcement) standby mode
in the DAB mode. (This function is only DAB
tuner.)
• Press and hold for 1 second or longer to turn on or
off the INFO mode. (This function is only DAB
tuner.)
[BND] button
• Switches the band.
• Press and hold for 1 second or longer to switch
seek or manual tuning.
[DIRECT] buttons
• Stores a station into memory or recalls it directly.
[ ] / [ ] lever
• Selects a station.
VXZ768R 7
Page 8
NOMENCLATURE
English
Display Items
Operation status and function mode indication
Titles, CT(clock), and the names of the mode
being selected etc. are displayed.
Function indication
: Stereo indication
: Manual indication
: MP3 indication
: WMA indication
: DVD indication
: VCD indication
: ENT indication
: 2-ZONE indication
: Main indication
: Sub indication
: MAGNA BASS EXTEND indication
: Z-Enhancer Plus indication
: Mute indication
Playback time indication,
Frequency indication
: Reception band indication
: Track number indication (CD/V-CD/MP3/WMA disc)
: Chapter number indication (DVD disc)
: Preset channel indication (1 to 6)
: Disc number indication (1 to 6) (CD)
: Disc (folder) Scan etc.
: Scan indication
: Repeat indication
: Random indication
: Title number indication (DVD disc)
: Folder number indication (MP3/WMA disc)
Display Screen
In extreme cold, the screen movement may slow down and the screen may darken, but this is normal.
The screen will recover when it returns to normal temperature.
The color of the display screen may vary by heat of the unit or temperature inside your car. This is the
phenomenon specific to illuminant; it is not breakdown.
The screen will recover when it returns to normal temperature.
8 VXZ768R
Page 9
4. DCP
English
The control panel can be detached to prevent
theft. When detaching the control panel, store it
in the DCP (DETACHABLE CONTROL PANEL)
case to prevent scratches.
We recommend taking the DCP with you when
leaving the car.
Removing the DCP
1. Press the [SRC] button for 1 second or longer
to turn off the power.
2. Deeply push in [OPEN] button to unlock the
flip down panel.
• If the flip down panel does not open fully, gently
open it with your hand.
[OPEN] button
DCP
3. Pull the DCP toward you and remove it.
DCP
4. Close the HOLD FLAP.
!
CAUTION
Be sure to close the HOLD FLAP for safety
when removing the DCP.
Attaching the DCP
1. Insert the right side of the DCP into the main
unit.
2. Insert the left side of the DCP into the main
unit.
2.
DCP
!
CAUTION
• The DCP can easily be damaged by shocks.
After removing it, be careful not to drop it
or subject it to strong shocks.
• If the FLIP DOWN PANEL is kept open, the
DCP may drop due to vibration of the car.
This results in damage to the DCP. So
close the FLIP DOWN PANEL or remove the
DCP to store into the case.
• The connector connecting the source unit
and the DCP is an extremely important
part. Be careful not to damage it by
pressing on it with fingernails,
screwdrivers, etc.
Note:
•
If the DCP is dirty, wipe off the dirt with a soft, dry
cloth only.
1.
HOLD FLAP
VXZ768R 9
Page 10
English
5. DVD VIDEO SYSTEM
DVD video is a high-quality digital video source that provides crisp and clear images. One 12 cm disc
contains either one film or four hours of music.
z DVD Video Features
This unit provides the following functions in
addition to the high image quality and sound
quality of DVD video.
Notes:
•
The functions, for example, the recorded
language, subtitles, angles, etc. differ with the
DVD video disc. Refer to the instructions provided
with the DVD video.
•
Some disc functions may operate differently than
described in this manual.
z Note on region numbers
The DVD video system assigns a region number
to DVD video players and DVD discs by sales
area.
This player can play “ALL” and “2” (and “2”
inclusive). For information checking on the
recognition of “2”, see “Country code list”
(P. 37). The DVD video region number is
marked on the disc jacket as shown.
z Multi-sound function
DVD video can store up to 8 languages for one
film; select the language of your preference.
• The languages stored on the disc are indicated by
the icon as shown.
z Multi-story function
When a DVD video contains more than one
story for a film, you can select the story you
wish to enjoy. The operation procedures vary
with the disc; observe the instructions for
selecting a story provided during playback.
z Dolby Digital
Dolby Digital enables up to 5.1 independent
multi-channel audio reproduction, the same type
of surround system that is also used in movie
theaters.
z DTS
DTS (Digital Theater System) is a sound system
that differs from the Dolby Digital system. DTS
provides a larger amount of data than Dolby
Digital enabling high-quality surround playback
and incorporates a DTS-CD software for music
like a DVD software allows 5.1 channel
independent multichannel audio reproduction.
z Menu screens
Menus can be called up during DVD video
playback to perform menu setting.
z Multi-angle function
A DVD video that is filmed from multiple angles
allows you to select the angle of choice.
• The number of recorded angles are indicated by
the icon as shown.
z Subpicture (subtitles) function
A DVD video can record subtitles for up to 32
languages and you can select the language of
the subtitles you wish to see.
• The number of recorded subtitle languages are
indicated by the icon as shown.
10 VXZ768R
z TV color system
This DVD player plays PAL discs and NTSC
discs only and cannot be used for playback of
SECAM discs.
Page 11
z Playable discs
This DVD video player can play the following
discs.
Playable disc
DVD video discs
Audio CDs MP3 ID3 TAG
video CDs
WMA
z MP3/WMA discs
This unit can play back CD-R/CD-RW and
DVD ±R/RW discs on which MP3/WMA music
data have been recorded. For a detailed
information, see the page entitled “Listening to
an MP3/WMA” (P. 31).
z CD Extra discs
A CD Extra disc is a disc in which a total of two
sessions have been recorded. The first session
is Audio session and the second session Data
session.
Your personally-created CDs with more than
second data sessions recorded cannot be
played on this DVD video player.
Note:
•
When you play a CD Extra disc, only the first
session will be recognizesd.
z Discs that cannot be played back
This DVD video player cannot play back
DVD-Audio, DVD-RAM, Photo CDs, etc.
Notes:
•
This unit cannot play 8cm discs.
•
It may also not be possible to play back CDs
recorded on a CD-R unit and CD-RW unit.
(Cause: disc characteristics, cracks, dust/dirt,
dust/dirt on player’s lens, etc.)
•
If a CD-R or CD-RW disc that has not been
finalized is played, it will take a long time to start
playing. Also, it may not be possible to play
depending on its recording conditions.
•
You cannot play Super Audio CDs. Playback of the
CD layer is not supported even if it is a hybrid disc.
z About playing a CD-R/CD-RW disc (MP3,
WMA)
This player can play CD-R/CD-RW discs
previously recorded in music CD format (MP3,
WMA) or video CD format.
DVD VIDEO SYSTEM
z About playing a DVD±R/RW disc
This player cannot play DVD±R/RW discs
previously recorded in video CD format.
However, MP3/WMA files recorded on
DVD ±R/RW discs can be played.
About the registered marks etc.
• This product incorporates copyright protection
technology that is protected by method claims of
certain U.S. patents and other intellectual property
rights owned by Macrovision Corporation and
other rights owners. Use of this copyright
protection technology must be authorized by
Macrovision Corporation, and is intended for
home and other limited viewing uses only unless
otherwise authorized by Macrovision Corporation.
Reverse engineering or disassembly is prohibited.
• Manufactured under license from Dolby
Laboratories. “Dolby”, “Pro Logic”, and the
double-D symbol are trademarks of Dolby
Laboratories.
• Manufactured under license from Digital Theater
Systems, Inc.U.S. Pat. No’s. 5,451,942;
5,956,674; 5,974,380; 5,978,762; 6,226,616;
6,487,535 and other U.S. and worldwide patents
issued and pending. “DTS” and “DTS Digital
Surround” are registered trademarks of Digital
Theater Systems, Inc. Copyright 1996, 2003
Digital Theater Systems, Inc. All Rights Reserved.
• Windows Media™, and the Windows ® logo are
trademarks, or registered trademarks of Microsoft
Corporation in the United States and/or other
countries.
English
VXZ768R 11
Page 12
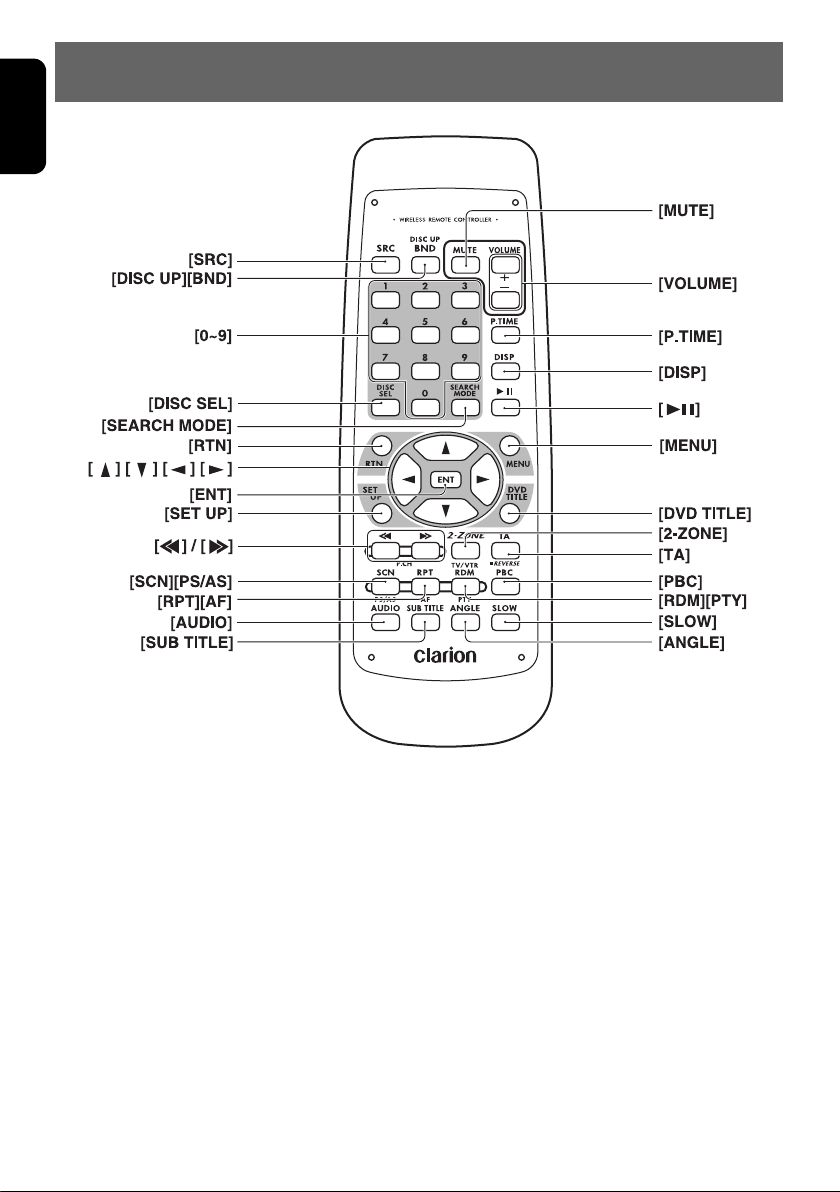
English
6. REMOTE CONTROL
12 VXZ768R
Page 13
REMOTE CONTROL
Buttons Used in the DVD Mode (During DVD/VCD
playback)
English
[P.TIME] button
Used to switch among play time displays.
[0-9] buttons (Ten-key buttons)
Used to input numbers.
[MENU] button
DVD VIDEO: Displays the menu screen.
V-C D: Displays the PBC menu.
[RTN] button
Returns to the previous menu.
[ ], [ ], [ ], [ ] buttons (cursor
buttons)
When selecting the menu items shown in the
monitor screen, use the cursor buttons to move
the cursor up and down, left and right.
[ENT] button
Press this button to enter the setup item.
[DVD TITLE] button
DVD VIDEO: Displays the title screen.
[SET UP] button
Displays the setup screen of the unit.
[PBC] button
Turns on/off the playback control (PBC) function.
[AUDIO] button
DVD VIDEO: Switches among languages
for audio.
V-C D: Switches among audio output
methods.
[SUB TITLE] button
Switches among languages for the subtitle.
[ANGLE] button
Switches among angles while in DVD playback.
(This button is available only on multiple angles
DVD s.)
[SLOW] button
While the button is kept pressed, slow play is
performed.
[SEARCH MODE] button
After this button is pressed, enter numbers
using Ten-key buttons.
DVD-VIDEO: TITLE/CHAPTER number.
V-C D: TRACK number (key inputs are
accepted only when the PBC is turned off.)
CD: TRACK number.
MP3/WMA: FOLDER/TRACK number.
[RPT] button
Repeat play. (During DVD-video playback.)
• Scan/repeat/random playback is impossible
during VCD playback.
VXZ768R 13
Page 14
REMOTE CONTROL
English
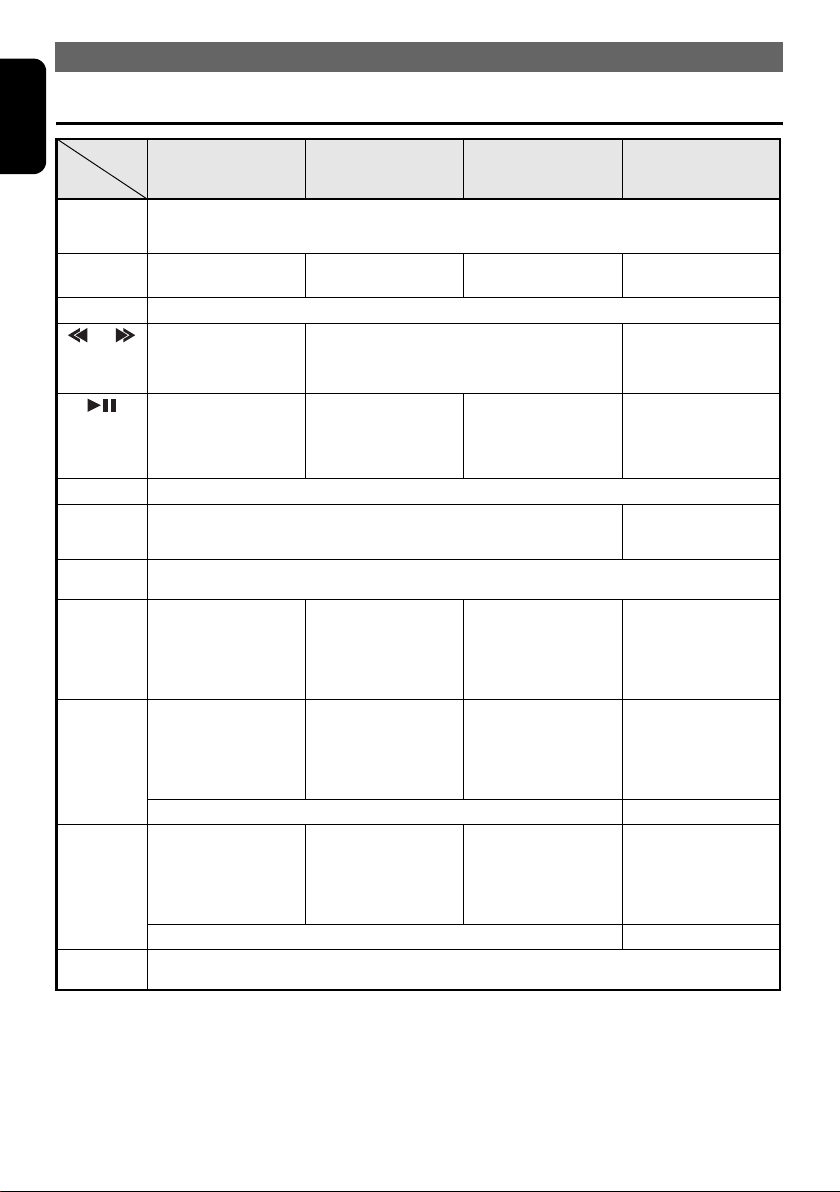
Buttons Used in Other Modes
Mode
Button
[SRC]
[DISC UP],
[BND]
[VOLUME]
[] , []
[]
[MUTE]
[TA]
[DISP]
[SCN],
[PS/AS]
[RPT], [AF]
[RDM],
[PTY]
[2-ZONE]
Radio (RDS) /DAB DVD CD changer TV
Switches among radio, DVD, CD changer, TV and AUX. Press to cancel a traffic announcement
broadcast, an emergency broadcast, and a PTY broadcast during a TA, ALARM or PTY
interrupt (except in the TV mode).
Switches reception
band.
Increases and decreases volume (in all modes).
Moves preset
channels up and
down.
No function. Switches between
Turns mute on and off.
TA on and off.
Press to cancel a traffic announcement broadcast during a TA
interrupt.
Switches among main display and clock display, and turns off the display.
When pressed and held for 1 second or longer: Switches the titles (except in the TV mode).
Preset scan.
When pressed and
held for 2 seconds or
longer:
Auto store.
AF function on and off.
When pressed and
held for 1 second or
longer:
REG function on and
off
Press to cancel an emergency broadcast during an ALARM interrupt. No function.
PTY mode on and off. Random play.
Press to cancel a PTY broadcast during a PTY interrupt. No function.
Press to switch the control zone between main zone or sub zone while 2-ZONE mode on.
Press and hold for 1 second or longer to turn on or off the 2-ZONE mode.
Returns to the first
track.
Moves tracks up and down.
When pressed and held for 1 second or
longer:
Fast-forward/fast-rewind.
playback and pause.
When pressed and
held for 1 second or
longer to stop play.
Scan play.
When pressed and
held for 1 second or
longer:
Folder scan play
(MP3/WMA disc).
Repeat play.
When pressed and
held for 1 second or
longer:
Folder repeat play
(MP3/WMA disc).
When pressed and
held for 1 second or
longer:
Folder random play
(MP3/WMA disc).
Moves the next disc in
increasing order.
Switches between
playback and pause.
Scan play.
When pressed and
held for 1 second or
longer: Disc scan play.
Repeat play.
When pressed and
held for 1 second or
longer: Disc repeat
play.
Random play.
When pressed and
held for 1 second or
longer: Disc random
play.
Switches reception
band.
Moves preset
channels up and
down.
No function.
No function.
Preset scan.
When pressed and
held for 2 seconds or
longer: Auto store.
No function.
Switches between TV
and VTR.
• Some of the corresponding buttons on the main unit and remote control unit have different functions.
•The [DISC SEL] button and the [REVERSE] button cannot be used for this unit.
• 2-ZONE function is not available when DAB is connected to this unit.
14 VXZ768R
Page 15
REMOTE CONTROL
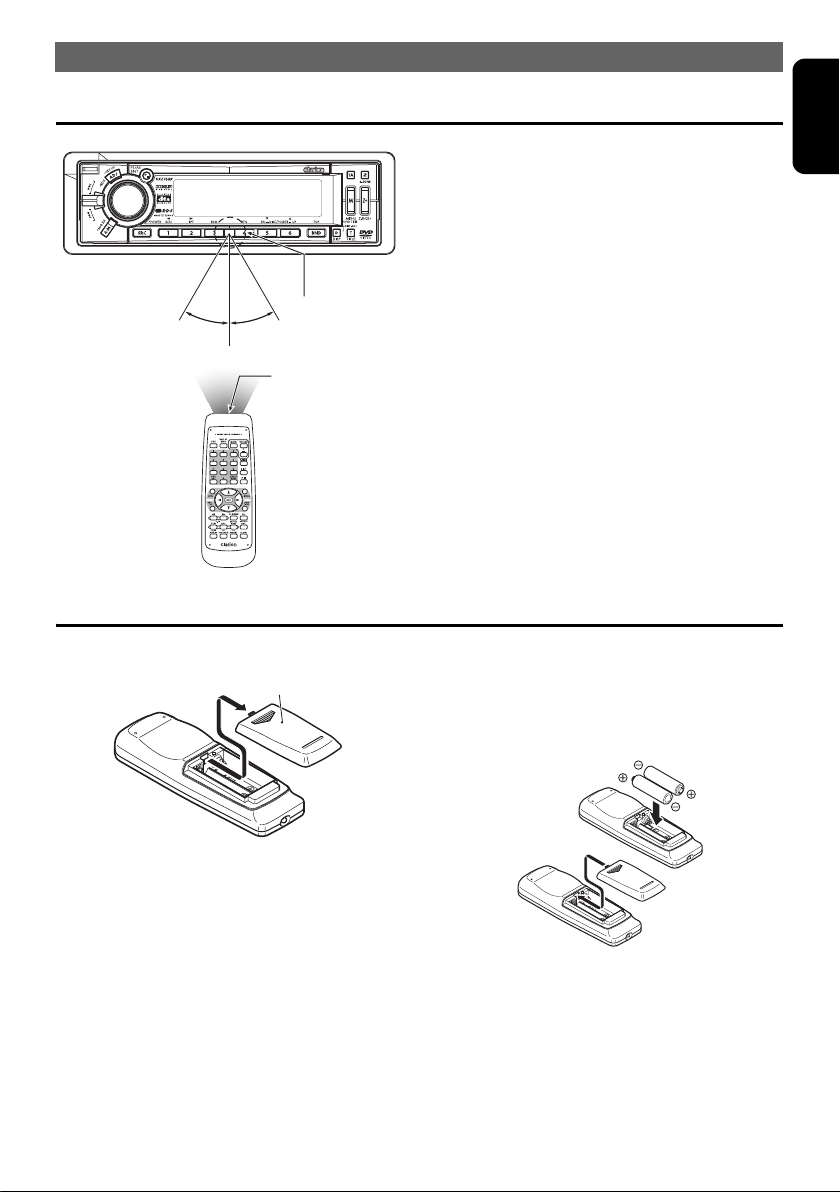
Operation Range of the Remote Control Unit
Receiver for
remote control unit
Operating range :
30° in all directions
Signal transmitter
Inserting the Batteries
English
1. Open the rear battery cover. 2. Insert the two supplied size AA (SUM-3,
Rear cover
R6/1.5V) batteries orienting the plus and
minus poles of the batteries as shown by the
<+> and <−> symbols inside the battery
compartment. Close the battery cover.
Notes:
Using batteries improperly can cause them to
explode. Take note of the following points:
•
When replacing batteries, replace both batteries
with new ones.
•
Do not short-circuit, disassemble or heat
batteries.
•
Do not dispose of batteries into fire or flames.
•
Dispose of spent batteries properly.
VXZ768R 15
Page 16

English
7. OPERATIONS
Basic Operations
Note:
•
Be sure to read this chapter referring to the front diagrams of chapter “2. CONTROLS” on page 5 (unfold).
!
CAUTION
Be sure to lower the volume before
switching off the unit power or the ignition
key. The unit remembers its last volume
setting. If you switch the power off with the
volume up, when you switch the power back
on, the sudden loud volume may hurt your
hearing and damage the unit.
System check and speaker setting
During the initial power up of this unit, it will go
through a system check procedure.
This procedure verifies any devices connected
through CeNET. Any additional CeNET devices
plugged into the unit after the initial power up
will initiate the system check procedure.
1. When the power is turned on,
appears in the display if the wire connections
were modified.
The system check starts automatically within
the unit.
2. When the system check is complete,
“SP-SET” appears in the display. Perform the
speaker setting.
3. Turn the [ROTARY] knob to select the
speaker system.
• The factory default setting is “2ch”. (Adjustment
2ch/5.1ch)
• To enjoy 5.1ch surround sound more effectively,
we recommend equipment of the center speaker
and the sub-woofer.
4. Press the [ ] button.
• The setting is complete and the display switches
to the radio mode.
“SYSTEM”
Turning on/off the power
Note:
•
Be careful about using this unit for a long time
without running the engine. If you drain the car’s
battery too far, you may not be able to start the
engine and this can reduce the service life of the
battery.
1. Press the [SRC] button.
2. The illumination and display on the unit light
up. The unit automatically remembers its last
operation mode and will automatically switch
to display that mode.
3. Press and hold the [SRC] button for 1 second
or longer to turn off the power for the unit.
Selecting a mode
1. Press the [SRC] button to change the
operation source mode.
2. Each time you press the [SRC] button, the
operation mode changes in the following
order:
Radio mode ➜ (DAB mode) ➜ DVD mode
➜ (CD changer mode) ➜ (TV mode) ➜
AUX mode ➜ Radio mode...
• External equipment not connected with CeNET is
not displayed.
Adjusting the volume
1. Turn the [ROTARY] knob to adjust the
volume.
• The volume level is from 0 (minimum) to 33
(maximum).
Switching the display
1. Each time you press the [DISP] button, the
display switches in the following order:
Main display ➜ Clock display ➜
Main display...
• Once selected, the preferred display becomes the
display default. When a function adjustment such
as volume is made, the screen will momentarily
switch to that function’s display, then revert back to
the preferred display several seconds after the
adjustment.
1. Press and hold the [DISP] button for 4
seconds or longer to turn off the display.
2. To turn on the display, press the [DISP]
button again.
16 VXZ768R
Page 17

CT (Clock Time) function
The CT function receives CT data sent from an
RDS station and displays the time.
1. Press the [DISP] button to switch to the CT
display.
• If a CT data is not being received, “CT––:––”
appears in the display.
Note:
•
CT data is not transmitted in some countries and
by some broadcast stations. Also, in some areas,
the CT may not display accurately.
Setting MAGNA BASS EXTEND
The MAGNA BASS EXTEND does not adjust
the low sound area like the normal sound
adjustment function, but emphasizes the deep
bass sound area to provide you with a dynamic
sound.
• This function cannot be adjusted when as follows:
“Pro Logic” is set to “ON”, the speaker system is
set to “5.1ch”, DVD/DTS-CD is being played.
• The factory default setting is “OFF”.
1. Press and hold the [A-M] button for 1 second
or longer to turn on.
2. Press and hold the [A-M] button for 1 second
or longer to turn off.
Setting the Z-Enhancer Plus
This unit is provided with 4 types of sound tone
effects stored in memory. Select the one you
prefer.
• This function cannot be adjusted when as follows:
“Pro Logic” is set to “ON”, the speaker system is
set to “5.1ch”, DVD/DTS-CD is being played.
• The factory default setting is “Z+ OFF”.
1. Each time you press the [Z+] button, the tone
effect changes in the following order:
“Z+ OFF” ➜ “B-BOOST” ➜ “IMPACT” ➜
“EXCITE” ➜ “CUSTOM” ➜ “Z+ OFF”...
• B-BOOST : bass emphasized
• IMPACT : bass and treble emphasized
• EXCITE : bass and treble emphasized, mid
• CUSTOM : user custom
• Z+ OFF : no sound effect
de-emphasized
OPERATIONS
Adjusting the center speaker
• This function cannot be adjusted when as follows:
“Pro Logic” is set to “ON”, the speaker system is
set to “5.1ch”, DVD/DTS-CD is being played.
• This function cannot be adjusted when the center
speaker output is set to “OFF” or the speaker
system is set to “2ch”. For details on how to set
the center speaker, refer to the subsection
“Turning on/off speakers” (P. 39) in the section
“Changing Initial Settings such as Menu
Language, etc.”.
• The factory default setting is “C-VOL 0”.
1. Press the [A-M] button and select “C-VOL 0”.
2. Turn the [ROTARY] knob to select from -4 to
+8 or OFF.
3. When the adjustment is complete, press the
[A-M] button several times until the function
mode is reached.
Adjusting the subwoofer
• This function cannot be adjusted when as follows:
“Pro Logic” is set to “ON”, the speaker system is
set to “5.1ch”, DVD/DTS-CD is being played.
• This function cannot be adjusted when the
subwoofer output is set to “OFF”. For details on
how to set the subwoofer, refer to the subsection
“Turning on/off speakers” (P. 39) in the section
“Changing Initial Settings such as Menu
Language, etc.”.
• The factory default setting is “SW-VOL 0”.
1. Press the [A-M] button and select “SW-VOL
0”.
2. Turn the [ROTARY] knob to select from -6 to
+6 or OFF.
3. When the adjustment is complete, press the
[A-M] button several times until the function
mode is reached.
English
VXZ768R 17
Page 18

OPERATIONS
English
Adjusting the Z-Enhancer Plus
• This function cannot be adjusted when as follows:
“Pro Logic” is set to “ON”, the speaker system is
set to “5.1ch”, DVD/DTS-CD is being played.
• Press and hold the [Z+] button for 1 second or
longer, then the setting parameter of bass/treble
will be initialized with a display “Z+FLAT”.
1. Press the [Z+] button and select the
Z-Enhancer Plus mode to adjust.
2. Press the [A-M] button and select “B-BST 0”
or “IMPACT 0” or “EXCITE 0”.
3. Turn the [ROTARY] knob to select from -3 to
+3.
4. When the adjustment is complete, press the
[A-M] button several times until the function
mode is reached.
Adjusting the bass
(Gain, Frequency, Q-curve)
• This function cannot be adjusted when as follows:
“Pro Logic” is set to “ON”, the speaker system is
set to “5.1ch”, DVD/DTS-CD is being played.
• This adjustment can only be performed when the
Z-Enhancer Plus is set to “CUSTOM”.
1. Press the [A-M] button and select “BASS”.
2. Turn the [ROTARY] knob to adjust the bass.
• The factory default setting is “B<G 0>”.
(Adjustment range: -6 to +8)
3. Move the [ ] / [ ] lever to select
“B<F 50>”.
4. Turn the [ROTARY] knob to select the
frequency.
• The factory default setting is “B<F 50>”.
(Adjustment 50/80/120 Hz)
5. Move the [ ] / [ ] lever to select
“B<Q 1>”.
6. Turn the [ROTARY] knob to select the
Q-curve.
• The factory default setting is “B<Q 1>”.
(Adjustment 1/1.25/1.5/2)
7. When the adjustment is complete, press the
[A-M] button several times until the function
mode is reached.
Adjusting the treble
(Gain, Frequency)
• This function cannot be adjusted when as follows:
“Pro Logic” is set to “ON”, the speaker system is
set to “5.1ch”, DVD/DTS-CD is being played.
• This adjustment can only be performed when the
Z-Enhancer Plus is set to “CUSTOM”.
1. Press the [A-M] button and select “TREBLE”.
2. Turn the [ROTARY] knob to adjust the treble.
• The factory default setting is “T<G 0>”.
(Adjustment range: -6 to +6)
3. Move the [ ] / [ ] lever to select
“T<F 12K>”.
4. Turn the [ROTARY] knob to select the
frequency.
• The factory default setting is “T<F 12K>”.
(Adjustment 8 kHz/12 kHz)
5. When the adjustment is complete, press the
[A-M] button several times until the function
mode is reached.
Adjusting the balance
• This function cannot be adjusted when as follows:
“Pro Logic” is set to “ON”, the speaker system is
set to “5.1ch”, DVD/DTS-CD is being played.
1. Press the [A-M] button and select “BAL 0”.
2. Turn the [ROTARY] knob to adjust the
balance of the left and right speakers.
• The factory default setting is “BAL 0”. (Adjustment
range: L13 to R13)
3. When the adjustment is complete, press the
[A-M] button several times until the function
mode is reached.
Adjusting the fader
• This function cannot be adjusted when as follows:
“Pro Logic” is set to “ON”, the speaker system is
set to “5.1ch”, DVD/DTS-CD is being played.
1. Press the [A-M] button and select “FAD 0”.
2. Turn the [ROTARY] knob to adjust the
balance of the front and rear speakers.
• The factory default setting is “FAD 0”. (Adjustment
range: F12 to R12)
3. When the adjustment is complete, press the
[A-M] button several times until the function
mode is reached.
18 VXZ768R
Page 19

Radio Operations
OPERATIONS
English
Listening to the radio
1. Press the [SRC] button and select the radio
mode. The frequency or PS appears in the
display.
• PS: Programme service name
2. Press the [BND] button and select the radio
band. Each time the button is pressed, the
radio reception band changes in the following
order:
FM1 ➜ FM2 ➜ FM3 ➜ AM (MW/LW) ➜
FM1...
3. Move the [ ] / [ ] lever to tune in the
desired station.
Tuning
There are 3 types of tuning modes available,
seek, manual and preset tuning.
Seek tuning
1. Press the [BND] button and select the
desired band (FM or AM (MW, LW)).
2. Tune into a station.
•If “MANU” is lit in the display, press and hold the
[BND] button for 1 second or longer. “MANU” in
the display goes off and seek tuning is now
available.
•If “TA” is lit in the display, TP stations are
automatically sought.
z DX SEEK
1. Move the [ ] / [ ] lever to automatically
seek a station.
2. When the lever is moved up, the station is
sought in the direction of higher frequencies;
if the lever is moved down, the station is
sought in the direction of lower frequencies.
• When seek tuning starts, “DX SEEK” appears in
the display.
z LOCAL SEEK
1. Move the [ ] / [ ] lever for 1 second or
longer and local seek tuning is carried out.
Broadcast stations with good reception
sensitivity are selected.
• When local seeking starts, “LO SEEK” appears in
the display.
Manual tuning
There are 2 ways available: Quick tuning and
step tuning.
When you are in the step tuning mode, the
frequency changes one step at a time. In the
quick tuning mode, you can quickly tune the
desired frequency.
1. Press the [BND] button and select the
desired band (FM or AM (MW/LW)).
•If “MANU” is not lit in the display, press and hold
the [BND] button for 1 second or longer. “MANU”
is lit in the display and manual tuning is now
available.
2. Tune into a station.
z Quick tuning:
1. Move the [ ] / [ ] lever for 1 second or
longer to tune in a station.
z Step tuning:
1. Move the [ ] / [ ] lever to manually tune
in a station.
Recalling a preset station
A total of 24 preset positions (6-FM1, 6-FM2,
6-FM3, 6-AM) exists to store individual radio
stations in memory. Pressing the corresponding
[DIRECT] button recalls the stored radio
frequency automatically.
1. Press the [BND] button and select the
desired band (FM or AM (MW/LW)).
2. Press the corresponding [DIRECT] button to
recall the stored station.
• Press and hold one of the [DIRECT] buttons for 2
seconds or longer to store that station into preset
memory.
Manual memory
1. Select the desired station with seek tuning,
manual tuning or preset tuning.
2. Press and hold one of the [DIRECT] buttons
for 2 seconds or longer to store the current
station into preset memory.
VXZ768R 19
Page 20

OPERATIONS
English
Auto store
Auto store is a function for storing up to 6
stations that are automatically tuned in
sequentially. If 6 receivable stations cannot be
received, a previously stored station remains
unoverwritten at the memory position.
1. Press the [BND] button and select the
desired band (FM or AM (MW/LW)).
2. Press and hold the [PS/AS] button for 2
seconds or longer. The stations with good
reception are stored automatically to the
preset channels.
• If auto store is performed in the FM bands, the
stations are stored in FM3 even if FM1 or FM2
was chosen for storing stations.
RDS Operations
Preset scan
Preset scan receives the stations stored in
preset memory in order. This function is useful
when searching for a desired station in memory.
1. Press the [PS/AS] button.
2. When a desired station is tuned in, press the
[PS/AS] button again to continue receiving
that station.
Note:
•
Be careful not to press and hold the [PS/AS]
button for 2 seconds or longer, otherwise the auto
store function is engaged and the unit starts
storing stations.
RDS (Radio Data System)
This unit has a built-in RDS decoder system that
supports broadcast stations transmitting RDS
data.
This system can display the name of the
broadcast station being received (PS) and can
automatically switch to the broadcast station
with the best reception as you move long
distances (AF switching).
Also, if a traffic announcement or programme
type is broadcast from an RDS station, no
matter what mode you are in, this broadcast is
received.
Additionally, if EON information is received, this
information enables automatic switching of other
preset stations on the same network and
interruption of the station being received with
traffic information from other stations (TP). This
function is not available in some areas.
When using the RDS function, always set the
radio to FM mode.
• AF : Alternative Frequency
• PS : Programme Service Name
• PTY : Programme Type
• EON : Enhanced Other Network
• TP : Traffic Programme
• RDS interrupt does not function during AM radio
reception.
• When set receives RDS signal, and can read PS
data, PS appears in the display.
Switching the display
This allows switching of the indication during
RDS reception.
1. Each time you press the [TITLE] button, the
display changes in the following order:
PS-NAME PTY
20 VXZ768R
Page 21

AF function
The AF function switches to a different
frequency on the same network in order to
maintain optimum reception.
• The factory default setting is “ON”.
1. Press and hold the [ADJ] button for 1 second
or longer to switch to the RDS mode.
2. Move the [ ] / [ ] lever to select
3. Turn the [ROTARY] knob to select
“OFF”.
z ON:
“AF” is lit in the display and the AF function
turns on.
z OFF:
“AF” goes off in the display and the AF function
turns off.
4. Press the [ADJ] button to return to the
previous mode.
• If the reception of the current broadcast station
deteriorates, “PI SEARCH” appears in the display
and the radio searches for the same programme
on another frequency.
z AF function between RDS and DAB
When the same programme is broadcasted by
both RDS and DAB, and this function is ON, the
unit switches to receive the broadcast with the
better reception automatically.
• This function only operates when the DAH923 or
DAH913 DAB unit, sold separately, is connected.
• This factory default setting is “ON”.
1. Press the [ADJ] button to switch to the adjust
mode.
2. Move the [ ] / [ ] lever to select
ACT”.
3. Turn the [ROTARY] knob to select
“OFF”.
z ON:
AF switching between DAB and RDS enabled.
z OFF:
AF switching between DAB and RDS disabled.
4. Press the [ADJ] button to return to the
previous mode.
“AF”.
“ON” or
“LINK
“ON” or
OPERATIONS
REG (Regional programme)
function
When the REG function is ON, the optimum
regional station can be received. When this
function is OFF, if the regional station area
switches as you drive, a regional station for that
region is received.
• The factory default setting is “OFF”.
Notes:
•
This function is disabled when a national station
such as BBC R2 is being received.
•
The REG function ON/OFF setting is valid when
the AF function is ON.
1. Press and hold the [ADJ] button for 1 second
or longer to switch to the RDS mode.
2. Move the [ ] / [ ] lever to select
3. Turn the [ROTARY] knob to select
“OFF”.
“REG”.
“ON” or
z ON:
“REG” is lit in the display and the REG function
turns on.
z OFF:
“REG” goes off in the display and the REG
function turns off.
4. Press the [ADJ] button to return to the
previous mode.
Manually tuning a regional station
in the same network
1. This function is valid when the AF function is
ON and the REG function is OFF.
Note:
•
This function can be used when a regional
broadcast of the same network is received.
2. Press any one of the [DIRECT] buttons to call
out the regional station.
3. If the reception condition of the called out
station is bad, press the [DIRECT] button of
the same number. The unit receives a local
station on the same network.
English
VXZ768R 21
Page 22

OPERATIONS
English
TA (Traffic Announcement)
In the TA standby mode, when a traffic
announcement broadcast starts, the traffic
announcement broadcast is received as top
priority regardless of the function mode so you
can listen to it. Traffic programme (TP)
automatic tuning is also possible.
• This function can only be used when “TP” is lit in
the display. When “TP” is lit, this means that the
RDS broadcast station being received has traffic
announcement programmes.
z Setting the TA standby mode
1. Press the [TA] button when only “TP” is lit in
the display.
“TP” and “TA” light in the display and the unit
is set into the TA standby mode until a traffic
announcement is broadcast.
2. When a traffic announcement broadcast
3. Press the [TA] button while a traffic
z Cancelling the TA standby mode
1. As “TP” and “TA” lit in the display, press the
•If “TP” is not lit, pressing the [TA] button searches
z Searching for a TP station
1. Press the [TA] button when “TP” is not lit in
2.
Note:
•
“TRA INFO” appears in the display.
starts,
announcement broadcast is being received,
the traffic announcement broadcast reception
is cancelled.
The unit goes into the TA standby mode.
[TA] button or [SRC] button.
“TA” in the display goes off and the TA
The
standby mode is cancelled.
for a TP station.
the display.
“TA” lights in the display and the unit
automatically receives a TP station by
SEEK”.
If a TP station is not received, the unit continues
the search operation. Pressing [TA ] button again
goes off “TA” in the display and stops TP station
searching.
“TP
Auto store function for TP stations
You can automatically store up to 6 TP stations
into preset memory. If the number of TP can be
received less than 6, broadcast stations already
stored in memory and left without being
overwritten.
“TA” lit in the display, press and hold the
1. As
[PS/AS] button for 2 seconds or longer.
The TP stations with the good reception
sensitivity are stored into preset memory.
• Even if you select FM1 or FM2, a TP station is
stored into memory for FM3.
PTY
This function enables you to listen to a
broadcast of the selected programme type even
if the unit is on a function mode other than radio.
• The factory default setting is “OFF”.
• Some countries do not yet have PTY broadcast.
• In the TA standby mode, a TP station has priority
over a PTY broadcast station.
z Setting/Cancelling the PTY standby
mode
1. Press and hold the [ADJ] button for 1 second
or longer to switch to the RDS mode.
2. Move the [ ] / [ ] lever to select
3. Turn the [ROTARY] knob to select
“OFF”.
• You cannot select “ON” or “OFF” during a TA,
ALARM or PTY interrupt.
z ON:
“PTY” is lit in the display and the PTY standby
mode turns on.
z OFF:
“PTY” goes off in the display and the PTY
standby mode turns off.
4. Press the [ADJ] button to return to the
previous mode.
z Cancelling a PTY interrupt broadcast
1. Press the [TA] button or [SRC] button during
the PTY broadcast.
The PTY interrupt is cancelled and the unit
returns to PTY standby mode.
“PTY”.
“ON” or
22 VXZ768R
Page 23

Selecting PTY
1. Press and hold the [ADJ] button for 1 second
or longer to switch to the RDS mode.
2. Move the [ ] / [ ] lever to select
SEL”.
• You cannot select “PTY SEL” during a TA, ALARM
or PTY interrupt.
3. Press the [ ] button to go to the PTY
select mode.
4. Press any one of the [DIRECT] buttons.
Alternatively, turn the [ROTARY] knob to
select the desired PTY.
• Below are the factory default settings stored for
the [DIRECT] buttons.
Preset
number
5. The PTY select mode is cancelled
ENGLISH Contents
1 News News
2 Info Information
3 Pop M Pop Music
4 Sport Sport
5 Classics Serious Classical Music
6 Easy M Easy Listening Music
automatically and returns to the RDS mode 7
seconds after a PTY is selected.
PTY item
“PTY
OPERATIONS
PTY preset memory
1. Press and hold the [ADJ] button for 1 second
or longer to switch to the RDS mode.
2. Move the [ ] / [ ] lever to select
SEL”.
3. Press the [ ] button to go to the PTY
select mode.
4. Turn the [ROTARY] knob to select the desired
PTY.
The 29 types of PTY on the next page can
be selected.
5. If you press and hold any one of the
[DIRECT] buttons for 2 seconds or longer, the
selected PTY is stored into that preset
channel memory.
“PTY
Emergency broadcast
If an emergency broadcast is received, all the
function mode operations are stopped.
“ALARM” appears in the display and the
emergency broadcast can be heard.
z Cancelling an emergency broadcast
1. Press the [TA] button or [SRC] button.
Emergency broadcast reception is cancelled.
English
PTY seek
1. Press and hold the [ADJ] button for 1 second
or longer to switch to the RDS mode.
2. Move the [ ] / [ ] lever to select
SEL”.
3. Press the [ ] button to go to the PTY
select mode.
4. Select PTY.
5. Move the [ ] / [ ] lever. If you move the
lever up, the unit seeks a PTY broadcast
moving up the frequencies; if you move the
lever down, it seeks moving down the
frequencies.
• If no station with the selected PTY broadcast can
be received, the unit returns to the previous mode.
“PTY
VXZ768R 23
Page 24

OPERATIONS
English
PTY item
ENGLISH DEUTSCH SVENSKA FRANÇAIS Contents
News Nachrich Nyheter Infos News
Affairs Aktuell Aktuellt Magazine Today’s events
Info Service Info Services Information
Sport Sport Sport Sport Sports
Educate Bildung Utbildn Educatif Education
Drama Hör + Lit Teater Fiction Drama
Culture Kultur Kultur Culture Culture
Science Wissen Vetenskp Sciences Science
Var ied Unterh Underh Divers Variety
Pop M Pop Pop M Pop Pop music
Rock M Rock Rock M Rock Rock music
Easy M U-Musik Lättlyss Chansons Easy music
Light M L-Musik L klass M Cl Lég Light music
Classics E-Musik Klassisk Classiq Classics
Other M - - Musik Övrig m Autre M Other music
Weather Wetter Väder Météo Weather
Finance Wirtsch Ekonomi Economie Finance
Children Kinder För barn Enfants For children
Social Soziales Socialt Société Social
Religion Religion Andligt Religion Religion
Phone In Anruf Telefon Forum Phone in
Travel Reise Resor Voyages Travel
Leisure Freizeit Fritid Loisirs Leisure
Jazz Jazz Jazz Jazz Jazz
Country Country Country Country Country
Nation M Landes M Nation m Ch pays Nation music
Oldies Oldies Oldies Rétro Oldies
Folk M Folklore Folkm Folklore Folk music
Document Feature Dokument Document Documentaries
Switching the PTY display language
You can select one of 4 languages (English,
German, Swedish or French) for the PTY
displayed in the display.
• The factory default setting is “ENGLISH”.
1. Press the [ADJ] button to switch to the adjust
mode.
2. Move the [ ] / [ ] lever to select
“LANGUAGE”.
3. Turn the [ROTARY] knob to select the desired
language.
4. Press the [ADJ] button to return to the
previous mode.
24 VXZ768R
Volume setting of TA, emergency
broadcast (ALARM) and PTY
The volume for TA, ALARM and PTY interrupts
can be set during TA, ALARM or PTY interrupt.
• The factory default setting is “15”.
1. During a TA, ALARM or PTY interrupt, turn
the [ROTARY] knob to set the volume to the
desired level (0 to 33).
• When the TA, ALARM or PTY interrupt ends, the
volume returns to the level it had before the
interrupt.
Page 25

DVD Operations
OPERATIONS
English
!
WARNING
About a Single CD/DVD (8cm DISC)
• Since the unit is not compatible with a
single CD/DVD, do not load it into the unit.
• Keep in mind the fact that a single CD/DVD
cannot be played even using a single
CD/DVD adaptor for the unit.
• If you try to push it into the unit forcibly
without removing it, the CD/DVD cannot be
ejected. This will result in damage to the
mechanism. Please never do this.
Loading a disc
1. Press the [OPEN] button to access the
DVD/CD SLOT behind the FLIP DOWN
PA NE L .
2. Insert a DVD/CD into the center of the
DVD/CD SLOT with the label side facing up.
The DVD/CD plays automatically after
loading.
Notes:
•
Never insert foreign objects into the DVD/CD
SLOT.
•
If the disc is not inserted easily, there may be
another disc in the mechanism or the unit may
require service.
3. Close the FLIP DOWN PANEL.
!
CAUTION
Be careful not to catch your hand or fingers
while closing the FLIP DOWN PANEL.
Notes:
•
If the FLIP DOWN PANEL does not open fully,
gently open with your hand.
•
After loading a CD, always close the FLIP DOWN
PA NE L .
3. Close the FLIP DOWN PANEL.
Note:
•
Always close the FLIP DOWN PANEL once you
take out the disc.
!
CAUTION
• Do not try to put your hand or fingers in the
disc insertion slot. Also never insert
foreign objects into the slot.
• Do not insert discs where adhesive comes
out from cellophane tape or a rental CD
label, or discs with marks where
cellophane tape or rental CD labels were
removed. It may be impossible to extract
these discs from the unit and they may
cause the unit to break down.
Listening to a disc already loaded in
the unit
1. Press the [SRC] button to select the DVD
mode.
When the unit enters the DVD mode, play
starts automatically.
If there is no disc loaded, the indication
appears in the display.
DISC”
Note:
•
The message “INVALID” will appear in the monitor
when button operation is invalid.
“NO
Eject function
Just pressing the [ ] button ejects the disc
even if the power to the unit was not turned on.
1. Press the [OPEN] button to open the FLIP
DOWN PANEL.
Note:
•
If the FLIP DOWN PANEL will not open far
enough, open it gently with your hand.
2. Press the [ ] button. Remove the disc after
it is ejected.
VXZ768R 25
Page 26

OPERATIONS
English
Watching a DVD-Video
For normal DVD-Video discs, the menu screen
appears. The displayed contents may differ,
depending on the DVD software.
Selecting the DVD menu
1. Press the [MENU] button during playback.
2. Select an item by pressing the [ ], [ ],
[ ], [ ] buttons and press the [ENT]
button to enter. Otherwise, select an item with
the ten-key buttons on the remote control unit
and press the [ENT] button to enter.
• Depending on the disc, items cannot be selected
with the ten-key buttons.
Stopping play
1. Press and hold the [ ] button for 1 second
or longer during playback.
2. Press the [ ] button, and playback starts
from the beginning of the disc.
Pausing play
1. Press the [ ] button during playback.
2. Press the [ ] button, and playback
resumes.
Slow play
1. Press and hold the [SLOW] button on the
remote control unit during playback, or move
and hold the
pause.
• While the lever is being moved, slow playback
continues at the speed 1/3 times the normal
playback.
• Slow playback cannot be performed in the
backward direction. In addition, audio cannot be
reproduced during slow playback.
[] / [ ] lever up during
2. Move the lever down again within about 3
seconds to move to the beginning of the
previous chapter.
Fast-forward/fast-rewind
z Fast-forward
1. Move the [ ] / [ ] lever up for 1 second or
longer.
z Fast-rewind
1. Move the [ ] / [ ] lever down for 1
second or longer.
• Move the lever, and the playback speed becomes
5-time faster first and then 20-time faster 3
seconds later. Release the lever, and the normal
speed is restored.
Repeat play
z Chapter repeat
Plays back one chapter repeatedly.
1. Press the [RPT] button.
Using the title menu
On DVD discs containing two or more titles, you
can select from the title menu for playback.
1. Press the [DVD TITLE] button on the remote
control unit or press and hold the [MENU]
button for 1 second or longer on this unit
during playback.
• Depending on the disc, the title menu cannot be
called with [DVD TITLE] button.
2. Press the [ ], [ ], [ ], [ ] buttons or
use the ten-key buttons to select an item.
• Depending on the disc, items cannot be selected
with the ten-key buttons.
3. Press the [ENT] button.
Skipping a chapter
Chapter means a small segment to divide the
data area of the disc.
z Chapter-up
1. Move the [ ] / [ ] lever up to move ahead
to the beginning of the next chapter.
z Chapter-down
1. Move the [ ] / [ ] lever down to move
back to the beginning of the current chapter.
26 VXZ768R
Page 27

Searching with a chapter/title
number
You can locate the beginning of the scene using
the chapter numbers or title numbers recorded
on the DVD-Video disc.
• This function can only be used from the remote
control unit.
1. Press the [SEARCH MODE] button during
playback.
2. Each time you press the button, you can
switch between title number input and
chapter number input.
z Chapter
A small segment to divide the data area of the
disc.
z Title
A large segment to divide the data area of the
disc.
3. Input the number of the chapter or title that
you want to play back with the ten-key
buttons (0 to 9).
4. Press the [ENT] button on the remote control
unit.
OPERATIONS
Switching subtitles
On DVD discs in which two or more subtitle
languages have been recorded, you can switch
among the subtitle languages during playback.
• This function can only be used from the remote
control unit.
1. Press the [SUB TITLE] button during
playback.
➜
Off
➜➜➜
Subtitle 1
Subtitle 2
Subtitle X
• Depending on the disc, up to 32 kinds of subtitles
may be recorded. For details, see the mark of the
disc ( : Indicates that 8 kinds of subtitles have
been recorded).
• Depending on the disc, switching may be
completely impossible or impossible on some
scenes.
• It may take time to switch among subtitles.
English
Switching among languages
On discs in which two or more audios or audio
languages have been recorded, you can switch
among the audio languages during playback.
• This function can only be used from the remote
control unit.
1. Press the [AUDIO] button during playback.
• Depending on the disc, up to 8 audios may be
recorded. For details, see the mark of the disc
( : Indicates that 8 audios have been
recorded).
• When the power is turned on or when the disc is
changed with a new one, the language set at the
time of factory shipment is selected. If that
language has not been recorded, the language
specified on the disc is selected.
• Depending on the disc, switching may be
completely impossible or impossible on some
scenes.
• It may take time to switch among audios.
Switching angles
On DVD discs in which video images have been
recorded in two or more angles, you can switch
among the angles during playback.
• This function can only be used from the remote
control unit.
1. Press the [ANGLE] button during playback.
• Depending on the disc, up to 9 angles may be
recorded. For details, see the mark of the disc
( : Indicates multi-angle).
• Depending on the disc, angles may switch
smoothly or switch with a momentary still image.
• Depending on the disc, switching may be
completely impossible or impossible on some
scenes.
• It may take time to switch among angles.
• Depending on the disc, scenes recorded in two or
more angles may be played back.
VXZ768R 27
Page 28

OPERATIONS
English
Displaying the playback status
• This function can only be used from the remote
control unit.
1. Press the [P. T IM E ] button during playback.
2. Each time you press the button, you can
switch between display (ON) and non-display
(OFF) of the playback status.
Watching a video CD (V-CD)
Title number
Chapter number
Playback time
Title001 Chapter001 00:00:19
D 3/2.1
Audio format
For V-CD discs equipped with the PBC (Play
Back Control) function, the menu screen
appears. The displayed contents may differ,
depending on the V-CD software.
Playback control (PBC)
This control signal is recorded on a Video CD
for version 2.0 and used to control playback.
Using pre-recorded menu screens in the Video
CD with PBC, you can enjoy playback of
software with a simplified dialog function or
software with search function. You can also
enjoy a still picture at high or standard
resolution.
Turning on/off PBC
On video CDs equipped with Play Back Control
function, you can turn it on/off.
• This function can only be used from the remote
control unit.
• The factory default setting of PBC is “ON”.
1. Press the [PBC] button.
2. Each time you press the button, you can
switch between on and off.
• When the PBC is turned on or off, the disc plays
from the beginning.
Selecting the V-CD menu
• You can do this operation when PBC is ON for a
disc with PBC functions.
1. Press the [MENU] button during playback.
2. Select an item by pressing the [ ], [ ],
[ ], [ ] buttons and press the [ENT]
button to enter. Otherwise, select an item with
the ten-key buttons on the remote control unit
and press the [ENT] button to enter.
• Depending on the disc, items cannot be selected
with the ten-key buttons.
Pausing play
1. Press the [ ] button during playback.
2. Press the [ ] button, and playback
resumes.
Slow play
1. Press and hold the [SLOW] button on the
remote control unit during playback, or move
and hold the [ ] / [ ] lever up during
pause.
• While the lever is being moved, slow playback
continues at the speed 1/3 times the normal
playback.
• Slow playback cannot be performed in the
backward direction. In addition, audio cannot be
reproduced during slow playback.
28 VXZ768R
Page 29

Skipping a track
z Track-up
1. Move the [ ] / [ ] lever up to move ahead
to the beginning of the next track.
z Track-dow n
1. Move the [ ] / [ ] lever down to move
back to the beginning of the current track.
2. Move the lever down again within about 2
seconds to move to the beginning of the
previous track.
Note:
•
This operation cannot be performed on some
discs with PBC.
Fast-forward/fast-rewind
z Fast-forward
1. Move the [ ] / [ ] lever up for 1 second or
longer.
z Fast-rewind
1. Move the [ ] / [ ] lever down for 1
second or longer.
• Move the lever, and the playback speed becomes
5-time faster first and then 20-time faster 3
seconds later. Release the lever, and the normal
speed is restored.
OPERATIONS
Changing audio output
You can change the audio output method.
• This function can only be used from the remote
control unit.
1. Press the [AUDIO] button during playback.
2. Each time you press the button, you can
switch among audio output methods.
➜
STEREO
➜➜
L (Left)
R (Right)
Displaying the playback status
• This function can only be used from the remote
control unit.
1. Press the [P. T IM E ] button during playback.
2. Each time you press the button, you can
switch between display (ON) and non-display
(OFF) of the playback status.
Track002 00:00:28
English
Searching with a track number
This operation allows searching with the track
numbers recorded on the video CDs.
• This function can only be used from the remote
control unit.
• You cannot do this operation when PBC is ON for
a disc with PBC functions.
1. Press the [SEARCH MODE] button during
playback.
2. Input the number of the track that you want to
play back with the ten-key buttons (0 to 9).
3. Press the [ENT] button on the remote control
unit.
VXZ768R 29
Page 30

OPERATIONS
English
Listening to a CD
This unit supports the display of the DISC
TITLE, TRACK TITLE and ARTIST of the CD
TEXT.
• Example showing CD TEXT display.
Track002 00:00:28
DISC
ARTIST
TRACK
Note:
•
This unit supports only CD TEXT in
alphanumerics. Also, some character data may
not be reproduced properly on the monitor.
Top function
The top function resets the CD player to the first
track of the disc.
1. Press the [BND] button to play the first track
(track No. 1) on the disc.
Pausing play
1. Press the [ ] button during playback.
2. Press the [ ] button again, and playback
resumes.
Displaying CD titles
This unit can display title data for CD-text disc
and user titles input with this unit.
1. Each time you press the [TITLE] button, the
title changes in the following order:
User title (disc) ➜ CD-text title (disc) ➜
Artist name ➜ CD-text title (track) ➜ User
title (disc)...
Note:
•
If the CD playing is not a CD-text CD or no user
title has been input, “NOTITL” appears in the
display.
Skipping a track
z Track-up
1. Move the [ ] / [ ] lever up to move ahead
to the beginning of the next track.
z Track-down
1. Move the [ ] / [ ] lever down to move
back to the beginning of the current track.
2. Move the lever down again within about 2
seconds to move to the beginning of the
previous track.
Fast-forward/fast-rewind
z Fast-forward
1. Move the [ ] / [ ] lever up for 1 second or
longer.
z Fast-rewind
1. Move the [ ] / [ ] lever down for 1
second or longer.
• Move the lever, and the playback speed becomes
5-time faster first and then 20-time faster 3
seconds later. Release the lever, and the normal
speed is restored.
Searching with a track number
This operation allows searching using the track
numbers recorded on the CDs.
• This function can only be used from the remote
control unit.
1. Press the [SEARCH MODE] button during
playback.
2. Input the number of the track that you want to
play back with the ten-key buttons (0 to 9).
3. Press the [ENT] button on the remote control
unit.
30 VXZ768R
Page 31

Scan play
This operation scans and plays back all tracks
recorded on the disc, the first 10 seconds for
each.
1. Press the [SCN] button.
Listening to an MP3/WMA
OPERATIONS
Repeat play
This operation plays back tracks recorded on
the CD repeatedly.
1. Press the [RPT] button.
Random play
This operation plays back all tracks on the disc
in no particular order.
1. Press the [RDM] button.
English
• Example showing WMA/ID3 Tag display.
Folder001 Track001 00:00:19
ALBUM
ARTIST
TITLE
Note:
•
This unit supports only WMA/ID3 Tag information
in ASCII characters. Also, some character data
may not be reproduced properly on the monitor.
What is MP3?
MP3 is an audio compression method and
classified into audio layer 3 of MPEG standards.
This audio compression method has penetrated
into PC users and become a standard format.
This MP3 features the original audio data
compression to about 10 percent of its initial
size with a high sound quality. This means about
10 music CDs can be recorded on a CD-R disc
or CD-RW disc to allow a long listening time
without having to change CDs.
What is WMA?
WMA is the abbreviation of Windows Media
Audio, an audio file format developed by
Microsoft Corporation.
Note:
•
If you play a file with DRM (Digital Rights
Management) for WMA remaining ON, playback
stops and the message “DRM” appears in the
display. (The WMA indicator blinks.)
z To disable DRM (Digital Rights
Management):
1. When using Windows Media Player 9, click
on TOOLS ➜ OPTIONS ➜ MUSIC RECORD
tab, then under Recording settings, unclick
the Check box for RECORD PROTECTED
MUSIC. Then, reconstruct files.
2. When using Windows Media Player 10, click
on TOOLS ➜ OPTIONS ➜ RIP MUSIC tab,
then under RIP SETTINGS, unclick the
Check box for COPY PROTECT MUSIC.
Then, reconstruct files.
• Personally constructed WMA files are used at
your own responsibility.
VXZ768R 31
Page 32

OPERATIONS
English
Precautions when creating
MP3/WMA disc
z Usable sampling rates and bit rates:
1. MP3: Sampling rate 32 kHz-48 kHz, Bit rate:
8 kbps-320 kbps / VBR
2. WMA: Bit rate 32 kbps-192 kbps
z File extensions
1. Always add a file extension “.MP3” or “.WMA”
to MP3 or WMA file by using single byte
letters. If you add a file extension other than
specified or forget to add the file extension,
the file cannot be played.
2. If files other than MP3/WMA are played,
playback stops and the message “NOT
SPRT” appears in the display.
z Logical format (File system)
1. When writing MP3/WMA file on a CD-R disc
or CD-RW disc, please select “ISO9660 level
1, 2 or JOLIET or Romeo” as the writing
software format. Normal play may not be
possible if the disc is recorded on another
format.
2. The folder name and file name can be
displayed as the title during MP3/WMA play
but the title must be within 62 single byte
ASCII characters (including an extension).
3. Do not affix a name to a file inside a folder
having the same name.
z Folder structure
1. A disc with a folder having more than 8
hierarchical levels will be impossible.
z Number of files or folders
1. Up to 512 files/512 folders can be played. But
if there are 999 files in one folder, other
folders cannot be played.
2. Tracks are played in the order that they were
recorded onto a disc. (Tracks might not
always be played in the order displayed on
the PC.)
3. Some noise may occur depending on the
type of encoder software used while
recording.
4. In case of a track recorded at VBR (variable
bit rate), the display for the play time of the
track may be slightly different from the actual
play time.
Also, the recommended value of VBR ranges
from 64 kbps to 320 kbps.
5. Depending on the damage conditions of a
file, it may occur that the file is not played and
the next file is played instead.
Also, if the damage is in a severe condition,
playback stops and the error message
appears in the display. For details on error
messages, refer to the section
DISPLAYS” (P. 56).
“10. ERROR
Top function
The top function resets the MP3/WMA player to
the first track of a folder being played.
1. Press the [BND] button to play the first track
(track No. 1) of a folder.
Pausing play
1. Press the [ ] button during playback.
2. Press the [ ] button again, and playback
resumes.
Displaying MP3/WMA titles
This unit can display title data for MP3/WMA
disc.
1. Each time you press the [TITLE] button, the
title changes in the following order:
Folder ➜ TRACK ➜ Album TAG ➜ Artist
TAG ➜ Title TAG ➜ Folder...
Notes:
•
If MP3/WMA disc is not input TAG, “NO TAG”
appears in the display.
•
For MP3, supports ID3 Tags V2.4 / 2.3 / 1.1 / 1.0.
•
Tag displays give priority to V2.4 / 2.3.
•
In the case of album Tags for WMA, the
information written into the extension header is
displayed.
•
Only ASCII characters can be displayed in Tags.
32 VXZ768R
Page 33

Skipping a track
z Track-up
1. Move the [ ] / [ ] lever up to move ahead
to the beginning of the next track.
z Track-dow n
1. Move the [ ] / [ ] lever down to move
back to the beginning of the current track.
2. Move the lever down again within about 2
seconds to move to the beginning of the
previous track.
Folder select
This function allows you to select a folder
containing MP3/WMA files and start playing
from the first track in the folder.
• This function can only be used from the main unit.
1. Press the [DN] button to move to the previous
folder.
2. Press the [UP] button to move to the next
folder.
OPERATIONS
4. Press the [ENT] button on the remote control
unit.
Track scan play
This operation plays back all tracks recorded on
the disc, about 10 seconds for each.
1. Press the [SCN] button.
Folder scan play
This operation plays back the first tracks of all
folders on the MP3/WMA disc, about 10
seconds for each.
1. Press and hold the [SCN] button for 1 second
or longer.
• Scan playback starts from the first track of the
next folder to the one currently being played back.
Track repeat play
This operation plays back the track currently
being played back repeatedly.
1. Press the [RPT] button.
English
Fast-forward/fast-rewind
z Fast-forward
1. Move the [ ] / [ ] lever up for 1 second or
longer.
z Fast-rewind
1. Move the [ ] / [ ] lever down for 1
second or longer.
• Move the lever, and the playback speed becomes
5-time faster first and then 20-time faster 3
seconds later. Release the lever, and the normal
speed is restored.
Searching with a folder/track
number
This operation allows searching using the folder
and track numbers recorded on the MP3/WMA
disc.
• This function can only be used from the remote
control unit.
1. Press the [SEARCH MODE] button during
playback.
2. Each time you press the button, you can
switch between folder number input and track
number input.
3. Input the number of the track or folder that
you want to play back with the ten-key
buttons (0 to 9).
Folder repeat play
This operation plays back tracks in an
MP3/WMA folder repeatedly.
1. Press and hold the [RPT] button for 1 second
or longer.
Track random play
This operation plays the tracks in the folder in a
random order.
1. Press the [RDM] button.
Folder random play
This operation plays back tracks recorded on
the disc in no particular order.
1. Press and hold the [RDM] button for 1 second
or longer.
VXZ768R 33
Page 34

OPERATIONS
English
Changing Initial Settings such as Menu Language, etc.
Selecting the monitor menu
Notes:
•
The setup main menu appears only while in the
DVD mode.
•
“PREFERENCES” appears only when there is no
disc loaded and playback stops.
•
Menu settings described in this section are
displayed on the monitor.
If the set language has not been recorded on the
disc, the language specified on the disc is used for
display.
1. Press the [SET UP] button on the remote
control unit or press and hold the [ADJ]
button on the unit for 1 second or longer in
the DVD mode to display the main menu.
2. Select “GENERAL SETUP”,
“PREFERENCES”, or “AUDIO SETUP” with
the “ ” or “ ” button and press the [ENT] to
enter.
3. Press the “ ” or “ ” button to select the left
menu item.
4. Press the “ ” button to go to the option list.
5. Press the “ ” button to go to back to the left
menu item.
6. Press the [RTN] button to display the main
menu.
7. Press the [SET UP] button on the remote
control unit or press the [ADJ] button on the
unit to return to the original mode from the
setup mode engaged.
SETUP MAIN MENU
GENERAL SETU P
GE L SET UP
PREFERENCES
AUD IO S ETUP
DOWN MI X
PRESS ENTER TO SELECT
Main unit Remote control
GENERAL SETU P
TV DI SPLAY NORM
ANGLE MARK ON
PRESS R IGHT TO SELECT
Main unit Remote control
(Main menu)
ORMAL /P S
Main unit Remote control
(Sub menu)
AL /PS
Main unit
GENERAL SETUP
TV D I SPL AY NORMAL /L B
PRESS ENTER TO SELECT
NORMAL / PS
WIDE
WIDE
Remote control
34 VXZ768R
Page 35

Setting up the screen size
Set up the screen size according to the TV
monitor to which the unit is connected.
• The factory default setting is “NORMAL/PS”.
1. Following the steps 1 to 3 in “Selecting the
monitor menu”, select “TV DISPLAY” from
“GENERAL SETUP”, and press the “ ”
button to go to the option list.
GENERAL SETUP
TV DI SPLAY NORMAL / LB
PRESS ENTER TO SELECT
NORMAL / P S
WIDE
WIDE
OPERATIONS
z When watching through a wide TV
monitor (16:9)
• WIDE:
3. Press the [ENT] button to enter.
Setting up the angle mark display
You can set up so that the angle mark appears
on scenes where the angles can be switched.
• The factory default setting is “ON”.
1. Following the steps 1 to 3 in “Selecting the
monitor menu”, select “ANGLE MARK” from
“GENERAL SETUP”, and press the “ ”
button to go to the option list.
English
2. Press the “ ” or “ ” button to select a
screen size.
• The color of the selected item changes.
z When watching through a conventional
TV monitor (4:3)
• NORMAL/PS : The leftmost and rightmost areas
of the screen are cut off.
This function allows displaying the important
part of image fully on the screen. In some
cases, image is displayed while being panned
(scrolled).
• NORMAL/LB : A black zone is created in the top
and bottom areas of the screen.
This method displays Cinema Scope and Vista
Vision images without cutting them off by
creating a black zone on the top and bottom
gaps.
GENERAL SETUP
ANGLE MARK OF F
PRESS ENTER TO SELECT
ON
WIDE
2. Press the “ ” or “ ” button to select “ON”
or “OFF”.
3. Press the [ENT] button.
VXZ768R 35
Page 36

OPERATIONS
English
Setting up the audio language
• The factory default setting is “ENGLISH”.
1. Following the steps 1 to 3 in “Selecting the
monitor menu”, select “AUDIO” from
“PREFERENCES”, and press the “ ”
button to go to the option list.
Setting up the subtitle language
• The factory default setting is “OFF”.
1. Following the steps 1 to 3 in “Selecting the
monitor menu”, select “SUBTITLE” from
“PREFERENCES”, and press the “ ”
button to go to the option list.
PREFERENCES
AUD I O
PRESS ENTER TO SELECT
ENGL I SH
FRENCH
GERMAN
ITALIAN
DUTCH
SPANI SH
SWED I SH
PORT UGUE S E
2. Press the “ ” or “ ” button to select a
language to be used.
Languages SELECT in the order:
ENGLISH
FRENCH
GERMAN
ITALIAN
DUTCH
SPANISH
SWEDISH
PORTUGUESE
3. Press the [ENT] button.
PREFERENCES
SUBT I T LE I TAL I AN
PRESS ENTER TO SELECT
ENGL I SH
FRENCH
GERMAN
DUTCH
SPANI SH
SWED I SH
PORTUGUESE
OFF
2. Press the “ ” or “ ” button to select a
language to be used.
Languages SELECT in the order:
ENGLISH
FRENCH
GERMAN
ITALIAN
DUTCH
SPANISH
SWEDISH
PORTUGUESE
OFF
3. Press the [ENT] button.
36 VXZ768R
Page 37

Setting up the disc menu language
• The factory default setting is “ENGLISH”.
1. Following the steps 1 to 3 in “Selecting the
monitor menu”, select “DISC MENU” from
“PREFERENCES”, and press the “ ”
button to go to the option list.
PREFERENCES
DISC MENU ITAL IAN
PRESS ENTER TO SELECT
2. Press the “ ” or “ ” button to select a
language to be used.
Languages SELECT in the order:
PORTUGUESE
3. Press the [ENT] button.
ENGL I SH
FRENCH
GERMAN
DUTCH
SPANI SH
SWED I SH
PORT UGUE S E
OFF
ENGLISH
FRENCH
GERMAN
ITALIAN
DUTCH
SPANISH
SWEDISH
OPERATIONS
Setting up the country code
Set up the country number for setting up of the
parental level.
• The default setting is “7166” (UK).
1. Following the steps 1 to 3 in “Selecting the
monitor menu”, select “LOCALE” from
“PREFERENCES”, and press the “ ”
button to go to the option list.
PREFERENCES
DISC MENU 7166
LOCALE
I N PU T LOCALE CODE
2. Press the [ENT] button to display the input
screen.
3. Press the ten-key buttons to input a 4-digit
country number.
4. Press the [ENT] button.
z Country code list
Country Input code
ALBANIA 6576
ANDORRA 6568
AUSTRIA 6584
BAHRAIN 6672
BELGIUM 6669
BOSNIA AND HERZEGOWINA 6665
BULGARIA 6671
CROATIA (local name: Hrvatska) 7282
CYPRUS 6789
CZECH REPUBLIC 6790
DENMARK 6875
EGYPT 6971
FINLAND 7073
FRANCE 7082
(FRANCE,METROPOLITAN) 7088
GERMANY 6869
GREECE 7182
HUNGARY 7285
ICELAND 7383
IRAN (ISLAMIC REPUBLIC OF) 7382
IRAQ 7381
IRELAND 7369
ISRAEL 7376
ITALY 7384
ENGL I SH
OFF
English
VXZ768R 37
Page 38

OPERATIONS
English
Country Input code
JAPAN 7480
JORDAN 7479
KUWAIT 7587
LEBANON 7666
LESOTHO 7683
LIECHTENSTEIN 7673
LUXEMBOURG 7685
MACEDONIA,THE FORMER
YUGOSLAV REPUBLIC OF
MALTA 7784
MONACO 7767
NETHERLANDS 7876
(NETHERLANDS ANTILLES) 6578
NORWAY 7879
OMAN 7977
POLAND 8076
PORTUGAL 8084
QATAR 8165
ROMANIA 8279
SAN MARINO 8377
SAUDI ARABIA 8365
SLOVAKIA (Slovak Republic) 8375
SLOVENIA 8373
SOUTH AFRICA 9065
SPAIN 6983
SWAZILAND 8390
SWEDEN 8369
SWITZERLAND 6772
SYRIAN ARAB REPUBLIC 8389
TURKEY 8482
UNITED ARAB EMIRATES 6569
UNITED KINGDOM 7166
Vatican City State 8665
YEMEN 8969
YUGOSLAVIA 8985
FARO E ISLANDS 7079
GIBRALTAR 7173
GREENLAND 7176
SVALBARD AND JAN MAYEN
ISLANDS
7775
8374
Setting up the parental level
You can change the level of parental lock
(audiovisual restriction).
This function allows cutting scenes that are
unfavorable for children or replacing them
automatically with other scenes prepared in
advance. For example, by replacing scenes of
radical violence or portrayals of sex with safe
scenes, you can make a trouble-free story as if
it were so from the beginning.
• The factory default setting is level “8”.
1. Following the steps 1 to 3 in “Selecting the
monitor menu”, select “PARENTAL” from
“PREFERENCES”, and press the “ ”
button to go to the option list.
PREFERENCES
PARENTAL 7
PRESS ENTER TO SELECT
2. Press the “ ” or “ ” button to select a
parental level.
You can select from 1 to 8 or NO PARENTAL.
3. Press the [ENT] button.
PREFERENCES
CONFIRM PASSWORD
I NPUT NEW PASSWORD
1
2
3
4
5
6
8
NO PARENTAL
8
38 VXZ768R
4. Press the ten-key buttons to input a 4-digit
confirm password.
• Factory default setting is “0000”.
• For details on how to set the password, refer to the
subsection “Setting up the password for setting
up of the parental level” (P. 39) in the section
“Changing Initial Settings such as Menu
Language, etc.”.
Page 39

Setting up the password for setting
up of the parental level
1. Following the steps 1 to 3 in “Selecting the
monitor menu”, select “PASSWORD” from
“PREFERENCES”, and press the “ ”
button to go to the option list.
PREFERENCES
OLD PASSWORD
I NPUT OLD PASSWORD
2. Press the ten-key buttons to input a 4-digit
old password.
• Factory default setting is “0000”.
3. Input a new password.
PREFERENCES
8
OPERATIONS
Turning on/off speakers
You can turn on/off or select the size of front
speakers, a center speaker, surround speakers,
and a subwoofer depending on your speaker
system.
1. Following the steps 1 to 3 in “Selecting the
monitor menu”, select “SPEAKER-SEL”
from “AUDIO SETUP”.
AUD I O SETUP
SPEAKER - SEL >
SP -GAI N >
DELAY >
DRC OFF
Dolby PL ON
PRESS R I GHT TO SELECT
2. Press the “ ” button to display the
SPEAKER-SEL screen.
SPEAKER - SEL
FRONT -SP SMA L L
CENTER - SP SMAL L
SRD- SP LARGE
SUB-WOOFER ON
English
NEW PASSWORD
I NPUT NEW PASSWORD
8
4. Input a confirm password.
It is recommended that you take down a
memo about the password and keep it safely
to avoid forgetting it.
If you forget your password, you can set a
new password by entering [4356] as the OLD
PASSWORD. Entering [4356], the password
will be back to “0000”.
Note:
When a disc with view limited is played
•
When a disc with view limited is played, the input
screen requiring you to input the password may
appear. When this happens, enter the correct
password, otherwise play does not start.
PRESS R I GHT TO SELECT
Each time you press “ ” or “ ” buttons,
the setting item changes as following order:
FRONT-SP
CENTER-SP
SRD-SP
SUB-WOOFER
VXZ768R 39
Page 40

OPERATIONS
English
3. Press the “ ” button to go to the option list
and press “ ” or “ ” buttons to select the
setting.
You can select the settings as shown in the
following table.
FRONT-SP
(Front speaker)
CENTER-SP
(Center speaker)
LARGE
SMALL ∗
SMALL ∗
OFF
LARGE ∗
SRD-SP
(Surround speaker)
SMALL
OFF
SUB-WOOFER
(Subwoofer)
ON ∗
OFF
Asterisk (∗) indicates the factory default setting.
4. Press the [ENT] button.
5. Repeat steps 2 to 4 to turn on/off each
speaker.
Adjusting the speaker gain
• The factory default setting is “0 dB”.
1. Following the steps 1 to 3 in “Selecting the
monitor menu”, select “SP-GAIN” from
“AUDIO SETUP”.
AUD I O SETUP
SPEAKER - SEL >
SP -GAI N >
DELAY >
DRC OFF
Dolby PL ON
PRESS R I GHT TO SELECT
2. Press the “ ” button to display the
SP-GAIN screen.
SP -GAI N
FRON T L 0dB
CENTE R 0dB
FRON T R 0dB
SRD L 0dB
SRD R 0dB
SUB-WOOFER 0dB
PRESS R I GHT TO SELECT
3. Press “ ” or “ ” buttons to select the
speaker.
Each time you press the buttons, you can
switch among speakers.
FRONT L
CENTER
FRONT R
SRD L
SRD R
SUB-WOOFER
The test tone is output from the speaker you
select.
4. Press “ ” button to go to the right pane.
5. Press “ ” or “ ” buttons to adjust the
speaker gain. The gain level ranges from
“-6dB” to “+6dB”.
6. Press the “ ” button to go back to the left
pane.
7. Repeat steps 3 to 5 to adjust the each
speaker gain.
Note:
•
The test tone will not be output when DVD or CD
is being played with mute ON.
In that case, press the [MUTE] button on the
remote control unit to cancel the mute, or adjust
the volume.
40 VXZ768R
Page 41

Adjusting the speaker delay time
The time necessary for sound to travel from
speakers to a listener differs depending on the
speaker location or the car size. By adjusting
the delay time of each speaker, you can hear
the sound from the front speakers and the other
speakers simultaneously.
• The factory default setting is “0 ms”.
1. Following the steps 1 to 3 in “Selecting the
monitor menu”, select “DELAY” from
“AUDIO SETUP”.
AUD I O SETUP
SPEAKER - SEL >
SP -GAI N >
DELAY >
DRC OFF
Dolby PL ON
PRESS R I GHT TO SELECT
2. Press the “ ” button to display the DELAY
screen.
DELAY
OPERATIONS
Adjusting the dynamic range
This function allows you to adjust the dynamic
range, the ratio of the loudest sounds to the
quietest sounds.
• The factory default setting is “OFF”.
1. Following the steps 1 to 3 in “Selecting the
monitor menu”, select “DRC” from “AUDIO
SETUP”.
2. Press “ ” button to go to the right pane.
AUD I O SETUP
CENTER - SP ON
DRC OFF
PRESS ENTER TO SELECT
3. Press “ ” or “ ” buttons to select the
setting. You can select the dynamic range
from “ON” or “OFF”.
4. Press the [ENT] button.
English
CENTER - SP 0ms
SRD- SP 0ms
PRESS R I GHT TO SELECT
3. Press “ ” or “ ” buttons to select the item.
Each time you press the buttons, you can
switch between center and surround
speakers.
CENTER-SP
SRD-SP
4. Press “ ” button to go to the right pane.
5. Press “ ” or “ ” buttons to adjust the delay
time. The delay time ranges from “0ms” to
“15 ms” when you select “CENTER-SP” or
“SRD-SP”.
6. Press the [ENT] button.
VXZ768R 41
Page 42

OPERATIONS
English
Setting the Dolby Pro Logic Decode
processing
You can set whether or not 2-channel source is
processed using Dolby Pro Logic Decode.
• The factory default setting is “ON”.
1. Following the steps 1 to 3 in “Selecting the
monitor menu”, select “Dolby PL” from
“AUDIO SETUP”.
2. Press “ ” button to go to the right pane.
AUD I O SETUP
CENTER - SP ON
Do l by PL
PRESS ENTER TO SELECT
OFF
3. Press “ ” or “ ” buttons to select “ON” or
“OFF”.
4. Press the [ENT] button.
Setting the down mix
This function allows you to select the method of
down-mixing when the channel format and the
output channel configuration are not in
agreement.
• This function can be operated only when the
speakers other than “FRONT-SP” are set to “OFF”
in “SPEAKER-SEL” (P. 39).
• The factory default setting is “Lo/Ro”.
1. Following the steps 1 to 3 in “Selecting the
monitor menu”, select “DOWN MIX” from
“AUDIO SETUP”.
2. Press “ ” button to go to the right pane.
“Lo/Ro”: Down-mixing the discrete 5-channel
master etc. to 2-channel stereo track
“Lt/Rt”: Writing down matrix-encoded sounds
to 2-channel stereo track
4. Press the [ENT] button.
AUD I O SETUP
CENTER - SP ON
DOWN M I X
PRESS ENTER TO SELECT
Lo /Ro
Lt /Rt
3. Press “ ” or “ ” buttons to select “Lo/Ro”
or “Lt/Rt”.
42 VXZ768R
Page 43

OPERATIONS
Different Pieces of Music Heard by Plural Listeners
(2-ZONE function)
English
About the 2-ZONE function
The 2-ZONE function is a function that outputs
separate sounds from the MAIN zone and SUB
zone by simultaneously operating two sources in
the one center unit, thereby allowing plural
listeners to enjoy separate music sources.
The sources of the MAIN zone are played back
from the speakers of the vehicle side, and those
of the SUB zone are from the headphone
systems (WH143/WH143H).
Notes:
•
You can adjust the sound level only for the MAIN
zone. To adjust the sound level for the SUB zone,
adjust it in the headphone (WH143/WH143H)
side.
•
The Audio mode and Z-enhancer function cannot
be set for the sources of the SUB zone.
•
You cannot select the radio mode while SUB zone
is selected as control zone.
•
If a cellular phone interrupt occurs when the
external equipment is selected in the SUB zone,
2-ZONE function will be canceled.
•
You cannot select different external equipments
(TV tuner/CD changer) for MAIN and SUB zone.
•
2-ZONE function is not available when DAB is
connected to this unit.
z Example for source change
Radio DVD AUX CD Changer TV
Internal
External
SUB (REAR)
DVD {{{{{
AUX {{{{{
CD Changer {{{{✕
TV {{{✕ {
Setting the 2-ZONE function
• The initial setting is “OFF”.
When you have set the 2-ZONE function to “ON”
in the initial state, the MAIN zone services for
sources inside this unit and the SUB zone, for
DVD. Changing a source during later use
causes the latest heard source to be invoked.
1. Press and hold the [ ] button for 1 second
or longer to turn on or off. When the 2-ZONE
function is turned on, “2-ZONE” on the
display lights.
Switching sources
1. Press the [ ] button to select the control
zone (“MAIN” or “SUB”).
2. Every time the button is pressed, the “MAIN
ZONE” changes to the “SUB ZONE” or vice
versa.
“MAIN” or “SUB” on the display lights at that
time, thereby indicating that the relevant
zone becomes ready to operate.
3. Press the [SRC] button to select a source in
the control zone.
MAIN (FRONT)
Internal External
VXZ768R 43
Page 44

OPERATIONS
English
Common Operations
Display Adjust Mode
Turning the screen saver function
on or off
This unit features various screen saver patterns
that are exhibited across the display. If the
screen savers are not desired, they can be
turned off.
If the button operation is performed with the
screen saver function on, the operation display
corresponding to the button operation is shown
for about 30 seconds and the display returns to
the screen saver display.
• The factory default setting is “ON”.
1. Press and hold the [DISP] button for 1
second or longer to switch to the display
adjust mode.
2. Move the [ ] / [ ] lever to select “SCRN
SVR”.
3. Turn the [ROTARY] knob to select the setting.
Each time you turn the [ROTARY] knob, the
setting changes in the following order:
OFF ➜ ON ➜ MESSAGE
4. Press the [DISP] button to return to the
previous mode.
Entering MESSAGE INFORMATION
When “MESSAGE” is selected for the screen
saver setting, you can change the contents of
the message.
• Up to 30 characters can be entered.
• The factory default setting is “WELCOME TO
CLARION”.
1. Press and hold the [DISP] button for 1
second or longer to switch to the display
adjust mode.
2. Move the [ ] / [ ] lever to select “INPUT”.
3. Press the [ ] button.
4. Move the [ ] / [ ] lever to move the
cursor.
5. Press the [BND] button to select a character.
Each time you press the [BND] button, the
character changes in the following orders:
Capital letters ➜ Numbers ➜ Symbols ➜
Umlaut ➜ Capital letters…
6. Turn the [ROTARY] knob to select the desired
character.
7. Repeat steps 4 to 6 to enter up to 30
characters for message.
8. Press and hold the [ ] button for 2
seconds or longer to store the message in
memory and return to the display adjust
mode.
• Press and hold the [BND] button for 1 second or
longer to delete the message. Then press and
hold the [ ] button for 2 seconds or longer to
return the message to the default setting.
9. Press the [DISP] button to return to the
previous mode.
Setting the method for title scroll
Set how to scroll in CD-TEXT, MP3/WMA
TITLE.
• The factory default setting is “ON”.
1. Press and hold the [DISP] button for 1
second or longer to switch to the display
adjust mode.
2. Move the [ ] / [ ] lever to select
“SCROLL”.
3. Turn the [ROTARY] knob to select “ON” or
“OFF”.
z ON:
Scrolls automatically.
z OFF:
Scrolls just 1 time when the title was changed or
you press and hold the [TITLE] button for 1
second or longer.
4. Press the [DISP] button to return to the
previous mode.
Dimmer control
You can set the dimmer control.
• The factory default setting is “ON”.
1. Press and hold the [DISP] button for 1
second or longer to switch to the display
adjust mode.
2. Move the [ ] / [ ] lever to select
“DIMMER”.
3. Turn the [ROTARY] knob to select “ON” or
“OFF”.
4. Press the [DISP] button to return to the
previous mode.
44 VXZ768R
Page 45

Adjust Mode
Anti-theft indicator
The red Anti-theft indicator is a function for
detering theft. When the DCP is removed from
the unit, this indicator blinks.
• The factory default setting is “OFF”.
1. Press the [ADJ] button to switch to the adjust
mode.
2. Move the [ ] / [ ] lever to select “LED”.
3. Turn the [ROTARY] knob to select “ON” or
“OFF”.
4. Press the [ADJ] button to return to the
previous mode.
Setting the low pass filter
• This function can only be adjusted when the
subwoofer output is set to “ON” and the speaker
system is set to “5.1ch”. For details on how to set
the subwoofer, refer to the subsection “Turning
on/off speakers” (P. 39) in the section
“Changing Initial Settings such as Menu
Language, etc.”.
• This function cannot be adjusted when as follows:
“Pro Logic” is set to “ON”, the speaker system is
set to “5.1ch”, DVD/DTS-CD is being played.
• The factory default setting is “THROUGH”. If the
speaker system is set to “5.1ch”, the factory
default setting is “50Hz”.
1. Press the [ADJ] button to switch to the adjust
mode.
2. Move the [ ] / [ ] lever to select “SW
LPF”.
3. Turn the [ROTARY] knob to select the setting.
Each time you turn the [ROTARY] knob, the
setting changes in the following order:
THROUGH ➜ 50Hz ➜ 80Hz ➜ 120Hz
4. Press the [ADJ] button to return to the
previous mode.
Setting the amplifier bypass circuit
• The factory default setting is “OFF”.
1. Press the [ADJ] button to switch to the adjust
mode.
2. Move the [ ] / [ ] lever to select “AMP
CNCL”.
3. Turn the [ROTARY] knob to select “ON” or
“OFF”.
z ON:
Uses with connected AMP.
OPERATIONS
z OFF:
Uses with inside AMP.
4. Press the [ADJ] button to return to the
previous mode.
Selecting AUX/TEL
You can listen to sounds and music from
external devices or your telephone calls from
the speakers when connected to this unit.
When TEL INT or External device is connected
to this unit, you can select TEL mode or AUX
mode.
• The factory default setting is “AUX”.
1. Press the [ADJ] button to switch to the adjust
mode.
2. Move the [ ] / [ ] lever to select
“AUX/TEL”.
3. Turn the [ROTARY] knob to select “AUX” or
“TEL”.
z AUX:
AUX/TEL input cable is for external Audio input.
z TEL:
AUX/TEL input cable is for cellular phone audio
input.
4. Press the [ADJ] button to return to the
previous mode.
Adjusting the auxiliary input
sensitivity
Adjust the auxiliary sensitivity when the audio
from an external device is difficult to hear even
after adjusting the volume.
• The factory default setting is “MID”.
1. Press the [ADJ] button to switch to the adjust
mode.
2. Move the [ ] / [ ] lever to select “AUX
SENS”.
3. Turn the [ROTARY] knob to select from
“LOW”, “MID” or “HIGH”.
4. Press the [ADJ] button to return to the
previous mode.
English
VXZ768R 45
Page 46

OPERATIONS
English
Setting the car speaker output for
the cellular phone
(Optional TEL-002)
• The factory default setting is “RIGHT”.
• To output the telephone calls, set the cellular
phone interrupt to “ON”.
1. Press the [ADJ] button to switch to the adjust
mode.
2. Move the [ ] / [ ] lever to select
“TEL-SP”.
3. Turn the [ROTARY] knob to select “RIGHT” or
“LEFT”.
z RIGHT:
Telephone calls can be heard on the front right
speaker connected to this unit.
z LEFT:
Telephone calls can be heard on the front left
speaker connected to this unit.
4. Press the [ADJ] button to return to the
previous mode.
Cellular phone interrupt setting
If you connect this unit and your cellular phone
with a separately sold unit (TEL-002), you can
listen to your telephone calls on your car
speakers.
• The factory default setting is “OFF”.
1. Press the [ADJ] button to switch to the adjust
mode.
2. Move the [ ] / [ ] lever to select
“TEL-SW”.
3. Turn the [ROTARY] knob to select the setting.
Each time you turn the [ROTARY] knob, the
setting changes in the following order:
OFF ➜ ON ➜ MUTE ➜ OFF...
z OFF:
This unit continues normal operation even when
the cellular phone is used.
Note:
•
If connecting a hands-free kit, please ensure the
setting is “ON” to receive the telephone audio
through the system.
z ON:
You can listen to your telephone calls from the
speakers connected to this unit.
• When listening to your calls on your car speakers,
you can adjust the volume by turning the
[ROTARY] knob.
z MUTE:
The sound from this unit is muted during
telephone calls.
4. Press the [ADJ] button to return to the
previous mode.
Performing a system check
This function verifies the devices hooked up
through CeNET.
1. Press the [ADJ] button to switch to the adjust
mode.
2. Move the [ ] / [ ] lever to select
“SYSTEM”.
3. Press and hold the [ ] button for 1 second
or longer to start the system check.
The digital connection configuration is
automatically checked.
4. When the system check is complete, perform
the speaker setting.
Turn the [ROTARY] knob to select the
speaker system and press the [ ] button.
The display returns to the previous mode.
For details on the speaker setting, refer to
the “System check and speaker setting”
(P. 16).
Note:
•
When the speaker setting has been changed by a
system check, the previously set “AUDIO SETUP”
returns to its default setting.
46 VXZ768R
Page 47

Other operations
Entering titles
Titles up to 8 characters long can be stored in
memory and displayed for CD, CD changer and
TV stations. The number of titles that can be
entered for each mode are as follows.
Mode Number of titles
CD mode 50 titles
TV mode 20 titles
CD changer mode Number of titles
DCZ628 connected 100 titles
CDC655Tz connected 100 titles
1. Press the [SRC] button to select the mode
you want to enter a title (CD, CD changer or
TV).
2. Play a track or tune in to a TV station for
which you want to enter the title.
3. Do one of the following:
z In the CD or CD changer mode:
Press the [TITLE] button to select “USER TITL”.
z In the TV mode:
Skip this step.
4. Press and hold the [TITLE] button for 1
second or longer to switch to the title input
display.
5. Move the [ ] / [ ] lever to move the
cursor.
6. Press the [BND] button to select a character.
Each time you press the [BND] button, the
character changes in the following order:
Capital letters ➜ Numbers ➜ Symbols ➜
Umlaut ➜ Capital letters…
7. Turn the [ROTARY] knob to select the desired
character.
8. Repeat steps 5 to 7 to enter up to 8
characters for the title.
9. Press and hold the [ ] button for 2
seconds or longer to store the title into
memory and return to the previous mode.
OPERATIONS
z In the CD or CD changer mode:
Press the [TITLE] button to select “USER TITL”.
z In the TV mode:
Skip this step.
3. Press and hold the [TITLE] button for 1
second or longer to switch to the title input
display.
4. Press and hold the [BND] button for 1 second
or longer to delete the title.
5. Press and hold the [ ] button for 2
seconds or longer to store the setting and
return to the previous mode.
Cellular telephone mute
This unit requires special wiring to mute the
audio signal automatically when a cellular
telephone rings in the car.
• This function is not compatible with all cellular
telephones. Contact your local authorized Clarion
dealer for information on proper installation and
compatibility.
AUX function
This system has an external input jack so you
can listen to audio from an external device
connected to this unit.
English
Clearing titles
1. Play a track or tune in to a TV station for
which you want to delete the title.
2. Do one of the following:
VXZ768R 47
Page 48

English
8. OPERATIONS OF ACCESSORIES
CD Changer Operations
•
CD changer functions
When an optional CD changer is connected
through the CeNET cable, this unit controls all
CD changer functions. This unit can control a
total of 2 changers.
1. Press the [SRC] button and select the CD
changer mode to start play.
2. If 2 CD changers are connected, press the
[SRC] button to select the CD changer for
play.
•If “NO MAG” appears in the display, insert the
magazine into the CD changer. “DISC CHK”
appears in the display while the player loads
(checks) the magazine.
•If “NO DISC” appears in the display, eject the
magazine and insert discs into each slot. Then,
reinsert the magazine back into the CD changer.
Note:
•
Some CDs recorded in CD-R/CD-RW mode may
not be usable.
!
CAUTION
CD-ROM discs cannot be played from every
CD changer, it’s depended on the model.
Pausing play
1. Press the [ ] button to pause play.
“PAU SE ” appears in the display.
2. To resume play, press the [ ] button
again.
Displaying CD titles
This unit can display title data for CD-text CDs
and user titles input with this unit.
z When connected to CDC655Tz or
DCZ628
1. Each time you press the [TITLE] button, the
title changes in the following order:
User title (disc) ➜ CD-text title (disc) ➜
Artist name ➜ CD-text title (track) ➜ User
title (disc)…
Notes:
•
If the CD playing is not a CD-text CD or no user
title has been input, “NO TITLE” appears in the
display.
If a CD-text CD is not input its disc title or a track
title, “NO TITLE” appears in the display.
Procedure to scroll a title
Set “AUTO SCROL” to “ON” or “OFF”.
(The factory default setting is “ON”. Refer to the
subsection “Setting the method for title
scroll” (P. 44) in section “Common
Operations”.)
z When set to “ON”
The title is automatically kept scrolling.
z When set to “OFF”
To scroll just 1 time when the title was changed
or you press and hold the [TITLE] button for 1
second or longer.
Selecting a CD
1. Press the [UP] or [DN] button to select the
desired disc.
• If a CD is not loaded in a slot of magazine,
pressing the [UP] or [DN] button can not work.
• Pressing the [BND] button also advances to next
disc.
Skipping a track
z Track-up
1. Move the [ ] / [ ] lever up to move ahead
to the beginning of the next track.
z Track-down
1. Move the [ ] / [ ] lever down to move
back to the beginning of the current track.
2. Move the lever down again within about 2
seconds to move to the beginning of the
previous track.
Fast-forward/fast-rewind
z Fast-forward
1. Move the [ ] / [ ] lever up for 1 second or
longer.
z Fast-rewind
1. Move the [ ] / [ ] lever down for 1
second or longer.
48 VXZ768R
Page 49

Scan play
Scan play locates and plays the first 10 seconds
of each track on a disc automatically. This
function continues on the disc until it is
cancelled.
• The scan play is useful when you want to select a
desired track.
1. Press the [SCN] button.
2. To cancel the scan play, press the [SCN]
button again.
Disc scan play
Disc scan play locates and plays the first 10
seconds of the first track on each disc in the
currently selected CD changer. This function
continues automatically until it is cancelled.
• Disc scan play is useful when you want to select a
desired CD.
1. Press and hold the [SCN] button for 1 second
or longer.
2. To cancel disc scan play, press the [SCN]
button again.
Repeat play
Repeat play continuously plays the current
track. This function continues automatically until
it is cancelled.
1. Press the [RPT] button.
2. To cancel repeat play, press the [RPT] button
again.
OPERATIONS OF ACCESSORIES
Disc random play
The disc random play selects and plays
individual tracks or discs automatically in no
particular order. This function continues
automatically until it is cancelled.
1. Press and hold the [RDM] button for 1 second
or longer.
2. To cancel disc random play, press the [RDM]
button again.
English
Disc repeat play
After all the tracks on the current disc have been
played, disc repeat play automatically replays
the current disc over from the first track. This
function continues automatically until it is
cancelled.
1. Press and hold the [RPT] button for 1 second
or longer.
2. To cancel disc repeat play, press the [RPT]
button again.
Random play
Random play selects and plays individual tracks
on the disc in no particular order. This function
continues automatically until it is cancelled.
1. Press the [RDM] button.
2. To cancel random play, press the [RDM]
button again.
VXZ768R 49
Page 50

OPERATIONS OF ACCESSORIES
English
TV Operations
TV tuner functions
When an optional TV tuner is connected
through the CeNET cable, this unit controls all
TV tuner functions. To watch TV it requires a TV
tuner and a monitor.
Watching a TV
1. Press the [SRC] button and select the TV
mode.
2. Press the [BND] button to select the desired
TV band (TV1 or TV2). Each time the button
is pressed, the input selection toggles
between TV1 and TV2.
3. Move the [ ] / [ ] lever to tune in the
desired TV station.
Watching a video
The TV tuner features a VTR input for an
external A/V source, such as a game station.
1. Press and hold the [ADJ] button for 1 second
or longer to select VTR.
2. To return to the TV broadcast, press and hold
the [ADJ] button for 1 second or longer.
TV tuning
There are 3 types of TV tuning modes available,
seek, manual and preset tuning.
Seek tuning
1. Press the [BND] button and select the
desired TV band (TV1 or TV2).
•If “MANU” is lit in the display, press and hold the
[BND] button for 1 second or longer. “MANU” in
the display goes off and seek tuning is now
available.
2. Move the [ ] / [ ] lever to automatically
seek a station. Move the lever up to
automatically tune up the frequency band to
the next available TV station; move the lever
down to automatically tune down.
Manual tuning
There are 2 ways available: Quick tuning and
step tuning.
When you are in the step tuning mode, the
frequency changes one step at a time. In the
quick tuning mode, you can quickly tune the
desired frequency.
1. Press the [BND] button and select the
desired band (TV1 or TV2).
•If “MANU” is not lit in the display, press and hold
the [BND] button for 1 second or longer. “MANU”
lights in the display and manual tuning is now
available.
2. Tune into a station.
z Quick tuning:
1. Move the [ ] / [ ] lever for 1 second or
longer to tune in a station.
z Step tuning:
1. Move the [ ] / [ ] lever to manually tune
in a station.
Recalling a preset station
A total of 12 TV stations can be stored (6-TV1
and 6-TV2). This allows you to select your
favorite TV stations and store them in memory.
1. Press the [BND] button and select the
desired TV band (TV1 or TV2).
2. To recall a stored TV station, press the
desired [DIRECT] button to select that
station.
• Press and hold one of the [DIRECT] buttons for 2
seconds or longer to store the current station into
preset memory.
Manual memory
1. Select the desired station with seek tuning,
manual tuning or preset tuning.
2. Press and hold one of [DIRECT] buttons for 2
seconds or longer to store the current station
into preset memory.
50 VXZ768R
Page 51

Auto store
Auto store selects 6 TV stations automatically
and stores each one into preset memory.
If the 6 stations with good reception are not
available, stations previously stored in memory
remain. Only stations with strong reception are
stored into memory.
1. Press the [BND] button and select the
desired TV band (TV1 or TV2).
2. Press and hold the [PS/AS] button for 2
seconds or longer. The stations with good
reception are stored automatically to the
preset channels.
Preset scan
Preset scan allows the user to view each preset
position before it automatically advances to the
next preset. This function is useful for searching
for a desired TV station in memory.
1. Press the [PS/AS] button.
2. When the desired station is found, press the
[PS/AS] button again to remain tuned to that
station.
Note:
•
Do not press and hold the [PS/AS] button for 2
seconds or longer. Doing so will trigger the auto
store function and start storing stations into
memory.
OPERATIONS OF ACCESSORIES
2. Move the [ ] / [ ] lever to select “TV
DIVER”.
3. Turn the [ROTARY] knob to select “ON” or
“OFF”.
z ON:
Sets the diver setting to ON.
z OFF:
Sets the diver setting to OFF.
4. Press the [ADJ] button to return to the
previous mode.
English
Setting the TV area
When you select the TV area (TV reception
area), the TV tuner area setting changes.
1. Press the [ADJ] button to switch to the adjust
mode.
2. Move the [ ] / [ ] lever to select “TV
AREA”.
3. Press the [ ] button.
4. Turn the [ROTARY] knob to select the
reception area.
5. Press the [ ] button.
6. Press the [ADJ] button to return to the
previous mode.
Setting the TV diver
You can change the reception setting for the TV
antenna connected to the TV tuner.
• The factory default setting is “ON”.
1. Press the [ADJ] button to switch to the adjust
mode.
VXZ768R 51
Page 52

OPERATIONS OF ACCESSORIES
English
Digital Radio / DAB Operations
DAB control function
When a CeNET cable is used to connect a DAB
(DAH913 or DAH923) (sold separately), all
functions can be operated.
• 2-ZONE function is not available when DAB is
connected to this unit.
Listening to the DAB station
1. Press the [SRC] button to select the DAB
mode.
2. When the unit receives a DAB station, the
display changes in the following order:
Frequency channel ➜ service label
Switching the display
1. Each time you press the [TITLE] button, the
display switches in the following order:
S-LABEL PTY
Notes:
•
The display shown in the normal reception mode
and the preset reception mode is the same when
a DAB station is received.
•
The number of programmes and broadcasting
times depend on the DAB stations.
•
When the strength of DAB signals is weak, audio
output is muted.
Seek tuning
1. Press the [SRC] button to select the DAB
mode.
2. Move the [ ] / [ ] lever for 1 second or
longer.
“DAB” lights up in the display when the main
unit receives a DAB station.
• The main unit stops the seek tuning when it
cannot find a DAB station. The display returns to
the previous mode.
Manual tuning
1. Press the [SRC] button to select the DAB
mode.
2. Press and hold the [BND] button for 1 second
or longer. “MANU” lights up in the display.
3. Move the [ ] / [ ] lever to select a station.
• If no operation is performed for more than 7
seconds, manual tuning is cancelled and the
display returns to the previous mode.
Switching programmes
1. Press the [SRC] button to receive a DAB
station.
2. Move the [ ] / [ ] lever to switch
programmes in the DAB station.
Note:
•
The programme name may be the same
depending on DAB programmes.
Programme scan
This function scans through each receivable
programme in a DAB station being received for
10 seconds sequentially. This is useful when
you want to search for a desired programme.
1. Press the [SRC] button to receive a DAB
station.
2. Perform the following operation depending on
the connected model.
Press the [PS/AS] button. “SERVICE SCN”
lights up and the unit starts scanning each
programme for 10 seconds sequentially.
Each time the main unit scans, the
programme name is shown in the display.
3. To stop programme scan when a desired
programme is tuned in, press the [PS/AS]
button.
Manual memory
The main unit has a manual memory function for
DAB programmes. Up to 18 programmes (6
programmes each) can be preset in the preset
buttons.
z [M1], [M2] and [M3]
1. Press the [SRC] button to select the DAB
mode.
2. Press the [BND] button to select any one
shown above.
3. Move the [ ] / [ ] lever to select a
desired programme.
4. Press and hold one of the [DIRECT] buttons
(1 to 6) for 2 seconds or longer to store the
programme.
Note:
•
The interrupt programme (PTY or INFO) cannot
be written into a manual memory.
52 VXZ768R
Page 53

Recalling a preset programme
1. Press the [SRC] button to select the DAB
mode.
2. Press the [BND] button. Each time you press
the [BND] button, the display changes in the
following order:
[M1] ➜ [M2] ➜ [M3] ➜ [M1]...
3. Press one of the [DIRECT] buttons to recall a
preset programme.
Note:
•
Press and hold the [DIRECT] button for 2 seconds
or longer to store the programme currently being
received. (Manual memory)
AF function
The AF function switches to a different
frequency on the same network in order to
maintain optimum reception.
• The factory default setting is “ON”
• If the reception of the current broadcast station
deteriorates, “SEARCH” appears in the display
and the radio searches for the same programme
on another frequency.
• For details on “AF function”, refer to the section
“RDS Operations” of each owner’s manual.
z Switching OFF the AF function (P. 21)
z Switching ON the AF function (P. 21)
z AF function between RDS and DAB
(P. 21)
When the same programme is broadcast by
both RDS and DAB, and this function is ON, the
main unit switches to receiving the broadcast
with the better reception automatically.
TA (Traffic Announcement)
In the TA standby mode, when a traffic
announcement broadcast starts, the traffic
announcement broadcast is received as top
priority regardless of the function mode. Traffic
programme (TP) automatic tuning is also
possible.
• This function can only be used when “TP” is lit in
the display. When “TP” is lit, this means that the
DAB or RDS broadcast station being received has
traffic announcement programmes.
• For details on “TA”, refer to the section “RDS
Operations” of each owner’s manual.
OPERATIONS OF ACCESSORIES
z Setting the TA standby mode (P. 22)
z Cancelling the TA standby mode (P. 22)
z Searching for a TP station (P. 22)
Notes:
•
If a TP station is not received, the main unit stops
the search operation.
•
“TP” may be lit in the display when a TP broadcast
is transmitted from an RDS station. In this case,
press the [TA ] button to perform TP seek tuning.
Press the [TA ] button again to return to the
previous mode.
INFO (Announcement)
In the INFO standby mode, when the selected
announcement programme starts, the main unit
switches to the selected announcement
programme automatically.
z Setting the INFO standby mode
1. Press and hold the [TA ] button for 1 second
or longer.
“INFO” lights in the display and the main unit
is set into the INFO standby mode until the
selected announcement is broadcast.
2. When the selected announcement broadcast
starts, the announcement item appears in the
display.
3. To cancel the selected announcement
broadcast reception, press and hold the [TA]
button for 1 second or longer while the
selected announcement broadcast is being
received.
The selected announcement broadcast
reception is cancelled and the main unit goes
into the INFO standby mode.
z Cancelling INFO standby mode
1. To cancel the INFO standby mode, press and
hold the [TA] button for 1 second or longer or
press the [SRC] button.
English
VXZ768R 53
Page 54

OPERATIONS OF ACCESSORIES
English
z Information select
This is a function for selecting INFORMATION
ON or OFF in the Information interrupt mode.
You can set ON up to 6 information items.
You can select any of the 6 items below:
INFORMATION item
ENGLISH Contents
Travel Transport flash
Warning Warning / Service
News News flash
Weather Area weather flash
Event Event announcement
Special Special event
1. Perform the following operation depending on
the connected model.
Press and hold the [ADJ] button for 1 second
or longer to switch to the RDS mode.
2. Move the [ ] / [ ] lever to select “INFO
SEL”: VCD indication, then press the [ ]
button to enter the INFO select mode.
3. Move the [ ] / [ ] lever to select an
information item. You can select any of 6
items:
Travel ➜ Warning ➜ News ➜ Weather ➜
Event ➜ Special ➜ Travel ➜ ...
4. Turn the [ROTARY] knob to set the
information item for ON or OFF.
5. Press the [ ] button to store the setting.
6. Press the [ADJ] button to return to the
previous display.
PTY
This function enables you to listen to the
selected programme type, irrespective of the
function mode.
• One common PTY can be selected for DAB or
RDS.
• Of DAB PTY and RDS PTY, the PTY which is
received earlier takes priority over the other.
• PTY broadcasts are not yet available in all
countries.
• In the INFO standby mode, INFO stations have
priority over PTY stations.
• In the TA standby mode, TP stations have priority
over PTY stations.
• For details on “PTY”, refer to the section “RDS
Operations” of each owner’s manual.
z Setting the PTY standby mode (P. 22)
z Cancelling the PTY standby mode (P. 22)
z Cancelling a PTY interrupt broadcast
(P. 22)
z Selecting PTY (P. 23)
z PTY seek (P. 23)
z PTY preset memory (P. 23)
Emergency broadcast
When an emergency broadcast is received, all
the function mode operations are stopped.
“ALARM” appears in the display and the
emergency broadcast can be heard.
• For details on “Emergency broadcast”, refer to
the section “RDS Operations” of each owner’s
manual.
z Cancelling an emergency broadcast
(P. 23)
Switching the PTY and INFO display
language
You can select one of 4 languages (English,
German, Swedish or French) for the PTY and
INFO shown in the display.
• The factory default setting is “ENGLISH”.
• For details on “Switching the PTY display
language” (P. 24), refer to the section “RDS
Operations” of each owner’s manual.
Volume setting of TA, INFO,
emergency broadcast (ALARM) and
PTY
The volume for TA, INFO, ALARM and PTY
interrupts can be set during TA, INFO, ALARM
and PTY interrupt. Perform the following
operation depending on the connected model.
• The factory default setting is “15”.
1. During a TA, INFO, ALARM or PTY interrupt,
turn the [ROTARY] knob to set the volume to
a desired level (0 to 33).
• When the TA, INFO, ALARM or PTY interrupt
ends, the volume returns to the level it had before
the interrupt.
54 VXZ768R
Page 55

9. TROUBLE SHOOTING
Problem Cause Measure
Power does not
turn on.
(No sound is
produced.)
No audio when
operating the unit
with amplifiers.
Nothing happens
when buttons are
pressed.
General
Fuse is blown. Replace with a fuse of the same amperage. If the fuse
Incorrect wiring. Consult Clarion dealer.
Amplifier turn-on lead is shorted
to ground or excessive current is
required.
The microprocessor has
malfunctioned due to noise, etc.
blows again, consult Clarion dealer.
Turn the unit off and check each wire for a possible short.
If the amplifier turn-on lead shorts out, cover it with
insulation such as tape.
Turn off the power, then press the
[OPEN] button and remove the
DCP. Press the reset button for
about 2 seconds with a thin rod.
Reset
button
English
Display is not
accurate.
No audio. The speaker protection circuit is
No audio. MP3/WMA files are absent on
Sound skips or is
noisy.
Sound is cut or
skipped.
Noise is generated
or noise is mixed
with sound.
Poor sound quality
in extremely cold
weather or extreme
humidity.
DVD (CD/MP3/WMA)
Wrong filename File system is not correct. Use ISO9660 level 1, 2 or JOLIET or Romeo file system.
DVD sound
decreased when
the system
check/speaker
setting was
changed to “5.1ch”
in a 4-speaker
configuration.
DCP or main unit connectors
are dirty.
operating.
the disc.
Files are not recognized as an
MP3/WMA file.
File system is not correct. Use ISO9660 level 1, 2 or JOLIET or Romeo file system.
Disc is dirty. Clean the disc with a soft cloth.
Disc is heavily scratched or
warped.
MP3/WMA files are not encoded
properly.
Water droplets may form on the
internal lens when the car is
parked in a humid place.
The “SPEAKER-SEL” center
speaker and sub-woofer
settings are “ON”.
Wipe the dirt off with a soft cloth moistened with cleaning
alcohol.
1. Check the speaker connection.
2. Turn down sound volume. Function can also be
restored by turning the power off and on again.
3. If the sound is muted again, consult Clarion dealer.
Write MP3/WMA files onto the disc properly.
Use MP3/WMA files encoded properly.
Replace with a disc with no scratches.
Use MP3/WMA files encoded properly.
Let dry for about 1 hour with the power on.
When the speaker setting is “5.1ch”, connect the center
speaker and sub-woofer. When speakers are not
available, be sure to set the corresponding speakers to
“OFF” at “SPEAKER-SEL” (P. 39).
VXZ768R 55
Page 56

English
10.ERROR DISPLAYS
If an error occurs, one of the following displays is displayed.
Take the measures described below to eliminate the problem.
Error Display Cause Measure
ERROR 2
ERROR 3
ERROR 6
ERROR P Parental level error Set the correct Parental level.
ERROR R
DRM
DVD (CD/MP3/WMA)
NOT SPRT
ERROR 2
ERROR 3
CD changer
ERROR 6
A DISC is caught inside the DVD deck
and is not ejected.
A DISC cannot be played due to
scratches, etc.
A DISC is loaded upside-down inside
the DVD deck and cannot play.
Region code error Eject the disc and replace correct
Playback stops because WMA files
protected by DRM are played.
Playback stops because MP3/WMA
bit rate is out of range which this unit
supports.
A DISC inside the CD changer is not
loaded properly.
A DISC inside the CD changer cannot
be played due to scratches, etc.
A DISC inside the CD changer cannot
be played because it is loaded
upside-down.
This is a failure of DVD deck’s
mechanism and consult Clarion dealer.
Replace with a non-scratched disc.
Eject the disc then reload it properly.
region code disc.
Perform the operation such as skipping
a file.
This is a failure of CD changer’s
mechanism and consult Clarion dealer.
Replace with a non-scratched disc.
Eject the disc then reload it properly.
If an error display other than the ones described above appears, press the reset button. If the problem
persists, turn off the power and consult Clarion dealer.
56 VXZ768R
Page 57

11.SPECIFICATIONS
English
Radio section
Tuning System:
PLL synthesizer tuner
Receiving Frequencies:
FM : 87.5 to 108 MHz (0.05 MHz steps)
MW : 531 to 1602 kHz (9 kHz steps)
LW : 153 to 279 kHz (3 kHz steps)
DVD Player section
System:
Digital Versatile Disc System with CDDA
capable
Usable Discs:
DVD Video Disc, Video CD, Compact disc
Frequency Response:
20 Hz to 22 kHz (±1 dB)
Signal to Noise Ratio: 100 dB
Distortion: 0.01%
Channel Separation: 80 dB
Note:
•
Specifications and design are subject to change without notice for further improvement.
General
Output Power:
4 × 27 W (DIN 45324, +B = 14.4 V)
Power Supply Voltage:
14.4 V DC (10.8 to 15.6 V allowable),
negative ground
Power Consumption: Less than 15 A
Speaker Impedance: 4 Ω (4 to 8 Ω allowable)
Auto Antenna Rated Current: 500 mA or less
Weight:
Main unit: 1.5 kg
Remote control unit:
Dimensions:
Main unit: 178 (W) × 50 (H) × 160 (D) mm
Remote control unit:
54 (W) × 155 (H) × 27 (D) mm
100 g (including battery)
VXZ768R 57
Page 58

English
58 VXZ768R
Page 59

Page 60

Page 61

2006/1
Clarion Co., Ltd.
All Rights Reserved. Copyright 2006: Clarion Co., Ltd.
Printed in China / Imprimé en Chine / Gedruckt in China / Stampato in Cina
Gedrukt in China / Impreso en China / Tryckt i Kina / Impresso na China
PE-2706E
280-8327-00
 Loading...