

Canon Pixma TR4500 Series Getting Started
Getting Started
Guía de inicio
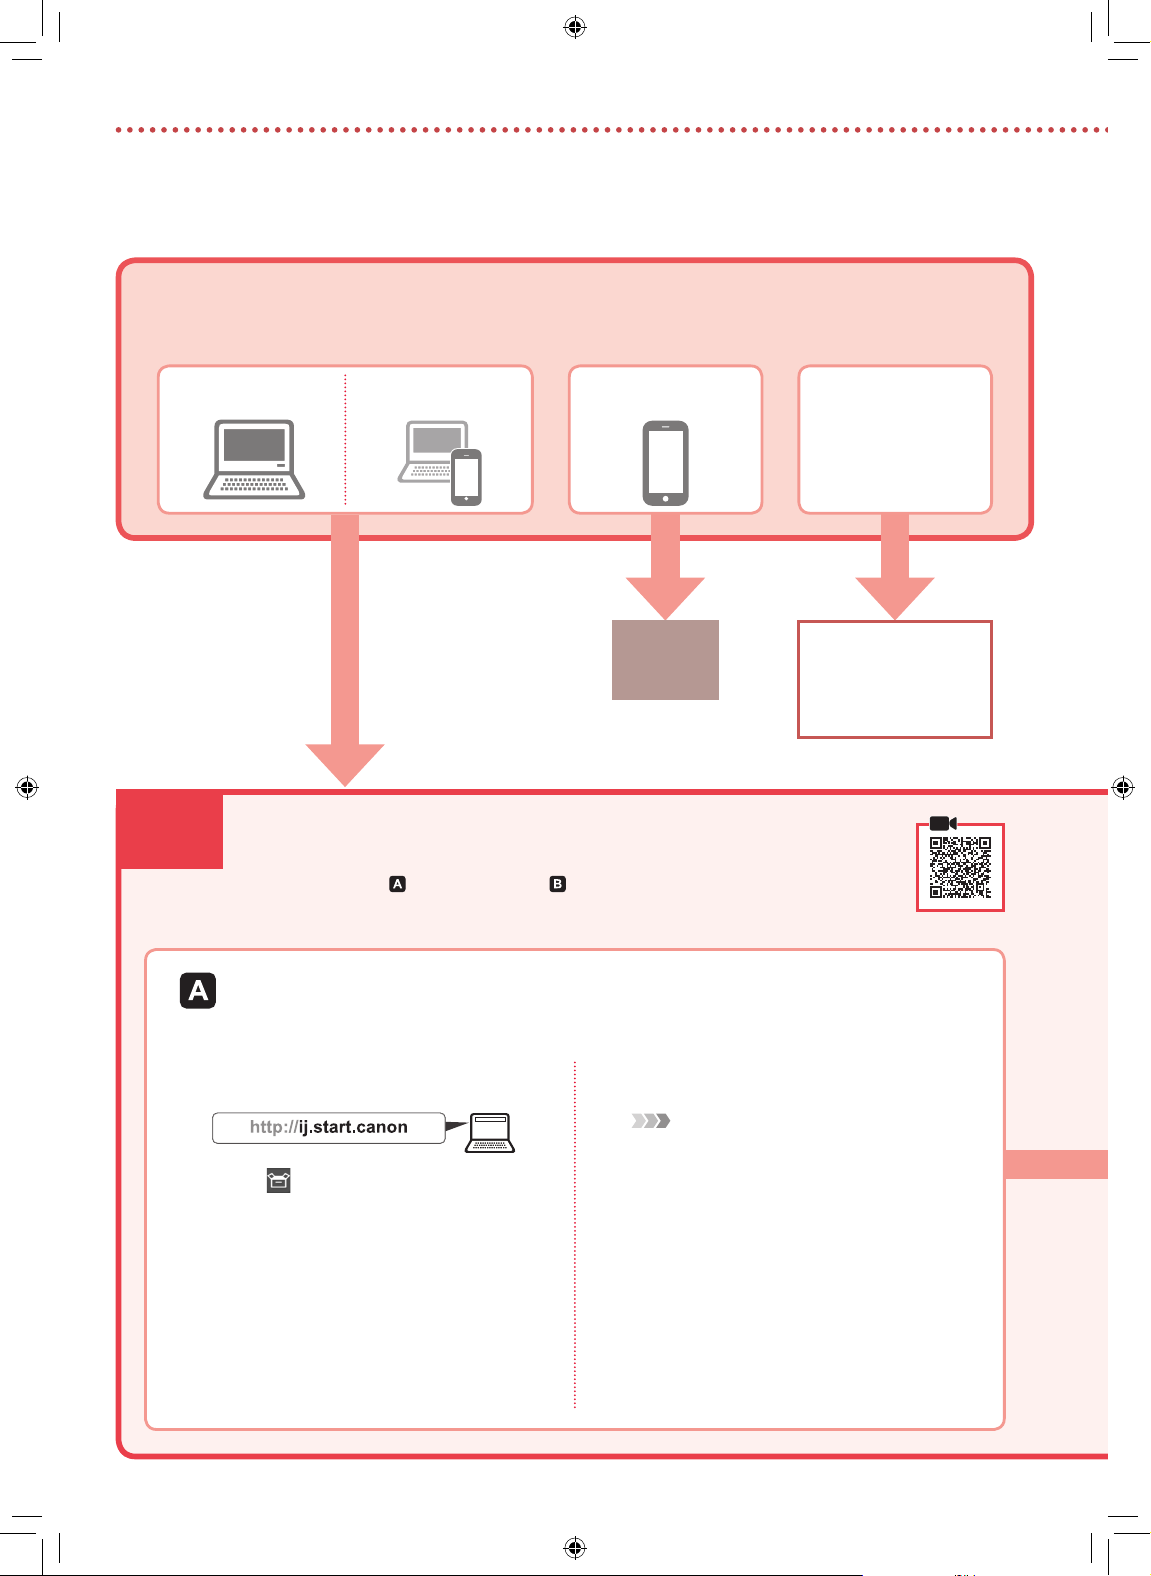
Web Setup
Conguración de la web
Detailed instructions and videos are
available on the Canon website.
Hay vídeos e instrucciones detalladas
enel sitio web de Canon.
Setup a Computer
Congurar un ordenador
Setup a Smartphone
Congurar un teléfono inteligente
Read Safety and Important Information
(addendum) rst.
Lea primero Información de seguridad e
información importante (apéndice).
TR4500_GS_book.indb 1 29/03/2018 09:02:32
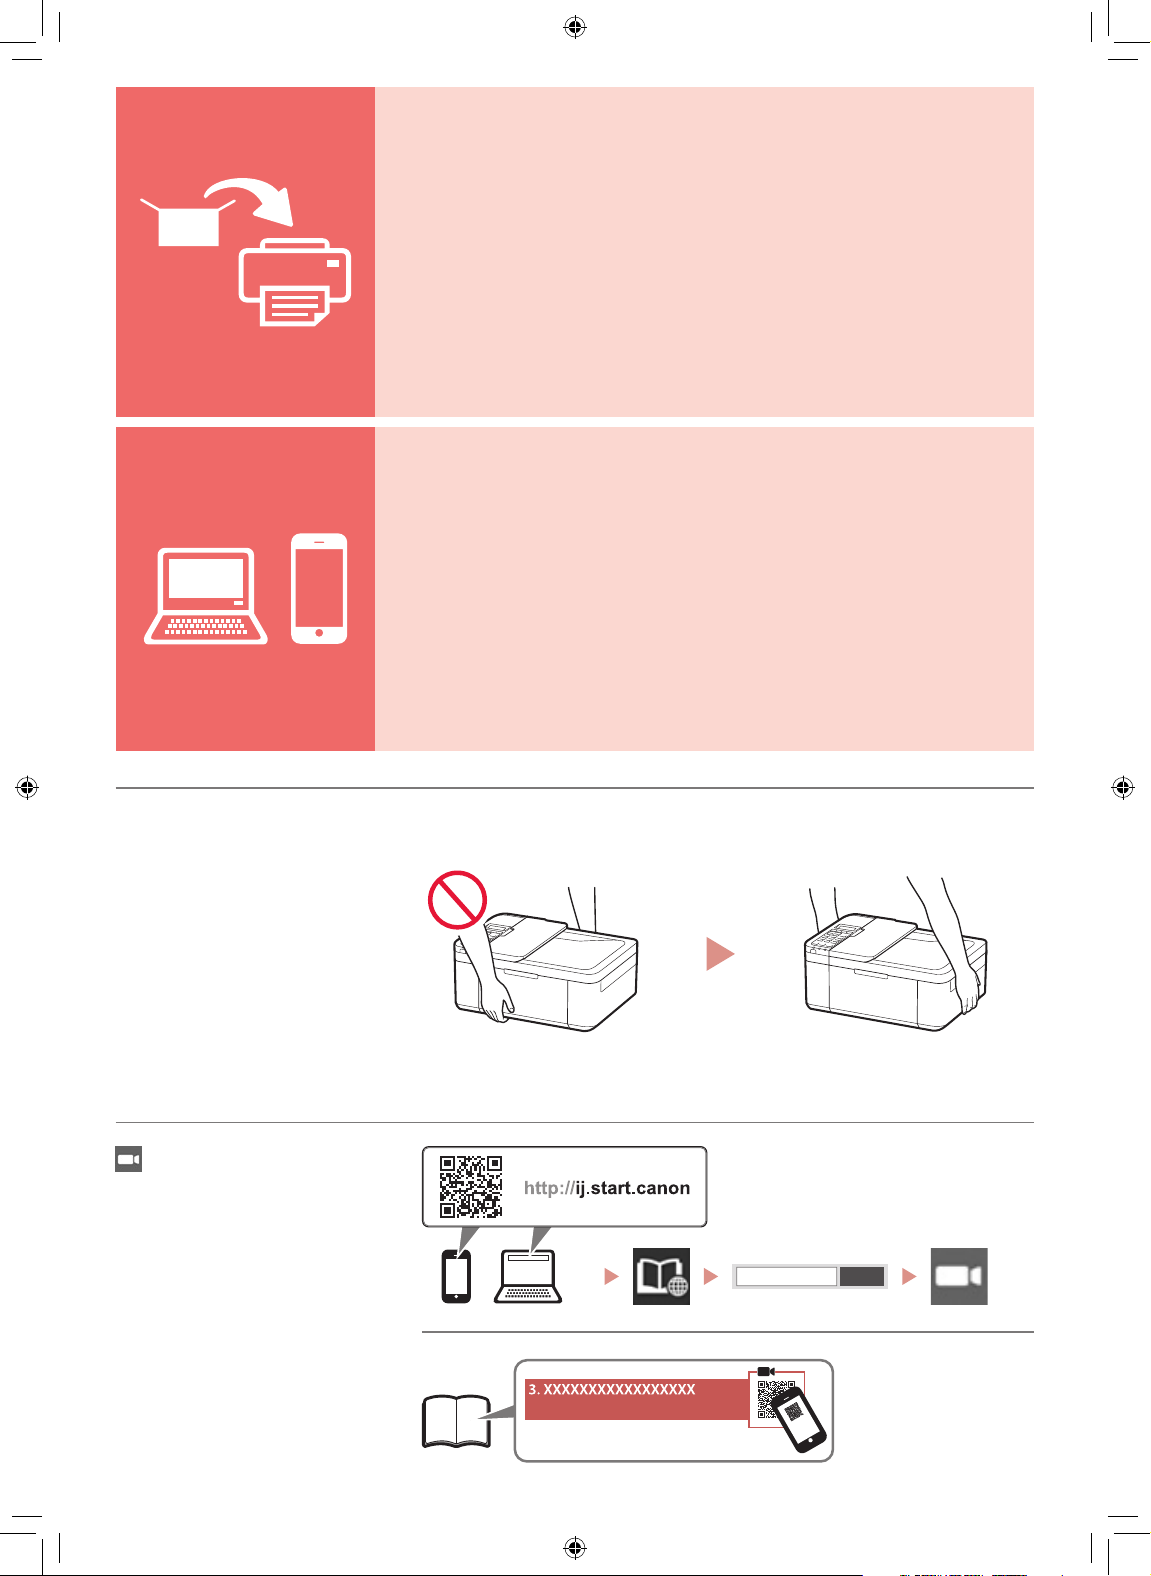
Installing the Printer ...................................................................................................................page 1
Instalación de la impresora ............................................................................................... página 1
Connecting with Computer and Smartphone/Tablet .........................................page 4
Conexión con el ordenador y con el teléfono inteligente o la tableta ..........página 4
How to Hold Printer
Cómo sujetar la impresora
Instructional Videos
Vídeos instructivos
Go
TR4500_GS_book.indb 2 29/03/2018 09:02:32
ENGLISH
Back
Setting up the printer
Web Setup
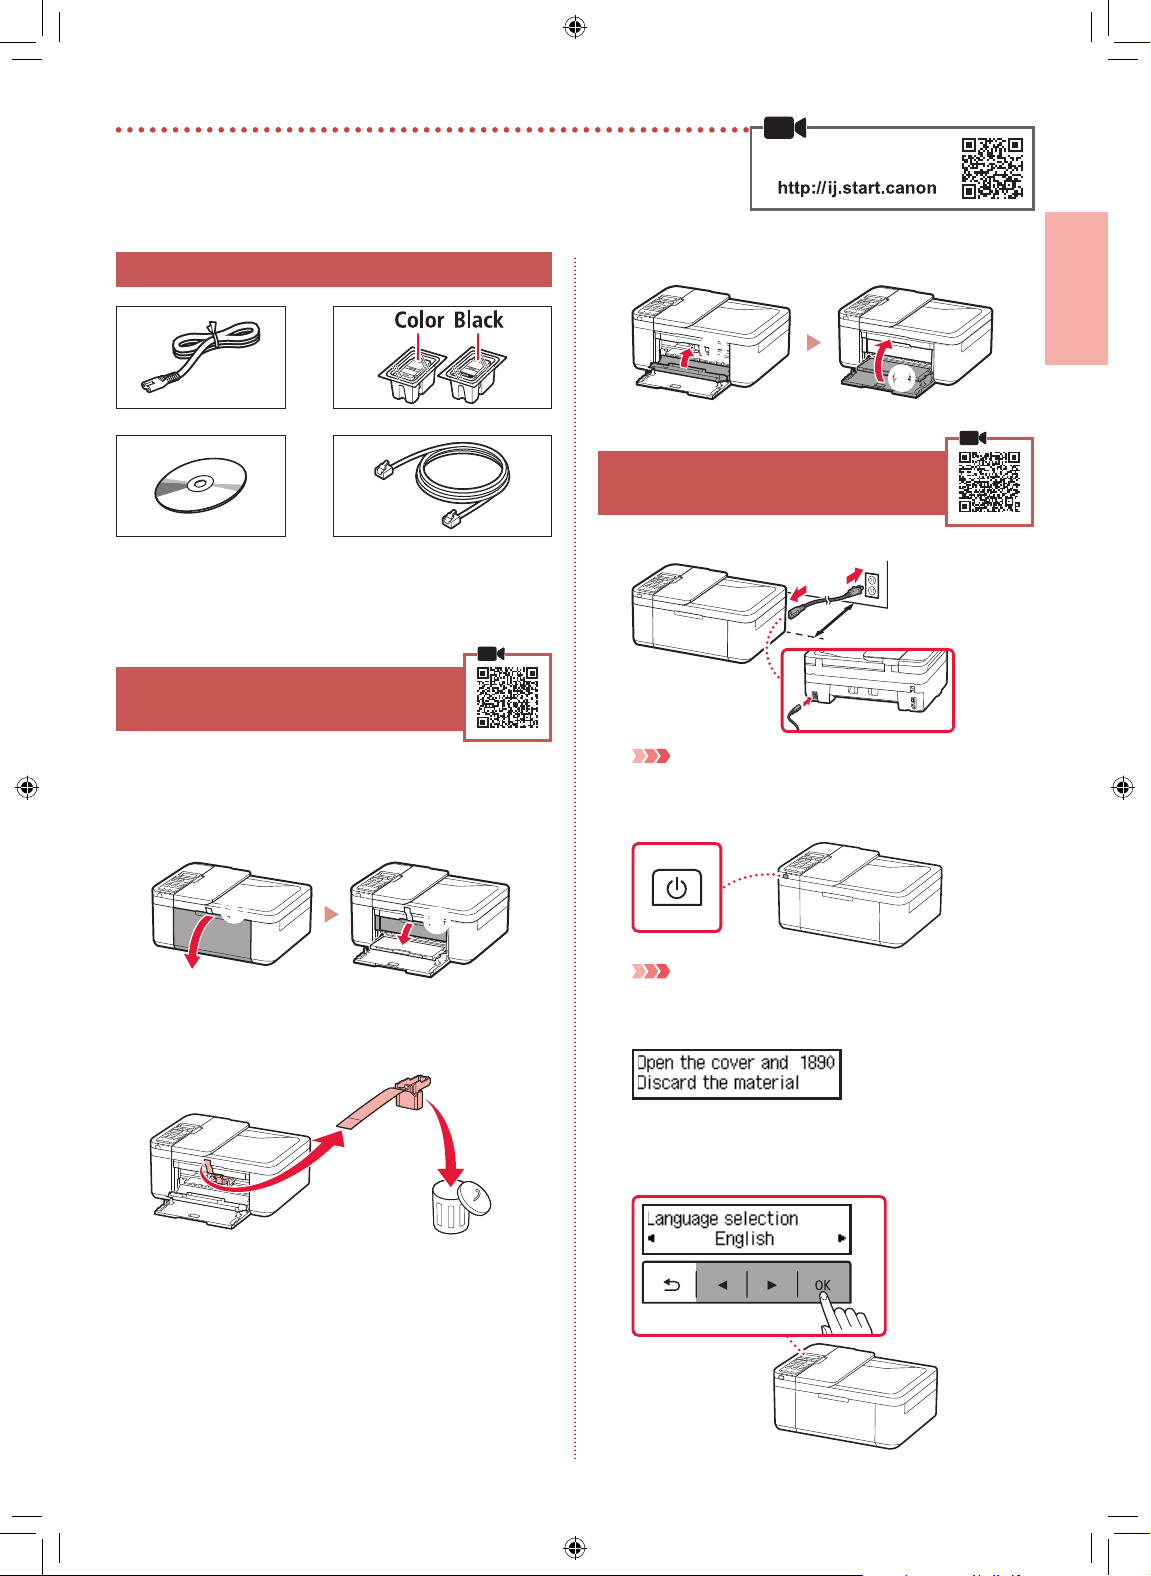
1. Box Contents
Power cord
•
Setup CD-ROM
•
Safety and Important Information
•
Getting Started (this manual)
•
2. Removing Packing Materials
Remove and dispose of the packing materials
1
from the device.
Be sure to remove any orange tape.
•
Open the front cover and paper output cover.
2
FINE cartridges
•
Modular cable
•
Close the paper output cover and front cover.
4
a
b
3. Turning on the Printer
Connect the power cord.
1
Important
P
lace the printer so it is at least 2 inches (5 cm) away from the wall.
•
At this time, do not connect any other cables.
•
Press the ON button.
2
a
Remove and dispose of the protective materials.
3
Pull the orange tape to remove the protective
•
material.
a
b
b
Important
If the following screen appears, press the ON button to turn o
the power, and redo the procedure from step 2 in "2. Removing
Packing Materials".
When the following screen appears, use the [
3
and ] buttons to select a language, and then
press the OK button.
1
TR4500_GS_book.indb 1 29/03/2018 09:02:33

Setting up the printer
If the following screen appears, select your
4
country or region, and then press the OK
button.
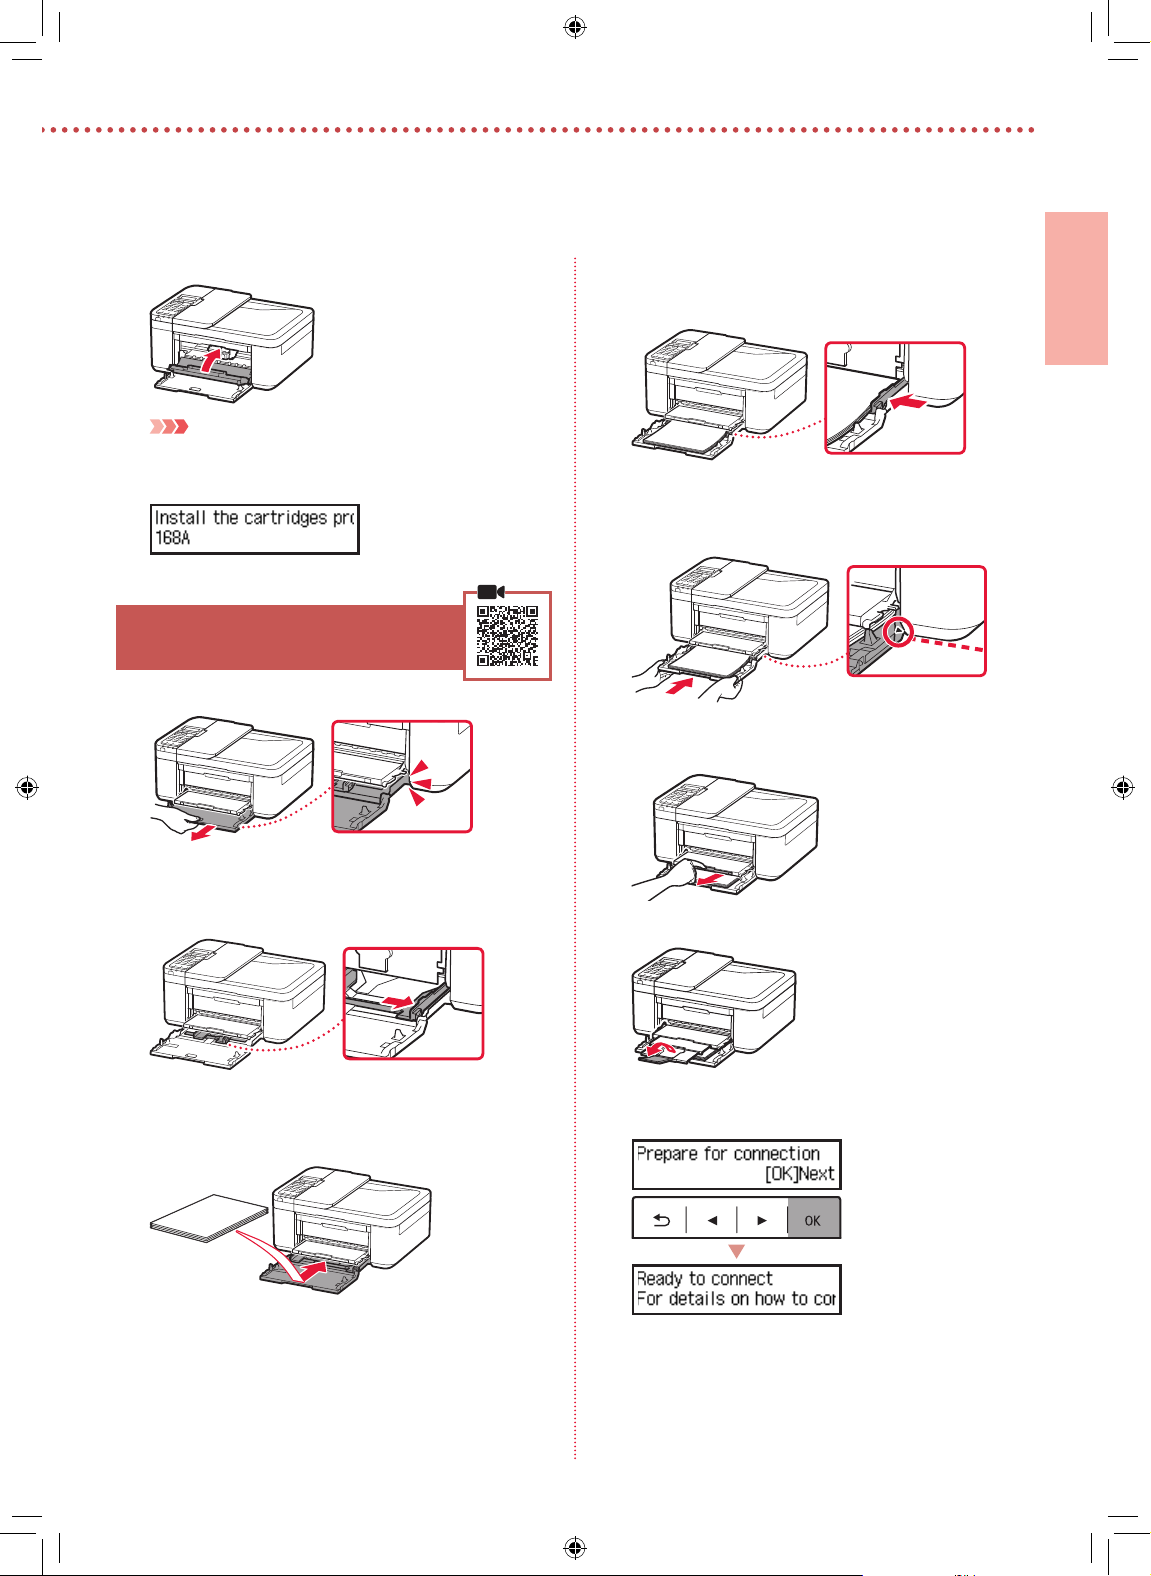
4. Installing the FINE
Cartridges
Open the front cover and paper output cover.
1
a
Remove the color FINE cartridge from the
2
container and remove the protective tape.
b
a
Install the color FINE cartridge.
3
The color FINE cartridge goes on the left.
•
Tilt the FINE cartridge upward at an angle and insert
•
it into the FINE cartridge holder.
Insert it all the way and press it upward until it clicks.
•
Important
Do not bump the FINE cartridge. Doing so
may cause a malfunction.
Conrm that the FINE cartridge is straight and
4
level.
b
Repeat steps 2 to 4 to install the black FINE
Important
Do not touch the ink on the protective tape. It could stain
•
your hands or surrounding objects.
Do not touch the areas shown in the
•
gure. Otherwise, the printer may not
print correctly.
5
cartridge.
The black FINE cartridge goes on the right.
•
2
TR4500_GS_book.indb 2 29/03/2018 09:02:34
ENGLISH
Close the paper output cover.
6
Important
If the following screen appears, return to step 3 in "4. Installing
the FINE Cartridges" and conrm that the color and black FINE
cartridges are positioned correctly.
5. Loading Paper
Pull out the cassette until it stops.
1
Push the paper all the way into the cassette, and then
•
slide the right paper guide against the edge of the
paper stack.
Push in the cassette.
4
The arrow ( ] ) on the front cover should align with
•
the front edge of the printer.
Pull out the paper output support of the paper
5
output tray.
Slide apart the paper guides.
2
Grip the right paper guide and move it to the right
•
edge.
Load paper.
3
Load plain LTR or A4 size paper with the print side
•
facing down.
Open the output tray extension.
6
Check that the following screen appears, and
7
then press the OK button.
TR4500_GS_book.indb 3 29/03/2018 09:02:35
3
Setting up the printer
What device are you connecting?
Select a device and follow the relevant section.
6-a
Computer Computer and
smartphone
Connecting to a Computer
If you are using multiple computers, perform these steps on each computer. There are
two methods, " Online Setup" and " Using the Setup CD-ROM (Windows Only)
Provided".
Smartphone No device
(Using your printer
standalone or as a fax)
Press the Stop button,
6-b
page 6
and then select Do not
connect > Yes, in this
order. To set up a fax see
"Using Fax Function" on
page 8.
Online Setup
Access the Canon website from a
1
computer.
Select Set Up.
2
Enter your printer's model name and
3
click Go.
Click Start.
4
Click If you have already prepared
5
your printer, go to Connect.
Note
When you are using a computer with Windows
(except for Windows 10 S) or macOS, proceed to
the next step. When you are using a computer with
another OS, continue the setup by following the onscreen instructions.
Click Download.
6
The setup le is downloaded to your
•
computer.
Run the downloaded le.
7
Proceed to step 9 on page 5.
8
4
TR4500_GS_book.indb 4 29/03/2018 09:02:35
 Loading...