

Canon PIXMA Q T 1 0 8 5 1 V 0 1, PIXMA MX860 Series Getting Started

Getting Started
for Mac Users
office all-in-one
series
QT10851V01


Contents
Getting Started Overview | 4
Prepare Your MX860 | 4
Before Starting | 4
Unpack and Set Up | 5
Set Up the Hardware | 8
Install the Print Head | 8
Install the Ink Tanks | 10
Load Paper | 11
Align the Print Head | 12
Set Up to Receive Faxes | 14
Set Up Your Fax Sender Information | 15
Set Up the Software | 15
Install the Software | 15
Connect to Your Network (optional) | 18
Choose Your Network Type | 18
Wireless Networks with a Single Access Point | 19
Wireless Networks with Multiple Airport Access Points | 23
Wired Networks | 28
Connecting Additional Computers | 33
Start Using Your MX860! | 37
Solution Menu | 37
On-Screen Manual | 37
4
Getting Started Overview
prepare your MX860
set up the hardware
set up the software
connect to your network (optional)
start using your MX860
Prepare Your MX860
Congratulations on your new MX860. This Getting Started guide will
help you through a fast, simple setup.
There will be decision points in fax and network setup where you will
make choices. Following the steps will make these choices easy.
Before Starting
If you do not have a wireless network, skip this step.
If you are installing your MX860 to a wireless network, locate your
network name (also called SSID or Service Set Identier) and network
password (if applicable).
You can locate the wireless network name by clicking the
icon in the
menu bar.
Network Name (also called SSID): ____________________________
Network Password (if applicable): ____________________________
You can also retrieve your network name and password by using the
Canon PIXMA Wireless Setup Assistant, or by following the
procedures available for download from the Canon support webpage
(www.usa.canon.com/downloadlibrary).
If you are unable to retrieve the network password or other settings,
refer to the manual of your access point or router, or contact the
manufacturer.
5
hardware
software
network
prepare
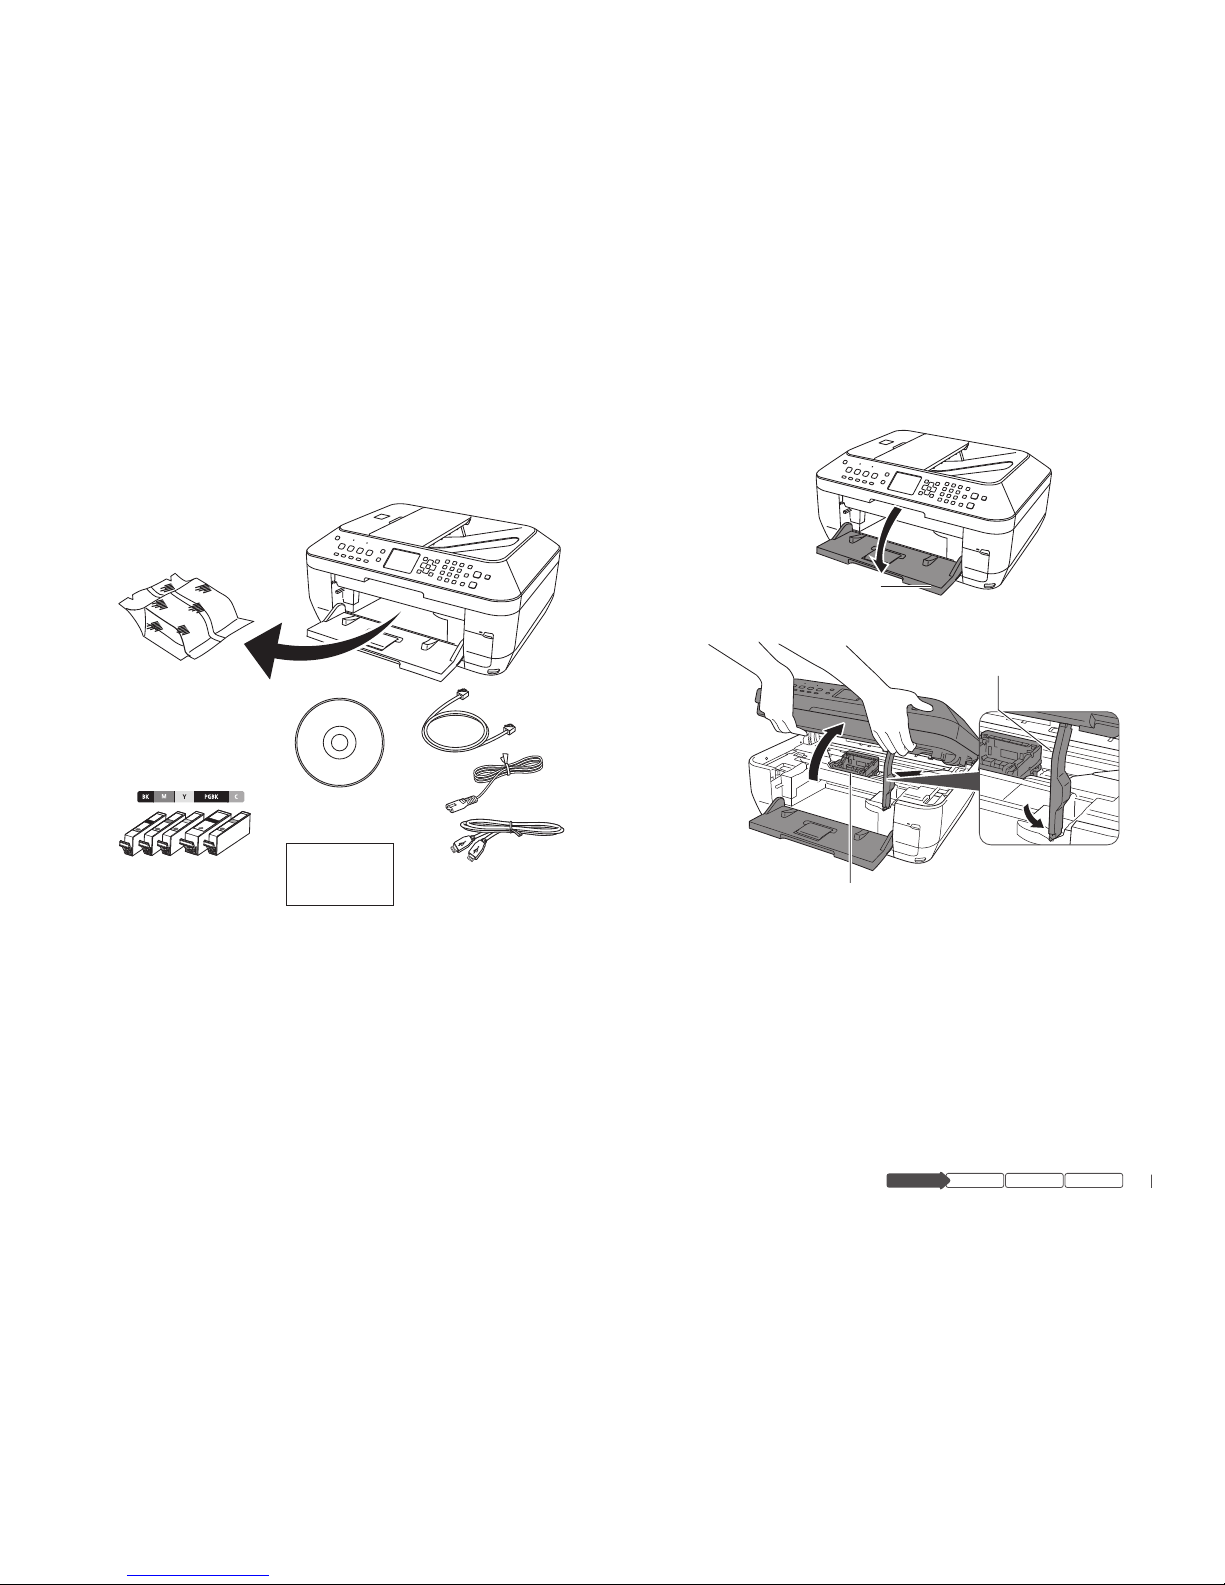
Unpack and Set Up
Check your box contents 1
MX860
printer/copier/scanner/fax
print head
(sealed package
is packed in the
paper output tray—
open tray to remove
package)
phone cord
power cord
ink tanks
USB cable
(needed for initial
network setup
or USB connection)
setup CD
NOT SHOWN:
documentation
If any parts are missing, contact Canon (see back cover for contact
data).
Remove all packing materials2
Remove all tape from the outside of the MX860.a
Open the paper output tray.b
paper output tray
Lift the scanning unit until the support slides into place. c
scanning unit support
print head holder
Remove all tape and packing material from inside the MX860.d
Lift the scanning unit slightly to release the support and close.e
6
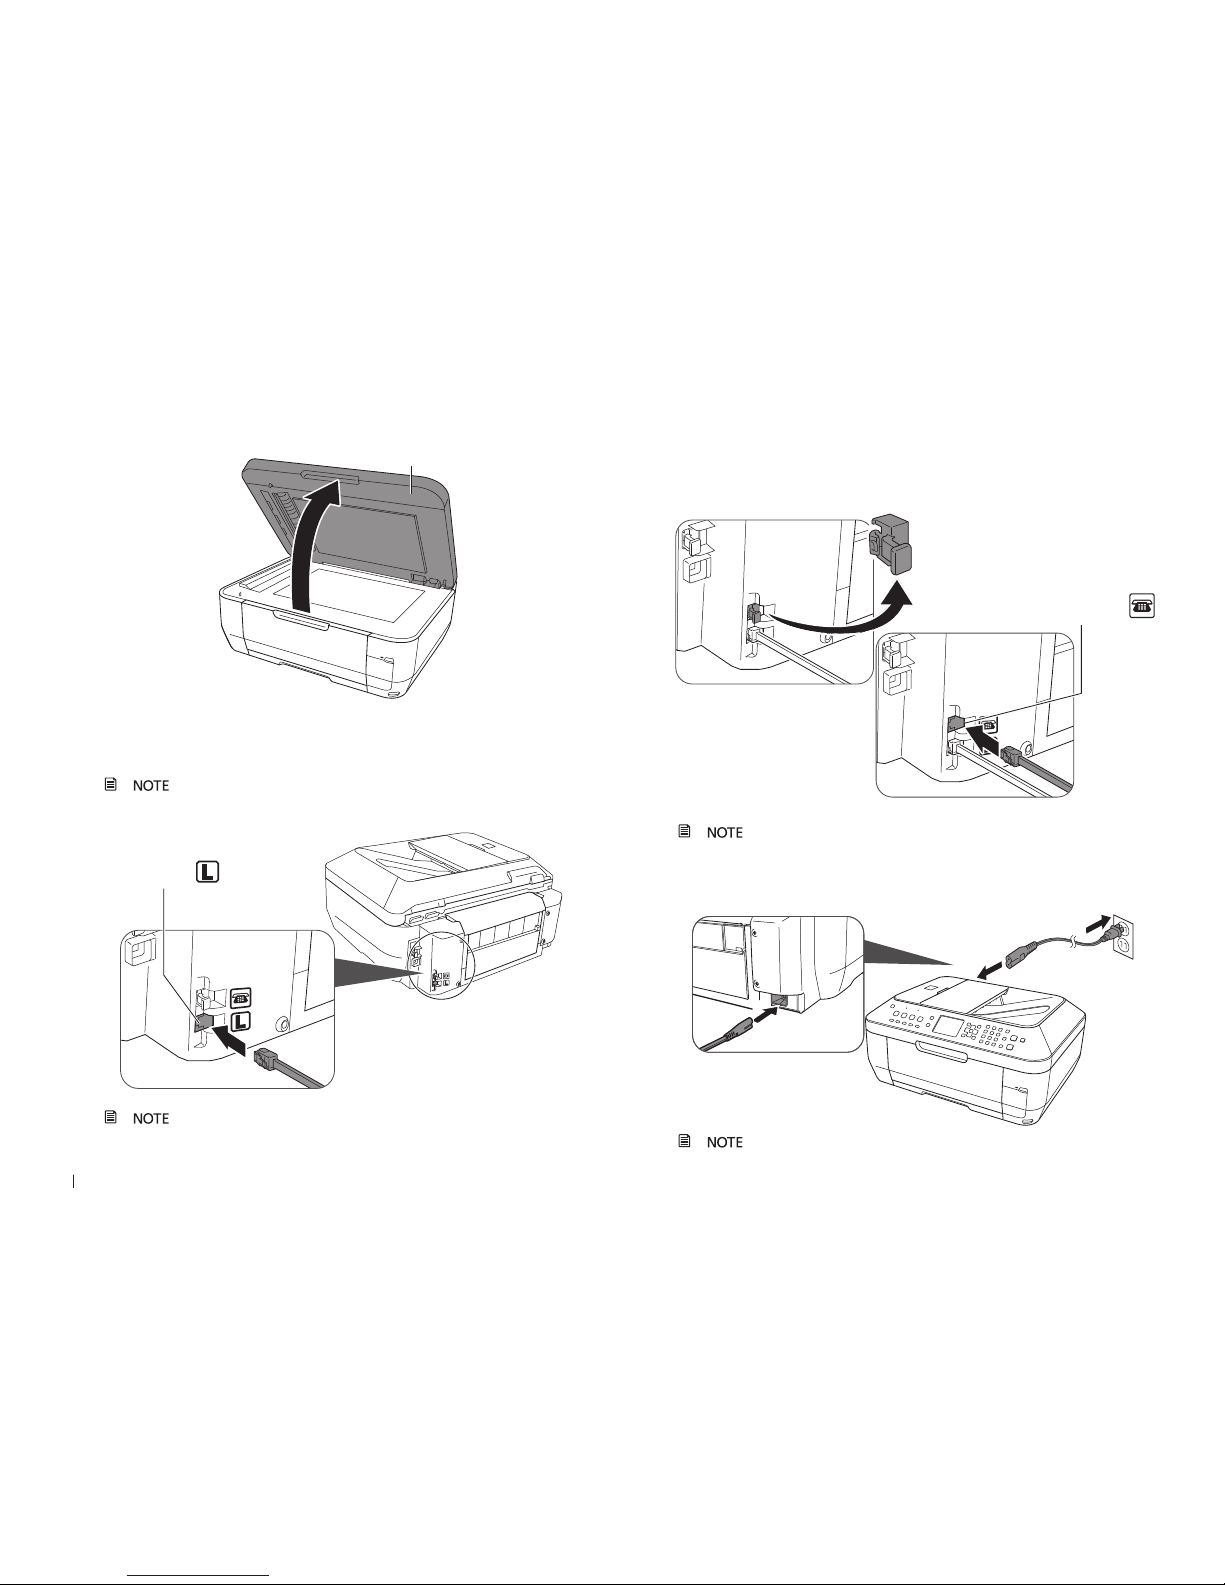
Lift the document cover and remove any packing material.f
document cover
Close the document cover.g
Connect the phone line for fax setup3
If you do not plan to fax from your MX860, proceed to step 5.
Connect the phone cord from the MX860 to the wall.
in from
wall jack
Make sure you connect the phone cable into the port
shown above.
Connect a phone or answering machine for fax setup4
To use a phone or answering machine on the same line, remove the cap
on the top phone jack and connect the phone or answering machine to
the MX860.
to phone or
answering machine
Make sure you connect the phone cable into the port
shown above.
5 Connect the power cord
Connect the power cord rst to the MX860, then to a wall socket.
DO NOT connect the USB cable yet.

7
hardware
software
network
hardware software
network
prepare
prepare
Power up6
Press the ON button to turn on the MX860.
Your MX860 will make sounds as it powers up. This is
normal.
Select language7
Use the ▲ and ▼ button on the operation panel to select a language for
the display, then press OK.
If you select a wrong language, press Back to return to
Language selection options.
back
Once your langage is selected, the display will prompt to
install the print head and ink tanks.

8
Set Up the Hardware
Install the Print Head
With the power on, open the paper output tray1
paper output tray
Lift the scanning unit until the support slides into place2
scanning unit support
print head holder
Raise the print head lock lever3
print head lock lever
Avoid touching the contact points in the print head holder.
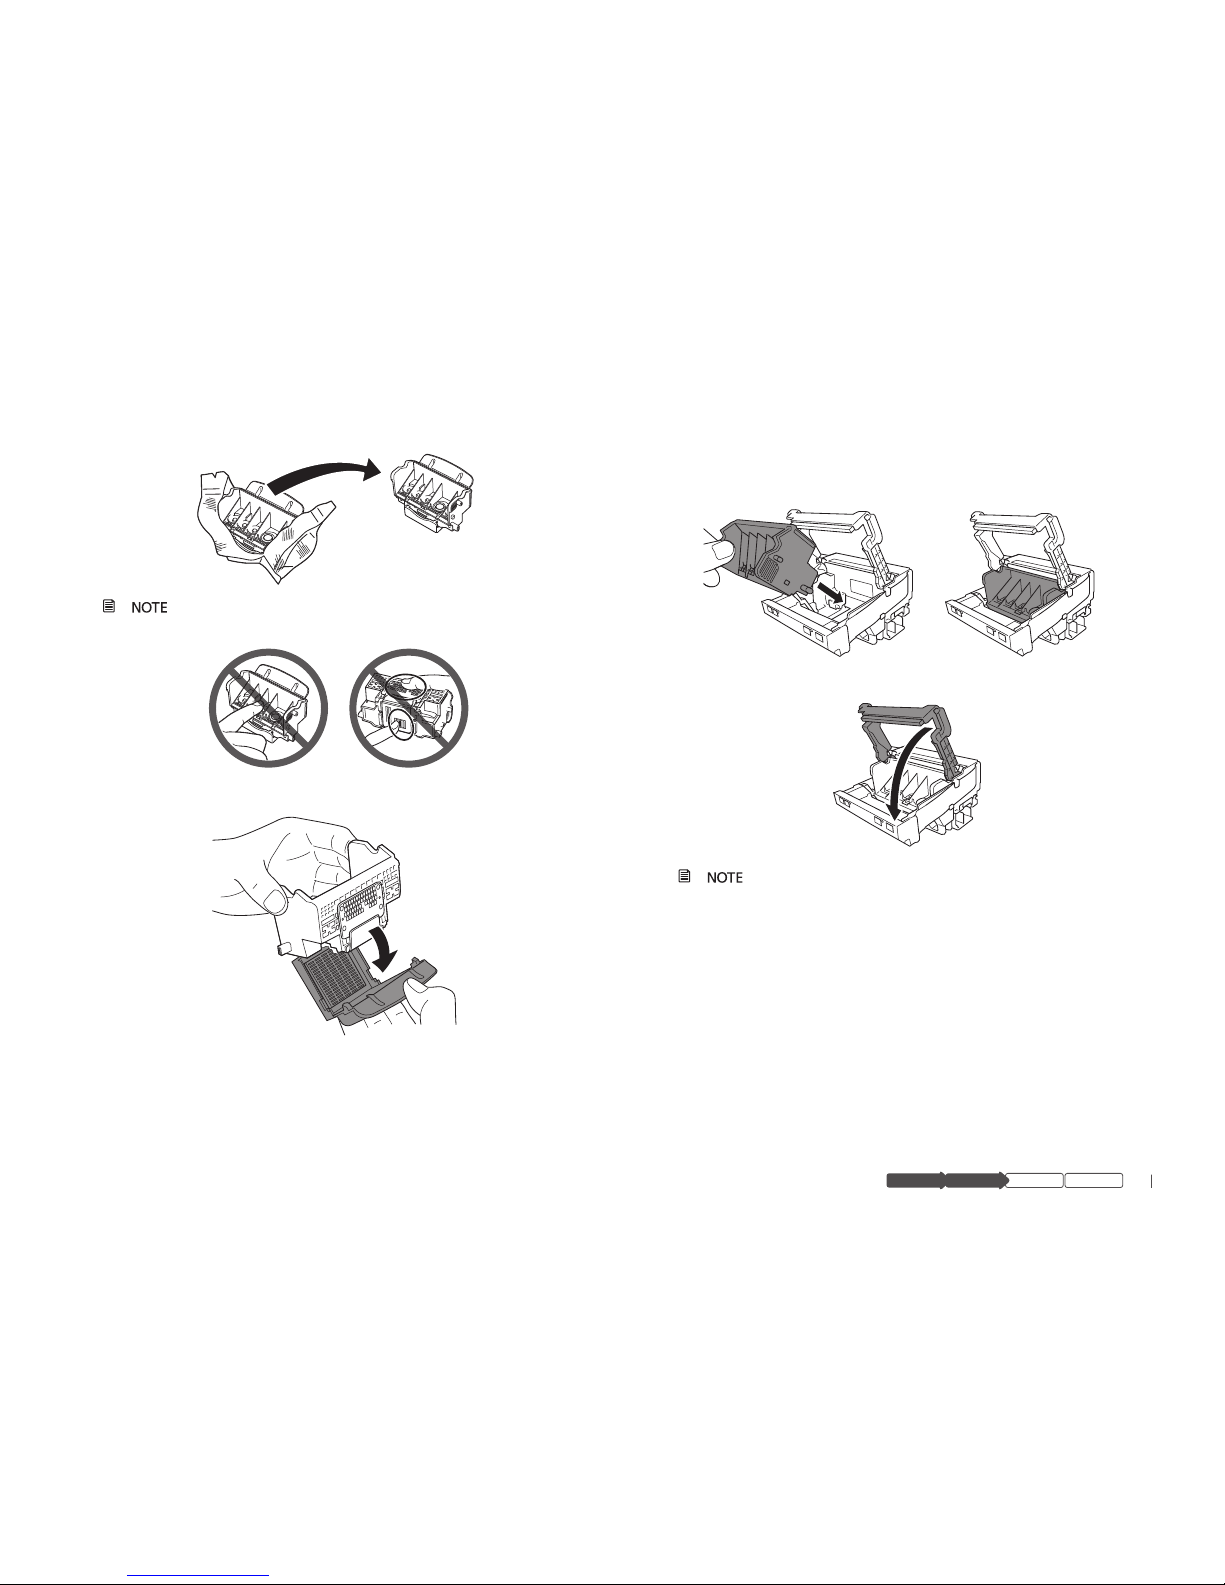
9
hardware
software
network
hardware software
network
prepare
prepare
Unpackage the print head4
When handling the print head, hold it only on the sides. Do
not touch the tank seats or contact points.
Remove the protective orange cap5
Insert the print head into the print head holder6
Tilt the print head forward and place it gently into position. Do not try to
force it.
Lower the print head lever until it locks into place7
Once the print head is in place, do not remove it
unnecessarily.

10
Install the Ink Tanks
Unwrap the first ink tank1
Pull the orange tape off to remove the protective wrap.
Remove protective cap2
Hold the ink tank as shown, and twist the cap off.
Do not grip the tank with force or hold the tank on the
sides to avoid squeezing ink from the tank.
Insert the ink tank into the print head3
Slide the ink tank into the matching color slot.a
Press the PUSH mark until it clicks into place.b
ink light will turn red
Take care to match the inks with the labels in the print
head.
Repeat steps 1–3 until all remaining ink tanks are in place and all 4
ink lights are red.
11
hardware
software
network
hardware software
network
prepare
prepare
Close the cover5
The printer will perform initial start up maintenance. Wait
until the “Load plain paper” screen displays before continuing setup.
Press the 6 OK button
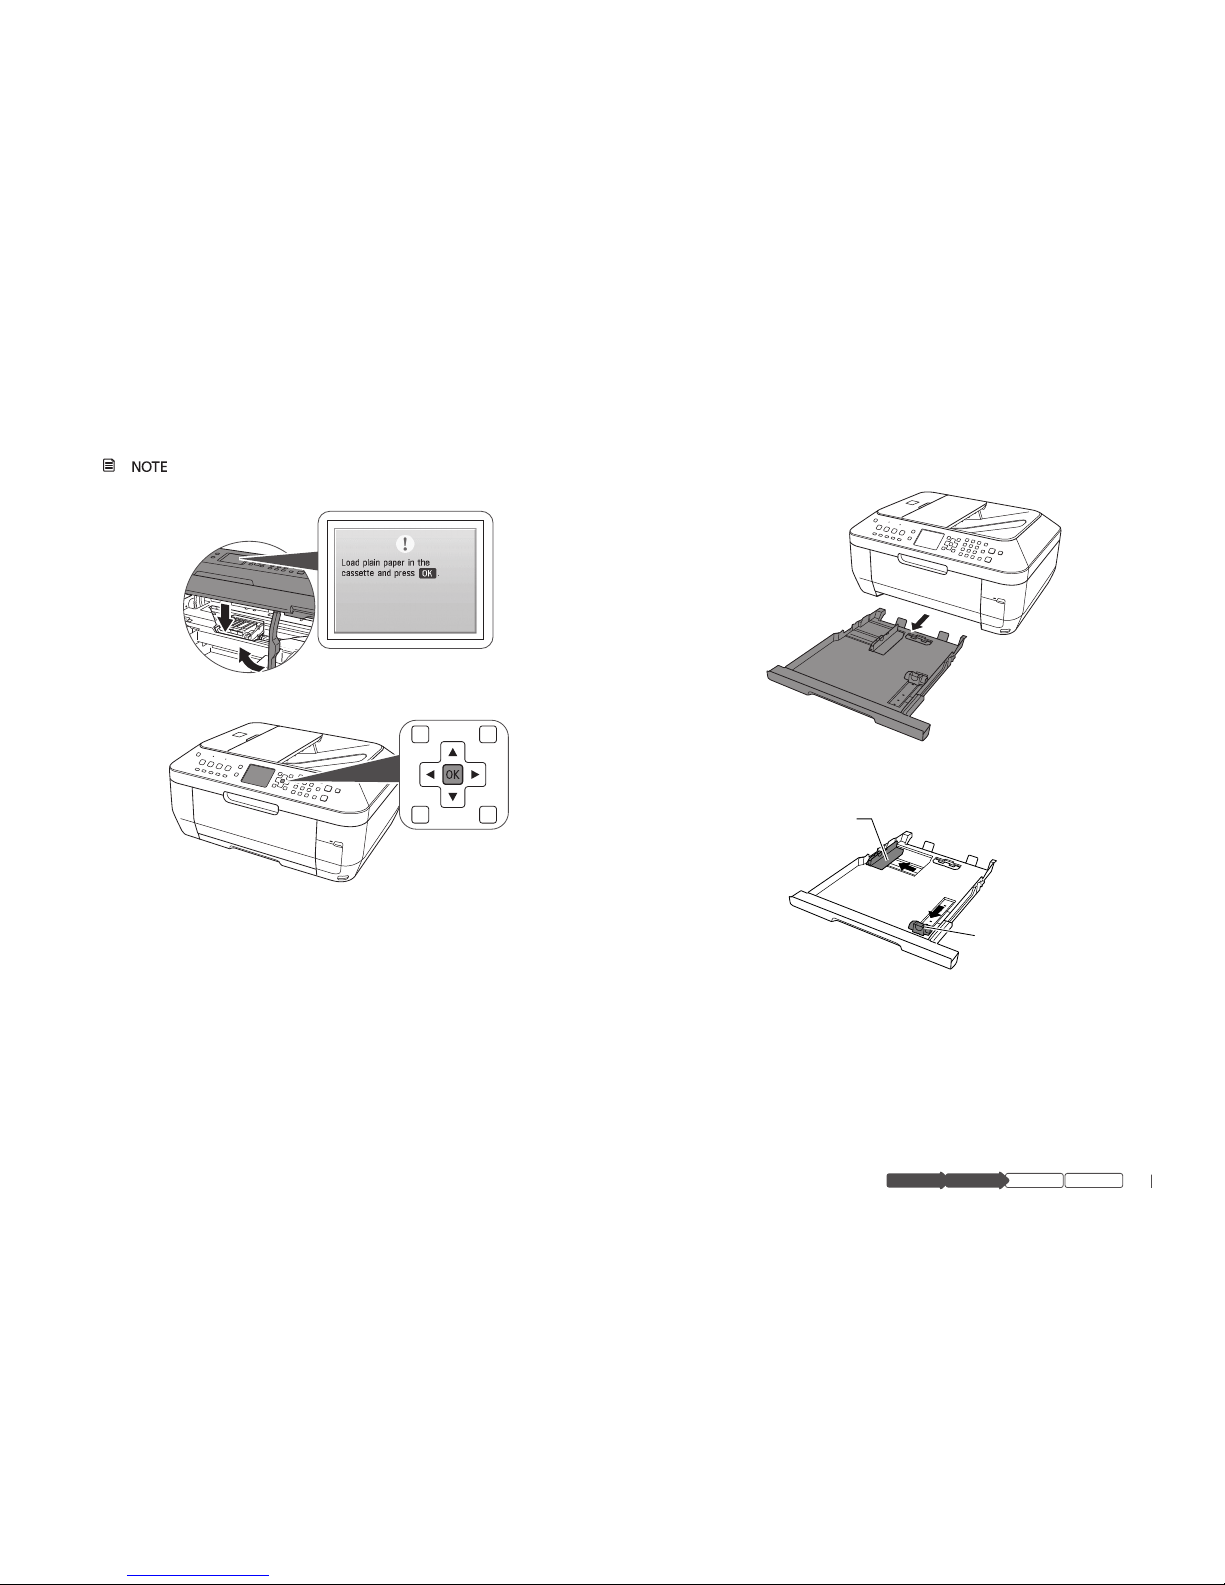
Load Paper
Remove the cassette1
Load plain paper with the printing side down2
Paper should fit between the adjustable paper guides.a
paper guide
paper guide
12
Insert at least 3 sheets of plain paper (the minimum needed for the b
next action).
The cassette is for plain paper only.
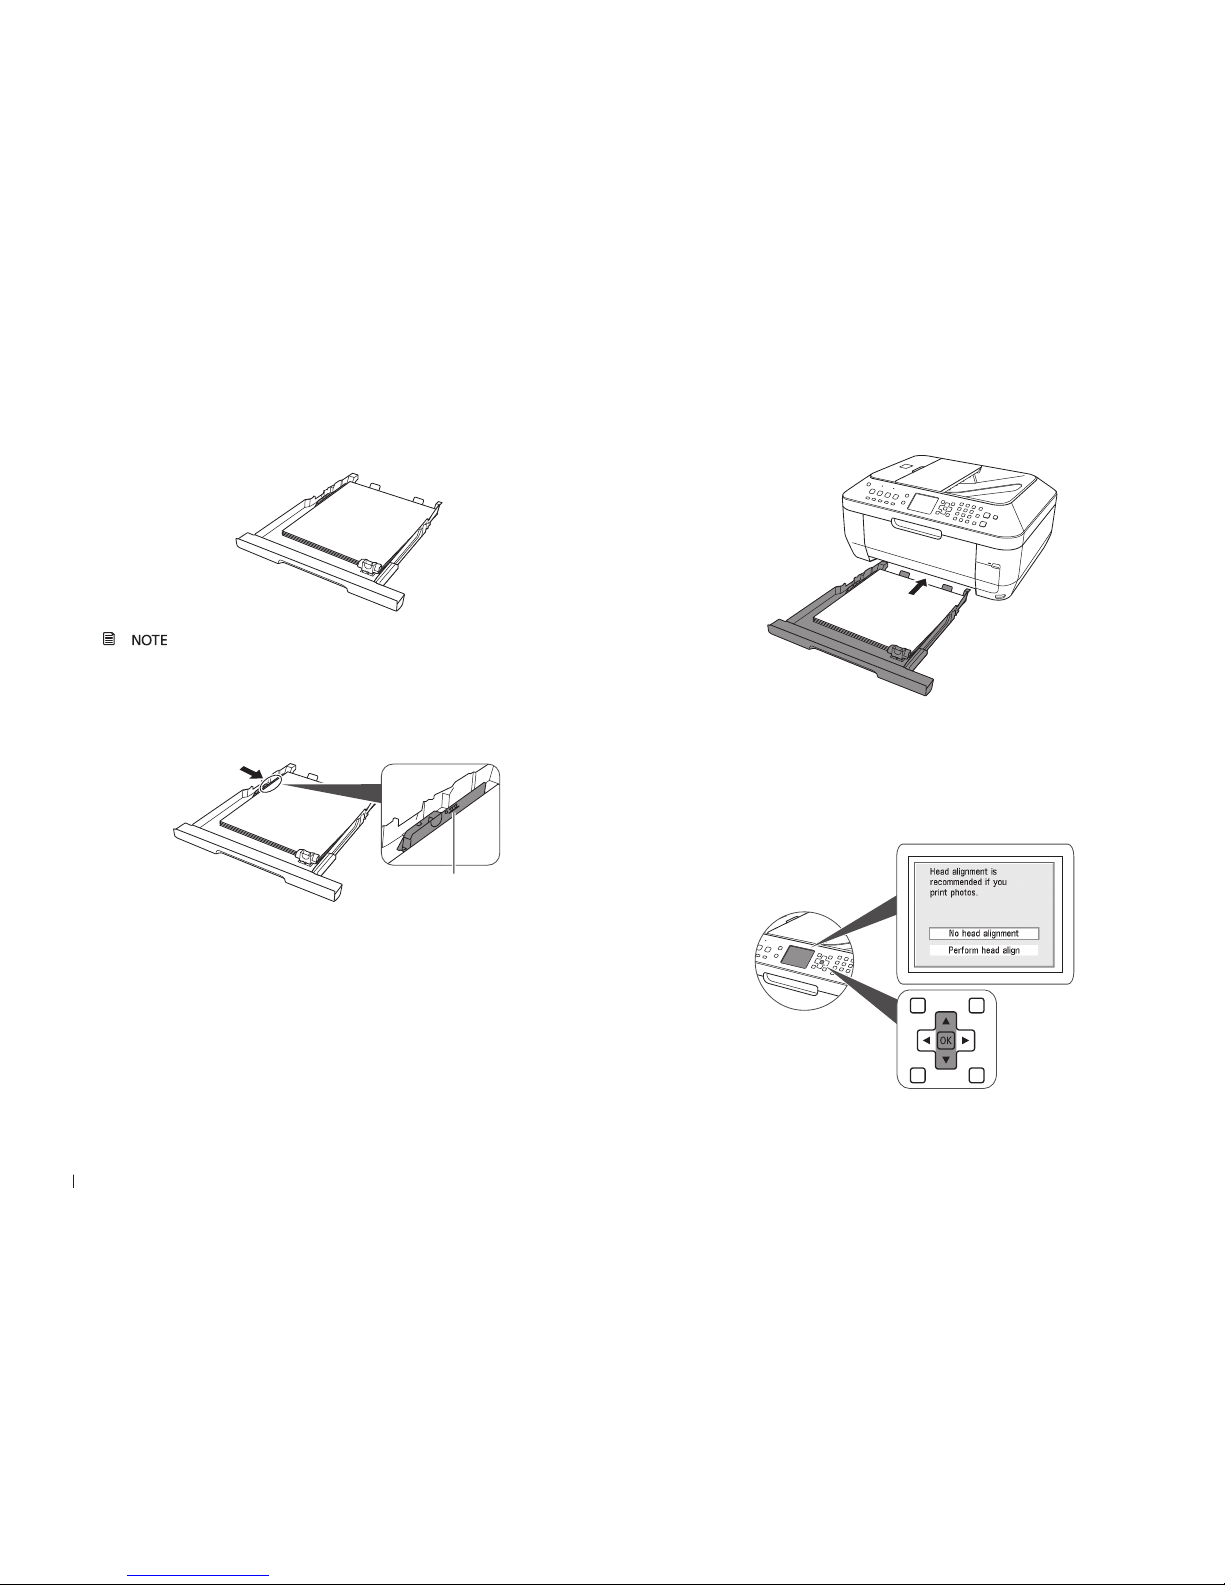
Slide the guides to match the paper size 3
(A slight space between the paper guide and the paper stack is
acceptable.)
Confirm paper stack does not exceed the limit4
paper stack
limit line
Slide the cassette back in until it clicks into place5
Align the Print Head
Start alignment1
Use the a ▲ and ▼ button to select Perform head align.
 Loading...