


Quick Guide
Read this guide rst.
Please read this guide before operating this product. After you finish reading the guide, store it in
a safe place for future reference.
Manuals for the Machine
The manuals for this machine are divided as follows. Please refer to them for detailed information.
Guides with this symbol are printed manuals.
Guides with this symbol are included on the accompanying CD-ROM.
Quick Guide (This Manual)
• Describes the precautions for using the machine.
• Provides an overview of functions, basic operations, and required settings before using
functions.
• Describes the maintenance and troubleshooting procedures for the machine.
e-Manual (HTML manual)
• Describes all the functions of the machine. Also provided with a search function that is useful
for finding and checking information.
• Included on the User Software CD-ROM.
For Macintosh Users
The examples shown in this manual are based on the operation in the Windows environment. To view how to use printer
driver and scanner driver, refer to the driver guides included in the User Software CD-ROM and the driver's help.
Displaying Driver Guides
To view the Driver Guides, double-click the HTML files from the following folders on the User
Software CD-ROM.
• Canon UFR II/UFRII LT Printer Driver Guide → [Documents] → [english] → [Print] → [Guide] →
[index.html]
• Canon Scanner Driver Guide → [Documents] → [english] → [Scan] → [Guide] → [index.html]
Displaying from Driver's Help System
From each driver panel, click [ ].
To view the manual in PDF format, Adobe Reader/Adobe Acrobat Reader is required. If Adobe Reader/Adobe
Acrobat Reader is not installed on your system, please download it from the Adobe Systems Incorporated
website.

How to Use the e-Manual
1
How to Install the e-Manual
This section describes how to install the e-Manual.
Top Page of the e-Manual
2
3
■ Windows
1. Insert the User Software CD-ROM in your computer.
2. Select the language for the e-Manual.
3. Click [Custom Installation].
4. Select [USB Connection], and click [Next].
5. Clear all the check boxes except for [Manuals].
6. Click [Install].
7. Read the License Agreement, and then click [Yes] to
agree.
The e-Manual is saved in the [Program Files] folder on
your computer. If the shortcut icon created on the
Desktop or if the [index.html] file is double-clicked, the
e-Manual is displayed.
■ Macintosh
1. Insert the User Software CD-ROM in your computer.
2. Open the [Documents] folder.
3. Drag and drop the [MF Guide] folder into a location
where you want to save it.
4. When displaying the installed e-Manual, double-click
[index.html] in the saved [MF Guide] folder.
If the CD-ROM Does Not Start
The CD-ROM auto run function may be disabled. In this
case, you must perform the following procedure.
4
1 Select from functions
The instructions for each function and operation
method are described.
2 [Top], [Site map], [Help]
Links to the e-Manual's top page, site map, and help are
displayed.
3 [For Macintosh Users]
Click to view precautions when using Macintosh.
4 First of all...
This section contains required information needed to
use the machine, and information on optional products.
■ Windows 8/Server 2012
1. Display the desktop → click the explorer icon on the
taskbar.
2. Click [Computer].
3. Double-click the CD-ROM icon.
4. Double-click [MInst.exe].
■ Windows Vista/7/Server 2008
1. Click [Start] on the Windows taskbar → click
[Computer].
2. Double-click the CD-ROM icon.
3. Double-click [MInst.exe].
■ Windows XP/Server 2003
1. Click [Start] on the Windows taskbar → click [My
Computer].
2. Double-click the CD-ROM icon.
3. Double-click [MInst.exe].

Contents
Preface
How To Use This Manual
...........................................................................................
...................................................
Symbols Used in This Manual
Keys and Buttons Used in This Manual
Displays Used in This Manual
Illustrations Used in This Manual
Abbreviations Used in This Manual
Trademarks
.................................................................................
.........................................
.........................................
..................................
............................
.....................
Chapter 1
Before You Start Using This Machine
Installation Location and Handling
Installation Precautions
Avoid Installing the Machine in the Following
Locations
Select a Safe Power Supply
Moving the Machine
Provide Adequate Installation Space
Handling Precautions
Parts and Their Functions
External View
Internal View
Control Panel Parts and Functions
Main Power and Energy Saver Key
How to Turn ON the Main Power
Energy Saver Key
Shutting Down the Machine
Setting Up the Connection
Settings Flowchart
Connecting to a USB Interface
Connecting to a Network (imageRUNNER
2202N/2002N Only)
Before Using the Machine
as a Printer or Scanner
System Requirements (Print)
System Requirements (Scan)
Installation
Setting Up the Printer Configuration
Flow of Settings for
Using the Desired Functions
Flow of Settings for Using Printing Functions
..............................................................................
............................................................................
.............................................................................
..................................................................................
......................................................
........................................................
......................................................
................................................
....................................................................
............................................
................................................................
..........................................................
....................................................
..........................
..........................................
.....................
..............................
............................
.................................
..........................................
......................................
..........................................
..........................................
........................
......................................
......
04
04
04
04
04
05
05
05
08
08
08
09
09
10
10
12
12
14
16
18
18
18
19
20
20
20
21
23
23
23
23
24
25
25
Flow of Settings for Using
Remote Scan Functions
.................................................
Chapter 2
Basic Operations
What This Machine Can Do
Placing Originals
Orientation
Platen Glass
Feeder (DADF-AM1) (Optional) (imageRUNNER
2202N/2002N Only)
Basic Copying
Basic Printing
Canceling a Job
Using the Stop Key
Using the Status Monitor Screen
Basic Remote Scanning
Operating the Machine from a Computer
(Remote UI) (For the imageRUNNER
2202N/2002N)
....................................................................
.................................................................................
................................................................................
...........................................................................
............................................................................
.......................................................................
......................................................................
............................................
..........................................................
................................................................
.................................
.....................................................
Chapter 3
Maintenance and Troubleshooting
Loading Paper
Loading Paper into a Drawer
Adjusting a Drawer to Hold a Different Paper Size
(Drawer 1)
Consumables
Recommended Paper
Purchase Information
..............................................................................................
Toner
Replacing the Toner
Locations of Paper Jams
When an Error Message/Error Code
Is Displayed
When an Error Message Is Displayed
When an Error Code Is Displayed
Service Call Message
..........................................................................
..........................................
................................................................................
............................................................................
.........................................................
..........................................................
.............................................................
...................................................
............................................................................
.........................
.................................
...........................................................
25
28
30
30
30
31
32
33
34
34
34
36
37
40
40
42
44
44
44
44
46
49
50
50
50
51
Contents

Contacting Your Local Authorized
Canon Dealer
........................................................................
51
Legal Notices
Product Name
EMC requirements of EC Directive
Laser Safety
Additional Information
IPv6 Ready Logo
WEEE Directive / Rule
Copyright
Disclaimers
Legal Limitations on the Usage of Your Product
and the Use of Images
Important Safety Instructions
Installation
Power Supply
Handling
Maintenance and Inspections
Consumables
Other Warnings
............................................................................
..........................................................................
..............................
................................................................................
.......................................................
.....................................................................
..........................................................
....................................................................................
.................................................................................
....................................................
......................................
..................................................................................
............................................................................
......................................................................................
.......................................
............................................................................
.......................................................................
52
52
52
52
52
53
53
53
53
53
55
55
55
56
57
58
59
Contents
Preface
Thank you for purchasing the Canon imageRUNNER 2202N/2002/2002N. Please read this manual thoroughly
before operating the machine to familiarize yourself with its capabilities, and to make the most of its many
functions. For information on the detailed settings for the functions described in this manual, see the
e-Manual. After reading this manual, store it in a safe place for future reference.
How To Use This Manual
Symbols Used in This Manual
The following symbols are used in this manual to explain
procedures, restrictions, handling precautions, and
instructions that should be observed for safety.
WARNING
Indicates a warning concerning operations that may lead to
death or injury to persons if not performed correctly. To use
the machine safely, always pay attention to these warnings.
CAUTION
Indicates a caution concerning operations that may lead
to injury to persons if not performed correctly. To use the
machine safely, always pay attention to these cautions.
IMPORTANT
Indicates operational requirements and restrictions. Be sure to
read these items carefully to operate the machine correctly,
and avoid damage to the machine or property.
NOTE
Indicates a clarification of an operation, or contains additional
explanations for a procedure. Reading these notes is highly
recommended.
Keys and Buttons Used in This Manual
The following symbols and key/button names are a
few examples of how keys and buttons to be clicked or
pressed are expressed in this manual:
• Display: <Message>
Example: <No Paper: MP Tray>
• Control Panel Keys: [Key Icon] (Key Name)
Example: [
[
• Buttons on Computer Operation Screens: [Button
Name]
Example: [OK]
[Add]
] (Start)
] (Stop)
Displays Used in This Manual
Screen shots used in this manual are those taken when
the imageRUNNER 2202N has the following optional
equipment attached to it:
• DADF-AM1
• Cassette Feeding Module-AB1
• Duplex Unit-C1
Note that functions that cannot be used depending on
the model or options do not appear on the display.
Screen shots used in this manual may differ from the
ones you actually see.
Indicates an operation that must not be performed. Read
these items carefully, and make sure not to perform the
described operations.
04
Illustrations Used in This Manual
Illustrations used in this manual are those displayed
when the imageRUNNER 2202N has the following
optional equipment attached to it:
• DADF-AM1
• Cassette Feeding Module-AB1
• Duplex Unit-C1
Abbreviations Used in This Manual
In this manual, product names and model names are
abbreviated as follows:
• Microsoft Windows Server 2003 operating system:
Windows Server 2003
• Microsoft Windows Server 2003 R2 operating system:
Windows Server 2003 R2
• Microsoft Windows XP operating system: Windows XP
• Microsoft Windows Vista operating system: Windows
Vista
• Microsoft Windows Server 2008 operating system:
Windows Server 2008
• Microsoft Windows Server 2008 R2 operating system:
Windows Server 2008 R2
• Microsoft Windows Server 2012 operating system:
Windows Server 2012
• Microsoft Windows 7 operating system: Windows 7
• Microsoft Windows 8 operating system: Windows 8
• Microsoft Windows operating system: Windows
• Microsoft Internet Explorer: Internet Explorer
• Microsoft Windows Internet Explorer: Internet Explorer
• Apple Macintosh: Macintosh
Trademarks
Apple, Mac OS, and Macintosh are trademarks or
registered trademarks of Apple Inc. in the U.S. and/or
other countries.
Microsoft, Windows, Windows Vista, Windows Server,
Internet Explorer, Excel and PowerPoint are either
registered trademarks or trademarks of Microsoft
Corporation in the United States and/or other countries.
All other product and brand names are registered
trademarks, trademarks or service marks of their
respective owners.
05

06

1
Before You Start Using This Machine
Installation Location and Handling
Installation Precautions
Parts and Their Functions
External View
Internal View
Control Panel Parts and Functions
Main Power and Energy Saver Key
How to Turn ON the Main Power
Energy Saver Key
Shutting Down the Machine
Setting Up the Connection
Settings Flowchart
Connecting to a USB Interface
Connecting to a Network (imageRUNNER
2202N/2002N Only)
Before Using the Machine
as a Printer or Scanner
System Requirements (Print)
System Requirements (Scan)
.........................................................................
..........................................................................
..................................................
................................................
.................................................................
............................................
.............................................................
.....................................................
..................................................
..........................
...........................
............................
.............................
......................................
..................................
.......................................
......................................
08
08
12
12
14
16
18
18
18
19
20
20
20
21
23
23
23
Installation
Setting Up the Printer Configuration
Flow of Settings for
Using the Desired Functions
Flow of Settings for Using Printing Functions
Flow of Settings for Using Remote Scan
Functions
..............................................................................
.....................
....................................
............................................................................
..
23
24
25
25
25
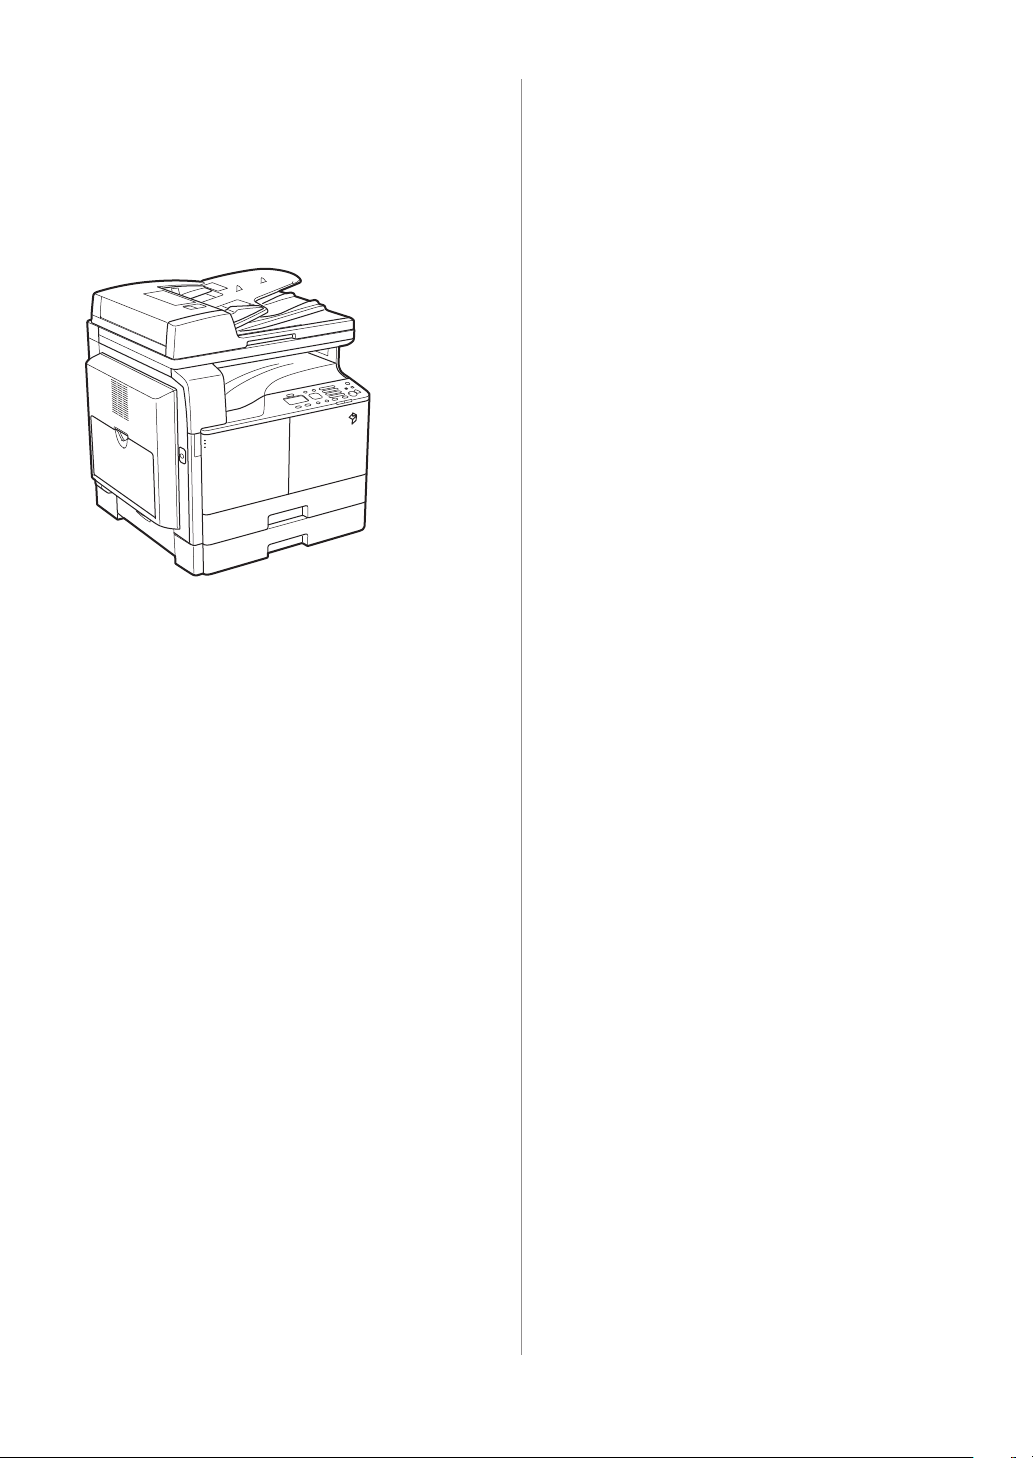
Installation Location and Handling
This section describes precautions for installation location and handling. We recommend that you read this
section prior to using this machine.
Installation Precautions
Avoid Installing the Machine in the Following Locations
• Avoid locations subject to temperature and humidity
extremes, whether low or high.
For example, avoid installing the machine near
water faucets, hot water heaters, humidifiers, air
conditioners, heaters, or stoves.
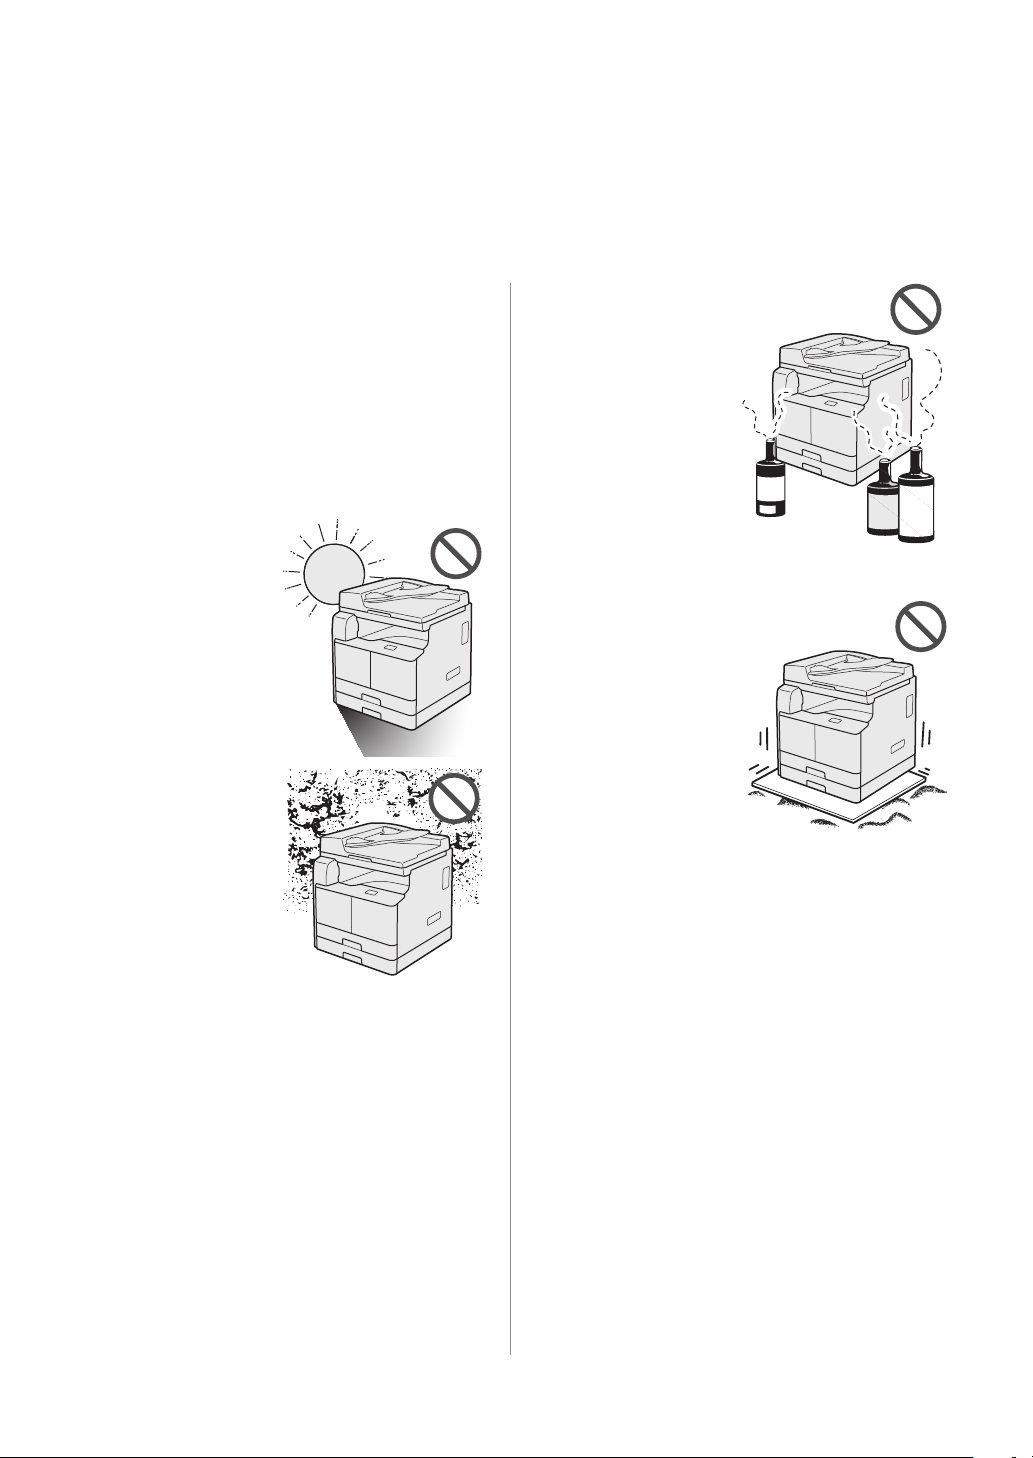
• Avoid installing the
machine in direct sunlight.
If this is unavoidable, use
curtains to shade the
machine. Be sure that the
curtains do not block the
machine's ventilation slots
or louvers, or interfere
with the electrical cord or
power supply.
• Avoid poorly ventilated
locations.
This machine generates
a slight amount of ozone
etc. during normal use.
Although sensitivity to
ozone etc. may vary, this
amount is not harmful.
Ozone etc. may be
more noticeable during
extended use or long production runs, especially
in poorly ventilated rooms. It is recommended that
the room be appropriately ventilated, sufficient to
maintain a comfortable working environment, in areas
of machine operation.
• Avoid locations where a considerable amount of dust
accumulates.
• Avoid locations where
ammonia gas is emitted.
• Avoid locations near volatile or flammable materials,
such as alcohol or paint thinner.
• Avoid locations that are
subject to vibration.
For example, avoid
installing the machine on
unstable floors or stands.
08 Installation Location and Handling
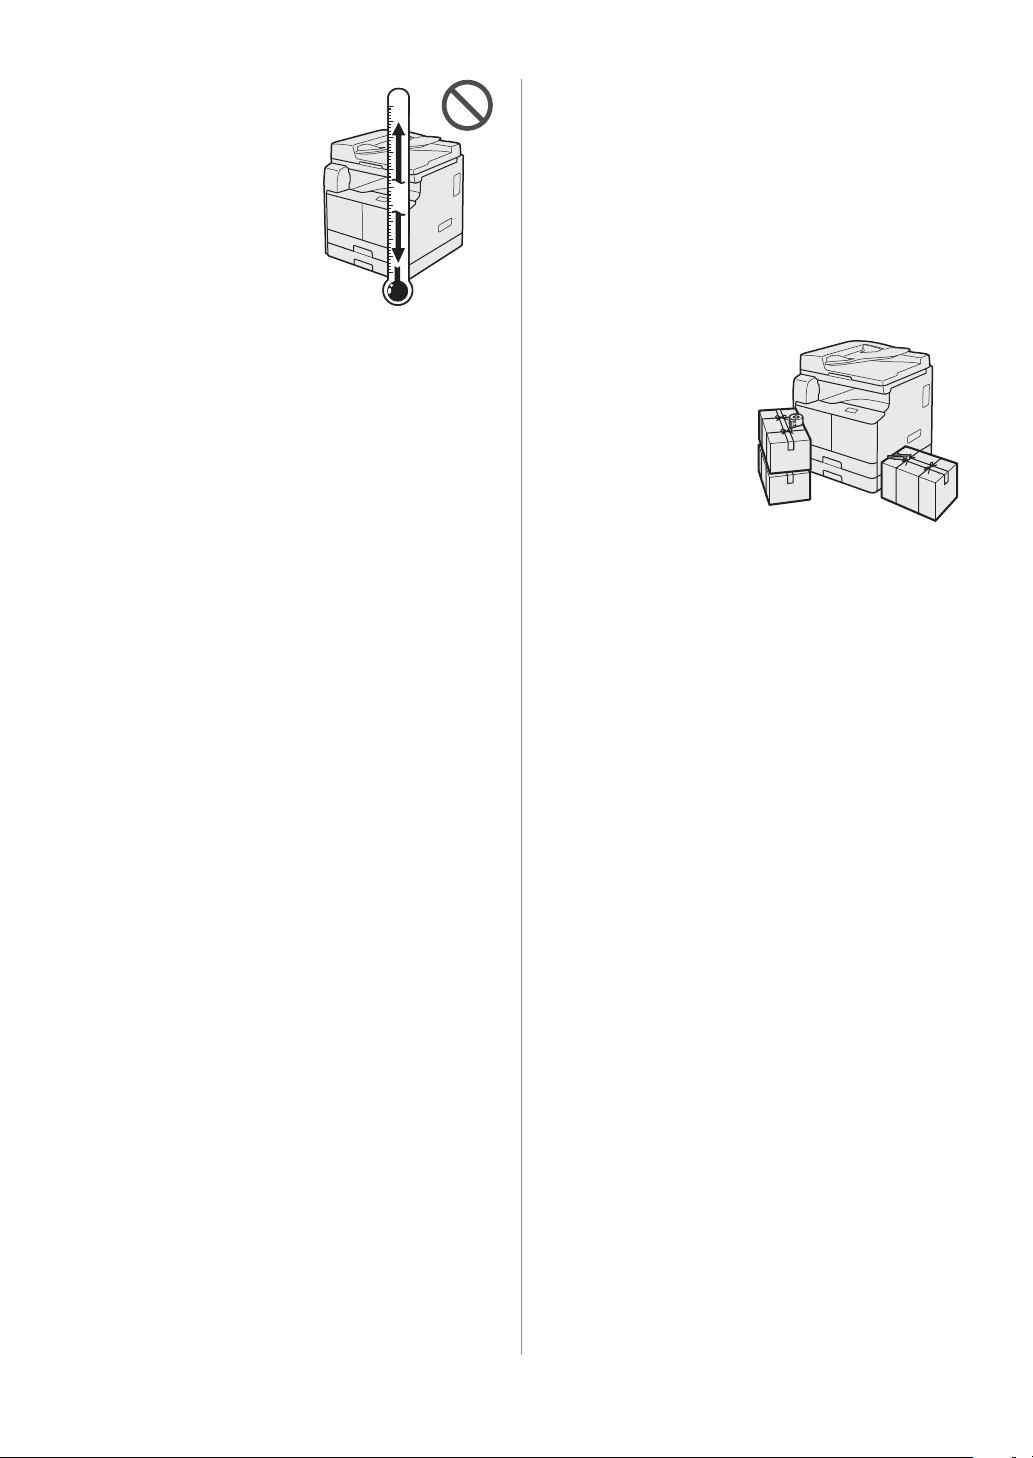
• Avoid exposing the
machine to rapid changes in
temperature.
If the room in which the
machine is installed is cold
but rapidly heated, water
droplets (condensation) may
form inside the machine. This
may result in a noticeable
degradation in the quality of
the copied image, the inability
to properly scan an original, or the copies having no
printed image at all.
• Avoid installing the machine near computers or other
precision electronic equipment.
Electrical interference and vibrations generated by
the machine during printing can adversely affect the
operation of such equipment.
• Avoid installing the machine near televisions, radios,
or similar electronic equipment.
The machine might interfere with sound and picture
signal reception.
Insert the power plug into a dedicated power outlet,
and maintain as much space as possible between the
machine and other electronic equipment.
• Avoid installing the machine at high altitudes of about
3,000 meters above sea level, or higher.
Machines with a hard disk may not operate properly
when used at high altitudes of about 3,000 meters
above sea level, or higher.
• If excessive stress is applied to the connection part of
the power cord, it may damage the power cord or the
wires inside the machine may disconnect. This could
result in a fire. Avoid the following situations:
- Connecting and disconnecting the power cord
frequently.
- Tripping over the power cord.
- The power cord is bent near the connection part,
and continuous stress is being applied to the power
outlet or the connection part.
- Applying excessive force on the power plug.
Moving the Machine
• If you intend to move
the machine, even to
a location on the same
floor of your building,
contact your local
authorized Canon dealer
beforehand. Do not
attempt to move the
machine yourself.
Select a Safe Power Supply
• Plug the machine into a 220 - 240 V AC outlet.
• Make sure that the power supply for the machine is
safe, and has a steady voltage.
• Do not connect other electrical equipment to
the same power outlet to which the machine is
connected.
• Do not connect the power cord to a multiplug power
strip, as this may cause a fire or electrical shock.
• The power cord may become damaged if it is stepped
on, affixed with staples, or if heavy objects are placed
on it. Continued use of a damaged power cord can
lead to an accident, such as a fire or electrical shock.
• The power cord should not be taut, as this may lead
to a loose connection and cause overheating, which
could result in a fire.
09Installation Location and Handling
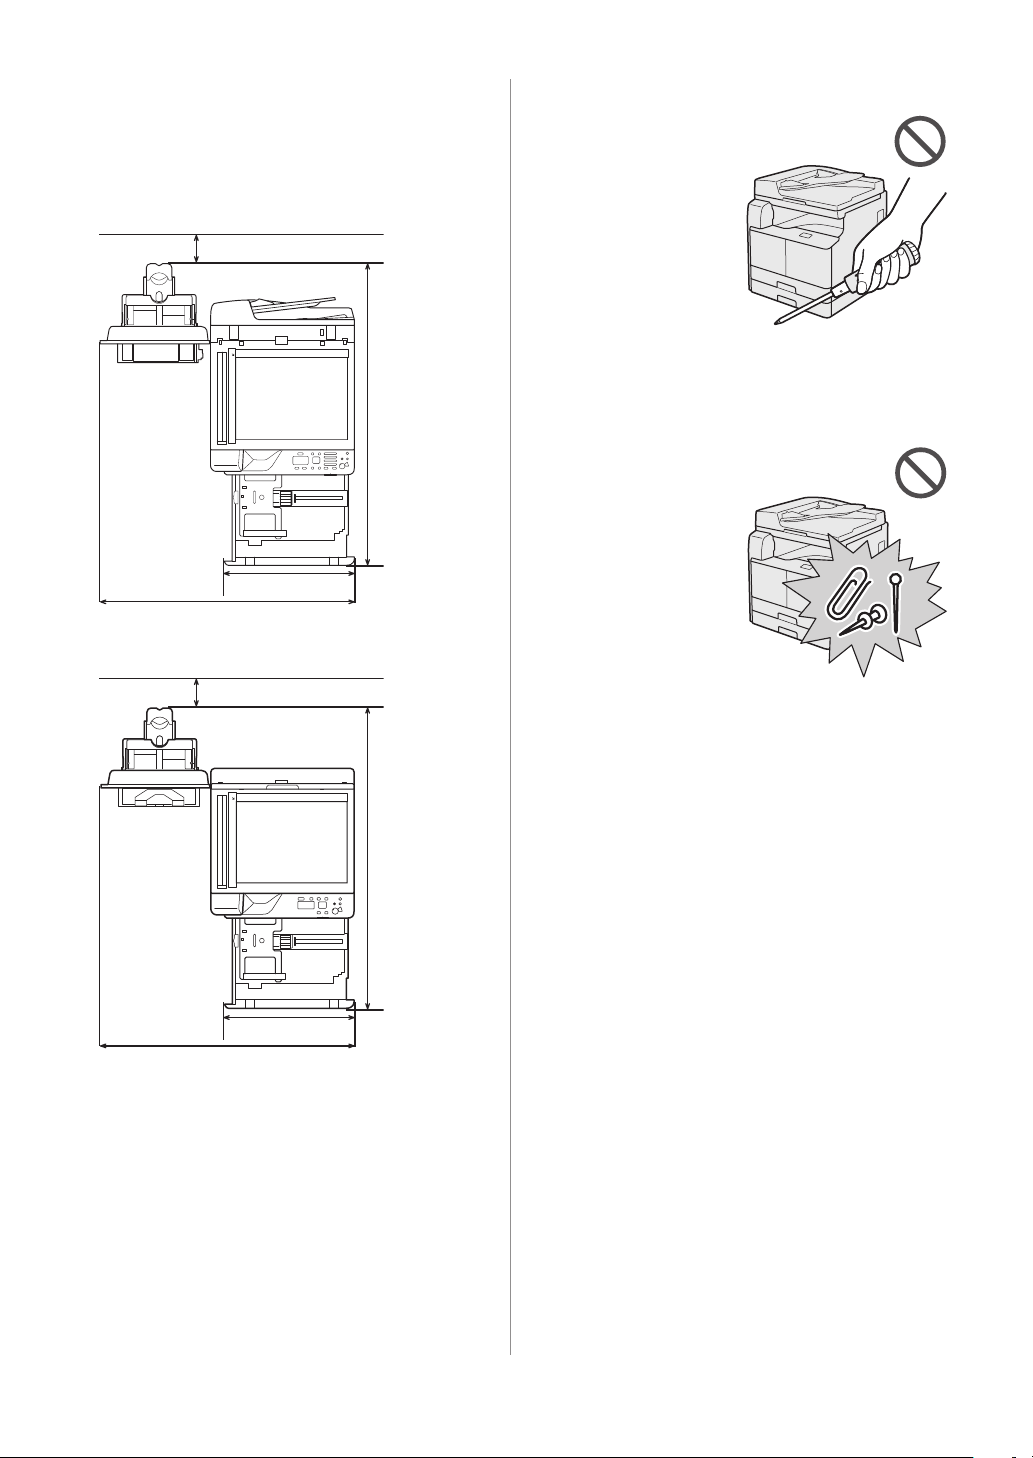
Provide Adequate Installation Space
Provide enough space on each side of the machine for
unrestricted operation.
For the imageRUNNER 2202N/2002N:
• When the feeder (DADF-AM1) is attached:
100 mm or more
1,285 mm
533 mm
1,022.9 mm
For the imageRUNNER 2002:
100 mm or more
1,285 mm
Handling Precautions
• Do not attempt to
disassemble or modify the
machine.
• Some parts inside the machine are subject to highvoltages and temperatures. Take adequate precautions
when inspecting the inside of the machine. Do not
carry out any inspections that are not described in the
manuals for this machine.
• Be careful not to spill
liquid or drop any foreign
objects, such as paper
clips or staples inside
the machine. If a foreign
object comes into
contact with electrical
parts inside the machine,
it might cause a short
circuit and result in a fire
or electrical shock.
• If there is smoke, or unusual noise, immediately turn
the main power switch OFF, disconnect the power
cord from the power outlet, and then call your local
authorized Canon dealer. Using the machine in this
state may cause a fire or electrical shock. Also, avoid
placing objects around the power plug so that the
machine can be disconnected whenever necessary.
533 mm
1,022.9 mm
10 Installation Location and Handling
• Do not turn the main power switch OFF or open the
front cover while the machine is in operation. This may
result in paper jams.
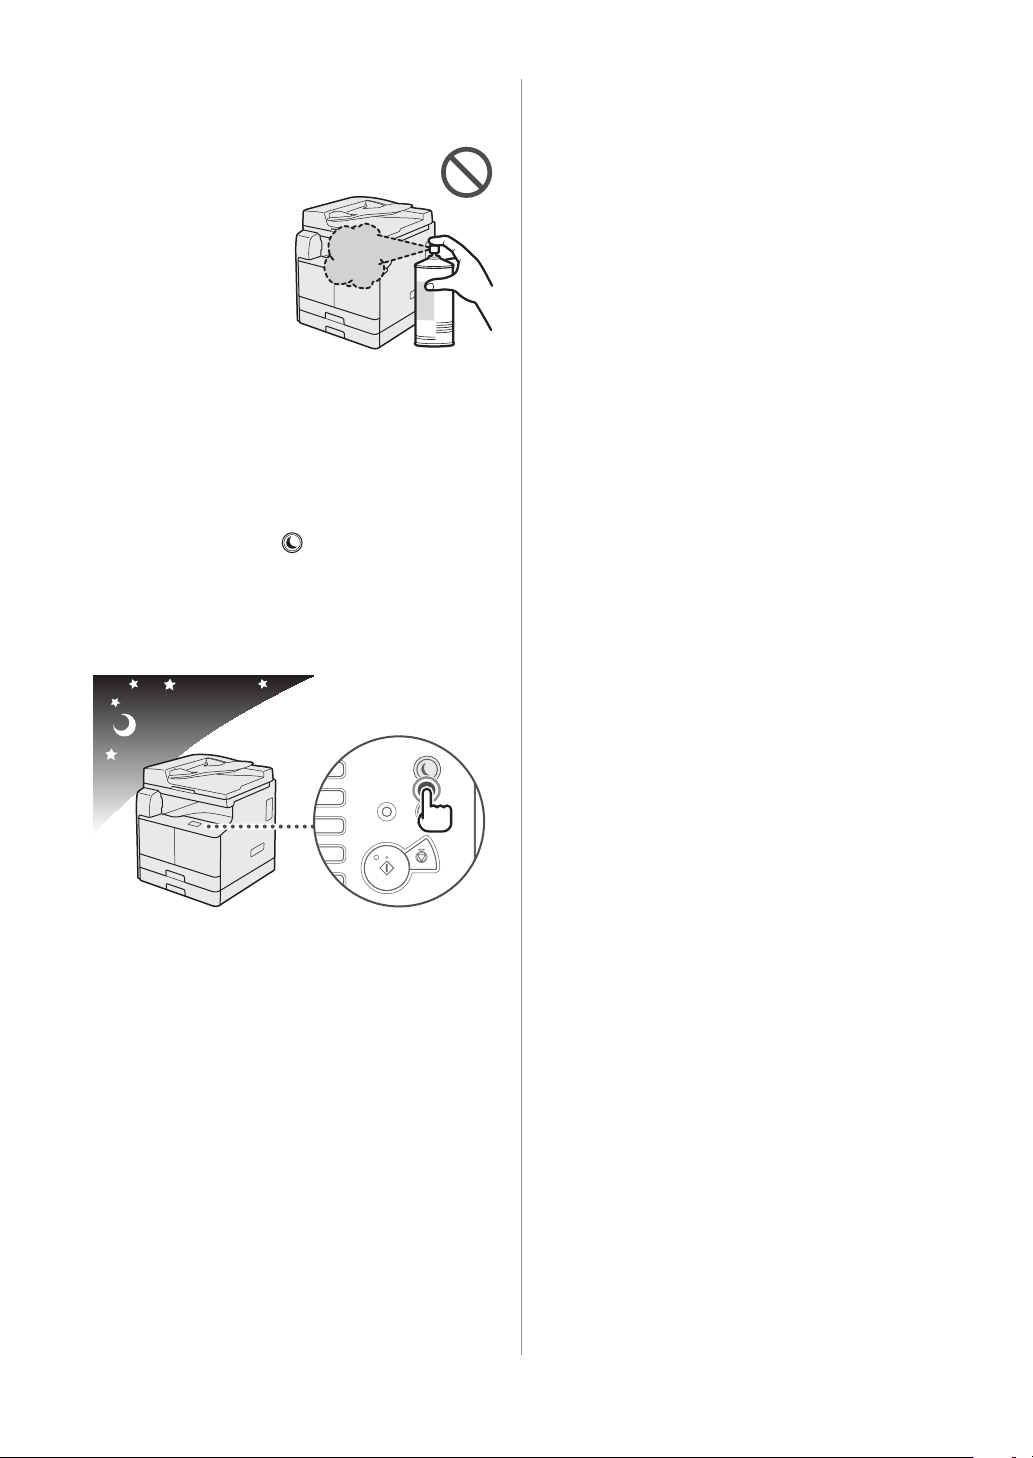
• Do not use flammable
sprays, such as spray glue,
near the machine. There is
a danger of ignition.
• This machine generates a slight amount of ozone
etc. during normal use. Although sensitivity to ozone
etc. may vary, this amount is not harmful. Ozone etc.
may be more noticeable during extended use or long
production runs, especially in poorly ventilated rooms.
It is recommended that the room be appropriately
ventilated, sufficient to maintain a comfortable
working environment, in areas of machine operation.
• For safety reasons, press [
it will not be used for a long period of time, such as
overnight. As an added safety measure, turn OFF the
main power switch, and disconnect the power cord
when the machine will not be used for an extended
period of time, such as during consecutive holidays.
] (Energy Saver) when
• When using the imageRUNNER 2002, use a USB
cable that is shorter than 3 meters. When using the
imageRUNNER 2202N/2002N, use the USB cable
included with the machine.
11Installation Location and Handling
Parts and Their Functions
6
2
This section provides you with the names and functions of all the parts of the machine. For information on
optional products, parts, and their functions, see e-Manual > Optional Products.
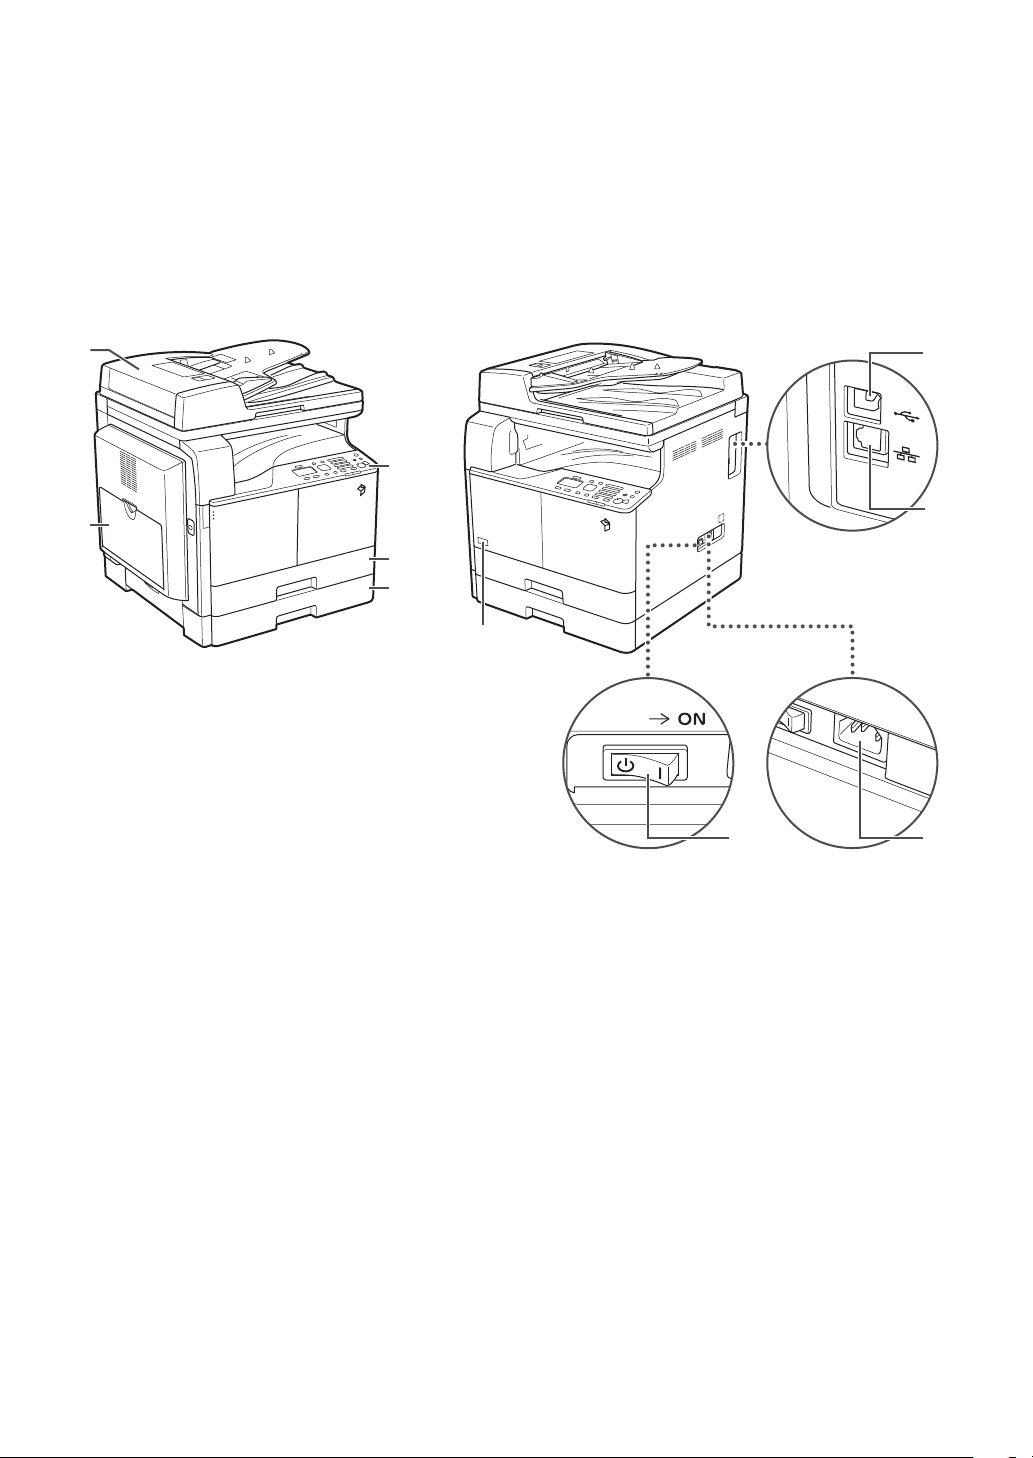
External View
For the imageRUNNER 2202N/2002N:
When the DADF-AM1 and Cassette Feeding Module-AB1 are attached:
3
1
4
5
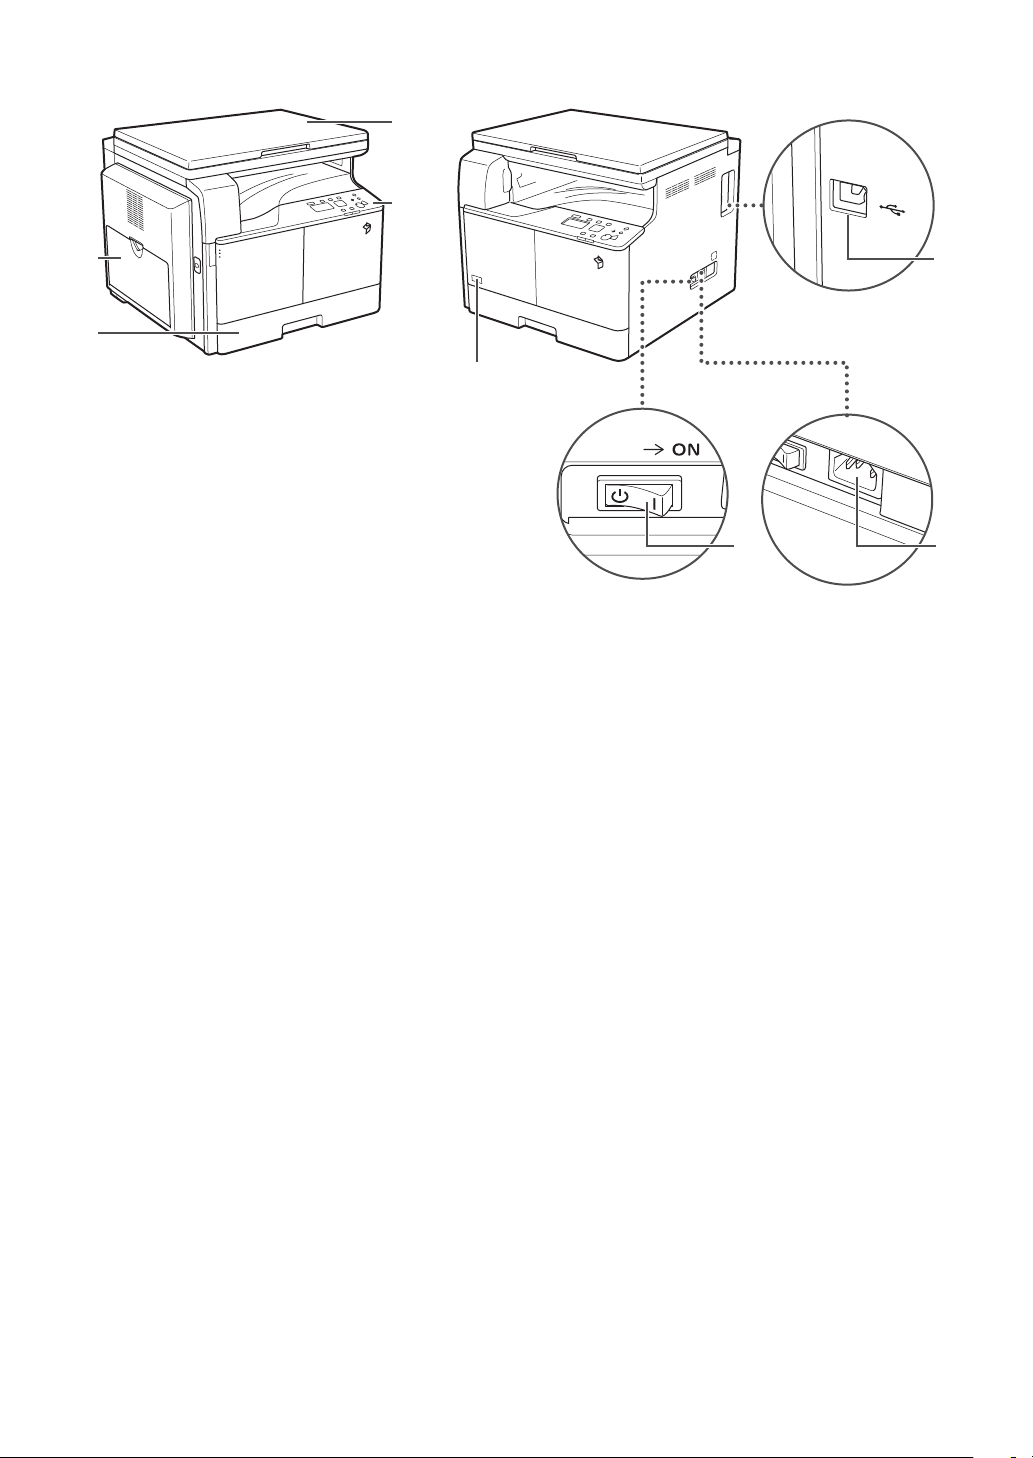
1 Multi-Purpose Tray
Use the multi-purpose tray to feed paper manually, and
for loading nonstandard paper stock, such as envelopes.
(See e-Manual > Basic Operations.)
2 Feeder (DADF-AM1) (Optional)
Originals placed in the feeder are fed one sheet at a
time to the platen glass for scanning. The feeder also
automatically turns over two-sided originals to make
one- or two-sided copies.
7
10
9
6 USB Port
Use the cable included with the machine to connect it
to a computer.
7 LAN Port
Use an Ethernet cable to connect the machine to a
network.
8 Power Socket
Connect the power cord.
8
3 Control Panel
Includes the keys, display, and indicators required for
operating the machine.
9 Main Power Switch
Press to the "I" side to turn the power ON.
10 Toner Code
4 Drawer 1
Holds up to 250 sheets of paper (80 g/m
2
).
5 Cassette Feeding Module-AB1 (Optional)
Holds up to 250 sheets of paper (80 g/m
2
).
This code indicates the type of genuine toner that can
be used with the machine. Use toner with a code that
includes the same letters as the code on the front cover
of the machine.
12 Parts and Their Functions
For the imageRUNNER 2002:
2
3
1
4
8
1 Multi-Purpose Tray
Use the multi-purpose tray to feed paper manually, and
for loading nonstandard paper stock, such as envelopes.
(See e-Manual > Basic Operations.)
2 Platen Cover
The platen cover secures the originals placed on the
platen glass.
3 Control Panel
Includes the keys, display, and indicators required for
operating the machine.
4 Drawer 1
Holds up to 250 sheets of paper (80 g/m
2
).
5
7 6
5 USB Port
Use the USB port to connect the machine to a computer
using a USB cable.
6 Power Socket
Connect the power cord.
7 Main Power Switch
Press to the "I" side to turn the power ON.
8 Toner Code
This code indicates the type of genuine toner that can
be used with the machine. Use toner with a code that
includes the same letters as the code on the front cover
of the machine.
13Parts and Their Functions
Internal View
For the imageRUNNER 2202N/2002N:
When the DADF-AM1 and Cassette Feeding Module-AB1 are attached:
2
1
7
5 46 3
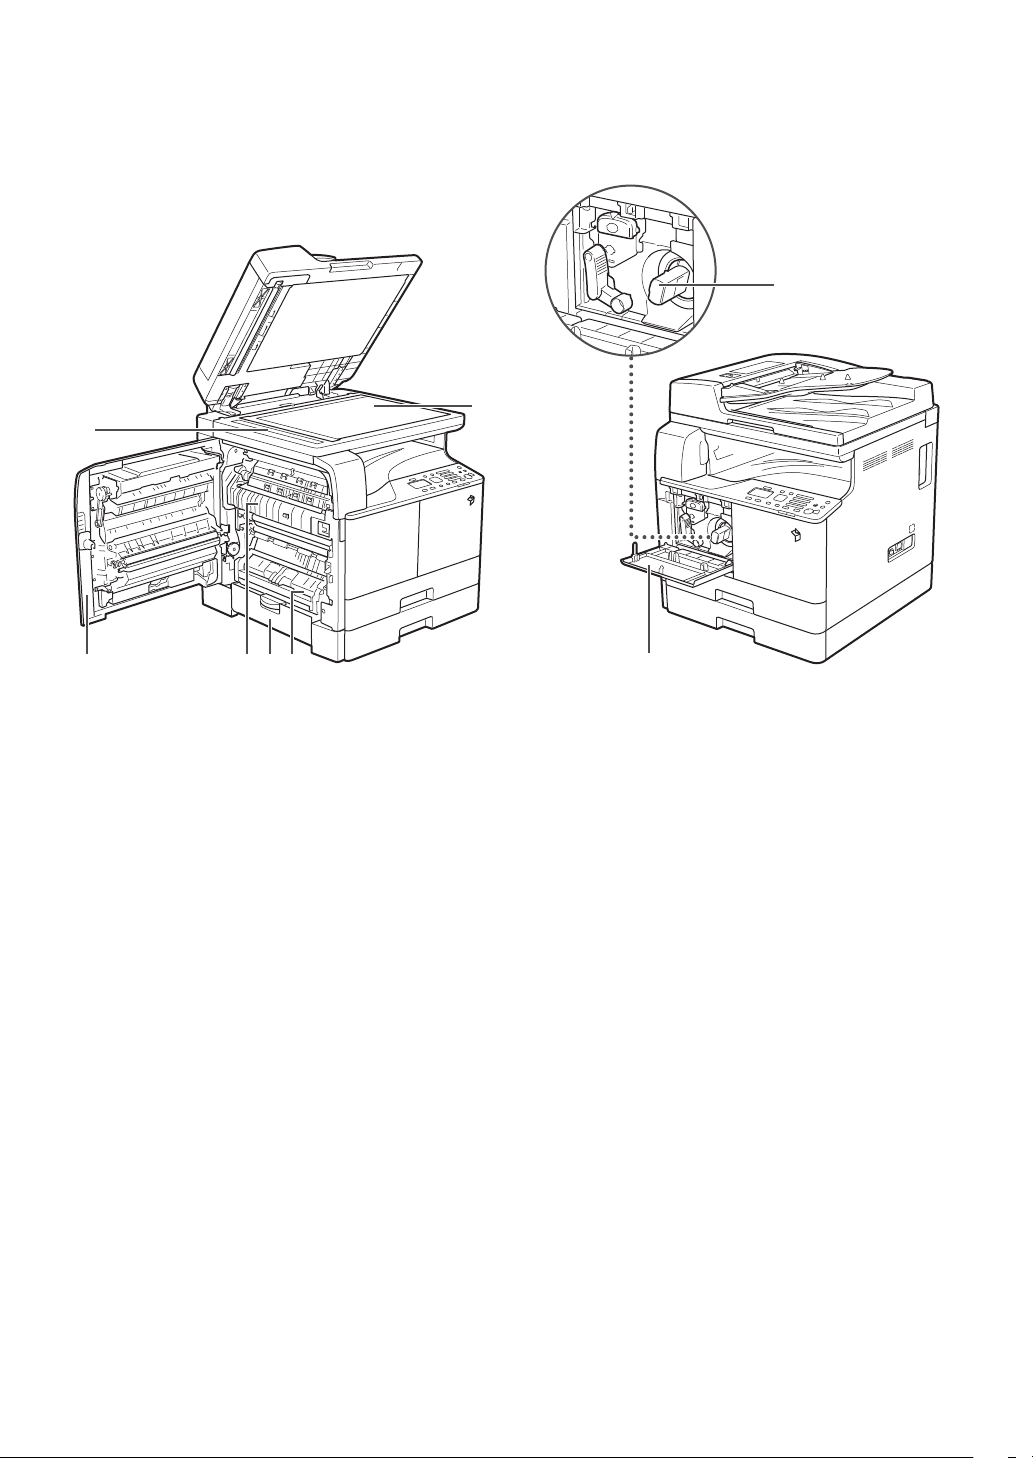
1 Scanning Area
Originals placed in the feeder are scanned here.
2 Platen Glass
Use the platen glass when scanning books, thick
originals, thin originals, transparencies, etc.
3 Drawer 1 Left Cover
Open this cover when clearing a paper jam in Drawer 1.
4 Drawer 2 Left Cover (Cover of the Optional Cassette
Feeding Module-AB1)
Open this cover when clearing a paper jam in Drawer 2.
8
5 Fixing Unit
If a paper jam occurs in the fixing unit, remove the
jammed paper carefully.
6 Left Cover
Open this cover to clear a paper jam inside the main
unit.
7 Toner Cartridge
When toner runs out, pull out the toner cartridge, and
replace it with a new one.
8 Front Cover
Open this cover to replace the toner cartridge.
14 Parts and Their Functions

For the imageRUNNER 2002:
5
1
4 3 2
1 Platen Glass
Use the platen glass when scanning books, thick
originals, thin originals, transparencies, etc.
2 Drawer 1 Left Cover
Open this cover when clearing a paper jam in Drawer 1.
3 Fixing Unit
If a paper jam occurs in the fixing unit, remove the
jammed paper carefully.
6
4 Left Cover
Open this cover to clear a paper jam inside the main
unit.
5 Toner Cartridge
When toner runs out, pull out the toner cartridge, and
replace it with a new one.
6 Front Cover
Open this cover to replace the toner cartridge.
15Parts and Their Functions
Control Panel Parts and Functions
9
6
72 3 5 81
4
For the imageRUNNER 2202N/2002N:
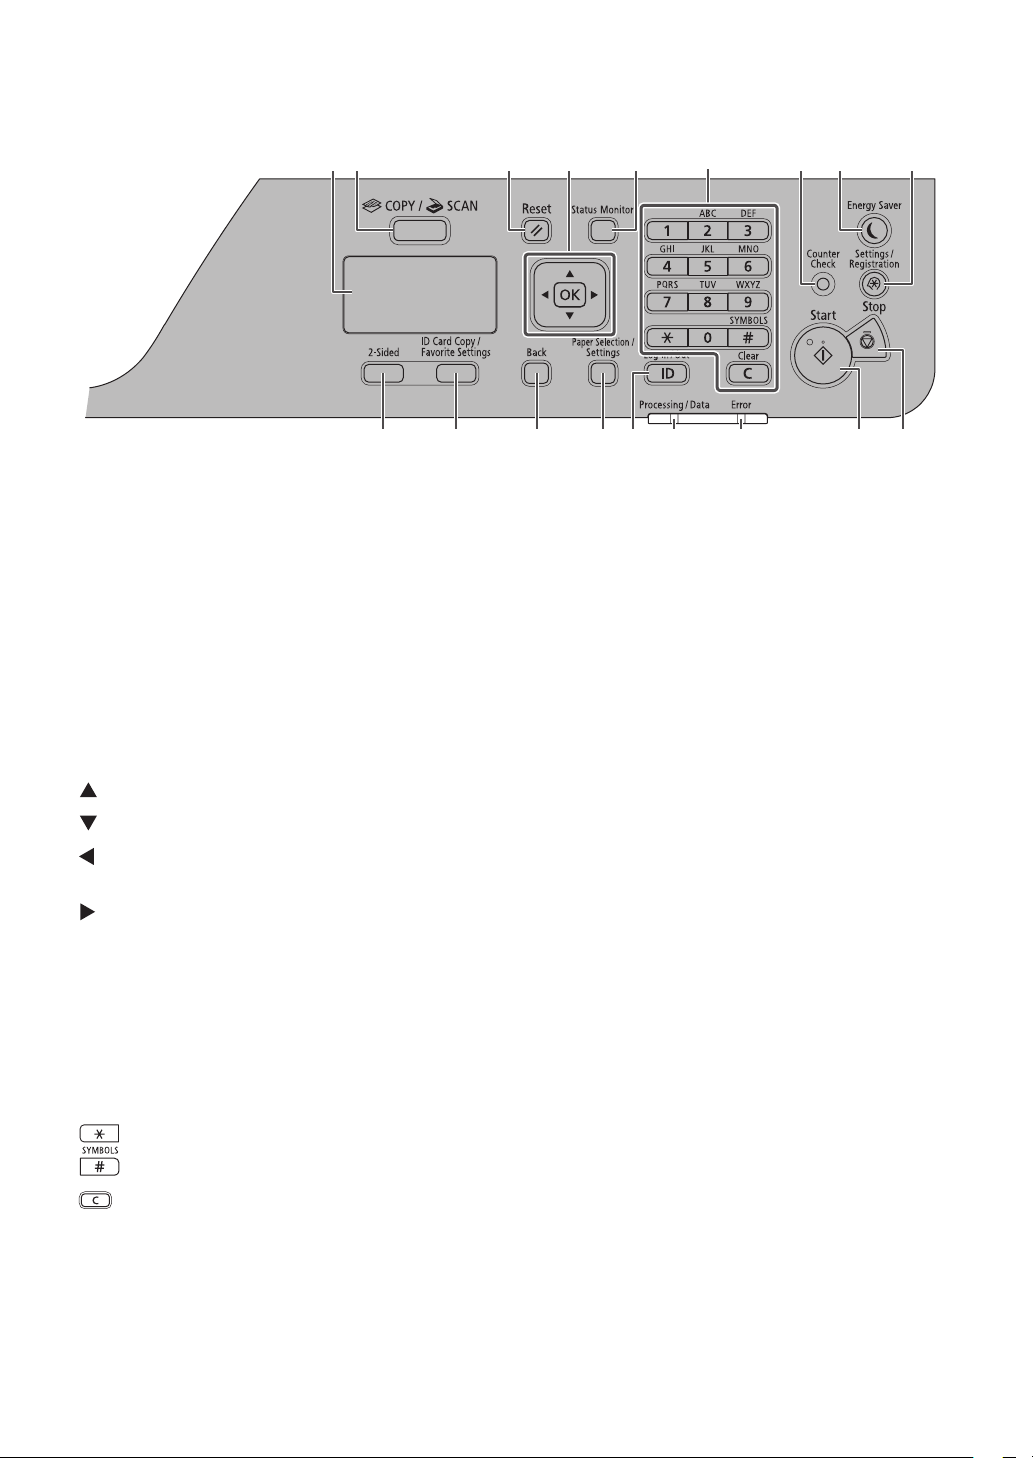
1 Display
During normal operation, displays messages and
prompts. When adjusting the settings, displays your
selections, text, and numbers.
2 [COPY/SCAN] Key
Press to switch the mode to copy or scan.
3 [Reset] Key
Press to reset the settings.
4
[ ] Key: Press to scroll up or to increase the value.
[
] Key: Press to scroll down or to decrease the value.
[
] Key: Press to return to the previous screen, or move
the cursor to the left.
[
] Key: Press to proceed to the next screen, or move
the cursor to the right.
[OK] Key: Press to confirm an action or setting.
5 [Status Monitor] Key
Press to view the status of jobs or cancel jobs.
13 12
101114161718 15
8 [Energy Saver] Key
Press to manually set or cancel the Sleep mode. The
Energy Saver indicator lights green while in the Sleep
mode.
9 [Settings/Registration] Key
Press to specify or register various settings.
10 [Stop] Key
Press to cancel jobs.
11 [Start] Key
Press to start a job.
12 [Error] Indicator
Flashes when an error occurs.
13 [Processing/Data] Indicator
Flashes when the device is in operation, is on when
there is a job waiting to be processed.
14 [Log In/Out] Key
Press to log in/out when Department ID Management
has been set.
6
Numeric keys ([0]-[9]): Press to enter characters and numbers.
[
] Key: Press to switch the character entry mode.
[
] Key: Press to enter symbols.
[
] Key: Press to delete entered characters and numbers.
7 [Counter Check] Key
Press this to display the total number of copies or prints
(performed by the machine) on the display. You can also
check the serial number of the machine (three letters
and five numbers).
16 Parts and Their Functions
15 [Paper Selection/Settings] Key
Press to select a paper source, such as a drawer or multipurpose tray, and register paper size and type.
16 [Back] Key
Press to return to the previous screen.
17 [ID Card Copy/Favorite Settings] Key
Press this to use ID Card Copy and Favorite settings.
18 [2-Sided] Key
Press to set 2-sided copies.
For the imageRUNNER 2002:
2
1
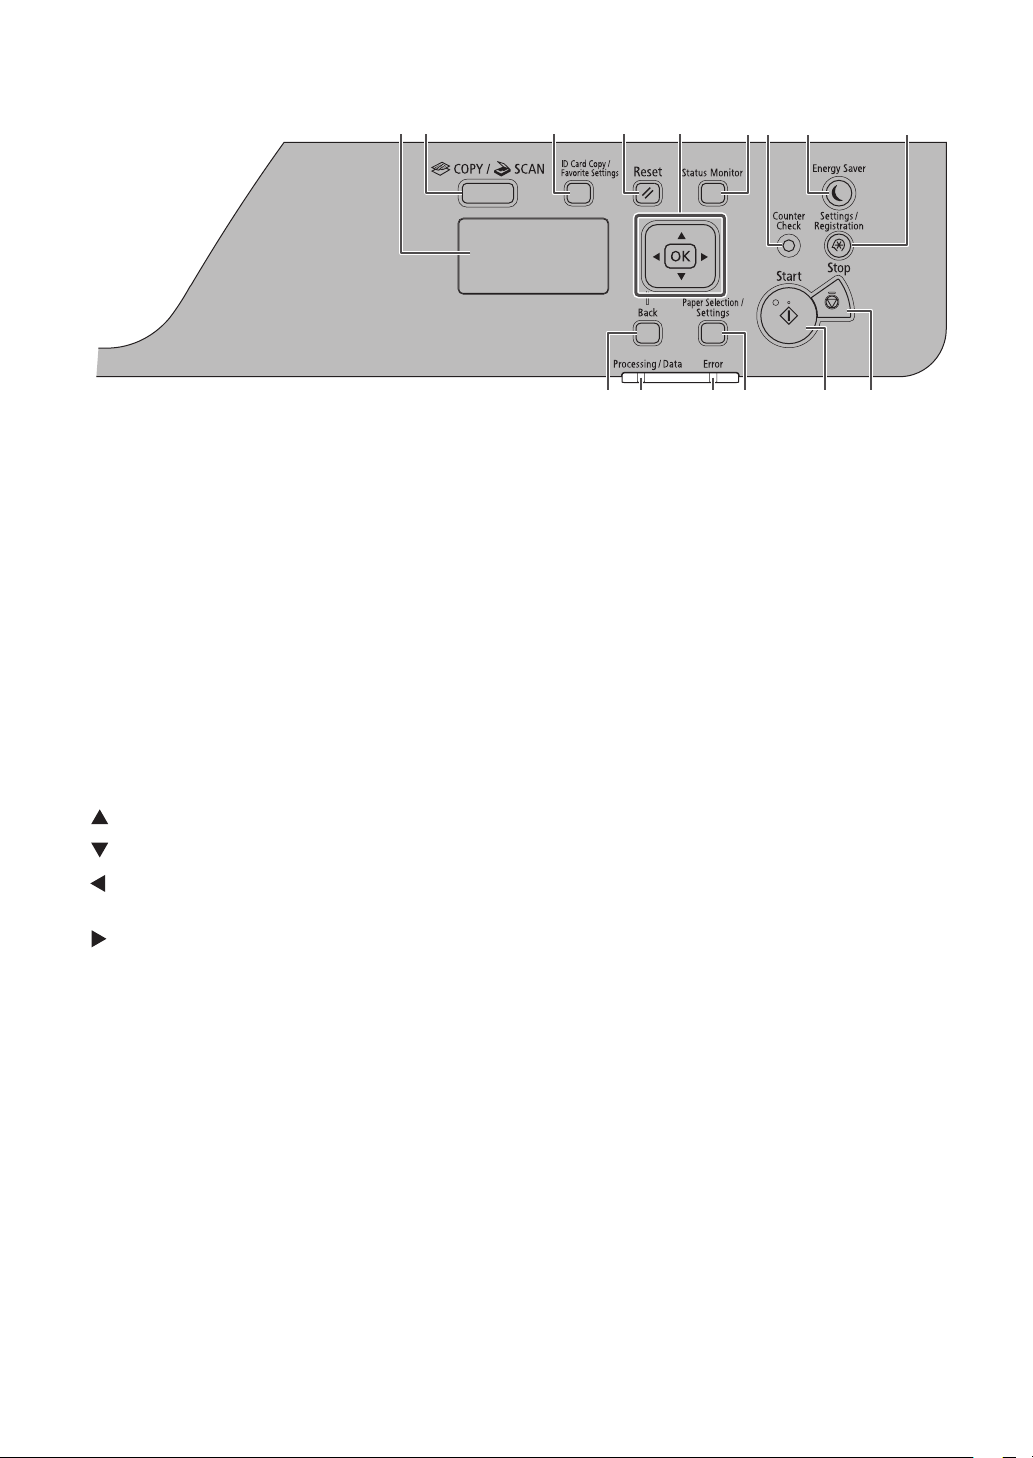
1 Display
During normal operation, displays messages and
prompts. When adjusting the settings, displays your
selections, text, and numbers.
2 [COPY/SCAN] Key
Press to switch the mode to copy or scan.
3 [ID Card Copy/Favorite Settings] Key
Press this to use ID Card Copy and Favorite settings.
3 4 8
5
6 7
14 13
9
10111215
8 [Energy Saver] Key
Press to manually set or cancel the Sleep mode. The
Energy Saver indicator lights green while in the Sleep
mode.
9 [Settings/Registration] Key
Press to specify or register various settings.
10 [Stop] Key
Press to cancel jobs.
4 [Reset] Key
Press to reset the settings.
5
[ ] Key: Press to scroll up or to increase the value.
[
] Key: Press to scroll down or to decrease the value.
[
] Key: Press to return to the previous screen, or move
the cursor to the left.
[
] Key: Press to proceed to the next screen, or move
the cursor to the right.
[OK] Key: Press to confirm an action or setting.
6 [Status Monitor] Key
Press to view the status of jobs or cancel jobs.
7 [Counter Check] Key
Press this to display the total number of copies or prints
(performed by the machine) on the display. You can also
check the serial number of the machine (three letters
and five numbers).
11 [Start] Key
Press to start a job.
12 [Paper Selection/Settings] Key
Press to select a paper source, such as a drawer or multipurpose tray, and register paper size and type.
13 [Error] Indicator
Flashes when an error occurs.
14 [Processing/Data] Indicator
Flashes when the device is in operation, is on when
there is a job waiting to be processed.
15 [Back] Key
Press to return to the previous screen.
17Parts and Their Functions

Main Power and Energy Saver Key
NOTE
This section describes how to use the main power switch and the Energy Saver key.
How to Turn ON the Main Power
This section explains how to turn ON the main power.
IMPORTANT
If you want to turn OFF the main power and then back
ON again, wait for at least 10 seconds before turning
ON the main power.
01 Make sure that the power plug is rmly
inserted into the power outlet.
WARNING
Do not connect or disconnect the power cord with
wet hands, as this may result in electrical shock.
02 Press the main power switch located on
the right side of the machine to the "I" side.
Energy Saver Key
You can press [ ] (Energy Saver) to make the machine
enter the Sleep mode and reduce power consumption.
If the machine is idle for a certain period of time, the
machine will enter the Auto Sleep mode to minimize
energy consumption.
Press [
resume normal machine operations.
] (Energy Saver) to cancel the Sleep mode and
NOTE
• The response of the buttons and keys may not be
optimal immediately after you turn ON the main
power of the machine.
• For the imageRUNNER 2202N/2002N:
If you are using Department ID Management, see
e-Manual > Basic Operations.
18 Main Power and Energy Saver Key
The machine can print documents from a personal
computer when it is in the Sleep mode.
 Loading...