

Canon imageCLASS MF249dw, imageCLASS MF247dw, imageCLASS MF244dw, imageCLASS MF236n, imageCLASS MF232w Installation Guide
Page 1

Windows
MF Driver
Installation Guide
USRM2-6228-02 2016-05 en Copyright CANON INC. 2016
Page 2

Contents
Introduction ....................................................................................................................................................... 2
How to Use the Manual ............................................................................................................................................. 3
Notations Used in the Manual ................................................................................................................................ 4
Disclaimers ............................................................................................................................................................... 5
Copyright .................................................................................................................................................................. 6
Trademarks .............................................................................................................................................................. 7
About the MF Driver and MF Scan Utility .................................................................................. 9
Before Use ......................................................................................................................................................... 11
Pre-installation Check ............................................................................................................................. 13
About Installation ................................................................................................................................................... 14
System Requirements ............................................................................................................................................. 15
Installation Preparations and Precautions ............................................................................................................... 16
Installation Using the Installer ....................................................................................................... 19
[Easy Installation] From the DVD-ROM (Network Connection) ................................................................................... 20
[Custom Installation] From the DVD-ROM (Network Connection) ............................................................................... 23
[Easy Installation] From the DVD-ROM (USB Connection) ........................................................................................... 26
[Custom Installation] From the DVD-ROM (USB Connection) ...................................................................................... 30
Installing a Downloaded MF Driver (Network Connection) ........................................................................................ 34
Installing a Downloaded MF Driver (USB Connection) ............................................................................................... 37
Installing MF Scan Utility ......................................................................................................................................... 40
Installation Without Using the Installer ................................................................................. 42
Installing by Specifying an inf File ............................................................................................................................ 43
Installing Using a WSD Port ..................................................................................................................................... 45
Uninstallation ................................................................................................................................................. 47
Uninstalling the MF Driver ....................................................................................................................................... 48
Uninstalling MF Scan Utility ..................................................................................................................................... 50
Uninstall Method for Software ................................................................................................................................. 51
Appendix ............................................................................................................................................................. 53
Creating a Shortcut to the Online Manual ................................................................................................................ 54
Installing the Shortcut to the Online Manual .......................................................................................................... 55
Uninstalling the Shortcut to the Online Manual ...................................................................................................... 56
I
Page 3

Introduction
Introduction
Introduction .......................................................................................................................................................... 2
How to Use the Manual ......................................................................................................................................... 3
Notations Used in the Manual .......................................................................................................................... 4
Disclaimers ............................................................................................................................................................. 5
Copyright ............................................................................................................................................................... 6
Trademarks ............................................................................................................................................................ 7
1
Page 4

Introduction
How to Use the Manual(P. 3)
Disclaimers(P. 5)
Copyright(P. 6)
Trademarks(P. 7)
Introduction
2
Page 5

Introduction
How to Use the Manual
This explains things that you need to know in order to use this manual.
Notations Used in the Manual(P. 4)
3
Page 6

Introduction
Notations Used in the Manual
This explains symbols and settings used in this manual.
Symbols Used in This Manual
In this manual, explanations of items and operations that must be followed while using the driver are set forth
the symbols that indicate the following.
IMPORTANT
● Indicates operational requirements and restrictions. Be sure to read these items carefully to operate the
product correctly, and avoid damage to the product.
NOTE
● Indicates a clarication of an operation, or contains additional explanations for a procedure. Reading these
notes is highly recommended.
About Settings
In this manual, setting names displayed on the computer screen are represented as shown in the following
examples.
Example:
[OK]
[OK]
4
Page 7

Introduction
Disclaimers
The information in this document is subject to change without notice.
CANON INC. MAKES NO WARRANTY OF ANY KIND WITH REGARD TO THIS MATERIAL, EITHER EXPRESS OR
IMPLIED, EXCEPT AS PROVIDED HEREIN, INCLUDING WITHOUT LIMITATION, THEREOF, WARRANTIES AS TO
MARKETABILITY, MERCHANTABILITY, FITNESS FOR A PARTICULAR PURPOSE OF USE OR NON-INFRINGEMENT.
CANON INC. SHALL NOT BE LIABLE FOR ANY DIRECT, INCIDENTAL, OR CONSEQUENTIAL DAMAGES OF ANY
NATURE, OR LOSSES OR EXPENSES RESULTING FROM THE USE OF THIS MATERIAL.
5
Page 8

Introduction
Copyright
Copyright CANON INC. 2016
No part of this publication may be reproduced, transmitted, transcribed, stored in a retrieval system, or
translated into any language or computer language in any form or by any means, electronic, mechanical,
magnetic, optical, chemical, manual, or otherwise, without the prior written permission of Canon Inc.
6
Page 9

Introduction
Trademarks
Windows and Windows Vista are either registered trademarks or trademarks of Microsoft Corporation in the
United States and other countries.
Mac is a trademark of Apple Inc.
Other product and company names herein may be the trademarks of their respective owners.
7
Page 10

About the MF Driver and MF Scan Utility
About the MF Driver and MF Scan
Utility
About the MF Driver and MF Scan Utility ............................................................................................. 9
8
Page 11
About the MF Driver and MF Scan Utility
About the MF Driver and MF Scan Utility
This gives an overview of the MF driver and MF Scan Utility, and explains icons displayed during installation.
The MF driver is a driver that is installed for printing, sending faxes, and scanning using a device.
As well as the MF driver and MF Scan Utility explained here, other software may be installed depending on the
supported device. For details about the other software, refer to the manual of the device.
Printer Driver
Enables you to use the device as a printer.
Fax Driver
Enables you to fax printed documents via the device.
Scanner Driver
Enables you to use the device as a scanner.
MF Scan Utility
Can read a scanned image into applications, attach a scanned image to an email, and store it in a hard disc.
NOTE
● Some functions in the driver software included in the accompanying DVD-ROM may not be usable depending
on the operating system. The newest version is on the Canon web site. Verify your operating environment
and download it if necessary.
9
Page 12

Before Use
Before Use
Before Use ............................................................................................................................................................ 11
10
Page 13

Before Use
Before Use
● The functions that you can use may vary according to the following conditions.
- The device you are using and its settings
- The rmware version of the device
- The option structure
- The driver version
- The computer environment you are using
● The screen content, procedures, etc. displayed and described in the manual may differ from those actually
displayed.
● In this manual, examples using Windows 7 (32-bit version) are explained.
11
Page 14

Pre-installation Check
Pre-installation Check
Pre-installation Check ................................................................................................................................... 13
About Installation ............................................................................................................................................... 14
System Requirements ......................................................................................................................................... 15
Installation Preparations and Precautions ........................................................................................................ 16
12
Page 15

Pre-installation Check
Pre-installation Check
This explains what you need to conrm beforehand in order to install the MF driver and software correctly.
About Installation(P. 14)
System Requirements(P. 15)
Installation Preparations and Precautions(P. 16)
13
Page 16

Pre-installation Check
About Installation
The respective installation methods shown below for installing the MF driver and MF Scan Utility are provided
according to the source of the installer, installation method, and device connection conguration.
● Installer source: supplied DVD-ROM or download from the web site
● Installation method: [Easy Installation] or [Custom Installation]
● Device connection conguration: TCP/IP network connection or USB connection
Select the most appropriate installation method for the following.
If you are using the supplied DVD-ROM
If you use the supplied DVD-ROM, you can install the MF driver, software, and manual in a single sequence
from the connection between the computer and device.
Select an installation procedure according to the installation method and device connection conguration.
When you want to install the MF driver, standard software, and manual:
- [Easy Installation] From the DVD-ROM (Network Connection)(P. 20)
- [Easy Installation] From the DVD-ROM (USB Connection)(P. 26)
When you want to select what to install while installing
- [Custom Installation] From the DVD-ROM (Network Connection)(P. 23)
- [Custom Installation] From the DVD-ROM (USB Connection)(P. 30)
If you are using an installer downloaded from the web site
If you use the installer downloaded from the web site, you can install the latest version of the MF driver and
MF Scan Utility. If the MF driver or MF Scan Utility included in the supplied DVD-ROM are not compatible with
the operating system of the computer you are using, install according to the following procedure.
Select an installation method according to the target device of the installation and the connection
conguration.
- Installing a Downloaded MF Driver (Network Connection)(P. 34)
- Installing a Downloaded MF Driver (USB Connection)(P. 37)
- Installing MF Scan Utility(P. 40)
Also, when installing the MF driver using [Custom Installation] from the supplied DVD-ROM or a downloaded
installer, you can acquire device information if you install it simultaneously with Canon Driver Information Assist
Service.
NOTE
● If you are installing the MF driver in an IPv6 environment, install it using a WSD port.
In an IPv6 environment, because the DVD-ROM menu is not displayed when you set the supplied DVD-ROM
in the computer, you cannot install the MF driver.
Related Topics
Installing Using a WSD Port(P. 45)
14
Page 17

Pre-installation Check
System Requirements
This explains the required system environment for using the MF driver.
Operating Systems
Windows Vista/7/8/8.1/10
Windows Server 2003/2003 R2/2008/2008 R2/2012/2012 R2
● The scanner driver and MF Scan Utility support Windows Vista/7/8/8.1/10 only.
● The printer driver (UFRII LT (V4)) supports Windows 8.1/10/Server 2012 R2 only.
● Printer drivers and fax drivers are supported only in network environments in the case of Server operating
systems.
Some printer drivers and fax drivers may not be supplied depending on the device you are using, your country,
or your region.
NOTE
● For the support status of the newest operating systems and service packs, check the Canon web site (http://
www.canon.com/).
● For details on the required system environments for software other than the MF Scan Utility, refer to the
Readme le for the respective software.
15
Page 18

Pre-installation Check
Installation Preparations and Precautions
This explains the preparations for installing the MF driver and software correctly, and precautions to take when
installing.
Installation Preparations
Before installing the MF driver and MF Scan Utility, complete the following operations.
Device Settings
Set the following items with the [System Management Settings] menu > [PDL Selection (Plug and Play)] of the
device.
- Connection method with the device (network or USB)
- Page description language (UFRII LT, UFRII LT (V4), PCL6, PS, or FAX)*
*FAX can only be used only when connected to the device via a network. Also, depending on the device,
some drivers are not supported.
For details about the setting menus, refer to the manual of the device.
Acquire the installer
You can acquire the installer by any of the following means.
- Download from the web site (http://www.canon.com/) (32-bit or 64-bit version)
- Supplied DVD-ROM
In some cases, the installer may be provided on a CD-ROM. If you use a CD-ROM, read CD-ROM for DVDROM in the explanations of the manual.
About Installation(P. 14)
Select the most appropriate installation method after checking the installation overview.
Precautions to Be Taken When Installing
Take care of the following items when installing.
● If the [User Account Control] dialog box is displayed, perform the following operation.
- If you are logged on with an Administrator account: Click [Allow] or [Continue].
- If you are logged on with a standard user account: Enter an Administrator account password → click [OK].
● If one of the following conditions is met, you may not be able to install the MF driver. If so, install the MF
driver after logging on as a local user belonging to a group with Administrator privileges.
- An environment in which communication between the domain controller and client operating system is
not possible.
- You are logged onto a client computer as a domain user belonging to a group with Administrator
privileges.
Conrm the status of the user account you are logged on in [Computer Management] > [Local Users and
Groups] > [Groups].
● If the [Windows Security] dialog box is displayed, click [Install this driver software anyway].
● If the following dialog box is displayed during installation, select [Yes]. The Windows Firewall block is
removed and you can proceed with the installation.
16
Page 19

Pre-installation Check
● If the software installation fails, try reinstalling after quitting all other applications. If it still fails, temporarily
uninstall, restart the computer, and try reinstalling.
● If you cannot use the software after updating the operating system, uninstall the software, then reinstall it.
● If you have installed other software while running the MF Scan Utility, it is not automatically registered in the
MF Scan Utility. In this case, manually register software installed afterward in the MF Scan Utility.
● When installing the MF driver, a Product Extended Survey Program is also installed. The Product Extended
Survey Program is a program that automatically sends to Canon information relating to the usage state of
the device every month for ten years. However, personal information and information other than for the
above purposes is not sent. Also, you can disable automatic sending of information or uninstall the program
at any time. If you want to turn off automatic sending, log on with an Administrator account, display
[Programs and Features] or [Add or remove programs] → select [Canon Laser Printer/Scanner/Fax Extended
Survey Program] → click [Change] and set in Windows.
Related Topics
[Easy Installation] From the DVD-ROM (Network Connection)(P. 20)
[Custom Installation] From the DVD-ROM (Network Connection)(P. 23)
[Easy Installation] From the DVD-ROM (USB Connection)(P. 26)
[Custom Installation] From the DVD-ROM (USB Connection)(P. 30)
Installing a Downloaded MF Driver (Network Connection)(P. 34)
Installing a Downloaded MF Driver (USB Connection)(P. 37)
Installing MF Scan Utility(P. 40)
Uninstalling the MF Driver(P. 48)
Uninstalling MF Scan Utility(P. 50)
Uninstall Method for Software(P. 51)
17
Page 20

Installation Using the Installer
Installation Using the Installer
Installation Using the Installer ................................................................................................................ 19
[Easy Installation] From the DVD-ROM (Network Connection) ......................................................................... 20
[Custom Installation] From the DVD-ROM (Network Connection) ................................................................... 23
[Easy Installation] From the DVD-ROM (USB Connection) ................................................................................. 26
[Custom Installation] From the DVD-ROM (USB Connection) ........................................................................... 30
Installing a Downloaded MF Driver (Network Connection) .............................................................................. 34
Installing a Downloaded MF Driver (USB Connection) ...................................................................................... 37
Installing MF Scan Utility .................................................................................................................................... 40
18
Page 21

Installation Using the Installer
Installation Using the Installer
This explains the procedure for installing using the installer included in the supplied DVD-ROM or the installer
downloaded from the web site.
Select the procedure most suitable to the device connection conguration and installation method.
[Easy Installation] From the DVD-ROM (Network Connection)(P. 20)
[Custom Installation] From the DVD-ROM (Network Connection)(P. 23)
[Easy Installation] From the DVD-ROM (USB Connection)(P. 26)
[Custom Installation] From the DVD-ROM (USB Connection)(P. 30)
Installing a Downloaded MF Driver (Network Connection)(P. 34)
Installing a Downloaded MF Driver (USB Connection)(P. 37)
Installing MF Scan Utility(P. 40)
19
Page 22

Installation Using the Installer
[Easy Installation] From the DVD-ROM (Network Connection)
This explains the procedure for automatically searching for a device on a network and installing with [Easy
Installation] from the supplied DVD-ROM.
In this procedure, as well as the MF driver, standard software and the electronic manual are installed.
Prerequisites
Conrm that the following conditions are satised. Complete the preparation operations.
● System Requirements(P. 15)
● A TCP/IP Network Environment
If you do not know the network environment you are using, check with your network administrator.
● The device must be in the same subnet as the computer you are using.
● Installation Preparations and Precautions(P. 16)
● When starting the computer, log on as a member of Administrators.
● [Desktop] screen display (when using Windows 8/8.1/Server 2012/Server 2012 R2)
Procedure
Set the DVD-ROM in the computer → click [Easy Installation].
1
If the DVD-ROM menu is not displayed, click "Open details."
In the following procedure, start the installer. For the DVD-ROM drive name, enter "D:."
For Windows 10:
Enter "D:\MInst.exe" in [Search the Web and Windows] → press the [ENTER] key on the keyboard.
For Windows Vista/7/Server 2008/Server 2008 R2:
] (Start) > enter "D:\MInst.exe" in [Search programs and les] or [Start Search] → press the [ENTER] key on
[
the keyboard.
For Windows 8/Server 2012:
Right-click the lower left corner of the screen → [Run] > enter "D:\MInst.exe" → click [OK].
For Windows 8.1/Server 2012 R2:
Right-click the [Start] screen → [Run] > enter "D:\MInst.exe" → click [OK].
For Windows Server 2003/Server 2003 R2:
] (Start) > [Run] > enter "D:\MInst.exe" → click [OK].
[
If [AutoPlay] is displayed:
Click [Run MInst.exe].
20
Page 23

Installation Using the Installer
If the [Select the Type of Connection] screen is displayed, select [Network Connection]
2
→ click [Next].
Click [Install].
3
Read the license agreement → click [Yes].
4
Click [Next].
5
Select the device you are using → click [Next].
6
NOTE
● If the device is not displayed in [Device List], check the connection state between the computer and device
and the IP address settings, and click [Update Device List]. If the device is still not displayed, click [Search by
IP Address] → enter the IP address of the device → click [OK]. For the IP address conrmation method, refer
to the manual of the device.
Check the settings → click [Start].
7
Install the software according to the instructions on the screen.
8
21
Page 24

Installation Using the Installer
Eject the DVD-ROM, select [Restart Computer Now (Recommended)], and click
9
[Restart].
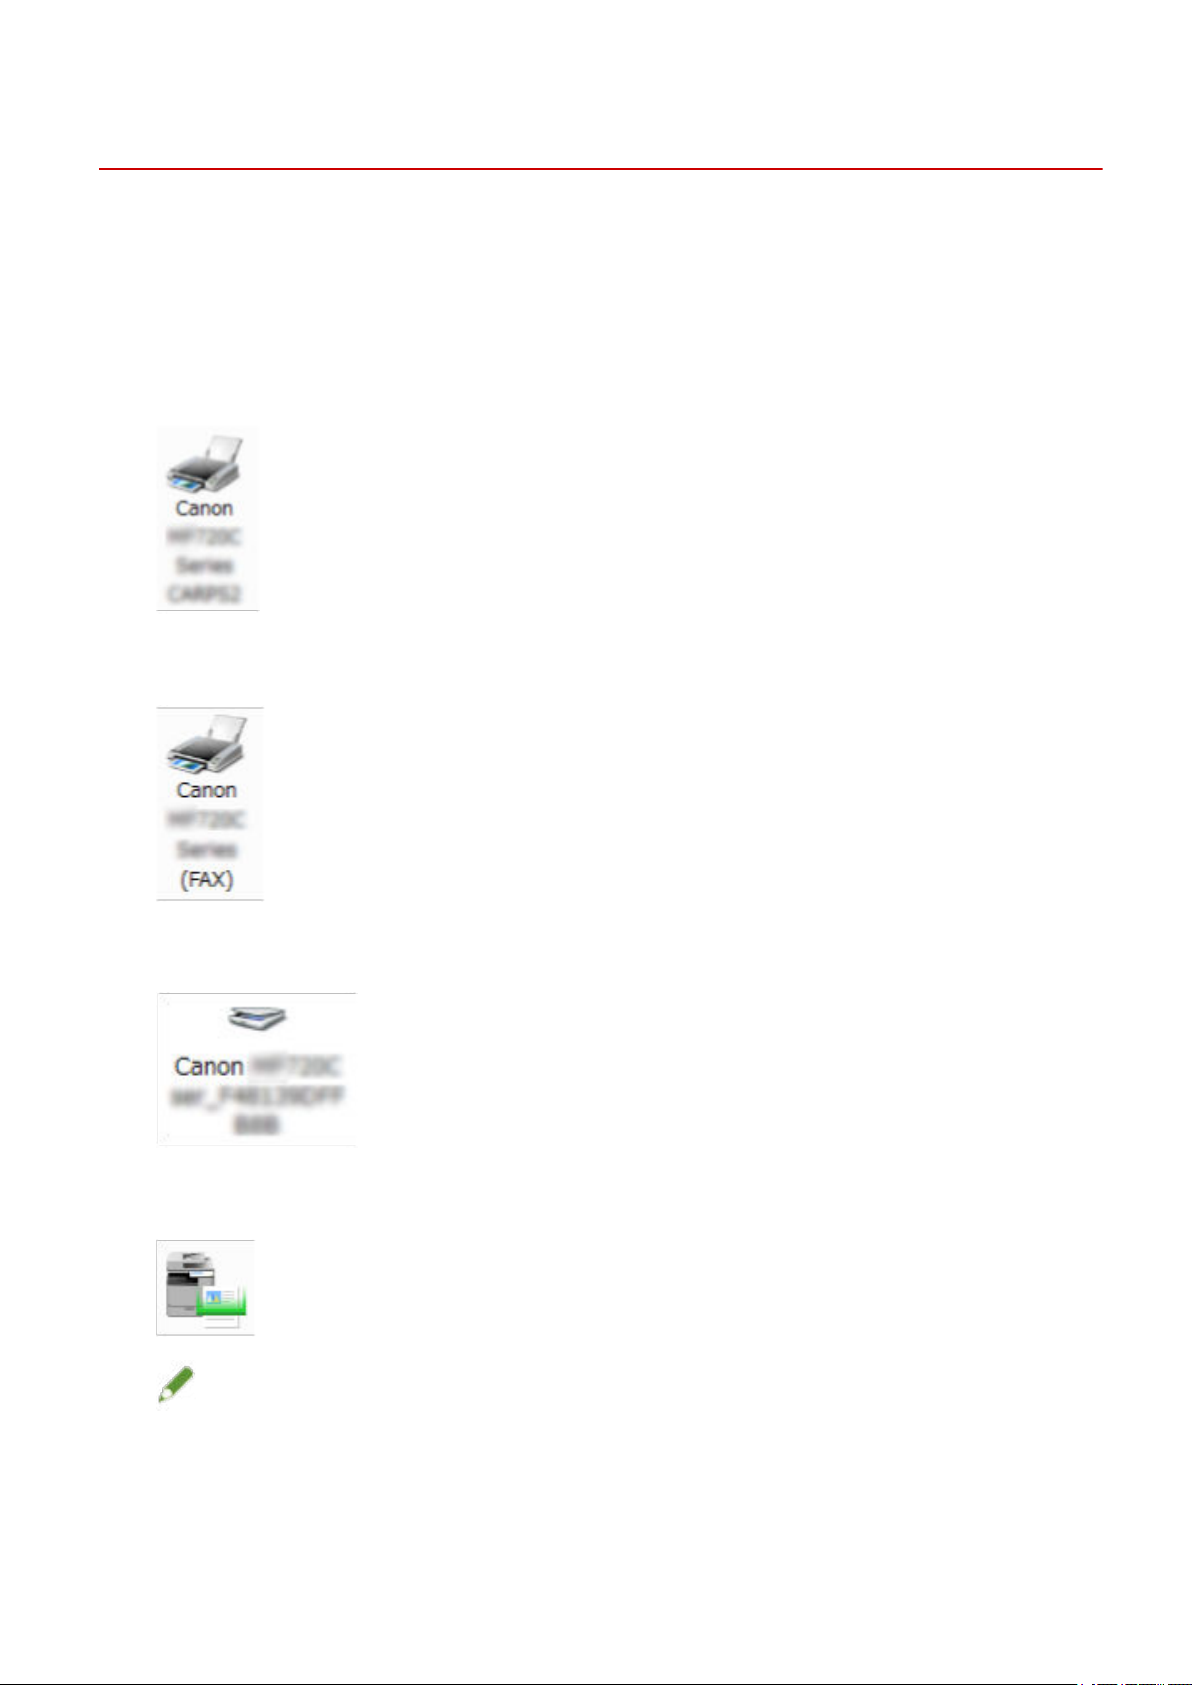
If installed correctly, an MF driver or software icon is displayed in the locations shown next. If the icon is not
displayed, uninstall the MF driver or software and reinstall it.
For a printer driver or fax driver:
When using Windows 10:
[Settings] > [Devices] > [Printers & scanners] > [Printers]
When a version other than Windows 10:
Windows Control Panel > [Devices and Printers], [Printers], or [Printers and Faxes].
For a scanner driver:
Windows Control Panel > [Scanners and Cameras].
For MF Scan Utility:
When using Windows 10:
Start menu > List of apps
When using Windows 8/8.1:
Click [ ] in the lower left corner of the [Start] screen → [Apps] screen > [Canon] folder > [MF Scan
Utility] folder
When using Windows Vista/7:
] (Start) or [Start] menu > [Canon] folder > [MF Scan Utility] folder
[
For other software or electronic manuals:
Taskbar or [Desktop] screen
Related Topics
About the MF Driver and MF Scan Utility(P. 9)
Uninstalling the MF Driver(P. 48)
22
Page 25

Installation Using the Installer
[Custom Installation] From the DVD-ROM (Network Connection)
This explains the procedure for automatically searching for a device on a network and installing with [Custom
Installation] from the supplied DVD-ROM. With this procedure, you can specify which software and manuals you
want to install.
Prerequisites
Conrm that the following conditions are satised. Complete the preparation operations.
● System Requirements(P. 15)
● A TCP/IP Network Environment
If you do not know the network environment you are using, check with your network administrator.
● The device must be in the same subnet as the computer you are using.
● Installation Preparations and Precautions(P. 16)
● When starting the computer, log on as a member of Administrators.
● [Desktop] screen display (when using Windows 8/8.1/Server 2012/Server 2012 R2)
Procedure
Set the DVD-ROM in the computer → click [Custom Installation].
1
If the DVD-ROM menu is not displayed, click "Open details."
In the following procedure, start the installer. For the DVD-ROM drive name, enter "D:."
For Windows 10:
Enter "D:\MInst.exe" in [Search the Web and Windows] → press the [ENTER] key on the keyboard.
For Windows Vista/7/Server 2008/Server 2008 R2:
] (Start) > enter "D:\MInst.exe" in [Search programs and les] or [Start Search] → press the [ENTER] key on
[
the keyboard.
For Windows 8/Server 2012:
Right-click the lower left corner of the screen → [Run] > enter "D:\MInst.exe" → click [OK].
For Windows 8.1/Server 2012 R2:
Right-click the [Start] screen → [Run] > enter "D:\MInst.exe" → click [OK].
For Windows Server 2003/Server 2003 R2:
] (Start) > [Run] > enter "D:\MInst.exe" → click [OK].
[
If [AutoPlay] is displayed:
Click [Run MInst.exe].
23
Page 26

Installation Using the Installer
If the [Select the Type of Connection] screen is displayed, select [Network Connection]
2
→ click [Next].
Select the software you want to install → click [Install].
3
Read the license agreement → click [Yes].
4
Click [Next].
5
Select the device you are using → click [Next].
6
NOTE
● If the device is not displayed in [Device List], check the connection state between the computer and device
and the IP address settings, and click [Update Device List]. If the device is still not displayed, click [Search by
IP Address] → enter the IP address of the device → click [OK]. For the IP address conrmation method, refer
to the manual of the device.
Select the driver to install → click [Next] → set as required.
7
If a list of drivers corresponding to the page description language is displayed after selecting a printer driver in
the [Select Driver] screen, select the driver you are going to use.
If you want to use the install destination computer as a print server, select the following.
● Select the [Select Driver] screen > [Canon Driver Information Assist Service].
● Select the [Conrm Settings] screen > [Use as Shared Printer] or [Use as Shared Fax].
Check the settings → click [Start].
8
Setting the default printer and test printing.
9
When setting as a default driver: select the driver → click [Next]
When test printing: select the check box of the driver
10
11
12
Click [Exit].
If you selected MF Scan Utility, check the instructions on the screen → click [Next] if
you want to continue with the installation.
Install the software according to the instructions on the screen → click [Next].
24
Page 27

Installation Using the Installer
13
Eject the DVD-ROM, select [Restart Computer Now (Recommended)], and click
[Restart].
If installed correctly, an MF driver or software icon is displayed in the locations shown next. If the icon is not
displayed, uninstall the MF driver or software and reinstall it.
For a printer driver or fax driver:
When using Windows 10:
[Settings] > [Devices] > [Printers & scanners] > [Printers]
When a version other than Windows 10:
Windows Control Panel > [Devices and Printers], [Printers], or [Printers and Faxes].
For a scanner driver:
Windows Control Panel > [Scanners and Cameras].
For MF Scan Utility:
When using Windows 10:
Start menu > List of apps
When using Windows 8/8.1:
Click [ ] in the lower left corner of the [Start] screen → [Apps] screen > [Canon] folder > [MF Scan
Utility] folder
When using Windows Vista/7:
] (Start) or [Start] menu > [Canon] folder > [MF Scan Utility] folder
[
For other software or electronic manuals:
Taskbar or [Desktop] screen
Related Topics
About the MF Driver and MF Scan Utility(P. 9)
Uninstalling the MF Driver(P. 48)
25
Page 28

Installation Using the Installer
[Easy Installation] From the DVD-ROM (USB Connection)
This explains the procedure for installing for a device connected by USB with [Easy Installation] from the
supplied DVD-ROM. In this procedure, as well as the MF driver, standard software and electronic manuals are
installed.
Prerequisites
Conrm that the following conditions are satised. Complete the preparation operations.
● System Requirements(P. 15)
● Installation Preparations and Precautions(P. 16)
● When starting the computer, log on as a member of Administrators.
● [Desktop] screen display (when using Windows 8/8.1/Server 2012/Server 2012 R2)
● The USB cable is not connected
Connect the USB cable according to the instructions in the screen. If you connected the USB cable and
installed, disconnect the USB cable and reinstall. Also, the USB cable is not supplied with this product.
Prepare it separately.
Procedure
Turn off the device.
1
Set the DVD-ROM in the computer → click [Easy Installation].
2
If the DVD-ROM menu is not displayed, click "Open details."
In the following procedure, start the installer. For the DVD-ROM drive name, enter "D:."
For Windows 10:
Enter "D:\MInst.exe" in [Search the Web and Windows] → press the [ENTER] key on the keyboard.
For Windows Vista/7/Server 2008/Server 2008 R2:
] (Start) > enter "D:\MInst.exe" in [Search programs and les] or [Start Search] → press the [ENTER] key on
[
the keyboard.
For Windows 8/Server 2012:
Right-click the lower left corner of the screen → [Run] > enter "D:\MInst.exe" → click [OK].
For Windows 8.1/Server 2012 R2:
Right-click the [Start] screen → [Run] > enter "D:\MInst.exe" → click [OK].
For Windows Server 2003/Server 2003 R2:
[ ] (Start) > [Run] > enter "D:\MInst.exe" → click [OK].
If [AutoPlay] is displayed:
Click [Run MInst.exe].
26
Page 29

Installation Using the Installer
If the [Select the Type of Connection] screen is displayed, select [USB Connection] →
3
click [Next].
Click [Install].
4
Read the license agreement → click [Yes].
5
Click [Next].
6
When the following screen appears, connect the device and computer with a USB cable
7
→ turn on the device.
If you could not conrm the connection between the device and the computer, click "Open details."
If the following screen is displayed, turn the device off, then reconnect the USB cable and turn the device on
again.
27
Page 30

Installation Using the Installer
Click [Exit].
8
Install the software according to the instructions on the screen.
9
10
Eject the DVD-ROM, select [Restart Computer Now (Recommended)], and click
[Restart].
If installed correctly, an MF driver or software icon is displayed in the locations shown next. If the icon is not
displayed, uninstall the MF driver or software and reinstall it.
For a printer driver or fax driver:
When using Windows 10:
[Settings] > [Devices] > [Printers & scanners] > [Printers]
When a version other than Windows 10:
Windows Control Panel > [Devices and Printers], [Printers], or [Printers and Faxes].
For a scanner driver:
Windows Control Panel > [Scanners and Cameras].
For MF Scan Utility:
When using Windows 10:
Start menu > List of apps
When using Windows 8/8.1:
Click [
Utility] folder
] in the lower left corner of the [Start] screen → [Apps] screen > [Canon] folder > [MF Scan
28
Page 31

When using Windows Vista/7:
[
] (Start) or [Start] menu > [Canon] folder > [MF Scan Utility] folder
For other software or electronic manuals:
Taskbar or [Desktop] screen
Related Topics
About the MF Driver and MF Scan Utility(P. 9)
Uninstalling the MF Driver(P. 48)
Installation Using the Installer
29
Page 32

Installation Using the Installer
[Custom Installation] From the DVD-ROM (USB Connection)
This explains the procedure for installing for a device connected by USB with [Custom Installation] from the
supplied DVD-ROM.
With this procedure, you can specify which software and manuals you want to install.
Prerequisites
Conrm that the following conditions are satised. Complete the preparation operations.
● System Requirements(P. 15)
● Installation Preparations and Precautions(P. 16)
● When starting the computer, log on as a member of Administrators.
● [Desktop] screen display (when using Windows 8/8.1/Server 2012/Server 2012 R2)
● The USB cable is not connected
Connect the USB cable according to the instructions in the screen. If you connected the USB cable and
installed, disconnect the USB cable and reinstall. Also, the USB cable is not supplied with this product.
Prepare it separately.
Procedure
Turn off the device.
1
Set the DVD-ROM in the computer → click [Custom Installation].
2
If the DVD-ROM menu is not displayed, click "Open details."
In the following procedure, start the installer. For the DVD-ROM drive name, enter "D:."
For Windows 10:
Enter "D:\MInst.exe" in [Search the Web and Windows] → press the [ENTER] key on the keyboard.
For Windows Vista/7/Server 2008/Server 2008 R2:
[ ] (Start) > enter "D:\MInst.exe" in [Search programs and les] or [Start Search] → press the [ENTER] key on
the keyboard.
For Windows 8/Server 2012:
Right-click the lower left corner of the screen → [Run] > enter "D:\MInst.exe" → click [OK].
For Windows 8.1/Server 2012 R2:
Right-click the [Start] screen → [Run] > enter "D:\MInst.exe" → click [OK].
For Windows Server 2003/Server 2003 R2:
] (Start) > [Run] > enter "D:\MInst.exe" → click [OK].
[
If [AutoPlay] is displayed:
30
Page 33

Installation Using the Installer
Click [Run MInst.exe].
If the [Select the Type of Connection] screen is displayed, select [USB Connection] →
3
click [Next].
Select the software you want to install → click [Install].
4
Read the license agreement → click [Yes].
5
Click [Next].
6
When the following screen appears, connect the device and computer with a USB cable
7
→ turn on the device.
If you could not conrm the connection between the device and the computer, click "Open details."
If the following screen is displayed, turn the device off, then reconnect the USB cable and turn the device on
again.
31
Page 34

Installation Using the Installer
Click [Exit].
8
If you selected MF Scan Utility, check the instructions on the screen → click [Next] if
9
you want to continue with the installation.
10
11
Install the software according to the instructions on the screen → click [Next].
Eject the DVD-ROM, select [Restart Computer Now (Recommended)], and click
[Restart].
If installed correctly, an MF driver or software icon is displayed in the locations shown next. If the icon is not
displayed, uninstall the MF driver or software and reinstall it.
For a printer driver or fax driver:
When using Windows 10:
[Settings] > [Devices] > [Printers & scanners] > [Printers]
When a version other than Windows 10:
Windows Control Panel > [Devices and Printers], [Printers], or [Printers and Faxes].
For a scanner driver:
Windows Control Panel > [Scanners and Cameras].
For MF Scan Utility:
When using Windows 10:
Start menu > List of apps
When using Windows 8/8.1:
32
Page 35

Click [ ] in the lower left corner of the [Start] screen → [Apps] screen > [Canon] folder > [MF Scan
Utility] folder
When using Windows Vista/7:
[ ] (Start) or [Start] menu > [Canon] folder > [MF Scan Utility] folder
For other software or electronic manuals:
Taskbar or [Desktop] screen
Related Topics
About the MF Driver and MF Scan Utility(P. 9)
Uninstalling the MF Driver(P. 48)
Installation Using the Installer
33
Page 36

Installation Using the Installer
Installing a Downloaded MF Driver (Network Connection)
This explains the procedure for installing the newest version of the MF driver using an installer downloaded
from the web site. It automatically searches for devices on the network and installs the MF driver.
Install with this procedure when the MF driver included in the supplied DVD-ROM is not compatible with the
operating system of the computer you are using.
Prerequisites
Conrm that the following conditions are satised. Complete the preparation operations.
● System Requirements(P. 15)
● A TCP/IP Network Environment
If you do not know the network environment you are using, check with your network administrator.
● The device must be in the same subnet as the computer you are using.
● Installation Preparations and Precautions(P. 16)
● When starting the computer, log on as a member of Administrators.
● [Desktop] screen display (when using Windows 8/8.1/Server 2012/Server 2012 R2)
Procedure
Double-click the downloaded installer → click [Next].
1
Read the license agreement → click [Yes].
2
If the following screen is displayed, select [Network Connection (for Network Models)]
3
→ click [Next].
34
Page 37

Installation Using the Installer
Select the device you are using → click [Next].
4
NOTE
● If the device is not displayed in [Device List], check the connection state between the computer and device
and the IP address settings, and click [Update Device List]. If the device is still not displayed, click [Search by
IP Address] → enter the IP address of the device → click [OK]. For the IP address conrmation method, refer
to the manual of the device.
Select the driver to install → click [Next] → set as required.
5
If a list of drivers corresponding to the page description language is displayed after selecting a printer driver in
the [Select Driver] screen, select the driver you are going to use.
If you want to use a print server, select the following.
● Select the [Select Driver] screen > [Canon Driver Information Assist Service] (when acquiring device
information).
● Select the [Conrm Settings] screen > [Use as Shared Printer] or [Use as Shared Fax] (when you want to use
the computer you are installing to as a print server).
Check the settings → click [Start].
6
Setting the default printer and test printing.
7
When setting as a default driver: select the driver → click [Next]
35
Page 38

Installation Using the Installer
When test printing: select the check box of the driver
Click [Exit].
8
If installed correctly, an MF driver icon is displayed in the locations shown next. If the icon is not displayed,
uninstall the MF driver and reinstall it.
For a printer driver or fax driver:
When using Windows 10:
[Settings] > [Devices] > [Printers & scanners] > [Printers]
When a version other than Windows 10:
Windows Control Panel > [Devices and Printers], [Printers], or [Printers and Faxes].
For a scanner driver:
Windows Control Panel > [Scanners and Cameras].
Related Topics
About the MF Driver and MF Scan Utility(P. 9)
Uninstalling the MF Driver(P. 48)
36
Page 39

Installation Using the Installer
Installing a Downloaded MF Driver (USB Connection)
This explains the procedure for installing the newest version of the MF driver using an installer downloaded
from the web site. It installs the MF driver to a device connected by USB.
Install with this procedure when the MF driver included in the supplied DVD-ROM is not compatible with the
operating system of the computer you are using.
Prerequisites
Conrm that the following conditions are satised. Complete the preparation operations.
● System Requirements(P. 15)
● Installation Preparations and Precautions(P. 16)
● When starting the computer, log on as a member of Administrators.
● [Desktop] screen display (when using Windows 8/8.1/Server 2012/Server 2012 R2)
● The USB cable is not connected
Connect the USB cable according to the instructions in the screen. If you connected the USB cable and
installed, disconnect the USB cable and reinstall. Also, the USB cable is not supplied with this product.
Prepare it separately.
Procedure
Turn off the device.
1
Double-click the downloaded installer → click [Next].
2
Read the license agreement → click [Yes].
3
If the following screen is displayed, select [USB Connection] → click [Next].
4
37
Page 40

Installation Using the Installer
When the following screen appears, connect the device and computer with a USB cable
5
→ turn on the device.
38
Page 41

Installation Using the Installer
If you could not conrm the connection between the device and the computer, click "Open details."
If the following screen is displayed, turn the device off, then reconnect the USB cable and turn the device on
again.
Click [Exit].
6
If installed correctly, an MF driver icon is displayed in the locations shown next. If the icon is not displayed,
uninstall the MF driver and reinstall it.
For a printer driver or fax driver:
When using Windows 10:
[Settings] > [Devices] > [Printers & scanners] > [Printers]
When a version other than Windows 10:
Windows Control Panel > [Devices and Printers], [Printers], or [Printers and Faxes].
For a scanner driver:
Windows Control Panel > [Scanners and Cameras].
Related Topics
About the MF Driver and MF Scan Utility(P. 9)
Uninstalling the MF Driver(P. 48)
39
Page 42

Installation Using the Installer
Installing MF Scan Utility
This explains the procedure for downloading the newest MF Scan Utility from the web site and installing it.
Install with this procedure when the MF Scan Utility included in the supplied DVD-ROM is not compatible with
the operating system of the computer you are using.
Prerequisites
Conrm that the following conditions are satised. Complete the preparation operations.
● System Requirements(P. 15)
● Installation Preparations and Precautions(P. 16)
● When starting the computer, log on as a member of Administrators.
● [Desktop] screen display (when using Windows 8/8.1)
Procedure
Decompress the downloaded le → click [Next].
1
Read the license agreement → click [Yes].
2
Click [Complete].
3
If installed correctly, an MF Scan Utility icon is displayed in the following location.
For Windows 10:
Start menu > List of apps
For Windows 8/8.1:
Click [
folder
For Windows 7/Vista:
] in the lower left corner of the [Start] screen → [Apps] screen > [Canon] folder > [MF Scan Utility]
[ ] (Start) or [Start] menu > [Canon] folder > [MF Scan Utility] folder
Related Topics
About the MF Driver and MF Scan Utility(P. 9)
40
Page 43

Installation Without Using the Installer
Installation Without Using the
Installer
Installation Without Using the Installer ............................................................................................ 42
Installing by Specifying an inf File ..................................................................................................................... 43
Installing Using a WSD Port ................................................................................................................................ 45
41
Page 44

Installation Without Using the Installer
Installation Without Using the Installer
This explains the procedure for installing the driver without using the usual installer.
Installing by Specifying an inf File(P. 43)
Installing Using a WSD Port(P. 45)
42
Page 45

Installation Without Using the Installer
Installing by Specifying an inf File
This explains the procedure for installing a printer driver or fax driver by specifying an inf le with the Windows
add printer function.
You can also install by selecting a temporary port (such as [LPT1]) in this procedure.
Prerequisites
Conrm that the following conditions are satised. Complete the preparation operations.
● When starting the computer, logon as a member of Administrators.
● Conrm the IP address of the device (if adding a port).
● Prepare the inf le.
Acquire the MF driver from the Canon web site (http://www.canon.com/) or the supplied DVD-ROM, and
prepare the inf le for the printer driver or fax driver stored in the following location.
For Fax
32-bit version: intdrv\FAX\us_eng\32bit\Driver
64-bit version: intdrv\FAX\us_eng\x64\Driver
For PCL
32-bit version: intdrv\PCL\us_eng\32bit\Driver
64-bit version: intdrv\PCL\us_eng\x64\Driver
For PS
32-bit version: intdrv\PS\us_eng\32bit\Driver
64-bit version: intdrv\PS\us_eng\x64\Driver
For UFR II
32-bit version: intdrv\UFRII\us_eng\32bit\Driver
64-bit version: intdrv\UFRII\us_eng\x64\Driver
For UFRII LT (V4)
intdrv\LIPSLX_UFRII_CARPS2_V4\Driver
Depending on the device, some drivers are not supported.
Procedure
Select [Devices and Printers].
1
For Windows 10:
Select [Settings] > [Devices] > [Printers & scanners] > [Related settings] > [Devices and printers].
For Windows 8/8.1/Server 2012/Server 2012 R2:
Display the charm bar in the [Desktop] screen → click [ Settings] > [Control Panel] > [Hardware and Sound]
> [Devices and Printers].
For Windows Vista/Server 2008:
Select [ ] (Start) > [Control Panel] > [Printers].
For Windows Server 2003/Server 2003 R2:
43
Page 46

Installation Without Using the Installer
Select [Start] > [Control Panel] > [Printers and Faxes].
Click [Add a printer] or [Install a printer] → proceed according to the displayed add
2
printer wizard.
Click [Add a local printer] (or [Add a local printer or network printer with manual
3
settings]).
Select [Create a new port] → select [Standard TCP/IP Port] from [Type of port] → click
4
[Next].
When selecting a temporary port, select [Use an existing port] → temporary port ([LPT1] etc.) → proceed to step
6.(P. 44)
Click [Finish].
5
The procedure for adding the port is nished. Install the driver.
In the [Add a printer] screen, click [Have Disk].
6
Click [Browse] → select the folder where the prepared inf le is stored → click [OK].
7
Select the device from [Printers] → click [Next].
8
Install the driver according to the instructions on the screen → click [Finish].
9
The installed device is displayed in [Devices and Printers], [Printers and Faxes], or [Printers] in the Windows
Control Panel.
In Windows 10, the installed device is displayed in [Settings] > [Devices] > [Printers & scanners] > [Printers].
44
Page 47

Installation Without Using the Installer
Installing Using a WSD Port
This explains the procedure for searching for devices on a network from Windows and installing a printer using
a WSD (Web Services on Devices) port.
Prerequisites
Conrm that the following conditions are satised. Complete the preparation operations.
● Installing by Specifying an inf File(P. 43)
Specify a temporary port ([LPT1] etc.) and install the printer driver.
Procedure
Select [Network] from the [ ] (Start) menu.
1
For Windows 10:
Display [Network] from Explorer.
For Windows 8/8.1/Server 2012/Server 2012 R2:
Display the charm bar in the [Desktop] screen → click [
[PC & devices] > [Devices]) > [Add a device].
Right-click the target device → click [Install].
2
The installed device is displayed in [Devices and Printers], [Printers and Faxes], or [Printers] in the Windows
Control Panel.
In Windows 10, the installed device is displayed in [Settings] > [Devices] > [Printers & scanners] > [Printers].
NOTE
● After installation is complete, the icon of the printer added after installation specifying the temporary port is
unnecessary. To delete the icon, right-click the icon to delete → click [Remove device] or [Uninstall].
Settings] > [Change PC settings] > [Devices] (or
45
Page 48

Uninstallation
Uninstallation
Uninstallation .................................................................................................................................................... 47
Uninstalling the MF Driver .................................................................................................................................. 48
Uninstalling MF Scan Utility ............................................................................................................................... 50
Uninstall Method for Software ........................................................................................................................... 51
46
Page 49

Uninstallation
Uninstallation
This explains the procedure for uninstalling MF drivers and software that are no longer needed.
Uninstalling the MF Driver(P. 48)
Uninstalling MF Scan Utility(P. 50)
Uninstall Method for Software(P. 51)
47
Page 50

Uninstallation
Uninstalling the MF Driver
This explains the procedure for uninstalling the MF driver. Perform this procedure if an MF driver has become
unnecessary.
There are two methods for uninstalling: uninstalling from Windows, and using the uninstaller. If you cannot nd
the MF driver in the Windows screen, you can uninstall using the uninstaller.
Prerequisites
Conrm that the following conditions are satised. Complete the preparation operations.
● MF driver installation
● When starting the computer, log on as a member of Administrators.
● [Desktop] screen display (when using Windows 8/8.1/Server 2012/Server 2012 R2)
Procedure
To Uninstall from Windows
Select [Control Panel] from the [ ] (Start) menu.
1
For Windows 10:
Select [Settings] > [Devices] > [Apps & features] > the uninstaller of the driver to be uninstalled → click
[Uninstall] → proceed to step 3.(P. 48)
For Windows 8/8.1/Server 2012/Server 2012 R2:
Display the charm bar in the [Desktop] screen → click [ Settings] > [Control Panel].
Click [Programs] > [Uninstall a program] → select the MF driver → click [Uninstall] or
2
[Uninstall/Change].
For Windows Vista/Server 2008:
Click [Programs] > [Programs and Features] > [Uninstall a program] → select the MF driver → click [Uninstall].
For Windows Server 2003/Server 2003 R2:
Double-click [Add or remove programs] → select the MF driver → click [Change/Remove].
If you cannot nd the MF driver when selecting the driver, uninstall it according to the procedure in " To
Uninstall Using the Uninstaller(P. 49) ."
When the uninstaller is displayed, click [Uninstall].
3
If the conrm deletion message is displayed, click [Yes].
4
48
Page 51

Uninstallation
To Uninstall Using the Uninstaller
Acquire the uninstaller.
1
Access the uninstaller on the supplied DVD-ROM or download it from the download page of the Canon web site
(http://www.canon.com/).
Open the following folder where the uninstaller is stored in the DVD-ROM or the
2
downloaded les.
32-bit version: DRIVERS\32bit\misc
64-bit version: DRIVERS\x64\misc
Double-click [DelDrv.exe].
3
When the uninstaller is displayed, click [Uninstall].
4
If the conrm deletion message is displayed, click [Yes].
5
49
Page 52

Uninstallation
Uninstalling MF Scan Utility
This explains the procedure for uninstalling only the MF Scan Utility if the MF Scan Utility is no longer needed.
Prerequisites
Conrm that the following conditions are satised. Complete the preparation operations.
● MF Scan Utility installation
● When starting the computer, log on as a member of Administrators.
● [Desktop] screen display (when using Windows 8/8.1)
Procedure
Select [Control Panel] from the [ ] (Start) menu.
1
For Windows 10:
Select [Settings] > [Devices] > [Apps & features] > MF Scan Utility → click [Uninstall] → proceed to step 3.(P. 50)
For Windows 8/8.1:
Display the charm bar in the [Desktop] screen → click [
Click [Programs] > [Uninstall a program] → select MF Scan Utility → click [Uninstall] or
2
[Uninstall/Change].
For Windows Vista:
Click [Programs] > [Programs and Features] > [Uninstall a program] → select MF Scan Utility → click [Uninstall].
If the conrm deletion message is displayed, click [Yes].
3
Click [OK].
4
Settings] > [Control Panel].
50
Page 53

Uninstallation
Uninstall Method for Software
If software installed at the same time as the MF driver is no longer needed, you can uninstall the software by
the following method.
Uninstall the various types of software from [Programs and Features] or [Add or remove programs] in Windows
after logging on with an Administrator account.
51
Page 54

Appendix
Appendix
Appendix ............................................................................................................................................................... 53
Creating a Shortcut to the Online Manual ......................................................................................................... 54
Installing the Shortcut to the Online Manual .................................................................................................. 55
Uninstalling the Shortcut to the Online Manual .............................................................................................. 56
52
Page 55

Appendix
Appendix
Contains additional information about the printer driver, such as restrictions, etc.
Creating a Shortcut to the Online Manual(P. 54)
53
Page 56

Appendix
Creating a Shortcut to the Online Manual
You can create a shortcut on your desktop to the website where online manuals for Canon products are
available.
Installing the Shortcut to the Online Manual(P. 55)
Uninstalling the Shortcut to the Online Manual(P. 56)
54
Page 57

Appendix
Installing the Shortcut to the Online Manual
This explains the procedure for installing a shortcut to the website where online manuals for Canon products
are available.
Insert the supplied DVD-ROM into your computer.
1
Click [Custom Installation].
2
If the DVD-ROM menu is not displayed, click "Open details."
In the following procedure, start the installer.
For Windows Server 2003/2003 R2:
Double-click the DVD-ROM icon in [My Computer] → double-click [MInst.exe].
For Windows versions other than Windows Server 2003/2003 R2:
- When the [Tap to choose what happens with this disc.] message is displayed: Click the message → click
[Run MInst.exe].
- When the [AutoPlay] dialog box is displayed: Click [Run MInst.exe].
- When Windows Explorer is displayed: Double-click [MInst.exe].
- When nothing is displayed (Windows10): From Explorer, double-click the DVD icon in [This PC] > [Devices
and drives].
- When nothing is displayed (Windows 8/8.1/Server 2012/Server 2012 R2): Click Explorer in the [Desktop]
screen → double-click the DVD icon in [Computer].
- When nothing is displayed (Windows Vista/7/Server 2008/Server 2008 R2): Double-click the DVD-ROM icon
in [
Select only the [Manuals] checkbox in the [Custom Installation] screen → click [Install].
3
Read the license agreement → click [Yes].
4
Check the installation destination → click [Install].
5
If you want to change the installation destination, click [Browse].
] (Start) > [Computer].
The installation operation begins.
Click [Quit].
6
Click [Next] → click [Exit].
7
A shortcut to the website where online manuals for Canon products are available is created on your desktop.
55
Page 58

Appendix
Uninstalling the Shortcut to the Online Manual
If the shortcut to the website where online manuals for Canon products are available is no longer necessary,
uninstall it according to the following procedure.
Insert the supplied DVD-ROM into your computer.
1
Click [Start Software Programs].
2
If the DVD-ROM menu is not displayed, click "Open details."
In the following procedure, start the installer.
For Windows Server 2003/2003 R2:
Double-click the DVD-ROM icon in [My Computer] → double-click [MInst.exe].
For Windows versions other than Windows Server 2003/2003 R2:
- When the [Tap to choose what happens with this disc.] message is displayed: Click the message → click
[Run MInst.exe].
- When the [AutoPlay] dialog box is displayed: Click [Run MInst.exe].
- When Windows Explorer is displayed: Double-click [MInst.exe].
- When nothing is displayed (Windows10): From Explorer, double-click the DVD icon in [This PC] > [Devices
and drives].
- When nothing is displayed (Windows 8/8.1/Server 2012/Server 2012 R2): Click Explorer in the [Desktop]
screen → double-click the DVD icon in [Computer].
- When nothing is displayed (Windows Vista/7/Server 2008/Server 2008 R2): Double-click the DVD-ROM icon
in [
Click [Start] for the [Manual Uninstaller] in the [Start Software Programs] screen.
3
Click [Next].
4
The uninstallation operation begins.
Click [Quit].
5
] (Start) > [Computer].
In the [Start Software Programs] screen, click [Back].
6
Click [Exit] in the setup screen.
7
56
Page 59

SIL OPEN FONT LICENSE
This Font Software is licensed under the SIL Open Font License,
Version 1.1.
This license is copied below, and is also available with a FAQ at:
http://scripts.sil.org/OFL
----------------------------------------------------------SIL OPEN FONT LICENSE Version 1.1 - 26 February 2007
-----------------------------------------------------------
PREAMBLE
The goals of the Open Font License (OFL) are to stimulate worldwide
development of collaborative font projects, to support the font
creation efforts of academic and linguistic communities, and to
provide a free and open framework in which fonts may be shared and
improved in partnership with others.
The OFL allows the licensed fonts to be used, studied, modied and
redistributed freely as long as they are not sold by themselves. The
fonts, including any derivative works, can be bundled, embedded,
redistributed and/or sold with any software provided that any reserved
names are not used by derivative works. The fonts and derivatives,
however, cannot be released under any other type of license. The
requirement for fonts to remain under this license does not apply to
any document created using the fonts or their derivatives.
DEFINITIONS
"Font Software" refers to the set of les released by the Copyright
Holder(s) under this license and clearly marked as such. This may
include source les, build scripts and documentation.
"Reserved Font Name" refers to any names specied as such after the
copyright statement(s).
"Original Version" refers to the collection of Font Software
components as distributed by the Copyright Holder(s).
"Modied Version" refers to any derivative made by adding to,
deleting, or substituting -- in part or in whole -- any of the
components of the Original Version, by changing formats or by porting
the Font Software to a new environment.
"Author" refers to any designer, engineer, programmer, technical
writer or other person who contributed to the Font Software.
PERMISSION & CONDITIONS
Permission is hereby granted, free of charge, to any person obtaining
a copy of the Font Software, to use, study, copy, merge, embed,
modify, redistribute, and sell modied and unmodied copies of the
Font Software, subject to the following conditions:
57
Page 60

SIL OPEN FONT LICENSE
1) Neither the Font Software nor any of its individual components, in
Original or Modied Versions, may be sold by itself.
2) Original or Modied Versions of the Font Software may be bundled,
redistributed and/or sold with any software, provided that each copy
contains the above copyright notice and this license. These can be
included either as stand-alone text les, human-readable headers or
in the appropriate machine-readable metadata elds within text or
binary les as long as those elds can be easily viewed by the user.
3) No Modied Version of the Font Software may use the Reserved Font
Name(s) unless explicit written permission is granted by the
corresponding Copyright Holder. This restriction only applies to the
primary font name as presented to the users.
4) The name(s) of the Copyright Holder(s) or the Author(s) of the Font
Software shall not be used to promote, endorse or advertise any
Modied Version, except to acknowledge the contribution(s) of the
Copyright Holder(s) and the Author(s) or with their explicit written
permission.
5) The Font Software, modied or unmodied, in part or in whole,
must be distributed entirely under this license, and must not be
distributed under any other license. The requirement for fonts to
remain under this license does not apply to any document created using
the Font Software.
TERMINATION
This license becomes null and void if any of the above conditions are
not met.
DISCLAIMER
THE FONT SOFTWARE IS PROVIDED "AS IS", WITHOUT WARRANTY OF ANY KIND,
EXPRESS OR IMPLIED, INCLUDING BUT NOT LIMITED TO ANY WARRANTIES OF
MERCHANTABILITY, FITNESS FOR A PARTICULAR PURPOSE AND NONINFRINGEMENT
OF COPYRIGHT, PATENT, TRADEMARK, OR OTHER RIGHT. IN NO EVENT SHALL THE
COPYRIGHT HOLDER BE LIABLE FOR ANY CLAIM, DAMAGES OR OTHER LIABILITY,
INCLUDING ANY GENERAL, SPECIAL, INDIRECT, INCIDENTAL, OR CONSEQUENTIAL
DAMAGES, WHETHER IN AN ACTION OF CONTRACT, TORT OR OTHERWISE, ARISING
FROM, OUT OF THE USE OR INABILITY TO USE THE FONT SOFTWARE OR FROM
OTHER DEALINGS IN THE FONT SOFTWARE.
58
 Loading...