

Page 1
Page 2

Page 3
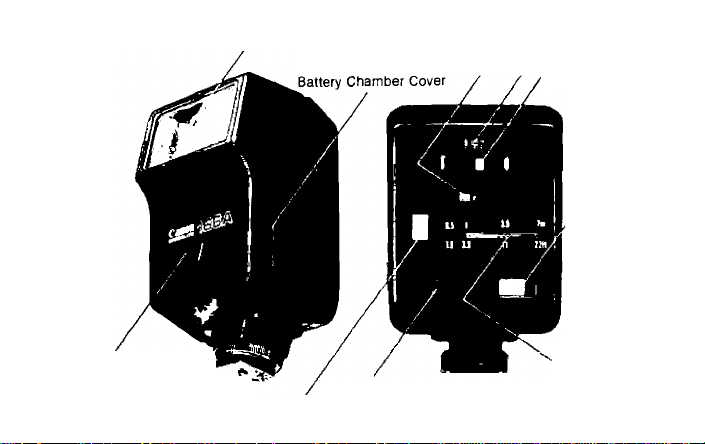
Flash Head ASA Film Speed Window
Aperture/MANU Window ^ aSA Film Speed
Switch
/
Main Switch
Sensor /i
Lock Nul /
Directly Coupled Contact
Pilot Lamp (Flash Test Button)
Aperture/MANU Selection Switch
Auto Shooting
Distance Range
Indicator
Page 4
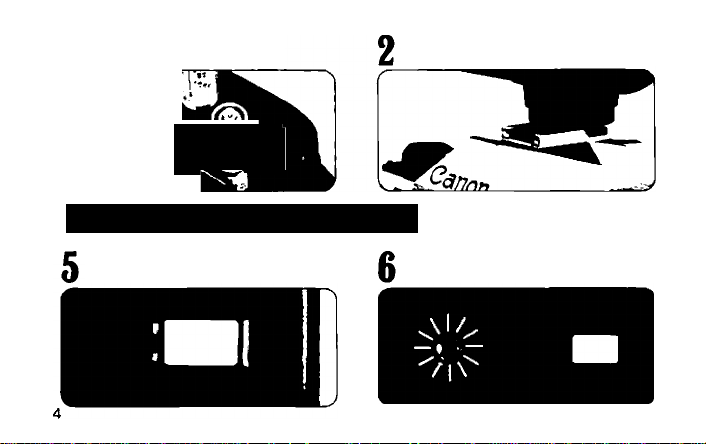
Load the batteries correctly Mount the 166A on the camera
<
Summary for Use of the 166A
Set the 166A’s main switch to ON
Wait for the pilot lamp to glow
Page 5
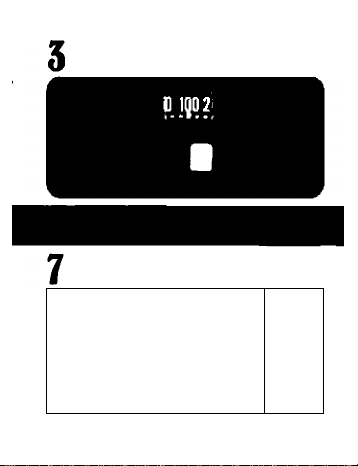
Set the ASA film speed
Check viewfinder information, and
press the shutter button.
r 75ir
. 125
1 30
1
_ _ _ _ _
Ll
_____
>
Page 6
Focus on the subject and select an
aperture.
Page 7
Loading the Batteries
Use four new size AA alkaline-man
ganese (LR6/AM-3) or Ni-Cd batteries.
Carbon-zinc batteries may also be
used, but their battery life is shorter.
Before loading the batteries, wipe their
contacts and the flash contacts with a
clean, dry cloth to prevent dirt from
Page 8
causing poor contact.
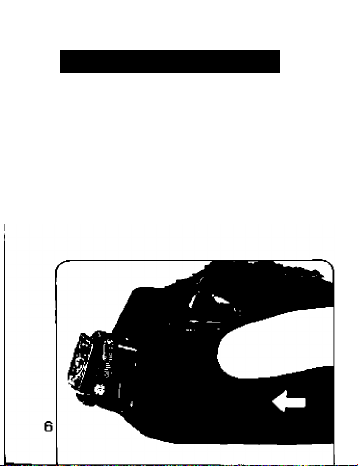
Press anrJ slide the battery chamber
cover oft in the direction of the arrow
in the photo.
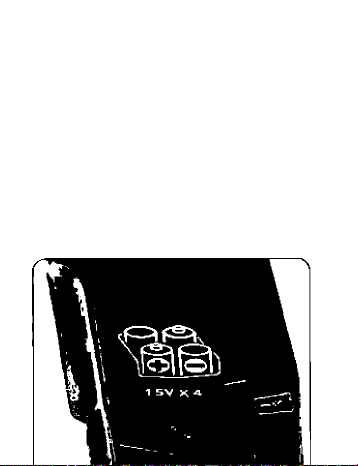
Load the batteries so that their con
tacts are in the directions indicated by
the diagram inside the battery cham
ber For proper function of the flash, it
is very important that their contacts be
facing in the correct directions.
Page 9

Once the batteries are loaded, slide
the battery chamber cover back on
while pressing the batteries down
Make sure the cover's tab fits into the
corresponding groove on the flash
body.
Remove the batteries if you do not ex
pect to use the 166A for about three
weeks or longer
Set the main switch to OFF when flash
photography is finished
When the batteries become exhausted,
replace all four at the same time with
four new ones of the same brand
Since battery performance deteriorates
in low temperatures, keep the batteries
warm until just before use. Keep a set
of spare batteries warm and alternate
them with the loaded ones so'that
warm batteries are always in use.
In temperatures below 0°C (32'F), the
Page 10

use of fully-charged Ni-Cd batteries is
recommended.
Each brand of Ni-Cd batteries has its
own terminals system Be sure to use a
type which is suitable for this flash
When recharging Ni-Cd batteries, fol
low the instructions of the battery man
ufacturer
Page 11
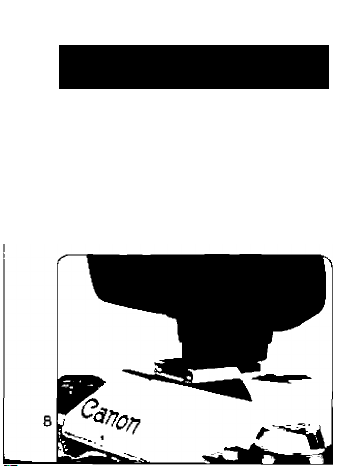
Mounting the 166A on the
Camera
1. Turn OFF the 166A's main switch
2 Loosen the lock nut and insert the
Speedlite into the camera's accessory
shoe For correct electrical contact,
make sure it is pushed in all the way.
3. Retighten the lock nut
Page 12
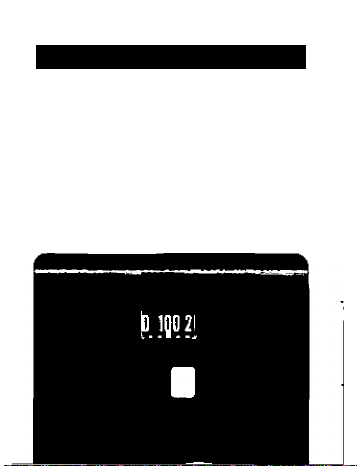
Setting the ASA Film Speed
To set the film speed, slide the ASA film
speed switch until the ASA value of your
film is aligned with the orange index. At
this time, the aperture displayed in the Aperture/MANU window will also change
Because the guide number of the flash
varies with the sensitivity of the film in use,
be sure to set the ASA film speed correctly
Page 13
* Make sure that the camera is set to the
correct ASA film speed.
It is possible to set the following ASA
film speeds Numbers in parentheses
are intermediate film speeds indicated
by the dots on the scale.
(32) (40) (64) (80) (125) (160)
ASA25 • *50 • • 100 •
(250) (320) (500)
200
• 400 •
(640)
800
Page 14
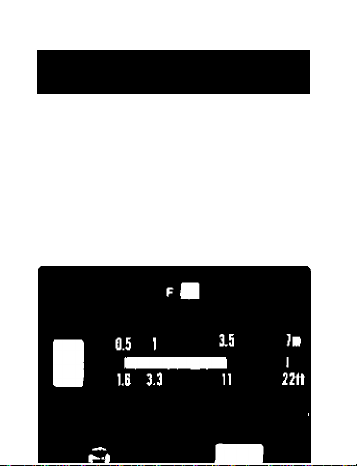
Choosing an Aperture and
Reading its Value
There is a choice of two apertures for au
tomatic flash photography To select an
aperture, set the Aperture/MANU selection
switch to the upper or middle position; the
aperture value will appear in the Aper
ture/MANU window. The aperture wilt
change depending on the setting of the
Page 15

ASA film speed When ASA 100 film is
used, for instance, the upper position is
f/2.0 and the middle position is f/5 6.
When the Aperture/MANU selection switch
is set on the lowest position, "MANU" ap
pears in the window. As this indicates
manual flash photography, automatic flash
photography is impossible on this setting
* In automatic flash photography, if the
ASA film speed is set between gradua
tions, such as 64 or 00, the aperture
value indicated is between click-stops
on the aperture ring. In the case of the
AL-1, AV-1, AT-1 or New F-1, set the
lens' aperture ring to the click-stop of
the larger aperture.
10
Page 16
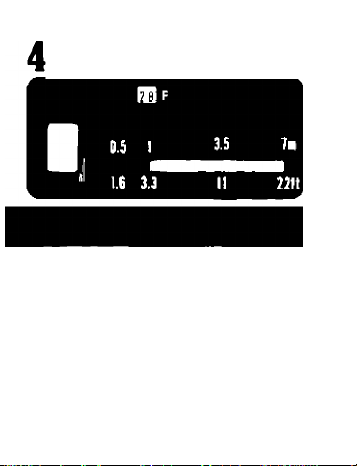
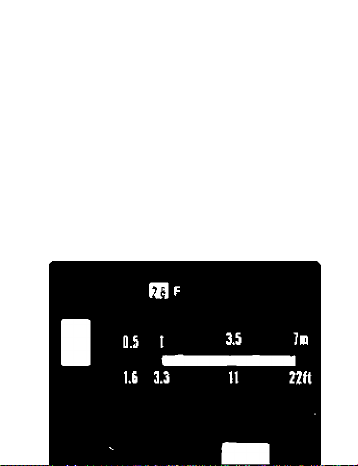
Reading the Auto Shooting
Distance Range
Once you have selected an aperture by
setting the Aperture/MANU selection
switch to the upper or middle position,
there is only a certain range of shooting
distances which will give correct exposure.
On the 166A, the correct shooting distance
is indicated by the red and green lines in
Page 17
accordance with the selection of the aperture.
Effective Shooting Distance
Green Line
0 5-3 5m; 1 6-11 ft.
After focusing, confirm the shooting dis
tance on the lens' distance scale Remem
ber that correct exposure is impossible if
the shooting distance is not within the ef
fective shooting range
Both depth of field and the shooting dis
tance are factors to consider when select
ing an aperture on the 166A When the
subject distance is between 1 ~3 5m
(3 3~11ft.), use the following as guides:
Upper position: For isolating the subject
(red line) from its surroundings by
blurring the foreground
and background
1-7m; 3 3-22 ft
'
Red Line
Page 18

Middle position: For the widest range of
(green line) good focus in front of and
* Note that the auto shooting distance
ranges remain the same regardless of
the film speed
behind the subject.
Page 19

Shutter Speed and Aperture
(with an FD lens)
Automatic Shutter Speed Setting
and Aperture Setting
1 On the A-series cameras and New F-1,
once the pilot lamp lights up (which
means the flash is charged), the shut
ter speed switches to X-sync. (on the
A-series cameras to 1/60 sec and on
the New F-1 to 1/90 sec) automatical
ly except when the camera is set to
“B" Setting the shutter speed is, there
fore, unnecessary.
When using an FD lens set on "A,''
once the pilot lamp glows the aperture
of the A-1, AE-1 PROGRAM, AE-1, or
New F-1 (Shutter Priority AE Mode) is
set automatically to the same aperture
Camera
A-1, AE-1 PROGRAM. AE-1, New F-1 {Shutter
Priority AE mode)
AL-1, AV-1, AT-1, New F-1 (Aperture Priority
AE or Manual Mode)
F-1 or other cameras
12
Shutter Speed
Setting
Automatic
(X-sync.)
Automatic
(X-sync)
Manual
(X-sync)
Aperture
Setting
Automatic (FD lens,.,
A mark)
Manual
Manual
Page 20

chosen on the 166A with the Aperture/MANU selection switch In the
case of the AL-1. AV-1, AT-1, and New
F-1 (Aperture Priority AE or Manual
Mode), turn the lens' aperture ring to
the same aperture which is set on the
166A
When using the 166A with the F-1 or
other cameras, or lenses other than FD
lenses, both shutter speed (X-sync)
and aperture must be set manually
When using New F-1 without a battery,
set the shutter dial to the t mark and
the aperture manually
Page 21

Main Switch and Pilot Lamp
Turn the main switch ON. The pilot lamp
lights up when the flash is charged,
telling you that it is ready to shoot.
The A-1 and AE-1 PROGRAM have special
viewfinder displays which make if possible
to confirm that the flash is charged See
pp 18 ~ 20 for details
Page 22

Test Firing
To test the flash for proper function, press
the pilot lamp after it glows If the flash
fires, it is in proper working order
Confirming Exposure and
Shooting
After focusing, check the lens' distance
scale to make sure the shooting distance
is within the auto distance range indicated
by the red or green line on the flash If it is
not, either move closer to or farther away
from the subject as required, or set the Ap-
erture/MANU selection switch to a more
appropriate position
After the pilot lamp lights up, press the
shutter button halfway and confirm ex
14
Page 23

posure information in the viewfinder The
indication varies depending on the camera
(seepp.18 — 22) if everything is correct,
confirm focusing and press the shutter
button ail the way for shutter release
AE Automatic Switch
Depending on the output of the previous
flash, the pilot lamp may remain lit, indi
cating that the flash is ready for the next
exposure When the pilot lamp does not
glow after the exposure (and the AE
camera is in the AE mode), the camera will
go into the normal AE mode operation until
the pilot lamp lights up (Except when the
camera is set to "B")
When the pilot lamp glows, the camera au
tomatically switches back to flash photo-
Page 24

graphy.
This special feature is called AE Automatic
Switch
* Make sure that the aperture or shutter
speed to which the camera is actually
set tor normal AE photography is ap
propriate for correct exposure.
* There is an extremely rare possibility
that the pilot lamp will glow again
while the shutter is in operation for a
normal AE shot. If this happens, ex
posure for that shot will be incorrect
* Since the viewfinder displays of the A-
1 and AE-1 PROGRAM each indicate
when the Mash is charged, it is possi
ble to confirm when the AE automatic
switch feature is in operation When
the shutter button is pressed halfway
and the "F'(A-D or the mark (AE-
1 PROGRAM) is not displayed in the
viewfinder, the camera is in the normal
Page 25

AE mode.
Switch OFF
Once flash is no longer necessary, be sure
to turn OFF the 166A's main switch to pre
vent battery drain. With the main switch
OFF, the circuit between the camera and
flash is disconnected and it is possible to
shoot normally even while the flash is at
tached to the camera
15
Page 26

Use with the A-1.
AE-1 PROGRAM, AE-1,
AL-1, AV-1, AT-1 and
New Canon F-1
The shooting modes are:
1. Full autoflash mode;
2. Automatic shutter setting autoflash
mode; and
3. Manual flash mode
A-1, AE-1 PROGRAM, AE-1.
Full Autoflash
Automatic
Shutter Setting
Autoflash
Manual Flash
16
Mode
New F-1 *: Shutter Priority AE Mode
New F-1 *
Yes, Main Mode.
Yes
Yes
Full Autoflash Photography
This is possible onfy on the A-1, AE-1
PROGRAM, AE-1 or New F-1 (in Shutter
Priority AE mode) with an FD lens set on
"A" Both the shutter speed and aperture
are automatically set on the camera when
the pilot lamp glows. (Except when the
camera is set to "B")
Automatic Shutter Setting
Autoflash Photography
With the AL-1, AV-1, AT-1 or New F-1 (in
Aperture Priority AE or Manual mode), al-
AL-1, AV-1, AT-1,
New F-r*
No
Yes Main Mode
: Manual or Aperture Priority AE Mode
Yes.
Page 27

though the shutter speed is set automat
ically, manually set the aperture which has
been selected on the flash
Because the aperture is set manually, this
mode is especially useful when exposure
correction is desired
* With the A-1, AE-1 PROGRAM or AE-1,
manual aperture setting is possible
when using an FD lens In this mode,
the shutter speed is still switched au
tomatically to 1/60 sec
Page 28

If you turn the lens' aperture ring to the
same aperture which was chosen on
the flash, the result will be the same as
if the aperture ring had remained on
"A"
When this flash mode is used on the
A-1, AE-1 PROGRAM, AE-1 or New F-1
(Shutter Priority AE Mode). AE auto
matic switch (p 14) is not possible It
Is possible on the AL-1, AV-1 or New
F-1 (Aperture Priority AE Mode). It is
never possible on the AT-1
Automatic Shutter Setting
Autofiash with an FL Lens on the
A-1, AE-1 PROGRAM, AE-1, AL-1,
AV-1, AT-1 or New F-1
FL lenses do not have the signal pin for
full aperture metering and the aperture
cannot be set automatically The shutter
speed, however, is switched automatically
17
Page 29

to X-sync Turn the lens' aperture ring to
the same aperture which is set on the
tiash.
Viewfinder Information and
Warnings
After the pilot lamp lights up, press the
shutter button haifway to activate the view
finder information dispiay Viewfinder infor
mation and exposure warnings vary with
the cameras.
* If the aperture selected on the flash is
larger than the lens’ maximum aperture
you cannot take a correct exposure On
the A-1, the lens' maximum aperture will
flash on and off to indicate under
exposure On the AE-1 PROGRAM, the
preselected aperture on the flash will
18
Page 30

flash on and off On the AE-1, the under
exposure lamp blinks. On the New F-1
(Shutter Priority AE Mode), the meter
needle points to the underexposure mark
or below In this case, set the Aperture/MANU selection switch to a smaller
one.
Full Autoflash Mode: FD lens on "A"
and AT dial not on "B."
• "6D" means the shutter speed is set to
1/60 sec, the "F"signal indicates the
camera is ready for flash, and the ap
erture set on the flash will be dis
played in the viewfinder.
• When the shutter speed Is set on "B,"
"bu" will be displayed instead of “ BD "
Page 31

ED F D . B
Automatic Shutter Setting Autofiash
Mode: FD lens off "A" and AT dial not
on "B," or FL lens
• In addition to the above-mentioned dis
plays in automatic shutter setting auto
flash mode, " m reminding you that
you have taken the aperture ring off
"A," is displayed. Set the aperture as
displayed in the viewfinder by hand.
* With the FL lens, the viewfinder display
is not always reliable and should be
switched OFF.
ED F B . B
Page 32

[Error in Display]
The aperture displayed may be one-half
f/stop off the one selected on the flash
This is because the aperturb dispiay is in
one-half f/stop increments; it has no effect
on actual exposure The aperture display
may also flash on and off if the flash-
selected aperture is the same as the lens'
maximum aperture In this case, exposure
will be correct, but it is advisabie to check
the fiash-seiected aperture to make sure it
is not iarger than the iens' maximum aper
ture
(aE-1 program Dtspia^
Full Autoflash Mode: FD lens on "A"
and shutter speed selector dial not on
“B."
19
Page 33

• The aperture selected on
the flash and the "5]" mark
indicating the Mash is
charged will be displayed
After the shutter is released,
the "[J]" mark will flash on
and off for two seconds
provided you continue to
press the shutter button
halfway and the subject
was within the auto shoot
ing distance range —'
Automatic Shutter Setting Autofiash
Mode: FD iens off "A” or FL iens.
• “0"glows in addition to the abovementioned dispiays If, however, the
auto-exposure confirmation mark
flashes on and off in this mode, it does
not confirm auto-exposure and should
be disregarded
ao
2.8
Page 34

Note: The aperture display may flash on
and off in both modes if the flashselected aperture is the same as the
lens' maximum aperture In this
case, exposure wili be correct
Full Autoflash Mode: FD lens on
■'A" and Shutter dial not on “B."
• The meter needle swings to
the aperture pre-selected
on the 166A to assure cor
rect exposure
Automatic Shutter Setting
Autoflash Mode; FD lens off ””
"A" or FL lens.
The aperture selected on the
166A and "M"(for manual ap
erture control) flashing on and
off are displayed —
Page 35

^AL-1 and AV-i Display^
Automatic Shutter Setting Autotlash
Mode: Setector dial rot on "8 "
• The meter needle swings to
the shutter speed of 1/60
sec. once the pilot
lamp glows
When the pilot lamp
goes out, the meter
needle points to the
shutter speed for nor
mal aperture-priority
AE
AL-1 AV-1
imo
sao
7S0
MID
UD
m
ITS
nh
»
1 3D
ih
s
1
i
7
?
T
Page 36

(^AT-1 Display^
Automatic Shutter Setting Autofiash
Mode: Shutter diai not on "B."
• No viewfinder flash information
F-4 Diaplay^
* •
Full Autofiash Mode: Shutter
Priority AE Mode — With AE
Motor Drive FN or AE Power
Winder FN, FD lens on "A" and
shutter dial not on "B.”
• The meter needle points to
the aperture pre-selected
on the 166A
• Shutter speed indicator
shows the setting on the
shutter speed dial, but shut-
30
Page 37

ter speed is automatically
changed to X-sync of 1/90
sec
Automatic Shutter Setting Autoflash
Mode: Aperture Priority AE or Manuai
Mode.
Manuai Mode: shutter dial not on"B."
• In addition to the above
flash
ap-
the
ture
the
the
the
32[
32
16^
11
8
è
T
ii
22
25D
Page 38

Aperture Priority AE Mode: With AE
Finder FN, shutter dial on “A."
• The camera switches automatically to
the X-sync speed of 1/90 sec. and
the meter needle points to the right
of 1/60 sec
I ,'tl 4 g I 2 < I 15 30 6P\ia 2i0 500 noil , [
Page 39

Precautions in Automatic Fiash Modes
In some cases, automatic flash may
not be suited to your subject If, for
instance, your main subject is small
with a dark or distant background or
if the subject’s surroundings are
bright white with strong reflections,
automatic flash exposure may be af
fected by a contrasting background,
causing under- or overexposure of
the subject This can be avoided by
switching to manual flash (see pp
24 ~ 26)
In delayed flash with the camera’s
self-timer, do not press the shutter
release button until the pilot lamp
glows
When the shooting distance is less
than one meter, flash distribution
may be somewhat uneven
Since it is possible for viewfinder in
formation in the AE-1, AL-1, AV-1,
AT-1 or New F-1 to be the same in
flash photography as in normal AE
photography, be sure that the pilot
lamp is glowing before shooting
Confirmation of auto-exposure flash
is possible only when the 166A is
used with AE-1 PROGRAM in the full
autoflash mode
The auto-exposure confirmation sig
nal tells you whether you are close
enough to your subject but not
23
Page 40

whether you are far enough away If
you think you may be too close to
your subject, check the lens' distance
scale and the auto shooting distance
range on the flash.
24
Page 41

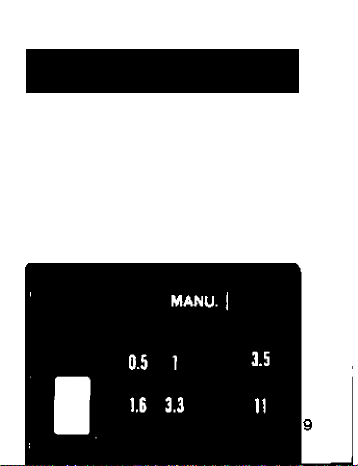
Manual Flash Photography
Setting the Aperture/MANU selection
switch to the lowest position places the
166A in the manual flash mode. The auto-
Page 42

matic flash circuit is cut off, and both flash
and camera are switched to regular syn
chronized flash photography. In this mode,
the shutter speed of each A-series camera
is still switched automatically to the X-synchronization speed of 1/60 sec. and the
shutter speed of the New F-1 to 1/90 sec.
(unless the shutter speed is set on “B”)
when the pilot lamp glows The aperture,
however, must be calculated for each
change in shooting distance using the
guide number formula, and then set
manually on the lens' aperture ring The
procedure for manual flash photography is
as follows:
1 Set the 166A's Aperture/MANU selec
tion switch to the lowest position.
"MANU" will appear in the Aper
ture/MANU window
2 Make sure that the proper ASA film
speed is set on the flash.
Page 43

3. Focus the subject,
4. Read the shooting distance from the
lens’ distance scale
5. Calculate the aperture using the fol
lowing guide number formula:
Aperture —
6 Set the aperture on the lens.
7 Turn the main switch ON
8 Do not press the shutter button until
the pilot lamp glows
* The 166A’s guide number is 20 (ASA
100, m) or 33 (ASA 25, ft.)
' Make sure that both the guide number
and shooting distance are in the same
unit, whether meters or feet
• The guide number changes with film
speed Attach the guide number table
onto the 166A for convenient use,
' If it is necessary to shoot immediately
after the pilot lamp glows, open the
guide number
------------------------------------shooting distance
25
Page 44

lens 1/2 to one full f/stop. This correc
tion is necessary because the flash is
not yet fully charged when the pilot
lamp glows.
Viewfinder Information on Manual
Flash
A-1
Shutter speed of 1 /60 sec (or “bu” when
set to "B"), the '‘F''flash signal, and''M’’ for
manual aperture control will be displayed
There is no aperture display
AE-1 PROGRAM
The ■'[}]''mark indicating the flash is
charged and “M" tor manual aperture con
trol will be displayed There is no aperture
display.
AE-1
The only information will be the flashing
26
Page 45

"M” signal to indicate manual aperture
control The meter needle will swing to its
upper limit
AL-1 and AV-1
The meter needle will swing to the shutter
speed of 1/60 sec. (unless selector dial is
on "B")
AT-1
There is no viewfinder indication in the AT-1
New F-1
Shutter speed indicator shows the setting
on the shutter speed dial, but the shutter
speed is automatically changed to X-sync,
of 1/90 sec. The meter needle will swing
to its upper limit The aperture needle
points to the aperture set on the lens.
In Aperture Priority AE Mode the meter
needle points to the right of the 1/60 sec
Page 46

Use of the 166A on Other
Cameras
The Speedlite 166A can be used on other
cameras which have a hoi shoe in either
the automatic flash mode or the manual
flash mode In either case, set the shutter
speed to the camera's X-synchronization
speed; the aperture also must be set
manually. Refer to the camera's instruction
book tor further details.
1 In regular automatic flash photography,
set the Aperture/MANU selection
switch so that the red or green line ap
pears in the window of the shooting
distance range Set the aperture on the
lens Provided the focused distance is
Page 47

within the auto shooting distance
range, exposure will be correct
In the case of manual flash photogra
phy, the procedure for calculating ap
erture value using the guide number
formula is the same as for manual
flash with A-series cameras or New
F-1 (see p 25)
When the 166A is used on a lens-shut
ter camera with built-in flash automa
tion (such as the Canonet G-lll 17), the
166A's Aperture/MANU selection switch
must be set to the lowest position so
that ‘'MANU'' appears in the Aperture/
MANU window Follow the camera’s
instructions for setting the camera
(^The Speedlite 166A cannot be used as\
a multiple flash
A slave unit cannot be used with the
166A
27
Page 48

Page 49

Page 50

fr
Care of the Flash
Remove the batteries if the Mash will
not be used for about three weeks or
longer. During prolonged storage, oc
casionally load the batteries and make
several test flashes to maintain proper
function of the capacitor.
Since a high voltage circuit is built into
the fiash, it would be dangerous to try
to take It apart by yourself If repair is
necessary, take it to the nearest
authorized Canon service facility.
Do not drop the flash in water If it is
exposed to rain or snow, wipe it off
with a dry cloth.
Do not leave the flash in direct sun
light or in hot, humid places
Page 51

Specifications
Type:
Electronic computer flash unit with a
series control system
Contact:
Clip-on type with direct contact and
lock.
Guide Number:
20 (ASA too, m) or 33 (ASA 25, ft)
Reaches full charge 30 sec. after pilot
lamp glows, with new batteries.
Flash Coverage Angle:
Covers the field of a 35mm lens on the
35mm format
Recycling Time:
(Interval between firing of flash and re
lighting of pilot lamp with new or fully-
charged batteries):
23
Page 52

Battery Type
Alkaline-
manganese
Ni-Cd
Auto
Approx
0 5—7 sec.
Approx
0 5 — 5 sec
Number of Flashes:
(When the Mash is fired in 30 sec.
intervais with new or fuiiy-charged bat
teries):
Battery Type
Alkaline
manganese
Ni-Cd
Auto Manuai
Approx.
250-2,500
times
Approx,
80—800
times
30
Manual
Approx.
7 sec
Approx
5 sec.
Approx.
250 times
Approx
80 times
Page 53

Color Temperature:
Same as daylight. Correction by spe
cial colored diffusion screen.
Flash Duration:
1/1000 sec-1/50000 sec.
Automatic Flash Control System:
Light reflected back from the subject is
measured and the series control sys
tem saves unneeded energy Averaged
light measuring sensitivity distribution.
Aperture/MANU Selection Switch:
Three positions: Upper (red) and mid
die (green) auto positions and lower
“MANU" (manual) position With ASA
100 film, upper setting corresponds to
f/2 0, middle setting to f/5 6
Auto Shooting Distance Range:
Red Setting: 1 0—7 Om
Green Setting: 0 5—3 5m
ASA Film Speed Scale:
ASA 25 to ASA 800
Page 54

Aperture Scale:
f/1 4~f/16
Distance Scale:
05~7m (1 6-22 ft)
Power Source:
Four Penlight (AA) alkaline-manganese
(AM-3, LR6) or Ni-Cd batteries
Pilot Lamp:
Comes on when unit is sufficiently
charged and affects automatic switch
over of camera to flash mode No flash
is fired if pilot lamp does not glow Ex
tinguishes when main switch is OFF
Also functions as flash test button
Auto-exposure Confirmation with AE-1
PROGRAM (Full Autoflash Mode):
By the ''[J]"mark flashing on and off in
the camera's viewfinder for two sec
onds after shutter release Confirms
that the flash was close enough to the
subject for correct exposure
Page 55

Dimensions:
66mm(W) X 49 5mm(L) x 98mm(H)
(2-%" X l-'S/ie" X 3-Vb")
Weight:
260g (9-^16 ozs ) inciuding batteries
Accessories:
Soft Case
Subject to change without notice
31
Page 56

Canon
.CANON U.S A.. INC. HEADQUARTERS
CANON USA, INC MANHATTAN SERVICE CENTER
CANON USA, INC ATLANTA BRANCH
6300 PiecbiiM Indusiri^l Blvd Norcrosb Geo>g>9 30071 USA
CANON U S A,. INC CHICAGO BRANCH
CANON U S A. INC. LOS ANGELES BRANCH
1 23 Paulanno Avenue fisi Cosía Mese California 9202S USA
CANON USA, INC LOS ANGELES SERVICE CENTER
3321 WifsOire Blvd L05 Angeles California 90010 USA
CANON USA INC. SAN FRANCISCO OFFICE
CANON USA INC HONOLULU OFFICE
Bldg B 2 1050 Ala Woana Blvd Honolulu Hav,s" 966ia USA
— CANON CANADA INC HEADQUARTERS
CANON CANADA INC MONTREAL SERVICE CENTRE
10652 Cole de Lessa Lacn,ne QueDec МВТ IAS Canada
CANON CANADA INC CALGARY OFFICE
2B26 i6insiree< ЧЕ Caigaiv Alberiu12S 7k7 Canada
EUROPE AFRICA
CÉNTRALò Unils e b 5 Bren! Tradaiy Centre Norm Cuculai Road Londr>n NW lO 0J7 Otmed K,ngoor"
SOUTH AMERICA_CANON LATIN AMERICA, INC. DEPTO DE VENTAS
SOUTHEAST AS A_CANON HONGKONG TRADING CO . LTD ^
OCEANIA
JAPAN
CANON CANADA INC EDMONTON SERVICE CENTRE
— CANON EUROPA N.V.
CANON FRANCE-PHOTO CINEMA S A ^
CANON UK LTD
CANON LATIN AMERICA. INC CENTRO DE SERVICIO V REPARACION
CANON SINGAPORE PTE LTD
________
CANON AUSTRALIA PTY LTD
__________
CANON SALES CO , INC
PUB. C-IE-088B
0382T20
Page 57

PRINTED IN JAPAN
 Loading...