

BTC 9001ARF User Manual

封面內頁
9001ARF
Wireless Keyboard & Mouse Kit
User’s Guide
Version 1.4

封面內頁
The information in this document is subject to change without notice and does not represent a commitment
on the part of the vendor.
No warranty of representation, either expressed or implied, is made with respect to the quality, accuracy or
fitness for any particular purpose of this document. The manufacturer reserves the right to make changes to
the content of this document and/or the products associated with it at any time without obligation to notify
any person or organisation of such changes.
In no event will the manufacturer be liable for direct, indirect, special, incidental or consequential damages
arising out of the use or inability to use this product or documentation, even if advised of the possibility of
such damages.
Copyright © 2003. All rights reserved
IBM, PC/AT and PS/2 are registered trademarks of International Business Machines Corporation.
Microsoft, Windows, and Windows NT are registered trademarks of Microsoft Corporation in the United
States of America and/or other countries.
All other trademarks are trademarks of their respective holders.

Table of Contents
1 Introduction......................................................................................................1
What's in this package ....................................................................................1
2 System Requirements .....................................................................................2
3 Hardware Installation.......................................................................................3
4 Software Installation ........................................................................................7
4.1 Keyboard Driver Installation ....................................................................7
4.2 Mouse Driver Installation .........................................................................7
5 Using the Keyboard and Mouse .....................................................................8
5.1 Using the Keyboard.................................................................................8
5.2 Using the Mouse Driver...........................................................................9
6 Troubleshooting.............................................................................................14


1 Introduction
Congratulations on your purchase of this wireless RF keyboard and mouse! This
keyboard and mouse will finally free you of the constraints of your desktop by
providing a wireless connection between your keyboard/mouse and your PC. Pass
around the keyboard or mouse during meetings without having to bother about a
cable blocking your way or write e-mails and surf the Internet from the comfort of
your living room couch!
This keyboard and mouse kit consists of a keyboard, a mouse and a receiver. The
receiver is connected to your PC through a cable with both a keyboard and
mouse connector. The keyboard and mouse can operate freely within a radius of
at least 3.28 feet (1meter) from the receiver, which itself has a maximum range
from your PC of around 3.28 feet (1 meter). Because the keyboard and mouse use
radio frequencies to transmit the wireless signal it has no constrictions on viewing
angles such as with infrared devices like your TV’s remote control, etc.
Besides providing unprecedented freedom of movement when operating the
keyboard or mouse, the kit also offers more extra functionality by introducing
dedicated buttons for often used Internet browser functions as well as Sleep
functions. (Please note: The Internet keys work only under Microsoft Internet
Explorer 5.0 or later version!). And last but not least, this package also provides a
special driver, which provides unique shortcut functions.
In order to enjoy your keyboard and mouse to their full potential we recommended
you read this manual carefully prior to installation.
What's in this package
A wireless keyboard with palmrest
A wireless mouse
A receiver
A driver CD
Batteries (2 pcs of AA; 2 pcs of AAA alkaline batteries)
1

2 System Requirements
Microsoft Windows NT 4.0, Windows 95, Windows 98, Windows ME,
Windows 2000 or Windows XP operating system
Microsoft Internet Explorer 5.0 or later version (for the Internet keys)
CD-ROM drive (for CD and Video operation)
Standard sound card (for CD and Video operation)
The system supporting ACPI or APM II (for power management buttons)
ATX mother board and ATX power supply (for power management buttons)
Please refer to table below for the other system requirements for the features.
Operating System
Function Description
Windows NT 4.0 /
Windows 95 /
Windows 98
Windows ME /
Windows 2000 /
Windows XP
Wireless Functionality
Keyboard Extra
Multimedia Buttons
Keyboard Extra ACPI
Keys
Mouse Driver
Shortcut Function
Keyboard Battery
Low Function
Keyboard LED Light
Function
2
Available immediately
after hardware installation
Requires keyboard driver
installation (see driver CD
for details)
Requires enabling of
system ACPI (Power
Management) function
Requires installation of
mouse driver (see driver
CD for details)
Requires installation of
keyboard driver (see
driver CD for details)
Requires installation of
keyboard driver (see
driver CD for details)
Available immediately after
hardware installation
Requires keyboard driver
installation (see driver CD
for details)
Available immediately after
hardware installation
Requires installation of
mouse driver (see driver
CD for details.)
Requires installation of
keyboard driver (see driver
CD for details)
Requires installation of
keyboard driver (see driver
CD for details)
3 Hardware Installation
Slide Switch Setting
Step 1: Make sure your PC is switched off.
Step 2:
Ta k e t h e receiver and select channel CH1 or CH2 by using the slide switch
on the side of the receiver. (Remember your selection.)
CH2
CH1
Back View of Receiver
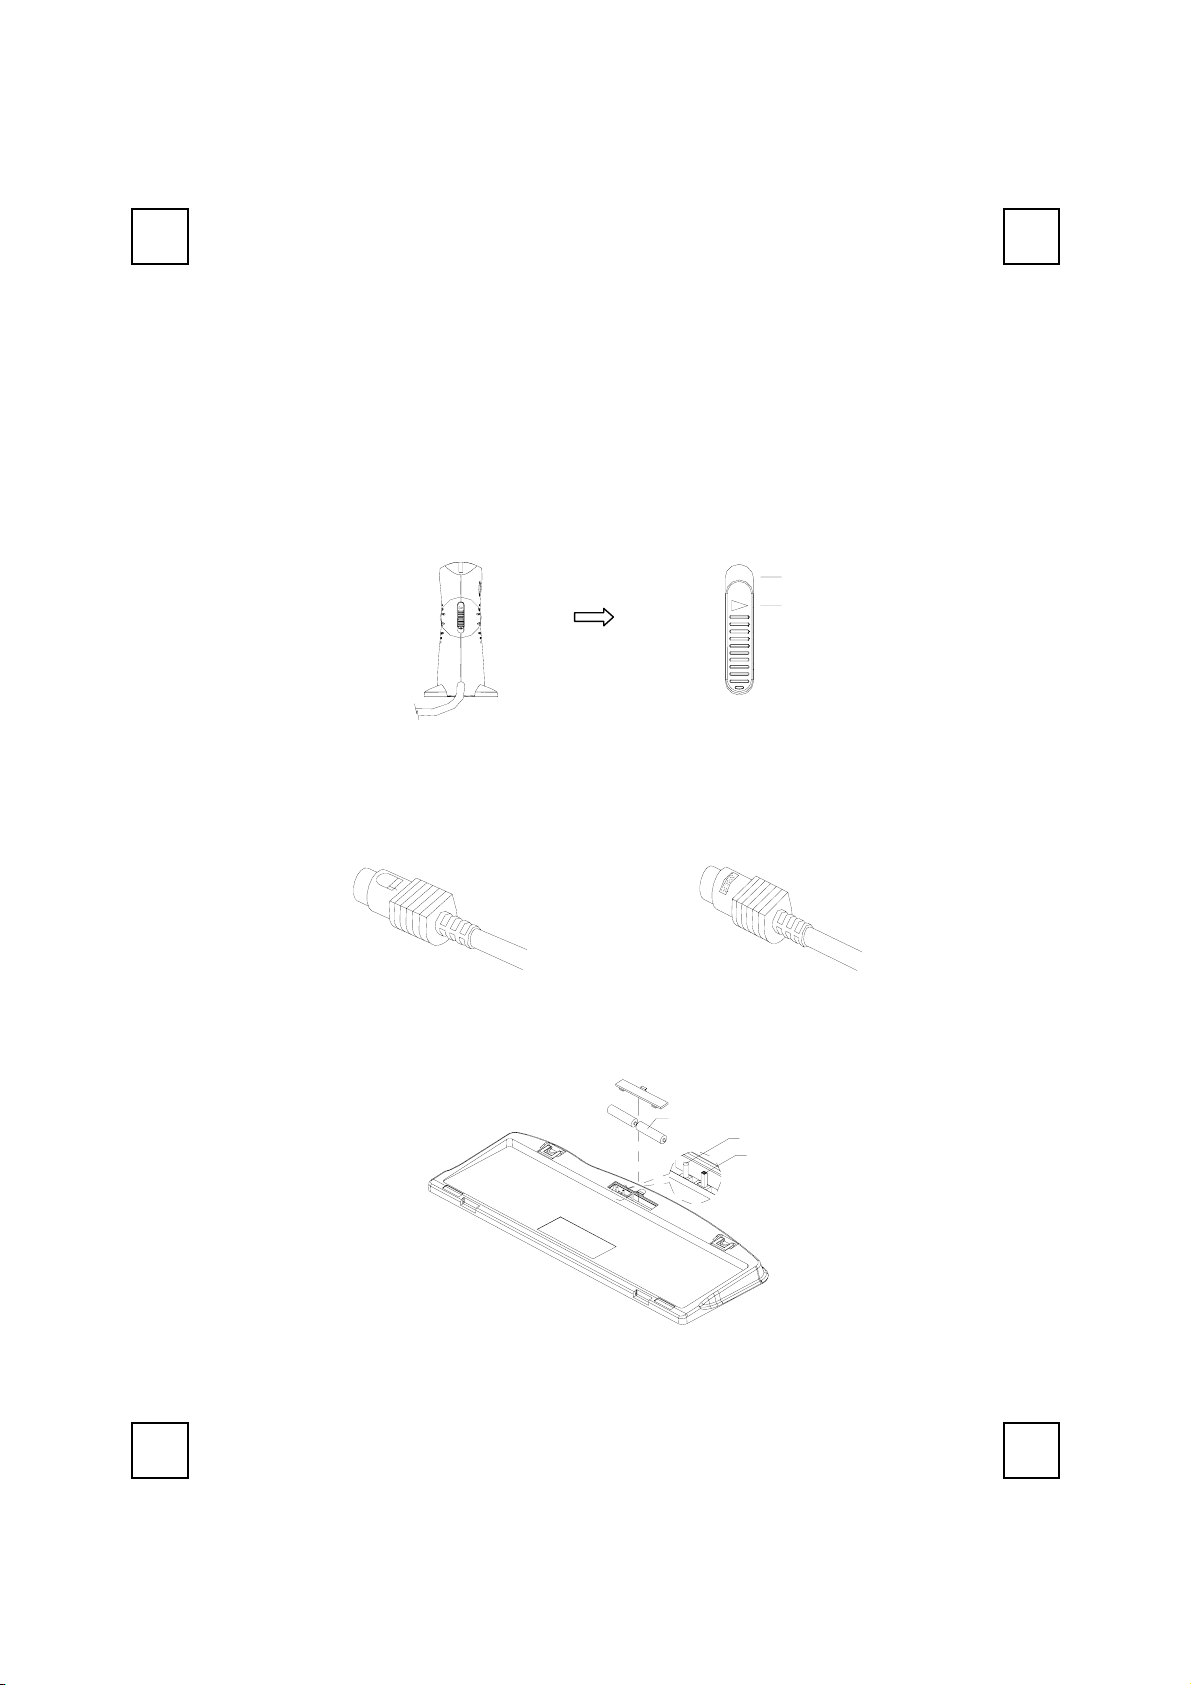
Step 3: Connect the receiver to your PC by plugging in the receiver’s PS/2 mouse
connector into the mouse port of your PC and the PS/2 keyboard
connector into the keyboard port.
Mouse Connector
Step 4: Tak e t h e keyboard and make sure the batteries on the back are installed
correctly. (Follow the polarity signs in the battery compartment.)
Channel Switch of Receiver
Keyboard Connector
(-)
Battery 1.5V 2pcs
(+)
ID Button
Channel Switch
Bottom View of Keyboard
3

Step 5: Use the slide switch on the back of the keyboard to select the same
channel as the one selected in step 2 on the receiver.
Channel Switch & ID Setting
of keyboard
CH1
ID Button
CH2
Step 6: Ta k e t h e mouse and make sure the batteries on the back are installed
correctly. (Follow the polarity signs in the battery compartment.)
ID Button
Bottom View of Mouse
Channel Switch
Step 7: Use the slide switch in the battery compartment of the mouse to select the
same channel as the one selected in step 2 and 5.
(Open the battery cover to find the switch channel setting)
1 CH 2
Channel Switch
Channel Switch of Mouse
Remarks:
1. The keyboard uses 2pcs standard UM-3 (AA) 1.5V alkaline batteries, and the
mouse uses 2pcs UM-4 (AAA) 1.5V alkaline batteries.
2. Battery life is approximately 3-4 months, depending on the intensity of usage.
3. Make sure the receiver is placed in a location relatively free of strong
electromagnetic or transmission sources in order to ensure optimal reception
of the keyboard and mouse signal.
4
 Loading...