

Brother MFC-P2500 Quick Start Manual
Laser Printer P2500
Quick Setup Guide
Read this Setup Guide before you set up the printer.
Before you can use the printer, you must set up the hardware and install the printer and scanner drivers.
Identify the Operating System on your computer (Window® 3.1x,
95/98, NT® 4.0 or Macintosh)
Follow the instructions in this guide for your operating system and cable interface.
©1999 B rother Industries, Ltd. Windows® and Windows® NT are registered trademarks of Microsoft Corporation in the U.S. and other countries. Macintosh and iMac are registered trademarks of Apple Computer, Inc.
All other brand and product names are trademarks or registered trademarks of their respective holders.
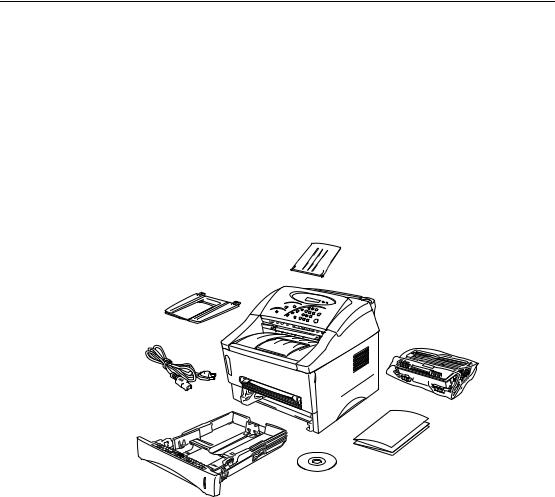
Components
Components may differ from one country to another. Save all packing materials and the printer carton. They should be used when shipping the printer.
Document support
Document support extension
Drum unit assembly
(with toner cartridge included)
AC power cord
Paper cassette
Documents
CD-ROM
Printer
CD-ROM includes : Initial Setup instructions
Printer and Scanner drivers
Fonts
User’s Guide
Instructional Video
Other Software
i
For Windows® users only (Windows®3.1x, 95/98
or NT ®4.0)
You can set up the printer easily by following the Initial Setup instructions on the CD-ROM.
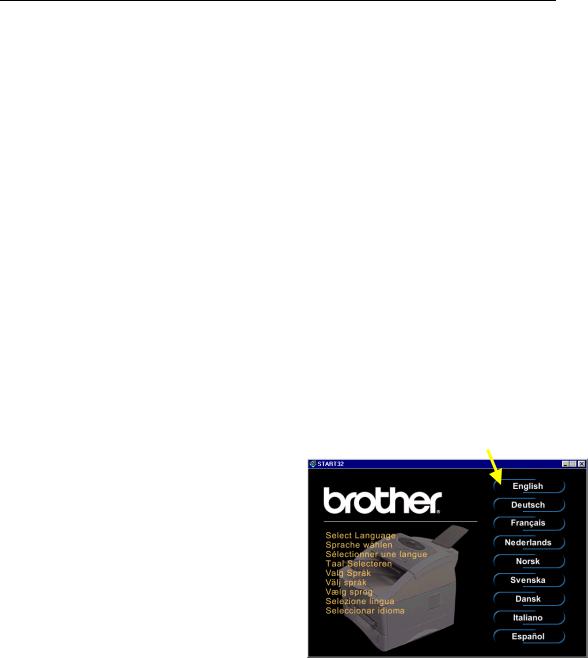
Step 1 Insert the CD-ROM
1.Turn on the power to your PC. Insert the CD-ROM into the CD-ROM drive.
The opening screen will appear automatically in Windows® 95/98/NT®4.0. If the screen does not appear, click Start and choose Run, enter the CD drive letter and type START.EXE.
If you are using Windows® 3.1x, click Run from the File Menu in the Program Manager, enter your CD drive letter and type START.EXE. For example: D:\START.EXE
3. Select the language you want, then follow the instructions on the screen.
ii

Step 2 Initial Setup
1. Click the Initial Setup button.
2.You can view the Initial Setup operations in the Instructional video
3.Click the interface cable you are going to use ( Parallel or USB).
iii
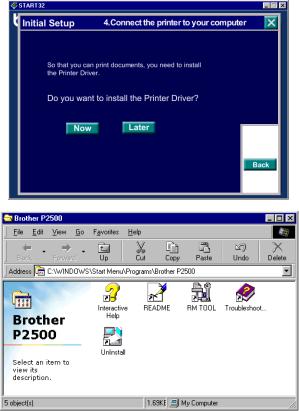
Step 3 Install the printer driver
1.If you click the Now button, you can install the printer and scanner drivers and Fonts immediately.
2.After the printer and scanner drivers have been installed, the P2500 window will appear. Follow the prompts on the screen to complete the installation.
If your printer is connected using a parallel interface cable, the setup is now completed. If you want to connect your printer using a USB interface cable, refer
to ‘For Windows 98 users with USB only’.
iv
 Loading...