

Page 1

MFC 4550/6550MC/7550MC
OP-US-5.0
OPERATIONS
MANUAL
Brother International Corporation
200 Cottontail Lane,
Somerset, NJ 08875-6714, U.S.A.
Brother International Corporation (Canada) Ltd.
Dollard-des-Ormeaux, QC, CANADA H9B 3H6
These machines are made for use in the USA or CANADA only. We
can not recommend using them overseas because it may violate the
Telecommunications Regulations of that country and the power
requirements of your fax machine may not be compatible with the
power available in foreign countries. Using USA or CANADA models
overseas is at your own risk and will void your warranty.
* Manufactured by Brother Industries Ltd. whose quality system
is registered by BSI and JQA.
BSI Certificate of registration No. FM27391
JQA Certificate of registration No. JQA-0340
1 rue Hôtel de Ville,
UF72440013
Printed in Japan
for Fax, Printer, Copier
MFC 4550
MFC 6550MC
MFC 7550MC
CONTENTS
Chapter 1: THE CONTROL PANEL KEYS
Chapter 2: HOW TO USE ON-SCREEN PROGRAMMING
(OSP) AND HELP KEY
Chapter 3: TELEPHONE FUNCTION SETTINGS
Chapter 4: USING THE UNIT AS A TELEPHONE
Chapter 5: SENDING FAXES
Chapter 6: RECEIVING FAXES AND OTHER CALLS
Chapter 7: POLLING
Chapter 8:
Chapter 9: MESSAGE CENTER MODE SETTINGS
(Only for MFC 6550MC/7550MC)
Chapter 10: USING THE MFC AS A PRINTER
Chapter 11: PRINTING REPORTS AND LISTS
Chapter 12: HOW TO USE THE COPY FUNCTION
Chapter 13: REPLACING TONER CARTRIDGE AND DRUM UNIT
Chapter 14: REGULAR MAINTENANCE
Chapter 15: OPTIONAL ACCESSORIES
Chapter 16: TROUBLESHOOTING PROCEDURES
Chapter 17: SPECIFICATIONS
Chapter 18: IMPORTANT INFORMATION
Chapter 19: INDEX
REMOTE FAX OPTIONS (Only for MFC 4550)
Page 2
MFC 4550/6550MC/7550MC
OP-US-5.0
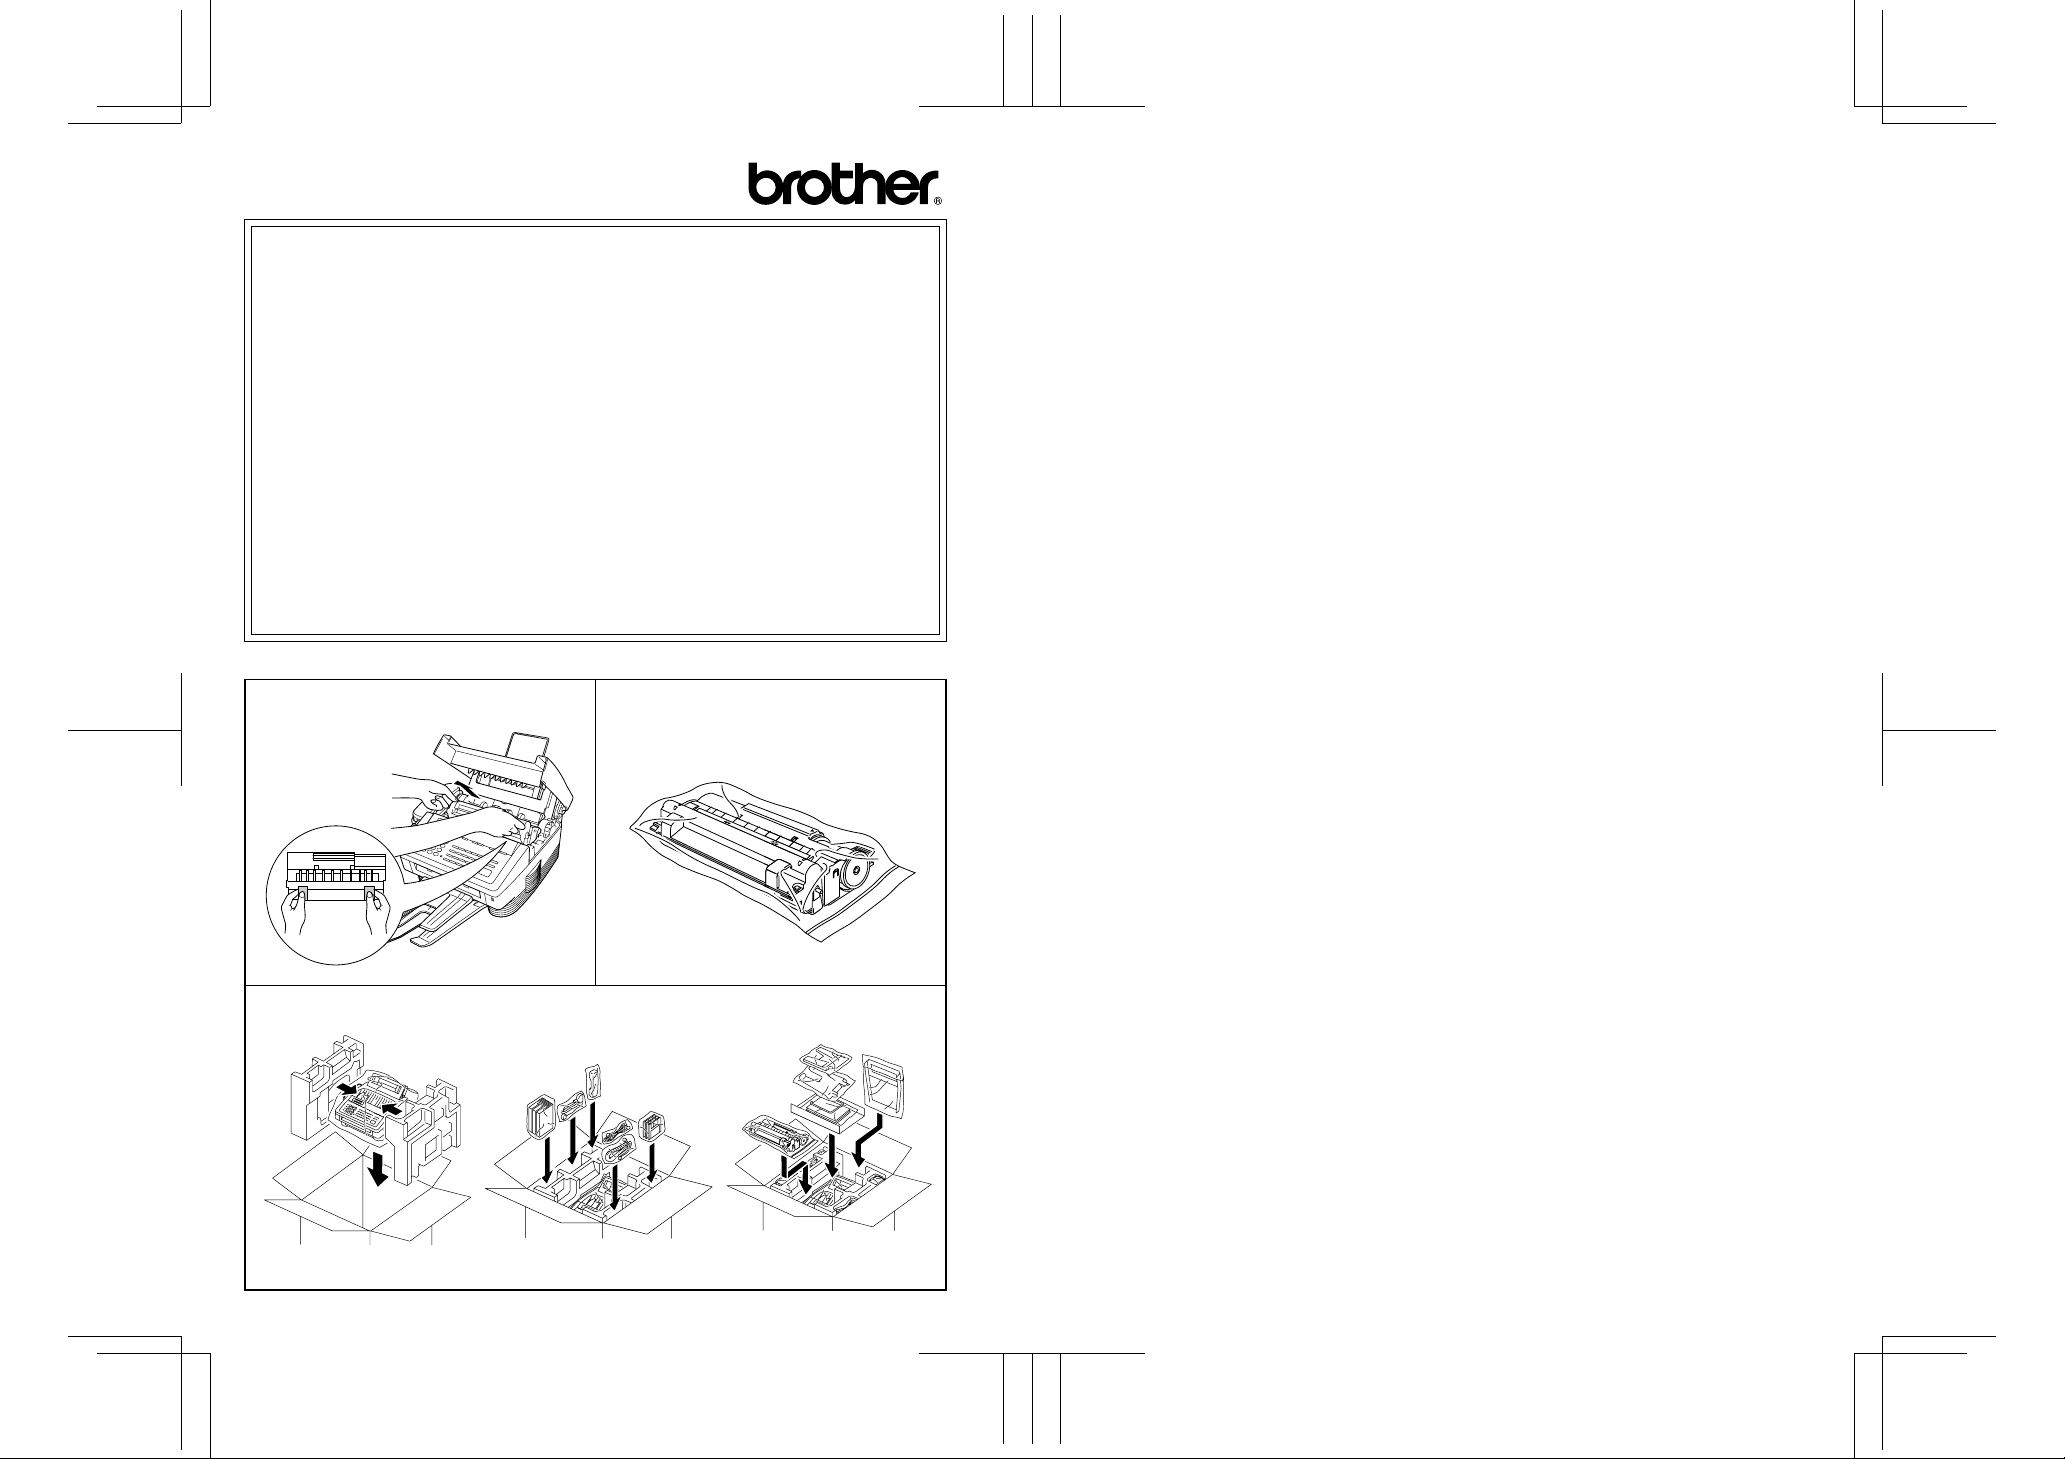
Shipment of the Multi-Function Center (MFC)
If for any reason you must ship your MFC, carefully package the MFC
to avoid any damage during transit. It is recommended that you save
and use the original packaging. The MFC should be adequately insured
with the carrier.
Warning
When shipping the MFC, the DRUM UNIT assembly including the TONER
CARTRIDGE must be removed from the machine (MFC) and placed in
the zip lock bag. Failure to remove it and place it in the zip lock bag
during shipping, will cause severe damage to the machine and will
VOID THE WARRANTY.
1. Remove the drum unit.
3. Repack the Machine (MFC).
2. Place the drum unit in the zip lock
bag.
Page 3
MFC 4550/6550MC/7550MC
OP-US-5.0
Introduction to the Operations Manual
for Fax, Printer, Copier
Have you set up your MFC and prepared your computer for
the printer mode by following the instructions in the Setup
Manual? The Setup Manual will help you prepare your MFC
to use it as a fax, printer and copier.
Your Multi-Function Center 6550MC/7550MC has 6
performance modes in one machine. It is a Fax, Printer,
Copier, Scanner, PC Fax and Message Center.
And your MFC 4550 has 5 performance modes. It is a Fax,
Printer, Copier, Scanner and PC Fax.
After you complete setting up the MFC, see the “Operations
Manual for Fax, Printer, Copier,” for more information about
your MFC, such as functions of the machine and the control
panel. Information about maintenance, troubleshooting and
technical specifications are also available in this manual.
Please keep this manual beside your MFC, so you can access
important information whenever necessary.
See the Multi-Function Link Pro Owner's Manual for
information on how to set up your MFC and Personal Computer
and how to use the Scanner and PC Fax.
Page 4

MFC 4550/6550MC/7550MC
OP-US-5.0
TABLE OF CONTENTS
1 . THE CONTROL PANEL KEYS............... 1-1
TELEPHONE AREA ................................ 1-2
ONE-TOUCH, PRINTER AND COPY AREA .............. 1-3
LCD & USER SETUP AREA .......................... 1-5
MESSAGE CENTER AREA (Only for MFC 6550MC/7550MC) 1-7
2. HOW TO USE ON-SCREEN PROGRAMMING (OSP)
AND HELP KEY .......................... 2-1
• ·· For Your Information
User-friendly Programming ........................... 2 - 1
Using the Function Mode to Access On-screen Programming
(OSP) ........................................... 2 - 1
Alternating Displays for On-screen Programming (OSP) ..... 2 - 2
Function Selection Table ............................. 2 - 2
Using the Help Key ................................. 2 - 9
How to Print a Help List ............................. 2 - 9
How to Enter Text in Function Mode ................... 2-10
How to Enter Special Characters, Symbols and Punctuation
Marks in Function Mode ............................ 2-11
How to Set the Sleep Time ........................... 2-12
3. TELEPHONE FUNCTION SETTINGS ........ 3-1
Setting the Dialing Mode (Tone/Pulse) ................... 3-1
Setting the Date and Time ............................ 3 - 2
Setting the Station I D ............................... 3 - 3
Setting the Beeper Volume Level ....................... 3 - 5
Storing the One-Touch Dial Numbers ................... 3 - 6
Storing the Speed-Dial Numbers ....................... 3 - 7
• When You Wish to Change the Stored One-Touch and
Speed-Dial Numbers (During Step 6 on Page 3-6, 8) ...... 3 -9
• Memory Storage/Temporary Battery Back Up ........... 3 - 9
Setting Up Number Groups for Broadcasting ............. 3 - 9
• Types of Numbers ............................... 3-11
• Chain Dialing .................................. 3-11
4. USING THE UNIT AS A TELEPHONE ........ 4-1
Manual Dialing .................................... 4 - 1
One-Touch Dialing .................................. 4 - 1
Page 5
MFC 4550/6550MC/7550MC
OP-US-5.0
TABLE OF CONTENTS
Speed Dialing ..................................... 4 -1
• Using Hold, Pause, # with the Telephone .............. 4 -1
• On Hook Dialing ................................. 4 - 2
Searching the Telephone Index ........................ 4 - 2
5. SENDING FAXES ......................... 5-1
A) DOCUMENT BASICS ............................ 5-1
The Size of Your Documents ........................ 5 - 1
How to Insert the Document ........................ 5 - 1
The Auto Document Feeder (ADF) ................... 5 - 2
Getting Ready to Send a Fax ....................... 5 - 3
Setting the Resolution .......................... 5 - 3
Setting the Contrast ........................... 5 - 4
B) BASIC FAX TRANSMISSIONS ..................... 5-5
• Sending a Fax ................................ 5 -5
• Talking to the Other Party When Sending a Fax ...... 5 - 5
Sending a Fax Automatically ....................... 5 - 6
Sending a Fax Manually ........................... 5 - 6
Automatic and Manual Redialing .................... 5 - 7
• Optional Settings When You Send a Fax Manually ..... 5 - 7
• Printing Page Headers .......................... 5 - 7
C) ADVANCED FAX TRANSMISSIONS ................. 5-8
Sending a Fax by Using Super Quick-Scan
(Memory Transmission) ........................... 5 - 8
• If You Get a MEMORY FULL Message When Trying to
Send a Fax by Using Super Quick-Scan ............. 5 - 8
Setting the Daily Timer (for Delayed Transmissions) ..... 5 -9
Delayed Transmission ............................ 5-10
Broadcasting .................................. 5-11
• Getting Familiar with the Broadcasting Function .... 5-11
Sending by Multiple Transmissions ................. 5-12
Interrupting the Timer and Polled J ob ............... 5-14
Canceling a Job ................................ 5-15
D) FAX TRANSMISSION OPTIONS ................... 5-16
Setting the Overseas Mode ........................ 5-16
Setting Your MFC for Multiple Resolution
Transmission .................................. 5-17
Sending a Fax with an Electronic Cover Page Message ... 5-18
• Selecting a Comment for the Cover Page ........... 5-19
Page 6
MFC 4550/6550MC/7550MC
OP-US-5.0
Customizing Your Cover Page Comment .............. 5-19
Printing a Sample Cover Page ..................... 5-20
To Always Send a Cover Page ...................... 5-21
• Sending an Automatic Cover Page ................ 5-22
Sending a Fax When the Cover Page Is ON ........... 5-22
Sending a Cover Page Temporarily .................. 5-22
Sending a Fax with Call Reservation
(Talking to the receiving party after fax transmission) . .. 5-24
• Using the Call Reservation Function .............. 5-24
Printing the Call Back Message .................... 5-26
ECM (Error Correction Mode) ...................... 5-26
Error Retransmission ............................ 5-26
Next-FAX Reservation ........................... 5-27
TABLE OF CONTENTS
6. RECEIVING FAXES AND OTHER CALLS ..... 6-1
A) BASIC SETUP TO RECEIVE FAXES ................. 6-1
Selecting an Answer Mode ......................... 6 - 1
Manual Reception (Manual Mode) ................... 6 -2
Automatic Fax Only Reception (Fax Mode) ............. 6 - 2
Setting the Ring Delay ............................ 6 - 2
The F/T Switch (Fax/Telephone Mode) ................ 6 - 3
Recording an F/T Outgoing Message (OGM)
(Only for MFC 6550MC/7550MC) .................... 6 - 4
Setting the F/T Ring Time ......................... 6 - 5
Smoothing ..................................... 6 - 6
Setting the Size of the Recording Paper ............... 6 - 7
Printing a Reduced Size Copy of the Incoming Document .. 6-8
Auto Reduction ............................... 6 - 8
Using Fixed Reduction Ratios .................... 6 - 8
• Selecting the Ratios of Fixed Reduction ............. 6 - 9
• Reception into Memory (Out of Paper Reception) ..... 6-10
Settign the Print Density ......................... 6-10
Toner Save Function ............................. 6-11
Speaker Volume ................................ 6-12
Ring Volume ................................... 6-13
B) REMOTE ACTIVATION .......................... 6-14
What is Remote Activation? ....................... 6-14
• Connecting an External or Extension Telephone ..... 6-14
Using Remote Codes ............................. 6-15
Page 7

MFC 4550/6550MC/7550MC
OP-US-5.0
TABLE OF CONTENTS
Using the Activation Code ...................... 6-15
Using the Deactivation Code .................... 6-15
Making the Remote Codes Easier to Use .............. 6-16
Troubleshooting ................................ 6-16
Changing and Registering Remote Codes ............. 6-16
C) CONNECTING TO A TELEPHONE ANSWERING DEVICE
(TAD) ........................................ 6-17
How to Use an External TAD with the MFC ........... 6-17
• Connecting an External TAD to the MFC ........... 6-18
Flowchart of External TAD Reception ................ 6-19
Hookup....................................... 6-19
Recording the TAD’s Outgoing Message (OGM) ......... 6-20
D) DISTINCTIVE RINGING ......................... 6-20
Distinctive Ringing .............................. 6-20
What Is Distinctive Ringing? .................... 6-20
What Is the Advantage of Using the Distinctive Ringing
Function? .................................. 6-20
Can My MFC Use Distinctive Ringing? ............ 6-20
Can I Change the Setting Later? ................. 6-21
How Will the MFC Treat All Other Numbers? ....... 6-21
The Message Center Answers the Other Phone Number(s)
on the Line: (Only for MFC 6550MC/7550MC) ....... 6-21
External Telephone Answering Device (TAD) Answers
Other Number(s) on the Line: ................... 6-22
Retrieving Faxes from a Remote Site When Using
Distinctive Ringing: (Only for MFC 6550MC/7550MC) . 6-22
How Does the Distinctive Ringing Function Work? ... 6-22
Flowchart of an Incoming Call ................... 6-23
Which Phone Number Should I Register? ........... 6-25
What Must I Do to Set Up Distinctive Ringing? ...... 6-25
Setting the Distinctive Ringing Function ............. 6-25
How to Turn the Distinctive Ringing Function ON or OFF 6-27
E) CALLER ID ................................... 6-27
What is Caller ID? .............................. 6-27
Advantages of Caller ID .......................... 6-27
How Does Caller ID Work? ........................ 6-28
The Caller ID Appears on the Display When Your
Telephone Rings .............................. 6-28
The Caller ID is Stored in Your Machine’s Memory ... 6-28
Scanning through the Caller IDs Stored in the Memory .. 6-28
Page 8

MFC 4550/6550MC/7550MC
OP-US-5.0
• Clearing a Caller ID Stored in Memory ............ 6-29
Printing the Caller ID List ........................ 6-30
F) RECEIVE PASSWORD........................... 6-31
Turning Receive Password On or OFF ............... 6-31
7. POLLING................................ 7 - 1
• What Is Polling? ................................. 7 - 1
• How Does It Work? ............................... 7 -1
• When to Use Polling .............................. 7 - 1
Polling Another Fax Machine (Calling) .................. 7 - 2
Setting Up Polled Waiting (Being Called) ................ 7 - 3
Delayed Polling .................................... 7 - 4
Setting Up Polled Waiting with Super Quick-Scan .......... 7 - 5
Sequential Polling .................................. 7 - 5
TABLE OF CONTENTS
8. REMOTE FAX OPTIONS (Only for MFC 4550) . 8-1
Setting the Fax Storage .............................. 8-1
Paging/Fax Forwarding .............................. 8 - 3
Setting Up Paging (Registering the Paging Number) ........ 8 - 4
Setting Up Fax Forwarding (Registering the Fax
Forwarding Number) ................................ 8 - 6
What Is Remote Control Access? ....................... 8 - 6
Setting the Remote Access Code ....................... 8 - 7
How to Use Remote Access and Control Codes ............. 8 - 8
Remote Fax Retrieval ............................... 8 - 8
• When to Enter the Remote Access Code ............... 8 - 8
Remote Control Commands ........................... 8 - 9
Retrieving the Memory Status List and Fax Messages
Remotely ........................................ 8-10
Changing the Fax Forwarding Number Remotely ......... 8-10
Printing a Fax Message ............................. 8-11
9. MESSAGE CENTER MODE SETTINGS
(Only for MFC 6550MC/7550MC) ............. 9 -1
A) GETTING STARTED ............................. 9-1
What Is the Message Center Mode? .................. 9 - 1
What Do I Want the Message Center to Do? ............ 9 - 1
Flowchart of an Incoming Call ...................... 9 - 3
Page 9

MFC 4550/6550MC/7550MC
OP-US-5.0
TABLE OF CONTENTS
Turning on the Message Center with 3 Basic Steps ....... 9 - 6
Setting the Message Storage ........................ 9 - 6
Recording the MSG CTR Outgoing Message
(MSG CTR OGM) ................................ 9-7
Activating the Message Center Mode ................. 9 -8
B) GETTING YOUR MESSAGES ...................... 9-9
How Will I Know Messages Have Been Received? ........ 9 - 9
• What Happens When the Memory Is Full... .......... 9 - 9
Playing an Incoming Voice Message (ICM) and Recorded
Memo (or Voice Alarm) ........................... 9-10
Backup Printing Option .......................... 9-10
Printing a Fax Message .......................... 9-11
• Erasing and Printing FAX Messages .............. 9-12
Calling Your Message Center for Messages
(See Remote Retrieval) ........................... 9-12
C) ERASING YOUR MESSAGES ..................... 9-13
Erasing Incoming Voice Messages, Fax Messages and
Recorded Memo (or Voice Alarm).................... 9-13
One by One Erasing ........................... 9-13
All in One Erasing ............................ 9-13
D) CHANGING THE OUTGOING MESSAGE ........... 9-14
Playing Your Outgoing Message (OGM) .............. 9-14
Erasing Your Outgoing Message (OGM) .............. 9-15
E) MORE FEATURES.............................. 9-16
Setting the Toll Saver ............................ 9-16
Setting the Maximum Time for Incoming Messages
(ICM MAX. TIME) .............................. 9-17
Playing OGM (Outgoing Message) ON/OFF Setting ..... 9-18
Recording a Conversation ......................... 9-18
Recording a Memo .............................. 9-19
F) PAGING/FAX FORWARDING ..................... 9-20
What Is Paging/Fax Forwarding? ................... 9-20
Setting Up Paging (Registering the Paging Number) .... 9-21
Setting Up Fax Forwarding (Registering the Fax
Forwarding Number) ............................ 9-23
• Memory Backup of Message Center Memory ........ 9-23
Changing the Fax Forwarding Number Remotely ....... 9-24
G) REMOTE RETRIEVAL........................... 9-24
What Is Remote Control Access? .................... 9-24
Setting the Remote Access Code .................... 9-24
Page 10

MFC 4550/6550MC/7550MC
OP-US-5.0
Using the Remote Access Code ..................... 9-25
Remote Control Commands ....................... 9-26
Retrieving the Memory Status List and Fax Messages
Remotely ..................................... 9-27
Changing the Fax Forwarding Number Remotely ....... 9-27
H) VOICE ALARM ................................ 9-28
Voice Alarm ................................... 9-28
Setting the Voice Alarm .......................... 9-28
• Recording Voice Messages for the Voice Alarm ....... 9-29
How Will the Voice Alarm Perform When the Scheduled
Time Arrives… ................................. 9-30
Using the Voice Alarm: Playing Entries, Erasing Entries
One by One, Erasing All at Once .................... 9-31
Remote Control of the Voice Alarm .................. 9-32
TABLE OF CONTENTS
10.
USING THE MFC AS A PRINTER ............ 10-1
Acceptable Paper .................................. 10-1
Control Panel Keys ................................ 10-4
Simultaneous Operation ............................ 10-4
On/OffLine Key ................................... 10-4
FF/Cont Key ..................................... 10-4
Test/Reset K ey.................................... 10-5
Print Priority K e y ................................. 10-5
• Windows® Printing ............................. 10-6
• Remote Printer Console Program for DOS
(Only for MFC 6550MC/7550MC) ................... 10-6
• Popular Printer Emulation Support
(Only for MFC 6550MC/7550MC) ................... 10-6
• Bidirectional Parallel Interface ..................... 10-6
• Enhanced Memory Management ................... 10-6
Multipurpose Sheet Feeder .......................... 10-7
Manual Feed Slot ................................. 10-9
When you load one sheet of paper manually: ............. 10-9
When you load more than one sheet of paper manually: .... 10-9
• Paper Tray ................................... 10-10
Printing the Internal Font List
(Only for MFC 6550MC/7550MC) .....................10-11
Printing the Print Configuration List
(Only for MFC 6550MC/7550MC) .................... 10-12
Page 11
MFC 4550/6550MC/7550MC
OP-US-5.0
TABLE OF CONTENTS
Restoring to the Factory Default Settings
(Only for MFC 6550MC/7550MC) .................... 10-13
Printing PC Data in Hexadecimal
(Only for MFC 6550MC/7550MC) .................... 10-14
11.
PRINTING REPORTS AND LISTS ...........11-1
How to Print Reports and Lists ....................... 11-2
Activity Report Interval ............................. 11-3
Printing the All Dial List ............................ 11-5
Transmission Verification (Xmit) Report ................ 11-6
Memory Status List ................................ 11-8
12.
HOW TO USE THE COPY FUNCTION ........12-1
Making a Single Copy .............................. 12-1
Making Multiple Copies ............................ 12-2
Stacking Multiple Copies ............................ 12-2
• What to Do When You Get a “MEMORY FULL” Message
while Making Copies ............................ 12-3
Sorting Multiple Copies (Only for MFC 6550MC/7550MC)... 12-3
• What to Do When You Get a MEMORY FULL Message while
Sorting Multiple Copies (Only for MFC 6550MC/7550MC) 12-4
Reducing and Enlarging Copies ....................... 12-4
Copying a Photograph .............................. 12-6
13.
REPLACING TONER CARTRIDGE AND DRUM
UNIT.................................... 13-1
Toner Empty Indicator ............................. 13-1
Replacing the Toner Cartridge ........................ 13-1
Replacing the Drum Unit ........................... 13-5
14.
REGULAR MAINTENANCE.................14-1
Regular Maintenance .............................. 14-1
Cleaning the Drum Unit ............................ 14-2
Packing and Shipping the Machine .................... 14-3
Paper Jams ...................................... 14-6
Fixing a Document Jam .......................... 14-6
Fixing a Recording Paper Jam ..................... 14-6
Page 12

MFC 4550/6550MC/7550MC
OP-US-5.0
15.
OPTIONAL ACCESSORIES ................. 15-1
Connecting the Serial Interface Board (RS100M)
(Only for MFC 6550MC/7550MC) ..................... 15-1
Setting the Serial Interface Parameters
(Only for MFC 6550MC/7550MC) ..................... 15-3
Memory Board.................................... 15-6
Optional Memory for the Printer & Fax Operations ..... 15-6
Installing the Optional Memory Board ................. 15-7
TABLE OF CONTENTS
16.
TROUBLESHOOTING PROCEDURES........16-1
Error Messages ................................... 16-2
Other Problems ................................... 16-5
Q & A ...........................................16-11
17.
SPECIFICATIONS ........................17-1
PARALLEL INTERFACE SPECIFICATIONS.......... 17-3
RESIDENT FONTS (Only for 6550MC/7550MC) ....... 17-3
SYMBOL SETS/CHARACTER SETS
(Only for 6550MC/7550MC) ....................... 17-4
18.
IMPORTANT INFORMATION ...............18-1
Standard Telephone and FCC Notices
(Applies only to 120V model) ......................... 18-1
Important Safety Instructions ........................ 18-3
19.
INDEX ..................................19-1
Page 13
MFC 4550/6550MC/7550MC
LCD & User Setting Area
Message Center Area
OP-US-5.0
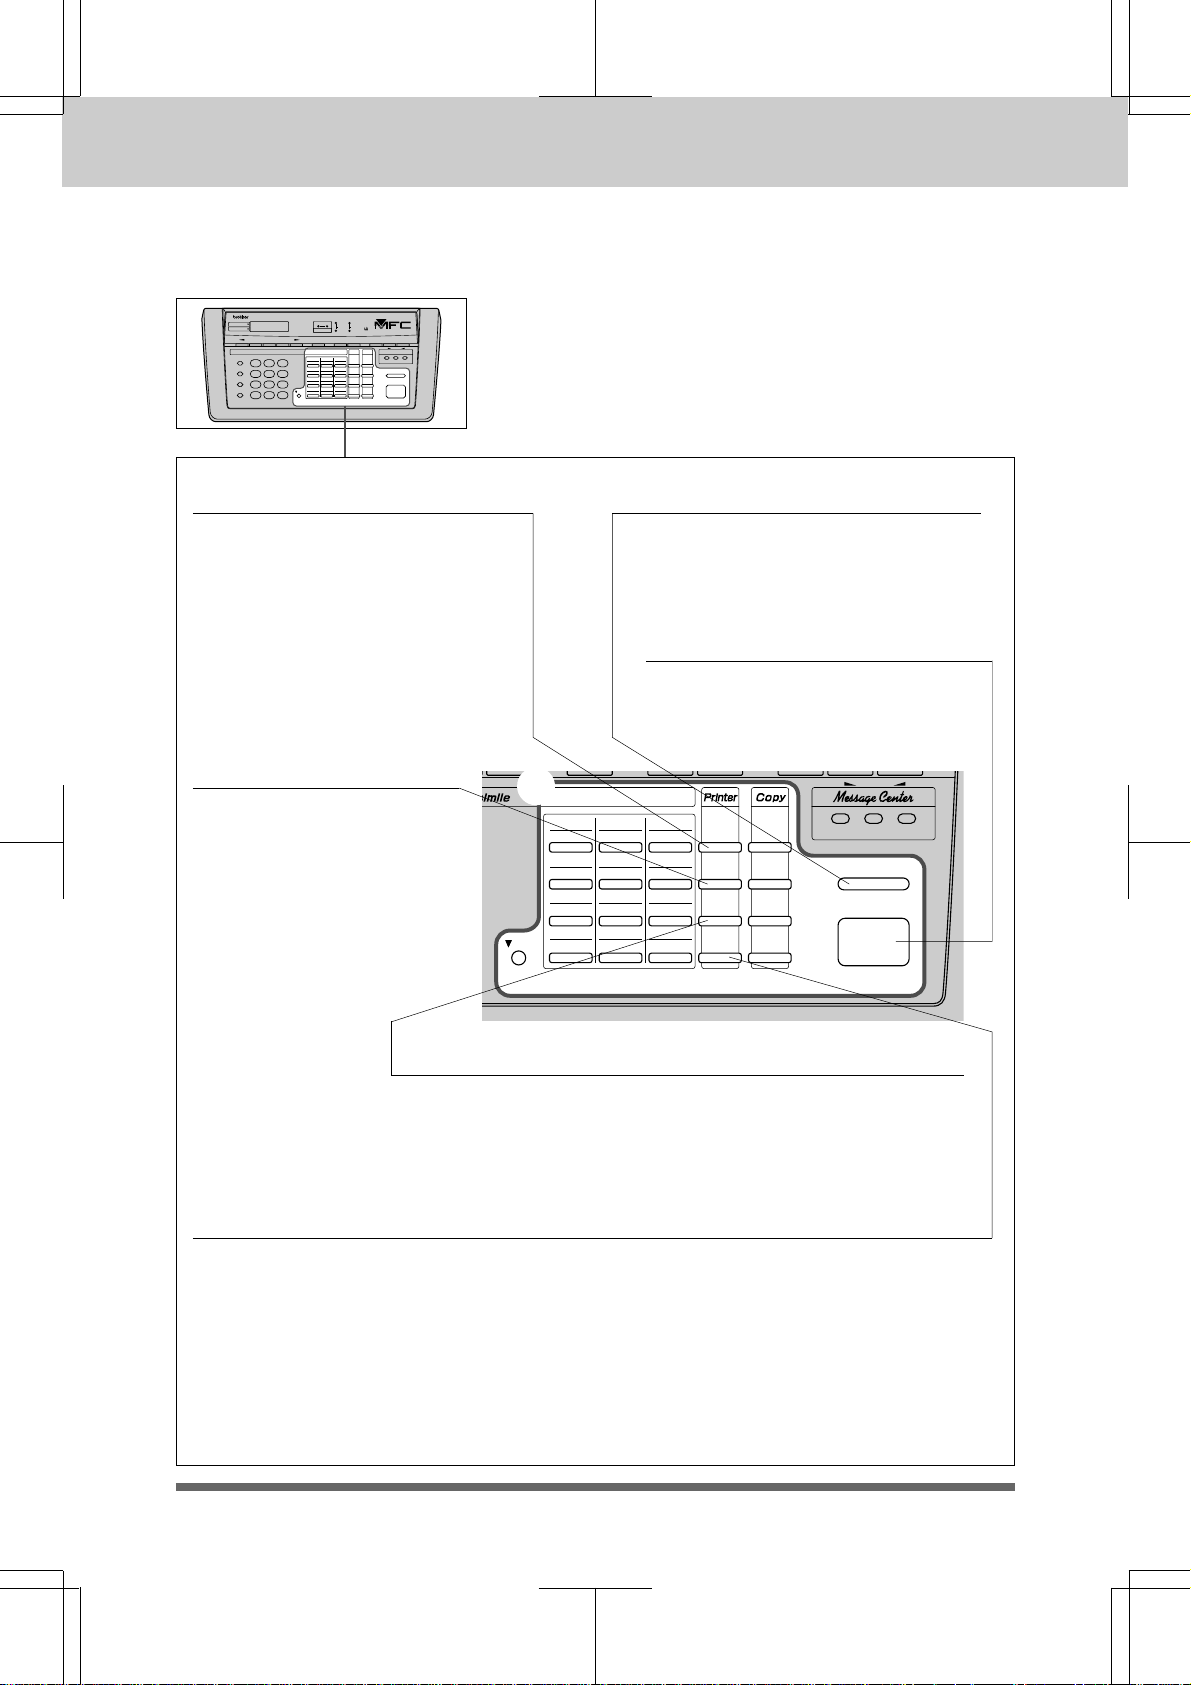
1. THE CONTROL PANEL KEYS
THE CONTROL PANEL KEYS
MFC 4550
C
A
LCD & User Setting Area
MFC 4550
status
status
Function Clear Tel-indexSet Help
Hook
Hold
Redial / Pause
Speed Dial
ABC DEF
1
GHI JKL MNO
4
PQRS TUV WXYZ
7
3
2
5
6
9
8
0
Telephone Area
01 02 03
13 14 15
04 05 06
16 17 18
07 08 09
19 20 21
10 11 12
Shift
22 23 24
B
Fine
Fax
Photo
TAD
S.Fine
F/T
Resolution Mode Coverpage
On/Off
Line
FF/Cont
Test/
Reset
Print
Priority
Photo
Enlarge
Reduce
Copy
FAX
PRINTER COPIER
Super
Q.Scan
SCANNER PC FAX
Stop
Start
One-Touch, Printer and Copy Area
Information
MFC 7550MC (MFC 6550MC panel keys are same as 7550MC)
C
status
status
Hook
1
GHI JKL MNO
Hold
4
Redial / Pause
Speed Dial
A
Telephone Area
PQRS TUV WXYZ
7
D
MFC 7550MC
Voice
Function Clear Tel-indexSet Help
ABC DEF
2
5
8
0
3
6
9
01 02 03
13 14 15
04 05 06
16 17 18
07 08 09
19 20 21
10 11 12
Shift
22 23 24
B
One-Touch, Printer and Copy Area
Fine
Fax
status
Fax
Photo
S.Fine
F/T
Resolution Mode Coverpage
On/Off
Line
FF/Cont
Test/
Reset
Print
Priority
FAX PRINTER COPIER SCANNER PC FAX MESSAGE CENTER
Photo
Enlarge/
Reduce
Copy
Record Erase
Sort
SIX
Super
Q.Scan
IN
ONE
Speaker HL
Play
Stop
Start
1-1
Page 14
MFC 4550/6550MC/7550MC
s
OP-US-5.0
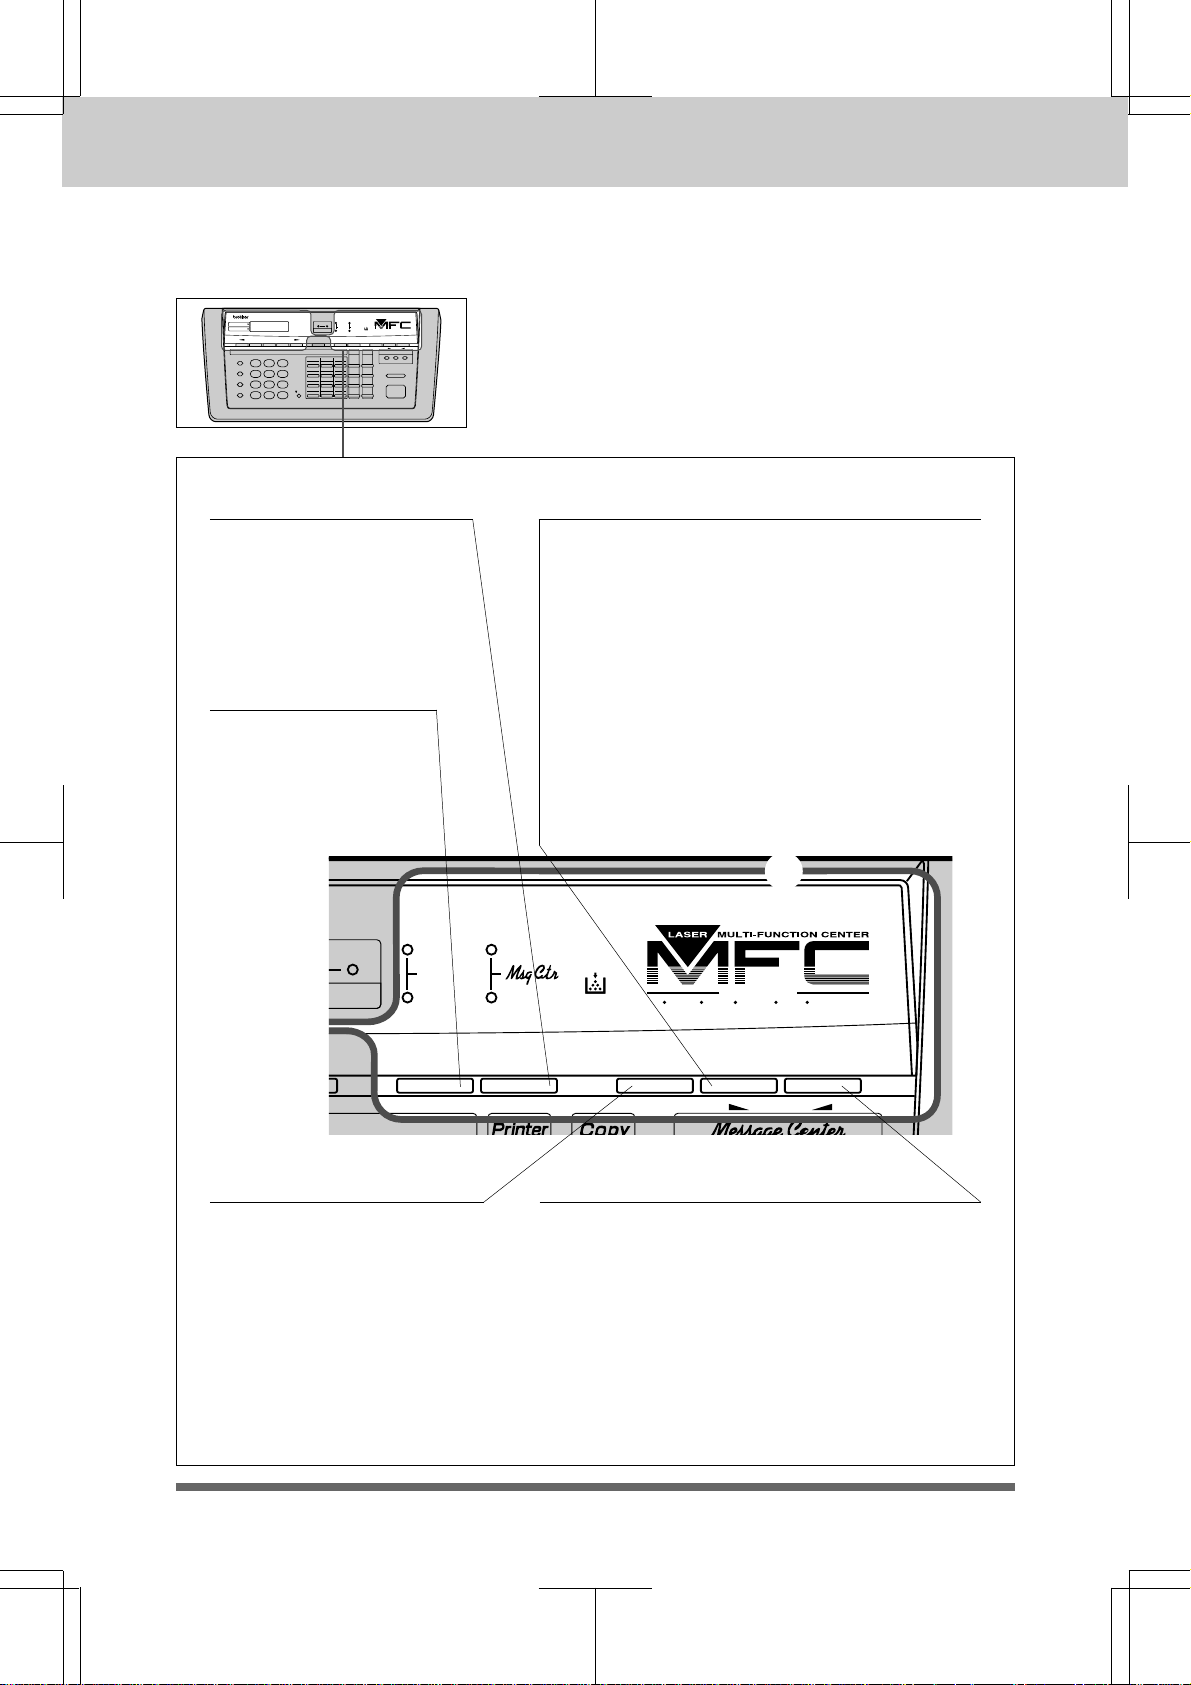
THE CONTROL PANEL KEYS
a TELEPHONE AREA
MFC 7550MC
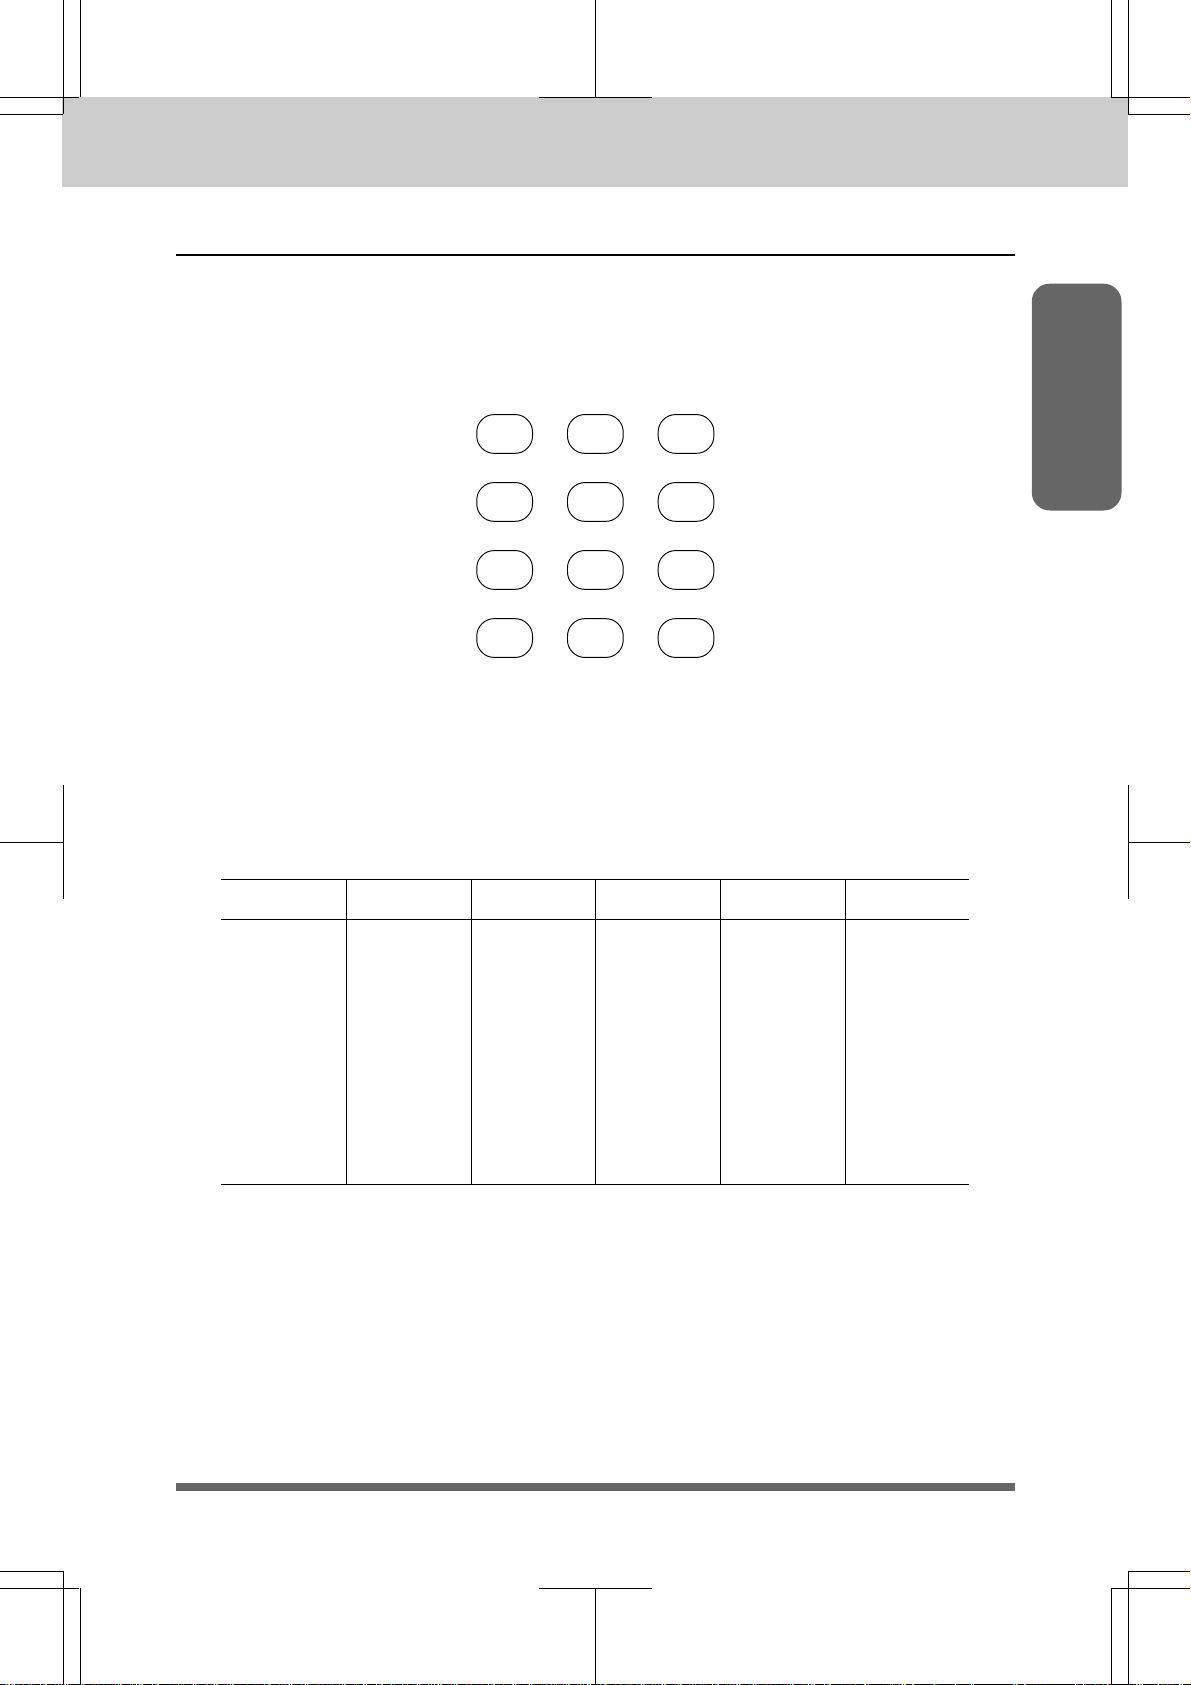
1. Number Keys
These twelve keys are used to
dial phone and fax numbers (see
page 4-1), and also can be used as
an alphanumeric keyboard for
entering information into the
machine. (See page 2-10~12.)
2. Hook
This key lets you dial telephone
and fax numbers without lifting
the handset. (See page 4-1, 2.)
3. Hold
You can use this key to put a call
on hold. (See page 4-1.)
4. Redial/Pause
This key redials the last number
called. (See page 5-7.) This key is
also used to insert a pause in
autodial numbers. (See page 3-7,
4-1.)
5. Speed-Dial
MFC 7550MC
status
status
a
Hook
1
GH I JKL MNO
Hold
4
Redial / Pause
6. Tel-index
PQRS TUV W XYZ
7
Speed Dial
Function Clear Tel-indexSet
AB C DEF
2
5
8
0
Fax
Voice
statu
01 02
Shift
13 14
04 05
16 17
07 08
19 20
10 11
22 23
3
6
9
This key lets you dial previously
stored Speed-Dial phone
numbers by entering a two-digit
number. (See page 3-7~9, 4-1.)
1-2
This key allows you to
alphabetically look up numbers
stored in the dialing memory.
(See page 4-2.)
Page 15
MFC 4550/6550MC/7550MC
OP-US-5.0
b ONE-TOUCH, PRINTER AND COPY AREA
THE CONTROL PANEL KEYS
MFC 7550MC
7. Shift
This key is used to access the “13”
through “24” One -Touch keys. (See
page 3-6.) In the printer mode when
Shift is pressed together with
Reset, it resets and restores the
MFC to the factory default settings.
b
01 02 03
13 14 15
04 05 06
16 17 18
07 08 09
19 20 21
10 11 12
Shift
22 23 24
8. One-Touch Dial Keys
These 12 keys give you instant
access to previously stored phone
numbers.
(See page 3-6~7, 4-1.)
Speaker HL
On/Off
Line
FF/Cont
Test/
Reset
Print
Priority
Photo
Sort
Enlarge/
Reduce
Copy
Record Erase Play
Stop
Start
Information
9. Enlarge/Reduce
(The MFC 4550 has separate keys
for Enlarge and Reduce.) This
Enlarge/Reduce key will reduce
or enlarge copies depending on the
ratio you select: 200%, 150%, 125%,
120%, 100%, 93%, 87%, 75%, and
50%. You can also use the Auto
Reduction function to have the
machine automatically calculate
the reduction ratio that fits the
size of your recording paper. (See
page 12-4~5.)
10. Copy
Press this key to make a
copy. (See page 12-1~6.)
11. Sort
(Only for 6550MC/7550MC)
This key is used to copy original
multiple pages copied in order.
(See page 12-3.)
12. Photo
This key is used to copy
photographs. (See page 12-6.)
1-3
Page 16
MFC 4550/6550MC/7550MC
OP-US-5.0
THE CONTROL PANEL KEYS
b ONE-TOUCH, PRINTER AND COPY AREA
MFC 7550MC
13. On/OffLine
This key is used to turn the
printer online (ready to receive
PC data) and offline (not ready to
receive PC data) alternately.
When the printer is online, the
LCD displays ONLINE. (See
page 10-4.)
16. FF/Cont
When the LCD shows
REMAINED DATA, you
can press this key to print
the data that is in the
memory. Also, it clears
some operation and
machine errors. (See page
10-4~5.)
17. Test/Reset
b
01 02 03
13 14 15
04 05 06
16 17 18
07 08 09
19 20 21
10 11 12
Shift
22 23 24
14. Stop
This key stops a fax, cancels an
operation, or exits from function
mode. (See page 2-2.)
15. Start
Use this key to start an operation,
such as sending a fax. (See page
5-5.)
Speaker HL
On/Off
Line
FF/Cont
Test/
Reset
Print
Priority
Photo
Sort
Enlarge/
Reduce
Copy
Record Erase Play
Stop
Start
This key is used to print a test page. When it is pressed
together with Shift, it clears data from the printer
memory, cancels an error status, and then resets and
restores to the factory default settings. (See page 10-5.)
18. Print Priority
When this key is pressed all faxes will be received into memory without first
printing and can be printed later. This key also increases the memory available
for printing without decreasing memory available for memory transmission and
incoming messages. (See page 10-5.)
1-4
Page 17
MFC 4550/6550MC/7550MC
-
o
OP-US-5.0
c LCD & USER SETUP AREA
THE CONTROL PANEL KEYS
MFC 7550MC
19. Z
This key moves the LCD cursor to
the left. It also allows you to back
up one step when you are in
function mode (see page 2-1) or
Telephone Index (see page 4-2).
(Left Arrow)
21. Liquid Crystal Display
The LCD displays messages that
will help you set up and operate
your machine (On-Screen
Programming), the upper row
shows fax and copy status and the
lower row shows printer and
scanner status. (See page 2-1.)
20. X
This key moves the LCD cursor to
the right, and it also lets you
advance one step when you are in
function mode (see page 2-1) or
Telephone Index (see page 4-2).
(Right Arrow)
22. Clear
This key deletes entered data
or backs up one step in function
mode. (See page 2-2.)
Information
MFC 7550MC
status
status
Set
23. Set
This key is used for storing a
function setting into the machine.
(See page 2-2.)
c
Function Clear Tel
24. Function
This key accesses the function and
programming mode (OSP), so you
can alter various settings. (See
page 2-1.)
V
1-5
Page 18
MFC 4550/6550MC/7550MC
OP-US-5.0
THE CONTROL PANEL KEYS
c LCD & USER SETUP AREA
MFC 7550MC
25. Mode
This key is used to specify
how the machine should
handle incoming calls.
(See page 6-1.)
27. Resolution
This key is used to
set the resolution
requirements when
sending a fax. (See
page 5-3.)
Fax
status
Fine
Photo
S.Fine
Resolution Mode Coverpage
26. Super Q.Scan
This key enables you to scan in your
originals at twice the normal speed, by
storing them in the memory before actual
transmission. (See page 5-8.) When it is
pressed, Broadcasting is available. (See
page 5-11~12.) When Super Q.Scan is
pressed together with Shift, Multi
Transmission is available. (See page
5-12~13.)
Also, you can gradually decrease the speaker
volume for the current call by pressing this
key (Only for MFC 6550MC/7550MC).
c
Fax
SIX
IN
Super
Q.Scan
ONE
Help
F/T
FAX PRINTER COPIER SCANNER PC FAX MESSAGE CENTER
28. Coverpage
This key is used to send a
Cover Page as the first
page of a fax transmission.
(See page 5-22~23.)
1-6
Speaker HL
29. Help
Press this key whenever you want a quick
reference Help List printed. This Help List
will give you information on how to perform
settings for a function, how to register
information, or how to get basic information.
(See page 2-1, 2-9.)
Also, you can gradually increase the speaker
volume for the current call by pressing this
key (Only for MFC 6550MC/7550MC).
Page 19
MFC 4550/6550MC/7550MC
OP-US-5.0
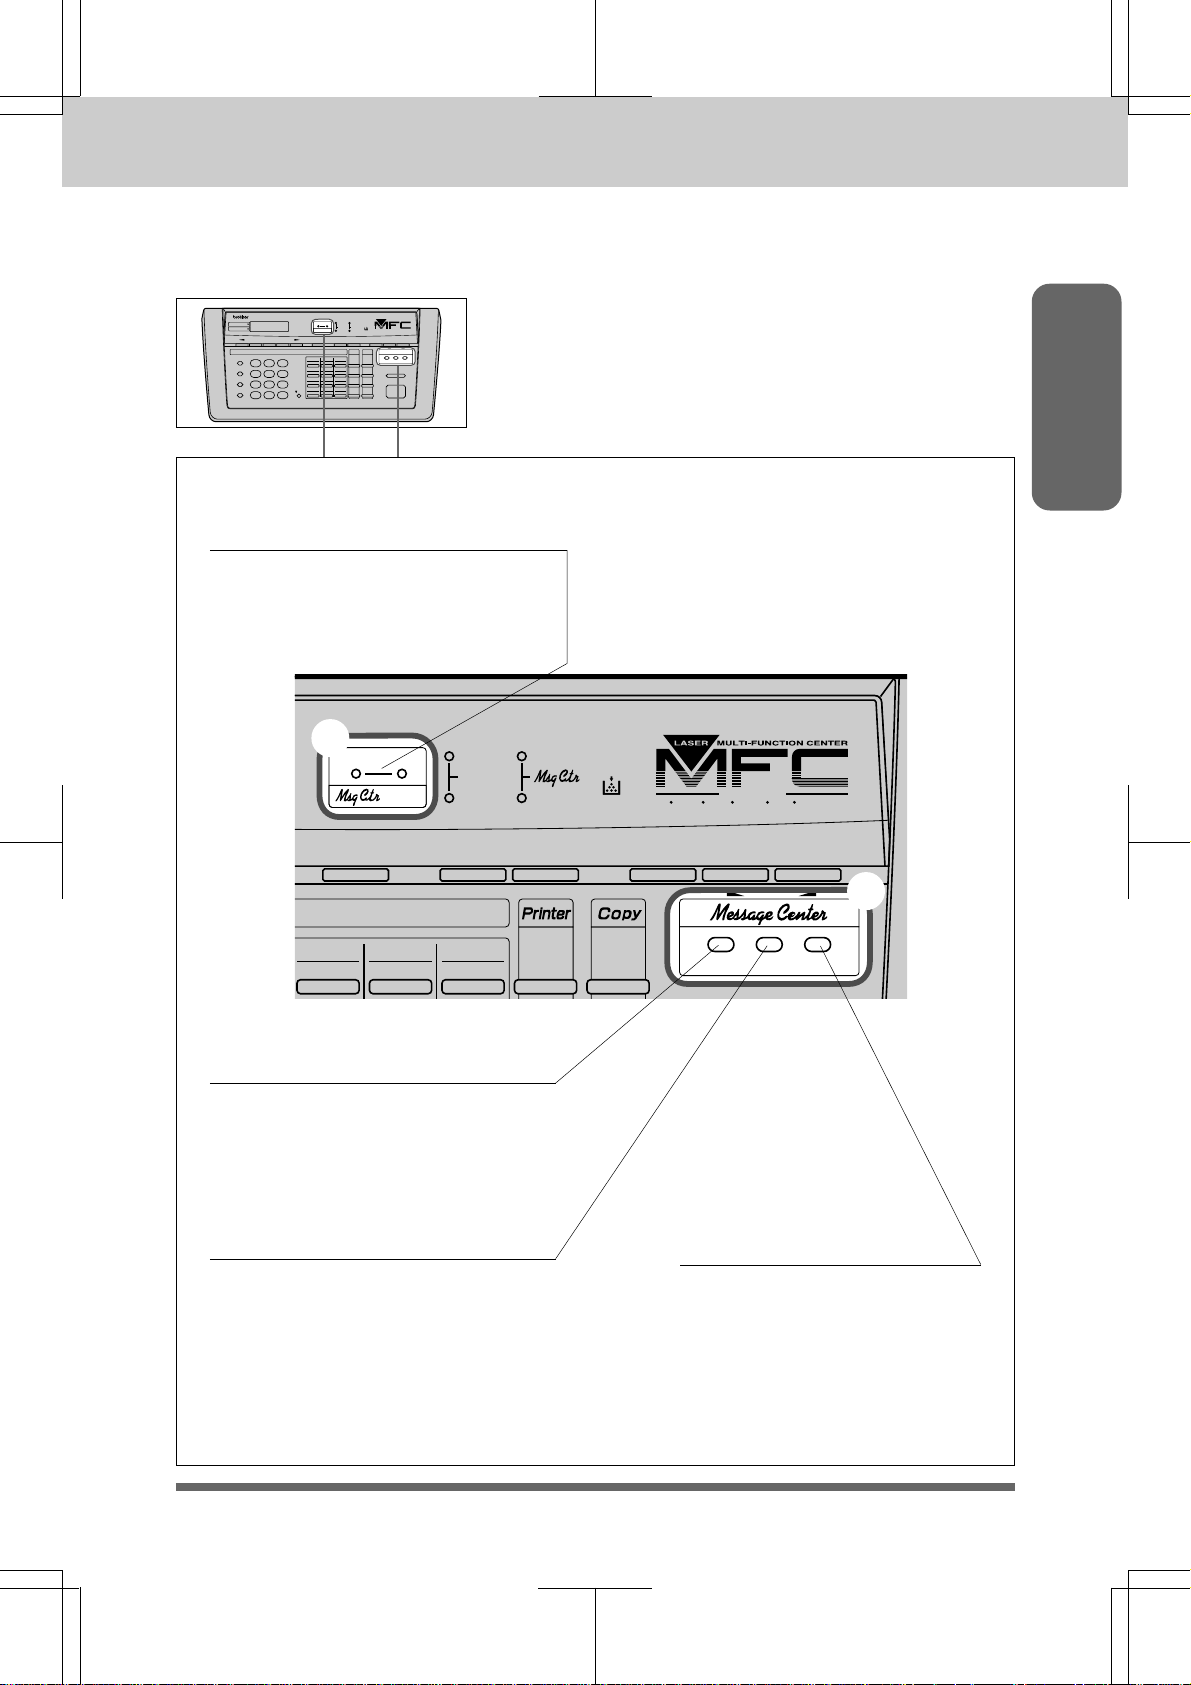
d
MESSAGE CENTER AREA
(Only for MFC 6550MC/7550MC)
THE CONTROL PANEL KEYS
MFC 7550MC
30. Voice and Fax
Indicator Lights
These lights tell you whether voice
or document messages are stored in
the memory. (See page 9-9.)
d
Fax
Voice
status
Tel-index Help
Fine
Photo
S.Fine
Resolution Mode Coverpage
Fax
F/T
SIX
IN
Super
Q.Scan
ONE
FAX PRINTER COPIER SCANNER PC FAX MESSAGE CENTER
Information
01 02 03
13 14 15
On/Off
31. Record
Use this key to record outgoing
voice messages, memo and voice
alarm messages into your MFC.
(See page 9-8, 19, 28~29.)
32. Erase
This key erases voice or fax
messages stored in your fax
machine. (See page 9-13, 15, 31.)
Line
Photo
Speaker HL
Record Erase Play
d
33. Play
Use this key to listen to
incoming voice messages,
outgoing voice messages,
memos and voice alarm
messages stored in your MFC.
(See page 9-10, 13, 14, 31.)
1-7
Page 20
MFC 4550/6550MC/7550MC
OP-US-5.0
HOW TO USE ON-SCREEN PROGRAMMING (OSP) AND HELP KEY
2.
HOW TO USE ON-SCREEN PROGRAMMING (OSP) AND HELP KEY
User-friendly Programming
We have designed your MFC with on-screen programming and a Help key, userfriendly programming that helps you take full advantage of all the functions your
machine has to offer.
Since your MFC programming is done on the LCD, we created step-by-step on-screen
prompt messages to help you program your machine. All you have to do is follow the
prompt instructions as they guide you through the function menu selections and
programming options and settings.
Using the Function Mode to Access On-screen Programming (OSP)
Press Function
ENTER NO. & SET
FAX MENU PRINTER MENU
Press 1 .
*
1.TEMP.SETTINGS
2.CANCEL JOB
3.PRINT REPORTS
1.FAX
2.PRINTER
Press 2 .
1.PRINT OPTIONS
2.RESET PRINTER
(Only for MFC
6550MC/7550MC)
* MFC 4550 does not display “2.PRINTER”.
4.SET AUTO DIAL
NOTE: When you are using the MFC as a
printer, you can not access the Printer
5.USER OPTIONS
6.TEL OPTIONS
Menu functions.
2-1
7.SETUP SYSTEM
8.SETUP MSG CTR
0.INTERRUPT
(In model MFC 4550, Function 8 indicates
REMOTE FAX OPT instead of SETUP MSG
CTR.)
Page 21
MFC 4550/6550MC/7550MC
OP-US-5.0
HOW TO USE ON-SCREEN PROGRAMMING (OSP) AND HELP KEY
You can access the Function mode by pressing Function and waiting for two seconds.
Then select FAX or PRINTER by pressing 1 or 2. (The MFC 4550 does not have this
selection.) (See page 2-1.)
When you enter Function mode, your machine will display a list of Level One
Functions to choose from (see pages 2-3 through 2-8 for these Level One Functions),
as seen on the previous page.
These function options will appear one after the other on the display. You can then
choose one of these options by pressing Set when the option you want appears on the
LCD.
You can also move through the function menu options at a faster rate by pressing X
(right arrow).
the option you want, press Set.
After you select either FAX MENU or PRINTER MENU, you can simply press the
Level One Function number, then press the Level Two Function number associated
with each option (refer to pages 2-3 through 2-8).
(See page 1-5 to locate this key on your Control Panel.) When you find
Information
Helpful Hints
If you want to exit function mode, simply press Stop. If you selected
the wrong menu and want to return to the previous step, press
Clear.
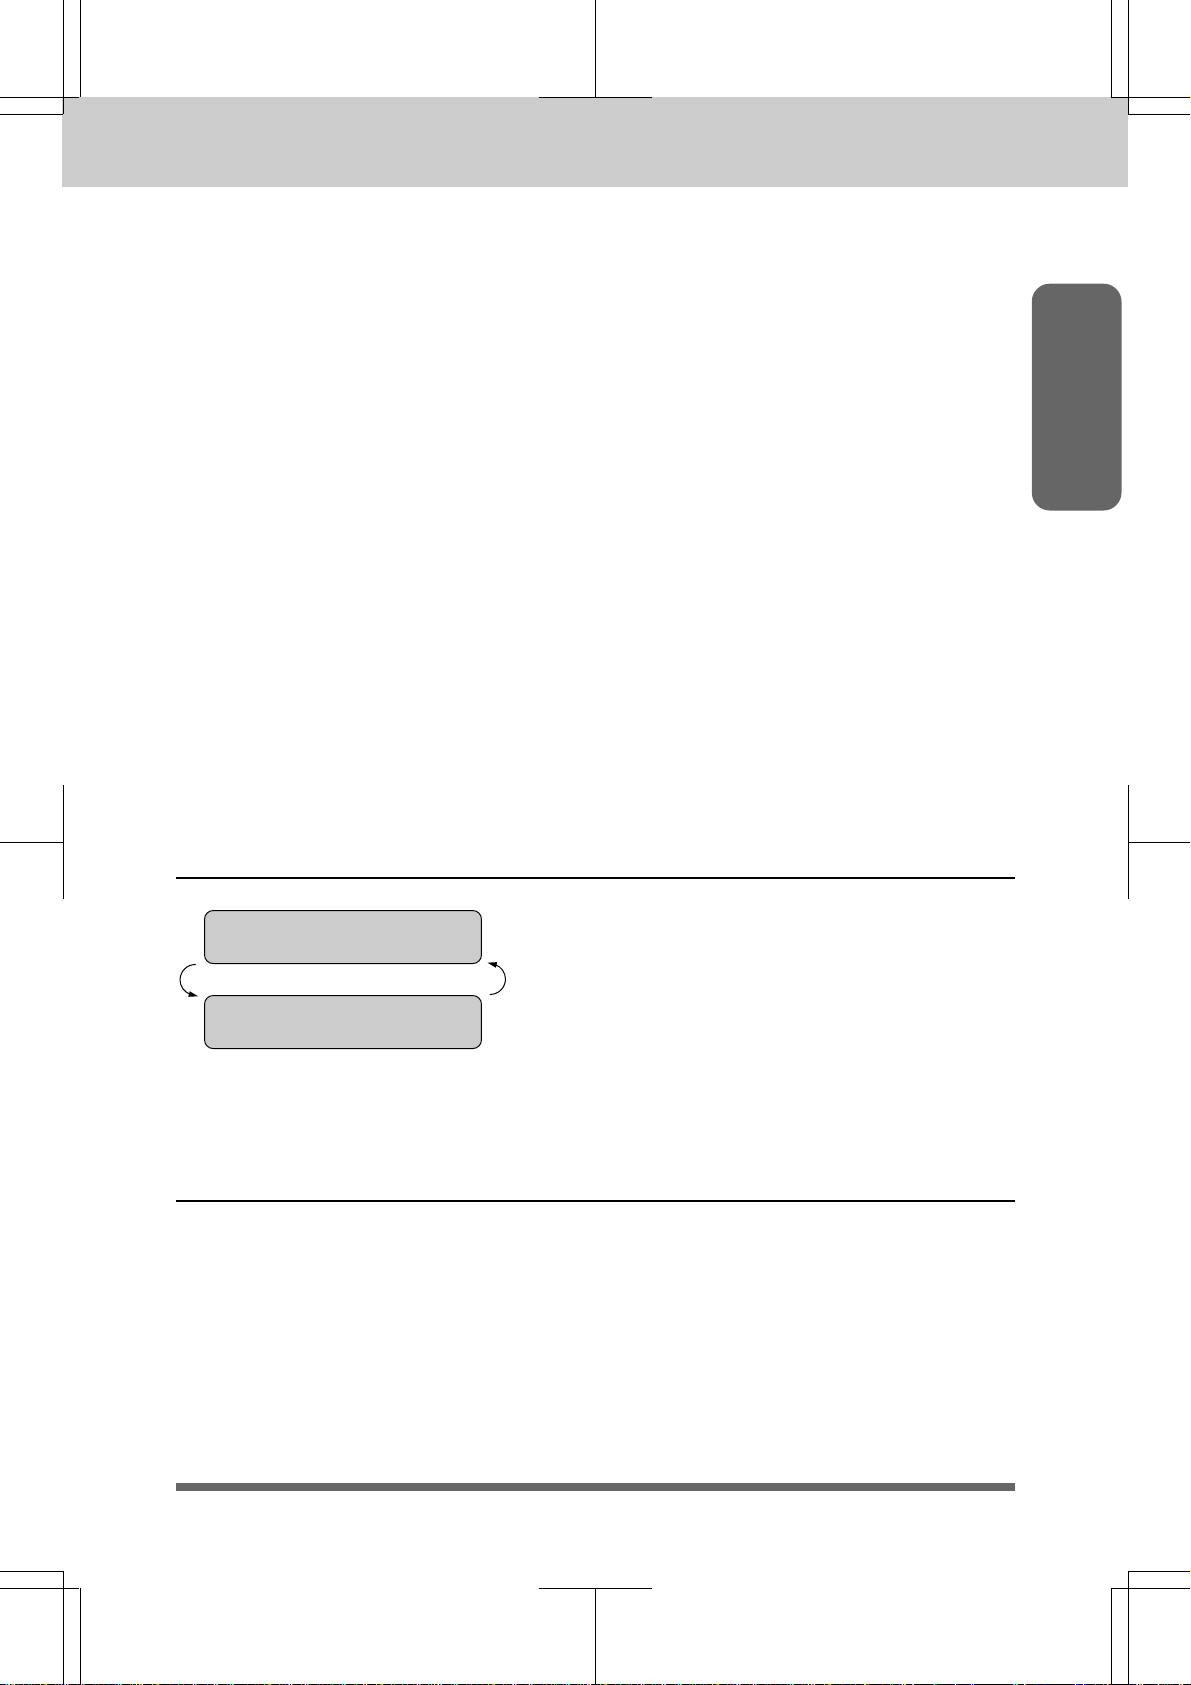
Alternating Displays for On-screen Programming (OSP)
SPEAKER:HIGH
ALTERNATE
SELECT { } & SET
When you see alternating displays, the LCD
will usually alternate between the currently
selected option, and a help message giving
brief instructions on how to proceed. The
example shows the current speaker volume
is high and prompts you to use Z (left
arrow) and X (right arrow) to change the
setting, and then to press Set to store it.
Function Selection Table
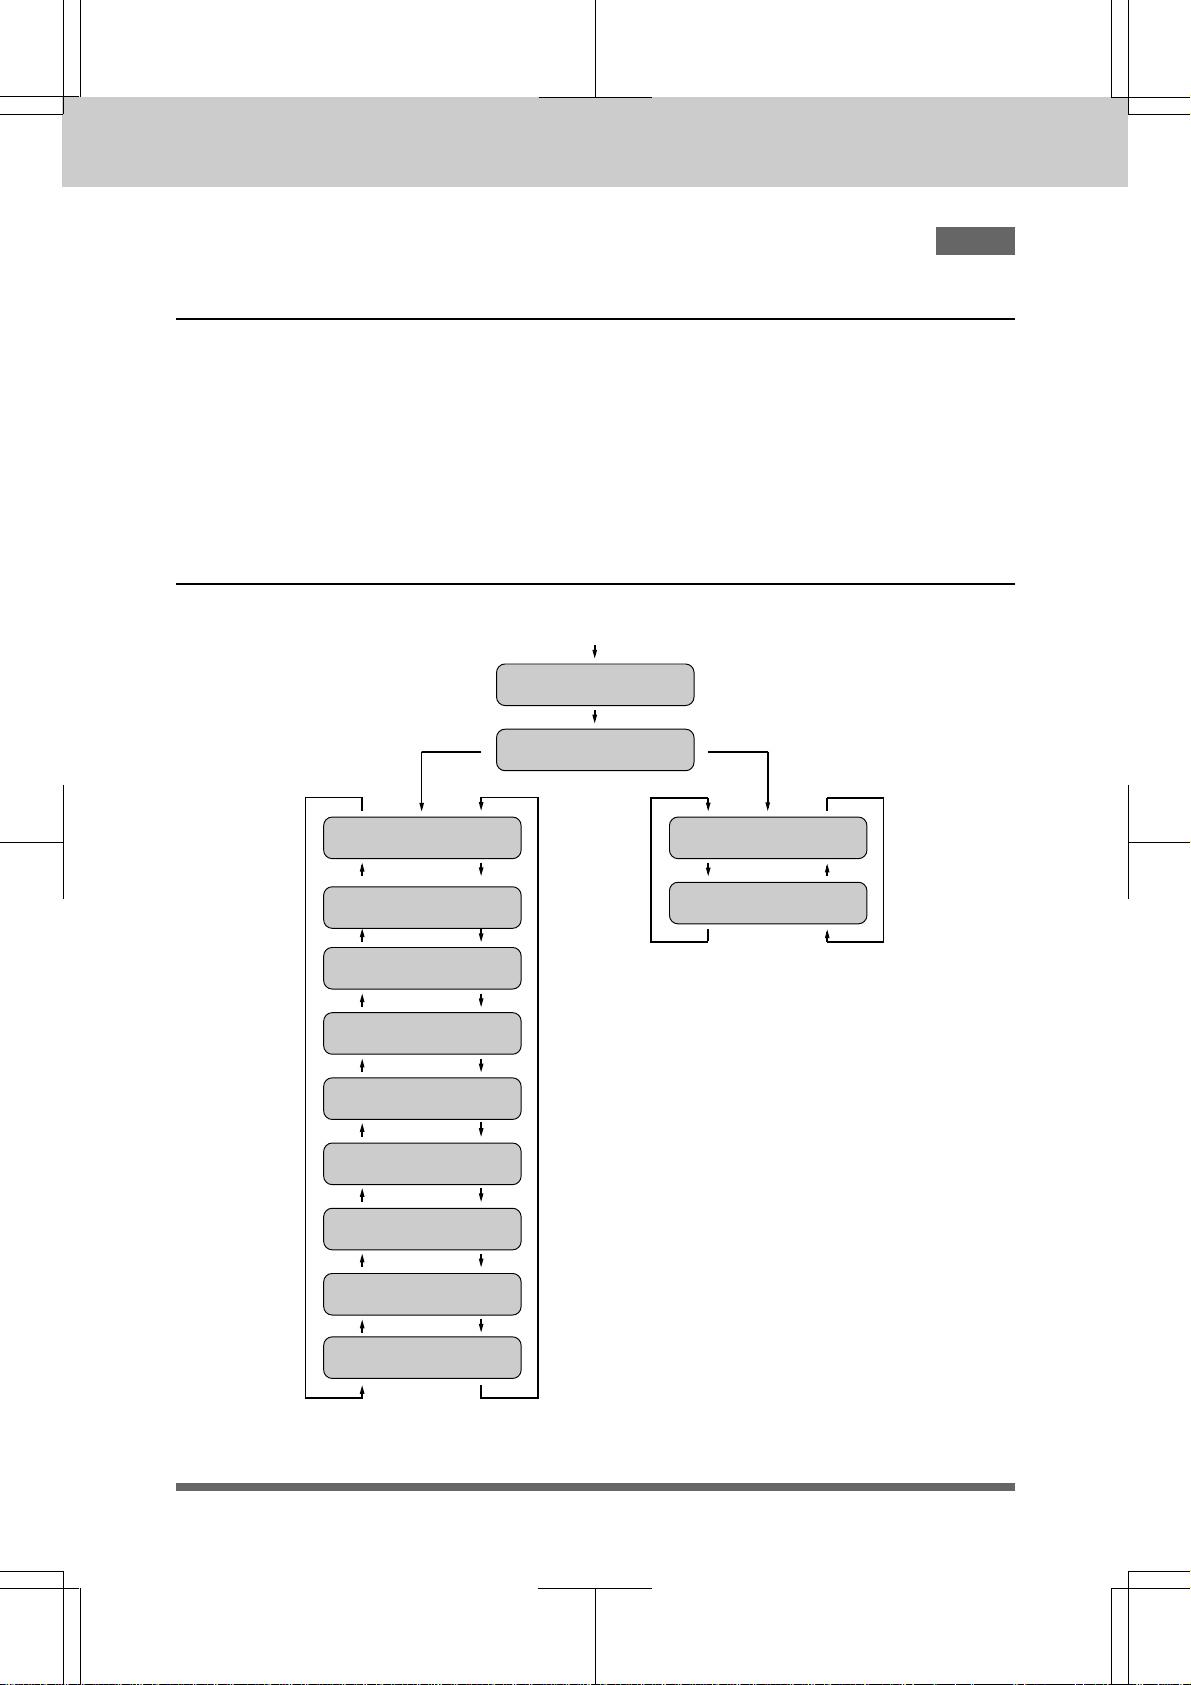
If you have a basic understanding of how to program your MFC, you can perform most
of the programming settings without the Owner’s Manual. To help you understand
the function selections, options, and settings that are found in your MFC programs,
we have the following Function Selection Table.
Read through this table to gain a basic understanding of what your new MultiFunction Center can do, and then the next section will begin instructing you how to
use On-Screen Programming.
2-2
Page 22

MFC 4550/6550MC/7550MC
OP-US-5.0
HOW TO USE ON-SCREEN PROGRAMMING (OSP) AND HELP KEY
<1. FAX MENU FUNCTIONS>
Level one
function
1. TEMP.
(TEMPORARY)
SETTINGS
Level two
function
1. TIMER 5-10~11
2. POLLING
3. CALL
RESERVE
4. CONTRAST
5. RESOLUTION
Use TIMER to send your documents at a
later time.
Polling is the process of retrieving faxes
from another machine. ON/OFF
You can send a fax and then talk to the
recipient using the CALL RESERVE
function. ON/OFF.
There are three types of contrast settings.
Usually the AUTO setting is acceptable.
But if you want to send or copy an
especially light or dark document, you
should change this setting.
AUTO: Default is AUTO. Contrast
S. LIGHT:To send very light documents.
S. DARK: T o send very dark documents.
If you need to send a set of originals at
various resolutions, this function will
allow you to set the required resolution
page by page. (If all documents are the
same resolution, use the Resolution key.
See page 1-6 #27.)
STANDARD/FINE/S. FINE/PHOTO
Explanation of Options
setting always reverts to AUTO
after one transmission.
Factory
setting
OFF
O F F 5-24~25
AUTO 5-4
STAN-
DARD
Page
7-1~6
5-17~18
2. CANCEL
JOB
3. PRINT
REPORTS
4. SET AUTO
DIAL
2-3
6. OVERSEAS
MODE
See page 11-1 for
a list of reports.
1. ONE-TOUCH
DIAL
If you have trouble when sending
overseas, you may want to set OVERSEAS
MODE to ON.
ON/OFF
If you wish to cancel a job that has been
set with the timer, a polled job etc., use
this function.
You can print several different lists and
reports, which are available under
function item 3. PRINT REPORTS.
If you register names and numbers on
One-Touch dial keys, you can dial a
number automatically just by pressing a
One-Touch key. (Max. of 24 locations)
OFF
5-16
5-15
11-1~8
3-6~7
Page 23
MFC 4550/6550MC/7550MC
OP-US-5.0
HOW TO USE ON-SCREEN PROGRAMMING (OSP) AND HELP KEY
Level one
function
4. SET AUTO
DIAL
Level two
function
2. SPEED-DIAL
3. SETUP
GROUPS
1. SMOOTHING
2. BEEPER
3. COVERPG
ON/OFF
Explanation of Options
If you register names and numbers as
Speed-Dial numbers, you can dial a
number automatically just by pressing
Speed-Dial key and a two-digit number.
(Max. of 36 locations for 4550/6550MC,
100 locations for 7550MC)
This is used for setting up a group number
used for broadcasting.
Smoothing enhances the appearance of
incoming faxes.
If you set SMOOTHING to ON, you will
receive messages with the smoothing
enhancement.
ON/OFF
You can adjust the volume of the beeper
with this function.
OFF/LOW/HIGH
If you set COVERPAGE to ON, you can
send your documents with a Cover Page
generated by your machine. When the
COVERPAGE setting is ON, you can
select a Cover Page comment.
ON/OFF
Factory
setting
ON
LOW 3-5
OFF
Page
3-7~8
3-9~10
Information
6-6
5-21
5. USER
OPTIONS
If you set ERROR RE-TRANSMISSION
4. ERROR RE-TX
5. REDUCTION
6. RCD PAPER
7. TONER SAVE O F F 6-11
to ON, the machine automatically resends
the page once an error occurs.
ON/OFF
You can avoid having your incoming data
separated by printing a reduced copy of
the incoming document. The reduction
methods are AUTO or Fixed ratio:
AUTO/100%/93%/87%/75%
You can select one of 3 sizes of recording
paper. The MFC automatically will adjust
the size of the incoming fax document or
original document so that it fits the paper
size you have selected.
LETTER/LEGAL/A4
You can extend the life of the toner by
conserving its use.
ON/OFF
OFF
AUTO
LETTER
5-26~27
6-8~9
6-7
2-4
Page 24

MFC 4550/6550MC/7550MC
OP-US-5.0
HOW TO USE ON-SCREEN PROGRAMMING (OSP) AND HELP KEY
Level one
function
5. USER
OPTIONS
6. TEL
OPTIONS
Level two
function
8. SLEEP MODE
9. PRINT
DENSITY
1. TONE/PULSE
2. RING DELAY
3. SPEAKER
VOLUME
4. F/T RING
TIME
Explanation of Options
This mode reduces the power consumption
when the machine is idle. The time period
before the machine drops into the mode is
user selectable.
You can adjust Print Density with this
function.
There are two different dial types and
you must select the type of signal suitable
for your telephone line.
TONE/PULSE
This is the number of rings before the
machine answers the call when in F/T or
Fax Mode.
0/1/2/3/4 rings
You can adjust the speaker volume with
this function.
OFF/LOW/HIGH
F/T RING TIME sets the time for
simulated ringing in F/T mode.
10/20/30/60 seconds
Factory
setting
00MIN 2-12~13
TONE
2 6-2~3
L O W 6-12
20 6-5~6
Page
6-10
3-1
7. SETUP
SYSTEM
6. DISTINCTIVE
7. CALLER ID
1. DATE/TIME
2. DAILY TIMER
The settings are OFF/LOW/HIGH.
If you have distinctive ringing service
from your phone company, you can use
this function to register the ringing
pattern of your fax number. And if you set
it to ON, you can use the registered
number as a fax number only.
OFF/ON/SET
You can display the last 30 Caller IDs
that are stored in the memory.
If you enter the date and time in 24-hour
format, the LCD will display the date and
time and they will be printed on outgoing
faxes.
If you frequently have delayed jobs, all
for execution at same time each day, you
can program that time. Once you register
it, you do not have to enter that time, just
set Timer Transmission in temporary
settings.
HIGH 6-135. RING VOLUME
OFF
01/01/1997
00:00
00:00 5-9
6-25~27
6-28~29
3-2
2-5
Page 25

MFC 4550/6550MC/7550MC
OP-US-5.0
HOW TO USE ON-SCREEN PROGRAMMING (OSP) AND HELP KEY
Level one
function
7. SETUP
SYSTEM
Level two
function
3. INTERVAL
4. STATION ID
5. REMOTE
CODE
6. SET
COVERPAGE
7. SET
PASSWORD
Explanation of Options
You can select the time interval at which
the activity report is printed.
6/12/24 hours, 2/4/7 days, OFF
You can enter your name or company
name, fax number and telephone number
in STATION ID.
It is printed at the top of each page of
every outgoing fax. It is also printed on
the automatic Cover Page.
If you enter a REMOTE CODE, you can
activate or deactivate the machine from a
remote telephone.
ON/OFF
You can register your own two custom
comments on the Cover Page.
Limits fax receiving to only from a fax
number stored as one of your One-Touch
numbers.
ON/OFF
Factory
setting
OFF
ON
*51 (ACT.)
#51(DEACT.)
OFF
11-3~4
6-16~17
5-19~20
Page
Information
3-3~4
6-31
8. REMOTE
FAX OPT
(Only for
MFC 4550)
8. MF LINK
1. FAX STORAGE
2. FAX FWD/
PAGING
3. REMOTE
ACCESS
4. PRINT FAX
When you use the application software
included into the MFC, you can select if
your PC connected to your MFC will
receive voice and fax messages.
ON/OFF
You can store the incoming fax messages
in the memory. Then you can use the
convenient remote control functions.
ON/OFF
You can choose either PAGING, FAX
FORWARDING or OFF. PAGING ON
will cause the MFC to page you when it
receives a fax message. FAX
FORWARDING ON will cause the MFC
to send any stored faxes that are received
to another predetermined fax number.
OFF/FAX FORWARD/PAGING
You can register the REMOTE ACCESS
CODE (3 digits) allowing you remotely
operate the machine. (Example:
Retrieving an incoming fax message)
You can print incoming faxes that were
stored in memory.
See the
Multi-
ON
OFF 8-1
O F F 8-4~6
15 9* 8-7
Function
Link Pro
Manual
8-11
2-6
Page 26
MFC 4550/6550MC/7550MC
OP-US-5.0
HOW TO USE ON-SCREEN PROGRAMMING (OSP) AND HELP KEY
Level one
function
8. SETUP
MSG CTR
(Only for
MFC
6550MC/
7550MC)
Level two
function
1. MSG
STORAGE
2. BACKUP PRINT
3. FAX FWD/
PAGING
4. REMOTE
ACCESS
5.ICM MAX. TIME
Explanation of Options
You can select the Message Storage of the
machine in Message Center mode.
FAX:ON/OFF, VOICE:ON/EXT/OFF
You can set the machine to print a backup
copy of faxes that are received into the
Message Center memory.
ON/OFF
You can choose either PAGING, FAX
FORWARDING or OFF. PAGING ON
will cause the MFC to page you when it
receives a fax message. FAX
FORWARDING ON will cause the MFC
to send any stored faxes that are received
to another predetermined fax number.
OFF/FAX FORWARD/PAGING
You can register a REMOTE ACCESS ID
(3 digits) allowing you to remotely operate
the MFC. (Example : Retrieving an
incoming fax message.)
This is the maximum length of voice
information in Message Center, Memos
and Voice Alarm recordings.
20/25/30/35/40/45/50/55/60 seconds
Factory
setting
FAX:OFF
VOICE:ON
O N 9-10~11
OFF
159*
9-21~23
9-24~25
30 9-17
Page
9-6~7
2-7
6. OGM
7. PRINT FAX
8. PLAYING OGM
9. TOLL SAVER
The machine has two types of OGM
(Outgoing Messages) for MSG CTR and
FAX/TEL switch. After selecting the
message type, you can play, record or
erase.
You can print incoming faxes that were
stored in MSG CTR memory.
If you set PLAYING OGM to ON, Message
Center OGM, or F/T OGM is replayed if
you change the receiving mode to Message
Center or F/T respectively.
ON/OFF
If you set TOLL SAVER to ON, you can
check if a message was received by the
Ring Delay. Toll Saver overrides the Ring
Delay setting.
ON/OFF
MSG
CTR
OGM
O N 9-18
O F F 9-16
6-4~5,
9-14~15
9-11~12
Page 27
MFC 4550/6550MC/7550MC
OP-US-5.0
HOW TO USE ON-SCREEN PROGRAMMING (OSP) AND HELP KEY
Level one
function
0.
INTERRUPT
Level two
function
Explanation of Options
You can send a fax without canceling the
Timer or Polled Waiting, even if there are
documents in the feeder, by “interrupting”
it.
Factory
setting
Page
5-14
<2. PRINTER MENU FUNCTIONS> (Only for MFC 6550MC/7550MC)
Level one
function
1. PRINT
OPTIONS
2. RESET
PRINTER
Level two
function
1. INTERNAL
FONT
2.
CONFIGURATION
1. FACTORY SET
2. HEX DUMP
MODE
Explanation of Options Page
You can print resident fonts to check and
confirm font types.
Printer settings and status are listed
here.
You can restore factory default settings
and temporary settings for the printer
back to factory default settings.
If you set HEX DUMP MODE, all the PC
data is printed in hexadecimal.
Factory
setting
10-11
10-12
10-13
10-14
Information
2-8
Page 28
MFC 4550/6550MC/7550MC
OP-US-5.0
HOW TO USE ON-SCREEN PROGRAMMING (OSP) AND HELP KEY
Using the Help Key
Press this key to print a quick reference Help List. The Help List will tell you how to
perform settings for a function, how to register information or, how to get basic
information for sending or receiving faxes, copying and printing. When you don’t have
the owner’s manual with you or when you want some information quickly, you can
press Help to get a list of basic operating procedures.
How to Print a Help List
Press Help to get a printout of the Help List. Use it when you need information about
how to register or set one of the functions, how to send or receive faxes, how to copy
or print. You can request a printout whenever the machine meets the following
conditions:
- while the LCD displays the date and time.
- while the machine is timer waiting.
- while the machine is polled/polling waiting.
- while the machine is at level one or two of the function menu.
- while you are using the phone.
- You can not print the Help List while the MFC is printing the data from the
PC.
2-9
Page 29
MFC 4550/6550MC/7550MC
OP-US-5.0
HOW TO USE ON-SCREEN PROGRAMMING (OSP) AND HELP KEY
How to Enter Text in Function Mode
Number keys have three or four letters printed above them. The following keys “0”,
“1”, “#” and “*” have no printed letters.
ABC DEF
123
GHI JKL MNO
456
PQRS TUV WXYZ
789
0#
*
By pressing the appropriate number key the correct number of times, you
can access the character you want. When you are setting certain functions, such
as the Station ID, you will have to enter text into your machine.
Information
K ey once twice three times four times five times
2ABC 2A
3DEF3D
4GH I4G
5JKL5J
6M N O 6M
7PQRS7
8TUV8T
9W X Y Z 9
Let’s say that you want to enter the initials “BR”. Follow the example on the next page.
2-10
Page 30
MFC 4550/6550MC/7550MC
OP-US-5.0
HOW TO USE ON-SCREEN PROGRAMMING (OSP) AND HELP KEY
KEYS TO PRESS
1. Press 2 twice to enter the letter B.
2 . Press 7 three times to enter the letter R.
3 . Press Set.
THE DISPLAY WILL SHOW:
NAME:
ENTER & SET
NAME:B
NAME:BR
FOR YOUR INFORMATION
1. If you want to enter a blank space, press X (right arrow) twice.
2. If you entered a letter incorrectly and want to change it, you can use Z
(left arrow) to move the cursor back. When you reach the letter, you can
enter a new one in it’s place. You can only overwrite letters, not insert
them, so you may have to go back and overwrite a lot of letters if you
forget to enter a letter.
3. If you have to enter a character that is assigned to the same number key
as the previous character, press X (right arrow) to move the cursor to
the right.
How to Enter Special Characters, Symbols and Punctuation Marks
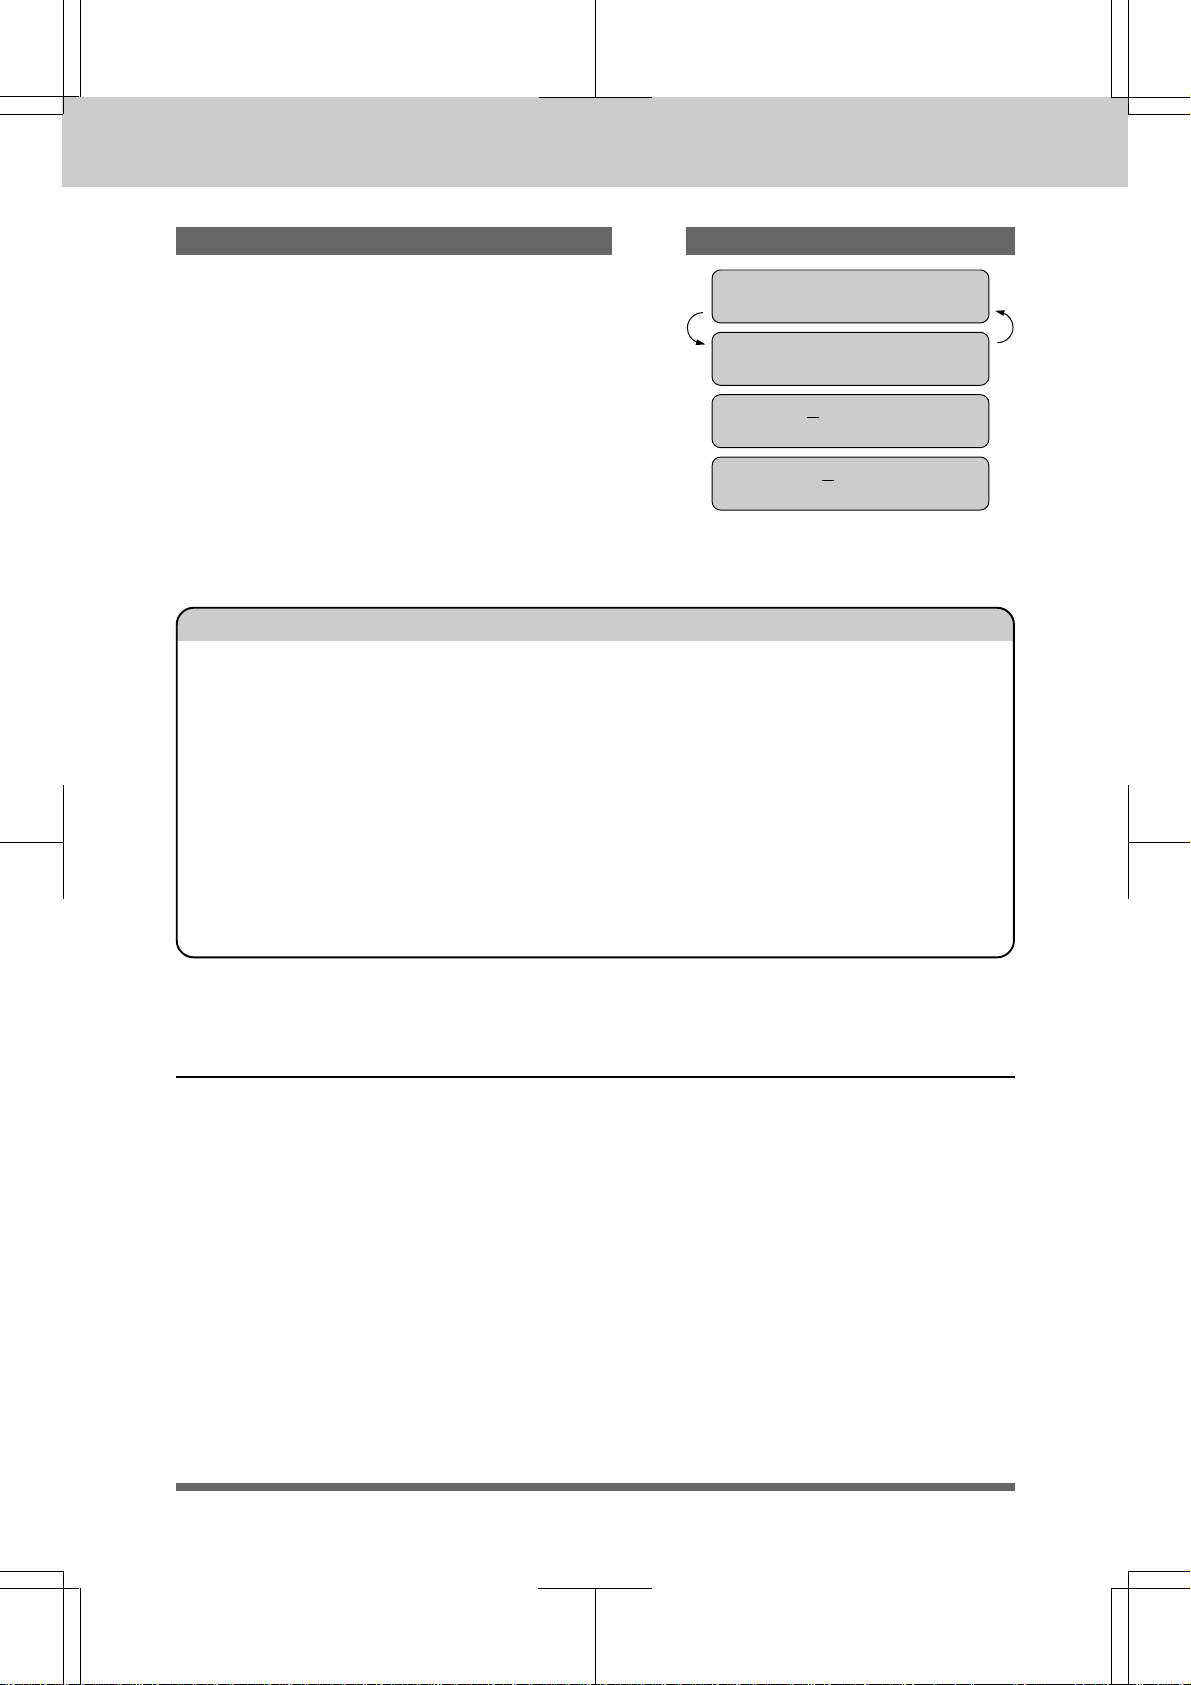
in Function Mode
0 key -------- ДЛЦЬАЗИЙ0
* key ------- (space) !”#$%&’()*+,-./
# key -------- :;<=>?@[]^_
The “0” key contains all the accented characters. The “*” and the “#” key are used for
punctuation marks and symbols. Let's say that you want to enter the Symbol “&”.
Follow the example on the next page.
2-11
Page 31

MFC 4550/6550MC/7550MC
OP-US-5.0
HOW TO USE ON-SCREEN PROGRAMMING (OSP) AND HELP KEY
KEYS TO PRESS
1. Press * to show a list of characters.
2 . Press *, *, *, *, *, * (6 times).
3. Press X (right arrow).
THE DISPLAY WILL SHOW:
NAME:JAMES _
MARK-_!”#$%&’()*
MARK- !”#$%&’()*
NAME:JAMES &_
How to Set the Sleep Time
The sleep mode reduces the power consumption when the MFC is idle. The time
period before the machine drops into sleep mode is user selectable.
You can select the time period before the machine drops into sleep mode from 00 to
99 minutes by using the number keys.
The sleep timer is automatically reset when a fax is received, the MFC starts to copy,
or the MFC is receiving PC data. The factory setting is 0 minute.
Information
Use the following sequence to set the sleep time.
KEYS TO PRESS
1. Press Function.
(The MFC 4550 will skip to Step 4.)
2. Wait for two seconds.
(Only for MFC 6550MC/7550MC)
3. Press 1.
(Only for MFC 6550MC/7550MC)
4. Press 5.
5. Press 8.
(Only for MFC
6550MC/
7550MC)
(Only for MFC
6550MC/
7550MC)
THE DISPLAY WILL SHOW:
01/01/1997 00:00
ONLINE
ENTER NO. & SET
1.FAX
2.PRINTER
1.FAX
5.USER OPTIONS
8.SLEEP MODE
SLEEP TIME:00MIN
2-12
Page 32

MFC 4550/6550MC/7550MC
OP-US-5.0
HOW TO USE ON-SCREEN PROGRAMMING (OSP) AND HELP KEY
6. Enter sleep time (00 to 99) by using
number keys.
Example: 05.
7. Press Set.
8. Press Stop to exit.
SLEEP TIME:05MIN
8.SLEEP MODE
NOTICE
-Sleep Mode is activated when the heater stops. However, the cooling fan
will continue to run until the machine has cooled down. The actual time
before the fan stops will vary depending upon operating conditions.
-It will take approximately 12 to 30 seconds for the machine to warm up
from the sleep mode before you can start printing or copying. The LCD will
show WARMING UP during this time. When it is ready it will automatically
start the last job you have entered.
NOTE: The cooling fan will continue to run until the temperature of the
machine reaches a certain level. Even after the heater stops, the
machine will have to warm up before copying and printing.
2-13
Page 33

MFC 4550/6550MC/7550MC
OP-US-5.0
3. TELEPHONE FUNCTION SETTINGS
TELEPHONE FUNCTION SETTINGS
This chapter is included in both the Setup Manual and this Operations Manual. If you
read the Setup Manual first, you may have completed these function settings already.
There are some settings, such as the date and time, you should set on your machine
before you begin using it. Once entered, these settings will remain in the machine
until you change them. You can begin customizing the settings by pressing Function
on the control panel. This activates the function mode and On-Screen Programming
prompts. You can complete a variety of settings in this mode.
Setting the Dialing Mode (Tone/Pulse)
Your machine supports both tone (multi-frequency) and pulse (rotary) dialing. It is
initially set to TONE, so you do not have to change the setting if you use that kind of
line. If you are using a pulse dial line, you can change the setting to PULSE by
following the steps below:
KEYS TO PRESS
1. Press Function.
(The MFC 4550 will skip to Step 4.)
2. Wait for two seconds.
(Only for MFC 6550MC/7550MC)
3. Press 1.
(Only for MFC 6550MC/7550MC)
(Only for MFC
6550MC/
7550MC)
(Only for MFC
6550MC/
7550MC)
THE DISPLAY WILL SHOW:
01/01/1997 00:00
ONLINE
ENTER NO. & SET
1.FAX
2.PRINTER
1.FAX
Information
4. Press 6.
5. Press 1.
After two seconds you will be prompted to
select pulse or tone.
6. Press Z (left arrow) or X (right arrow)
to find the dialing mode that matches
your telephone line.
Example: PULSE.
7. Press Set.
8. Press Stop to return to the date and time.
6.TEL OPTIONS
1.TONE/PULSE
DIALING:TONE
SELECT { } & SET
DIALING:PULSE
1.TONE/PULSE
3-1
Page 34

MFC 4550/6550MC/7550MC
OP-US-5.0
TELEPHONE FUNCTION SETTINGS
Setting the Date and Time
Your machine shows the date and time on the display and prints it on every fax page
you send. You can set the date and time in function mode.
KEYS TO PRESS
1. Press Function.
(The MFC 4550 will skip to Step 4.)
2. Wait for two seconds.
(Only for MFC 6550MC/7550MC)
3. Press 1.
(Only for MFC 6550MC/7550MC)
4. Press 7.
5. Press 1.
6. Enter the last two digits of the year.
Example: 96.
(Only for MFC
6550MC/
7550MC)
(Only for MFC
6550MC/
7550MC)
THE DISPLAY WILL SHOW:
01/01/1997 00:00
ONLINE
ENTER NO. & SET
1.FAX
2.PRINTER
1.FAX
7.SETUP SYSTEM
1.DATE/TIME
ENTER YEAR:XX
ENTER YEAR:96
ENTER MONTH:XX
7. Enter two digits for the month. (JAN =
01, OCT = 10, etc.)
Example: 09.
8. Enter two digits for the day.
Example: 12.
9. Enter the time in 24-hour format.
Example: 15:25 (3:25 P.M.).
10
. Wait for two seconds.
11
. Press Stop to exit and to view the new
date and time.
3-2
ENTER MONTH:09
ENTER DAY:XX
ENTER DAY:12
ENTER TIME:XX:XX
ENTER TIME:15:25
1.DATE/TIME
09/12/1996 15:25
ONLINE
Page 35

MFC 4550/6550MC/7550MC
OP-US-5.0
Setting the Station ID
TELEPHONE FUNCTION SETTINGS
The Station ID is for identification purposes. Here you can store your name, fax
number, and telephone number. Your machine prints this information on the
electronic Cover Page and every fax page you send.
• The telephone number that you stored above is used only for the Call Back Message
and the Cover Page features.
• If you do not enter a fax number, no additional information can be entered.
• When you want to enter a space, use X (right arrow) . You can back up to type over
mistakes by using the Z (left arrow).
• If Station ID has been programmed, then after Step 5 the name will be displayed
with the prompt “1” to change “2” to exit. Press “1” to change information. Press “2”
to exit from the function.
KEYS TO PRESS
1. Press Function.
THE DISPLAY WILL SHOW:
09/12/1996 15:25
ONLINE
ENTER NO. & SET
(The MFC 4550 will skip to Step 4.)
2. Wait for two seconds.
(Only for MFC 6550MC/7550MC)
3. Press 1.
(Only for MFC 6550MC/7550MC)
(Only for MFC
6550MC/
7550MC)
(Only for MFC
6550MC/
7550MC)
1.FAX
2.PRINTER
1.FAX
Information
4. Press 7.
5. Press 4.
You will be prompted to enter your fax
number.
6. Enter your fax number (up to 20 digits).
Example: 4155554444.
7. Press Set.
You will be prompted to enter your
telephone number.
7.SETUP SYSTEM
4.STATION ID
FAX:
ENTER & SET
FAX:4155554444_
TEL:
ENTER & SET
3-3
Page 36

MFC 4550/6550MC/7550MC
OP-US-5.0
TELEPHONE FUNCTION SETTINGS
8. Enter your telephone number (up to 20
digits).
If your telephone number and fax
number share the same line, enter the
same number again.
Example: 4155554445.
9 . Press Set.
You will be prompted to enter your name
or company’s name.
10
. Enter your name by using the number
keys (up to 20 characters).
Example: BROTHER.
By pressing the appropriate number key
the correct number of times, you can
access the character you want. For
example, press 2 twice to enter B.
Refer to the section “How to Enter Text in
Function Mode” on pages 2-10~12.
TEL:4155554445_
NAME:
ENTER & SET
NAME:BROTHER
11
. Press Set to confirm the entry.
12
. Press Stop to return to the date and time.
4.STATION ID
NOTICE
The Telephone Consumer Protection Act. of 1991 makes it unlawful for any
person to use a computer or electronic device to send any message via a
telephone fax machine unless such messages clearly contain in a margin at
the top or bottom of each transmitted page or on the first page of the
transmission, the date and time it is sent and an identification of the
business or other entity, or other individual sending the message and the
telephone number of the sending machines or such business, other entity,
or individual.
To program this information into your machine, complete the steps on the
previous page.
3-4
Page 37

MFC 4550/6550MC/7550MC
OP-US-5.0
Setting the Beeper Volume Level
TELEPHONE FUNCTION SETTINGS
If the beeper setting is LOW or HIGH, it will “beep” every time you press a key, make
an error, or at the end of sending or receiving a fax.
The initial setting on your machine for the beeper is LOW. If you do not want the
beeper on, select OFF, and if you want it loud, select HIGH.
KEYS TO PRESS
1. Press Function.
THE DISPLAY WILL SHOW:
09/12/1996 15:25
ONLINE
ENTER NO. & SET
(The MFC 4550 will skip to Step 4.)
2. Wait for two seconds.
(Only for MFC 6550MC/7550MC)
3. Press 1.
(Only for MFC 6550MC/7550MC)
4. Press 5.
5. Press 2.
(Only for MFC
6550MC/
7550MC)
(Only for MFC
6550MC/
7550MC)
1.FAX
2.PRINTER
1.FAX
5.USER OPTIONS
2.BEEPER
Information
6. Press Z (left arrow) or X (right arrow)
until you get the setting you want.
Example: OFF.
7. Press Set.
8. Press Stop to return to the date and time.
BEEPER:LOW
SELECT { } & SET
BEEPER:OFF
2.BEEPER
3-5
Page 38

MFC 4550/6550MC/7550MC
OP-US-5.0
TELEPHONE FUNCTION SETTINGS
Storing the One-Touch Dial Numbers
You can dial numbers automatically by storing telephone or fax numbers as OneTouch dial numbers. You can also store names with the numbers so when you call, you
can verify the destination by the name on the display. You can store a maximum of
24 numbers. To access numbers 13 to 24, hold down the Shift key. For example, One-
Touch location “13” is accessed by pressing Shift and the “01” One-Touch key
simultaneously. Here is how to store a telephone number as a One-Touch dial
number:
KEYS TO PRESS
1. Press Function.
(The MFC 4550 will skip to Step 4.)
2. Wait for two seconds.
(Only for MFC 6550MC/7550MC)
3. Press 1.
(Only for MFC 6550MC/7550MC)
4. Press 4.
5. Press 1.
6. Press the One-Touch key where you want
to store a number.
Example: One - Touch 05.
Note: The One-Touch keys are
number keys.
not the
(Only for MFC
6550MC/
7550MC)
(Only for MFC
6550MC/
7550MC)
THE DISPLAY WILL SHOW:
09/12/1996 15:25
ONLINE
ENTER NO. & SET
1.FAX
2.PRINTER
1.FAX
4.SET AUTO DIAL
1.ONE-TOUCH DIAL
SELECT ONE-TOUCH
*05:
ENTER & SET
7. Enter a number
(up to 20 digits).
Example: 14155551212.
8. Press Set.
You then will be prompted to enter the
name or company associated with this
number.
9. Enter the name by using the number
keys
(up to 15 characters).
Example: NJ OFFICE.
(See page 2-10~12.)
3-6
*05:14155551212_
NAME:
ENTER & SET
NAME:NJ OFFICE
Page 39

MFC 4550/6550MC/7550MC
OP-US-5.0
10
. Press Set.
TELEPHONE FUNCTION SETTINGS
TYPE:FAX
SELECT { } & SET
11
. Select the type of number (FAX, TEL,
TYPE:FAX
F/T, CHAIN) by using Z (left arrow) or
X (right arrow) to display the type you
want.
(See For Your Information on page 3-11.)
Example: FAX.
12
. Press Set.
13
. Return to Step 6 to enter another number,
SELECT ONE-TOUCH
or press Stop to return to the date and
time.
Helpful HInts
If you must wait for a dial tone to access an outside line, insert a
pause by pressing the Redial/Pause key. When you press Redial/
Pause, a dash “-” will appear on the display. By storing the numbers
with a pause, you can create a delay of 3.5 seconds.
Storing the Speed-Dial Numbers
When you store a phone or fax number as a Speed-Dial number, you must enter a twodigit number, from 01 to 00 (00=100) for 7550MC and from 01 to 36 for 4550/6550MC
using the number keys. For example, you can not enter “5”. You must enter “05”. You
can store as many as 100 numbers (7550MC), 36 numbers (4550/6550MC) as SpeedDial numbers.
Information
KEYS TO PRESS
1. Press Function.
(The MFC 4550 will skip to Step 4.)
2. Wait for two seconds.
(Only for MFC 6550MC/7550MC)
3. Press 1.
(Only for MFC 6550MC/7550MC)
4. Press 4.
5. Press 2.
(Only for MFC
6550MC/
7550MC)
(Only for MFC
6550MC/
7550MC)
THE DISPLAY WILL SHOW:
09/12/1996 15:25
ONLINE
ENTER NO. & SET
1.FAX
2.PRINTER
1.FAX
4.SET AUTO DIAL
2.SPEED-DIAL
SPEED-DIAL? #_
3-7
Page 40

MFC 4550/6550MC/7550MC
OP-US-5.0
TELEPHONE FUNCTION SETTINGS
6. Use the number keys to enter a two-digit
number.
Example: 05.
7. Enter the number (up to 20 digits).
Example: 5555151.
8. Press Set.
You will be prompted to enter the name
or company associated with this number.
9. Use the number keys to enter a name (up
to 15 characters).
Example: MANCHESTER.
(See page 2-10~12 for entering text.)
10
. Press Set.
SPEED-DIAL? #05
#05:
ENTER & SET
#05:5555151_
NAME:
ENTER & SET
NAME:MANCHESTER
TYPE:FAX
SELECT { } & SET
11
. Select the type of number (FAX, TEL,
F/T, CHAIN) by using Z (left arrow) or
X (right arrow) to display the type you
want.
Example: TEL. (See page 3-11.)
12
. Press Set.
13
. You are ready to enter another Speed-
Dial number. Or press Stop to return to
the date and time.
Helpful Hints
• Print the All Dial List to make sure you have stored the correct
numbers. (See page 11-5.) This list will contain the type of number:
FAX, TEL, F/T, or CHAIN.
• Even if there is a loss of electrical power or you unplug your
machine, the telephone and fax numbers you have stored
will not be lost.
• If your machine is connected to a PBX, you must insert an additional
number before each fax or telephone number to access an outside
line.
TYPE:TEL
SPEED-DIAL? #_
3-8
Page 41

MFC 4550/6550MC/7550MC
OP-US-5.0
FOR YOUR INFORMATION
TELEPHONE FUNCTION SETTINGS
When You Wish to Change the Stored One-Touch and Speed-Dial
Numbers (During Step 6 on Page 3-6, 8)
When you access the function for a One-Touch key or Speed-Dial number,
that is already in use, you will be asked if you wish to change it or to exit
and select a different One-Touch or Speed-Dial number. This display does
not appear if the One-Touch key or Speed-Dial number you chose is not
assigned.
1. Press 1 to assign a new number to the One-Touch key or Speed-Dial
number, or press 2 to choose a different One-Touch key or Speed-Dial
number.
*05:NJ OFFICE
1.CHANGE 2.EXIT
2. If you are replacing an existing number with a new one, the old number
and name will appear in the display. Press Clear to erase the old number
and name. Then, enter the new number and name and press Set to store
the entry.
Information
Memory Storage/Temporary Battery Back Up
Your machine is equipped with an internal battery that will keep the date
and time information for up to two hours after power has been cut off. After
that time, the date and time will be lost and you will have to reenter the
information. All other settings in the SET AUTO DIAL, USER OPTIONS
and SETUP SYSTEM functions (see page 2-3~6) are stored permanently
and will be retained even in the event of a power failure. However, the data
stored in the memory during Out-of-Paper Reception and Memory
Transmission will be lost when the power is disconnected.
Setting Up Number Groups for Broadcasting
Number Groups allow you to send the same fax message to many fax numbers by
pressing only one One-Touch key. (This is called Broadcasting.) You must store each
fax number first as a One-Touch or Speed-Dial number. Then you can combine the
stored numbers into a Group.
You can have up to 6 smaller Groups (each group uses a One-Touch key) or you can
assign up to 123 numbers (MFC 7550MC), and 59 numbers (MFC 4550/6550MC) if
you want one large Group. You can use the same stored number in several groups.
Groups can have a name up to 15 characters long.
3-9
Page 42

MFC 4550/6550MC/7550MC
OP-US-5.0
TELEPHONE FUNCTION SETTINGS
KEYS TO PRESS
1. Press Function.
(The MFC 4550 will skip to Step 4.)
2. Wait for two seconds.
(Only for MFC 6550MC/7550MC)
3. Press 1.
(Only for MFC 6550MC/7550MC)
4. Press 4 .
5. Press 3 .
6. Press the One-Touch key where you wish
to store the number.
Example: select “One-Touch 02” as a
group.
(Only for MFC
6550MC/
7550MC)
(Only for MFC
6550MC/
7550MC)
THE DISPLAY WILL SHOW:
09/12/1996 15:25
ONLINE
ENTER NO. & SET
1.FAX
2.PRINTER
1.FAX
4.SET AUTO DIAL
3.SETUP GROUPS
SELECT ONE-TOUCH
SETUP GROUP:G0
ENTER & SET
7. After two seconds, enter a numbere for
the group, using the number keys.
Example: 1.
8. Enter the One-Touch or Speed-Dial
numbers in this group.
Example: #03, #05, *02.
(Note: Press the Speed-Dial key and
number keys for Speed-Dial numbers,
and the One-Touch keys for One-Touch
numbers.)
9. Press Set.
10
. Enter the group’s name.
Example: ALL BROTHER.
SETUP GROUP:G01
G01:
ENTER & SET
G01:#03#05*02_
NAME:
ENTER & SET
NAME:ALL BROTHER
3-10
Page 43

MFC 4550/6550MC/7550MC
OP-US-5.0
11
. Press Set.
TELEPHONE FUNCTION SETTINGS
3.SETUP GROUPS
12
. Press Stop to return to the date and
time.
Helpful Hints
See page 5-11 for Broadcasting procedure. You can print a list of all
One-Touch numbers and Speed-Dial numbers. Group numbers will
be listed under One-Touch numbers. (See page 11-5.)
FOR YOUR INFORMATION
Types of Numbers
When you store a number as a One-Touch or as a Speed-Dial number, you
have a choice of choosing the type of number. There are 4 options:
1. FAX (A fax number).
2. TEL (A telephone number).
3. F/T (Both a fax number and a telephone number)
4. CHAIN (A number, usually an access code, for chain dialing).
Chain Dialing
Chain dialing is used to store a very long dialing sequence. You can spread
the number over two or more keys if you register the first key(s) in the
sequence as type “Chain”. Chain tells the system that the dialing
sequence is not completed and that there is more to follow. The last
key in the sequence must be any other dial type (either FAX, TEL or F/T).
You can use any combination of One-Touch, Speed-Dial and manually
dialed numbers in a chain.
*:One-Touch
#:Speed Dial
Information
If you must wait for another dial tone at any point in the dialing sequence,
store a pause at that point in the number by pressing the Pause/Redial key.
(If you need a pause that is longer than 3.5 seconds, call our Fax Diagnostic
Center at 1-800-284-4329 (USA), 1-800-853-6660 (CANADA) for assistance.)
Only one pause can be stored in each One-Touch and Speed-Dial
number.
When you are ready to dial the chain number, simply press the keys one
after the other in sequence and then press Start key.
Chain dialing makes using access codes easy. Sometimes you may want to
choose from among several long-distance carriers when you make a call;
rates may vary depending upon the time and destination. To take advantage
of low rates, you can store the access code of a long-distance carrier as you
would a regular number and register it as a “chain” number. Then to dial,
press this (access code) number followed by the regular number and Start
key.
You can set up chain dialing for phone/credit card numbers, the same way.
However, when using chain dialing, do
because your credit card number will be on it.
NOT send a cover page
3-11
Page 44

MFC 4550/6550MC/7550MC
OP-US-5.0
USING THE UNIT AS A TELEPHONE
4. USING THE UNIT AS A TELEPHONE
Your machine can be used to make regular telephone calls. You can dial numbers
manually, by pressing the number keys, or by using One-Touch or Speed-Dialing.
Manual Dialing
1. Pick up the handset, or press Hook.
2. When you hear a dial tone, you can begin dialing by pressing the number keys.
3. If you used Hook to dial, pick up the handset when the call is answered.
One-Touch Dialing
1. Pick up the handset, or press Hook.
2. When you hear a dial tone, press the One-Touch key.
3. If you used Hook, pick up the handset when the call is answered.
If you try to use a One-Touch number that has not been stored on the key you pressed,
you will hear a warning sound and the display will say, NOT REGISTERED. The
display will return to normal after 2 seconds.
Speed Dialing
1. Pick up the handset or press Hook.
2. When you hear a dial tone, press Speed-Dial and then press the two-digit Speed-
Dial number.
3. If you used Hook, pick up the handset when the call is answered.
FOR YOUR INFORMATION
Using Hold, Pause, # with the Telephone
-Press Redial/Pause to insert a 3.5 second pause between numbers.
-Press Hold to put a call on hold. You can replace the handset without
disconnecting the call. You must pick up the machine’s handset to release
the call from Hold.
-Press # to switch the dialing type from “pulse” to “tone” temporarily. This
key also is used for push-button services, such as those offered by banks,
credit card companies, or paging services.
4-1
Page 45

MFC 4550/6550MC/7550MC
OP-US-5.0
FOR YOUR INFORMATION
On Hook Dialing
When you make a call using Hook, you can listen to the other end through
the one-way speaker of the machine, but the other party can not hear you
unless you pick up the handset. Also, if you press Hook again before you
pick up the handset, the call will be disconnected.
Searching the Telephone Index
Once you have stored a name and number as a One-Touch number or as a Speed-Dial
number, you can search for that name alphabetically using the Telephone Index. You
can dial a number directly from the Telephone Index.
USING THE UNIT AS A TELEPHONE
Telephone
1. Press Tel-Index.
2. Use the number keys to enter the first
character of the stored name, and press
Z (left arrow) or X (right arrow) to find
the name.
3. Pick up the handset, or press Hook.
4. Press Start to begin dialing.
-Return the handset to its cradle or press
Hook to cancel the call.
THE DISPLAY WILL SHOW:KEYS TO PRESS
09/12/1996 15:25
ONLINE
TEL.INDEX
ONLINE
NJ OFFICE
ONLINE
NJ OFFICE
ONLINE
4-2
Page 46

MFC 4550/6550MC/7550MC
OP-US-5.0
SENDING FAXES DOCUMENT BASICS
5. SENDING FAXES
A) DOCUMENT BASICS
The Size of Your Documents
4mm4mm
216mm (8.5")
208mm (8.2")
4mm4mm
216mm (8.5")
Maximum
900mm
(35.4")
148mm
(5.8")
Minimum
100mm
(3.9")
scanned
(printed)
area
The size of the documents you want to send by fax should not be larger (or smaller)
than your machine can accommodate. The documents should each be between 5.8 and
8.5 inches (148 and 216 mm) wide and between 3.9 and 35.4 inches (100 and 900 mm)
long.
The maximum width of the scanned area, that can be printed on the recording paper
of the recipient’s fax, is 8.2 inches (208 mm).
(
MAX.900mm,35.4"
MIN.100mm,3.9"
(
Document
length
How to Insert the Document
To send a fax, first insert the document you wish to send, face down,
in the document feeder. The top edge of the document should go in
first, or the fax will be received upside down.
To prevent the document from skewing as it is fed, adjust the paper
guides to fit the width of the document.
5-1
TOP
Page 47

MFC 4550/6550MC/7550MC
OP-US-5.0
About the Documents You Send...
Do not use documents that are curled, wrinkled, folded, ripped, or that
contain staples, paper clips, paste, or tape. Also, do not use cardboard,
newspaper, or fabric.
DOCUMENT BASICS SENDING F AXES
NOTICE
curled folded
staples
tape
NO!
wrinkled
ripped
paper clip
The Auto Document Feeder (ADF)
The Auto Document Feeder (ADF) automatically feeds documents (up to 30 pages)
into the machine, one at a time. The thickness and weight of the documents should
fall into the following categories:
Thickness: For one sheet: 2.8 x 10
For multiple sheets: 2.8 x 10
-3
to 4.7 x 10⁻³ inches (0.07 to 0.12 mm).
-3
to 3.9 x 10⁻³ inches (0.07 to 0.10 mm).
fabric
Sending FAX
Weight: For one sheet: 0.07 x 10
For multiple sheets: 0.07 x 10
As a reference, please note that the paper used for this manual has the following
thickness and weight:
Thickness: 3.1 x 10
Weight: 0.091 x 10
Before inserting documents into the document feeder, fan the sheets of paper to make
sure the documents are not stuck together. Then tap the leading edge on a flat surface
so all the pages are even when placed in the feeder. Make sure you always place the
documents in face down.
-3
inches (0.08 mm)
-3
lbs/inch2 (64 g/m2)
-3
to 0.121 x 10⁻³ lbs/inch2 (52 to 85 g/m2).
-3
to 0.114 x 10⁻³ lbs/inch2 (52 to 80 g/m2).
5-2
Page 48

MFC 4550/6550MC/7550MC
OP-US-5.0
SENDING FAXES DOCUMENT BASICS
Getting Ready to Send a Fax
Setting the Resolution
You can choose a setting (STANDARD, FINE, SUPERFINE, or PHOTO) for the
resolution any time before you press Start or Copy . You can choose a setting by
pressing the Resolution key. (
means light off. means light on.)
STANDARD The STANDARD resolution can be used for most
Fine
Photo
S.Fine
typewritten text. When the STANDARD setting is on,
both lights are off.
Transmission speed is normal.
FINE The FINE resolution is an ideal setting to use if you want
Fine
Photo
S.Fine
to send documents that have small print. When the
FINE setting is on, the FINE light will be lit.
Transmission speed is slower than STANDARD.
SUPERFINE The SUPERFINE resolution is a good setting to use for
Fine
Photo
S.Fine
documents with very small print or artwork. When the
SUPERFINE setting is on, the S. FINE light will be lit.
Transmission speed is slower than FINE.
PHOTO The PHOTO resolution is ideal for sending documents
Fine
Photo
S.Fine
that have varying shades of gray, such as photographs.
The PHOTO setting is on when both lights are lit.
Transmission speed is slower than FINE.
To set different resolutions for each page of a multipage document, refer to “Multiple
Resolution Transmission” on page 5-17~18.
5-3
Page 49

MFC 4550/6550MC/7550MC
OP-US-5.0
Setting the Contrast
The machine has automatic contrast control, but if you are sending or copying a
document that is very light or very dark, you may want to set the contrast yourself.
Use SUPER LIGHT to send a very light document.
Use SUPER DARK to send a very dark document.
DOCUMENT BASICS SENDING F AXES
THE DISPLAY WILL SHOW:KEYS TO PRESS
09/12/1996 15:25
ONLINE
1. Insert the documents face down into the
feeder.
2. Press Function.
(The MFC 4550 will skip to Step 5.)
3. Wait for two seconds.
(Only for MFC 6550MC/7550MC)
4. Press 1.
(Only for MFC 6550MC/7550MC)
5. Press 1.
6. Press 4.
The display will alternate messages.
7. Use Z (left arrow) or X (right arrow)
to select one of the settings, AUTO,
S.LIGHT, or S. DARK.
Example: S.LIGHT.
(Only for MFC
6550MC/
7550MC)
(Only for MFC
6550MC/
7550MC)
FAX: NO. & START
SCAN READY
COPY: PRESS COPY
SCAN READY
ENTER NO. & SET
1.FAX
2.PRINTER
1.FAX
1.TEMP.SETTINGS
4.CONTRAST
CONTRAST:AUTO
SELECT { } & SET
CONTRAST:S.LIGHT
Sending FAX
8. Press Set.
9. Press Stop to exit.
4.CONTRAST
FAX: NO. & START
ONLINE
COPY: PRESS COPY
ONLINE
Then start the fax sending operation (see page 5-5) or copy (see page 12-1).
5-4
Page 50

MFC 4550/6550MC/7550MC
OP-US-5.0
SENDING FAXES BASIC FAX TRANSMISSIONS
B) BASIC FAX TRANSMISSIONS
FOR YOUR INFORMATION
Sending a Fax
There are 3 basic ways to send a fax:
1 ) Manual transmission:
You can talk or listen to the other party before you send a fax by picking
up the handset and dialing the number. After the other party has
finished talking and has pressed the Start button, you will be able to
send your fax by pressing your Start key and placing the handset in its
cradle. (If you call and all you hear is the chirping sound of a machine,
you can go ahead and press your Start key, and then replace the
handset.)
2) Automatic transmission:
You can send a fax without picking up the handset or without pressing
Hook by dialing the fax number and then pressing Start.
a . One-Touch Dialing
Press one of the One-Touch keys. (The numbers must be stored
beforehand. See page 3-6~7.) Then press Start.
b . Speed-Dialing
Press Speed-Dial, then use the number keys to enter a two-digit
number.
For example, press “05” for 5. (The numbers must be stored beforehand.
See page 3-7~8.) Then press Start.
c. Telephone Index
You can use the Tel-Index to make telephone or fax calls. (See page
4-2.)
3) Delayed transmission:
It is possible to send documents at a later time by using the TIMER
function. (See page 5-10~11.)
Talking to the Other Party When Sending a Fax
When you are sending a fax manually and you hear the recipient’s voice
instead of fax tones, you can use the handset to have a conversation. When
or if you want to then send a fax, ask the person on the other line to press
Start on his/her fax machine and when you hear fax tones you can press
Start to begin sending your fax.
5-5
Page 51

MFC 4550/6550MC/7550MC
OP-US-5.0
BASIC FAX TRANSMISSIONS SENDING F AXES
Sending a Fax Automatically
THE DISPLAY WILL SHOW:KEYS TO PRESS
09/12/1996 15:25
ONLINE
1. Insert the documents face down into the
feeder.
2. Enter a fax number.
Example: One-Touch dialing.
3. Press Start.
Sending a Fax Manually
1. Insert the documents face down into the
feeder.
FAX: NO. & START
SCAN READY
COPY: PRESS COPY
SCAN READY
NJ OFFICE
ONLINE
DIALING
ONLINE
SENDING P.01
ONLINE
Sending FAX
THE DISPLAY WILL SHOW:KEYS TO PRESS
09/12/1996 15:25
ONLINE
FAX: NO. & START
SCAN READY
2. Pick up the handset or press Hook and
listen for the dial tone.
3. Enter the fax number.
You can use manual dialing, One-Touch
dialing, Speed Dialing, or Tel-Index.
4. When you hear a fax tone, press Start.
Your machine will begin sending the
documents.
5. Return the handset to its cradle, if you
did not use Hook.
COPY: PRESS COPY
SCAN READY
ENTER FAX NO.
ONLINE
PRESS START KEY
ONLINE
NJ OFFICE
ONLINE
SENDING
ONLINE
5-6
Page 52

MFC 4550/6550MC/7550MC
OP-US-5.0
SENDING FAXES BASIC FAX TRANSMISSIONS
Automatic and Manual Redialing
If a number you have dialed is busy or your call did not go through for some other
reason, you can redial that number. There are two ways to redial: “automatic” and
“manual.” Automatic redialing can be used only for faxes that were sent using
automatic transmission—not for telephone calls. The MFC automatically will redial
the number 3 times at 5 minute intervals before giving up. It will redial the last dialed
number when you press Redial/Pause (manual redialing).
FOR YOUR INFORMATION
Optional Settings When You Send a Fax Manually
• Resolution (See page 5-3, 5-17~18.)
• Contrast (See page 5-4.)
• Cover Page (See page 5-18~23.)
• Overseas Mode (See page 5-16.)
• Call Reservation (See page 5-24~25.)
Printing Page Headers
Your machine can print a page header on the top of every fax you send. It
is printed on the receiving party’s fax paper. It contains the date and time
of transmission, your fax number and name (Station ID), and page number.
Of course you must register your Station ID beforehand for that information
to be available. (See page 3-3.)
Transmission Date and Time Station ID Page Number
09/12/1996 15:25 4155554444 BROTHER PAGE 01
5-7
Page 53

MFC 4550/6550MC/7550MC
OP-US-5.0
ADVANCED FAX TRANSMISSIONS SENDING F AXES
C) ADVANCED FAX TRANSMISSIONS
Sending a Fax by Using Super Quick-Scan (Memory Transmission)
If you are faxing a set of documents that are confidential in nature or you just need
your original documents back right away, you do not have to stand at the machine and
wait for the transmission of each page to be completed. You can use Super Quick-Scan
in order to get your original documents back before transmission.
1. Insert the documents into the feeder.
THE DISPLAY WILL SHOW:KEYS TO PRESS
09/12/1996 15:25
ONLINE
FAX: NO. & START
SCAN READY
COPY: PRESS COPY
SCAN READY
2. Press Super Q.Scan.
The display will indicate how much memory is
available.
3. Enter the fax number.
4. Press Start to begin scanning the
documents into memory. Once
MEMORY 100%
ONLINE
ENTER FAX NO.
ONLINE
NJ OFFICE
ONLINE
MEMORY 100%
ONLINE
completed,the machine will dial the
destination.
FOR YOUR INFORMATION
If You Get a MEMORY FULL Message When Trying to Send a Fax
by Using Super Quick-Scan
If the memory becomes full when scanning page 1 and the display shows
PRESS STOP KEY, then press Stop to abort the job.
Sending FAX
If the memory becomes full on page 2 or more of a multipage document, you
will be prompted to press Start to send the portion already scanned, or to
press Stop to abort the job.
5-8
Page 54

MFC 4550/6550MC/7550MC
OP-US-5.0
SENDING FAXES ADVANCED FAX TRANSMISSIONS
Setting the Daily Timer (for Delayed Transmissions)
The Daily Timer function lets you send a fax at a preset time every day. This is handy
for sending delayed jobs that must go out at the same time daily. Once you enter the
time, you don’t have to enter it again. The setting will stay the same until you change
it. So you can use it every day, or only on days when you need it.
THE DISPLAY WILL SHOW:KEYS TO PRESS
09/12/1996 15:25
ONLINE
1. Press Function.
(The MFC 4550 will skip to Step 4.)
2. Wait for two seconds.
(Only for MFC 6550MC/7550MC)
3. Press 1.
(Only for MFC 6550MC/7550MC)
4. Press 7.
5. Press 2.
6. Enter the time in 24-hour format using
the number keys.
Example: 19:45 (7:45 P.M.).
7. Wait for two seconds, press Stop to exit.
(Only for MFC
6550MC/
7550MC)
(Only for MFC
6550MC/
7550MC)
ENTER NO. & SET
1.FAX
2.PRINTER
1.FAX
7.SETUP SYSTEM
2.DAILY TIMER
ENTER TIME:00:00
ENTER TIME:19:45
2.DAILY TIMER
5-9
Page 55

MFC 4550/6550MC/7550MC
OP-US-5.0
ADVANCED FAX TRANSMISSIONS SENDING F AXES
Delayed Transmission
You can use the timer to send documents at a later time (up to 24 hours later). When
the preset time is displayed, accept it or enter a new time if needed. Your machine also
will produce a report, the “Delayed Sending Report”, after the fax is sent. You can set
up to three different documents for delayed transmission.
THE DISPLAY WILL SHOW:KEYS TO PRESS
09/12/1996 15:25
ONLINE
1. Insert the documents into the feeder.
2. Press Super Q.Scan if you use memory
transmission, or you can send your fax
normally.
3 . Press Function.
(The MFC 4550 will skip to Step 6.)
4. Wait for two seconds.
(Only for MFC 6550MC/7550MC)
5. Press 1.
(Only for MFC 6550MC/7550MC)
6. Press 1.
7. Press 1.
8. Accept the displayed time or enter the
time in 24-hour format using the number
keys.
Example: 19:45 (7:45 P.M.).
(Only for MFC
6550MC/
7550MC)
(Only for MFC
6550MC/
7550MC)
FAX: NO. & START
SCAN READY
COPY: PRESS COPY
SCAN READY
MEMORY 100%
ONLINE
ENTER FAX NO.
ONLINE
ENTER NO. & SET
1.FAX
2.PRINTER
1.FAX
1.TEMP.SETTINGS
1.TIMER
SET TIME=00:00
SET TIME=19:45
Sending FAX
9. Wait for two seconds.
10
. Press Stop.
11
. Enter the fax number.
1.TIMER
ENTER FAX NO.
ONLINE
MEMORY 100%
ONLINE
NJ OFFICE
ONLINE
5-10
Page 56

MFC 4550/6550MC/7550MC
OP-US-5.0
SENDING FAXES ADVANCED FAX TRANSMISSIONS
12
. Press Start.
The machine will wait until the specified
time to call.
Broadcasting
By using the numbers you have stored for One-Touch dialing, Speed-Dialing, or group
dialing, you can automatically send faxes to a maximum of 124 numbers or locations
(MFC 7550MC) and 60 numbers (MFC 4550/6550MC) at once. Remember, each
Group you created reserves one of the One-Touch keys. You can not broadcast to a
number that has not been stored into memory. Use the Telephone Index to help you
choose the numbers to which you wish to broadcast. (See page 4-2.) After transmission
is completed, a Broadcast Report will be printed automatically to let you know the
results.
09/12/1996 15:25
ONLINE
FOR YOUR INFORMATION
Getting Familiar with the Broadcasting Function
* To stop the broadcast in progress, press Stop.
* Enter the chain dialing numbers as you normally would, but keep in
mind that each key counts as one location, so the number of locations you
can call becomes limited. (You have up to 124 different locations (MFC
7550MC), or 60 locations (MFC 4550/6550MC) you can call with OneTouch, Speed-Dialing, and group numbers.)
* If the line is busy or for some other reason a connection could not be made
while broadcasting, the machine will redial the number automatically.
(See page 5-7.)
* If the memory is full, press Stop to abort the job or press Start to send
the portion that is in the memory (if more than one page has been
scanned.) (See page 5-8.)
THE DISPLAY WILL SHOW:KEYS TO PRESS
09/12/1996 15:25
ONLINE
1. Insert the documents into the feeder.
FAX: NO. & START
SCAN READY
5-11
COPY: PRESS COPY
SCAN READY
Page 57

MFC 4550/6550MC/7550MC
OP-US-5.0
ADVANCED FAX TRANSMISSIONS SENDING F AXES
2. Press Super Q.Scan.
3. Enter the One-Touch key(s) and/or SpeedDial number(s), one after the other, or a
MEMORY 100%
ONLINE
ENTER FAX NO.
ONLINE
ALL BROTHER
ONLINE
Group number.
Example: Group number.
4. Press Start and the machine will read the
documents into memory, and then start
sending faxes to all the numbers you
entered.
MEMORY 100%
ONLINE
DIALING
ONLINE
SENDING P.01
ONLINE
Sending by Multiple Transmissions
Use this function to send several different faxes to several destinations at once. For
example, you can automatically fax “Document A” to one destination and “Document
B” to another destination.
Sending FAX
This is not to be confused with Broadcasting, which is sending the same document(s)
to many destinations.
If you wish, you can combine this function with broadcasting so you can fax different
documents to different lists of people at the same time. To do this, store various sets
of documents in memory. Then automatically your machine will fax “Document A” to
one list of people and “Document B” to another list of people. You can preset 3 different
documents (including timer transmission) in memory; if you set one timer transmission,
multiple transmissions are available for two other destinations.
If you press only Super Q.Scan instead of Shift + Super Q.Scan for the last
document, your machine will start dialing without waiting for 30 seconds.
THE DISPLAY WILL SHOW:KEYS TO PRESS
09/12/1996 15:25
ONLINE
1. Insert “Document A” into the feeder.
FAX: NO. & START
SCAN READY
COPY: PRESS COPY
SCAN READY
5-12
Page 58

MFC 4550/6550MC/7550MC
OP-US-5.0
SENDING FAXES ADVANCED FAX TRANSMISSIONS
2. Press Shift + Super Q.Scan together to
send by multiple transmission.
The display shows remaining memory.
3. Enter the fax number. (Or enter a series
of numbers if you are broadcasting.)
4 . Press Start to start scanning documents.
5. Insert “Document B” within 30 seconds
after “Document A” has been scanned. (If
you wait more than 30 seconds to scan
another document, the machine will begin
to send document “A”.) Repeat Step 2, 3,
4 for document “B”.
6. Repeat Step 1, 2, 3, 4 for document “C”.
7. After 30 seconds, your machine will start
sending the documents in scanned order.
MULTI TX 100%
ONLINE
ENTER FAX NO.
ONLINE
NJ OFFICE
ONLINE
MULTI TX 100%
ONLINE
09/12/1996 15:27
ONLINE
ENTER FAX NO.
ONLINE
PRESS START KEY
ONLINE
MULTI TX 70%
ONLINE
DIALING
ONLINE
After scanning documents, your machine will start sending them in scanned order.
5-13
Page 59

MFC 4550/6550MC/7550MC
OP-US-5.0
ADVANCED FAX TRANSMISSIONS SENDING F AXES
Interrupting the Timer and Polled Job
You can send a fax without canceling the timer (see page 5-10~11) or Polled Waiting
with documents in the feeder (see page 7-3~4) by “interrupting” it. When you
interrupt the Timer to send a “new” set of documents, the machine does not
automatically redial the number if it was busy. Also, you can not use the function
mode if you have interrupted the Timer or Polled Waiting.
Example: TIMER WAITING with a document in the feeder.
KEYS TO PRESS THE DISPLAY WILL SHOW:
1. Press Function.
(The MFC 4550 will skip to Step 4.)
2. Wait for two seconds.
(Only for MFC 6550MC/7550MC)
3. Press 1.
(Only for MFC 6550MC/7550MC)
(Only for MFC
6550MC/
7550MC)
(Only for MFC
6550MC/
7550MC)
TIMER WAITING
ONLINE
ENTER NO. & SET
1.FAX
2.PRINTER
1.FAX
4. Press 0.
5. Wait for two seconds.
6. Remove documents from the machine.
7. Place the “new” documents into the feeder.
8. Enter the new fax number for the
documents you are sending now, then
press Start.
9. After the transmission is finished, place
the “old” documents back into the feeder.
10
. Press Function and 1 and 0 to restore the
timer. (For MFC 4550, press Function
and 0.)
0.INTERRUPT
REMOVE DOCUMENT
ONLINE
INSERT DOCUMENT
ONLINE
FAX OR COPY
ONLINE
FUNC 10 TO RESET
ONLINE
DIALING
ONLINE
SENDING P.01
ONLINE
INSERT DOCUMENT
ONLINE
FAX OR COPY
ONLINE
FUNC 10 TO RESET
ONLINE
0.INTERRUPT
TIMER WAITING
ONLINE
Sending FAX
5-14
Page 60

MFC 4550/6550MC/7550MC
OP-US-5.0
SENDING FAXES ADVANCED FAX TRANSMISSIONS
Canceling a Job
Use the Cancel Job function to permanently remove scheduled tasks such as Polling
or Polled Waiting (see page 7-3~4) and Timer (Delayed Transmission) (see page 510~11) from your machine.
Example: TIMER WAITING with documents in the feeder.
1. Press Function.
(The MFC 4550 will skip to Step 4.)
2. Wait for two seconds.
(Only for MFC 6550MC/7550MC)
3. Press 1.
(Only for MFC 6550MC/7550MC)
(Only for MFC
6550MC/
7550MC)
(Only for MFC
6550MC/
7550MC)
THE DISPLAY WILL SHOW:KEYS TO PRESS
TIMER WAITING
ONLINE
ENTER NO. & SET
1.FAX
2.PRINTER
1.FAX
4. Press 2.
Any waiting jobs that have been set up
will appear in the display.
If no jobs are waiting to be processed, a
NO JOB WAITING message will appear
in the display.
5. Use Z (left arrow) or X (right arrow) to
select the job you wish to cancel.
6. Press Set.
7. Press 1 to cancel the selected job, or 2 to
exit without canceling.
If 1 is selected, the job will be canceled
and the next job in the queue will appear
in the display.
8. To cancel the next job, press 1 again. To
exit, simply press 2.
2.CANCEL JOB
19:45 NJ OFFIC
SELECT { } & SET
19:45 NJ OFFIC
19:45 NJ OFFIC
1.CLEAR 2.EXIT
5-15
Page 61

MFC 4550/6550MC/7550MC
OP-US-5.0
FAX TRANSMISSION OPTIONS SENDING F AXES
D) FAX TRANSMISSION OPTIONS
Setting the Overseas Mode
If you experience difficulty with sending faxes overseas, you may want to use the
Overseas mode. Using the Overseas mode is an effective way to send faxes overseas.
THE DISPLAY WILL SHOW:KEYS TO PRESS
09/12/1996 15:25
ONLINE
1. Insert the documents into the feeder.
2. Press Function.
(The MFC 4550 will skip to Step 5.)
3. Wait for two seconds.
(Only for MFC 6550MC/7550MC)
4. Press 1.
(Only for MFC 6550MC/7550MC)
5. Press 1.
6. Press 6.
7. Press Z (left arrow) or X (right arrow)
to switch to ON.
(Only for MFC
6550MC/
7550MC)
(Only for MFC
6550MC/
7550MC)
FAX: NO. & START
SCAN READY
COPY: PRESS COPY
SCAN READY
ENTER NO. & SET
1.FAX
2.PRINTER
1.FAX
1.TEMP.SETTINGS
6.OVERSEAS MODE
OVERSEAS:OFF
SELECT { } & SET
OVERSEAS:ON
Sending FAX
8. Press Set.
9. Press Stop to exit.
10
. Then start the fax sending operation.
(See page 5-5.)
After sending your fax, the overseas mode
will switch itself OFF.
6.OVERSEAS MODE
ENTER FAX NO.
ONLINE
PRESS START KEY
ONLINE
5-16
Page 62

MFC 4550/6550MC/7550MC
OP-US-5.0
SENDING FAXES FAX TRANSMISSION OPTIONS
Setting Your MFC for Multiple Resolution Transmission
This is a temporary setting for the current transmission job only. You can set the
resolution of the documents you send by pressing Resolution. Once you set the
resolution, all the pages will be sent at the same resolution. However, there may be
times when you want to send some pages at one resolution, such as STANDARD, and
other pages in another resolution, such as PHOTO. If you send all pages in Photo
resolution, for instance, it would take a great deal of time. It is better to specify the
resolution for each page to minimize transmission time. This is made possible by
using the 1.TEMP. SETTINGS function.
THE DISPLAY WILL SHOW:KEYS TO PRESS
09/12/1996 15:25
ONLINE
1. Insert the documents into the feeder.
2. Press Function.
(The MFC 4550 will skip to Step 5.)
3. Wait for two seconds.
(Only for MFC 6550MC/7550MC)
4. Press 1.
(Only for MFC 6550MC/7550MC)
5. Press 1.
6. Press 5.
7. Press Z (left arrow) or X (right arrow)
to find the resolution you want for the
first page of your documents.
Example: FINE.
(Only for MFC
6550MC/
7550MC)
(Only for MFC
6550MC/
7550MC)
FAX: NO. & START
SCAN READY
COPY: PRESS COPY
SCAN READY
ENTER NO. & SET
1.FAX
2.PRINTER
1.FAX
1.TEMP.SETTINGS
5.RESOLUTION
PAGE 01:STANDARD
SELECT { } & SET
PAGE 01:FINE
8. Press Set.
Return to Step 6 to set the resolution for
page 2 and the following pages.
5-17
PAGE 02:FINE
Page 63

MFC 4550/6550MC/7550MC
OP-US-5.0
FAX TRANSMISSION OPTIONS SENDING F AXES
9. When you finish setting the resolution
for all your pages, press Stop.
10
. Enter the fax number.
11
. Press Start.
FAX: NO, & START
ONLINE
COPY: PRESS COPY
ONLINE
The resolution will revert to STANDARD
after the documents have been sent.
Sending a Fax with an Electronic Cover Page Message
An automatic Cover Page will allow you to send details of who the fax is going to, who
it is from and when it was sent. This is what the Cover Page looks like:
09/12/1996 15:25
=== COVER PAGE ===
Sending FAX
TO: NJ OFFICE E
FAX:14155551212
FROM: BROTHER E
FAX: 4155554444
TEL: 4155554445
03 PAGE[S] TO FOLLOW
COMMENT: PLEASE CALL
(1)
(2)
(3)
(4)
(1) The “TO” information comes from the One-Touch or the Speed-Dial memory. If
you are dialing manually, the name of the destination will be left blank.
(2) The “FROM” information comes from the Station ID.
(3) The number of pages you are sending. When Cover Page is sent each time by
using the automatic settings (see page 5-21~22), the number of pages will be left
blank. If you have used the temporary Cover Page setting (see page 5-22~23), the
number of pages you entered will be listed.
(4) Your comments. You may customize the comments (see page 5-19~20).
5-18
Page 64

MFC 4550/6550MC/7550MC
OP-US-5.0
SENDING FAXES FAX TRANSMISSION OPTIONS
FOR YOUR INFORMATION
Selecting a Comment for the Cover Page
You can choose one comment from among 6 options. The first option is to
send no comment at all. The next 3 are built-in comments, and the last two
are ones you can enter yourself. (For more information see below
“Customizing Your Cover Page Comment”.)
1.COMMENT OFF
2. PLEASE CALL
3.URGENT
4.CONFIDENTIAL
5. (Your own customized comment up to 27 characters.)
6. (Your own customized comment up to 27 characters.)
Customizing Your Cover Page Comment
You can customize the comment on your Cover Page as follows:
THE DISPLAY WILL SHOW:KEYS TO PRESS
09/12/1996 15:25
ONLINE
1. Press Function.
(The MFC 4550 will skip to Step 4.)
2. Wait for two seconds.
(Only for MFC 6550MC/7550MC)
3. Press 1.
(Only for MFC 6550MC/7550MC)
4. Press 7.
5 . Press 6.
(Only for MFC
6550MC/
7550MC)
(Only for MFC
6550MC/
7550MC)
ENTER NO. & SET
1.FAX
2.PRINTER
1.FAX
7.SETUP SYSTEM
6.SET COVERPAGE
5.
6. Press Z (left arrow) or X (right arrow)
to select 5 or 6 where you wish to store a
comment.
Example: 5.
5-19
SELECT { } & SET
5.
Page 65

MFC 4550/6550MC/7550MC
OP-US-5.0
FAX TRANSMISSION OPTIONS SENDING F AXES
7. Press Set.
8. Enter your customized comment by using
the number keys (up to 27 characters).
(See page 2-10~12 for more details.)
Example: TOP SECRET.
9. Press Set.
10
. Press Stop to exit.
Printing a Sample Cover Page
You can print a sample Cover Page to check the format.
THE DISPLAY WILL SHOW:KEYS TO PRESS
1. Press Function.
(The MFC 4550 will skip to Step 4.)
2. Wait for two seconds.
(Only for MFC 6550MC/7550MC)
3. Press 1.
(Only for MFC 6550MC/7550MC)
(Only for MFC
6550MC/
7550MC)
(Only for MFC
6550MC/
7550MC)
5._
5.TOP SECRET
6.SET COVERPAGE
09/12/1996 15:25
ONLINE
ENTER NO. & SET
1.FAX
2.PRINTER
1.FAX
Sending FAX
4. Press 3.
5 . Press 4.
6. Press Start.
3.PRINT REPORTS
4.COVERPAGE
PRESS START KEY
PRINTING
5-20
Page 66

MFC 4550/6550MC/7550MC
OP-US-5.0
SENDING FAXES FAX TRANSMISSION OPTIONS
To Always Send a Cover Page
If you often send an automatic Cover Page, you can set it to ON to avoid having to
set up the details of the Cover Page each time. Here is how you can switch the setting
for the automatic Cover Page to ON or OFF:
KEYS TO PRESS THE DISPLAY WILL SHOW:
09/12/1996 15:25
ONLINE
1. Press Function.
(The MFC 4550 will skip to Step 4.)
2. Wait for two seconds.
(Only for MFC 6550MC/7550MC)
3. Press 1.
(Only for MFC 6550MC/7550MC)
4. Press 5.
5. Press 3.
6. Press Z (left arrow) or X (right arrow)
to choose ON or OFF.
Example: ON.
7. Press Set.
(Only for MFC
6550MC/
7550MC)
(Only for MFC
6550MC/
7550MC)
ENTER NO. & SET
1.FAX
2.PRINTER
1.FAX
5.USER OPTIONS
3.COVERPG ON/OFF
COVERPAGE:OFF
SELECT { } & SET
COVERPAGE:ON
1.COMMENT OFF
8. If you selected ON, you must select a
comment, by pressing Z (left arrow) or
X (right arrow).
Example: 2.PLEASE CALL. (See page
5-19.)
9. Press Set.
10
. Press Stop to exit.
5-21
SELECT { } & SET
2.PLEASE CALL
3.COVERPG ON/OFF
Page 67

MFC 4550/6550MC/7550MC
OP-US-5.0
FAX TRANSMISSION OPTIONS SENDING F AXES
FOR YOUR INFORMATION
Sending an Automatic Cover Page
If you have the Cover Page ON/OFF setting to ON, the total number of
pages will not be printed on the Cover Page. Also, the comment you selected
when you set it to ON will be printed on all the Cover Pages you send.
Sending a Fax When the Cover Page Is ON
1. Insert the documents into the feeder. The
display will say COVERPAGE ON for one
second.
THE DISPLAY WILL SHOW:KEYS TO PRESS
09/12/1996 15:25
ONLINE
COVERPAGE ON
SCAN READY
FAX: NO. & START
SCAN READY
COPY: PRESS COPY
SCAN READY
Sending FAX
2. Enter the fax number.
3. Press Start.
Your machine will begin transmitting
the Cover Page and original document.
Sending a Cover Page Temporarily
1. Insert the documents into the feeder.
2. Press Coverpage.
NJ OFFICE
ONLINE
SEND COVERPAGE
ONLINE
SENDING P.01
ONLINE
THE DISPLAY WILL SHOW:KEYS TO PRESS
09/12/1996 15:25
ONLINE
FAX: NO. & START
SCAN READY
COPY: PRESS COPY
SCAN READY
1.COMMENT OFF
ONLINE
SELECT { } & SET
ONLINE
5-22
Page 68

MFC 4550/6550MC/7550MC
OP-US-5.0
SENDING FAXES FAX TRANSMISSION OPTIONS
3. Press Z (left arrow) or X (right arrow)
to select the comment you want.
Example: 2.PLEASE CALL.
4. Press Set.
5. Enter the number of pages you are
sending. (Enter 00 to leave the number of
pages blank.)
6. Wait for two seconds.
7. Enter the fax number.
8. Press Start.
2.PLEASE CALL
ONLINE
TOTAL PAGES? :00
ONLINE
TOTAL PAGES? :02
ONLINE
ENTER FAX NO.
ONLINE
PRESS START KEY
ONLINE
NJ OFFICE
ONLINE
SEND COVERPAGE
ONLINE
SENDING P.01
ONLINE
Helpful Hints
• Even if the Cover Page ON/OFF setting is ON, you can avoid sending
an automatic Cover Page by pressing Coverpage once to turn off
the Cover Page for that transmission.
• If you want the total number of pages sent to be printed on the cover
page, press Coverpage once to set the COVERPAGE ON/OFF
option to OFF. Then press Coverpage once again and enter the
number of pages. (See page 5-21~22.)
5-23
Page 69

MFC 4550/6550MC/7550MC
OP-US-5.0
FAX TRANSMISSION OPTIONS SENDING F AXES
Sending a Fax with Call Reservation (Talking to the receiving party
after fax transmission)
You can send a fax and then talk to the recipient using the Call Reservation feature.
After your fax has been printed on the receiving end, the receiving fax machine will
ring as if it were receiving a telephone call. If the recipient picks up the handset, your
machine will ring. Then you can pick up your handset and start a conversation. If you
have both Call Reservation and Call Back Message set to ON and the recipient does
not pick up the handset when it rings, your machine will leave a fax message asking
the recipient to call you.
FOR YOUR INFORMATION
Using the Call Reservation Function
• There are some fax machines that will not respond to this function.
• When you use auto redialing, you can not use the Call Reservation
function, but if Call Back Message is ON, your machine will leave a Call
Back Message asking the other party call you.
• You can not use Call Reservation with the Delayed Transmission or with
the Polling function.
• You must register your Station ID number to turn Call Back
Message: ON. (See page 3-3~4.)
THE DISPLAY WILL SHOW:KEYS TO PRESS
09/12/1996 15:25
ONLINE
1. Insert the documents into the feeder.
2. Press Function.
(The MFC 4550 will skip to Step 5.)
3. Wait for two seconds.
(Only for MFC 6550MC/7550MC)
4. Press 1.
(Only for MFC 6550MC/7550MC)
5. Press 1.
(Only for MFC
6550MC/
7550MC)
(Only for MFC
6550MC/
7550MC)
FAX: NO. & START
SCAN READY
COPY: PRESS COPY
SCAN READY
ENTER NO. & SET
1.FAX
2.PRINTER
1.FAX
1.TEMP.SETTINGS
Sending FAX
5-24
Page 70

MFC 4550/6550MC/7550MC
OP-US-5.0
SENDING FAXES FAX TRANSMISSION OPTIONS
6. Press 3.
7. Press Z (left arrow) or X (right arrow)
to select Call Reservation ON or OFF.
Example: Call Reserve ON.
8. Press Set.
9. Press Z (left arrow) or X (right arrow)
to select Call Back Message ON or OFF.
Example: Call Back Message ON.
10
. Press Set.
11
. Press Stop.
3.CALL RESERVE
CALL RESERVE:OFF
SELECT { } & SET
CALL RESERVE:ON
CALL BACK:OFF
SELECT { } & SET
CALL BACK:ON
3.CALL RESERVE
ENTER FAX NO.
ONLINE
12
. Enter the fax number.
13
. Press Start.
14
. Pick up your handset if it rings.
09/12/1996 15:25
=== CALL BACK MESSAGE ===
TO: NJ OFFICE R
FAX: 14155551212
FROM: BROTHER T
PLEASE CALL AT [TEL] 4155554445 Y
PRESS START KEY
ONLINE
NJ OFFICE
ONLINE
DIALING
ONLINE
[FAX] 4155554444 Y
5-25
Page 71

MFC 4550/6550MC/7550MC
OP-US-5.0
FAX TRANSMISSION OPTIONS SENDING F AXES
Printing the Call Back Message
You can print a sample Call Back Message to check the format.
1. Press Function.
(The MFC 4550 will skip to Step 4.)
2. Wait for two seconds.
(Only for MFC 6550MC/7550MC)
3. Press 1.
(Only for MFC 6550MC/7550MC)
(Only for MFC
6550MC/
7550MC)
(Only for MFC
6550MC/
7550MC)
THE DISPLAY WILL SHOW:KEYS TO PRESS
09/12/1996 15:25
ONLINE
ENTER NO. & SET
1.FAX
2.PRINTER
1.FAX
4. Press 3.
5 . Press 5.
6. Press Start.
3.PRINT REPORTS
5.CALL BACK MSG
PRESS START KEY
PRINTING
ECM (Error Correction Mode)
The Error Correction Mode (ECM) is a way for the MFC to check the integrity of a fax
transmission while it is in progress. ECM transmissions are possible only between
machines that both have the ECM feature. If they do, you may send and receive fax
messages that are continuously checked for their integrity.
Sufficient memory must be available in your machine for this feature to work.
Error Retransmission
Sending FAX
Error Retransmission is helpful when the receiving machine does not have ECM.
Even though your machine can not check the integrity of the message, it will send the
affected page(s) again after occurrences of accidental noise have caused an error.
This feature is available only for memory transmission using Super QuickScan (see page 5-8~13).
5-26
Page 72

MFC 4550/6550MC/7550MC
OP-US-5.0
SENDING FAXES FAX TRANSMISSION OPTIONS
THE DISPLAY WILL SHOW:KEYS TO PRESS
09/12/1996 15:25
ONLINE
1. Press Function.
(The MFC 4550 will skip to Step 4.)
2. Wait for two seconds.
(Only for MFC 6550MC/7550MC)
3. Press 1.
(Only for MFC 6550MC/7550MC)
4. Press 5.
5 . Press 4.
6. Press Z (left arrow) or X (right arrow)
to choose either ON or OFF.
Example: ON.
7. Press Set.
(Only for MFC
6550MC/
7550MC)
(Only for MFC
6550MC/
7550MC)
ENTER NO. & SET
1.FAX
2.PRINTER
1.FAX
5.USER OPTIONS
4.ERROR RE-TX
ERROR RE-TX:OFF
SELECT { } & SET
ERROR RE-TX:ON
4.ERROR RE-TX
8. Press Stop to exit.
Next-FAX Reservation
You can use Next-FAX Reservation for sending a fax when the machine is busy
receiving or transmitting from memory. This function saves you from having to wait
until the incoming fax has printed or the fax stored in memory has finished
transmission. To use the Next-FAX Reservation feature, insert the documents as you
normally would and follow a few other simple steps.
5-27
Page 73

MFC 4550/6550MC/7550MC
OP-US-5.0
FAX TRANSMISSION OPTIONS SENDING F AXES
FOR YOUR INFORMATION
• Next-FAX Reservation can not be used when there are documents in the
document feeder awaiting Delayed Transmission or Polled Waiting or
when the Interrupt function is in use.
• When you are making a call using Next-FAX Reservation, you can dial
manually, or use One-Touch, Speed-Dial, Redial, or Chain dialing.
However, when you use One-Touch dialing, the screen will display only
the number of the One-Touch number you are using, such as “*01” and
not the name of the person you are calling. Similarly, if you use SpeedDialing, the screen will show you only the Speed-Dial number, such as
“#02”.
• You can set the resolution for Next-FAX Reservation by pressing
Resolution, but you can not change any settings using the Function
key. (For example, you can not change a setting for multiple resolution
transmission by using function mode.)
• To cancel a Next-FAX Reservation, remove the documents and press
Stop.
THE DISPLAY WILL SHOW:KEYS TO PRESS
RECEIVING P.01
ONLINE
1. Insert the documents into the feeder.
2 . Enter a fax number.
3. Press Start.
4. Press Set.
ENTER No & START
SCAN READY
14155551234
ONLINE
PRESS SET
ONLINE
NEXT-FAX RESERVD
ONLINE
09/12/1996 15:25
ONLINE
DIALING
ONLINE
Sending FAX
-If a One-Touch or Speed-Dial number is selected that is not stored, a warning
beep will sound.
5-28
Page 74

MFC 4550/6550MC/7550MC
OP-US-5.0
RECEIVING F AXES AND OTHER CALLS
BASIC SETUP TO RECEIVE FAXES
6. RECEIVING FAXES AND OTHER CALLS
A) BASIC SETUP TO RECEIVE FAXES
Selecting an Answer Mode
There are four different answer modes for your machine. You may choose the mode
that best suits your needs by pressing the Mode button repeatedly until you have
changed the Fax and F/T lights to the setting you want to use. For more detailed
information about a particular mode, please refer to the page number in the right
column.
Note: the lighted indicators mean
Mode
1. Manual
(manual receive)
Light How it works
Fax
F/ T
You control the phone line
and must answer every call
yourself.
= not selected = is selected and lit
When to use it
Use this mode when you are
using a computer modem on
the same line or if you receive
very few fax messages. You
can also use this mode with
Distinctive Ringing.
Page #
6-2
2 . Fax
(automatic
receive)
3. F/T
(Fax/Telephone)
4 . MSG CTR
(Message Center)
(For MFC
6550MC/
7550MC)
5. TAD
(External
Telephone
Answering
Device or
machine)
(For MFC 4550)
Fax
F/ T
Fax
F/ T
Fax
F/ T
Fax
TAD
F/ T
The machine automatically
answers every call as a fax.
The machine controls the
line and automatically
answers every call. If the
call is a fax it will receive
the fax. If the call is not a
fax it will ring (double ring)
for you to pick up the call.
The machine automatically
answers every call. The
messages are stored in
order on a first come first
served basis.
The answering machine
controls the phone line and
answers every call. As soon
as the TAD answers, the
machine listens for fax
tones. If it hears then it will
take over the call and receive the fax message.
For dedicated fax lines. You
can not receive a voice call but
you can call out.
This mode is for when you
are not using an
answering machine. You
can not have an answering
machine on the same line,
even if it is on a separate
jack on the same line. You
can not use the telephone
company’s Voice Mail in
this mode.
Use this mode to record both
voice and fax messages into
the machine’s memory.
You must have an external
answering machine plugged
into the MFC for this mode to
work properly. It will not work
with the telephone company’s
Voice Mail services. The TAD
mode can be set so you have
time to answer calls before
the TAD picks up. You do not
have to change modes when
you are in or out.
6-2
6-3
9-8
6-17
*NOTE: • In TAD mode the Ring Delay and F/T Ring Time settings on the machine do not apply!
The number of rings is set on the external answering machine, which overrides the
settings on the machine.
• In F/T mode you must set the Ring Delay and F/T Ring Time. If you have extension phones on the
line, set the Ring Delay to 4 rings.
6-1
Page 75

MFC 4550/6550MC/7550MC
OP-US-5.0
BASIC SETUP TO RECEIVE FAXES
RECEIVING F AXES AND OTHER CALLS
Manual Reception (Manual Mode)
When you set the Answer Mode to manual, you must answer each incoming call
yourself. Here is what you should do when using Manual Mode:
If You Get a... Then You Should...
1. Regular phone call Talk as you normally would.
2. Phone call and Press Start when finished talking, and replace the
request to send a fax handset.
Note: Sender must also press Start.
3. Fax tone... Press Start, and replace the handset.
Automatic Fax Only Reception (Fax Mode)
You can automatically receive all your faxes in Automatic Fax Reception mode (Fax
light is ON). Select this mode by pressing Mode.
Setting the Ring Delay
You can set the number of rings before the MFC will answer the line.
THE DISPLAY WILL SHOW:KEYS TO PRESS
09/12/1996 15:25
ONLINE
1. Press Function.
(The MFC 4550 will skip to Step 4.)
2. Wait for two seconds.
(Only for MFC 6550MC/7550MC)
3. Press 1.
(Only for MFC 6550MC/7550MC)
4. Press 6.
5 . Press 2.
(Only for MFC
6550MC/
7550MC)
(Only for MFC
6550MC/
7550MC)
ENTER NO. & SET
1.FAX
2.PRINTER
1.FAX
6.TEL OPTIONS
2.RING DELAY
RING DELAY:02
Receive FAX
SELECT { } & SET
6-2
Page 76

MFC 4550/6550MC/7550MC
OP-US-5.0
RECEIVING F AXES AND OTHER CALLS
6. Press Z (left arrow) or X (right arrow)
BASIC SETUP TO RECEIVE FAXES
RING DELAY:00
repeatedly until you find the number of
rings you want.
Example: 00.
When you set 00, you can receive your
incoming faxes without any rings.
7. Press Set.
2.RING DELAY
8. Press Stop to exit.
The F/T Switch (Fax/Telephone Mode)
When you share one line for your telephone and fax application, in the F/T switch
mode, the machine can determine whether an incoming call is a fax or a telephone call.
(See Chart below.)
Incoming Call
The fax picks up
after Ring Delay
elapses.
All extensions in the home
will ring for 0-4 rings
(Ring Delay - see page 6-2).
You pick up any
extension within Ring
Delay selection.
The MFC picks up the call
and automatically detects
whether it is a fax or voice
call.
Automatic fax
call
Fax reception is
automatically
activated.
The fax message
is received.
The caller may
hang up, but
the F/T ringing
will continue
for 10-60
seconds.
fax call
Only the fax handset
rings (double ring)
for you to pick up.
The handset will ring
for 10-60 seconds
(F/T Ring Time - see
page 6-5).
The caller stays
on the line through
the entire 10-60 second
Ring Time.
The fax mode
is activated.
You must manually
determine if it is a
voice or fax call.
Automatic or
manual fax call
A) If you are at the
machine, press START.
B) If you are at an
extension phone, you
can transfer the fax
call to the MFC by
pressing your Remote
Activation Code (three
digits).
You pick up the
MFC handset.
Talk as normal or
press the Start
key to receive a
manual fax.
Voice callVoice call or manual
Talk as
normal.
6-3
The caller may hang up.
Page 77

MFC 4550/6550MC/7550MC
OP-US-5.0
BASIC SETUP TO RECEIVE FAXES
RECEIVING F AXES AND OTHER CALLS
Recording an F/T Outgoing Message (OGM)
(Only for MFC 6550MC/7550MC)
You can store an outgoing message in your machine so callers know what to do. For
example, you can leave a message that says:
“Hi, I can not answer your call right now; please call me again later. If you send a fax,
please wait until you hear a fax tone and then press the Start key, or press (*51) and
press the Start key.”
NOTE: The caller can not leave an incoming message in this mode.
KEYS TO PRESS
1 . Press Function.
(The MFC 4550 will skip to Step 4.)
2 . Wait for two seconds.
(Only for MFC 6550MC/7550MC)
3. Press 1.
(Only for MFC 6550MC/7550MC)
4. Press 8.
(Only for MFC
6550MC/
7550MC)
(Only for MFC
6550MC/
7550MC)
THE DISPLAY WILL SHOW:
09/12/1996 15:25
ONLINE
ENTER NO. & SET
1.FAX
2.PRINTER
1.FAX
8.SETUP MSG CTR
5. Press 6.
6. Press Z (left arrow) or X(right arrow)
repeatedly until you get the F/T OGM.
7. Press Set.
8. Press Record.
9. Pick up the handset.
10
. Record a message within 20 seconds.
6.OGM
MSG CTR OGM
SELECT { } & SET
F/T OGM
REC/ERASE/PLAY?
PICK UP HANDSET
RECORD OGM:00/20
RECORD OGM:15/20
Receive FAX
6-4
Page 78

MFC 4550/6550MC/7550MC
OP-US-5.0
RECEIVING F AXES AND OTHER CALLS
11
. Press Stop, and replace the handset.
The recorded message will be played
automatically.
12
. Press Stop to exit.
Helpful Hints
It is not necessary to have an outgoing message. The F/T mode will
work fine without one. It is only to help the caller understand the
status of your machine.
Setting the F/T Ring Time
BASIC SETUP TO RECEIVE FAXES
RECORD OGM:20/20
PLAYING OGM
F/T OGM
SELECT { } & SET
You can specify the maximum time you want the machine to ring (double ring) to
notify you after it has answered a telephone call. There are four predefined settings:
10, 20, 30, or 60 seconds. During this time, only the MFC will ring. No other phones
on the same line will ring.
KEYS TO PRESS
1. Press Function.
THE DISPLAY WILL SHOW:
09/12/1996 15:25
ONLINE
ENTER NO. & SET
(The MFC 4550 will skip to Step 4.)
2. Wait for two seconds.
(Only for MFC 6550MC/7550MC)
3. Press 1.
(Only for MFC 6550MC/7550MC)
4. Press 6.
5 . Press 4.
(Only for MFC
6550MC/
7550MC)
(Only for MFC
6550MC/
7550MC)
1.FAX
2.PRINTER
1.FAX
6.TEL OPTIONS
4.F/T RING TIME
RING TIME:20 SEC
6-5
SELECT { } & SET
Page 79

MFC 4550/6550MC/7550MC
OP-US-5.0
BASIC SETUP TO RECEIVE FAXES
6. Press Z (left arrow) or X(right arrow)
RECEIVING F AXES AND OTHER CALLS
RING TIME:10 SEC
repeatedly until you find the setting you
want.
Example: 10 sec.
7. Press Set.
4.F/T RING TIME
8. Press Stop to exit.
Smoothing
The smoothing feature enhances the appearance of incoming faxes by making the
lines smooth and takes no additional time. This function does not apply to outgoing
faxes, or to lists or reports you print. The initial setting is ON.
KEYS TO PRESS THE DISPLAY WILL SHOW:
09/12/1996 15:25
ONLINE
1. Press Function.
(The MFC 4550 will skip to Step 4.)
2. Wait for two seconds.
(Only for MFC 6550MC/7550MC)
3. Press 1.
(Only for MFC 6550MC/7550MC)
4. Press 5.
5 . Press 1.
6. Press Z (left arrow) or X (right arrow)
to choose ON or OFF.
Example: OFF.
7. Press Set.
(Only for MFC
6550MC/
7550MC)
(Only for MFC
6550MC/
7550MC)
ENTER NO. & SET
1.FAX
2.PRINTER
1.FAX
5.USER OPTIONS
Receive FAX
1.SMOOTHING
SMOOTHING:ON
SELECT { } & SET
SMOOTHING:OFF
1.SMOOTHING
8. Press Stop to exit.
6-6
Page 80

MFC 4550/6550MC/7550MC
OP-US-5.0
RECEIVING F AXES AND OTHER CALLS
BASIC SETUP TO RECEIVE FAXES
Setting the Size of the Recording Paper
There are three different settings for the size of the recording (printing) paper. The
machine automatically will reduce and print the incoming data according to the
setting of the recording paper size.
KEYS TO PRESS THE DISPLAY WILL SHOW:
09/12/1996 15:25
ONLINE
1. Press Function.
(The MFC 4550 will skip to Step 4.)
2. Wait for two seconds.
(Only for MFC 6550MC/7550MC)
3. Press 1.
(Only for MFC 6550MC/7550MC)
4. Press 5.
(Only for MFC
6550MC/
7550MC)
(Only for MFC
6550MC/
7550MC)
ENTER NO. & SET
1.FAX
2.PRINTER
1.FAX
5.USER OPTIONS
5. Press 6.
6. Press Z (left arrow) or X (right arrow)
to select either LETTER, LEGAL or A4.
Example : A4
7. Press Set.
8. Press 1 to go to the REDUCTION setting
in Function menu 1-5-5. (See page 6-8-9.)
9. Press Z (left arrow) or X (right arrow)
to select either AUTO, 100%, 93%, 87%,
or 75%.
Example: AUTO
10.Press Set.
6.RCD PAPER
RCD PAPER:LETTER
SELECT { } & SET
RCD PAPER:A4
CHANGE REDUCTION
1.YES 2.NO
REDUCTION:AUTO
SELECT { } & SET
REDUCTION:AUTO
6.RCD PAPER
11
. Press Stop to exit.
6-7
Page 81

MFC 4550/6550MC/7550MC
OP-US-5.0
BASIC SETUP TO RECEIVE FAXES
RECEIVING F AXES AND OTHER CALLS
NOTICE
Regardless of the actual size of the recording paper, the machine will
calculate the reduction ratio by this setting. So when you change the
recording paper, you must also change this setting to get the correct
reduction. Your machine can be set to receive incoming fax documents on
only letter, legal or A4 paper.
Printing a Reduced Size Copy of the Incoming Document
You can avoid separating data even if the document is longer than the recording paper
by using this function to print a reduction of the document. There are two types of
reduction: Auto Reduction and Fixed Reduction.
Auto Reduction
Regardless of the original size of the incoming document, it will be reduced so that it
fits on one page of recording paper. The machine will automatically calculate the
reduction ratio by taking into account the size of the incoming document and the size
of the recording paper you selected in Function menu 1-5-6. (See page 6-7.)
Using Fixed Reduction Ratios
You can choose to have incoming documents reduced at a fixed reduction ratio,
regardless of the size of the recording paper. The reduction ratio can be selected from
among four choices: 100%, 93%, 87%, or 75%.
KEYS TO PRESS THE DISPLAY WILL SHOW:
09/12/1996 15:25
ONLINE
1. Press Function.
(The MFC 4550 will skip to Step 4.)
2. Wait for two seconds.
(Only for MFC 6550MC/7550MC)
3. Press 1.
(Only for MFC 6550MC/7550MC)
4. Press 5.
5 . Press 5.
(Only for MFC
6550MC/
7550MC)
(Only for MFC
6550MC/
7550MC)
ENTER NO. & SET
1.FAX
2.PRINTER
1.FAX
5.USER OPTIONS
5.REDUCTION
REDUCTION:AUTO
Receive FAX
SELECT { } & SET
6-8
Page 82

MFC 4550/6550MC/7550MC
OP-US-5.0
RECEIVING F AXES AND OTHER CALLS
6. Press Z (left arrow) or X (right arrow)
to select the reduction ratio you want :
-If you want Auto Reduction, choose
“AUTO”.
-Choose 93%, 87%, or 75% if you want
Fixed Reduction.
Example: 93%
-Choose 100% if you want to record the
same size.
7. Press Set.
8. Press Stop to exit.
BASIC SETUP TO RECEIVE FAXES
REDUCTION: 93%
5.REDUCTION
NOTICE
• You can use Auto Reduction to reduce incoming documents to fit on one
page of recording paper, only as long as the original document is not
longer than legal size. If the original is longer than legal size, the data
will not be reduced (see For Your Information below) and will carry over
to print on a second page.
• When you use Auto Reduction and you receive an incoming document
that is smaller than your recording paper, no reduction will take place.
• When selecting Fixed Reduction, you must consider the size of the
recording paper as registered in Function menu 1-5-6. (See page 6-7.) If
you selected letter size, you can choose a reduction of 93%, 87%, or 75%.
If you selected A4 size, you can choose a reduction of only 93% or 87%.
And if you selected legal size, you can choose only 93%.
FOR YOUR INFORMATION
Selecting the Ratios of Fixed Reduction
Other party sends you a document
the size of…
Letter document (8.5"x11")
(mostly Domestic communications)
A4 document (8.2"x11.6")
(mostly Internatlonal communications)
Legal documents (8.5"x14")
Your receiving
paper size is:
Letter
A4, Legal
Letter
A4
Legal
Letter
Legal
Recommended
Reduction Ratio is:
93%
100%
87%
93%
100%
75%
93%
6-9
Page 83

MFC 4550/6550MC/7550MC
OP-US-5.0
BASIC SETUP TO RECEIVE FAXES
RECEIVING F AXES AND OTHER CALLS
FOR YOUR INFORMATION
Reception into Memory (Out of Paper Reception)
If the multipurpose sheet feeder is empty, the LCD will display the message
CHECK PAPER. Add more recording paper.
Your machine automatically will store incoming faxes in its memory if it
runs out of paper. The contents of the memory will be printed automatically
when you replace the recording paper. The memory will not be lost as long
as you do not turn off the machine or disconnect the power. (However for
MFC 6550MC/7550MC, even the memory for out of paper reception and
memory transmission will be saved for up to 2 hours after power has been
cut off.)
Setting the Print Density
You can set print conditions with the following steps. Press Z (left arrow) to make
the print lighter and X (right arrow) to make the print darker. If the print is still too
light or too dark, you can adjust it further by turning the Print Density Dial located
in the right corner under the top cover. (Remove the drum unit to find the dial. See
page 16-6 for more information.)
KEYS TO PRESS THE DISPLAY WILL SHOW:
1. Press Function.
(The MFC 4550 will skip to Step 4.)
2. Wait for two seconds.
(Only for MFC 6550MC/7550MC)
3. Press 1 .
(Only for MFC 6550MC/7550MC)
4. Press 5 .
5. Press 9.
The display will alternate messages.
6. Use Z (left arrow) or X (right arrow) to
change the settings.
7. Press Set.
(Only for MFC
6550MC/
7550MC)
(Only for MFC
6550MC/
7550MC)
09/12/1996 15:25
ONLINE
ENTER NO. & SET
Receive FAX
1.FAX
2.PRINTER
1.FAX
5.USER OPTIONS
9.PRINT DENSITY
SELECT { } & SET
9.PRINT DENSITY
8. Press Stop to exit.
6-10
Page 84

MFC 4550/6550MC/7550MC
OP-US-5.0
RECEIVING F AXES AND OTHER CALLS
BASIC SETUP TO RECEIVE FAXES
Toner Save Function
This function lets you extend the life of the toner by conserving its use. When the
Toner Save is set to ON, the print appears somewhat lighter. This feature is also
available when copying. The default setting is OFF.
KEYS TO PRESS THE DISPLAY WILL SHOW:
09/12/1996 15:25
ONLINE
1. Press Function.
(The MFC 4550 will skip to Step 4.)
2. Wait for two seconds.
(Only for MFC 6550MC/7550MC)
3. Press 1 .
(Only for MFC 6550MC/7550MC)
4. Press 5 .
(Only for MFC
6550MC/
7550MC)
(Only for MFC
6550MC/
7550MC)
ENTER NO. & SET
1.FAX
2.PRINTER
1.FAX
5.USER OPTIONS
5. Press 7.
6. Press Z (left arrow) or X (right arrow)
to select either ON or OFF.
Example: ON.
7. Press Set.
8. Press Stop to exit.
7.TONER SAVE
TONER SAVE:OFF
SELECT { } & SET
TONER SAVE:ON
7.TONER SAVE
6-11
Page 85

MFC 4550/6550MC/7550MC
OP-US-5.0
BASIC SETUP TO RECEIVE FAXES
RECEIVING F AXES AND OTHER CALLS
Speaker Volume
There are three settings available for the Speaker Volume, OFF, LOW, or HIGH. This
setting controls the loudness of the MFC’s one-way speaker, which is connected to the
phone line. The initial setting is LOW.
KEYS TO PRESS THE DISPLAY WILL SHOW:
09/12/1996 15:25
ONLINE
1. Press Function.
(The MFC 4550 will skip to Step 4.)
2. Wait for two seconds.
(Only for MFC 6550MC/7550MC)
3. Press 1.
(Only for MFC 6550MC/7550MC)
4. Press 6.
(Only for MFC
6550MC/
7550MC)
(Only for MFC
6550MC/
7550MC)
ENTER NO. & SET
1.FAX
2.PRINTER
1.FAX
6.TEL OPTIONS
5 . Press 3.
6 . Press Z (left arrow) or X (right arrow)
3.SPEAKER VOLUME
SPEAKER:LOW
SELECT { } & SET
SPEAKER:HIGH
to choose a setting either OFF, LOW, or
HIGH.
Example: HIGH.
7. Press Set.
3.SPEAKER VOLUME
8. Press Stop to exit.
If you want to change the speaker volume using On Hook Dialing for the current call,
use the control panel keys shown below:
Super
Q.Scan
Help
Receive FAX
Speaker HL
Press
(Only for MFC 6550MC/7550MC)
6-12
Page 86

MFC 4550/6550MC/7550MC
OP-US-5.0
RECEIVING F AXES AND OTHER CALLS
BASIC SETUP TO RECEIVE FAXES
Ring Volume
You can set the ring volume to either OFF, LOW or HIGH. The initial setting is HIGH.
Even if you select OFF, the ring volume will be LOW for F/T ringing, Call Reservation
ringing and when the Distinctive Ringing mode is SET.
KEYS TO PRESS THE DISPLAY WILL SHOW:
09/12/1996 15:25
ONLINE
1. Press Function.
(The MFC 4550 will skip to Step 4.)
2. Wait for two seconds.
(Only for MFC 6550MC/7550MC)
3. Press 1.
(Only for MFC 6550MC/7550MC)
4. Press 6.
(Only for MFC
6550MC/
7550MC)
(Only for MFC
6550MC/
7550MC)
ENTER NO. & SET
1.FAX
2.PRINTER
1.FAX
6.TEL OPTIONS
5. Press 5.
6. Press Z (left arrow) or X (right arrow)
to choose either OFF, LOW, or HIGH.
Example: LOW.
7. Press Set.
8. Press Stop to exit.
5.RING VOLUME
RING VOLUME:HIGH
SELECT { } & SET
RING VOLUME:LOW
5.RING VOLUME
6-13
Page 87

MFC 4550/6550MC/7550MC
OP-US-5.0
REMOTE ACTIVATION
RECEIVING F AXES AND OTHER CALLS
B) REMOTE ACTIVATION
What is Remote Activation?
If you answer a call that is a fax message, you can use the Remote Activation Code
to make your MFC take over the call. If your MFC answers a telephone call that is for
you, you can use the Remote Deactivation Code to pick up the call at an extension
phone. (You do not need a code to take over a call at the MFC.) You must use a touch
tone phone.
FOR YOUR INFORMATION
Connecting an External or Extension Telephone
You may connect an external telephone to your MFC, as shown below. Use
the “EXT.” jack on your machine.
Alternatively, you may wish to use this “EXT.” jack to connect a telephone
answering device (TAD). An extension phone is a telephone that is plugged
into a separate wall jack on the same line.
External
LINE
EXT.
If the external telephone is in use, the warning message EXT. TEL IN USE
will be displayed on the fax LCD. When the handset on the machine is
picked up, an alarm will sound. You can disconnect the external phone and
switch to the MFC’s handset by pressing Hook.
Telephone
Extension
Telephone
Receive FAX
6-14
Page 88

MFC 4550/6550MC/7550MC
OP-US-5.0
RECEIVING F AXES AND OTHER CALLS REMOTE ACTIVATION
Using Remote Codes
The Remote Activation Code (*51) is used in F/T, TAD and MSG CTR modes. The
Deactivation Code (#51) is used only in F/T mode and MSG CTR mode.
Using the Activation Code
When you are at the MFC, you will probably answer incoming calls before your MFC
or answering machine is programmed to pick up. If you answer a call and no one
seems to be on the line, assume it is a fax message. Do not hang up. You must
activate your machine to take over the call first. (If you are holding the MFC’s
handset, just press the Start key and hang up.) If you are on an extension/external
phone, press *51 and wait for your MFC to respond before you hang up. After
3 seconds you will hear receiving tones (chirps) through the handset of extension
phone. Then hang up. You can repeat the code as many times as needed. Your MFC
will take over the call and print the fax message. If your caller wants to talk before
sending the fax, you can have a conversation first and then activate your MFC with
the code.
The Remote Activation Code can also be used by your callers. When you are using a
TAD, your outgoing message (OGM) should end with the statement “to send a fax,
press *51”. (See the section on Connecting a Telephone Answering Device for more
information.)
Using the Deactivation Code
When your MFC is in F/T mode, sometimes it will answer a call that is not fax calling
tones (a telephone call or manual fax). It will respond with a double ring (short,
short) to alert you to take over. Because it has already answered the call, only the MFC
will ring, extension phones are no longer connected to the call. Pick up any phone on
the line, except an external phone connected to the machine.
To take over the call at the MFC:
Pick up the handset of the machine and talk to the caller as usual. If no one is there
or someone is trying to send you a manual fax, press the Start key and replace the
handset. Your MFC will display RECEIVING and print the incoming fax message.
To take over the call at an extension phone:
Pick up the handset on another telephone and press #51 quickly during the
silence between the double ring pattern. When the machine hears the code it will
stop ringing and let you speak with the caller. If no one is on the line or someone is
trying to send you a manual fax, send the call back to the MFC (*51).
6-15
Page 89

MFC 4550/6550MC/7550MC
OP-US-5.0
REMOTE ACTIVATION
RECEIVING F AXES AND OTHER CALLS
Making the Remote Codes Easier to Use
You can change the codes at any time. It may be easier for you and your callers to press
the same key three times (Example: *** and ###). Although you can change the
codes to any numbers you want, try to avoid using digits for the Activation Code. The
Remote Activation Code can not match any number you dial. If you try to dial a phone
number that includes the Activation Code, your MFC will go into receiving mode.
Troubleshooting
Sometimes other equipment on your phone line reserves a key that is in the Activation
or Deactivation code. (Some answering machines reserve the “*” key.) If the code you
use to retrieve messages from your answering machine causes the line to be
disconnected, try changing the Remote Codes. Change *51 to ### and #51 to 999. The
Remote Activation and Deactivation Codes may not work with some telephone
systems or telephone sets.
NOTE: If you accidentally pick up an extension phone when a fax message is being
received, you may disrupt the transmission or render some portions
unreadable.
Changing and Registering Remote Codes
KEYS TO PRESS THE DISPLAY WILL SHOW:
1. Press Function.
(The MFC 4550 will skip to Step 4.)
2. Wait for two seconds.
(Only for MFC 6550MC/7550MC)
3. Press 1 .
(Only for MFC 6550MC/7550MC)
4. Press 7 .
5. Press 5.
(Only for MFC
6550MC/
7550MC)
(Only for MFC
6550MC/
7550MC)
09/12/1996 15:25
ONLINE
ENTER NO. & SET
1.FAX
2.PRINTER
1.FAX
7.SETUP SYSTEM
5.REMOTE CODE
REMOTE ACT.:ON
SELECT { } & SET
Receive FAX
6-16
Page 90

MFC 4550/6550MC/7550MC
OP-US-5.0
RECEIVING F AXES AND OTHER CALLS REMOTE ACTIVATION
6. Press Z (left arrow) or X (right arrow)
to choose ON or OFF.
Example: ON.
7. Press Set.
8. Enter new remote code to activate.
(Factory setting is *51.) Then press Set.
9. Enter new remote code to deactivate.
(Factory setting is #51.)
10
. Press Set.
11
. Press Stop to exit.
REMOTE ACT.:ON
ACT.CODE:*51
DEACT.CODE:#51
5:REMOTE CODE
C) CONNECTING TO A TELEPHONE ANSWERING DEVICE (TAD)
How to Use an External TAD with the MFC
When you have a Telephone Answering Device on the fax phone line, the TAD will
answer all the incoming calls. Your Brother MFC will listen in on the line for fax CNG
tones. If it hears them, it will take over the call and receive the fax message. If it does
not hear fax tones, it will let the TAD continue playing the outgoing message so the
caller can leave a voice message.
The TAD must answer within 4 rings (2 rings are recommended). The MFC can not
hear the CNG calling tones until the TAD answers the call. When the Ring Delay is
set for 4 rings, only 8-10 seconds of CNG calling tones are left for the “handshake”.
So you must strictly follow the instructions for recording the OGM.
You must erase the incoming messages frequently on your TAD. When the TAD’s
memory is full it will not answer any incoming calls (fax or voice).
For MFC 6550MC/7550MC, set Message Storage to VOICE: EXT mode. For MFC
4550, set the MFC’s answer mode to TAD mode. (See page 6-1, 9-2.)
6-17
Page 91

MFC 4550/6550MC/7550MC
OP-US-5.0
CONNECTING TO A TELEPHONE ANSWERING DEVICE (TAD)
FOR YOUR INFORMATION
Connecting an External TAD to the MFC
You may connect an external TAD to your MFC, as shown below. Use the
“EXT.” jack on your machine.
RECEIVING FAXES AND OTHER CALLS
TAD TAD
NO !
LINE
EXT.
-Do not connect a TAD elsewhere on the same phone line. This will
cause problems because your MFC and TAD will both try to
control the line.
Receive FAX
6-18
Page 92

MFC 4550/6550MC/7550MC
OP-US-5.0
RECEIVING FAXES AND OTHER CALLS
CONNECTING TO A TELEPHONE ANSWERING DEVICE (TAD)
Flowchart of External TAD Reception
Example) VOICE : EXT.
mode.
(TAD mode for MFC
4550)
Fax reception is
automatically
activated by
fax tones.
Auto
dialed
fax call
Incoming Call
The call is picked up
by the external TAD.
(Maximum 4 rings.)
The external TAD
outgoing message
begins.
Voice call
Manual
dialed
fax call
The caller must
press your Remote
Activation Code
to activate the
fax machine.
The fax message is
received on paper.
The fax message
is received on
paper.
The caller leaves a
voice message on the
external TAD.
The caller
can also
send a fax message.
Hookup
There is only one way you can hook up a Telephone Answering Device (TAD) on the
fax phone line. The TAD must be plugged into the back of the MFC in the jack labeled
EXT. Your machine can not work properly if you plug the TAD into a wall jack. Follow
these steps:
1. Plug the telephone line cord from the wall jack into the back of the machine in the
jack labeled LINE.
2. Plug the telephone line cord from your TAD into the back of the machine in the jack
labeled EXT. (Double check that the telephone line cord comes from the jack in the
TAD for telephone line and not for telephone set.)
3. Put your machine in TAD mode by turning both the Fax and F/T lights on. (If your
machine is MFC 6550MC or 7550MC, put it in Message Center mode and set
Message Storage to VOICE: EXT mode.)
4. Set your TAD to 4 rings or less. (The machine’s Ring Delay setting does not apply).
5. Turn the TAD’s Answer mode to ON.
6. Record the OGM (outgoing message) on your TAD as explained on the next page.
6-19
Page 93

MFC 4550/6550MC/7550MC
OP-US-5.0
CONNECTING TO A TELEPHONE ANSWERING DEVICE (TAD)
RECEIVING FAXES AND OTHER CALLS
Recording the TAD’s Outgoing Message (OGM)
The TAD’s outgoing message is important because it must be set up to handle two
kinds of fax receptions: automatic and manual. Timing is important.
1. Record 5 seconds of silence as the beginning of your message. (Your MFC will be
able to hear the fax calling tones, of automatic fax transmissions, before they stop.)
2. Limit your speaking to 20 seconds.
3. End your 20 second message by giving your Remote Activation Code for people
sending manual faxes:
“After the beep, leave a message or send a fax by pressing *51.”
NOTE: Do not assume that most callers send faxes automatically. Many people do
not realize they are not sending fax tones when they lift the handset or press
the Hook key. Also, some machines may not send fax tones.
D) DISTINCTIVE RINGING
Distinctive Ringing
What Is Distinctive Ringing?
Distinctive ringing is a service offered by the telephone carriers that allows you to
have several different numbers on one phone line, so you can have a separate number
for your MFC. Each number has its own distinctive ringing pattern. This way, when
you get an incoming call, you can identify the number being called by its ring. Your
local telephone company can provide more information about this service. The service
is usually offered as a monthly charge to your normal telephone bill.
What Is the Advantage of Using the Distinctive Ringing Function?
Using Distinctive Ringing is the most efficient way to receive both fax and telephone
calls on the same line. It is much easier for your callers who dial manually. The MFC
will answer with receiving tones so they will not have to press an activation code or
wait 30 seconds to hear fax tones (F/T mode). And the people who call to talk on your
main number, will not have to talk to your machine. Basically, it gives you two
independent numbers without the higher cost of a second line.
Can My MFC Use Distinctive Ringing?
Yes, it has a distinctive ringing function that allows you to register the distinctive
ringing pattern of an additional phone number on the line. The number you register
must be the number you want to use as your dedicated fax number. Once you register
the ringing pattern, the MFC will be able to identify its own incoming calls and
automatically receive faxes at that number. You can register only
There are some ringing patterns that can not be registered.
one ringing pattern.
Receive FAX
6-20
Page 94

MFC 4550/6550MC/7550MC
OP-US-5.0
RECEIVING F AXES AND OTHER CALLS
Can I Change the Setting Later?
Yes, you can change or cancel the distinctive ringing setting at any time. You can
switch it OFF temporarily and then turn it back ON. When you move or get a new fax
number, change the distinctive ringing mode to SET so you can register the new
number.
How Will the MFC Treat All Other Numbers?
If you have registered the distinctive ringing number, the MFC will answer the
registered number (with fax receiving tones) and receive faxes automatically. When
a call comes in to your main number or to additional distinctive ringing numbers, all
the phones will ring. You can set the MFC’s Message Center or an external answering
device (TAD) to answer calls on the other number(s). (See the chart on page 6-23~24.)
If you change the answer mode on the MFC to Fax or F/T, that setting will override
the Distinctive Ringing setup. In Fax or F/T modes, your MFC will answer
the phone numbers (including its own ring pattern).
The Message Center Answers the Other Phone Number(s) on the Line:
(Only for MFC 6550MC/7550MC)
DISTINCTIVE RINGING
all
If you change the answer mode on the MFC to MSG CTR (Message Center), it will
allow the Distinctive Ringing function to work. The Message Center will answer only
the main number or additional distinctive ringing numbers according to the way you
have set Message Storage. (See page Message Center Mode Settings for details.)
NOTE: If you set the Message Storage to FAX: ON/VOICE: OFF, the Message
Center will be set to answer the main number with fax receiving tones.
To have your Message Center’s OGM answer your main number(s):
1. Register the distinctive ringing number. (See “Setting the Distinctive Ringing
Function” on page 6-25~26.)
2 . Set the Message Center’s Message Storage to either VOICE: ON/FAX: OFF or
VOICE: ON/FAX: ON mode. (See page 9-2~4, 6.)
3. Keep the Message Center on (both Fax and F/T lights lit).
4 . Turn Toll Saver OFF (see page 9-16) and set the Ring Delay to 4 rings (see page
6-2~3).
6-21
Page 95

MFC 4550/6550MC/7550MC
OP-US-5.0
DISTINCTIVE RINGING
External Telephone Answering Device (TAD) Answers Other Number(s) on
the Line:
An external telephone answering device (TAD) can be set up to work with the
Distinctive Ringing function. The external TAD must be set to its maximum number
of rings (at least 4 ring patterns). Otherwise, it will answer the registered fax number
before the MFC has time to recognize the ringing pattern. The external TAD’s OGM
(outgoing message) will answer your main number(s) if you do either #1 or #2 as
follows:
1. Plug the external TAD into the EXT jack of the MFC (you will not hear the first two
rings on the MFC). Put your machine in Manual mode (Fax and F/T lights off). For
MFC 6550MC/7550MC, set the Message Center’s Message Storage to either FAX:
OFF/VOICE: EXT or FAX: ON/VOICE: EXT. Turn the MSG CTR on (Fax and F/T
lights lit) or set the MFC to Manual Mode.
2. Plug the external TAD into another phone jack and put the MFC in Manual mode
(Fax and F/T lights turned off).
Retrieving Faxes from a Remote Site When Using Distinctive Ringing:
(Only for MFC 6550MC/7550MC)
RECEIVING F AXES AND OTHER CALLS
When you use the Distinctive Ringing feature, faxes are printed on paper. If you want
to be able to retrieve faxes from another location, you must set up the Message Center
for FAX: ON. This allows fax messages to be stored in the Message Center’s memory,
so they can be retrieved. However, because the Message Center only answers the
main number(s), you must make sure the faxing party sends faxes, that must be
retrieved, to the main number.
How Does the Distinctive Ringing Function Work?
Your telephone number will have the standard ring pattern of long long, while the
new number could have a ring pattern of short short, long short, etc. When Distinctive
Ringing is ON, you will not hear the first two rings of all incoming calls on the MFC.
Extension phones will ring as usual. If the MFC recognizes the ring pattern, all
ringing will stop and the MFC will answer and automatically receive the fax message.
Otherwise, you will hear the extension phones and the MFC continue to ring. The
MFC always listens to at least two ring patterns before it answers, so do not pick up
the phone during that time. You will quickly learn to recognize the ring pattern for
faxes, so you will not be tempted to answer that number. Either you, your Message
Center or a telephone answering device can answer the main number(s).
Receive FAX
6-22
Page 96

MFC 4550/6550MC/7550MC
OP-US-5.0
RECEIVING F AXES AND OTHER CALLS
Flowchart of an Incoming Call
(For MFC 4550)
Incoming Call
All extension phones ring,
MFC is silent.
(The answer mode must
Registered
Distinctive
Ringing Number
MFC automatically
receives and prints fax
message.
be Manual.)
Main number and other
Distinctive Ringing Number(s).
MFC begins ringing
on third ring.
DISTINCTIVE RINGING
You answer the call.
Telephone Answering
Device (TAD)
answers the call.
6-23
Page 97

MFC 4550/6550MC/7550MC
OP-US-5.0
DISTINCTIVE RINGING
RECEIVING F AXES AND OTHER CALLS
(For MFC 6550MC/MFC 7550MC)
Registered
Distinctive
Ringing Number
MFC
automatically
receives and
prints fax
message.
FAX: ON
MESSAGE CENTER mode
(Fax and F/T lights on)
Incoming Call
FAX: OFF
Other Number(s)
MANUAL mode
(Fax and F/T lights off)
You answer
the call.
External
TAD OGM
answers the
call.
Incoming
voice
message is
recorded in
External TAD
memory.
Imcoming fax
message
will not be
received
automatically.
VOICE: ON VOICE: EXT.
Message
Center OGM
answers the
call.
Incoming
voice and fax
messages
are recorded
in MSG CTR
memory.
External
TAD OGM
answers the
call.
Incoming
voice
message is
recorded in
External TAD
memory.
Incoming
fax message
is recorded
in MSG CTR
memory.
VOICE: OFF VOICE: EXT.VOICE: ON VOICE: OFF
MFC
answers the
call.
Fax
message is
recorded in
MSG CTR
memory.
Message
Center OGM
answers the
call.
Incoming
voice
message is
recorded in
MSG CTR
memory.
Incoming
fax message
is recorded
on paper.
External
TAD OGM
answers
the call.
Incoming
voice
message is
recorded in
External TAD
memory.
Incoming
fax message
is recorded
on paper.
Fax
message is
recorded
only on
paper, but it
is not stored
in the
memory.
Voice
message
will not be
stored in the
memory.
Receive FAX
6-24
Page 98

MFC 4550/6550MC/7550MC
OP-US-5.0
RECEIVING F AXES AND OTHER CALLS
Which Phone Number Should I Register?
It is a good idea to keep your old number for its original purpose and to register the
new number as your fax number. Remember to give the new fax number to your
customers and colleagues.
What Must I Do to Set Up Distinctive Ringing?
To use the Distinctive Ringing feature you must:
1. Get the distinctive ringing service from your telephone carrier.
2. When your distinctive ringing number is available, register it in the function called
“Setting the Distinctive Ringing Function”.
3. For MFC 4550, keep the MFC in Manual answer mode (both Fax and F/T lights
turned off) and for MFC 6550MC/7550MC, keep the machine in MSG CTR answer
mode (both Fax and F/T lights lit) if you want the Message Center to answer the
main number(s).
DISTINCTIVE RINGING
Setting the Distinctive Ringing Function
This function is a one-time procedure to register a distinctive ringing number with
your MFC. Your MFC will answer the registered number automatically, simulating
Fax mode on a dedicated fax line. You can register only
set up this function if you do not have the distinctive ringing service. It may
cause your MFC to malfunction.
This procedure is in two parts: First, you must put the MFC in SET mode; D/R SET
MODE will be on the display screen. Second, you must wait for a friend to call the
distinctive ringing number so you can register the ringing pattern. When a call comes
in, do not pick up the handset until the MFC’s display says PICK UP TO SET. Then
pick up the handset. If the caller dialed your distinctive ringing number, press the
Start key and check that the display says REGISTERED before you hang up. If the
caller dialed the other number, press the Stop key and hang up to try again.
Before you begin this function:
1. If your MFC is connected to a telephone answering device or to the telephone
company’s Voice Mail system, disconnect it before you begin this function.
2. Have a friend ready to call your distinctive ringing number.
one number. Do not try to
KEYS TO PRESS THE DISPLAY WILL SHOW:
09/12/1996 15:25
ONLINE
1. Press Function.
(The MFC 4550 will skip to Step 4.)
6-25
ENTER NO. & SET
Page 99

MFC 4550/6550MC/7550MC
OP-US-5.0
DISTINCTIVE RINGING
RECEIVING F AXES AND OTHER CALLS
2. Wait for two seconds.
(Only for MFC 6550MC/7550MC)
3. Press 1 .
(Only for MFC 6550MC/7550MC)
4. Press 6 .
5. Press 6.
6. Press Z (left arrow) or X (right arrow)
to find the SET mode.
7. Press Set.
(Only for MFC
6550MC/
7550MC)
(Only for MFC
6550MC/
7550MC)
1.FAX
2.PRINTER
1.FAX
6.TEL OPTIONS
6.DISTINCTIVE
DISTINCTIVE:OFF
SELECT { } & SET
DISTINCTIVE:SET
6.DISTINCTIVE
8. Press Stop.
NOTE: The display should say D/R SET
MODE. Also, the answer mode
lights will flash. You must now
wait for someone to call the
distinctive ringing fax number.
9 . When the phone rings, listen carefully to
check that the ringing pattern is the one
you want to register. If it is,
wait (at least
two ring cycles) until the display says
PICK UP TO SET. Then pick up the fax
handset.
10
. Press Start to set.Check that the display
says REGISTERED.
(If the other number was called, press
Stop to cancel.)
11
. Press Start again to receive the incoming
fax, or if the call is a voice call, talk into
the handset.
D/R SET MODE
ONLINE
PICK UP TO SET
Receive FAX
START TO SET
STOP TO CANCEL
REGISTERED
TELEPHONE/FAX
ONLINE
6-26
Page 100

MFC 4550/6550MC/7550MC
OP-US-5.0
RECEIVING F AXES AND OTHER CALLS
After you complete this one-time setup:
1. The Distinctive Ringing function automatically will be changed from SET to ON.
Set the answer mode based upon your needs.
2. Be sure to have a friend call you on
correctly.
3. If you do not complete this function by pressing Start key to register a number, your
machine will stay in D/R SET MODE. So, if you decide
must repeat Steps 1~8 and in Step 6 change the mode to OFF.
both numbers to test that everything is set up
DISTINCTIVE RINGING
not to register a number, you
How to Turn the Distinctive Ringing Function ON or OFF
The distinctive ringing function is designed to accommodate the distinctive ringing
service (a telephone service that provides you with multiple numbers, each with a
distinctive ring pattern, on one line). You can change the distinctive ringing function
setting to ON or OFF as needed
number in the function called Setting the Distinctive Ringing Function. To change the
setting, repeat Steps 1~8 above; Step 6 is where you can select either ON or OFF.
after you have registered the distinctive ringing
E) CALLER ID
What is Caller ID?
Caller ID is a telephone service that allows the subscriber to see a display of the
caller’s phone number (or name in certain states) as the telephone rings. It is a fast
way to screen your calls. You can respond quickly to calls you missed, because Caller
IDs are received and stored in your machine’s memory.
NOTICE
To get the Caller ID Service: apply for the Caller ID service at your local
telephone company.
The type of service varies from state to state and is determined by your
telephone company. Your particular service may display only the caller’s
phone number or the caller’s number and/or name.
Advantages of Caller ID
For Business
All businesses profit from a quicker response to customer calls. Businesses that
provide mail order services, money-lending services or provide confidential information,
can protect themselves from false orders or acceptance of false identification.
At Home
Residential customers can protect themselves from unwanted calls.
6-27
 Loading...