

Page 1
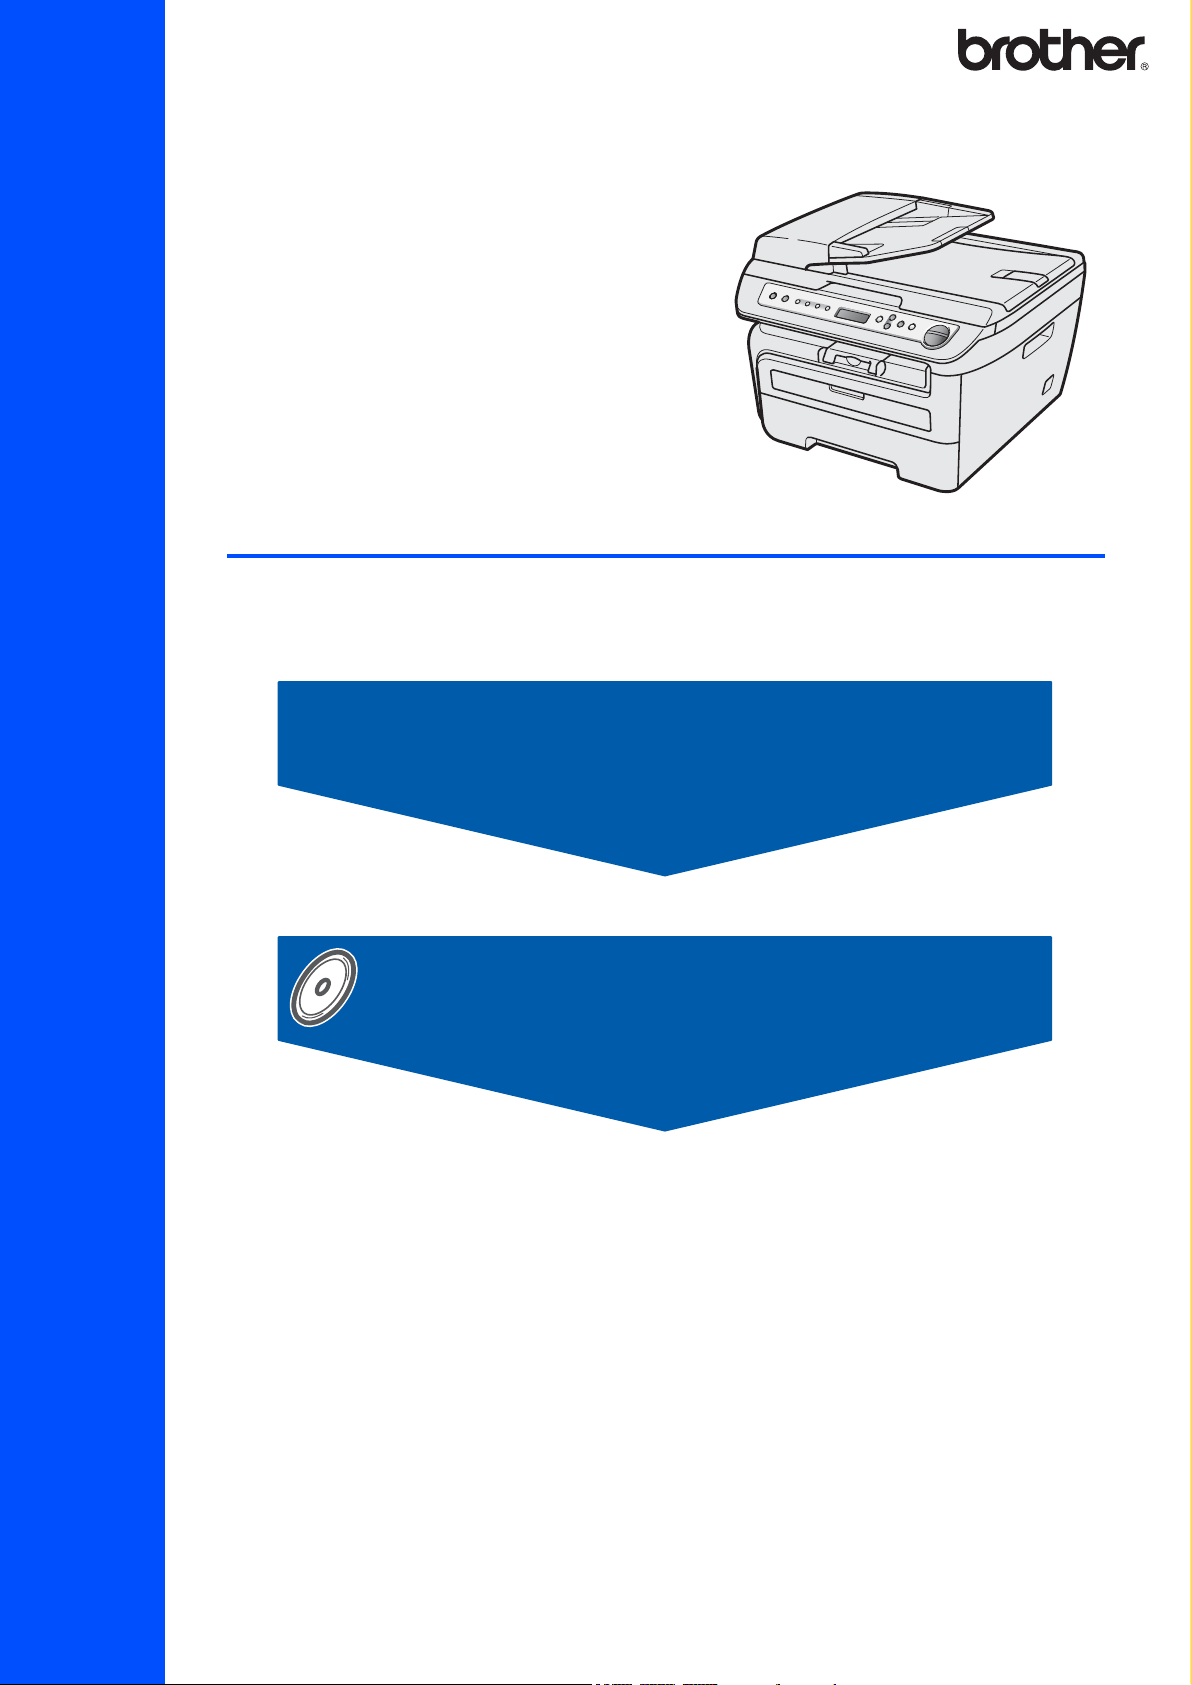
DCP-7030
DCP-7040
Before you can use the machine, you must set up the hardware and install the driver. Please read
this ‘Quick Setup Guide’ for proper set up and installation instructions.
STEP 1
Setting Up the Machine
STEP 2
Installing the Driver & Software
Quick Setup Guide
Setup is Complete!
Keep this ‘Quick Setup Guide’ and the supplied CD-ROM in a convenient place for quick and easy
reference at all times.
Version 0
ARL/ASA/NZ
Page 2

1
Symbols used in this guide
Warning
Warnings tell you what to do to prevent
possible personal injury.
Note
Notes tell you how you should respond
to a situation that may arise or give tips
about how the current operation works
with other features.
Caution
Cautions specify procedures you must
follow or avoid to prevent possible
damage to the machine or other objects.
User's Guide, Software User's Guide or
Network User's Guide
Indicates reference to the User's Guide,
Software User's Guide or Network
User's Guide which is on the CD-ROM
we have supplied.
Improper Setup
Improper Setup icons alert you to
devices and operations that are not
compatible with the machine.
Page 3

Table of Contents
Windows
®
Macintosh
®
Getting Started
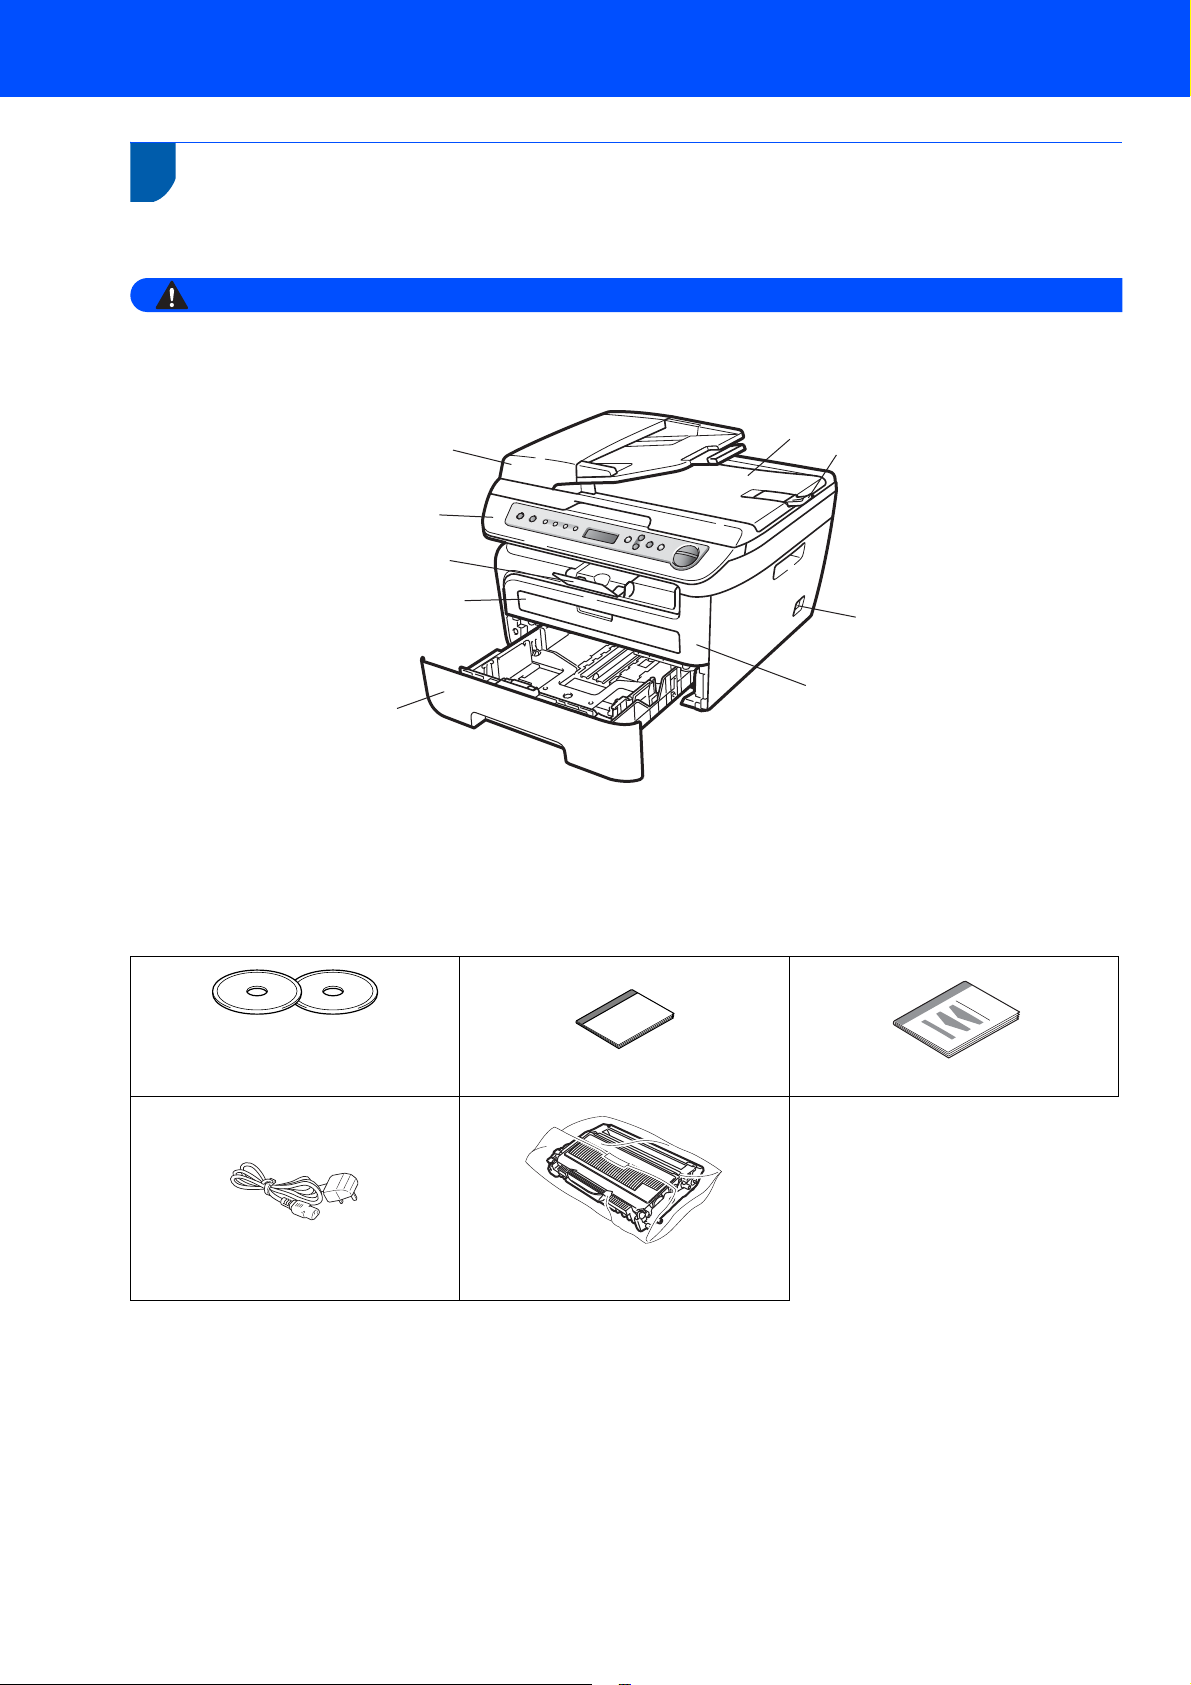
Carton components...................................................................................................................................... 2
Control panel................................................................................................................................................ 4
STEP 1 –
Installing the drum unit and toner cartridge assembly.................................................................................. 5
Loading paper in the paper tray ................................................................................................................... 6
Install the power cord and phone line .......................................................................................................... 7
Setting the LCD contrast .............................................................................................................................. 7
STEP 2 –
For USB Interface Cable Users
(For Windows
For USB Interface Cable Users................................................................................................................. 13
For Mac OS
Setting Up the Machine
Installing the Driver & Software
®
2000 Professional/XP/XP Professional x64 Edition/Windows Vista®) ............................. 10
®
X 10.2.4 or greater......................................................................................................... 13
Consumables and Options
Consumables ............................................................................................................................................. 15
1
Page 4
Getting Started
Warning
1
1
Carton components may vary from one country to another.
Save all packing materials and the carton in case for any reason you must ship your machine.
Carton components
Plastic bags are used in the packaging of your machine. To avoid danger of suffocation, keep these bags away
from babies and children.
9
1
2
3
8
4
5
1 Automatic Document Feeder (ADF) (DCP-7040 only)
2 Control Panel
3 Face-down Output Tray Support
4 Manual Feed Slot
5 Paper Tray
CD-ROMs
For Windows
For Macintosh
®
®
7
6
6Front Cover
7 Power Switch
8 ADF Document Output Support Flap (DCP-7040 only)
9 Document Cover
User’s Guide
Quick Setup Guide
AC Power Cord
Drum Unit Assembly
(including Toner Cartridge)
The interface cable is not a standard accessory. Please purchase the appropriate interface cable for the interface
you intend to use (USB). Do NOT connect the interface cable at this time. Connecting the interface cable is done
during the software installation process.
USB interface cable
Please make sure you use a USB 2.0 interface cable that is no longer than 6 feet (2 metres). When you use a
USB cable, make sure you connect it to the USB port of your computer and not to a USB port on a keyboard
or non-powered USB hub.
To ensure safe operation the supplied plug must be inserted only into a standard power outlet that is properly
grounded through the standard electrical wiring. Non grounded equipment may cause an electrical shock
hazard, and may cause excessive electrical noise radiation.
2
Page 5

Getting Started
Australia & New Zealand users:
Hong Kong, Malaysia & Singapore users:
The mains pulg supplied with this machine is a grounded three pin pulg. Make sure that the AC socket will accept this
grounded three pin pulg. This machine must be grounded, If in doubt, call a qualified electrician.
Philippines & Thailand users:
The mains pulg supplied with this machine is a side grounded two pin pulg. Make sure
that the AC socket will accept this side grounded two pin pulg. This machine must be
grounded, If in doubt, call a qualified electrician.
3
Page 6
Getting Started
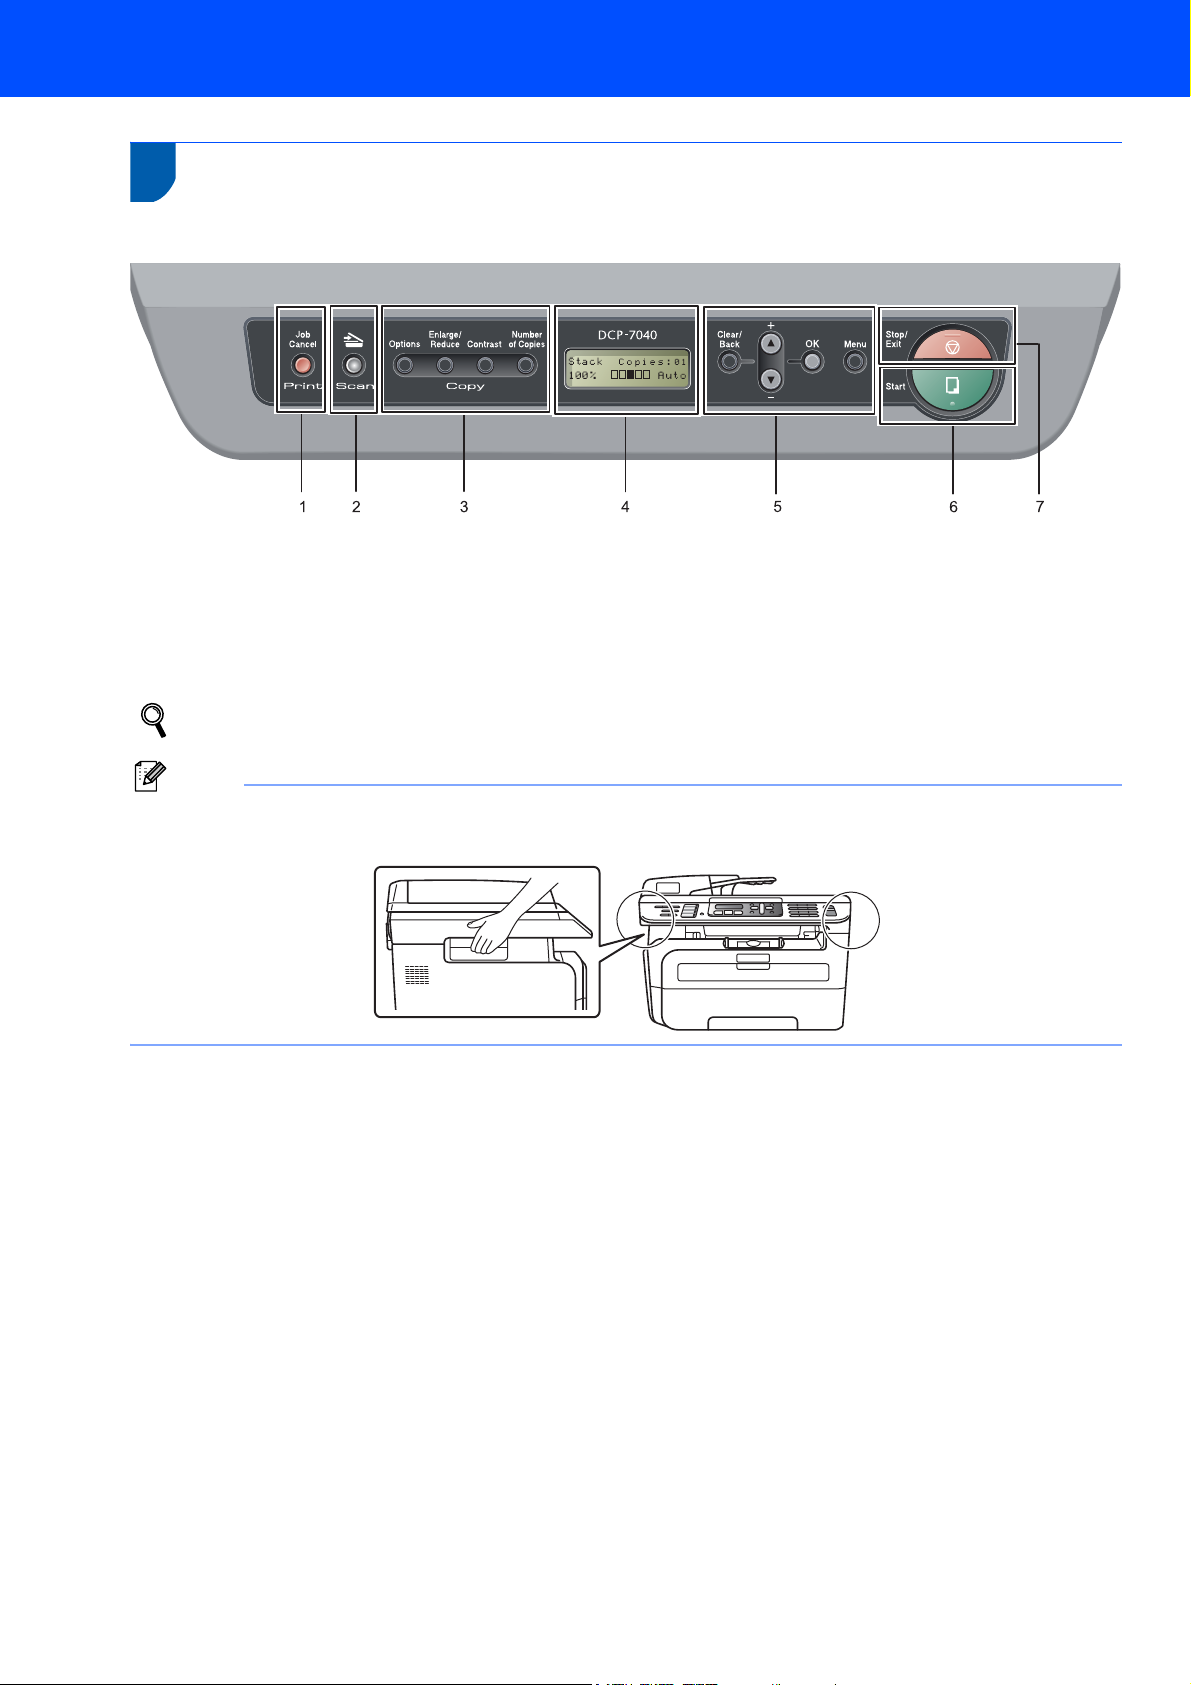
Note
2
DCP-7030 and DCP-7040 have the same keys.
Control panel
1 Job Cancel
2 Scan key
3 Copy keys
4 LCD (Liquid Crystal Display)
For the details of the control panel, see Control panel overview in Chapter 1 of the User’s Guide.
5 Menu keys
6 Start keys
7 Stop/Exit key
When you move the machine, grasp the side handholds that are under the scanner. Do NOT carry the machine
by holding it at the bottom.
Illustration in this Quick Setup Guide are based on DCP-7040.
4
Page 7

Setting Up the Machine
Improper Setup
1
1 Installing the drum unit and
1 Open the front cover.
toner cartridge assembly
DO NOT connect the interface cable.
Connecting the interface cable is done when
installing the driver.
4 Put the drum unit and toner cartridge assembly
into the machine.
2 Unpack the drum unit and toner cartridge
assembly.
3 Gently shake it from side to side several times
to distribute the toner evenly inside the
assembly.
5 Close the front cover of the machine.
5
Page 8

STEP 1
Note
Caution
2 Loading paper in the paper
1 Pull the paper tray completely out of the
Setting Up the Machine
tray
machine.
3 Fan the stack of paper well to avoid paper jams
and misfeeds.
4 Put paper in the paper tray. Make sure that the
paper is flat in the tray and below the maximum
paper mark (1).
1
2 While pressing the green paper-guide release
lever, slide the paper guides to fit the paper
size you are using. Make sure that the guides
are firmly in the slots.
(For Asia) For Legal size paper, press the release
button in the bottom of the paper tray and pull out
the back of the paper tray. (Legal size paper is not
available in some regions.)
Make sure the paper guides touch the sides of the
paper so it will feed properly. If you do not this, it
may cause damage to your machine.
5 Put the paper tray firmly back into the machine.
Ma ke su re that it is c ompletely inserted into the
machine.
6
Page 9

Setting Up the Machine
3 Install the power cord and
phone line
1 Make sure that the machine’s power switch is
off. Connect the AC power cord to the machine.
2 Plug the AC power cord into an AC outlet. Turn
the power switch on.
4 Setting the LCD contrast
You can change the contrast to help the LCD look
lighter or darker.
1 Press Menu and or to select
1.General Setup. Press OK.
2 Press or to select 5.LCD Contrast.
Press OK.
3 Press to increase the contrast.
—OR—
Press to decrease the contrast.
Press OK.
7
Page 10

Supplied CD-ROM ‘MFL-Pro Suite’
Note
1
1
Supplied CD-ROM ‘MFL-Pro Suite’
Windows
®
Install MFL-Pro Suite
You can install the MFL-Pro Suite software and
multifunction drivers.
Install Other Drivers or Utilities
You can install additional MFL-Pro Suite software
utilities, install without ScanSoft™ PaperPort™ 11SE
with OCR by NUANCE or install the driver only.
Documentation
View the Software User’s Guide in HTML format. You
can also view the manuals in PDF format by
accessing the Brother Solutions Center. (Internet
access required) The Software User’s Guide includes
instructions for features available when connected to
a computer. (eg. printing and scanning details)
On-Line Registration
Register your machine from the Brother Product
Registration Page.
Brother Solutions Center
Access the Brother Solutions Center for FAQs, User’s
Guide, driver updates and tips for using your
machine. (Internet access required)
Supplies Information
Visit our site for original/genuine Brother supplies at
http://www.brother.com/original/
.
Repair MFL-Pro Suite
If an error occurred during the installation of the
MFL-Pro Suite, use this selection to automatically
repair and re-install the MFL-Pro Suite.
Macintosh
®
Start Here OSX
You can install the MFL-Pro Suite that includes the
printer driver, scanner driver, the Brother
®
ControlCenter2 and BRAdmin Light for Mac OS
X
10.2.4 or greater.
Documentation
View the Software User’s Guide in HTML format. You
can also view the manuals in PDF format by
accessing the Brother Solutions Center. (Internet
access required) The Software User’s Guide includes
instructions for features available when connected to
a computer. (eg. printing and scanning details)
Brother Solutions Center
Access the Brother Solutions Center for FAQs, User’s
Guide, driver updates and tips for using your
machine. (Internet access required)
Presto! PageManager
®
You can install Presto!
PageManager® to add OCR
capability to the Brother ControlCenter2 and easily
scan, share and organize photos and documents.
On-Line Registration
Register your machine from the Brother Product
Registration Page.
Utilities
You can find the following additional Utilities from this
folder.
®
Presto!
PageManager® Uninstaller
BRAdmin Light
MFL-Pro Suite includes the Printer Driver,
Scanner Driver, Brother ControlCenter3 and
ScanSoft™ PaperPort™ 11SE. ScanSoft™
PaperPort™ 11SE is a document management
application for scanning and viewing documents.
8
Page 11

STEP 2
Follow the instructions on this page for your operating system and interface.
For the latest drivers, documentation, and to find the best solution for your problem, access the Brother Solution Center
directly from the CD-ROM / Driver or visit http://solutions.brother.com/.
Installing the Driver & Software
Windows
For USB Interface Cable Users ..................................................................................... 10
Macintosh
For USB Interface Cable Users ..................................................................................... 13
®
®
The screens for Windows® in this Quick Setup Guide are based on Windows® XP.
The screens for Mac OS
®
X in this Quick Setup Guide are based on Mac OS® X 10.4.
9
Page 12

STEP 2
Important
Note
Note
1
Installing the Driver & Software
Windows
®
®
Windows
1
USB
For USB Interface Cable Users (For Windows® 2000
Professional/XP/XP Professional x64 Edition/Windows Vista
Make sure that you have finished the
instructions from step 1 Setting Up the
Machine on pages 5 through 7.
• Please close any applications running before
installing the MFL-Pro Suite.
• The supplied CD-ROM includes ScanSoft™
PaperPort™ 11SE. This software supports
®
Windows
greater), XP Professional x64 Edition and
Windows Vista
Windows
MFL-Pro Suite.
2000 (SP4 or greater), XP (SP2 or
®
only. Please update to the latest
®
Service Pack before installing
1 Turn off and unplug the machine from the AC
outlet and disconnect it from your computer, if
you already connected an interface cable.
®
)
4 The CD-ROM main menu will appear. Click
Install MFL-Pro Suite.
• If this window does not appear, use Windows®
Explorer to run the start.exe program from the
root folder of the Brother CD-ROM.
®
• For Windows Vista
Control screen appears, click Allow.
, when the User Account
2 Turn on your computer. (You must be logged
on with administrator rights.)
3 Put the supplied CD-ROM for Windows
your CD-ROM drive. If the model name screen
appears, choose your machine. If the language
screen appears, choose your language.
®
into
5 After reading and accepting the ScanSoft™
PaperPort™ 11SE License Agreement, click
Yes.
The installation of ScanSoft™ PaperPort™
11SE will automatically start and is followed by
the installation of MFL-Pro Suite.
10
Page 13

Installing the Driver & Software
Note
Improper Setup
Improper Setup
Windows
®
6 When the Brother MFL-Pro Suite Software
License Agreement window appears, click Yes
if you agree to the Software License
Agreement.
7 Choose Standard and then click Next. The
installation will continue.
8 When this screen appears, connect the USB
interface cable to your PC, and then connect it
to the machine.
®
USB
Windows
For Windows Vista®, when this screen appears,
click the check box and click Install to complete
the installation properly.
DO NOT connect the machine to a USB port on
a keyboard or a non-powered USB hub.
Brother recommends that you connect the
machine directly to your computer.
9 Plug the AC power cord into an AC outlet. Turn
the power switch on.
The installation of the Brother drivers will
automatically start. The installation screens
appear one after another, please wait for a
while.
DO NOT try to cancel any of the screens during
this installation.
11
Page 14

STEP 2
Note
10 When the On-Line Registration screen is
®
USB
Windows
11 Click Finish to restart your computer. (After
Installing the Driver & Software
displayed, make your selection and follow the
on-screen instructions.
restarting the computer, you must be logged on
with Administrator rights.)
Windows
®
• XML Paper Specification Printer Driver
The XML Paper Specification Printer Driver is the
most suitable driver when printing from the
applications that use the XML Paper Specification
documents. Please download the latest driver by
accessing the Brother Solutions Center at
http://solutions.brother.com/
• After restarting the computer, the Installation
Diagnostics will run automatically. If the
installation is unsuccessful, the installation results
window will be shown. If the Installation
Diagnostics shows a failure, please follow the
on-screen instruction or read the on-line help and
FAQs in Start/All Programs/ Brother/
DCP-XXXX .
The MFL-Pro Suite (including printer
driver and scanner driver) has been
installed and the installation is now
complete.
.
12
Page 15

Installing the Driver & Software
Important
Note
Improper Setup
Note
Macintosh
®
2
For USB Interface Cable Users
For Mac OS® X 10.2.4 or greater
Make sure that you have finished the
instructions from step 1 Setting Up the
Machine on pages 5 through 7.
For Mac OS® X 10.2.0 to 10.2.3 users, upgrade to
®
Mac OS
information for Mac OS
http://solutions.brother.com/
X 10.2.4 or greater. (For the latest
®
X, visit
)
1 Plug the AC power cord into an AC outlet. Turn
the power switch on.
4 Put the supplied CD-ROM for Macintosh
your CD-ROM drive.
®
into
5 Double-click the Start Here OSX icon to install.
Follow the on-screen instructions.
®
USB
Macintosh
2 Connect the USB interface cable to your
computer, and then connect it to the machine.
DO NOT connect the machine to a USB port on
a keyboard or a non-powered USB hub.
Brother recommends that you connect the
machine directly to your computer.
3 Turn on your Macintosh
®
.
Please wait, it will take a few seconds for the
software to install. After the installation, click
Restart to finish installing the software.
6 The Brother software will search for the Brother
device. During this time the following screen
will appear.
7 When this screen appears, click OK.
For Mac OS® X 10.3.x or greater users:
The MFL-Pro Suite, Brother printer driver,
scanner driver and Brother
ControlCenter2 have been installed and
the installation is now complete.
Go to step 12.
13
Page 16

STEP 2
Note
Installing the Driver & Software
Macintosh
®
®
Macintosh
8 For Mac OS
Click Add.
9 Choose USB.
®
X 10.2.4 to 10.2.8 users:
USB
10 Choose your model name, and then click Add.
12 To install Presto!
®
PageManager®, double-click
the Presto! PageManager icon and follow the
on-screen instructions.
When Presto!®PageManager® is installed OCR
capability is added to the Brother ControlCenter2.
You can also easily scan, share and organize
®
photos and documents using Presto!
®
PageManager
.
Presto!® PageManager® has been
installed and the installation is now
complete.
11 Click Print Center, then Quit Print Center.
The MFL-Pro Suite, Brother printer driver,
scanner driver and Brother
ControlCenter2 have been installed and
the installation is now complete.
14
Page 17

Consumables and Options
1
1
When the time comes to replace consumable items, an error message will be indicated on the LCD.
For more information about the consumables for your machine, visit us at http://solutions.brother.com/
your local Brother reseller.
Consumables
Toner Cartridge Drum Unit
TN-2130/2150 DR-2125
or contact
15
Page 18

Trademarks
The Brother logo is a registered trademark of Brother Industries, Ltd.
Brother is a registered trademark of Brother Industries, Ltd.
Multi-Function Link is a registered trademark of Brother International Corporation.
Windows Vista is either a registered trademark or a trademark of Microsoft Corporation in the United States and other
countries.
Microsoft, Windows and Windows Server are registered trademarks of Microsoft Corporation in the United States and/or other
countries.
Macintosh and TrueType are registered trademarks of Apple Inc.
Nuance, the Nuance logo, PaperPort and ScanSoft are trademarks or registered trademarks of Nuance Communications, Inc.
or its affiliates in the United States and / or other countries.
Presto! PageManager is a registered trademark of NewSoft Technology Corporation.
Each company whose software title is mentioned in this manual has a Software Licence Agreement specific to its proprietary
programs.
All other brand and product names mentioned in this manual are trademarks or registered trademarks of their
respective companies.
Compilation and Publication
Under the supervision of Brother Industries Ltd., this manual has been compiled and published, covering the latest product
descriptions and specifications.
The contents of this manual and the specifications of this product are subject to change without notice.
Brother reserves the right to make changes without notice in the specifications and materials contained herein and shall not be
responsible for any damages (including consequential) caused by reliance on the materials presented, including but not limited
to typographical and other errors relating to the publication.
This product is designed for use in a Professional Environment.
©2008 Brother Industries, Ltd. ©1998-2008 TROY Group, Inc. ©1983-2008 PACIFIC SOFTWORKS INC. This product
includes the "KASAGO TCP/IP" software developed by ELMIC WESCOM,INC. ©2008 Devicescape Software, Inc. This
product includes RSA BSAFE Cryptographic software from RSA Security Inc. Portions Copyright for ICC profiles 2003 by
European Color Initiative, www.eci.org. ALL RIGHTS RESERVED
Page 19

 Loading...