

Page 1

®
53-1003161-01
11 July 2014
Virtual Connect Enterprise
Manager Server Guide
Supporting Brocade Network Advisor 12.3.0
Page 2
Copyright © 2011 - 2014, Brocade Communications Systems, Incorporated.
Brocade, the B-wing symbol, Brocade Assurance, ADX, AnyIO, DCX, Fabric OS, FastIron, HyperEdge, ICX, MLX, MyBrocade, NetIron, OpenScript,
VCS, VDX, and Vyatta are registered trademarks, and The Effortless Network and the On-Demand Data Center are trademarks of Brocade
Communications Systems, Inc., in the United States and in other countries. Other brands and product names mentioned may be trademarks of
others.
Notice: This document is for informational purposes only and does not set forth any warranty, expressed or implied, concerning any equipment,
equipment feature, or service offered or to be offered by Brocade. Brocade reserves the right to make changes to this document at any time,
without notice, and assumes no responsibility for its use. This informational document describes features that may not be currently available.
Contact a Brocade sales office for information on feature and product availability. Export of technical data contained in this document may
require an export license from the United States government.
The authors and Brocade Communications Systems, Inc. assume no liability or responsibility to any person or entity with respect to the accuracy
of this document or any loss, cost, liability, or damages arising from the information contained herein or the computer programs that
accompany it.
The product described by this document may contain open source software covered by the GNU General Public License or other open source
license agreements. To find out which open source software is included in Brocade products, view the licensing terms applicable to the open
source software, and obtain a copy of the programming source code, please visit http://www.brocade.com/support/oscd.
Brocade Communications Systems, Incorporated
Corporate and Latin American Headquarters
Brocade Communications Systems, Inc.
1745 Technology Drive
San Jose, CA 95110
Tel: 1-408-333-8000
Fax: 1-408-333-8101
E-mail: info@brocade.com
European Headquarters
Brocade Communications Switzerland Sàrl
Centre Swissair
Tour B - 4ème étage
29, Route de l'Aéroport
Case Postale 105
CH-1215 Genève 15
Switzerland
Tel: +41 22 799 5640
Fax: +41 22 799 5641
E-mail: emea-info@brocade.com
Asia-Pacific Headquarters
Brocade Communications Systems China HK, Ltd.
No. 1 Guanghua Road
Chao Yang District
Units 2718 and 2818
Beijing 100020, China
Tel: +8610 6588 8888
Fax: +8610 6588 9999
E-mail: china-info@brocade.com
Asia-Pacific Headquarters
Brocade Communications Systems Co., Ltd. (Shenzhen WFOE)
Citic Plaza
No. 233 Tian He Road North
Unit 1308 – 13th Floor
Guangzhou, China
Tel: +8620 3891 2000
Fax: +8620 3891 2111
E-mail: china-info@brocade.com
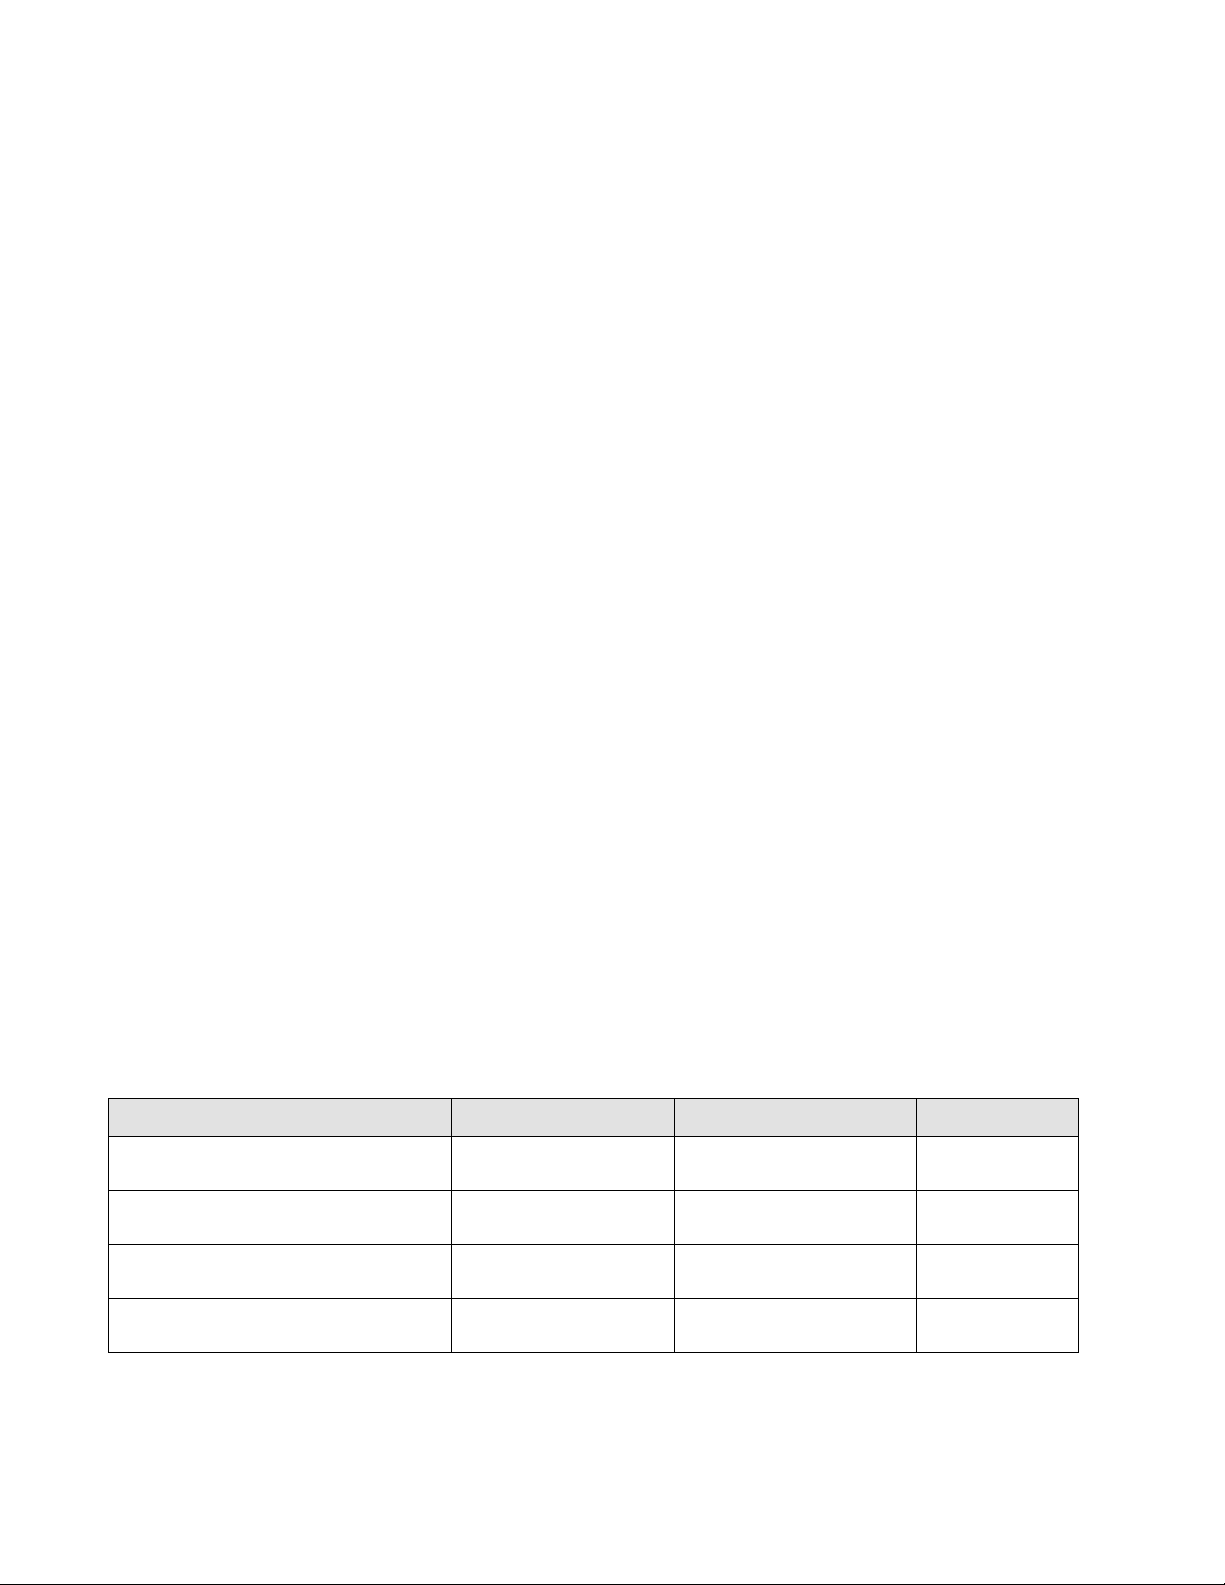
Document History
Title Publication number Summary of changes Date
Virtual Connect Enterprise Manager Server
Guide
Virtual Connect Enterprise Manager Server
Guide
Virtual Connect Enterprise Manager Server
Guide
Virtual Connect Enterprise Manager Server
Guide
53-1002308-01 New document May 2011
53-1002808-01 Update for 12.0.0 December 2012
53-1003062-01 Update for 12.2.0 February 2014
53-1003161-01 Update for 12.2.0 February 2014
2 of 10 Virtual Connect Enterprise Manager Server Guide
Publication Number: 53-1003161-01
Page 3
Virtual Connect Enterprise Manager server discovery
NOTE
NOTE
The Management application enables you to discover Virtual Connect Enterprise Manager (VCEM) servers.
Brocade Network Advisor supports VCEM servers running version 6.2 and 7.1.
You can discover up to 2 VCEM servers.
Discovering a VCEM server
To discover a VCEM server, complete the following steps.
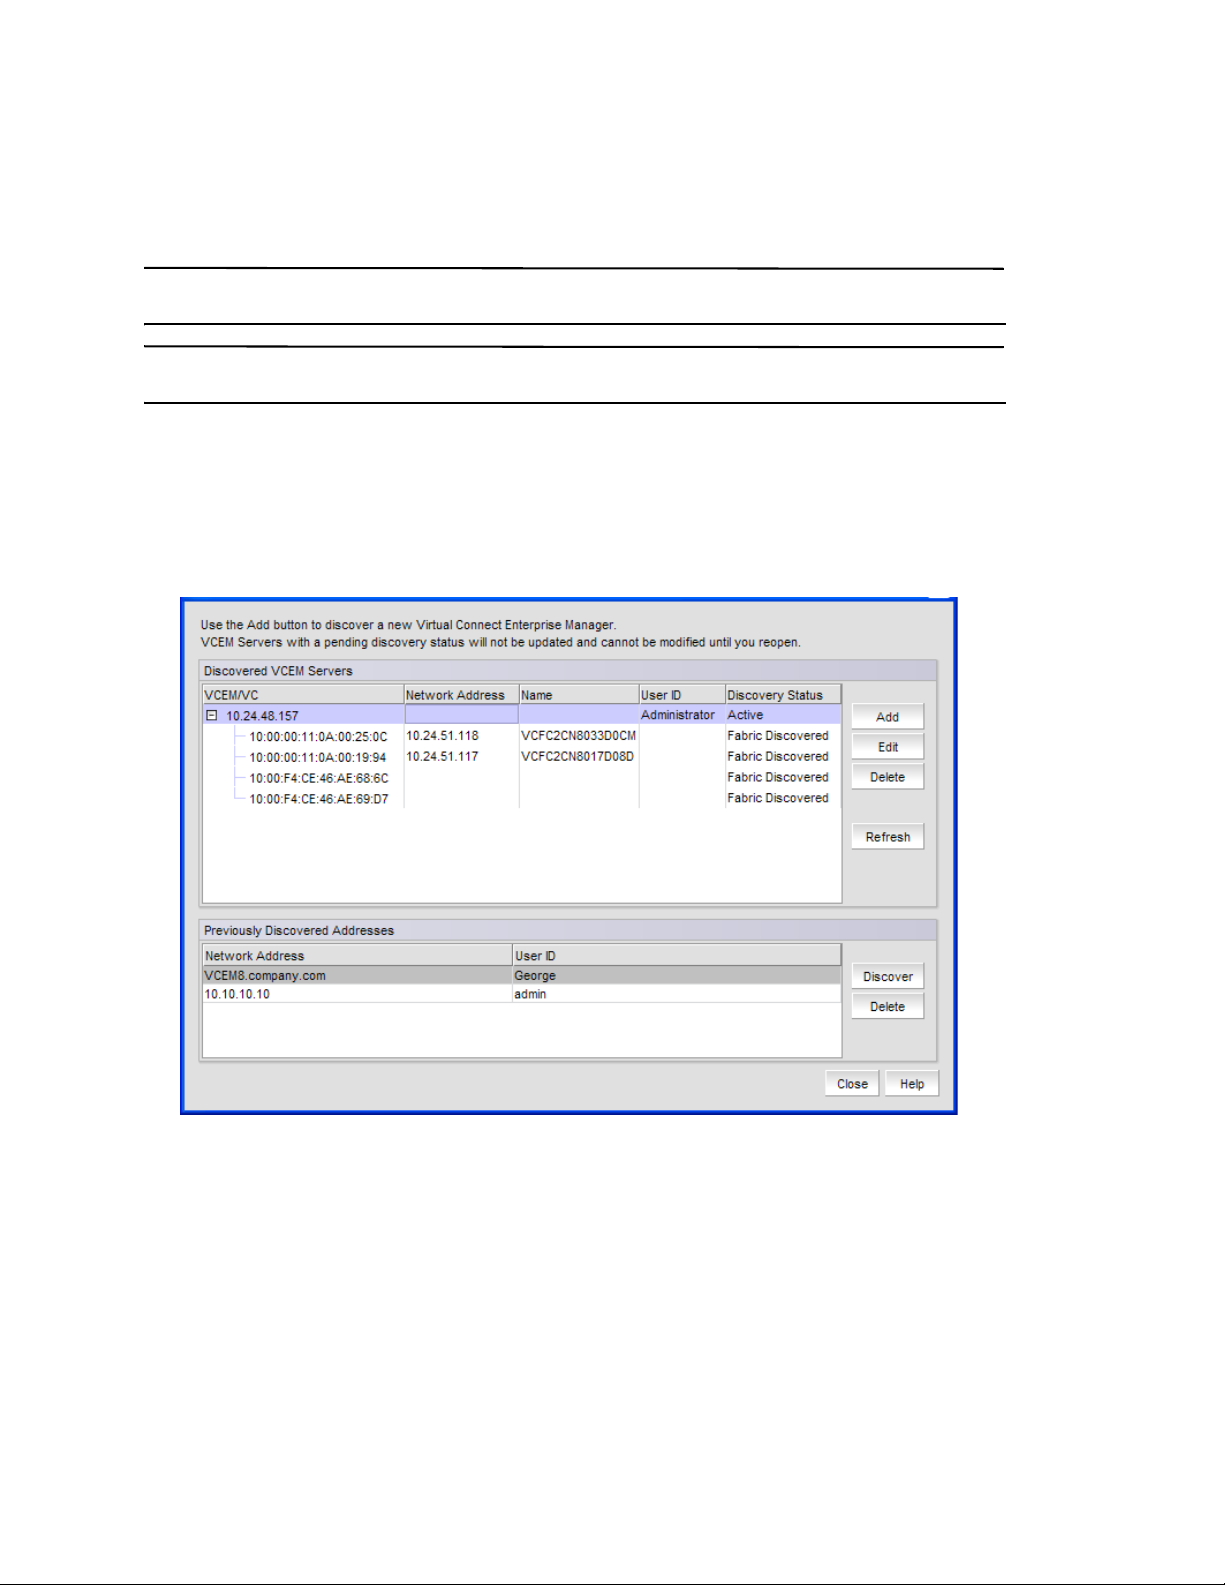
1. Select Discover > VCEM Server.
The Discover VCEM Servers dialog box displays.
FIGURE 1 Discover VCEM Servers dialog box
2. Click Add.
The Add VCEM Server dialog box displays.
Virtual Connect Enterprise Manager Server Guide 3 of 10
Publication Number: 53-1003161-01
Page 4

FIGURE 2 Add VCEM Server dialog box
3. Enter the IPv4 IP address or fully qualified domain name in the Network Address field.
4. Enter the VCEM server SOAP API port number (default is 50001) in the Port field.
5. Enter the VCEM server user name in the User ID field.
6. Enter the VCEM server password Password field.
7. C l ic k OK on the Add VCEM Server dialog box.
If an error occurs, a message displays. Click OK to close the error message and fix the problem.
A VCEM server displays in Discovered VCEM Servers table with pending status. To update the status from
pending, click Refresh or you must close and reopen the Discover VCEM Servers dialog box.
8. Click Close on the Discover VCEM Servers dialog box.
Editing a VCEM server
To edit VCEM server discovery, complete the following steps.
1. Select Discover > VCEM Servers.
The Discover VCEM Servers dialog box displays.
2. Select the VCEM server in the Discovered VCEM Servers list and click Edit.
The Edit VCEM Server dialog box displays.
FIGURE 3 Edit VCEM Server dialog box
3. Change the IPv4 IP address or fully qualified domain name in the Network Address field.
4. Change the VCEM server SOAP API port number in the Port field.
5. Enter the VCEM server user name in the User ID field.
6. Enter the VCEM server user password Password field.
4 of 10 Virtual Connect Enterprise Manager Server Guide
Publication Number: 53-1003161-01
Page 5

7. C l ic k OK on the Edit VCEM Server dialog box.
If an error occurs, a message displays. Click OK to close the error message and fix the problem.
8. Click Close on the Discover VCEM Servers dialog box.
Removing a VCEM server from active discovery
If you decide you no longer want the Management application to discover and monitor a specific VCEM server, you
can delete it from active discovery.
To delete a VCEM server from active discovery, complete the following steps.
1. Select Discover > VCEM Servers.
The Discover VCEM Servers dialog box displays.
2. Select the VCEM server you want to delete from active discovery in the Discovered VCEM Servers table.
3. Click Delete.
The deleted VCEM server displays in the Previously Discovered Addresses table.
4. Click Close on the Discover VCEM Servers dialog box.
Rediscovering a previously discovered VCEM server
To return a VCEM server to active discovery, complete the following steps.
1. Select Discover > VCEM Servers.
The Discover VCEM Servers dialog box displays.
2. Select the VCEM server you want to return to active discovery in the Previously Discovered Addresses table.
3. Click Discover.
The rediscovered VCEM server displays in the Discovered VCEM Servers table.
4. Click Close on the Discover VCEM Servers dialog box.
Deleting a VCEM server from discovery
To delete a VCEM server permanently from discovery, complete the following steps.
1. Select Discover > VCEM Servers.
The Discover VCEM Servers dialog box displays.
2. Select one or more VCEM servers you want to delete permanently from discovery in the Previously Discovered
Addresses table.
3. Click Delete.
4. Click Close on the Discover VCEM Servers dialog box.
Virtual Connect Enterprise Manager Server Guide 5 of 10
Publication Number: 53-1003161-01
Page 6

Viewing the VCEM server discovery state
The Management application enables you to view device discovery status through the Discover VCEM Servers dialog
box.
To view the discovery status of a device, complete the following steps.
1. Select Discover > VCEM Servers.
The Discover VCEM Servers dialog box displays.
2. Right-click the VCEM server node select Expand All to show all devices.
The Discovery Status field details the actual status message text, which varies depending on the situation. The
following are samples of actual status messages:
• Active
• Login Failed
• Failed
• Discovery Pending
• Delete Pending
Troubleshooting VCEM server discovery
If you encounter discovery problems, complete the following checklist to ensure that discovery was set up correctly.
1. Verify IP connectivity by issuing a ping command to the server.
a. Open the command prompt.
b. From the Server, type
2. Enter the IP address with the SOAP API port number, using https, to verify the HP VCEM server is running.
For example, https://10.1.1.11:50001.
3. Verify that the User ID and password are correct for the VCEM server.
ping Device_IP_Address.
Virtual Connect module product icons
The following table lists the manageable Virtual Connect (VC) module product icons that display on the topology.
TABLE 1 VC module icons
Icon Description Icon Description
VC module Multi-fabric VC module
6 of 10 Virtual Connect Enterprise Manager Server Guide
Publication Number: 53-1003161-01
Page 7

Virtual Connect module right-click menus
TABLE 2 VC module right-click menus
Menu item Description
Product Only available when VC is missing from one fabric, but present in another fabric.
Select to shift the view from the current VC (which is missing) to the VC present in the
other fabric.
Accept Change Select to accept changes to the selected fabric.
Show Ports Select to show ports on the VC module.
Show Connections Select to show connections to the VC module.
Properties Select to view Properties dialog box.
Viewing VC module properties
To view VC module properties, complete the following steps.
1. Right-click a VC module and select Properties.
2. Review the properties for the device.
TABLE 3 Properties tab
Field Description
Fabric The name of the fabric.
Name (Fabric OS modules only) The name of the device.
WwnName The world wide name of the device.
IP Address (Fabric OS modules only) The IP address of the device.
Status The operational status.
Type The device type - Virtual Connect.
Port Count The number of ports.
Product Name The product name.
Serial # The hardware serial number.
VC Firmware The downloaded firmware version of the VC Ethernet management module and all VC FC modules
managed by the VC Domain.
VC Domain Name The domain name.
VC Domain Group The domain group.
IO Bay
Discovery Status The discovery status of the VCEM server of this module.
Last Discovery The last time data collection was performed for this VC module on the VCEM server.
Virtual Connect Enterprise Manager Server Guide 7 of 10
Publication Number: 53-1003161-01
Page 8

TABLE 4 Port tab
Field Description
Fabric The name of the fabric.
Switch The name of the VC module.
Port # The port number.
Type The port type.
Status The status of the port. For example, LOGGED-IN or NOT-LOGGED-IN.
Port Speed (Gb/s) The speed of the port in gigabits per second.
Port WWN The world wide name of the port.
Physical/Logical Whether the port is Physical or Logical.
NPIV Enabled Whether the port is NPIV enabled or not.
Connected Switch The name of the switch connected to the port.
TABLE 5 NPIV WWNs tab
Field Description
NPIV Port WWN The world wide name of the NPIF port.
NPIV Node WWN The world wide name of the NPIF node.
Name The user-defined name of the NPIV WWN. This is an editable field.
Uplink Port Number The port number of the uplink.
Uplink Port WWN The port world wide name of the uplink.
Server Profile The server profile.
Server Bay The server bay number.
Virtual Serial Number The serial number.
3. Click Close to close the Properties dialog box.
8 of 10 Virtual Connect Enterprise Manager Server Guide
Publication Number: 53-1003161-01
Page 9

VCEM integration support in SMI-A
NOTE
Discovery of TopologyView and SANActiveConnections will be incomplete for VC modules connected to the end
devices due to lack off support in the HP SOAP API.
HP SAN Network Advisor supports virtual connect discovery for the HP VC 8Gb 24-port FC module and VC 8Gb
20-port FC module through the HP Virtual Connect Enterprise Manager (VCEM) server.
The AG and NPIV profile is updated to support the VirtualConnect (VC) modules of VCEM integration:
• Instances of Brocade_AccessGateway (VC module) for ElementConformsToProfile is not returned as complete
topology. Therefore Brocade_AccessGateway of VC module does not conform to the AG and NPIV profile.
• Instances of the below classes will not be returned for VC as external management access points are disabled.
- Brocade_ElementConformsToProfile
- Brocade_AGWebGUIRemoteAccessPoint
- Brocade_AGMgmtAccessPoint
- Brocade_AGHostedRemoteAccessPoint
- Brocade_AGHostedMgmtAccessPoint
• The Brocade_AGSoftwareIdentity.Manufacturer value is populated as “HP” for VC modules.
Virtual Connect Enterprise Manager Server Guide 9 of 10
Publication Number: 53-1003161-01
Page 10

10 of 10 Virtual Connect Enterprise Manager Server Guide
Publication Number: 53-1003161-01
 Loading...