

GB
FR
GR
NL
PT
DE
Betriebsanleitung - Trapezhaube
User's guide - Trapezoid hood
Le guide d’utilisation - Hotte trapèze
Οδηγός χρήσης του τραπεζοειδή απορροφητήρα σας.
Gebruiksaanwijzing van uw afzuigkap "piramide"
O guia de utilização - Extractor de fumos trapézio
99631294_A_ML.qxp 18/06/2007 09:05 Page 1
Vorwort
Liebe Kundin, lieber Kunde,
Sie haben soeben eine neue BRANDT Dunstabzugshabe erworben,
und wir danken Ihnen dafür.
Unsere Forschungsteams haben für Sie eine neue Generation an
Geräten konzipiert, damit Sie Ihre kulinarisches Talent voll entfalten können und sich jeden Tag wieder freuen können.
Die neue BRANDT Abzugshaube fügt sich mit ihrer reinen
Linienführung und modernen Ästhetik harmonisch in Ihre Küche ein
und verbindet einfache Benutzung perfekt mit Garleistung.
In der BRANDT Produktpalette finden Sie auch eine breite Auswahl
an Backöfen, Kochfeldern, Geschirrspülern, Mikrowellenherden
und Einbaukühlschränken, die Sie auf Ihre neue BRANDT
Dunstabzugshaube abstimmen können.
Im ständigen Bemühen, Ihre Anforderungen an unsere Produkte
optimal zu erfüllen, steht unser Verbraucherservice für Fragen und
Vorschläge ganz zu Ihrer Verfügung.
Als Spezialist auf dem Gebiet des Kochens und Garens trägt
BRANDT zum Gelingen Ihrer Gerichte, zu geteilter Gaumenfreude
und Gemütlichkeit bei und bietet Ihnen immer leistungsfähigere,
einfach zu gebrauchende, umweltfreundliche, ästhetische und
zuverlässige Geräte.
Die Marke BRANDT.
2
99631294_A_ML.qxp 18/06/2007 09:05 Page 2
DE
Sicherheitshinweise
- Es ist verboten, unter der Dunstabzugshaube Gerichte zu flambieren oder die
Gaskochstellen einzuschalten, ohne dass ein Kochgeschirr darauf steht (die angesaugten
Flammen könnten das Gerät beschädigen).
- Frittiervorgänge unter der Dunstabzugshaube müssen ständig überwacht werden.
- Reparaturen dürfen nur von einem zugelassenen Fachmann durchgeführt werden.
- Regelmäßig den Kassettenfilter reinigen, um Brandgefahr zu vermeiden.
- Das Gerät darf nicht über einem mit Brennstoffen (Holz, Kohle usw..) betriebenen Herd
verwendet werden.
Diese Dunstabzugshauben wurden für den Gebrauch in privaten Haushalten konzipiert.
Da wir immer darauf achten, unsere Produkte ständig weiterzuentwickeln, behalten wir uns
im Zuge der technischen Entwicklung das Recht vor, ihre technischen, funktionellen oder
ästhetischen Merkmale zu ändern.
Diese Dunstabzugshauben sind nur für das Zubereiten von Getränken und Lebensmitteln
bestimmt. Diese Produkte enthalten keine Teile auf Asbestbasis.
Symbole in dieser Gebrauchsanweisung:
Sicherheitshinweise
Tipps und Tricks
3
99631294_A_ML.qxp 18/06/2007 09:05 Page 3
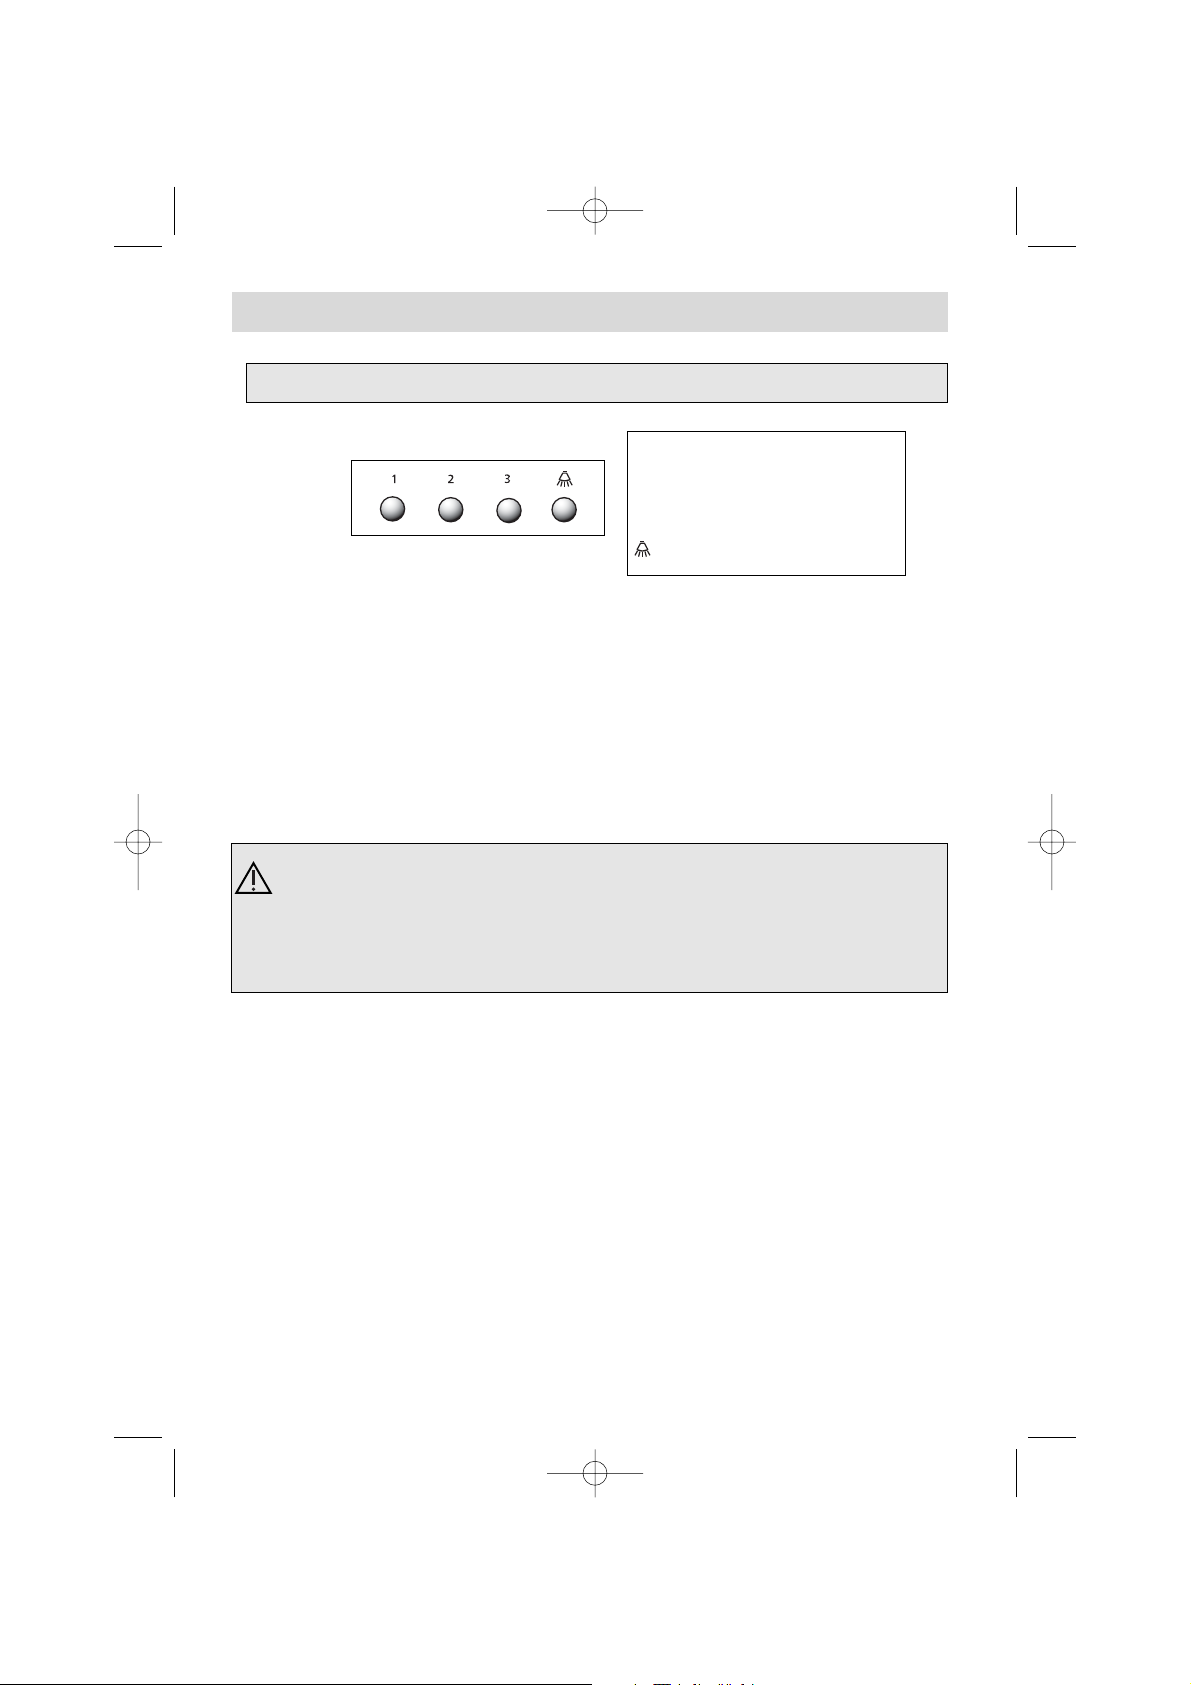
So sieht Ihre neue Dunstabzugshaube aus Abb.1
In einer Küche, die mit einem an einen Kamin angeschlossenen Gerät beheizt wird,
(z.B.: Ofen), muss die Dunstabzugshaube mit Umlaufprinzip installiert werden. Die
Dunstabzugshaube darf nicht ohne die Metallfilterkassetten benutzt werden.
Wenn die Dunstabzugshaube in der Küche gleichzeitig mit Geräten benutzt wird, die mit
Gas oder einem anderen Brennstoff betrieben werden, ist für angemessene Belüftung des
Raums zu sorgen.
Modell mit 3 Geschwindigkeiten
1 Niedrige Geschwindigkeit
2 Mittlere Geschwindigkeit
3 Hohe Geschwindigkeit
Beleuchtung
Wichtig: Wenn mehrere Geschwindigkeitstasten gedrückt sind, wird die höchste
Stufe berücksichtigt.
Die Dunstabzugshaube schaltet sich aus, wenn keine Tasten gedrückt sind.
4
99631294_A_ML.qxp 18/06/2007 09:05 Page 4
DE
Die Installation muss die geltenden Bestimmungen für die Belüftung von Räumen einhalten. In Frankreich sind diese Vorschriften in der DTU 61.1 des CSTB angegeben.
Insbesondere darf die abgezogene Luft nicht in ein Rohr geführt werden, das für den
Abzug des Rauchs von Geräten benutzt wird, die mit Gas oder einem anderen Brennstoff
betrieben werden. Stillgelegte Abzugsrohre dürfen nur nach Genehmigung eines kompetenten Fachmanns benutzt werden.
Der Abstand zwischen dem Kochfeld und dem niedrigsten Teil der Dunstabzugshaube muss
70 cm betragen. Wenn in der Betriebsanleitung des unter der Dunstabzugshaube installierten
Kochfelds ein größerer Abstand als 70 cm vorgegeben ist, muss dies berücksichtigt werden.
Installation Ihrer Dunstabzugshaube
Wenn ein Abzug ins Freie vorhanden ist: Abb. 4
Die Dunstabzugshaube kann mit einem Abzugsschacht (Mindest-Ø 125 mm, emailliert, aus
Aluminium, Schlauch oder aus unbrennbarem Material) daran angeschlossen werden. Wenn
der Schachtquerschnitt weniger als 125 mm beträgt, müssen Sie unbedingt zum
Umlaufprinzip übergehen.
W
enn kein Abzug ins Freie v
orhanden ist: Abb. 5
Alle unsere Geräte können auch nach dem Umlaufprinzip betrieben werden.
In diesem Fall muss ein Aktivkohlefilter eingesetzt werden, der die Gerüche bindet.
- In mindestens 70 cm Abstand über dem Kochfeld an der Wand einen waagerechten Strich ziehen.
- Einen senkrechten Strich an der Wand von der Decke bis zur unteren Kante der Abzugshaube ziehen.
- Montageschablonen an die Wand anlegen (Abb. 2).
- Die 6 Löcher bohren. Die 6 Dübel eindrücken.
- Die beiden Schrauben oben an der Dunstabzugshaube einschrauben und sie 5 mm überstehen lassen.
- Metallfilter entfernen.
- Dunstabzugshaube an den beiden Schrauben aufhängen (Abb. 3).
- Die beiden Schrauben unten einschrauben.
Einbau Ihrer Dunstabzugshaube
Anschluss der Dunstabzugshaube
Dieses Gerät wird mit einem Netzkabel H 05 VVF mit drei 0,75 mm2-Adern (neutral
und Phase) geliefert. Es muss über eine Normsteckdose IEC 60083 an ein Stromnetz
mit 220 - 240 V einphasig angeschlossen werden, die auch nach der Installation
gemäss Einbauregeln zugänglich bleiben muss.
Bei nicht korrekt ausgeführter Montage können wir im Falle eines Unfalls nicht haftbar
gemacht werden. Die Sicherung der Anlagen muss 10 oder 16 A betragen. Wenn das
Anschlusskabel beschädigt ist, den Kundendienst rufen, um jegliche Gefahr auszuschließen.
Vor dem endgültigen Festziehen der 4 Schrauben die Höhe der Dunstabzugshaube
justieren.
5
99631294_A_ML.qxp 18/06/2007 09:05 Page 5
Montage des Kamins
Abluftbetrieb:
Abb. 4 und 8
- Halterung des Metallkamins an der Decke anlegen und an der Wand befestigen (Abb. 6).
- Bei Schächten mit einem Querschnitt von 125 mm ist der mitgelieferte Adapter zu benutzen
(Abb. 8).
Wenn der Außenschacht einen Querschnitt von weniger als 125 mm aufweist, muss die
Dunstabzugshaube unbedingt im Umlaufprinzip angeschlossen werden.
- Bei der Vorbereitung des Teleskop-Kamins darauf achten, dass die Ansaugöffnungen nicht
sichtbar sind (Abb. 8).
Die Kaminteile so weit wie möglich ineinanderschieben.
- Oberen Teil an der Metallhalterung befestigen.
- Die Länge des Teleskop-Kamins justieren, dabei den unteren Teil herunterziehen und in den
oberen Teil der Dunstabzugshaube einschieben.
Umlaufbetrieb: Abb. 5 und 9
- Die Rückschlagklappen können abgenommen werden.
- Rauchablenker an der Decke anlegen und an der Wand befestigen.
Den Rauchablenker sorgfältig im Verhältnis zum an die Wand gezeichneten vertikalen Strich mittig anbringen
(Abb. 7).
- Den Kamin vorbereiten und darauf achten, dass die Ansaugöffnungen nach oben weisen, damit sie sichtbar sind (B/Abb. 9).
- Oberen Teil des Rauchablenkers befestigen.
- Die Länge des Teleskop-Kamins justieren, dabei den unteren Teil herunterziehen und in den oberen Teil der Dunstabzugshaube einschieben.
Wir empfehlen für den optimalen Einsatz des Geräts den Anschluss an einen Schacht mit
150 mm Querschnitt (nicht mitgeliefert). Die Anzahl Rohrkrümmer und die Schachtlänge
weitgehend begrenzen. Beim Abluftbetrieb der Dunstabzugshaube muss für ausreichen-
de Frischluftzufuhr gesorgt werden, damit vermieden wird, den Raum unter Unterdruck zu
setzen.
Austauschen der Lampe
1. Metallfilter entfernen (Abb. 10).
2. Birne E14-40W herausschrauben und austauschen (Abb. 11).
3. Metallfilter austauschen.
Vor jedem Eingriff muss die Dunstabzugshaube vom Stromnetz getrennt werden, entweder
durch Ziehen des Netzsteckers oder durch Betätigen des Überlastschalters.
6
99631294_A_ML.qxp 18/06/2007 09:05 Page 6
DE
Ausbau der Filterkassette
(Abb. 10)
Einbau des Kohlefilters
(Abb. 12)
1. Kassetten abnehmen.
2. Kohlefilter auf die zum Inneren der Dunstabzugshaube zeigende Seite der Kassette
legen.
3. Zwei Griffleisten auflegen.
4. Diesen Vorgang mit den anderen Kassetten wiederholen.
Reinigung der Dunstabzugshaube
Vor der Entnahme der Metallfettfilter muss die Dunstabzugshaube vom Stromnetz
getrennt werden, entweder durch Ziehen des Netzsteckers oder durch Betätigen
des Überlastschalters. Nach der Reinigung sind die Metallfettfilter wieder entsprechend der Anleitung zu befestigen.
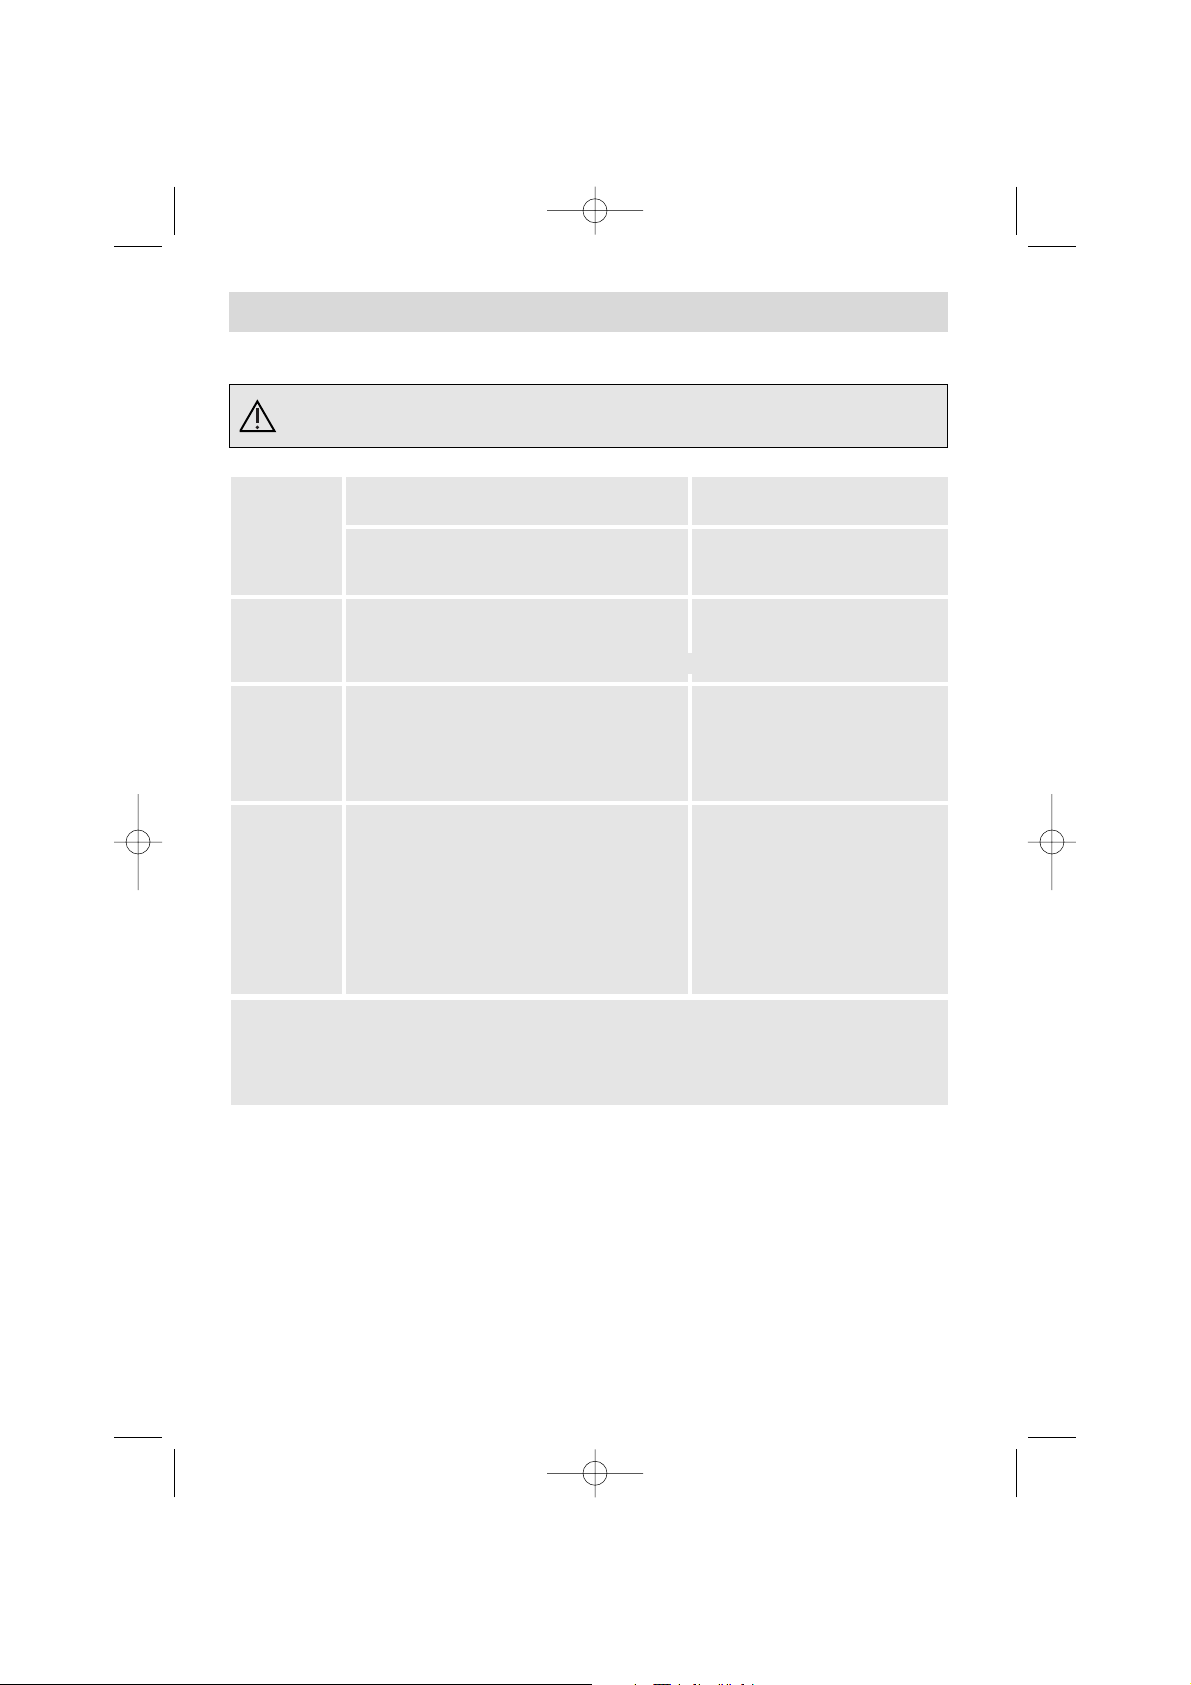
REINIGUNG
WARUM?
WIE?
UNBEDINGT EINMAL PRO MONAT
UNBEDINGT EINMAL PRO JAHR
Dieser Filter hält Fettdunst und Staub zurück.
Dieses Teil trägt wesentlich zur Wirksamkeit
Ihres Dunstabzugs bei.
Dieser Filter bindet die Gerüche
und muss je nach Nutzungs-
grad mindestens einmal jährlich
gewechselt werden.
Mit einem handelsüblichen Haushaltsprodukt,
dann reichlich abspülen und trocknen. Diese
Reinigung kann im Geschirrspüler in vertikaler
Position erfolgen (nicht mit schmutzigem
Geschirr und Silberbesteck in Berührung brin-
gen).
Diese Filter beim Fachhändler
bestellen (mit der Produkt-
referenz auf dem Geräteschild
im Inneren der Dunstab-
zugshaube) und das Datum des
Austauschs notieren.
FILTERKASSETTE
AKTIVKOHLEFILTER
Niemals Metallkratzer, Scheuermittel oder zu harte Bürsten benutzen.
Für die Reinigung von Gehäuse und Leuchtblende ausschließlich handelsübliche, in Wasser gelöste
Reinigungsmittel verwenden, mit klarem Wasser abspülen und mit einem weichen Lappen trocknen.
Vor der ersten Benutzung der Filterkassette die
Schutzfolie abziehen.
Für Dunstabzugshauben in
Umlaufbetrieb
Zur Vermeidung von Brandrisiken.
7
99631294_A_ML.qxp 18/06/2007 09:05 Page 7
Kundendienst
Aussehensmängel, die durch falsche Benutzung oder die Reinigung mit Scheuerprodukten
verursacht wurden, die jedoch keinen Betriebsausfall mit sich führen oder das Gerät
unbrauchbar machen, werden vom Hersteller nicht übernommen. Jegliche
Störungsbeseitigung muss von einem qualifizierten Techniker durchgeführt werden.
Nur der Vertrieb unserer Marke:
• • KKennt Ihr Gerät und seine Funktionsweise
ennt Ihr Gerät und seine Funktionsweise
• • WWendet alle unsere Einstellungs-, Wartungs- und Reparaturmethoden an
endet alle unsere Einstellungs-, Wartungs- und Reparaturmethoden an
• • VVerwendet ausschließlich Originalteile.
erwendet ausschließlich Originalteile.
Bei Reklamation oder bei Bestellung von Ersatzteilen beim Vertrieb muss die vollständige
Artikelnummer des Geräts (Gerätetype und Seriennummer) angegeben werden.
Diese Angaben befinden sich auf dem innen im Gerät angebrachten Geräteschild.
Die in diesem Büchlein gegebenen Beschreibungen und Merkmale werden nur zur Information gegeben und beinhalten keine Verpflichtung. Um Ihnen stets hochwertige Qualität bieten
zu können, behalten wir uns das Recht vor, ohne Vorankündigung alle notwendigen Änderungen oder Verbesserungen an den Produkten vorzunehmen.
BRANDT APPLIANCES SAS
7 rue Henri Becquerel
92500 RUEIL MALMAISON
MADE IN FRANCE
220 - 240V ~ 50 Hz
8
99631294_A_ML.qxp 18/06/2007 09:05 Page 8
GB
Introduction
Dear Customer,
Thank you for choosing the BRANDT hood.
Our design staff have produced a new generation of kitchen
equipment, to make everyday cooking a pleasure.
The modern, attractive design of your new BRANDT hood will
blend smoothly into your kitchen installation, providing an optimum combination of easy use and performance.
The Brandt range also includes a huge choice of fitted cooking
hobs, ovens, dish-washers and refrigerators, that will match your
new BRANDT hood.
Of course, we make every effort to ensure that our products meet
all your requirements, and our Customer Relations department is
at your disposal, to answer all your questions and to listen to all
your suggestions.
A specialist in the world of cooking, BRANDT works hard to
contribute to your culinary success, and your cooking pleasure,
offering ever more effective products, which are easy to use,
environmentally friendly, attractive and reliable.
The BRANDT name.
9
99631294_A_ML.qxp 18/06/2007 09:05 Page 9
Safety instructions
- You should never "flambé" dishes under the hood or operate gas rings under the hood
without cooking utensils being placed on them (the flames sucked up into the hood can
damage the appliance).
- When frying food under the appliance, a careful watch must be kept on this at all times.
- Repairs must only be carried out by an approved specialist.
- You should regularly clean the filter cartridge.
- The hood should never be used over a combustible fuel burning stove (wood, coal, etc).
These hoods have been designed for non-commercial use in private homes.
With a view to constantly improving our products, we reserve the right to modify their
technical, functional or aesthetic characteristics, making any changes to their features
considered necessary or desirable in view of technical progress.
These hoods are designed exclusively for cooking foodstuffs and drinks. These products do
not contain any asbestos based components.
Throughout this manual,
indicates safety recommendations,
indicates advice to help you make the best use
of your oven
10
99631294_A_ML.qxp 18/06/2007 09:05 Page 10

GB
The controls on your hood Fig.1
In the case of a kitchen heated by a device connected to a chimney (for
example a stove) the "recycling" version of the hood should be installed. Do not use the
hood without metal filters.
Suitable ventilation should be ensured for the room when the suction hood is used at the same
time as appliances using gas or another combustible fuel.
3-speed model
1 Slow speed
2 Medium speed
3 Fast speed
Lighting
Important: When several speed buttons are pressed-in, the highest speed applies.
The hood turns off when none of the buttons are pressed-in.
11
99631294_A_ML.qxp 18/06/2007 09:05 Page 11
The hood must be installed in conformity with the applicable regulations concerning
the ventilation of premises. In France, these regulations are detailed in DTU 61.1 from
the CSTB. In particular, the evacuated air must not be channelled into a duct used to
evacuate fumes from appliances using gas or other combustible fuels. Disused ducts may
only be used after approval from a competent specialist.
The minimum distance between the cooking surface and the lowest part of the hood must be
70 cm. If the instructions for the hob installed under the hood specify a distance of more than
70 cm, this requirement must be respected.
Installing your hood ?
If you possess an outlet to the exterior: fig. 4
Your hood can be connected to this using a flue (minimum Ø 125 mm, enamelled, made from aluminium, flexible or made from a non-flammable material). If your flue is below 125 mm in diameter,
you must obligatorily use the "recycling" mode.
If y
ou do not possess an outle
t to the exterior: fig. 5
All of our appliances can be used in recycling mode.
In this case, you should add an active carbon filter which will keep in odours.
- Draw a horizontal line 70 cm minimum from the cooktop.
- Draw a vertical line on the wall running from the ceiling to the lower edge of the hood.
- Place the mounting hole template against the wall (fig. 2)
.
- Drill the 6 holes. Insert the 6 wall plugs.
- Screw up the top two screws of the hood, but not completely - allow them to
protrude by 5 mm.
- Remove the metal filter.
- Attach the suction hood to the two screws (fig. 3).
- Screw up the two screws at the bottom.
Assembling your hood
Connecting up your hood
This appliance is delivered with a H 05 VVF power cable with 2 conductors of
0.75 mm
2
(neutral, live). This must be connected to the 220-240 V single phase
mains network via a CEI 60083 standard plug which must remain accessible following
installation. We will not be liable in the event of an accident arising following incorrect
installation. The fuse for your installation must be 10 or 16A. If the power cable is damaged, call the after sales service department in order to avoid danger.
Adjust the level of your hood before fully tightening up all four screws.
12
99631294_A_ML.qxp 18/06/2007 09:05 Page 12
GB
Assembling the chimney
Hood to be used with external evacuation :
fig. 4 and 8
- Attach the metal chimney bracket to the wall, also placing this against the ceiling (fig. 6).
Take care in aligning the 2 triangular slots on the metal bracket with the vertical line on the wall.
- In the case of a flue with a diameter of 125 mm, use the adapter supplied (fig. 8).
If your exterior duct is below 125 mm, you must obligatorily connect your hood in
recycling mode
- Prepare your telescopic chimney taking care to block off the vents (fig. 8).
Fit the chimneys into one another as far as they will go.
- Fit the upper part to the metal bracket.
- Adjust the length of the telescopic chimney by bringing down the lower part and fitting it to the
top of the hood.
Hood to be used in "recycling" mode: f
ig. 5 and 9
- It is possible to remove the back flow valves.
- Fit the plastic smoke deflector to the wall also placing this against the ceiling.
Take care to centre the deflector vis-à-vis the vertical line drawn on the wall (fig. 7).
- Prepare your chimney taking care to place the vents toward the top to ensure that
they are visible
(fig. 9).
- Fit the upper part to the plastic deflector.
- Adjust the length of the telescopic chimney by bringing down the lower part and fitting it into the
top of the hood.
To ensure optimal use of your device, we advise that you connect a flue with a diameter
of 150 mm (not supplied). Limit the number of angles and bends as far as possible, and
keep the length of the flue to a minimum. In the event that the hood will be functioning
using exterior evacuation, you should ensure a sufficient inlet of fresh air to avoid a pressure deficiency in the room.
Changing the lamp ?
1. Remove metal filters (fig. 10).
2. Unscrew then change the E14-40W bulb (fig. 11).
3. Replace the metal filters.
Before carrying out any work, the power supply to the hood must be turned off,
either by unplugging it or by using the circuit breaker switch,
13
99631294_A_ML.qxp 18/06/2007 09:05 Page 13
Dismantling the filter cartridge
(fig. 10)
Assembling the carbon filter
(fig. 12)
1. Remove the cartridges.
2. Place the carbon filter on the cartridge, on the inner side of the hood.
3. Fit the 2 fastener clips.
4. Repeat this operation on all of the cartridges.
Cleaning your hood ?
The power supply to the hood must be turned off either by removing the plug or by
using the circuit breaker switch before you remove the metal filters. After cleaning,
the metal filters must be refitted in conformity with the instructions.
MAINTENANCE
WHY?
HOW?
VITAL EVERY MONTH
VITAL EVERY YEAR
This filter traps fatty vapours and dust. This
component plays an important part in
ensuring the effectiveness of your hood.
This filter traps odours and must
be changed at least once a year
depending on your level of use.
Use a commercial household cleaning product then
rinse abundantly and dry. This cleaning can be
carried out in your dishwasher in the vertical position
(ensure that the cartridge never comes into contact
with dirty crockery or silver tableware).
You should order these filters from
your dealer (quoting the reference
shown on the ID plate located
inside the hood) and note the date
the filter was changed.
FILTER CARTRIDGE
ACTIVATED CARBON FILTER
Never use metal scouring pads, abrasive products or excessively stiff brushes.
To clean the body and the lighting port, you should use only commercial household cleaning products
diluted in water and then rinse using clean water, drying with a soft cloth.
Remove the protective film before using the fil-
ter cartridge for the first time.
For hoods installed in "recycling"
mode.
To avoid all risks of fire.
14
99631294_A_ML.qxp 18/06/2007 09:05 Page 14

GB
BRANDT APPLIANCES SAS
7 rue Henri Becquerel
92500 RUEIL MALMAISON
MADE IN FRANCE
220 - 240V ~ 50 Hz
Who should I contact ?
Blemishes on the hood caused by abnormal use or cleaning with abrasive products which
do not cause the appliance to cease functioning or which do not cause it to become unsuitable for use will not be dealt with by the manufacturer. Any repairs must be carried out by
a qualified technician.
Only the distributors of our brand :
• Are fully familiar with your appliance and its operation
• Are fully familiar with your appliance and its operation,,
• Fully apply our adjustment, maintenance and repair methods,
• Fully apply our adjustment, maintenance and repair methods,
• Use only original parts.
• Use only original parts.
To submit a complaint or to order spare parts from your distributor, please be sure to give him
the complete reference for your appliance (type of appliance and serial number).
You can find this information on the identification plate fitted inside the appliance.
The descriptions and characteristics featuring in this booklet are provided for information
purposes only, and are not binding upon us. Indeed, as part of our ongoing commitment to
improving the quality of our products, we reserve the right to make any modifications or
improvements necessary, without notice.
15
99631294_A_ML.qxp 18/06/2007 09:05 Page 15
 Loading...