

GB
FR
GR
NL
PT
DE
Betriebsanleitung - Trapezhaube
User's guide - Trapezoid hood
Le guide d’utilisation - Hotte trapèze
Οδηγός χρήσης του τραπεζοειδή απορροφητήρα σας.
Gebruiksaanwijzing van uw afzuigkap "piramide"
O guia de utilização - Extractor de fumos trapézio
99631294_A_ML.qxp 18/06/2007 09:05 Page 1
Vorwort
Liebe Kundin, lieber Kunde,
Sie haben soeben eine neue BRANDT Dunstabzugshabe erworben,
und wir danken Ihnen dafür.
Unsere Forschungsteams haben für Sie eine neue Generation an
Geräten konzipiert, damit Sie Ihre kulinarisches Talent voll entfalten können und sich jeden Tag wieder freuen können.
Die neue BRANDT Abzugshaube fügt sich mit ihrer reinen
Linienführung und modernen Ästhetik harmonisch in Ihre Küche ein
und verbindet einfache Benutzung perfekt mit Garleistung.
In der BRANDT Produktpalette finden Sie auch eine breite Auswahl
an Backöfen, Kochfeldern, Geschirrspülern, Mikrowellenherden
und Einbaukühlschränken, die Sie auf Ihre neue BRANDT
Dunstabzugshaube abstimmen können.
Im ständigen Bemühen, Ihre Anforderungen an unsere Produkte
optimal zu erfüllen, steht unser Verbraucherservice für Fragen und
Vorschläge ganz zu Ihrer Verfügung.
Als Spezialist auf dem Gebiet des Kochens und Garens trägt
BRANDT zum Gelingen Ihrer Gerichte, zu geteilter Gaumenfreude
und Gemütlichkeit bei und bietet Ihnen immer leistungsfähigere,
einfach zu gebrauchende, umweltfreundliche, ästhetische und
zuverlässige Geräte.
Die Marke BRANDT.
2
99631294_A_ML.qxp 18/06/2007 09:05 Page 2
DE
Sicherheitshinweise
- Es ist verboten, unter der Dunstabzugshaube Gerichte zu flambieren oder die
Gaskochstellen einzuschalten, ohne dass ein Kochgeschirr darauf steht (die angesaugten
Flammen könnten das Gerät beschädigen).
- Frittiervorgänge unter der Dunstabzugshaube müssen ständig überwacht werden.
- Reparaturen dürfen nur von einem zugelassenen Fachmann durchgeführt werden.
- Regelmäßig den Kassettenfilter reinigen, um Brandgefahr zu vermeiden.
- Das Gerät darf nicht über einem mit Brennstoffen (Holz, Kohle usw..) betriebenen Herd
verwendet werden.
Diese Dunstabzugshauben wurden für den Gebrauch in privaten Haushalten konzipiert.
Da wir immer darauf achten, unsere Produkte ständig weiterzuentwickeln, behalten wir uns
im Zuge der technischen Entwicklung das Recht vor, ihre technischen, funktionellen oder
ästhetischen Merkmale zu ändern.
Diese Dunstabzugshauben sind nur für das Zubereiten von Getränken und Lebensmitteln
bestimmt. Diese Produkte enthalten keine Teile auf Asbestbasis.
Symbole in dieser Gebrauchsanweisung:
Sicherheitshinweise
Tipps und Tricks
3
99631294_A_ML.qxp 18/06/2007 09:05 Page 3

So sieht Ihre neue Dunstabzugshaube aus Abb.1
In einer Küche, die mit einem an einen Kamin angeschlossenen Gerät beheizt wird,
(z.B.: Ofen), muss die Dunstabzugshaube mit Umlaufprinzip installiert werden. Die
Dunstabzugshaube darf nicht ohne die Metallfilterkassetten benutzt werden.
Wenn die Dunstabzugshaube in der Küche gleichzeitig mit Geräten benutzt wird, die mit
Gas oder einem anderen Brennstoff betrieben werden, ist für angemessene Belüftung des
Raums zu sorgen.
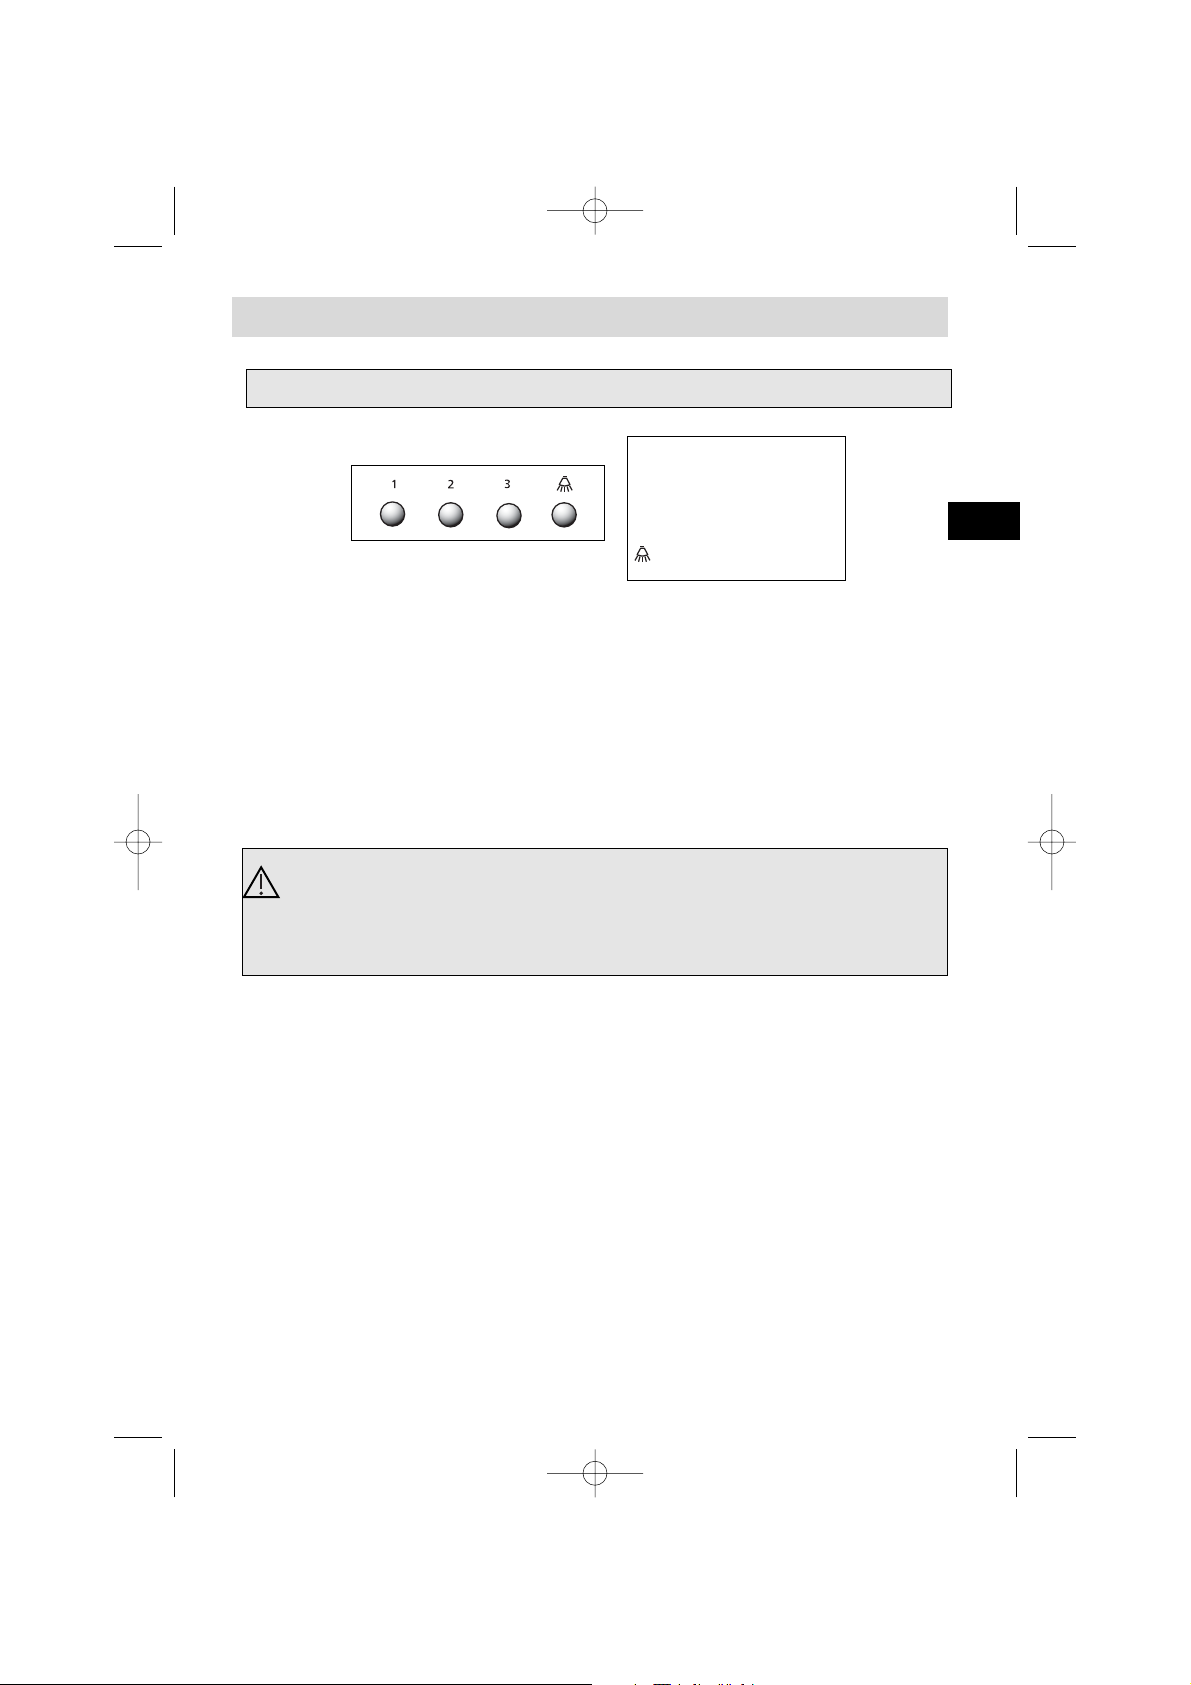
Modell mit 3 Geschwindigkeiten
1 Niedrige Geschwindigkeit
2 Mittlere Geschwindigkeit
3 Hohe Geschwindigkeit
Beleuchtung
Wichtig: Wenn mehrere Geschwindigkeitstasten gedrückt sind, wird die höchste
Stufe berücksichtigt.
Die Dunstabzugshaube schaltet sich aus, wenn keine Tasten gedrückt sind.
4
99631294_A_ML.qxp 18/06/2007 09:05 Page 4
DE
Die Installation muss die geltenden Bestimmungen für die Belüftung von Räumen einhalten. In Frankreich sind diese Vorschriften in der DTU 61.1 des CSTB angegeben.
Insbesondere darf die abgezogene Luft nicht in ein Rohr geführt werden, das für den
Abzug des Rauchs von Geräten benutzt wird, die mit Gas oder einem anderen Brennstoff
betrieben werden. Stillgelegte Abzugsrohre dürfen nur nach Genehmigung eines kompetenten Fachmanns benutzt werden.
Der Abstand zwischen dem Kochfeld und dem niedrigsten Teil der Dunstabzugshaube muss
70 cm betragen. Wenn in der Betriebsanleitung des unter der Dunstabzugshaube installierten
Kochfelds ein größerer Abstand als 70 cm vorgegeben ist, muss dies berücksichtigt werden.
Installation Ihrer Dunstabzugshaube
Wenn ein Abzug ins Freie vorhanden ist: Abb. 4
Die Dunstabzugshaube kann mit einem Abzugsschacht (Mindest-Ø 125 mm, emailliert, aus
Aluminium, Schlauch oder aus unbrennbarem Material) daran angeschlossen werden. Wenn
der Schachtquerschnitt weniger als 125 mm beträgt, müssen Sie unbedingt zum
Umlaufprinzip übergehen.
W
enn kein Abzug ins Freie v
orhanden ist: Abb. 5
Alle unsere Geräte können auch nach dem Umlaufprinzip betrieben werden.
In diesem Fall muss ein Aktivkohlefilter eingesetzt werden, der die Gerüche bindet.
- In mindestens 70 cm Abstand über dem Kochfeld an der Wand einen waagerechten Strich ziehen.
- Einen senkrechten Strich an der Wand von der Decke bis zur unteren Kante der Abzugshaube ziehen.
- Montageschablonen an die Wand anlegen (Abb. 2).
- Die 6 Löcher bohren. Die 6 Dübel eindrücken.
- Die beiden Schrauben oben an der Dunstabzugshaube einschrauben und sie 5 mm überstehen lassen.
- Metallfilter entfernen.
- Dunstabzugshaube an den beiden Schrauben aufhängen (Abb. 3).
- Die beiden Schrauben unten einschrauben.
Einbau Ihrer Dunstabzugshaube
Anschluss der Dunstabzugshaube
Dieses Gerät wird mit einem Netzkabel H 05 VVF mit drei 0,75 mm2-Adern (neutral
und Phase) geliefert. Es muss über eine Normsteckdose IEC 60083 an ein Stromnetz
mit 220 - 240 V einphasig angeschlossen werden, die auch nach der Installation
gemäss Einbauregeln zugänglich bleiben muss.
Bei nicht korrekt ausgeführter Montage können wir im Falle eines Unfalls nicht haftbar
gemacht werden. Die Sicherung der Anlagen muss 10 oder 16 A betragen. Wenn das
Anschlusskabel beschädigt ist, den Kundendienst rufen, um jegliche Gefahr auszuschließen.
Vor dem endgültigen Festziehen der 4 Schrauben die Höhe der Dunstabzugshaube
justieren.
5
99631294_A_ML.qxp 18/06/2007 09:05 Page 5
Montage des Kamins
Abluftbetrieb:
Abb. 4 und 8
- Halterung des Metallkamins an der Decke anlegen und an der Wand befestigen (Abb. 6).
- Bei Schächten mit einem Querschnitt von 125 mm ist der mitgelieferte Adapter zu benutzen
(Abb. 8).
Wenn der Außenschacht einen Querschnitt von weniger als 125 mm aufweist, muss die
Dunstabzugshaube unbedingt im Umlaufprinzip angeschlossen werden.
- Bei der Vorbereitung des Teleskop-Kamins darauf achten, dass die Ansaugöffnungen nicht
sichtbar sind (Abb. 8).
Die Kaminteile so weit wie möglich ineinanderschieben.
- Oberen Teil an der Metallhalterung befestigen.
- Die Länge des Teleskop-Kamins justieren, dabei den unteren Teil herunterziehen und in den
oberen Teil der Dunstabzugshaube einschieben.
Umlaufbetrieb: Abb. 5 und 9
- Die Rückschlagklappen können abgenommen werden.
- Rauchablenker an der Decke anlegen und an der Wand befestigen.
Den Rauchablenker sorgfältig im Verhältnis zum an die Wand gezeichneten vertikalen Strich mittig anbringen
(Abb. 7).
- Den Kamin vorbereiten und darauf achten, dass die Ansaugöffnungen nach oben weisen, damit sie sichtbar sind (B/Abb. 9).
- Oberen Teil des Rauchablenkers befestigen.
- Die Länge des Teleskop-Kamins justieren, dabei den unteren Teil herunterziehen und in den oberen Teil der Dunstabzugshaube einschieben.
Wir empfehlen für den optimalen Einsatz des Geräts den Anschluss an einen Schacht mit
150 mm Querschnitt (nicht mitgeliefert). Die Anzahl Rohrkrümmer und die Schachtlänge
weitgehend begrenzen. Beim Abluftbetrieb der Dunstabzugshaube muss für ausreichen-
de Frischluftzufuhr gesorgt werden, damit vermieden wird, den Raum unter Unterdruck zu
setzen.
Austauschen der Lampe
1. Metallfilter entfernen (Abb. 10).
2. Birne E14-40W herausschrauben und austauschen (Abb. 11).
3. Metallfilter austauschen.
Vor jedem Eingriff muss die Dunstabzugshaube vom Stromnetz getrennt werden, entweder
durch Ziehen des Netzsteckers oder durch Betätigen des Überlastschalters.
6
99631294_A_ML.qxp 18/06/2007 09:05 Page 6
DE
Ausbau der Filterkassette
(Abb. 10)
Einbau des Kohlefilters
(Abb. 12)
1. Kassetten abnehmen.
2. Kohlefilter auf die zum Inneren der Dunstabzugshaube zeigende Seite der Kassette
legen.
3. Zwei Griffleisten auflegen.
4. Diesen Vorgang mit den anderen Kassetten wiederholen.
Reinigung der Dunstabzugshaube
Vor der Entnahme der Metallfettfilter muss die Dunstabzugshaube vom Stromnetz
getrennt werden, entweder durch Ziehen des Netzsteckers oder durch Betätigen
des Überlastschalters. Nach der Reinigung sind die Metallfettfilter wieder entsprechend der Anleitung zu befestigen.
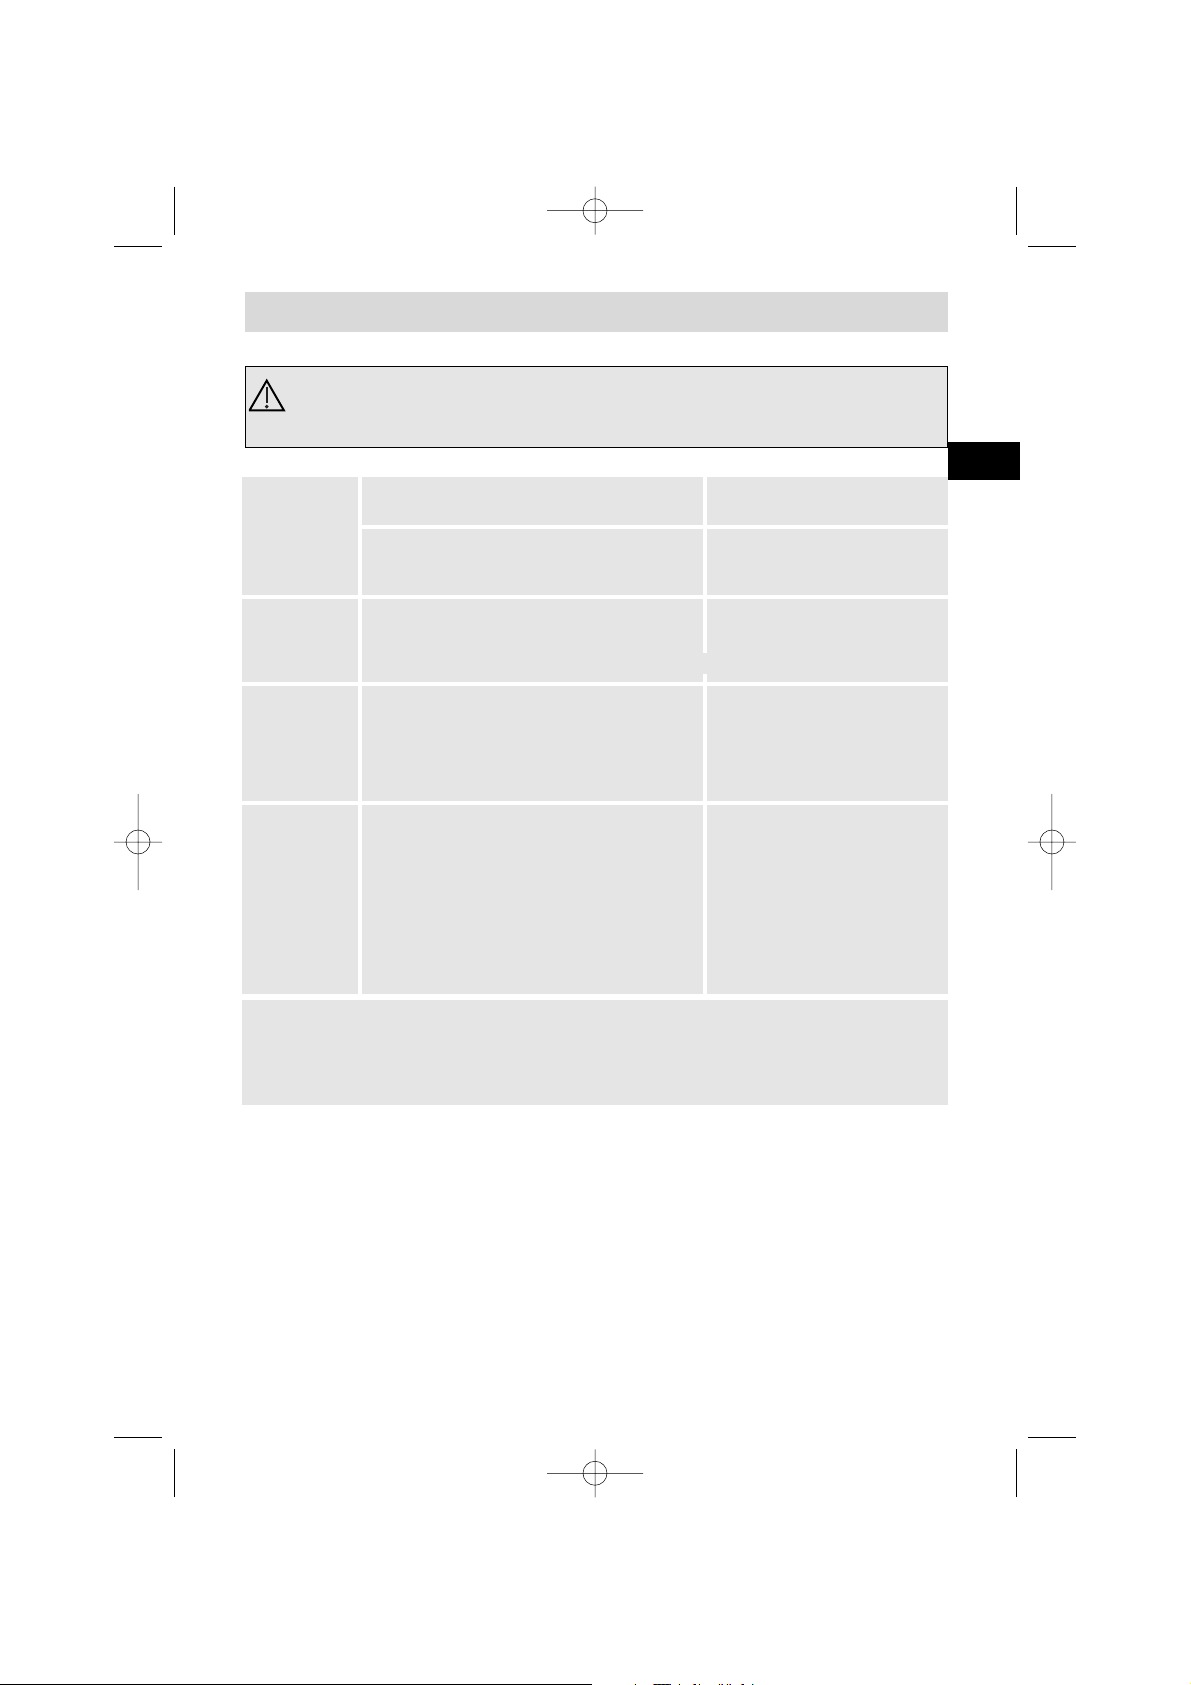
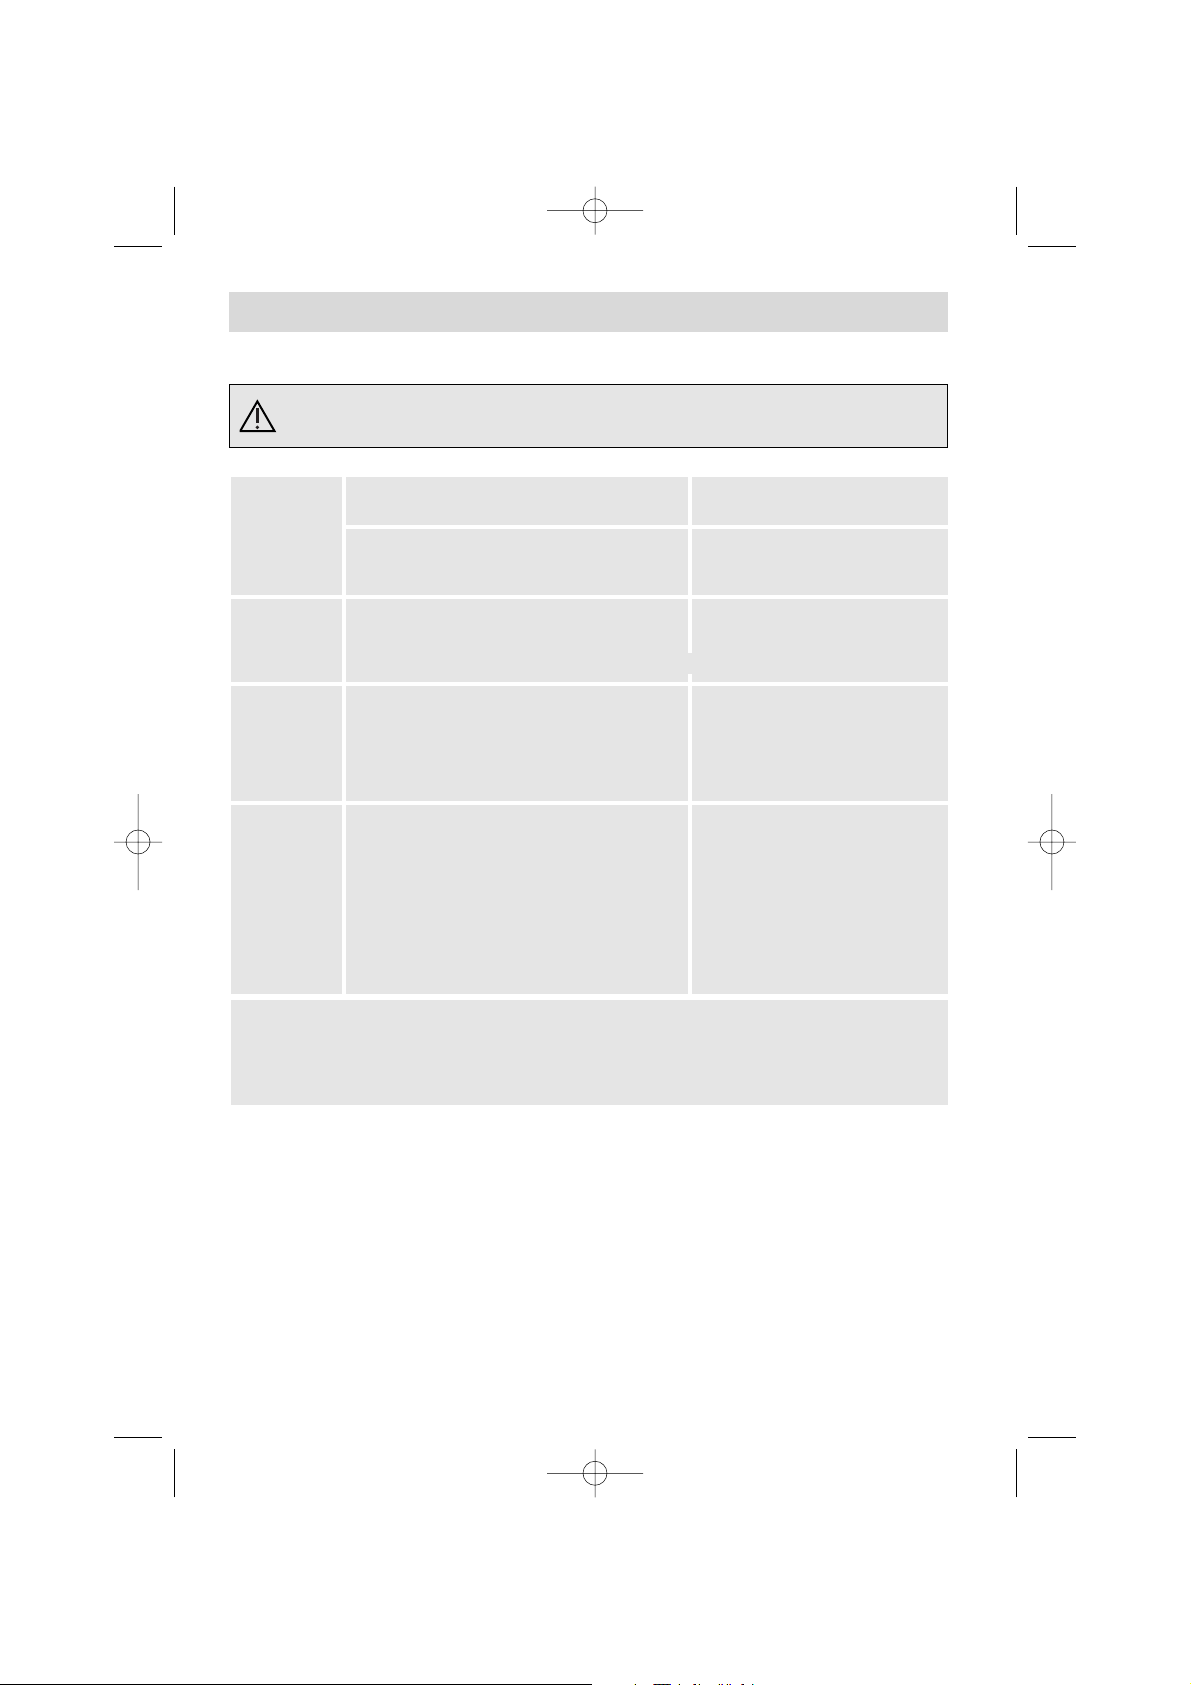
REINIGUNG
WARUM?
WIE?
UNBEDINGT EINMAL PRO MONAT
UNBEDINGT EINMAL PRO JAHR
Dieser Filter hält Fettdunst und Staub zurück.
Dieses Teil trägt wesentlich zur Wirksamkeit
Ihres Dunstabzugs bei.
Dieser Filter bindet die Gerüche
und muss je nach Nutzungs-
grad mindestens einmal jährlich
gewechselt werden.
Mit einem handelsüblichen Haushaltsprodukt,
dann reichlich abspülen und trocknen. Diese
Reinigung kann im Geschirrspüler in vertikaler
Position erfolgen (nicht mit schmutzigem
Geschirr und Silberbesteck in Berührung brin-
gen).
Diese Filter beim Fachhändler
bestellen (mit der Produkt-
referenz auf dem Geräteschild
im Inneren der Dunstab-
zugshaube) und das Datum des
Austauschs notieren.
FILTERKASSETTE
AKTIVKOHLEFILTER
Niemals Metallkratzer, Scheuermittel oder zu harte Bürsten benutzen.
Für die Reinigung von Gehäuse und Leuchtblende ausschließlich handelsübliche, in Wasser gelöste
Reinigungsmittel verwenden, mit klarem Wasser abspülen und mit einem weichen Lappen trocknen.
Vor der ersten Benutzung der Filterkassette die
Schutzfolie abziehen.
Für Dunstabzugshauben in
Umlaufbetrieb
Zur Vermeidung von Brandrisiken.
7
99631294_A_ML.qxp 18/06/2007 09:05 Page 7
Kundendienst
Aussehensmängel, die durch falsche Benutzung oder die Reinigung mit Scheuerprodukten
verursacht wurden, die jedoch keinen Betriebsausfall mit sich führen oder das Gerät
unbrauchbar machen, werden vom Hersteller nicht übernommen. Jegliche
Störungsbeseitigung muss von einem qualifizierten Techniker durchgeführt werden.
Nur der Vertrieb unserer Marke:
• • KKennt Ihr Gerät und seine Funktionsweise
ennt Ihr Gerät und seine Funktionsweise
• • WWendet alle unsere Einstellungs-, Wartungs- und Reparaturmethoden an
endet alle unsere Einstellungs-, Wartungs- und Reparaturmethoden an
• • VVerwendet ausschließlich Originalteile.
erwendet ausschließlich Originalteile.
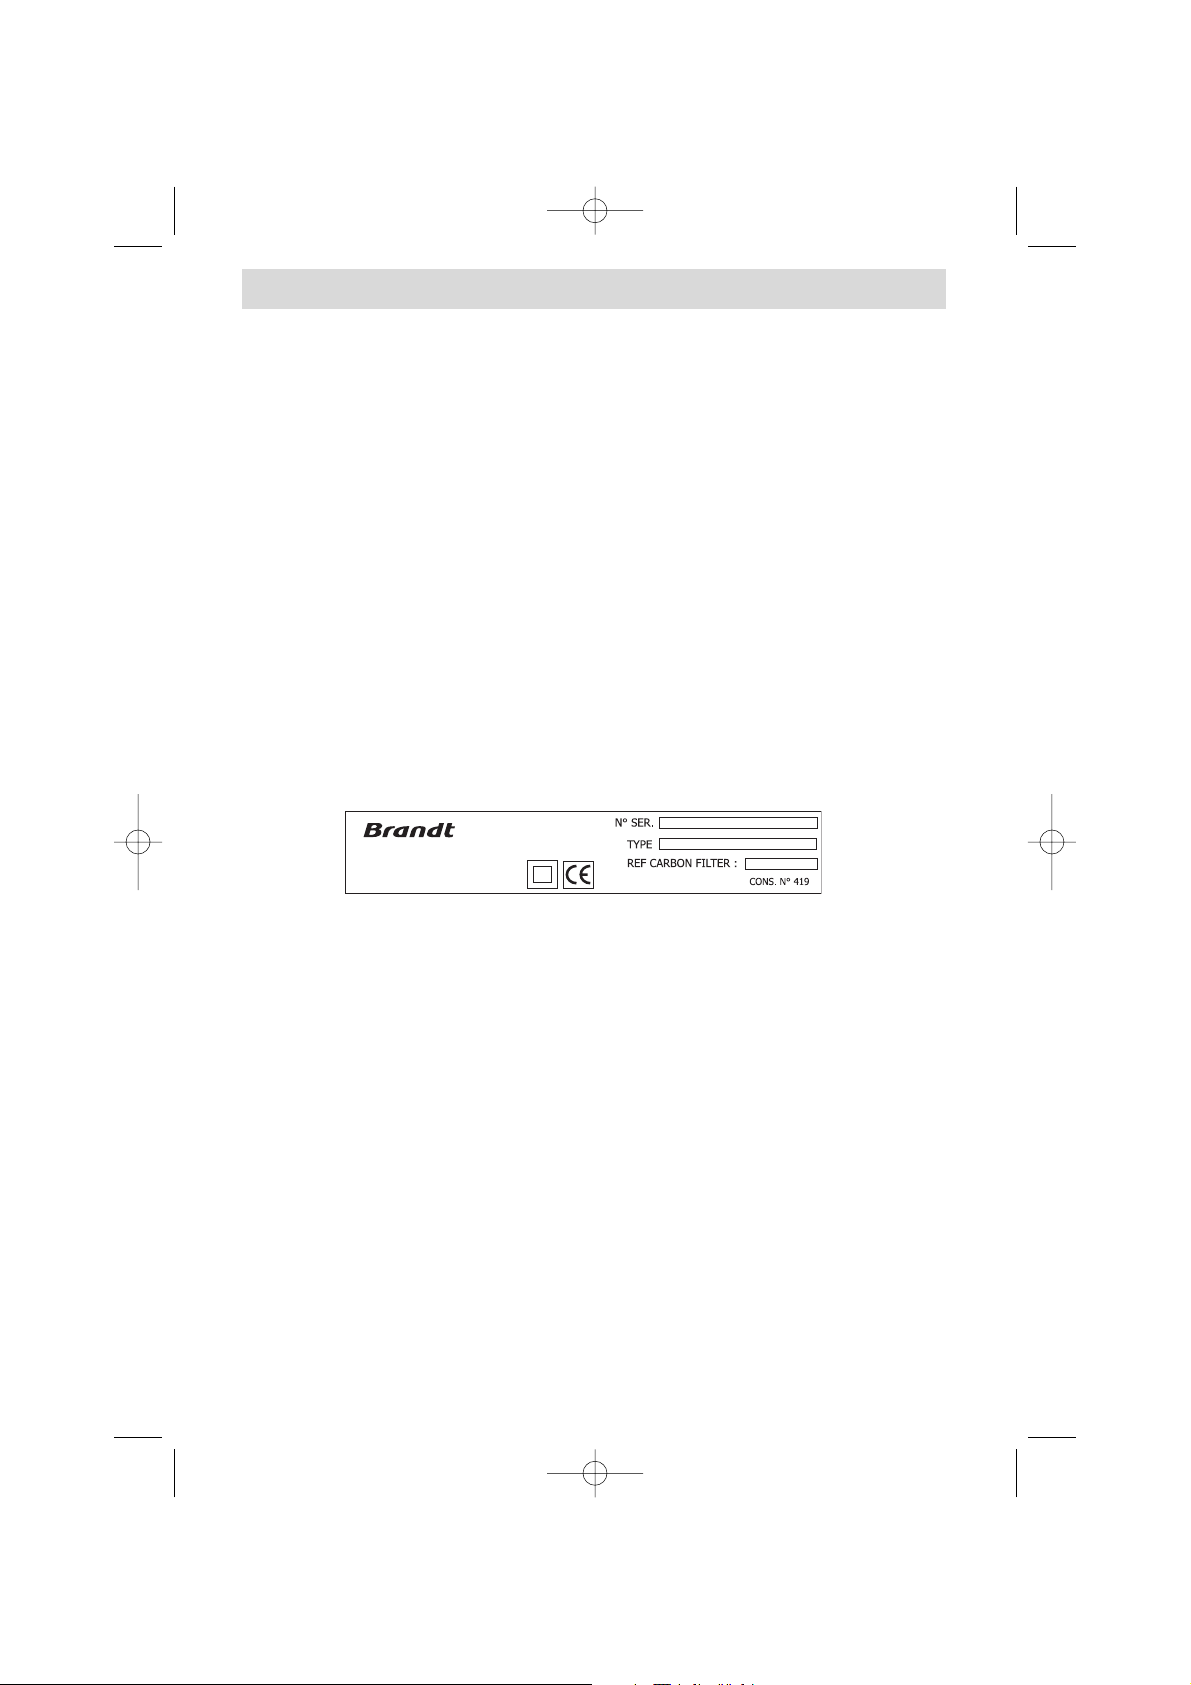
Bei Reklamation oder bei Bestellung von Ersatzteilen beim Vertrieb muss die vollständige
Artikelnummer des Geräts (Gerätetype und Seriennummer) angegeben werden.
Diese Angaben befinden sich auf dem innen im Gerät angebrachten Geräteschild.
Die in diesem Büchlein gegebenen Beschreibungen und Merkmale werden nur zur Information gegeben und beinhalten keine Verpflichtung. Um Ihnen stets hochwertige Qualität bieten
zu können, behalten wir uns das Recht vor, ohne Vorankündigung alle notwendigen Änderungen oder Verbesserungen an den Produkten vorzunehmen.
BRANDT APPLIANCES SAS
7 rue Henri Becquerel
92500 RUEIL MALMAISON
MADE IN FRANCE
220 - 240V ~ 50 Hz
8
99631294_A_ML.qxp 18/06/2007 09:05 Page 8
GB
Introduction
Dear Customer,
Thank you for choosing the BRANDT hood.
Our design staff have produced a new generation of kitchen
equipment, to make everyday cooking a pleasure.
The modern, attractive design of your new BRANDT hood will
blend smoothly into your kitchen installation, providing an optimum combination of easy use and performance.
The Brandt range also includes a huge choice of fitted cooking
hobs, ovens, dish-washers and refrigerators, that will match your
new BRANDT hood.
Of course, we make every effort to ensure that our products meet
all your requirements, and our Customer Relations department is
at your disposal, to answer all your questions and to listen to all
your suggestions.
A specialist in the world of cooking, BRANDT works hard to
contribute to your culinary success, and your cooking pleasure,
offering ever more effective products, which are easy to use,
environmentally friendly, attractive and reliable.
The BRANDT name.
9
99631294_A_ML.qxp 18/06/2007 09:05 Page 9
Safety instructions
- You should never "flambé" dishes under the hood or operate gas rings under the hood
without cooking utensils being placed on them (the flames sucked up into the hood can
damage the appliance).
- When frying food under the appliance, a careful watch must be kept on this at all times.
- Repairs must only be carried out by an approved specialist.
- You should regularly clean the filter cartridge.
- The hood should never be used over a combustible fuel burning stove (wood, coal, etc).
These hoods have been designed for non-commercial use in private homes.
With a view to constantly improving our products, we reserve the right to modify their
technical, functional or aesthetic characteristics, making any changes to their features
considered necessary or desirable in view of technical progress.
These hoods are designed exclusively for cooking foodstuffs and drinks. These products do
not contain any asbestos based components.
Throughout this manual,
indicates safety recommendations,
indicates advice to help you make the best use
of your oven
10
99631294_A_ML.qxp 18/06/2007 09:05 Page 10
GB
The controls on your hood Fig.1
In the case of a kitchen heated by a device connected to a chimney (for
example a stove) the "recycling" version of the hood should be installed. Do not use the
hood without metal filters.
Suitable ventilation should be ensured for the room when the suction hood is used at the same
time as appliances using gas or another combustible fuel.
3-speed model
1 Slow speed
2 Medium speed
3 Fast speed
Lighting
Important: When several speed buttons are pressed-in, the highest speed applies.
The hood turns off when none of the buttons are pressed-in.
11
99631294_A_ML.qxp 18/06/2007 09:05 Page 11
The hood must be installed in conformity with the applicable regulations concerning
the ventilation of premises. In France, these regulations are detailed in DTU 61.1 from
the CSTB. In particular, the evacuated air must not be channelled into a duct used to
evacuate fumes from appliances using gas or other combustible fuels. Disused ducts may
only be used after approval from a competent specialist.
The minimum distance between the cooking surface and the lowest part of the hood must be
70 cm. If the instructions for the hob installed under the hood specify a distance of more than
70 cm, this requirement must be respected.
Installing your hood ?
If you possess an outlet to the exterior: fig. 4
Your hood can be connected to this using a flue (minimum Ø 125 mm, enamelled, made from aluminium, flexible or made from a non-flammable material). If your flue is below 125 mm in diameter,
you must obligatorily use the "recycling" mode.
If y
ou do not possess an outle
t to the exterior: fig. 5
All of our appliances can be used in recycling mode.
In this case, you should add an active carbon filter which will keep in odours.
- Draw a horizontal line 70 cm minimum from the cooktop.
- Draw a vertical line on the wall running from the ceiling to the lower edge of the hood.
- Place the mounting hole template against the wall (fig. 2)
.
- Drill the 6 holes. Insert the 6 wall plugs.
- Screw up the top two screws of the hood, but not completely - allow them to
protrude by 5 mm.
- Remove the metal filter.
- Attach the suction hood to the two screws (fig. 3).
- Screw up the two screws at the bottom.
Assembling your hood
Connecting up your hood
This appliance is delivered with a H 05 VVF power cable with 2 conductors of
0.75 mm
2
(neutral, live). This must be connected to the 220-240 V single phase
mains network via a CEI 60083 standard plug which must remain accessible following
installation. We will not be liable in the event of an accident arising following incorrect
installation. The fuse for your installation must be 10 or 16A. If the power cable is damaged, call the after sales service department in order to avoid danger.
Adjust the level of your hood before fully tightening up all four screws.
12
99631294_A_ML.qxp 18/06/2007 09:05 Page 12
GB
Assembling the chimney
Hood to be used with external evacuation :
fig. 4 and 8
- Attach the metal chimney bracket to the wall, also placing this against the ceiling (fig. 6).
Take care in aligning the 2 triangular slots on the metal bracket with the vertical line on the wall.
- In the case of a flue with a diameter of 125 mm, use the adapter supplied (fig. 8).
If your exterior duct is below 125 mm, you must obligatorily connect your hood in
recycling mode
- Prepare your telescopic chimney taking care to block off the vents (fig. 8).
Fit the chimneys into one another as far as they will go.
- Fit the upper part to the metal bracket.
- Adjust the length of the telescopic chimney by bringing down the lower part and fitting it to the
top of the hood.
Hood to be used in "recycling" mode: f
ig. 5 and 9
- It is possible to remove the back flow valves.
- Fit the plastic smoke deflector to the wall also placing this against the ceiling.
Take care to centre the deflector vis-à-vis the vertical line drawn on the wall (fig. 7).
- Prepare your chimney taking care to place the vents toward the top to ensure that
they are visible
(fig. 9).
- Fit the upper part to the plastic deflector.
- Adjust the length of the telescopic chimney by bringing down the lower part and fitting it into the
top of the hood.
To ensure optimal use of your device, we advise that you connect a flue with a diameter
of 150 mm (not supplied). Limit the number of angles and bends as far as possible, and
keep the length of the flue to a minimum. In the event that the hood will be functioning
using exterior evacuation, you should ensure a sufficient inlet of fresh air to avoid a pressure deficiency in the room.
Changing the lamp ?
1. Remove metal filters (fig. 10).
2. Unscrew then change the E14-40W bulb (fig. 11).
3. Replace the metal filters.
Before carrying out any work, the power supply to the hood must be turned off,
either by unplugging it or by using the circuit breaker switch,
13
99631294_A_ML.qxp 18/06/2007 09:05 Page 13
Dismantling the filter cartridge
(fig. 10)
Assembling the carbon filter
(fig. 12)
1. Remove the cartridges.
2. Place the carbon filter on the cartridge, on the inner side of the hood.
3. Fit the 2 fastener clips.
4. Repeat this operation on all of the cartridges.
Cleaning your hood ?
The power supply to the hood must be turned off either by removing the plug or by
using the circuit breaker switch before you remove the metal filters. After cleaning,
the metal filters must be refitted in conformity with the instructions.
MAINTENANCE
WHY?
HOW?
VITAL EVERY MONTH
VITAL EVERY YEAR
This filter traps fatty vapours and dust. This
component plays an important part in
ensuring the effectiveness of your hood.
This filter traps odours and must
be changed at least once a year
depending on your level of use.
Use a commercial household cleaning product then
rinse abundantly and dry. This cleaning can be
carried out in your dishwasher in the vertical position
(ensure that the cartridge never comes into contact
with dirty crockery or silver tableware).
You should order these filters from
your dealer (quoting the reference
shown on the ID plate located
inside the hood) and note the date
the filter was changed.
FILTER CARTRIDGE
ACTIVATED CARBON FILTER
Never use metal scouring pads, abrasive products or excessively stiff brushes.
To clean the body and the lighting port, you should use only commercial household cleaning products
diluted in water and then rinse using clean water, drying with a soft cloth.
Remove the protective film before using the fil-
ter cartridge for the first time.
For hoods installed in "recycling"
mode.
To avoid all risks of fire.
14
99631294_A_ML.qxp 18/06/2007 09:05 Page 14
GB
BRANDT APPLIANCES SAS
7 rue Henri Becquerel
92500 RUEIL MALMAISON
MADE IN FRANCE
220 - 240V ~ 50 Hz
Who should I contact ?
Blemishes on the hood caused by abnormal use or cleaning with abrasive products which
do not cause the appliance to cease functioning or which do not cause it to become unsuitable for use will not be dealt with by the manufacturer. Any repairs must be carried out by
a qualified technician.
Only the distributors of our brand :
• Are fully familiar with your appliance and its operation
• Are fully familiar with your appliance and its operation,,
• Fully apply our adjustment, maintenance and repair methods,
• Fully apply our adjustment, maintenance and repair methods,
• Use only original parts.
• Use only original parts.
To submit a complaint or to order spare parts from your distributor, please be sure to give him
the complete reference for your appliance (type of appliance and serial number).
You can find this information on the identification plate fitted inside the appliance.
The descriptions and characteristics featuring in this booklet are provided for information
purposes only, and are not binding upon us. Indeed, as part of our ongoing commitment to
improving the quality of our products, we reserve the right to make any modifications or
improvements necessary, without notice.
15
99631294_A_ML.qxp 18/06/2007 09:05 Page 15

Edito
Chère Cliente, Cher Client,
Vous venez d'acquérir une nouvelle hotte BRANDT et nous vous
en remercions.
Nos équipes de recherche ont conçu pour vous une nouvelle
génération d'appareils pour vous permettre d'exercer pleinement
vos talents culinaires et vous régaler chaque jour.
Avec des lignes pures et une esthétique moderne, votre nouvelle
hotte BRANDT s'intègre harmonieusement dans votre cuisine et
allie parfaitement facilité d'utilisation et performances de cuisson.
Vous trouverez également dans la gamme des produits BRANDT,
un vaste choix de fours, cuisinières, tables de cuisson, lave-vaisselle, fours micro-ondes et réfrigérateurs intégrables, que vous
pourrez coordonner à votre nouvelle hotte BRANDT.
Bien entendu, dans un souci permanent de satisfaire au mieux vos
exigences vis à vis de nos produits, notre service consommateurs
est à votre disposition et à votre écoute pour répondre à toutes
vos questions ou suggestions.
Spécialiste de tout l'univers de la cuisson, BRANDT contribue
ainsi à la réussite culinaire, au plaisir partagé, à la convivialité en
vous apportant des produits toujours plus performants, simples
d'utilisation, respectueux de l'environnement, esthétiques et fiables.
La Marque BRANDT.
16
99631294_A_ML.qxp 18/06/2007 09:05 Page 16

FR
Consignes de sécurité
- Il est interdit de flamber des mets ou de faire fonctionner des foyers gaz sans les recouvrir de plats de cuisson au-dessous de la hotte (les flammes aspirées risqueraient de détériorer l’appareil).
- Les fritures effectuées sous l’appareil doivent faire l’objet d’une surveillance constante.
- Les réparations doivent être exclusivement effectuées par un spécialiste agréé.
- Nettoyez régulièrement le filtre cassette pour éviter tout risque de prise de feu.
- Le fonctionnement au-dessus d’un foyer à combustible (bois, charbon, etc...) n’est pas autorisé.
Ces hottes ont été conçues pour être utilisées par des particuliers dans un lieu d’habitation.
Dans le souci d’une amélioration constante de nos produits, nous nous réservons le droit
d’apporter à leurs caractéristiques techniques, fonctionnelles ou esthétiques toutes modifications de leurs caractéristiques liées à l’évolution technique.
Ces hottes sont destinées exclusivement à la cuisson des boissons et denrées alimentaires.
Ces produits ne contiennent aucun composant à base d’amiante.
Tout au long de la notice,
vous signale les consignes de sécurité,
vous signale les conseils et les astuces
17
99631294_A_ML.qxp 18/06/2007 09:05 Page 17

Comment se présente votre hotte ? Fig.1
Dans le cas d’une cuisine chauffée avec un appareil raccordé à une cheminée
(ex : poêle), il faut installer la hotte en version recyclage. Ne pas utilisez la hotte sans les
filtres métalliques.
Une ventilation convenable de la pièce doit être prévue lorsqu’une hotte de cuisine est utilisée
simultanément avec des appareils utilisants du gaz ou un autre combustible.
Modèle 3 vitesses
1 Petite vitesse
2 Moyenne vitesse
3 Grande vitesse
Éclairage
Important : Lorsque plusieurs touches de vitesse sont enfoncées, la vitesse la plus
élevée est privilégiée.
L’arrêt de la hotte se fait lorsque toutes les touches ne sont pas enfoncées.
18
99631294_A_ML.qxp 18/06/2007 09:05 Page 18

FR
L’installation doit être conforme aux règlements en vigueur pour la ventilation des
locaux. En France, ces règlements sont indiqués dans le DTU 61.1 du CSTB. En parti-
culier, l’air évacué ne doit pas être envoyé dans un conduit utilisé pour évacuer les
fumées d’appareils utilisant du gaz ou autre combustible. L’utilisation de conduits désaffectés
ne peut se faire qu’après accord d’un spécialiste compétent.
La distance minimale entre le plan de cuisson et la partie la plus basse de la hotte doit être
de 70 cm. Si les instructions de la table de cuisson installée sous la hotte spécifient une distance plus grande que 70 cm, celle-ci doit être prise en compte.
Comment installer votre hotte ?
Vous possédez une sortie vers l’extérieur : fig. 4
Votre hotte peut être raccordée sur celle-ci par l’intermédaire d’une gaine d’évacuation (minimum Ø
125 mm, émaillée, en alu, flexible ou en matière ininflammable). Si votre gaine est inférieure à 125 mm
de diamètre, passez obligatoirement en mode recyclage.
V
ous ne possédez pas de sortie v
ers l’extérieur : fig. 5
Tous nos appareils ont la possibilité de fonctionner en mode recyclage.
Dans ce cas, ajoutez un filtre à charbon actif qui retiendra les odeurs.
- Tracez un trait horizontal à 70 cm minimum du plan de cuisson.
- Tracez un trait vertical sur le mur allant du plafond jusqu’au bord inférieur de la hotte.
- Placez contre le mur les gabarits de montage (fig. 2)
.
- Percez les 6 trous. Enfoncez les 6 chevilles.
- Vissez les deux vis du haut de la hotte en les laissant dépasser de 5 mm.
- Retirez le filtre métallique.
- Accrochez la hotte aspirante aux deux vis
(fig. 3).
- Vissez les deux vis du bas.
Montage de votre hotte
Raccordement de votre hotte
Cet appareil est livré avec un câble d’alimentation H 05 VVF à 2 conducteurs de
0,75 mm2(neutre et phase). Il doit être branché sur réseau 220-240 V monophasé par
l’intermédiaire d’une prise de courant normalisée CEI 60083 qui doit rester accessible après installation, conformément aux règles d’installation.
Notre responsabilité ne saurait être engagée en cas d’accident consécutif à une installation
incorrecte. Le fusible de votre installation doit être de 10 ou 16 A. Si le câble d’alimentation
est endommagé, faites appel au service après-vente afin d’éviter un danger.
Avant serrage complet des 4 vis, ajustez le niveau de la hotte.
19
99631294_A_ML.qxp 18/06/2007 09:05 Page 19

Montage de la cheminée
Fonctionnement en évacuation extérieure:
fig. 4 et 8
- Fixez contre le mur, en appui sur le plafond, le support de cheminée métallique (fig. 6).
- Dans le cas d’une gaine diamètre 125 mm, utilisez l’adaptateur fourni (fig. 8).
Si votre gaine extérieure est inférieure à 125 mm, il est obligatoire de raccorder votre hotte en mode
recyclage.
- Préparez votre cheminée télescopique en prenant soin de dissimuler les ouïes (fig. 8).
Emboîter les cheminées l’une dans l’autre au maximum.
- Fixez la partie supérieure sur le support métallique.
- Ajustez la longueur de la cheminée télescopique en descendant la partie inférieure et l’emboîter
dans le sommet de la hotte.
Fonctionnement en recyclage: f
ig. 5 et 9
- Il est possible de retirer les clapets anti-retours.
- Fixez contre le mur, en appui sur le plafond, le déflecteur plastique des fumées.
Prendre soin de centrer le déflecteur par rapport au trait vertical tracé sur le mur
(fig. 7).
- Préparez votre cheminée en prenant soin de placer les ouïes vers le haut de manière
qu’elles soient visibles (fig. 9).
- Fixez la partie supérieure sur le déflecteur plastique.
- Ajustez la longueur de la cheminée télescopique en descendant la partie inférieure et l’emboîter
dans le sommet de la hotte.
Pour une utilisation optimale de votre appareil, nous vous conseillons le raccordement à
une gaine diamètre 150 mm (non livrée). Limiter au maximum le nombre de coude et la
longueur de la gaine. Dans le cas où la hotte fonctionne en évacuation extérieure, il
convient d’assurer une arrivée d’air frais suffisante pour éviter de mettre la pièce en
dépression.
Comment changer la lampe ?
1. Retirez les filtres métalliques (fig. 10).
2. Dévissez puis changez l’ampoule E14-40W (fig. 11).
3. Replacez les filtres métalliques.
Avant toute intervention, la hotte doit être mise hors tension, soit en retirant la prise, soit en
actionnant le disjoncteur,
20
99631294_A_ML.qxp 18/06/2007 09:05 Page 20

FR
Démontage du filtre cassette
(fig. 10)
Montage du filtre charbon
(fig. 12)
1. Retirez les cassettes.
2. Placez le filtre charbon sur la cassette coté intérieur de la hotte.
3. Placez les 2 tringles de maintien.
4. Faîtes cette opération sur toutes les cassettes.
Comment nettoyer votre hotte ?
La hotte doit être mise hors tension, soit en retirant la prise, soit en actionnant le disjoncteur,
avant que les filtres métalliques soient enlevés. Après le nettoyage, les filtres métalliques doivent être de nouveau fixés conformément aux instructions.
ENTRETIEN
POURQUOI ?
COMMENT ?
IMPERATIF TOUS LES MOIS
IMPERATIF TOUS LES ANS
Ce filtre retient les vapeurs grasses et les pous-
sières. Il est l’élément assurant une part impor-
tante de l’efficacité de votre hotte.
Ce filtre retient les odeurs et
doit être changé au moins tous
les ans en fonction de votre uti-
lisation.
Avec un nettoyant ménager du commerce, puis rin-
cez abondamment et séchez. Ce nettoyage peut être
effectué dans votre lave-vaisselle en position vertica-
le (ne pas mettre en contact avec de la vaisselle sale
ou des couverts en argent).
Commandez ces filtres chez
votre revendeur (sous la réfé-
rence indiquée sur la plaque
signalétique située à l’intérieur
de la hotte) et notez la date de
changement.
FILTRE CASSETTE
FILTRE CHARBON ACTIF
N’utilisez jamais de tampons métalliques, de produits abrasifs ou de brosses trop dures.
Pour nettoyer la carrosserie et le hublot d’éclairage, utilisez exclusivement des nettoyants ménagers du
commerce dilués dans de l’eau, puis rincez à l’eau claire et essuyez avec un chiffon doux.
Avant la première utilisation du filtre cassette,
retirez le film de protection.
Pour les hottes installées en
recyclage
Pour éviter tout risque d’incendie.
21
99631294_A_ML.qxp 18/06/2007 09:05 Page 21

BRANDT APPLIANCES SAS
7 rue Henri Becquerel
92500 RUEIL MALMAISON
MADE IN FRANCE
220 - 240V ~ 50 Hz
Qui contacter ?
Les défauts d’aspect provoqués par une utilisation anormale ou le nettoyage avec des produits abrasifs
qui n’entraîne pas un non fonctionnement ou une inaptitude à l’usage ne sont pas pris en compte par le
fabriquant. Tout dépannage doit être effectué par un technicien qualifié.
Seuls les distributeurs de notre marque :
• • CConnaissent parfaitement votre appareil et son fonctionnement
onnaissent parfaitement votre appareil et son fonctionnement,,
• • AAppliquent intégralement nos méthodes de réglage, d’entretien et de
ppliquent intégralement nos méthodes de réglage, d’entretien et de
réparation,
réparation,
• • UUtilisent exclusivement les pièces d’origine.
tilisent exclusivement les pièces d’origine.
En cas de réclamation ou pour commander des pièces de rechange à votre distributeur, précisez-lui la
référence complète de votre appareil (type de l’appareil et numéro de série)
Ces renseignements figurent sur la plaque signalétique fixée à l’intérieur de l’appareil.
Les descriptions et les caractéristiques apportées dans ce livret sont données seulement à titre d’information
et non d’engagement. En effet, soucieux de la qualité de nos produits, nous nous réservons le droit d’effectuer, sans préavis, toutes modifications ou améliorations nécessaires.
Pour en savoir plus sur tous les produits de la marque :
informations, conseils, les points de vente, les spécialistes après-vente.
Pour communiquer :
nous sommes à l’écoute de toutes vos remarques, suggestions, propositions auxquelles nous vous répondrons personnellement.
Vous pouvez nous écrire :
SERVICE CONSOMMATEURS BRANDT
BP 9526
95069
CERGY PONTOISE CEDEX
ou nous téléphoner au :
* Service fourni par Brandt Customer Services, société par actions simplifiée au capital de
2.500.000 euros - 5/7 avenue des Béthunes, 95310 Saint Ouen l’Aumône - RCS Pontoise 440 303 303
Brandt Appliances - société par actions simplifiée au capital de 10.000.000 Euros
RCS Nanterre 440 302 347.
Relations consommateurs
22
99631294_A_ML.qxp 18/06/2007 09:05 Page 22
*

GR
Εισαγωγή
Αξιότιμη πελάτισσα, Αξιότιμε πελάτη,
Σας ευχαριστούμε που αγοράσατε έναν απορροφητήρα της
BRANDT.
Οι ομάδες έρευνας δημιουργούν για εσάς νέες γενιές
προϊόντων και συσκευών για να είναι το μαγείρεμα
καθημερινή απόλαυση.
Με απαλές γραμμές και σύγχρονη αισθητική, ο νέος
απορροφητήρας σας BRANDT ενσωματώνεται αρμονικά
στην κουζίνα σας και συνδυάζει αποδώσεις και ευκολία
χρήσης.
Η Brandt παράγει επίσης ολόκληρες σειρές από προϊόντα,
όπως κουζίνες, φούρνους, πλυντήρια πιάτων, ψυγεία. Όλα
αυτά μπορούν να εντοιχιστούν ή να συνδυαστούν μαζί με
τον νέο απορροφητήρα σας από την BRANDT.
Βέβαια σε μια συνεχή προσπάθεια να ικανοποιήσουμε
συνεχώς καλύτερα τις απαιτήσεις απέναντι στα προϊόντα
μας η υπηρεσία πελατών είναι στη διάθεσή σας για να σας
ακούσει, για να απαντήσει στις ερωτήσεις σας ή για τις
οποιεσδήποτε συστάσεις σας.
Ειδικός στις οικιακές συσκευές κουζίνας, η BRANDT
συμβάλλει στην επιτυχία και την απόλαυση των φαγητών
σας, καθώς και στη δημιουργία φιλικού περιβάλλοντος,
προσφέροντάς σας όλο και πιο αποδοτικά, ευκολόχρηστα,
οικολογικά, καλαίσθητα και αξιόπιστα προϊόντα
Η μάρκα BRANDT.
23
99631294_A_ML.qxp 18/06/2007 09:05 Page 23

Μέτρα ασφαλείας
- Απαγορεύεται να φλαμπάρετε φαγητά ή να θέτετε σε λειτουργία τις εστίες
υγραερίου χωρίς να τις καλύπτετε με σκεύη μαγειρέματος κάτω από τον
απορροφητήρα (αν η συσκευή απορροφήσει φλόγες κινδυνεύουν να της
προκαλέσουν βλάβη).
- Το τηγάνισμα κάτω από τον απορροφητήρα πρέπει να είναι αντικείμενο μόνιμης
επίβλεψης.
- Οι επισκευές πρέπει να πραγματοποιούνται αποκλειστικά από εξειδικευμένο
προσωπικό.
- Πρέπει να καθαρίζετε τακτικά την κασέτα φίλτρου.
- Η λειτουργία της συσκευής πάνω από εστίες καύσιμης ύλης (ξύλο, κάρβουνο, κλπ...) δεν
επιτρέπεται.
Οι απορροφητήρες αυτοί έχουν σχεδιαστεί για να χρησιμοποιούνται από ιδιώτες
σε οικιακό περιβάλλον. Με στόχο τη συνεχή βελτίωση των προϊόντων μας, διατηρούμε το δικαίωμα να τροποποιήσουμε τα τεχνικά, λειτουργικά ή αισθητικά
χαρακτηριστικά των συσκευών σύμφωνα με τις τεχνικές εξελίξεις.
Οι απορροφητήρες αυτοί προορίζονται αποκλειστικά στην παρασκευή τροφίμων
και ποτών. Τα προϊόντα μας δεν περιέχουν κανένα στοιχείο με βάση τον αμίαντο.
Σε όλο το εγχειρίδιο, το
σας επισημαίνει τις οδηγίες ασφαλείας,
σας επισημαίνει τις συμβουλές και τα τεχνάσματα
24
99631294_A_ML.qxp 18/06/2007 09:05 Page 24

GR
Παρουσίαση του απορροφητήρα σας σχήμα 1
Σε περίπτωση που η κουζίνα θερμαίνεται από συσκευή η οποία είναι
συνδεδεμένη με εξαγωγή αέρα (π.χ. σόμπα), ο απορροφητήρας πρέπει να
εγκατασταθεί με σύστημα ανακύκλωσης. Μη χρησιμοποιείτε τον
απορροφητήρα χωρίς τα μεταλλικά φίλτρα.
Πρέπει να προβλεφθεί ικανοποιητικός εξαερισμός του χώρου όταν ένας
απορροφητήρας κουζίνας χρησιμοποιείται ταυτόχρονα με συσκευές οι οποίες
χρησιμοποιούν υγραέριο ή κάποια άλλη καύσιμη ύλη.
Μοντέλο 3 ταχυτήτων
1 Χαμηλή ταχύτητα
2 Μεσαία ταχύτητα
3 Υψηλή ταχύτητα
Φωτισμός
Σε περίπτωση που πατηθούν περισσότερα του ενός πλήκτρα ταχύτητας, θα
δοθεί προτεραιότητα στην υψηλότερη ταχύτητα. Ο απορροφητήρας
σταματά όταν κανένα πλήκτρο δεν είναι πατημένο.
25
99631294_A_ML.qxp 18/06/2007 09:05 Page 25

Η εγκατάσταση πρέπει να συμμορφώνεται με τις ισχύουσες νομικές διατάξεις
για τον εξαερισμό των εσωτερικών χώρων. Στη Γαλλία, αυτές οι διατάξεις
περιλαμβάνονται στο DTU 61.1 του CSTB (Οικοδομικό Επιστημονικό και Τεχνικό Κέντρο). Ιδίως, ο εκκενωμένος αέρας δεν πρέπει να καταλήγει σε κάποιο αγωγό ο οποίος
χρησιμοποιείται για την εκκένωση αερίων προερχόμενων από συσκευές που
χρησιμοποιούν υγραέριο ή κάποια άλλη καύσιμη ύλη. Η χρήση αγωγών σε
εγκατάλειψη υπόκειται στην έγκριση ενός ειδικού. Η ελάχιστη απόσταση μεταξύ
του επιπέδου ψησίματος των τροφίμων και του χαμηλότερου τμήματος του
απορροφητήρα πρέπει να είναι 70 εκ. Σε περίπτωση που οι οδηγίες της βάσης
εστιών που έχετε εγκαταστήσει κάτω από τον απορροφητήρα καθορίζουν ότι η
απόσταση πρέπει να είναι μεγαλύτερη των 70 cm., θα πρέπει να την τηρήσετε.
Πως να εγκαταστήσετε τον απορροφητήρα σας
Διαθέτετε έξοδο προς τα έξω: σχήμα 4
Ο απορροφητήρας σας μπορεί να συνδεθεί με την έξοδο δια μέσω ενός αγωγού εκκένωσης (ελάχιστη διάμετρος 125 mm, ο οποίος μπορεί να είναι από εμαγιέ, αλουμίνιο,
εύκαμπτος ή από άκαυστο υλικό) Σε περίπτωση που ο αγωγός σας έχει διάμετρο μικρότερη από 125 mm, περάστε υποχρεωτικά σε λειτουργία ανακύκλωσης.
Δεν δια
θέτετε έξοδο προς τα έξω: σχήμα 5
Όλες μας οι συσκευές μπορούν να λειτουργήσουν σε λειτουργία ανακύκλωσης.
Στην περίπτωση αυτή, προσθέστε ένα φίλτρο ενεργού άνθρακα το οποίο θα συγκρατεί
τις μυρωδιές.
- Κάντε μια οριζόντια γραμμή σε απόσταση τουλάχιστον 70 cm από τον πάγκο βάσης εστιών.
- Κάντε μια κάθετη γραμμή στον τοίχο από το ταβάνι μέχρι το κάτω άκρο του
απορροφητήρα.
- Τοποθετήστε στον τοίχο πρότυπα τοποθέτησης (εικ. 2).
- Κάντε τις 6 οπές. Βάλτε τα 6 ούπατ.
- Βιδώστε τις δύο βίδες του πάνω μέρους του απορροφητήρα αφήνοντας να προεξέχουν
5 mm.
- Αφαιρέστε το μεταλλικό φίλτρο.
- Στερεώστε τον απορροφητήρα στις δύο βίδες (εικ. 3).
- Βιδώστε τις δύο βίδες του κάτω μέρους.
Τ
οποθέτηση του απορροφητήρα σας
Σύνδεση του απορροφητήρα σας
Η συσκευή ;αυτή διατίθεται με καλώδιο τροφοδοσίας H 05 WF με τρεις αγωγούς
0,75 mm2 (ουδέτερο, φάση). Πρέπει να συνδεθεί σε μονοφασικό ρεύμα 220-240 V
μέσω πρίζας ρεύματος με βάση τα πρότυπα CEI 60083, η οποία πρέπει να
εξακολουθήσει να είναι προσβάσιμη μετά την εγκατάσταση.
Ουδεμία ευθύνη φέρουμε σε περίπτωση ατυχήματος λόγω απουσίας γείωσης ή
λανθασμένης γείωσης. Η ασφάλειά σας πρέπει να είναι 10 ή 16 Α. Σε περίπτωση που
το καλώδιο τροφοδοσίας είναι φθαρμένο, καλέστε την υπηρεσία τεχνικής εξυπηρέτησης ώστε να αποφύγετε κάθε κίνδυνο.
Πριν σφίξετε τελείως τις 4 βίδες, αλφαδιάστε τον απορροφητήρα.
26
99631294_A_ML.qxp 18/06/2007 09:05 Page 26

GR
Τοποθέτηση του καπναγωγού
Λειτουργία εξωτερικής εκκένωσης αερίων: σχήματα 4 και 8
- Στερεώστε στον τοίχο, με στήριξη στο ταβάνι, τη μεταλλική βάση του καπναγωγού
(σχήμα 6).
Φροντίστε να ευθυγραμμίσετε τις δύο τριγωνικές εγκοπές της μεταλλικής βάσης με την
κάθετη γραμμή στον τοίχο.
- Σε περίπτωση που ο αγωγός σας έχει διάμετρο 125 mm χρησιμοποιήστε το παρεχόμενο
προσαρμοστικό εξάρτημα (σχήμα 8).
Σε περίπτωση που ο εξωτερικός σας αγωγός έχει διάμετρο μικρότερη από 125 mm,
πρέπει απαραίτητα να συνδέσετε τον απορροφητήρα σε λειτουργία ανακύκλωσης.
- Προετοιμάστε τον τηλεσκοπικό σας καπναγωγό φροντίζοντας να καλύψετε τις οπές
(σχήμα 8).
Εφαρμόστε τον ένα καπναγωγό μέσα στον άλλον πιέζοντας μέχρι τέρμα.
- Στερεώστε το επάνω μέρος της μεταλλικής βάσης.
- Προσαρμόστε το μήκος του τηλεσκοπικού καπναγωγού κατεβάζοντας το κάτω τμήμα και
εφαρμόζοντάς το στην κορυφή του απορροφητήρα.
Λειτουργία ανακύκλωσης: σχήμα 5 και 9
- Είναι δυνατόν να αφαιρεθούν τα κλαπέτα αντεπιστροφής.
- Στερεώστε τον πλαστικό εκτροπέα καπνών στον τοίχο, με στήριξη στο ταβάνι.
Φροντίστε να ευθυγραμμίσετε τον εκτροπέα σε σχέση με την κάθετη γραμμή που
έχετε κάνει στον τοίχο (σχήμα 7).
- Προετοιμάστε τον καπναγωγό σας φροντίζοντας να τοποθετήσετε τις οπές προς
τα επάνω έτσι ώστε να είναι ορατές (σχήμα 9).
- Στερεώστε το επάνω τμήμα στον πλαστικό εκτροπέα.
- Προσαρμόστε το μήκος του τηλεσκοπικού καπναγωγού κατεβάζοντας το κάτω
τμήμα και εφαρμόζοντάς το στην κορυφή του απορροφητήρα.
Για τη βέλτιστη χρήση της συσκευής σας, σας συνιστούμε να τη συνδέσετε με
αγωγό διαμέτρου 150 mm (δεν παρέχεται με τη συσκευή). Μειώστε όσο το
δυνατόν περισσότερο τον αριθμό των γωνιών και το μήκος του αγωγού. Σε
περίπτωση που ο απορροφητήρας λειτουργεί με εξωτερική εκκένωση του αέρα,
πρέπει να εξασφαλίσετε ότι θα υπάρχει ικανοποιητική παροχή καθαρού αέρα
έτσι ώστε να μην αναπτυχθεί υποπίεση στη χώρο.
Πως να αντικαταστήσετε τη λάμπα
1. Αφαιρέστε τα μεταλλικά φίλτρα (σχ. 10).
2. Ξεβιδώστε και αντικαταστήστε τη λυχνία Α14-40 W (σχ. 11).
3. Επανατοποθετήστε τα μεταλλικά φίλτρα.
Πριν από κάθε επέμβαση, πρέπει να διακόψετε την ηλεκτρική τροφοδοσία
του απορροφητήρα, είτε βγάζοντας την πρίζα, είτε ενεργοποιώντας το
διακόπτη διακοπής.
27
99631294_A_ML.qxp 18/06/2007 09:05 Page 27

Αφαίρεση του φίλτρου κασέτας
(Εικ. 10)
Τοποθέτηση του φίλτρου άνθρακα
(Εικ. 12)
1. Αφαιρέστε τις κασέτες.
2. Τοποθετήστε το φίλτρο άνθρακα στην κασέτα εσωτερική πλευρά του
απορροφητήρα.
3. Τοποθετήστε τις 2 ράβδους συγκράτησης.
4. Κάντε την ίδια διαδικασία σε όλες τις κασέτες.
Καθαρισμός του απορροφητήρα σας
Πρέπει να διακόψετε την παροχή ηλεκτρικής τροφοδοσίας του απορροφητήρα, είτε
βγάζοντας την πρίζα, είτε ενεργοποιώντας το διακόπτη διακοπής, πριν αφαιρέσετε τα
μεταλλικά φίλτρα. Μετά τον καθαρισμό, τα μεταλλικά φίλτρα πρέπει να
επανατοποθετηθούν σύμφωνα με τις οδηγίες.
ΣΥΝΤΗΡΗΣΗ
ΓΙΑΤΙ;
ΠΩΣ;
ΑΠΑΡΑΙΤΗΤΗ ΚΑΘΕ ΜΗΝΑ
ΑΠΑΡΑΙΤΗΤΗ ΚΑΘΕ ΧΡΟΝΟ
Αυτό το φίλτρο συγκρατεί τους λιπαρούς
ατμούς και τις σκόνες. Αποτελεί το εξάρτημα
που επηρεάζει σε μεγάλο βαθμό την
αποτελεσματικότητα του απορροφητήρα
σας.
Το φίλτρο αυτό συγκρατεί τις
μυρωδιές και πρέπει να
αντικαθίσταται τουλάχιστον μια
φορά το χρόνο ανάλογα και με τη
χρήση της συσκευής σας.
Με κάποιο υγρό καθαρισμού οικιακής χρήσης το
οποίο θα ξεβγάλετε με άφθονο νερό πριν
στεγνώσετε. Αυτός ο καθαρισμός μπορεί να γίνει και
στο πλυντήριο πιάτων σε κάθετη θέση (να μην έρθει
σε επαφή με βρώμικα πιατικά ή ασημένια
μαχαιροπίρουνα).
Παραγγείλετε αυτά τα φίλτρα από τον
αντιπρόσωπό σας (με τον κωδικό
ανταλλακτικού ο οποίος αναγράφεται
στην ενδεικτική πινακίδα στο εσωτερικό
του απορροφητήρα) και σημειώστε την
ημερομηνία αντικατάστασης.
ΚΑΣΕΤΑ ΦΙΛΤΡΟΥ
ΦΙΛΤΡΟ ΕΝΕΡΓΟΥ ΑΝΘΡΑΚΑ
Μην χρησιμοποιείτε μεταλλικό σύρμα, λειαντικά προϊόντα ή πολύ σκληρές βούρτσες.
Για να καθαρίσετε το πλαίσιο και το προστατευτικό κάλυμμα του φωτισμού, χρησιμοποιήστε αποκλειστικά υγρά
καθαρισμού οικιακής χρήσεως διαλυμένα σε νερό, και εν συνεχεία ξεβγάλτε με καθαρό νερό και σκουπίστε με ένα
απαλό πανάκι.
Πριν την πρώτη χρήση της κασέτας φίλτρου,
αφαιρέστε την προστατευτική ταινία.
Για τους απορροφητήρες σε
λειτουργία ανακύκλωσης.
Για να αποφύγετε οποιοδήποτε κίνδυνο πυρκαγιάς.
28
99631294_A_ML.qxp 18/06/2007 09:06 Page 28

GR
BRANDT APPLIANCES SAS
7 rue Henri Becquerel
92500 RUEIL MALMAISON
MADE IN FRANCE
220 - 240V ~ 50 Hz
Επικοινωνία
Οι ατέλειες εμφάνισης που ενδέχεται να προκληθούν από λανθασμένη χρήση ή καθα-
ρισμό με λειαντικά προϊόντα και οι οποίες δεν έχουν σαν αποτέλεσμα τη μη λειτουργία
ή την προβληματική λειτουργία της συσκευής δεν λαμβάνονται υπόψη από τον
κατασκευαστή. Η αποκατάσταση οποιασδήποτε βλάβης πρέπει να πραγματοποιείται
από εξειδικευμένο τεχνικό.
Μόνον οι εξουσιοδοτημένοι διανομείς της μάρκας μας:
• Γνωρίζουν τέλεια τη συσκευή σας και τη λειτουργία της
• Γνωρίζουν τέλεια τη συσκευή σας και τη λειτουργία της,,
• Εφαρμόζουν πλήρως τις μεθόδους μας ρύθμισης, συντήρησης και επισκευής,
• Εφαρμόζουν πλήρως τις μεθόδους μας ρύθμισης, συντήρησης και επισκευής,
• Χρησιμοποιούν αποκλειστικά γνήσια ανταλλακτικά.
• Χρησιμοποιούν αποκλειστικά γνήσια ανταλλακτικά.
Σε περίπτωση παραπόνων ή για παραγγελία ανταλλακτικών, πρέπει να δώσετε τον
ακριβή κωδικό της συσκευής σας (τύπος συσκευής και σειριακός αριθμός).
Αυτές οι πληροφορίες αναγράφονται στην ενδεικτική πινακίδα στο εσωτερικό της
συσκευής.
Οι περιγραφές και τα χαρακτηριστικά που παρουσιάζονται στο παρόν εγχειρίδιο
παρέχονται μόνον ενδεικτικά και δεν είναι δεσμευτικές. Πράγματι, με στόχο τη συνεχή
βελτίωση των προϊόντων μας, διατηρούμε το δικαίωμα να πραγματοποιήσουμε, χωρίς
προηγούμενη ειδοποίηση, όλες τις απαραίτητες τροποποιήσεις ή βελτιώσεις.
29
99631294_A_ML.qxp 18/06/2007 09:06 Page 29

Inhoud
Geachte klant,
U heeft net een afzuigkap van BRANDT aangekocht. We willen u hier
graag voor bedanken.
Onze onderzoeksteams hebben voor u een nieuwe generatie
van apparaten ontworpen waarmee koken en bakken dag na
dag een waar plezier wordt.
Dank zij het moderne en verfijnde ontwerp zal uw nieuwe
BRANDT-afzuigkap harmonieus in uw keuken kunnen
worden ingepast. Uw afzuigkap is een geslaagde combinatie
van gebruiksvriendelijkheid en
optimale prestaties.
In het gamma van BRANDT-producten vindt u tevens een ruime
keuze aan kookplaten, ovens, vaatwasautomaten en koelkasten
voor inbouw die u allemaal harmonieus met uw BRANDT-afzuig-
kap kan combineren.
Uiteraard wensen wij onze klanten ook na de aankoop altijd
tevreden te houden. Onze servicedienst zal u altijd met uw
vragen of suggesties
verderhelpen.
Als keukenspecialist streeft BRANDT ononderbroken naar
kookplezier en perfecte kookresultaten. U zal onmiddellijk ontdekken dat onze apparaten garant staan voor
betrouwbaarheid, schitterende kookprestaties en een
opvallend gebruiksgemak. Bovendien zijn ze milieuvriendelijk
en besteden we alle zorg aan een esthetisch verfijnde
vormgeving.
BRANDT.
30
99631294_A_ML.qxp 18/06/2007 09:06 Page 30

NL
Veiligheidsaanwijzingen
- Flambeer nooit gerechten onder de afzuigkap en laat nooit een gasvuur branden zonder dat
u er een kookpot op zet (de vlammen worden door de afzuigkap aangezogen en kunnen het
apparaat beschadigen).
- Frituren onder de afzuigkap mag, maar enkel indien u ononderbroken toezicht houdt
- Laat herstellingen uitsluitend door een erkend vakman uitvoeren.
- Reinig regelmatig de filtercassette.
- Het gebruik van een afzuigkap boven een fornuis dat met brandstof zoals hout, houtskool enz.
werkt, is verboden.
Deze afzuigkappen zijn ontworpen voor gebruik door privé-personen in woningen.
Wij streven ononderbroken naar verbetering van onze produkten en behouden ons dan ook het
recht voor de technische, functionele en esthetische kenmerken van onze produkten te
wijzigen om ze aan de nieuwste technische evolutie aan te passen.
Deze afzuigkappen zijn uitsluitend bestemd voor het koken en bakken van dranken en
voedingsmiddelen. Deze produkten bevatten geen enkel bestanddeel op basis van asbest.
In deze gebruikshandleiding
geeft symbol
veiligheidsaanwijzingen en symbool,
tips en praktische richtlijnen aan
31
99631294_A_ML.qxp 18/06/2007 09:06 Page 31

Overzicht van uw afzuigkap ? Fig.1
Indien uw keuken wordt verwarmd met een toestel dat op een schouw is
aangesloten (kachel...), dient u de afzuigkap met luchtzuivering te installeren. Gebruik de
afzuigkap nooit zonder de metalen filters.
Gebruikt u in een bepaalde ruimte gelijktijdig een afzuigkap en apparaten die met gas of een
andere brandstof werken, zorg dan voor voldoende verluchting in de ruimte.
Model met 3 snelheden
1 Lage snelheid
2 Gemiddelde snelheid
3 Hoge snelheid
Verlichting
Indien u meer dan één snelheidstoets heeft ingedrukt, zal de toets met de hoog-
ste snelheid worden toegepast. Om de afzuigkap te stoppen, zorgt u er gewoon
voor dat geen enkele toets is ingedrukt.
32
99631294_A_ML.qxp 18/06/2007 09:06 Page 32

NL
De installatie dient overeenkomstig de geldende bepalingen met betrekking tot de ventilatie van de installatieplaats te worden uitgevoerd. In Frankrijk gelden de bepalingen
van DTU 61.1 van de CSTB. In het bijzonder mag de afgevoerde lucht niet worden afgevoerd via een buis die ook wordt gebruikt voor de afvoer van de rook van apparaten die met
gas of een andere brandstof werken. Het gebruik van tweedehands afvoerbuizen is enkel na
raadpleging van een erkend vakman toegelaten.
De minimale afstand tussen de kookplaat en de onderzijde van de afzuigkap dient
70 cm te bedragen. Indien in de gebruiksaanwijzing van de kookplaat een minimale afstand van
meer dan 70 cm staat vermeld, dient u deze aanwijzing toe te passen.
Installatie van de afzuigkap ?
U heeft een afvoer naar de buitenlucht : fig. 4
Gebruik een afvoerbuis met een minimale diameter van 125 mm om de afzuigkap op de
luchtafvoer aan te sluiten (gebruik een geëmailleerde afvoerbuis in aluminium, soepel materiaal of
onontvlambaar materiaal). Indien u een afvoerbuis met een diameter van minder dan 125 mm
gebruikt, dient u verplicht de luchtzuivering te installeren.
U heef
t geen afvoer naar de buitenlucht : fig. 5
Al onze apparaten kunnen met luchtzuivering worden geïnstalleerd.
Gebruik in dit geval een actieve-koolfilter die de geuren filtert.
- Trek een horizontale lijn op minimaal 70 cm boven de kookplaat.
- Trek een verticale lijn op de muur vanaf het plafond tot de onderrand van de afzuigkap.
- Plaats de montageplaten tegen de muur (fig. 2)
.
- Boor de 6 bevestigingsgaten en plaats vervolgens de 6 pluggen.
- Schroef de 2 schroeven aan de bovenzijde van de afzuigkap vast. Laat ze 5 mm uit de
wand steken.
- Verwijder de metalen filter.
- Haak de afzuigkap op de twee schroeven (fig. 3).
- Schroef de 2 schroeven aan de onderzijde van de afzuigkap vast.
Montage van de afzuigkap
Aansluiting van uw afzuigkap
Dit apparaat wordt geleverd met een voedingskabel van het type H 05 VVF met 2 geleiders
van 0,75mm
2
(nulleider, fase). Uw apparaat dient te worden aangesloten op een elektriciteitsnet van 220-240 V ~ (monofasig) via een genormaliseerd stopcontact (1 fasedraad +
1 nulleider) overeenkomstig de norm CEI 60083 (het stopcontact dient na de aansluiting
bereikbaar te blijven).
Onze aansprakelijkheid vervalt bij een ongeval ten gevolge van onjuiste installatie. De zekering
van de installatie dient 10 of 16 A te bedragen. Vervang een beschadigde voedingskabel altijd veiligheidshalve door een voedingskabel die u bij de servicedienst kan aankopen.
Alvorens de 4 schroeven volledig vast te draaien, controleert u eerst of de afzuigkap perfect hangt.
33
99631294_A_ML.qxp 18/06/2007 09:06 Page 33

Montage van de schouw
Bij afvoer naar de buitenlucht :
fig. 4 en 8
- Plaats de metalen schouwsteun tegen de muur en tegen het plafond (fig. 6).
Let erop dat de twee driehoekige inkepingen van de metalen steun mooi in lijn liggen met de
vertikale streep op de muur.
- Bij gebruik van een afvoerbuis met een diameter van 125 mm gebruikt u de bijgeleverde
adapter (fig. 8).
Bij gebruik van een afvoerbuis met een buitendiameter van minder dan 125 mm dient u de luchtzuivering op uw afzuigkap te installeren.
- Schuif uw teleskopische schouwelementen zoveel mogelijk ineen (fig. 8).
Zorg ervoor dat de luchtspleten niet zichtbaar blijven.
- Bevestig het bovenste deel op de metalen steun.
- Pas de lengte van de teleskopische schouw aan door het onderste element te verlagen en in de
bovenzijde van de afzuigkap te schuiven.
Bij een afzuigkap met luchtzuivering : f
ig. 5 en 9
- U kan de terugslapkleppen verwijderen.
- Plaats de plastic rookdeflector tegen de muur en tegen het plafond. Let erop dat de
deflector mooi in lijn ligt met de vertikale streep op de muur (fig. 7).
- Schuif uw teleskopische schouwelementen ineen. Zorg ervoor dat de luchtspleten naar
boven worden gericht zodat ze zichtbaar zijn
(fig. 9).
- Bevestig het bovenste deel op de plastic deflector.
- Pas de lengte van de teleskopische schouw aan door het onderste element te verlagen en in de
bovenzijde van de afzuigkap te schuiven.
Om een optimaal gebruik van uw afzuigkap te garanderen, raden wij u aan een afvoerbuis met een diameter van 150 mm te gebruiken (niet bijgeleverd). Beperkt zoveel mogelijk het aantal gebogen buisselementen evenals de lengte van de afvoerbuis. Bij gebruik van een afzuigkap met afvoer naar de buitenlucht, dient u voor voldoende ventilatie met frisse lucht te zorgen om onderdruk in de kamer te vermijden.
Vervanging van de lamp ?
1. Verwijder de metalen filters (fig. 10).
2. Schroef het lampje los en plaats een nieuw lampje van het type E14-40W (fig. 11).
3. Plaats de metalen filters opnieuw op de afzuigkap.
Trek de stekker van de afzuigkap uit het stopcontact (of zet de
beveiligingsschakelaar uit) alvorens het lampje te vervangen,
34
99631294_A_ML.qxp 18/06/2007 09:06 Page 34

NL
Demontage van de filtercassette
(fig. 10)
Montage van de koolfilter
(fig. 12)
1. Verwijder de cassettes.
2. Plaats de nieuwe koolfilter op de cassette aan de binnenzijde van de afzuigkap.
3. Plaats de 2 dwarsstangen die de filter op zijn plaats houden.
4. Ga op dezelfde manier tewerk voor alle andere cassettes.
Reiniging van de afzuigkap ?
Trek de stekker van de afzuigkap uit het stopcontact (of zet de beveiligingsschakelaar uit) alvorens
de metalen filters te verwijderen. Na de reiniging dienen de metalen filters overeenkomstig de aanwijzingen opnieuw in de afzuigkap worden gemonteerd.
ONDERHOUD
WAAROM ?
HOE ?
VERPLICHT MAANDELIJKS
VERPLICHT JAARLIJKS
Deze filter houdt stof en vettige dampen
tegen en is een onmisbaar onderdeel om
uw afzuigkap proper te houden.
Deze filter houdt geuren tegen en
dient al naargelang van de intensiteit
van het gebruik van uw afzuigkap
jaarlijks te worden vervangen.
Met een huishoudelijk reinigingsprodukt. Spoel
de filterkassette vervolgens goed af en droog
ze. U kan de filterkassette vertikaal in uw
vaatwasmachine reinigen (let erop dat de
kassette geen vuile vaatwas of zilveren
bestek raakt).
Bestel deze filter bij uw verkoper.
Vermeld de referentie op het
infoplaatje (zie binnenzijde van
de afzuigkap) en noteer de
vervangingsdatum.
FILTERKASSETTE
ACTIEVE-KOOLFILTER
Gebruik nooit metalen sponsen, schuurprodukten of te harde borstels.
Om de behuizing van de afzuigkap en de verlichtingskap te reinigen, gebruikt u uitsluitend
huishoudelijke reinigingsmiddelen (verdund in water). Spoel ze vervolgens met zuiver water af en veeg ze
met een zachte doek droog.
Vóór het eerste gebruik van de filterkas-
sette verwijdert u de beschermfolie.
Voor afzuigkappen met luchtzuive-
ring
om brandgevaar te vermijden.
35
99631294_A_ML.qxp 18/06/2007 09:06 Page 35

BRANDT APPLIANCES SAS
7 rue Henri Becquerel
92500 RUEIL MALMAISON
MADE IN FRANCE
220 - 240V ~ 50 Hz
Contactpersoon?
Esthetische fouten die zijn veroorzaakt door een verkeerd gebruik van de afzuigkap of het gebruik van
schurende produkten, maar die de werking van de afzuigkap niet storen of onmogelijk maken, vallen niet
onder de garantie van de fabrikant. Elke herstelling dient te gebeuren door een erkend vakman.
Enkel de verdelers van ons merk :
• Kennen perfect uw apparaat en de werking ervan
• Kennen perfect uw apparaat en de werking ervan,,
• Passen onze regel-, onderhouds- en herstellingsmethoden volledig toe,
• Passen onze regel-, onderhouds- en herstellingsmethoden volledig toe,
• • GGebruiken uitsluitend originele wisselstukken.
ebruiken uitsluitend originele wisselstukken.
Bij klachten of bestellingen van wisselstukken bij uw verdeler vermeldt u de precieze en
volledige referentie van uw apparaat (type van apparaat en serienummer).
Deze gegevens vindt u op het identificatieplaatje aan de binnenzijde van uw afzuigkaps.
De beschrijvingen en kenmerken in deze handleiding worden enkel ter informatie gegeven en brengen geen enkele verbintenis met zich mee. Wij streven naar een optimale kwaliteit en
behouden ons bijgevolg het recht voor zonder voorafgaandelijke kennisgeving alle
noodzakelijke wijzigingen of verbeteringen aan te brengen.
36
99631294_A_ML.qxp 18/06/2007 09:06 Page 36

PT
Editorial
Estimado(a) Cliente,
Acabou de adquirir um exaustor BRANDT e agradecemos-lhe a
sua confiança.
As nossas equipas de pesquisa conceberam, pensando em si,
uma nova geração de aparelhos para que o acto de cozinhar
seja um prazer no dia a dia.
Dotado de linhas puras e de um design contemporâneo, o seu
novo exaustor Brandt, integra-se harmoniosamente na sua
cozinha e alia perfeitamente facilidade de utilização e altos
desempenhos.
Encontrará também na gama dos produtos Brandt, uma vasta
escolha de placas de cozedura, de fornos, de máquinas de
lavar loiça e de frigoríficos integráveis que poderá coordenar
ao seu novo exaustor Brandt.
Evidentemente, com a preocupação permanente de satisfazer
da melhor maneira possível as suas expectativas em relação
aos nossos produtos, o nosso serviço de consumidores encontra-se à sua disposição e à sua escuta para responder a todas
as suas perguntas ou sugestões.
Especialista de todo o universo da cozedura, a BRANDT
contribui desta forma para o sucesso culinário, o prazer
partilhado e o convívio apresentando electrodomésticos com
um contínuo desempenho, de simples utilização, amigos do
ambiente, estéticos e fiáveis.
A Marca BRANDT.
37
99631294_A_ML.qxp 18/06/2007 09:06 Page 37

Instruções de Segurança
- É interdito realizar receitas "flambé" ou fazer funcionar os bicos de gás sem os cobrir com
pratos de cozedura por cima do extractor de fumos (as chamas aspiradas são susceptíveis de
deteriorar o aparelho).
- As frituras efectuadas sob o aparelho devem ser alvo de uma vigilância constante.
- As reparações devem ser efectuadas exclusivamente por um técnico homologado.
- Limpe regularmente o filtro da cassete.
- O funcionamento por cima de um foco de combustível (madeira, carvão, etc...) não é autorizado.
Estes extractores de fumos foram concebidos para serem utilizados por particulares num local
de habitação.
Com a preocupação de melhorar constantemente os nossos produtos, reservamo-nos o direito de
realizar modificações nas suas características técnicas, funcionais ou estéticas, modificações
estas inerentes à evolução técnica.
Estes extractores de fumos estão destinados exclusivamente à cozedura das bebidas e
alimentos. Estes produtos não contém qualquer componente à base de amianto.
Ao longo do folheto,
assina-lhe as instruções de segurança,
assinala-lhe os conselhos e as astúcias
38
99631294_A_ML.qxp 18/06/2007 09:06 Page 38

PT
Como se apresenta o seu exaustor? Fig.1
Em caso de cozinha aquecida com um aparelho ligado a uma chaminé (ex.: fogão de
aquecimento), é necessário instalar o extractor de fumos na sua versão reciclagem. Não
utilize o extractor de fumos sem os filtros metálicos.
Deverá ser prevista uma ventilação conveniente do espaço quando um extractor de fumos de
cozinha for utilizado simultaneamente com aparelhos que utilizam gás ou qualquer outro
combustível.
Modelo 3 velocidades
1 Pequena velocidade
2 Média velocidade
3 Grande velocidade
Iluminação
Quando várias teclas de velocidade estiverem pressionadas, é privilegiada a velo-
cidade mais elevada. A paragem do extractor de fumos faz-se quando todas as
teclas deixarem de estar pressionadas.
39
99631294_A_ML.qxp 18/06/2007 09:06 Page 39

A instalação deverá estar conforme aos regulamentos em vigor para a
ventilação dos locais. Em França, estes regulamentos estão indicados no DTU 61.1 do
CSTB. Em particular, o ar evacuado não deve ser enviado numa conduta utilizada para
evacuar os fumos de aparelhos que utilizam gás ou qualquer outro combustível. A utilização
de tubos desafectados só pode ser feita após acordo de um especialista competente.
A distância mínima entre a placa de cozedura e a parte mais baixa do extractor de fumos
deverá ser de 70 cm. Se as instruções da placa de cozedura instalada sob o extractor de
fumos especificarem uma distância superior a 70 cm, esta deverá ser levada em consideração.
Como instalar o seu extractor de fumos ?
Você possui uma saída para o exterior? fig. 4
O seu extractor de fumos pode ser ligado a ela por intermédio de uma conduta de evacuação (mínimo Ø 125 mm, esmaltada, em alumínio ininflamável). Se o diâmetro da conduta for inferior a 125
mm, deve passar obrigatoriamente para o modo reciclagem.
V
ocê não possui saída para o e
xterior : fig. 5
Todos os nossos aparelhos têm a possibilidade de funcionar em modo reciclagem.
Neste caso, acrescente um filtro de carvão activo que captará os cheiros.
- Faça um traço horizontal no mínimo a 70 cm da área de cozedura.
- Faça um traço vertical na parede, a partir do tecto até ao rebordo inferior do exaustor.
- Coloque contra a parede as guias de montagem (fig. 2)
.
- Abra os 6 orifícios e fixe as 6 cavilhas.
- Aparafuse os 2 parafusos na parte superior do exaustor até 5 mm.
- Retire o filtro metálico.
- Fixe o exaustor por meio dos 2 parafusos
(fig. 3).
- Aparafuse ambos os parafusos da parte inferior.
Montagem do seu extrator de fumos
Ligação do seu extractor de fumos
Este aparelho é fornecido com um cabo eléctrico H 05 VVF de 2 condutores de
0,75 mm2(neutro, fase). Ele deve ser ligada à rede 220-240 V monofásica por
intermédio de uma tomada eléctrica normalizada CEI 60083 que deve ficar acessível após instalação.
A nossa responsabilidade não poderia ser empenhada em caso de acidente
consecutivo a uma instalação incorrecta. O fusível da sua instalação deve ser de 10 ou
16 A. Se o cabo eléctrico estiver estragado, recorra ao serviço pós-venda a fim de evitar qualquer perigo.
Antes de aparafusar totalmente os 4 parafusos, regule o nível do exaustor.
40
99631294_A_ML.qxp 18/06/2007 09:06 Page 40

PT
Montagem da chaminé
Funcionamento em evacuação exterior :
fig. 4 e 8
- Fixe contra a parede, apoiado ao tecto, o suporte da chaminé metálica (fig. 6).
Tome cuidado de maneira a alinhar as duas ranhuras triangulares do suporte metálico com o traço
vertical na parede.
- Em caso de um tubo com 125 mm de diâmetro, utilize o adaptador incluído (fig. 8).
Se o seu tubo exterior for inferior a 125 mm, é indispensável a ligação do seu
extractor de fumos em modo reciclagem.
- Prepare a sua chaminé telescópica tomando cuidado para dissimular os orifícios (fig. 8).
Encaixar ao máximo as chaminés uma dentro da outra.
- Encaixar a parte superior no suporte metálico.
- Ajuste o comprimento da chaminé telescópica baixando a parte inferior e encaixá-la no topo do
extractor de fumos.
Funcionamento em modo reciclagem : f
ig. 5 e 9
- É possível retirar as válvulas de retenção.
- Fixe contra a parede, apoiado contra o tecto, o deflector plástico dos fumos.
Tome cuidado de maneira a centrar o deflector em relação ao traço vertical
traçado na parede
(fig. 7).
- Prepare a sua chaminé tomando cuidado para colocar os orifícios voltados para cima
de maneira a que fiquem visíveis (fig. 9).
- Fixe a parte superior ao deflector de plástico.
- Ajuste o comprimento da chaminé telescópica baixando a parte inferior e encaixando-a no topo do
extractor de fumos.
Para uma utilização optimizada do seu aparelho, aconselhamo-lo a ligar a uma conduta
com 150 mm de diâmetro (não incluída). Limitar ao máximo o número de cotovelos e o
comprimento do tubo. Se o extractor de fumos funcionar em evacuação exterior, convém
assegurar-se da existência de uma entrada de ar fresco suficientemente grande para evitar colocar a peça em depressão.
Como substituir a lâmpada ?
1. Retire os filtros metálicos (fig. 10).
2. Desenrosque a lâmpada E14-40W e substitua-a (fig. 11).
3. Coloque novamente os filtros metálicos.
Antes de qualquer intervenção, o extractor de fumos deverá ser colocado fora de tensão,
quer retirando a tomada, quer accionando o disjuntor.
41
99631294_A_ML.qxp 18/06/2007 09:06 Page 41

Desmontagem do filtro cassete
(fig. 10)
Montagem do filtro carvão
(fig. 12)
1. Retire as cassetes.
2. Coloque o filtro carvão sobre a cassete na parte interna do extractor.
3. Coloque os 2 ganchos de fixação.
4. Efectue esta operação em todas as cassetes.
Como limpar o seu extractor de fumos ?
O extractor de fumos deve ser colocado fora de tensão, quer retirando a tomada, quer accionando o
disjuntor, antes de retirar os filtros metálicos. Após a limpeza, os filtros metálicos devem ser fixados
de novo em conformidade com as instruções.
MANUTENÇÃO
PORQUÊ ?
COMO ?
INDISPENSÁVEL TODOS OS MESES
INDISPENSÁVEL TODOS OS ANOS
Este filtro absorve os vapores gordos e as
poeiras. Ele é o elemento que assegura a parte
importante da eficácia do seu extractor de fumos.
Este filtro absorve os cheiros e deve
ser substituído pelo menos todos os
anos em função da sua utilização.
Com um produto de limpeza doméstico vendido no
comércio, em seguida enxagúe e seque. Esta limpeza
pode ser efectuada no seu lava-loiça em posição verti-
cal (não colocar em contacto com a loiça suja ou
com talheres de prata).
Encomende filtros no seu
revendedor (sob a referência
indicada na placa de característica
situada dentro do extractor de
fumos) e anote a data de
substituição.
FILTRO CASSETE
FILTRO CARVÃO ACTIVO
Nunca utilize esfregões metálicos, produtos abrasivos ou escovas demasiado duras.
Para limpar a parte exterior e o vigia de iluminação, utilize exclusivamente produtos de limpeza domésticos vendi-
dos no comércio diluídos em água, em seguida enxagúe com água límpida e seque com um pano.
Antes da primeira utilização do filtro cassete,
retire a película de protecção.
Para os extractor de fumos instala-
dos em modo reciclagem
Para evitar qualquer perigo de incêndio.
42
99631294_A_ML.qxp 18/06/2007 09:06 Page 42

PT
BRANDT APPLIANCES SAS
7 rue Henri Becquerel
92500 RUEIL MALMAISON
MADE IN FRANCE
220 - 240V ~ 50 Hz
Quem contactar?
Qualquer defeito no aspecto que tenha sido provocado por uma utilização incorrecta ou pela limpeza com produtos abrasivos e que não provoquem o não funcionamento ou uma incapacidade
de utilização não serão levados em consideração pelo fabricante. Qualquer arranjo deverá ser
efectuado por um técnico competente.
Apenas os distribuidores da nossa marca :
• • CConhecem perfeitamente o seu aparelho e o seu funcionamento,
onhecem perfeitamente o seu aparelho e o seu funcionamento,
• • AAplicam integralmente os nossos métodos de regulação, de manutenção e de reparação,
plicam integralmente os nossos métodos de regulação, de manutenção e de reparação,
• Utilizam exclusivamente as peças de origem.
• Utilizam exclusivamente as peças de origem.
Em caso de reclamação ou para encomendar peças sobresselentes ao seu distribuidor,
indique-lhe a referência completa do seu aparelho (tipo de aparelho e número de série).
Estas informações estão inscritas na placa de características fixada no interior do aparelho.
As descrições e as características incluídas neste manual são dadas apenas a título de informação
e não de compromisso. De facto, preocupados com a qualidade dos nossos produtos,
reservamo-nos o direito de efectuar, sem pré-aviso, todas as modificações ou melhoramentos
necessários.
43
99631294_A_ML.qxp 18/06/2007 09:06 Page 43

Abb. 1 / Fig. 1 / σχήμα 1
Abb. 2 / Fig. 2 / σχήμα 2
Abb. 4 / Fig. 4 / σχήμα 4
Abb. 5 / Fig. 5 / σχήμα 5
Abb. 3 / Fig. 3 / σχήμα 3
99631294_A_ML.qxp 18/06/2007 09:06 Page 44
271 mm
274 mm
2
1
514 mm
110 mm
500 mm
5mm
665 mini - 1120 mm maxi
600 / 900 mm
> 70 cm
A
=
=
125
150
125
150

PT
Abb. 6 / Fig. 6 / σχήμα 6 Abb. 7 / Fig. 7 / σχήμα 7
Abb. 8
Fig. 8
σχήμα 8
Abb. 9
Fig. 9
σχήμα 9
Abb. 12 / Fig. 12 / σχήμα 12
Abb. 10 / Fig. 10 / σχήμα 10
Abb. 11 / Fig. 11 / σχήμα 11
99631294_A_ML.qxp 18/06/2007 09:06 Page 45
=
=
=
=

99631294_A_ML.qxp 18/06/2007 09:06 Page 46

99631294_A_ML.qxp 18/06/2007 09:06 Page 47

48
99631294 - 06/07
99631294_A_ML.qxp 18/06/2007 09:06 Page 48
 Loading...