


Special Edition Includes:
Dr. Ellington Darden’s
Six Week Fast Fat Loss –
Body Leanness Program
2
WWWBOWFLEXCOM

Table of Contents
Safety Precautions |
1 |
Get To Know Your Bowflex® Motivator® 2 |
|
Safety Warning Labels |
2 |
Get To Know Your Bowflex® Motivator® 2 |
|
Home Gym |
4 |
How to Use Your Bowflex® Motivator® 2 |
|
Home Gym |
5 |
The Bowflex® Body Leanness Program |
|
By Ellington Darden, Ph.D. |
9 |
Define Your Goals |
29 |
Warm Up / Cool Down |
|
Aerobic Rowing |
31 |
Chest Exercises: |
|
Bench Press |
32 |
Chest Fly |
32 |
Decline Bench Press |
33 |
Incline Bench Press |
33 |
Resisted Punch |
34 |
Lying Cable Crossover |
34 |
Shoulder Exercises: |
|
Rear Deltoid Rows |
35 |
Lateral Shoulder Raise |
35 |
Seated Shoulder Press |
36 |
Front Shoulder Raise |
36 |
Shoulder Extension |
37 |
Shoulder Shrug |
37 |
Scapular Protraction |
38 |
Scapular Depression |
38 |
Lying Front Shoulder Raise |
39 |
Reverse Fly |
39 |
Shoulder Rotator Cuff—Internal |
40 |
Shoulder Rotator Cuff—External |
40 |
Seated Lateral Shoulder Raise |
41 |
Scapular Retraction |
41 |
Back Exercises: |
|
Lying Lat Pulldowns |
42 |
Low Back Extension |
42 |
Pulldowns |
43 |
Narrow Pulldowns with Hand Grips |
43 |
Lying Lat Fly |
44 |
Lying Narrow Lat Pulldowns |
44 |
Seated Lat Rows |
45 |
Arm Exercises: |
|
|
Triceps Pushdown |
|
45 |
French Press |
|
46 |
Lying Triceps Extension |
|
46 |
Cross Triceps Extension |
|
47 |
Lying 45° Triceps Extension |
|
47 |
Seated Triceps Extension |
|
48 |
Standing Biceps Curl |
|
48 |
Seated Biceps Curl |
|
49 |
Lying Biceps Curl |
|
49 |
Seated Wrist Extension |
|
50 |
Standing Wrist Curl |
|
50 |
Reverse Curl |
|
51 |
Seated Wrist Curl |
|
51 |
Standing Wrist Extension |
|
52 |
“Rope” Pushdowns |
|
52 |
Abdominal Exercises: |
|
|
Reverse Crunch |
|
53 |
Resisted Reverse Crunch |
|
53 |
Seated (Resisted) Abdominal Crunch |
54 |
|
Seated (Resisted) Oblique Abdominal Crunch |
54 |
|
Trunk Rotation |
|
55 |
Leg Exercises: |
|
|
Leg Extension |
|
55 |
Lying Leg Extension |
|
56 |
Ankle Eversion |
|
56 |
Ankle Inversion |
|
57 |
Standing Hip Extension (Knee Flexed) |
57 |
|
Standing Hip Abduction |
|
58 |
Seated Hip Adduction |
|
58 |
Seated Hip Abduction |
|
59 |
Standing Leg Kickback |
|
59 |
Bowflex® Motivator® 2 |
Warranty |
60 |
Bowflex® Motivator® 2 |
Warranty Card |
61 |
Muscle Chart |
|
63 |
Table of Contents

Safety Precautions
WARNING: Failure to follow these precautions can cause damage to the the Bowflex® Motivator® 2 home gym and serious injury to users and bystanders.
•Read the owner’s manual and follow it carefully before using the machine.
•CONSULT YOUR PHYSICIAN BEFORE STARTING ANY EXERCISE PROGRAM. Only he or she can determine the exercise program that is appropriate for your particular age and condition. If you have not been exercising or are pregnant or have a heart condition or any physical limitation, failure to consult your physician before engaging in physical exercise, such as using the Bowflex® Motivator® 2 , could result in serious injury or death. If while using the Bowflex® Motivator® 2 you have any pain or tightness in your chest, an irregular heart beat, shortness of breath, feel faint, light-headed or dizzy or have any pain or discomfort, STOP and consult your physician immediately.
•DO NOT TRY EXERCISES THAT ARE NOT IN THIS MANUAL. Only the exercises in this manual are based on the calibrated resistance and capacity levels of the Bowflex® Motivator® 2 home gym.
Exercises not in this manual may damage the equipment or cause injury.
•Parents and others in charge of children should be aware that children, because of their natural play instinct and fondness for experimenting, may be tempted to situations and behavior for which the equipment is not intended, with resulting damage to the equipment and injury to the children or others. Children’s access to the equipment should therefore be controlled, and they should be instructed about the potential for personal injury and damage if they play with the equipment.
•Inspect your machine for any worn or loose components prior to use. Tighten or replace any worn or loose components prior to use. Pay close attention to cables, or belts and their connections.
•Before exercising, make sure the cable pulley system is properly secured, properly attached, and in perfect working condition.
•Keep cables and Power Rod® unit bound with the rod binding strap when not in use.
•Do not wear any loose or dangling clothing or jewelry while using the Bowflex® Motivator® 2 home gym. Stand clear of all moving components.
•When connecting the Power Rod® unit to the cable hooks or disconnecting them, do not stand so that you are looking directly over the top of the rods. Stand off to the side, so that if a rod is accidentally released, you will not be struck by it.
•Keep out of the path of the Power Rod® unit when exercising and make certain that observers also stand clear of the Bowflex® Motivator® 2 home gym when the Power Rod® unit are in use.
•Never use dumbbells or other weight equipment to increase the weight resistance. Doing so will likely damage the equipment and potentially injure users. Use only the Power Rod® unit that came with your Bowflex® Motivator® 2 home gym.
•Never move or adjust the seat while sitting on it. Never stand on the seat. You could lose your balance and fall and damage the seat
•Never attempt to exercise while the seat rail is in the folded position.
•Never attempt to exercise with more resistance than you are physically able to handle.
•Never allow children to use the Bowflex® Motivator® 2 home gym unsupervised. To do so could result in injury. Certain kinds of resistance training may be inappropriate for children in certain younger age groups. Before children are allowed to use the
equipment, their mental and physical development should be taken into account through consultation with their doctor, who must approve any exercise program before a child attempts it. Children should be controlled and instructed on the correct use of the equipment.
•This equipment is under no circumstances suitable as a children’s toy.
•Maximum user weight for the Bowflex® Motivator® 2 home gym is 300 pounds (136 kg). For your safety, do not use or allow others to use the Bowflex® Motivator® 2 home gym if they weigh in excess of 300 pounds (136 kg).
•Keep your body weight centered on the machine, seat, or base frame platform while exercising.
•When using the Bowflex® Motivator® 2 home gym for standing leg exercises, always grasp the Lat Bar on your machine for stability.
•Set up and use your Bowflex® Motivator® 2 home gym on a hard, level surface.
•Allow a workout area of at least 8’4” x 6’6” (2.6 m x 2 m) of free space for safe operation of the Bowflex® Motivator® 2 home gym.
•This machine is meant for individual consumer use only, and is not meant for use by institutions.
•Always read and follow the Warning and Safety labels attached to your Bowflex® Motivator® 2 home gym. Do not remove these labels. If you need replacement labels, please call a Nautilus Representative at (800) 628-8458.
Safety Precautions

Get To Know Your Bowflex® Motivator® 2 Safety Warning Labels
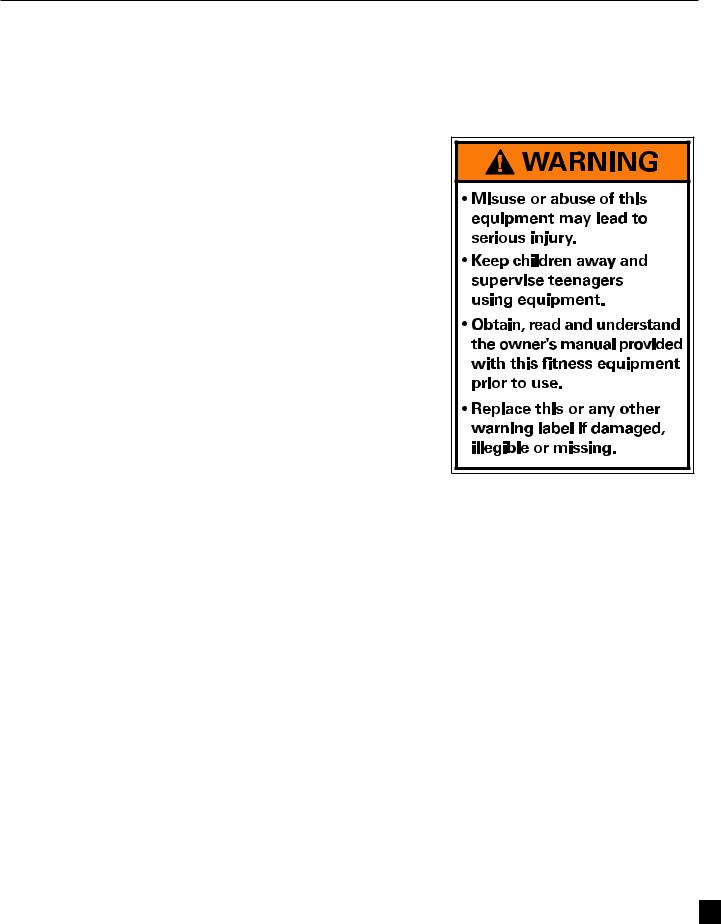
The following safety warnings are located on the Bowflex® Motivator® 2 exercise machine. Please read all safety precautions and warning information prior to using your product. Be sure to replace any warning label if damaged, illegible, or missing. If you need replacement labels, please call a Nautilus Representative at (800) 628-8458.
Label 1 |
Label 3 |
|
|
Label 4 |
|
Label 2


 Home Gym
Get To Know Your Bowflex® Motivator® 2 Safety Warning Labels
The following safety warnings are located in site specific areas on the unit. Please review and understand the safety warning labels and their locations on the unit prior to use.
If you do not have, or cannot find, or need to replace a warning label please call 1-800-NAUTILUS (1-800-628-8458) to obtain a new label.
Label 1: Please make sure all users read, understand, and follow the warning labels on the home gym. See Figure 1 for general use safety label.
Location: The warning label in Figure 1 is located on the back of the lat tower.
Label 2: “Caution: At all times stay out of the paths of moving rods.”
Location: Left and right side of rod box.
Label 3: “Warning: Do not hang from bar.”
Location: Front of lat tower.
Figure 1
Label 4: “Caution: Before each use of this equipment, check all fasteners, snap hooks, cables and pulley functions. Tighten and fasten as needed. Check pulleys and cable for wear and function.”
Location: Back of the lat tower below Label 1.

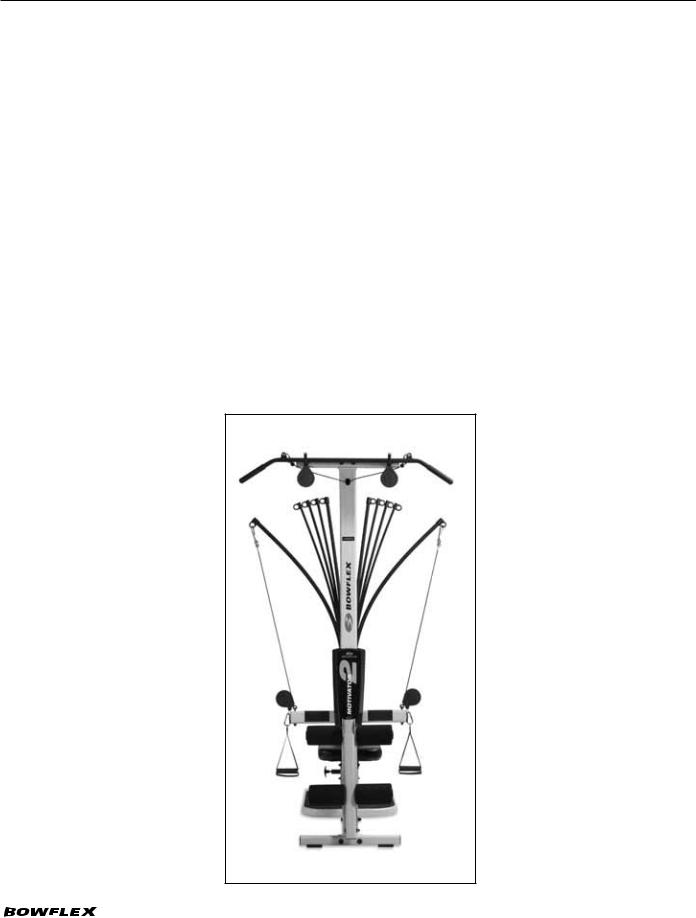
Get To Know Your Bowflex® Motivator® 2 Home Gym
Please take your time to read through the entire manual and follow it carefully before attempting to use your Bowflex® Motivator® 2 home gym. Also locate and read all warning labels that are posted on the machine. It’s important to understand how to properly perform each exercise before you do so using Power Rod® Resistance.


 Home Gym
|
|
|
|
|
|
|
|
|
|
|
|
|
Upper |
|
|
|
|
|
|
|
|
|
|
|
|
|
|
|
|
|
Bent Lat Bar |
||||
|
Lat Tower |
|
|
|
|
|
|
|
|||
|
|
|
|
|
|
|
|
|
|
|
|
|
|
|
|
|
|
|
|
|
|
|
|
|
|
|
|
|
|
|
|
|
|
|
|
Power Rod® Unit |
|
|
|
|
|
|
|
|
|
||
|
|
|
|
|
|
|
|
Lat Bar Pulley |
|
||
|
|
|
|||||||||
|
|
|
|
|
|
|
|
|
|
|
|
|
|
|
|
|
|
|
|
|
|
|
|
|
|
|
|
|
Rod Caps |
||||||
|
|
|
|
|
|
|
|
|
|
|
|
|
|
|
|
|
|
|
|
|
|
|
|
Rod Hook |
|
|
|
|
|
|
|
|
|
||
|
|
|
|
|
|
|
|
|
|
|
|
|
|
|
|
|
|
|
|
Cable |
|
|
|
|
|||
|
|
|
|
|
|
Leg Attachment |
|
|
|
|
|
|
|
|
|
|
|
|
|
|
|
|
|
|
|
|
|
|
Bench |
||
|
|
Rod Box |
|
|
|
||
|
|
|
|
|
|
||
|
|
|
|
|
|
|
|
Chest Bar Pulley
|
|
Get To Know Your Bowflex® Motivator® 2 Home Gym |

How to Use Your Bowflex® Motivator® 2 Home Gym
Power Rod® Resistance
Power Rod® units are made from a special composite material. Your rods are sheathed with a protective black rubber coating. Each rod is marked with its weight rating on the “Rod Cap”.
Adjusting And
Understanding
The Resistance
The Bowflex® Motivator® 2 home gym comes with 210 pounds (95 kg) of resistance [one pair of 5 lb. (2.25 kg) rods, two pair of 10 lb. (4.5 kg) one pair of 30 lb. (13.5 kg) rods, and one pair of 50 lb. (22.5 kg) rods].
Hooking The Power Rod® Unit To The Cables
You may use one rod or several rods in combination, to create your desired resistance
level.
To hook multiple rods up to one cable, bend the closest rod toward the cable and place the
cable hook through that rod cap. You can then hook up the next closest rod through the same cable hook.
Hooking up the closest rod first prevents rods from crossing over the top of one another.
Safety
When connecting the Power Rod® unit to the cable hooks and disconnecting them, do not stand so that you are looking directly over the top of the rods. Stand off to the side, so that if a rod is accidentally released, you will not be struck by it.
When You Are Not Using Your Bowflex® Motivator® 2 Home Gym
Disconnect the cables from the Power Rod® unit when your are not using your Bowflex® Motivator® 2 home gym. Use the rod
binding strap included with your machine
to bind all the rods together at the top. You can also place your cables and grips through the strap
to keep them out of the way. Leaving the rods and cables under tension could cause injury if a rod were inadvertantly released.
Get To Know Your Bowflex® Motivator® 2 Home Gym
How to Use Your Bowflex® Motivator® 2 Home Gym
The Workout Bench
Your Bowflex® Motivator® 2 home gym has a number of seat and bench positions: flat bench forward, flat bench back, 45° incline and free-sliding seat extension.
To adjust the seat, pull out the Seat Rail Knob, then slide the seat to one of the three locking holes on the Seat Rail. Release the Seat Rail Knob to secure when finished.
Removing the Bench:
The Bench easily attaches and releases from the Seat.
To attach the Bench, insert the half hinge on the end of the Bench into the half hinge on the seat. To remove
the Bench, lift up on the long portion and pull away from seat.
Flat Bench:
The Flat bench position is used for most exercises. You may lock the bench into a Back (closest to Power Rod® unit) or Forward (furthest from Power Rod® unit) position to accommodate height/ reach needs.
45° Incline Bench:
Start with a flat bench, following the above instructions to release and move the seat and bench. Lift the bench while sliding the seat toward the Power Rod® unit until the bench back is resting against the Lat Tower.
Free-Sliding Seat:
Remove the Bench, pull out the Seat Rail Knob, give it half a turn and release to place the Seat in a “free sliding” position for Aerobic Rowing.
Storing Your
Bowflex® Motivator® 2
Home Gym
Folding your Bowflex® Motivator® 2 home gym for storage is easy.
1)Lock the Seat and Bench into the flat position.
2)Remove all Power Rod® resistance and then
bind the Power Rod® unit with the rod binding strap.
3)Remove the Seat Rail Knob from the seat rail.
4)Tilt the bench toward the Power Rod® unit.
5)Secure the bench by inserting the Seat Rail
Knob into the hole in the side of the Seat Rail Bracket.
Maintenance and Care of Your
Bowflex® Motivator® 2 Home Gym
Inspect your machine for any worn or loose components prior to use. Tighten or replace any worn or loose components prior to use. Pay close attention to cables, or belts and their connections.
Clean the bench with a non-abrasive household cleaner after each use. This will keep it looking new. Do not
use automotive cleaner, which can make the bench too “slick.”
Review all warning notices. The safety and integrity designed into a machine can only be maintained when the equipment is regularly examined for damage and repaired. It is the sole responsibility of the owner to ensure that regular maintenance is performed. Worn or damaged components shall be replaced immediately or the equipment removed from service until the repair is made. Only manufacturer supplied components shall be used to maintain/repair the equipment.
If you have any questions regarding your Bowflex® Motivator® 2 home gym, please call our Customer Service Department at 1-800-NAUTILUS (1-800-628-8458) or by mail at:
16400 SE Nautilus Drive Vancouver, Washington, USA 98683
|
|
Get To Know Your Bowflex® Motivator® 2 Home Gym |

How to Use Your Bowflex® Motivator® 2 Home Gym
Accessories and Equipment
Hand Grips: The Hand Grips fit snugly around your hand, ankle, or wrist. Attach the pulley cable clips to the D- Rings on the Hand Grips to attach them to the cables.
Standard Grip: Grasp the grip and cuff together to form a grip without inserting your hand through the cuff portion. Most of the exercises you perform utilize this grip. The Standard Grip also is used for Hammer Grip exercises, when you need to hold the Hand Grip vertically for greater wrist support.
Hand Cuff Grip: Slip your hand through the cuff portion of the grip so that the foam pad rests on the back of your hand. Then grasp the remainder of the grip that is sitting in your palm. This method of gripping is great for exercises like front shoulder raises or any exercise where your palm is facing down.
Ankle Cuff Grip: The cuff opening can be made larger to accommodate the ankle. Place your hand in the cuff and slide it away from the grip. Insert your foot or ankle and tighten by sliding the grip back toward the cuff.
Lat Cross Bar:The Lat Cross Bar enhances exercises that work back, shoulders and triceps muscles.
Warning:
•Before using the Lat Cross Bar, make sure that all fasteners are in place and tightened.
•Make sure that the Lat Tower cables are securely fastened to the regular Bowflex® cables and the Bent Lat Bar, Squat Bar or Hand Grips.
•Always use the Bent Lat Bar holders to support the Bent Lat Bar, or remove the bar when not in use.
•Do not hang from or attempt to perform “chin ups” from the Lat Cross Bar. •Never pull on the Bent Lat Bar unless there is resistance attached to it.
Leg Extension: Designed to add more effectiveness exercises that target your legs, thighs, calves, etc.
Caution:
•Before using the Leg Extension, make sure that all fasteners are in place and tightened. •Make sure that the Extension’s cables are securely fastened to the regular cables.
Grips manufactured under license agreement with Hands-On Sports & Gym Accessories, Inc. Patent #4756527
Get To Know Your Bowflex® Motivator® 2 Home Gym

How to Use Your Bowflex® Motivator® 2 Home Gym
Using Your Leg Press Belt
Leg Press Belt: The Leg Press Belt is used for the Leg Press exercise.
•With the Bowflex® seat adjusted to the “free sliding” position (spring lock seat pin unlocked), the hand grips removed, and the desired amount of resistance hooked up, sit on the seat and position the leg press belt around your hips.
•Slide forward to the pulleys and place your feet through the right and left openings under the rod cables.
•Attach the rod cables to the D-rings on the Leg Press Belt so that the belt is taut.
•Place hands on vertical main frame and push yourself back while placing feet, one at a time, onto the pulley frame.
•Grasp belt near where it’s attached to the cables and begin to press back.
|
|
Get To Know Your Bowflex® Motivator® 2 Home Gym |

The Bowflex®
Body Leanness
Program
By Ellington Darden, Ph.D.
The following program was created by Dr. Ellington Darden. It contains a rigorous fitness and dietary program. Please consult your physician before beginning any fitness or dietary program.
Some of the names of the exercises listed in this program have been changed in order
to match the names of the exercises in this manual. The exercises themselves have not been changed, in order to preserve
the integrity of Dr. Darden’s Study.
FAST FAT LOSS NOW!
Introduction
The Bowflex® Body Leanness
Program
This program is scientifically designed for maximal fat loss over six weeks. It is important that you practice every aspect of the plan to achieve optimum results.
The program separates into three two-week stages. During each stage you will exercise, control the number and quality of calories you consume, and drink plenty of ice-cold water.
Before starting the exercise routine you must be familiar with your Bowflex® Motivator® 2 home gym. You should experiment with finding the proper amount of resistance to use on each exercise. You should be able to perform 8 repetitions, but not more than 12 repetitions, for each exercise. It is essential that you learn how to perform each movement before trying a complete circuit, because part of the effectiveness of the training depends on minimal rest between each exercise.
 7! 2 . )
 . '
. '
CONSULT YOUR PHYSICIAN BEFORE STARTING THIS PROGRAM.
Show this plan and your Bowflex® Motivator® 2 home gym Owner’s Manual to your physician. Only he or she can determine whether this course is appropriate for your particular age and condition. If while using the Bowflex® Motivator® 2 you have any pain or tightness in your chest, an irregular heart beat, shortness of breath, feel faint, light-headed or dizzy or have any pain or discomfort, STOP and consult your physician immediately.
Certain people who should not try this program--including children and teenagers; pregnant women; women who are breast feeding; diabetics; individuals with certain types of heart, liver, or kidney disease; and those suffering from certain types of arthritis. This is not an all-inclusive list. You may have a condition that would make this program unsafe for you. Play it safe and consult a healthcare professional before starting the program.
10 |
|
The Bowflex® Body Leanness Program |
|
|
|

A Personal Guarantee From Dr. Ellington Darden
Dear Bowflex® Enthusiast,
I’m excited, really excited! I’m elated because I’ve developed an exercising and eating program that produces fat loss faster than any plan I’ve ever tested.
The men involved in my research, for example, had an average fat loss of 27.95 pounds (12.68 kg) per man. Women on the same program averaged a reduction of 16.96 pounds (7.69 kg). Best of all, these dramatic results were achieved—not in six months— but in only six weeks!
That’s right. Similar results can be accomplished by you in six short weeks, which include just 18 workouts (3 per week) on the Bowflex® machine.
Bowflex® home gym was a significant part of the results. The exercises performed on it allowed the participants to build muscle, which accelerated their metabolisms, and produced faster and greater fat losses.
The plan worked so well that it became know as The Bowflex® Body Leanness Program.
Leanness means to strip away the fat from under the skin as well as at deeper levels. Leanness also implies a pleasing shape and tone to the skeletal muscles.
You might say leanness is the opposite of fatness because the people involved in my research certainly got rid of their excessive fatness in record time.
All the guidelines that were applied have been organized in the booklet you are now holding in your hands. It’s the next best thing to actually going through one of my research projects. In fact, it’s probably better since nothing is experimental. All of the fine points have been tried, tested and proven effective.
If you are overfat, and if you are interested in doing this program, there are several things that you need to understand about my experience. Since 1965, I’ve trained more than 10,000 overfat individuals. After many years of pushing, coaxing, and listening to these trainees, certain traits became evident to me:
•People are not lazy by choice. They are forced into it by the confusion that surrounds the abundance of fitness information that is available. If these individuals are given simple decisive instructions, they will train very intensely.
•People, if they are provided with specific menus, will drastically alter their eating habits.
•Most of these people, however, will do neither of these challenging things for more than a week—unless they quickly see and feel changes in their body.
The Bowflex® Body Leanness Program emerged from these findings. For you to get the best-possible results, you must be willing to exercise very intensely on the Bowflex® machine and adhere to a strict eating plan.
In return, you’ll get simple exercise instructions, specific menus to use, and my guarantee that if you follow the program exactly as directed, you’ll observe the pounds and inches disappear on almost a weekly basis.
Now it’s your turn to get excited, and get started!
Sincerely,
Dr. Ellington Darden
The Bowflex® Body Leanness Program 11
Measurements
If you would like to measure your personal before-and-after results, there are several steps you need to take. It is important that you accurately perform each task, then at the end of the six-week program, repeat the process in the same manner.
Body Weight:
Remove clothing and shoes and record your weight to the nearest quarter pound or hundred grams. Be sure to use the same scale when weighing yourself at the end of the six-week program. For the most accurate recordings, weigh yourself nude in the morning.
Since the program is divided into three two-week segments, you may want to weigh yourself at the end of each two-week period. Understand, however that weight loss is not the best
way to determine your success. Fat loss is the key component. To determine the amount of fat you’ve lost, you’ll need to follow the instructions in the next section.
Enter your starting weight on the RESULTS SUMMARY SHEET provided.
Circumference of Body Parts:
For an even better idea of the changes that will occur to your body in the next six weeks, it is necessary to measure the circumference of certain body parts. This will tell you where the fat is shrinking and what areas are toning up.
Use a plastic tape to measure the following:
1) Upper arms — hanging and relaxed, midway between the shoulder and elbow.
2)2” (5 cm) above navel — belly relaxed.
3)At navel — belly relaxed.
4)2” (5 cm) below navel — belly relaxed.
5)Hips — feet together at maximum protrusion
of buttocks.
6) Thighs — high, just below the buttocks crease with legs apart and weight distributed equally
on both feet.
Record each measurement on your Results Summary Sheet.
Women Measure:
Suprailium, triceps, and thigh.
Men Measure:
Chest, abdomen, and thigh.
1
2
3
4
5
6
12 |
|
The Bowflex® Body Leanness Program |
|
|
|

Measurements
Skinfold Measurements
To accurately track your progress through this six-week program, it is necessary to take skinfold measurements.
By measuring yourself in this way, you will be able to determine your lean-body mass and your body-fat percentage. The goal of this program is to increase your lean-body mass and decrease your body-fat percentage.
Please read this section carefully. Proper measuring techniques are essential to track your success. It is best to have someone measure you. Measuring yourself can lead to inaccurate results.
Women Measure: Suprailium, Triceps, and Thigh
Suprailium
Stand relaxed. Pick up a diagonal skinfold just above the crest of the hip bone on the right side of the waist.
Triceps
Stand with right elbow flexed 90 degrees and locate the center of the back of the upper arm midway between the shoulder and the elbow. Relax arm at your side. Pick up skinfold as pictured.
Thigh
Stand relaxed with most of the weight on your left leg. Pick up a skinfold in the
vertical plane on the front side of the right thigh, midway between the hip and knee joints.
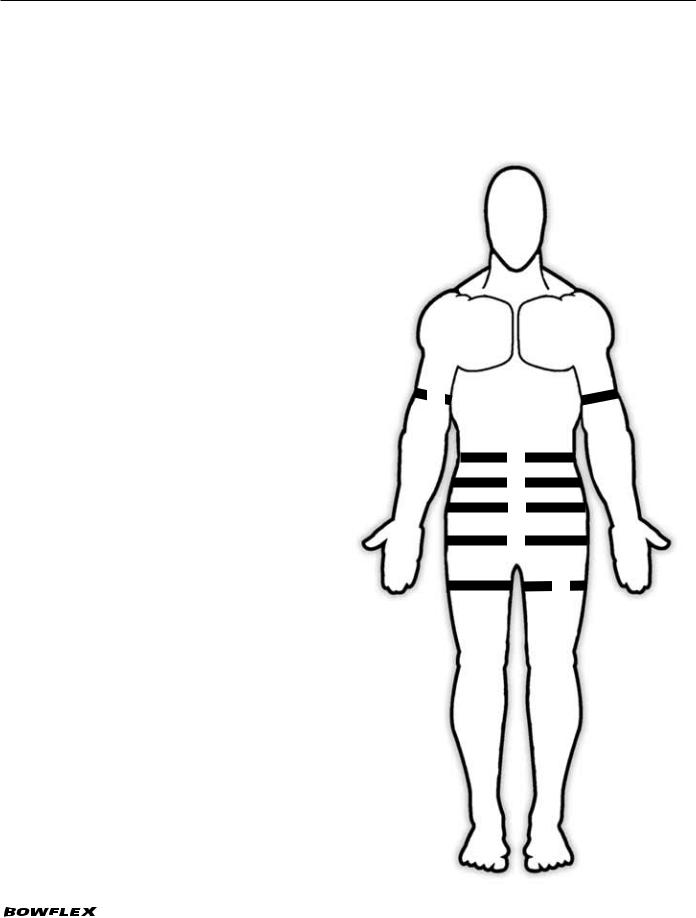
Men Measure: Chest, Abdomen and Thigh
Chest
Stand relaxed. Pick up a diagonal skinfold over the right pectoralis muscle, midway between the armpit and the nipple.
Abdomen
Stand relaxed. Pick up a vertical skinfold on the right side of the navel.
The Bowflex® Body Leanness Program 13

Measurements
Using Calipers When Measuring Skinfolds
The procedure for measuring skinfold thickness is to grasp firmly with the thumb and forefinger a fold of skin and surface fat and pull it away from the underlying muscle. Take the caliper in your other hand and open the jaws. Clamp the jaws over the pinched skin and fat. The jaws exert constant tension at the point of contact with the skin. The thickness of the double layer of skin and fat can then be read directly from the caliper, which is marked in millimeters.
Women |
|
Men |
|||||||
Suprailium |
|
Chest |
|
|
|
||||
Triceps |
|
|
Abdomen |
|
|||||
Thigh |
|
|
Thigh |
|
|||||
Total |
|
|
Total |
|
|||||
Use these figures on the following chart to determine your body-fat percentage and enter the number on the line below.
Starting body-fat percentage
Optional Picture Taking
Pictures can be the most exciting evaluation you can do. The numbers and the tape measurements are great, but actually seeing differences from comparison photographs of yourself is quite satisfying.
Taking full-length photographs is not difficult, but to see the maximum difference between before and after, you should follow these guidelines.
1)Keep everything the same. Wear the same outfit, a snug solid color is best, and have the person taking the picture stand in the same place, with the same setting behind you.
2)Make sure you stand against an uncluttered, light background.
3)Have the person taking the photograph move away from you until he can see your entire body in the viewfinder.
4)Stand relaxed for three pictures, front, right side, and back. Do not try to suck in your stomach.
5)Interlace your fingers and place them on top of your head, so the contours of your torso will be plainly visible. Keep your feet 8” (20 cm) apart in all three pictures.
6)When you get the film developed tell the processors to make your after photos the same size as your previous ones. This way, your height in both sets
of photos is equal and more valid comparisons can be made.
14 |
|
The Bowflex® Body Leanness Program |
|
|
|

Determining Your Body Fat
To Use The Nomogram:
1)Locate the sum of your three skinfolds in the right column and mark it.
2)Locate your age in years on the far left column and mark it.
3)Connect the two marks with a straightedge. Where the straightedge intersects the line in the middle column appropriate to you, you will find your body-fat percentage.
Baun, W.D, Baun, M.R., and Raven, P.B. A nomogram for the estimate of percent body fat from generalized equations. Research Quarterly for Exercise and Motivator® 2, 52:380-384, 1981.
Age in Years
60
55
50
45
40
35
30
25
20
15
Female
Male
|
40 |
|
33 |
38 |
|
|
||
31 |
36 |
|
|
||
29 |
34 |
|
|
||
27 |
|
|
|
32 |
|
25 |
|
|
23 |
30 |
|
28 |
||
|
||
21 |
|
|
19 |
26 |
|
|
||
17 |
24 |
|
|
||
15 |
22 |
|
|
||
13 |
20 |
|
|
||
11 |
18 |
|
|
||
9 |
16 |
|
14 |
||
|
||
7 |
12 |
|
|
||
5 |
10 |
|
3 |
||
|
Percent
Body-Fat
130
125
120
115
110
105
100
95
90
85
80
75
70
65
60
55
50
45
40
35
30
25
20
15
10
(mm) Skinfolds Three of Sum
The Bowflex® Body Leanness Program 15

Calculating Lean Body Mass
Now that you know your body-fat percentage, you can calculate your lean-body percentage. This will eventually show you how many pounds of muscle were added to your body, after completing the program.
For Example:
Before the program, Joe weighs 200 pounds (90.7 kg) and measures 30% fat, which amounts to 60 pounds (27.2 kg). Thus, his lean-body mass is 70%, or 140 pounds (63.5 kg).
After the program, Joe weighs 180 pounds (81.6 kg) and is 20% fat, which equals 36 pounds (16.3 kg). His lean-body mass is 80%, or 144 pounds (65.3 kg).
Simple calculations allow us to find the amount of fat Joe lost, and the amount of muscle Joe gained. Before fat weight (60 pounds), minus after fat weight (36 pounds) equals 24 pounds (10.8 kg) of fat lost. After lean-mass weight (144 pounds) minus before lean-mass weight (140 pounds) equals 4 pounds (1.8 kg) of muscle gained.
Enter Your Information Here: (Pounds or Kilograms)
Before
Body Weight |
Fat Percentage |
|
Body Fat Weight |
|
|
x |
|
= |
|
|
|
|
||
Body Weight |
Weight of Body Fat |
|
Lean-Body Weight |
|
|
– |
|
= |
|
|
|
|
||
Use the Same Factors to Calculate After Six Weeks.
After
|
Body Weight |
|
|
Fat Percentage |
|
Body Fat Weight |
|
|
x |
|
|
= |
|
|
|
|
|
|
||
|
Body Weight |
|
|
Weight of Body Fat |
|
Lean-Body Weight |
|
|
– |
|
= |
|
|
|
|
|
|
|||
|
|
|
|
Final Results |
|
|
|
Before Body Fat Weight |
|
|
After Body Fat Weight |
|
Total Fat Lost |
|
|
|
= |
|
||
|
|
– |
|
|
||
After Lean-Mass Weight |
Before Lean-Mass Weight |
|
Total Lean-Mass Gained |
|||
|
|
|
|
|
||
|
|
– |
|
= |
|
|
16 |
|
The Bowflex® Body Leanness Program |
|
|
|

Your Results Summary Sheet
Name |
|
Age |
|
|
|
|||
|
|
|
||||||
Height |
|
Weight Loss |
|
|||||
Weight Before |
|
Muscle Gain |
|
|||||
Weight After |
|
Fat Loss |
|
|||||
Please follow the instructions in the “Measurements” section for measuring circumferences.
Measurements |
Before |
After |
Difference |
Right Arm
Left Arm
2” (5 cm) Above Navel
Navel
2” (5 cm) Below Navel
Hips
Right Thigh
Left Thigh
Total
Percent Body Fat
If you wish to send in your results to the Bowflex Division, please send to: Bowflex® Results, 16400 SE Nautilus Drive, Vancouver, Washington, USA 98683. Or you may fax this sheet to Bowflex Results at 1-360-694-7755. Please include your name, address, and phone number. Submissions may be selected for use in promotional marketing materials.
The Bowflex® Body Leanness Program 17

The Workouts
GUIDELINES Week 1&2
All exercises should be practiced with one set of 8 to 12 repetitions. The style of performance is very important. The movement for each repetition should be 4 seconds in the positive phase and 4 seconds in the negative. Keep the motion slow and smooth. When 12 repetitions are accomplished, increase the resistance by approximately 5 percent. Keep the time between exercises to a minimum, no longer than 60 seconds. No workout should take more than 30 minutes to complete. Perform each workout three days a week.
Exercise |
Sets |
Reps |
Leg Extension |
1 |
8-12 |
Bench Press |
1 |
8-12 |
Lying Biceps Curl |
1 |
8-12 |
Seated Shoulder Press |
1 |
8-12 |
Seated Abdominal Crunch |
1 |
8-12 |
|
|
|
GUIDELINES Week 3&4
All exercises should be practiced with one set of 8 to 12 repetitions. The style of performance is very important. The movement for each repetition should be 4 seconds in the positive phase and 4 seconds in the negative. Keep the motion slow and smooth. When 12 repetitions are accomplished, increase the resistance by approximately 5 percent. Keep the time between exercises to a minimum, no longer than 45 seconds. No workout should take more than 30 minutes to complete. Perform each workout three days a week.
Exercise |
Sets |
Reps |
Leg Extension |
1 |
8-12 |
Bench Press |
1 |
8-12 |
Lying Biceps Curl |
1 |
8-12 |
Seated Shoulder Press |
1 |
8-12 |
Rear Deltoid Rows* |
1 |
8-12 |
SeatedTriceps Extension |
1 |
8-12 |
Seated Abdominal Crunch |
1 |
8-12 |
|
|
|
GUIDELINES Week 5&6
All exercises should be practiced with one set of 8 to 12 repetitions. The style of performance is very important. The movement for each repetition should be 4 seconds in the positive phase and 4 seconds in the negative. Keep the motion slow and smooth. When 12 repetitions are accomplished, increase the resistance by approximately 5 percent. Keep the time between exercises to a minimum, no longer than 30 seconds. No workout should take more than 30 minutes to complete. Perform each workout three days a week.
Exercise |
Sets |
Reps |
Leg Extension |
1 |
8-12 |
Leg Press |
1 |
8-12 |
Bench Press |
1 |
8-12 |
Lying Biceps Curl |
1 |
8-12 |
Lying Shoulder Pullover |
1 |
8-12 |
Reverse Fly |
1 |
8-12 |
Rear Deltoid Rows* |
1 |
8-12 |
Seated Triceps Extension |
1 |
8-12 |
Seated Abdominal Crunch |
1 |
8-12 |
|
|
|
* The Upright Row exercise was used in Dr. Darden’s original study. Although many people have used this exercise for years, recent information in the Physical Therapy field has caused the authors of this manual to caution against performing this exercise because of the unnatural twisting movement created in the shoulder joint. We suggest you substitute Rear Deltoid Rows for the upright Row exercise.
18 |
|
The Bowflex® Body Leanness Program |
|
|
|
 Loading...