


Bosch Nexxt Premium Gas Operating, Care And Installation Instructions Manual
\
en Operating, Care and
Instalation instructions
fr Notice d'utF]sation,
de maintenance et
d'installation
es ODeraci6n_ cuidado
e mstmcciones para
la instalaci6n ........
le Co
Definitions .................................................................................
IMPORTANT SAFETY _NSTRUCTIONS ........................................................
GROUNDING INSTRUCTIONS ..............................................................
INSTALLATION INSTRUCTION ...............................................................
Introduction ..............................................................................
Information concerning waste disposal .......................................................
Before installing the dryer ...................................................................
Electrical connection .......................................................................
Gas connection ...........................................................................
Exhaust air connection .....................................................................
Accessories ..............................................................................
Installation - step by step ...................................................................
Check list before using the dryer .............................................................
Preparing to transport the dryer step by step .................................................
OPERATING INSTRUCTIONS ................................................................
Your new dryer ............................................................................
Panel ....................................................................................
Summary of instructions .....................................................................
Safety information ..........................................................................
Before switching on the dryer ...............................................................
Using the dryer ...........................................................................
Protecting the dryer ........................................................................
Protection of the environment ................................................................
Before using the dryer for the first time .......................................................
Temporary disconnection of the dryer ........................................................
Laundry ....................................................................................
Identification of textiles .....................................................................
Drying tips ...............................................................................
Program selection ..........................................................................
Automatic programs .......................................................................
Mix programs .............................................................................
Special programs .........................................................................
Time programs ...........................................................................
Additional options .........................................................................
Options ..................................................................................
indicator of program sequence ..............................................................
Program selection tame .....................................................................
Operation ..................................................................................
Using the dryer ...........................................................................
Using the dryer rack .......................................................................
C_eaning and care ..........................................................................
Cleaning the dryer .........................................................................
Cleaning the lint filter .......................................................................
Cleaning the exhaust duct ..................................................................
Cleaning the moisture sensor ...............................................................
Cleaning the bearing shield .................................................................
Changing the light bulb .....................................................................
Troub{eshooting ............................................................................
SERVICE and REPAIR .....................................................................
STATEMENT OF WARRANT_ES BOSCH CLOTHES DRYERS ....................................
Exclusions ...............................................................................
3
4
5
6
6
6
6
8
8
9
11
12
12
12
13
13
14
15
16
16
16
16
16
17
17
17
17
17
18
18
18
18
18
19
2O
2O
21
22
22
23
25
25
25
25
25
25
26
26
27
28
28
Congratulations on having seiected
a Bosch clothes dryer, the choice of
those that demand exceptional
performance from their clothes
dryer.
This dryer compiies with
ANSI Z21.51/ CGA 7.1 2002
Clothes Dryers Vot. I.
A distinctive feature of your dryer is
tow energy consumption.
An easy operation philosophy,
a variety of customized drying
programs and a solid touch and feet
make this appliance a user friendly
assistant in your household.
The Bosch dryer offers the following
standard features:
High efficiency precision drying
system
Large 6.25 cu.ft. (177 t)
stainless steel drum with
a capacity up to 17.6 tbs (8 kg)
Large port hole (>18"/457 mm),
door lock with automatic drum
stop function
Exceptionally quiet operation
Sensor controlled auto cycles
Timed cycles from
10 to 150 minutes
Short program for 1/2toad
(25 minutes)
Each dryer which leaves our factory
has undergone a thorough
performance test and is in futt
working condition. If you have any
questions especially concerning
installation of the dryer our
customer service team will be
happy to advise you.
Further information and a selection
of our products can be found on
our web site:
www.boschapptiances.com
Information
Please read and follow these
operating and installation
instructions and atl other
information enclosed with the dryer.
iiiiiiiiiiiiiiiiiiiiiiiiiiiiiiiiiiiiiiiiiiiiiiiiiiiiiiiiiiiiiiiiiiiiiiiiiii_
Definitions
DANGER This indicates that
death or serious injuries may
occur as a result of non
observance of this warning.
WARNING This indicates that
injuries or significant damage
may occur as a result of non
observance of this warning.
CAUTION This indicates that
minor injuries or damage may
occur as a result of non
observance of this warning.
[_] This symbol is used to draw the
user's attention to something in
particular.
WARNING: For your safety the information in this manual must be followed to minimize
the risk of fire or explosion or to prevent property damage, personal injury or death.
- Do not store or use gasoline or other flammable vapors and liquids in the vicinity of this
or any other appliance.
- WHAT TO DO IF YOU SMELL GAS
Do not try to light any appliance.
Do not touch any electrical switch. Do not use any phone in your building.
Clear the room, building or area of al! occupants.
Immediately call your gas supplier from a neighbor's phone. Follow the gas
supplier's instructions.
If you cannot reach your gas supplier, call the fire department.
- Installation and service must be performed by a qualified installer, service agency or
the gas supplier.
SAFETY mNSTR
1. Read atl instructions before
using the dryer. Bosch dryers
are provided with Operating,
Care and Instaltation
Instructions.
2. Do not dry articles that have
been previously cteaned,
washed, soaked, or spotted
with gasoline, dry cleaning
solvents, other flammable, or
explosive substances as they
give off vapors that could ignite
or explode.
3. Do not allow children to play on
or with the appliance. Close
supervision of children is
necessary when the appliance
is used near children.
4. Do not reach into the appliance
if the drum is rotating.
5. Do not instatI or store this
appliance where it witt be
exposed to the weather.
6. Do not tamper with the
controls.
7. Do not repair or replace any
part of the appliance or attempt
any service untess specifically
recommended in the
user maintenance instructions
or in published user repair
instructions that you
understand and have the skills
to carry out.
8. Do not use fabric softeners or
products to eliminate static
unless recommended by the
fabric manufacturer.
9. Do not use heat to dry articles
containing foam rubber or
similarly textured rubber like
materials. Foam rubber
matedats can ignite when
heated.
10. Clean lint screen bdore or after
each toad.
11. Keep area around the exhaust
opening and adjacent
surrounding areas free from the
accumulation of tint, dust and
dirt. An obstructed port might
reduce the airflow and cause
over heating.
12. The interior of the machine and
exhaust duct should be
cleaned periodically by qualified
service personnel.
13. Removing any panel or cover,
including the light cover, may
expose live electrical circuits.
Always unplug the dryer from
the electrical supply before
attempting any service.
14. Store all laundry chemicals and
aids in a cool dry place
according to the manu-
facturer's instructions.
Make sure children cannot
reach them.
15. To reduce the risk of fire,
clothes, cleaning rags, mop
heads and the like which have
traces of any flammable
substance, such as vegetable
oit, cooking oit, petroleum
based oils or distillates, waxes,
fats, etc., must not be placed
in the dryer. These items may
contain some flammable
substance(s) even after
washing.
16. Combustible materials,
gasoline, and other flammable
vapors and liquids must not be
stored near the dryer.
17. Do not place items exposed to
cooking oils in your dryer. Items
contaminated with cooking oils
may contribute to a chemical
reaction that could cause
a toad to catch fire.
18. Do not climb or sit on top of
the dryer.
19. To reduce the risk of fire or
electrical shock, DO NOT use
an extension cord or an
adapter to connect the dryer to
the electrical power supply.
NS
20. The dryer must only be used for
its intended purpose.
21. Always check pockets and
remove any objects. Cigarette
lighters are particularly
hazardous.
22. Do not operate until worn out
power cords and/or loose plugs
are replaced.
23. Do not operate the dryer if any
guards and/or panels have
been removed.
24. Do not operate the dryer if any
parts are missing or broken.
25. Do not bypass any safety
devices.
26. Do not use a plastic or
non metal flexible duct with this
dryer. Plastic or non-metal
flexible duct are a potential fire
hazard.
27. Do not operate this dryer until
you are sure that the dryer
has been installed according
to the INSTALLATION
INSTRUCTIONS and that
installation and grounding are
in compliance with all local
regulations and/or other
applicable regulations and
requirements.
28. Failure to install, maintain
and/or operate the dryer
according to the manufac
turer's instructions may result
in injury and/or damage.
29. BEFORE THE APPLIANCE IS
REMOVED FROM SERVICE
OR DISCARDED, REMOVE
THE DOOR TO THE DRYING
COMPARTMENT.
30. To avoid floor damage and
mold growth, do not let spills or
splashout cause standing
water around or under the
appliance.
31. No other fuel-burning
appliances shall be installed in
the same closet as the dryer.
4
Notes:
A
B
C
The IMPORTANT
SAFEGUARDS and
WARNINGS presented in
this manual do not cover all
possible conditions that
may occur.
Common sense, caution
and care must be
exercised when installing,
maintaining or operating
the dryer.
Always contact your
dealer, distributor, service
agent or the manufacturer
about any problems or
conditions that you do not
understand.
Follow also the Safety
Information in the
INSTALLATION
INSTRUCTIONS and the
OPERATING
INSTRUCTIONS.
GROUNDING
INSTRUCTIONS
This appliance must be grounded.
In the event of malfunction or
breakdown, grounding wilt reduce
the risk of electric shock by
providing a path of least resistance
for the electric current. This
appliance is equipped with a cord
having an equipment grounding
conductor and a grounding plug.
The plug must be plugged into an
appropriate outlet that is properly
installed and grounded in
accordance with all local codes and
ordinances.
Improper connection of the
equipment grounding conductor
can result in a risk of electric
shock.
Check with a qualified electrician
or serviceman if you are in doubt
as to whether the dryer is
properly grounded,
DO NOT modify the plug
provided with the appliance
if it will not fit the outlet have
a proper outlet installed by
a qualified electrician or
exchange the cord with an
appropriate one rated for the
dryer.
KEEP THESE
INSTRUCTIONS FOR
FUTURE REFERENCE.
In case of change of ownership,
manual should be conveyed with
the dryer.
SAVE THESE INSTRUCTIONS!
I
Introduction
Read these installation instructions
completely and carefully. They wilt
save you time and effort and help to
ensure optimum dryer performance.
Be sure to observe all listed
warnings and cautions.
These installation instructions are
intended for use by qualified
installers, in addition to these
instructions the dryer must be
installed:
In the U.S.A., in accordance
with the National Electric Code,
ANSI/NFPA70 latest
edition/State and Municipal
codes and/or local codes.
In Canada, in accordance with
the Canadian Electric Code
C22.1 latest edition/Provincial
and Municipal codes and/or
local codes.
The gas installation must conform
with locat codes, or in absence of
local codes, with the National Fuel
Gas Code, ANSI Z223.1/NFPA 54
or the CAN/CSA B149.1,
Installation Codes.
Note:
This gas dryer has been UL and
C UL listed for safe operation up to
a height of 7,700 ft. without any
modifications to components for
natural gas.
Information
concerning waste
disposal
Disposal of the packaging
Keep children away from
shipping carton and packaging
components, Danger of
suffocation from plastic foil and
folding cartons,
All packaging materials are
environmentally friendly and can be
reused, Please dispose of
packaging in an environmentally
friendly manner,
Please ask your dealer or inquire at
your local authority about current
means of disposal,
Disposal of the appliance
If appliance is no longer usable,
pull out main plug, cut off power
cord and discard with main plug,
To prevent children from locking
themselves in the appliance,
remove the door,
Old appliances are not worthless
rubbish! Valuable raw materials can
be reclaimed from environmentally
friendly recycling,
Please ask your dealer or inquire at
your local authority about current
means of disposal,
Before installing
the dryer
Unpacking the appliance
The dryer is very heavy. Do not
lift it by yourself. Do not lift the
appliance by projecting
components (e.g. door) dueto
risk of breakage.
Remove the appliance
packaging carefully to prevent
damage to the surfaces.
Check the dryer for transportation
damage. Do not connect a dryer
which is visibly damaged. If in
doubt, contact your dealer.
Supplied components
After removing the packaging,
immediately remove any objects
from the drum.
The dryer is delivered as a complete
unit. The operating instructions and
supplied accessories can be found
in the drum.
6
Installation location
Do not install the dryer:
outdoors,
in an environment with dripping
water,
near flammable materials,
in rooms which are at risk of
frost,
in the garage,
in rooms which may contain
gas or other fuels,
in cupboards with tockabte
doors or in alcoves.
with other fuel burning
appliance in the same closet.
The installation room must be welt
ventilated, otherwise the dryer will
operate below optimum
performance.
Do not operate the dryer at
temperatures above 104 °F (40 °C)
and below 41 °F (5 °C). Low
temperatures affect the automatic
program sequence and may
prolong the drying times.
The installation surface for the dryer
must be clean, level and firm. Do
not install the appliance on carpets!
Compensate for uneven floors with
the height adjustable feet.
Install the dryer and level side
to side and front to back.
Use a bubble level. Never remove
the height adjustable feet!
The size of the installation area
depends on the dimensions of the
dryer. Ensure that there is adequate
room for the swivel range of the
door!
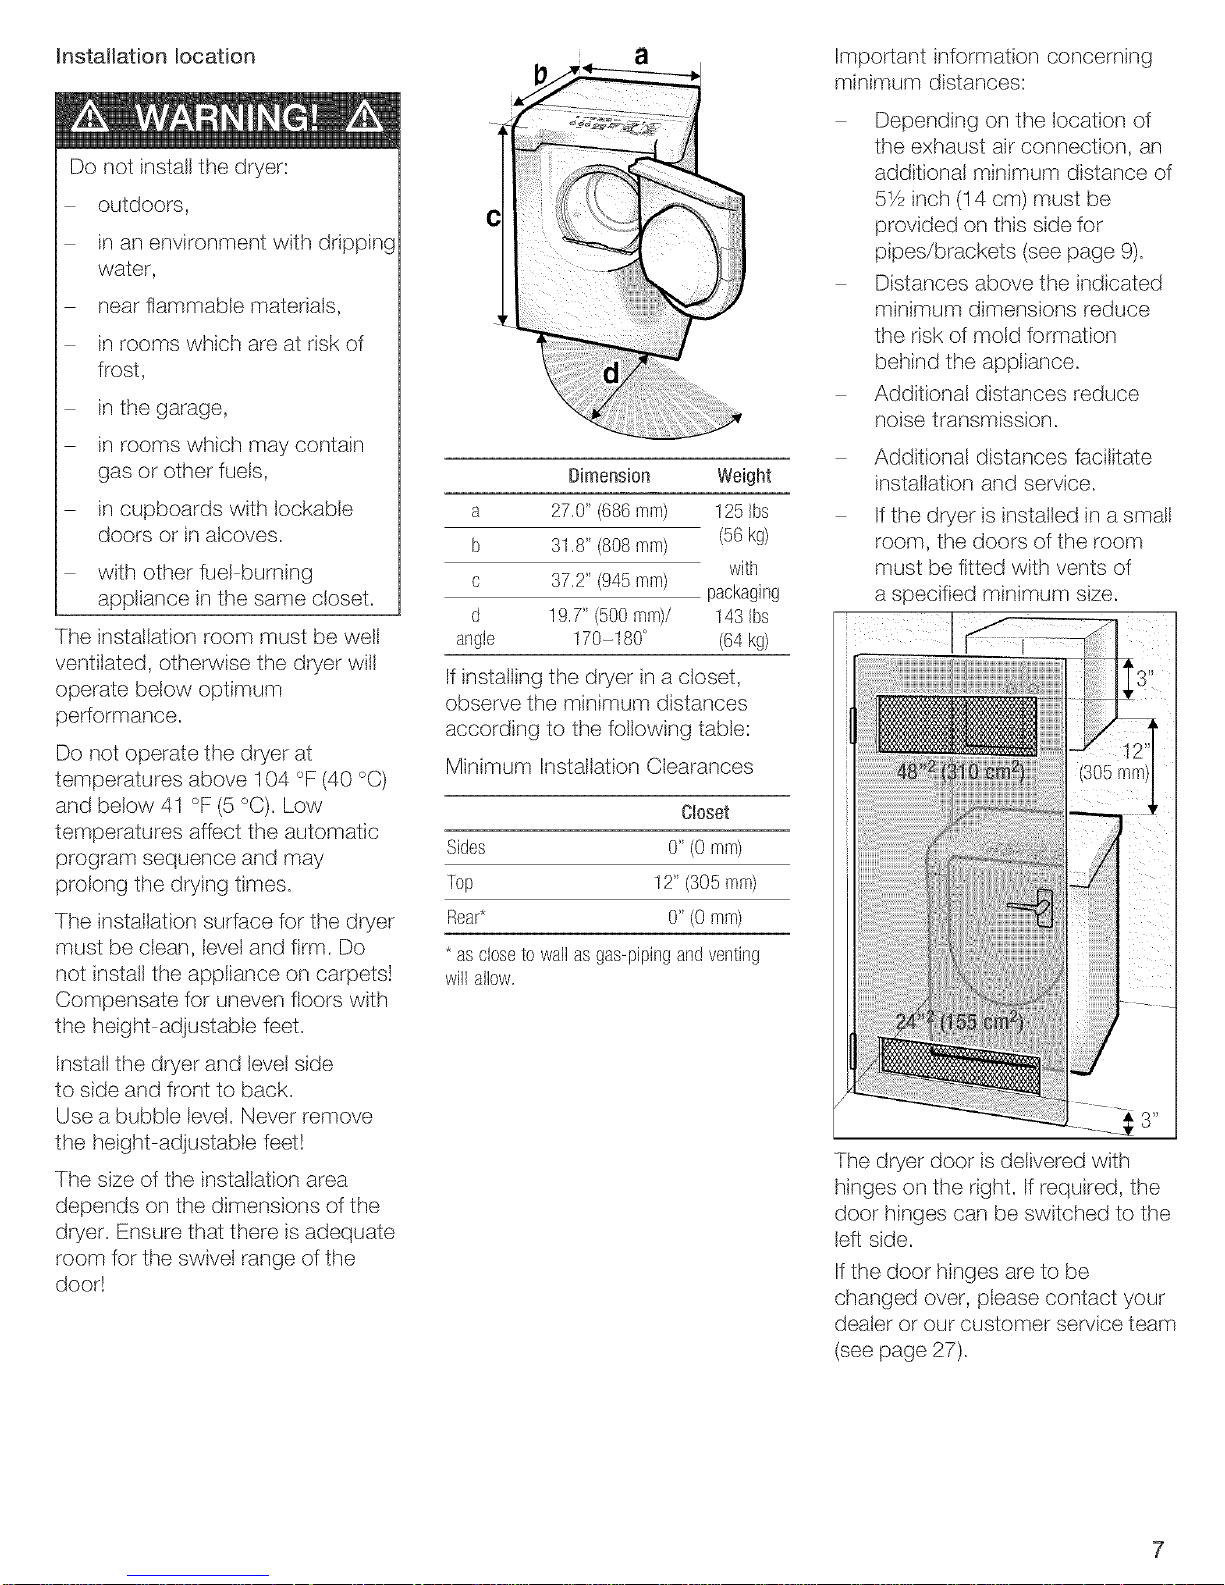
a
b
c
d
angle
Dimension
27.0"(686mm)
31.8"(808mm)
37.2"(945mm)
19.7" (500ram)/
170-180 °
Weight
125Ibs
(56kg)
with
packaging
143Ibs
(64kg)
If installing the dryer in a closet,
observe the minimum distances
according to the following table:
Minimum Installation Clearances
Closet
Sides 0"(0 mm)
Top 12"(305 mm)
Rear* 0"(0mm)
* ascloseto wallasgas-pipingandventing
willallow.
Important information concerning
minimum distances:
Depending on the location of
the exhaust air connection, an
additional minimum distance of
5Y2 inch (I 4 cm) must be
provided on this side for
pipes/brackets (see page 9).
Distances above the indicated
minimum dimensions reduce
the risk of mold formation
behind the appliance.
Additional distances reduce
noise transmission.
Additional distances facilitate
installation and service.
If the dryer is installed in a small
room, the doors of the room
must be fitted with vents of
a specified minimum size.
s"
The dryer door is delivered with
hinges on the right. If required, the
door hinges can be switched to the
left side.
If the door hinges are to be
changed over, please contact your
dealer or our customer service team
(see page 27).
Electrical connection
GROUNDING iNSTRUCTiONS
This appliance must be grounded.
In the event of a malfunction or
breakdown, grounding wilt reduce
the risk of electrical shock by
providing a path of least resistance
for the electric current.
This appliance features a cord with
an equipment-grounding conductor
and a grounding plug. The plug
must be plugged into an
appropriate outlet which has been
properly installed and grounded in
accordance with all tocal
regulations and ordinances.
Improper connection of the
equipment grounding conductor
may result in electric shock.
Have the appliance checked by
a qualified electrician or service
technician if you are in doubt as
to whether the dryer has been
properly grounded.
Do not modify the plug provided
with the appliance if it will not fit in
the outlet, have a proper outlet
installed by a qualified electrician or
exchange the cord with an
appropriate one rated for the dryer.
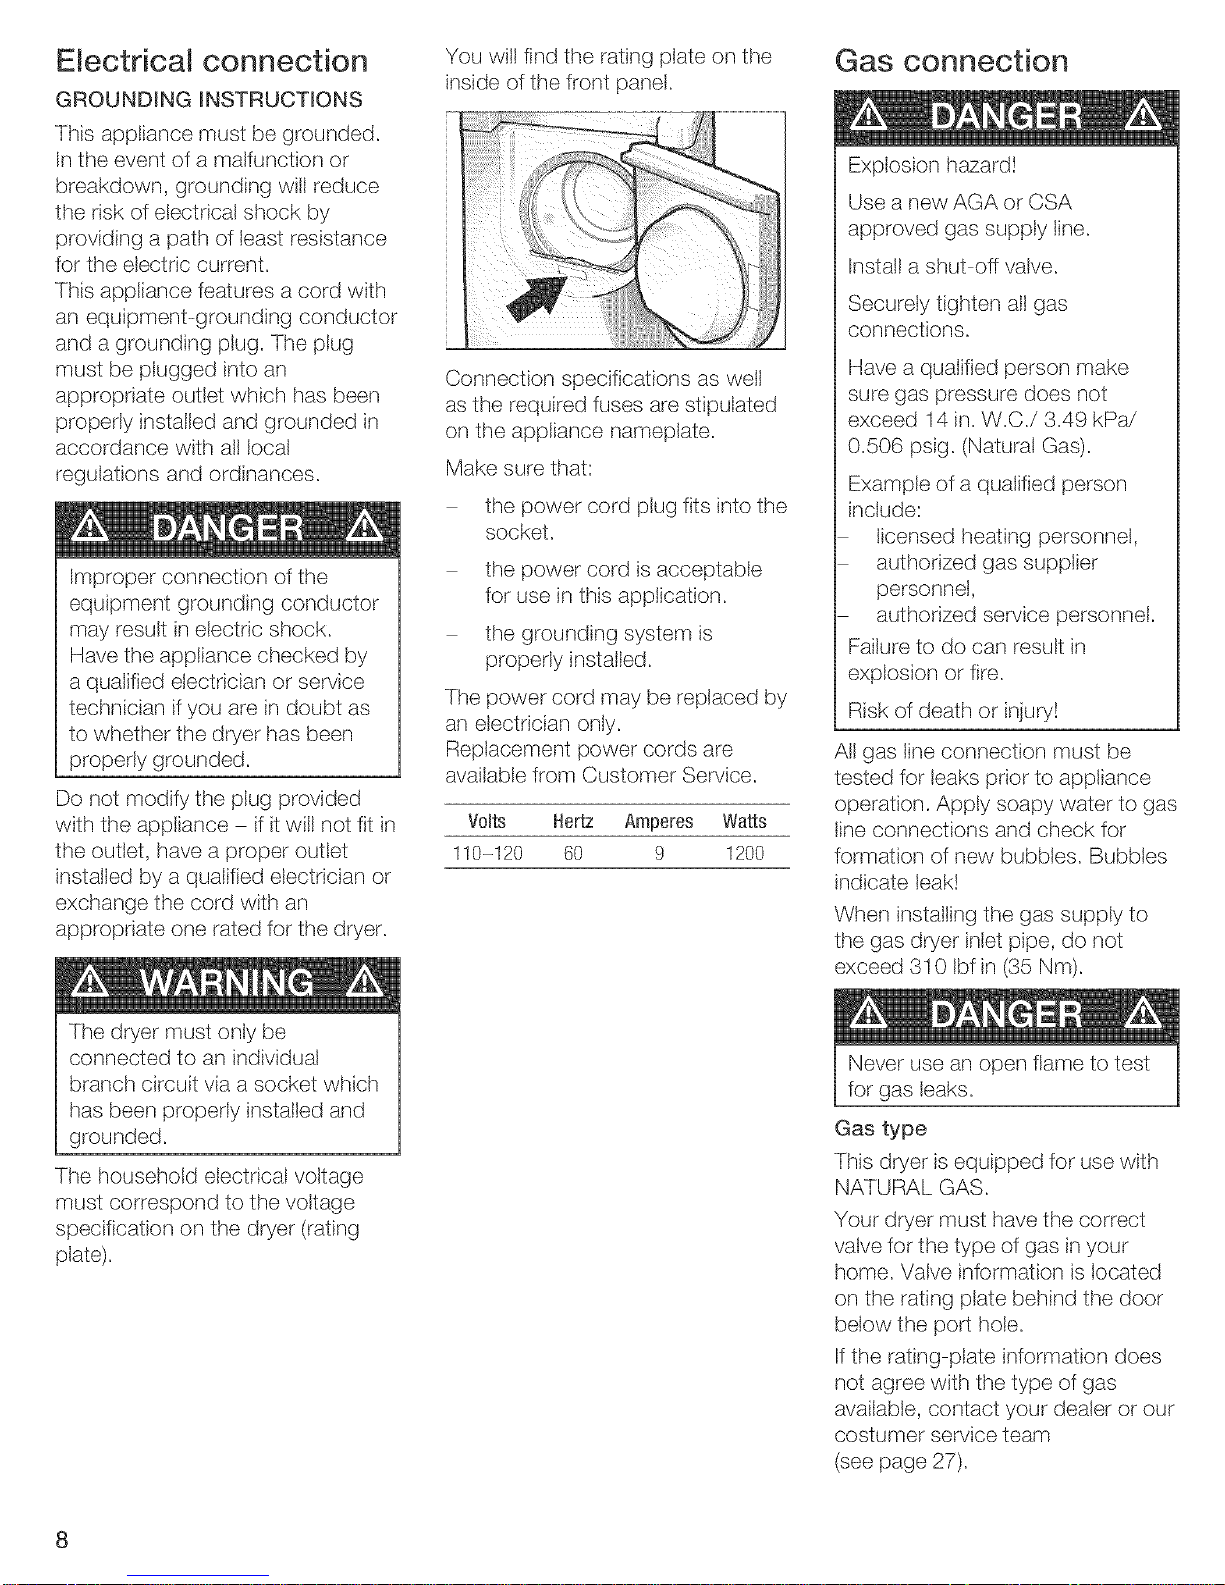
You wilI find the rating plate on the
inside of the front panel,
Connection specifications as well
as the required fuses are stipulated
on the appliance nameplate.
Make sure that:
the power cord plug fits into the
socket.
the power cord is acceptable
for use in this application,
the grounding system is
properly installed.
The power cord may be replaced by
an electrician only.
Replacement power cords are
available from Customer Service.
Volts Hertz Amperes Watts
110-120 60 9 1200
Gas connection
Explosion hazard!
Use a new AGA or CSA
approved gas supply line.
Install a shut off valve.
Securely tighten all gas
connections.
Have a qualified person make
sure gas pressure does not
exceed 14 in. W.C./3.49 kPa/
0.506 psig. (Natural Gas).
Example of a qualified person
include:
licensed heating personnel,
authorized gas supplier
personnel,
authorized service personnel.
Failure to do can result in
explosion or fire.
Risk of death or injury!
All gas line connection must be
tested for leaks prior to appliance
operation, Apply soapy water to gas
line connections and check for
formation of new bubbles, Bubbles
indicate leak!
When installing the gas supply to
the gas dryer inlet pipe, do not
exceed 310 tbf in (35 Nm).
The dryer must only be
connected to an individual
branch circuit via a socket which
has been properly installed and
grounded.
The household electrical voltage
must correspond to the voltage
specification on the dryer (rating
plate).
Never use an open flame to test
for gas leaks.
Gas type
This dryer is equipped for use with
NATURAL GAS.
Your dryer must have the correct
valve for the type of gas in your
home. Valve information is located
on the rating plate behind the door
below the port hole.
If the rating plate information does
not agree with the type of gas
available, contact your dealer or our
costumer service team
(see page 27).
8
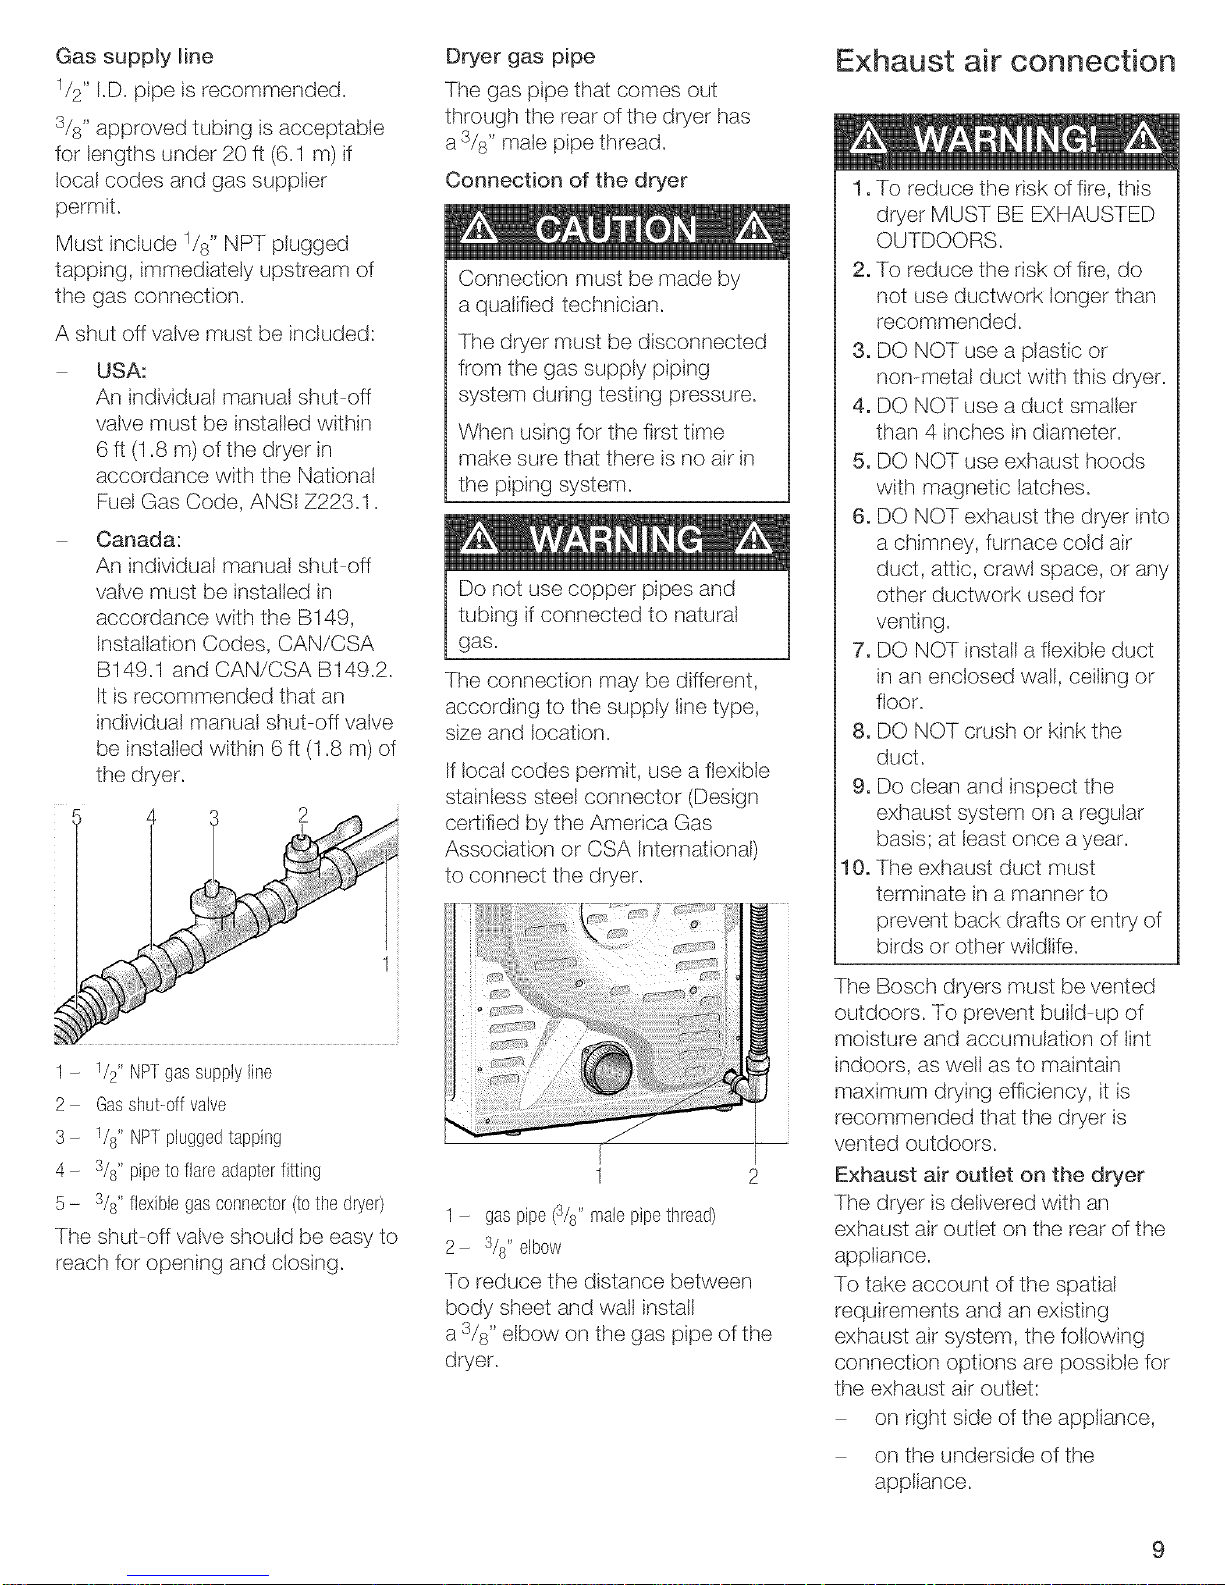
Gas supply line
1/2" I,D, pipe is recommended,
3/s" approved tubing is acceptable
for lengths under 20 ft (6,1 m) if
local codes and gas supptier
permit,
Must include 1/s" NPT plugged
tapping, immediately upstream of
the gas connection,
A shut off vatve must be included:
USA:
An individual manual shut off
valve must be installed within
6ft (1.8 m) of the dryer in
accordance with the National
Fuel Gas Code, ANSI Z223,1,
Canada:
An individual manual shut off
valve must be installed in
accordance with the B149,
Installation Codes, CAN/CSA
B149,1 and CAN/CSA B149,2,
It is recommended that an
individual manual shut off valve
be instatled within 6 ff (1,8 m) of
the dryer,
1 - 1/2" NPTgassupplyline
2- Gasshut-0ffvalve
3- 1/8"NPTpluggedtapping
4- 3/8"pipeto flareadapterfitting
5- 3/s"flexiblegasconnector(tothe dryer)
The shut off valve should be easy to
reach for opening and closing,
Dryer gas pipe
The gas pipe that comes out
through the rear of the dryer has
a 3/8" male pipe thread,
Connection of the dryer
Connection must be made by
a qualified technician,
The dryer must be disconnected
from the gas supply piping
system during testing pressure,
When using for the first time
make sure that there is no air in
the piping system,
Do not use copper pipes and
tubing if connected to natural
gas,
The connection may be different,
according to the supply line type,
size and location,
If local codes permit, use a flexible
stainless steel connector (Design
certified by the America Gas
Association or CSA International)
to connect the dryer,
1 2
1 - gaspipe(3/8"malepipethread)
2- 3/8"elbow
To reduce the distance between
body sheet and wall install
a 3/8" elbow on the gas pipe of the
dryer,
Exhaust air connection
1. To reduce the risk of fire, this
dryer MUST BE EXHAUSTED
OUTDOORS,
2. To reduce the risk of fire, do
not use ductwork longer than
recommended,
3. DO NOT use a plastic or
non-metal duct with this dryer,
4. DO NOT use a duct smaller
than 4 inches in diameter,
5. DO NOT use exhaust hoods
with magnetic latches,
6. DO NOT exhaust the dryer into
a chimney, furnace cold air
duct, attic, crawl space, or any
other ductwork used for
venting,
7. DO NOT install a flexible duct
in an enclosed watt, ceiling or
floor,
8. DO NOT crush or kink the
duct,
9. Do clean and inspect the
exhaust system on a regular
basis; at least once a year,
10. The exhaust duct must
terminate in a manner to
prevent back drafts or entry of
birds or other wildlife,
The Bosch dryers must be vented
outdoors, To prevent build up of
moisture and accumulation of tint
indoors, as well as to maintain
maximum drying efficiency, it is
recommended that the dryer is
vented outdoors,
Exhaust air outlet on the dryer
The dryer is delivered with an
exhaust air outlet on the rear of the
appliance,
To take account of the spatial
requirements and an existing
exhaust air system, the following
connection options are possible for
the exhaust air outlet:
on right side of the appliance,
on the underside of the
appliance,
 Loading...