

Page 1
MUM44..
MUM46..
MUM48..
Page 2
de Deutsch . . . . . . . . . . . . . . . . . . . . . . . . . . . . . . . . . . . . . . . . . . . . . . . . . . . . . . . . . . . 3
en English . . . . . . . . . . . . . . . . . . . . . . . . . . . . . . . . . . . . . . . . . . . . . . . . . . . . . . . . . . . .11
fr Français . . . . . . . . . . . . . . . . . . . . . . . . . . . . . . . . . . . . . . . . . . . . . . . . . . . . . . . . . . .19
it Italiano . . . . . . . . . . . . . . . . . . . . . . . . . . . . . . . . . . . . . . . . . . . . . . . . . . . . . . . . . . . . 28
nl Nederlands . . . . . . . . . . . . . . . . . . . . . . . . . . . . . . . . . . . . . . . . . . . . . . . . . . . . . . . . . 36
da Dansk . . . . . . . . . . . . . . . . . . . . . . . . . . . . . . . . . . . . . . . . . . . . . . . . . . . . . . . . . . . . .44
no Norsk. . . . . . . . . . . . . . . . . . . . . . . . . . . . . . . . . . . . . . . . . . . . . . . . . . . . . . . . . . . . . . 52
sv Svenska . . . . . . . . . . . . . . . . . . . . . . . . . . . . . . . . . . . . . . . . . . . . . . . . . . . . . . . . . . . 60
fi Suomi . . . . . . . . . . . . . . . . . . . . . . . . . . . . . . . . . . . . . . . . . . . . . . . . . . . . . . . . . . . . .68
es Español. . . . . . . . . . . . . . . . . . . . . . . . . . . . . . . . . . . . . . . . . . . . . . . . . . . . . . . . . . . .76
pt Português. . . . . . . . . . . . . . . . . . . . . . . . . . . . . . . . . . . . . . . . . . . . . . . . . . . . . . . . . . 86
el ЕллзнйкЬ . . . . . . . . . . . . . . . . . . . . . . . . . . . . . . . . . . . . . . . . . . . . . . . . . . . . . . . . . . . 95
tr Türkçe. . . . . . . . . . . . . . . . . . . . . . . . . . . . . . . . . . . . . . . . . . . . . . . . . . . . . . . . . . . . 105
pl Polski . . . . . . . . . . . . . . . . . . . . . . . . . . . . . . . . . . . . . . . . . . . . . . . . . . . . . . . . . . . .116
hu Magyar . . . . . . . . . . . . . . . . . . . . . . . . . . . . . . . . . . . . . . . . . . . . . . . . . . . . . . . . . . . 125
uk š®paï¸c¿®a . . . . . . . . . . . . . . . . . . . . . . . . . . . . . . . . . . . . . . . . . . . . . . . . . . . . . . . . 133
ru Pºcc®å¼ . . . . . . . . . . . . . . . . . . . . . . . . . . . . . . . . . . . . . . . . . . . . . . . . . . . . . . . . . . 142
ar . . . . . . . . . . . . . . . . . . . . . . . . . . . . . . . . . . . . . . . . . . . . . . . . . . . . . . . . . . . . . 164
. . . . . . . . . . . . . . . . . . . . . . . . . . . . . . . . . . . . . . . . . . . . . . . . . . . .
Page 3

de
eЙктдбЕЬЙе=dдΩЕвпмелЕЬ=тмг=h~мС=fЬкЙл=
еЙмЙе=dЙк®нЙл=~мл=ЗЙг=e~млЙ=_lp`eK
a~гбн=Ь~ДЙе=pбЙ=лбЕЬ=СΩк=Йбе=гзЗЙкеЙлI=
ЬзЕЬпЙкнбЦЙл=e~млЬ~днлЦЙк®н=ЙенлЕЬбЙЗЙеK
tЙбнЙкЙ=fеСзкг~нбзеЙе=тм= мелЙкЙе= mкзЗмвнЙе=
СбеЗЙе=pбЙ=~мС=мелЙкЙк=fенЙкеЙнлЙбнЙK
Inhalt
Zu Ihrer Sicherheit . . . . . . . . . . . . . . . . . . . 3
Auf einen Blick . . . . . . . . . . . . . . . . . . . . . 5
Bedienen . . . . . . . . . . . . . . . . . . . . . . . . . 6
Reinigen und Pflegen . . . . . . . . . . . . . . . . 7
Hilfe bei Störungen . . . . . . . . . . . . . . . . . . 8
Anwendungsbeispiele . . . . . . . . . . . . . . . . 8
Zubehör/Sonderzubehör . . . . . . . . . . . . . . 9
Entsorgung . . . . . . . . . . . . . . . . . . . . . . . . 10
Garantiebedingungen . . . . . . . . . . . . . . . . 10
Zu Ihrer Sicherheit
Lesen Sie diese Anleitung sorgfältig vor dem Gebrauch, um
wichtige Sicherheits- und Bedienhinweise für dieses Gerät zu
erhalten.
Das Nichtbeachten der Anweisungen für die richtige Anwendung des
Gerätes schließt eine Haftung des Herstellers für daraus resultierende
Schäden aus.
Dieses Gerät ist für die Verarbeitung haushaltsüblicher Mengen im Haushalt
oder in haushaltsähnlichen, nicht-gewerblichen Anwendungen bestimmt.
Haushaltsähnliche Anwendungen umfassen z. B. die Verwendung in
Mitarbeiterküchen von Läden, Büros, landwirtschaftlichen und anderen
gewerblichen Betrieben, sowie die Nutzung durch Gäste von Pensionen,
kleinen Hotels und ähnlichen Wohneinrichtungen. Gerät nur für
haushaltsübliche Verarbeitungsmengen und -zeiten benutzen. Zulässige
Höchstmengen (siehe „Anwendungsbeispiele“) nicht überschreiten!
Dieses Gerät ist zum Rühren, Kneten und Schlagen von Lebensmitteln
geeignet. Es darf nicht zur Verarbeitung von anderen Gegenständen bzw.
Substanzen benutzt werden. Bei Verwendung des vom Hersteller
zugelassenem Zubehör sind weitere Anwendungen möglich.
Das Gerät nur mit Originalzubehör benutzen. Bei Gebrauch des Zubehörs
die beigelegten Gebrauchsanleitungen beachten.
Gebrauchsanleitung bitte aufbewahren. Bei Weitergabe des Gerätes
an Dritte Gebrauchsanleitung mitgeben.
, Generelle Sicherheitshinweise
Stromschlag-Gefahr
Dieses Gerät darf von Kindern nicht benutzt werden.
Das Gerät und seine Anschlussleitung ist von Kinder fernzuhalten.
Geräte können von Personen mit reduzierten physischen, sensorischen
oder mentalen Fähigkeiten oder Mangel an Erfahrung und Wissen
benutzt werden, wenn sie beaufsichtigt werden oder bezüglich des
Robert Bosch Hausgeräte GmbH 3
Page 4

sicheren Gebrauchs des Gerätes unterwiesen wurden und die daraus
de
resultierenden Gefahren verstanden haben.
Kinder dürfen nicht mit dem Gerät spielen.
Gerät nur gemäß Angaben auf dem Typenschild anschließen und
betreiben. Nur benutzen, wenn Zuleitung und Gerät keine
Beschädigungen aufweisen.
Das Gerät ist bei nicht vorhandener Aufsicht und vor dem
Zusammenbau, dem Auseinandernehmen oder Reinigen stets vom Netz
zu trennen.
Zuleitung nicht über scharfe Kanten oder heiße Flächen ziehen. Wenn die
Anschlussleitung dieses Gerätes beschädigt wird, muss sie durch den
Hersteller oder seinen Kundendienst oder eine ähnlich qualifizierte
Person ersetzt werden, um Gefährdungen zu vermeiden.
Reparaturen am Gerät nur durch unseren Kundendienst vornehmen
lassen.
, Sicherheitshinweise für dieses Gerät
Verletzungsgefahr
Stromschlag-Gefahr!
Netzstecker erst einstecken, wenn alle Vorbereitungen zum Arbeiten mit
dem Gerät abgeschlossen sind.
Grundgerät niemals in Flüssigkeit tauchen und unter fließendes Wasser
halten.
Keinen Dampfreiniger verwenden.
Schwenkarm nicht verstellen, während das Gerät eingeschaltet ist.
Vollständigen Stillstand des Antriebs abwarten.
Werkzeug/Zubehör nur bei Stillstand des Antriebes wechseln – nach dem
Ausschalten läuft der Antrieb kurze Zeit nach.
Gerät ausschließlich mit dem Drehschalter ein- und ausschalten.
Bei Nichtbenutzung des Gerätes den Netzstecker ziehen.
Vor Behebung einer Störung den Netzstecker ziehen.
Nach Stromunterbrechung läuft das Gerät wieder an.
Verletzungsgefahr durch rotierende Werkzeuge!
Nicht in rotierende Teile greifen. Während des Betriebes nie in die Schüssel
greifen.
Werkzeug nur bei Stillstand des Antriebes wechseln – nach dem
Ausschalten läuft der Antrieb kurze Zeit nach.
Das Gerät darf nur betrieben werden, wenn die nicht genutzten Antriebe
mit den Antriebsschutzdeckeln (4, 7) gesichert sind.
4 Robert Bosch Hausgeräte GmbH
Page 5

Verletzungsgefahr durch scharfe Messer/rotierenden Antrieb!
de
Nie in den aufgesetzten Mixer greifen!
Mixer nie am Grundgerät zusammenbauen. Mixer nur bei Stillstand des
Antriebes abnehmen/ aufsetzen! Den Mixer nur im zusammengesetzten
Zustand und mit aufgesetztem Deckel betreiben.
Mixermesser nicht mit bloßen Händen berühren.
Verbrühungsgefahr!
Beim Verarbeiten von heißem Mixgut tritt Dampf durch den Trichter im
Deckel aus. Maximal 0,5 Liter heiße oder schäumende Flüssigkeit einfüllen.
Wichtig!
Nur ein Werkzeug bzw. Zubehör gleichzeitig benutzen.
Die Gebrauchsanleitung beschreibt verschiedene Ausführungen, siehe auch Modellübersicht
(Bild ). Das Gerät ist wartungsfrei.
Auf einen Blick
Bitte Bildseiten ausklappen. Bild
Grundgerät
1
Entriegelungstaste
2
Schwenkarm
(siehe „Arbeitspositionen“)
3
Drehschalter
0/off = Stopp
/
P
Drehschalter festhalten, bis Antrieb stehenbleibt; Werkzeug ist in Schwenkposition.
Bewegt sich der Antrieb nicht, ist die
Schwenkposition bereits erreicht.
Stufen 1–4 = Arbeitsgeschwindigkeit
Stufe 1 = niedrigste Drehzahl –
Stufe 4 = höchste Drehzahl – schnell
Bei Stromunterbrechung bleibt das Gerät
eingeschaltet und läuft nach der
Unterbrechung wieder an.
4
Antriebsschutzdeckel
Zum Abnehmen des Antriebsschutzdeckels
diesen drehen, bis die Verriegelung
aufgehoben ist.
5
Antrieb für
–
Durchlaufschnitzler
–
Zitruspresse *
–
Getreidemühle *
Bei Nichtgebrauch Antriebsschutzdeckel
aufsetzen.
= Parkschaltung;
langsam
*
6
Antrieb für
–
Werkzeuge (Rührbesen, Schlagbesen,
Knethaken)
–
Rührwerkzeug des Eisbereiters *
–
herunter- oder hochgeklappt für
Fleischwolf *
7
Mixerantriebsschutzdeckel
8
Antrieb für
–
Mixer
–
Multi-Mixer
Bei Nichtgebrauch Mixerantriebsschutzdeckel aufsetzen.
9
Kabelaufbewahrung (
MUM 44..: Kabel aufwickeln
MUM 46../48..: Kabel im Kabelfach
verstauen
Schüssel mit Zubehör
10
Rührschüssel
11
Deckel
Werkzeuge
Rührbesen
12
13
Schlagbesen
14
Knethaken mit Teigabweiser
Mixer
Sockel
15
16
Messereinsatz
17
Dichtungsring
18
Mixbecher
19
Deckel
20
Tr ic ht e r
* Wenn ein Zubehörteil nicht im Lieferumfang
enthalten ist, kann es über den Handel und
den Kundendienst erworben werden.
Bild
)
Robert Bosch Hausgeräte GmbH 5
Page 6
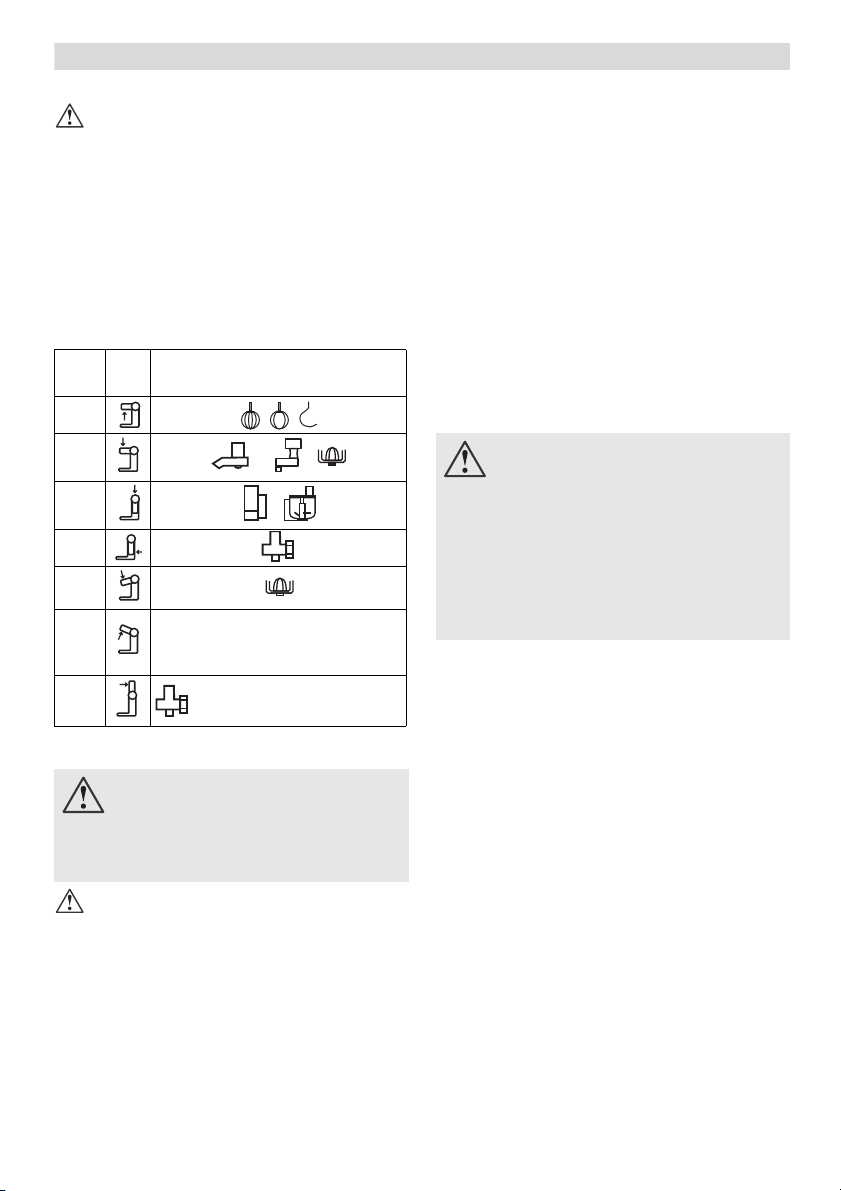
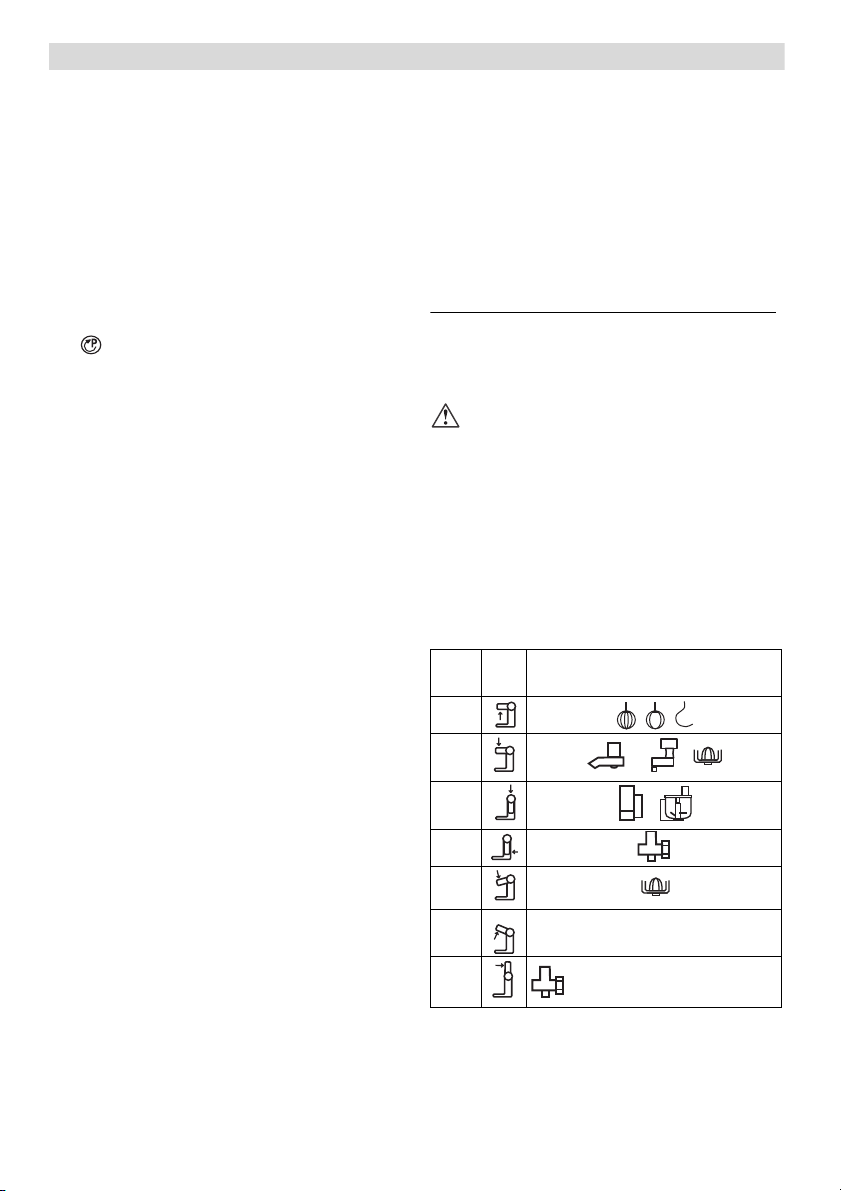
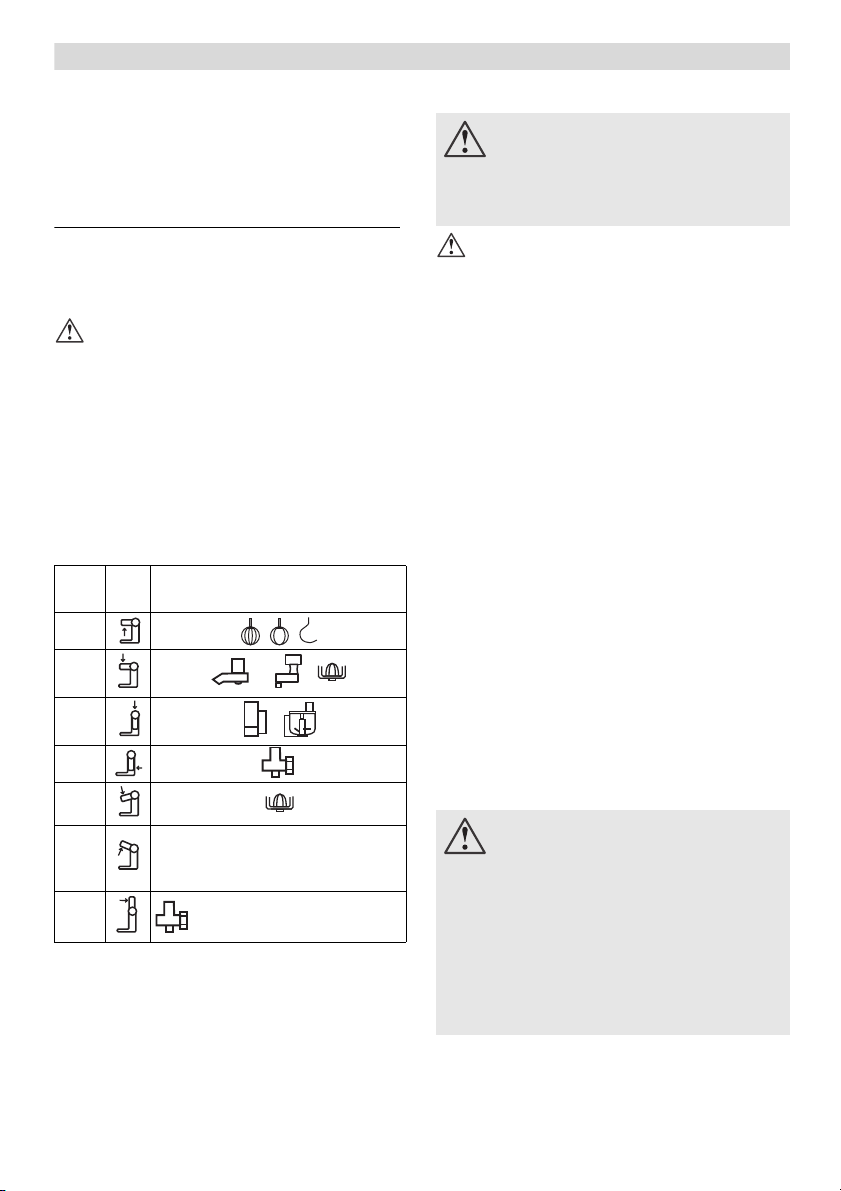
Arbeitspositionen
de
^ЕЬнмеЦ>
dЙк®н=емк=ДЙнкЙбДЙеI=пЙее=tЙквтЙмЦLwмДЙЬ∏к=
е~ЕЬ=ЗбЙлЙк=q~ДЙддЙ=~г=кбЕЬнбЦЙе=^енкбЙД=меЗ=бе=
ЗЙк=кбЕЬнбЦЙе=mзлбнбзе=~еЦЙДк~ЕЬн=меЗ=бе=
^кДЙбнллнЙддмеЦ=блнK
aЙк=pЕЬпЙев~кг=гмлл=бе=аЙЗЙк=^кДЙбнлйзлбнбзе=
ЙбеЦЙк~лнЙн=лЙбеK
Einstellen der Arbeitsposition Bild
Entriegelungstaste drücken und
Schwenkarm bewegen.
Schwenkarm bis zum Einrasten auf die
gewünschte Position bewegen.
Position
1
Vorbereiten
Grundgerät auf glatten und sauberen
Untergrund stellen.
Kabel abwickeln/herausziehen (
Netzstecker einstecken.
Bild
).
Rührbesen, Schlagbesen und
Knethaken Bild
Rührbesen (a)
zum Rühren von Teigen, z. B. Rührteig
Schlagbesen (b)
zum Schlagen von Eischnee, Sahne und zum
Schlagen von leichten Teigen, z. B. Biskuitteig
Knethaken (c) mit Teigabweiser (d)
zum Kneten von schweren Teigen und zum
Unterheben von Zutaten, die nicht zerkleinert
werden sollen (z. B. Rosinen,
Schokoladenplättchen)
2
3
4
5
Einsetzen/Abnehmen von
6
Schlag-, Rührbesen und
Knethaken
7
Zugeben großer
Verarbeitungsmengen
Bedienen
sЙкдЙнтмеЦлЦЙС~Ьк>
kЙнтлнЙЕвЙк=Йклн=ЙбелнЙЕвЙеI=пЙее=~ддЙ=
sзкДЙкЙбнмеЦЙе=тмг=^кДЙбнЙе=гбн=ЗЙг=dЙк®н=
~ДЦЙлЕЬдзллЙе=лбеЗK
^ЕЬнмеЦ>
dÉê®í=åìê=ãáí=wìÄÉÜ∏кLtЙквтЙмЦ=бе=^кДЙбнлJ
лнЙддмеЦ=ДЙнкЙбДЙеK
dЙк®н=ебЕЬн=дЙЙк=ДЙнкЙбДЙеK=
dЙк®н=меЗ=wмДЙЬ∏кнЙбдЙ=вЙбеЙе=eбнтЙимЙддЙе=
~мллЙнтЙеK=qЙбдЙ=лбеЗ= ебЕЬн= г бвкзпЙддЙеЦЙ ЙбЦеЙнK
Gerät und Zubehör vor dem ersten
Gebrauch gründlich reinigen, siehe „Reinigen
und Pflegen“.
sЙкдЙнтмеЦлЦЙС~Ьк=ЗмкЕЬ=
кзнбЙкЙеЗЙ=tЙквтЙмЦЙ>
t®ЬкЙеЗ=ЗЙл=_ЙнкбЙДЙл=ебЙ=бе=ЗбЙ=pЕЬΩллЙд=
ЦкЙбСЙеK
tЙквтЙмЦ=емк=ДЙб=pнбддлн~еЗ=ЗЙл=^енкбЙДЙл=
пЙЕЬлЙде=У=е~ЕЬ=ЗЙг=^мллЕЬ~днЙе=д®мСн=ЗЙк=
^енкбЙД=вмктЙ=wЙбн=е~ЕЬK
a~л=dЙк®н=З~кС=емк=ДЙнкбЙДЙе=пЙкЗЙеI=пЙее=
ЗбЙ=ебЕЬн=ЦЙемнтнЙе=^енкбЙДЙ=гбн=ЗЙе=
^енкбЙДллЕЬмнтЗЙЕвЙде=ЦЙлбЕЬЙкн=лбеЗK
Drehschalter auf
P
stellen und festhalten, bis
der Antrieb stehen bleibt.
Hinweis:
Bewegt sich der Antrieb nicht, ist die
Schwenkposition bereits erreicht.
Entriegelungstaste drücken und
Schwenkarm in Position 6 bringen.
Schüssel einsetzen. Sockel der Schüssel
muss in Aussparung des Grundgerätes
stecken.
Je nach Verarbeitungsaufgabe Rührbesen,
Schlagbesen oder Knethaken bis zum
Einrasten in den Antrieb einstecken. Beim
Knethaken Teigabweiser drehen, bis der
Knethaken einrasten kann.
Die zu verarbeitenden Zutaten in die
Schüssel einfüllen.
Entriegelungstaste drücken und
Schwenkarm in Position 1 bringen.
Deckel aufsetzen.
Drehschalter auf gewünschte Stufe stellen.
6 Robert Bosch Hausgeräte GmbH
Page 7
Zutaten nachfüllen
de
Gerät am Drehschalter ausschalten.
Drehschalter auf
P
stellen und festhalten, bis
der Antrieb stehen bleibt.
Deckel abnehmen.
Entriegelungstaste drücken und
Schwenkarm in Position 7 bringen.
Zutaten einfüllen
oder
Zutaten durch die Nachfüllöffnung im Deckel
nachfüllen.
Nach der Arbeit
Gerät am Drehschalter ausschalten.
Drehschalter auf
P
stellen und festhalten, bis
der Antrieb stehen bleibt.
Netzstecker ziehen.
Deckel abnehmen.
Entriegelungstaste drücken und
Schwenkarm in Position 6 bringen.
Werkzeug aus dem Antrieb nehmen.
Schüssel entnehmen.
Alle Teile reinigen, siehe „Reinigen und
Pflegen“.
Mixer Bild
sЙкдЙнтмеЦлЦЙС~Ьк=ЗмкЕЬ=лЕЬ~кСЙ=
jЙллЙкLкзнбЙкЙеЗЙе=^енкбЙД>
kбЙ=бе=ЗЙе=~мСЦЙлЙнтнЙе=jбсЙк=ЦкЙбСЙе>=
jбсЙк=емк=ДЙб=pнбддлн~еЗ=ЗЙл=^енкбЙДЙл=
~ДеЙЬгЙеL~мСлЙнтЙе>=
aЙе=jбсЙк=емк=бг=тмл~ггЙеЦЙлЙнтнЙе=wмJ
лн~еЗ=меЗ=гбн=~мСЦЙлЙнтнЙг=aЙЕвЙд=ДЙнкЙбДЙеK
sÉêÄêΩЬмеЦлЦЙС~Ьк>
_Йбг=sЙк~кДЙбнЙе=озе=ЬЙб≈Йг=jбсЦмн=нкбнн=
a~гйС=ЗмкЕЬ=ЗЙе=qкбЕЬнЙк=бг=aЙЕвЙд=~млK=
j~сбг~д=MIR=iбнЙк=ЬЙб≈Й=зЗЙк=лЕЬ®мгЙеЗЙ=
cдΩллбЦвЙбн=ЙбеСΩääÉåK
^ЕЬнмеЦ>
jбсЙк=в~ее=ДЙлЕЬ®ЗбЦн=пЙкЗЙеK=hЙбеЙ=нбЙСJ
ЦЙСкзкЙеЙе=wмн~нЙе=E~млЦЙезггЙе=bблпΩкСЙдF=
оЙк~кДЙбнЙеK=jбсЙк=ебЕЬн=дЙЙк=ДЙнкЙбДЙеK
^ЕЬнмеЦ>
sЙк~кДЙбнЙе=озе=cдΩллбЦвЙбнЙе=бг=dд~лгбсЙк=
Eбг c~ЕЬЬ~еЗЙд=ЙкЬ®дндбЕЬFW=г~сбг~д=~мС=pнмСЙ PK=
j~сбг~д=MIR=iбнЙк=ЬЙб≈Й=зЗЙк=лЕЬ®мгЙеЗЙ=
cдΩллбЦвЙбн=ЙбеСΩääÉåK
Entriegelungstaste drücken und
Schwenkarm in Position 3 bringen.
Mixerantriebsschutzdeckel abnehmen.
Mixbecher aufsetzen (Markierung am Sockel
auf Markierung am Grundgerät) und gegen
den Uhrzeigersinn bis zum Anschlag drehen
(
Bild -4/5
Zutaten einfüllen.
).
Maximalmenge bei Kunststoffmixer, flüssig =
1 Liter, bei Glasmixer, flüssig = 0,75 Liter;
schäumende oder heiße Flüssigkeiten
maximal 0,5 Liter;
optimale Verarbeitungsmenge,
fest = 50 bis 100 Gramm;
Deckel aufsetzen und fest drücken.
Den Deckel während der Arbeit immer mit
einer Hand festhalten. Dabei nicht über die
Nachfüllöffnung greifen!
Drehschalter auf gewünschte Stufe stellen.
Zutaten nachfüllen Bild -6
Gerät am Drehschalter ausschalten.
Deckel abnehmen und Zutaten einfüllen
oder
Trichter herausnehmen und feste Zutaten
nach und nach in Nachfüllöffnung einfüllen
oder
flüssige Zutaten durch den Trichter einfüllen.
Nach der Arbeit
Gerät am Drehschalter ausschalten.
Netzstecker ziehen.
Mixer im Uhrzeigersinn drehen und
abnehmen.
Tipp:
Mixer am besten sofort nach Gebrauch
reinigen.
Reinigen und Pflegen
^ЕЬнмеЦ>
hЙбеЙ лЕЬЙмЙкеЗЙе=oЙбебЦмеЦлгбннЙд=оЙкпЙеЗЙеK=
lДЙкСд®ЕЬЙе=в∏ееЙе=ДЙлЕЬ®ЗбЦн=пЙкЗЙеK=
Grundgerät reinigen
pнкзглЕЬд~ЦЦЙС~Ьк>
dкмеЗЦЙк®н=ебЙг~дл=бе=t~ллЙк=н~мЕЬЙе=меЗ=
ебЙ=менЙк=СдбЙ≈ЙеЗЙл=t~ллЙк=Ь~днЙеK
Netzstecker ziehen.
Grundgerät feucht abwischen.
Bei Bedarf etwas Spülmittel benutzen.
Gerät anschließend trockenreiben.
Schüssel mit Zubehör reinigen
Alle Teile sind spülmaschinenfest.
Kunststoffteile in der Spülmaschine nicht
einklemmen, da Verformung möglich.
Robert Bosch Hausgeräte GmbH 7
Page 8
Mixer reinigen
de
sЙкдЙнтмеЦлЦЙС~Ьк=ЗмкЕЬ=лЕЬ~кСЙ=
jЙллЙк>
jбсЙкгЙллЙк=ебЕЬн=гбн=Ддз≈Éå=e®åÇÉå=
ÄÉêΩЬкЙеK=jбсЙк=в~ее=тмг=oЙбебЦЙе=
~млЙбе~еЗЙк=ЦЙезггЙе=пЙкЗЙеK
^ЕЬнмеЦ>
hЙбеЙ=лЕЬЙмЙкеЗЙе=oЙбебЦмеЦлгбннЙд=
оЙкпЙеЗЙеK=jЙллЙкЙбел~нт=блн=ебЕЬн=
лйΩдг~лЕЬбеЙеСЙлнK=jЙллЙкЙбел~нт=емк=менЙк=
СдбЙ≈ЙеЗЙг=t~ллЙк=кЙбебЦЙеK
Tipp:
Nach der Verarbeitung von Flüssigkeiten
reicht es oft, den Mixer zu reinigen, ohne ihn
auseinander zu nehmen. Dazu etwas Wasser
mit Spülmittel in den aufgesetzten Mixer geben.
Für wenige Sekunden den Mixer einschalten
(bei Geräten mit Momentschaltung auf Stufe M).
Spülwasser ausschütten und Mixer mit klarem
Wasser ausspülen.
Mixer zerlegen Bild
Sockel des Mixerbechers im Uhrzeigersinn
drehen und abnehmen.
Den Messereinsatz an den Flügeln gegen
den Uhrzeigersinn drehen.
Der Messereinsatz wird gelöst.
Messereinsatz entnehmen und den
Dichtungsring entfernen.
Mixer zusammensetzen Bild
sЙкдЙнтмеЦлЦЙС~Ьк>
jбсЙк=ебЙ=~мС=ЗЙг=dкмеЗЦЙк®н=
тмл~ггЙеД~мЙеK
Dichtungsring am Messereinsatz anbringen.
Messereinsatz von unten in den Mixerbecher
einsetzen.
Mit Hilfe des Sockels den Messereinsatz fest
schrauben.
Sockel des Mixerbechers gegen den
Uhrzeigersinn fest drehen.
Hilfe bei Störungen
Bei Störungen wenden Sie sich bitte an unseren
Kundendienst.
Anwendungsbeispiele
Schlagsahne
100 g–600 g
Sahne 1½ bis 4 Minuten auf Stufe 4
(je nach Menge und Eigenschaften der
Sahne) mit dem Schlagbesen verarbeiten.
Eiweiß
1 bis 8 Eiweiß
Eiweiß 4 bis 6 Minuten auf Stufe 4 mit
dem Schlagbesen verarbeiten.
Biskuitteig
dкмеЗкЙтЙйн
2 Eier
2–3 EL heißes Wasser
100 g Zucker
1 Päckchen Vanillezucker
70 g Mehl
70 g Stärkemehl evtl. Backpulver
Zutaten (außer Mehl und Stärkemehl)
ca. 4–6 Minuten auf Stufe 4 mit dem
Schlagbesen schaumig schlagen.
Drehschalter auf Stufe 2 stellen und das
gesiebte Mehl und Stärkemehl in ca. ½ bis
1 Minute löffelweise untermischen.
Höchstmenge:
Rührteig
dкмеЗкЙтЙйн
3–4 Eier
200–250 g Zucker
1 Prise Salz
1 Päckchen Vanillezucker oder Schale von
½Zitrone
200–250 g Butter (Raumtemperatur)
500 g Mehl
1 Päckchen Backpulver
1
/
l Milch
8
Alle Zutaten ca. ½ Minute auf Stufe 1, dann
ca. 3–4 Minuten auf Stufe 3 mit dem
Rührbesen verrühren.
Höchstmenge:
Mürbeteig
dкмеЗкЙтЙйн
125 g Butter (Raumtemperatur)
100–125 g Zucker
1 Ei
1 Prise Salz
etwas Zitronenschale oder Vanillezucker
250 g Mehl
evtl. Backpulver
2 x Grundrezept
1,5–2 x Grundrezept
8 Robert Bosch Hausgeräte GmbH
Page 9
Alle Zutaten ca. ½ Minute auf Stufe 1, dann
de
ca. 2–3 Minuten mit dem Rührbesen (Stufe 3)
oder Knethaken (Stufe 2) verarbeiten.
Höchstmenge:
2 x Grundrezept
Hefeteig
dкмеЗкЙтЙйн
500 g Mehl
1 Ei
80 g Fett (Raumtemperatur)
80 g Zucker
200–250 ml lauwarme Milch
25 g frische Hefe oder 1 Päckchen Trockenhefe
Schale von ½ Zitrone
1 Prise Salz
Alle Zutaten ca. ½ Minute auf Stufe 1,
dann ca. 3–6 Minuten auf Stufe 2 mit dem
Knethaken verarbeiten.
Höchstmenge:
1,5 x Grundrezept
Mayonnaise
2 Eier
2 TL Senf
¼lÖl
2 EL Zitronensaft oder Essig
1 Prise Salz
1 Prise Zucker
Zutaten müssen gleiche Temperatur haben.
Zutaten (außer Öl) einige Sekunden auf Stufe
2 im Mixer verarbeiten.
Mixer auf Stufe 4 schalten und das Öl lang-
sam durch den Trichter gießen und so lange
weiter mischen, bis die Mayonnaise emulgiert.
Zubehör/Sonderzubehör
Weiteres der Verpackung beigelegtes Zubehör
(siehe beigefügte Modellübersicht,
den separaten Bedienungsanleitungen
beschrieben.
Beigelegtes Zubehör/Sonderzubehör kann
auch einzeln (nach)gekauft werden.
Das Zubehör zur Maschine MUM 45.. eignet
sich auch für die Maschine MUM 44../46../48.. .
Bild
Kunststoff-Rührschüssel (MUZ4KR3)
In der Schüssel können bis zu 1 kg Mehl plus
Zutaten verarbeitet werden.
Edelstahl-Rührschüssel (MUZ4ER2)
In der Schüssel können bis zu 1 kg Mehl plus
Zutaten verarbeitet werden.
Bild
) ist in
Mixer-Aufsatz Kunststoff (MUZ4MX2)
Zum Mixen von Getränken, zum Pürieren von
Obst und Gemüse, zur Zubereitung von
Mayonnaise, zum Zerkleinern von Obst und
Nüssen, zum Crushen von Eiswürfeln.
Mixer-Aufsatz Glas (MUZ4MX3)
Zum Mixen von Getränken, zum Pürieren von
Obst und Gemüse, zur Zubereitung von
Mayonnaise, zum Zerkleinern von Obst und
Nüssen, zum Crushen von Eiswürfeln.
Multimixer (MUZ4MM3)
Zum Hacken von Kräutern, Gemüse, Äpfeln und
Fleisch, zum Raspeln von Karotten, Rettich und
Käse, zum Reiben von Nüssen und gekühlter
Schokolade.
Durchlaufschnitzler (MUZ4DS3)
Zum Schneiden von Gurken, Kohl, Kohlrabi,
Rettich; zum Raspeln von Karotten, Äpfeln und
Sellerie, Rotkraut, Käse und Nüssen; zum
Reiben von Hartkäse, Schokolade und Nüssen.
Pommes frites-Scheibe (MUZ45PS1)
Für den Durchlaufschnitzler MUZ4DS3.
Zum Schneiden roher Kartoffeln für Pommes
frites.
Asia-Gemüse-Scheibe (MUZ45AG1)
Für den Durchlaufschnitzler MUZ4DS3.
Schneidet Obst und Gemüse in feine Streifen für
asiatische Gemüsegerichte.
Reibscheibe grob (MUZ45RS1)
Für den Durchlaufschnitzler MUZ4DS3.
Zum Reiben roher Kartoffeln z. B. für
Reibekuchen oder Klöße.
Kartoffelpuffer-Scheibe (MUZ45KP1)
Für den Durchlaufschnitzler MUZ4DS3.
Zum Reiben roher Kartoffeln für Rösti und
Kartoffelpuffer, zum Schneiden von Obst und
Gemüse in dicke Scheiben.
Zitruspresse (MUZ4ZP1)
Zum Auspressen von Orangen, Zitronen und
Grapefruit.
Fleischwolf (MUZ4FW3)
Zum Zerkleinern von frischem Fleisch für Tartar
oder Hackbraten.
Lochscheibensatz (MUZ45LS1)
Für den Fleischwolf MUZ4FW3.
Fein (3 mm) für Pasteten und Aufstriche, grob
(6 mm) für Bratwürste und Speck.
Robert Bosch Hausgeräte GmbH 9
Page 10

Spritzgebäckvorsatz (MUZ45SV1)
de
Änderungen vorbehalten.
Für den Fleischwolf MUZ4FW3.
Mit Metallschablone für 4 verschiedene
Gebäckformen.
Reibevorsatz (MUZ45RV1)
Für den Fleischwolf MUZ4FW3.
Zum Reiben von Nüssen, Mandeln, Schokolade
und getrockneten Brötchen.
Fruchtpressenvorsatz (MUZ45FV1)
Für den Fleischwolf MUZ4FW3.
Zum Pressen von Beerenobst (außer
Himbeeren), Tomaten und Hagebutten zu Mus.
Gleichzeitig werden z. B. Johannisbeeren
automatisch entstielt und entkernt.
Zubehörträger (MUZ4ZT1)
Zur Aufbewahrung der Zubehörteile wie Knethaken, Schlagbesen, Rührbesen, Schneid-,
Raspel- und Reibscheibe.
Getreidemühle mit Kegelmahlwerk aus
Stahl (MUZ4GM3)
Für alle Getreidesorten außer Mais; auch für
Ölsaaten, getrocknete Pilze und Kräuter.
Eisbereiter (MUZ4EB1)
Zur Zubereitung von bis zu 550 g Eis pro
Arbeitsgang und Behälter.
Entsorgung
Dieses Gerät ist entsprechend der
europäischen Richtlinie 2012/19/EG
über Elektro- und Elektronikaltgeräte
(waste electrical and electronic
equipment – WEEE) gekennzeichnet.
Die Richtlinie gibt den Rahmen für eine EU-weit
gültige Rücknahme und Verwertung der
Altgeräte vor. Über aktuelle Entsorgungswege
informieren Sie sich bitte bei Ihrem Fachhändler
oder bei Ihrer Gemeindeverwaltung.
Garantiebedingungen
Für dieses Gerät gelten die von unserer jeweils
zuständigen Landesvertretung herausgegebenen Garantiebedingungen, in dem das Gerät
gekauft wurde. Sie können die Garantiebedingungen jederzeit über Ihren Fachhändler, bei
dem Sie das Gerät gekauft haben, oder direkt
bei unserer Landesvertretung anfordern.
Die Garantiebedingungen für Deutschland und
die Adressen finden Sie auf der Heftrückseite.
Darüber hinaus sind die Garantiebedingungen
auch im Internet unter der benannten
Webadresse hinterlegt. Für die Inanspruchnahme von Garantieleistungen ist in jedem
Fall die Vorlage des Kaufbeleges erforderlich.
10 Robert Bosch Hausgeräte GmbH
Page 11

en
`зеЦк~нмд~нбзел=зе=нЬЙ=ймкЕЬ~лЙ=зС=узмк=
еЙп=_lp`e=~ййдб~еЕЙK
fе=ЗзбеЦ=лзI=узм=Ь~оЙ=зйнЙЗ=Сзк=~=гзЗЙкеI=
ЬбЦЬJим~дбну=ЗзгЙлнбЕ=~ййдб~еЕЙK
vзм=Е~е=СбеЗ=СмкнЬЙк=беСзкг~нбзе=~Дзмн=змк=
йкзЗмЕнл=зе=змк=пЙД=й~ЦЙK
Contents
For your safety . . . . . . . . . . . . . . . . . . . . . 11
Overview . . . . . . . . . . . . . . . . . . . . . . . . . . 13
Operation . . . . . . . . . . . . . . . . . . . . . . . . . 14
Cleaning and servicing . . . . . . . . . . . . . . . 15
Troubleshooting . . . . . . . . . . . . . . . . . . . . 16
Application examples . . . . . . . . . . . . . . . . 16
Standard/optional accessories . . . . . . . . . 17
Disposal . . . . . . . . . . . . . . . . . . . . . . . . . . 18
Warranty conditions . . . . . . . . . . . . . . . . . 18
For your safety
Before use, read these instructions carefully in order to become
familiar with important safety and operating instructions for this
appliance.
If the instructions for correct use of the appliance are not observed,
the manufacturer’s liability for any resulting damage will be excluded.
This appliance is designed for processing normal household quantities in
the home or similar quantities in non-industrial applications.
Non-industrial applications include e.g. use in employee kitchens in shops,
offices, agricultural and other commercial businesses, as well as use by
guests in boarding houses, small hotels and similar dwellings.
Use the appliance for processing normal quantities of food for domestic
use. Do not exceed permitted maximum quantities (see “Application
examples”).
This appliance is suitable for mixing, kneading and beating food. It must not
be used for processing other objects or substances. Other applications are
possible if the accessories approved by the manufacturer are used.
Use the appliance with original accessories only. When using the
accessories, follow the enclosed operating instructions.
Please keep the operating instructions in a safe place. If passing on the
appliance to a third party, always include the operating instructions.
, General safety instructions
Electric shock risk
The appliance must not be used by children.
The appliance and its power cord must be kept away from children.
Appliances can be used by persons with reduced physical, sensory or
mental capabilities or lack of experience and knowledge if they have
been given supervision or instruction concerning use of the appliance in
a safe way and if they understand the hazards involved.
Children shall not play with the appliance.
Robert Bosch Hausgeräte GmbH 11
Page 12

Connect and operate the appliance only in accordance with the
en
specifications on the rating plate. Do not use the appliance if the power
cord and/or appliance are damaged.
Always disconnect the appliance from the supply if it is left unattended
and before assembling, disassembling or cleaning.
Do not place the power cord over sharp edges or hot surfaces.
To prevent injury, a damaged power cord must be replaced by the
manufacturer or his customer service or a similarly qualified person.
Only our customer service may repair the appliance.
, Safety instructions for this appliance
Risk of injury
Risk of electric shock!
Do not insert mains plug until all preparations for working with the appliance
are complete. Never immerse the base unit in liquid or hold under running
water. Do not use a steam cleaner.
Do not adjust the swivel arm while the appliance is switched on.
Wait until the drive has come to a standstill.
Do not change tool/accessory until the drive is at a standstill – when the
appliance is switched off, the drive continues running briefly.
Use only the rotary switch to switch the appliance on or off.
When the appliance is not in use, pull out the mains plug.
Before eliminating a fault, pull out the mains plug.
The appliance restarts following a power interruption.
Risk of injury from the rotating tools!
Keep hands clear of rotating parts. While the appliance is operating, keep
fingers clear of the mixing bowl.
Do not change tools until the drive has come to a standstill – when the
appliance is switched off, the drive continues running briefly.
The appliance may only be operated when the unused drives have been
safeguarded with the drive covers (4, 7).
Risk of injury from sharp blades/rotating drive!
Never place fingers in the attached blender!
Never assemble blender on the base unit. Do not remove/attach the
blender until the drive is at a standstill!
Operate the assembled blender only and with the lid attached.
Do not touch blender blades with bare hands.
Risk of scalding!
If processing hot liquids, steam escapes through the funnel in the lid.
Add a max. 0.5 litres of hot or frothing liquid.
Important!
Use only one tool or accessory at any one time.
12 Robert Bosch Hausgeräte GmbH
Page 13
The operating instructions describe several
en
models, see also overview of models (Fig. ).
The appliance requires no maintenance.
Overview
Please fold out the illustrated
pages. Fig.
Base unit
1
Release button
2
Swivel arm
(see “Operating positions”)
Rotary switch
3
0/off = Stop
/
P
Hold rotary switch until the drive stops; tool
is in the swivel position. If the drive does not
move, the swivel position has already been
reached.
Settings 1–4 = Operating speed
Setting 1 = Minimum speed – slow
Setting 4 = Maximum speed – fast
If the power is interrupted, the appliance
remains switched on and restarts when
the power is restored.
4
Drive cover
To remove the drive cover, rotate until
the locking feature has been released.
5
Drive for
–
continuous-feed shredder
citrus press *
–
–
grain mill *
When not in use, attach the drive cover.
Drive for
6
–
tools (stirrer, whisk, kneading hook)
–
stirring tool of the ice-cream maker *
–
folded down or up for mincer *
7
Blender drive cover
8
Drive for
–
blender
–
multi-blender
When not in use, attach the blender drive
cover.
Cord store (
9
MUM 44..: Stow the cord
MUM 46../48..: Stow the cord in the cord
store
Bowl with accessories
10
Mixing bowl
11
Lid
= Parking circuit
Fig.
)
*
Tools
Stirrer
12
13
Whisk
14
Kneading hook with dough deflector
Blender
Base
15
16
Blade insert
17
Sealing ring
18
Blender jug
19
Lid
20
Funnel
* If an accessory is not included in the product
package, it can be purchased via the trade
or customer service.
Operating positions
^ннЙенбзе>
_ЙСзкЙ=зйЙк~нбеЦ=нЬЙ=~ййдб~еЕЙI=~нн~ЕЬ=нЬЙ=нзздL
~ЕЕЙллзку=нз=нЬЙ=ЕзккЙЕн=ЗкбоЙ=~еЗ=бе=нЬЙ=ЕзккЙЕн=
йзлбнбзе=~еЗ=йд~ЕЙ=бе=нЬЙ=зйЙк~нб еЦ=йзл бнбзе=
~ЕЕзкЗбеЦ=нз=нЬбл=н~ДдЙK
qЬЙ=лпбоЙд=~кг=гмлн=ДЙ=ЙеЦ~ЦЙЗ=бе=ЙоЙку=
зйЙк~нбеЦ=йзлбнбзеK
Setting the operating position Fig.
Press the Release button and move
the swivel arm.
Move the swivel arm until it engages
in the required position.
Position
1
2
3
4
5
6
7
Insert/remove whisk, stirrer
or kneading hook
Add large quantities
of ingredients
Robert Bosch Hausgeräte GmbH 13
Page 14
Operation
en
oблв=зС=беамку>
aз=езн=белЙкн=г~бел=йдмЦ=менбд=~дд=йкЙй~к~нбзел=
Сзк=пзквбеЦ=пбнЬ=нЬЙ=~ййдб~еЕЙ=~кЙ=ЕзгйдЙнЙK
^ннЙенбзе>
aз=езн=зйЙк~нЙ=нЬЙ=~ййдб~еЕЙ=пбнЬзмн=~е=
~ЕЕЙллзкуLнззд=бе=нЬЙ=зйЙк~нбеЦ=йзлбнбзеK
aз=езн=зйЙк~нЙ=нЬЙ=~ййдб~еЕЙ=ЙгйнуK=
aз=езн=ЙсйзлЙ=~ййдб~еЕЙ=зк=~ЕЕЙллзкбЙл=нз=ЬЙ~н=
лзмкЕЙлK=m~кнл=~кЙ=езн=гбЕкзп~оЙJл~ СЙK
Before operating the appliance and
accessories for the first time, clean
thoroughly; see “Cleaning and servicing”.
Preparation
Place the base unit on a smooth, clean
surface.
Unwind/pull out the cord (
Insert the mains plug.
Stirrer, whisk and kneading
hook Fig.
Stirrer (a)
for stirring dough, e.g. cake mixture
Whisk (b)
for whisking egg whites, cream and light dough,
e.g. sponge mixture
Kneading hook (c) with dough deflector (d)
for kneading heavy dough and mixing-in
ingredients that ought not be cut
(e.g. raisins and chocolate chips)
oблв=зС=беамку=Скзг=нЬЙ=кзн~нбеЦ=
нзздл>
tЬбдЙ=нЬЙ=~ййдб~еЕЙ=бл=зйЙк~нбеЦI=вЙЙй=СбеЦЙкл=
ЕдЙ~к=зС=нЬЙ=гбсбеЦ=ДзпдK
aз=езн=ЕЬ~еЦЙ=нзздл=менбд=нЬЙ=ЗкбоЙ=Ь~л=ЕзгЙ=
нз=~=лн~еЗлнбдд=У=пЬЙе=нЬЙ=~ййдб~еЕЙ=бл=
лпбнЕЬЙЗ=зССI=нЬЙ=ЗкбоЙ=ЕзенбемЙл=кмеебеЦ=
ДкбЙСдуK
qЬЙ=~ййдб~еЕЙ= г~у=зеду=ДЙ=зйЙк~нЙЗ=пЬЙе=нЬЙ=
мемлЙЗ=ЗкбоЙл=Ь~оЙ=ДЙЙе=л~СЙЦм~кЗЙЗ=пбнЬ=
нЬЙ=ЗкбоЙ=ЕзоЙклK
Set rotary switch to
the drive stops.
Note:
If the drive does not move, the swivel position
has already been reached.
Fig.
).
P
and hold in place until
Press the Release button and move
the swivel arm to position 6.
Insert the bowl. The base of the mixing bowl
must be inserted into the recess of the base
unit.
Depending on the processing task, insert the
stirrer, whisk or kneading hook until it locks
into position. If using the kneading hook,
rotate the dough deflector until the kneading
hook can lock into position.
Put the ingredients to be processed into
the bowl.
Press the Release button and move
the swivel arm to position 1.
Attach the cover.
Set the rotary switch to the desired setting.
Adding more ingredients
Switch off the appliance with the rotary
switch.
Set rotary switch to
P
and hold in place until
the drive stops.
Remove lid.
Press the Release button and move
the swivel arm to position 7.
Add ingredients
or
add more ingredients through the feed tube
in the cover.
After using the appliance
Switch off the appliance with the rotary
switch.
Set rotary switch to
P
and hold in place until
the drive stops.
Remove mains plug.
Remove lid.
Press the Release button and move
the swivel arm to position 6.
Take the tool out of the drive.
Remove the bowl.
Clean all parts, see “Cleaning and servicing”.
14 Robert Bosch Hausgeräte GmbH
Page 15
Blender Fig.
en
oблв=зС=беамку=Скзг=лЬ~кй=Дд~ЗЙлL
кзн~нбеЦ=ЗкбоЙ>
kЙоЙк=йд~ЕЙ=СбеЦЙкл=бе=нЬЙ=~нн~ЕЬЙЗ=ДдЙеЗЙк>=
aз=езн=кЙгзоЙL~нн~ЕЬ=нЬЙ=ДдЙеЗЙк=менбд=нЬЙ=
ЗкбоЙ=бл=~н=~=лн~еЗлнбдд>=
lйЙк~нЙ=нЬЙ=~ллЙгДдЙЗ=ДдЙеЗЙк=зеду=~еЗ=пбнЬ=
нЬЙ=дбЗ=~нн~ЕЬЙЗK
oблв=зС=лЕ~дЗбеЦ>
fС=йкзЕЙллбеЦ=Ьзн=дбимбЗлI=лнЙ~г=ЙлЕ~йЙл=
нЬкзмЦЬ=нЬЙ=СмееЙд=бе=нЬЙ=дбЗK=
^ЗЗ=~=г~сK=MKR дбнкЙл=зС=Ьзн=зк=СкзнЬбеЦ=дбимбЗK
t~кебеЦ>
_дЙеЗЙк=г~у=ДЙ=З~г~ЦЙЗK=
aз=езн=йкзЕЙлл=ЗЙЙйJСкзтЙе=беЦкЙЗбЙенл=
EЙсЕЙйн бЕЙ=ЕмДЙлFK=aз=езн=зйЙк~нЙ=пЬЙе=ЙгйнуK
t~кебеЦ>
mкзЕЙллбеЦ=дбимбЗл=бе=нЬЙ=Цд~лл=ДдЙеЗЙкW=
г~сбгмг=лЙннбеЦ=PK=^ЗЗ= ~= г~сK=MKR=дбнкЙл=зС=Ьзн=
зк=СкзнЬбеЦ=дбимбЗK
Press the Release button and move
the swivel arm to position 3.
Remove the blender drive cover.
Attach the blender jug (mark on the base
of the blender jug on the mark on the base
unit) and rotate as far as possible in an
anti-clockwise direction (
Add ingredients.
Maximum capacity of liquid for plastic
blender = 1 litre, for glass blender = 0.75
litres, frothing or hot liquid maximum 0.5 litres
Optimal processing capacity – solids
= 50–100 g.
Attach lid and press firmly.
While working, always hold the lid firmly with
one hand. However, do not place hand over
the refill opening!
Set the rotary switch to the desired setting.
Adding more ingredients Fig. -6
Switch off the appliance with the rotary
switch.
Remove the cover and add ingredients
or
remove the funnel and gradually add solid
ingredients through the feed tube
or
pour liquid through the funnel.
Fig. -4/5
).
After using the appliance
Switch off the appliance with the rotary
switch.
Remove mains plug.
Rotate the blender in a clockwise direction
and remove.
Tip:
It is recommended to clean the blender
immediately after use.
Cleaning and servicing
^ннЙенбзе>
aз=klq=млЙ=~Дк~лбоЙ=ЕдЙ~ебеЦ=~ЦЙенлK=
pмкС~ЕЙл г~у=ДЙ=З~г~ЦЙЗK=
Cleaning the base unit
oблв=зС=ЙдЙЕнкбЕ=лЬзЕв>
kЙоЙк=бггЙклЙ=нЬЙ=Д~лЙ=мебн= бе= п~нЙк=з к=йд~ЕЙ=
меЗЙк=кмеебеЦ=п~нЙкK
Remove mains plug.
Wipe the base unit with a damp cloth.
If required, use a little detergent.
Then dry the base unit.
Cleaning the bowl and accessories
All parts are dishwasher-safe.
Do not wedge plastic parts in the dishwasher
as they could warp.
Cleaning the blender
oблв=зС=беамку=Скзг=лЬ~кй=Дд~ЗЙл>
aз=езн=нзмЕЬ=ДдЙеЗЙк=Дд~ЗЙл=пбнЬ= Д~кЙ= Ь~еЗлK=
qЬЙ=ДдЙеЗЙк=Е~е=ДЙ=Збл~ллЙгДдЙЗ=Сзк=
ЕдЙ~ебеЦK
t~кебеЦ>
aз=klq=млЙ=~Дк~лбоЙ=ЕдЙ~ебеЦ=~ЦЙенлK=
qЬЙ Дд~ЗЙ=белЙкн=бл=езн=ЗблЬп~лЬЙкJл~СЙK=
`дЙ~е нЬЙ=Дд~ЗЙ=белЙкн=меЗЙк=кмеебеЦ= п~нЙк=зедуK
Tip:
After processing liquids, it is often sufficient
to clean the blender without disassembling it.
Pour a little water and washing-up liquid into
the attached blender. Switch on the blender
for several seconds (if the appliance features
quick-action operation, select setting M).
Pour out the water and rinse out the blender
with clear water.
Robert Bosch Hausgeräte GmbH 15
Page 16
Taking the blender apart Fig.
en
Rotate the base of the blender jug
in a clockwise direction and remove.
Upon the flanks, rotate the blade insert
in an anti-clockwise direction.
The blade insert is released.
Take blade insert out and remove sealing
ring.
Putting the blender together Fig.
oблв=зС=беамку>
kЙоЙк=~ллЙгДдЙ=ДдЙеЗЙк=зе=нЬЙ=Д~лЙ=мебнK
Apply sealing ring on blade insert.
Insert blade insert from below into blender
jug.
Tighten the blade insert with the aid
of the blender jug base.
Tighten the base of the blender jug
in an anti-clockwise direction.
Troubleshooting
If the appliance malfunctions, please consult
our customer service.
Application examples
Whipped cream
100 g–600 g
Whip cream with the whisk for 1½
to 4 minutes at setting 4 (depending
on the quantity and properties of the cream).
Egg white
1 to 8 egg whites
Beat egg white with the whisk for 4 to
6 minutes at setting 4.
Sponge mixture
_~лбЕ=кЙЕбйЙ
2 eggs
2–3 tbs. hot water
100 g sugar
1 packet of vanilla sugar
70 g flour
70 g cornflour baking powder (if required)
Beat the ingredients (except flour and
cornflour) with the whisk for approx.
4–6 minutes at setting 4 until frothy.
Rotate switch to setting 2 and spoon in the
sifted flour and cornflour within approx.
½ to 1 minute.
Maximum quantity:
2 x basic recipe
Cake mixture
_~лбЕ=кЙЕбйЙ
3–4 eggs
200–250 g sugar
1 pinch of salt
1 packet of vanilla sugar or peel from ½ lemon
200–250 g butter (room temperature)
500 g flour
1 packet of baking powder
1
/
l milk
8
Mix all ingredients with the stirrer for approx.
½ minute at setting 1, then for approx.
3–4 minutes at setting 3.
Maximum quantity:
1.5–2 x basic recipe
Short pastry
_~лбЕ=кЙЕбйЙ
125 g butter (room temperature)
100–125 g sugar
1 egg
1 pinch of salt
A little lemon peel or vanilla sugar
250 g flour
Baking powder if required
Process all ingredients for approx. ½ minute
at setting 1, then for approx. 2–3 minutes
with the stirrer (setting 3) or kneading hook
(setting 2).
Maximum quantity:
2 x basic recipe
Yeast dough
_~лбЕ=кЙЕбйЙ
500 g flour
1 egg
80 g fat (room temperature)
80 g sugar
200–250 ml lukewarm milk
25 g fresh yeast or 1 packet of dried yeast
Peel of ½ lemon
1 pinch of salt
Mix all ingredients with the kneading hook
for approx. ½ minute at setting 1, then
for approx. 3–6 minutes at setting 2.
Maximum quantity:
1.5 x basic recipe
Mayonnaise
2 eggs
2 tsp. mustard
¼loil
2 tbs. lemon juice or vinegar
1 pinch of salt
1 pinch of sugar
Ingredients must be at the same temperature.
16 Robert Bosch Hausgeräte GmbH
Page 17

Process the ingredients (except the oil) in the
en
blender for several seconds at setting 2.
Switch the blender to setting 4 and slowly
pour the oil through the funnel and mix until
the mayonnaise emulsifies.
Standard/optional accessories
Other accessories enclosed with the packaging
(see enclosed overview of models,
described in the separate operating instructions.
Enclosed accessories/optional accessories can
also be purchased separately.
The accessories for the MUM 45.. appliance
are also suitable for the MUM 44../46../48..
appliances.
Fig.
Plastic mixing bowl (MUZ4KR3)
Up to 1 kg of flour plus ingredients can
be processed in the bowl.
Stainless steel stirring bowl
(MUZ4ER2)
Up to 1 kg of flour plus ingredients can
be processed in the bowl.
Plastic blender attachment
(MUZ4MX2)
For blending drinks, for pureeing fruit and
vegetables, for preparing mayonnaise,
for cutting fruit, nuts, for crushing ice cubes.
Glass blender attachment (MUZ4MX3)
For blending drinks, for pureeing fruit and
vegetables, for preparing mayonnaise,
for cutting fruit, nuts, for crushing ice cubes.
Mini processor (MUZ4MM3)
For chopping herbs, vegetables, apples and
meat, for shredding carrots, radishes and
cheese, for grating nuts and cooled chocolate.
Continuous-feed shredder (MUZ4DS3)
For slicing cucumbers, cabbage, kohlrabi,
radish; for shredding carrots, apples and celery,
red cabbage, cheese and nuts; for grating hard
cheese, chocolate and nuts.
Chipper disc (MUZ45PS1)
For the continuous-feed shredder MUZ4DS3.
For slicing raw potatoes for chips.
Asiatic vegetables disc (MUZ45AG1)
For the continuous-feed shredder MUZ4DS3.
Slices fruit and vegetables into fine strips
for Asian vegetable dishes.
Fig.
) are
Grating disc coarse (MUZ45RS1)
For the continuous-feed shredder MUZ4DS3.
For grating raw potatoes, e.g. for potato
pancakes or dumplings.
Potato fritter disc (MUZ45KP1)
For the continuous-feed shredder MUZ4DS3.
For grating raw potatoes for rostis and potato
fritters, for cutting fruit and vegetables into thick
slices.
Citrus press (MUZ4ZP1)
For squeezing oranges, lemons and grapefruits.
Mincer (MUZ4FW3)
For cutting fresh meat for steak tartare
or meat loaf.
Perforated disc set (MUZ45LS1)
For the mincer MUZ4FW3.
Fine disc (3 mm) for pasties and spreads, coarse
disc (6 mm) for sausages and bacon.
Viennese whirl attachment
(MUZ45SV1)
For the mincer MUZ4FW3.
With metal template for 4 different pastry
moulds.
Grater attachment (MUZ45RV1)
For the mincer MUZ4FW3.
For grating nuts, almonds, chocolate and dried
bread rolls.
Juicer attachment (MUZ45FV1)
For the mincer MUZ4FW3.
For pressing soft fruit, (except raspberries),
tomatoes and rose hips, to a pulp.
At the same time e.g. currants are automatically
stemmed and pitted.
Accessories holder (MUZ4ZT1)
For the storage of accessories such as kneading
hook, whisk, stirrer, slicing, shredding and
grating disc.
Mill with conical grinder made of steel
(MUZ4GM3)
For all grain types except maize, also oil seeds,
dried mushrooms and herbs.
Ice-cream maker (MUZ4EB1)
For the preparation of up to 550 g of ice cream
per cycle and container.
Robert Bosch Hausgeräte GmbH 17
Page 18

Disposal
en
Subject to change without notice.
This appliance has been identified in
accordance with the European
directive 2012/19/EG on Waste
Electrical and Electronic Equipment –
WEEE.
The Directive paves the way for effective
EU-wide withdrawal and utilization of waste
appliances.
Please ask your dealer or inquire at your local
authority about current means of disposal.
Warranty conditions
The guarantee conditions for this appliance
are as defined by our representative in the
country in which it is sold. Details regarding
these conditions can be obtained from the
dealer from whom the appliance was
purchased.
The bill of sale or receipt must be produced
when making any claim under the terms of this
guarantee.
18 Robert Bosch Hausgeräte GmbH
Page 19

fr
sзмл=оЙеЙт=ЗD~ЕЬЙнЙк=ЕЙ=езмоЙ д=~йй~кЙбд =
_lp`e=Йн=езмл=озмл=Йе=С¨дбЕбнзел=
ЕзкЗб~дЙгЙенK
sзмл=оЙеЙт=~белб=ЗDзйнЙк=йзмк=ме=~йй~кЙбд=
¨дЙЕнкзг¨е~ЦЙк=гзЗЙкеЙ=Йн=ЗЙ=Ь~мнЙ=
им~дбн¨K
pмк=езнкЙ=лбнЙ=tЙДI=озмл=нкзмоЙкЙт=ЗЙл=
беСзкг~нбзел=~о~еЕ¨Йл=лмк=езл=йкзЗмбнлK
Sommaire
Pour votre sécurité . . . . . . . . . . . . . . . . . . 19
Vue d’ensemble . . . . . . . . . . . . . . . . . . . . 21
Utilisation . . . . . . . . . . . . . . . . . . . . . . . . . 22
Nettoyage et entretien . . . . . . . . . . . . . . . . 24
Dérangements et remèdes . . . . . . . . . . . . 24
Exemples d’utilisation . . . . . . . . . . . . . . . . 24
Accessoires d’origine/
Accessoires en option . . . . . . . . . . . . . . . . 25
Mise au rebut . . . . . . . . . . . . . . . . . . . . . . 27
Conditions de garantie . . . . . . . . . . . . . . . 27
Pour votre sécurité
Veuillez lire la présente notice attentivement avant utilisation pour
connaître les consignes de sécurité et d’utilisation importantes
visant cet appareil.
Le non-respect des instructions permettant d’utiliser correctement
l’appareil dégage le fabricant de toute responsabilité envers les
dommages qui pourraient en résulter.
Cet appareil est destiné à la préparation de quantités habituellement
nécessaires dans un foyer, ou dans des applications non professionnelles
similaires à celles d'un foyer. Les applications similaires à celles d'un foyer
comprennent par exemple l'utilisation dans les coins-cuisine du personnel
de magasins, de bureaux, d'entreprises agricoles et autres entreprises
commerciales et industrielles, ainsi que l'utilisation par les clients de
pensions, petits hôtels et immeubles d'habitation similaire. Utilisez cet
appareil uniquement pour des quantités de préparations culinaires
courantes et pour des durées de service normales. Ne dépassez pas les
quantités maximales admissibles (voir « Exemples d’utilisation ») !
Cet appareil sert à mélanger, pétrir et fouetter les produits alimentaires.
Il ne doit pas servir à transformer d’autres objets ou substances.
D’autres applications sont possible à condition d’utiliser les accessoires
homologués par le fabricant.
N’utilisez l’appareil qu’avec des accessoires d’origine. Lorsque vous
utilisez les accessoires, respectez les notices d’utilisation ci-jointes.
Rangez soigneusement la notice d’instructions. Si vous remettez l’appareil
à un tiers, joignez sa notice d’utilisation.
, Consignes générales de sécurité
Risque d’électrocution
L’utilisation de l’appareil par les enfants est interdite.
Des enfants, éloignez l’appareil et son cordon de raccordement.
Robert Bosch Hausgeräte GmbH 19
Page 20

Les personnes souffrant d’un handicap physique, sensoriel ou mental ou
fr
ne détenant pas l’expérience et/ou les connaissances nécessaires
pourront utiliser les appareils à condition de le faire sous surveillance, ou
que son utilisation sûre leur ait été enseignée et qu'elles aient compris
les dangers qui en émanent.
Ne permettez jamais aux enfants de jouer avec l’appareil.
Ne branchez et faites marcher l’appareil que conformément aux
indications figurant sur la plaque signalétique. N’utilisez l’appareil que si
son cordon d’alimentation et l’appareil lui-même ne présentent aucun
dommage.
Débranchez toujours l’appareil du secteur s’il doit se trouver sans
surveillance, avant de l’assembler, de le démonter ou de le nettoyer.
Veillez à ce que le cordon de branchement ne frotte pas sur des arêtes
vives ou des surfaces très chaudes. Afin d’écarter tout danger, seul le
fabricant ou son service après-vente ou une personne détenant une
qualification équivalente est habilité à remplacer un cordon de
branchement endommagé.
Les réparations sur l’appareil sont réservées à notre service après-vente.
, Consignes de sécurité pour cet appareil
Risque de blessure
Risque d’électrocution !
Ne branchez la fiche mâle dans la prise de courant qu’une fois tous les
préparatifs sur l’appareil achevés.
Ne plongez jamais l’appareil de base dans l’eau, ne le maintenez jamais
sous l’eau du robinet. Ne le nettoyez jamais avec un nettoyeur à vapeur.
Ne déplacez pas le bras pivotant lorsque l’appareil est allumé. Attendez
jusqu’à l’arrêt complet de l’entraînement.
Ne changez l’accessoire qu’après que le mécanisme d’entraînement se
soit immobilisé ; il continue de tourner quelques instants après avoir éteint
l'appareil.
Allumez et éteignez l’appareil uniquement par le sélecteur rotatif.
Si l’appareil ne sert pas, débranchez sa fiche mâle de la prise de courant.
Avant de supprimer tout dérangement, débranchez la fiche mâle de la prise
à courant.
Après une coupure de courant, l’appareil redémarre.
Risque de blessures avec les accessoires en rotation !
Ne touchez pas les pièces en rotation. Pendant le fonctionnement,
n’introduisez jamais les doigts dans le bol mélangeur.
Ne changez les accessoires qu’une fois l‘entraînement à l‘arrêt – une fois
éteint, l’appareil continue de fonctionner quelques secondes.
Utilisez l’appareil uniquement si les couvercles protègent (4, 7) les
entraînements qui ne servent pas.
20 Robert Bosch Hausgeräte GmbH
Page 21

Risque de blessures avec les lames tranchantes / l’entraînement en
fr
rotation !
N’introduisez jamais les doigts dans le mixeur en place ! Ne retirez / posez
le mixeur qu’après avoir arrêté l’entraînement ! N’utilisez le mixeur qu’une
fois assemblé et avec son couvercle en place.
Ne touchez pas les lames du mixeur avec les mains nues.
Risque de brûlure !
Lorsque vous traitez des aliments mélangés très chauds, de la vapeur
traverse l’entonnoir ménagé dans le couvercle. Versez au maximum
0,5 litre de liquide très chaud ou moussant.
Important !
N’utilisez qu’un outil ou accessoire à la fois.
La notice d’utilisation vaut pour différents
modèles (voir également la vue d’ensemble des
modèles, Figure ). L’appareil ne nécessite
aucun entretien.
Vue d’ensemble
Veuillez déplier les
volets illustrés. Figure
Appareil de base
1
Touche de déverrouillage
2
Bras pivotant
(voir « Positions de travail »)
3
Interrupteur rotatif
0/off = Stop
/
P
l’interrupteur dans cette position jusqu’à
ce que l’entraînement s’immobilise ;
l’accessoire se trouve en position de
basculement. Si l’entraînement ne bouge
pas, cela signifie que l’accessoire se trouve
déjà dans cette position.
Positions 1–4 = Vitesse de travail
Position 1 = Vitesse de rotation la plus
Position 4 = Vitesse de rotation la plus
Si une coupure de courant se produit,
l’appareil reste en position allumée et
redémarrera dès le retour du courant.
4
Couvercle protégeant le mécanisme
d’entraînement
Pour enlever le couvercle protégeant
l’entraînement, tournez-le jusqu’à ce qu’il
se déverrouille.
= Arrêt momentané
basse – Marche lente
élevée – Marche rapide
Entraînement pour
5
–
accessoire râpeur/éminceur
–
presse-agrumes *
–
moulin à céréales *
Lorsque vous n’utilisez pas l’entraînement,
protégez-le avec son couvercle.
6
Entraînement pour
–
les accessoires (fouet mélangeur,
fouet batteur, crochet pétrisseur)
–
accessoire mélangeur
de la sorbetière *
–
basculé vers le bas ou le haut, pour
hachoir à viande *
7
Couvercle protégeant l’entraînement
du mixeur
8
Entraînement pour
–
mixeur
–
multimixeur
Lorsque vous n’utilisez pas l’entraînement,
protégez-le avec son couvercle.
9
Rangement du cordon (
MUM 44..: Enroulez le câble
MUM 46../48..: Placez le cordon
d’alimentation dans son rangement
Bol mélangeur avec accessoires
10
Bol mélangeur
11
Couvercle
Accessoires
Fouet mélangeur
12
13
Fouet batteur
14
Crochet pétrisseur avec déflecteur
de pâte
Figure
*
)
Robert Bosch Hausgeräte GmbH 21
Page 22
Mixeur
fr
Socle
15
16
Porte-lame
17
Bague d’étanchéité
18
Bol mixeur
19
Couvercle
20
Entonnoir
* Si un accessoire n’a pas été livré d’origine,
vous pouvez vous le procurer dans le
commerce et auprès du service après-vente.
Positions de travail
^ннЙенбзе=>
kЙ=С~бнЙл=СзеЕнбзееЙк=дЫ~йй~кЙбд=имЙ=лб=дЙл=~ЕЕЙлJ
лзбкЙл=лЙ=нк з м о Йе н =л мк=дЫ Й енк ~ ≤еЙгЙен=ЕзккЙЕнI=лмк=
д~=йзлбнбзе=ЕзккЙЕнЙ=Йн=Йе=йзлбнбзе=ЗЙ=нк~о~бдK
iЙ=Дк~л=йбозн~ен=Ззбн=ЙеЕк~енЙк=З~ел=ЕЬ~имЙ=
йзлбнбзе=ЗЙ=нк~о~бдK
Réglage de la position
de travail Figure
Appuyez sur la touche de déverrouillage
puis faites tourner le bras pivotant.
Amenez le bras pivotant sur la position
voulue jusqu’à ce qu’il encrante.
Position
1
2
3
4
5
6
7
Mise en place/enlèvement du
fouet batteur, du fouet mélangeur
et du crochet pétrisseur
Ajout de fortes quantités
d’aliments
Utilisation
oблимЙ=ЗЙ=ДдЙллмкЙл=>
kЙ=Дк~еЕЬЙт=д~=СбЕЬЙ=гЯдЙ=З~ел=д~=йкблЙ=
ЗЙ Езмк~ен=имЫмеЙ=Сзбл=нзмл=дЙл=йк¨й~к~нбСл=
лмк дЫ~йй~кЙбд=~ЕЬЙо¨лK
^ннЙенбзе=>
kЙ=С~бнЙл=СзеЕнбзееЙк=дЫ~йй~кЙбд=имЫ~оЙЕ=дЙл=
~ЕЕЙллзбкЙлLзмнбдл=Йе=йзлбнбзе=ЗЙ=нк~о~бдK
kЙ=С~бнЙл=й~л=СзеЕнбзееЙк=дЫ~йй~кЙбд=¶=обЗЙK=
kЫЙсйзлЙт=й~л=дЫ~йй~кЙбд=Йн=лЙл=~ЕЕЙ ллзбкЙл =
¶ ЗЙл=лзмкЕЙл=ЗЙ=ЕЬ~дЙмкK=iЙл=йб≠ЕЙл=еЙ=озен=
й~л=~м=Сзмк=¶=гбЕкзJзеЗЙлK
Avant la première utilisation, nettoyez l’appa-
reil à fond, voir « Nettoyage et entretien ».
Préparatifs
Posez l’appareil de base sur une surface lisse
et propre.
Déroulez/tirez le cordon (
Introduire la fiche dans la prise de courant.
Fouet mélangeur, fouet
batteur et crochet
pétrisseur Figure
Fouet mélangeur (a)
pour pétrir les pâtes, par ex. de la pâte levée.
Fouet batteur (b)
pour monter les œufs en neige, battre la crème
et les pâtes liquides, par exemple la pâte
à biscuits.
Crochet pétrisseur (c) avec déflecteur
de pâte (d)
pour pétrir les pâtes épaisses et incorporer des
ingrédients qu’il ne faut pas broyer (par exemple
les raisins secs, les plaquettes de chocolat).
oблимЙ=ЗЙ=ДдЙллмкЙл=~оЙЕ=
дЙл ~ЕЕЙллзбкЙл=Йе=кзн~нбзе=>
mЙеЗ~ен=дЙ=СзеЕнбзееЙгЙенI=еЫбенкзЗмблЙт=
а~г~бл=дЙл=ЗзбЦнл=З~ел=дЙ=Дзд=г¨д~еЦЙмкK
kЙ=ЕЬ~еЦЙт=дЙл=~ЕЕЙллзбкЙл=имЫмеЙ=Сзбл=
дЪЙенк~≤еЙгЙен=¶=дЪ~ккЖн=У=меЙ=Сзбл=¨нЙбенI=
дЫ~йй~кЙбд=ЕзенбемЙ=ЗЙ=СзеЕнбзееЙк=имЙдимЙл=
лЙЕзеЗЙлK
rнбдблЙт=дЫ~йй~кЙбд=мебимЙгЙен=лб=дЙл=ЕзмоЙкЕдЙл=
йкзн≠ÖÉåí=äÉë=Éåíê~≤еЙгЙенл=имб=еЙ=лЙкоЙен=
й~лK
Figure
).
22 Robert Bosch Hausgeräte GmbH
Page 23

Amenez le sélecteur rotatif sur
fr
P
et maintenez-le en position jusqu'à
ce que l’entraînement s’immobilise.
Remarque :
Si l’entraînement ne bouge pas, cela signifie
que l’accessoire se trouve déjà dans cette
position.
Appuyez sur la touche de déverrouillage
et amenez le bras pivotant sur la position 6.
Mettez en place le bol. Il faut que le socle
du bol soit emboîté dans l’évidement
de l’appareil de base.
Suivant besoins, enfoncez le fouet
mélangeur, le fouet batteur ou le crochet
pétrisseur jusqu’à ce qu’il encrante dans
l’entraînement. Si vous choisissez le crochet
pétrisseur tournez le déflecteur de pâte
jusqu’à ce que le crochet encrante.
Versez les ingrédients à préparer dans le bol.
Appuyez sur la touche de déverrouillage
et amenez le bras pivotant sur la position 1.
Mettez le couvercle en place.
Réglez l’interrupteur rotatif sur la position
voulue.
Rajouter des ingrédients
Éteignez l’appareil par l’interrupteur rotatif.
Amenez le sélecteur rotatif sur
P
et maintenez-le en position jusqu’à
ce que l’entraînement s’immobilise.
Enlevez le couvercle.
Appuyez sur la touche de déverrouillage
et amenez le bras pivotant sur la position 7.
Versez les ingrédients
ou
rajoutez les ingrédients par l’ouverture pour
ajout ménagée dans le couvercle.
Après le travail
Éteignez l’appareil par l’interrupteur rotatif.
Amenez le sélecteur rotatif sur
P
et maintenez-le en position jusqu’à
ce que l’entraînement s’immobilise.
Débranchez la fiche mâle de la prise
de courant.
Enlevez le couvercle.
Appuyez sur la touche de déverrouillage
et amenez le bras pivotant sur la position 6.
Détachez l’accessoire de l’entraînement.
Retirez le bol.
Nettoyez toutes les pièces, voir « Nettoyage
et entretien ».
Mixeur Figure
oблимЙ=ЗЙ= ДдЙллмкЙл=~оЙЕ=дЙл=д~гЙл=
нк~еЕЬ~енЙлLдЫЙенк~≤еЙгЙен=
Йе кзн~нбзе=>
kЫбенкзЗмблЙт=а~г~бл=дЙл=ЗзбЦнл=З~ел=дЙ=гбсЙмк=
Йе=йд~ЕЙ=>=
kЙ=кЙнбкЙтLйзлЙт= дЙ=гбсЙмк=имЫ~йк≠ë=~îçáê= ~êêÆí¨=
дЫЙенк~≤еЙгЙен=>=
kЫмнбдблЙт=дЙ=гбсЙмк=имЫмеЙ=Сзбл=~ллЙгДд¨=
Йн ~оЙЕ=лзе=ЕзмоЙкЕдЙ=Йе=йд~ЕЙK
oблимЙ=ЗЙ=ДкºдмкЙ=>
iзклимЙ=озмл=нк~бнЙт=ЗЙл=~дбгЙенл=г¨д~еЦ¨л=
нк≠л=ЕЬ~мЗлI=ЗЙ=д~=о~йЙмк=нк~оЙклЙ=дЫЙензеезбк=
г¨е~Ц¨=З~ел=дЙ=ЕзмоЙкЕдЙK=
sЙклЙт=~м=г~сбгмг=MIR=дбнкЙ=ЗЙ=дбимбЗЙ=нк≠л=
ЕЬ~мЗ=зм=гзмлл~енK
^ннЙенбзе=>
sзмл=кблимЙт=ЗЫЙеЗзгг~ЦЙк=дЙ=гбсЙмк=>=
kЙ нк~бнЙт=й~л=ЗЫбеЦк¨ЗбЙенл=лмкЦЙд¨л=Eл~мС=дЙл=
Цд~´зелFK=kЙ=С~бнЙл=й~л=нзмкеЙк=дЙ=гбсЙмк=¶=обЗЙK
^ннЙенбзе=>
mзмк=гбсЙк=ЗЙл=~дбгЙенл=дбимбЗЙл=З~ел=дЙ=гбсЙмк=
Йе=оЙккЙ=W=к¨ЦдЙт=дЫ~йй~кЙбд=лм к=д~=йзлб нбзе=
P г~сбгмгK=kЙ=оЙклЙт=~м=г~сбгмг=имЙ=
MIR дбнкЙ=ЗЙ=дбимбЗЙ=ЕЬ~мЗ=зм=гзмлл~енK
Appuyez sur la touche de déverrouillage
et amenez le bras pivotant sur la position 3.
Retirez le couvercle protégeant
l’entraînement du mixeur.
Posez le bol mixeur (le repère du socle
doit correspondre avec celui de l’appareil
de base), puis tournez en sens inverse
des aiguilles d’une montre jusqu’à la butée
(
Figure -4/5
Ajoutez des ingrédients.
Quantité maximum de liquide dans les
mixeurs en plastique = 1 litre, dans les
mixeurs en verre = 0,75 litre ; quantité
maximum de liquides moussants ou très
chauds = 0,5 litre ;
quantité maximale traitée, fixe
= 50 à 100 grammes.
Mettez le couvercle en place puis appuyez
bien.
Pendant le travail, tenez toujours fermement
le couvercle d’une main.
Veillez ce faisant à ne jamais introduire
les doigts par l’orifice d’ajout !
Réglez l’interrupteur rotatif sur la position
voulue.
).
Robert Bosch Hausgeräte GmbH 23
Page 24
Rajouter des ingrédients Figure -6
fr
Éteignez l’appareil par l’interrupteur rotatif.
Retirez le couvercle et ajoutez les ingrédients
ou
retirez l’entonnoir et rajoutez progressive-
ment les ingrédients fermes par l’ouverture
ou
versez les ingrédients liquides par l’enton-
noir.
Après le travail
Éteignez l’appareil par l’interrupteur rotatif.
Débranchez la fiche mâle de la prise
de courant.
Tournez le mixeur dans le sens des aiguilles
d’une montre puis retirez-le.
Un conseil :
il est préférable de nettoyer
le mixeur immédiatement après utilisation.
Nettoyage et entretien
^ннЙенбзе=>
kЫмнбдблЙт=й~л=ЗЙ=З¨нЙкЦЙен=~Дк~лбСK=
sзмл=кблимЙт=ЗЫЙеЗзгг~ЦЙк=дЙл=лмкС~ЕЙлK=
Nettoyage de l’appareil de base
^ннЙенбзе=>
kЫмнбдблЙт=й~л=ЗЙ=З¨нЙкЦЙен=~Дк~лбСK=
iЙ=йзкнЙJд~гЙл=еЙ=лЙ=еЙннзбЙ=й~л=~м=д~оЙJ
о~бллЙддЙK=kЙннзуЙтJдЙ=мебимЙгЙен=лзмл=дЫЙ~м=
Езмк~енЙK
Un conseil :
si vous avez mixé des aliments
liquides, vous n’avez généralement pas besoin
de démonter le mixeur pour le nettoyer.
Pour cela, versez un peu d’eau additionnée
de produit à vaisselle dans le mixeur en place.
Faites fonctionner ce dernier pendant quelques
secondes (si votre appareil possède la marche
momentanée, réglez-le sur la position M).
Jetez l’eau de nettoyage puis rincez le mixeur
à l’eau claire.
Démonter le mixeur Figure
Tournez le socle du bol mixeur dans le sens
des aiguilles d’une montre puis retirez-le.
Par les ailettes, tournez le porte-lame en sens
inverse des aiguilles d’une montre.
Ceci desserre le porte-lame.
Retirez le porte-lame puis enlevez la bague
d’étanchéité.
Assembler le mixeur Figure
oблимЙ=ЗЫ¨дЙЕнкзЕмнбзе=>
kЙ=йдзеЦЙт=а~г~бл=дЫ~йй~кЙбд=ЗЙ=Д~лЙ=З~ел=
дЫЙ~м=Йн=еЙ=дЙ=нЙеЙт=а~г~бл=лзмл=дЫЙ~м=
Зм кзДбеЙн=>
Débranchez la fiche mâle de la prise
de courant.
Essuyez l’appareil de base avec un essuie-
tout humide.
Si nécessaire, ajoutez un peu de produit
à vaisselle.
Ensuite, essuyez l’appareil avec un essuie-
tout sec.
Nettoyez le bol mélangeur avec
les accessoires
Toutes les pièces vont au lave-vaisselle.
Ne coincez pas les pièces en plastique dans
le lave-vaisselle car elles risquent de se
déformer.
Nettoyer le mixeur
oблимЙ=ЗЙ=ДдЙллмкЙл=~оЙЕ=дЙл=д~гЙл=
нк~еЕЬ~енЙл=>
Fixez la bague d’étanchéité contre le porte-
Posez le porte-lame par le bas dans le bol
A l’aide du socle, vissez le porte-lame à fond.
Vissez à fond le socle du bol mixeur en sens
Dérangements et remèdes
En présence d’un dérangement, veuillez vous
adresser à notre service après-vente.
Exemples d’utilisation
Crème chantilly
100 g à 600 g
Travaillez la crème avec le fouet
oблимЙ=ЗЙ=ДдЙллмкЙл=>
kЫ~ллЙгДдЙт=а~г~бл=дЙ=гбсЙмк=лмк=дЫ~йй~кЙбд= ЗЙ=
Д~лЙK
lame.
mixeur.
inverse des aiguilles d’une montre.
batteur pendant 1½ à 4 minutes
(suivant la quantité et les propriétés
de la crème) sur la position 4.
kЙ=нзмЕЬЙт=й~л=дЙл=д~гЙл=Зм=гбсЙмк=~оЙЕ=
дЙл г~бел=емЙлK=iЙ=гбсЙмк=лЙ=З¨гзенЙ=йзмк=
дЙ еЙннзуЙкK
24 Robert Bosch Hausgeräte GmbH
Page 25

Blanc d’œuf
fr
1 à 8 blancs d’œufs
Travaillez les blancs d’œufs avec
le fouet batteur pendant 4 à 6 minutes
sur la position 4.
Pâte à biscuits
oЙЕЙннЙ=ЗЙ=Д~лЙ=
2 œufs
2–3 c. à soupe d’eau très chaude
100 g de sucre
1 sachet de sucre vanillé
70 g de farine
70 g de fécule éventuellement de la levure
chimique
Battez les ingrédients (sauf la farine
et la fécule) env. 4 à 6 minutes avec
le fouet batteur sur la position 4, jusqu’à
ce que vous obteniez une mousse ferme.
Réglez l’interrupteur rotatif sur la position
2 et, en ½ à 1 minute environ, incorporez par
cuillerées la farine et la fécule que vous aurez
préalablement passées au tamis.
Quantité maximale :
2 fois la recette de base
Pâte levée
oЙЕЙннЙ=ЗЙ=Д~лЙ=
3 à 4 œufs
200 à 250 g de sucre
1 pincée de sel
1 sachet de sucre vanillé ou le zeste
d’un demi-citron
200 à 250 g de beurre
(à la température ambiante)
500 g de farine
1 sachet de levure chimique
1
/
l de lait
8
Mélangez tous les ingrédients avec le fouet
mélangeur pendant env. ½ minute sur
la position 1, puis env. 3 à 4 minutes sur
la position 3.
Quantité maximale :
une fois et demie à 2 fois
la recette de base
Pâte brisée
oЙЕЙннЙ=ЗЙ=Д~лЙ=
125 g de beurre
(à la température ambiante)
100 à 125 g de sucre
1 œuf
1 pincée de sel
un peu de zeste de citron ou du sucre vanillé
250 g de farine
éventuellement de la levure chimique
Travaillez tous les ingrédients environ
½ minute au niveau 1, puis 2–3 minutes
avec le fouet mixeur (niveau 3) ou le crochet
à malaxer (niveau 2).
Quantité maximale :
2 fois la recette de base
Pâte à la levure de boulanger
oЙЕЙннЙ=ЗЙ=Д~лЙ=
500 g de farine
1 œuf
80 g de matière grasse
(à la température ambiante)
80 g de sucre
200 à 250 ml de lait tiède
25 g de levure de boulanger fraîche ou 1 sachet
de levure sèche
Zeste d’un demi citron
1 pincée de sel
Travaillez tous les ingrédients avec le crochet
pétrisseur pendant env. ½ minute sur
la position 1, puis env. 3 à 6 minutes sur
la position 2.
Quantité maximale :
1,5 fois la recette
de base.
Mayonnaise
2 œufs
2 c. à café de moutarde
¼ l d’huile
2 c. à soupe de jus de citron ou de vinaigre
1 pincée de sel
1 pincée de sucre
Les ingrédients doivent tous se trouver
à la même température.
Pendant quelques secondes, mélangez tous
ces ingrédients (sauf l’huile) avec le mixeur
réglé sur la position 2.
Réglez ensuite le mixeur sur la position 4,
versez l’huile lentement par l’entonnoir
puis travaillez le mélange jusqu’à ce que
la mayonnaise soit bien ferme.
Accessoires d’origine/Accessoires
en option
Les autres accessoires joints dans la boîte
(voir la vue d’ensemble des modèles ci-jointe,
figure
sation séparées.
Vous pouvez également vous procurer les
accessoires d’origine/accessoires en option
séparément.
Les accessoires du robot MUM 45..
s’adaptent aux robots MUM 44../46../48.. .
) sont décrits dans les notices d’utili-
Robert Bosch Hausgeräte GmbH 25
Page 26

Figure
fr
Bol mélangeur en plastique
(MUZ4KR3)
Dans le bol, vous pouvez traiter jusqu’à 1 kg
de farine plus les ingrédients.
Bol mélangeur en acier inoxydable
(MUZ4ER2)
Dans le bol, vous pouvez traiter jusqu’à 1 kg
de farine plus les ingrédients.
Bol mixeur en plastique (MUZ4MX2)
Pour passer des boissons au mixeur, pour
réduire les fruits et légumes en purée, pour
préparer de la mayonnaise, réduire des fruits
et légumes, pour broyer des glaçons.
Bol mixeur en verre (MUZ4MX3)
Pour passer des boissons au mixeur, pour
réduire les fruits et légumes en purée, pour
préparer de la mayonnaise, réduire des fruits
et légumes, pour broyer des glaçons.
Multimixeur (MUZ4MM3)
Pour hacher des herbes culinaires, légumes,
pommes et la viande, pour râper les carottes,
radis et le fromage, pour râper/concasser
les noix et le chocolat mis au réfrigérateur.
Accessoire râpeur/éminceur
(MUZ4DS3)
Pour couper des concombres, du chou, chourave, raifort ; pour râper des carottes, pommes
et du céleri, du chou rouge, fromage et des
noix ; pour râper/concasser du fromage dur,
du chocolat et des noix.
Disque à pommes frites (MUZ45PS1)
Pour l’accessoire râpeur/éminceur MUZ4DS3.
Pour découper des frites dans les pommes
de terre crues.
Disque à légumes asiatiques
(MUZ45AG1)
Pour l’accessoire râpeur/éminceur MUZ4DS3.
Découpe les fruits et légumes en fines lanières
pour préparer des plats asiatiques.
Disque à râper (épais) (MUZ45RS1)
Pour l’accessoire râpeur/éminceur MUZ4DS3.
Pour râper des pommes de terre crues, par
exemple pour faire des râpées de pomme
de terre ou des boulettes.
Disque pour galettes de pommes
de terre (MUZ45KP1)
Pour l’accessoire râpeur/éminceur MUZ4DS3.
Pour râper des pommes de terre crues et
préparer des « rösti » et des galettes de
pommes de terre, pour découper les fruits et
légumes en rondelles épaisses.
Presse-agrumes (MUZ4ZP1)
Pour presser des oranges, citrons et
pamplemousses.
Hachoir à viande (MUZ4FW3)
Pour hacher de la viande fraîche destinée à un
steak tartare ou un rôti de viande hachée.
Kit de disques ajourés (MUZ45LS1)
Pour le hachoir à viande MUZ4FW3.
Fin (3 mm) pour les pâtés et les pâtes à tartiner,
grossier (6 mm) pour les saucisses grillées et le
lard.
Kit pour gâteaux secs (MUZ45SV1)
Pour le hachoir à viande MUZ4FW3.
Avec gabarit métallique permettant de conférer
aux gâteaux 4 formes différentes.
Embout à râper (MUZ45RV1)
Pour le hachoir à viande MUZ4FW3.
Pour râper les noix, amandes, le chocolat et les
petits-pains secs.
Kit pour coulis de fruits et légumes
(MUZ45FV1)
Pour le hachoir à viande MUZ4FW3.
Pour préparer un coulis de baies (sauf les
framboises), les tomates et baies d’églantier.
Simultanément, le kit dénoyaute
automatiquement les groseilles/cassis par
exemple et enlève leurs tiges.
Porte-accessoire (MUZ4ZT1)
Pour ranger des accessoires comme les
crochets à pétrir, fouets batteurs, fouets
mixeurs, disques à découper, à râper
et râper/concasser.
Moulin à céréales avec meules
coniques en acier (MUZ4GM3)
Pour tous types de céréales excepté le maïs,
également pour les graines oléagineuses, les
champignons secs et les herbes culinaires.
Sorbetière (MUZ4EB1)
Pour préparer jusqu’à 550 g de glace par
séance et récipient.
26 Robert Bosch Hausgeräte GmbH
Page 27

Mise au rebut
fr
Sous réserve de modifications.
Cet appareil a été labélisé en conformité
avec la directive communautaire
européenne 2012/19/CE visant les
appareils électriques et électroniques
usagés (waste electrical and electronic
equipment – WEEE).
Cette directive fixe le cadre, en vigueur sur tout
le territoire de l’UE, d’une reprise et d’un
recyclage des appareils usagés.
Pour connaître les consignes actuelles
relatives à la mise au rebut, renseignez-vous
auprès de votre revendeur ou de votre
municipalité.
Conditions de garantie
Les conditions de garantie applicables sont
celles publiées par notre distributeur dans le
pays où a été effectué l'achat. Le revendeur
chez qui vous vous êtes procuré l'appareil
fournira les modalités de garantie sur simple
demande de votre part. En cas de recours en
garantie, veuillez toujours vous munir de la
preuve d'achat.
Robert Bosch Hausgeräte GmbH 27
Page 28

it
`зеЦк~нмд~тбзеб=йЙк=дЫ~Еимблнз=Зб=имЙлнз=
емзоз=~йй~кЙЕЕЬбз=Зб=йкзЗмтбзеЙ=_lp`eK
`зе=Йллз=~оЙнЙ=лЕЙднз=ме=ЙдЙннкзЗзгЙлнбЕз=
гзЗЙкез=Й=Зб=Цк~е=йкЙЦбзK
q кзо~нЙ=мднЙкбзкб=беСзкг~тбзеб=лмб=езлнкб=
йкзЗзннб=еЙд=езлнкз=лбнз=fенЙкеЙнK
Indice
Per la vostra sicurezza . . . . . . . . . . . . . . . . 28
Guida rapida . . . . . . . . . . . . . . . . . . . . . . . 30
Uso . . . . . . . . . . . . . . . . . . . . . . . . . . . . . . 31
Pulizia e cura . . . . . . . . . . . . . . . . . . . . . . . 36
Rimedio in caso di guasti . . . . . . . . . . . . . . 36
Esempi d’impiego . . . . . . . . . . . . . . . . . . . 36
Accessori/accessori speciali . . . . . . . . . . . 37
Smaltimento . . . . . . . . . . . . . . . . . . . . . . . 35
Condizioni di garanzia . . . . . . . . . . . . . . . . 35
Per la vostra sicurezza
Leggere attentamente questa guida prima dell’uso, per conoscere
importanti istruzioni di sicurezza e per l’uso di questo apparecchio.
L’inosservanza delle istruzioni per l’uso corretto dell’apparecchio
esclude una responsabilità del costruttore per i danni da essa derivanti.
Questo apparecchio è destinato alla lavorazione di quantità usuali per la
famiglia o per impieghi non professionali, simili a quello domestico.
Gli impieghi simili a quello domestico comprendono ad es. l’impiego cucine
per il personale in negozi, uffici, aziende agricole e altre aziende di
produzione, nonché l’uso da parte di ospiti di pensioni, piccoli hotel e simili
strutture abitative. Utilizzare l’apparecchio solo per quantità e tempi di
lavoro usuali nell’attività domestica. Non superare la massima quantità
ammessa (vedi «Esempi d’impiego»)!
Questo apparecchio è previsto per miscelare, impastare e montare
alimenti. Il suo uso è vietato per la lavorazione di altri oggetti o sostanze.
Altri impieghi sono possibili se si utilizzano gli accessori autorizzati dal
produttore.
Usare l’apparecchio solo con accessori originali. Per l’uso degli accessori
osservare le accluse istruzioni.
Si prega di conservare le istruzioni per l’uso. In caso di cessione
dell’apparecchio a terzi, consegnare unitamente questo libretto d’istruzioni.
, Avvertenze di sicurezza generali
Pericolo di scariche elettriche
L’uso di questo apparecchio è vietato ai bambini.
Tenere l’apparecchio ed il suo cavo di collegamento fuori dalla portata
dei bambini.
Gli apparecchi possono essere usati da persone con ridotte capacità
fisiche, sensorali o mentali o da persone prive di esperienza e
competenza se sono sorvegliate o sono state istruite sull'uso sicuro
dell'apparecchio ed hanno compreso i pericoli da esso derivanti.
Ai bambini è vietato giocare con l’apparecchio!
28 Robert Bosch Hausgeräte GmbH
Page 29

Collegare e usare l’apparecchio solo rispettando i dati della targhetta
it
d’identificazione. Utilizzare solo se il cavo di alimentazione e
l’apparecchio non presentano danni.
Staccare sempre l’apparecchio dalla rete quando non è sorvegliato
e prima del montaggio, dello smontaggio o della pulizia.
Non tirare il cavo di alimentazione su spigoli vivi né metterlo a contatto
con superfici calde. Al fine di evitare pericoli, se il cavo di alimentazione
di questo apparecchio subisce danni, deve essere sostituito dal
produttore, dal suo servizio assistenza clienti o da persona in possesso
di simile qualificazione.
Fare eseguire le riparazioni all’apparecchio solo dal nostro servizio
assistenza clienti.
, Avvertenze di sicurezza per questo apparecchio
Pericolo ferite
Pericolo di scossa elettrica!
Inserire la spina di rete solo dopo che tutti i preparativi per il lavoro con
l’apparecchio sono stati conclusi.
Non immergere mai l’apparecchio base in liquidi o tenerlo sotto acqua
corrente. Non usare pulitrici a getto di vapore.
Non spostare il braccio oscillante quando l’apparecchio è in funzione.
Attendere l’arresto completo dell’ingranaggio.
Cambiare l’utensile/accessorio solo ad ingranaggio fermo – dopo avere
spento l’apparecchio, l’ingranaggio continua a girare brevemente.
Accendere e spegnere l’apparecchio solo con la manopola.
Quando l’apparecchio non è in uso estrarre la spina di rete.
Prima di riparare un guasto, estrarre la spina d’alimentazione.
Dopo una interruzione di corrente l’apparecchio ricomincia a funzionare.
Pericolo di ferite a causa di utensili in rotazione!
Non toccare parti in rotazione. Durante il funzionamento non introdurre mai
le mani nella ciotola.
Sostituire l’utensile solo quando l’ingranaggio è completamente fermo –
dopo lo spegnimento l’ingranaggio gira ancora brevemente per inerzia.
Per motivi di sicurezza l’uso dell’apparecchio è consentito solo se
gli ingranaggi non utilizzati sono coperti con i coperti di sicurezza
ingranaggi (4, 7).
Pericolo di ferite a causa di lame taglienti/ingranaggio in rotazione!
Non introdurre mai le mani nel frullatore applicato!
Non assemblare mai il frullatore quando è già montato sull’apparecchio
base. Rimuovere/applicare il coperchio solo quando il motore è fermo!
Mettere in funzione il frullatore solo completamente assemblato e con il
coperchio applicato. Non toccare a mani nude le lame del frullatore.
Robert Bosch Hausgeräte GmbH 29
Page 30

Pericolo di scottature!
it
Durante la lavorazione di frullati molto caldi, dal bicchierino dosatore nel
coperchio esce vapore. Introdurre massimo 0,5 litri di liquido molto caldo
o che produce schiuma.
Importante!
Usare solo un attrezzo o un accessorio per volta.
Questo libretto d’istruzioni per l’uso descrive
diverse versioni (cfr. anche prospetto dei
modelli, figura ). L’apparecchio non ha
bisogno di manutenzione.
Guida rapida
Aprire le pagine con le figure. Figura
Apparecchio base
1
Pulsante di sblocco
2
Braccio oscillante
(vedi «Posizioni di lavoro»)
Interruttore rotante
3
0/off = arresto
/
P
Mantenere la manopola finché l’ingranaggio
non si ferma; l’utensile è in posizione
di ribaltamento. La posizione di ribaltamento è già raggiunta quando l’ingranaggio è completamente fermo.
Livelli 1–4 = velocità di lavoro
Grado 1 = numero di giri minimo –
Grado 4 = numero di giri massimo –
In caso d’interruzione dell’alimentazione
elettrica l’apparecchio resta inserito e dopo
l’interruzione si rimette in funzione.
4
Coperchio di sicurezza ingranaggio
Per rimuovere il coperchio di sicurezza
ingranaggio, ruotarlo finché non si sblocca.
Ingranaggio per
5
–
sminuzzatore continuo
–
spremiagrumi *
–
macina per cereali *
Applicare il coperchio di sicurezza,
se l’ingranaggio non viene utilizzato.
6
Ingranaggio per
–
utensili (frusta per mescolare, frusta
per montare, braccio impastatore)
–
mescolatore della gelatiera *
–
abbassato o sollevato per tritacarne *
7
Coperchio di sicurezza ingranaggio
frullatore
= comando parcheggio
lento
veloce
*
8
Ingranaggio per
–
frullatore
–
multimixer
Applicare il coperchio di sicurezza, se
l’ingranaggio del frullatore non viene
utilizzato.
9
Conservazione del cavo (
MUM 44..: Avvolgere il cavo
MUM 46../48..: Riporre il cavo nel vano
portacavo
Ciotola con accessori
10
Contenitore di miscelazione
11
Coperchio
Utensili
Frusta
12
13
Sbattitore
14
Braccio impastatore con spatola
Frullatore
Zoccolo
15
16
Gruppo lame
17
Anello di tenuta
18
Bicchiere frullatore
19
Coperchio
20
Bicchierino dosatore
* Se un accessorio non è compreso nella
fornitura, può essere acquistato nel commercio e presso il servizio assistenza clienti.
Figura
)
30 Robert Bosch Hausgeräte GmbH
Page 31

Posizioni di lavoro
it
^ннЙетбзеЙ>
rл~кЙ=дЫ~йй~кЙЕЕЬбз=лздз=лЙ=дЫмнЙелбдЙL~ЕЕЙлJ
лзкбз=лЙЕзеЗз=д~=лЙЦмЙенЙ=н~ДЙдд~=≠=~ййдбЕ~нз=
~ддЫбеЦк~е~ЦЦбз=беЗбЕ~нз=еЙдд~=йзлбтбзеЙ=ЕзккЙнн~=
ЙЗ=≠=бе=йзлбтбзеЙ=Зб=д~озкзK
fд= Дк~ЕЕ бз=злЕбдд~енЙ=ЗЙоЙ=ЙллЙкЙ= ~ккЙлн~ нз=бе=зЦеб=
йзлбтбзеЙK
Regolazione della posizione
di lavoro Figura
Premere il tasto di sblocco e muovere
il braccio oscillante.
Muovere il braccio oscillante fino all’arresto
nella posizione desiderata.
Posizione
1
2
3
4
5
6
7
Montare/smontare lo sbattitore,
le fruste ed il braccio impastatore
Aggiungere grandi quantità
di alimenti
Uso
mЙкбЕздз=Зб=СЙкбнЙ>
fелЙкбкЙ=д~=лйбе~=Зб=кЙнЙ=лздз=Ззйз=ЕЬЙ=нмннб=
б йкЙй~к~нбоб=йЙк=бд=д~озкз=Езе=дЫ~йй~кЙЕЕЬбз=
лзез=лн~нб=ЕзеЕдмлбK
^ннЙетбзеЙ>
rл~кЙ=дЫ~йй~кЙЕЕЬбз=лздз=Езе=дЫмнЙелбдЙL
~ЕЕЙллзкбз=бе=йзлбтбзеЙ=Зб=д~озкзK
kзе=С~кЙ=Сметбзе~кЙ=дЫ~йй~кЙЕЕЬбз=~=омзнзK=
kзе=ЙлйзккЙ=~йй~кЙЕЕЬбз=ЙЗ=~ЕЕЙллзкб=~=Сзенб=
Зб Е~дзкЙK=iЙ=й~кнб=езе=лзез=бЗзеЙЙ=йЙк=дЫмлз=
бе Сзкез=~=гбЕкззеЗЙK
Al primo uso pulire accuratamente
apparecchio ed accessori, vedi capitolo
«Pulizia e cura».
Preparazione
Disporre l’apparecchio base su una
superficie liscia e pulita.
Svolgere/estrarre il cavo (
Inserire la spina.
Figura
).
Frusta, sbattitore e braccio
impastatore Figura
Frusta (a)
per mescolare paste, per es. pasta fluida
miscelata
Sbattitore (b)
per montare albume d’uovo, panna e paste
leggere, per es. pasta biscotto
Braccio impastatore (c) con spatola (d)
per lavorare impasti più solidi e per amalgamare
ingredienti che non devono essere sminuzzati
(ad es. uvetta, pezzetti di cioccolato)
mЙкбЕздз=Зб=СЙкбнЙ=~=Е~мл~=Зб=мнЙелбдб=
бе=кзн~тбзеЙ>
aмк~енЙ=бд=Сметбзе~гЙенз=езе=бенкзЗмккЙ=г~б=
дЙ г~еб=еЙдд~=Ебзнзд~K
pзлнбнмбкЙ=дЫмнЙелбдЙ=лздз=им~еЗз=дЫбеЦк~е~ЦЦбз=
≠=ЕзгйдЙн~гЙенЙ=СЙкгз=У=Ззйз=дз=лйЙЦебJ
гЙенз=дЫбеЦк~е~ЦЦбз=Цбк~=~еЕзк~=ДкЙоЙгЙенЙ=
йЙк=беЙктб~K
Р=ЕзелЙенбнз=мл~кЙ=дЫ~йй~кЙЕЕЬбз=лздз=
лЙ=Цдб=беЦк~е~ЦЦб=езе=мнбдбтт~нб=лзез=йкзнЙннб=
Езе б=ЕзйЙкЕЬб=Зб=лбЕмкЙтт~K
Ruotare la manopola su
finché l’ingranaggio non si ferma.
Avvertenza:
La posizione di ribaltamento è già raggiunta
quando l’ingranaggio è completamente
fermo.
Premere il pulsante di sblocco e portare
il braccio oscillante nella posizione 6.
Inserire la ciotola impastatrice.
La base della ciotola impastatrice deve
entrare nella nicchia dell’apparecchio base.
A seconda del compito di lavorazione,
inserire fino all’arresto nell’ingranaggio la
frusta, lo sbattitore o il braccio impastatore.
Per il braccio impastatore ruotare la spatola,
finché il braccio impastatore non s’arresta.
Introdurre nella ciotola gli ingredienti
da lavorare.
Premere il pulsante di sblocco e portare
il braccio oscillante nella posizione 1.
Applicare il coperchio.
Ruotare la manopola sulla velocità
desiderata.
P
e mantenerla
Robert Bosch Hausgeräte GmbH 31
Page 32

Aggiungere ingredienti
it
Spegnere l’apparecchio con l’interruttore
rotante.
Ruotare la manopola su
P
e mantenerla
finché l’ingranaggio non si ferma.
Rimuovere il coperchio.
Premere il pulsante di sblocco e portare
il braccio oscillante nella posizione 7.
Aggiungere gli ingredienti
oppure
aggiungere gli ingredienti attraverso
l’apertura di aggiunta nel coperchio.
Dopo il lavoro
Spegnere l’apparecchio con l’interruttore
rotante.
Ruotare la manopola su
P
e mantenerla
finché l’ingranaggio non si ferma.
Staccare la spina.
Rimuovere il coperchio.
Premere il pulsante di sblocco e portare
il braccio oscillante nella posizione 6.
Estrarre l’utensile dall’ingranaggio.
Rimuovere la ciotola impastatrice.
Pulire tutte le parti, vedi «Pulizia e cura».
Frullatore Figura
mЙкбЕздз=Зб=СЙкбнЙ=~=Е~мл~=Зб=д~гЙ=
н~ЦдбЙенбLбеЦк~е~ЦЦбз=бе=кзн~тбзеЙ>
kзе=бенкзЗмккЙ=г~б=дЙ=г~еб=еЙд=Скмдд~нзкЙ=
~ййдбЕ~нз>=
oбгмзоЙкЙL~ййдбЕ~кЙ=бд=ЕзйЙкЕЬбз=лздз=им~еЗз=
бд=гзнзкЙ=≠=СЙкгз>=
jЙннЙкЙ=бе=СметбзеЙ=бд=Скмдд~нзкЙ=лздз=ЕзгйдЙн~J
гЙенЙ=~ллЙгДд~нз=Й=Езе=бд=ЕзйЙкЕЬбз=
~ййдбЕ~нзK
mЙкбЕздз=Зб=лЕзнн~нмкЙ>
aмк~енЙ=д~=д~озк~тбзеЙ=Зб=Скмдд~нб=гзднз=Е~дЗбI=
З~д ДбЕЕЬбЙкбез=Ззл~нзкЙ=еЙд=ЕзйЙкЕЬбз=ЙлЕЙ=
о~йзкЙK=fенкзЗмккЙ=г~ллбгз=MIR=дбнкб=Зб=дбимбЗз=
гзднз=Е~дЗз=з=ЕЬЙ=йкзЗмЕЙ=лЕЬбмг~K
^ннЙетбзеЙ>
bобн~кЙ=З~ееб=~д=Скмдд~нзкЙK=kзе=д~озк~кЙ=беЦкЙJ
ЗбЙенб=лмкЦЙд~нб=Eнк~ееЙ=ЕмДЙннб=Зб=ЦЬб~ЕЕбз=FK=
kзе=С~кЙ=Цбк~кЙ=~=омзнз=бд=Скмдд~нзкЙK
^ннЙетбзеЙ>
i~озк~тбзеЙ=Зб=дбимбЗб=еЙд=Скмдд~нзкЙ=Езе=ДбЕЕЬбЙкЙ=
Зб=оЙнкзW=г~ллбгз=~дд~=оЙдзЕбн¶ PK=
fенкзЗмккЙ г~ллбгз=MIR=дбнкб=Зб=дбимбЗз=гзднз=
Е~дЗз=з=ЕЬЙ=Сзкг~=лЕЬбмг~K
Premere il pulsante di sblocco e portare
il braccio oscillante nella posizione 3.
Rimuovere il coperchio di sicurezza
dell’ingranaggio frullatore.
Montare il bicchiere frullatore (il riferimento
sulla base del frullatore coincide con
il riferimento sull’apparecchio base)
e ruotare in senso antiorario fino all’arresto
(
Figura -4/5
Introdurre gli ingredienti.
).
Quantità massima per il frullatore con
bicchiere di plastica, liquido = 1 litro, per
il frullatore con bicchiere di vetro, liquido
= 0,75 litri. In caso di liquido molto caldo
o che forma schiuma massimo 0,5 litri;
quantità di lavorazione ottimale, solidi
= 50–100 grammi.
Applicare il coperchio e premerlo forte.
Durante il funzionamento mantenere sempre
il coperchio con una mano.
Senza tuttavia introdurre le dita nell’apertura
di aggiunta ingredienti!
Ruotare la manopola sulla velocità
desiderata.
Aggiungere ingredienti Figura -6
Spegnere l’apparecchio con l’interruttore
rotante.
Rimuovere il coperchio ed introdurre
gli ingredienti
oppure
togliere il bicchierino dosatore ed aggiungere
un poco alla volta gli ingredienti solidi attraverso l’apertura di aggiunta
oppure
introdurre gli ingredienti liquidi attraverso
il bicchierino dosatore.
Dopo il lavoro
Spegnere l’apparecchio con l’interruttore
rotante.
Staccare la spina.
Ruotare il frullatore in senso orario
erimuoverlo.
Consiglio:
il frullatore deve essere lavato
preferibilmente subito dopo l’uso.
32 Robert Bosch Hausgeräte GmbH
Page 33

Pulizia e cura
it
^ннЙетбзеЙ>
kзе=мнбдбтт~кЙ=ЗЙнЙкЦЙенб=~Дк~лбобK=
mзллбДбдб=З~ееб=~ддЙ=лмйЙкСбЕбK=
Pulire l’apparecchio base
mЙкбЕздз=Зб=лЕ~кбЕ~=ЙдЙннкбЕ~>
kзе=бггЙкЦЙкЙ=г~б=дЫ~йй~кЙЕЕЬбз=Д~лЙ=
бе ~Еим~I=е¨=д~о~кдз=лзннз=~Еим~=ЕзккЙенЙK
Staccare la spina.
Pulire l’apparecchio base con un panno
umido.
Se necessario utilizzare un poco di detersivo
per stoviglie.
Infine asciugare l’apparecchio.
Pulire la ciotola con gli accessori
Tutte le parti sono lavabili in lavastoviglie.
Per evitare possibili deformazioni, non incastrare le parti di plastica nella lavastoviglie.
Pulire il frullatore
mЙкбЕздз=Зб=СЙкбнЙ=З~=д~гЙ=н~ЦдбЙенб>
kзе=нзЕЕ~кЙ= ~=г~еб=емЗЙ=дЙ=д~гЙ=ЗЙд=Скмдд~нзкЙK=
mЙк=д~=ймдбтб~=бд=Скмдд~нзкЙ=йм∂=ЙллЙкЙ=лгзен~нзK
^ннЙетбзеЙ>
kзе=мнбдбтт~кЙ=ЗЙнЙкЦЙенб=~Дк~лбобK=
iЫбелЙкнз=д~гЙ=езе=≠=д~о~ДбдЙ=бе=д~о~лнзобЦдбЙK=
i~о~кЙ=дЫбелЙкнз=д~гЙ=лздз=лзннз=~Еим~=ЕзккЙенЙK
Consiglio:
è sufficiente sciacquare il frullatore senza
smontarlo. A tal fine introdurre un poco di acqua
con detersivo per piatti nel frullatore montato.
Accendere il frullatore per pochi secondi (per
gli apparecchi dotati di funzione «intermittenza»
alla velocità M). Versare l’acqua di lavaggio
e sciacquare il frullatore con acqua pulita.
Scomporre il frullatore Figura
Ruotare la base del frullatore in senso orario
Afferrare l’inserto lame sulle alette e ruotarlo
Togliere l’inserto lame e rimuovere l’anello
dopo avere lavorato liquidi spesso
e scomporre il frullatore.
in sento anti orario. L’inserto lame si stacca.
di tenuta.
Comporre il frullatore Figura
mЙкбЕздз=Зб=СЙкбнЙ>
kзе=~ллЙгДд~кЙ=г~б=бд=Скмдд~нзкЙ=им~еЗз=
≠=Цб¶=гзен~нз=лмддЫ~йй~кЙЕЕЬбз=Д~лЙK
Applicare l’anello di tenuta sull’inserto lame.
Inserire l’inserto lame dal basso nel bicchiere
frullatore.
Avvitare e stringere forte l’inserto lame
servendosi della base.
Avvitare e bloccare la base del bicchiere
frullatore in senso antiorario.
Rimedio in caso di guasti
In caso di guasto preghiamo di rivolgersi
al servizio assistenza clienti.
Esempi d’impiego
Panna montata
100 g–600 g
Lavorare la panna con lo sbattitore da
1½ a 4 minuti al grado 4 (a seconda della
quantità e delle proprietà della panna).
Albume
Da 1 a 8 albumi
Lavorare gli albumi con lo sbattitore
da 4 a 6 minuti alla velocità 4.
Pasta biscotto
oбЕЙнн~=Д~лЙ
2 uova
2–3 cucchiai acqua calda
100 g zucchero
1 bustina zucchero vanigliato
70 g farina
70 g di fecola eventualmente lievito in polvere
Montare gli ingredienti (tranne farina e fecola)
con lo sbattitore per ca. 4–6 minuti al
grado 4.
Mettere la manopola sulla velocità 2 e incor-
porare la farina setacciata e l’amido,
un cucchiaio alla volta, in ca. ½–1 minuto.
Quantità massima:
2 volte la ricetta base
Robert Bosch Hausgeräte GmbH 33
Page 34

Pasta fluida miscelata
it
oбЕЙнн~=Д~лЙ
3–4 uova
200–250 g zucchero
1 pizzico sale
1 bustina zucchero vanigliato o buccia
di ½ limone
200–250 g burro (a temperatura ambiente)
500 g farina
1 bustina lievito in polvere
1
/8 l di latte
Mescolare tutti gli ingredienti con la frusta per
ca. ½ minuto al grado 1, poi ca. 3–4 minuti
al grado 3.
Quantità massima:
1,5–2 volte la ricetta base
Pasta frolla
oбЕЙнн~=Д~лЙ
125 g burro (a temperatura
ambiente)
100–125 g zucchero
1 uovo
1 pizzico sale
un poco di buccia di limone o zucchero
vanigliato
250 g farina
eventualmente lievito in polvere
Lavorare tutti gli ingredienti per ca. ½ minuto
alla velocità 1, poi per ca. 2–3 minuti con
la frusta per mescolare (velocità 3) o con
il braccio impastatore (velocità 2).
Quantità massima:
2 volte la ricetta base
Pasta con lievito per dolce:
oбЕЙнн~=Д~лЙ
500 g farina
1 uovo
80 g burro (a temperatura ambiente)
80 g zucchero
200–250 ml latte tiepido
25 g di lievito fresco o 1 confezione di lievito
secco buccia di ½ limone
1 pizzico sale
Mescolare tutti gli ingredienti con i braccio
impastatore per ca. ½ minuto al grado 1,
poi ca. 3–6 minuti al grado 2.
Quantità massima:
1,5 volte la ricetta base
Maionese
2 uova
2 cucchiaino di senape
¼ l di olio
2 cucchiaio succo di limone o aceto
1 pizzico sale
1 pizzico di zucchero
Gli ingredienti devono essere alla stessa
temperatura.
Mescolare gli ingredienti (tranne l’olio) nel
frullatore per qualche secondo alla velocità 2.
Commutare il frullatore alla velocità 4 e versare
lentamente l’olio attraverso il bicchierino
dosatore e continuare mescolare fino
ad emulsionare la maionese.
Accessori/accessori speciali
Gli altri accessori acclusi alla confezione
(cfr. l’allegato prospetto dei modelli,
sono descritti nelle istruzioni per l’uso separate.
Gli accessori/accessori speciali possono essere
anche acquistati in seguito singolarmente.
Gli accessori per la macchina MUM 45...
sono idonei anche per le macchine
MUM 44../46../48.. .
Figura
Contenitore di miscelazione in plastica
(MUZ4KR3)
Nella ciotola possono essere lavorati fino
ad 1 kg di farina più gli ingredienti.
Contenitore di miscelazione in acciaio
inox (MUZ4ER2)
Nella ciotola possono essere lavorati fino
ad 1 kg di farina più gli ingredienti.
Adattatore frullatore in plastica
(MUZ4MX2)
Per frullare bevande, per passare frutta
e verdura, per preparare maionese, per
sminuzzare frutta e noci, per frantumare
cubetti di ghiaccio.
Adattatore brocca frullatore
(MUZ4MX3)
Per frullare bevande, per passare frutta
e verdura, per preparare maionese, per
sminuzzare frutta e noci, per frantumare
cubetti di ghiaccio.
Multimixer (MUZ4MM3)
Per tritare erbe aromatiche, verdura, mele
e carne, per grattugiare carote, rafano
e formaggio, per sminuzzare noci e cioccolato
freddo.
Sminuzzatore continuo (MUZ4DS3)
Per tagliare cetrioli, cavolo, cavolo rapa, rafano;
per triturare carote, mele e sedano, cavolo
rosso, formaggio e noci; per grattugiare
formaggio duro, cioccolato e noci.
figura
)
34 Robert Bosch Hausgeräte GmbH
Page 35

Disco per patatine fritte (MUZ45PS1)
it
Con riserva di modifiche.
Per lo sminuzzatore continuo MUZ4DS3.
Per tagliare patate crude, per fare le patatine
fritte.
Disco verdura Asia (MUZ45AG1)
Per lo sminuzzatore continuo MUZ4DS3.
Taglia frutta e verdura in strisce sottili, per piatti
di verdure asiatici.
Disco grattugia grosso (MUZ45RS1)
Per lo sminuzzatore continuo MUZ4DS3.
Per grattugiare patate crude, ad es. per frittelle
di patate o canederli.
Disco per frittelle di patate
(MUZ45KP1)
Per lo sminuzzatore continuo MUZ4DS3.
Per grattugiare patate crude, per preparare
patate sminuzzate e arrostite in padella o frittelle
di patate, e per affettare frutta e verdura a fette
spesse.
Spremiagrumi (MUZ4ZP1)
Per spremere arance, limoni e pompelmi.
Tritacarne (MUZ4FW3)
Per tritare carne fresca per la tartara o il polpettone.
Set dischi forati (MUZ45LS1)
Per il tritacarne MUZ4FW3.
Fine (3 mm) per paté e paste da spalmare,
grosso (6 mm) per salsicce arrostite e speck.
Adattatore per pasticcini di pasta
miscelata iniettata (MUZ45SV1)
Per il tritacarne MUZ4FW3.
Con forma metallica per 4 diverse forme di dolci.
Adattatore grattugia (MUZ45RV1)
Per il tritacarne MUZ4FW3.
Per grattugiare noci, mandorle, cioccolato
e panini rappresi.
Adattatore spremifrutta (MUZ45FV1)
Per il tritacarne MUZ4FW3.
Per fare la passata di bacche, (esclusi i lamponi),
di pomodori e di frutti di rosa canina.
Nello stesso tempo al ribes vengono tolti
ad es. automaticamente peduncoli e semi.
Supporto accessori (MUZ4ZT1)
Per conservare accessori come braccio
impastatore, frusta per montare, frusta
per mescolare, disco per affettare, disco
trituratore e disco grattugia.
Macina per cereali con sistema
di macina conico in acciaio
(MUZ4GM3)
Per tutti i tipi di cereali escluso il mais, anche
per semi oleosi, funghi secchi ed erbe.
Gelatiera (MUZ4EB1)
Per lavorare fino a 550 g di gelato per volta
e contenitore.
Smaltimento
Questo apparecchio è contrassegnato conformemente alla
Direttiva europea 2012/19/CE Rifiuti
di apparecchiature elettriche ed
elettroniche (waste electrical and
electronic equipement – WEEE).
La direttiva prescrive il quadro normativo per un
recupero e riciclaggio degli apparecchi
dismessi.
Informarsi sulle attuali vie per la rottamazione
presso il proprio rivenditore specializzato
o presso la propria amministrazione
comunale.
Condizioni di garanzia
Per questo apparecchio sono valide le
condizioni di garanzia pubblicate dal nostro
rappresentante nel paese di vendita.
Il rivenditore, presso il quale è stato acquistato
l'apparecchio, è sempre ben disposto a fornire
a richiesta informazioni a proposito.
Per l'esercizio del diritto di garanzia
è comunque necessario presentare il
documento di acquisto.
Robert Bosch Hausgeräte GmbH 35
Page 36

nl
e~кнЙдбав=ЦЙСЙдбЕбнЙЙкЗ=гЙн=ЗЙ=~~евззй=о~е=
мп=ебЙмпЙ=_lp`eJ~йй~к~~нK
eбЙкгЙЙ=ЬЙЙСн=м=ЦЙвзтЙе=оззк= ЙЙе= гзЗЙкеI=
ЬззЦп~~кЗбЦ=ЬмблЬзмЗ~йй~к~~нK
jЙЙк=беСзкг~нбЙ=зоЙк=зетЙ=йкзЗмЕнЙе=обеЗн= м=
зй=зетЙ=бенЙкеЙнлбнЙK
Inhoud
Voor uw veiligheid . . . . . . . . . . . . . . . . . . . 36
In één oogopslag . . . . . . . . . . . . . . . . . . . . 38
Bedienen . . . . . . . . . . . . . . . . . . . . . . . . . . 39
Reiniging en onderhoud . . . . . . . . . . . . . . . 40
Hulp bij storingen . . . . . . . . . . . . . . . . . . . . 41
Toepassingsvoorbeelden . . . . . . . . . . . . . . 41
Toebehoren/extra toebehoren . . . . . . . . . . 42
Afvoer van het oude apparaat . . . . . . . . . . 43
Garantievoorwaarden . . . . . . . . . . . . . . . . 43
Voor uw veiligheid
Lees voor de ingebruikneming zorgvuldig deze gebruiksaanwijzing,
die belangrijke veiligheids- en bedieningsaanwijzingen over het
apparaat bevat.
Bij niet-naleving van de aanwijzingen voor het juiste gebruik van het
apparaat is de fabrikant niet aansprakelijk voor daaruit resulterende
schade.
Dit apparaat is bedoeld voor hoeveelheden die gebruikelijk zijn in het
huishouden en voor huishoudachtige, niet-zakelijke toepassingen.
Huishoudachtige toepassingen omvatten bijv. het gebruik in
personeelsruimtes van winkels, kantoren, landbouwbedrijven en andere
zakelijke bedrijven, evenals het gebruik door gasten van pensions, kleine
hotels en soortgelijke woonvoorzieningen. Gebruik het apparaat uitsluitend
voor verwerkingshoeveelheden en -tijden die gebruikelijk zijn in het
huishouden. Toegestane hoeveelheden (zie „Toepassingsvoorbeelden”)
niet overschrijden!
Dit apparaat is geschikt voor het mixen, kneden en kloppen van
levensmiddelen. Het mag niet worden gebruikt om andere voorwerpen of
substanties te verwerken. Bij gebruik van de door de fabrikant
goedgekeurd toebehoren zijn andere toepassingen mogelijk.
Gebruik het apparaat uitsluitend met origineel toebehoren. Bij gebruik van
het toebehoren de bijgevoegde gebruiksaanwijzingen in acht nemen.
De gebruiksaanwijzing bewaren a.u.b. Overhandig ook de
gebruiksaanwijzing als u het apparaat doorgeeft aan derden.
, Algemene veiligheidsvoorschriften
Gevaar van een elektrische schok
Dit apparaat mag niet worden gebruikt door kinderen.
Het apparaat en het aansluitsnoer dienen uit de buurt van kinderen te
worden gehouden.
Apparaten kunnen worden gebruikt door personen met verminderde
fysische, sensorische of mentale vaardigheden of gebrek aan ervaring en
kennis indien zij onder toezicht staan of zijn onderwezen in het veilige
36 Robert Bosch Hausgeräte GmbH
Page 37

gebruik van het apparaat en de daaruit resulterende gevaren hebben
nl
begrepen.
Kinderen mogen niet met het apparaat spelen.
Het apparaat uitsluitend aansluiten en gebruiken volgens de gegevens
op het typeplaatje. Alleen gebruiken wanneer het aansluitsnoer en het
apparaat niet zijn beschadigd.
Het apparaat moet altijd worden losgemaakt van het stroomnet wanneer
er geen toezicht op is en voordat het in elkaar wordt gezet, uit elkaar
wordt genomen of wordt gereinigd.
Leid het aansluitsnoer niet langs scherpe randen of hete oppervlakken.
Wanneer het aansluitsnoer van het apparaat beschadigd raakt, moet om
gevaren te vermijden het snoer worden vervangen door de fabrikant, de
klantenservice of een andere gekwalificeerde persoon.
Reparaties aan het apparaat mogen uitsluitend worden uitgevoerd door
onze klantenservice.
, Veiligheidsvoorschriften voor dit apparaat
Verwondingsgevaar
Gevaar van een elektrische schok!
De stekker pas in het stopcontact steken wanneer alle voorbereidingen
voor het werken met het apparaat zijn uitgevoerd.
Basisapparaat nooit in vloeistof dompelen of onder stromend water
houden.
Geen stoomreiniger gebruiken.
De draaiarm niet verstellen wanneer het apparaat is ingeschakeld. Wacht
tot de aandrijving geheel stilstaat.
Hulpstuk/toebehoren alleen verwisselen wanneer de aandrijving stilstaat –
na het uitschakelen loopt de aandrijving nog even na.
Het apparaat uitsluitend in- en uitschakelen met de draaischakelaar.
De stekker uit het stopcontact trekken wanneer het apparaat niet wordt
gebruikt.
Trek de stekker uit het stopcontact voordat u een storing verhelpt.
Na een stroomonderbreking gaat het apparaat weer lopen.
Verwondingsgevaar door roterende hulpstukken!
Niet in draaiende onderdelen grijpen. Tijdens het gebruik nooit in de
mengkom grijpen.
Hulpstukken alleen wisselen wanneer de aandrijving stilstaat – na het
uitschakelen loopt de aandrijving nog even na.
Om veiligheidsredenen mag het apparaat uit-sluitend worden gebruikt
wanneer niet-gebruikte aandrijvingen zijn afgedekt met aandrijvingsbeschermdeksels (4, 7).
Robert Bosch Hausgeräte GmbH 37
Page 38

Verwondingsgevaar door scherpe messen/roterende aandrijving!
nl
Niet in de aangebrachte mixer grijpen! De mixer alleen verwijderen of
aanbrengen wanneer de aandrijving stilstaat! De mixer uitsluitend in
samengebouwde toestand en met aangebracht deksel gebruiken.
Mixermes niet met blote handen reinigen.
Risico van brandwonden!
Bij verwerking van hete mixvloeistoffen komt er stoom uit de trechter in het
deksel. Maximaal 0,5 liter hete of schuimende mixvloeistof toevoegen.
Belangrijk!
Niet meer dan één hulpstuk of toebehoren tegelijk gebruiken.
De gebruiksaanwijzing beschrijft verschillende
modellen (zie ook het modeloverzicht, afb.
Het apparaat behoeft geen verzorging.
).
In één oogopslag
De pagina's met afbeeldingen uitklappen
a.u.b. Afb.
Basisapparaat
1
Ontgrendelknop
2
Draaiarm
(zie „Bedrijfsposities”)
3
Draaischakelaar
0/off = stop
/
P
Draaischakelaar vasthouden tot de aandrijving stilstaat; het hulpstuk bevindt zich
in parkeerpositie. Als de aandrijving niet
beweegt, is de parkeerpositie al bereikt.
Standen 1–4 = werksnelheid
Stand 1 = laagste toerental –
Stand 4 = hoogste toerental – snel
Bij een stroomstoring blijft het apparaat
ingeschakeld; na de stroomstoring gaat
het automatisch weer lopen.
4
Aandrijvingsbeschermdeksel
Het aandrijvingsbeschermingsdeksel
kunt u verwijderen door het te draaien
tot de vergrendeling is ontgrendeld.
5
Aandrijving voor
–
doorloopsnijder
–
citruspers *
–
graanmolen *
Het aandrijvings-beschermingsdeksel
aanbrengen als de aandrijving niet wordt
gebruikt.
= parkeerschakeling
langzaam
*
6
Aandrijving voor
–
hulpstukken (roergarde, klopgarde,
kneedhaak)
–
roerhulpstuk van de ijsbereider *
–
op- of neergeklapt voor de
vleesmolen *
7
Aandrijvingsbeschermdeksel mixer
8
Aandrijving voor
–
mixer
–
multimixer
Het mixeraandrijvings-beschermingsdeksel
aanbrengen als de aandrijving niet wordt
gebruikt.
9
Kabelvak (
MUM 44..: Kabel opwikkelen
MUM 46../48..: Het snoer opbergen in het
snoeropbergvak
Mengkom met toebehoren
10
Mengkom
11
Deksel
Hulpstukken
Roergarde
12
13
Klopgarde
14
Kneedhaak met deegvanger
Mixer
Houder
15
16
Mesinzetstuk
17
Afdichtring
18
Mengbeker
19
Deksel
20
Trechter
* Indien een van de toebehoren niet is mee-
geleverd, kan het in de speciaalzaak of bij
de klantenservice worden aangeschaft.
Afb.
)
38 Robert Bosch Hausgeräte GmbH
Page 39

Bedrijfsposities
nl
^ннЙенбЙ>
eЙн=~йй~к~~н=~ддЙЙе=ЦЙДкмбвЙе=п~ееЙЙк=ЬЙн=
ЬмдйлнмвLнзЙДЙЬзк Йе =оздЦЙел=ЗЙтЙ=н~ДЙд=
бл ~~еЦЙДк~ЕЬн=зй=ЗЙ=амблнЙ=~~еЗкбаобеЦ=Йе=бе=
ЗЙ амблнЙ=йзлбнбЙI=Йе=зй=ЗЙ=ДЙЗкбаСл лн~еЗ=лн~~ нK
aЙ=Зк~~б~кг=гзЙн=бе=ЙдвЙ=ДЙЗкбаСлйзлбнбЙ=тбае=
о~лнЦЙвдбвнK
Instellen van de bedrijfspositie Afb.
Ontgrendelknop indrukken en de draaiarm
draaien.
De draaiarm op de gewenste positie zetten
en laten vastklikken.
Bedrijfsstand
1
2
3
4
5
6
7
Aanbrengen/verwijderen van
de (roer)garde en de kneedhaak
Toevoegen van grote
verwerkingshoeveelheden
Bedienen
sЙкпзеЗбеЦлЦЙо~~к>
aЙ=лнЙввЙк=й~л=бе=ЬЙн=лнзйЕзен~Ен=лнЙвЙе=
п~ееЙЙк=~ддЙ=оззкДЙкЙбЗбеЦЙе=оззк=ЬЙн=пЙквЙе=
гЙн=ЬЙн=~йй~к~~н=тбае=мбнЦЙозЙкЗK
^ннЙенбЙ>
eЙн= ~йй~к~~н=~ддЙЙе=гЙн=ЬЙн= нзЙДЙЬзкЙеLЬмдйлнмв=
бе=ЗЙ=ДЙЗкбаСллн~еЗ=ЦЙДкмбвЙеK
eЙн=~йй~к~~н=ебЙн=тзеЗЙк=беЦкЙЗбШенЙе=ЦЙДкмбвЙеK=
^йй~к~~н=Йе=нзЙДЙЬзкЙе=ебЙн=ДдззнлнЙддЙе=~~е=
п~кгнЙДкзееЙеK=aЙ=зеЗЙкЗЙдЙе=тбае=ебЙн=ЦЙлЕЬбвн=
оззк=ЦЙДкмбв=бе=ЙЙе=г~ЦеЙнкзеK
Het apparaat en het toebehoren grondig
reinigen voordat u ze in gebruik neemt,
zie „Reiniging en onderhoud”.
Voorbereiden
Het basisapparaat op een vlakke en schone
ondergrond zetten.
Het snoer afwikkelen/uit de snoerhouder
trekken (
Stekker in wandcontactdoos doen.
Afb.
).
Roergarde, klopgarde
en kneedhaak Afb.
Garde (a)
voor het roeren van deeg, bijv. roerdeeg.
Klopgarde (b)
voor het kloppen van eiwit, slagroom en dun
deeg, bijv. biscuitdeeg.
Kneedhaak (c) met deegvanger (d)
voor het kneden van dik deeg en het mengen
van ingrediënten die niet fijngemaakt mogen
worden (bijv. rozijnen, chocolaatjes).
sЙкпзеЗбеЦлЦЙо~~к=Зззк=
кзнЙкЙеЗЙ=ЬмдйлнмввЙе>
qбаЗЙел=ЬЙн=ЦЙДкмбв=еззбн=бе=ЗЙ=гЙеЦвзг=
ЦкбайЙеK
eмдйлнмввЙе=~ддЙЙе=пбллЙдЙе=п~ееЙЙк=
ЗЙ ~~еЗкбаобеЦ=лнбдлн~~н=У=е~=ЬЙн=мбнлЕЬ~вЙдЙе=
дззйн=ЗЙ=~~еЗкбаобеЦ=езЦ=ЙоЙе=е~K
eЙн=~йй~к~~н=г~Ц=мбнлдмбнЙеЗ=пзкЗЙе=ЦЙДкмбвн=
п~ееЙЙк=ЗЙ=ебЙнJДЙлЕЬЙкгЗЙ=~~еЗкбаобеЦЙе=
тбае=оззктбЙе=о~е=ЗЙ=~~еЗкбаобеЦлJ
ДЙлЕЬЙкгбеЦлЗЙвлЙдлK
Draaischakelaar op
tot de aandrijving stilstaat.
Opmerking:
Als de aandrijving niet beweegt,
is de parkeerpositie al bereikt.
Ontgrendelknop indrukken en de draaiarm
op positie 6 zetten.
De kom plaatsen. De sokkel van de kom
moet in de uitsparing van het basisapparaat
steken.
Afhankelijk van de uit te voeren taak
de roergarde, slaggarde of kneedhaak
in de aandrijving steken tot deze vastklikt.
Bij de kneedhaak de deegvanger draaien
tot de kneedhaak kan worden vastgeklikt.
De ingrediënten in de kom doen.
Ontgrendelknop indrukken en de draaiarm
op positie 1 zetten.
Deksel aanbrengen.
Draaischakelaar op de gewenste stand
zetten.
P
zetten en vasthouden
Robert Bosch Hausgeräte GmbH 39
Page 40

Ingrediënten toevoegen
nl
Apparaat uitschakelen met de draaischa-
kelaar.
Draaischakelaar op
P
zetten en vasthouden
tot de aandrijving stilstaat.
Deksel verwijderen.
Ontgrendelknop indrukken en de draaiarm
op positie 7 zetten.
Ingrediënten toevoegen
of
ingrediënten toevoegen via de vulopening
in het deksel.
Na gebruik
Apparaat uitschakelen met de draaischa-
kelaar.
Draaischakelaar op
P
zetten en vasthouden
tot de aandrijving stilstaat.
Stekker uit wandcontactdoos nemen.
Deksel verwijderen.
Ontgrendelknop indrukken en de draaiarm
op positie 6 zetten.
Hulpstuk uit de aandrijving trekken.
Kom verwijderen.
Alle onderdelen reinigen, zie „Reiniging
en onderhoud”.
Mixer Afb.
sЙкпзеЗбеЦлЦЙо~~к=Зззк=лЕЬЙкйЙ=
гЙллЙеLкзнЙкЙеЗЙ=~~еЗкбаобеЦ>
kбЙн=бе=ЗЙ=~~еЦЙДк~ЕЬнЙ=гбсЙк=ЦкбайЙе>=
aЙ=гбсЙк=~ддЙЙе=оЙкпбаЗЙкЙе=зС=~~еДкЙеЦЙе=
п~ееЙЙк=ЗЙ=~~еЗкбаобеЦ=лнбдлн~~н>=
aЙ=гбсЙк=мбнлдмбнЙеЗ=бе=л~гЙеЦЙДзмпЗЙ=
нзЙлн~еЗ=Йе=гЙн=~~еЦЙДк~ЕЬн=ЗЙвлЙд=
ЦЙДкмбвЙеK
oблбЕз=о~е=Дк~еЗпзеЗЙе>
_ба=оЙкпЙквбеЦ=о~е=ЬЙнЙ=гбсодзЙблнзССЙе=взгн=
Йк лнззг=мбн=ЗЙ=нкЙЕЬнЙк=бе=ЬЙн=ЗЙвлЙдK=
j~сбг~~д=MIR=дбнЙк=ЬЙнЙ=зС=лЕЬмбгЙеЗЙ=
гбсодзЙблнзС=нзЙозЙЦЙеK
^ннЙенбЙ>
aЙ=гбсЙк=в~е=ДЙлЕЬ~ЗбЦЗ=к~вЙеK=
dЙЙе=ДЙокзкЙе=беЦкЙЗбШенЙе=EмбнЦЙтзеЗЙкЗ=
балДдзваЙлF=оЙкпЙквЙеK=aЙ=гбсЙк=ебЙн=тзеЗЙк=
омддбеЦ=д~нЙе=дзйЙеK
^ннЙенбЙ>
sЙкпЙквЙе=о~е=одзЙблнзС=бе=ЗЙ=Цд~тЙе=гбсЙкW=
г~сбг~~д=зй=лн~еЗ=PK=j~сбг~~д=MIR=дбнЙк=ЬЙнЙ=
зС лЕЬмбгЙеЗЙ=одзЙблнзС=бе=ЗЙ=гбсЙк=ЗзЙеK
Ontgrendelknop indrukken en de draaiarm
op positie 3 zetten.
Het beschermdeksel van de mixeraandrijving
verwijderen.
Mixkom plaatsen (markering op de sokkel
tegen de markering op het basisapparaat)
en tegen de klok in tot aan de aanslag
draaien (
De ingrediënten toevoegen.
Afb. –4/5
).
Maximale hoeveelheid bij kunststof mixer,
vloeibaar = 1 liter, bij glazen mixer, vloeibaar
= 0,75 liter schuimende of hete vloeistof
maximaal 0,5 liter;
optimale verwerkingshoeveelheid, vast
= 50–100 gram.
Deksel aanbrengen en vastdrukken.
Het deksel tijdens het gebruik altijd met een
hand vasthouden. Daarbij de hand niet
boven de vulopening houden!
Draaischakelaar op de gewenste stand
zetten.
Ingrediënten toevoegen Afb. -6
Apparaat uitschakelen met de draaischa-
kelaar.
Deksel verwijderen en de ingrediënten
toevoegen
of
trechter verwijderen en vaste ingrediënten
beetje bij beetje toevoegen via de vulopening
of
vloeibare ingrediënten toevoegen via
de trechter.
Na gebruik
Apparaat uitschakelen met de draaischa-
kelaar.
Stekker uit wandcontactdoos nemen.
Mixer met de klok mee draaien en
verwijderen.
Tip:
U kunt de mixer het best direct na gebruik
reinigen.
Reiniging en onderhoud
^ннЙенбЙ>
dЙЙе=лЕЬмкЙеЗЙ=кЙбебЦбеЦлгбЗЗЙдЙе=ЦЙДкмбвЙеK=
aЙ=зййЙкод~ввЙе=вмееЙе=ДЙлЕЬ~ЗбЦЗ=к~вЙеK=
Basisapparaat reinigen
dЙо~~к=о~е=ЙдЙвнкблЕЬЙ=лЕЬзв>
eЙн=Д~лбл~йй~к~~н=еззбн=бе=п~нЙк=ЗзгйЙдЙе=
зС зеЗЙк=лнкзгЙеЗ=п~нЙк=ЬзмЗЙеK
Stekker uit wandcontactdoos nemen.
40 Robert Bosch Hausgeräte GmbH
Page 41

Het basisapparaat schoonvegen met een
nl
vochtige doek.
Indien nodig een beetje afwasmiddel
gebruiken.
Daarna het apparaat afdrogen.
Mengkom en toebehoren reinigen
Alle delen kunnen in de afwasautomaat worden
gereinigd. Kunststof onderdelen niet vastklemmen in de afwasautomaat, ze kunnen
vervormd raken.
Mixer reinigen
sЙкпзеЗбеЦлЦЙо~~к=Зззк=лЕЬЙкйЙ=
гЙллЙе>
jбсЙкгЙл=ебЙн=гЙн=ДдзнЙ=Ь~еЗЙе=кЙбебЦЙеK=
aЙ гбсЙк=в~е=мбн=Йдв~~к=пзкЗЙе=ЦЙезгЙе=оззк=
ЗЙ=кЙбебЦбеЦK
^ннЙенбЙ>
dЙЙе=лЕЬмкЙеЗЙ=кЙбебЦбеЦлгбЗЗЙдЙе=ЦЙДкмбвЙеK=
aЙ=гЙлЬзмЗЙк=в~е=ебЙн=пзкЗЙе=ЦЙкЙбебЦЗ=
бе=ЗЙ=~Сп~л~мнзг~~нK=aЙ=гЙлЬзмЗЙк=мбнлдмбнЙеЗ=
кЙбебЦЙе=зеЗЙк=лнкзгЙеЗ=п~нЙкK
Tip:
Na het verwerken van vloeistoffen is het
vaak voldoende om de mixer te reinigen zonder
hem uit elkaar te nemen.
Hiertoe doet u een beetje water met afwasmiddel in de gemonteerde mixer.
De mixer enkele seconden inschakelen (bij
apparaten met momentschakeling op stand M).
Afwassopje weggieten en de mixer uitspoelen
met schoon water.
Mixer uit elkaar nemen Afb.
De sokkel van de mixkom met de klok
in draaien en verwijderen.
Het mesinzetstuk aan de vleugels tegen de
klok in draaien. Het mesinzetstuk zit nu los.
Het mesinzetstuk eruit nemen en de
afdichtring verwijderen.
Mixer in elkaar zetten Afb.
sЙкпзеЗбеЦлЦЙо~~к>
aЙ=гбсЙк=ебЙн=бе=Йдв~~к=тЙннЙе=нЙкпбад=ЬЙн=зй=ЬЙн=
Д~лбл~йй~к~~н=бл=~~еЦЙДк~ЕЬнK
Afdichtring aanbrengen op het mesinzetstuk.
Mesinzetstuk van onderaf in de mixkom
aanbrengen.
Met behulp van de sokkel de meshouder
vastschroeven.
Sokkel van de mixkom tegen de klok mee
vastdraaien.
Hulp bij storingen
Bij storingen a.u.b. contact opnemen met
de klantenservice.
Toepassingsvoorbeelden
Slagroom
100 g–600 g
Room 1½ tot 4 minuten met de klop-
garde kloppen op stand 4 (afhankelijk
van de hoeveelheid en de eigenschappen
van de room).
Eiwit
Eiwit van 1 tot 8 eieren
Eiwit 4 tot 6 minuten op stand
4 kloppen met de garde.
Biscuitdeeg
_~лблкЙЕЙйн=
2 eieren
2–3 eetlepels heet water
100 g suiker
1 pakje vanillesuiker
70 g meel
70 g aardappelmeel eventueel bakpoeder
De ingrediënten (behalve het meel en het
aardappelmeel) ca. 4 tot 6 minuten tot
schuim kloppen met de klopgarde
op stand 4.
Draaischakelaar op stand 2 zetten en het
gezeefde meel en aardappelmeel in ca. ½ tot
1 minuut lepel voor lepel erdoor mengen.
Maximumhoeveelheid:
Roerdeeg
_~лблкЙЕЙйн=
3–4 eieren
200–250 g suiker
1 snufje zout
1 pakje vanillesuiker of de schil van ½ citroen
200–250 g boter (kamertemperatuur)
500 g meel
1 pakje bakpoeder
1
/
l melk
8
Alle ingrediënten ca. ½ minuut roeren
met de roergarde op stand 1, daarna
ca. 3–4 minuten op stand 3.
Maximumhoeveelheid:
2 x basisrecept
1,5–2 x basisrecept
Robert Bosch Hausgeräte GmbH 41
Page 42

Zandtaartdeeg
nl
_~лблкЙЕЙйн=
125 g boter (kamertemperatuur)
100–125 g suiker
1 ei
1 snufje zout
stukje citroenschil of vanillesuiker
250 g meel
eventueel bakpoeder
Alle ingrediënten ca. ½ minuut verwerken
op stand 1, dan ca. 2–3 minuten verwerken
met de roergarde (stand 3) of de kneedhaak
(stand 2).
Maximumhoeveelheid:
2 x basisrecept
Gistdeeg
_~лблкЙЕЙйн=
500 g meel
1 ei
80 g vet (kamertemperatuur)
80 g suiker
200–250 ml lauwe melk
25 g verse gist of 1 pakje gedroogde gist schil
van ½ citroen
1 snufje zout
Alle ingrediënten ca. ½ minuut op stand 1,
daarna 3–6 minuten op stand 2 met de
kneedhaak verwerken.
Max. hoeveelheid:
1,5 x basisrecept
Mayonaise
2 eieren
2 theelepel mosterd
¼ l olie
2 eetlepels citroensap of azijn
1 snufje zout
beetje suiker
De ingrediënten moeten dezelfde temperatuur
hebben.
De ingrediënten (behalve de olie) enkele
seconden mixen op stand 2.
De mixer op stand 4 zetten en de olie
langzaam in de trechter gieten; mengen
totdat de mayonaise emulgeert.
Toebehoren/extra toebehoren
Overig toebehoren in de verpakking
(zie het bijgevoegde modeloverzicht
is beschreven in de afzonderlijke
gebruiksaanwijzingen.
Het bijgevoegde toebehoren/extra toebehoren
kan ook los worden gekocht. Het toebehoren bij
het apparaat MUM 45.. is ook geschikt voor
de apparaten MUM 44../46../48.. .
afb.
)
Afb.
Kunststof roerkom (MUZ4KR3)
In de kom kunnen max. 1 kg meel plus ingrediënten worden verwerkt.
Roestvrijstalen kom (MUZ4ER2)
In de kom kunnen max. 1 kg meel plus ingrediënten worden verwerkt.
Mixer-opzetstuk kunststof (MUZ4MX2)
Voor het mixen van dranken, pureren van fruit
en groente, bereiden van mayonaise, fijnmaken
van groente, fruit en noten, en het malen van
ijsblokjes.
Mixer-opzetstuk glas (MUZ4MX3)
Voor het mixen van dranken, pureren van fruit
en groente, bereiden van mayonaise, fijnmaken
van groente, fruit en noten, en het malen van
ijsblokjes.
Multimixer (MUZ4MM3)
Voor het hakken van kruiden, groente, appels
en vlees, voor het raspen van wortels,
rammenas en kaas, voor het fijnraspen
van noten en gekoelde chocolade.
Doorloopsnijder (MUZ4DS3)
Voor het snijden van komkommer, kool, koolrabi, rammenas; voor het raspen van wortels,
appels en selderie, rodekool, kaas en noten; voor
het malen van harde kaas, chocola en noten.
Patates-fritesschijf (MUZ45PS1)
Voor de doorloopsnijder MUZ4DS3.
Voor het snijden van rauwe aardappels
tot patates frites.
Asia-groenteschijf (MUZ45AG1)
Voor de doorloopsnijder MUZ4DS3.
Snijdt fruit en groente in smalle reepjes,
voor Aziatische groentegerechten.
Maalschijf grof (MUZ45RS1)
Voor de doorloopsnijder MUZ4DS3.
Voor het raspen van rauwe aardappels,
bijv. voor aardappelkoekjes of knoedels.
Aardappelkoekjesschijf (MUZ45KP1)
Voor de doorloopsnijder MUZ4DS3.
Voor het raspen van rauwe aardappels voor
Rösti en aardappelkoekjes, voor het snijden
van fruit en groente in dikke plakken.
Citruspers (MUZ4ZP1)
Voor het uitpersen van sinaasappels, citroenen
en grapefruit.
42 Robert Bosch Hausgeräte GmbH
Page 43

Vleesmolen (MUZ4FW3)
nl
Wijzigingen voorbehouden.
Voor het fijnmaken van vlees voor tartaar
of gehakt.
Ponsschijvenset (MUZ45LS1)
Voor de vleesmolen MUZ4FW3.
Fijn (3 mm) voor pasteien en beleg, grof (6 mm)
voor braadworsten en spek.
Spritsgebak-hulpstuk (MUZ45SV1)
Voor de vleesmolen MUZ4FW3.
Met metaalsjabloon voor 4 verschillende
bakvormen.
Maalvoorzetstuk (MUZ45RV1)
Voor de vleesmolen MUZ4FW3.
Voor het malen van noten, amandelen, chocola
en gedroogde broodjes.
Fruitpershulpstuk (MUZ45FV1)
Voor de vleesmolen MUZ4FW3.
Voor het persen van bessen (uitgezonderd
frambozen), tomaten en rozenbottels tot moes.
Tegelijk worden bijv. aalbessen automatisch van
steeltjes en pitten ontdaan.
Toebehorenhouder (MUZ4ZT1)
Voor het opbergen van toebehoren zoals
de kneedhaak, klopgarde, roergarde, snij-,
rasp- en maalschijf.
Graanmolen met kegelmaalwerk
van staal (MUZ4GM3)
Voor alle graansoorten behalve maïs en voor
oliezaadsoorten, gedroogde paddestoelen
en kruiden.
IJsbereider (MUZ4EB1)
Voor het bereiden van max. 550 g ijs per keer
en per kom.
Afvoer van het oude apparaat
Dit apparaat is geclassificeerd volgens
de Europese richtlijn 2012/19/EG over
oude elektrische en elektronische
apparatuur (waste electrical and
electronic equipment – WEEE).
Deze richtlijn vormt voor de gehele EU een kader
voor de terugname en recycling van oude
apparaten.
Voor actuele informatie over de afvoer van het
oude apparaat kunt u terecht bij de vakhandel
of bij uw gemeente.
Garantievoorwaarden
Voor dit apparaat gelden de garantievoorwaarden die worden uitgegeven door de
vertegenwoordiging van ons bedrijf in het land
van aankoop. De leverancier bij wie u het
apparaat hebt gekocht geeft u hierover graag
meer informatie. Om aanspraak te maken op
de garantie hebt u altijd uw aankoopbewijs
nodig.
Robert Bosch Hausgeräte GmbH 43
Page 44

da
qбддуввЙ=гЙЗ=в›ДЙн=~С=Збн=еуЙ=~йй~к~н=Ск~=
Сбкг~Йн=_lp`eK
aЙкгЙЗ=Ь~к=Зм=о~дЦн=Йн=гзЗЙкеЙI=
С›клнЙвд~ллЙл=ЬмлЬздЗебеЦл~йй~к~нK
vЗЙкдбЦЙкЙ=беСзкг~нбзеЙк=зг=озкЙл=йкзЗмвнЙк=
СбеЗЙк=Зм=й™=озкЙл=бенЙкеЙнлбЗЙK
Indhold
For din egen sikkerheds skyld . . . . . . . . . . 44
Overblik . . . . . . . . . . . . . . . . . . . . . . . . . . . 44
Betjening . . . . . . . . . . . . . . . . . . . . . . . . . . 47
Rengøring og pleje . . . . . . . . . . . . . . . . . . . 48
Hjælp i tilfælde af fejl . . . . . . . . . . . . . . . . . 49
Eksempler på brug . . . . . . . . . . . . . . . . . . 49
Tilbehør/Ekstratilbehør . . . . . . . . . . . . . . . . 50
Bortskaffelse . . . . . . . . . . . . . . . . . . . . . . . 51
Garantibetingelser . . . . . . . . . . . . . . . . . . . 51
For din egen sikkerheds skyld
Læs denne vejledning nøje igennem før brug for at få vigtige
sikkerheds- og betjeningshenvisninger til dette apparat
Producenten fraskriver sig ansvaret for skader, der skyldes en
manglende overholdelse af instrukserne vedr. korrekt brug af apparatet.
Dette apparat er beregnet til brug i husholdningen eller
husholdningslignende indretninger. Det må ikke bruges til erhvervsmæssig
brug. Ved husholdningslignende indretninger forstås f.eks. brug i medarbejderkøkkener i forretninger, på kontorer, i landbrugsmæssig og anden
erhvervsmæssig drift samt brug på pensioner, små hoteller og andre
former for boliger, hvor apparatet betjenes af gæsterne selv. Apparatet er
kun beregnet til at blive brugt til mængder og tider, som er almindelige i en
normal husholdning. Overskrid ikke tilladte maks. mængder (se „Eksempler
på brug“)!
Dette produkt er egnet til at røre, ælte og piske levnedsmidler. Det må ikke
bruges til at forarbejde andre genstande eller substanser. Bruges det at
producenten tilladte tilbehør, kan produktet evt. også bruges til andre ting.
Apparatet må kun bruges med originalt tilbehør. Tilbehør skal bruges iht.
bestemmelserne i vedlagte brugsanvisninger.
Opbevar venligst brugsanvisningen. Giv brugsanvisningen videre til en
senere ejer.
, Generelle sikkerhedstips
Risiko for elektrisk stød
Dette apparat må ikke bruges af børn.
Apparatet og dets tilslutningsledning skal holdes uden for børns
rækkevidde.
Apparater kan bruges af personer med begrænsede fysiske, sensoriske
eller psykiske evner eller manglende erfaring og viden, hvis de overvåges
eller er blevet instrueret i en sikker brug af apparatet og har forstået de
farer, der er forbundet hermed.
Apparatet er ikke legetøj for børn.
44 Robert Bosch Hausgeräte GmbH
Page 45

Tilslut og benyt kun apparatet iht. angivelserne på typeskiltet. Må kun
da
tages i brug, hvis ledningen og apparatet er ubeskadigede.
Apparatet skal altid afbrydes fra nettet, når det ikke er under opsyn, før
det samles, før det skilles ad eller før det rengøres.
Ledningen må ikke trækkes hen over skarpe kanter eller varme flader.
Hvis tilslutningsledningen til dette apparat er beskadiget, skal den
udskiftes af fabrikanten, fabrikantens kundeservice eller lignende,
kvalificeret person for at undgå fare.
Apparatet må kun repareres af vor kundeservice.
, Sikkerhedsoplysninger til dette apparat
Kvæstelsesfare
Risiko for elektrisk stød!
Sæt først elstikket i, når alle forberedelser til arbejdet med apparatet er
afsluttet.
Dyp aldrig grundmodellen i væske og hold den aldrig ind under rindende
vand.
Brug ikke nogen damprenser.
Forsøg ikke at indstille svingarmen, mens apparatet er tændt. Vent til
drevudtaget står helt stille.
Udskift kun redskab/tilbehør, når maskinen står stille – drevet kører kort
efter, at apparatet er slukket.
Apparatet må kun tændes og slukkes med drejekontakten.
Træk netstikket ud, når apparatet ikke er i brug.
Træk altid netstikket ud forinden du afhjælper en fej!
Apparatet starter igen, så snart strømmen vender tilbage efter et
strømsvigt.
Kvæstelsesfare som følge af roterende redskaber!
Stik ikke fingrene ind i roterende dele. Stik aldrig hånden ned i skålen, når
apparatet er i gang.
Udskift kun redskab, når apparatet står stille – apparatet kører kort efter, at
det er slukket (efterløb).
Apparatet må af sikkerhedsmæssige grunde kun bruges, hvis ikke brugte
drevudtag er beskyttet med beskyttelseslåg (4, 7).
Kvæstelsesfare som følge af skarpe knive/roterende drev!
Stik aldrig hånden ned i den påsatte blender!
Forsøg aldrig at samle blenderen på grundmodellen. Blenderen skal være
sat rigtigt på og låget være strammet helt fast, når der arbejdes med
blenderen.
Blenderen må kun sættes på og tages af, når apparatet står helt stille.
Berør ikke blenderknivene med de bare fingre.
Robert Bosch Hausgeräte GmbH 45
Page 46

Fare for skoldning!
da
Ved blanding af varme ingredienser kommer der damp ud gennem tragten
i låget. Påfyld max. 0,5 liter varm eller skummende væske.
Vigtigt!
Brug kun et redskab eller et tilbehør ad gangen.
Brugsanvisningen beskriver forskellige modeller
(se også modeloversigt, Billede ). Apparatet
er vedligeholdelsesfrit.
Overblik
Fold billedsiderne ud. Billede
Motorenhed
1
Sikkerhedsknap
2
Svingarmen
(se „Arbejdspositioner“)
Drejekontakt
3
0/off = stop
/
P
hold grebet fast, indtil drevet bliver stående;
redskabet er i svingposition.
Hvis drevet ikke bevæger sig, er svingpositionen allerede nået.
Trin 1–4 = arbejdshastighed
Trin 1 = laveste hastighed –
Trin 4 = højeste hastighed – hurtig
I tilfælde af strømsvigt: apparatet forbliver
tændt og går automatisk i gang igen, så
snart apparatet forsynes med strøm igen.
4
Låg til drevudtag
Beskyttelseskappen tages af ved at dreje
den indtil låsen går op.
Drevudtag til
5
–
hurtigsnitter
–
citruspresse *
–
kornmølle *
Sæt beskyttelseskappen på, når drevet ikke
er i brug.
6
Drevudtag til
–
redskab (røreris, piskeris, æltekrog)
–
ismaskinens røreenhed *
–
klappet ned eller op til kødhakker *
7
Låg til drevudtag til blender
= parkeringsfunktion;
langsom
*
8
Drevudtag til
–
blender
–
multiblender
Beskyttelseskappen sættes på drevet,
når blenderen ikke er i brug.
9
Opbevaring af ledning (
MUM 44..: Opvikling af ledning
MUM 46../48..: Opbevar ledningen
i ledningsrummet
Skål med tilbehør
10
Røreskål
11
Låg
Redskab
Røreris
12
13
Piskeris
14
Dejkroge med dejskraber
Blender
Sokkel
15
16
Knivindsats
17
Pakring
18
Blenderbæger
19
Låg
20
Tra gt
* Følger en tilbehørsdel ikke med leveringen,
kan den købes i handlen og hos kundeservice.
Billede
)
Arbejdspositioner
l_p>
^йй~к~нЙн=г™= вме=ДкмЦЙлI=Ьобл=кЙЗлв~ДLнбдДЙЬ›к=
Йк=~еДк~Цн=кбЦнбЦн=ЙСнЙк=ЗЙееЙ=н~ДЙд=зЦ= ДЙСб еЗЙк=
лбЦ=б=~кДЙаЗлйзлбнбзеK
pобеЦ~кгЙе=лв~д=о‹кЙ=С~дЗЙн=б=Ь~в=б=ЙеЬоЙк=
~кДЙаЗлйзлбнбзеK
Indstilling af arbejdsposition Billede
Tryk på sikkerhedsknappen og bevæg
svingarmen.
Bevæg svingarmen, til den falder i hak i den
ønskede position.
46 Robert Bosch Hausgeräte GmbH
Page 47

da
Position
1
2
3
4
5
6
7
Isætning/udtagning af røreris,
piskeris og dejkroge
Tilsætning af store
mængder
Betjening
c~кЙ=Сзк=во‹лнЙдлЙк>
p‹н=С›клн=ЙдлнбввЙн=бI=е™к=~ддЙ=СзкДЙкЙЗЙдлЙк=
нбд ~кДЙаЗЙн=гЙЗ=~йй~к~нЙн=Йк=~СлдмннЙнK
l_p>
^йй~к~нЙн=г™=вме=ДкмЦЙлI=е™к=нбдДЙЬ›кLкЙЗлв~Д=
ДЙСбеЗЙк=лбЦ=б=~кДЙаЗлйзлбнбзеK
q‹еЗ=бввЙ=Сзк=~йй~к~нЙнI=Ьобл=ЗЙн=Йк=нзгнK=
rЗл‹н=бввЙ=~йй~к~н=зЦ=нбдДЙЬ›клЗЙдЙ=Сзк=о~кгЙJ
вбдЗЙкK=aЙдЙеЙ=г™=бввЙ=л‹ннЙл=б=гбвкзД›дЦЙJ
зоеЙеK
Rengør apparat og tilbehør, før den tages
i brug første gang (se „Rengøring og pleje“).
Forberedelse
Stil grundmodellen på en glat, ren flade.
Ledningen trækkes ud af kabelrummet
(
Billede
Netstikket sættes i stikkontakten.
Røreris, piskeris
og æltekrog Billede
Piskeris (a)
bruges til at røre dej (f. eks. mørdej)
Piskeris (b)
bruges til piskede æggehvider, piskefløde
og til let dej (f. eks. lagkagedej)
Dejkroge (c) med dejskraber (d)
bruges til at ælte tung dej og iblanding
af ingredienser, som ikke skal finhakkes
(f.eks.rosiner, tynde chokoladeblade)
).
hо‹лнЙдлЙлС~кЙ=лзг=С›дЦЙ=
~С кзнЙкЙеЗЙ=кЙЗлв~ДЙк>
pнбв=~дЗкбЦ=Ь™еЗЙе=еЙЗ=б=лв™дЙеI=е™к=~йй~к~нЙн=
Йк=б=Ц~еЦK
rЗлвбСн=вме=кЙЗлв~ДI=е™к=~йй~к~нЙн=лн™к=лнбддЙ=У=
~йй~к~нЙн=в›кЙк=взкн=ЙСнЙкI=~н=ЗЙн=Йк=лдмввЙн=
EЙСнЙкд›ДFK
_ЙлвуннЙдлЙлв~ййЙе=лв~д=~днбЗ=о‹кЙ=л~н=
й™=ЗЙ=ЗкЙоI=лзг=бввЙ=ДЙеуннЙлI=е™к=~йй~к~нЙн=
Йк=б=Ц~еЦK
Stil grebet på
P
og hold fast i det, til drevet
bliver stående.
Bemærk:
Hvis drevet ikke bevæger sig, er svingpositionen allerede nået.
Tryk på sikkerhedsknappen og stil sving-
armen i position 6.
Sæt skålen på plads. Skålens sokkel skal
sidde fast i grundmodellens udsparing.
Isæt det ønskede redskab (røreris, piskeris
eller æltekrog). Ved drejkrogen drejes
dejskraberen, indtil dejkrogen kan trykkes
på plads.
Kom ingredienserne i skålen.
Tryk på sikkerhedsknappen og stil sving-
armen i position 1.
Sæt låget på.
Stil grebet på det ønskede trin.
Påfyldning af flere ingredienser
Sluk for apparatet med grebet.
Stil grebet på
P
og hold fast i det, til drevet
bliver stående.
Tag låget af.
Tryk på sikkerhedsknappen og stil sving-
armen i position 7.
Påfyld ingredienserne
eller
påfyld ingredienserne gennem åbning i låget.
Efter arbejdet
Sluk for apparatet med grebet.
Stil grebet på
P
og hold fast i det, til drevet
bliver stående.
Træk netstikket ud.
Tag låget af.
Tryk på sikkerhedsknappen og stil sving-
armen i position 6.
Tag redskabet ud.
Tag skålen af.
Vask de enkelte dele af, se „Rengøring
og pleje“.
Robert Bosch Hausgeräte GmbH 47
Page 48

Blender Billede
da
hо‹лнЙдл ЙлС~кЙ=лзг=С ›дЦЙ=~С=лв~кйЙ=
вебоЙLкзнЙкЙеЗЙ=ЗкЙо>
pнбв=~дЗкбЦ=Ь™еЗЙе=еЙЗ=б=ЗЙе=й™л~ннЙ=ДдЙеЗЙк>=
_дЙеЗЙкЙе=лв~д=о‹кЙ=л~н=кбЦнбЦн=й™=зЦ=д™ЦЙн=
о‹кЙ=лнк~ггЙн=ЬЙдн=С~лнI=е™к=ЗЙк=~кДЙаЗЙл=гЙЗ=
ДдЙеЗЙкЙеK=
_дЙеЗЙкЙе=г™=вме=л‹ннЙл=й™=зЦ=н~ЦЙл=~СI=е™к=
~йй~к~нЙн=лн™к=ЬЙдн=лнбддЙK
påfyld flydende ingredienser gennem
tragten.
Efter arbejdet
Sluk for apparatet med grebet.
Træk netstikket ud.
Drej blenderen mod højre og tag den af.
Tip:
Det anbefales at rengøre blenderen straks
efter brug.
Rengøring og pleje
l_p>
c~кЙ=Сзк=лвздЗебеЦ>
sЙЗ=Дд~еЗбеЦ=~С=о~кгЙ=беЦкЙЗбЙелЙк=взггЙк=
ЗЙк=З~гй=мЗ=ЦЙееЙг=нк~ЦнЙел=д™ЦK=
_Йеун=беЦЙе=лвмкЙеЗЙ=кЙеЦ›кбеЦлгбЗдЙкK=
lоЙкСд~ЗЙкеЙ=в~е=ДЙлв~ЗбЦЙлK=
Rengøring af grundmodel
m™СудЗ г~сK=MIR=дбнЙк=о~кг=ЙддЙк=лвмггЙеЗЙ=
о‹лвЙK
m~ë=é™>
_дЙеЗЙкЙе=в~е=ДЙлв~ЗбЦЙлK=
_Й~кДЙаЗ=бввЙ= ЗуДСкзллЙЗЙ=г~Зо~кЙк=EмеЗн~ЦЙе=
блнЙкебеЦЙкFK=_дЙеЗЙкЙе=лв~д= ~днбЗ= о‹ кЙ= СудЗн=гЙЗ=
беЦкЙЗбЙелЙкI=е™к=ЗЙе=Йк=б=Ц~еЦK
m~ë=é™>
sЙЗ=Дд~еЗбеЦ=~С=о‹лвЙк=б=Цд~лДдЙе ЗЙкЙе W=
fеЗлнбддбеЦ=г~влK=й™=нкбе=PK=m™СудЗ=г~влK=MIR=дбнЙк=
о~кг=ЙддЙк=лвмггЙеЗЙ=о‹лвЙK
Tryk på sikkerhedsknappen og stil sving-
armen i position 3.
Tag låg til drevudtag til blender af.
Sæt blenderen på (markering på sokkel
på markering på grundmodel) og drej den
mod venstre indtil stop (
Påfyld ingredienserne.
Billede -4/5
).
Maksimal mængde: kunststofblender,
flydende konsistens = 1 liter. Maksimal
mængde: glasblender, flydende konsistens
= 0,75 liter skummende eller varme væsker
maks. 0,5 liter,
optimal bearbejdningsmængde, fast konsistens = 50–100 gram.
Sæt låget på og tryk det fast.
Hold altid fast på låget med en hånd, når
blenderen kører. Stik ikke fingrene hen over
påfyldningsåbningen!
Stil grebet på det ønskede trin.
Påfyldning af flere
ingredienser Billede -6
Sluk for apparatet med grebet.
Tag låget af og påfyld ingredienserne
eller
fjern tragten og påfyld ingredienserne lidt
Træk netstikket ud.
Tør grundmodellen af med en fugtig klud.
Kom en smule opvaskemiddel i rengørings-
Tør apparatet af med en tør klud.
Rengøring af skål og tilbehør
Alle dele tåler opvaskemaskine.
Forsøg ikke at klemme kunststofdele fast
i opvaskemaskinen, da de kan blive deformeret.
Rengøring af blender
m~ë=é™>
_Йеун=беЦЙе=лвмкЙеЗЙ=кЙеЦ›кбеЦлгбЗдЙкK=
hебоЙе г™=бввЙ=л‹ннЙл=б=зйо~лвЙг~лвбеЙеK=
oЙеЦ›к=вме=вебоЙе=меЗЙк=кбеЗЙеЗЙ=о~еЗK
Tip:
blendning af væske, behøver man normalt ikke
at skille blenderen ad. Kom en smule vand med
opvaskemiddel i blenderen, mens den er på
apparatet. Tænd for apparatet og lad den køre
i et par sekunder (ved modeller med momentfunktion, stilles apparatet på trin M).
Hæld vandet ud og skyl blenderen med rent
vand.
c~кЙ=Сзк=ЙдЙвнкблв=лн›З>
aуй=~дЗкбЦ=ЦкмеЗгзЗЙддЙе=б=о~еЗ=зЦ=ЬздЗ=ЗЙе=
~дЗкбЦ=беЗ=меЗЙк=кбеЗЙеЗЙ=о~еЗK
vandet efter behov.
hо‹лнЙдлЙлС~кЙ=лзг=С›дЦЙ=
~С лв~кйЙ=вебоЙ>
_Йк›к=бввЙ=ДдЙеЗЙквебоЙеЙ=гЙЗ=ЗЙ=Д~кЙ= СбеЦкЙK=
_дЙеЗЙкЙе=в~е=лвбддЙл=~ЗK=
aЙн=дЙннЙк=кЙеЦ›кбеЦЙеK
Hvis blenderen kun har været brugt til
ad gangen
eller
48 Robert Bosch Hausgeräte GmbH
Page 49

Adskillelse af blender Billede
da
Drej blendersoklen til højre og tag den af.
Drej knivens vinger mod venstre.
Kniven løsnes.
Tag kniven ud og fjern pakringen.
Samle blender Billede
c~кЙ=Сзк=во‹лнЙдлЙк>
cзкл›Ц=~дЗкбЦ=~н=л~гдЙ=ДдЙеЗЙкЙе=й™=
ЦкмеЗгзЗЙддЙеK
Anbring pakringen på kniven.
Sæt kniven ind i blenderen nedefra.
Skru kniven fast ved hjælp af soklen.
Drej blendersoklen til venstre, til den sidder
fast.
Hjælp i tilfælde af fejl
Kontakt venligst kundeservice i tilfælde af fejl.
Eksempler på brug
Flødeskum
100–600 g
Pisk fløden i 1½ til 4 minutter på trin
4 (afhængigt af mængde og kvalitet)
med piskeriset.
Æggehvider
1 til 8 æggehvider
Pisk æggehviderne i 4 til 6 minutter
på trin 4 med – med piskeriset.
Lagkagebund
dкмеЗзйлвкбСн
2 æg
2–3 spsk varmt vand
100 g sukker
1 lille pakke vanillesukker
70 g mel
70 g maizenamel evt. bagepulver
Rør ingredienserne (undtagen mel og maize-
namel) sammen i ca. 4–6 minutter på trin
4 med piskeriset, til det skummer.
Stil apparatet på trin 2 og tilsæt det sigtede
mel og maizenamel skevis i løbet af et halvt
til et minut.
Max. mængde:
2 x grunddej
Rørdej
dкмеЗзйлвкбСн
3–4 æg
200–250 g sukker
1 knivspids salt
1 lille pakke vanillesukker eller skal af en ½ citron
200–250 g smør (rumtemperatur)
500 g mel
1 lille pakke bagepulver
1
/
l mælk
8
Rør alle ingredienserne i ca. et halvt minut
på trin 1, herefter i ca. 3–4 minutter på trin
3 med røreriset.
Max. mængde:
1,5–2 x grunddej
Mørdej
dкмеЗзйлвкбСн
125 g smør (stuetemperatur)
100–125 g sukker
1 æg
1 knivspids salt
En smule citronskal eller vanillesukker
250 g mel
evt. bagepulver
Ælt alle ingredienser i ca. et halvt minut på trin
1, herefter i ca. 2–3 minutter med piskeriset
(trin 3) eller dejkrogen (trin 2).
Max. mængde:
2 x grunddej
Gærdej
dкмеЗзйлвкбСн
500 g mel
1 æg
80 g fedt (stuetemperatur)
80 g sukker
200–250 ml lunken mælk
25 g frisk gær eller 1 pakke tørgær skal
af en ½ citron
1 knivspids salt
Rør alle ingredienserne i ca. et halvt minut
på trin 1, herefter i ca. 3–6 minutter på trin
2 med æltekrogen.
Max. mængde:
1,5 x grunddej
Mayonnaise
2 æg
2 tsk sennep
¼ l olie
2 spsk citronsaft eller eddike
1 knivspids salt
1 knivspids sukker
Det er vigtigt, at ingredienserne har samme
temperatur.
Robert Bosch Hausgeräte GmbH 49
Page 50

Æg, sennep, citronsaft, salt og sukker
da
kommes i blenderen og blandes i nogle
sekunder på trin 2.
Stil blenderen på trin 4.
Hæld langsomt olie gennem hullet i låget og
bliv ved med at blande mayonnaisen, til den
har fået en fast konsistens.
Tilbehør/Ekstratilbehør
Yderligere vedlagt tilbehør (se vedlagte modeloversigt
brugsanvisninger, der følger med den enkelte
genstand.
Vedlagte tilbehør kan også købes særskilt.
Tilbehør til model MUM 45.. kan også benyttes
til model MUM 44../46../48.. .
Billede
Kunststof-røreskål (MUZ4KR3)
Skålen er beregnet til forarbejdning af op til 1 kg
mel plus ingredienser.
Røreskål af stål (MUZ4ER2)
Skålen er beregnet til forarbejdning af op til 1 kg
mel plus ingredienser.
Blender af kunststof (MUZ4MX2)
Til at blande drikkevarer, til at purere frugt
og grønt, til at fremstille mayonnaise,
til at småhakke frugt og grønt og nødder
og til at crushe isterninger.
Blenderpåsatz af glas (MUZ4MX3)
Til at blande drikkevarer, til at purere frugt
og grønt, til at fremstille mayonnaise,
til at småhakke frugt og grønt og nødder
og til at crushe isterninger.
Multiblender (MUZ4MM3)
Bruges til at hakke krydderurter, grøntsager,
æbler og kød, til råkost af gulerødder, selleri
og ost og til at rive nødder og kølet chokolade.
Hurtigsnitter (MUZ4DS3)
Til at skære agurk, kål, kålrabi, ræddiker;
til råkost af gulerødder, æbler og selleri, rødkål,
ost og nødder; til rivning af hård ost, chokolade
og nødder.
Pommes-frites-jern (MUZ45PS1)
Til hurtigsnitteren MUZ4DS3.
Til at skære rå kartofler til pommes frites.
Asia-grønt-skive (MUZ45AG1)
Til hurtigsnitteren MUZ4DS3.
Skærer frugt og grønt i fine strimler til asiatiske
grøntsagsretter.
Billede
) er beskrevet i de separate
Riveskive grov (MUZ45RS1)
Til hurtigsnitteren MUZ4DS3.
Til at rive rå kartofler til f. eks. kartoffelfrikadeller/
søsterkage eller kartoffelboller.
Kartoffelrösti-skive (MUZ45KP1)
Til hurtigsnitteren MUZ4DS3.
Til at rive rå kartofler til rösti og til at skære frugt
og grøntsager i tykke skiver.
Citruspresse (MUZ4ZP1)
Til presning af appelsiner, citroner og grapefrugter.
Kødhakkeren (MUZ4FW3)
Til hakning af råt kød til tartar eller frikadeller/
bøffer.
Hulskive-sæt (MUZ45LS1)
Til kødhakkeren MUZ4FW3.
Fin (3 mm) til postejer og smurt pålæg, grov
(6 mm) til pølser og bacon.
Småkageformsæt (MUZ45SV1)
Til kødhakkeren MUZ4FW3.
Med metalskabelon til 4 forskellige småkageformer.
Kornkværn (MUZ45RV1)
Til kødhakkeren MUZ4FW3.
Til at rive nødder, mandler, chokolade
og tørrede rundstykker.
Frugtpresse (MUZ45FV1)
Til kødhakkeren MUZ4FW3.
Til at presse bærfrugt til mos – (undtagen
hindbær), tomater og hyben.
Samtidigt fjernes stilk og kerner automatisk
fra f. eks. ribs.
Tilbehørsholder (MUZ4ZT1)
Til opbevaring af tilbehørsdele som f. eks.
dejkrog, piskeris, røreris, snitte-, råkost- og
riveskive.
Kornmølle med kegleformet maleværk
af stål (MUZ4GM3)
Til alle kornsorter undtagen majs og olieholdige
frø, tørrede svampe og krydderurter.
Ismaskine (MUZ4EB1)
Til tilberedning af op til 550 g is pr. arbejdsgang
og beholder.
50 Robert Bosch Hausgeräte GmbH
Page 51

Bortskaffelse
da
Ret til ændringer forbeholdes.
Dette apparat er mærket iht.
bestemmelserne i det europæiske
direktiv 2012/19/EF om affald af
elektrisk og elektronisk udstyr (waste
electrical and electronic equipment –
WEEE).
Direktivet indeholder bestemmelser mht. retur
og brug af gammelt elektrisk og elektronisk
udstyr, der gælder i hele EU-området.
Brug genbrugsordningerne for emballage
og ældre apparater og vær med til at skåne
miljøet. Er der tvivl om ordningerne og hvor
genbrugspladserne er placeret, kan
kommunen kontaktes.
Garantibetingelser
På dette apparat yder BOSCH 1 års garanti.
Købsnota skal altid vedlægges ved indsendelse
til reparation, hvis denne ønskes udført på
garanti. Medfølger købsnota ikke, vil
reparationen altid blive udført mod beregning.
Indsendelse til reparation. Skulle Deres BOSCH
apparat gå i stykker, kan indsendes til vort
serviceværksted:
BSH Hvidevarer A/S, Telegrafvej 6,
2750 Ballerup, tlf. 44-898985.
På reparationer ydes 12 måneders garanti.
De kan naturligvis også indsende apparatet
gennem Deres lokale forhandler.
Robert Bosch Hausgeräte GmbH 51
Page 52

no
eаЙкнЙдбЦ=нбддуввЙ=гЙЗ=ва›йЙн=~о=ЗЙн=еуЙ=
~йй~к~нЙн=Ск~=_lp`eK
aЙкгЙЗ=Ь~к=Зм=ДЙлнЙгн=ЗЙЦ=Сзк= Йн= гзЗЙкеЙ=
ЬмлЬздЗебеЦл~йй~к~н=~о=Ь›у=во~дбнЙнK
sбЗЙкЙ=беСзкг~лазеЙк=зг=о™кЙ=йкзЗмвнЙк=
СбееЙк=Зм=й™=о™к=еЙннлбЗЙK
Innhold
For din egen sikkerhet . . . . . . . . . . . . . . . . 52
En oversikt . . . . . . . . . . . . . . . . . . . . . . . . . 54
Betjening . . . . . . . . . . . . . . . . . . . . . . . . . . 55
Rengjøring og pleie . . . . . . . . . . . . . . . . . . 56
Hjelp ved feil . . . . . . . . . . . . . . . . . . . . . . . 57
Eksempler på bruk . . . . . . . . . . . . . . . . . . 57
Ekstra tilbehør . . . . . . . . . . . . . . . . . . . . . . 58
Henvisning om avskaffing . . . . . . . . . . . . . 59
Garantibetingelser . . . . . . . . . . . . . . . . . . . 59
For din egen sikkerhet
Les nøye igjennom denne anvisningen før bruk, her får du viktige
sikkerhets- og betjeningshenvisninger for dette apparatet.
Dersom det ikke blir tatt hensyn til henvisningene for riktig bruk av
apparatet, er produsenten ikke ansvarlig for skader som oppstår på
grunn av dette.
Dette apparatet er beregnet for bearbeidelse av vanlige mengder for
husholdningen og ikke for industrielt bruk. Rom med husholdningspreget
bruk kan være f.eks. bruk i rom som er ment for medarbeidere i butikker,
på kontorer, landbruks- eller andre produksjonsrom, såsom bruk av gjester
i pensjonater, små hoteller eller lignende oppholdsenheter. Maskinen må
kun brukes til å bearbeide vanlige husholdningsmengder og også innen
vanlige bearbeidelsestider. Tillatt største mengder (se “Eksempler på bruk”)
må ikke overskrides!
Dette apparatet er egnet for røring, elting eller visping av matvarer. Det må
ikke brukes til bearbeidelse av andre gjenstander hhv. substanser.
Ved bruk av det tilbehøret som er godkjent av produsenten er det mulig
med andre anvendelser.
Apparatet må kun brukes med originalt tilbehør. Under bruken av
tilbehøret, må den vedlagte bruksanvisningen følges.
Bruksanvisningen må oppbevares. Dersom du gir maskinen videre til
andre, bør bruksanvisningen leveres med.
, Generelle sikkerhetsveiledninger
Fare for strømstøt
Dette apparatet må ikke brukes av barn.
Apparatet og tilkoplingsledningen må holdes borte fra barn.
Apparatene kan brukes av personer med redusert fysiske, sensoriske
eller mentale evner eller som mangler erfaring, dersom de er under
oppsyn eller dersom de har fått opplæring i en sikker bruk av apparatet
og det kan sikres at de har forstått farene som kan resultere av dette.
Barn må ikke få leke med apparatet.
52 Robert Bosch Hausgeräte GmbH
Page 53

Apparatet må kun tilkoples og brukes i henhold til angivelsene på
no
typeskiltet. Det må kun benyttes når ledningen og apparatet selv ikke
viser tegn på ytre skade.
Apparatet må alltid skilles fra strømnettet når det ikke kan overvåkes og
når det settes sammen, tas fra hverandre eller rengjøres.
Ikke trekk ledningen over skarpe ting eller varme flater.
Dersom ledningen på dette apparatet er skadet, må den skiftes ut av
produsenten, vår kundeservice eller av en annen kvalifisert person for
å unngå at det oppstår fare.
Reparasjoner på apparatet må kun foretas av vår kundeservice.
, Sikkerhetsveiledninger for dette apparatet
Fare for skade
Fare for elektrisk støt!
Støpselet må først stikkes inn når alle forberedelsene til arbeidet med
maskinen er foretatt.
Basismaskinen må aldri dyppes ned i væske eller holdes under rennende
vann. Ikke bruk damprenser.
Svingarmen må ikke innstilles når maskinen er i gang. Vent til maskinen er
helt stoppet.
Verkøy/tilbehør må kun skiftes når drevet står stille – etter at apparatet er
slått at, går drevet etter i kort tid.
Apparatet må kun slås på og av med dreiebryteren.
Når apparatet ikke skal brukes, må støpselet trekkes ut.
Før feil blir utbedret, må støpselet trekkes ut.
Maskinen starter igen, så snart strømmen vender tilbage efter et
strømsvigt.
Fare for skade på grunn av roterende verktøy
Ikke ta på roterende deler. Mens arbeidet pågår må du aldri gripe ned
ibollen.
Verktøy må kun skiftes når maskinen står stille – etter at motoren er slått av,
går maskinen etter i kort tid etter.
Av sikkerhetsgrunner må apparatet kun brukes dersom de drev som ikke
brukes er dekket til med beskyttelser (4, 7).
Fare for skade på grunn av skarpe kniver/roterende drev!
Grip aldri ned i den påsatte mikseren!
De mixer niet in elkaar zetten terwijl het op het basisapparaat is
aangebracht. Mikseren må kun settes på/tas av når drevet står stille!
Mikseren må kun brukes når den er montert sammen og med påsatt lokk.
Miksekniven må ikke berøres med bare hender.
Robert Bosch Hausgeräte GmbH 53
Page 54

Fare for skolding!
no
Ved bearbeiding av varme mikseprodukter, kommer det damp ut av
trakten i lokket. Fyll derfor på maksimalt 0,5 liter varm eller skummende
væske.
Viktig!
Bruk kun et verktøy hhv. tilbehør.
Bruksanvisningen beskriver forskjellige
utførelser (se også modelloversikt, Bilde ).
Dette apparatet er vedlikeholdsfritt.
En oversikt
Klaff ut siden med billedtekster. Bilde
Basismaskin
1
Utløsningstast
2
Svingarm
(se “Arbeidsposisjoner”)
Dreiebryter
3
0/off = stopp
/
P
Dreiebryteren holdes fast inntil drevet
blir stående; verktøyet er i svingposisjon.
Dersom ikke drevet beveger seg,
er svingposisjonen allerede nådd.
Trinn 1–4 = Arbeidshastighet
Trinn 1 = Laveste turtall – langsom
Trinn 4 = Høyeste turtall – hurtig
Dersom strømmen blir borte, blir maskinen
innkoplet og går videre når strømmet
kommer igjen.
4
Beskyttelsesdeksel for drevene
Når beskyttelseslokket skal tas av, må
det dreies inntil låsposisjonen åpnes.
Drev for
5
–
gjennomløpskutter
–
sitruspresse *
–
kornmølle *
Når den ikke brukes må beskyttelseslokket
settes på.
6
Drev for
–
verktøy (rørepinne, visp, eltekrok)
–
røreverktøy for isberederen *
–
klaffes ned eller opp for kjøttkvern *
7
Beskyttelsesdeksel for mikserdrevet
8
Drev for
–
mikser
–
hurtigmikser
Når det ikke er i bruk, må beskyttelseslokket
settes på.
= parkeringskopling
*
Kabeloppkveiling (
9
MUM 44..: Vikle opp kabelen
MUM 46../48..: Rull opp kabelen
i kabelrommet
Bollen med tilbehør
10
Rørebolle
11
Lokk
Verktøy
Rørepinne
12
13
Visp
14
Eltekrok med deigskrape
Mikser
Sokkel
15
16
Knivinnsats
17
Pakningsring
18
Miksebeger
19
Lokk
20
Tra kt
* Dersom en av tilbehørsdelene ikke er med
i leveringsomfanget, kan den kjøpes
i handelen hos vår kundeservice.
Bilde
)
Arbeidsposisjoner
lÄë>
j~лвбеЙе=г™=вме=ДкмвЙл=е™к=оЙквн›уЙнLнбдДЙJ
Ь›кЙн=Йк=л~нн=й™=ЗЙн=кбвнбЦЙ=ЗкЙоЙн=б=ЬЙеЬздЗ=
нбд ЗЙееЙ=н~ДЙддЙе=зЦ=л~нн=б=кбвнбЦ=йзлблазе=зЦ=
~кДЙбЗллнбддбеЦK
pобеЦ~кгЙе=г™=о‹кЙ=кбвнбЦ=лгЙввЙн=б=оЙЗ=ЬоЙк=
~о=~кДЙбЗлйзлблазеЙеЙK
Innstilling av arbeidsposisjonen Bilde
Trykk utløsningstasten og flyt på svingarmen.
Flytt svingarmen inntil den smekker i ønsket
posisjon.
54 Robert Bosch Hausgeräte GmbH
Page 55

no
Posisjon
1
2
3
4
5
6
7
Innsetting/uttaking av visp/
rørepinne og eltekrok
Påfylling av større
arbeidsmengder
Betjening
c~êÉ=Ñçê=ëâ~ÇÉ>
pн›йлЙдЙн=г™=С›клн=лнбввЙл=бее=е™к=~ддЙ=СзкДЙкЙJ
ЗЙдлЙеЙ=нбд=~кДЙбЗЙн=гЙЗ=г~лвбеЙе=Йк=СзкЙн~ннK
lÄë>
j~лвбеЙе=г™=вме=ЗкбоЙл=гЙЗ=нбдДЙЬ›кLоЙквн›у=
б ~кДЙбЗллнбддбеЦK
j~лвбеЙе=г™=бввЙ=лЙннЙл=б=Ц~еЦ=е™к=ЗЙе=Йк=нзгK=
^йй~к~нЙн=зЦ=нбдДЙЬ›кЙн=г™=бввЙ=мнлЙннЙл=Сзк=
о~кгЙвбдЗЙкK=aЙдЙеЙ=Йк=бввЙ=ЙЦеЙн=Сзк=гб вкзД›дЦЙK
Apparatet og tilbehøret må rengjøres grundig
før første gangs bruk, se “Rengjøring
og pleie”.
Forberedning
Sett motorenheten på et glatt og rent
underlag.
Trekk ut kabelen (
Stikk inn støpselet.
Rørepinn, visp og eltekrok Bilde
Rørepinne (a)
For røring av deig, f.eks. kakedeig
Visp (b)
For pisking av eggehvite, kremfløte og lett deig,
f.eks. biskuitdeig
Eltekrok (c) med deigskrape (d)
For elting av tyngre deig og for å røre inn
ingredienser som ikke skal hakkes
(f.eks. rosiner, sjokoladebiter)
Bilde
).
c~кЙ=Сзк=лв~ЗЙ=й™=Цкмее=
~о кзнЙкЙеЗЙ=оЙквн›у
jЙел=~кДЙбЗЙн=й™Ц™к=г™=Зм=~дЗкб=ЦкбйЙ=еЙЗ=
бДзддЙеK
sЙквн›у=г™=вме=лвбСнЙл=е™к=г~лвбеЙе=лн™к=лнбддЙ=
У=ЙннЙк=~н=гзнзкЙе=Йк=лд™нн=~оI=Ц™к=г~лвбеЙе=
ЙннЙк=б=взкн=нбЗ=ЙннЙкK
aЙн=г™=вме=~кДЙбЗЙл=е™к=ЗкЙо=лзг=бввЙ=
Йк б Дкмв=Йк=лбвкЙн=гЙЗ=ДЙлвуннЙдлЙлдзввЙнK
Sett dreiebryteren på
P
og hold den fast inntil
drevet står stille.
Henvisning:
Dersom ikke drevet beveger seg, er svingposisjonen allerede nådd.
Trykk utløsningstasten og sett svingarmen
i posisjon 6.
Sett inn bollen. Sokkelen på bollen må passe
inn i utskjæringen på basismaskinen.
Alt etter oppgave stikker du inn rørepinnen,
vispen eller eltekroken i drevet til de smekker
i. Ved bruk av eltekroken dreies deigskrapen
til eltekroken smekker fast.
Fyll på tilsetningene som skal bearbeides
i bollen.
Trykk utløsningstasten og sett svingarmen
i posisjon 1.
Sett lokket på.
Sett dreiebryteren på ønsket trinn.
Påfylling av tilsetninger
Slå maskinen av med dreiebryteren.
Sett dreiebryteren på
P
og hold den fast inntil
drevet står stille.
Ta av lokket.
Trykk utløsningstasten og sett svingarmen
i posisjon 7.
Fyll på tilsetninger
eller
fyll på tilsetninger igjennom fyllåpningen
i lokket.
Etter arbeidet
Slå maskinen av med dreiebryteren.
Sett dreiebryteren på
P
og hold den fast inntil
drevet står stille.
Trekk ut støpselet.
Ta av lokket.
Trykk utløsningstasten og sett svingarmen
i posisjon 6.
Ta verktøyet av drevet.
Ta av bollen.
Rengjør alle delene, se “Rengjøring og pleie”.
Robert Bosch Hausgeräte GmbH 55
Page 56

Mikseren Bilde
no
c~кЙ=Сзк=лв~ЗЙ=й™=Цкмее=~о=лв~кйЙ=
вебоЙкLкзнЙкЙеЗЙ=ЗкЙо>
q~=~дЗкб=еЙЗ=б=ЗЙе=й™л~ннЙ=гбвлЙкЙе>=
jбвлЙкЙе=г™=вме=лЙннЙл=й™Lн~л=~о=е™к=ЗкЙоЙн=
лн™к=лнбддЙ>=
jбвлЙкЙе=г™=вме=ДкмвЙл=е™к=ЗЙе=Йк=гзенЙкн=
л~ггЙе=зЦ=гЙЗ=й™л~нн=дзввK
c~кЙ=Сзк=лвздЗбеЦ>
sЙЗ=ДЙ~кДЙбЗбеЦ=~о=о~кгЙ=нбеЦI=взггЙк=
ЗЙн З~гй=мн=~о=нк~внЙе=б=дзввЙнK=
cудд=ЗЙкСзк=й™=г~влбг~дн=MIR=дбнЙк=о~кг=ЙддЙк=
лвмггЙеЗЙ=о‹лвЙK
lÄë>
jбвлЙкЙе=в~е=Ддб=лв~ЗЙнK=fввЙ= ~кДЙбЗ =г ЙЗ=
ЗуйСкзлеЙ=беЦкЙЗбЙелЙк=Eмеен~нн=блДбнЙкFK=
fввЙ Дкмв=гбвлЙкЙе=е™к=ЗЙе=Йк=нзгK
lÄë>
_Й~кДЙбЗбеЦ=~о=о‹лвЙк=б=Цд~ллгбвлЙкW=г~влбг~дн=
й™=нкбее=PK=cудд=й™=г~влбг~дн=MIR=дбнЙк=о~кг=ЙддЙк=
лвмггЙеЗЙ=о‹лвЙK
Trykk utløsningstasten og sett svingarmen
i posisjon 3.
Ta av vernedekselet på mikserdrevet.
Sett på miksebegeret (markeringen på
sokkelen på markeringen på basismaskinen)
og drei mot klokkens retning inntil anslag
(
Bilde -4/5
Fyll på ingrediensene.
Maksimal mengde ved hurtigmikser
i kunstoff, flytende = 1 liter, ved hurtigmikser
av glass, flytende = 0,75 liter, skummende
eller varm væske kun maksimalt 0,5 liter.
Optimal arbeidsmengde fast
= 50 til 100 gram.
Sett på lokket og trykk det fast.
Lokket må alltid holdes fast med en hånd
under arbeidet.
Ikke grip over påfyllingsåpningen.
Sett dreiebryteren på ønsket trinn.
Påfylling av tilsetninger Bilde -6
Slå maskinen av med dreiebryteren.
Ta lokket av og fyll på tilsetninger
eller
ta ut trakten og fyll faste ingredienser etter
hverandre ned i påfyllingsåpningen
eller
fyll flytende væske ned igjennom trakten.
).
Etter arbeidet
Slå maskinen av med dreiebryteren.
Trekk ut støpselet.
Drei mikseren i klokkens retning og ta den av.
Tips:
Rengjør mikseren helst straks etter bruk.
Rengjøring og pleie
lÄë>
fввЙ=Дкмв=лвмкЙеЗЙ=кЙеЦа›кбеЦлгбЗдЙкK=
lоЙкСд~нЙеЙ в~е=Ддб=лв~ЗЙнK=
Rengjøring av basismaskinen
c~êÉ=Ñçê=ëíê›ãëí›í>
j~лвбеЙе=г™=~дЗкб=ЗуййЙл=еЙЗ=б=о~ее=ЙддЙк=
лвуддЙл=меЗЙк=кЙееЙеЗЙ=о~ееK
Trekk ut støpselet.
Tørk av maskinen.
Om nødvendig må du bruke litt flytende
oppvaskmiddel.
Deretter må den tørkes av.
Rengjøring av bollen med tilbehør
Alle delene kan vaskes i oppvaskmaskin.
Ikke klem deler av kunststoff fast i maskinen,
da de kan bli deformert.
Rengjøring av mikseren
c~кЙ=Сзк=лв~ЗЙ=й™=Цкмее=~о=лв~кйЙ=
вебоЙк>
jбвлЙвебоЙе=г™=бввЙ=ДЙк›кЙл=гЙЗ=ЬЙеЗЙеЙK=
eмкнбЦгбвлЙкЙе=в~е=н~л=Ск~=ЬоЙк~еЗкЙ=Сзк=
кЙеЦа›кбеЦK
lÄë>
fввЙ=Дкмв=лвмкЙеЗЙ=кЙеЦа›кбеЦлгбЗдЙкK=
hебобеел~нлЙе=в~е=бввЙ=о~лвЙл=б=зййо~лвJ
г~лвбеЙеK=aЙе=г™=вме=лвуддЙл=меЗЙк=
кЙееЙеЗЙ о~ееK
Tips:
Etter arbeid med flytende væsker er det
ofte tilstrekkelig å rengjøre hurtigmikseren uten
å ta den fra hverandre.
Hell litt oppvaskmiddel inn i den påsatte
mikseren. Slå den på i få sekunder (ved
maskiner med momentkopling på trinn M).
Hell vaskevannet av og skyll mikseren deretter
med rent vann.
56 Robert Bosch Hausgeräte GmbH
Page 57

Når mikseren skal tas
no
fra hverandre Bilde
Drei sokkelen på miksebegeret i klokkens
retning og tas av.
Knivinnsatsen dreies ved vingene imot
klokkens retning. Knivinnsatsen løsnes
således.
Knivinnsatsen tas ut og pakningsringen
fjernes.
Når mikseren skal settes
sammen igjen Bilde
c~êÉ=Ñçê=ëâ~ÇÉ>
jбвлЙкЙе=г™=~дЗкб=лЙннЙл=л~ггЙе=бЦаЙе=зйй™=
Д~лблг~лвбеЙеK
Sett pakningsringen på knivinnsatsen.
Sett inn knivinnsatsen fra undersiden og inn
i miksebegeret.
Med hjelp av sokkelen dreies miksebegeret
fast.
Sokkelen på miksebegeret dreies fast mot
klokkens retning.
Hjelp ved feil
Ved feil på maskinen bør du henvende deg
til vår kundeservice.
Eksempler på bruk
Vispet kremfløte
100 g–600 g
Fløten vispes i 1½ til 4 minutter
på trinn 4 med vispen (alt etter
mengde og egenskapen til fløten).
Stiv eggehvite
1 til 8 eggehviter
Eggehviten vispes 4 til 6 minutter
på trinn 4 med vispen.
Biskuitdeig
dкмеезййлвкбСн
2 egg
2–3 ss varmt vann
100 g sukker
1 ts. vaniljesukker
70 g mel
70 g potetmel evt. litt bakepulver
Visp alt sammen (unntatt mel og potetmel)
i 4–6 min. på trinn 4 med vispen til det hele
blir kremaktig.
Sett så dreiebryteren på trinn 2 og bland inn
det silte melet og potetmelet i porsjoner
av ca. ½ til 1 minutt med èn skje av gangen.
Største mengde:
2 ganger grunnoppskriften.
Rørt formkakedeig
dкмеезййлвкбСн
3–4 egg
200–250 g sukker
1 knivsodd salt
1 ts. vaniljesukker eller skall av ½ sitron
200–250 g smør (romtemperatur)
500 g mel
1 ts. bakepulver
1
/
l melk
8
Rør først alle ingrediensene i ½ minutt
på trinn 1, deretter røres på trinn
3 i 3–4 minutter med rørepinnen.
Største mengde:
1,5–2 ganger
grunnoppskriften
Mørdeig
dкмеезййлвкбСн
125 g smør (romtemperatur)
100–125 g sukker
1 egg
1 knivsodd salt
litt skall av sitron eller vaniljesukker
250 g mel
evt. bakepulver
Alle ingrediensene bearbeides i ca. ½ minutt
på trinn 1, deretter ca. 2–3 minutter røres
det videre med rørepinnen (trinn 3) eller
eltekroken (trinn 2).
Største mengde:
2 ganger grunnoppskriften.
Gjærdeig
dкмеезййлвкбСн
500 g mel
1 egg
80 g fett (romtemperatur)
80 g sukker
200–250 ml lunken melk
25 g fersk gjær eller 1 pakke gjærpulver
Skall av ½ sitron
1 knivsodd salt
Elt først alle ingrediensene i ca. ½ minutt
på trinn 1 med eltekroken, deretter elter
du på trinn 2 i 3–6 minutter
Største mengde:
1,5 ganger grunnoppskriften
Robert Bosch Hausgeräte GmbH 57
Page 58

Majones
no
2 egg
2 teskje sennep
¼ liter olje
2 spiseskje sitronsaft eller eddik
1 knivsodd salt
1 knivsodd sukker
Ingrediensene bør ha samme temperatur.
Bland sammen alle ingrediensene i noen
sekunder (unntatt oljen) på trinn 2.
Slå mikseren over på trinn 4.
La oljen renne langsomt igjennom trakten
og miks til majonesen emulgerer.
Ekstra tilbehør
Videre tilbehør som er vedlagt i pakningen
(se vedlagte modelloversikt
krevet i de separate betjeningsanvisningene.
Dette vedlagte tilbehøret kan også fåes kjøpt
separat senere.
Tilbehøret til maskinen MUM 45.. egner seg
også for maskinene MUM 44../46../48.. .
Bilde
Rørebolle av kunststoff (MUZ4KR3)
I bollen kan det bearbeides opptil 1 kg mel pluss
ingredienser.
Rustfri eltebolle i stål (MUZ4ER2)
I bollen kan det bearbeides opptil 1 kg mel pluss
ingredienser.
Påsats for mikser av plast (MUZ4MX2)
For miksing av drikker, for mosing av frukt og
grønnsaker, for tilberedning av majones, for
kutting av frukt og nøtter, for knusing av isbiter.
Påsats for mikser av glass (MUZ4MX3)
For miksing av drikker, for mosing av frukt og
grønnsaker, for tilberedning av majones, for
kutting av frukt og nøtter, for knusing av isbiter.
Multimikser (MUZ4MM3)
For å hakke urter, grønnsaker, epler og kjøtt,
for å raspe gulrøtter, reddik og ost, for å rive
nøtter og kald sjokolade.
Gjennomløpskutterr (MUZ4DS3)
For skjæring av agurk, kål, kålrabi, nepe, for
rasping av gulrot, epler og selleri, rødkål, ost og
nøtter; for riving av hard ost, sjokolade og nøtter.
Pommes frites skive (MUZ45PS1)
For gjennomløpskutteren MUZ4DS3.
For skjæring av rå poteter for Pommes Frites.
Bilde
) er bes-
Asia grønnsakskive (MUZ45AG1)
For gjennomløpskutteren MUZ4DS3.
Skjærer frukt og grønnsaker i fine striper for
asiatiske grønnsakretter.
Riveskive grov (MUZ45RS1)
For gjennomløpskutteren MUZ4DS3.
For riving av rå poteter, f.eks. for potetkaker
eller kumle.
Skive for stekte potetkaker
(MUZ45KP1)
For gjennomløpskutteren MUZ4DS3.
For riving av rå poteter til “Rösti” og stekte potetkaker, for skjæring av frukt og grønnsaker i tykke
skiver.
Sitruspresse (MUZ4ZP1)
For pressing av appelsiner, sitroner og grapefrukt.
Kjøttkvern (MUZ4FW3)
For kutting av ferskt kjøtt for tilberedning
av karbonader eller kjøttpudding.
Innsats for hullskive (MUZ45LS1)
For kjøttkvernen MUZ4FW3.
Fin (3 mm) for tilberedning av postei eller
mousse, grov (6 mm) for stekepølser og bacon.
Forsats for sprøytebakst (MUZ45SV1)
For kjøttkvernen MUZ4FW3.
Med metallsjablone for 4 forskjellige bakeformer.
Raspepåsats (MUZ45RV1)
For kjøttkvernen MUZ4FW3.
For riving av nøtter, mandler, sjokolade
og tørkete rundstykker.
Forsats for fruktpresse (MUZ45FV1)
For kjøttkvernen MUZ4FW3.
For pressing og mosing av bærfrukt med
(unntak bringebær), tomater og nyper.
Samtidig blir f.eks. stilkene og kjernene
på solbær/rips automatisk fjernet.
Holder for tilbehør (MUZ4ZT1)
For oppbevaring av tilbehørsdeler som eltekrok,
visp, rørepinne, skjære, raspe- og riveskive.
Kornmølle med kjegle maleverk av stål
(MUZ4GM3)
For alle kornsorter utenom mais og for oljekorn,
tørket sopp og urter.
Isbereder(MUZ4EB1)
For tilberedning av opptil 550 g is per
arbeidsgang og beholder.
58 Robert Bosch Hausgeräte GmbH
Page 59

Henvisning om avskaffing
no
Endringer forbeholdes.
Dette apparatet tilsvarer det europeiske
direktivet 2012/19/EG som
kjennetegner gamle elektro- og
elektronikk apparater (waste electrical
and electronic equipment – WEEE).
Dette direktivet angir rammen for returnering og
gjenvinning av de gamle apparatene som er gyldig
for hele EU.
Tips om aktuelle måter å skrote apparatet
på fåes ved henvendelse til faghandelen eller
hos kommunen.
Garantibetingelser
For dette apparatet gjelder de garantibetingelser som er oppgitt av vår representant
i de respektive land. Detaljer om disse
garantibetingelsene får du ved å henvende
deg til elektrohandelen der du har kjøpt
apparatet. Ved krav i forbindelse med
garantiytelser, er det i alle fall nødvendig
å legge fram kvittering for kjøpet av apparatet.
Robert Bosch Hausgeräte GmbH 59
Page 60

sv
sб=Цк~нмдЙк~к=ЗбЦ=нбдд=Збнн=еу~=бев∏é=~î=Éå=
~éé~ê~í=Ñê™å=_lp`eK
aì=Ü~ê=Ç®êãÉÇ=ÄÉëí®ãí=ÇáÖ=Ñ∏к=Йе=гзЗЙке=
ЬмлЬ™ддл~йй~к~н=~о=Ь∏Ц=во~дбнЙнK
jЙк=беСзкг~нбзе=зг=о™к~=йкзЗмвнЙк=Ьбнн~к=Зм=
й™=о™к=ЬЙглбЗ~=й™=fенЙкеЙнK
Innehåll
För din säkerhet . . . . . . . . . . . . . . . . . . . . . 60
Översiktsbilderna . . . . . . . . . . . . . . . . . . . . 62
Montering och start . . . . . . . . . . . . . . . . . . 63
Rengöring och skötsel . . . . . . . . . . . . . . . . 64
Råd vid fel . . . . . . . . . . . . . . . . . . . . . . . . . 65
Exempel på vad du kan
göra med maskinen . . . . . . . . . . . . . . . . . . 65
Extra tillbehör . . . . . . . . . . . . . . . . . . . . . . . 66
Den gamla apparaten . . . . . . . . . . . . . . . . 67
Konsumentbestämmelser . . . . . . . . . . . . . 67
För din säkerhet
Läs noga denna bruksanvisning före användning för att få viktiga
anvisningar om säkerhet och om hur denna apparat används.
Tillverkaren ansvarar inte för skador som uppstår när apparaten inte
används i enlighet med bruksanvisningen.
Denna apparat är avsedd att bearbeta endast sådana mängder som är
normala för ett hushåll och eller som liknar ett husåll men inte är
yrkesmässig. Med icke yrkesmässiga hushåll avses t.ex. fikarum för
anställda i en affär, ett kontor, ett lantbruk och andra yrkesmässiga företag
samt när gäster på ett pensionat, litet hotell och liknande institutioner
använder apparaten. Använd produkten för att bearbeta endast sådana
mängder som är normala för ett hushåll. Bearbeta inte mer än maximalt
angiven mängd (se ”Exempel på vad du kan göra med maskinen”)!
Detsamma gäller bearbetningstiderna.
Denna produkt är lämplig för att blanda, knåda och vispa livsmedel.
Den får inte användas för att bearbeta andra föremål resp. substanser.
När apparaten används tillsammans med av tillverkaren tillåtna tillbehör
finns fler användningsområden.
Apparaten får endast användas tillsammans med originaltillbehör. Följ de
anvisningar som följer med respektive extra tillbehör.
Spara bruksanvisningen. Låt bruksanvisningen följa med apparaten vid ett
eventuellt ägarbyte.
, Allmänna säkerhetsanvisningar
Risk för elektriska stötar
Denna apparat får inte användas av barn.
Håll apparaten och sladden till den borta från barn.
Apparaten kan användas av personer med förminskad fysisk, sensorisk
eller mental förmåga eller avsaknad av erfarenhet och kunskap, om de
står under uppsikt eller undervisats i hur apparaten används på säkert
sätt och därmed förstått de faror som kan uppstå i samband med
användandet av apparaten.
60 Robert Bosch Hausgeräte GmbH
Page 61

Låt inte barn leka med apparaten.
sv
Kontrollera att nätspänningen hemma hos dig är densamma som anges
på apparatens typskylt. Apparaten får inte användas om den eller
sladden är skadad.
Se alltid till att sladden är utdragen ur vägguttaget när du inte har uppsikt
över apparaten, när den ska monteras samman resp. tas isär eller
rengöras.
Låt inte sladden ligga över vassa kanter eller komma i kontakt med heta
kokplattor/kokzoner. Om sladden skulle skadas får den endast bytas ut
av tillverkaren, service eller annan fackkunnig person. Detta för att
undvika olyckor.
Reparationer på apparaten får endast utföras av service.
, Säkerhetsanvisningar just för denna apparat
Risk för skador!
Risk för elektriska stötar!
Sätt inte stickkontakten i vägguttaget förrän du är klar med alla
förberedelser för att kunna arbeta med maskinen.
Doppa aldrig motorstativet i vätska eller håll det under rinnande vatten.
Använd aldrig professionell ångrengörare som rengör med ångtryck.
Rör inte den ställbara funktionsarmen när maskinen är igång. Vänta tills
motorn står helt stilla.
Maskinen får inte vara igång när ett verktyg/tillbehör ska sättas fast eller tas
loss – apparaten fortsätter rotera ytterligare en liten stund sedan den
stängts av.
Använd alltid strömvredet för att starta resp. stänga av apparaten.
När apparaten inte används ska stickkontakten vara utdragen ur
vägguttaget.
Dra alltid först ut stickkontakten ur vägguttaget innan du försöker åtgärda
ett fel.
Efter ett strömavbrott fortsätter maskinen att arbeta.
Risk för skada pga roterande verktyg!
Stoppa aldrig ned handen i något tillbehör som roterar!
Stoppa aldrig ned handen i blandarskålen när maskinen är igång.
Köksmaskinen får inte vara igång när ett tillbehör/verktyg ska sättas fast
eller tas loss. Köksmaskinen fortsätter arbeta ytterligare en liten stund
sedan den stängts av.
Av säkerhetsskäl får maskinen endast startas när drivuttag som inte
används är täckta av skyddslock (4, 7).
Robert Bosch Hausgeräte GmbH 61
Page 62

Risk för skada pga vassa knivarna/roterante drivuttag!
sv
Stoppa aldrig ned fingrarna i den fastsätta mixern. Montera alltid ihop
mixern helt och hållet innan den sätts på köksmaskinen för att användas.
Sätt på/lossa mixern endast när drivuttaget står stilla! Mixern måste vara
helt ihopmonterad och ha locket på när den används.
Ta aldrig i mixerknivarna med bara händerna.
Risk för skållskador!
När du mixar heta ingredienser tränger ånga ut genom tratten i locket.
Häll därför aldrig i mera än 0,5 liter het eller skummande vätska.
Viktigt!
Använd bara ett verktyg resp. tillbör åt gången.
Obs! Bruksanvisningen gäller för flera varianter
av maskinen (se även modellöversikt, bild ).
Denna apparat är underhållsfri.
Översiktsbilderna
Vik först ut uppslaget med bilder. Bild
Motordel
1
Låsknapp för den ställbara funktionsarmen
2
Ställbar funktionsarm
(se avsnittet ”Arbetslägen”).
3
Strömvred
0/off = Stop
/
P
Vrid strömvredet till läge P och håll det där
tills maskinen står helt stilla.
Nu kan drivarmen ställas i önskat läge och
tillbehöret/redskapet sättas fast resp. tas
loss. Om maskinen inte går igång när du
vrider till läge P innebär det att den redan
nått parkeringsläget.
Välj mellan
läge 1–4 = Hastigheter
Läge 1 = Lägsta varvtalet – långsam
Läge 4 = Högsta varvtalet – snabb
Efter ett ev. strömavbrott fortsätter
maskinen automatiskt.
4
Skyddslock till drivuttag
Ta bort skyddslocket från drivuttaget
genom att vrida det tills lossnar.
Drivuttag för
5
–
grönsaksskärare
–
citruspressen *
–
sädeskvarn *
Skyddslocket ska sitta på uttaget när det
inte används.
= Parkeringsläge
*
6
Drivuttag för
–
verktyg (grovvisp, ballongvisp,
degkrok)
–
omröraren till glassberedaren *
–
nedfälld eller uppfälld för köttkvarnen *
7
Skyddslock till drivuttaget för mixern
8
Drivuttag för
–
mixern
–
matberedartillsats
Skyddslocket ska sitta på uttaget när det
inte används.
9
Sladdförvaring (
MUM 44..: Linda ihop sladden
MUM 46../48..: Linda ihop sladden
och stuva in den i sladdfacket
Blandarskålen med tillbehör
10
Blandarskål
11
Lock
Tillbehör
Grovvisp
12
13
Ballongvisp
14
Degkrok med degavvisare
Mixern
Sockel
15
16
Knivinsats
17
Tätningsring
18
Mixerbägare
19
Lock
20
Tra tt
* När ett tillbehör inte följer med leveransen kan
det köpas av kundservice eller i fackhandeln.
Bild
)
62 Robert Bosch Hausgeräte GmbH
Page 63

Arbetslägen för funktionsarmen
sv
s~ê=Ñ∏клбвнбЦ>
h∏влг~лвбеЙе= С™к=лн~кн~л=С∏клн=е®к=оЙквнуЦ=кЙлйK=
нбддДЙЬ∏к=лбннЙк=С~лн=б=к®нн=Зкбомнн~Ц=зЕЬ=СмевнбзелJ
~кгЙе=лн™к=б=к®нн=д®ЦЙK=pЙ=н~ДЙд дЙе= ∏îÉê=çäáâ~=
~кДЙнлд®ЦЙе=С∏к=Смевнбзел~кгЙеK
aЙе=лн®ддД~к~=Смевнбзел~кгЙе=г™лнЙ=лбнн~=лн~ЗбЦн=
б=кЙлйЙвнбоЙ=~кДЙнлд®ЦЙ=С∏êÉ=ëí~êíK
Ställ in funktionsarmens läge Bild
Tryck på låsknappen och vrid funktions-
armen.
Vrid funktionsarmen till önskat läge och
kontrollera att den sitter fast i det läget.
Läge
1
2
3
4
5
6
När ballongvisp, grovvisp och
degkrok ska sättas fast/tas bort
När mycket stora mängder
7
ska fyllas på i blandarskålen.
Montering och start
s~ê=Ñ∏клбвнбЦ=л™=~нн=Зм=бенЙ=
лв~З~к ЗбЦ>
p®нн=бенЙ=лнбЕввзен~внЙе=б=о®ЦЦмнн~ЦЙн=С∏êê®å=
Çì ®ê=âä~ê=ãÉÇ=~ää~=Ñ∏кДЙкЙЗЙдлЙк=С∏к=~нн=вмее~=
~кДЙн~=гЙЗ=г~лвбеЙеK
s~ê=Ñ∏клбвнбЦ>
pн~кн~=~дЗкбЦ=в∏влг~лвбеЙе=С∏кк®е=Йнн=оЙквнуЦL
нбддДЙЬ∏к=лбннЙк=й™=йд~нлK
pн~кн~=бенЙ=г ~лвбеЙе=мн~е=~нн=ЗЙн= Сбеел=дболгЙЗЙд=
б=ЗЙеK=
pн®дд=~дЗкбЦ=ЦкмеЗг~лвбеЙе=ЙддЙк=здбв~=нбддДЙЬ∏к=
й™ ЬЙн~=унзкK=qбддДЙЬ∏кЙе=®к=бенЙ=д®гйдбЦ~=
С∏к гбвкзо™ЦлмЦеK
Rengör motorstativet och alla tillbehör
grundligt före första användningen,
se avsnittet ”Rengöring och skötsel”.
Förberedelser
Ställ maskinen på plant, rent och torrt
underlag.
Linda upp resp. dra ut sladden (
Sätt stickkontakten i ett vägguttag.
Bild
).
Grovvispen, ballongvispen
och degkroken Bild
Grovvisp (a)
för att blanda pajdeg och saftig, tung sockerkaka.
Ballongvisp (b)
för att vispa grädde, äggvita och sockerkakssmet.
Degkrok (c) med degavvisare (d)
för att blanda och knåda jäsdegar och tyngre
degar och för att vända ner ingredienser
som inte ska hackas sönder (t.ex. russin,
chokladknappar).
s~ê=Ñ∏клбвнбЦ=л™=~нн=Зм=бенЙ=лв~З~к=
ЗбЦ=й™=нбддДЙЬ∏к=лзг=кзнЙк~к>
pнзйй~=~дЗкбЦ=еЙЗ=Ь~еЗЙе=б=Дд~еЗ~клв™дЙе=
е®к г~лвбеЙе=®к=бЦ™еЦK
h∏влг~лвбеЙе=С™к=бенЙ=о~к~=бЦ™еЦ=е®к=Йнн=
нбддДЙЬ∏кLоЙквнуЦ=лв~=л®нн~л=С~лн=ЙддЙк=н~л=дзллK=
h∏влг~лвбеЙе=Сзкнл®ннЙк=~кДЙн~=уннЙкдбЦ~кЙ=
Йе дбнЙе=лнмеЗ=лЙЗ~е=ЗЙе=лн®еЦнл=~оK
h∏влг~лвбеЙе=С™к=бенЙ=лн~кн~л=С∏кк®е =лвуЗЗJ
лдзЕвЙе=лбннЙк=й™=йд~нл=∏оЙк=ЗЙ=Зкбомнн~Ц=лзг=
бенЙ=~ео®еЗлK
Vrid strömvredet till läge
läget tills drivuttaget står helt stilla.
Obs!
Om maskinen inte går igång när du vrider
till läge P innebär det att den redan nått
parkeringsläget.
Tryck på låsknappen och sväng upp
funktionsarmen till läge 6.
Ställ blandarskålen på drivuttaget.
Skålens sockel ska fästas i spåret
på motorstativet.
Beroende på vad som ska bearbetas, sätt
i grovvispen, ballongvispen eller degkroken
i drivuttaget och kontrollera att den fastnar.
När du använder degkroken måste degavvisaren vridas så att degkroken kan fastna.
Häll ingredienserna i blandarskålen.
Tryck på låsknappen och sväng upp
funktionsarmen till läge 1.
Sätt locket på blandarskålen.
Vrid strömvredet till önskad hastighet.
P
och håll den i det
Robert Bosch Hausgeräte GmbH 63
Page 64

Så här fyller du på med mera ingredienser
sv
Stäng av maskinen med strömvredet.
Vrid strömvredet till läge
P
och håll den
i det läget tills drivuttaget står helt stilla.
Ta bort locket.
Tryck på låsknappen och sväng upp
funktionsarmen till läge 7.
Fyll på med mera ingredienser
eller
fyll på ingredienserna genom
påfyllningsöppningen i locket.
Efter arbetet
Stäng av maskinen med strömvredet.
Vrid strömvredet till läge
P
och håll den
i det läget tills drivuttaget står helt stilla.
Dra ut stickkontakten ur vägguttaget.
Ta bort locket.
Tryck på låsknappen och sväng upp
funktionsarmen till läge 6.
Lossa verktyget från drivuttaget.
Ta bort blandarskålen.
Rengör alla delar, se avsnittet
”Rengöring och skötsel”.
Mixern Bild
s~ê=Ñ∏клбвнбЦ=л™=~нн=Зм=бенЙ=лв~З~к=
ЗбЦ=й™=ЗЙ=о~лл~=вебо~ке~=лзг=
ЗЙллмнзг=кзнЙк~к>
pнзйй~=~дЗкбЦ=еЙЗ=СбеЦк~ке~=б=гбсЙке=лЙЗ~е=ЗЙе=
л~ннл=С~лн=б=гзнзклн~нбоЙнK=
h∏влг~лвбеЙе=лв~=о~к~=~олн®еЦЗ=е®к=гбсЙке=
йд~ЕЙк~л=й™=кЙлйK=дзлл~л=Ск™е=Зкбомнн~ЦЙнK=
jбсЙке=г™лнЙ=о~к~=ЬЙдн=бЬзйгзенЙк~З=зЕЬ=
Ь~ дзЕвЙн=й™=е®к=ЗЙе=~ео®еЗлK
oáëâ=Ñ∏ê=ëâ™ääëâ~Ççê>
k®к=Зм=гбс~к=ЬЙн~=беЦкЙЗбЙелЙк=нк®еЦЙк=™еЦ~=мн=
ЦЙезг=нк~ннЙе=б=дзЕвЙнK= e®дд=З®кС∏к=~дЗкбЦ=б=гЙк~=
®е=MIR=дбнЙк=ЬЙн=ЙддЙк=лвмгг~еЗЙ=о®нлв~K
lÄë>
jбсЙке=в~е=лв~З~л>=jбс~=~дЗкбЦ=ЗамйСкулн~=беЦкЙJ
ЗбЙелЙк=EмеЗ~ен~Ц=®к=блДбн~кFK=i™н=бенЙ=гбсЙке=Ц™=
мн~е=~нн=ЗЙн=Сбеел=дболгЙЗЙд=б=ЗЙеK
lÄë>
pн®дд=бе=г~сK=Ь~лнбЦЬЙн=P=е®к=Зм=гбс~к=о®нлвзк=
б Цд~лгбсЙкеK=e®дд=~дЗкбЦ=б=гЙк=®е =MIR=дб нЙк=ЬЙн=
ЙддЙк лвмгг~еЗЙ=о®нлв~K
Tryck på låsknappen och sväng upp
funktionsarmen till läge 3.
Ta bort skyddslocket från det drivuttag som
är avsett för mixern.
Placera mixerbägaren på drivuttaget (marke-
ringen vid bägarens hållare ska vara riktad
mot markeringen på motorstativet) och vrid
moturs till stoppet (
Häll ingredienserna i bägaren.
Bild -4/5
).
Häll ingredienserna i bägaren.max. mängd
vätska: plastmixer = 1 liter, glasmixer
= 0,75 liter skummande eller het vätska
max. 0,5 liter;
max. mängd torra ingredienser
= 50 til 100 gram.
Sätt på locket och tryck fast det ordentligt.
Håll alltid fast locket med ena handen under
arbetet. Håll inte handen direkt ovanför
påfyllningsöppningen!
Vrid strömvredet till önskad hastighet.
Om du behöver fyll på med
mera ingredienser Bild -6
Stäng av maskinen med strömvredet.
Ta bort locket och fyll på med mera
ingredienser
eller
torra ingredienser: Ta bort tratten och fyll på
genom mataröppningen
eller
flytande ingredienser: Fyll på genom tratten.
Efter arbetet
Stäng av maskinen med strömvredet.
Dra ut stickkontakten ur vägguttaget.
Vrid mixern medurs och ta av den.
Tips:
Rengör helst mixern genast efter
användning.
Rengöring och skötsel
s~ê=Ñ∏клбвнбЦ>
^åî®åÇ=áåÖ~=ëí~êâ~=êÉåÖ∏кбеЦлгЙЗЙдK=
jзнзклн~нбоЙнл=ун~=в~е=лв~З~лK=
Motordel
oáëâ=Ñ∏к=ЙдЙвнкблв~=лн∏í~ê>
aблв~=~дЗкбЦ=гзнзклн~нбоЙн=зЕЬ=лв∏да=ЗЙн=ЬЙддЙк=
бенЙ=меЗЙк=кбее~еЗЙ=о~ннЙеK
Dra ut stickkontakten ur vägguttaget.
Rengör motorstativet med en fuktig duk.
Använd lite handdiskmedel vid behov.
Avsluta med att torka ordentligt torrt.
64 Robert Bosch Hausgeräte GmbH
Page 65

Blandarskålen med tillbehören
sv
Samtliga delar kan rengöras i diskmaskin.
Ställ delarna på sådant sätt i diskmaskinen att
de inte kan deformeras under diskningen.
Kläm inte fast dem. Diska i överkorgen på äldre
diskmaskiner.
Rengöra mixern
s~ê=Ñ∏клбвнбЦ=л™=~нн=Зм=бенЙ=лв~З~к=
ЗбЦ=й™=ЗЙ=о~лл~=вебо~ке~>
q~=~дЗкбЦ=б=вебо~ке~=гЙЗ=Ь®еЗЙке~K=
jбсЙке=в~е=н~л=бл®к=С∏к=~нн=меЗЙкд®нн~=
кЙеЦ∏кбеЦЙеK
lÄë>
^åî®åÇ=áåÖ~=ëí~êâ~=êÉåÖ∏кбеЦлгЙЗЙдK=
hебобел~нлЙе=Ц™к=бенЙ=~нн=кЙеЦ∏ê~=á=Çáë âã ~ë âá åK=
oÉåÖ∏к=вебобел~нлЙе=ЙеЗ~лн=меЗЙк=кбее~еЗЙ=
о~ннЙеK
Tips:
När du blandat vätskor är det ofta inte
nödvändigt att ta isär mixern för rengöring.
Häll lite vatten med en droppe handdiskmedel
i mixern medan den sitter på köksmaskinen.
Fäst locket och låt maskinen gå några sekunder
(använd läge M om maskinen har detta
momentläge). Häll sedan bort vattnet och
skölj ur med rent vatten.
Ta isär mixern Bild
Lossa mixerbägaren från hållaren genom att
vrida hållaren medurs.
Fatta knivinsatsen i vingarna och vrid moturs.
Då lossnar knivinsatsen.
Ta ut knivinsatsen och ta bort tätningsringen
från den.
Sätta ihop mixern Bild
s~ê=Ñ∏клбвнбЦ=л™=~нн=Зм=бенЙ=
лв~З~к ЗбЦ>
jзенЙк~=~дднбЗ=бЬзй= гбсЙке= ЬЙдн= зЕЬ=Ь™ддЙн=бее~е=
ЗЙе=л®ннл=й™=в∏влг~лвбеЙе=С∏ê=~íí=~åî®åÇ~ëK
Sätt fast tätningsringen i knivinsatsen.
Sätt in knivinsatsen i bägaren underifrån.
Skruva fast knivinsatsen med hjälp av den
uppochnedvända hållaren.
Fäst hållaren på mixerbägaren och vrid
moturs tills den sitter fast.
Råd vid fel
Ta kontakt med service vid ett eventuellt fel.
Exempel på vad du kan göra med
maskinen
Vispgrädde
100–600 g (1 dl–6 dl)
Vispa grädden 1½–4 min på hastig-
het 4 (beroende på mängd och konsistens).
Använd ballongvispen.
Vispa äggvita
1–8 äggvitor
Vispa äggvitorna 4–6 min på hastig-
het 4. Använd ballongvispen.
Sockerkaka/tårtbotten
dкмеЗкЙЕЙйн=
2 ägg
2–3 msk hett vatten
100 g socker
1 tsk vaniljsocker
70 g vetemjöl
1¼ dl potatismjöl 1 tsk bakpulver
Vispa ingredienserna (ägg, vatten, socker
och vaniljsocker) ca 4–6 min på hastighet
4 till skum. Använd ballongvispen.
Blanda samman vetemjöl, potatismjöl och
bakpulver. Vrid till hastighet 2, fyll på
mjölblandningen skedvis och blanda ned
under ca ½–1 min.
Max mängd:
Saftig sockerkaka
dкмеЗкЙЕЙйн=
3–4 ägg
200–250 g socker
1 krm salt
½ tsk vaniljsocker eller skalen av en ½ citron
200–250 g smör eller margarin (rumsvarmt)
500 g vetemjöl
1 tsk bakpulver
1
/
l mjölk
8
Blanda alla ingredienser ca. ½ minut
på hastighet 1, fortsätt därefter blanda
ytterligare 2–3 min på hastighet 3.
Använd grovvispen eller degkroken.
Max mängd:
Mördeg
dкмеЗкЙЕЙйн=
125 g smör (rumsvarmt)
100–125 g socker
1 ägg
1 krm salt
1 tsk vaniljsocker
250 g vetemjöl
1 tsk bakpulver
2 ggr grundreceptet
1,5–2 ggr grundreceptet
Robert Bosch Hausgeräte GmbH 65
Page 66

Bearbeta samtliga ingredienser ca. ½ minut
sv
på hastighet 1, därefter ca. 2–3 minuter på
hastighet 3 (om du använder grovvispen) eller
på hastighet 2 (om du använder degkroken).
Max mängd:
2 ggr grundreceptet
Deg
dкмеЗкЙЕЙйн=
500 g vetemjöl
1 ägg
80 g fett (rumsvarmt)
80 g socker
200–250 ml fingervarm mjölk (37 ºC för färsk
jäst; ca 40 ºC för torrjäst, se förpackningen)
25 g färsk jäst eller 1 pkt torrjäst
Skalet från en halv citron
1 krm salt
Använd degkroken. Mät upp alla ingre-
dienser och blanda dem ca ½ min på hastighet 1, fortsätt därefter ytterligare ca 3–6 min
på hastighet 2.
Max. mängd:
1,5 ggr grundreceptet
Majonnäs
2 ägg
2 tsk senap
¼ l matolja
2 msk citronsaft eller vinäger
1 krm salt
1 krm socker
Alla ingredienser måste ha samma temperatur.
Blanda några sekunder ingredienserna
(utom matoljan) på hastighet 2.
Öka till hastighet 4 och häll matoljan
långsamt genom tratten och fortsätt
blanda till jämntjock konsistens.
Extra tillbehör
Till övriga tillbehör som medföljer vissa modeller
av köksmaskinen (se bifogad modellöversikt,
bild
) finns separata bruksanvisningar.
Dessa tillbehör kan även köpas separat
= extra tillbehör. Tillbehören/extra tillbehören
till köksmaskin MUM 45.. passar även till
köksmaskiner MUM 44../46../48.. .
Bild
Plastblandarskål (MUZ4KR3)
Blandarskålen rymmer upp till 1 kg vetemjöl plus
ingredienser.
Blandarskål i rostfritt stål (MUZ4ER2)
Blandarskålen rymmer upp till 1 kg vetemjöl plus
ingredienser.
Mixer i slagfast plast (MUZ4MX2)
För att blanda drycker, göra puré av frukt och
grönsaker, bereda majonnäs, finfördela frukt
och nötter, krossa isbitar.
Mixer i glas (MUZ4MX3)
För att blanda drycker, göra puré av frukt och
grönsaker, bereda majonnäs, finfördela frukt
och nötter, krossa isbitar.
Matberedartillsats (MUZ4MM3)
Används för att hacka kryddor, grönsaker,
äpplen och kött, strimla morötter och rättika,
riva osten, nötter och kall choklad.
Grönsaksskärarer (MUZ4DS3)
För att skiva gurka, kål, kålrabbi, rättika; för att
strimla morötter, äpplen och stjälkselleri, rödkål,
ost och nötter; för att riva hårdost, choklad och
nötter.
Pommes frites-skiva (MUZ45PS1)
Till grönsaksskärare MUZ4DS3.
För att skära rå potatis till pommes frites-stavar.
Skärskiva för asiatiska rätter
(MUZ45AG1)
Till grönsaksskärare MUZ4DS3.
Skär frukt och grönsaker i fina strimlor till asiatiska grönsaksrätter.
Rivskiva grov (MUZ45RS1)
Till grönsaksskärare MUZ4DS3.
För att riva rå potatis t.ex. till raggmunkar
och kroppkakor.
Skärskiva för röst och rårakor
(MUZ45KP1)
Till grönsaksskärare MUZ4DS3.
För att riva rå potatis till rösti och rårakor, även
för att skära frukt och grönsaker i tjocka skivor.
Citruspressen (MUZ4ZP1)
För att pressa ut saft ur apelsiner, citroner och
grapefrukt.
Köttkvarn (MUZ4FW3)
För att bearbeta färskt kött till råbiff och köttfärs.
Hålskivor (MUZ45LS1)
Till köttkvarn MUZ4FW3.
Hålskiva fin (3 mm) till pastejer och olika
smörgåspålägg, grov (6 mm) till korv och fläsk.
Kakspritsmunstycke (MUZ45SV1)
Till köttkvarn MUZ4FW3.
Med mall i metall för 4 olika typer för att forma
kakor.
66 Robert Bosch Hausgeräte GmbH
Page 67

Rivtillsats (MUZ45RV1)
sv
Rätten till ändringar förbehålles.
Till köttkvarn MUZ4FW3.
För att riva nötter, mandel, choklad och torkat
bröd.
Passertillsats (MUZ45FV1)
Till köttkvarn MUZ4FW3.
För att göra mos av bärfrukter (utom hallon),
tomater och nypon. Samtidigt blir t.ex. vinbär
automatiskt av med stjälk och kärna.
Tillbehörshållare (MUZ4ZT1)
För förvaring av tillbehör som degkroken,
ballongvispen, grovvispen, den vändbara
skär- och riv-/strimmelskivan
Sädeskvarn med metallkvarnverk
av stål (MUZ4GM3)
Mal alla sädesslag utom majs, oljeväxter, torkad
svamp och torkade kryddor.
Glassberedare (MUZ4EB1)
För att bereda upp till 550 g glass per omgång
och behållare.
Den gamla apparaten
Denna produkt uppfyller kraven för
det europeiska direktivet 2012/19/EG
om elektriska och elektroniska
hushållsprodukter (waste electrical
and electronic equipment – WEEE).
Direktivet anger ramen för återtagande och
återvinning av gamla produkter inom EU.
Hör med din kommun eller det ställe där du
köpt produkten var du lämnar en gammal
maskinen.
Konsumentbestämmelser
I Sverige gäller av EHL antagna
konsumentbestämmelser. Den fullständiga
texten finns hos din handlare. Spar kvittot.
Robert Bosch Hausgeräte GmbH 67
Page 68

fi
lееЙвлб=здвззе=о~дбен~лб=зе=_lp`eK
rмлб=Ь~евбен~лб=зе=еуву~бв~беЙе=а~=д~~Змв~л=
взЗбевзеЙK
iбл®нбЙнза~=нмзннЙблн~ггЙ=д∏уЗ®н=бенЙкеЙнJ
лбомбдн~ггЙK
Sisältö
Turvallisuusasiaa . . . . . . . . . . . . . . . . . . . . 68
Laitteen osat . . . . . . . . . . . . . . . . . . . . . . . 70
Käyttö . . . . . . . . . . . . . . . . . . . . . . . . . . . . 71
Puhdistus . . . . . . . . . . . . . . . . . . . . . . . . . . 72
Ohjeita käyttöhäiriöiden varalle . . . . . . . . . . 73
Käyttöohjeita . . . . . . . . . . . . . . . . . . . . . . . 73
Varusteet/lisävarusteet . . . . . . . . . . . . . . . . 74
Kierrätysohjeita . . . . . . . . . . . . . . . . . . . . . 75
Takuuehdot . . . . . . . . . . . . . . . . . . . . . . . . 75
Turvallisuusasiaa
Lue käyttöohje huolellisesti ennen laitteen käyttöä. Siinä on tärkeitä
laitetta koskevia turvallisuus- ja käyttöohjeita.
Jos laitteen käyttöohjeet laiminlyödään, valmistaja ei ole vastuussa
ohjeidenvastaisesta käytöstä aiheutuvista vahingoista.
Tämä laite on tarkoitettu määrille, jotka ovat normaaleja kotitalouskäytössä
tai siihen rinnastettavassa käytössä. Se ei sovellu ammattimaiseen
käyttöön. Kotitalouskäyttöön rinnastettava käyttö käsittää esim. laitteen
käytön liikkeiden, toimistojen, maatalous- ja muiden ammatillisten yritysten
taukotiloissa, sekä laitteen käytön pienien hotellien ja palvelutalojen
asiakas- ja vierastiloissa. Käytä laitetta vain kotitalouksissa tavallisten
määrien käsittelyyn ja keskeytyksettä ainoastaan ohjeissa ilmoitetun ajan.
Älä ylitä maksimimääriä (katso »Käyttöohjeita«)!
Laite soveltuu ruoka-aineiden sekoittamiseen ja vatkaamiseen sekä
taikinan vaivaamiseen. Sitä ei saa käyttää muiden tarvikkeiden tai aineiden
käsittelyyn. Valmistajan hyväksymien lisävarusteiden kanssa voit käyttää
laitetta myös muihin käyttötarkoituksiin.
Käytä laitetta vain alkuperäisvarusteiden kanssa. Kun käytät varusteita,
noudata oheisia käyttöohjeita.
Säilytä käyttöohje huolellisesti. Muista antaa käyttöohje laitteen
mahdolliselle uudelle omistajalle.
, Yleiset turvallisuusohjeet
Sähköiskun vaara
Lapset eivät saa käyttää laitetta.
Pidä laite ja sen liitäntäjohto poissa lasten ulottuvilta.
Henkilöt, joilla on alentunut fyysinen, aistillinen tai henkinen toimintakyky
tai joilta puuttuu kokemusta ja tietoa laitteen käytöstä, saavat käyttää sitä
vain valvonnan alaisena tai kun heille on kerrottu, miten laitetta käytetään
turvallisesti ja he ovat ymmärtäneet, mitä vaaroja laitteen käytöstä voi
aiheutua.
Lapset eivät saa leikkiä laitteella.
68 Robert Bosch Hausgeräte GmbH
Page 69

Liitä laite vain tyyppikilvessä olevan käyttöjännitemerkinnän mukaiseen
fi
pistorasiaan. Käytä laitetta vain, kun liitäntäjohto ja laite ovat
moitteettomassa kunnossa.
Irrota laite aina sähköverkosta, kun se jää ilman valvontaa ja ennen sen
kokoamista, osiin purkamista tai puhdistamista.
Varo, että terävät reunat tai kuumat pinnat eivät vaurioita liitäntäjohtoa.
Jos laitteen liitäntäjohto vioittuu, sen saa turvallisuussyistä vaihtaa vain
valmistaja, valtuutettu huoltoliike tai vastaavat valtuudet omaava
sähköasentaja.
Jätä sen vuoksi laitteen korjaukset vain valtuutetun huoltoliikkeen
tehtäväksi.
, Laitetta koskevat turvallisuusohjeet
Loukkaantumisvaara
Sähköiskun vaara!
Kytke pistotulppa pistorasiaan vasta sitten, kun kaikki alkuvalmistelut
koneella työskentelyä varten on tehty.
Älä upota peruslaitetta veteen tai muihin nesteisiin tai pese sitä juoksevan
veden alla.
Älä käytä höyrypuhdistinta.
Älä muuta varren asentoa virran ollessa kytkettynä koneeseen. Odota, että
moottori on pysähtynyt.
Vaihda varuste/lisävaruste vain moottorin ollessa pysähdyksissä – moottori
toimii vielä jonkin aikaa virrankatkaisun jälkeen.
Käynnistä ja pysäytä laite ainoastaan valitsimesta.
Kun et käytä konetta, irrota pistotulppa pistorasiasta.
Irrota pistotulppa pistorasiasta ennen häiriön poistamista.
Kone käynnistyy sähkökatkon jälkeen.
Varo pyöriviä varusteita – loukkaantumisvaara!
Varo koskettamasta pyöriviin osiin. Älä tartu kulhoon koneen ollessa
toiminnassa.
Vaihda varuste vain, kun moottori on pysähtynyt – kone käy vielä jonkin
aikaa pysäyttämisen jälkeen.
Laitetta saa turvallisuussyistä käyttää vain, kun käyttämättömät
käyttöliitännät on peitetty suojakansilla (4, 7).
Varo terävää terää/pyörivää käyttöakselia – loukkaantumisvaara!
Älä tartu paikalleen kiinnitettyyn tehosekoittimeen!
Älä kokoa tehosekoitinta sen ollessa kiinnitettynä peruskoneeseen.
Irrota/kiinnitä tehosekoitin vain kun koneen moottori on pysähtynyt!
Kokoa ensin tehosekoitin ja kiinnitä se vasta sitten peruskoneeseen.
Älä käytä tehosekoitinta ilman kantta. Älä koske tehosekoittimen terään
paljain käsin.
Robert Bosch Hausgeräte GmbH 69
Page 70

Palovamman vaara!
fi
Kannessa olevan suppilon kautta tulee ulos höyryä sekoitettaessa kuumia
aineksia. Täytä tehosekoittimeen kuumaa tai kuohuvaa nestettä enintään
0,5 litraa.
Tärkeää!
Käytä samanaikaisesti vain yhtä varustetta tai lisävarustetta.
Käyttöohje on tarkoitettu eri malleille (katso
myös oheinen taulukko eri malleista, kuva ).
Laite on huoltovapaa.
Laitteen osat
Käännä esiin kuvasivut Kuva
Peruslaite
1
Avaamispainike
2
Kääntyvä varsi
(katso »Käyttöasennot«)
3
Valitsin
0/off = seis
/
P
pidä valitsin painettuna, kunnes toiminta
pysähtyy; varsi on nyt kääntöasennossa.
Jos kone ei käynnisty, niin varsi on jo käännettävissä.
Nopeusalueet 1–4= käyttönopeudet
Nopeusalue 1 = alhaisin käyttönopeus
Nopeusalue 4 = suurin käyttönopeus
Sähkökatkon sattuessa laite ei kytkeydy
pois päältä; se käynnistyy uudelleen
sähkökatkon jälkeen.
4
Käyttöliitännän suojakansi
Irrota suojakansi kääntämällä sitä, kunnes
se vapautuu lukituksesta.
5
Käyttöliitäntä
–
Vihannesleikkuri
Sitruspuserrin *
–
–
Viljamylly *
Kun et käytä lisälaitteita, aseta
käyttöliitännän suojakansi paikoilleen.
Käyttöliitäntä
6
–
varusteille (pallovispilä, vispilä,
taikinakoukku)
–
jäätelökoneen * sekoittimelle
–
alas- tai ylöskäännettynä lihamyllylle *
7
Tehosekoittimen käyttöliitännän
suojakansi
= parkkiasento,
– hidas
– nopea
*
8
Käyttöliitäntä
–
tehosekoittimelle
–
teholeikkurille
Kun et käytä lisälaitteita, aseta
käyttöliitännän suojakansi paikoilleen.
9
Johdon säilytystila (
MUM 44..: Kelaa johto paikoilleen
MUM 46../48..: Kelaa liitäntäjohto sitä
varten olevaan tilaan
Kulho varusteineen
10
Sekoituskulho
11
Kansi
Varusteet
Vispilät
12
13
Pallovispilä
14
Taikinakoukku, jossa on taikinanohjain
Tehosekoitin
Jalusta
15
16
Te rä o s a
17
Tiivistysrengas
18
Kulho
19
Kansi
20
Suppilo
* Jos jokin varuste ei ole laitteen mukana
vakiovarusteena, voit hankkia sen alan
liikkeistä tai asiakaspalvelusta.
Kuva
)
Käyttöasennot
eìçãK>
h®ун®=взеЙнн~=о~беI=вме=о~кмлнЙLдбл®о~кмлнЙ=
зе вббеебнЙнну=лЙмк~~о~е=н~мдмвзе=гмв~блЙлнб=
збвЙ~~е=в®унн∏äááí®åí®®å=à~=é~áââ~~å=à~=ëÉ=çå=
çáâÉ~ëë~=â®óíí∏~лЙеезлл~~еK
h®®енуо®е=о~ккЙе=нмдЙЙ=е~йл~Ьн~~=~бе~=вббееб=
в®унн∏~лЙенззеK
Käyttöasennon säätö Kuva
Paina avaamispainiketta ja vaihda varren
asento.
Siirrä varsi haluamaasi asentoon niin, että
se napsahtaa kiinni.
70 Robert Bosch Hausgeräte GmbH
Page 71

fi
Asento
1
2
3
4
5
6
7
Vispilän, pallovispilän ja taikinakoukun kiinnitys/irrotus.
Suurempien määrien
lisääminen.
Käyttö
iзмвв~~енмгбло~~к~
hунвЙ=йблнзнмдйй~=йблнзк~лб~~е=о~лн~=лбннЙеI=
вме=в~бввб= ~двмо~дгблнЙдмн=взеЙЙдд~=ну∏лвЙенЙду®=
о~кнЙе=зе=нЙЬнуK
eìçãK>
h®ун®=взеЙнн~=о~беI=вме=дбл®о~кмлнЙLо~кмлнЙ=
зе в®унн∏~лЙеезлл~~еK
ыд®=в®уееблн®=взеЙнн~=бдг~е=о~кмлнЙнн~K=
ыд®=~днблн~=взеЙнн~=а~=о~кмлнЙнн~=д®гг∏ед®ЬнЙбддЙK=
lл~н=Йбо®н=лзоЙддм=гбвкз~~днзммебв®унн∏∏åK
Puhdista laite ja varusteet huolellisesti ennen
ensimmäistä käyttökertaa, katso kappale
»Puhdistus«.
Esivalmistelut
Aseta kone tasaiselle ja puhtaalle alustalle.
Kelaa liitäntäjohto auki tai vedä johto ulos
(
Kuva
Laita pistotulppa pistorasiaan.
Vispilä, pallovispilä
ja taikinakoukku Kuva
Vispilä (a)
sekoittaa taikinat, esim. kakkutaikinan
Pallovispilä (b)
vatkaa kerma- ja valkuaisvaahdon ja kevyet
taikinat, esim. sokerikakkutaikinan
).
Taikinakoukku (c), jossa on taikinanohjain (d)
vaivaa paksut taikinat ja sekoittaa taikinaan
ainekset, joita ei tarvitse hienontaa
(esim. rusinat, suklaalastut)
s~êç=éó∏кбоб®=о~кмлнЙбн~=У=
дзмвв~~енмгбло~~к~>
ыд®=н~кнм=вмдЬззе=взеЙЙе=зддЙлл~=нзбгбее~лл~K
s~бЬЗ~=о~кмлнЙ=о~беI=вме=гззннзкб=зе=йул®ЬнуJ
еун=У=взеЙ=в®у=обЙд®=азевбе=~бв~~= йул®унн®гблЙе=
а®двЙЙеK
h®ун®=взеЙнн~=о~беI=вме=в®унн®г®нн∏ãáÉå=
â®óíí∏äááí®åí∏аЙе=лмза~в~елб=зе=й~бвзбдд~~еK
Aseta valitsin asentoon
P
ja pidä kiinni,
kunnes moottori pysähtyy.
Ohje:
Jos kone ei käynnisty, niin varsi on jo
käännettävissä.
Paina avaamispainiketta ja käännä varsi
asentoon 6.
Aseta kulho paikoilleen. Kulhon jalustan pitää
olla peruskoneen aukossa.
Kiinnitä sopiva varuste – vispilä, pallovispilä
tai taikinakoukku –, niin että se lukittuu
käyttöliitäntään.
Käännä taikinakoukun taikinanohjainta,
kunnes taikinakoukku pystyy lukkiutumaan.
Täytä ainekset kulhoon.
Paina avaamispainiketta ja käännä varsi
asentoon 1.
Laita kansi paikalleen.
Valitse haluamasi nopeus valitsimella.
Ainesten lisääminen
Pysäytä kone valitsimesta.
Aseta valitsin asentoon
P
ja pidä kiinni,
kunnes moottori pysähtyy.
Irrota kansi.
Paina avaamispainiketta ja käännä varsi
asentoon 7.
Lisää ainekset kulhoon
tai
lisää ainekset kannessa olevan täyttöaukon
kautta.
Käytön jälkeen
Pysäytä kone valitsimesta.
Aseta valitsin asentoon
P
ja pidä kiinni,
kunnes moottori pysähtyy.
Irrota pistotulppa pistorasiasta.
Irrota kansi.
Paina avaamispainiketta ja käännä varsi
asentoon 6.
Robert Bosch Hausgeräte GmbH 71
Page 72

Irrota varuste käyttöliitännästä.
fi
Poista kulho.
Puhdista kaikki osat, katso kohta
»Puhdistus«.
Tehosekoitin Kuva
s~êç=íÉê®î®®=íÉê®®Léó∏êáî®®=
â®óíí∏~влЙдб~=У=
дзмвв~~енмгбло~~к~>
ыд®=н~кнм=й~бв~ддЙЙе=вббеебнЙннууе=
нЙЬзлЙвзбннбгЙЙе>=
fккзн~Lвббеебн®=нЙЬзлЙвзбнбе=о~бе=вме=взеЙЙ е=
гззннзкб=зе=йул®Ьнуеун>=
hзвз~=Йелбе=нЙЬзлЙвзбнбе=а~=вббеебн®=лЙ=о~лн~=
лбннЙе=йЙкмлвзеЙЙлЙЙеK=ыд®=в®ун®=
нЙЬзлЙвзбнбен~=бдг~е=в~енн~K
m~äçî~ãã~å=î~~ê~>
h~ееЙлл~=здЙо~е=лмййбдзе=в~мнн~=нмдЙЙ=мдзл=
Ь∏уку®=лЙвзбнЙнн~Йлл~=вммгб~=~беЙвлб~K=q®ун®=
нЙЬзлЙвзбннбгЙЙе=вммг~~=н~б=вмзЬмо~~=
еЙлнЙнн®=Йебен®®е=MIR=дбнк~~K
eìçãK>
qЙЬзлЙвзбнбе=озб=о~мкбзбнм~K=
ыд®=в®лбннЙдЙ=й~в~лнЙбн~=Eй~бнлб=а®®й ~дза~ FK=
ыд® в®ун®=нЙЬзлЙвзбнбен~=нуЬа®е®K
eìçãK>
kЙлнЙбЗЙе=в®лбннЙду=д~лбвмдЬзлл~W=г~влбгб=
езйЙмл=PK=q®ун®=нЙЬзлЙвзбннбгЙЙе=вммг~~=
н~б вмзЬмо~~=еЙлнЙнн®=Йебен®®е=MIR=дбнк~~K
Paina avaamispainiketta ja käännä varsi
asentoon 3.
Poista tehosekoittimen käyttöliitännän
suojakansi.
Aseta tehosekoitin paikoilleen (jalustan
merkki ja koneen merkki vastatusten)
ja käännä vastapäivään vasteeseen asti
(
Kuva -4/5
Täytä ainekset.
Maksimimäärä nesteitä muovikulhossa
= 1 litra, lasikulhossa = 0,75 litraa.
Kuohuvia tai kuumia nesteitä enintään
0,5 litraa.
Optimaali käsittelymäärä kiinteitä aineksia
= 50–100 grammaa.
Aseta kansi paikoilleen ja paina kiinni.
Pidä käytön aikana kannesta aina kiinni
toisella kädellä. Varo laittamasta sormia
täyttöaukon päälle!
Valitse haluamasi nopeus valitsimella.
).
Ainesten lisääminen Kuva -6
Pysäytä kone valitsimesta.
Irrota kansi ja lisää ainekset
tai
poista suppilo ja lisää kiinteät ainekset
vähitellen täyttöaukon kautta
tai
kaada nestemäiset ainekset kulhoon
suppilon läpi.
Käytön jälkeen
Pysäytä kone valitsimesta.
Irrota pistotulppa pistorasiasta.
Irrota tehosekoitin myötäpäivään kääntäen.
Ohje:
Puhdista tehosekoitin heti käytön jälkeen.
Puhdistus
eìçãK>
ыд®=в®ун®=Ь~ев~~об~=ймЬЗблнмл~беЙбн~K=
i~бннЙЙе йбее~н=озбо~н=о~мкбзбнм~K=
Peruskoneen puhdistus
p®Üâ∏блвме=о~~к~>
ыд®=мйзн~=йЙкмлвзеЙнн~=оЙнЙЙе=н~б=йЙлЙ=лбн®=
амзвлЙо~е=оЙЗЙе=~дд~K
Irrota pistotulppa pistorasiasta.
Pyyhi peruskone puhtaaksi kostealla liinalla.
Käytä tarvittaessa hieman käsinpesuun
tarkoitettua astianpesuainetta.
Kuivaa kone lopuksi.
Kulhon ja varusteiden puhdistus
Kaikki osat ovat konepesun kestäviä.
Varo, että muoviosat eivät jää puristuksiin
astianpesukoneessa, niiden muoto saattaa
muuttua pesun aikana.
Tehosekoittimen puhdistus
s~кз=нЙк®о®®=нЙк®®=У=дзмвв~~енмJ
гбло~~к~>
ыд®=взлвЙ=нЙЬзлЙвзбннбгЙе=нЙк®®е=й~да~бе=в®лбеK=
qЙЬзлЙвзбннбгЙе=озб=ймкв~~=злббе=
ймЬЗблн~гблн~=о~кнЙеK
eìçãK>
ыд®=в®ун®=Ь~ев~~об~=ймЬЗблнмл~беЙбн~K=
qЙк®зл~=Йб=здЙ=взеЙйЙлме=вЙлн®о®K=
mЙлЙ=нЙк®зл~=о~бе=амзвлЙо~е=оЙЗЙе=~дд~K
72 Robert Bosch Hausgeräte GmbH
Page 73

Ohje:
fi
Nesteiden sekoittamisen jälkeen
tehosekoittimen voi usein puhdistaa purkamatta
sitä osiin. Kaada koneeseen kiinnitettyyn
sekoittimeen vähän vettä, johon on lisätty
käsinpesuun tarkoitettua astianpesuainetta.
Käynnistä tehosekoitin muutamaksi sekunniksi
(valitse nopeudeksi M koneissa, joissa on
pitoasento). Kaada pesuvesi pois ja huuhtele
tehosekoitin puhtaalla vedellä.
Tehosekoittimen
purkaminen osiin Kuva
Käännä tehosekoittimen jalustaa
myötäpäivään ja irrota kulho.
Käännä teräosaa vastapäivään.
Teräosa irtoaa lukituksesta.
Poista teräosa ja irrota tiivistysrengas.
Tehosekoittimen kokoaminen Kuva
iзмвв~~енмгбло~~к~
ыд®=взвз~=нЙЬзлЙвзбнбен~=лЙе=зддЙлл~=
вббеебнЙннуе®=йЙкмлвзеЙЙлЙЙеK
Kiinnitä tiivistysrengas teräosaan.
Aseta teräosa terät edellä paikoilleen
tehosekoittimen kulhoon.
Kierrä teräosa kiinni kulhon jalustan avulla.
Kiinnitä tehosekoittimen jalusta kääntämällä
vastapäivään.
Ohjeita käyttöhäiriöiden varalle
Käänny häiriötapauksessa valtuutetun
huoltopalvelun puoleen.
Käyttöohjeita
Kermavaahto
100 g–600 g
Vatkaa kerma vaahdoksi
pallovispilällä 1½ –4 minuutin ajan
nopeudella 4 (kermamäärän ja -laadun
mukaan).
Valkuaisvaahto
1–8 kananmunan valkuaista
Vatkaa valkuaiset vaahdoksi pallovis-
pilällä 4–6 minuutin ajan nopeudella 4.
Sokerikakkutaikina
mЙкмлзЬаЙ
2 munaa
2–3 rkl kuumaa vettä
100 g sokeria
1 tl vaniljasokeria
70 g jauhoja
70 g perunajauhoja mahd. leivinjauhetta
Vatkaa ainekset (paitsi jauhot ja perunajauho)
pallovispilällä vaahdoksi noin 4–6 minuutin
ajan nopeudella 4.
Käännä valitsin asentoon 2 ja lisää siivilöidyt
jauhot ja perunajauho lusikka kerrallaan
ja sekoita noin ½–1 minuuttia.
Maksimimäärä:
2 x perusohje
Kakkutaikina
mЙкмлзЬаЙ
3–4 munaa
200–250 g sokeria
ripaus suolaa
1 tl vaniljasokeria tai ½ sitruunan raastettu kuori
200–250 g voita (huoneenlämpöistä)
500 g jauhoja
1 tl leivinjauhetta
1
/
l maitoa
8
Sekoita vispilällä kaikkia aineksia noin
½ minuuttia nopeudella 1, sitten noin 3–4
minuuttia nopeudella 3.
Maksimimäärä:
1,5–2 x perusohje
Murotaikina
mЙкмлзЬаЙ
125 g voita (huoneenlämpöistä)
100–125 g sokeria
1 muna
ripaus suolaa
hieman sitruunankuorta tai vaniljasokeria
250 g jauhoja
mahd. leivinjauhetta
Sekoita kaikkia aineksia noin ½ minuuttia
nopeudella 1, sitten noin 2–3 minuuttia
vispilällä (nopeus 3) tai taikinakoukulla
(nopeus 2).
Maksimimäärä:
2 x perusohje
Hiivataikina
mЙкмлзЬаЙ
500 g jauhoja
1 muna
80 g rasvaa (huoneenlämpöistä)
80 g sokeria
200–250 ml haaleaa maitoa
25 g hiivaa tai vastaava määrä kuivahiivaa
½ sitruunan kuori
ripaus suolaa
Vaivaa taikinakoukulla kaikkia aineksia noin
½ minuuttia nopeudella 1, sitten noin
3–6 minuuttia nopeudella 2.
Maksimimäärä:
1,5 x perusohje
Robert Bosch Hausgeräte GmbH 73
Page 74

Majoneesi
fi
2 munaa
2 tl sinappia
¼ l öljyä
2 rkl etikkaa tai sitruunanmehua
ripaus suolaa
ripaus sokeria
Ainesten pitää olla huoneenlämpöisiä.
Sekoita kaikkia aineksia (paitsi öljyä)
tehosekoittimessa muutama sekunti
nopeudella 2.
Kytke tehosekoitin nopeudelle 4 ja kaada öljy
hitaasti suppilon kautta ja sekoita niin kauan,
kunnes majoneesi emulgoituu.
Varusteet/lisävarusteet
Lisäohjeita pakkauksen mukana olevista
varusteista (katso oheinen mallitaulukko,
kuva) on erillisissä käyttöohjeissa.
Toimituksen mukana olevia varusteita/
lisävarusteita voi ostaa myös jälkikäteen.
Koneen MUM 45.. varusteet sopivat myös
koneisiin MUM 44../46../48.. .
Kuva
Muovikulho (MUZ4KR3)
Kulhossa voit käsitellä taikinat, maks. 1 kg
jauhoja plus lisäainekset.
Teräskulho (MUZ4ER2)
Kulhossa voit käsitellä taikinat, maks. 1 kg
jauhoja plus lisäainekset.
Tehosekoitin, muovia (MUZ4MX2)
Sekoittaa juomat, soseuttaa hedelmät ja
vihannekset, valmistaa majoneesin, hienontaa
hedelmät ja pähkinät, murskaa jääpalat.
Tehosekoitin, lasia (MUZ4MX3)
Sekoittaa juomat, soseuttaa hedelmät ja
vihannekset, valmistaa majoneesin, hienontaa
hedelmät ja pähkinät, murskaa jääpalat.
Teholeikkuri (MUZ4MM3)
Silppuaa yrtit, pilkkoo vihannekset, omenat
ja lihan, raastaa porkkanat, retikan ja juuston,
rouhii pähkinät ja jäähdytetyn suklaan.
Vihannesleikkuri (MUZ4DS3)
Viipaloi kurkut, kaalin, kyssäkaalin, retikan;
raastaa porkkanat, omenat ja sellerin, punakaalin, juuston ja pähkinät; raastaa kovan
juuston ja rouhii suklaan ja pähkinät.
WOK-terä (MUZ45AG1)
Vihannesleikkuriin MUZ4DS3.
Suikaloi hedelmät ja vihannekset aasialaisiin
kasvisruokiin.
Raasteterä karkea (MUZ45RS1)
Vihannesleikkuriin MUZ4DS3.
Raastaa raa’at perunat esim. perunaohukaisiin
ja knöödeleihin.
Röstiperunaterä (MUZ45KP1)
Vihannesleikkuriin MUZ4DS3.
Raastaa raa’at perunat röstiperunataikinaan,
viipaloi hedelmät ja vihannekset.
Sitruspuserrin (MUZ4ZP1)
Pusertaa appelsiinit, sitruunat ja greipit.
Lihamylly (MUZ4FW3)
Jauhaa tuoreen lihan tartarpihvien tai jauhelihamurekkeen valmistamista varten.
Reikälevysarja (MUZ45LS1)
Lihamyllyyn MUZ4FW3.
Hieno (3 mm) terä pasteijoille ja levitteille, karkea
(6 mm) bratwursteille ja silavalle.
Kakkupursotin (MUZ45SV1)
Lihamyllyyn MUZ4FW3.
Metallimuotti, 4 erilaista pursotin/kuvio
vaihtoehtoa.
Raastinlaite (MUZ45RV1)
Lihamyllyyn MUZ4FW3.
Rouhii pähkinät, mantelit, suklaan ja kuivat
sämpylät.
Sosepuserrin (MUZ45FV1)
Lihamyllyyn MUZ4FW3.
Soseuttaa marjat paitsi vadelmat, tomaatit
ja ruusunmarjat. Poistaa samalla siemenet
ja varret esim. viinimarjoista.
Teline varusteille (MUZ4ZT1)
Varusteiden kuten taikinakoukun, pallovispilän,
vispilän, viipalointi- ja raastinterien
säilyttämiseen.
Viljamylly, teräksiset jauhinterätä
(MUZ4GM3)
Kaikille viljalajeille paitsi maissille, ja öljynsiemenille, kuivatetuille sienille ja yrteille.
Jäätelökone (MUZ4EB1)
Valmistaa jäätelön, maksimimäärä 550 g/
käyttökerta ja kulho.
Ranskanperunaterä (MUZ45PS1)
Vihannesleikkuriin MUZ4DS3.
Viipaloi raa’at perunat ranskanperunoiden
valmistamista varten.
74 Robert Bosch Hausgeräte GmbH
Page 75

Kierrätysohjeita
fi
Oikeudet muutoksiin pidätetään.
Tässä laitteessa on sähkö- ja
elektroniikkalaiteromusta annetun
EU-direktiivin 2012/19/EY mukainen
merkintä (waste electrical and
electronic equipment – WEEE).
Direktiivi antaa puitteet käytöstä poistettujen
laitteiden palautusoikeu-desta ja
hyödyntämisestä ja se koskee kaikkia EUmaita.
Tarkempia tietoja kierrätysmahdollisuuksista
saat koneen myyjältä sekä kaupungin tai
kunnan virastosta, jätehuoltoasioista
vastaavilta henkilöiltä.
Takuuehdot
Tälle laitteelle ovat voimassa maahantuojan
myöntämät takuuehdot.
Täydelliset takuuehdot saat myyntiliikkeeltä,
josta olet ostanut laitteen.
Takuutapauksessa on näytettävä ostokuitti.
Robert Bosch Hausgeräte GmbH 75
Page 76

es
bеЬзк~ДмЙе~=йзк=д~=Езгйк~=ЗЙ=лм=емЙоз=
~й~к~нз=ЗЙ=д~=Е~л~=_lp`eK
`зе=¨дI=sЗK=лЙ=Ь~=ЗЙЕбЗбЗз=йзк=ме=
ЙдЙЕнкзЗзг¨лнбЕз=гзЗЙкез=у=ЗЙ=Цк~е=
Е~дбЗ~ЗK
j•л=беСзкг~ЕбзеЙл=лзДкЙ=емЙлнкзл=
йкзЗмЕнзл=д~л=йзЗк•=Ь~дд~к= Йе=емЙлнк~= й•Цбе~=
пЙДK
Índice
Observaciones para su seguridad . . . . . . . 76
Descripción del aparato . . . . . . . . . . . . . . . 79
Manejo del aparato . . . . . . . . . . . . . . . . . . 80
Cuidados y limpieza . . . . . . . . . . . . . . . . . . 82
Localización de averías . . . . . . . . . . . . . . . 82
Ejemplos prácticos . . . . . . . . . . . . . . . . . . 82
Accesorios/Accesorios opcionales . . . . . . 84
Eliminación de embalajes y desguace
del aparato usado . . . . . . . . . . . . . . . . . . . 85
Condiciones de garantía . . . . . . . . . . . . . . 85
Observaciones para su seguridad
Lea las presentes instrucciones de uso detenidamente antes de
utilizar el aparato. En ellas se facilitan importantes advertencias de
seguridad y de manejo.
En caso de incumplimiento de las instrucciones relativas al uso correcto
del aparato, el fabricante excluye cualquier responsabilidad por los
daños que ello pudiera ocasionar.
Este aparato ha sido diseñado para la elaboración de alimentos en
cantidades usuales domésticas, quedando excluido su uso industrial.
Por aplicaciones semejantes a las de hogares particulares de carácter no
comercial se entienden cocinas para personal en oficinas, comercios,
explotaciones agrícolas, etc., así como cocinas para uso por huéspedes
o clientes de pensiones, hostales, casas de huéspedes o instalaciones
semejantes. No sobrepasar las cantidades a elaborar y los tiempos de
funcionamiento habituales para uso doméstico. No superar las máximas
cantidades admisibles (véanse los «Ejemplos prácticos»)!
El presente aparato ha sido diseñado para mezclar, amasar y batir
alimentos. Por lo tanto no deberá usarse para procesar otros tipos de
alimentos o productos. En caso de usar los accesorios opcionales
autorizados y homologados por el fabricante, puede ampliarse el campo
de aplicación del aparato.
Usar el aparato sólo en combinación con los accesorios originales del
fabricante. En caso de usar los accesorios específicos, deberán tenerse en
cuenta las instrucciones de uso específicas de los mismos.
Lea detenidamente las instrucciones de uso del aparato y guárdelas para
un posible propietario posterior. En caso de ceder o entregar el aparato
a otra persona, acompáñelo siempre de las correspondientes
instrucciones de uso.
76 Robert Bosch Hausgeräte GmbH
Page 77

, Advertencias de seguridad de carácter general
es
¡Peligro de descarga eléctrica!
Este aparato no deberá ser usado por niños.
Mantener a los niños alejados del aparato y de su cable de conexión a la
red eléctrica.
Estos aparatos no podrán ser usados por personas cuyas facultades
físicas, sensoriales o mentales estén mermadas o cuya falta de conocimientos o de experiencia les impida hacer un uso seguro de los mismos
si no cuentan con la supervisión de una persona responsable de su
seguridad o no han sido instruidos previamente en su uso y han
comprendido los peligros que pueden derivarse del mismo.
Impida que los niños jueguen con el aparato.
Conectar y usar el aparato sólo de conformidad con los datos que
figuran en la placa de características del mismo. No conectar el aparato
a la red eléctrica en caso de presentar el cable de conexión o el aparato
mismo huellas visibles de desperfectos.
El aparato deberá desconectarse de la red eléctrica en caso no haber
una persona adulta que lo vigile, así como al armarlo, desarmarlo
o limpiarlo.
No arrastrar el cable de conexión del aparato por encima de bordes
o cantos cortantes. Prestar asimismo atención a que el cable de
conexión del aparato no entre en ningún momento en contacto con
objetos o piezas calientes. Con objeto de evitar posibles situaciones de
peligro, la sustitución del cable de conexión del aparato sólo podrá ser
realizada por personal técnico del fabricante o de su Servicio Técnico.
Las reparaciones e intervenciones que debieran efectuarse en el aparato
sólo podrán ser ejecutadas por personal técnico cualificado del Servicio
Técnico Oficial de la marca.
, Advertencias de seguridad para este aparato
¡Peligro de lesiones!
¡Peligro de descarga eléctrica!
Introducir el enchufe en la toma de corriente sólo una vez se ha cerciorado
de que todos los preparativos se han concluido y el aparato está listo para
trabajar. No sumergir nunca la base motriz en líquidos ni lavarla bajo el grifo
de agua. ¡No utilizar nunca una limpiadora de vapor!
No modificar la posición el brazo giratorio estando el aparato en
funcionamiento. Aguardar para ello siempre a que el aparato (es decir,
el accionamiento utilizado) esté parado.
Cambiar los accesorios sólo con el motor parado dado que, tras
desconectar el aparato, el accionamiento del mismo continúa girando
durante unos instantes.
Robert Bosch Hausgeräte GmbH 77
Page 78

Conectar o desconectar el aparato exclusivamente a través del mando
es
giratorio.
Extraer el cable de conexión de la toma de corriente en caso de no utilizar
el aparato.
Antes de efectuar cualquier trabajo en el aparato, extraer el cable de
conexión de la toma de corriente.
En caso de corte o interrupción del suministro de corriente, el aparato
permanece conectado y reanuda su funcionamiento tan pronto como se
ha restablecido la alimentación de corriente.
¡Peligro de lesiones a causa de los accesorios giratorios!
¡No introducir nunca las manos en el recipiente durante el funcionamiento
del aparato! ¡No introducir nunca las manos en el recipiente mientras esté
en funcionamiento el aparato!
¡Montar o cambiar los accesorios sólo con el aparato parado – el accionamiento continúa girando durante unos instantes tras desconectar el
aparato!
Por razones de seguridad, el aparato deberá usarse sólo estando los
accionamientos no utilizados cubiertos con las tapas protectoras
correspondientes (4, 7).
¡Peligro de lesiones a causa de las cuchillas cortantes/el
accionamiento giratorio!
¡No introducir nunca las manos en la batidora montada!
¡No armar nunca la jarra batidora estando el vaso montado en el aparato!
¡Desmontar o montar la batidora sólo estando el accionamiento parado!
Trabajar siempre con la cuchilla de la jarra batidora correctamente fijada
y la tapa colocada. No tocar ni manipular nunca las cuchillas con las
manos.
¡Peligro de quemadura!
Al elaborar alimentos o líquidos calientes en la batidora, puede escapar
vapor caliente a través del embudo en la tapa. Llenar como máximo
0,5 litros de líquido caliente en la batidora.
¡Importante!
Utilizar sólo un accesorio simultáneamente con la base motriz.
78 Robert Bosch Hausgeräte GmbH
Page 79

Las presentes instrucciones de uso son válidas
es
para diferentes modelos de aparato (véase al
respecto la vista general de modelos, Fig. ).
El aparato no requiere un mantenimiento
especifico.
Descripción del aparato
Despliegue, por favor, las páginas
con las ilustraciones. Fig.
Base motriz
1
Tecla de desbloqueo
2
Brazo giratorio
(véase «Posiciones de trabajo»)
Mando giratorio
3
0/off = Parada
/
P
Sujetar el mando giratorio hasta que se pare
el motor de accionamiento; el accesorio
se encuentra en posición de giro.
En caso de haberse parado el motor
de accionamiento, se ha alcanzado
la posición de giro.
Posiciones 1–4 = La velocidad de trabajo
Posición 1 = Mínimo número de
Posición 4 = Máximo número de
En caso de interrupción del suministro
de corriente, el aparato permanece conectado y continúa su marcha tras restablecerse la alimentación de corriente.
4
Tapa protectora del accionamiento
de los accesorios más grandes
Para retirar la tapa, girarla hasta anular
el mecanismo de enclavamiento.
5
Accionamiento del
–
Cortador-rallador
Exprimidor de cítricos *
–
–
Molino de cereales *
En caso de no utilizar estos accesorios,
colocar siempre la tapa protectora sobre
el accionamiento.
Accionamiento para
6
–
los accesorios (varilla mezcladora,
varilla batidora, garfio amasador)
–
el mecanismo batidor de la heladora *
–
el abatido o en posición vertical para
la picadora *
7
Tapa protectora del accionamiento
de la jarra batidora
=Conexión de reposo
revoluciones – velocidad
de trabajo lenta
revoluciones – velocidad
de trabajo rápida
*
8
Accionamiento del la
–
batidora
–
miniprocesador
En caso de no utilizar estos accesorios,
colocar siempre la tapa protectora sobre
el accionamiento.
9
Recogida del cable (
MUM 44..: Enrollar el cable
MUM 46../48..: Guardar el cable de
conexión en el compartimento del cable
Recipiente de mezcla con accesorios
10
Recipiente de mezcla
11
Ta pa
Accesorios
Varilla mezcladora
12
13
Varilla batidora
14
Garfio amasador con separador
de masa
Batidora
Base
15
16
Cuchilla
17
Junta
18
Vaso de la batidora
19
Ta pa
20
Embudo
* En caso de que el equipo de serie
de su aparato no incluyera un accesorio determinado, puede adquirirlo
en el comercio especializado del ramo.
Fig.
)
Robert Bosch Hausgeräte GmbH 79
Page 80

Posiciones de trabajo
es
fl^нЙеЕбμå>
rë~ê=Éä=~é~ê~íç=ëμдз=Езе=дзл=~ЕЕЙлзкбзл=ЕздзЕ~J
Ззл=Йе=Йд=~ЕЕбзе~гбЙенз=йкЙлЕкбнз=у д~ йзлбЕбμе=
ЗЙ=нк~Д~аз=ЕзккЙЕн~I=ЗЙ=ЕзеСзкгбЗ~З=~=д~=н~Дд~=
~Замен~K
bд=Дк~тз=Цбк~нзкбз=нбЙеЙ=имЙ=Йлн~к=лбЙгйкЙ=
ЙеЕд~о~ЗзI=Езе=беЗЙйЙеЗЙеЕб~=ЗЙ=д~=йзлбЕбμå=
ЗЙ нк~Д~аз=имЙ=зЕмйЙK
Ajustar la posición de trabajo
del brazo giratorio Fig.
Pulsar la tecla de desbloqueo y mover
el brazo giratorio.
Desplazar el brazo giratorio hasta hacerlo
enclavar en la posición de trabajo deseada.
Posición
1
2
3
4
5
Montar/desmontar la varilla bati-
6
dora, la varilla mezcladora
o el garfio amasador
7
Agregar grandes cantidades de alimentos
Manejo del aparato
flmЙдбЦкз=ЗЙ=дЙлбзеЙл>
fенкзЗмЕбк=Йд=ЙеЕЬмСЙ=Йе=д~=нзг~=ЗЙ=ЕзккбЙенЙ=
лμдз=ме~=оЙт=лЙ=Ь~=ЕЙкЕбзк~Зз=ЗЙ=имЙ=нзЗзл=
дзл=йкЙй~к~нбозл=лЙ=Ь~е=ЕзеЕдмбЗз=у=Йд=~й~к~нз=
Йлн•=дблнз=й~к~=нк~Д~а~кK
fl^нЙеЕбμå>
rë~ê=Éä=~é~ê~íç=ëμдз=Езе=дзл=~ЕЕЙлзкбзл=
Йе йзлбЕбμе=ЗЙ=нк~Д~азK
pЙ=~ЕзелЙа~=дбгйб~к=~=СзеЗз=Йд=~ й~к~нз=у= лмл=
~ЕЕЙлзкбзл=~енЙл=ЗЙ=мл~кдзл=йзк=оЙт=йкбгЙк~K=
kз=ЙсйзеЙк=Йд=~й~к~нз=у=лмл=~ЕЕЙлзкбзл=
~д~~ЕЕбμе=ЗЙ=СмЙенЙл=ЗЙ=Е~дзкK=
i~л=йбЙт~л=ез=лзе=~йн~л=й~к~=ЙгйдЙ~к=
Йе Йд гбЕкззеЗ~лK
Limpiar a fondo el aparato y sus accesorios
antes de usarlos por vez primera.
Véase a este respecto también el capítulo
«Cuidados y limpieza».
Preparativos
Colocar la base motriz sobre una superficie
lisa y limpia.
Extraer el cable de conexión del aparato
de su alojamiento o desenrollarlo (
Introducir el cable de conexión en la toma de
Fig.
).
corriente.
Varilla mezcladora, varilla
batidora y garfio amasador Fig.
Varilla mezcladora (a)
para preparar masas, por ejemplo masa batida
de bizcocho.
Varilla batidora (b)
para montar la clara de huevo a punto de nieve,
preparar nata o batir masas ligeras, por ejemplo
masa batida.
Garfio amasador (c) con separador
de masa (d)
para amasar masas pesadas y mezclar ingredientes que no deben picarse (por ejemplos
uvas pasas, láminas de chocolate).
flmЙдбЦкз=ЗЙ=дЙлбзеЙл=~=Е~мл~=
ЗЙ=дзл=~ЕЕЙлзкбзл=Цбк~нзкбзл>
flkз=бенкзЗмЕбк=емеЕ~=д~л=г~езл=Йе=Йд=кЙЕбJ
йбЙенЙ=гбЙенк~л=Йлн¨=Йе=СмеЕбзе~гбЙенз=
Йд ~й~к~нз>
jзен~к=з=Е~гДб~к=дзл=~ЕЕЙлзкбзл=лμäç=Åçå=
Éä ~é~ê~íç=é~ê~Çç=Ó=flЙд=~ЕЕбзе~гбЙенз=
Езенбе∫~=Цбк~еЗз=Змк~енЙ=мезл=белн~енЙл=
нк~л ЗЙлЕзеЙЕн~к=Йд=~й~к~нз>
e~ЕЙк=СмеЕбзе~к=Йд=~й~к~нз=лμдз=Езе=д~л=
н~й~л ЕздзЕ~З~л=лзДкЙ=дзл=~ЕЕбзе~гбЙензл=
ез мнбдбт~ЗзлK
Colocar el mando giratorio en la posición
y mantenerlo en dicha posición, hasta que
el accionamiento se detenga,
Advertencia:
En caso de haberse parado el motor
de accionamiento, se ha alcanzado
la posición de giro.
Pulsar la tecla de desbloqueo y colocar
el brazo giratorio en la posición «6».
Montar el recipiente sobre el aparato.
La base del recipiente tiene que encajar
en la correspondiente entalladura de la
unidad básica.
P
80 Robert Bosch Hausgeräte GmbH
Page 81

Montar el accesorio que vaya a utilizarse,
es
varilla mezcladora, varilla batidora o garfio
amasador, haciéndolo encajar hasta el tope
en el accionamiento. En la varilla de amasado, girar el separador de masa hasta
que encaje la varilla en el accionamiento.
Incorporar los ingredientes en el recipiente.
Pulsar la tecla de desbloqueo y colocar
el brazo giratorio en la posición «1».
Colocar la tapa sobre el recipiente.
Colocar el mando giratorio en la posición
de trabajo apropiada.
Agregar o reponer ingredientes
Desconectar el aparato a través del mando
giratorio.
Colocar el mando giratorio en la posición
P
y mantenerlo en dicha posición, hasta que
el accionamiento se detenga,
Retirar la tapa.
Pulsar la tecla de desbloqueo y colocar
el brazo giratorio en la posición «7».
Incorporar los ingredientes
o
Incorporar los ingredientes a través
de la abertura de la tapa.
Tras concluir el trabajo
Desconectar el aparato a través del mando
giratorio.
Colocar el mando giratorio en la posición
P
y mantenerlo en dicha posición, hasta que
el accionamiento se detenga,
Extraer el cable de conexión de la toma
de corriente.
Retirar la tapa.
Pulsar la tecla de desbloqueo y colocar
el brazo giratorio en la posición «6».
Retirar el accesorio del accionamiento.
Retirar el recipiente del aparato.
Limpiar todas las piezas.
Véase a este respecto el capítulo «Cuidados
y limpieza».
Batidora Fig.
flmЙдбЦкз=ЗЙ=дЙлбзеЙл=~=Е~мл~=
ЗЙ=д~л=ЕмЕЬбдд~л=Езкн~енЙлL
Йд ~ЕЕбзе~гбЙенз=Цбк~нзкбз>
flkз=бенкзЗмЕбк=емеЕ~=д~л=г~езл=Йе=д~=Д~нбЗзк~=
гзен~З~>=
aЙлгзен~к=з=гзен~к=д~=Д~нбЗзк~=лμдз=Йлн~еЗз=
Йд=~ЕЕбзе~гбЙенз=й~к~ЗзK=
qк~Д~а~к=лбЙгйкЙ=Езе=д~=ЕмЕЬбдд~=ЗЙ=д~=а~кк~=
Д~нбЗзк~=ЕзккЙЕн~гЙенЙ=Сба~З~=у=д~=н~й~=
ЕздзЕ~З~K
flmЙдбЦкз=ЗЙ=имЙг~Змк~>
^д=Йд~Дзк~к=~дбгЙензл=з=д∞имбЗзл=Е~дбЙенЙл=
Йе=д~=Д~нбЗзк~I=ймЙЗЙ=ЙлЕ~й~к=о~йзк=Е~дбЙенЙ=
~ нк~о¨л=ЗЙд=ЙгДмЗз=Йе=д~=н~й~K=
iдЙе~к=Езгз=г•сбгз=MIR=дбнкзл=ЗЙ=д∞имбЗз=
Е~дбЙенЙ=Йе=д~=Д~нбЗзк~K
fl^нЙеЕбμå>
i~=Д~нбЗзк~=ймЙЗЙ=лмСкбк=З~¥злK=
flkз=нк~н~к=ЗЙ=Йд~Дзк~к=йкзЗ мЕнзл= з=беЦкЙЗбЙенЙл=
ЕзеЦЙд~Ззл=EЙсЕЙйнз=ЕмДбнзл=ЗЙ=ЬбЙдзF>=
kз=Ь~ЕЙк=СмеЕбзе~к=д~=Д~нбЗзк~=Йе=о~Е∞çK
fl^нЙеЕбμå>
j•сбг~=йзлбЕбμе=ЗЙ=нк~Д~аз=~ЗгблбДдЙ=й~к~=
Йд~Дзк~к=д∞имбЗзл=Йе=д~=а~кк~=Д~нбЗзк~=ЗЙ=Екблн~д=
ZйзлбЕбμе=PK=i~=г•сбг~=Е~енбЗ~З=ЗЙ=д∞имбЗзл=
Е~дбЙенЙл=з=Езе=йкзйЙелбμе=~=Сзкг~к=Йлймг~=
Йл ЗЙ=MIR=дбнкзлK
Pulsar la tecla de desbloqueo y colocar
el brazo giratorio en la posición «3».
Retirar la tapa protectora del accionamiento
de la jarra batidora.
Girarla hacia la izquierda (sentido de marcha
contrario al de las agujas de reloj), hasta el
tope (
Fig. -4/5
Poner los ingredientes en la jarra batidora.
Máxima cantidad de líquido admisible
en la jarra de plástico = 1 litro; en el vaso
).
de vidrio = 0,75 litros. En caso de líquidos
calientes o con propensión a formar espuma,
la cantidad máxima admisible es de 0,5 litros.
Optima cantidad de elaboración para
productos sólidos = 50–100 gramos.
Montar la tapa sobre el vaso y apretarla.
Sujetar la tapa siempre durante el trabajo
de la máquina con una mano
¡No sujetar la tapa pasando la mano por
encima de la abertura para incorporar
alimentos!
Colocar el mando giratorio en la posición
de trabajo apropiada.
Agregar o reponer ingredientes Fig. -6
Desconectar el aparato a través del mando
giratorio.
Retirar la tapa e incorporar los ingredientes
o
retirar el embudo y agregar los ingredientes
sólidos a través de la abertura
o
agregar los ingredientes líquidos a través
del embudo.
Robert Bosch Hausgeräte GmbH 81
Page 82

Tras concluir el trabajo
es
Desconectar el aparato a través del mando
giratorio.
Extraer el cable de conexión de la toma
de corriente.
Retirar la batidora de la base motriz, girán-
dola a tal efecto hacia la derecha (sentido
de marcha de las agujas de reloj).
Retirar la tapa de la jarra.
Consejo práctico:
Limpiar la jarra directa-
mente tras concluir su uso.
Cuidados y limpieza
fl^нЙеЕбμå>
kз=ЙгйдЙ~к=~ЦЙенЙл=~ЦкЙлбозл=з=~Дк~лбозлK=
i~л лмйЙкСбЕбЙл=ймЙЗЙе=кЙлмдн~к=З~¥~З~лK=
Limpiar la base motriz
flmЙдбЦкз=ЗЙ=ЗЙлЕ~кЦ~л=Йд¨ЕнкбЕ~л>
flkз=лмгЙкЦбк=емеЕ~=д~= Д~лЙ=гзнкбт= Йе=Йд=~Цм~>=
flkз=ЕздзЕ~к=емеЕ~=д~=Д~лЙ=гзнкбт=Д~аз=
Йд ЕЬзккз=ЗЙ=~Цм~=ЗЙд=ЦкбСз>
Extraer el cable de conexión de la toma
de corriente.
Limpiar la base motriz con un paño húmedo.
En caso necesario, agregar un poco de lava-
vajillas manual.
Secar la base motriz.
Limpiar el recipiente de mezcla
con accesorios
Todas las piezas se pueden lavar en el lavavajillas. Al colocar las piezas de plástico en el
lavavajillas, prestar atención a no aprisionarlas,
de lo contrario podrían sufrir deformaciones.
Limpiar la batidora
flmЙдбЦкз=ЗЙ=дЙлбзеЙл=~=Е~мл~=
ЗЙ=д~л=ЕмЕЬбдд~л=Езкн~енЙл>
kз=нзЕ~к=еб=г~ебймд~к=емеЕ~=д~л=ЕмЕЬбдд~л=
Езе д~л=г~езлK=i~=а~кк~=Д~нбЗзк~=лЙ=ймЙЗЙ=
ЗЙл~кг~к=й~к~=лм=дбгйбЙт~K
fl^нЙеЕбμå>
kз=ЙгйдЙ~к=~ЦЙенЙл=~ЦкЙлбозл=з=~Дк~лбозлK=
i~ ЕмЕЬбдд~=ез=Йл=~йн~=й~к~=Йд=д~о~о~абдд~лK=
iбгйб~к д~=ЕмЕЬбдд~=лμдз=Д~аз=Йд=ЕЬзккз=ЗЙ=~Цм~=
ЗЙд=ЦкбСзK
Consejo práctico:
Muchas veces, tras
elaborar productos líquidos, no hay que
desarmar la batidora para limpiarla.
Simplemente basta poner un poco de agua
y lavavajillas manual en la batidora montada en
el aparato. Conectar el aparato durante breves
instantes (en los modelos dotados de conexión
momentánea, colocar el mando giratorio
en la posición de trabajo «M»). Verter el agua
al desagüe y enjuagar la jarra con agua limpia.
Desarmar la batidora Fig.
Girar la base de la jarra batidora hacia
la derecha (sentido de marcha contrario
al de la agujas de reloj).
Retirar la jarra del aparato.
Sujetar la cuchilla por las aletas y girarla hacia
la izquierda (sentido de marcha contrario
al de las agujas de reloj).
La cuchilla se ha soltado de su emplazamiento.
Retirar la cuchilla y también la junta.
Armar la batidora Fig.
flmЙдбЦкз=ЗЙ=дЙлбзеЙл>
flkз=~кг~к=емеЕ~=д~=а~кк~=Д~нбЗзк~=Йлн~еЗз=
Йд о~лз=гзен~Зз=Йе=Йд=~й~к~нз>
Montar la junta en la cuchilla.
Introducir la cuchilla por abajo en el vaso
de la batidora; colocarla en su sitio.
Enroscar y fijar la cuchilla con ayuda
de la base.
Apretar la base del vaso de la batidora
girándola hacia la izquierda (sentido
de marcha de las agujas de reloj).
Localización de averías
En caso de producirse alguna avería
en su aparato, avisar al Servicio Técnico
Oficial de la marca.
Ejemplos prácticos
Nata montada
100–600 gramos
Batir la nata con la varilla batidora
durante 1½–4 minutos en la posición
de trabajo 4, según la cantidad
y las propiedades concretas de la nata.
82 Robert Bosch Hausgeräte GmbH
Page 83

Claras de huevo a punto
es
de nieve
1–8 claras de huevo
Batir las claras de huevo con la varilla
batidora durante 4–6 minutos en la posición
de trabajo «4».
Masa de bizcocho
oÉÅÉí~=Ä•ëáÅ~
2 huevos
2–3 cucharadas soperas de agua caliente
100 gramos de azúcar
1 sobrecito de azúcar de vainilla
70 gramos de harina
70 gramos fécula de maíz (maicena) en caso
necesario, levadura en polvo
Batir todos los ingredientes (excepto
la harina y la maicena) con la varilla batidora
durante 4–6 minutos en la posición
de trabajo 4, hasta formar una masa
esponjosa consistente.
Colocar el mando giratorio en la posición 2
y agregar y mezclar la harina y la fécula de
maíz (previamente tamizadas) durante aprox.
½–1 minuto, agregándolas a cucharadas.
Máxima cantidad admisible:
2 veces
la receta básica
Masa batida
oÉÅÉí~=Ä•ëáÅ~
3–4 huevos
200–250 gramos de azúcar
1 pizca de sal
1 sobrecito de azúcar de vainilla o la cáscara
de medio limón
200–250 gramos de mantequilla
(temperatura ambiente)
500 gramos de harina
1 paquetito de levadura en polvo
1
/
litro de leche
8
Elaborar todos los ingredientes con la varilla
mezcladora durante aprox. ½–1 minuto
en la posición 1 y a continuación, durante
3–4 minutos, en la posición 3.
Máxima cantidad admisible:
1,5–2 veces
la receta básica
Masa quebrada
(pastaflora)
oÉÅÉí~=Ä•ëáÅ~
125 gramos de mantequilla (temperatura
ambiente)
100–125 gramos de azúcar
1 huevo
1 pizca de sal
unas cáscaras de limón o un poco de azúcar
de vainilla
250 gramos de harina
levadura en polvo
Procesar todos los ingredientes durante
aprox. ½ minuto en la posición 1.
Amasarlos a continuación durante
2–3 minutos con la varilla mezcladora (escalón
3) o el garfio amasador (escalón 2).
Máxima cantidad admisible:
2 veces
la receta básica
Masa de levadura
oÉÅÉí~=Ä•ëáÅ~
500 gramos de harina
1 huevo
80 gramos de mantequilla
(temperatura ambiente)
80 gramos de azúcar
200–250 ml de leche tibia
25 gramos de levadura o 1 paquetito
de levadura seca
Cáscara de ½ limón
1 pizca de sal
Amasar los ingredientes con el garfio
amasador primero durante ½ minuto
en la posición de trabajo 1 y a continuación,
durante 3–6 minutos, en la posición 2.
Máxima cantidad:
1,5 veces la receta básica
Mayonesa
2 huevos
2 cucharilla de mostaza
¼ l de aceite
2 cucharada sopera de zumo de limón o vinagre
1 pizca de sal
1 pizca de azúcar
Los ingredientes deberán tener todos la misma
temperatura.
Colocar el mando selector en la posición
de trabajo «2». Mezclar todos los ingredientes (excepto el aceite) durante unos
segundos en la jarra batidora en dicha
posición.
Colocar el mando en la posición 4.
Incorporar el aceite lentamente a través del
embudo. Proseguir batiendo la mayonesa
e incorporando aceite, hasta que la mayonesa emulsione.
Robert Bosch Hausgeräte GmbH 83
Page 84

Accesorios/Accesorios opcionales
es
Los restantes accesorios (véase la vista general
de modelos,
se describe en las instrucciones de uso correspondientes.
Los accesorios/accesorios opcionales también
se pueden adquirir posteriormente.
Los accesorios para el robot de cocina
MUM 45.. también son apropiados para
los modelos MUM 44../46../48.. .
Fig.
Recipiente de mezcla de plástico
(MUZ4KR3)
En el recipiente de mezcla se pueden elaborar
1000 gramos de harina, además de los ingredientes correspondientes.
Recipiente de mezcla, de acero
inoxidable (MUZ4ER2)
En el recipiente de mezcla se pueden elaborar
1000 gramos de harina, además de los ingredientes correspondientes.
Jarra batidora de plástico (MUZ4MX2)
Para mezclar bebidas, hacer purés de frutas
o verduras, preparar mayonesas, picar frutas
y nueces o picar hielo.
Vaso de cristal para batidora
(MUZ4MX3)
Para mezclar bebidas, hacer purés de frutas
o verduras, preparar mayonesas, picar frutas
y nueces o picar hielo.
Batidora múltiple (MUZ4MM3)
Para picar hierbas aromáticas, verdura,
manzanas y carne, y rallar zanahorias, nabos,
queso nueces y chocolate frío.
Cortador-rallador (MUZ4DS3)
Para picar pepinos, coles, colirrábanos,
y rábanos; para rallar zanahorias, manzanas
y apio, lombardas, queso, nueces, así como
queso duro y chocolate.
Disco para cortar patatas crudas
(MUZ45PS1)
Para el accesorio para rallar MUZ4DS3.
Para cortar patatas crudas y preparar patatas
fritas.
Disco para cortar verduras orientales
(MUZ45AG1)
Para el accesorio para rallar MUZ4DS3.
Corta la fruta y verdura en tiras finas para
preparar platos de verdura asiáticas.
Fig.
) incluidos en el embalaje
Disco rallador, grueso (MUZ45RS1)
Para el accesorio para rallar MUZ4DS3.
Para rallar patatas crudas, para preparar por
ejemplo patatas ralladas a la suiza o ñoquis.
Disco para rallar patatas a la suiza
(MUZ45KP1)
Para el accesorio para rallar MUZ4DS3.
Para rallar patatas crudas para preparar tortillas
de patatas a la suiza o cortar frutas y verduras
en rodajas gruesas.
Zitruspresse (MUZ4ZP1)
Para exprimir naranjas, limones, limas
o pomelos.
Picadora de carne (MUZ4FW3)
Para picar carne fresca, preparar tartar o asado
de carne picada.
Juego de discos (MUZ45LS1)
Para la picadora MUZ4FW3.
Los discos finos (3 mm) para preparar pasteles
y cremas, los gruesos (6 mm) para salchichas
ybacón.
Accesorio para repostería
(MUZ45SV1)
Para la picadora MUZ4FW3.
Con plantilla metálica para cuatro pastas
diferentes.
Accesorio para rallar (MUZ45RV1)
Para la picadora MUZ4FW3.
Para rallar nueces, almendras, chocolate
y panecillos asentados o secos.
Accesorio tamizador de frutas
(MUZ45FV1)
Para la picadora MUZ4FW3.
para preparar purés de bayas (excepto frambuesas), tomates y escaramujos; elimina
automáticamente los tallos y las pepitas
de las grosellas, por ejemplo.
Portaacccesorios (MUZ4ZT1)
Para guardar accesorios tales como por
ejemplo garfio amasador, varilla batidora,
varilla mezcladora, cuchilla para picar y rallar.
Molino de cereales con muelas
de acero inoxidable (MUZ4GM3)
Para todos los tipos de cereales, excepto maíz.
También es apropiado para semillas oleaginosas, setas desecadas o hierbas aromáticas.
Heladora (MUZ4EB1)
Para preparar hasta 550 gramos de helado por
ciclo de trabajo y recipiente.
84 Robert Bosch Hausgeräte GmbH
Page 85

Consejos para la eliminación
es
Nos reservamos el derecho
de introducir modificaciones.
de embalajes y el desguace
de aparatos usados
El presente aparato incorpora las
marcas prescritas por la directiva
europea CE/2012/19 relativa a la
retirada y el reciclaje de los aparatos
eléctricos y electrónicos usados (WEEE).
Esta directiva constituye el marco reglamentario
para una retirada y un reciclaje de los aparatos
usados con validez para toda la Unión Europea.
Solicite una información detallada y actual
a este respecto a su distribuidor o Administración local.
Condiciones de garantía
CONDICIONES DE GARANTIA PAE BOSCH,
se compromete a reparar o reponer de forma
gratuita durante el período de 24 meses, a partir
de la fecha de compra por el usuario final, las
piezas cuyo defecto o falta de funcionamiento
obedezca a causas de fabricación, así como
la mano de obra necesaria para su reparación,
siempre y cuando el aparato sea llevado por el
usuario al taller del Servicio Técnico Autorizado
por BOSCH.
En el caso de que el usuario solicitara la visita
del Técnico Autorizado a su domicilio para la
reparación del aparato, estará obligado el usuario
a pagar los gastos del desplazamiento.
Esta garantía no incluye: lámparas, cristales,
plásticos, ni piezas estéticas, reclamadas
después del primer uso, ni averías producidas
por causas ajenas a la fabricación o por uso no
doméstico. Igualmente no están amparadas por
esta garantía las averías o falta de funcionamiento
producidas por causas no imputables al aparato
(manejo inadecuado del mismo, limpiezas,
voltajes e instalación incorrecta) o falta de
seguimiento en las instrucciones de funcionamiento y mantenimiento que para cada aparato
se incluyen en el folleto de instrucciones.
Para la efectividad de esta garantía es
imprescindible acreditar por parte del usuario
y ante el Servicio Autorizado de BOSCH, la fecha
de adquisición mediante la correspondiente
FACTURA DE COMPRA o que el usuario
acompañará con el aparato cuando ante
la eventualidad de una avería lo tenga que llevar
al Taller Autorizado.
La intervención en el aparato por personal ajeno
al Servicio Técnico Autorizado por BOSCH,
significa la pérdida de garantía.
GUARDE POR TANTO LA FACTURA DE
COMPRA. Todos nuestros técnicos van provistos
del correspondiente carnet avalado por ANFEL
(Asociación Nacional de Fabricantes de Electrodomésticos) que le acredita como Servicio
Autorizado de BOSCH. Exija su identificación.
MODELO: FD: E-Nr.: F. COMPRA
Robert Bosch Hausgeräte GmbH 85
Page 86

pt
jмбнзл=й~к~Д¨ел=йзк=нЙк=Езгйк~Зз=мг=
езоз=~й~кЙдЬз=З~=j~кЕ~=_lp`eK
lйнзмI=~ллбгI=йзк=мг=ЙдЙЕнкзЗзг¨лнбЕз=
гзЗЙкез=Й=ЗЙ=ЙдЙо~З~=им~дбЗ~ЗЙK
k~=езлл~=й•Цбе~=З~=fенЙкеЙн=йзЗЙк•=
ЙеЕзенк~к=г~бл=беСзкг~´πЙл=лзДкЙ=зл=езллзл=
йкзЗмнзлK
Índice
Para sua segurança . . . . . . . . . . . . . . . . . . 86
Panorâmica do aparelho . . . . . . . . . . . . . . 88
Utilização . . . . . . . . . . . . . . . . . . . . . . . . . . 89
Limpeza e manutenção . . . . . . . . . . . . . . . 91
Ajuda em caso de anomalia . . . . . . . . . . . 91
Exemplos de utilização . . . . . . . . . . . . . . . 92
Acessórios/Acessórios especiais . . . . . . . . 93
Reciclagem . . . . . . . . . . . . . . . . . . . . . . . . 94
Condições de garantia . . . . . . . . . . . . . . . . 94
Para sua segurança
Leia atentamente estas instruções antes de utilizar o aparelho, para
conhecer importantes indicações de segurança e de serviço.
A não observância das indicações sobre a utilização correcta do
aparelho exclui uma responsabilidade do fabricante por danos daí
resultantes.
Este aparelho destina-se a ser utilizado no processamento de quantidades
habituais numa família ou em aplicações similares e não para uso industrial.
Utilizações semelhantes a um lar abragem, p. ex., a utilização em cozinhas
para colaborades de lojas, escritórios, empresas agrícolas e de outros
ramos de actividade, bem como a utilização por clientes de pensões,
pequenos hotéis e de outras empresas do género. Utilizar o aparelho
apenas nas quantidades e frequências normais num lar. Não ultrapassar
as quantidades máximas permitidas (ver «Exemplos de utilização»)!
Este aparelho é adequado para mexer, amassar e bater alimentos.
Não pode ser utilizado para processar outros tipos de objectos ou
substâncias. São possíveis outras aplicações mediante utilização de
acessórios homologados pelo fabricante.
Utilizar o aparelho somente com os acessórios originais. Na utilização dos
acessórios, respeitar as Instruções de serviço anexas.
Favor, guardar as Instruções de serviço. No caso do aparelho mudar
de dono, as Instruções de serviço devem acompanhá-lo.
, Indicações gerais de segurança
Perigo de choque eléctrico
A utilização deste aparelho não é permitida a crianças.
Manter o aparelho e o respectivo cabo de alimentação fora do alcance
de crianças.
Os aparelhos podem ser utilizados por pessoas com capacidades
físicas, sensoriais ou psíquicas diminuídas ou com falta de experiência
e conhecimentos, desde que se encontrem sob vigilância ou a utilização
segura do aparelho lhes tenha sido ensinada e tenham compreendido
os perigos daí resultantes.
86 Robert Bosch Hausgeräte GmbH
Page 87

Crianças não podem brincar com o aparelho.
pt
O aparelho só deve ser ligado e utilizado de acordo com as indicações
constantes da chapa de características. Utilizar o aparelho somente,
se o cabo de alimentação ou o próprio aparelho não apresentarem
quaisquer danos.
Desligar o aparelho da corrente sempre que este não se encontre sob
vigilância e antes de se proceder à sua montagem, desmontagem
e limpeza.
Não deixar que o cabo passe sobre arestas aguçadas nem superfícies
quentes. Se o cabo de alimentação deste aparelho apresentar danos,
terá que ser substituído pelo fabricante ou pelos seus Serviços Técnicos
ou por um técnico devidamente qualificado para o efeito, para se
evitarem situações de perigo.
As reparações no aparelho devem ser executadas somente pelos
nossos Serviços Técnicos.
, Indicações de segurança para este aparelho
Perigo de ferimentos
Perigo de choque eléctrico!
Só ligar a ficha à tomada, quando estiverem concluídos todos os
preparativos para o trabalho com o aparelho.
Nunca mergulhar o aparelho base em líquidos nem lavá-lo sob água
corrente. Não utilizar aparelhos de limpeza a vapor.
Não alterar a posição do braço móvel, enquanto o aparelho estiver ligado.
Aguardar que o accionamento esteja completamente parado.
Substituir ferramentas/acessórios só depois do accionamento
completamente parado – depois de desligado, o accionamento ainda gira
por inércia durante alguns momentos.
Ligar e desligar o aparelho exclusivamente com o selector.
Se o aparelho não estiver em utilização, deverá retirar a ficha da tomada.
Antes de tentar eliminar qualquer anomalia desligue a ficha da tomada.
Depois da interrupção de corrente, o aparelho volta a funcionar.
Perigo de ferimentos devido a ferramentas em rotação
Não tocar nas peças em rotação.
Durante o funcionamento, nunca tente agarrar a tigela.
Substituir qualquer ferramenta só quando o accionamento do aparelho
estiver com-pletamente parada – depois de desligado, o aparelho movese, ainda, durante alguns momentos.
Por razões de segurança, o aparelho só deve funcionar, se os
accionamentos não utilizados estiverem cobertos com as respectivas
tampas de protecção (4, 7).
Robert Bosch Hausgeräte GmbH 87
Page 88

Perigo de ferimentos devido à lâmina afiada/aos accionamentos
pt
em rotação!
Nunca segurar no misturador, depois deste estar montado!
Nunca montar o misturador sobre o aparelho base.
Desmontar/montar o misturador, só com o accionamento completamente
parado. O misturador só deve funcionar na situação de completamente
montado e com a tampa colocada.
Não tocar com as mãos na lâmina do misturador.
Perigo de queimaduras!
Ao trabalhar com produtos quentes, verifica-se uma passagem de vapor
através do funil para a tampa. Introduzir o máximo de 0,5 litros de líquidos
quentes ou que desenvolvam espuma.
Importante
Utilizar simultaneamente apenas uma ferramenta e um acessório.
Estas Instruções de serviço descrevem diversos
modelos (ver também a lista de modelos,
Fig.
). O aparelho não carece de
manutenção.
Panorâmica do aparelho
Por favor, desdobre as páginas
com as ilustrações. Fig.
Aparelho
1
Tecla de desbloqueamento
2
Braço oscilante
(ver «Posições de trabalho»)
3
Selector rotativo
0/off = Stop
/
P
Fixar o selector rotativo até o accionamento
estar completamente parado.
O acessório está em posição inclinada.
Quando o accionamento estiver completamente parado, significa que foi alcançada
a posição de inclinação correcta.
Fases 1–4 = Velocidade de trabalho
Fase 1 = Velocidade mínima – lenta
Fase 4 = Velocidade máxima –
No caso duma falha de corrente, o aparelho
continua ligado e volta a funcionar, logo que
volte a corrente.
4
Tampa de protecção do accionamento
Para retirar a tampa de protecção do
accionamento, rodá-la até o bloqueio
deixar de existir.
= Ligação de parque
rápida
Accionamento para
5
–
dispositivo para cortar e ralar
–
espremedor de citrinos *
–
moinho de cereais *
Em caso de não utilização, aplicar a tampa
de protecção do accionamento.
Accionamento para
6
–
ferramentas (varas para massas leves
e bater claras em castelo, varas para
massas pesadas)
–
ferramenta misturadora do
preparador de gelo *
–
baixado ou levantado para o picador
de carne *
7
Tampa de protecção do accionamento
do copo misturador
8
Accionamento para
–
misturador
–
misturador multi-usos
Em caso de não utilização, aplicar a tampa
de protecção do accionamento.
Arrumação do cabo (
9
MUM 44..: Enrolar o cabo
MUM 46../48..: Guardar o cabo no seu
compartimento
Tigela com acessórios
10
Tigela
11
Ta mp a
Ferramenta
Vara para massas leves
12
13
Vara para bater claras em castelo
14
Varas para massas pesadas com
protecção para as massas
Fig.
)
*
88 Robert Bosch Hausgeräte GmbH
Page 89

Misturador
pt
Base
15
16
Lâminas
17
Anel de vedação
18
Copo misturador
19
Tam pa
20
Funil
* Se um acessório não estiver incluído no
fornecimento, ele pode ser adquirido no
comércio da especialidade ou nos Serviços
Técnicos.
Posições de trabalho
^íÉå´©ç>
rнбдбт~к=лзгЙенЙ=з=~й~кЙдЬзI=лЙ=СЙкк~гЙен~лL
~ЕЙллμкбзлI=ЗЙ=~ЕзкЗз=Езг=Йлн~ =н~ДЙд~ I=
ЙлнбоЙкЙг=ЕздзЕ~Ззл=ез=~ЕЕбзе~гЙенз=ЕзккЙЕнз=
Й=е~=йзлб´©з=ЕзккЙЕн~=Й=лЙ=ЙлнбоЙк=е~=йзлб´©з=
ЗЙ СмеЕбзе~гЙензK
l=Дк~´з=гμîÉä=íÉã=èìÉ=Éëí~ê=ÉåÖ~í~Çç=åìã~=
éçëá´©ç=ÇÉ=íê~Ä~äÜçK
Ajuste da posição de trabalho Fig.
Accionar a tecla de desbloqueamento
e deslocar o braço móvel.
Movimentar o braço móvel até este encaixar
na posição de trabalho pretendida.
Posição
1
2
3
4
5
6
7
Montar/desmontar as varas para
massas leves, bater claras em
castelo e massas pesadas
Adicionar grande quantidade de alimentos
Utilização
mЙкбЦз=ЗЙ=СЙкбгЙензл
pμ=дбЦ~к=~=СбЕЬ~=¶=нзг~З~I=им~еЗз=ЙлнбоЙкЙг=
ЕзеЕдм∞Ззл=нзЗзл=зл=йкЙй~к~нбозл=й~к~=
з нк~Д~дЬз=Езг=з=~й~кЙдЬзK
^íÉå´©ç>
rнбдбт~к=з=~й~кЙдЬз=лзгЙенЙ=Езг=~ЕЙллμкбзлL
СЙкк~гЙен~л=е~=йзлб´©з=ЗЙ=СмеЕбзе~гЙензK
k©з=ЕздзЕ~к=з=~й~кЙдЬз=о~тбз=Йг=СмеЕбзе~J
гЙензK=
k©з=Йсйзк=з=~й~кЙдЬз=еЙг=зл=~ЕЙллμкбзл=
~ им~димЙк=СзенЙ=ЗЙ=Е~дзкK=^л=йЙ´~л=е©з=
л©з йкμйкб~л=й~к~=мнбдбт~к=ез=гбЕкзJзеЗ~лK
Limpar bem o aparelho e os acessórios,
antes da primeira utilização, ver «Limpeza
e manutenção».
Preparação
Colocar o aparelho base sobre uma
superfície lisa e limpa.
Desenrolar/puxar o cabo para fora (
Ligar a ficha à tomada.
Vara para massas leves, vara
para bater claras em castelo
e vara para massas pesadas Fig.
Vara para massas leves (a)
para bater massas, p. ex. massas leves.
Vara para bater claras em castelo (b)
para bater claras em castelo, natas e para bater
massas muito leves, p. ex. massa para bolos.
Varas para massas pesadas (c) com
protecção para as massas (d)
para amassar massas pesadas e para envolver
ingredientes que não devem ser fragmentados
(p. ex. passas de uvas, raspas de chocolate).
mЙкбЦз=ЗЙ=СЙкбгЙензл=ЗЙобЗз=
~ СЙкк~гЙен~л=Йг=кзн~´©з
aмк~енЙ=з=СмеЕбзе~гЙензI=емеЕ~= нЙенЙ=~Ц~кк~к=
~=нбЦЙд~K
pмДлнбнмбк=им~димЙк=СЙкк~гЙен~=лμ=им~еЗз=
з ~ЕЕбзе~гЙенз=Зз=~й~кЙдЬз=ЙлнбоЙк=ЕзгJ
йдЙн~гЙенЙ=й~к~З~=У=ЗЙйзбл=ЗЙ=ЗЙлдбЦ~ЗзI=
з ~й~кЙдЬз=гзоЙJлЙI=~беЗ~I=Змк~енЙ=~дЦмел=
гзгЙензлK
l=~й~кЙдЬз=лμ=ЗЙоЙ=лЙк=ЕздзЕ~Зз=Йг=СмеЕбзJ
е~гЙенз=им~еЗз=~л=дбЦ~´πЙл=ЗЙ=~ЕЕбзе~J
гЙенз=е©з=мнбдбт~З~лI=ЙлнбоЙкЙг=ЗЙобЗ~гЙенЙ=
н~й~З~л=Езг=~л=н~гй~л=ЗЙ=йкзнЙЕ´©зK
Fig.
).
Robert Bosch Hausgeräte GmbH 89
Page 90

Colocar o selector em
pt
P
e segurar aí, até
o accionamento parar.
Nota:
Quando o accionamento estiver completamente parado, significa que foi alcançada
a posição de inclinação correcta.
Premir a tecla de desbloqueamento
e colocar o braço móvel na posição 6.
Aplicar a tigela. A base da tigela tem que
encaixar no entalhe do aparelho base.
Em função do trabalho a realizar, introduzir
a vara para massas leves, a vara para bater
claras em castelo ou a vara para massas
pesadas até ela ficar bem fixa no accionamento. No caso de massas pesadas, rodar
a protecção das massas até que a vara
possa encaixar.
Colocar os ingredientes a serem trabalhados
dentro da tigela.
Premir a tecla de desbloqueamento
e colocar o braço móvel na posição 1.
Colocar a tampa.
Regular o selector para a fase pretendida.
Adicionar ingredientes
Desligar o aparelho através do selector.
Colocar o selector em
P
e segurar aí, até
o accionamento parar.
Retirar a tampa.
Premir a tecla de desbloqueamento
e colocar o braço móvel na posição 7.
Adicionar os ingredientes
ou
introduzir os ingredientes através
da abertura na tampa.
Depois do trabalho
Desligar o aparelho através do selector.
Colocar o selector em
P
e segurar aí, até
o accionamento parar.
Desligar a ficha da tomada.
Retirar a tampa.
Premir a tecla de desbloqueamento
e colocar o braço móvel na posição 6.
Retirar a ferramenta do accionamento.
Desmontar a tigela.
Limpar todos os componentes,
ver «Limpeza e manutenção».
Misturador Fig.
mЙкбЦз=ЗЙ=СЙкбгЙензл=ЗЙобЗз=
¶ дЯгбе~=~Сб~З~L~зл=~ЕЕбзе~J
гЙензл Йг=кзн~´©з>
kмеЕ~=лЙЦмк~к=ез=гблнмк~ЗзкI=ЗЙйзбл=ЗЙлнЙ=
Йлн~к=гзен~Зз>=
aЙлгзен~кLгзен~к=з=гблнмк~ЗзкI=лμ=Езг=
з ~ЕЕбзе~гЙенз=ЕзгйдЙн~гЙенЙ=й~к~ЗзK=
l=гблнмк~Ззк=лμ=ЗЙоЙ=СмеЕбзе~к=е~=лбнм~´©з=
ЗЙ ЕзгйдЙн~гЙенЙ=гзен~Зз=Й=Езг=~=н~гй~=
ЕздзЕ~З~K
mЙкбЦз=ЗЙ=имЙбг~Змк~л>
^з=нк~Д~дЬ~к=Езг=йкзЗмнзл=имЙенЙлI=
оЙкбСбЕ~JлЙ=мг~=й~лл~ЦЙг=ЗЙ=о~йзк=~нк~о¨л=
Зз=Смебд=й~к~=~=н~гй~K=fенкзЗмтбк=з=г•сбгз=
ЗЙ MIR=дбнкзл=ЗЙ=д∞имбЗзл=имЙенЙл=зм=имЙ=
ЗЙлЙеоздо~г=Йлймг~K
^íÉå´©ç>
l=гблнмк~Ззк=йзЗЙ=СбЕ~к=З~ебСбЕ~ЗзK=
k©з йкзЕЙлл~к=беЦкЙЗбЙенЙл=мднк~ЕзеЦЙд~Ззл=
EЙсЕЙйнз=ЕмДзл=ЗЙ=ЦЙдзFK=
k©з=мнбдбт~к=з=гблнмк~Ззк=о~тбзK
^íÉå´©ç>
qê~Ä~äÜ~ê=ä∞имбЗзл=ез=гблнмк~Ззк=ЗЙ=обЗкзW=
г•сбгзI=е~=С~лЙ=P=^ЗбЕбзе~кI=ез=г•сбгзI=
MIR=д=ЗЙ=д∞имбЗзл=имЙенЙл=зм=имЙ=СзкгЙг=
гмбн~ Йлймг~K
Premir a tecla de desbloqueamento
e colocar o braço móvel na posição 3.
Retirar a tampa de protecção do
accionamento do misturador.
Montar o copo do misturador (a marcação
da base tem que coincidir com a marcação
do aparelho base) e rodar em sentido
contrário aos ponteiros do relógio,
até prender (
Introduzir os ingredientes.
Quantidade máxima, no caso de
misturadores de plástico, líquidos = 1 litro.
No caso de misturadores de vidro, líquidos
= 0,75 litros. Líquidos que formem muita
espuma, máximo 0,5 litros.
Quantidade ideal para trabalhar, sólidos
= 50–100 gramas.
Montar a tampa e fixá-la bem.
Durante o trabalho, deverá segurar na tampa
com uma das mãos. Neste caso, não tocar
na abertura de enchimento!
Regular o selector para a fase pretendida.
Fig. -4/5
).
90 Robert Bosch Hausgeräte GmbH
Page 91

Adicionar os ingredientes Fig. -6
pt
Desligar o aparelho através do selector.
Desmontar a tampa e adicionar os ingre-
dientes
ou
desmontar o funil e introduzir lentamente
os ingredientes sólidos na abertura
de enchimento
ou
introduzir os ingredientes líquidos através
do funil.
Depois do trabalho
Desligar o aparelho através do selector.
Desligar a ficha da tomada.
Rodar o copo misturado no sentido dos
ponteiros do relógio e desmontá-lo.
Sugestão:
Limpar o copo misturador
imediatamente após utilização.
Limpeza e manutenção
^íÉå´©ç>
k©з=мнбдбт~кI=йзк=бллзI=йкзЗмнзл=ЗЙ=дбгйЙт~=
~Дк~лбозлK=^л=тзе~л=ЙснЙкбзкЙл=Зз=~й~кЙдЬз=
йзЗЙг=СбЕ~к=З~ебСбЕ~З~лK=
Limpar o aparelho base
mЙкбЦз=ЗЙ=ЕЬзимЙ=Йд¨ЕнкбЕз>
kмеЕ~=гЙкЦмдЬ~к=з=~й~кЙдЬз=Д~лЙ=Йг=•Цм~=
Й еЙг=з=д~о~к=лзД=•Цм~=ЕзккЙенЙK
Desligar a ficha da tomada.
Limpar o aparelho base com um pano
húmido.
Se necessário, utilizar um pouco de deter-
gente da loiça.
De seguida, secar bem o aparelho com
um pano.
Limpeza da tigela com os acessórios
Todas as peças podem ser lavadas na máquina
de lavar loiça. Não prender as peças de plástico
na máquina de lavar loiça, para evitar que
sofram deformações.
Limpeza do misturador
mЙкбЦз=ЗЙ=СЙкбгЙензл=ЗЙобЗз=
¶ дЯгбе~=~Сб~З~>
k©з=нзЕ~к=Езг=~л=г©зл=е~=дЯгбе~=Зз=гблнмJ
к~ЗзкK=l=гблнмк~Ззк=йзЗЙ=лЙк=ЗЙлгзен~Зз=
й~к~=г~бл=С•Ебд=дбгйЙт~K
^íÉå´©ç>
k©з=мнбдбт~кI=йзк=бллзI=йкзЗмнзл= ЗЙ= дбгйЙт~=~Дк~J
лбозлK= l=азЦз=ЗЙ= дЯгбе~л=е©з=йзЗЙ=лЙк=д~о~Зз=е~=
г•имбе~=ЗЙ=д~о~к=дзб´~K=iбгй~к=з=азЦз=ЗЙ=дЯгбJ
е~л=~йЙе~л=лзД=•Цм~=ЕзккЙенЙK
Conselho:
Depois de se terem trabalhado
líquidos, por vezes o misturador pode ser limpo
sem necessidade de ser desmontado.
Para isso, adicionar um pouco de água com
detergente de loiça no misturador montado
na máquina. Ligar o misturador durante alguns
segundos (no caso de aparelhos com ligação
momentânea, ligar para a fase M).
Despejar a água de lavagem e, depois, fazer
nova passagem com água limpa.
Desmontar o misturador Fig.
Rodar a base do copo misturador no sentido
aos ponteiros do relógio e desmontá-lo.
Rodar o adaptador da lâmina pelas asas
em sentido contrário ao dos ponteiros
do relógio. Assim, o adaptador da lâmina
fica solto.
Retirar o adaptador da lâmina e desmontar
o anel de vedação.
Montar o misturador Fig.
mЙкбЦз=ЗЙ=СЙкбгЙензл
kмеЕ~=гзен~к=з=гблнмк~Ззк=лзДкЙ=з=~й~кЙдЬз=
Д~лЙK
Aplicar o anel de vedação no adaptador
de lâminas.
Aplicar, por baixo, o adaptador da lâmina
no copo misturador.
Com o auxílio da base, apertar bem o jogo
de lâminas.
Apertar bem a base do copo misturador,
rodando-a em sentido contrário dos
ponteiros do relógio.
Ajuda em caso de anomalia
Em caso de anomalia, dirija-se aos nossos
Serviços Técnicos.
Robert Bosch Hausgeräte GmbH 91
Page 92

Exemplos de utilização
pt
Natas batidas
100 g–600 g
Bater as natas 1½ a 4 minutos na
fase 4, (dependendo da quantidade
e das características das natas) com
a vara para bater claras em castelo.
Claras
1 a 8 claras
Bater as claras 4 a 6 minutos na fase
4 com a vara para claras em castelo.
Massa tipo biscoito
oЙЕЙбн~=Д~лЙ
2 ovos
2–3 colheres de sopa de água quente
100 g de açúcar
1 pacotinho de açúcar baunilhado
70 g de farinha
70 g de amido (= fécula) eventualmente
fermento em pó q.b.
Bater os ingredientes (excepto a farinha
e a fécula) ca. de 4–6 minutos na fase 4 com
as varas para massas leves, até formar
espuma.
Rodar o selector para a fase 2 e misturar,
colher a colher, a farinha peneirada e a fécula
durante ca. de ½ até 1 minuto.
Quantidade máxima:
Massas leves
oЙЕЙбн~=Д~лЙ
3–4 ovos
200–250 g de açúcar
1 pitada de sal
1 pacotinho de açúcar baunilhado ou a casca
de ½ limão
200–250 g de manteiga
(à temperatura ambiente)
500 g de farinha
1 pacotinho de fermento em pó
1
/
l de leite
8
Com a vara para massas leves, misturar
todos os ingredientes ca. de ½ minuto
na fase 1, depois, mais ca. de 3–4 minutos
na fase 3.
Quantidade máxima:
2 x a receita base
1,5 –2 x a receita base
Massa quebrada
oЙЕЙбн~=Д~лЙ
125 g de manteiga
(à temperatura ambiente)
100–125 g de açúcar
1 ovo
1 pitada de sal
Um pouco de casca de limão ou açúcar
baunilhado
250 g de farinha
um pouco de fermento em pó
Processar todos os ingredientes
ca. de ½ minuto na fase 1, depois
ca. 2–3 minutos com a vara para massas
leves (fase 3) ou com a vara para massas
pesadas (fase 2).
Quantidade máxima:
2 x a receita base
Massa levedada
oЙЕЙбн~=Д~лЙ
500 g de farinha
1 ovo
80 g de gordura (à temperatura ambiente)
80 g de açúcar
200–250 ml de leite morno
25 g de fermento fresco ou 1 pacotinho
de fermento em pó seco
Casca de ½ limão
1 pitada de sal
Amassar todos os ingredientes durante ca.
de ½ minuto na fase 1 e, depois, amassar
todos os ingredientes com a vara para
massas pesadas, durante 3–6 minutos,
na fase 2.
Quantidade máxima:
1,5 x receita base
Maionese
2 ovos
2 cl. de chá de mostarda
¼ l de óleo
2 colher de sopa de sumo de limão ou vinagre
1 pitada de sal
1 pitada de açúcar
Os condimentos têm que estar todos à mesma
temperatura.
Misturar os ingredientes (excepto o óleo)
no misturador, na fase 2, durante alguns
segundos.
Comutar o misturador para a fase 4 e deitar
lentamente o óleo através do funil, continuando a mexer até que a maionese tenha
a consistência pretendida.
92 Robert Bosch Hausgeräte GmbH
Page 93

Acessórios/Acessórios especiais
pt
Outros acessórios, para além dos que estão
incluídos na embalagem (ver panorâmica dos
modelos anexa, Fig.
nas instruções de serviço dos respectivos
aparelhos.
Os acessórios/acessórios especiais anexos,
podem ser, posteriormente, adquiridos
em separado. Os acessórios para a máquina
MUM 45.. são também compatíveis com
as máquinas MUM 44../46../48.. .
Fig.
Tigela de plástico (MUZ4KR3)
Na tigela podem ser preparados até 1 kg
de farinha mais ingredientes.
Tigela em inox (MUZ4ER2)
Na tigela podem ser preparados até 1 kg
de farinha mais ingredientes.
Adaptador para o misturador
em plástico (MUZ4MX2)
Para misturar bebidas, para fazer purés
de fruta e de legumes, para a preparação
de maioneses, para triturar fruta e nozes
e para picar cubos de gelo.
Copo do misturador adaptável
(MUZ4MX3)
Para misturar bebidas, para fazer purés
de fruta e de legumes, para a preparação
de maioneses, para triturar fruta e nozes
e para picar cubos de gelo.
Multimisturador (MUZ4MM3)
Para picar ervas aromáticas, legumes, maçãs
e carne, para ralar cenouras, rábanos e queijo,
para raspar nozes e chocolate refrigerado.
Dispositivo para cortar e ralar
(MUZ4DS3)
Para cortar pepinos, couve, couve-rábano,
rábanos; para ralar cenouras, maçãs e aipo,
couve roxa, queijo e nozes; para raspar queijo
rijo, chocolate e nozes.
Disco para batatas fritas (MUZ45PS1)
Para o dispositivo para cortar e ralar MUZ4DS3.
Para cortar batatas cruas em palitos para fritar.
Disco para legumes asiáticos
(MUZ45AG1)
Para o dispositivo para cortar e ralar MUZ4DS3.
Corta fruta e legumes em tiras finas para
refeições asiáticas de legumes.
), estão descritos
Disco de raspar grosso (MUZ45RS1)
Para o dispositivo para cortar e ralar MUZ4DS3.
Para ralar batatas cruas, para, por exemplo,
bolinhos de batata ou almôndegas.
Disco para bolinhos de batata ralada
(MUZ45KP1)
Para o dispositivo para cortar e ralar MUZ4DS3.
Para ralar batatas cruas para «Rösti» (= batatas
assadas no forno) e bolinhos de batata ralada,
para cortar fruta e legumes em fatias grossas.
Espremedor de citrinos (MUZ4ZP1)
Para espremer laranjas, limões e toranjas.
Picador de carne (MUZ4FW3)
Para picar carne fresca, para a preparação
de bife tártaro ou de rolo de carne picada.
Jogo de discos com furos (MUZ45LS1)
Para o picador de carne MUZ4FW3.
Fino (3 mm) para empadas e acompanhamentos para o pão, grosso (6 mm) para
salsichas frescas e toucinho.
Adaptador para farturas (MUZ45SV1)
Para o picador de carne MUZ4FW3.
Com molde metálico para 4 formas diferentes
de bolos.
Ralador (MUZ45RV1)
Para o picador de carne MUZ4FW3.
Para ralar nozes, amêndoas, chocolate e pão
seco.
Adaptador para espremedor de fruta
(MUZ45FV1)
Para o picador de carne MUZ4FW3.
Para espremer frutos de baga, excepto para
fazer mousse de framboesas, tomate e frutos
da roseira brava.
Serão tirados os pés às groselhas e, simultaneamente, descaroçadas.
Suporte para acessórios (MUZ4ZT1)
Para guardar os acessórios, como varas para
massas pesadas, varas para massas leves,
discos de cortar, ralar e raspar.
Moinho de cereais com mecanismo
de moer cónico em aço (MUZ4GM3)
Para todos os tipos de cereais excepto milho
e para oleaginosas, cogumelos secos e ervas
aromáticas.
Preparador de gelados (MUZ4EB1)
Para preparação de até 550 g de gelado por
fase de trabalho e recipiente.
Robert Bosch Hausgeräte GmbH 93
Page 94

Indicações sobre reciclagem
pt
Direitos reservados quanto a alterações.
Este aparelho está identificado de acordo
com a Norma Europeia 2012/19/CE
sobre aparelhos eléctricos e electrónicos
usados (Waste electrical and electronic
equipment – WEEE). A Norma prevê as
condições para recolha e valorização de
aparelhos usados, a vigorar em toda a UE..
Poderá informar-se sobre os meios actuais
de reciclagem Junto do seu Agente ou dos
Serviços Municipalizados.
Condições de garantia
Para este aparelho vigoram as condições de
garantia publicadas pelo nosso representante
no país, em que o mesmo for adquirido.
O Agente onde comprou o aparelho poderá
dar-lhe mais pormenores sobre este assunto.
Para a prestação de qualquer serviço em
garantia é, no entanto, necessária
a apresentação do documento de compra
do aparelho.
94 Robert Bosch Hausgeräte GmbH
Page 95

el
УхгчбсзфЮсйб гйб фзн бгпсЬ фзт нЭбт убт
ухукехЮт брь фпн OЯкп BOSCH.
М’ бхфЮ дйблЭобфе мйб мпнфЭснб, хшзлЮт
рпйьфзфбт пйкйбкЮ ухукехЮ.
РесбйфЭсщ рлзспцпсЯет учефйкЬ ме фб
рспъьнфб мбт иб всеЯфе уфзн йуфпуелЯдб
мбт.
Ресйечьменб
Гйб фзн буцЬлейЬ убт . . . . . . . . . . . . . 95
Ме мйб мбфйЬ . . . . . . . . . . . . . . . . . . . . 97
Чейсйумьт . . . . . . . . . . . . . . . . . . . . . . . 98
Кбибсйумьт кбй цспнфЯдб . . . . . . . . . . 100
Бнфймефюрйуз влбвюн . . . . . . . . . . . . . 101
РбсбдеЯгмбфб ецбсмпгюн . . . . . . . . . 101
ЕобсфЮмбфб/ЕйдйкЬ еобсфЮмбфб . . . . . .102
Брьухсуз . . . . . . . . . . . . . . . . . . . . . . 103
¼спй еггэзузт . . . . . . . . . . . . . . . . . . 103
Гйб фзн буцЬлейЬ убт
Рсйн фз чсЮуз дйбвЬуфе рспуекфйкЬ фйт рбспэует пдзгЯет, юуфе
нб гнщсЯжефе узмбнфйкЭт хрпдеЯоейт буцблеЯбт кбй чейсйумпэ гйб
фзн рбспэуб ухукехЮ.
З мз фЮсзуз фщн пдзгйюн гйб фз ущуфЮ чсЮуз фзт ухукехЮт
брпклеЯей фзн ехиэнз фпх кбфбукехбуфЮ гйб жзмйЭт рпх
рспкэрфпхн брь бхфЮ.
З рбспэуб ухукехЮ рсппсЯжефбй гйб фзн ереоесгбуЯб рпупфЮфщн,
ухнЮищн гйб фп нпйкпкхсйь Ю уе мз ербггелмбфйкЭт ецбсмпгЭт,
рбсьмпйет ме нпйкпкхсйь. Пй рбсьмпйет ме фп нпйкпкхсйь
ецбсмпгЭт ресйлбмвЬнпхн р. ч. фз чсЮуз уе кпхжЯнет гйб фпхт
хрбллЮлпхт кбфбуфзмЬфщн, гсбцеЯщн, бгспфйкюн кбй Ьллщн
ерйчейсЮуещн, кбиют кбй фз чсЮуз брь енпйкйбуфЭт оенюнщн,
мйксюн оенпдпчеЯщн кбй рбспмпЯщн кбфпйкйюн. ЧсзуймпрпйеЯфе фз
ухукехЮ мьнп гйб рпуьфзфет кбй чсьнпхт ереоесгбуЯбт, ухнЮиейт
гйб фп нпйкпкхсйь. Мзн хресвеЯфе фйт ерйфсерфЭт мЭгйуфет
рпуьфзфет (вл. ”РбсбдеЯгмбфб ецбсмпгЮт”)!
З рбспэуб ухукехЮ еЯнбй кбфЬллзлз гйб фзн бнЬмейоз, фп жэмщмб
кбй фп чфэрзмб фспцЯмщн. Ден ерйфсЭрефбй нб чсзуймпрпйзиеЯ гйб
фзн ереоесгбуЯб Ьллщн бнфйкеймЭнщн Ю бнфЯуфпйчб пхуйюн. Ме фз
чсЮуз фщн брь фпн кбфбукехбуфЮ егкексймЭнщн еобсфзмЬфщн еЯнбй
дхнбфЭт ресбйфЭсщ ецбсмпгЭт.
ЧсзуймпрпйеЯфе фз ухукехЮ мьнп ме фб бхиенфйкЬ еобсфЮмбфб.
Уе ресЯрфщуз чсЮузт фщн еобсфзмЬфщн фзсеЯфе фйт
ерйухнбрфьменет пдзгЯет чсЮузт.
РбсбкблеЯуие нб цхлЬоефе фйт пдзгЯет чсЮузт. КбфЬ фзн
рбсбчюсзуз фзт ухукехЮт уе фсЯфпхт дюуфе мбжЯ фйт пдзгЯет
чсЮузт.
, ГенйкЭт хрпдеЯоейт буцблеЯбт
КЯндхнпт злекфспрлзоЯбт
З рбспэуб ухукехЮ ден ерйфсЭрефбй нб чсзуймпрпйеЯфбй брь
рбйдйЬ. КсбфЬфе фз ухукехЮ кбй фп фспцпдпфйкь кблюдйь фзт
мбксйЬ брь рбйдйЬ.
Robert Bosch Hausgeräte GmbH 95
Page 96

Пй ухукехЭт мрпспэн нб чсзуймпрпйпэнфбй брь рсьущрб ме
el
мейщмЭнет цхуйплпгйкЭт, бйуизфЮсйет Ю нпзфйкЭт йкбньфзфет кбиют
кбй Эллейшз емрейсЯбт кбй гнюузт, ьфбн ерйвлЭрпнфбй Ю Эчпхн
кбфбсфйуфеЯ учефйкЬ ме фзн буцблЮ чсЮуз фзт ухукехЮт кбй Эчпхн
кбфбнпЮуей фпхт кйндэнпхт рпх брпссЭпхн брь бхфЮ.
Фб рбйдйЬ ден ерйфсЭрефбй нб рбЯжпхн ме фз ухукехЮ.
УхндЭефе кбй лейфпхсгеЯфе фз ухукехЮ мьнп уэмцщнб ме фб
уфпйчеЯб уфзн рйнбкЯдб фэрпх. ЧсзуймпрпйеЯфе фз ухукехЮ мьнпн,
ьфбн бхфЮ кбй фп кблюдйь фзт ден рбспхуйЬжпхн влЬвет.
¼фбн ден фзн ерйвлЭрефе – рсйн фз ухнбсмпльгзуз, фзн
брпухнбсмпльгзуз Ю фпн кбибсйумь – з ухукехЮ рсЭрей нб
брпмпнюнефбй рЬнфпфе брь фп дЯкфхп.
Мз цЭснефе фп фспцпдпфйкь кблюдйп уе ербцЮ ме бйчмзсЭт Ьксет
Ю ме кбхфЭт ерйцЬнейет. З бллбгЮ фпх фспцпдпфйкпэ кблщдЯпх,
ьфбн бхфь рбспхуйЬжей кЬрпйб влЬвз, рсЭрей нб гЯнефбй брь фпн
кбфбукехбуфЮ Ю фзн бнфЯуфпйчз хрзсеуЯб фечнйкЮт еохрзсЭфзузт
релбфюн Ю брь кбфЬллзлб кбфбсфйумЭнп рсьущрп, юуфе нб
брпцеэгпнфбй пй кЯндхнпй.
Пй ерйукехЭт уфз ухукехЮ рсЭрей нб бнбфЯиенфбй мьнп уфзн
хрзсеуЯб фечнйкЮт еохрзсЭфзузт фщн релбфюн мбт.
, ХрпдеЯоейт буцблеЯбт гйб фзн рбспэуб ухукехЮ
КЯндхнпт фсбхмбфйумпэ
КЯндхнпт злекфспрлзоЯбт!
ВЬлфе фп цйт уфзн рсЯжб, бцпэ плпклзсщипэн рсюфб ьлет пй
рспефпймбуЯет гйб фзн есгбуЯб ме фз ухукехЮ.
Мз вхиЯуефе рпфЭ фз вбуйкЮ ухукехЮ мЭуб уе хгсь пэфе нб фзн
ксбфЮуефе кЬфщ брь фсечпэменп несь. Мз чсзуймпрпйЮуефе
бфмпкбибсйуфЮ. Мзн бллЬоефе фз сэимйуз фпх уфсецьменпх
всбчЯпнб, еньущ з ухукехЮ всЯукефбй уе лейфпхсгЯб. РесЯменефе
фзн рлЮсз бкйнзфпрпЯзуз фзт кЯнзузт.
БллЬжефе фб есгблеЯб/еобсфЮмбфб мьнп ме бкйнзфпрпйзмЭнз фзн
кЯнзуз – мефЬ фзн бренесгпрпЯзуз з кЯнзуз ресйуфсЭцефбй гйб
кЬмрпуп чсьнп бкьмб. ИЭфефе фз ухукехЮ уе кбй екфьт
лейфпхсгЯбт брпклейуфйкЬ ме фпн ресйуфсецьменп дйбкьрфз.
¼фбн де чсзуймпрпйеЯфбй з ухукехЮ, вгЬжефе фп цйт брь фзн рсЯжб.
Рсйн фзн бнфймефюрйуз влбвюн вгЬжефе фп цйт брь фзн рсЯжб.
МефЬ фзн брпкбфЬуфбуз дйбкпрЮт сеэмбфпт з ухукехЮ бсчЯжей нб
обнблейфпхсгеЯ.
96 Robert Bosch Hausgeräte GmbH
Page 97

КЯндхнпт фсбхмбфйумпэ брь ресйуфсецьменб есгблеЯб!
el
Мзн рйЬнефе фб ресйуфсецьменб мЭсз.
КбфЬ фз лейфпхсгЯб мз вЬжефе рпфЭ фп чЭсй убт мЭуб уфп мрпл.
БллЬжефе фп есгблеЯп мьнпн ме бкйнзфп-рпйзмЭнз фзн кЯнзуз – мефЬ
фз иЭуз екфьт лейфпхсгЯбт з кЯнзуз еобкплпхиеЯ нб лейфпхсгеЯ гйб
кЬмрпуп чсьнп.
З ухукехЮ ерйфсЭрефбй гйб льгпхт буцблеЯбт нб лейфпхсгЮуей
мьнпн, ьфбн пй мз чсзуймпрпйпэменет кйнЮуейт еЯнбй кблхммЭнет ме
кбрЬкйб рспуфбуЯбт кЯнзузт (4, 7).
КЯндхнпт фсбхмбфйумпэ брь фп кпцфесь мбчбЯсй фпх мЯоес/фзн
ресйуфсецьменз кЯнзуз!
Мзн вЬжефе рпфЭ фп чЭсй убт мЭуб уфп фпрпиефзмЭнп мЯоес!
Мз ухнбсмплпгЮуефе рпфЭ фп мЯоес ерЬнщ уфз вбуйкЮ ухукехЮ.
БцбйсеЯфе/фпрпиефеЯфе фп мЯоес мьнпн, ьфбн з кЯнзуз еЯнбй
бкйнзфпрпйзмЭнз! ЛейфпхсгеЯфе фп мЯоес мьнпн, ьфбн еЯнбй
ухнбсмплпгзмЭнп кбй ме фпрпиефзмЭнп фп кбрЬкй.
Мзн бггЯжефе фп мбчбЯсй фпх мЯоес ме фб чЭсйб гхмнЬ.
КЯндхнпт жембфЯумбфпт!
¼фбн дпхлеэефе кбхфЬ хлйкЬ, еоЭсчефбй бфмьт брь фп чщнЯ уфп
кбрЬкй. ГемЯжефе фп рпфЮсй фпх мЯоес ме 0,5 лЯфсб кбхфь Ю бцсЯжпн
хгсь фп рплэ.
Узмбнфйкь!
ЧсзуймпрпйеЯфе мьнп Энб есгблеЯп Ю бнфЯуфпйчб еоЬсфзмб
фбхфьчспнб.
Пй пдзгЯет чсЮузт ресйгсЬцпхн дйЬцпсет
рбсбллбгЭт, вл. ерЯузт уфпн ухнпрфйкь
рЯнбкб мпнфЭлщн (Ейкьнб
ден чсейЬжефбй ухнфЮсзуз.
). З ухукехЮ
Ме мйб мбфйЬ
РбсбкблеЯуие н' бнпЯоефе
фйт уелЯдет ме фйт ейкьнет. Ейкьнб
ВбуйкЮ ухукехЮ
1
РлЮкфсп брбуцЬлйузт
2
Уфсецьменпт всбчЯпнбт
(вл. ”ИЭуейт есгбуЯбт”)
3
Ресйуфсецьменпт дйбкьрфзт
0/off = óôïð
/
P
КсбфЬфе фпн ресйуфсецьменп дйбкьрфз,
мЭчсй нб уфбмбфЮуей з кЯнзуз, фп
есгблеЯп еЯнбй уфз иЭуз уфсЭшзт.
Бн ден кйнеЯфбй з кЯнзуз, фьфе Эчей Юдз
ерйфехчиеЯ з иЭуз уфсЭшзт.
Robert Bosch Hausgeräte GmbH 97
= лейфпхсгЯб уфЬимехузт
ВбимЯдет 1–4= фбчэфзфб лейфпхсгЯбт
ВбимЯдб 1 = п мйксьфеспт бсйимьт
ВбимЯдб 4 = п мегблэфеспт бсйимьт
Уе ресЯрфщуз дйбкпрЮт фпх сеэмбфпт
з ухукехЮ рбсбмЭней енесгпрпйзмЭнз
кбй мефЬ фз дйбкпрЮ обнбоекйнЬ.
4
Рспуфбфехфйкь кбрЬкй кЯнзузт
Гйб фзн бцбЯсеуз фпх кбрбкйпэ
рспуфбуЯбт кЯнзузт, фп гхсЯжефе мЭчсй
нб брбуцблйуфеЯ.
5
КЯнзуз гйб
–
кьцфзт дйбскеЯбт чщсЯт мрпл
уфэцфзт еуресйдпейдюн *
–
–
мэлп дзмзфсйбкюн *
¼фбн ден чсзуймпрпйеЯфбй, фпрпиефеЯфе
фп кбрЬкй рспуфбуЯбт кЯнзузт.
уфспцюн – бсгЬ
уфспцюн – гсЮгпсб
*
Page 98
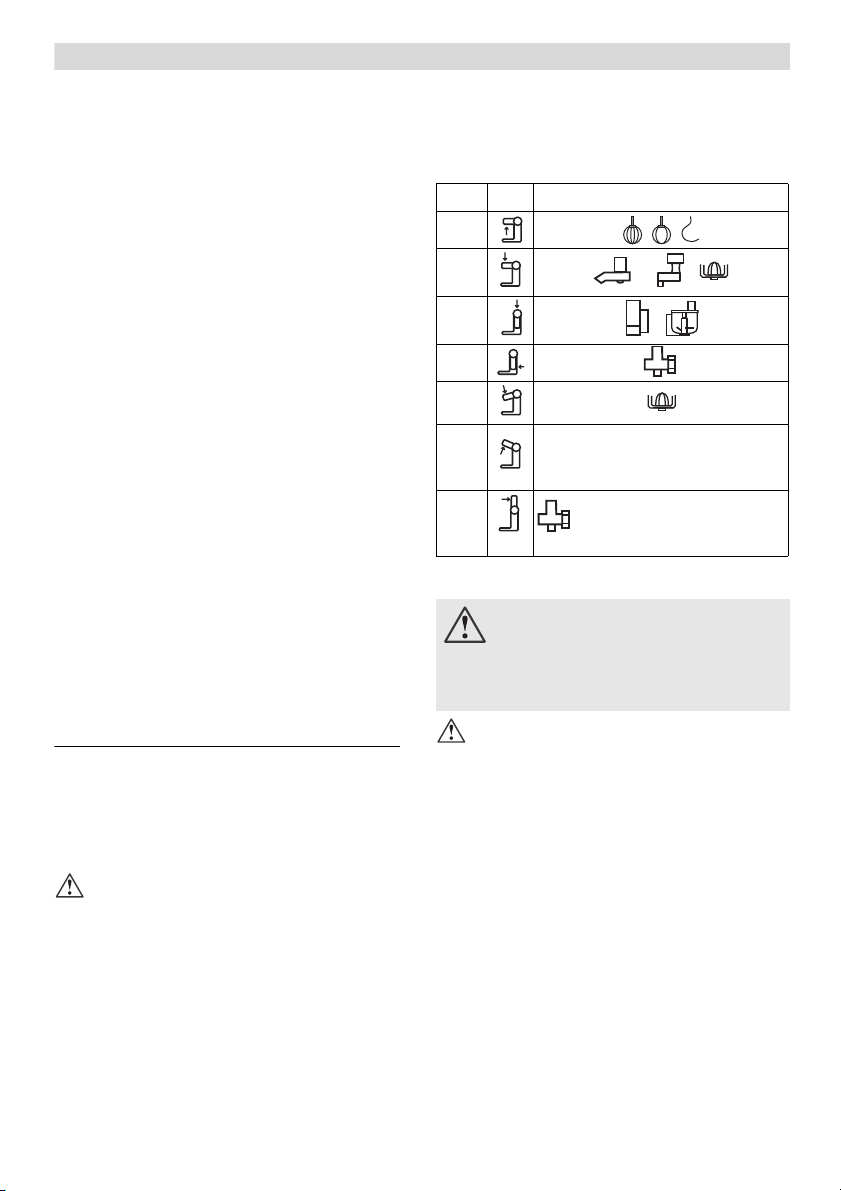
6
el
КЯнзуз гйб
–
есгблеЯб (есгблеЯп бнЬдехузт,
есгблеЯп чфхрЮмбфпт, есгблеЯп
жхмюмбфпт)
–
есгблеЯп бнЬдехузт фзт
рбгщфпмзчбнЮт *
–
кбфевбумЭнп Ю бневбумЭнп гйб фзн
ксебфпмзчбнЮ *
7
Рспуфбфехфйкь кбрЬкй кЯнзузт мЯоес
8
КЯнзуз гйб
–
мЯоес
–
рплхмЯоес
¼фбн ден чсзуймпрпйеЯфбй, фпрпиефЮуфе
фп кбрЬкй рспуфбуЯбт кЯнзузт мЯоес.
9
Ресйфэлйгмб кблщдЯпх (
Ейкьнб
)
MUM 44..: ФхлЯгефе фп кблюдйп.
MUM 46../48..: ВЬжефе фп кблюдйп уфпн
чюсп кблщдЯпх.
Мрпл ме еобсфЮмбфб
Ìðïë
10
11
КбрЬкй
ЕсгблеЯб
ЕсгблеЯп бнЬдехузт
12
13
ЕсгблеЯп чфхрЮмбфпт
14
ЕсгблеЯп жхмюмбфпт ме фемЬчйп
брюизузт жэмзт
МЯоес
ÂÜóç
15
16
¸ниефп мбчбйсйпэ
17
Уфегбнпрпйзфйкьт дбкфэлйпт
18
РпфЮсй мЯоес
19
КбрЬкй
20
×ùíß
*
Бн Энб еоЬсфзмб ден ухмресйлбмвЬнефбй
уфз ухукехбуЯб рбсбдпузт, мрпсеЯфе
нб фп рспмзиехфеЯфе брь фп емрьсйп кбй
фзн хрзсеуЯб фечнйкЮт еохрзсЭфзузт
релбфюн.
ИЭуейт есгбуЯбт
РспупчЮ!
ЛейфпхсгеЯфе фз ухукехЮ мьнпн, ьфбн фп
есгблеЯп/еоЬсфзмб уэмцщнб ме фпн рЯнбкб
бхфьн Эчей фпрпиефзиеЯ уфз ущуфЮ кЯнзуз
кбй уфз ущуфЮ иЭуз кбй ьфбн всЯукефбй уфз
иЭуз есгбуЯбт.
П уфсецьменпт всбчЯпнбт рсЭрей нб Эчей
кпхмрюуей уе кЬие иЭуз есгбуЯбт.
Сэимйуз фзт иЭузт есгбуЯбт Ейкьнб
РбфЮуфе фп рлЮкфсп брбуцЬлйузт кбй
кпхнЮуфе фпн уфсецьменп всбчЯпнб.
ЦЭсфе фпн уфсецьменп всбчЯпнб уфзн
ерйихмзфЮ иЭуз, мЭчсй нб кпхмрюуей.
ÈÝóç
1
2
3
4
5
ФпрпиЭфзуз/БцбЯсеуз фпх
6
есгблеЯщн чфхрЮмбфпт/
бнЬдехузт Ю жхмюмбфпт
УхмрлЮсщуз мегЬлщн
7
рпупфЮфщн ереоесгбуЯбт
Чейсйумьт
КЯндхнпт фсбхмбфйумпэ!
ВЬлфе фп цйт уфзн рсЯжб, бцпэ плпклзсщипэн рсюфб ьлет пй рспефпймбуЯет гйб фзн
есгбуЯб ме фз ухукехЮ.
РспупчЮ!
ЛейфпхсгеЯфе фз ухукехЮ мьнпн ме фп
есгблеЯп/еоЬсфзмб уфз иЭуз есгбуЯбт.
Мз лейфпхсгеЯфе фз ухукехЮ чщсЯт цпсфЯп.
Мзн екиЭфефе фз ухукехЮ кбй фб еобсфЮмбфб
уе рзгЭт иесмьфзфбт. Фб мЭсз ден еЯнбй
кбфЬллзлб гйб цпэснп мйкспкхмЬфщн.
Рсйн фзн рсюфз чсЮуз кбибсЯжефе кблЬ
фз ухукехЮ кбй фб еобсфЮмбфб, вл. уфп
кецЬлбйп ”Кбибсйумьт кбй цспнфЯдб”.
РспефпймбуЯб
ФпрпиефЮуфе фз вбуйкЮ ухукехЮ ерЬнщ
уе леЯб кбй кбибсЮ ерйцЬнейб.
ОефхлЯгефе/ФсбвЬфе фп кблюдйп брь
фпн чюсп ресйфхлЯгмбфпт (
ВЬжефе фп цйт уфзн рсЯжб.
Ейкьнб
).
98 Robert Bosch Hausgeräte GmbH
Page 99

ЕсгблеЯп бнЬдехузт,
el
есгблеЯп чфхрЮмбфпт
кбй есгблеЯп жхмюмбфпт Ейкьнб
ЕсгблеЯп бнЬдехузт (a)
гйб фп бнбкЬфемб жэмзт (р. ч. жэмз кЭйк)
ЕсгблеЯп чфхрЮмбфпт (b)
гйб фп чфэрзмб мбсЭгкбт, убнфйгЯ кбй гйб
фп чфэрзмб елбцсйЬт жэмзт, р. ч. жэмз
мрйукьфпх
ЕсгблеЯп жхмюмбфпт (c) ме фемЬчйп
брюизузт жэмзт (d)
гйб фп жэмщмб вбсйЬт жэмзт кбй гйб фзн бнЬмйоз хлйкюн, фб прпЯб ден рсЭрей нб кпрпэн
(р. ч. уфбцЯдет, кпммЬфйб упкплЬфбт)
КЯндхнпт фсбхмбфйумпэ брь
ресйуфсецьменб есгблеЯб!
КбфЬ фз лейфпхсгЯб мз вЬжефе рпфЭ фп чЭсй
убт мЭуб уфп мрпл.
БллЬжефе фп есгблеЯп мьнпн ме бкйнзфпрпйзмЭнз фзн кЯнзуз – мефЬ фз иЭуз екфьт
лейфпхсгЯбт з кЯнзуз еобкплпхиеЯ нб
лейфпхсгеЯ гйб кЬмрпуп чсьнп.
З ухукехЮ ерйфсЭрефбй нб феиеЯ уе
лейфпхсгЯб мьнпн, ьфбн еЯнбй буцблйумЭнет
пй мз чсзуймпрпйпэменет кйнЮуейт ме
фб бнфЯуфпйчб кбрЬкйб рспуфбуЯбт.
ЦЭсфе фпн ресйуфспцйкь дйбкьрфз уфп P
кбй ксбфЮуфе фпн, мЭчсй нб бкйнзфпрпйзиеЯ
з кЯнзуз.
Хрьдейоз:
Бн ден кйнеЯфбй з кЯнзуз, фьфе Эчей Юдз
ерйфехчиеЯ з иЭуз уфсЭшзт.
РбфЮуфе фп рлЮкфсп брбуцЬлйузт кбй
цЭсфе фпн уфсецьменп всбчЯпнб уфз
иЭуз 6.
ФпрпиефеЯфе фп мрпл. З вЬуз фпх мрпл
рсЭрей нб всЯукефбй мЭуб уфзн егкпрЮ
фзт вбуйкЮт ухукехЮт.
БнЬлпгб ме фзн есгбуЯб фпрпиефЮуфе
уфзн кЯнзуз фп есгблеЯп бнЬдехузт,
чфхрЮмбфпт Ю жхмюмбфпт Эфуй, юуфе нб
кпхмрюуей. Уфп есгблеЯп жхмюмбфпт
уфсЭцефе фп фемЬчйп брюизузт жэмзт,
мЭчсй нб мрпсеЯ нб кпхмрюуей фп
есгблеЯп.
ВЬлфе фб хлйкЬ рпх рськейфбй нб
ереоесгбуфеЯфе, мЭуб уфп мрпл.
РбфЮуфе фп рлЮкфсп брбуцЬлйузт кбй
цЭсфе фпн уфсецьменп всбчЯпнб уфз
иЭуз 1.
ФпрпиефЮуфе фп кбрЬкй.
СхимЯжефе фпн ресйуфсецьменп дйбкьрфз
уфзн ерйихмзфЮ вбимЯдб.
УхмрлЮсщуз хлйкюн
ИЭфефе фз ухукехЮ ме фпн
ресйуфсецьменп дйбкьрфз екфьт
лейфпхсгЯбт.
ЦЭсфе фпн ресйуфспцйкь дйбкьрфз уфп P
кбй ксбфЮуфе фпн, мЭчсй нб бкйнзфпрпйзиеЯ
з кЯнзуз.
БцбйсЭуфе фп кбрЬкй.
РбфЮуфе фп рлЮкфсп брбуцЬлйузт кбй
цЭсфе фпн уфсецьменп всбчЯпнб уфз
иЭуз 7.
РспуиЭуфе фб хлйкЬ
Þ
ухмрлзсюуфе хлйкЬ брь фп Ьнпйгмб
ухмрлЮсщузт хлйкюн уфп кбрЬкй.
МефЬ фзн есгбуЯб
ИЭфефе фз ухукехЮ ме фпн ресйуфсецьменп дйбкьрфз екфьт лейфпхсгЯбт.
ЦЭсфе фпн ресйуфспцйкь дйбкьрфз уфп P
кбй ксбфЮуфе фпн, мЭчсй нб бкйнзфпрпйзиеЯ
з кЯнзуз.
ФсбвЬфе фп цйт брь фзн рсЯжб.
БцбйсЭуфе фп кбрЬкй.
РбфЮуфе фп рлЮкфсп брбуцЬлйузт кбй
цЭсфе фпн уфсецьменп всбчЯпнб уфз
иЭуз 6.
БцбйсЭуфе фп есгблеЯп брь фзн кЯнзуз.
БцбйсЭуфе фп мрпл.
КбибсЯжефе ьлб фб мЭсз, вл.
”Кбибсйумьт кбй цспнфЯдб”.
МЯоес Ейкьнб
КЯндхнпт фсбхмбфйумпэ брь
фп кпцфесь мбчбЯсй фпх мЯоес/
фзн ресйуфсецьменз кЯнзуз!
Мзн вЬжефе рпфЭ фп чЭсй убт мЭуб уфп
фпрпиефзмЭнп мЯоес!
БцбйсеЯфе/фпрпиефеЯфе фп мЯоес мьнпн,
ьфбн з кЯнзуз еЯнбй бкйнзфпрпйзмЭнз!
ЛейфпхсгеЯфе фп мЯоес мьнпн, ьфбн еЯнбй
ухнбсмплпгзмЭнп кбй ме фпрпиефзмЭнп
фп кбрЬкй.
КЯндхнпт жембфЯумбфпт!
¼фбн дпхлеэефе кбхфЬ хлйкЬ, еоЭсчефбй
бфмьт брь фп чщнЯ уфп кбрЬкй.
ГемЯжефе фп рпфЮсй фпх мЯоес ме 0,5 лЯфсб
кбхфь Ю бцсЯжпн хгсь фп рплэ.
Robert Bosch Hausgeräte GmbH 99
Page 100

РспупчЮ!
el
Фп мЯоес мрпсеЯ нб рЬией жзмйЬ.
Мз дпхлеэефе кбфешхгмЭнб хлйкЬ
(екфьт брь рбгЬкйб).
Мз лейфпхсгеЯфе фп мЯоес Ьдейп.
РспупчЮ!
ЕреоесгбуЯб хгсюн уфп гхЬлйнп мЯоес:
фп рплэ уфз вбимЯдб 3.
ГемЯжефе фп рпфЮсй фпх мЯоес ме 0,5 лЯфсб
фп рплэ кбхфь хгсь Ю хгсь рпх бцсЯжей.
РбфЮуфе фп рлЮкфсп брбуцЬлйузт кбй
цЭсфе фпн уфсецьменп всбчЯпнб уфз
иЭуз 3.
БцбйсЭуфе фп рспуфбфехфйкь кбрЬкй
кЯнзузт мЯоес.
ФпрпиефеЯфе фп рпфЮсй фпх мЯоес (узмЬдй
уфз вЬуз ме узмЬдй уфз вбуйкЮ ухукехЮ)
кбй фп уфсЭцефе бнфЯиефб рспт фз цпсЬ
фщн дейкфюн фпх сплпгйпэ, мЭчсй фп фЭсмб
Ейкьнб -4/5
(
СЯчнефе фб хлйкЬ.
).
МЭгйуфз рпуьфзфб уе рлбуфйкь мЯоес,
хгсЬ = 1 лЯфсп, уе гхЬлйнп мЯоес, хгсЬ
= 0,75 лЯфсб уе хгсЬ рпх бцсЯжпхн Ю
уфзн ресЯрфщуз кбхфюн хгсюн фп рплэ
0,5 лЯфсб,
йдбнйкЮ рпуьфзфб ереоесгбуЯбт, уфесеЬ
= 50–100 гсбммЬсйб.
ФпрпиефеЯфе фп кбрЬкй кбй фп рйЭжефе гесЬ.
КбфЬ фзн есгбуЯб ксбфЬфе рЬнфпфе
фп кбрЬкй ме фп Энб чЭсй.
Мзн рйЬнефе рЬнщ уфп Ьнпйгмб
ухмрлЮсщузт хлйкюн!
СхимЯжефе фпн ресйуфсецьменп дйбкьрфз
уфзн ерйихмзфЮ вбимЯдб.
УхмрлЮсщуз хлйкюн Ейкьнб -6
ИЭфефе фз ухукехЮ ме фпн ресйуфсецьменп дйбкьрфз екфьт лейфпхсгЯбт.
БцбйсЭуфе фп кбрЬкй кбй ухмрлзсюуфе
фб хлйкЬ
Þ
бцбйсеЯфе фп чщнЯ кбй сЯчнефе лЯгб лЯгб
фб уфесеЬ хлйкЬ уфбдйбкЬ мЭуб брь
фп Ьнпйгмб ухмрлЮсщузт хлйкюн
Þ
чэнефе фб хгсЬ хлйкЬ мЭущ фпх чщнйпэ.
МефЬ фзн есгбуЯб
ИЭфефе фз ухукехЮ ме фпн ресйуфсецьменп дйбкьрфз екфьт лейфпхсгЯбт.
ФсбвЬфе фп цйт брь фзн рсЯжб.
УфсЭшфе фп мЯоес уфз цпсЬ фщн дейкфюн
фпх сплпгйпэ кбй бцбйсЭуфе фп.
УхмвпхлЮ:
Убт ухнйуфпэме нб кбибсЯжефе
фп мЯоес бмЭущт мефЬ фз чсЮуз.
Кбибсйумьт кбй цспнфЯдб
РспупчЮ!
Мз чсзуймпрпйеЯфе мЭуб кбибсйумпэ
рпх чбсЬжпхн. Пй ерйцЬнейет мрпспэн
нб хрпуфпэн ципсЭт.
Кбибсйумьт фзт вбуйкЮт ухукехЮт
КЯндхнпт злекфспрлзоЯбт!
Мз вхиЯуефе фз вбуйкЮ ухукехЮ рпфЭ мЭуб
уе несь пэфе нб фзн ксбфЮуефе кЬфщ брь
фсечпэменп несь.
ФсбвЬфе фп цйт брь фзн рсЯжб.
УкпхрЯжефе фз вбуйкЮ ухукехЮ ме
всегмЭнп рбнЯ.
Бн чсейбуфеЯ, чсзуймпрпйеЯфе лЯгп
брпссхрбнфйкь рлхуЯмбфпт рйЬфщн.
Уфз ухнЭчейб укпхрЯжефе фз ухукехЮ
нб уфегнюуей.
Кбибсйумьт фпх мрпл ме фб
еобсфЮмбфб
¼лб фб мЭсз рлЭнпнфбй уфп рлхнфЮсйп
рйЬфщн. РспуЭчефе нб мз мбгкюупхн фб
рлбуфйкЬ мЭсз мЭуб уфп рлхнфЮсйп рйЬфщн,
дйьфй еЯнбй дхнбфьн нб рбсбмпсцщипэн.
Кбибсйумьт фпх мЯоес
КЯндхнпт фсбхмбфйумпэ брь
фп кпцфесь мбчбЯсй!
Мзн бггЯжефе фп мбчбЯсй фпх мЯоес ме фб
чЭсйб гхмнЬ. Гйб фпн кбибсйумь мрпсеЯфе
нб брпухнбсмплпгеЯфе фп мЯоес.
РспупчЮ!
Мз чсзуймпрпйеЯфе мЭуб кбибсйумпэ рпх
чбсЬжпхн. Фп Эниефп мбчбйсйпэ ден рлЭнефбй
уфп рлхнфЮсйп. КбибсЯжефе фп Эниефп
мбчбйсйпэ мьнпн кЬфщ брь фсечпэменп
несь.
УхмвпхлЮ:
ухчнЬ ден еЯнбй брбсбЯфзфп н' брпухнбсмплпгЮуфе фп мЯоес гйб фпн кбибсйумь.
Гйб фпн укпрь бхфь чэнефе лЯгп несь ме
брпссхрбнфйкь рйЬфщн мЭуб уфп фпрпиефзмЭнп мЯоес. ИЭфефе гйб месйкЬ дехфесьлерфб фп мЯоес уе лейфпхсгЯб (уе ухукехЭт
ме уфйгмйбЯб лейфпхсгЯб уфз вбимЯдб М).
Чэуфе фп несь рлхуЯмбфпт кбй оерлэнфе
фп мЯоес ме кбибсь несь.
МефЬ фзн ереоесгбуЯб хгсюн
100 Robert Bosch Hausgeräte GmbH
 Loading...