Bosch MMBH4P3B, MMBH6P6B User manual

Bosch MMBH4P3B, MMBH6P6B User manual


Register

your


and


new


device on


MyBosch now


get free

benefits:


bosch-


home.


com/


welcome


VitaBoost

High performance blender

MMBH4... MMBH6...

[de]

Gebrauchsanleitung

Hochleistungsmixer

3

[en]

Instruction manual

High performance blender

14

[fr]

Mode d’emploi

Super blender

24

[it]

Istruzioni per l’uso

Frullatore ad alta potenza

35

[nl]

Gebruiksaanwijzing

Power blender

45

[da]

Brugsanvisning

High Speed Blender

56

[no]

Bruksanvisning

High Speed Blender

66

[sv]

Bruksanvisning

High Speed Blender

76

[fi]

Käyttöohje

High Speed Blender

86

[es]

Instrucciones de uso

Batidora de vaso profesional

96

[pt]

Instruções de serviço

Liquidificador de elevada performance

107

[el]

Οδηγίες χρήσης

Μπλέντερ υψηλής απόδοσης

118

[tr]

Kullanım kılavuzu

Yüksek performanslı mikser

130

[pl]

Instrukcja obsługi

Blender kielichowy wysokoobrotowy

142

[uk]

Інструкція з експлуатації

Стаціонарний блендер

153

[ru]

Инструкция по эксплуатации

Высокоскоростной стационарный блендер

164

[ar]

مادختسلاا تاداشرإ

ةءافكلا يلاع طلاخ

188

Bestimmungsgemäßer Gebrauch

de

Bestimmungsgemäßer Gebrauch

Dieses Gerät ist nur für den privaten Haushalt und das häusliche Umfeld bestimmt. Gerät nur für haushaltsübliche Verarbeitungsmengen und -zeiten benutzen. Zulässige Höchstmengen (siehe „Rezepte“) nicht überschreiten.

Dieses Gerät ist zum Mischen flüssiger bzw. halbfester

Lebensmittel, zum Zerkleinern / Hacken von rohem Obst und Gemüse, zum Pürieren von Speisen und zum Zerkleinern von tiefgefrorenen Lebensmitteln (z. B. Obst) oder Eiswürfeln geeignet. Das Gerät darf nicht zur Verarbeitung von anderen Substanzen bzw. Gegenständen benutzt werden.

Das Gerät nur in Innenräumen bei Raumtemperatur und bis zu

2000 m über Meereshöhe verwenden.

Wichtige Sicherheitshinweise

Die Gebrauchsanleitung sorgfältig durchlesen, danach handeln und aufbewahren! Bei Weitergabe des Geräts diese Anleitung beilegen. Das Nichtbeachten der Anweisungen für die richtige Anwendung des Gerätes schließt eine Haftung des Herstellers für daraus resultierende Schäden aus.

Dieses Gerät kann von Personen mit reduzierten physischen, sensorischen oder mentalen Fähigkeiten oder Mangel an Erfahrung und/oder Wissen benutzt werden, wenn sie beaufsichtigt oder bezüglich des sicheren Gebrauchs des Gerätes unterwiesen wurden und die daraus resultierenden Gefahren verstanden haben. Kinder sind vom Gerät und der Anschlussleitung fernzuhalten und dürfen das Gerät nicht bedienen. Kinder dürfen nicht mit dem Gerät spielen. Reinigung und Benutzer-Wartung dürfen nicht durch Kinder vorgenommen werden.

WWStromschlaggefahr und Brandgefahr!

■■ Gerät nur gemäß Angaben auf dem Typenschild anschließen und betreiben. Nur benutzen, wenn Zuleitung und Gerät keine Beschädigungen aufweisen. Reparaturen am Gerät, wie z. B. eine beschädigte Netzanschlussleitung auswechseln, dürfen nur durch unseren Kundendienst ausgeführt werden, um

Gefährdungen zu vermeiden.

■■ Gerät niemals an Zeitschaltuhren oder fernbedienbaren

Steckdosen anschließen. Das Gerät während des Betriebs stets beaufsichtigen!

■■ Gerät nicht auf oder in die Nähe heißer Oberflächen, wie z. B. Herdplatten, stellen. Das Netzkabel nicht mit heißen Teilen in

Berührung bringen oder über scharfe Kanten ziehen.

3

de Wichtige Sicherheitshinweise

■■ Das Grundgerät niemals in Wasser tauchen oder in den

Geschirrspüler geben. Keinen Dampfreiniger benutzen. Das Gerät nicht mit feuchten Händen benutzen.

■■ Das Gerät muss nach jedem Gebrauch, bei nicht vorhandener

Aufsicht, vor dem Zusammenbau, Auseinandernehmen oder Reinigen und im Fehlerfall stets vom Netz getrennt werden.

WWVerletzungsgefahr!

■■ Vor dem Auswechseln von Zubehör oder Zusatzteilen, die im Betrieb bewegt werden, muss das Gerät ausgeschaltet und vom Netz getrennt werden.

■■ Niemals in den aufgesetzten Mixer greifen! Mixer nie ohne aufgesetzen Deckel betreiben.

■■ Vorsicht beim Umgang mit den scharfen Messern, bei der Entleerung des Behälters und bei der Reinigung.

■■ Vor dem Ausschalten unbedingt den Drehwähler bis zum Anschlag gegen den Uhrzeigersinn drehen (Nullstellung).

■■ Nach dem Ausschalten läuft der Antrieb kurze Zeit nach. Vollständigen Stillstand des Antriebs abwarten.

■■ Gerät nur im komplett zusammengesetzten Zustand verwenden.

WWVerbrühungsgefahr!

■■ Vorsicht beim Einfüllen heißer Flüssigkeiten. Durch plötzliche Dampfbildung kann die Flüssigkeit aus dem Behälter herausspritzen.

■■ Den Deckel während der Arbeit immer mit einer Hand festhalten. Dabei nicht über die Nachfüllöffnung greifen! Beim Verarbeiten von heißem Mixgut tritt Dampf durch die Nachfüllöffnung im

Deckel aus.

WWErstickungsgefahr!

Kinder nicht mit Verpackungsmaterial spielen lassen.

WWAchtung!

■■ Darauf achten, dass sich keine Fremdkörper im Mixbecher befinden. Nicht mit Gegenständen (z. B. Messer, Löffel) im Mixbecher hantieren. Ausschließlich den mitgelieferten Stopfer bei aufgesetztem Deckel verwenden!

■■ Es wird empfohlen, das Gerät niemals länger eingeschaltet zu lassen, wie für die Verarbeitung der Lebensmittel notwendig.

Nicht im Leerlauf betreiben.

WWWichtig!

Das Gerät nach jeder Verwendung oder nach längerem

Nichtgebrauch unbedingt gründlich reinigen. X „Reinigung und

Pflege“ siehe Seite 9

4

Auf einen Blick


Inhalt

de

Herzlichen Glückwunsch zum Kauf Ihres

4 Deckel


neuen Gerätes aus dem Hause Bosch.


a Öffnung für Stopfer / zum Nachfüllen

Weitere Informationen zu unseren


b

Verschlusskappe mit Skala


Produkten finden Sie auf unserer


c

Stopfer


Internetseite.


* Je nach Modell


Vor dem ersten Gebrauch


Inhalt


Bevor das neue Gerät benutzt werden


Bestimmungsgemäßer Gebrauch

3


Wichtige Sicherheitshinweise

3


kann, muss dieses vollständig entpackt,


gereinigt und geprüft werden.


Auf einen Blick

5


Vor dem ersten Gebrauch

5

Achtung!


Symbole und Markierungen

5

Ein beschädigtes Gerät nie in Betrieb


Teile und Bedienelemente

6

nehmen!


Verwendung

7

■■ Grundgerät und alle Zubehörteile


Automatik-Programme

8

aus der Verpackung nehmen und


Reinigung und Pflege

9

vorhandenes Verpackungsmaterial


Sicherheitssysteme

10

entfernen.


Hilfe bei Störungen

10

■■ Alle Teile auf Vollständigkeit und


Rezepte

11

sichtbare Schäden prüfen. X Bild A


Entsorgung

12

■■ Vor dem ersten Gebrauch alle Teile


Garantiebedingungen

13

gründlich reinigen und trocknen.


X „Reinigung und Pflege“ siehe


Seite 9

X Bild A

1Grundgerät / Motorblock a Dämpfungsauflage

b Antrieb

c Rückstellknopf (Überlastungsschutz)

2Bedienfeld

a Ein-/Ausschalter on/off

b Drehwähler mit Markierung c Statusanzeige (LED)

d Markierung min e Markierung max f Taste Pulse

g 6 (3)* Programmwahl-Tasten mit LEDs

3Mixbecher

a Behälter aus Tritan b Skala

c Mixmesser d Griff

e Griff-Abdeckung (abnehmbar)

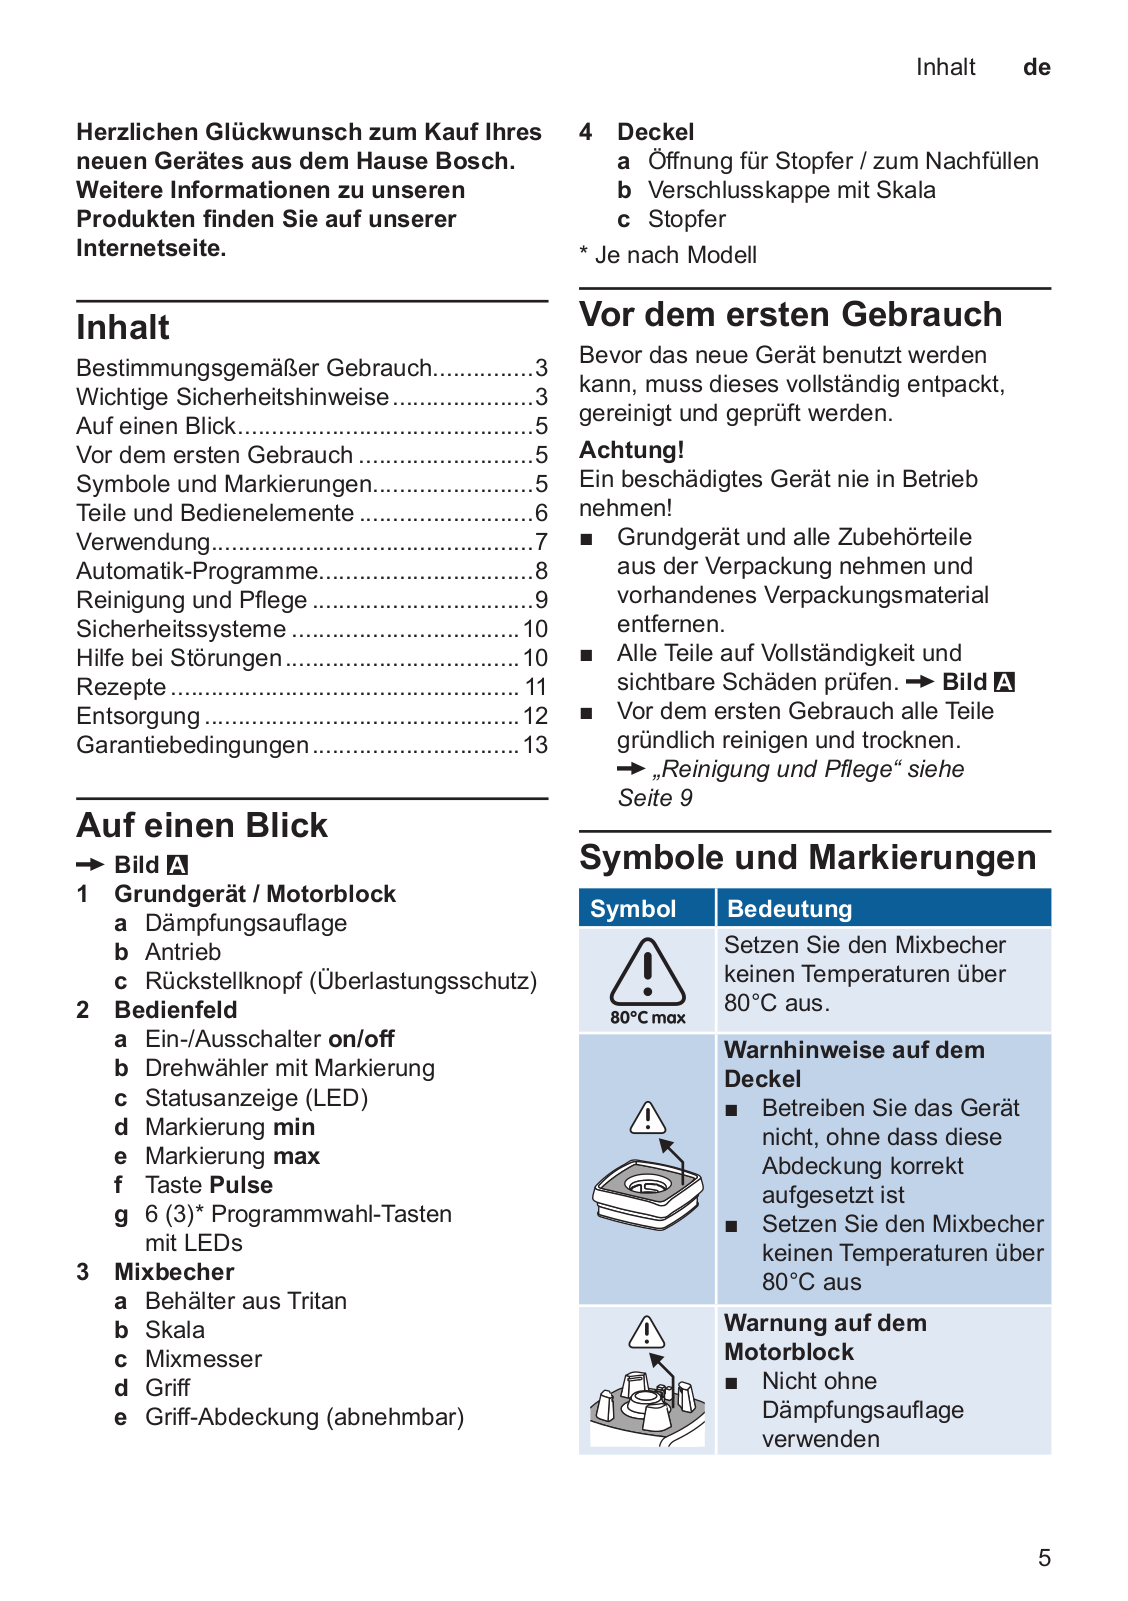
Symbole und Markierungen

Symbol Bedeutung

Setzen Sie den Mixbecher keinen Temperaturen über

80°C aus.

Warnhinweise auf dem Deckel

■■ Betreiben Sie das Gerät nicht, ohne dass diese

Abdeckung korrekt

aufgesetzt ist

■■ Setzen Sie den Mixbecher keinen Temperaturen über

80°C aus

Warnung auf dem Motorblock

■■ Nicht ohne

Dämpfungsauflage verwenden

5

de Teile und Bedienelemente

Teile und Bedienelemente

Hochleistungs-Motorblock

Der Mixer ist mit einem Hochgeschwindig- keits-Motor mit einer Motorgeschwindigkeit von bis zu 45000 Umdrehungen pro Minute ausgestattet. Dadurch werden nicht nur besonders schnelle und feine Mix-Ergeb- nisse erreicht, sondern auch ein Erwärmen von Lebensmitteln ist möglich. Zum Beispiel wird mit dem Automatik-Programm Soup aus kalten Zutaten eine heiße Suppe hergestellt.

Hinweis: Bei der GeschwindigkeitsEinstellung max, bei Verwendung der Taste Pulse und bei bestimmten Automatik-

Programmen läuft der Mixer auf höchster

Drehzahl. Um ein unerwünschtes Erwärmen der Lebensmittel zu verhindern, die Zutaten kürzere Zeit oder bei geringerer Drehzahl verarbeiten.

Ein-/Aus-Schalter „on/off“

Zum Einund Ausschalten des Geräts.

Statusanzeige

Zur Anzeige des Gerätestatus und als

Markierung für die Nullstellung des

Drehwählers.

Anzeige

Anzeige leuchtet: Gerät ist eingeschaltet und betriebsbereit

Anzeige blinkt:

––Fehler im Gerät

––Mixbecher ist nicht korrekt aufgesetzt oder hat sich gelöst

––Drehwähler beim Einschalten nicht in

Nullstellung

––nach Unterbrechung der Spannungsversorgung

––länger als 5½ Minuten Dauerbetrieb (manueller Modus)

Drehwähler

Zur stufenlosen Einstellung der Drehzahl des Mixmessers.

Einstellungen

Nullstellung (Markierung zeigt auf die Statusanzeige) = Stillstand

min Niedrigste Drehzahl

max Höchste Drehzahl

Achtung!

Wenn das Gerät nach 5½ Minuten Dauerbetrieb mit der Geschwindigkeits-

Einstellung max automatisch ausschaltet, nach erneutem Einschalten höchstens weitere 1-2 Minuten mit der Einstellung max arbeiten, da sich die Lebensmittel sonst zu stark erhitzen und den Behälter beschädigen können.

Hinweise:

––Wenn der Drehwähler beim

Einschalten nicht in Nullstellung ist, der Mixbecher sich gelöst hat oder die

Stromzufuhr unterbrochen war, blinkt die Statusanzeige. Den Drehwähler zuerst in Nullstellung bringen und dann weiterarbeiten.

––Die Einstellung des Drehwählers hat keinen Einfluß bei Verwendung der

Pulse-Funktion.

Pulse-Taste

Zum kurzzeitigen Schalten auf die höchste Drehzahl. Das Gerät arbeitet mit höchster

Drehzahl, solange die Taste Pulse gedrückt wird.

Hinweis: Die Funktion kann nicht verwendet werden, wenn ein AutomatikProgramm ausgeführt wird.

Programmwahl-Tasten mit LEDs

Zum Auswählen und Starten von Automatik-

Programmen. X „Automatik-Programme“ siehe Seite 8

Nach dem Einschalten leuchten alle LEDs.

Durch Drücken einer Taste startet das ausgewählte Programm und das Gerät läuft automatisch.

6

Mixbecher

Zur Verarbeitung von bis zu 2 Litern

Lebensmitteln. Der Mixbecher ist aus Tritan. Tritan ist ein bruchsicherer, geschmacksund geruchsneutraler Kunststoff.

Achtung!

Setzen Sie den Mixbecher keinen

Temperaturen über 80°C aus.

Deckel mit Verschlusskappe

Zum sicheren Verschließen des Mixbechers während der Verarbeitung. Zum Nachfüllen zerkleinerter oder flüssiger Zutaten die

Verschlusskappe gegen den Uhrzeigersinn drehen und abnehmen.

Stopfer

Um Zutaten, die am Rand kleben oder sich schlecht mixen lassen, in Richtung Mixmesser zu schieben. Dazu die Verschlusskappe gegen den Uhrzeigersinn drehen, abnehmen und Stopfer in die

Öffnung setzen. X „Stopfer verwenden“ siehe Seite 8

Sicherheitssysteme

Das Gerät verfügt über verschiedene Sicherheitssysteme.

X „Sicherheitssysteme“ siehe Seite 10

Verwendung

WWVerletzungsgefahr!

––Netzstecker erst einstecken, wenn alle Vorbereitungen zum Arbeiten mit dem

Gerät abgeschlossen sind und der Mixbecher korrekt auf das Grundgerät aufgesetzt worden ist.

––Nie in den aufgesetzten Mixbecher greifen und immer mit aufgesetztem Deckel arbeiten.

Hinweis: Das Gerät arbeitet nur mit korrekt aufgesetztem Mixbecher.

X Bild B

1.Das Grundgerät auf eine stabile, waagrechte Arbeitsfläche stellen. Dämpfungsauflage auf das Grundgerät aufsetzen. Dabei die Aussparung beachten.

Verwendung de

Wichtig: Mixbecher nie ohne

Dämpfungsauflage aufsetzen.

2.Mixbecher auf die Dämpfungsauflage setzen. Darauf achten, dass der Mixbecher fest auf dem Gerät sitzt.

3.Gewünschte Zutaten in den Mixbecher füllen.

4.Deckel mit Verschlusskappe aufsetzen und festdrücken.

5.Drehwähler bis zum Anschlag gegen den Uhrzeigersinn drehen (Nullstellung).

6.Netzstecker einstecken. Gerät mit dem

Ein-/Aus-Schalter einschalten. Alle

LEDs leuchten.

7.Drehwähler langsam im Uhrzeigersinn bis zum Erreichen der gewünschten

Drehzahl drehen. Die Status-LED leuchtet.

Hinweis: Verwendung der ProgrammwahlTasten X „Automatik-Programme“ siehe Seite 8.

8.Zutaten so lange verarbeiten, bis die gewünschte Konsistenz erreicht ist.

9.Drehwähler bis zum Anschlag gegen den Uhrzeigersinn drehen (Nullstellung).

Stillstand des Geräts abwarten.

10.Gerät mit dem Ein-/Aus-Schalter ausschalten. Netzstecker ausstecken.

11.Mixbecher abnehmen. Deckel abnehmen.

12.Mixgut umfüllen.

Alle Teile reinigen. X „Reinigung und

Pflege“ siehe Seite 9

Zutaten nachfüllen

X Bild C

1.Verschlusskappe gegen den Uhrzeigersinn drehen und abnehmen.

2.Zerkleinerte oder flüssige Zutaten durch die Öffnung nachfüllen. Dabei die maximale Füllmenge beachten.

3.Die Verschlusskappe aufsetzen und im Uhrzeigersinn festdrehen.

4.Zutaten so lange verarbeiten, bis die gewünschte Konsistenz erreicht ist.

7

de Automatik-Programme

X Bild D

Zum Nachfüllen größerer Mengen:

1.Drehwähler bis zum Anschlag gegen den Uhrzeigersinn drehen (Nullstellung).

Stillstand des Geräts abwarten.

2.Gerät mit dem Ein-/Aus-Schalter ausschalten. Netzstecker ausstecken.

WWVerletzungsgefahr!

Deckel niemals bei eingestecktem Gerät abnehmen.

3.Deckel abnehmen.

4.Zutaten nachfüllen.

5.Deckel wieder aufsetzen.

6.Netzstecker einstecken. Gerät mit dem

Ein-/Aus-Schalter einschalten. Alle

LEDs leuchten.

7.Drehwähler langsam im Uhrzeigersinn bis zum Erreichen der gewünschten

Drehzahl drehen. Die Status-LED leuchtet.

8.Zutaten so lange verarbeiten, bis die gewünschte Konsistenz erreicht ist.

Stopfer verwenden

WWVerletzungsgefahr!

Stopfer niemals ohne aufgesetzten Deckel verwenden!

X Bild E

1.Verschlusskappe gegen den Uhrzeigersinn drehen und abnehmen.

2.Den mitgelieferten Stopfer in die

Öffnung setzen.

3.Zutaten mit dem Stopfer in Richtung Mixmesser schieben. Dazu den Stopfer an den Ecken und Wänden des

Mixbechers entlang führen.

4.Danach den Stopfer sofort wieder entnehmen. Die Verschlusskappe aufsetzen und im Uhrzeigersinn festdrehen.

Hinweis: Durch Verwendung des Stopfers kann die Qualität des Mixergebnisses deutlich verbessert werden.

Pulse-Funktion verwenden

■■ Bei eingeschaltetem Gerät die Taste

Pulse nach unten drücken und halten.

■■ Solange die Taste Pulse gehalten wird läuft das Gerät mit maximaler Drehzahl.

■■ Die Taste Pulse loslassen. Das

Gerät arbeitet wieder mit der vorher ausgewählten Drehzahl.

Hinweis: Während ein Automatik-

Programm läuft, kann die Pulse-Funktion nicht verwendet werden.

Automatik-Programme

Das Gerät verfügt über 6 (3)* Automatik-

Programme (je nach Modell). Nach

Drücken der entsprechenden Taste startet das gewählte Programm und verarbeitet die Zutaten mit

voreingestellten Geschwindigkeiten und

Verarbeitungsdauern. Das Programm endet nach der Zubereitung automatisch.

Folgende Programme können ausgewählt werden:

Programme

Shake Für Frucht-Smoothies und Milchshakes mit frischen Zutaten

Smoothie Für grüne Smoothies und Frucht-Smoothies mit gefrorenen Zutaten

Soup Für die Zubereitung heißer Suppen

Ice Cream* Für Eis und Sorbets Sauce* Für Saucen und Dips Cleaning* Reinigungsprogramm

* Je nach Modell

Achtung!

Wenn das Automatik-Programm Soup beendet ist, das Programm Soup nicht erneut starten, da sich die Lebensmittel sonst zu stark erhitzen und den Behälter beschädigen können.

8

Hinweise:

––Das Automatik-Programm Soup nur mit kalten Zutaten verwenden. Werden heiße Zutaten eingefüllt erhöht sich die

Temperatur zu stark.

––Ein Automatik-Programm kann nur gestartet werden, wenn der Drehwähler in Nullstellung ist.

––Ein Automatik-Programm kann jederzeit durch erneutes Drücken der entsprechenden Programmwahl-Taste oder durch Ausschalten mit dem Ein-/ Aus-Schalter beendet werden.

Ein Beispiel

Birnen-Smoothie herstellen (Rezept

X „Birnen-Smoothie“ siehe Seite 11)

X Bild F

1.Das Grundgerät auf eine stabile, waagrechte Arbeitsfläche stellen. Dämpfungsauflage auf das Grundgerät

aufsetzen. Dabei die Aussparung beachten.

Wichtig: Mixbecher nie ohne

Dämpfungsauflage aufsetzen.

2.Mixbecher auf die Dämpfungsauflage setzen. Darauf achten, dass der Mixbecher fest auf dem Gerät sitzt.

3.Gewünschte Zutaten in den Mixbecher füllen.

4.Deckel mit Verschlusskappe aufsetzen und festdrücken.

5.Drehwähler bis zum Anschlag gegen den Uhrzeigersinn drehen (Nullstellung).

6.Netzstecker einstecken. Gerät mit dem

Ein-/Aus-Schalter einschalten. Alle

LEDs leuchten.

7.Die Programmwahl-Taste Shake drücken. Die LED der Taste leuchtet.

8.Das Gerät verarbeitet die Zutaten automatisch.

9.Das Gerät beendet die Verarbeitung automatisch. Alle LEDs leuchten.

Reinigung und Pflege

de

10.Gerät mit dem Ein-/Aus-Schalter ausschalten. Netzstecker ausstecken.

11.Mixbecher abnehmen. Deckel abnehmen.

12.Den fertigen Frucht-Smoothie in Gläser

füllen.

■■ Alle Teile reinigen. X „Reinigung und

Pflege“ siehe Seite 9

Reinigung und Pflege

Das Gerät und die verwendeten Einzelteile müssen nach jedem Gebrauch gründlich gereinigt werden.

WWStromschlaggefahr!

––Vor dem Reinigen den Netzstecker ausstecken.

––Das Grundgerät nie in Flüssigkeiten tauchen und nicht in der Spülmaschine reinigen.

––Keinen Dampfreiniger verwenden.

WWVerletzungsgefahr!

Mixmesser nie mit bloßen Händen berühren. Bürste benutzen.

Achtung!

––Keine alkoholoder spiritushaltigen

Reinigungsmittel verwenden.

––Keine scharfen, spitzen oder metallischen Gegenstände benutzen.

––Keine scheuernden Tücher oder Reinigungsmittel verwenden.

Hinweise:

––Teile sofort nach Gebrauch reinigen. So trocknen Rückstände nicht an und der

Kunststoff wird nicht angegriffen (z. B. durch ätherische Öle in Gewürzen).

––Bei der Verarbeitung von z. B. Karotten können Verfärbungen an den Kunststoffteilen entstehen, die mit einigen Tropfen Speiseöl entfernt werden können.

––Zur leichteren Reinigung des

Mixbechers die Griffabdeckung vom Griff abziehen und nach dem Trocknen wieder aufsetzen.

9

de Sicherheitssysteme

Im Bild G finden Sie eine Übersicht, wie die

Einzelteile zu reinigen sind.

Programm „Cleaning“

Zur einfachen und schnellen Vorreinigung. ■■ Den leeren Mixbecher auf das Gerät

setzen.

■■ 1,25 Liter warmes Wasser und 2 Tropfen Spülmittel einfüllen.

■■ Deckel mit Verschlusskappe aufsetzen und festdrücken.

■■ Gerät wieder einschalten und die Programmwahl-Taste Cleaning drücken.

■■ Das Gerät durchläuft die automatische Vorreinigung und beendet das Programm automatisch.

■■ Gerät mit dem Ein-/Aus-Schalter ausschalten. Netzstecker ausstecken.

■■ Mixbecher, Deckel mit Verschlusskappe und Dämpfungsauflage abnehmen.

■■ Alle Teile gründlich abspülen und gegebenfalls nachreinigen.

■■ Grundgerät reinigen.

Sicherheitssysteme

Einschaltsicherung /

Abschaltautomatik

Das Gerät lässt sich nur bedienen, wenn der Mixbecher korrekt aufgesetzt wurde und wenn der Drehwähler beim

Einschalten oder nach Unterbrechung der Stromzufuhr in Nullstellung gedreht ist.

Das Gerät schaltet automatisch ab, wenn der Mixbecher sich gelöst hat. Das Gerät schaltet im manuellen Modus (Drehzahl min max) automatisch nach 5½ Minuten Dauerbetrieb ab. X „Hilfe bei Störungen“ siehe Seite 10

Überlastsicherung

Bei Überhitzung schaltet sich der Motor automatisch ab. X „Hilfe bei Störungen“ siehe Seite 10

Hinweis: Bei Aktivierung des

Überlastungsschutzes kann ein leichter Fremdgeruch entstehen. Dies ist kein

Anzeichen für eine Fehlfunktion.

Hilfe bei Störungen

WWVerletzungsgefahr!

Vor Behebung einer Störung den Netzstecker ausstecken.

Hinweis: Bei einem Fehler in der

Bedienung des Gerätes, einem Auslösen der elektronischen Sicherungen bzw. einem

Gerätedefekt lässt sich das Gerät nicht mehr einschalten. Versuchen Sie als Erstes das aufgetretene Problem an Hand der folgenden Hinweise zu beseitigen.

Achtung!

Sollte sich eine Störung so nicht beseitigen lassen, wenden Sie sich bitte an den

Kundendienst.

Störung

Gerät läuft nicht an oder schaltet während der Benutzung ab. Die Statusanzeige blinkt.

Mögliche Ursachen

––Mixbecher ist nicht korrekt aufgesetzt, hat sich gelöst oder wurde abgenommen.

––Drehwähler war beim Einschalten oder nach einer Stromunterbrechung nicht in Nullstellung.

––Das Gerät war im manuellen Modus

(Drehzahl min max) länger als 5½ Minuten im Dauerbetrieb.

Abhilfe

■■ Gerät mit dem Ein-/Aus-Schalter ausschalten.

■■ Mixbecher korrekt aufsetzen.

■■ Drehwähler bis zum Anschlag gegen den Uhrzeigersinn drehen (Nullstellung).

■■ Gerät mit dem Ein-/Aus-Schalter einschalten. Die Statusanzeige leuchtet.

Störung

Gerät läuft nicht an oder schaltet während der Benutzung ab.

Mögliche Ursache

Die Überlastsicherung ist aktiviert.

10

Abhilfe

■■ Drehwähler bis zum Anschlag gegen den Uhrzeigersinn drehen (Nullstellung).

■■ Gerät mit dem Ein-/Aus-Schalter ausschalten. Netzstecker ausstecken.

■■ Mixbecher abnehmen.

■■ Gerät ca. 15-20 Minuten abkühlen lassen und dann erneut einschalten.

■■ Falls das Gerät nicht anläuft, Gerät umdrehen. Rückstellknopf auf der Unterseite drücken (X Bild A - 1c).

■■ Falls der Rückstellknopf blockiert ist,

Gerät weiter abkühlen lassen und später erneut versuchen.

Rezepte

Hinweise:

––Im Bild H finden Sie eine Tabelle mit weiteren Anwendungsbeispielen.

Lebensmittel vor der Verarbeitung reinigen und zerkleinern. Harte Bestandteile, wie Kerne und Schalen entfernen.

––Die Rezepte und Anwendungsbeispiele können auch ohne Automatik-Programm durchgeführt werden. Dazu mit dem Drehwähler die Geschwindigkeit von min bis max erhöhen und alle Zutaten mixen, bis die gewünschte Konsistenz erreicht ist.

Birnen-Smoothie

––3 Bananen

––3 Birnen

––Saft von zwei Orangen (ca. 200 ml)

––100 ml kaltes Wasser

■■ Die gewaschenen Birnen und die geschälten Bananen in Stücke schneiden.

■■ Alle Zutaten in den Mixbecher füllen und

Deckel mit Verschlusskappe aufsetzen.

■■ Die Taste Shake drücken.

■■ Nach Beendigung des Automatik-

Programms den Smoothie frisch servieren.

Rezepte de

Tipp: Birnen können je nach Sorte im

Geschmack ganz verschieden sein. Wer keine süßen Birnen vorliegen hat, kann seinen Smoothie durch Zugabe von zwei bis vier Datteln würzen – diese geben eine sehr milde Süße ab, die mit den restlichen Zutaten hervorragend harmoniert.

Beeren-Honig-Smoothie

––400 g tiefgekühlte Himbeeren / Beerenmischung

––1 Banane

––500 ml Milch

––3 EL Zitronensaft

––2 EL Honig

■■ Die Himbeeren / Beerenmischung antauen lassen.

■■ Die geschälte Banane in Stücke schneiden.

■■ Alle Zutaten in den Mixbecher füllen und

Deckel mit Verschlusskappe aufsetzen.

■■ Die Taste Smoothie drücken. ■■ Nach Beendigung des Automatik-

Programms den Smoothie frisch servieren.

Frischer Obst-Ingwer-Smoothie

––4 Handvoll Feldsalat

––2 Birnen

––2 Bananen

––1 Stück frischer Ingwer (ca. 15 g)

––10 Eiswürfel

––200 ml kaltes Wasser

■■ Den Feldsalat gründlich waschen. ■■ Die gewaschenen Birnen und die geschälten Bananen in Stücke

schneiden.

■■ Den Ingwer schälen.

■■ Alle Zutaten in den Mixbecher füllen und

Deckel mit Verschlusskappe aufsetzen.

■■ Die Taste Smoothie drücken. ■■ Nach Beendigung des Automatik-

Programms den Smoothie frisch servieren.

11

de Rezepte

Heidelbeer-Eiscreme

––1 unbehandelte Zitrone

––150 g Vollmilchjoghurt

––150 g Puderzucker

––600 g tiefgekühlte Heidelbeeren

––150 ml kalte Vollmilch

■■ Alle Zutaten in den Mixbecher füllen und

Deckel mit Verschlusskappe aufsetzen.

■■ Je nach Modell: Die Taste Ice Cream drücken und das Automatik-Programm laufen lassen.

■■ Oder: Mit dem Drehwähler langsam die Geschwindigkeit erhöhen und alle Zutaten mixen, bis eine cremige Konsistenz erreicht ist.

■■ Die Eiscreme umfüllen und eventuell noch einige Zeit in den Gefrierschrank geben, wenn eine festere Konsistenz gewünscht wird.

Tipp: Die Eiscreme kann auch mit anderen tiefgekühlten Beeren hergestellt werden (z. B. Himbeeren, Erdbeeren oder

Beerenmischungen).

Grüne Soße

––Je ein Bund Petersilie, Borretsch, Sauerampfer, Pimpinelle, Kresse, Kerbel, Schnittlauch

––2 EL Wasser

––460 g Crème Fraîche

––230 g Saure Sahne

––1 TL Senf

––3 EL Öl (z. B. Walnuss-Öl)

––1 EL Essig oder Zitronensaft

––Salz und Pfeffer

■■ Die Kräuter waschen und abtropfen lassen, harte Stiele entfernen.

■■ Alle Zutaten in den Mixbecher füllen und

Deckel mit Verschlusskappe aufsetzen.

■■ Je nach Modell: Die Taste Sauce drücken und das Automatik-Programm laufen lassen.

■■ Oder: Mit dem Drehwähler langsam die Geschwindigkeit erhöhen und alle Zutaten mixen, bis eine cremige Konsistenz erreicht ist.

■■ Die Soße abschmecken und kaltstellen. Tipp: Die Sauce passt hervorragend zu gekochten Eiern, Kartoffeln und Gemüse.

Pfannkuchenteig

––300 ml Milch

––100 g Mehl

––2 kleine Eier

––1 Prise Salz

––1 TL Öl (z. B. Sonnenblumen-Öl)

■■ Alle Zutaten in den Mixbecher füllen und

Deckel mit Verschlusskappe aufsetzen.

■■ Den Drehwähler auf max stellen und alle Zutaten 30-60 Sekunden mixen.

■■ Den Pfannkuchenteig portionsweiße in eine heiße und gefettete Pfanne geben und ausbacken.

Tomatensuppe

––750 g frische Tomaten oder Tomaten aus der Dose

––2 rote Paprika

––90 g Cashewnüsse

––6 Blätter Basilikum

––Salz und Pfeffer

■■ Frische Tomaten waschen und den

Stielansatz entfernen.

■■ Alle Zutaten in den Mixbecher füllen und

Deckel mit Verschlusskappe aufsetzen. ■■ Die Taste Soup drücken und das

Automatik-Programm laufen lassen. ■■ Nach Beendigung des Automatik-

Programms die heiße Suppe abschmecken und servieren.

Hinweis: Ist die Suppe nach Beendigung des Automatik-Programms noch nicht heiß genug, den Drehwähler auf max stellen und höchstens weitere 1-2 Minuten mixen.

12

Entsorgung de

Entsorgung

Entsorgen Sie die Verpackung

J umweltgerecht. Dieses Gerät ist entsprechend der europäischen Richtlinie 2012/19/EU über Elektround Elektronikaltgeräte (waste electrical and electronic equipment – WEEE) gekennzeichnet. Die Richtlinie gibt den Rahmen für eine EU-weit gültige Rücknahme und Verwertung der Altgeräte vor. Über aktuelle Entsorgungswege bitte beim Fachhändler informieren.

Garantiebedingungen

Für dieses Gerät gelten die von unserer jeweils zuständigen Landesvertretung herausgegebenen Garantiebedingungen des Landes, in dem das Gerät gekauft wurde. Sie können die Garantiebedin­ gungen jederzeit über Ihren Fachhändler, bei dem Sie das Gerät gekauft haben, oder direkt bei unserer Landesvertretung anfordern. Die Garantiebedingungen für

Deutschland und die Adressen finden

Sie auf den letzten vier Seiten dieses Heftes. Darüber hinaus sind die Garantie­ bedingungen auch im Internet unter der benannten Webadresse hinterlegt.

Für die Inanspruchnahme von Garantie­ leistungen ist in jedem Fall die Vorlage des Kaufbeleges erforderlich.

Änderungen vorbehalten.

13

en Intended use

Intended use

This appliance is intended for domestic use and the household environment only. Use the appliance only for processing normal amounts of food and for normal amounts of time for domestic use. Do not exceed permitted maximum quantities (see “Recipes”).

This appliance is suitable for mixing liquid or semi-solid food, for cutting or chopping raw fruit and vegetables, for puréeing food and for chopping frozen food (such as fruit) or for crushing ice cubes.

The appliance must not be used for processing other substances or objects.

Only use the appliance indoors at room temperature and up to 2000 m above sea level.

Important safety information

Read and follow the operating instructions carefully and keep for later reference! Enclose these instructions when you give this appliance to someone else.

If the instructions for correct use of the appliance are not observed, the manufacturer’s liability for any resulting damage will be excluded.

This appliance can be used by persons with reduced physical, sensory or mental capabilities or lack of experience and/or knowledge if they have been given supervision or instruction concerning use of the appliance in a safe way and if they understand the hazards involved. Keep children away from the appliance and connecting cable and do not allow them to use the appliance. Do not let children play with the appliance. Cleaning and user maintenance must not be performed by children.

WWRisk of electric shock and fire!

■■ Connect and operate the appliance only in accordance with the specifications on the rating plate. Do not use the appliance if the power cord and/or appliance are damaged. Only our customer service may repair the appliance, e.g. by replacing a damaged power cord, in order to avoid hazards.

■■ Never connect the appliance to timer switches or remotecontrollable sockets. Never leave the appliance unattended while it is switched on!

■■ Do not place the appliance on or near hot surfaces, e.g. hobs.

The power cord must not come into contact with hot parts or be pulled across sharp edges.

■■ Never immerse the base unit in water or place it in the dishwasher. Do not steam-clean the appliance. Do not use the appliance with damp hands.

14

Important safety information

en

■■ After each use, whenever the appliance is unsupervised, prior to assembly, prior to disassembly, prior to cleaning and in the event of an error, the appliance must always be disconnected from the mains.

WWRisk of injury!

■■ Before replacing accessories or additional parts which move during operation, the appliance must be switched off and disconnected from the power supply.

■■ Never reach into the attached blender! Never use the blender without the lid in place.

■■ Care should be taken when handling the sharp cutting blades, emptying the container and during cleaning.

■■ Before switching off, it is essential to turn the rotary selector in an anticlockwise direction as far it will go (zero setting).

■■ After switching off, the drive continues for a short time. Wait until the drive has come to a standstill.

■■ The appliance must be completely assembled before use.

WWRisk of scalding!

■■ Care should be taken when filling hot liquids. Sudden formation of steam may cause the liquid to spurt out of the container.

■■ You should always use one hand to hold the lid firmly in place while you work, but don’t place your hand over the filling opening! When you process hot ingredients in the jug, steam will escape through the filling opening in the lid.

WWRisk of suffocation!

Do not allow children to play with packaging material.

WWCaution!

■■ Check that there are no foreign objects in the blender jug. Do not insert objects (e.g. knives, spoons) into the jug. Only use the pusher provided with the lid on!

■■ We recommend that the appliance is never switched on for longer than is necessary to process the ingredients. Do not operate

at no-load.

WWImportant!

It is essential to clean the appliance thoroughly after each use or after it has not been used for an extended period. X “Cleaning and maintenance” see page 20

15

en


Contents


Congratulations on the purchase of


4 Lid


your new Bosch appliance. You can find

a Opening for pusher / for adding more

further information about our products

ingredients

on our website.


b Locking cap with scale

Contents


c Pusher


*Depending on the model

Intended use

14

Before using the appliance

Important safety information

14

Overview

16

for the first time

Before using the appliance


Before the new appliance can be used,

for the first time

16

Symbols and markings

16

it must be fully unpacked, cleaned and

checked.


Parts and operating controls

17


Caution!


Use


18


Automatic programmes

19

Never operate a damaged appliance!

Cleaning and maintenance

20

■■ Remove the base unit and all

Safety systems

21

accessories from the packaging and

Troubleshooting

21

dispose of all packing materials.

Recipes

22

■■ Check that all the parts are present and

Disposal

23

examine them for obvious damage.

Guarantee

23

X Fig. A


■■ Thoroughly clean and dry all parts

Overview


before using for the first time.


X “Cleaning and maintenance” see

X Fig. A


page 20


1 Base unit / Motor block


Symbols and markings


a

Cushion pad


b

Drive


Symbol

Meaning


c

Reset button (overload protection)


2

Control panel


Do not expose the blender


a

on/off switch


jug to temperatures above


b

Rotary selector with mark


80°C.


c

Status display (LED)


Warnings on the lid


d

min mark


e

max mark


■■ Do not use the appliance


f

Pulse button


unless this cover is


g

6 (3)* programme selection buttons


correctly attached


with LEDs


■■ Do not expose the blender

3

Blender jug


jug to temperatures above


a

Container made of Tritan


80°C


b

Scale


Warning on the motor block


c

Blender knife


■■ Do not operate without


d

Handle


the rubber pad


e

Handle cover (removable)


16

Parts and operating controls

High-speed motor block

The blender is equipped with a highspeed motor with a motor speed of up to

45000 revolutions per minute. This not only provides particularly fast and fine blending results but also makes it possible to heat food. Using the Soup automatic

programme, for example, a hot soup can be made from cold ingredients.

Note: At the max speed setting, the blender runs at the highest speed when using the Pulse button and with certain automatic programmes. In order to prevent unwanted heating of food, process the ingredients for a shorter time or at a lower speed.

on/off switch

To switch the appliance on and off.

Status display

To display the appliance status and as a mark for the zero setting of the rotary selector.

Display

Display lights up: appliance is switched on and ready for use

Display flashes:

––fault in the appliance

––Blender jug is not correctly positioned or has become detached

––Rotary selector not at zero setting when switched on

––after interruption of the power supply

––longer than 5½ minutes of continuous operation (manual mode)

Rotary selector

For continuous adjustment of the blender knife speed.

Settings

Zero setting (mark points to the status display) = standstill

min Lowest speed

max Highest speed

Parts and operating controls

en

Caution!

When the appliance automatically turns off after 5½ minutes of continuous operation at the max speed setting, only use the max speed setting for another 1-2 minutes at the most after turning the machine back on.

Otherwise, the food may heat up too much and damage the container.

Notes:

––The status display flashes if the rotary selector is not at the zero setting when switched on, if the blender jug has become detached, or if the electricity supply has been interrupted. Turn the rotary selector first to the zero setting and then continue.

––The rotary selector setting does not affect the use of the Pulse function.

Pulse button

For switching to the maximum speed for a short time. The appliance works at

maximum speed while the Pulse button is pressed.

Note: The function cannot be used while an automatic programme is running.

Programme selection buttons with LEDs

For selecting and starting automatic programmes. X “Automatic programmes” see page 19

All LEDs light up after switching on. The selected programme will start after pressing the button and the appliance will run automatically.

Blender jug

For processing up to 2 litres of food. The blender jug is made of Tritan. Tritan is an unbreakable plastic with no discernable taste or smell.

Caution!

Do not expose the blender jug to temperatures above 80°C.

Lid with locking cap

To securely close the blender jug during processing. To add chopped or liquid ingredients, turn the locking cap anticlockwise and remove.

17

en Use

Pusher

To push ingredients that either stick to the edge or do not blend well towards the

blender knife. To do so, turn the locking cap anticlockwise, remove and place the pusher into the opening. X “Using the pusher” see page 19

Safety systems

The appliance has various safety systems.

X “Safety systems” see page 21

Use

WWRisk of injury!

––Do not insert the mains plug until all preparations for working with the

appliance are complete and the blender jug has been correctly positioned on to the base unit.

––Never put your hand in the blender jug once it is in place, and always put the lid on before using the appliance.

Note: The appliance will only work if the blender jug has been correctly positioned.

X Fig. B

1.Place the base unit onto a stable and level work surface. Position the cushion pad on to the base unit, observing the

recess.

Important: Never attach the blender jug without the cushion pad.

2.Place the blender jug on to the cushion pad. Make sure the blender jug is firmly positioned on the appliance.

3.Put the desired ingredients into the blender jug.

4.Put the lid with the locking cap in place and press it firmly.

5.Turn the rotary selector in an anticlockwise direction as far as it will go

(zero setting).

6.Plug the mains plug into the mains.

Switch on the appliance with the on/off switch. All LEDs are lit.

7.Slowly turn the rotary switch clockwise until the desired speed is reached. The status LED lights up.

Note: Using the programme buttons

X “Automatic programmes” see page 19.

8.Process the ingredients until the desired consistency is achieved.

9.Turn the rotary selector in an anticlockwise direction as far as it will go (zero setting). Wait until the appliance comes to a standstill.

10.Switch off the appliance with the on/off switch. Disconnect the mains plug.

11.Remove the blender jug. Remove the lid.

12.Pour the blended food into another container.

Clean all parts. X “Cleaning and maintenance” see page 20

Adding more ingredients

X Fig. C

1.Turn the locking cap in an anticlockwise direction and remove.

2.Add more chopped or liquid ingredients through the opening, remembering to observe the maximum capacity.

3.Put on the locking cap and tighten it by turning in a clockwise direction.

4.Process the ingredients until the desired consistency is achieved.

X Fig. D

Adding larger quantities:

1.Turn the rotary selector in an anticlockwise direction as far as it will go (zero setting). Wait until the appliance comes to a standstill.

2.Switch off the appliance with the on/off switch. Disconnect the mains plug.

WWRisk of injury!

Never remove the lid while the appliance is plugged in.

3.Remove the lid.

4.Add the extra ingredients.

5.Replace the lid.

6.Plug the mains plug into the mains.

Switch on the appliance with the on/off switch. All LEDs are lit.

18

7.Slowly turn the rotary switch clockwise until the desired speed is reached. The status LED lights up.

8.Process the ingredients until the desired consistency is achieved.

Using the pusher

WWRisk of injury!

Never use the pusher without the lid attached!

X Fig. E

1.Turn the locking cap in an anticlockwise direction and remove.

2.Place the pusher provided into the opening.

3.Push the ingredients with the pusher towards the blender knife by guiding the pusher along the corners and sides of the blending jug.

4.Then remove the pusher again immediately. Put on the locking cap and tighten it by turning in a clockwise direction.

Note: Using the pusher can considerably improve the quality of the blending result.

Using the Pulse function

■■ With the appliance switched on, press the Pulse button down and hold.

■■ While the Pulse button is pressed, the appliance will run at maximum speed.

■■ Release the Pulse button. The appliance will start again with the previously selected speed.

Note: While an automatic programme is running, the Pulse function cannot be used.

Automatic programmes

The appliance has 6 (3)* automatic programmes (depending on the model).

After pressing the relevant button, the programme selected starts and processes the ingredients at preset speeds and processing times. The programme ends automatically after preparation.

Automatic programmes

en

The following programmes can be selected:

Programmes

Shake For fruit smoothies and milkshakes with fresh ingredients

Smoothie For green smoothies and fruit smoothies with frozen ingredients

Soup For preparing hot soups Ice cream* For ice cream and sorbets Sauce* For sauces and dips Cleaning* Cleaning programme

*Depending on the model

Caution!

When the automatic programme Soup has finished, do not restart the Soup programme. Otherwise, the food may heat up too much and damage the container.

Please note:

––Only use cold ingredients with the Soup automatic programme. If hot ingredients are added, the temperature increases too much.

––An automatic programme can only be started when the rotary selector is at the zero setting.

––An automatic programme can be ended at any time by repressing the relevant programme selection button or by switching off with the on/off switch.

An example

Making a pear smoothie

(recipe X “Pear smoothie” see page 22)

X Fig. F

1. Place the base unit onto a stable and level work surface. Position the cushion pad on to the base unit, observing the recess.

Important: Never attach the blender jug without the cushion pad.

2.Place the blender jug on to the cushion pad. Make sure the blender jug is firmly positioned on the appliance.

3.Put the desired ingredients into the blender jug.

19

en Cleaning and maintenance

4.Put the lid with the locking cap in place and press it firmly.

5.Turn the rotary selector in an anticlockwise direction as far as it will go

(zero setting).

6.Plug the mains plug into the mains.

Switch on the appliance with the on/off switch. All LEDs are lit.

7.Press the Shake programme selection button. The LED on the button lights up.

8.The appliance processes the ingredients automatically.

9.The appliance ends processing automatically. All LEDs are lit.

10.Switch off the appliance with the on/off switch. Disconnect the mains plug.

11.Remove the blender jug. Remove the lid.

12.Pour the finished fruit smoothie into glasses.

■■ Clean all parts. X “Cleaning and maintenance” see page 20

Cleaning and maintenance

The appliance and the individual parts used must be thoroughly cleaned after each use.

WWRisk of electric shock!

––Unplug the appliance before cleaning it.

––Never immerse the base unit in liquids and do not clean in the dishwasher.

––Do not use a steam cleaner.

WWRisk of injury!

Do not touch the blender blades with your bare hands. Use a brush.

Caution!

––Do not use any cleaning agents containing alcohol or spirits.

––Do not use any sharp, pointed or metal objects.

––Do not use abrasive cloths or cleaning agents.

Notes:

––Clean all parts immediately after use.

This will prevent residues from drying on and possibly attacking the plastic (e.g. essential oils in herbs).

––When processing food such as carrots, the plastic parts may become discoloured, but this can be removed with a few drops of cooking oil.

––To make cleaning the blender jug easier, remove the cover from the handle and replace once dry.

In Fig. G, you will find a summary of how to clean the individual parts.

“Cleaning” programme

For quick and easy cleaning.

■■ Attach the empty blender jug on to the appliance.

■■ Fill it with 1.25 litres of warm water and 2 drops of washing-up liquid.

■■ Put the lid with the locking cap in place and press it firmly.

■■ Switch the appliance on again and press the Cleaning programme selection button.

■■ The appliance runs through automatic pre-cleaning and ends the programme automatically.

■■ Switch off the appliance with the on/off switch. Disconnect the mains plug.

■■ Remove the blender jug, the lid with locking cap and the cushion pad.

■■ Rinse all parts thoroughly and clean again if necessary.

■■ Clean the base unit.

20

Safety systems

Start lock-out and automatic cut-out

The appliance can only be operated if the blender jug has been correctly positioned and if the rotary selector is turned to

the zero setting when switching on the appliance or after an interruption in the power supply. The appliance will switch off automatically if the blender jug becomes detached while it is running. The appliance automatically switches off in manual mode

(speed min max) after 5½ minutes of continuous operation. X “Troubleshooting” see page 21

Overload protection

The motor switches off automatically if the appliance overheats. X “Troubleshooting” see page 21

Note: When activating the overload protection, a slightly strange smell may occur. This is not a sign of malfunction.

Troubleshooting

WWRisk of injury!

Before dealing with any faults, unplug the mains plug.

Note: The appliance will no longer switch on if there is an error in appliance operation, if the electronic fuses trip or the

appliance has a defect. First try to eliminate the problem which has occurred with

the help of the following information.

Caution!

If a fault cannot be eliminated, please contact customer service.

Safety systems

en

Fault

Appliance fails to start up or switches off while in use. The status display flashes.

Possible causes

––Blender jug is not correctly positioned, has become detached or has been removed.

––Rotary selector was not at the zero setting when switching on or after an interruption in power.

––The appliance was operating continuously in manual mode (speed min max) for longer than 5½ minutes.

Remedy

■■ Switch off the appliance with the on/off switch.

■■ Position the blender jug correctly.

■■ Turn the rotary selector in an anticlockwise direction as far as it will go

(zero setting).

■■ Switch on the appliance with the on/off switch. The status display lights up.

Fault

Appliance fails to start up or switches off while in use.

Possible cause

The overload protection device is activated.

Remedy

■■ Turn the rotary selector in an anticlockwise direction as far as it will go

(zero setting).

■■ Switch off the appliance with the on/off switch. Disconnect the mains plug.

■■ Remove the blender jug.

■■ Leave the appliance to cool for approx.

15-20 minutes and then switch it on again.

■■ If the appliance does not start, turn the appliance upside down. Press the reset button on the bottom (X Fig. A - 1c).

■■ If the reset button is blocked, leave the appliance to cool again and try it again later.

21

en Recipes

Recipes

Notes:

––In Fig. H, you will find a table with other application examples. Clean and chop food before processing. Remove hard components such as cores and peel.

––The recipes and application examples can also be carried out without an automatic programme. To do this, use the rotary selector to increase the speed from min to max and blend all the ingredients until the desired consistency is reached.

Pear smoothie

––3 bananas

––3 pears

––Juice of two oranges (approx. 200 ml)

––100 ml cold water

■■ Cut the washed pears and the peeled bananas into pieces.

■■ Add the ingredients to the blender jug and put on the lid with the locking cap.

■■ Press the Shake button.

■■ After ending the automatic programme, serve the smoothie immediately.

Tip: Pears can differ greatly in taste depending on their variety. If you don’t have any sweet pears, a smoothie can be sweetened by adding two to four dates - these give it a very mild sweetness that harmonises perfectly with the rest of the ingredients.

Berry and honey smoothie

––400 g frozen raspberries / berry mixture

––1 banana

––500 ml milk

––3 tbsp lemon juice

––2 tbsp honey

■■ Let the raspberries / berry mixture thaw. ■■ Cut the peeled banana into pieces.

■■ Add the ingredients to the blender jug and put on the lid with the locking cap.

■■ Press the Smoothie button.

■■ After ending the automatic programme, serve the smoothie immediately.

Fresh fruit-ginger smoothie

––4 handfuls corn salad

––2 pears

––2 bananas

––1 piece fresh ginger, (approx. 15 g)

––10 ice cubes

––200 ml cold water

■■ Wash the corn salad thoroughly.

■■ Cut the washed pears and the peeled bananas into pieces.

■■ Peel the ginger.

■■ Add the ingredients to the blender jug and put on the lid with the locking cap.

■■ Press the Smoothie button.

■■ After ending the automatic programme, serve the smoothie immediately.

Raspberry ice cream

––1 untreated lemon

––150 g full-fat yoghurt

––150 g icing sugar

––600 g frozen blueberries

––150 ml cold whole milk

■■ Add the ingredients to the blender jug and put on the lid with the locking cap.

■■ Depending on the model: Press the

Ice Cream button and run the automatic programme.

■■ Or: Increase the speed slowly with the rotary selector and blend all the ingredients until a creamy consistency has been achieved.

■■ Pour the ice cream into another container and put it into the freezer for a while if a firmer consistency is desired.

Tip: The ice cream can also be made with other frozen berries (e.g. raspberries, strawberries or berry mixtures).

22

Green sauce

––One bunch each of parsley, borage, sorrel, salad burnet, cress, chervil, chives

––2 tbsp water

––460 g crème fraîche

––230 g sour cream

––1 tsp mustard

––3 tbsp oil (e.g. walnut oil)

––1 tbsp vinegar or lemon juice

––Salt and pepper

■■ Wash and dry the herbs, remove the hard stalks.

■■ Add the ingredients to the blender jug and put on the lid with the locking cap.

■■ Depending on the model: Press the

Sauce button and run the automatic programme.

■■ Or: Increase the speed slowly with the rotary selector and blend all the ingredients until a creamy consistency has been achieved.

■■ Season the sauce and put in the fridge.

Tip: The sauce is a perfect accompaniment to boiled eggs, potatoes and vegetables.

Pancake mixture

––300 ml milk

––100 g flour

––2 small eggs

––1 pinch salt

––1 tsp oil (e.g. sunflower oil)

■■ Add the ingredients to the blender jug and put on the lid with the locking cap.

■■ Set the rotary selector to max and blend all the ingredients for 30-60 seconds.

■■ Pour the pancake mixture in portions into a hot and greased pan and fry.

Disposal en

Tomato soup

––750 g fresh tomatoes or tinned tomatoes

––2 red peppers

––90 g cashew nuts

––6 basil leaves

––Salt and pepper

■■ Wash the fresh tomatoes and remove the thick stem.

■■ Add the ingredients to the blender jug and put on the lid with the locking cap.

■■ Press the Soup button and run the automatic programme.

■■ After ending the automatic programme, season the hot soup and serve.

Note: If the soup is not hot enough once the automatic programme has finished, turn the rotary selector to max and mix for another 1-2 minutes at the most.

Disposal

Dispose of packaging in an environ­

J mentally­friendly manner. This appliance is labelled in accordance with European Directive 2012/19/EU concerning used electrical and electronic appliances (waste electrical and electronic equipment – WEEE). The guideline determines the frame­ work for the return and recycling

of used appliances as applicable throughout the EU. Please ask your specialist retailer about current disposal facilities.

Guarantee

The guarantee conditions for this appliance are as defined by our representative in the country in which it is sold. Details regarding these conditions can be obtained from the dealer from whom the appliance was purchased. The bill of sale or receipt must be produced when making any claim under the terms of this guarantee.

Changes reserved.

23

fr Conformité d’utilisation

Conformité d’utilisation

Cet appareil est destiné exclusivement à une utilisation domestique et non professionnelle. Utiliser cet appareil uniquement

pour des quantités de préparations culinaires courantes

et pour des durées de service normales. Ne pas dépasser les quantités maximales admissibles (voir « Recettes ») !

Cet appareil convient pour mélanger les produits alimentaires liquides et mi-solides, pour broyer / hacher les fruits et légumes crus, pour réduire les préparations en purée et pour broyer les produits alimentaires surgelés (les fruits par exemple) ou les glaçons. L’appareil ne doit pas servir à transformer d’autres substances ou objets.

N’utiliser l’appareil que dans des pièces intérieures à température ambiante et jusqu’à 2 000 m au-dessus du niveau de la mer.

Consignes de sécurité importantes

Lire attentivement cette notice d’utilisation. Respecter les instructions qu’elle contient et la ranger soigneusement ! Si l’appareil change de propriétaire, lui remettre cette notice.

Le non-respect des instructions permettant d’utiliser correctement l’appareil dégage le fabricant de toute responsabilité envers les dommages qui pourraient en résulter.

Cet appareil peut être utilisé par des personnes aux capacités physiques, sensorielles ou mentales réduites ou des personnes inexpérimentées, à condition qu’elles soient surveillées ou qu’elles aient été informées de l’utilisation sûre de l’appareil et qu’elles comprennent les risques inhérents à son usage. Il faut tenir les enfants à l’écart de l’appareil et du cordon de branchement et ne pas leur permettre d’utiliser l’appareil. Ne pas laisser les enfants jouer avec l’appareil. Le nettoyage et l’entretien incombant à l’utilisateur ne doivent pas être effectués par des enfants.

WWRisque de chocs électriques et d’incendie !

■■ Ne brancher et n’utiliser l’appareil que conformément aux indications figurant sur la plaque signalétique. N’utiliser l’appareil que si son cordon d’alimentation et l’appareil lui-même ne présentent aucun dommage. Afin d’écarter tout danger, seul notre service après-vente est habilité à réparer l’appareil, comme par exemple, procéder au remplacement d’un cordon d’alimentation endommagé.

■■ Ne jamais raccorder l’appareil à des minuteries ou à des prises pouvant être commandées à distance. Surveiller toujours l’appareil pendant son fonctionnement !

24

Consignes de sécurité importantes

fr

■■ Ne jamais poser l’appareil sur des surfaces chaudes (tables de cuisson par ex.) ou à proximité de celles-ci. Ne pas mettre le cordon d’alimentation en contact avec des éléments brûlants et ne pas le faire glisser sur des arêtes vives.

■■ Ne jamais plonger l’appareil de base dans l’eau ou le mettre dans un lave-vaisselle. Ne jamais utiliser de nettoyeur à vapeur. Ne pas utiliser l’appareil avec les mains humides.

■■ L’appareil doit toujours être débranché du secteur, après chaque utilisation, lorsqu’il n’est pas sous surveillance, lorsqu’il doit être monté ou démonté, avant de le nettoyer et en cas de panne.

WWRisques de blessures !

■■ L’appareil doit être éteint et débranché du secteur avant de procéder au changement d’accessoires ou de pièces complémentaires mobiles en fonctionnement.

■■ Ne jamais introduire les doigts dans le mixeur en place ! Ne jamais exploiter l’appareil sans couvercle.

■■ Attention lors de la manipulation des lames acérées pendant le vidage du récipient et son nettoyage.

■■ Avant extinction de l’appareil, tourner impérativement le sélecteur rotatif dans le sens inverse des aiguilles d’une montre jusqu’en butée (position zéro).

■■ Après extinction de l’appareil, son moteur continue de tourner brièvement. Attendre l’arrêt complet de l’entraînement.

■■ Utiliser l’appareil uniquement à l’état entièrement assemblé.

WWRisque de brûlures !

■■ Attention lors du versement de liquides très chauds dans l’appareil. La formation de vapeur risque de faire jaillir subitement le liquide hors de l’appareil.

■■ Pendant le travail, toujours tenir fermement le couvercle d’une main. Ce faisant, ne jamais introduire les doigts dans l’orifice d’ajout ! Lors du traitement d’aliments très chauds, de la vapeur s’échappe par l’orifice d’ajout situé dans le couvercle.

WWRisque d’asphyxie !

Ne jamais laisser les enfants jouer avec les emballages.

WWAttention !

■■ Veiller à ce qu’aucun corps étranger ne se trouve dans le bol mixeur. Ne pas introduire d’objets (p. ex. couteau, cuillère) dans le bol mixeur. Utiliser exclusivement le pilon poussoir fourni !

■■ Ne jamais laisser l’appareil allumé plus longtemps que nécessaire au traitement des produits alimentaires. Ne pas faire tourner l’appareil à vide.

25

fr Consignes de sécurité importantes

WWImportant !

Nettoyer soigneusement l’appareil après chaque utilisation ou après une longue durée sans utilisation. X « Nettoyage et entretien » voir page 31

Vous venez d’acheter ce nouvel appareil Bosch et nous vous en félicitons cordialement. Sur notre site web, vous trouverez plus informations sur nos produits.

Sommaire

Conformité d’utilisation 24

Consignes de sécurité importantes 24 Vue d’ensemble 26

Avant la première utilisation 27 Symboles et repères 27

Pièces et éléments de commande 27 Utilisation 28 Programmes automatiques 30 Nettoyage et entretien 31 Systèmes de sécurité 31 Problèmes et solutions 32 Recettes 32 Mise au rebut 34 Garantie 34

Vue d’ensemble

X Figure A

1Appareil de base / bloc-moteur a Support amortisseur

b Entraînement

c Touche de réinitialisation

(protection contre la surcharge)

2Bandeau de commande

a Interrupteur Marche/Arrêt « on/off » b Sélecteur rotatif avec repère

cAffichage de statut (LED)

dRepère min

eRepère max

fTouche Pulse

g6 (3)* touches de sélection du

programme avec LED

3Bol mixeur

a Récipient en Tritan b Échelle

c Lame du mixeur d Poignée

e Couvercle de la poignée (amovible)

4Couvercle

a Orifice pour le pilon poussoir / l’ajout b Bouchon gradué

c Pilon poussoir

* Selon le modèle

26

Avant la première utilisation

Avant de pouvoir utiliser le nouvel appareil, le déballer complètement, le nettoyer et le contrôler.

Attention !

Ne jamais mettre en service un appareil endommagé !

■■ Sortir l’appareil de base ainsi que tous les accessoires de l’emballage et retirer les éventuels restes d’emballage.

■■ Contrôler l’intégrité des pièces et vérifier qu’elles ne présentent pas de dommage visible. X Figure A

■■ Avant de les utiliser pour la première fois, nettoyer et sécher soigneusement toutes les pièces. X « Nettoyage et entretien » voir page 31

Symboles et repères

Symbole Signification

N'exposez pas le bol mixeur à des températures

supérieures à 80°C.

Avertissements sur le couvercle

■■ Ne faites pas fonctionner l'appareil si ce couvercle n'est pas correctement en

place

■■ N’exposez pas le bol mixeur à des températures supérieures à 80°C

Avertissement sur le bloc-moteur

■■ Ne pas utiliser sans support amortisseur

Avant la première utilisation

fr

Pièces et éléments de commande

Bloc-moteur grande vitesse

Le mixeur est doté d’un moteur grande vitesse fournissant une rotation maximale de 45000 tours/minute. Ceci ne permet pas seulement un mixage particulièrement rapide et fin, mais aussi la cuisson des aliments. Le programme automatique Soup, par exemple, permet la préparation d’une soupe chaude à partir d’ingrédients froids.

Remarque : avec le réglage max de la vitesse, l’utilisation de la touche Pulse et certains programmes automatiques, le mixeur tourne à vitesse maximale. Pour éviter que les aliments ne cuisent, les mixer brièvement ou à vitesse réduite.

Interrupteur Marche/Arrêt « on/off »

Pour la mise en marche et l’arrêt de l’appareil.

Voyant d’état

Pour l’indication de l’état de l’appareil et en tant que repère pour la position zéro du sélecteur rotatif.

État

Voyant allumé : l’appareil est sous tension et prêt à fonctionner

Voyant clignote :

––Défaut au niveau de l’appareil

––Le bol mixeur n’est pas posé correctement ou s’est détaché

––Sélecteur rotatif pas en position zéro lors de la mise en marche

––Après une coupure de la tension d’alimentation

––plus longtemps que 5½ minutes en marche continue (mode manuel)

27

fr Utilisation

Sélecteur rotatif

Pour le réglage progressif de la vitesse de rotation des lames du mixeur.

Réglages

Position zéro (repère de départ) = arrêt

min Vitesse la plus basse

max Vitesse la plus élevée

Attention !

Si l’appareil s’arrête automatiquement au bout de 5½ minutes de fonctionnement continu sur le réglage de vitesse max, ne pas utiliser le réglage max pendant plus de 1 à 2 minutes après la remise en marche car les aliments pourraient trop chauffer et endommager le récipient.

Remarques :

––Si le sélecteur rotatif ne se trouve pas en position zéro lors de la mise en marche de l’appareil, si le bol mixeur s’est détaché ou si l’alimentation a été interrompue, le voyant d’état clignote. Tourner d’abord le sélecteur rotatif en position zéro, puis poursuivre.

––Le réglage du sélecteur rotatif n’a aucune influence en cas d’utilisation de la fonction Pulse.

Touche Pulse

Pour un fonctionnement bref à vitesse maximale. L’appareil travaille à vitesse maximale tant que la touche Pulse est actionnée.

Remarque : la fonction ne peut pas être activée lorsqu’un programme automatique est en cours.

Touches de sélection du programme avec LED

Pour la sélection et le lancement des programmes automatiques.

X « Programmes automatiques » voir page 30

Après la mise en marche, toutes les LED s’allument. Le programme

sélectionné est lancé par actionnement d’une touche, l’appareil fonctionne alors automatiquement.

Bol mixeur

Pour le traitement de max. 2 litres d’aliments. Le bol mixeur est fabriqué en Tritan. Le Tritan est un plastique incassable, sans odeur ni goût.

Attention !

N’exposez pas le bol mixeur à des températures supérieures à 80°C.

Couvercle avec bouchon avec système de vérouillage

Pour une utilisation en toute sécurité du bol mixeur en cours de fonctionnement. Pour ajouter des ingrédients broyés ou liquides, tourner le bouchon dans le sens inverse des aiguilles d’une montre et le retirer.

Pilon poussoir

Pour pousser vers les lames les ingrédients qui collent aux parois ou ont du mal à

se mixer. Pour cela, tourner le bouchon dans le sens inverse des aiguilles d’une montre et insérer le pilon poussoir dans l’orifice. X « Utiliser le pilon poussoir » voir page 29

Systèmes de sécurité

L’appareil possède différents systèmes de sécurité. X « Systèmes de sécurité » voir page 31

Utilisation

WWRisques de blessures !

––Ne brancher la fiche secteur qu’une fois tous les préparatifs sur l’appareil achevés et que le bol mixeur est placé correctement sur l’appareil de base.

––Ne jamais mettre les mains dans le bol mixeur. L’utiliser uniquement avec son couvercle mis en place.

Remarque : l’appareil fonctionne uniquement quand le bol mixeur est placé correctement.

X Figure B

1.Poser l’appareil de base sur un plan de travail stable et horizontal. Placer le support amortisseur sur l’appareil de base en respectant la forme d’encastrement.

28

Important : ne jamais mettre le bol mixeur en place sans son support amortisseur.

2.Mettre le bol mixeur en place sur le support amortisseur. Veiller à ce que le bol mixeur soit fixé fermement sur l’appareil.

3.Verser les ingrédients souhaités dans le bol-mixeur.

4.Mettre le couvercle et le bouchon en place et appuyer.

5.Tourner le sélecteur rotatif dans le sens inverse des aiguilles d’une montre jusqu’en butée (position zéro).

6.Brancher la fiche dans la prise de courant. Mettre l’appareil sous tension avec l’interrupteur Marche/Arrêt. Toutes les LED s’allument.

7.Tourner le sélecteur rotatif lentement dans le sens des aiguilles d’une montre jusqu’à atteindre la vitesse souhaitée.

Le voyant d’état s’allume.

Remarque : utilisation des touches de sélection du programme X « Programmes automatiques » voir page 30.

8.Travailler les ingrédients jusqu’à avoir atteint la consistance souhaitée.

9.Tourner le sélecteur rotatif dans le sens inverse des aiguilles d’une montre jusqu’en butée (position zéro). Attendre que l’appareil se soit immobilisé.

10.Éteindre l’appareil avec l’interrupteur

Marche/Arrêt. Débrancher la fiche de la prise de courant.

11.Retirer le bol mixeur. Retirer le couvercle.

12.Verser les ingrédients mixés dans un autre récipient.

Nettoyer toutes les pièces. X « Nettoyage et entretien » voir page 31

Rajouter des ingrédients

X Figure C

1.Tourner le bouchon dans le sens inverse des aiguilles d’une montre et le retirer.

2.Ajouter les aliments broyés ou liquides par l’orifice. Toujours respecter la contenance maximale.

3.Mettre le bouchon en place et le tourner dans le sens des aiguilles d’une montre.

Utilisation fr

4.Travailler les ingrédients jusqu’à avoir atteint la consistance souhaitée.

X Figure D

Pour l’ajout de grandes quantités :

1.Tourner le sélecteur rotatif dans le sens inverse des aiguilles d’une montre jusqu’en butée (position zéro). Attendre que l’appareil se soit immobilisé.

2.Éteindre l’appareil avec l’interrupteur

Marche/Arrêt. Débrancher la fiche de la prise de courant.

WWRisques de blessures !

Ne jamais retirer le couvercle lorsque l’appareil est branché.

3.Retirer le couvercle.

4.Rajouter des ingrédients.

5.Remettre le couvercle en place.

6.Brancher la fiche dans la prise de courant. Mettre l’appareil sous tension avec l’interrupteur Marche/Arrêt. Toutes les LED s’allument.

7.Tourner le sélecteur rotatif lentement dans le sens des aiguilles d’une montre jusqu’à atteindre la vitesse souhaitée. Le voyant d’état s’allume.

8.Travailler les ingrédients jusqu’à avoir atteint la consistance souhaitée.

Utiliser le pilon poussoir

WWRisques de blessures !

Ne jamais utiliser le pilon poussoir sans couvercle !

X Figure E

1.Tourner le bouchon dans le sens inverse des aiguilles d’une montre et le retirer.

2.Insérer le pilon poussoir fourni dans l’orifice.

3.Pousser les ingrédients avec le pilon poussoir en direction de la lame. Pour cela, faire glisser le pilon poussoir dans les coins et le long des parois du bol mixeur.

4.Ensuite, retirer le pilon poussoir. Mettre le bouchon en place et le tourner dans le sens des aiguilles d’une montre.

Remarque : l’utilisation du pilon poussoir peut améliorer considérablement le résultat de mixage.

29

fr Programmes automatiques

Utiliser la fonction Pulse

■■ Mettre l’appareil en marche, presser la touche Pulse vers le bas et la maintenir dans cette position.

■■ L’appareil tourne à vitesse maximale tant que la touche Pulse est maintenue appuyée.

■■ Relâcher la touche Pulse. L’appareil fonctionne de nouveau à la vitesse préalablement sélectionnée.

Remarque : lorsqu’un programme automatique est en cours, la fonction Pulse ne peut pas être utilisée.

Programmes automatiques

L’appareil dispose de 6 (3)* programmes automatiques (selon le modèle). Une fois la touche correspondante actionnée, le programme sélectionné démarre et traite les ingrédients avec la vitesse

et la durée préréglées. Le programme s’arrête automatiquement, une fois la préparation finie.

Les programmes suivants peuvent être sélectionnés :

Programmes

Shake Pour la préparation de smoothies et milkshakes

à base de fruits frais

Smoothie Pour la préparation de smoothies verts et aux fruits

à base d’ingrédients surgelés

Soup Pour la préparation de soupes chaudes

Ice Cream* Pour la préparation de glaces et sorbets

Sauce* Pour la préparation de sauces chaudes et froides

Cleaning* Programme de nettoyage

* Selon le modèle

Attention !

À la fin du programme automatique Soup, ne pas redémarrer immédiatement le programme Soup car les aliments pourraient trop chauffer et endommager le récipient.

Remarques :

––Utiliser le programme automatique

Soup uniquement avec des ingrédients froids. Si des ingrédients chauds sont utilisés, la température augmente trop fortement.

––Un programme automatique ne peut

être lancé que lorsque le sélecteur rotatif se trouve en position zéro.

––Le programme automatique peut être interrompu à tout moment par une nouvelle pression sur la touche de sélection du programme correspondante ou par arrêt de l’appareil par le biais de l’interrupteur Marche/Arrêt.

Un exemple

Préparation d’un smoothie à la poire

(recette X « Smoothie aux poires » voir page 33)

X Figure F

1.Poser l’appareil de base sur un plan de travail stable et horizontal. Placer le support amortisseur sur l’appareil

de base en respectant la forme d’encastrement.

Important : ne jamais mettre le bol mixeur en place sans son support amortisseur.

2.Mettre le bol mixeur en place sur le support amortisseur. Veiller à ce que le bol mixeur soit fixé fermement sur l’appareil.

3.Verser les ingrédients souhaités dans le bol-mixeur.

4.Mettre le couvercle et le bouchon en place et appuyer.

5.Tourner le sélecteur rotatif dans le sens inverse des aiguilles d’une montre jusqu’en butée (position zéro).

6.Brancher la fiche dans la prise de courant. Mettre l’appareil sous tension avec l’interrupteur Marche/Arrêt. Toutes les LED s’allument.

7.Appuyer sur la touche de sélection du programme Shake. La LED de la touche correspondante s’allume.

8.L’appareil traite les ingrédients automatiquement.

30

Loading...
+ 168 hidden pages