

Page 1
LS 181
Page 2

Page 3
LS 1281
Page 4
LS 181
3
Page 5
LS 181
4
Page 6
LS 181
5
Page 7
LS 181
6
Page 8
LS 181
7
Page 9
LS 181
8
Page 10
Page 11
LS 181
10
Page 12

LS 181
11
Page 13
LS 181
12
Page 14
Page 15
LS 181
14
Page 16
LS 181
15
Page 17
LS 181
16
Page 18

LS 181
17
Page 19

LS 181
18
Page 20

LS 181
19
Page 21

LS 181
20
Page 22

LS 181
21
Page 23

LS 181
22
Page 24

LS 181
23
Page 25

LS 181
24
Page 26

LS 181
25
Page 27

LS 181
26
Page 28

LS 181
27
Page 29

LS 181
28
Page 30

LS 181
29
Page 31

LS 181
30
Page 32

LS 181
31
Page 33

LS 181
32
Page 34

Page 35

Page 36

LS 181
Important Safety Instructions
Important Safety Instructions
Caution:
To reduce the risk of electric shock, do not dismantle the product and do not expose the
apparatus to rain or moisture. No user serviceable parts inside.Refer servicing to
qualified personnel only.
Explanation of Graphical Symbols:
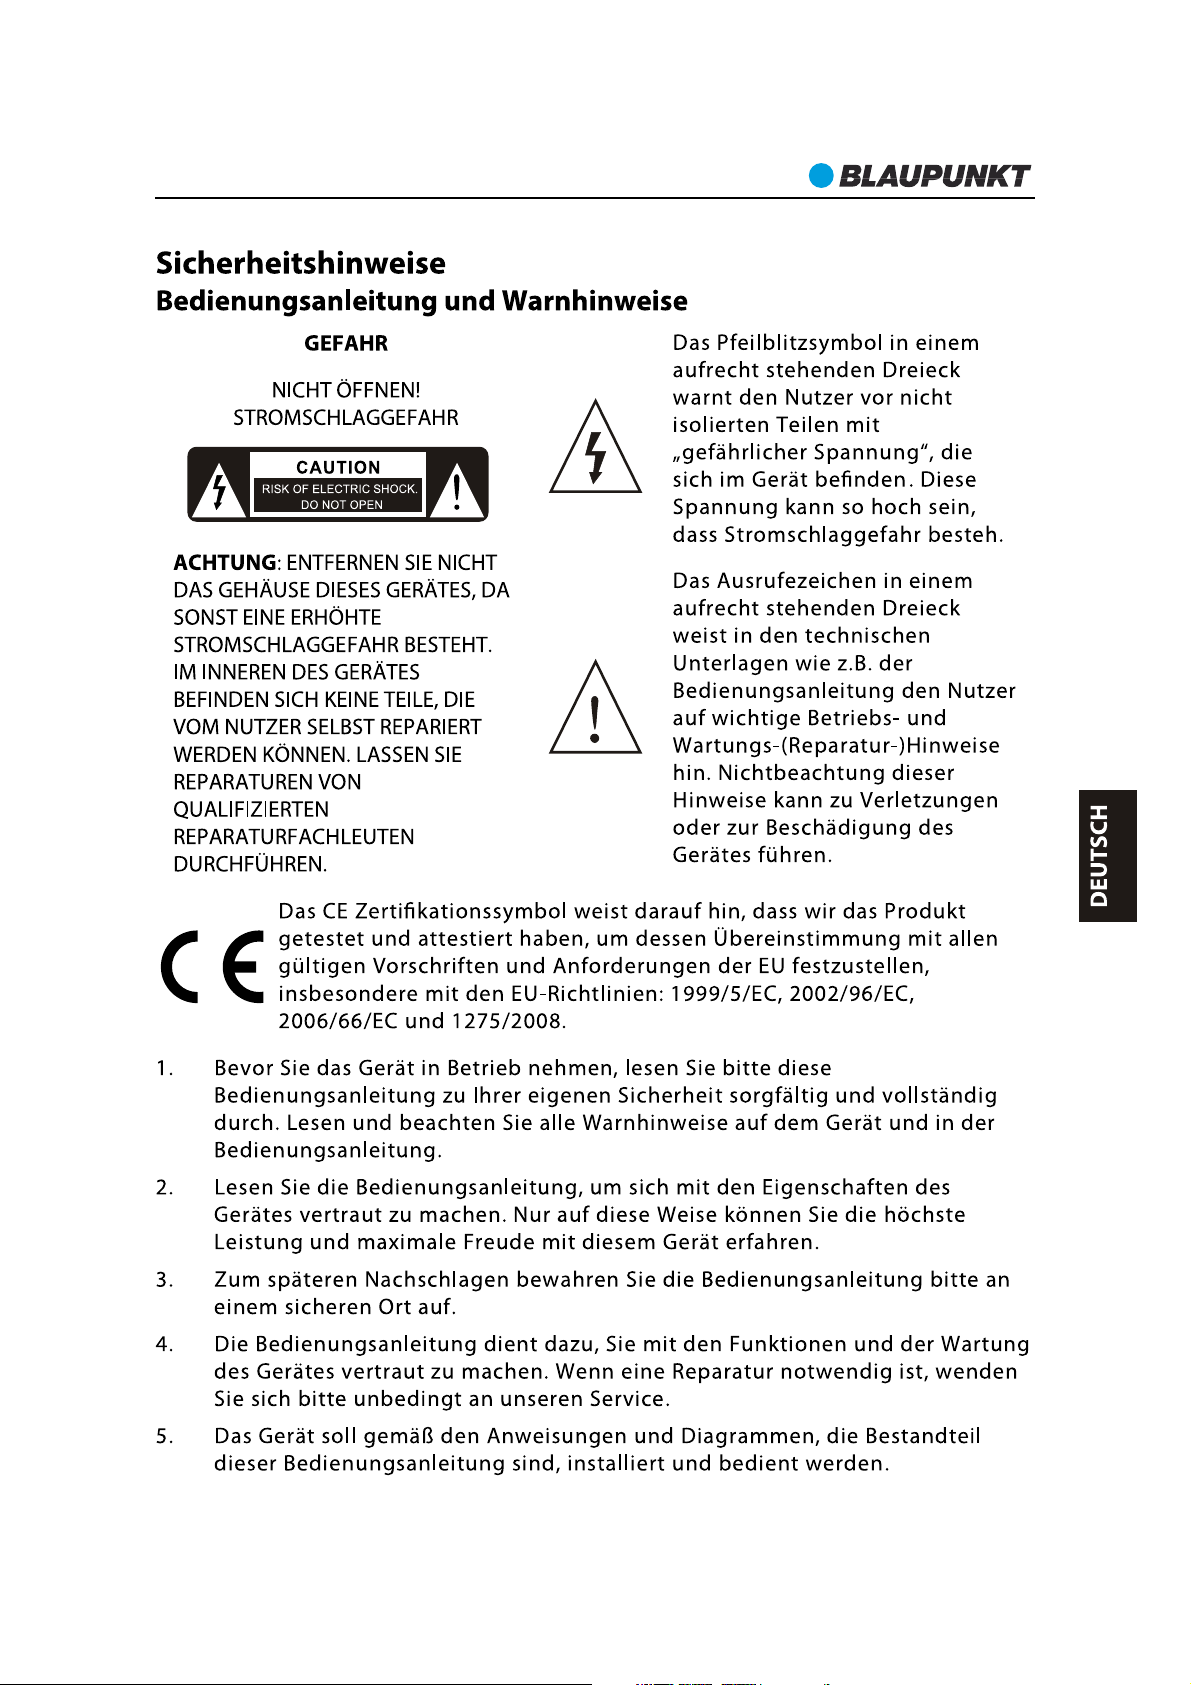
The lightning flash within an equilateral triangle is intended to alert you to the
presence of uninsulated dangerous voltage within the product's enclosurethat
may be of sufficient magnitude to constitutean electric shock to a person or
persons.
The exclamation point within an equilateral triangle is intended to alert you to
the presence of important operating and maintenance (servicing) instructions
in the literature accompanyingthe product.
To achieve the utmost in enjoyment and performance, and in order tobecome familiar with its
features, please read this manual carefully before attempting to operate this product.This will
assure you yearsof troublefree performance and listening pleasure.
Important Notes
This safety and operating instruction should be retained for future reference.
The apparatus should not be exposed to dripping or splashing or placed in a humid
atmosphere such as a bathroom.
¡Do not install the product in the following areas:
¡Places exposed to direct sunlight or close to radiators.
¡On top of other stereo equipment that radiate too much heat.
¡Blocking ventilation or in a dusty area.
¡Areas where thereis constant vibration.
¡Humid or moist places.
Do not place nearcandles or other naked flames.
Operate the product only as instructed in this manual.
Before turning on the powerfor the first time, make sure the power adaptoris properly
connected.
For safety reasons, donot removeany covers or attempt to gain accessto the inside of the
product. Refer any servicing to qualified personnel.
Do not attempt to removeany screws, or open the casing of the unit; there are no user
serviceable parts inside. Refer all servicing to qualified service personnel.
35
Page 37

Page 38

LS 181
11.
Heat The product should be situated away from heat sources such as radiators,
heat registers, stoves, or other products, including amplifiers that produceheat. No
naked flame sources, such as lighted candles, should be placed on the apparatus.
12.
Waterand moisture To reduce the risk of fire or electric shock, do not expose the
product to train, dripping, splashing or excessive moisture such as in a sauna or
bathroom. Do not use this product near water, for example,near a bathtub,
washbowl, kitchen sink, laundry tub, in a wet basement or near a swimming pool (or
similar).
Object and Liquid Entry Never push objects of any kind into this product through
13.
openings, as they may touch dangerousvoltage points or short circuit parts that
could result in a fire or electric shock. Never spill liquid of any kind on the product.
Do not place any object containing liquid on topof the product.
Cleaning Unplug the product from the wall outlet before cleaning. Dust in the
14.
woofer may be cleaned with a dry cloth. If you wish to use an aerosol cleaning spray,
do not spray directly on the cabinet; spray ontothe cloth. Be careful not to damage
the drive units.
15.
Attachments Do not use attachments not recommended by the product
manufacturer, as they may cause hazards.
16.
Accessories Do not place this product on an unstable cart, stand, tripod, bracket
or table.The product mayfall, causing serious injury to a child or adult, and serious
damage to the product. Use only with a cart, stand, tripod, bracket or table
recommended by the manufacturer or sold with the product. Any mounting of the
product should follow the manufacturer’s instructions and should use a mounting
accessory recommended by the manufacturer.
Moving the product A product and cart combinationshould be movedwith care.
17.
Quick stops, excessiveforce and uneven surfaces may cause the product and cart
combination to overturn.
Unused periods The powercord of the appliance should be unplugged from the
18.
outlet during lightning storms or when the apparatus is left unused for a long
period of time.
19.
Servicing Do not attempt to service this product yourself, as opening or removing
covers may expose youto dangerous voltage or other hazards. Refer all servicing to
qualified service personnel.
Please remove the powerplug form the main power source or wallpower source
20.
when not in use.When plugged in to a power source, the system is in standby mode,
so the power is not entirely cut off.
Replacement parts When replacement parts are required, ensure that the service
21.
technician has used replacement parts specified by the manufacturer or have the
same characteristics as the original part. Unauthorized substitutions may result in
fire, electric shock or other hazards.
Mains fuses For continued protection against fire hazard,use fuses only of the
22.
correct type and rating.The correct fuse specification for each voltage range is
marked on the product.
Do not turn up the volume while listening to a section with very low level inputs or
23.
no audio signals. If you do, the speaker may be damaged when a
suddenly played.
is
peak level section
37
Page 39

LS 181
The only means of completely disconnecting the product fromthe power supply is
24.
by removing the powercord fromthe wall outlet or the product.The wall outlet or
the power cord entry to the product must remainfreely accessible at all times while
the product is in use.
Try to install the product near a wall socket or extension cord and shall be easily
25.
accessible.
26.
The highest environmental temperaturesuitable for this product is 35°C.
ESD hints The normal function of the product maybe disturbed by strongElectro
27.
Magnetic Interference. If so, simply resetthe product to resume normal operation
by following the instruction manual. In case the function could not resume, please
use the product in other location.
Battery
28.
1).
The batteries must not be exposed to excessive heat such as sunshine, fire or
the like.
The batteries should be drawn to the environmental aspects of battery
2).
disposal.
3).
Battery usage CAUTION to prevent battery leakage which may result in body
injuries, property damage, or damage to the apparatus:
Install all batteries correctly, + and – as marked on the apparatus.
Do not mix batteries (old and new or carbon and alkaline, etc.)
Remove batteries when the unit is not used for a long time.
ERP2 - (Energy Related Products) note
This product with ecodesign complies with the stage 2 requirements of Commission
Regulation (EC) NO. 1275/2008 implementing Directive 2009/125/EC regard tostandby
and off mode electric power consumption of electronic household and office equipment.
After 60 minutes without any audio input, the device will automatically switch into
standby mode. Follow up the instruction manual to resume the operation.
Important note:
This device is equipped with an energy saving mode: if no signal is given during 60
minutes the device will switch automatically into standby mode in orderto saveenergy
(ERP 2 standard). Please note that low volume setting in the audio source may be
recognized as“no audiosignal”: this will affect the capability of signal detection from the
device and can also originate an automatic switch into standby mode. If this happens
please reactivate the audio signal transmission or increase the volume setting on the
audio source player (MP3 player, etc.), in orderto resume playback. Please contact the
local service center if the problem remains.
The Bluetooth® word mark and logos are registered trademarks owned by Bluetooth SIG,
Inc. and any use of such marks by us is under license.Other trademarks and trade names
are those of their respective owners.
38
Page 40

LS 181
Warning
This appliance is not intended foruse by persons (including children) with reduced
physical sensory or mental capabilities, or lack of experience and knowledge, unless they
have been given supervision or instruction concerning use of the appliance by a person
responsible for their safety. Children should be supervised to ensure that they do not play
with the appliance.
1.
To prevent possible hearing damage, do not listen at high volume levels for long
time periods respectively a sudden high volume level.
2.
Never use the device unsupervised! Switch off the device whenever you are not
using it, even if this only for a short while.
The appliance is not intended to be operated by means of an external timer or
3.
separate remote control system.
If the supply cord is damaged, it must be replaced bythe manufacturer, its service
4.
agent or similarly qualified persons in order to avoid a hazard.
5.
Before operating this system, check the voltage of this system to see if it is identical
to the voltage of your local power supply.
The unit should not be impeded by covering the ventilation opening with items
6.
such as newspaper, table cloths, curtains etc. Make sure that there are at least 20
cm of space above and at least 5 cm of space on each side of the unit.
The apparatus must not be exposed to dripping or splashing and that objects filled
7.
with liquids, such as vases, must not be placed on the apparatus.
To prevent fire or shock hazard, do not expose this equipment to hot places, rain,
8.
moisture or dust.
Do not locate this unit near any water sources e.g. taps, bathtubs, washing
9.
machines or swimming pools. Ensure that youplace the unit on a dry, stable
surface.
10.
Do not place this unit close to a strong magnetic field.
Do not place the unit on a amplifier or receiver.
11.
12.
Do not place this unit in a damp area as the moisture will affect the life of electric
components.
13.
If the system is brought directly from a cold to a warm location, or is placed in a very
damp room, moisture may condenseon the lens inside the player. If this occurs, the
system will not operate properly. Please leave the system turned on for about an
hour until the moisture evaporates.
Do not attempt to clean the unit with chemical solvents as this might damage the
14.
finish. Wipewith a clean, dry or slightly damp cloth.
When removing the power plug from the wall outlet, always pull directly on the
15.
plug, never pull on the cord.
The mains plug is used as the disconnect device,the disconnect device must
16.
remain readily operable.
39
Page 41

LS 181
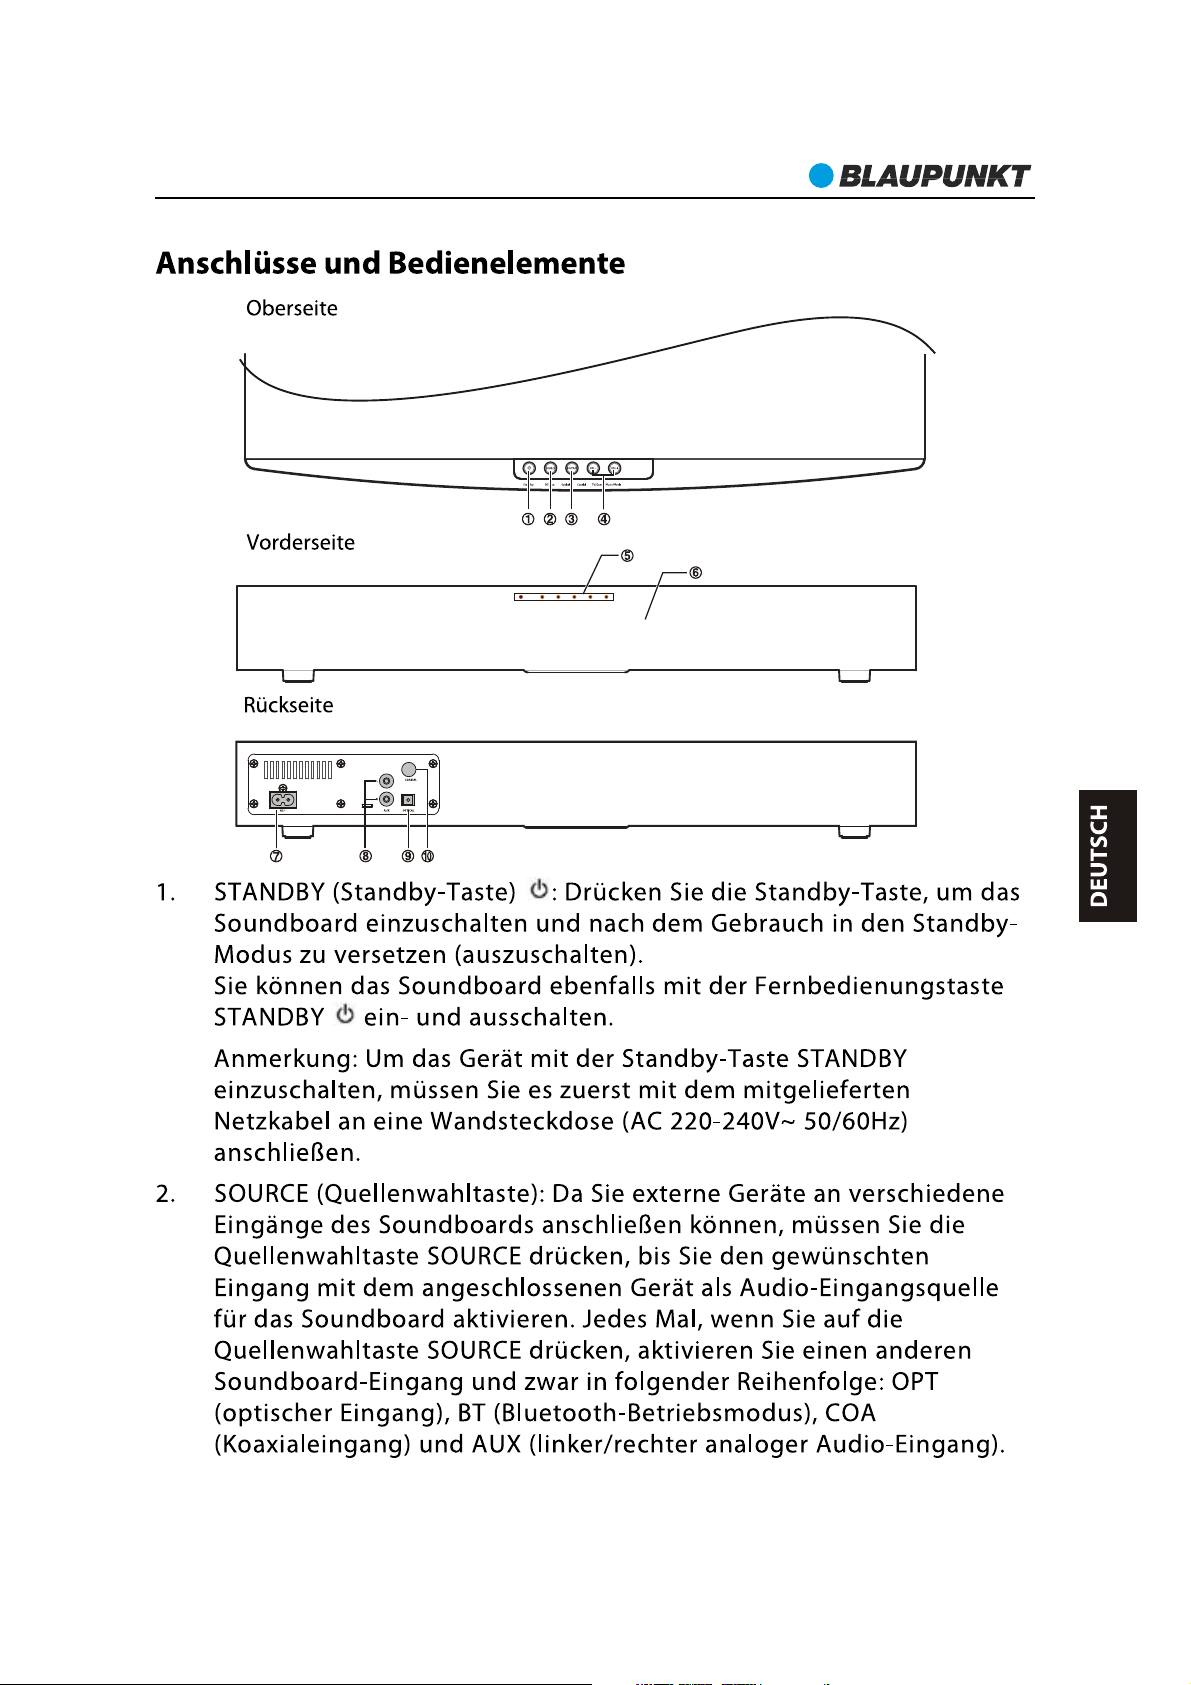
IDENTIFYINGTHE PARTS
Main Unit
Top view
Front view
Back view
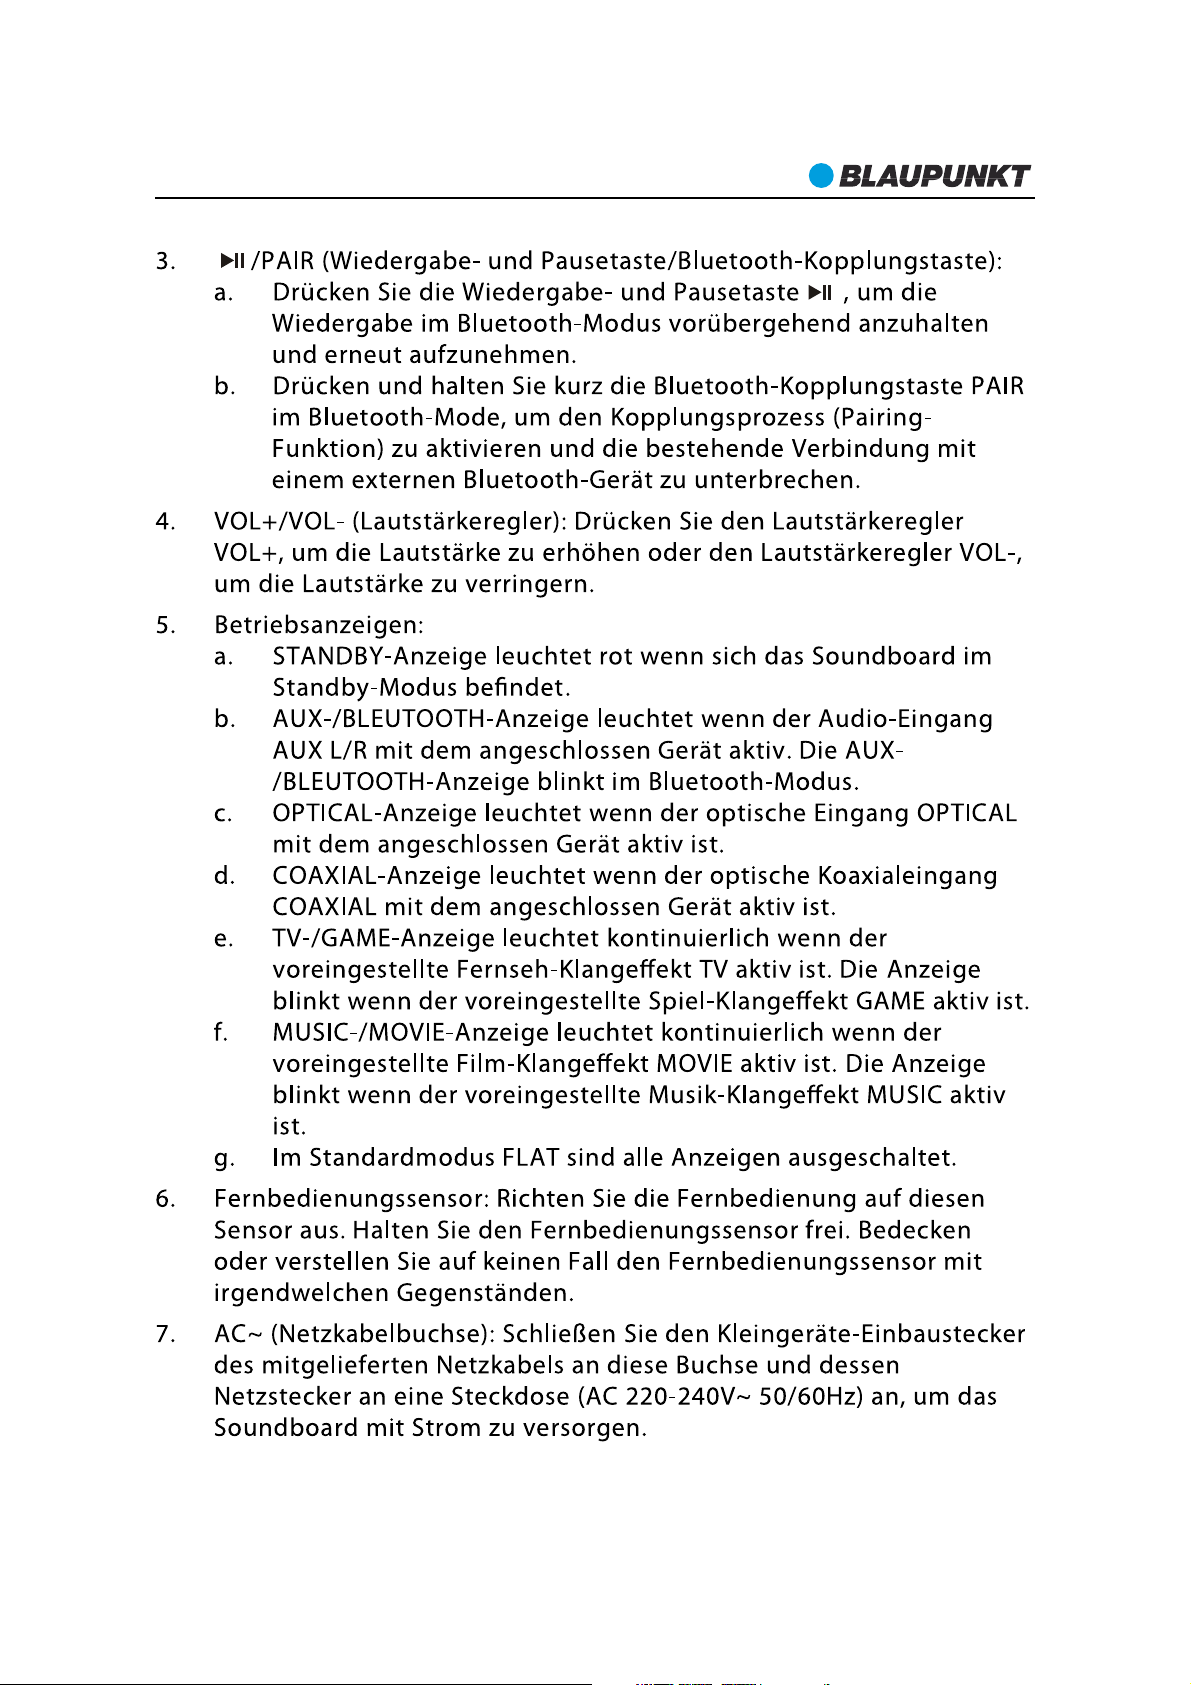
1.
• Switch the unit between ON and
STANDBY modes.
2. SOURCE
• Switch the modes.
3. /PAIR
• Play/pause/resume playback in Bluetooth
mode.
• Press and hold this buttonto activate the
pairing function in BLUETOOTH mode and
disconnect the existing paired Bluetooth
device.
4. VOL+/VOL-
• Increase/decrease the volume level.
5. Standby, AUX/Bluetooth, Optical,
Coaxial,TV/Game, Music/Movie
Indicators.
• Standby indicator lights up red when the
unit is in STANDBY mode.
• AUX/Bluetooth indicator lights up
when the unit is in AUX mode; the light
flashes when the unit is in Bluetooth mode.
• Optical, Coaxial indicator lights up when
the unit is in Optical/Coaxial mode
respectively.
• TV/Game, Music/Movie indicator
In TV mode: light is on.
In Game mode: light flashes.
In Movie mode: light is on.
In Music mode: light flashes.
In FLAT mode: the TV/Game and
Music/Movie indicator is off.
6. Remote Controlsensor
7. AC~ Socket
• Connect to power cord.
8. AUX (R/L) socket
• Connect to an external audio device.
9. OPTICAL socket
10. COAXIAL socket
40
Page 42

LS 181
Remote Control
This remote control provides learning function key forTV control, none learning function
key for soundboard control. Please refer to following introduction and drawing.
learnable keys area
1.
• Switch the unit between ON and
STANDBY modes.
2. LED indication
3. Learning button areafor TV
• Theremote control can learn
some functions for TV control
4. VOL+/VOL-
• Increase/decrease the volume level.
5. MUTE
• Mute or resume the sound.
6.
• Play/pause/resume playback in
Bluetooth mode.
7. /
• Skip to previous track/skip to next track in Bluetooth mode.
8. PAIR
• Activate the pairing function in Bluetooth mode and disconnect the existing paired
Bluetooth device.
9. MUSIC/TV/FLAT/MOVIE/GAME
• Select a preset soundeffect.
10. OPT/BT/COA/AUX
• Switch on Optical, Bluetooth, Coaxial or AUX mode respectively.
41
Page 43

LS 181
PREPARATIONS
Prepare the Remote Control
The provided remote controlallows the unit to be operated froma distance.
• Even if the remote control is operatedwithin the effective range (6m), its operation may
be impossible if there are anyobstacles between the unit and the remote control.
• If the remote control is operatednear other products which generate infra red rays, or if
other remote control devices using infra red raysare used near the unit, it may operate
incorrectly. Conversely, the other products may operate incorrectly.
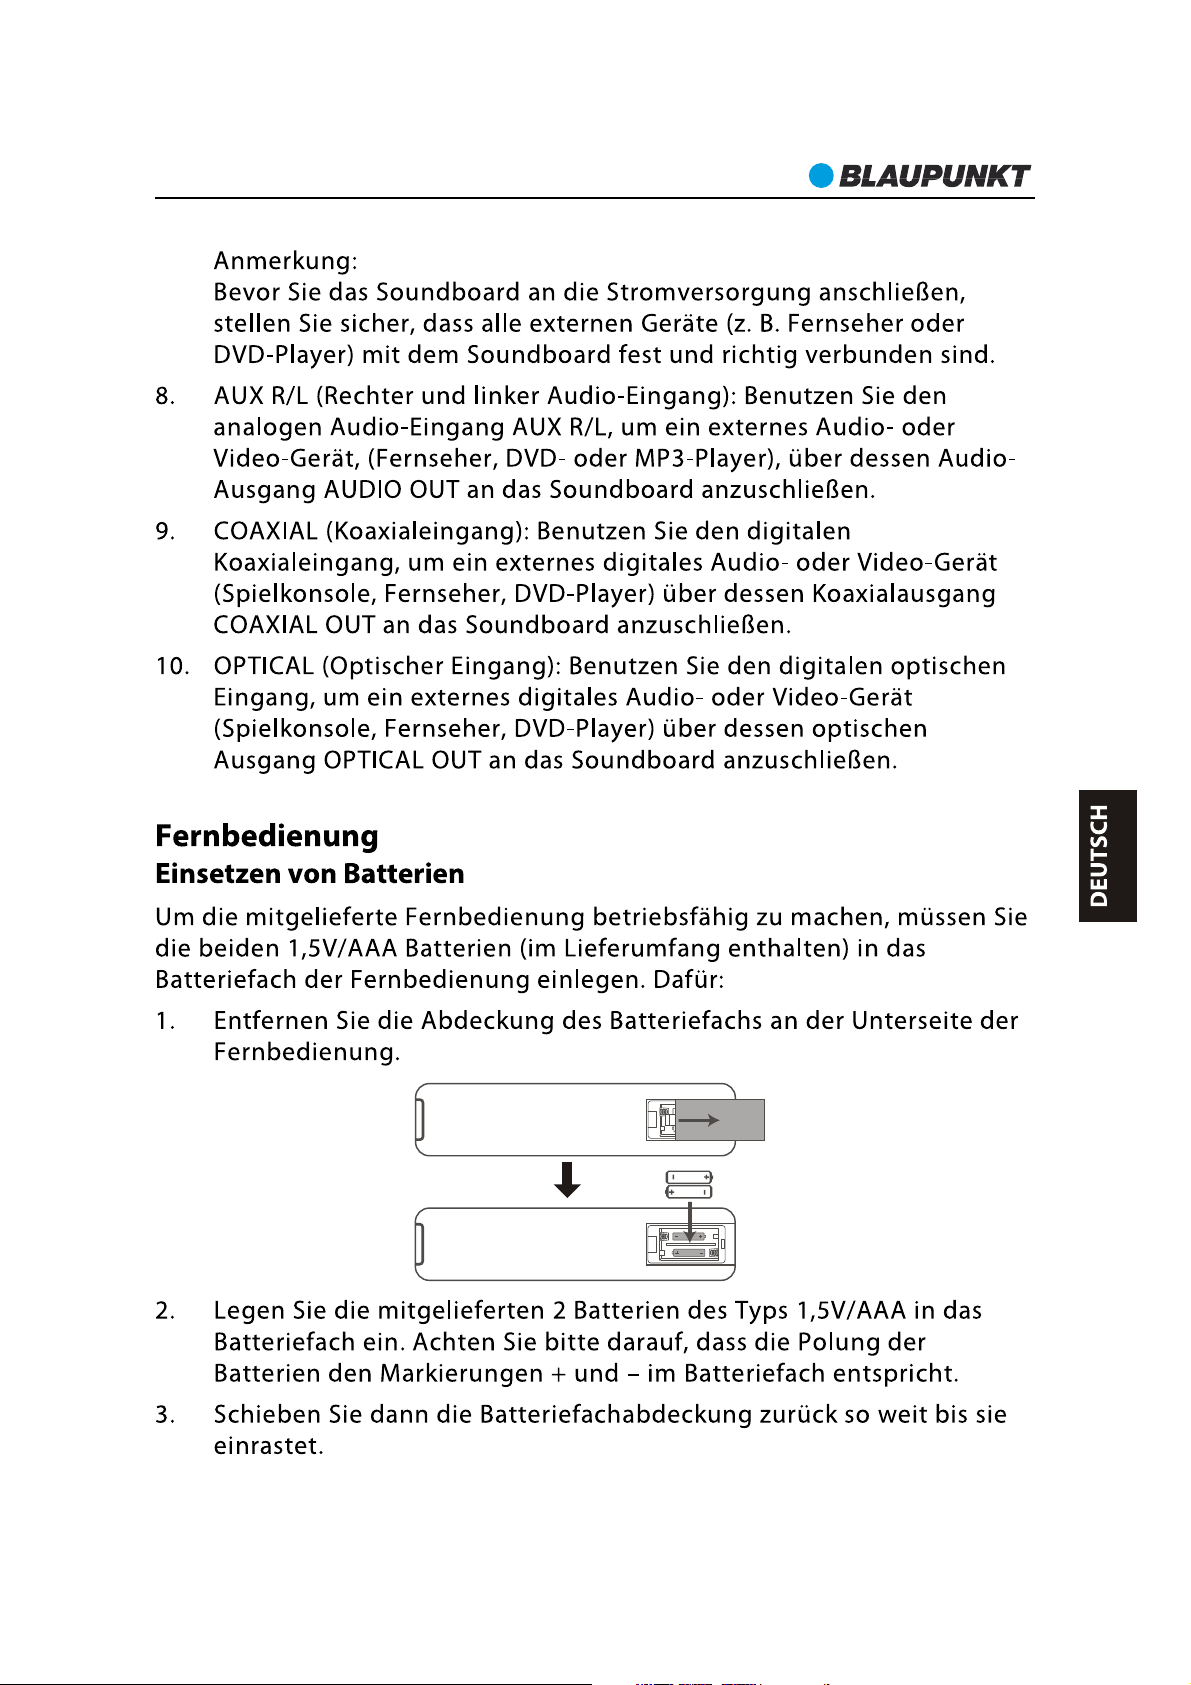
Battery Installation
1. Remove the battery compartment cover.
2. Insert two“AAA”size (R03 or UM 4) dry batteries. Make sure that the batteries are
inserted with their positive“ ”±and negative“ ”poles positioned correctly.
3. Close the cover.
Precautions ConcerningBatteries
• Be sure to insert the batteries with correct positive“ ”and negative“ ”polarities.
• Use batteries of the same type. Neveruse differenttypes of batteries together.
• Either rechargeable or non rechargeable batteries can be used. Referto the precautions
on their labels.
• If the remote control is not to be used for a longtime (more than a month), remove the
batteries to prevent fromleaking.
• If the batteries leak, wipe away the leakage inside the battery compartment with a paper
towel and replace the batteries with new ones.
• Do not use any batteries other than those specified. Do not mix new batteries with old
ones.
• Do not heat or disassemble batteries. Neverthrow them in fire or water.
• Do not carry or store batteries with other metallic objects. Doing so could cause
batteries to short circuit, leak or explode.
• Never recharge a battery unless it is confirmed to be a rechargeable type.
42
Page 44

LS 181
Remote control learning function operation:
This remote control includes several learning function keys forTV. Please refer to below
learning function keys drawing.This feature that allows you to use one remote control for
TV and sound board operation. Please refer tobelow steps for learning operation.
TV remote control
sound board
remote control
learnable keys area
a. Press and hold the and key 3 seconds at same time to enter the learning
function mode. In this mode, the red LED indicatorwill light on eternally.
b. Place the remote control aim to theTV’s remotecontrol sensor within 50mm distance as
below drawing. Please kindly note that both remote control’ssensor shall aim together
within 50mm distance in order to get reception.
c. Press one learning function key which you desire to learn theTV’s function. Meanwhile,
the red LED indicator will start to flash slowly if your operation is successful.
d. Press one relative functional key onTV’s remote control which you desire tobe learned.
The red LED indicators will quick flare 3 times if the function was learned successfully.
(For example, if you want to learn theTV power on/off function in the sound board's
remote control, you need to press one learning key fromthe sound board's remote
control first, and then press the power on/off key from TV's remote control).
e. Repeat steps c and d for other learning operation functions.
f. Press any other key which is not included in the learnable keys area.The remote
control will exit from the learning mode, and the red LED indicator will turn off. Then you
can use the remote control for TV and for sound board's operation.
Learning function DIY (Do it yourself):
a. Thefunctional printing for the learnable button is only for your reference. These
learnable keys are open to learn all functions of TV.For example, you can use numerical
buttons to learn CH up/down function ofTV etc.
b.There are provided 4 additional keys which can be used for learningTV functions like
CH +/ , UP/DOWN, ENTER etc.You can learn and define freely the functional control keys
according to yourTV's operation.
c. If one of the learning functions is not working properly, please repeat steps a. to f.
43
Page 45

LS 181
CONNECTIONS
The sound board provides digital (COAXIAL, OPTICAL) and analogue inputs for
connection from different sources.
Digital inputs connection
Connecting DVD player/TV outputs to digital inputs from the sound board.
Remove the protective cap of the OPTICAL socket. Use the optical cable to connect
the OPTICAL output socket from the DVD player/TV with the input socket fromthe sound
board.
Use the COAXIAL cable to connect the COAXIAL output socket from the DVD player/TV
with the input socket from the sound board.
sound board inputs
DVD player / TV outputs
Tip:
If there is no sound coming out of the sound board and the indicator lights up make sure
that the audio setting of your sourceplayer (e.g. DVD player, game player, TV) is set to
PCM with COAXIALinput.
If there is no sound output and the OPTICAL indicator lights up, ensure that the audio
setting of the input source (e.g. TV,game console, DVD player,TV) is set to PCM mode with
optical input.
44
Page 46

LS 181
Analogue inputs connection
Connecting DVD player/TV outputs to analogue inputs from the sound board.
Use a RCA audio cable (not include) to connect the DVD player/TV outputs with the AUX
(R/L) input socket from the sound board.
sound board inputs
DVD player / TV outputs
Notes:
The above drawings aresystem connection examples only for home cinema
entertainment. This sound boardincludes digital (1 x coaxial and 1 x optical) and
analogue (left and right channels) inputs.These inputs allowyou toconnect and play any
audio source device which has the corresponding connection jacks like the aboveTV and
DVD player examples.
Connect Power
Caution:
Risk of product damage! Ensure that the power supply voltage correspondsto the
voltage printed on the rating label on the back or on the underside of the unit.
Before connecting the AC power cord, ensure that youhave completed all other
connections.
Be sure to unplug the power cord fromthe outlet when the system is not in use for an
extended period of time.
Connect the AC power cord to the wall socket.
45
Page 47

LS 181
GENERAL OPERATION
Standby/ON
When you connect the unit for the first time to the mains socket, it will be in standby
mode and the Standby indicator will be red.
Press the button to switch ON the main unit.
Press the button again to switch the unit back into STANDBY mode. The POWER
indicator will light up.
Disconnect the mains plug from the mains socket if youwant to switchOFF the unit
completely.
Select the Play Mode
Press repeatedly the SOURCE button on the unit to switch between AUX, OPTICAL,
BLUETOOTH and COAXIAL modes.Alternatively press the OPT, BT, COA and AUX button
on the remote control to select the desired mode.
Note:
If there is no signal under the AUX, OPTICAL, COAXIALor BLUETOOTH mode, the unit will
automatically switch off within 60 minutes to save energy.
Adjust theVolume
Press the VOL +/– buttonsto adjust the volume.
If you want to turn off the sound, press the MUTE buttonon the remote control. Press the
MUTE button again or press theVOL+/- button to resume normal listening.
Select theSound Effect
While playing, press the MUSIC, TV, FLAT,MOVIE or GAME button on the remote control
to select the desired preset equalizer.
• When TVis selected, the TV/Game indicator will light up steadily.
• When GAME is selected, the TV/Game indicatorwill flash.
• When Movieis selected, the Music/Movie indicator will light up steadily.
• When Music is selected, the Music/Movie indicator will flash.
• When FLATis selected, theTV/Game and Music/Movie indicator is turned off.
AUX/COAXIAL/OPTICAL OPERATION
1. Press repeatedly the SOURCE button on the unit to switch between AUX,OPTICAL and
COAXIAL modes. Alternatively press the OPT, COA and AUX button on the remote control
to select the desired mode.
2. Operate your audio device directly forplayback features.
3. Press the VOL+/– button to adjust the volume to your desired level.
46
Page 48

LS 181
BLUETOOTH OPERATION
You can listen to tracks from a media deviceif it is connected to the unit via Bluetooth.
Pair Bluetooth-enabled Devices
You need to pair your Bluetooth device with this unit before you connect them for the first
time.
Note:
The operational range between this unit and a Bluetooth deviceis approximately 8
meters (without any object between the Bluetooth device and the unit).
Before you connect a Bluetooth device to this unit, ensure that you know the device’s
capabilities.
Compatibility with all Bluetooth devices is not guaranteed.
Any obstacle between this unit and the Bluetoothdevice can reducethe operational
range.
If the signal strength is weak, your Bluetooth device may disconnect, but it will re enter
automatically into pairing mode.
1. During ON mode, press repeatedlythe SOURCE buttonon the unit (or pressthe BT
button on the remote control)to select the Bluetooth mode.If the unit is not pairedto any
Bluetooth device, the system enters automatically into pairing mode; or you need to
press the PAIR button to start pairing.
2. Activate the Bluetooth function on your device and select the search mode.
“BLAUPUNKT LS1 ”will appear on your Bluetooth device.
3. Select“BLAUPUNKT LS ”in the pairing list. After successful pairing, the
AUX/Bluetooth indicator will light up steadily.
Tips:
• Enter "0000" for the password if necessary.
• If there is already an existing connection, pressthe PAIR button on the remotecontrol
(or press and hold the /PAIR button on the main unit) to re activate the pairing mode.
The existing connection will be interrupted and the BLUETOOTH indicator will flash.
• If no other Bluetooth device pairs with this unit within two minutes, the unit will restore
its previous connection.
• Theunit will also be disconnected when your device is moved beyond the operational
range.
• If you want to reconnect your device to this unit, place it within the operational range.
• If the device is moved beyond the operational range, when it is brought back, please
check if the device is still connected to the unit.
• If the connection is lost, follow the aboveinstructions to pair your device again to this
unit.
81
181
Listen to Music from a Bluetooth Device
• If the connected Bluetooth device supports Advanced Audio Distribution Profile (A2DP),
you can listen to the music stored on the device through this unit speakers.
• If the device also supports Audio Video Remote Control Profile (AVRCP), you can use the
player’sremote control to play music stored on the device.
1. Pair your device with this unit.
2. Play music via your device (if it supports A2DP).
3. Use supplied remote controlto controlplay (if it supports AVRCP).
To pause/resume play, press the button.
To skip to a track, press the / buttons.
47
Page 49

LS 181
TROUBLESHOOTING
To keep the warranty valid, never try to repair the system by yourself. If you encounter
problems when using this unit, check the following points before requesting service.
No power
• Ensure that the mains cable is connected securely.
• Make sure that the unit is switched on.
The remote control does not function
• Use the remote controlnear to the unit.
• Point the remotecontrol atthe remote control sensor on the unit.
• Replace the batteries in the remote control with new ones.
• Remove any obstacles between the remote controland the unit.
Loud hum or noiseis heard
• Theplugs and sockets are dirty. Wipe them with a cloth slightly moistened with an
appropriate non abrasive cleaning solution.
The unit does not respond when pressing anybuttons
• The unit may freeze up during use. Switch off and then switch on the unit again at the
mains socket to reset it.
No sound output
• Make sure that the unit is not muted. Press MUTE or VOL + to resume normal listening.
• Ensure that the audio setting of the input source (e.g. TV,game console,DVD player, etc.)
is set to PCM mode while using optical connection.
I can't find the Bluetooth name of this uniton myBluetooth devicefor Bluetooth
pairing
• Ensure that the unit is switched on.
• Ensure that the Bluetooth function is activated on your Bluetooth device.
• The unit has a Bluetooth function that can receive a signal within 8 metres. Keep a
distance within 8 metres both devices.
The unit switches off automatically during playing
• Please increase the volume levelon your input source player like DVD player/TV ect.
48
Page 50

LS 181
SPECIFICATIONS
General
Power requirements: AC220 240V~ 50/60Hz
Power consumption(onmode): 70Watt
Power consumption(standbymode): < 0,5 Watt
Output power RMS: 60Watt 15W x 2 (speakers) + 30W (subwoofer)
Total harmonic distortion: 1%(1kHz, 1W)
Audio input sensitivity: 700mV
Frequency response: 40Hz 20KHz
Main unit dimensions: 525 x 75 x 305 mm ( W x H x D)
Speakers
Front Impedance: 3Ω x 2
Woofer Impedance: 6Ω
Remote Control
Distance: 6 metres
Angle: 30°
STANDARD ACCESSORIES
Remote Control
Instruction Manual
AC Power Cord
COAXIAL cable
OPTICAL cable
x 1pc
x 1pc
x 1pc
x 1pc
x 1pc
49
Page 51

Page 52

Page 53

Page 54

Page 55

Page 56

All rights
 Loading...