


IP640
Table of contents
 Loading...
bintec elmeg User Guide
www.bintec-elmeg.com
elmeg IP640
User Guide
elmeg IP640
Copyright© Version 1.0, 2019 bintec elmeg GmbH
1

bintec elmeg
Legal Notice
Aim and purpose
This document is part of the user manual for the installation and configuration of bintec elgmeg
devices. For the latest information and notes on the current software release, please also read
our release notes, particularly if you are updating your software to a higher release version. You
will find the latest release notes under
Liability
This manual has been put together with the greatest possible care. However, the information
contained in this manual is not a guarantee of the properties of your product. bintec elmeg
GmbH is only liable within the terms of its conditions of sale and supply and accepts no liability
for technical inaccuracies and/or omissions.
The information in this manual can be changed without notice. You will find additional information and also release notes for bintec elmeg devices under www.bintec-elmeg.com.
bintec elmeg devices make WAN connections as a possible function of the system configuration. You must monitor the product in order to avoid unwanted charges. bintec elmeg GmbH
accepts no responsibility for data loss, unwanted connection costs and damage caused by unin
tended operation of the product.
Tra dem arks
bintec trademarks and the bintec logo, artem trademarks and the artem logo, elmeg trademarks and the elmeg logo are registered trademarks of bintec elmeg GmbH.
Company and product names mentioned are usually trademarks of the companies or manufacturers concerned.
www.bintec-elmeg.com.
-
Copyright
All rights reserved. No part of this manual may be reproduced or further processed in any way
without the written consent of bintec elmeg GmbH. The documentation may not be processed
and, in particular, translated without the consent of bintec elmeg GmbH.
You will find information on guidelines and standards in the declarations of conformity under
www.bintec-elmeg.com/confomity.
How to reach bintec elmeg GmbH
bintec elmeg GmbH
Südwestpark 94, D-90449 Nürnberg, Deutschland,
Telefon: +4991196730, Fax: +499116880725
Internet: www.bintec-elmeg.com
© bintec elmeg GmbH 2019, All rights reserved. Rights of modification reserved.
2
elmeg IP640
bintec elmeg Contents
Contents
Overview . . . . . . . . . . . . . . . . . . . . . . . . . . . . . . . . . . . . . . . . . . . . . . . . . . . . . . . . . . . . . . . . . . . . 4
Keys . . . . . . . . . . . . . . . . . . . . . . . . . . . . . . . . . . . . . . . . . . . . . . . . . . . . . . . . . . . . . . . . . . . . . . . . . . . . . . . . . . . 4
Connections . . . . . . . . . . . . . . . . . . . . . . . . . . . . . . . . . . . . . . . . . . . . . . . . . . . . . . . . . . . . . . . . . . . . . . . . . . . 6
Illustration in the user guide . . . . . . . . . . . . . . . . . . . . . . . . . . . . . . . . . . . . . . . . . . . . . . . . . . . . . . . . . . . . 7
Safety precautions . . . . . . . . . . . . . . . . . . . . . . . . . . . . . . . . . . . . . . . . . . . . . . . . . . . . . . . . . . . 8
Using the telephone . . . . . . . . . . . . . . . . . . . . . . . . . . . . . . . . . . . . . . . . . . . . . . . . . . . . . . . . . 9
Getting to know your telephone . . . . . . . . . . . . . . . . . . . . . . . . . . . . . . . . . . . . . . . . . . . . . . . . . . . . . . . 9
Making calls . . . . . . . . . . . . . . . . . . . . . . . . . . . . . . . . . . . . . . . . . . . . . . . . . . . . . . . . . . . . . . . . . . . . . . . . . . 16
Call lists . . . . . . . . . . . . . . . . . . . . . . . . . . . . . . . . . . . . . . . . . . . . . . . . . . . . . . . . . . . . . . . . . . . . . . . . . . . . . . 26
Message Centre . . . . . . . . . . . . . . . . . . . . . . . . . . . . . . . . . . . . . . . . . . . . . . . . . . . . . . . . . . . . . . . . . . . . . . . 28
Voice mails . . . . . . . . . . . . . . . . . . . . . . . . . . . . . . . . . . . . . . . . . . . . . . . . . . . . . . . . . . . . . . . . . . . . . . . . . . . 29
Directories . . . . . . . . . . . . . . . . . . . . . . . . . . . . . . . . . . . . . . . . . . . . . . . . . . . . . . . . . . . . . . . . . . . . . . . . . . . . 30
Settings . . . . . . . . . . . . . . . . . . . . . . . . . . . . . . . . . . . . . . . . . . . . . . . . . . . . . . . . . . . . . . . . . . . . 35
Basic settings . . . . . . . . . . . . . . . . . . . . . . . . . . . . . . . . . . . . . . . . . . . . . . . . . . . . . . . . . . . . . . . . . . . . . . . . . 35
Configuring other settings with the Web configurator . . . . . . . . . . . . . . . . . . . . . . . . . . . . . . . . . . 41
Status of the telephone . . . . . . . . . . . . . . . . . . . . . . . . . . . . . . . . . . . . . . . . . . . . . . . . . . . . . . . . . . . . . . . 52
Appendix . . . . . . . . . . . . . . . . . . . . . . . . . . . . . . . . . . . . . . . . . . . . . . . . . . . . . . . . . . . . . . . . . . 53
Service (Customer Care) . . . . . . . . . . . . . . . . . . . . . . . . . . . . . . . . . . . . . . . . . . . . . . . . . . . . . . . . . . . . . . . 53
Manufacturer's advice . . . . . . . . . . . . . . . . . . . . . . . . . . . . . . . . . . . . . . . . . . . . . . . . . . . . . . . . . . . . . . . . . 53
Menu tree . . . . . . . . . . . . . . . . . . . . . . . . . . . . . . . . . . . . . . . . . . . . . . . . . . . . . . . . . . . . . . . . . . . . . . . . . . . . 55
Display icons . . . . . . . . . . . . . . . . . . . . . . . . . . . . . . . . . . . . . . . . . . . . . . . . . . . . . . . . . . . . . . . . . . . . . . . . . 56
Index . . . . . . . . . . . . . . . . . . . . . . . . . . . . . . . . . . . . . . . . . . . . . . . . . . . . . . . . . . . . . . . . . . . . . . 58
elmeg IP640
If the telephone is connected to a telephone system, the telephone system can have a
bearing on the telephone functions or block or add to them.
Further information: User guide for the telephone system
This guide is aimed at telephone users.
Information for administrators: www.bintec-elmeg.com
3
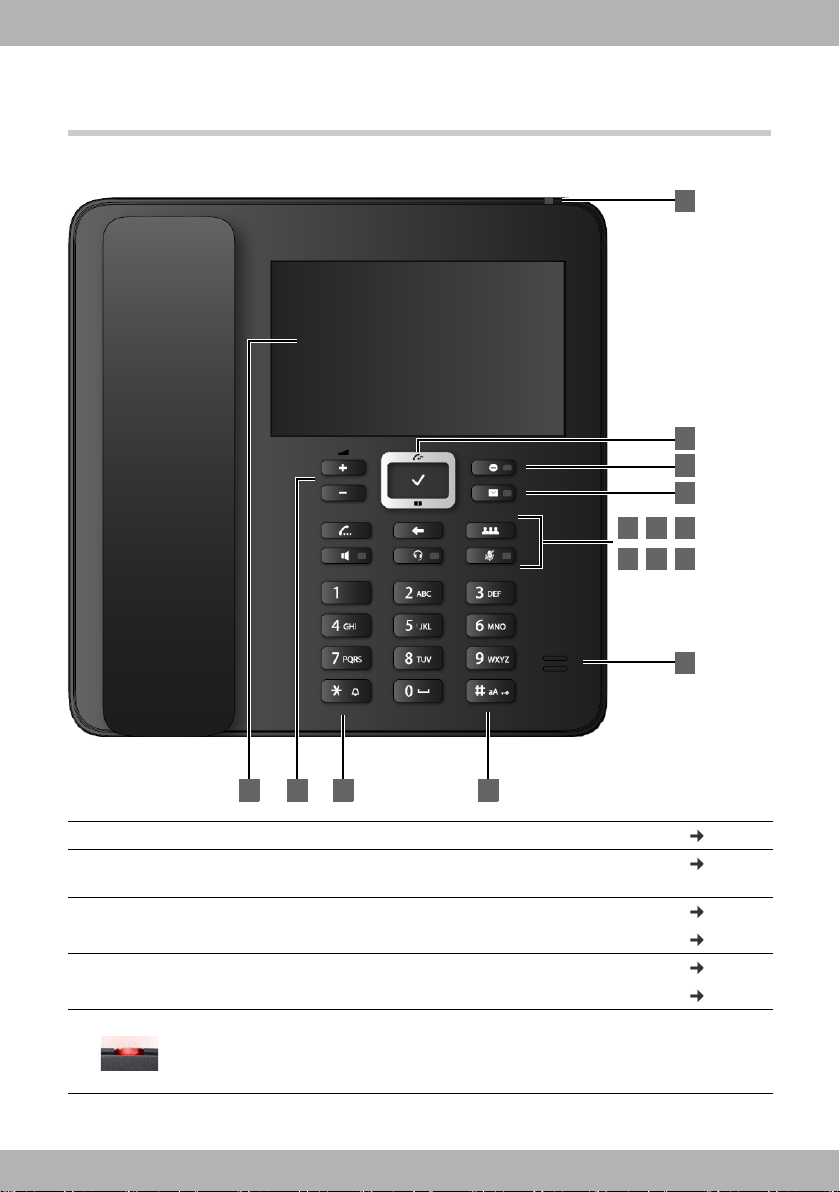
Keys
10
13
1 2 3 4
9
12
11
6
7
14
8
5
15
bintec elmegKeys
Overview
1 Tou ch s cre en Activate the display key functions page 9
2 Volume keys Depending on the operating mode: Adjust the volume
of the speaker, receiver, headset or ringtone
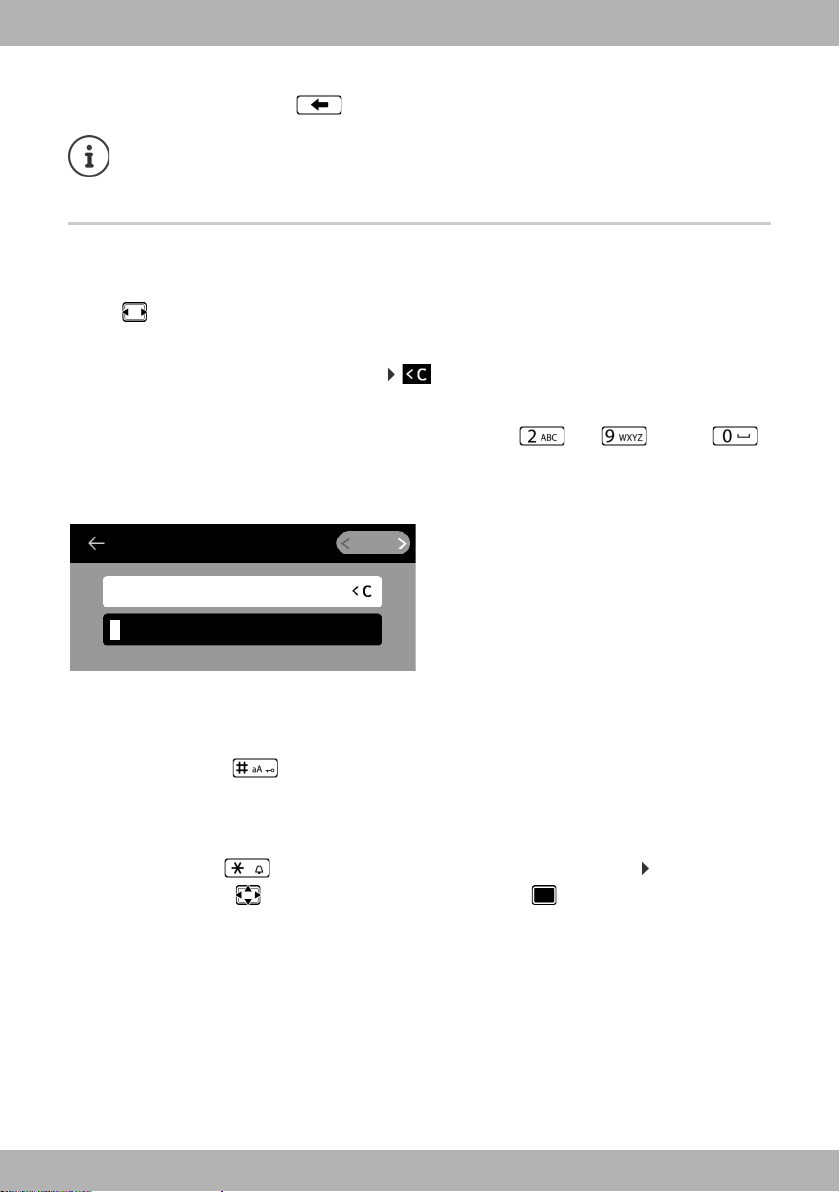
3 Star key Display special characters when inputting text page 14
Activate/deactivate the ringtone page 19
4 Hash key Switch text mode (upper/lower case letters, digits) page 14
Lock/unlock the keypad page 15
5 Status LED Status display for incoming calls
Flashes: Incoming call
Lights up: Call in progress
4
page 20
elmeg IP640
bintec elmeg Keys
6 Control key Scroll through lists and entries.
In idle status:
Open the call list page 26
Open the menu page 13
Open the directory page 30
7 Do Not Disturb key Activate/deactivate Do Not Disturb (DND) page 19
Lights up: "Do Not Disturb" function is activated
8 Message Centre Open call and message lists page 26
Flashes: New message in the Message Centre
9 Consultation call
key
10 End/back key Cancel function;
11 Conference call key Initiate conference call page 23
12 Handsfree key Activate/deactivate speakers page 20
13 Headset key Make call via headset
14 Mute key Activate/deactivate microphone (mute) page 20
15 Microphone Microphone of the handsfree unit
Initiate/end consultation call; put participant on hold page 23
go back one menu level (press briefly);
return to idle status (press and hold)
Start dialling page 16
Lights up: Call is being made via the speaker
(handsfree mode)
Start dialling page 16
Lights up: Call is being made via the headset
Lights up: The microphone is muted
page 12
page 13
elmeg IP640
5
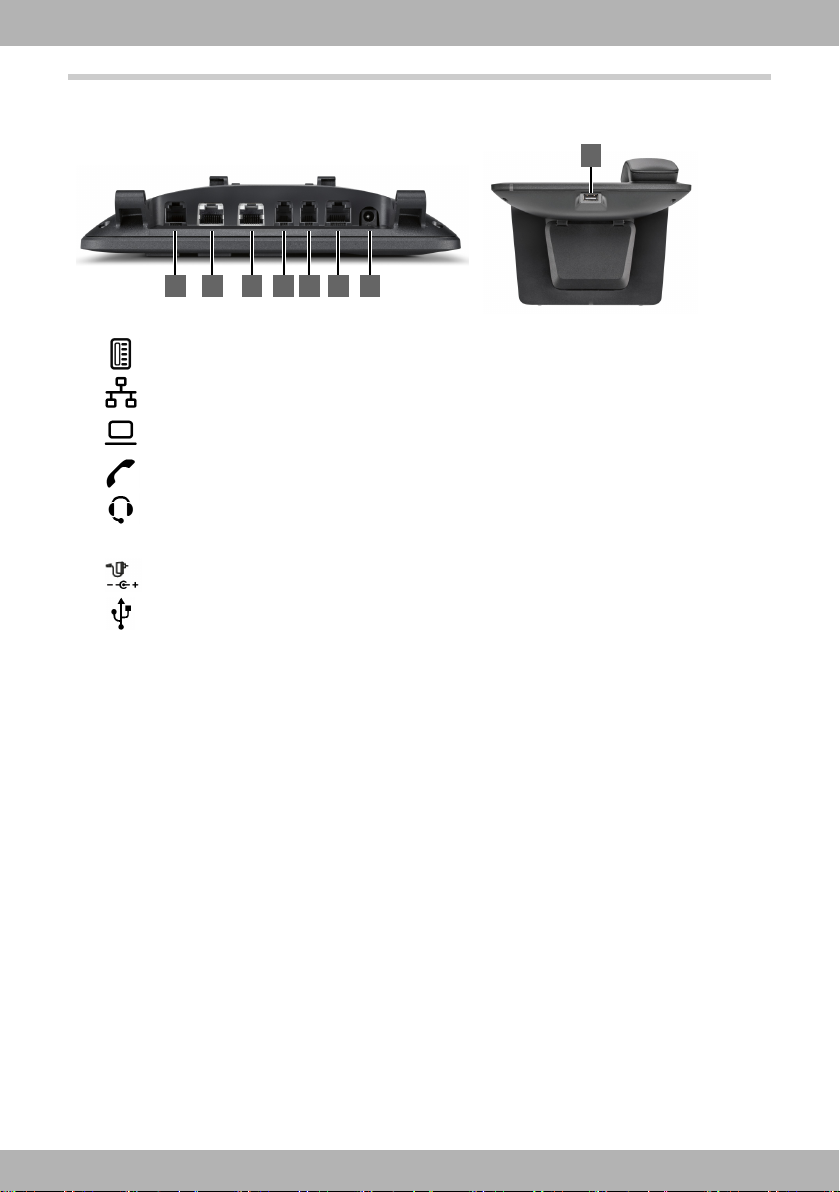
Connections
1 2 3 4 5 6 7
8
EHS
1 Expansion module with additional function keys
2LAN (PoE)
3
4 Receiver
5 Headset with RJ9 plug
6 EHS headset (Electronic Hook Switch)
7Power adapter
PC; a PC can also be connected to the telephone instead of to the local network, the
telephone establishes the network connection
bintec elmegConnections
6
8 USB; to connect for example a USB stick with a directory or a Bluetooth headset
elmeg IP640
bintec elmeg Illustration in the user guide
/
/
/
Illustration in the user guide
Icons
Important information regarding function and appropriate handling or functions that
could generate costs.
Prerequisite for carrying out the following action.
Additional helpful information.
Keys
Handsfree key Do not disturb key
Headset key Message key
End/Back key Volume keys
Conference call key Hash key
Consultation call key Star key
Mute key
Control key rim / centre
Digit/letter keys
Procedures
Example: Setting the display language
¤ Settings Language Select the language Select ( = selected)
Step Actions required
¤ Press the middle of the control key when the handset is in idle
mode. The main menu is opened.
¤ Settings Tap Settings or use the Control key to select Settings
and press .
The Settings submenu is opened.
¤ Language Scroll through the menu entries by swiping up or down, or by using
the Control key.
Tap Language or press the Control key .
The Language submenu is opened.
¤ Select
language
Scroll to the required language by swiping up or down, or by using
the Control key.
¤ Select Next to the required language, tap symbol or press the Control
key . The option selected is denoted by .
elmeg IP640
7
bintec elmegSafety precautions
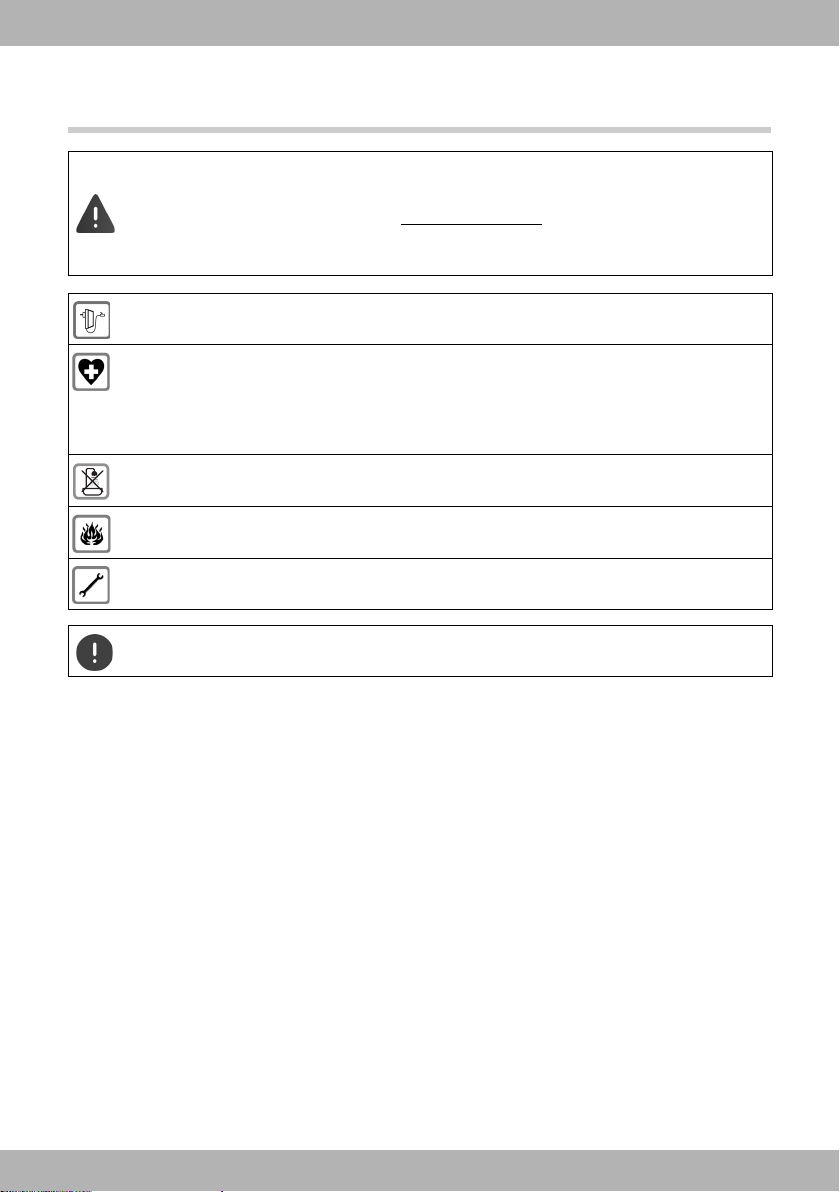
Safety precautions
Read the safety precautions and the user guide before use.
Comprehensive user guides for all telephones and telephone systems as well as for
accessories can be found online at bintec-elmeg.com
thereby help to save paper while providing fast access to the complete up-to-date
documentation at any time.
Use only the power adapter indicated on the device.
Using your telephone may affect nearby medical equipment. Be aware of the technical
conditions in your particular environment, e.g. doctor's surgery.
If you use a medical device (e.g. a pacemaker), please contact the device manufacturer.
They will be able to advise you regarding the susceptibility of the device to external
sources of high frequency energy.
The devices are not splashproof. For this reason do not install them in a damp environment such as bathrooms or shower rooms.
Do not use the devices in environments with a potential explosion hazard
(e.g. paint shops).
Remove faulty devices from use or have them repaired by our Service team, as these
could interfere with other wireless services.
in the Support category. We
To connect the phone to the local network and PC only use shielded cables.
8
elmeg IP640
bintec elmeg Getting to know your telephone
REDIAL CALL DIVERT
Ringback
Call Divert
IP1 -> 1234567
LDAP SELECT LINE
2
1
3 4 5 6
7
Connection
1
Connection
2
Susan
Group 1
CF
sip:peter.me
ier@120...
Using the telephone
Getting to know your telephone
Display
The display of the elmeg IP640 is realised as a touch screen. The phone is operated by directly
touching the display (swiping or tapping) or from the Control key on the phone.
When the phone is in idle mode, it is possible to switch between four display screens:
• A start screen with access to important phone functions
• Two screens with function keys, right ( page 10)
• One screen with information on calls and incoming messages, on very left ( page 11)
Switching between the idle display screens:
¤ Swipe left or right or press the Control key left or right
Start screen (example)
1 Status bar
2 Three function keys each on the left and right page 10
3 Open the redial list page 17
4 Set up call forwarding, enable/disable page 24
5 Open company directory (if configured) page 33
6 Select the line for the next call page 16
7 Information area: displayed here for example is an incoming call or when
elmeg IP640
call forwarding is active or a ringback has been initiated.
Change the background colour/image: page 38
9
bintec elmegGetting to know your telephone
1 2 3 5 64
August
Zimmerman
Susan
Brown
Egon SIP
Max SIP
Phillip
Black
Group 2
Connection 3
Connection 4
Alexander
Maxwell
Benjamin
Smith
#62*
Answ. mach.
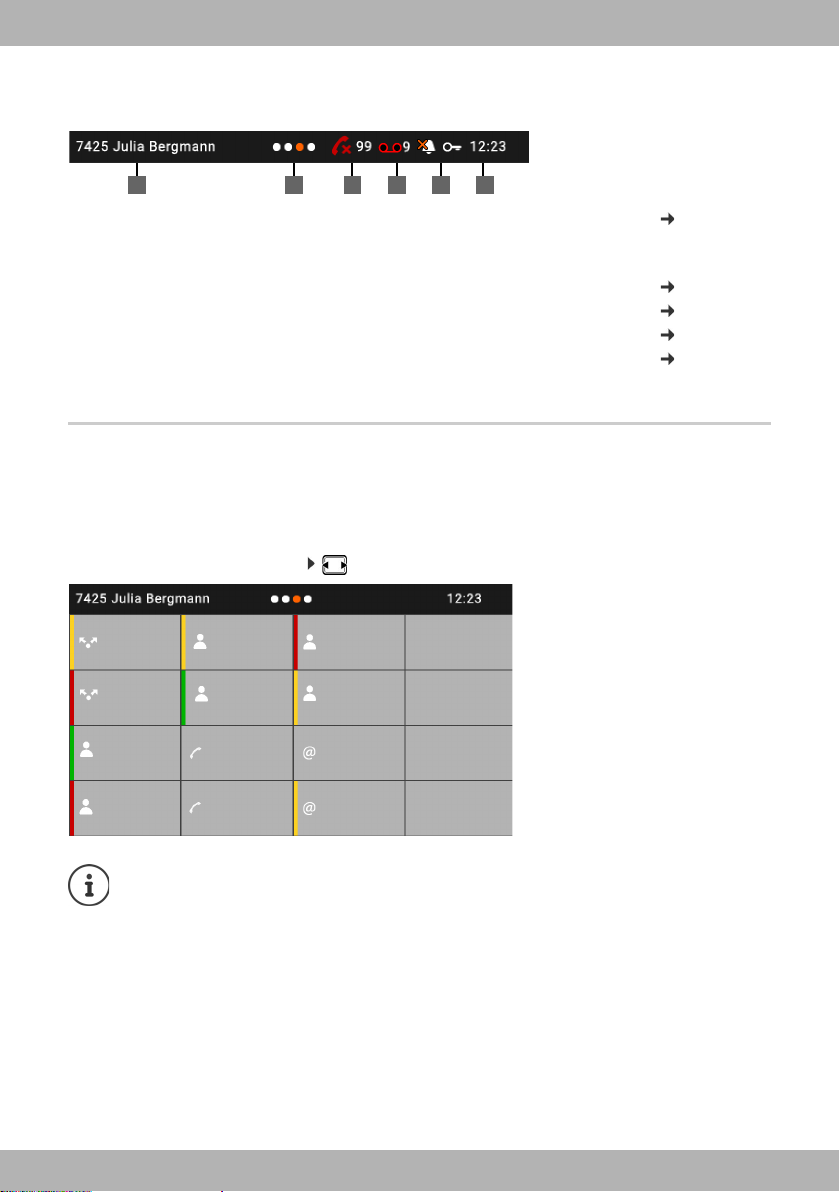
Status bar
All idle display screens have the same status bar.
1
Name of the standard connection (is assigned by the administrator,
page 16
e. g. extension and/or name of the phone user)
2 Position of the screen being displayed (orange dot)
3 Number of missed calls page 26
4 Number of new voice messages page 29
5 Status icons page 56
6 Time page 35
If a lack of space means not all status icons can be displayed, the display is alternate.
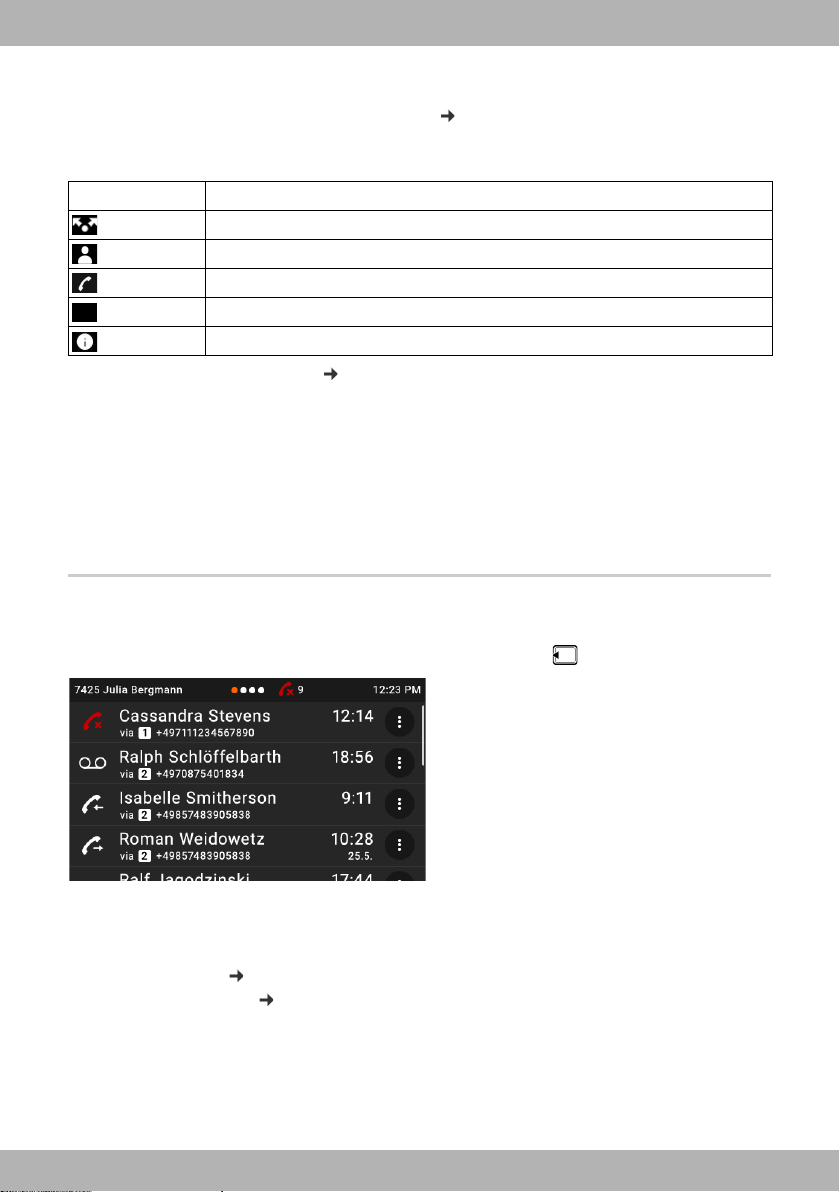
Function keys
Programmable function keys offer rapid access to frequently used numbers and functions.
A
total of 38 function keys are available, six on the central start screen and 16 each on the two
start screens on the right. The current assignment is shown on the start screens on the idle dis
play.
To switch between the screens: Swipe left or right or press the Control key left or right
-
The number of function keys can be increased using an expansion module.
10
elmeg IP640
bintec elmeg Getting to know your telephone
@
yesterday
yesterday
Assigning function keys
Use the Web configurator to assign function keys: page 48
The function keys are arranged on the display starting in the top left, from the top down and
from left to right. They can be assigned the following functions:
Icon Function
For detailed function descriptions page 48
It is possible to select colours for keys with functions Line, BLF, SIP Info and FAC .
A colour indicates, on the left-hand side of a key, whether the function is active or not.
For key assignments Line and BLF, the Standard selection means:
Yel l ow Not registered with the provider / phone system, or error
Green Free
Permanently red Conversation ongoing
Flashing red Incoming call
Line
Quick Dial, Park + Retrieve, BLF
Call Divert, FA C, DTMF
SIP URI
SIP Info
Event list
The event list is displayed as the left-hand side of the idle display.
¤ From the start screen, swipe right or press the Control key left .
The list contains all entries in the call lists (incoming, outgoing and missed calls) and messages
on the answering machine.
For additional information
• about the call lists page 26
• about voice messages page 29
elmeg IP640
11
bintec elmegGetting to know your telephone
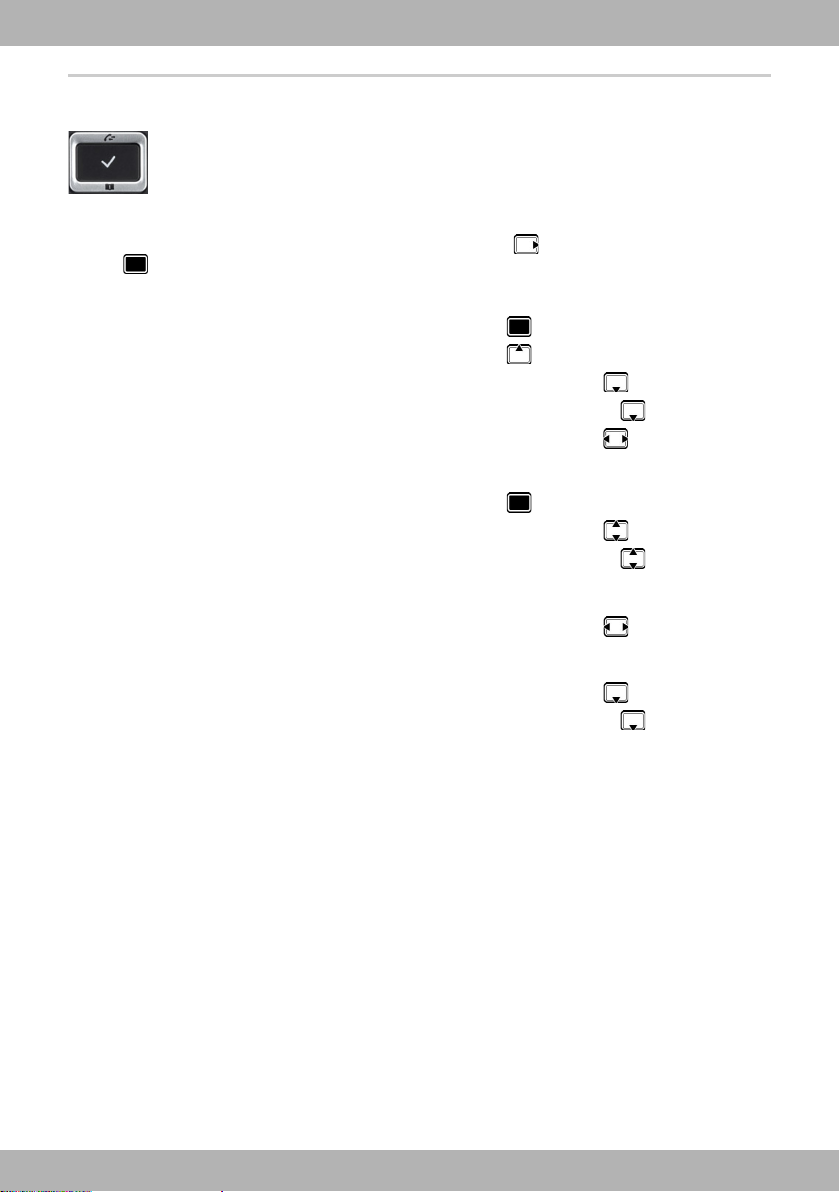
Control key
The Control key enables you to navigate the menus and input fields, and also to
call up certain functions depending on the situation.
Most functions can also be performed by touching the touch screen.
In the description below, the side of the Control key (up, down, right, left) that you have to press
in the different operating situations is marked in black, e. g. for "press right on the Control
key" or for "press the centre of the Control key".
In idle status
Open the main menu
Open the call lists
Open the directory assigned to the key Briefly press
Open the list of available directories Press and hold
Scroll through the idle display screens Briefly press
In submenus and lists and selection fields
Select/confirm function
Scroll one line upwards/downwards Briefly press
Scroll the list upwards/downwards Press and hold
In input fields
Moves the cursor to the left/right one character at a time Briefly press
During a conversation
Open the directory Briefly press
Open the list of available online directories Press and hold
12
elmeg IP640
bintec elmeg Getting to know your telephone
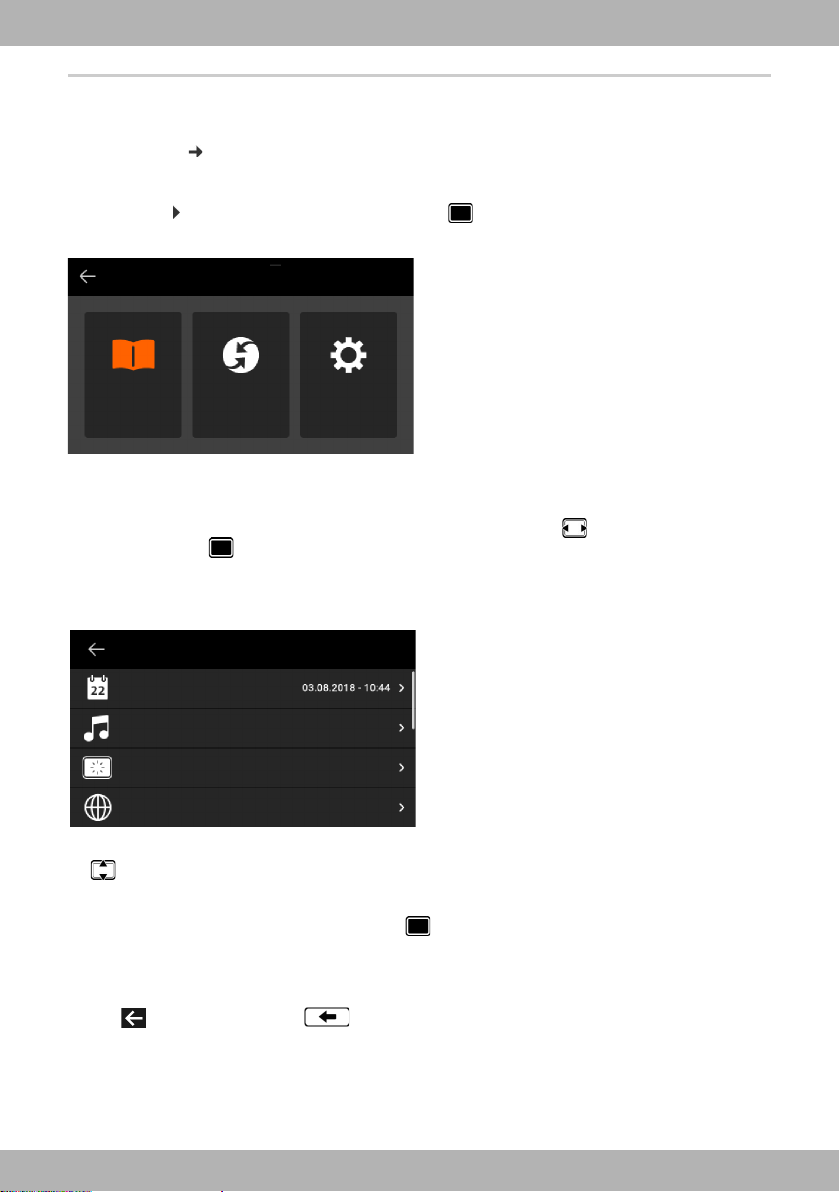
MAIN MENU
Contacts Select Services Settings
Date + Time
Audio Settings
Display
Language
SETTINGS
Menu navigation
The functions of the telephone are displayed in a menu that consists of several levels.
overview page 55
Menu
Main menu
In idle mode: Press the centre of the Control key
The functions of the display menu are displayed each with their icon.
The icon for the submenu selected is shown orange.
Select submenu:
¤ Tap the submenu, or select the submenu using the Control key and press the middle of
the Control key
Submenus
The functions in the submenus are displayed as lists. The selected function is highlighted.
To select a function:
¤ Swipe up or down, or scroll through the list using the Control key
To open a submenu:
¤ Tap the submenu or press the Control key
If not all functions can be displayed, you will see a scroll bar on the right-hand side.
Returning to the previous menu level
¤ Tap or press the End key
elmeg IP640
13
bintec elmegGetting to know your telephone
FIRST NAME
Abc
ABC2ДБАВГЗ
Returning to idle status
¤ Press and hold the End key
If no key is pressed, the display automatically switches to idle mode after about
3 minutes.
Settings which have not been saved or confirmed are rejected.
Entering text
Input position
¤ Use to move the position of the cursor.
Correcting incorrect entries
Delete characters to the left of the cursor:
Entering letters/characters
Multiple letters and digits are assigned to each key between and and the
key. As soon as a key is pressed, the possible characters are displayed at the bottom of the display.
The selected character is highlighted.
Select letters/digits:
¤ Press the key briefly several times in succession
Switch between lower case, upper case and digit entry mode:
¤ Press the Hash key . . . the mode set is displayed on the right in the black field
When editing a directory entry, the first letter and each letter following a space is
automatically in upper case.
Entering special characters:
¤ Press the Star key . . . the available special characters are displayed Tap the charac-
ter required, or use to navigate to it and confirm it with .
14
elmeg IP640

bintec elmeg Getting to know your telephone
Locking/unlocking the keypad
The keypad lock prevents any accidental use of the telephone.
Locking the keypad: ¤ Press and hold . . . the following icon appears on the display
Unlocking the keypad: ¤ Press and hold Enter the PIN for the keypad lock
Changing the keypad lock PIN with the Web configurator: page 41
If a call is indicated on the handset, the keypad automatically unlocks and you can
accept the call. It then locks again when the call is finished.
It is not possible to call emergency numbers either when keypad lock is activated.
(default: 1234) OK
elmeg IP640
15
bintec elmegMaking calls
Making calls
The phone is connected to the LAN.
At least one VoIP connection has been set up and assigned to the telephone.
VoIP connections are set up by the administrator with the Web configurator or
assigned using a PABX.
Up to six VoIP connections (call numbers) can be assigned to the phone. The first connection to be set up is the standard send connection. The name of the standard send
connection is displayed in idle mode in the top left in the status bar ( page 9).
No connection available: the following icon is shown in the display
Information about the telephone connections and the standard send connection:
Web configurator page 52
Making a call
¤ Enter the number Lift the handset
or
¤ lift the handset Enter the number DIAL
Use + as a prefix for calls abroad: Press and hold key
Calls are initiated via the standard send connection if you do not select another option. To use
another VoIP connection:
¤ SELECT LINE select required connection Enter the number DIAL
Using the speaker to make calls:
Using the headset to make calls:
You can switch over at any time during the conversation.
In the following instructions, the icon also always stands for or .
When entering the call number:
Deleting incorrectly entered numbers to the left of the cursor:
Cancel dialling: ¤ END
Incoming call during number entry:
Accept the call:
Reject the call: ¤ REJECT
16
¤ Enter the number Press the handsfree key
¤ Enter the number Press the headset key
¤ ACCEPT
¤
elmeg IP640
bintec elmeg Making calls
Dialling from the directory
¤ Open the directory select entry lift the handset
or
¤ Contacts OK select entry lift the handset
More than one number in the directory entry: Select the phone number
Dialling from the redial list
The redial list contains the most recently dialled numbers.
¤ In idle status press REDIAL select entry lift the handset
or
¤ Open the call lists OUTGOING select entry lift the handset
Dialling from a call list
The call lists contain the most recent accepted, outgoing and missed calls ( page 26). If the
number is saved in the directory, the name is displayed.
¤ Use to open the call lists select a list (ALL, ACCEPTED, MISSED, OUTGOING) select
entry lift the handset
The list of new missed calls can also be opened by pressing the Message key .
Dialling with quick dial keys
Keys 1 to 4 on the phone can be assigned a phone number, that is then dialled with one
keypress.
Assign quick dial key from the Web configurator: page 47
¤ Press and hold quick dial key – . . . the number saved for the key is dialled, the
handsfree function or the headset is enabled
Dialling a number using a function key
Dialling numbers with one press of a function key.
A quick dial number is assigned to the function key.
Assigning numbers to function keys: Web configurator ( page 48)
¤ Press the function key assigned the required number . . . the number saved for the function
key is dialled, the handsfree function is activated
elmeg IP640
17
bintec elmegMaking calls
ACCEPT REJECT SILENCE
via Connection 1
Connection
1
Connection
2
Susan
Group 1
CF
sip:peter.mei
er@120...
Ringback
Asking for a ring back when the line of a participant you have called is busy.
The PABX or the provider supports this function.
Initiating ringback
¤ RINGBACK . . . the ringback request is registered, Ringback and the phone number are
shown on the display
When the other participant's line is free, the ringback is initiated. The telephone rings,
Ringback is displayed in the header.
There can be an active ringback on each line.
Anonymous calling
Withhold Calling Line Identification. The number is not shown to the person receiving the call.
The PABX or the provider supports this function.
¤ Select Services Enable the switch next to Withhold Number
( = the connection is established without Calling Line Identification)
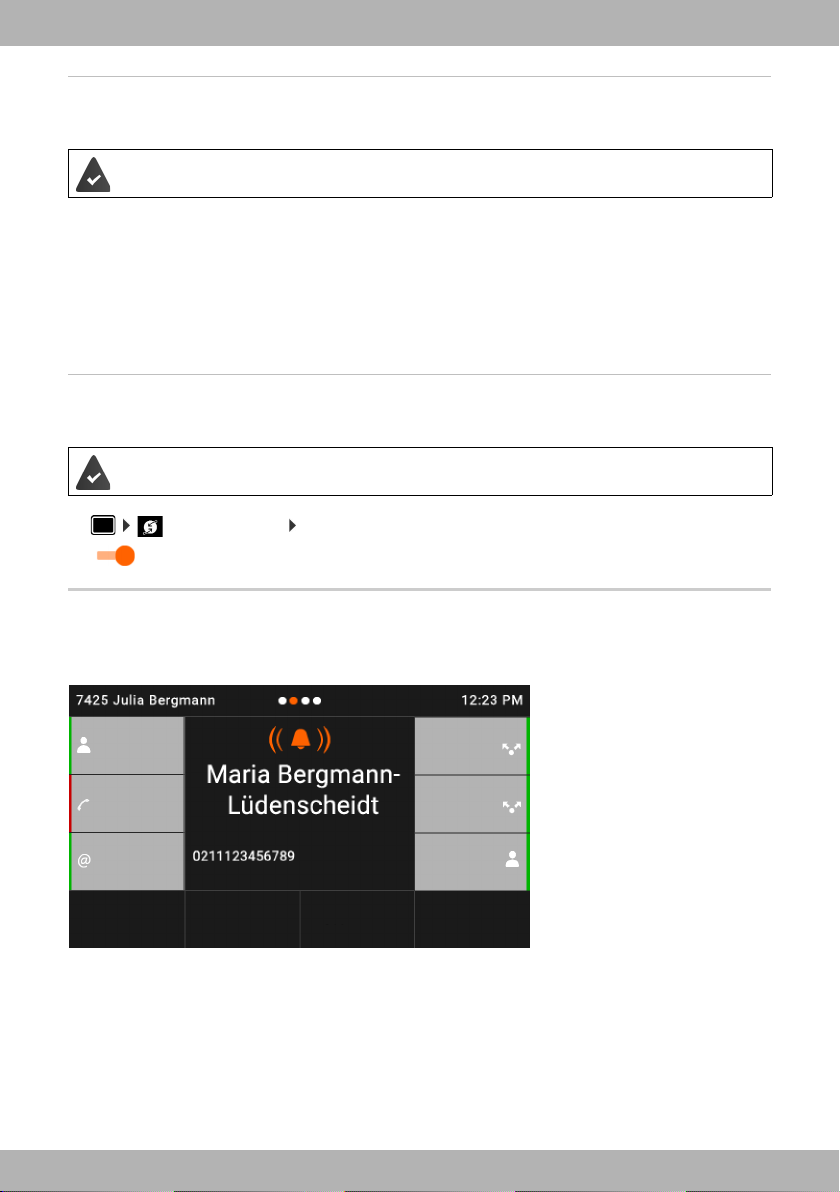
Incoming calls
An incoming call is indicated by ringing, by a display on the screen and by the flashing Status
LED.
18
elmeg IP640
Loading...