

Page 1
Important safety and
assembly instructions
EG540
Version 1.0 September 2006
EUROGRAND
Page 2
EG540 ASSEMBLY
Assembling the EG540
GENERAL SAFETY REMARKS
The EG540 must be assembled before use. A Phillips or slotted
screwdriver is required to assemble the parts.
CAUTION
The piano should be assembled by at least two
persons to avoid injury, due to its weight and bulky
parts.
NOTICE
During assembly, make sure you use the correct
parts and screws and assemble them in the
correct order.
Use only screws that are included with the unit
for assembly, otherwise the parts might get
damaged.
To disassemble the unit, follow the steps in reverse
order.
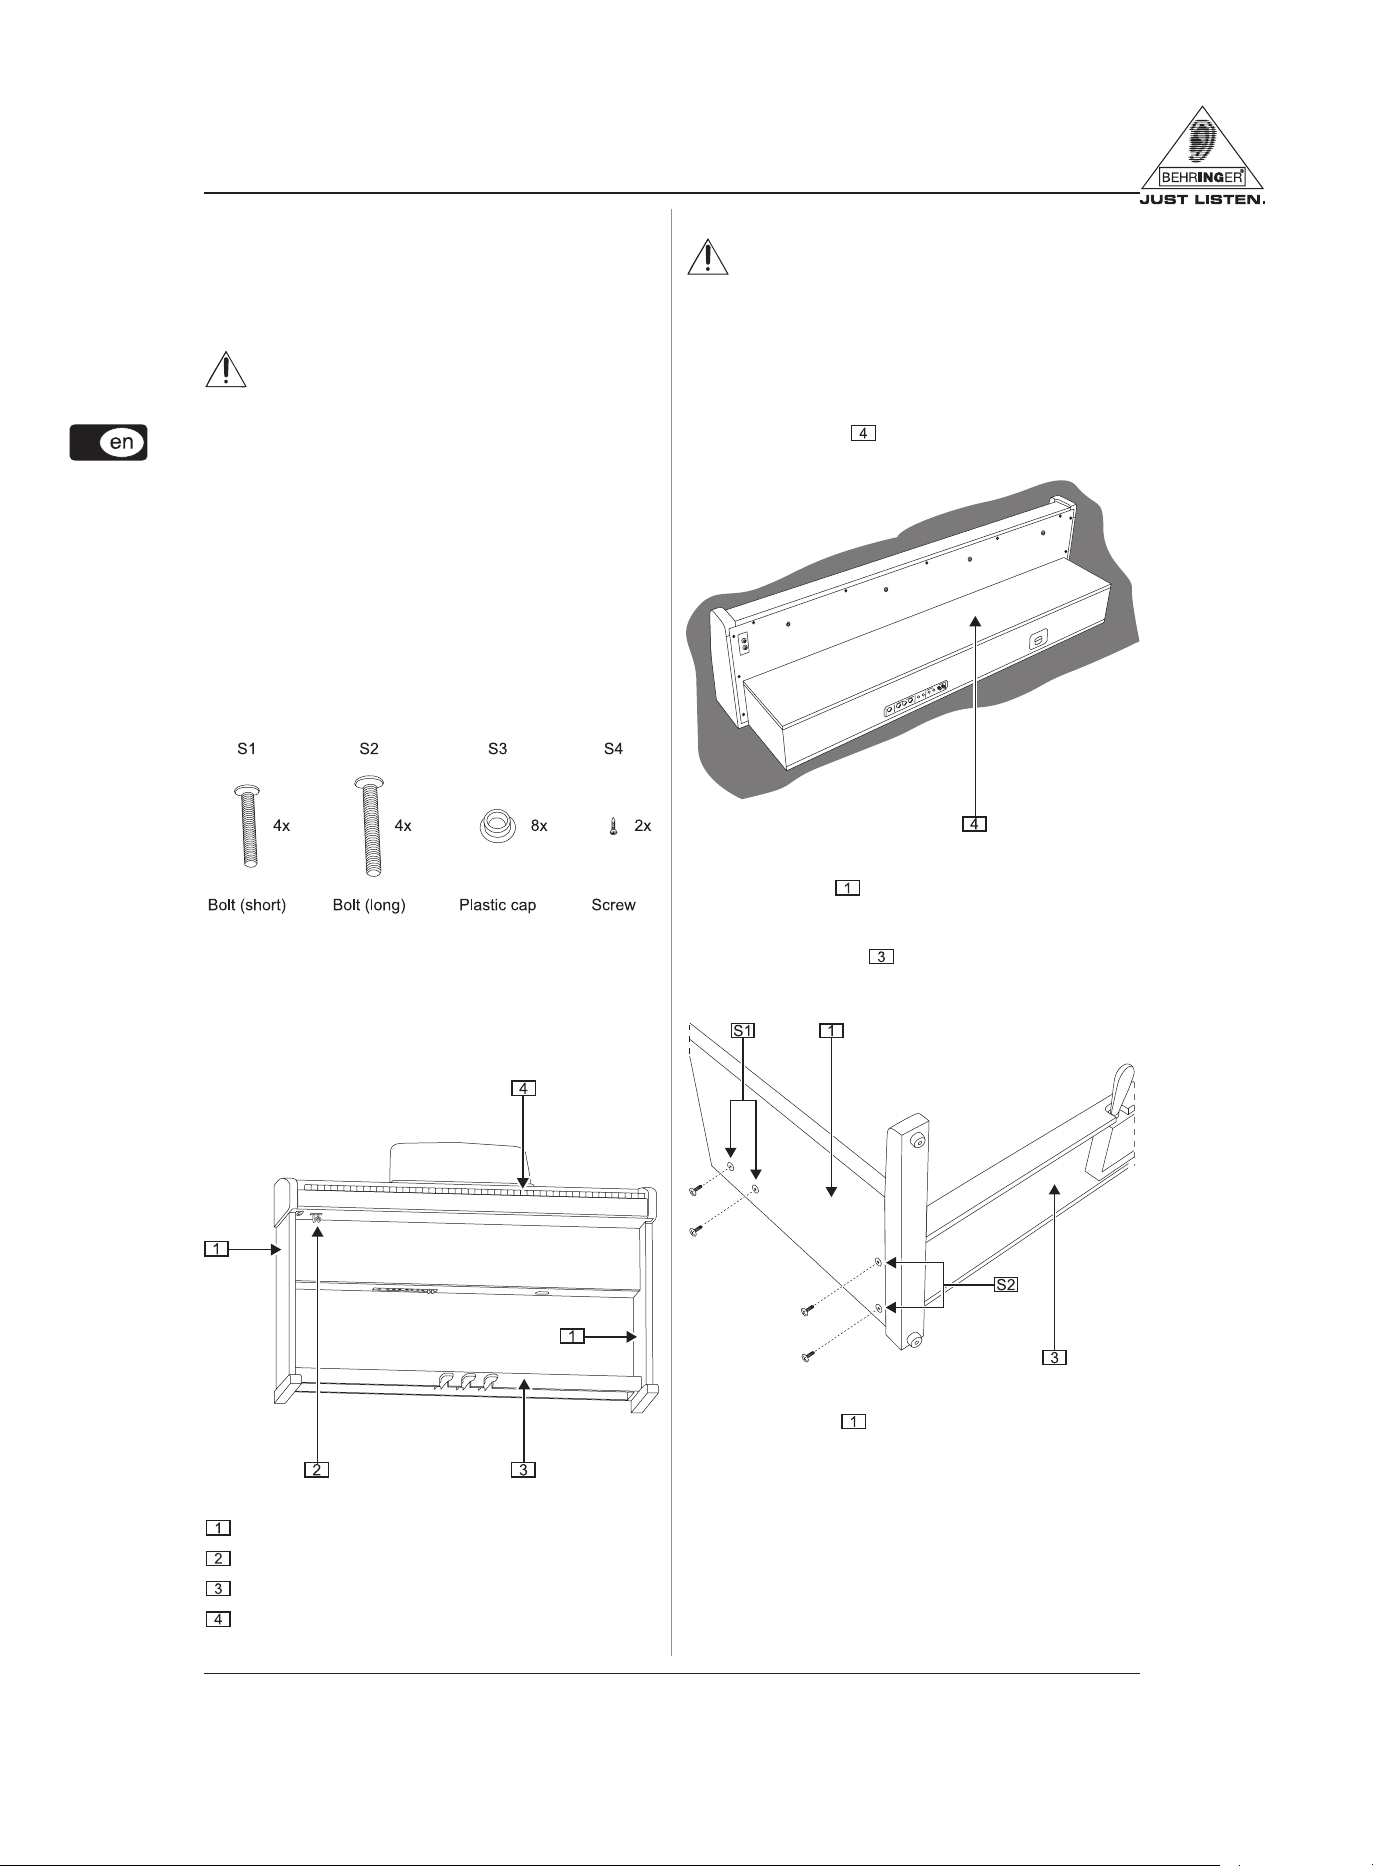
Fig. 1 shows the designations of the small parts supplied which
are required for assembling the digital piano.
Process of assembly
CAUTION
Be careful not to hurt yourself during assembly
by accidentally dropping the unit.
NOTICE
Make sure that the music rest is raised before
assembling the piano to prevent damage to the
unit.
1) Place the console on a soft carpet or blanket with the
back resting on the floor.
Fig. 1: Small parts overview
The small parts are numbered consecutively (S1-S4). These
numbers can be found in the illustrations below as well as in the
text so that you know which screw is needed for which hole.
The illustration below identifies each part and shows how to
assemble the piano.
Fig. 2: Parts overview
legs
headphone hanger
pedal board
console
Fig. 3: Assembly position
2) Hold the left leg against the console with the recessed
holes facing away from the console and secure it with two
short bolts (S1) at the recessed positions.
3) Hold the pedal board against the foot of the left leg with
the pedals facing up and secure it with two long bolts (S2) at
the recessed positions.
Fig. 4: Mounting the legs
4) Hold the right leg against the console with the recessed
holes facing away from the console and secure it with two
short bolts (S1) at the recessed positions of the console and
with another two long bolts (S2) against the pedal board, as
already done on the left side.
5) Ensure that all bolts have been properly secured and use
the plastic caps (S3) to cover the bolts by pushing one into
each hole.
6) Pass the pedal cable through the cable clips inside the pedal
board to the back of the unit.
2
Page 3

EG540 ASSEMBLY
CAUTION
Be careful when bringing the piano into an upright
position. There is an enormous risk to overbalance
the unit when not handled properly, which may
result in damage to the instrument, personal
property or even cause serious injury. Make sure
that a minimum of two persons are involved in
accomplishing the next step and follow the
instructions carefully.
NOTICE
Make sure that the pedal screw underneath the
pedal board is screwed tightly and will not stick
out too far. Otherwise the pedal board might be
damaged when taking the next step.
7) Hold the unit at the top and lift it towards the legs, bringing
the piano to an upright position.
Be absolutely sure to hold the piano at the positions
shown in fig. 5 to minimize the risk of overbalancing.
10) Adjust the pedal screw underneath the pedal board until the
screw firmly touches the ground.
For parquet or laminate floor, you may consider
using felt underlays to protect the floor and ensure
a non-slippery surface.
Fig. 7: Adjusting the pedal screw
Using the music rest
1) Lift the music rest.
2) Pull the two hinges located at the back of the music rest to a
position of about 20° and slowly push the rest to the console’s
back until the hinges secure the position.
Fig. 5: Setting the piano upright
8) Connect the pedal cable to the pedal connector which can
be found on the connector board on the underside of the
console.
9) Attach the headphone hanger with two screws (S4) to
the console’s underside, underneath the keyboard and close
to the front.
Fig. 6: Attaching the headphone hanger
Fig. 8 : Lifting the music rest
3
 Loading...