


Avycon AVR-EP908E-12T, AVR-EP908E-16T, AVR-EP908E-24T, AVR-EP908E-2T, AVR-EP908E-4T User Manual
...
CMS Mobile Viewer
CMS Mobile Viewer
User`s Manual
This document contains preliminary information and is subject to change without notice.
1. CMS MOBILE VIEWER
1.1i Phone / iPad (AVY Viewer HD)
1.1.1 System Requirements
There are no other requirements to run this program because it is specialized to perform on iOSs interface.
1.1.2Installation
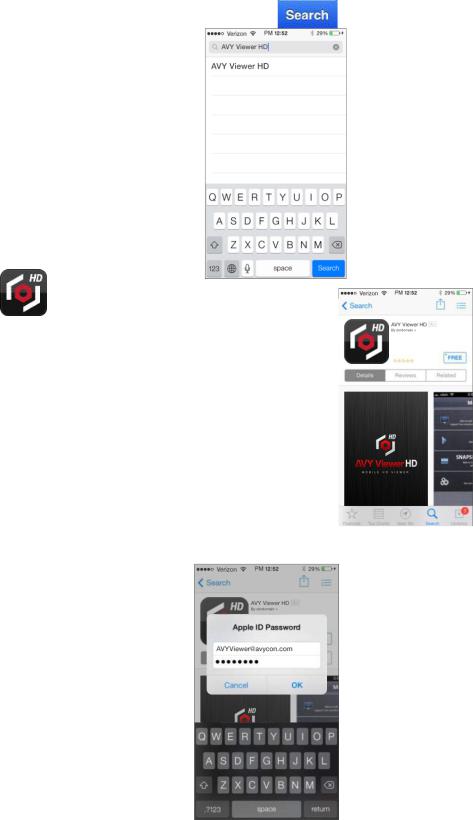
Turn on the iPhone or iPad then connect to App Store.
Move to search menu and type “AVY Viewer HD” then tap “ |
”. |
Select “ ” program which is offered by dvrdomain for free.
When a user tap a “ ” button, it will be turned to “
 ”
”
Tap “ ” to start installation.
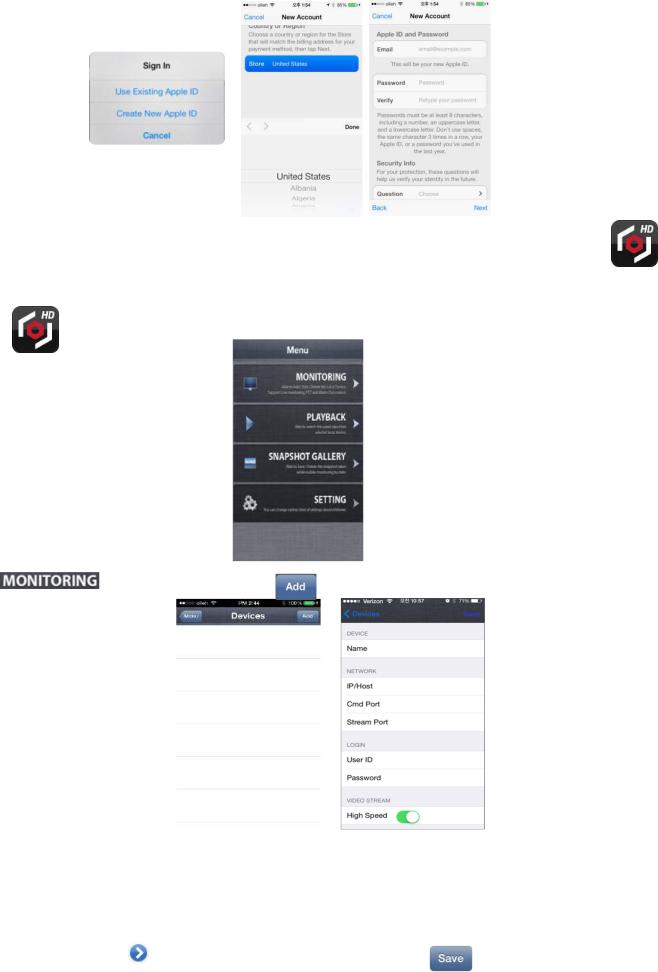
If a user does not have the account, then Tap “ ” and it is registered by free.
NOTE
‘AVY Viewer HD’ supports iOS6 or higher version, if you use lower iOS with older device, please install ‘AVY Viewer HD’
1.1.3Site Registration
Tap “ ” icon on iPhone or iPad then below will show.
Tap “ |
” then below will show and tap " |
” on top right corner. |
Enter Site Name, IP or DDNS address.
Enter Admin/Stream port value. (Default, 5920/5921)
Enter ID/Password. (Default, admin/1111)
Tap “ ” to save the setting.
To edit the saved site, tap “ |
” next to site Name, then change the value, and tap “ |
”. |
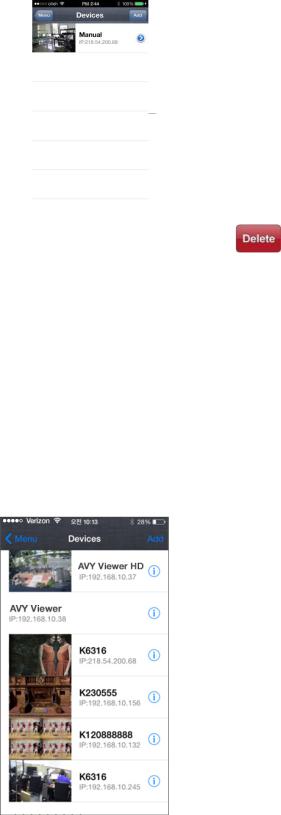
To delete the saved site, slide the finger from right to left across Device Name. Then tap” |
” to remove the site. |
NOTE
Please tap ‘Off’ in “High Speed” to see high quality video when the network condition is good. Otherwise, the video would be lagged.
NOTE
Please tap ‘On’ in “High Speed” for better transmission when the network condition is bad.
NOTE
“Video Stream” does not apply when the dual streaming is on in the device.
NOTE
“Video Stream” cannot be applied to some old models. Please keep your device with the latest firmware version.
1.1.4Connection
Tap on Device Name to connect the DVR to iPhone or iPad

1.1.5Live View (Portrait View)
To select other channels,
- Slide finger from Right to Left to ascend. (1 → 2 → 3 …… 14 → 15 → 16) - Slide finger from Left to Right to descend. (16 → 15 → 14 …… 3 → 2 → 1)
Tap “ ” to take Snapshot.
Tap “ ” to enable Frame skip or Tap “
 ” to disable Frame skip.
Tap “  ” to choose split mode between 1, 4, 9 and 16.
-In Multi-channel display mode, a user can double tap on certain channel to change to 1CH display mode.
Tap “ ” to enable PTZ function. Please refer to 10.1.7 PTZ Control for more detail.
Tap “ ” to remove Camera Name and Date/Time from OSD.
Tap “ ” to enable audio or Tap “
 ” to disable audio. (1CH display ONLY)
Tap “ ” to switch from Live mode to Playback mode.
To use Zoom feature, simply pinch and drag in 1CH display. (1CH display ONLY)
NOTE
Audio, Zoom and PTZ are available only in full screen mode.(1channel only)
NOTE
If a user enable frame skip, used memories will be stable and It’s possible to use it on live mode and playback mode.
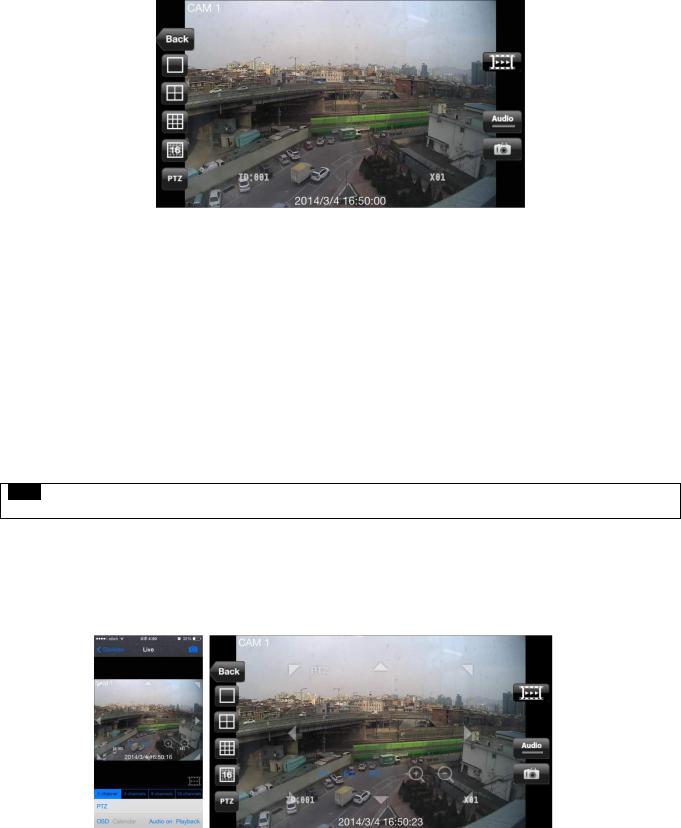
1.1.6Live View (Landscape View)
To select other channels,
- Slide finger from Right to Left to ascend. (1 → 2 → 3 …… 14 → 15 → 16) - Slide finger from Left to Right to descend. (16 → 15 → 14 …… 3 → 2 → 1)
Tap “ ” to go back to main menu.
Tap “


 ” to choose split mode between 1, 4, 9 and 16.
- In Multi-channel display mode, user can double tap on certain channel to change to 1CH display mode.
Tap “ ” to enable PTZ function. Please refer to 10.1.7 PTZ Control for more detail.
Tap “ ” to enable audio or Tap “
 ”to disable audio. (1CH display ONLY)
Tap “ ” to take Snapshot.
To use Zoom feature, simply pinch and drag in 1CH display. (1CH display ONLY)
NOTE
Audio, Zoom and PTZ are available only in full screen mode. (1channel only)
1.1.7PTZ Control
Users are able to control PTZ with iPhone or iPad by touching the screen.
Tap “ ” or “
 ” to execute PTZ function.
Tap Arrow for Pan and Tilt movement.
Touch “ ” to zoom out.
Touch “  ” to zoom in.
If users already set up the presets on DVR, users may use them by touching “

 ”.
”.
 Loading...