

ETHERNET SETUP GUIDE
Your Monarch® 9416® XL® Thermal Transfer printer has
a factory-installed internal Ethernet print server. Use this
Setup Guide to connect the printer to your network with
the Print Server Utility (provided on the enclosed
CD-ROM).
Information in this document supercedes information in
previous versions. Check our Web site
(www.monarch.com
release information.
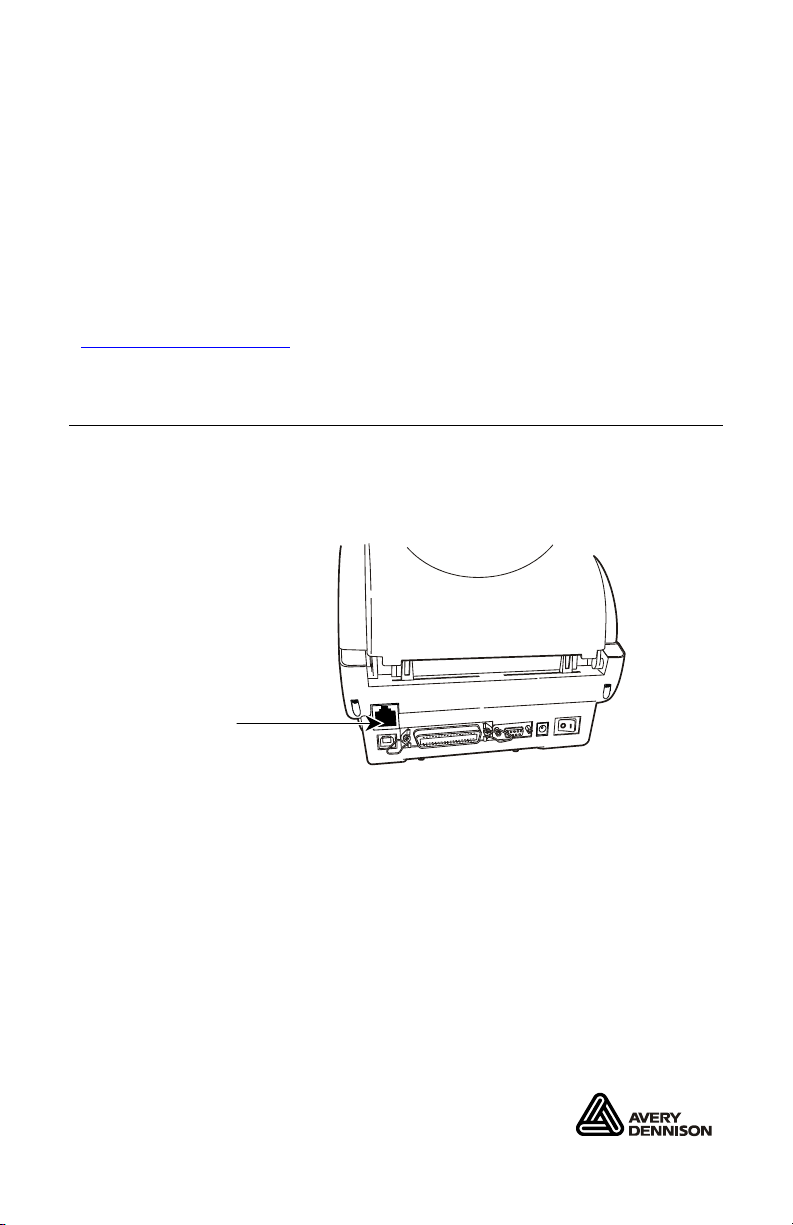
Connecting the Printer
1. Turn off the printer.
2. Connect a network cable from the printer to your
network using the Ethernet port.
) for the latest documentation and
Ethernet Port
3. Turn on the printer.
Note: When using the internal Ethernet printer server,
the printer’s parallel port is disabled.
TC9416TTIESG Rev. AC 2/09 ©2007 Avery Dennison Corp. All Rights Reserved.
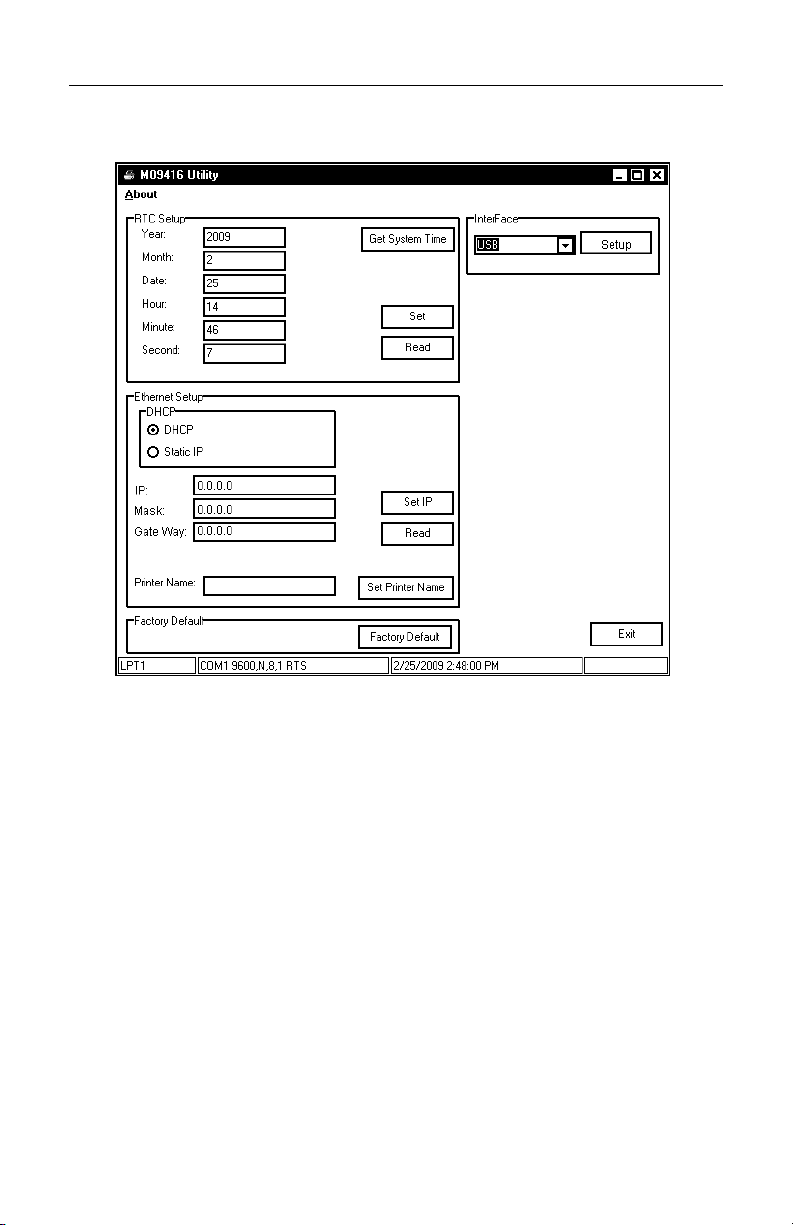
Using the Print Server Utility
1. Run the M0916Util.exe file. You see the main
screen.
2. Enter any changes to the real time clock or click Get
System Time to change the time. Then, click Set.
3. For DHCP, select DHCP. When using a static IP
address, select Static IP. Then, enter the IP Address,
Subnet Mask, and Gateway. Click Set IP when
finished.
4. Enter a Printer Name. Then, click Set Printer Name.
5. Click Exit when finished.
Resetting the Printer
♦ Click Factory Default from the main screen to return
the printer to factory default settings.
♦ Click Reset Printer from the web browser screen to
reset the printer. This is the same as turning off the
printer and then back on. See "Using a Web Browser"
for more information.
2
Co
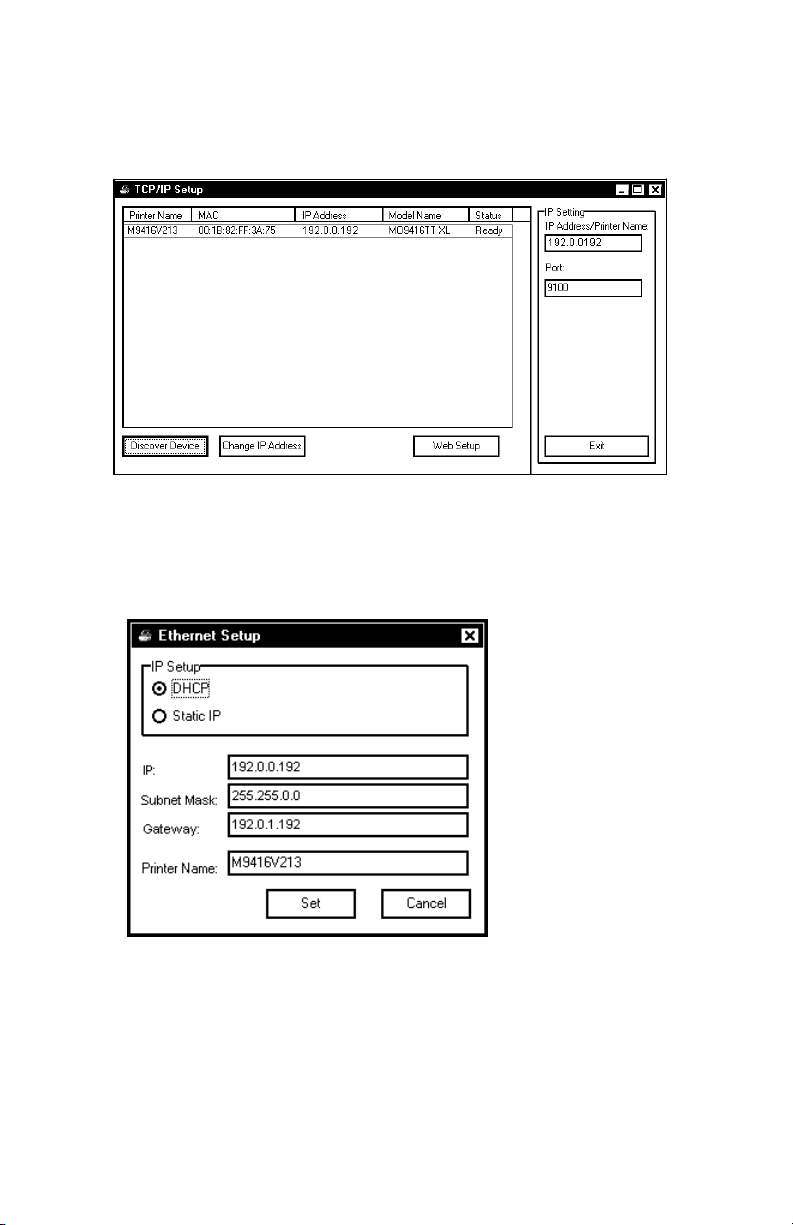
nfiguring Multiple Printers
1. , select Ethernet from the
From the main screen
InterFace box and click Setup.
You see the TCP/IP
Setup screen.
2.
Click Discover Device to see the printers on your
network.
3. Highlight a printer to configure and click Change I
Address. You see the Ethernet Setup screen.
4. For DHCP, select ing a static IP
ad ter the IP Address,
dress, select Static IP. Then, en
DHCP. When us
Subnet Mask, Gateway, and Printer Name.
5. Click Set.
6.
Click Exit when finished.
P
3
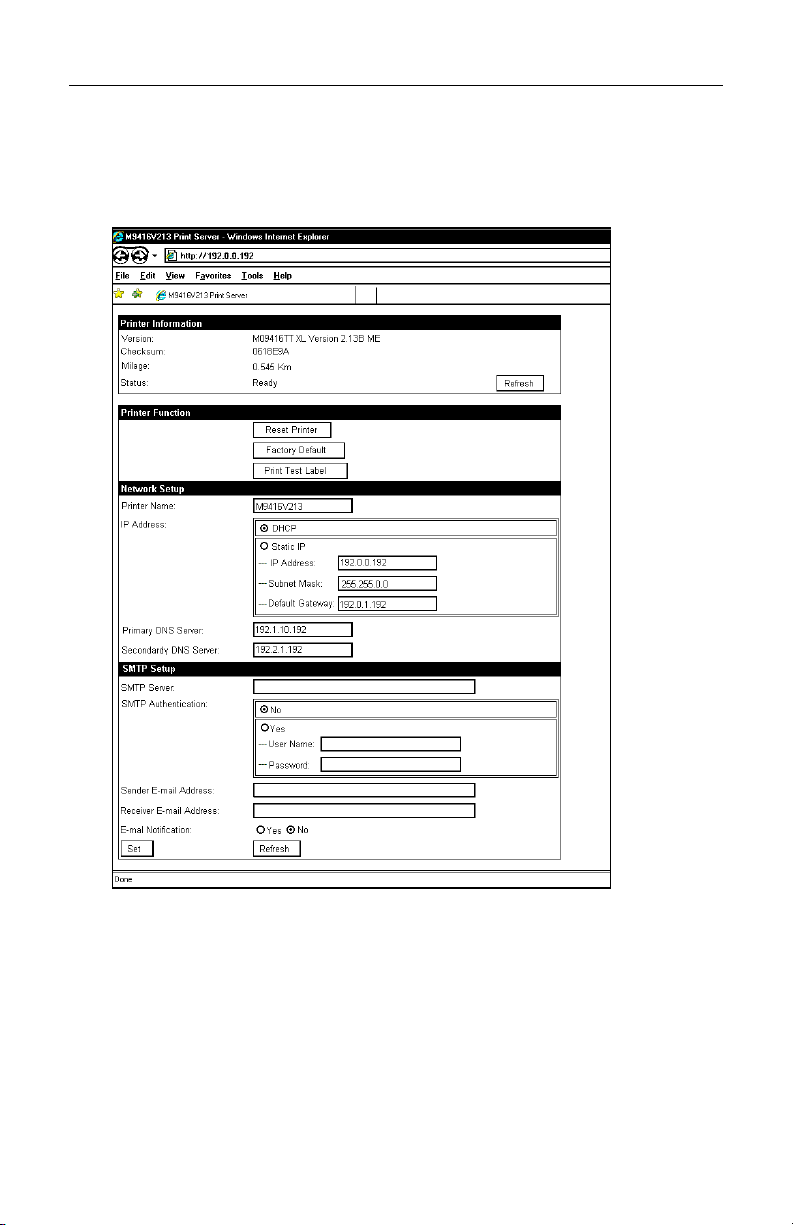
Using a Web Browser
You can configure and mana
web browser.
1. From the TCP/IP Setup screen, click Web Setup.
You see th
e web browser screen.
ge the printer by using your
2. gs.
Enter any necessary network and SNMP settin
3. Click Set to save the settings.
4. Click Refresh to refresh the browser's window.
5. Close your browser.
6. Click Exit when finished.
4
 Loading...