

Page 1

Setting Up the System
Caution
Do not touch the electrical connectors while setting up the printer. Electrostatic discharge can damage or
destroy the printhead or electronic components.
ALWAYS PLUG THE PRINTER INTO THE ELECTRICAL WALL OUTLET FIRST AND THEN TURN ON
THE PRINTER – NEVER TURN ON THE PRINTER AND THEN PLUG IT INTO THE WALL OUTLET.
Follow these instructions to setup the printer,
keypad/terminal, and power supply in the tray.
1. Remove the tray and check inside the packaging for the
adhesive feet. Remove the feet from their adhesive
backing and apply one to each corner.
2. Place the tray on the cut table near an electrical outlet.
Tray design may vary from the one shown.
3. Make sure the power is off on both the printer and the
keypad/terminal before setting up any cables.
To keypad/terminal
6. Place the printer’s power supply behind the tray with
the printer’s connector on the right side.
To printer
4. Facing the front of the tray, lay the serial cable
(part number 125802) behind the tray.
5. Plug the three-hole end of the printer’s power
supply cable into the three-pronged outlet in the
printer’s power supply.
Adhesive Feet
Power cable Printer’s Power Power Cable
to Printer Supply to wall outlet
7. Place the keypad/terminal’s power supply into the
tray under the shelf with the three-pronged end
facing the cut-out in the back of the tray.
L-shaped connector
8. Through the back of the tray, plug the three-hole
end of the keypad/terminal’s cable into the threepronged outlet in the keypad/terminal’s power
supply (18-24V).
9. Lay the keypad/terminal’s cable with the L-shaped
connector on the shelf.
10. Place the keypad/terminal on the shelf, but do not
Keypad/Terminal’s
Power Supply
TC9414PHSG Rev. AC 4/05 2003 Paxar Americas, Inc. All rights reserved.
remove the tape from the Velcro at this point.
Page 2
The keypad/terminal should not be operated in a location that has room temperatures above 158° F or
below -4° F for extended periods of time. This could permanently damage the display.
Make sure the printer’s power supply is not accidentally connected to the keypad/terminal.
11. Plug the L-shaped connector into the socket located
on the top of the keypad/terminal (12V).
12. Connect the serial cable to the top of the keypad/terminal.
13. Place the printer in the tray.
Serial
Cable
The printer should never be operated while
resting on its side or upside down.
14. Plug the printer’s power supply cable (with the straight end)
into the socket on the back of the printer.
Power Cable
Serial Cable
15. Connect the serial cable to the printer’s serial port.
16. If necessary, adjust the cables. Make sure all the
cables move freely through the openings in the back of
the tray. Use a cable tie to secure them.
L-shaped
Connector
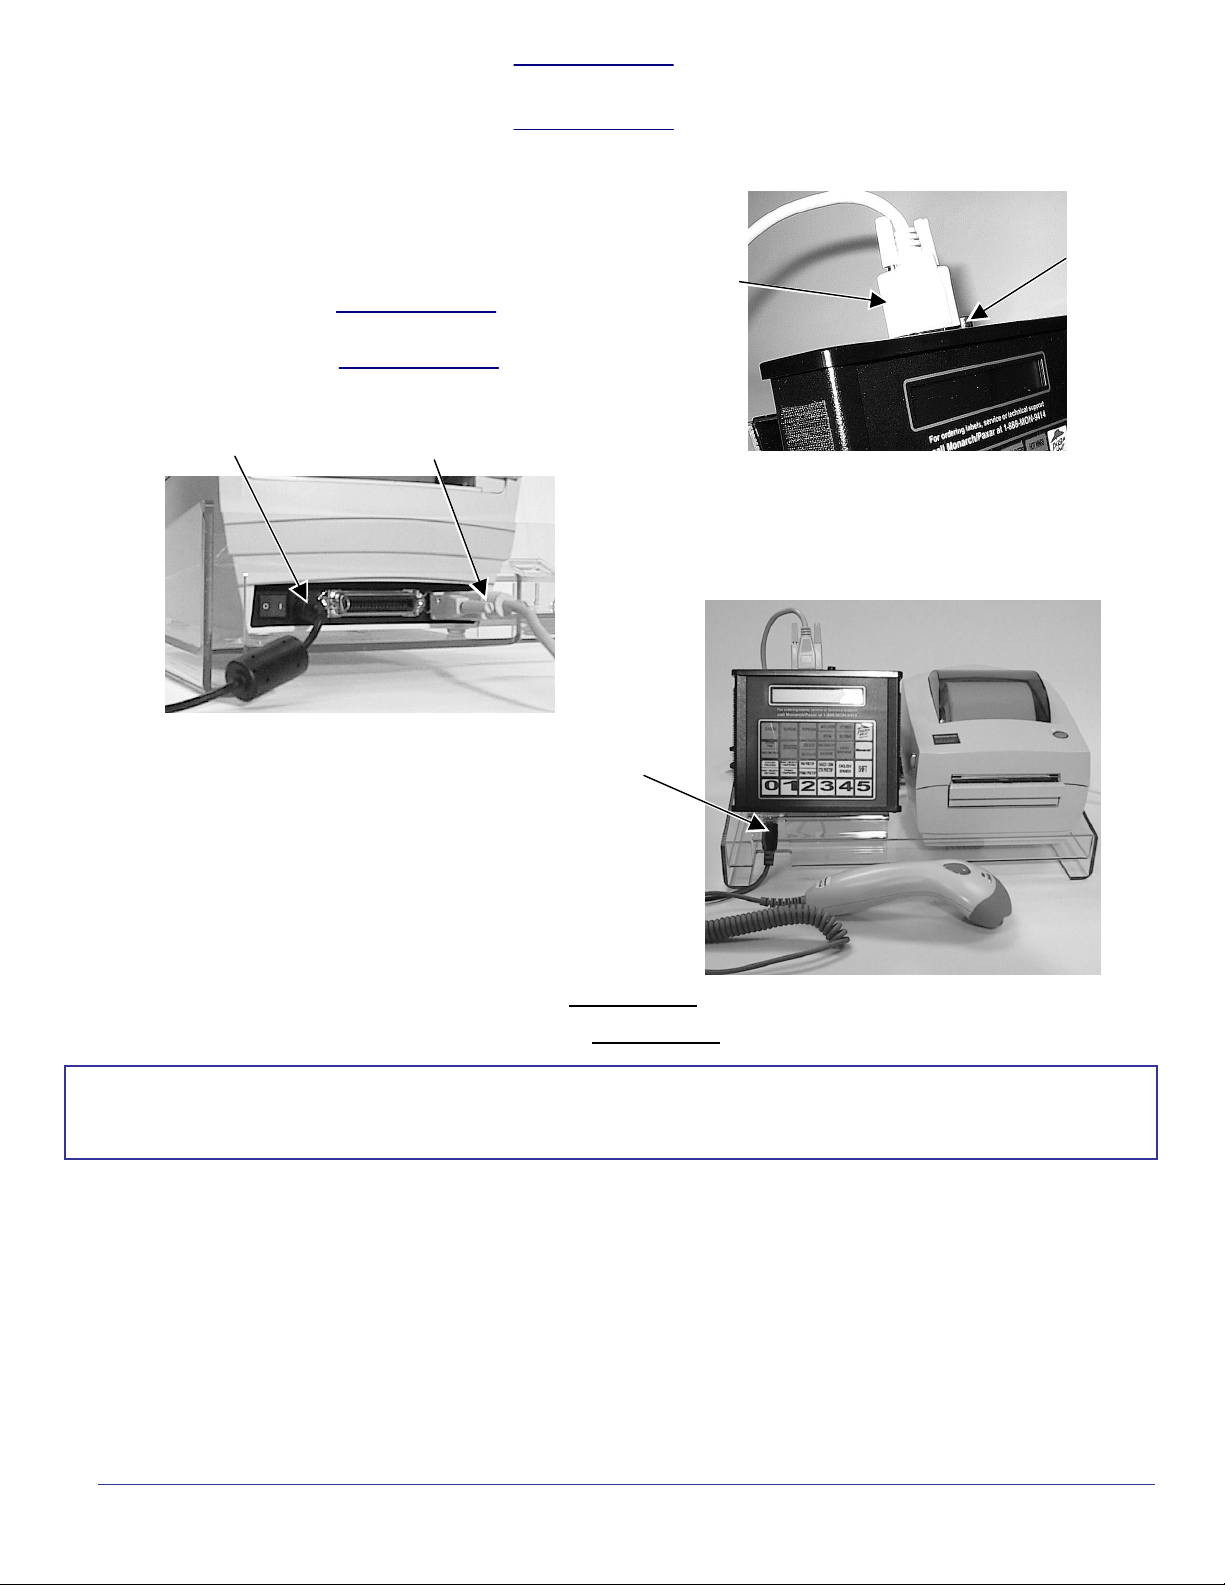
17. Lift up the keypad/terminal with one hand and feed
the scanner cable connector through the
notch as shown.
18. Plug the scanner cable connector into the socket
Scanner
Cable
and then turn the connector to lock the cable in
place.
19. Remove the tape from the Velcro on the
keypad/terminal and put the keypad/terminal onto
the shelf.
20. Plug the printer's power supply cable into a GROUNDED electrical outlet.
21. Plug the keypad/terminal's power cable into a GROUNDED electrical outlet.
Warning
The printer and power supply should never be operated in a location where either one can get
wet. Personal injury could result.
22. Press the power switch on the back of the printer to the ON position (I) to turn on the printer.
For future upgrades, an extra cable (part number 125801) is provided to connect your keypad/terminal
to a PC.
IF YOU NEED HELP, PLEASE CALL 1-888-666-9414.
IF YOU NEED MORE PAPER LABELS, CALL ONE OF THE FOLLOWING:
PrimeSource: 800-397-4737 (order item #85221)
Wasserstrom: 800-999-9277 (order item #374014)
Unified Food Co-Op: 800-444-4144 (order item #374014)
 Loading...