

Page 1

NETWORK TIME PROTOCOL
ADDENDUM
Use this addendum with the Monarch 9855 and 9860 printers using
MonarchNet2 software and printer firmware version 4.2 or greater. This
addendum includes information about using the Network Time Protocol
(NTP) and Monarch Network Control Language (NCL).
Note: Information in this document supercedes information in previous
versions.
About the Network Time Protocol
The network time protocol allows the printer to query a time server on the
network and synchronize the clock in the printer.
Using MonarchNet2 to Set the NTP
You can enable the network time protocol via MonarchNet2.
1. Start your Web Browser.
2. Type in your
printer’s IP
Address and press
Enter. For
example,
192.0.0.192.
Monarch, MonarchNet2, 9855, 9860, and NCL are trademarks of Paxar Americas, Inc.
Paxar is a trademark of Paxar Corporation.
TC7410NTPAD Rev. AA 4/06 2006 Paxar Americas, Inc. All rights reserved.
Page 2
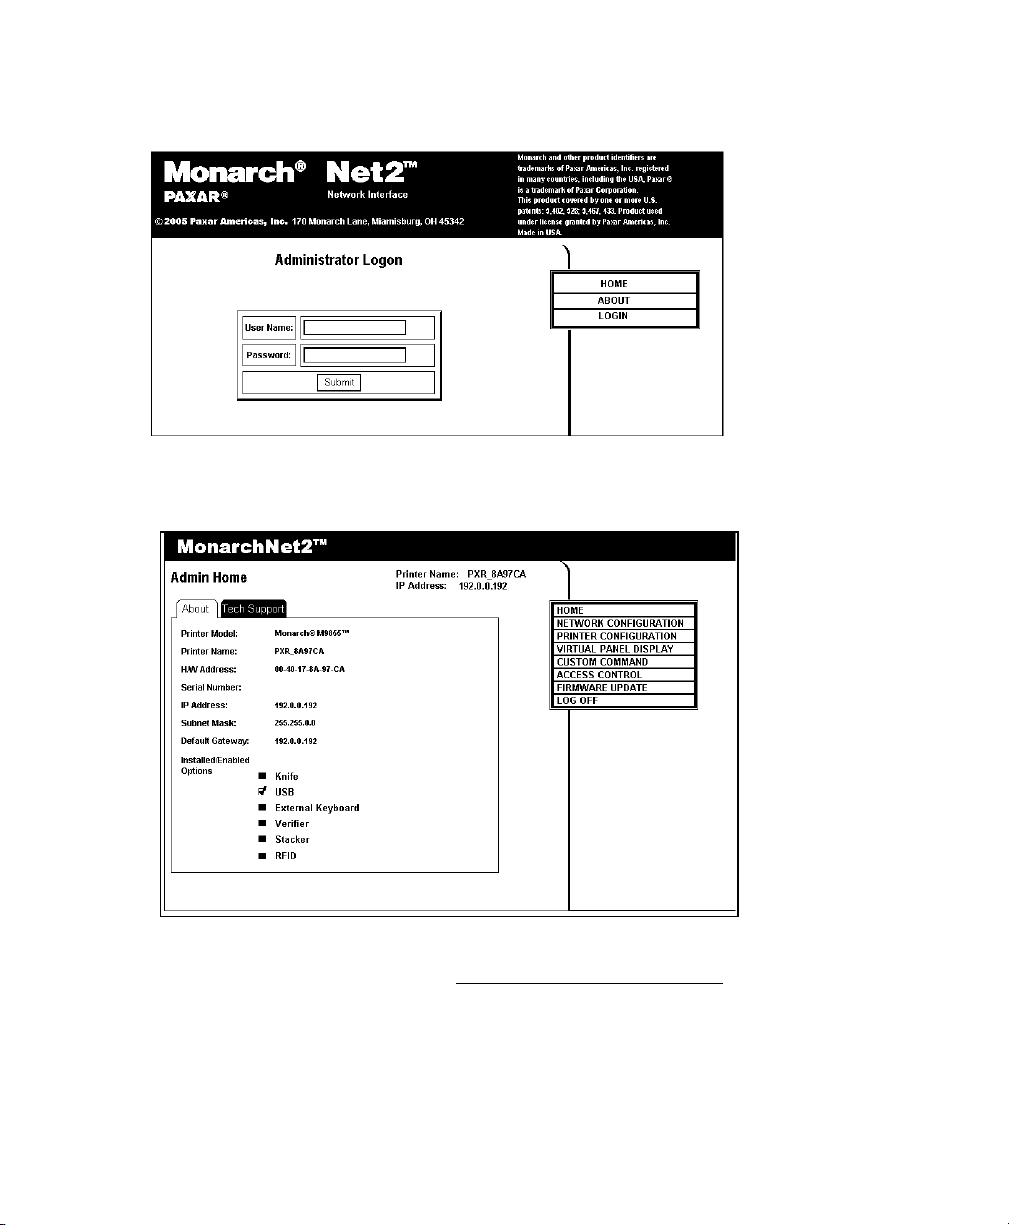
3. Click either Login or the printer’s name (for example, PXR_8A983A) to
log on.
4. Type access for the password. You do not need a User Name.
5. Click Submit.
6. Click Network Configuration.
7. From the Protocols tab, click Update TCP/IP Settings
TCP/IP settings and enable the network time.
2
to configure the
Page 3

8. Select Enable Network Time.
Enable Network
Time and enter
Server’s IP
Address and
Time Zone
Offset
Web pages time out after five
minutes of inactivity.
Shows the
status of the
time server.
9. Enter the Time Server’s IP Address. The printer waits 20 seconds for
the server to respond. The status is displayed within parentheses:
“Waiting for Server,” “Time Server Error,” or the current date and time.
10. Enter the Time Zone Adjustment in hours and minutes, from Greenwich
Mean Time (GMT). This offset varies by location and time zone. For
example, Eastern/Standard time is five hours behind GMT. Use –5:00
for the offset. For an offset of 3.5 hours, use 3:30.
Note: Changes for Daylight Savings Time are not made automatically. If
your time zone participates in Daylight Savings Time, change the
time zone offset accordingly.
11. You can specify if the Web pages time out after five (5) minutes of
inactivity. Select Enable Web Authorization Timeout.
Note: The time out period is set for five minutes and cannot be changed.
12. Make any other TCP/IP settings and click Submit when finished.
13. Click BACK
to return to the previous screen.
3
Page 4

Using NCL with NTP
The date/time stamp can be used in NCL log and configuration upload file
names.
Time Settings
Syntax [NCL_START]
[Time]
Keys=values
[NCL_END]
Keys Description Values:
IPAddr
TimeZone
Example [NCL_START]
IP Address of the host time server. nnn.nnn.nnn.nnn
Time zone offset from Greenwich Mean Time
(GMT), in hours and minutes. This offset
varies by location and time zone. For
example, Eastern/Standard time is five hours
behind GMT. Use –5:00 for the offset. For
an offset of 3.5 hours, use 3:30.
0 to 9999
[Time]
IPAddr=10.10.20.20
TimeZone=-5:00
[NCL_END]
This NCL file specifies the IP address of the network’s time server and sets
the time zone offset to –5:00 (five hours behind GMT).
4
Page 5

Uploading a Log File
A log is kept of all changes made through NCL. You can upload the log to
confirm changes or keep track of changes.
Use the following syntax to upload a log file.
Syntax [NCL_START]
[Log]
Keys=values
[NCL_END]
Keys Description Values
IPAddr
FTP_User
FTP_Password
Path
Clear
If FTP_User and FTP_Password are provided, the FTP protocol is used;
otherwise, the file transfer is done via TFTP protocol.
IP Address of the file
transfer server
User name for file transfer
server
Password for file transfer
server
Relative path to where the
log file will be written
Clears the data after the
log file is sent
nnn.nnn.nnn.nnn
“username”
“password”
“sub-directory\filename”
1 clears the buffer
Note: The time comes from the network’s time server (if available), not
from the file transfer server (FTP or TFTP).
Example
[NCL_START]
[Log]
IPAddr=10.20.30.40
Path=”Log\MyLog.txt”
Clear=1
[NCL_END]
This NCL file contains the logging command [Log]. The IP Address of the
TFTP server is 10.20.30.40. The log file is named Mylog.txt and
located in the Log directory. Then, the log buffer is cleared.
Note: No log file is created if the printer errors.
5
Page 6

Additionally, the Path can contain any of the following options:
%IPA The IP address is substituted for %IPA and dots (‘.’) are replaced
with dashes (‘-‘).
%MAC The MAC address is substituted for %MAC and dots (‘.’) are
replaced with dashes (‘-‘).
%PUC The value of a Power-Up Counter is inserted in place of %PUC. The
counter is set to zero when the printer is turned on or reset and
incremented each time a log file is sent to the host.
%DAT The current date is substituted for %DAT and slashes (‘/’) are
replaced with dashes (‘-‘). The format is YY-MM-DD.
%TIM The current time is substituted for %TIM and colons (‘:’) are
replaced with dashes (‘-‘). The format is HH=MM=SS.
%DNT The current date and time are substituted for %DNT and slashes (‘/’)
and colons (‘:’) are replaced with dashes (‘-‘). The format is
YY-MM-DD_ HH=MM=SS.
These options are useful to determine
♦ a printer’s IP address or location (perform a search).
♦ which file goes with a particular printer?
♦ when a log file was created based on time and/or date.
Example “Logs/PX_%IPA_%DAT.log”
generates a filename similar to:
“Logs/PX_192-0-0-192_06-03-20.log”
6
Page 7

New Console Commands
Use the following console commands to view the network time settings and
the NCL log file.
SHow DATE or DATE
Shows the current date in format Day mm/dd/yy hh:mm:ss.
SHow TIME
Shows the current time in format hh:mm:ss.
SHOw PRN LOG
Displays the NCL log file.
UPTIME
Shows how long the printer has been on in format hh:mm:ss up N day(s),
hh:mm:ss.
Example DATE
The printer returns:
Mon 03/20/06 13:06:42
Example SHow TIME
The printer returns:
09:35:46
Example UPTIME
The printer returns:
22:59:36 up 2 day(s), 13:07:33
The printer has been on for 2 days, 22 hours, 59 minutes, and 36 seconds.
The current time is 13:07:33.
Note: The show printer configuration (SH PRN CFG) command displays
the date and time information if the time server is operational.
7
Page 8

Example SH PRN LOG
The printer returns:
**************** Monarch *****************
******** Network Control Language ********
************* Start of Log **************
**** NCL Preparsing Start
**** NCL Parsing Start
002 [TIME]
003 IPADDR = "10.10.20.20"
004 TIMEZONE = "-5:00"
005 [NCL_END]
**** NCL Parsing Done
**** NCL Preparsing Start
**** NCL Parsing Start
002 [PRINTER.9855]
003 SUPPLYTYPE = "Die Cut"
004 RIBBON = "Yes"
005 FEEDMODE = "Continuous"
006 MARGINPOSITION = "15"
007 CONTRAST = "100"
008 SPEED = "8.0 IPS"
009 [NCL_END]
**** NCL Parsing Done
*************** End of Log ***************
8
 Loading...