

Page 1
Wireless Local Area Network Card
®
WL-107
1588
English
(For 802.11b Wireless Networks)
Quick Start Guide
Page 2
Quick Start Guide
English
System Requirements
To begin using the ASUS WLAN Card, you must have the following
minimum requirements:
• Windows XP/2000/ME/98SE or Linux Redhat (Version 7.1 or later)
• Standard PCMCIA Slot Type II
• 32MB system memory or larger
• 300MHz processor or higher
Installation Procedures
Linux users: This manual is meant for Windows users. Information
pertaining to Linux is located in “readme.txt” in the Linux folder.
Linux drivers are also located in the same folder.
Important: Install the ASUS WLAN card utilities before inserting the
ASUS WLAN Card into your computer.
Follow these instructions to setup the ASUS WLAN card.
1. Install the ASUS WLAN card utilities and driver from the support CD.
2. Insert the ASUS WLAN card into your computer.
Installing the ASUS WLAN utilities and driver
Follow these instructions to install the ASUS WLAN card utilities and driver.
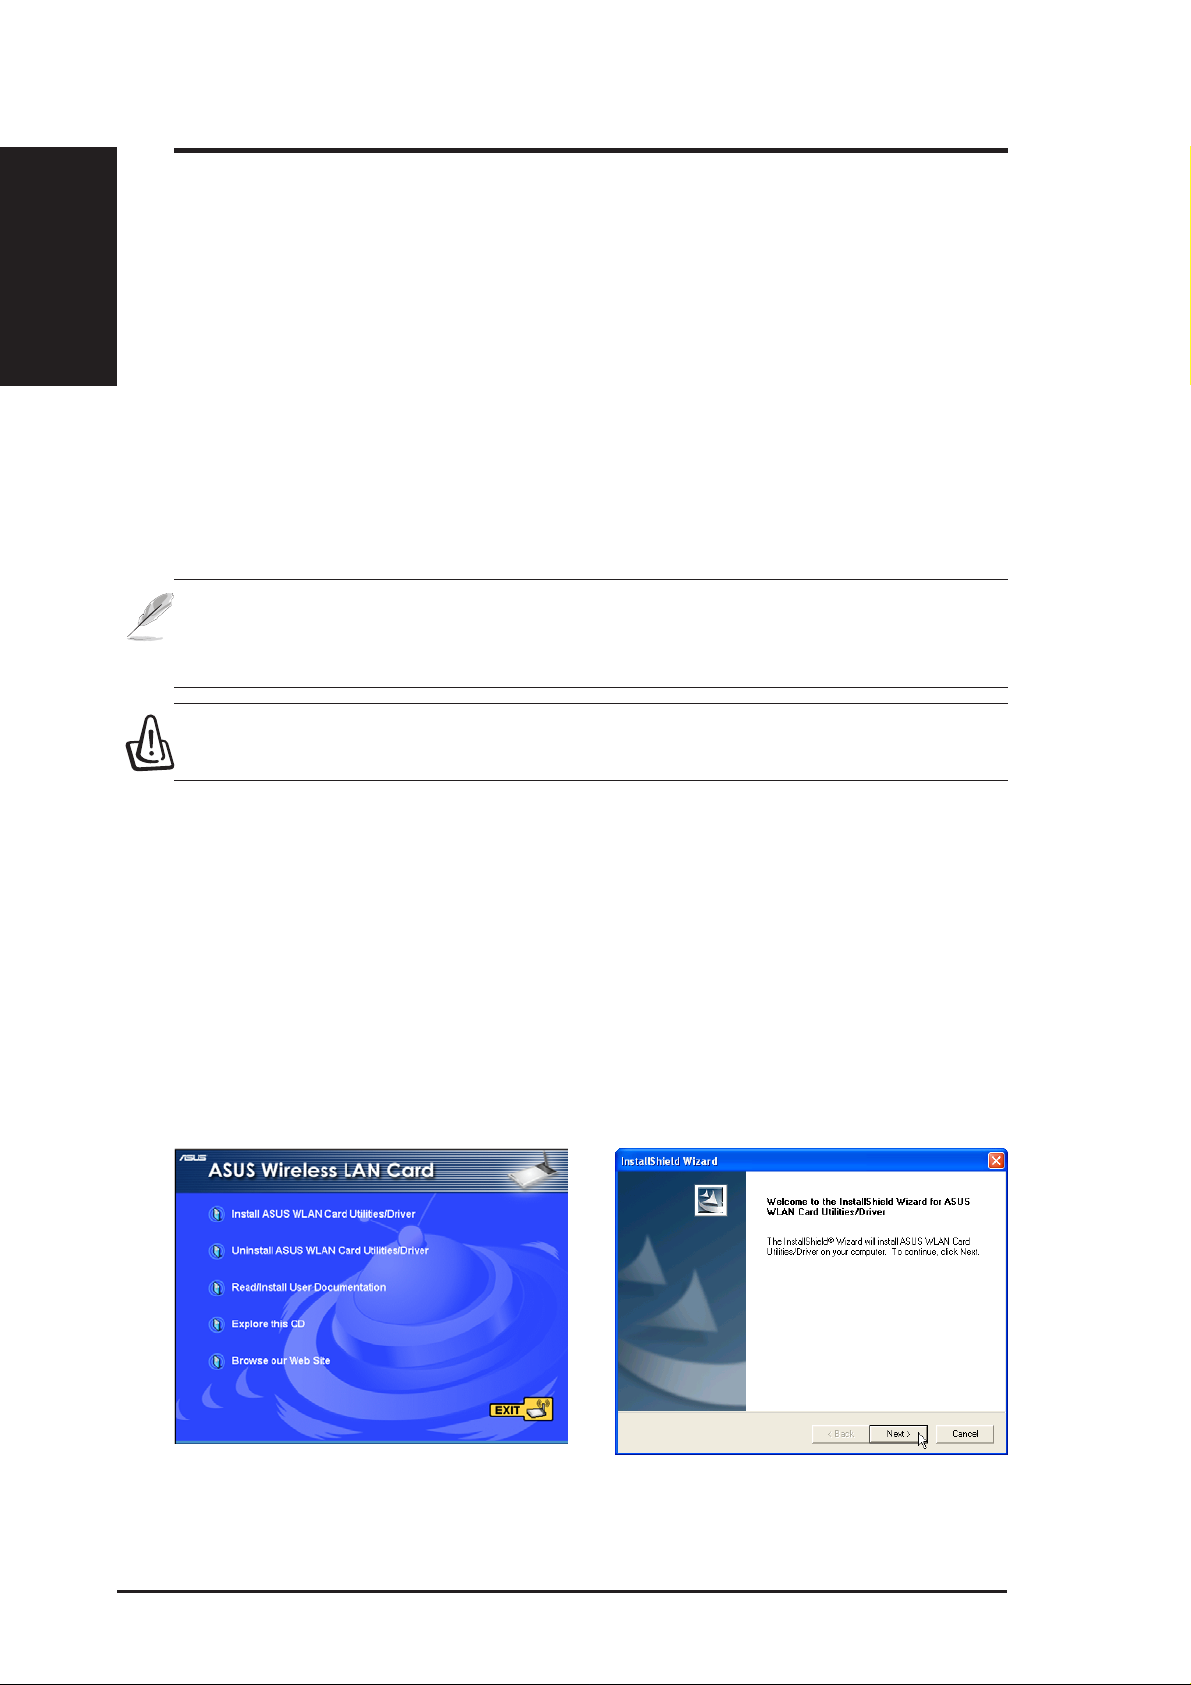
Insert the support CD and an autorun menu will appear. If your autorun is
disabled, double click SETUP.EXE in the root directory of the support CD.
WLAN Card Utilities/Driver.
2
2. Click Next on the Welcome screen.1. Select your language and click Install ASUS
ASUS WLAN Card
Page 3

Quick Start Guide
Installing the ASUS WLAN utilities and driver (Cont.)
3. Click Next after reading the Information. 4. Click Next to use the default Destination
Folder or click Browse to select another folder .
English
5. Click Next to place icons in the default pro-
gram folder or type another folder name.
7. Windows XP users: When the program is
launched for the first time (during Windows
restart), you will be asked which function to
use. Select to use ASUS utilities for more
functions.
6. When Setup is complete, click Finish to exit
the installation wizard and restart Windows.
8. Carefully insert the ASUS WLAN card into
your computer’s PC card slot. Windows will
automatically find and configure the ASUS
WLAN card using the drivers installed in the
previous steps.
ASUS WLAN Card
3
Page 4

Quick Start Guide
English
Configuring the ASUS WLAN utility
After installing the ASUS WLAN Card Utilities, you will need
to make some settings before being able to use your wireless
connection. Double-click the ASUS WLAN Control Center icon
to start the utility.
1. Right-click the ASUS WLAN icon and select “Wireless Settings”
2. Set the Network Name (SSID) to the same
name as the SSID set in your wireless access point.
3. Use “Site Survey” if you don’t know the
name of your access point(s).
4
ASUS WLAN Card
4. Encryption settings must also match those
set in the access point. Ask your network
administrator about settings if necessary.
Click Apply to save your settings
Page 5

Quick Start Guide
Configuring the ASUS WLAN utility (Cont.)
English
5. Check the “Status” page to see the “Association State”. It should show “Connected xx:xx:xx:xx:xx:xx”.
6. Y ou can also see the connection quality on
the “Connection” page. Click OK to exit the
utility.
Soft AP (Windows XP Only)
Soft AP mode allows the ASUS WLAN card to act as a virtual access point.
The computer needs to be connected to a wired network using an Ethernet
connection in order to provide network access to WLAN clients.
1. Select Soft AP Mode 2. Drag and drop a wired network connection
next to the globe icon.
ASUS WLAN Card
5
Page 6

English
Quick Start Guide
Soft AP (Windows XP Only) (Cont.)
3. Enable ICS* and Firewall if desired. Refer
to Windows help for information on “Internet Connection Sharing”.
*ICS is used to share this computer’s Internet connection with the rest of the computers on your
network. When this computer is connected to the Internet, communication to and from the Internet to all the computers on your network are sent through this computer, called the host computer. Other computers can send and receive email and access the W eb as if it were connected
directly to the Internet.
4. Y ou can easily switch between Soft AP and
Station mode by right clicking the taskbar
icon and selecting “A-S Change Mode”.
Reading the ASUS WLAN Status Indicators
The part of the ASUS WLAN Card that protrudes out of the PCMCIA socket
consists of two LEDs that indicate the status of the ASUS WLAN Card .
PWR
ACT
PWR (Power) LED
OFF: No power or error.
ON: Power ON.
ACT (Activity) LED
OFF: No wireless activity.
Blink: Transmitting or receiving wireless data.
6
ASUS WLAN Card
 Loading...